#enfusion_model
1 messages · Page 41 of 1
 sly bridge
 daring condor
thats an issue with blender
lots of focus on the cool tech aspects and the programs function
 warm mist
If you want to do something military themed the old German m24 stick grenades are a fun simple object to do. One of the first 3d models I did
daring condor
but little about actual technique
also if this is your first model then ill just be quite blunt
it will come out looking pretty crap
sly bridge
that’s mainly because most people moved from a different software to blender, rather than started with blender
modeling technics are (generally) software agnostic
daring condor
do a few smaller things to get the hang off how to do stuff
yeah
arrimus is fun
theres other stuff too
and then there is the classic
go to sketchfab or artstation
find an asset you like
and try to analyise the wireframe
sly bridge
daring condor
arrimus is fun
indeed, one of the best people creating youtube content for modeling related things
daring condor
you can learn a lot from just reverse engineering stuff
 surreal ore
How about just doing the BlendrGuru doughnut tutorial
sly bridge
surreal ore
How about just doing the BlendrGuru doughnut tutorial
ohhh noes…
surreal ore
Over a million people have done it
sly bridge
surreal ore
Over a million people have done it
quantity over quality
daring condor
but then it gets useless quickly
also like
you learn nothing about hard surface
good job you learned how to place a taurus and do some deformation on the frosting
its more useful for an intro to someone who wants to do things like renders, not assets
for asset creation the tutorial is garbage
surreal ore
He's wanted to learn techniques, I would just assume a tutorial that many people have down would teach some techniques. Lol
daring condor
it teaches you the basics of how to use the software
and does so effectively
he goes through each step and mode to.. excruciating... detail
whenever i watch one of his videos i want to blow my brains out out of boredom
surreal ore
Sounds horrible lol
I personally think that the discord is great
Not his, not sure if he has one
 sudden charm
Hello, has anyone here already brought a car into Reforger?
sly bridge
sudden charm
Hello, has anyone here already brought a car into Reforger?
brought it from where?
 wispy crypt
Hey I think I am doing something wrong. Trying to create my own prefab instance for a grenade doesn't seem to work for me. From what I understood no scripting seemed to be needed as it is just the model and texture being switched out. Yet trying to throw it crashes the game. Same if add my own components creating it from scratch. Tried different models as well. Has anyone experienced this and found a work around?
wispy crypt
Mhm, yeah I am confused. Tried using exact same base groundwork as the existing grenade and tweaked it to be the right ammo type etc both trynna switch stuff and just the model itself etc
 polar dew
So I'm a little bit of a noob when it comes to models. What does the occluder do exactly?
polar dew
Like if object X is behind object with occluder don't show object X? Or does ot have other functions?
 little kayak
Q: for (me) unknown reasons I can't import bones into Enfusion, while they are present in Blender.
In this channel I found a YT video explaining how to handle that, but the model in the video didn't had multiple LOD's (while I have 3).
Do I have to add bones to each LOD, is just my naming wrong, or am I forgetting a step?
 surreal ore
@little kayak got time to get into VC?
little kayak
sure
surreal ore
Give me like 5 minutes to get on my pc
sudden charm
sly bridge
brought it from where?
just a vehicle model in the reforger game to drive
a raw vehicle model
 queen venture
In this part of the tutorial, I am having a hard time figuring out what I need to do when using Maya. Have any other Maya users figured out what we need to do to add "custom properties"? It doesn't seem to be doing anything when I do the same thing with the "add attributes" feature. https://community.bistudio.com/wiki/Arma_Reforger:Weapon_Creation#Checking_colliders_.26_materials

 last parcel
you can change that part when importing as long as you name it correctly
queen venture
okay that is good to know, which part exactly do I need to name correctly? And where do I change it in the Enfusion Engine after import?
 queen venture
thankyou!
 calm rune
How many colliders does a piece of clothing need? I know firegeo is one but are there others?
 last hill
calm rune
How many colliders does a piece of clothing need? I know *firegeo* is one but ar...
last hill
calm rune
How many colliders does a piece of clothing need? I know *firegeo* is one but ar...
Uhh CharNoCollision or something like that if memory serves?
 digital forge
Okay so I've imported my model into the workbench with a collider and such which I've tested and it works. I'm just worried about the fact that it's saying that all interaction layers are used for the collider. I'm not quite sure how to go about fixing that.
 bright raft
digital forge
Okay so I've imported my model into the workbench with a collider and such which...
bright raft
digital forge
Okay so I've imported my model into the workbench with a collider and such which...
You have to assign custom property to the collider. There is info about it in the wiki. I am on the phone so can't really find it
digital forge
I mean I'm using the enfusion tools addon for blender which already did that for me, I'm fairly sure. I'm also seeing a custom property field called Cover like I set in the collider layer presets.
digital forge
bright raft
You have to assign custom property to the collider. There is info about it in th...
Ah no I figured it out. Needed to sort the layer preset in the import tab in the workbench as well. I had missed that part on the wiki. Thanks!
calm rune
last hill
Uhh CharNoCollision or something like that if memory serves?
Yeah I’m a little confused about it due to the fact that some vanilla clothing only had firegeo and some has both firegeo and char :/
 thorn topaz
For anything canopy related, Boolean will become your best friend.
You'll want references too, lots and lots of references, as many as you can find, some recommendations for that-
Flickr, grubbyfingersshop, britmodeller.com, cs.finescale, ninetails.com, airliners.net, prime portal, dvids hub, svsm.org, cybermodeler.
These are but a few general examples.
If you're starting out I recommend checking out blender guru's (not the doughnut) chair tutorial, this will introduce you to the subdivision modifer and some of its quirks.
I suggest this because for aviation a combination Subvision+Shrinkwrap+Solidify+Boolean is an excellent workflow that will allow you to get many shapes in a small amount of time.
BUT you must understand their behaviors because each of these steps have many things which can go wrong but in essence here is the idea-
For subdiv, use as simple geo as you can get away with, the idea is to let the modifier handle the curves and you manipulate the shape via vertices.
Shrinkwrap - Requires a duplicate of the subdiv mesh with a higher sub count, the original mesh gets shrink wrapped to this new, more subdivided mesh (A mesh without boolean!)
Solidify- Adds thickness to your mesh automatically, it can be touchy if your thickness is too high, and sometimes doesn't like to be uniform.
Boolean- You cut windows and hatches with these, but boolean can be tempermental and sometimes make your topology messy, it can also create 'pinches' when applied to the subdiv modifer and cleaned up, which is where the next step comes in.
Here is an example of the three things listed above at work, notice how, as the booleans are ticked on, the reflection does not change.
This particular model is no longer shrink wrapped but you get the gyst.

 zinc wyvern
Thanks
Altho, my problem with the canopy was the shape itself, I guess that isn’t a boolean thing?
thorn topaz
Depends on what part of the canopy you mean, for the flat part you could use a boolean create the flat curve along the front
zinc wyvern
I mean all of it
I guess my biggest problem is somehow joining it to the rest
Do you think it would be possible in a CAD? Would make the cockpit a lot easier to do
thorn topaz
In that case you would model the fuselage first, get the light to reflect off the body as accurately as possible (ignore the engines and wings).
Follow only the shape of the nose to the spine.
then model the canopy separate, first start with the circular/oval shape which forms the back of the canopy frame. You could then extrude that out and into the body, use a boolean to slice off the flat bit. Then extrude the back half until it is flush with the spine of the aircraft.
https://www.flickr.com/photos/150671024@N05/35751508606/sizes/k/

The safest and most inclusive global community of photography enthusiasts. The best place for inspiration, connection, and sharing!
In other words you aren't building the model with the canopy in mind at first, you add it the canopy and cockpit area as a cutaway/merging later in.


The safest and most inclusive global community of photography enthusiasts. The best place for inspiration, connection, and sharing!
thorn topaz
Oh right right, I got the blueprints mixed up there
zinc wyvern
zinc wyvern
Do you think it would be possible in a CAD? Would make the cockpit a lot easier ...
But anyways, this
thorn topaz
same principal really, as for the CAD I could not say, no experience with that
typically the canopy buldges out of the airframe, for that reason you generally want to model the airframe, then model the back of the canopy curve, then marry that to the fuselage. If you try to model the canopy into it at the start, especially with a subdiv workflow, you're going to have many headaches.
daring condor
thorn topaz
🐊
okay so if i was to make a plane or heli
id just get a 3d scan
and then use that to get the shape
😆
 shell hedge
lots of modelers use these blueprint thingies, where you have something from all sides
thorn topaz
Whenever your working with anything round, you should find as many references from a variety of angles and especially glossy with reflections if you can.
You can gleam a lot from the way light bounces off things and it more oft than not fills in the gap left by blueprints.
https://www.flickr.com/photos/45945507@N05/49675805303/sizes/3k/


The safest and most inclusive global community of photography enthusiasts. The best place for inspiration, connection, and sharing!
shell hedge
to outline it
daring condor
those tend to be really bad
well not raelly
but they are usually wrong
since they are taken from modelling kits
thorn topaz
think of blueprints as a guideline but not THE guide, sometimes the different views are scaled differently, one may be slightly warped, things may not line up. If you try to follow blueprints to 100% you're more often than not going to chase your tail
this is where your library of references (or winging it) comes in
shell hedge
haha winging it, get it, cuz airplane
daring condor
they aint making no plane
thorn topaz
I flew right into that one
thorn topaz
Mmhm! interesting with its curves and flat angles, not many designs like it
daring condor
was abandoned for a reason
but yeah i try to use 3d scans as my primary refs
especially regarding proportions
thorn topaz
terrible reflection/glare off the canopy glass iirc
daring condor
 thorn topaz
Hmm, interesting!
it doesnt certainly have a unique front that stands out yet oddly fits
 dense thunder
Does anyone have a decal example/tut they can recommend?
I'm after making some custom road/car park markings
dense thunder
no special settings needed or anything?
shell hedge
yea just clone an existing decal material and play around with it
dense thunder
ok thanks i'll give a look 🙂
 solemn goblet
thorn topaz
solemn goblet
thorn topaz
What the hell? Why do all your things say like "window_cut_left" instead of "cube.088" like mine???
 wheat bear
anyone know what exceeding UV coords means when importing an fbx on the workbench?
thorn topaz
solemn goblet
What the hell? Why do all your things say like "window_cut_left" instead of "cu...
I named my boolean mesh to "window_cut_left" whenever you pick a target for your boolean modifier, it uses the target mesh name.
This includes the BTool Ctrl+ numpad - shortcut.
solemn goblet
(the joke is that I'm a disorganized mess)
 solemn goblet
i'll get around to sorting it any day now
 thorn topaz
there will be time to rename things later when you are certain they won't change into anything else
solemn goblet
I don't trust them yet, they keep speaking cockney slang at me and haven't yet calmed down
 opal scroll
I see the modders are already working on helis
daring condor
@zinc wyvern can I DM you quickly?
 prisma delta
opal scroll
I see the modders are already working on helis
prisma delta
opal scroll
I see the modders are already working on helis
theyve already put flying helis in game
i think they made their own flying physics
opal scroll
But they haven't released then yet
 delicate condor
It likely is not ready for public use yet.
shell hedge
yes, the helicopter is not early access
surreal ore
Yeah it's not quite ready yet.
zinc wyvern
I plan on making a full-fidelity flight combat addon, we’ll see how that comes out
 late veldt
Everyone wants realistic flyers and I just want someone to remake Crimson Skies. I am new to modelling, and focusing on buildings. I am looking for how I can add windows to my buildings, however as it shares a name with an operating system and I have a lack of base knowledge I am having problems with my SEO. Does anyone have any resources handy that might help teach me about light portals / windows.
 hidden yarrow
Getting our F-16 ready for reforger aswell currently also in development for arma 3 tho making it with @slate ivy and @mystic crow
 bright raft
hidden yarrow
Getting our F-16 ready for reforger aswell currently also in development for arm...
bright raft
hidden yarrow
Getting our F-16 ready for reforger aswell currently also in development for arm...
Any cockpit shots?
hidden yarrow

 covert dune

bright raft
hidden yarrow
Looking very good
solemn goblet
hidden yarrow
Getting our F-16 ready for reforger aswell currently also in development for arm...
Daaaang that landing gear is sick
 tacit eagle
landing gear is always the most difficult part of the model, next would be the cockpit
tacit eagle

 opaque quartz
Hi Everyone! I am attempting to create a custom inventory item. When I export/import, collision does not work the way I expect.

 opaque quartz
Layer is set to Prop
Static Flag is checked under General -> Flags in object properties.
Collision does now seem to show up in the xob properties

But my character can still walk straight through my object.
opaque quartz
I possibly got to work by adding a RigidBody to my entitiy, I had to check Model Geometry and this worked, but I am concerned I am using the key mesh for collision as opposed to my box mesh that was a part of my UBX_Key
surreal ore
@opaque quartz how big is the key?
opaque quartz
oh its huge. way to big for a regular key
About the size of the player model
@surreal ore This is my first test case to see if I can import an object into the Game at all. Reimporting is easy enough that I figured a huge (applied transforms) scale like that would stop me from wondering if I needed to zoom etc. Just got it working with my previous comment, but still a bit confused about wheather or not I did the right thing by getting collision to work by using Model Geometry in my RigidBody component.
surreal ore
 chrome sleet
I'm trying to leverage an existing xob file but when I include it in a prefab the vector where I manipulate it's location seems to be offset. Does anyone know how to fix that?
 last hill
chrome sleet
I'm trying to leverage an existing xob file but when I include it in a prefab th...
last hill
chrome sleet
I'm trying to leverage an existing xob file but when I include it in a prefab th...
If it's your model, in your 3d software is it positioned at 0,0,0 with the transform position set? I use 3ds Max and setting my model root as 0,0,0 then hitting reset xForm tells the engine where it is in relation to the translation widget on Enfusion. If you are on Blender there is instructions on the wiki for position for models etc. If not your model, you might be able to manually set the offset if memory serves.
chrome sleet
last hill
If it's your model, in your 3d software is it positioned at 0,0,0 with the trans...
Yeah it's one of the existing BI ones, I am just going to offset its resting position for now but it would be great to reposition that in the actual entity
zinc wyvern
Okay, I’m just jealous at the models here. Does anyone have any tips for a learning curriculum for 3D modeling? I can make something, but that something looks like trash
little kayak
Most of the guys have years of experience, either as a hobby or work related.
That said, YouTube is a great source of tutorials for Blender or other 3D software. So start with that and begin with small and simple objects before even thinking about building complex models like vehicles or weapons.
zinc wyvern
The thing is, I’m not able to think off stuff to do, partly because I don’t know what´s simple and what’s not
last hill
zinc wyvern
The thing is, I’m not able to think off stuff to do, partly because I don’t know...
Start with a custom weapon crate or locker or something with basic shapes and work out from there. Or start with a basic shaped weapon item, or something along those lines, think of something not in the game, hell even a book or something like that, plenty of stuff that can be added, it's up to your imagination and what you feel the scope of the game can include. Then you get references and start making, break that model, learn from it and make the next one, break it, make it again etc etc. I've been doing that and so far, none of my models have ever seen the light of day, hence buying and importing for now still.
little kayak
My first model, without any experience, was a pumpkin (created for a one-time Halloween event). Took me weeks to build 🤣
Currently I'm working on a tactical tablet, which is already way out of my comfort zone...
So I suggest follow some tutorials and build the models they use as examples. The moment you get comfortable with specific things, you'll come up with your own creations or modifications which may or may not be useful to implement in-game.
Even small stuff like a banana, or cans of soup (aka simple cylinder) can be great assets for Arma.
delicate condor
Start from small parts for example.
zinc wyvern
I’m not sure what to expect too, is it like drawing where you get better over time?
delicate condor
A screw or a bolt or a bullet
Mostly yeas when you get more familiar with different tools and methods of making things
 whole briar
Reposting a help request (I know that it is not an ordinary Model problem but related to it, maybe someone knows what to do): Hello there, I am trying to get a new gun into the game. i downloaded a free model from sketchfab, got it into workbench and made everything like in the sample weapon mod. My problem is, that the size of the weapon is way to big when spawning, i can't pick it up or do anything with it and even if added to arsenal it does not spawn in there. i was trying to understand what is wrong and saw that the model has no bones so there are no links for where to grab the gun, where to reload and so on and at that point i am thinking that this is why it does not work. can anyone tell me what to do now? tried to download other similar models from sketchfab but when importing to workbench none of it has bones, so i cannot check wether it is actually the problem or not.
last hill
whole briar
> Reposting a help request (I know that it is not an ordinary Model problem but ...
So it depends on the scale of the base model that was downloaded. The engine uses real world scale I believe in metric format. If the model downloaded is incorrectly scaled (easy to find out in the 3d software) it will come across massive in the workbench.
There is a bit of work to get the prefab setup to allow it to spawn in the engine as a pickup item, with the prompts etc to pickup/equip/replace, then to get it to spawn inside the arsenal crate it needs to be using an override arsenal script, at least I have never been able to use duplicate or inherit successfully.
Inside the tutorial for new weapon it goes through the bone creations, if the person has them in the 3d software already and is exporting them out, just needs to go to import settings and check the box that says import skinning and heirarchy to bring them in
whole briar
last hill
So it depends on the scale of the base model that was downloaded. The engine use...
First of all, thank you for the explanation regarding the size. so i would need to rescale the model in blender if i understand that right? Regarding the prefab setup i did all i needed to do in contrast to the sample mod weapon. This should not be the problem. I am new to this so i am still learning, but that the Asset (.xob) file has no bones in the engine means that you can't even use it in the game and this is actually the problem or am i wrong with this?
last hill
whole briar
First of all, thank you for the explanation regarding the size. so i would need ...
Well you can still use the weapon to a degree but the game will not have a clue where anything is, so for instance without the barrel_chamber and barrel_muzzle bones/empties the weapon will not have a clue where your bullet is coming from or exiting etc etc. Did you add the bones from the tutorial for new weapon? w_root etc etc? I use 3ds Max myself but the tutorials are aimed more at Blender so it should work great for you
whole briar
I was trying to add bones to the weapon in blender based on tutorials but did not manage to properly parent the bones to the gun for some reason. Everytime i was trying to create just one bone for the magazine and link it to the weapon, i saved it as an .fbx file and imported it into enfusion. Still no bones ingame
last hill
whole briar
I was trying to add bones to the weapon in blender based on tutorials but did no...
Did you check the boxes in workbench on the xob file?
After those boxes, click the button at the top to Reimport Resource (to bring in the bones if they exist in the model you are importing)
 whole briar
thanks for the advice! but as it seems all of the different models i downloaded have no bones for no reason. so i will need to learn to add them manually as it seems. but do you think this will solute the problem with not being able to pick the gun up?
is it even common that free models on sketchfab do not have bones or am i doing something wrong? i just drag and drop the .fbx into the assets/weapons/moddedgun folder within workbench -> import as model -> open it up -> go to Import Settings -> tick the boxes and reimport -> checking on details -> still no bones, no matter which downloaded weapon i use
last hill
whole briar
thanks for the advice! but as it seems all of the different models i downloaded ...
That I have found is a configuration issue in the prefab settings in the ActionManagerComponent section on the prefab.
So you won't have bones on most models that you either buy or download free, due to the fact that most people allow for more than one engine on their models. You will need to make and position the bones yourself in most cases.
Sorry that I misunderstood before.
 thorny rivet
Does anyone know how to fix this?
last hill
thorny rivet
Does anyone know how to fix this?
If you have LOD models... this looks to be LOD related, are all of your LOD's oriented the same?
whole briar
last hill
That I have found is a configuration issue in the prefab settings in the ActionM...
did you find a way to solve this?
whole briar
last hill
So you won't have bones on most models that you either buy or download free, due...
thank you for that explanation! So if i see that right i need to add one core bone (near the barrel), a barrel bone, muzzle bone, trigger bone, rear and front sight bone, magazine bone and a hand grab bone right? so basically set all those bones, make the model without the magazine parent and link them all to that model (parent). the magazine is then added seperatly as an own .xbo within enfusion right?
last hill
whole briar
thank you for that explanation! So if i see that right i need to add one core bo...
So you want - w_root as the main parent, then under that you will want w_trigger, w_safety, barrel_muzzle (placed at the exit of the barrel), barrel_chamber (placed at the entry point of the bullet to the barrel, must be placed directly horizontal to the muzzle bone), slot_magazine, rear_sight, front_sight and eye (tells the game where the camera will position to look down sights). To start with you will want to weight paint all of your vertices to the w_root (to tell the game that if the w_root bone moves around, the gun does too), then if that works, go back in Blender and select the individual pieces you want affected by each bone and weight those components to the bones in question (trigger verts to w_trigger etc etc).
Easiest way to find out, look at the base game asset xobs and turn on bone display in the previewer and compare the positions to your bones.
thorny rivet
last hill
If you have LOD models... this looks to be LOD related, are all of your LOD's or...
I didn't use any LODs
last hill
thorny rivet
I didn't use any LODs
Then not sure why it is popping in and out as you move around, sorry
thorny rivet
whole briar
last hill
So you want - w_root as the main parent, then under that you will want w_trigger...
What does "weight xyz" mean? I understood that i i need to place a main parent (ie horizontal near the barrel) and link all other bones to that. the main parent must be linked to the model right? But what after that does weight paint or weight components mean? (does that mean link or sth like that?)
last hill
whole briar
What does "weight xyz" mean? I understood that i i need to place a main parent (...
I am not sure what it is called in Blender, it is called skin modifier in 3ds Max.
whole briar
yeah but does weight mean link those pieces or something different? Still not sure if i understood that right
 fathom bolt
whole briar
yeah but does weight mean link those pieces or something different? Still not su...
fathom bolt
whole briar
yeah but does weight mean link those pieces or something different? Still not su...
When we talk about weight we are talking about weight painting in blender
So you need to select the piece of your model go to weight paint and be sure that your model is in red color
I think you talk about that
whole briar
thank you for explanation @fathom bolt ! and what do i actually need to paint and what does it do?
fathom bolt
For weapon it’s prevent deformation with animation. So all the weapon need to be in red
Here is the doc of blender I think you have all here
whole briar
thank you! will do! actually i managed to set some bones that are recognized in workbench, for some reason every bone now has an start and end entry in enfusion, dunno why. if i add them to the prefab it works, even if it does not put the magazine where i set up the bone. but if i go to the game within enfusion it crashes when loading up after i dragged and dropped the prefab into the world
opaque quartz
surreal ore
@Hatz#2896 https://community.bistudio.com/wiki/Arma_Reforger:Collision_Layer
@surreal ore Thank you, I've reviewed this. So why did Model Geometry work when just setting the type to prop did not.
fathom bolt
whole briar
thank you! will do! actually i managed to set some bones that are recognized in ...
Here you can find a sample that I made for weapon creation :

164 files and 30 subfolders
fathom bolt
fathom bolt
Here you can find a sample that I made for weapon creation :
https://mega.nz/fo...
With blend files and project for workbench
 thorny tree
How do I add bones to an existing object?
bright raft
thorny tree
How do I add bones to an existing object?
You can't
thorny tree
Okay. Well, is there a Tutorial how to add and export meshes with bones from Blender to Enfusion? Because when I tried, it doesn't show the set bones.
bright raft
You have to check this two options in enfusion import tab

Sorry, TheAussieMerc, used your pic cause I saw it earlier 😄
thorny tree
Damn. Thanks, it worked.
tacit eagle
Ručni bacač M57 ( that's it for today) for my other work see https://forums.bohemia.net/forums/topic/238811-veles-rpg-at-pack/

Bohemia Interactive Forums
Hello Everyone, I would like to show case some content that Im creating for Arma Reforger and Arma 4. Here is the list of Unguided AT launchers Im planning (please note the Unguided part) Spoiler List of AT Launchers [ Finished HP ] [ Wip / Requires Redux] [ Not Started ] RPG-2 RPG-7 RPG-7D RPG-7...
 tacit eagle
you use Booleans? or is that Moi 3d
solemn goblet
That there is Blender with some hopscuts iirc. Magazine is looking suh weet
 zenith quartz
Booleans yeah.
And thanks! Mag ain't mine, that's the one component here I didn't do, by Defcon. 😁
tacit eagle
is it for offical arma content or a mod
whole briar
fathom bolt
Here you can find a sample that I made for weapon creation :
https://mega.nz/fo...
Thanks @fathom bolt ! Will definitly look into that
And thanks for all that explanation and help in this channel!
zenith quartz
tacit eagle
is it for offical arma content or a mod
Mod.
calm rune
fathom bolt
Here you can find a sample that I made for weapon creation :
https://mega.nz/fo...
Looking at your sample. Did you just use the bones that were already in the sample BI provided us or did you add your own armature and just rename?
fathom bolt
calm rune
Looking at your sample. Did you just use the bones that were already in the samp...
I have make my bones like the m16, everything in the sample works correctly in game there is a project for workbench
 hazy shell
zenith quartz
hazy shell
zenith quartz
Love it and you for making it 😛
zenith quartz
Thankya!
tacit eagle
what is it a hk 433? also I cant work with making a hi poly using Booleans, too much work cleaning it up
zenith quartz
Yes, 433.
I need to learn zbrush dynamesh.
Currently I just use Blender's Remesh method.
shell hedge
merge everything by phong angles
tacit eagle
I'm experimenting with instant meshes which is auto retopoly but used for sculpting
whole briar
Hey there, anyone got any idea why adding modded weapon to the arsenalconfig in workbech does not work for me? already tried to switch between default/weapon/ammunition
 solemn goblet
tacit eagle
solemn goblet
tacit eagle
Looking good 😎
tacit eagle
thx I just have to do some welds in sculpt mode and few floaters
solemn goblet
What weapon is it exactly? I'm not gun savvy
tacit eagle
RB m57
solemn goblet
Oh wow, the angle made me think it was some type of recoiless rifle
Looking good, keep us updated when it's in-game

 last hill
Second ever model creation from scratch, learning as I go but trying to be as accurate as possible. Rail in the background is the Block II rail. Still a long ways to go but this is what I have done so far, little under an hour and a half of work put into it, spent 2 hours looking for reference images in high resolution
 tacit eagle
@last hill you have a high poly to bake from?
I would also bevel the sight protectors with 3 sides
last hill
tacit eagle
<@293168886419947530> you have a high poly to bake from?
I do not have any model to bake from, just making it. I'm going to be creating it in high detail (I chose this as my first model due to the basic shapes), then hopefully baking out the details to a lower poly model, if I can figure that side of things out. At the moment it's just a basic form which I am adding to.
Will add a small chamfer to the casing mesh and also increase it's thickness slightly, went too thin
tacit eagle
make it out of a plane, with the bevels like this

then apply a solid modifier to add thickness. 0 bias is best for detail
last hill
tacit eagle
then apply a solid modifier to add thickness. 0 bias is best for detail
I'm on 3ds max, can't see solid modifier, I do have extrude etc but no solid modifier. Is that for Blender or am I missing that modifier?
tacit eagle
its called something else because autoschiet likes to use non trade standard names
i think its a modifier called shell
last hill
No shell modifier, Extrude creates thickness from a base plane/shape so assuming that to be the one
tacit eagle
last hill
Hmm
last hill
tacit eagle
https://knowledge.autodesk.com/support/3ds-max/learn-explore/caas/CloudHelp/clou...
Sneaky thing, missed it
last hill
Well.. unfortunately, should have been doing backups as I moved to new components, exported out the model to do a quick test of the so far, chamfers don't appear to work/import correctly, missing polys on the model that imports in, will check and see if maybe they are flipped or something in 3ds and try that but if not that, might have to start again
Fun times
 last hill
Salvaged, welded vertices at a very low target distance and it reconnected the verts and has fixed the issue in import. Will be more careful. Bed time now though.
 tacit eagle
 thorn topaz
zinc wyvern
I’m not sure what to expect too, is it like drawing where you get better over ti...
thorn topaz
zinc wyvern
I’m not sure what to expect too, is it like drawing where you get better over ti...
Part of this is that there are multiple ways to approach modelling something and different techniques work better for different things.
If you're having difficulty in finding something simple then look around you, electric outlets, cups, cans, plates, electronics, misc objects, furniture and so on.
Even when you are used to it it's a good idea to try something simple to fiddle with techniques.
Since you are using Blender I have to ask, first and foremost, do you know how to lock a selection to a certain axis when moving? Do you know how to select a loop select, do you know how to move vertices along nearby edges, or to add edge loops, or extrude a set of verts to form new faces?
These are all very helpful foundation functions that can greatly speed up and keep your workflow clean.
bright raft
thorn topaz
Part of this is that there are multiple ways to approach modelling something and...
Sorry to ask, are you the man who did the original AH64 model?
thorn topaz
bright raft
Sorry to ask, are you the man who did the original AH64 model?
If you are referring to the Franze apache or the arma 3 AH-64D Official Project, then yes I did.
If you are referring to the apache from Arma 2 Operation Arrowhead then no.
tacit eagle
lol look at this garbage I've made years ago
 bright raft
thorn topaz
If you are referring to the Franze apache or the arma 3 AH-64D Official Project,...
bright raft
thorn topaz
If you are referring to the Franze apache or the arma 3 AH-64D Official Project,...
Yeah I was referring to that. Stellar work man. Was inspiration for me, when I decided making Hatchet Uh60 with Yax.
fathom bolt
thorn topaz
If you are referring to the Franze apache or the arma 3 AH-64D Official Project,...
The Tiger ?
zinc wyvern
Ummm since getting good at modeling takes lots of time and I’m still very much a beginner, would someone be interested in a team-up? I’m talking mainly planes
 hidden yarrow
Nice plane 10/10
hidden yarrow
well to be fair making models especially good ones will take a while
maybe by the time hes done its added
last hill
Slowly getting there, learning more about the tools as I go. Still a ways to go, details to add, bolting platform and tweak the picatinny mount more, basic shape/mounting plate formed. Should be pretty good going forward, learnt to not use Chamfer after last time and so far no issues in rendering on the engine itself. It's taking shape, still a while off yet. I know it's a very basic model, but will keep tweaking it based off my reference images
 calm rune
last hill
Slowly getting there, learning more about the tools as I go. Still a ways to go,...
calm rune
last hill
Slowly getting there, learning more about the tools as I go. Still a ways to go,...
For someone who is new at modeling any particular reason why you chose that over blender?
last hill
calm rune
For someone who is new at modeling any particular reason why you chose that over...
Have had it a long time now, found it easier to use and didn't really know anything about Blender until recently. Used my tax return on this a year or so ago and kept using it. I primarily mucked around in it. Yeah was a waste of money but I was dumb lol.
calm rune
last hill
Have had it a long time now, found it easier to use and didn't really know anyth...
Ah, gotcha.
bright raft
last hill
Have had it a long time now, found it easier to use and didn't really know anyth...
As next tax return I strongly suggest Substance Painter
tacit eagle
I threw that autoschiet stuff in the trash and never looked back
 shell hedge
bright raft
As next tax return I strongly suggest Substance Painter
shell hedge
bright raft
As next tax return I strongly suggest Substance Painter
painter is very fun to use once you learn to navigate the jank
bright raft
Agreed. It is relaxing when I start some YouTube video in the background and can play around with all the materials
tacit eagle
you can also texture paint with blender
shell hedge
print your model on cardboard, glue it together, paint it and then use photogrammetry to bring it into the game
delicate condor
shell hedge
print your model on cardboard, glue it together, paint it and then use photogram...
this would be pretty HC
👍
last hill
bright raft
As next tax return I strongly suggest Substance Painter
Will look into it. Tax return in a couple weeks.
 pliant bolt
Cries in negative tax return 😕
 stiff goblet
bright raft
As next tax return I strongly suggest Substance Painter
stiff goblet
bright raft
As next tax return I strongly suggest Substance Painter
tbh, i don't think you'll be able to buy perpetual licenses for substance painter much longer. i think adobe will integrate the substance products into its subscription model in 1-2 years.
shell hedge
stiff goblet
tbh, i don't think you'll be able to buy perpetual licenses for substance painte...
they're already available for in an adobe subscription
individually or painter+designer+sampler
stiff goblet
i know, but you can still purchase perpetual licenses on steam.
i think that will go away in a few years and the only option will be subscription through creative cloud.
shell hedge
oh I didn't even know
but that's my fault as I don't use the tools section on steam at all
why did they make Stager?
stiff goblet
yeah. the subscription is a pretty bad deal for consumers. atm you can get a perpetual license on steam for 129 euros per product (let's assume sampler, designer, and painter since stager is whatever) or pay monthly for 20 euros. if you're going to use the software for more than ~1.75 years, it's cheaper to purchase the licenses than to pay adobe subscription model.
shell hedge
for sure
whole briar
hey there, does someone has a skeleton preset .fbx built on an arma model he wants to share? I got one of a tutorial for hats, followed all of the steps, it works with it, but the hat is offset and floating. was looking into comments on YT many people got the same issue. think the model is not accurate and the headbone is missing.
last hill
whole briar
hey there, does someone has a skeleton preset .fbx built on an arma model he wan...
You talking about making stuff in 3ds?
whole briar
last hill
You talking about making stuff in 3ds?
yes, making stuff in blender. So hats, clothes and stuff like that. i am looking for a skeleton preset, cause the one i got from the tut has some kind of issue. still learning rigging with weapons but for a whole skeleton i do not have the skills right now to build a whole skelly rig myself
last hill
whole briar
yes, making stuff in blender. So hats, clothes and stuff like that. i am looking...
If it is floating and back wards, you need to import the head mesh into Bldnder as well to get it positioned, then rig the hat to the head bone using weight painting. I am 3ds max but the process is apparently the same/similar.
whole briar
last hill
If it is floating and back wards, you need to import the head mesh into Bldnder ...
the whole skelly rig is done by empty axis there is no bone. when looking into hat rigs ingame there is a headbone that is connected to all the face axis. that is missing in preset
last hill
The sample literally has a head and body, but if memory serves the head is just a mesh
So you need to get the skeleton from the body template sample.
whole briar
last hill
So you need to get the skeleton from the body template sample.
thank you! will try that
whole briar
last hill
The sample literally has a head and body, but if memory serves the head is just ...
if i start my project with the sample mod addon, how can i duplicate the sample templates? they are locked up for me
last hill
whole briar
if i start my project with the sample mod addon, how can i duplicate the sample ...
Download the zip from the pinned samples, it's not locked on the zip file as it isn't encrypted.
I am not at my PC mate so I can't get the link to it all sorry. Doing this from memory
 tidal latch
whole briar
hey there, does someone has a skeleton preset .fbx built on an arma model he wan...
tidal latch
whole briar
hey there, does someone has a skeleton preset .fbx built on an arma model he wan...
two questions:
- Did you correctly skinned your hat? For start, you can rig just to head bone
- Are you sure that you have imported skinning in Wokrbench import settings?
whole briar
tidal latch
two questions:
* Did you correctly skinned your hat? For start, you can rig just...
what do you mean by import skinning into workbench?
so i used the sample rig now and the body to scale the hat in blender perfectly to the head, assigned it to the skelly, imported it to workbench, made the item object with collider, everything is perfectly alligned in blender -> result is still the same issue, hat floating behind, above and left of the head
delicate condor
vertex weighting on head selection(s)
whole briar
delicate condor
vertex weighting on head selection(s)
only thing i can say is that the hat is completly painted dark blue in blender weight settings
whole briar
ah and what ive seen again is when importing to workbench, there are still no bones. its 0+169 and not 3+169 dunno why
whole briar
delicate condor
red would be full weight on selection/vertex group
so i need to paint it to red ?
delicate condor
possibly
or you can just assign it to the head group in edit mode
that adds selected verticles on a group by set weight (slider below the group list)
whole briar
but is missing weight responsible to the floating problem or does this create a different problem?
and what am i doing wrong that bones are not imported and just the 169 axis?
calm rune
whole briar
ah and what ive seen again is when importing to workbench, there are still no bo...
make sure you check off both these boxes and reimport.
 surreal ore
@whole briar the weight is for determining bone influence
No weight no bone influence
No bone influence no movement
whole briar
So ... I painted the hat red now in weight and now when reimporting i got finally the headbone and the other axis in adition so 1+168 now. that is good, thank you!
but when i updated the prefab, restartet workbench and spawned hat ingame, it is still offset
delicate condor
is the new exporter sensitive to the origin of the exported model?
surreal ore
That's probably what it is.
Not applying transforms before export.
Armature is at 0,0,0 and hat is at 0,0,1 or whatever
whole briar
thank you for all your help. it was not the applying, i think i messed up the skelly copy. some of the axis like left_foot_ik, right_hand_ik and stuff like that was far offset and not assigned to root bone. not pretty sure if that is responsible for the head problem, but this is a problem anyway
will delete all of that and restart the whole attempt next days
 chilly dragon
whole briar
thank you for all your help. it was not the applying, i think i messed up the sk...
chilly dragon
whole briar
thank you for all your help. it was not the applying, i think i messed up the sk...
Are you selecting custom properties and unselecting add leaf bones when exporting? I believe it there should only be 163 bones in total if im not mistaken?
whole briar
i unchecked custom properties and unchecked leaf bones boxes before exporting
chilly dragon
keep custom properties checked
calm rune
uncheck leaf bones but check custom properties
whole briar
all right, trying it again with that advice
tidal latch
whole briar
but when i updated the prefab, restartet workbench and spawned hat ingame, it is...
don't forget to rotate mesh in workbench import menu too by 180 degrees

as for why it's like that, you can search discord for the answer - it was already explained twice
calm rune
I got annoyed having to rotate it 24/7 so I just rotated the skeleton in blender and saved it lmao
tidal latch
calm rune
I got annoyed having to rotate it 24/7 so I just rotated the skeleton in blender...
that will break colliders/fire geometry
calm rune
tidal latch
that will break colliders/fire geometry
All of mine seem to be fine :/ or are you talking about basebody ones?
tidal latch
base body for sure
I wouldn't be surprised though if some issues with geometry would appear at later stage though
calm rune
tidal latch
I wouldn't be surprised though if some issues with geometry would appear at late...
It’s strange though because In the sample the colliders are flipped anyway so if anything rotating the bones would line them up correctly
thorny rivet
Does anyone know why I have only one material, when there should be two?

 stiff goblet
You can't export objects with the .XXX auto naming scheme of Blender. Enfusion doesn't like it
Change the name of the materials to something like M_Gun_01 & M_Gun_02 (maybe a bit more descriptive) and it should work properly.
last parcel
or you have the same material id for both, so you need to change that
don't know how to do it in blender though
 sand pagoda
also you should keep right folder structure and hierarchy
 calm rune
last parcel
or you have the same material id for both, so you need to change that
calm rune
last parcel
or you have the same material id for both, so you need to change that
Just click this box and type a new name.
 last parcel
i don't need that info, seeing as i don't use blender 😉
tacit eagle
 shell hedge
whats this
 tight hollow
shell hedge
whats this
tight hollow
shell hedge
whats this
forbidden fleshlight
fathom bolt
tight hollow
forbidden fleshlight
lightsaber ?
tight hollow
fathom bolt
lightsaber ?
Yes
fathom bolt
tight hollow
Yes
really ??
tight hollow
fathom bolt
really ??
Idk I'm not the creator
fathom bolt
oh 😄
bright raft
I guess some kind of rpg
shell hedge
big stick
tacit eagle
 thorn topaz
bright raft
Yeah I was referring to that. Stellar work man. Was inspiration for me, when I ...
thorn topaz
bright raft
Yeah I was referring to that. Stellar work man. Was inspiration for me, when I ...
Whoa, THAT UH60? I love that addon! The attention to detail and the smoothness of the model, it was so refreshing to see a brand new blackhawk.
Everything about that asset is amazing in both form and function. You did a fantastic job and inspired me to (at least hopefully) model a UH-60A someday.
bright raft
thorn topaz
Whoa, THAT UH60? I love that addon! The attention to detail and the smoothness...
That is amazing to hear it from you 🙂 I hope to do AH64D model for next ARMA (either Reforger or 4) just like yours in previous installments, with as much features as possible in engine.
 cloud rampart
Is there any blender of the heads of reforge?
The one of the samples are not the same from the game
last hill
cloud rampart
Is there any blender of the heads of reforge?
Not that I am aware of. If memory serves from my looking at the samples, no there aren't. But the one provided is one of the base game heads I thought? Don't quote me.
Short answer is no.
cloud rampart
I tried differents headgears on the samples provided and nothing, finished doing recalibration to the model and riggin step by step
so, will continue by that way
solemn goblet
I think BI themselves have some head shenanigans going on
As in, some heads don't even fit the helmets right. I think they are at least properly rigged.
 lethal frigate
shell hedge
this guy gonna remake DCS in arma
lethal frigate
shell hedge
this guy gonna remake DCS in arma
I see no problem 😂
fathom bolt
cloud rampart
I tried differents headgears on the samples provided and nothing, finished doing...
You want to do an helmet ?
cloud rampart
fathom bolt
You want to do an helmet ?
i have done two beret and where very difficult to put on the exact spot, and some heads have different form and the headgear get big/small
fathom bolt
Ok cause I have a rig.blend for headgear….
cloud rampart
From the samples or custom? The samples one have that problem and need to readjust many times to get it right
sand pagoda
🥴


 fluid wing
i have an unfinished Mod back from 2015 in ARMA3 that could better fit into Reforger. I am a Terrain Dev and never get enough knowledge to finish this model, textures, cfg, and animation. I wanna share this project so we can finish this. Just PM me. Take a look at this: https://www.youtube.com/watch?v=YEmjbbcR6qE
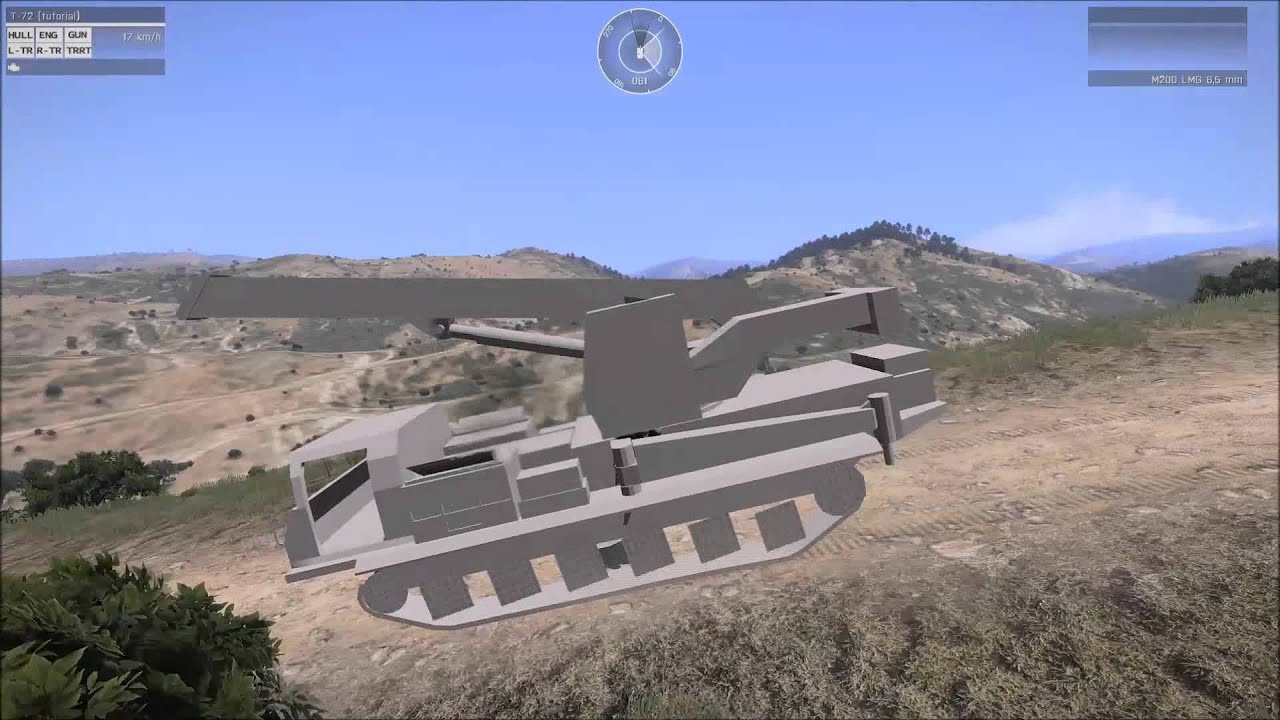
Early Alpha Test of my first Vehicle. KGS-25
"This video was created using content of Bohemia Interactive a.s."
"Copyright © 2013 Bohemia Interactive a.s. All rights reserved."
"See www.bistudio.com for more information."
tacit eagle
I remember seeing that in 2015
last parcel
been trying out fusion 360 for a couple of days really like the program so far 😄
 tacit eagle
your going to be in a world of hurt trying to get that into game
Cad programs do not translate at all into CGI work
last parcel
the only hard part is making lower poly but meh it still saves me time in the overall end
 calm rune
last parcel
the only hard part is making lower poly but meh it still saves me time in the ov...
calm rune
last parcel
the only hard part is making lower poly but meh it still saves me time in the ov...
What in the world kind of highpoly geometry is that!? Lmao
last parcel
its from fusion 360 imported into 3dmax where i later make lowpoly
calm rune
Damn. So strange seeing the edge flow look like that for a highpoly lol
tacit eagle
it can work if you do normal smoothing but its far from ideal for baking
fathom bolt
cloud rampart
From the samples or custom? The samples one have that problem and need to readju...
Custom
cloud rampart
fathom bolt
Custom
Can u share It?
stiff goblet
last parcel
been trying out fusion 360 for a couple of days really like the program so far �...
i gotta say, i've never heard of someone using fusion 360 for game asset modelling. that is definitely a first.
fathom bolt
cloud rampart
Can u share It?
When I’m on my PC yes
fathom bolt
cloud rampart
Can u share It?
i use two blend file one for the weight and another for the skeleton.
for an helmet i start with "weightref" to set the good weight and after that i finish in "skeleton" to export correctly
whole briar
Hi there, does anyone know when i upload or update my mods i got my uploaded workshop picture in there and after some hours they all turn to just white?
bright raft
whole briar
Hi there, does anyone know when i upload or update my mods i got my uploaded wor...
I think that it might be a bug, when you have loaded local mod. If you delete it and check workshop it should be ok
whole briar
bright raft
I think that it might be a bug, when you have loaded local mod. If you delete it...
What should I delete? I tried it with set thumb and preview image and ist shows the image for quiet an hour before turning it white

 whole briar
Thanks for the fast reply anyway 🙂
hidden yarrow
bright raft
Morning's work:
you use booleans and bevel workkflow? or subd?
zenith quartz
You did all that just this morning?!
bright raft
hidden yarrow
you use booleans and bevel workkflow? or subd?
Booleans and bevel. Personnal preference over subd
bright raft
zenith quartz
You did all that just this morning?!
Yep. Waiting for a friend to come so launched WAN show on yt and it just went
But it still requires UVs etc. Pretty sure some pro would do it under 30 mins
hidden yarrow
lol

 bright raft
Well ok I dont know that. I am not in the industry so it was just a guess 😄
bright raft
zenith quartz
That looks so freakin cool
bright raft
How many polys? I assume some of the edges looks beveled because of cavity in matcap
zenith quartz
Right now it's like 40K but that's because some parts are highpoly
I haven't worked to optimize it yet.
bright raft
That's still pretty good. Push it closer to 30k and I think it would be great
bright raft
yeaaah animating is kinda hard imho ;D
bright raft
I model only the shape of it. I find making grip pattern in substance painter easier
zenith quartz
Yeah that's my plan too.
calm rune
bright raft
Morning's work:
Do you use the mech machine addon with boolean cleanup when doing these areas?
 zenith quartz
Tbh you could do that quite easily with the right sphere.
Guessing knobs aren't attached.
Then you just take a UV sphere, rotate 90 degrees, and match cylinder up to the existing circles on the sphere kinda
then bevel
tacit eagle
booleans 🤮
bright raft
calm rune
Do you use the mech machine addon with boolean cleanup when doing these areas?
No, in this area I did exactly what Avery said. I created sphere (from cube with subd), and matched rotation. Then flatten sides and used loop tools to make them circular. After that I bridged edges between sphere and scope tube.
After that bevel
This is what it looks like

Maybe a bit messy, but looks good enough
bright raft
tacit eagle
booleans 🤮
Whats wrong with them?
tacit eagle
they give you shit results that you have to fix later by retopologizing
bright raft
I prefer that for low poly models over retopologizing everything with subdivied model. Just my workflow that I like to think works fine for me
And my workflow is mainly low-poly -> high poly so there's that
tacit eagle
 bright raft
I did not boolean this part, and on this model I rarely used boolean. All I am saying, is if used smart, booleans can be useful and are not necessary evil
solemn goblet
retopo on booleans is cathartic though
bright raft
solemn goblet
retopo on booleans is cathartic though
Indeed it is
solemn goblet
I kinda wish Blender had mayas quad draw tool
There's probably a plugin somehwere that remakes it 🤷
tacit eagle
quad remesher addon
bright raft
Probably yeah. I never used Maya though, only 3ds max long time ago. Made f18 cockpit with it
tacit eagle
its the 60 dollars but can also be free
calm rune
tacit eagle
quad remesher addon
$15 for 3 months. Good addon tbh.
solemn goblet
Retopoflo 3 is p good for it
calm rune
solemn goblet
Retopoflo 3 is p good for it
Might be my 3rd most used addon.
tacit eagle
not for hard surfaces
solemn goblet
I mostly just say heck it and bake from highpoly even if its shit
because 'shit' might not be shit post bake lmao only when it is do I go back and fix it
They call me the gambler 😎
tacit eagle
I dont pay for subs, its disgusting
solemn goblet
I'm part of the fully no sub and fully legal gang
Feels good man. Affinity Designer is my best friend.
sly bridge
tacit eagle
I dont pay for subs, its disgusting
what?
sly bridge
solemn goblet
I'm part of the fully no sub and fully legal gang
what?
tacit eagle
yep I hate subscription plans
solemn goblet
My tools are: Blender, Affinity, Substance Painter (steam) and uh... Davinci Resolve if I'm feeling funny
calm rune
tacit eagle
yep I hate subscription plans
I like them especially when its cheap and I know I don't need it 24/7
tacit eagle
davinci why?
solemn goblet
The low low price of zero shillings
Or do you mean, in regards to 3D? There is no reason for it in terms of 3D but sometimes presenting you can color correct video.
tacit eagle
substance painter is free in the unreal tool kit right
solemn goblet
I got it back in 2018 and the 2018 version is perfectly fine even for Reforger
tacit eagle
whats so good about it, cant blender do the similar?
solemn goblet
As Substance Painter?
bright raft
tacit eagle
whats so good about it, cant blender do the similar?
Maybe large portion of stuff can be done in blender. But Substance is just better suited for painting meshes
solemn goblet
Technically. Managing layers in Substance is so much easier. Even if you have a major fundamental understanding of PBR, Substance will be easier.
bright raft
Its very similar to Photoshop in terms of UI, has pretty good integrated baker
bright raft
solemn goblet
Technically. Managing layers in Substance is so much easier. Even if you have ...
exactly
solemn goblet
Oh, the bake by mesh name is excellent too since you won't need to explode your models
bright raft
And you get shit ton of brushes, generators and filters out of the box
solemn goblet
Yep. It's easy to fall into the trap of 'substance effect' though. The tools can be a little 'too easy'. Having a hobby like tabletop modeling might actually help you avoid it lmao
bright raft
If there is one tool I'd suggest to any 3d artist, its definitely that
 solemn goblet
I have to make undersides like that too, hope it's not too much to ask you to share how you go about it.
You're doing basically the same method I do but maybe you interact with the mesh differently...
tacit eagle
undersides?
solemn goblet
Yeah, the frame or whatever of cars haha. I have never driven a car I do not know what they are called
tacit eagle
well im just doing a blockout now, you use a 2d plane and use solid modifier
solemn goblet
Yeah I mean, that works
calm rune
Any recommended websites for getting good reference photos or blueprint photos?
tacit eagle
yeah google, yandex, opera
yandex is probably the best tho
google and all the western garbage is too censoring
youtube is also a good place for reference photos
sometimes many people will not photo certain angles but will video them in a walk around
scale model sites like scalemates that have instructions are another good site
hazy shell
zenith quartz
Looks fantastic so far !
 dim pier
Can you import an .fbx with textures imbedded in it to enfusion?
for example:
blender monkey with textures saved as a .fbx

when imported into enfusion it has a blank material
 solemn goblet
I've only ever done this into Blender, I think for Enfusions sake you will have to import the materials separately.
surreal ore
You have to import the textures for the materials. Enfusion will make the materials for you. You have to assign textures to the materials
tacit eagle
do you guys think I should make custom wheels or use the ones from the Ural? the ones from the ural have tire inflation while the trailer does not

 light eagle
Maybe this would be a better place to ask this. I have multiple skins for a vehicle I'm working on. That vehicle has multiple prefabs associated with it that also have multiple skins available. Is there a better way of handling vehicle variations with multiple skins OTHER than making a prefab (inherited from base) for every variation and skin combo? Just setting my textures in the prefab, my vehicle would have nearly 40 different prefabs.
prisma delta
tacit eagle
im making this for that guy who made the trailer concept in enfusion
Do you have a link to the trailer concept? I've been thinking about doing some trucks and trailers too but I have no idea how to make something like that work
tacit eagle
go to enfusion physics
prisma delta
thanks, that's awesome. I hope we'll be able to load vehicles and equipment up onto them in the future. I'd even like to do some forklifts and stuff to move loads
just full-on logistics simulation lol
tacit eagle
nah. loading ammo and stuff in to trucks is far better for gameplay making everything overly complex and pedantic is disrespectful to peoples time. I just think its cool to have trailers to transport tanks and Ifv since they use a lot of fuel and wheels are quicker than tracks. I just think this would help the community in longer missions.
prisma delta
tacit eagle
nah. loading ammo and stuff in to trucks is far better for gameplay making every...
life roleplay is a pretty popular arma mod, and people will literally spend hours collecting "apples" or "mining" rocks
calm rune
tacit eagle
nah. loading ammo and stuff in to trucks is far better for gameplay making every...
Gonna have to disagree on that one. The realism aspect is what a huge portion of Arma players love. Opens up a lot of new gameplay styles too for servers such as Life servers.
zinc wyvern
Hey guys, am interested in teaming up with a good-ish 3D guy for vehicles, mainly planes. If anyone's interested or has a better place to put this msg, don't be afraid to DM me.
sly bridge
zinc wyvern
Hey guys, am interested in teaming up with a good-ish 3D guy for vehicles, mainl...
zinc wyvern
Ahhhh, didn't even notice that how deep it was buried. Thank you
 zinc wyvern
I admire you
zenith quartz
Thanks? Haha. 😄
solemn goblet
I also admire you Avery

 delicate condor
boomsticks 👍
tacit eagle
yes they are old I will have to do some rework on them tho

 shell hedge
dim pier
shell hedge
dim pier
same thing when you move the collider to root? also make sure the names match
light eagle
what are your export settings?
dim pier
Haven't tried moving collider to root

 light eagle
and your import settings in reforger tools?

 dim pier
shell hedge
same thing when you move the collider to root? also make sure the names match
dim pier
shell hedge
same thing when you move the collider to root? also make sure the names match
what do you mean by root? Would I have everything in one collection instead of collections for LODs and Colliders?
light eagle
check export skinning, then reimport
light eagle
you using the reimport resource button correct? (dumb questions I know)
 light eagle
Also, that geo looks like it really needs to be clean up. Have you gone over the wiki on geometry guidelines?
dim pier
No but this was more of a experiment. I've been able to get the model in game fine just can't get collisions
light eagle
If your reimport doesn't work, I would create a simple box mesh collision, block things out. You may be having issues with that overly complex huge trimesh geometry.
https://community.bistudio.com/wiki/Arma_Reforger:FBX_Import
https://community.bistudio.com/wiki/Arma_Reforger:Vehicle_Creation
Both have sections going over basic guidelines for geo. Simple as possible is best choice. Do as much with as little as possible. Keep overlaps to just one at most.
bright raft

 light eagle
Beautiful work as always
tacit eagle
does anyone got any idea how this suspension works ?

does it just pivot? that seems like thats not right
dim pier
light eagle
If your reimport doesn't work, I would create a simple box mesh collision, block...
reimport didn't work i'll have to give that a try
dim pier
tight hollow
Is that the america class aircraft carrier?
Wasp amphibious assault ship
tacit eagle
 fathom bolt
tacit eagle
fathom bolt
tacit eagle
How did you do the pattern of the wheel ?
shell hedge
i vote baked displacement
shell hedge
yes
you can also do something silly like bake your displacement on a rectangular plane and then wrap it onto a wheel
fathom bolt
shell hedge
you can also do something silly like bake your displacement on a rectangular pla...
Interesting I need to learn that
shell hedge
fathom bolt
Interesting I need to learn that
if you spend more than 2 minutes on it you might get something interesting
stiff goblet
fathom bolt
Interesting I need to learn that
this is how i do something like this in blender
- take a plane and model the wheel so that it has the proper shape and such.
- use an array modifier to extend the wheel longer (you have to make sure that the modelling is "tiled" so that there are no gaps)
- use the simple deform modifier, set it to "Bend" change the axis so it's in the right orientation, then set the rotation to be 360 degrees.
base shape for step 1

array modifier
 shell hedge
o yes that too
stiff goblet
simple deform modifier
 shell hedge
probably easier too since you dont have to mess with a texture
stiff goblet
you'll have to play with the axis and such to get it to work properly.
stiff goblet
shell hedge
probably easier too since you dont have to mess with a texture
ye. also, you can modify the shape whenever you want by going into edit mode and modifying the base shape. it will update the entire mesh.
in 30 secs you can change the whole shape
 shell hedge
I mean same with texture but yeah
stiff goblet
it requires more effort with a texture bc you have to
- modify the OG mesh
- bake
- reimport the texture
with this workflow you just go into edit mode and make the changes
shell hedge
all I need to do is click save in substance designer
but defo need to edit the mesh if I want the general curvature changed
fathom bolt
stiff goblet
this is how i do something like this in blender
1. take a plane and model the wh...
Awesome !
stiff goblet
it's not much longer, but it is longer imo. this is also a good workflow for tires bc by disabling the deform modifier, you get a flat plane you can use to bake your texture, you can easily reduce the poly count to get some simple geometry for your low poly, etc.
fathom bolt
Thanks 👍
shell hedge
yea or just start off in low poly to begin with
stiff goblet
both works :P just use the one that lets you work as fast as possible. personal preference imo
shell hedge
probably saner to start in low poly than mess with poly reduction later
for games anyway
stiff goblet
sometimes. for a shape like this, you can get a high poly that has clean edge flow super easily since you are only modelling a single object, then reducing is just removing some of the edges. doesn't take too long and you have control over where the hard edges go. that's not really something you have when using a displacement texture since for the hard edges, you have to have a super duper high poly count.
shell hedge
just like your pictures
stiff goblet
in general, i think using modifiers in blender is a great way to model. you can make a high poly from that low poly mesh by putting on bevel modifiers and calling it a day. can also modify it by using displacements, poly reduction, other modifiers. it's a really non-destructive way to work and lets you go through iterations super quickly.
same way it works in 3ds max (though i kinda hate 3ds max tbh)
shell hedge
yes the modern way to do things is to use these functions as often as possible
they make u do things faster
not to mention they are more precise than a human anyway
whole briar
hey there, anyone got an idea how i can get my hands on the arma standard uniforms to retexture them in substance? samples have no standard uniform fbx
shell hedge
there's no way to export the models
but there is a character template that might help you make your own
whole briar
shell hedge
but there is a character template that might help you make your own
yeah i have seen the character model, but sadly not a uniform fbx. some uniforms got the exact model i just would need to retexture
delicate condor
You will likely do retexture the old fashioned way of painting textures by hand in image editor
 delicate condor
Models get released for retexturing very rarely. Though character base has been exception in the past too
 dapper oar
you could put in a feature request on the feedback tracker for retexturing samples/texture templates for the characters.
delicate condor
Should be easier to preview a texture in the workbench though
whole briar
dapper oar
you could put in a feature request on the feedback tracker for retexturing sampl...
sounds good!
whole briar
delicate condor
Should be easier to preview a texture in the workbench though
problem is that i can just retexture the camo but not add details that way.
tacit eagle
I use neither
 sand pagoda
wheeled version of spg-9

 bright raft
sand pagoda
wheeled version of spg-9
bright raft
sand pagoda
wheeled version of spg-9
That is shit tone of detail man. Awesome work
tacit eagle
I have a spg 9 too

 tacit eagle
you want it?
thorny rivet
Can someone help me with turret component for cars, please?
thorny rivet
thorny rivet
Can someone help me with turret component for cars, please?
Problem solved, big thanks to SpaceStrider!
tacit eagle
Anyone knows how much polygon limit ARMA Reforger have?
Including interiors
I mean, Vehicles of course.
shell hedge
at least 7
tacit eagle
is there no maximum limit then?
bright raft
tacit eagle
is there no maximum limit then?
There is no limit per se, (well maybe there is, defined in Directx) but you should always try to make it as low as possible.
And number of polys depend on model you are making. If it is a weapon, 30k ish should be enough for example
shell hedge
for lod0***
bright raft
shell hedge
for lod0***
Yes, exactly. Forgot to mention about LODs 😉
Rather big oopsie
 bright raft
XD
stiff goblet
per model, i would imagine the limit is something like the bit depth of the engine. certainly not something that should ever be reached by a single mesh :P
shell hedge
challenge accepted
tacit eagle
bright raft
There is no limit per se, (well maybe there is, defined in Directx) but you shou...
Sounds like can be add more polygons than A3
stiff goblet
shell hedge
challenge accepted
make sure to take a photo of your melted PC ;) i'd love to see it.
stiff goblet
tacit eagle
Sounds like can be add more polygons than A3
a good way to understand what your targets should be for certain objects is to look at the official meshes. You can open them in the engine and see how many vertices they have.
a house for example (just the base mesh) has around 60k tris, interior is similiar, then all the detail meshes on top.
so at the highest level of detail, you'd probably be around 150-200k for a house. with LODs that will drop as you get further away obv
bright raft
tacit eagle
Sounds like can be add more polygons than A3
Probably. But even in A3 I could add meshes with pretty high polycount
shell hedge
stiff goblet
make sure to take a photo of your melted PC ;) i'd love to see it.
2.5 mil polys froze workbench during import
will wait a few mins
bright raft
It does freeze it, but it can import after a while I think
shell hedge
the mesh is only 90 mb
stiff goblet
i know unity has a limit of 65535 vertices per mesh, which i think comes from the FBX importer? i'm not totally sure.
So there has to be a limit here as well, it's not 16 bit. maybe 32bit? if so, you could have 4.1B vertices per mesh if it's unsigned. super reasonable :D
shell hedge
if this takes more than 10 minutes i dont know if i want to try my 8 mil poly mesh
will just leave it overnight I guess
use the pc as a heater for more comfy sleep

delicate condor
tacit eagle
Sounds like can be add more polygons than A3
It's already possible to use more polies in A3 than you should
What's possible is not what you should be aiming for
Unless you want people to ask why your mod runs at 5fps
You can see used polycount when you open vanilla vehicles in workbench if I remember right
shell hedge
yup all meshes have the counters in workbench
 short bear
wz.88

 bright raft
Redoing MK18 frontguard for my mod

 eager hill
bright raft
Redoing MK18 frontguard for my mod
eager hill
bright raft
Redoing MK18 frontguard for my mod
Looks great, but remember to make those rail guards or whatever they are called as an attachment for the weapon.
whole briar
anyone made some progress regarding creating uniforms? when i scale my jacket to the skeleton, got memory points, skeleton and a cube colider, enfusion crashes when loading it into workbench. some got any idea?
 plucky rover
tacit eagle
plucky rover
tacit eagle
what tires are those?
tacit eagle
ja-190
plucky rover
oh, are they contemporary? i've never seen treads like that, was curious what type they were
tacit eagle
they are big 1.3m

 mossy pond
All in all how hard is porting a model in to reforger just basic shit
little kayak
mossy pond
All in all how hard is porting a model in to reforger just basic shit
depends on what you want to port, from what, and what kind of source files you have
mossy pond
fbx
surreal ore
Its easy dude.. Just gotta use the right export settings. In some cases you may end up having to triangulate before export, sometimes something weird happens when you import causing you to lose some verts. Other than that its pretty straight forward
What you really need to look into though is how colliders are handled and the naming conventions of objects within your model.
whole briar
Anyone got his hands on uniform rigging? Managed to get a uniform into the game now basically but still got some offset (floating) and the uniform is stiff so does not follow the character movements (ie arms movement and crouching). Anyone got ideas or willing to answer some questions on that topic? I worked through a couple of rigging tutorials but there are some differences an reforger or I am a bit confused. What I did was rescale the uniform to the bodyexample on the rig, deleted the body, connected the jacket to the rig with empty groups , assigned the armature (whole rig) to the jacket, got memory points and a collider. Weight painted the jacket to red. Got it into game, basically it works ingame instead of Offsets and stuff on the character so not moving with the arms properly or the body when crouching
last hill
whole briar
Anyone got his hands on uniform rigging? Managed to get a uniform into the game ...
You need to paint the weights to individual skeleton bones, not just one or two,
whole briar
last hill
You need to paint the weights to individual skeleton bones, not just one or two,
you mean to the jackets or the bones themselves?
last hill
whole briar
you mean to the jackets or the bones themselves?
So the clothes, get weight painted to the body positions they need to be, so arms to arms etc etc.
whole briar
Do I understand that right? The skeleton is patented to the jacket and after that I need to weight paint the different parts and that fixes my problem? So ie I paint the arms blue, upper torso red and lower torso blue again ?
last hill
No. blue means it is NOT affected. You need to paint it, the more red, the more it is affected. Take your time and if you're not copying the paint weights from the sample clothing you will need to be careful of how you paint it.
whole briar
there is an sample clothing .fbx ? havent seen that if there is one please tell me where i can find it so i could try to modify transfer it
but basically do you think that is why the uniform does not move with the arms and stuff or did i miss steps regarding rigging? i thought that just using the sample skelly and parenting it to the clothing would be enough
ok well i found a bodymodel and a full equiped model in the samples but when i look at them on weight paint everything is blue
last hill
whole briar
ok well i found a bodymodel and a full equiped model in the samples but when i l...
Move to the main chest bone and see, if you haven't got the bone selected it will all be blue if memory serves
whole briar
If I select a chest bone alone I can just do that in edit or pose mode but if I do that I cannot select weight paint.
calm rune
@whole briar This blender file and this video will tell you everything you need to weight your clothing properly for reforger. If you do not figure it out then I have absolutely no idea how I to help you lol

Weight transfer from body to cloth a short and quick tutorial
Discord :- https://discord.gg/g8kMPmh
Instagram :- https://www.instagram.com/techlyfzone/
Telegram :- https://t.me/Techlyf
FPAGE :- https://www.facebook.com/tech2lyf/
whole briar
calm rune
<@309027503329116161> This blender file and this video will tell you everything ...
Thanks for the video but the file is empty for me
calm rune
Works fine. I just downloaded it and opened it.
You should see this when you open the blend file. Minus the color over the body. Had to do that bcz discord thinks it is a nude body lmao @whole briar
 whole briar
calm rune
You should see this when you open the blend file. Minus the color over the body....
whole briar
calm rune
You should see this when you open the blend file. Minus the color over the body....
when i want to open it it shows an error that the file format is not supported
calm rune
Do you use blender? @whole briar
whole briar
yes i do
watched the tutorial, did everything mentioned. when goint to posemode and moving the bones neither body nor clothes move with it i do not eben see colours like in the video
calm rune
whole briar
watched the tutorial, did everything mentioned. when goint to posemode and movin...
If you can not see the weight colors and you followed the video then well you missed a part because it works for everyone else but you lol
whole briar
thats actually what im asking myself what went wrong. i do not see weight colors except of blue in like every model i try 😄
calm rune
You are gonna have to stream one day and let someone follow along.
whole briar
last hill
Move to the main chest bone and see, if you haven't got the bone selected it wil...
can you tell me what was meant by that ? i cant select a bone and go to weight painting then
calm rune
whole briar
thats actually what im asking myself what went wrong. i do not see weight colors...
If you followed the video completely then when you go into the vertex window you should see all these vertex groups and when you are in weight paint mode you should be able to click on each group and it should show the corresponding weight on your clothing.
 whole briar
calm rune
If you followed the video completely then when you go into the vertex window you...
whole briar
calm rune
If you followed the video completely then when you go into the vertex window you...
So ... i worked with an older version of blender, installed the latest one now and this time i can open the file and see all those weights, finally! So i guess, i will need to copy the body from your file, replace it with mine and copy the weight as mentioned in the tutorial?
calm rune
whole briar
So ... i worked with an older version of blender, installed the latest one now a...
That would work yes.
whole briar
calm rune
That would work yes.
is the body model in the file scaled properly for reforger or do i need to rescale?
calm rune
whole briar
is the body model in the file scaled properly for reforger or do i need to resca...
the body is the same scale as the in game body
whole briar
calm rune
the body is the same scale as the in game body
thank you, you brought me one step closer! Thanks and cheers for your time and patience!
calm rune
whole briar
thank you, you brought me one step closer! Thanks and cheers for your time and p...
no problem!
whole briar
so ... got it done in blender. everything is rigged, weight paint transfered and working. deleted the bodyobject, exportet it as fbx with unchecked custom properties and unchecked add leaf bones, imported it to the game, reimported texture hirachy -> bones are there. edited the new asset into worn model of the prefab, saved game, closed workbench, started again, loaded game up, set prefab in world, equiped it -> same issue. Uniform is floating (offset) and still stiff and not following the body
chilly dragon
whole briar
so ... got it done in blender. everything is rigged, weight paint transfered and...
Did you check export skinning before reimporting resources?
whole briar
chilly dragon
Did you check export skinning before reimporting resources?
yes, and export scene hirachy
chilly dragon
How many bones does it say that your mesh has?
whole briar
sadly not able to check that in actual project, tried to use another rig from the sample and now the workbench instantly crashes when loading into project
ill try to do a new one and tell you
i tried to different models. will tell you how much bones my first model has. Basically i have done my own, and secondly for better understanding i opend the blend file from the sample, deleted everything except of the jacket, collider, memory points and bones. loading into the workbech goes quickly, but when reimporting for the skinning and hirachy the workbench always crashes and can't load into project again without crashing
when i use my first own model, it takes like 10 minutes to load into workbench and same time for reimport for the skinning and hirachy
totaly strange
chilly dragon
whole briar
sadly not able to check that in actual project, tried to use another rig from th...
I’d try only exporting your mesh, you can do that by selecting it then in the export tab there should be an option to export selected. How many faces does your model have?
whole briar
chilly dragon
I’d try only exporting your mesh, you can do that by selecting it then in the ex...
the mesh is the object without rig, coliders and so on or what do you mean?
its 0+161 bones
chilly dragon
whole briar
the mesh is the object without rig, coliders and so on or what do you mean?
Just the actual model of the jacket without anything else. If that’s after you’ve exported skinning then you haven’t weight painted the object correctly
whole briar
chilly dragon
Just the actual model of the jacket without anything else. If that’s after you’v...
So you mean if I import it and the workbench crashes it is a weight paint problem? I know it is a bit of confusing cause 1 got one extrem long loading model that ist completely offset and stiff and one that crashes the workbench
whole briar
surreal ore
are you around?
Will be again tomorrow just reading and answering atm
tacit eagle
 chilly dragon
whole briar
So you mean if I import it and the workbench crashes it is a weight paint proble...
chilly dragon
whole briar
So you mean if I import it and the workbench crashes it is a weight paint proble...
No the 0+161 bones, the zero should be like 40 or something for a jacket. The number before the zero indicates how many bones the object is affected by. Since it’s zero your either reimporting the resources in incorrectly or you haven’t weight painted it
I’m thinking it’s crashing and or taking so long is because your model is too large of a file
whole briar
chilly dragon
I’m thinking it’s crashing and or taking so long is because your model is too la...
Hm … the crash thing should not happen because of size, cause the import process goes quick as it should just when reimporting it crashes quite quickly. Might have something to do with not being able to load bones correctly or sth like that. When I do not let workbench rotate the model when reimporting it’s loads up to 96% then crashes. If I let workbench rotate the model by 190 degrees when reimporting it crashes at 18%.
For the own model that might be the case even if I can’t imagine that this is the case cause it ist quiet just a jacket. But I have seen in blender the jacket uses a full texture. Can I delete this in some way to prove your point? Maybe that is the problem.
For the weight paint stuff I completely transferred the weights of the bones to the jacket and checked it by clicking vertex groups should be fine.
What I noticed is that on the crashing model when I move bones in pose mode the model follows, when I do that with my own model it does not follow the bones in pose mode. The bones just leave the body without bodyparts following. I can’t see the difference to the other model on rigging
whole briar
So this is how it looks like no matter how i make the blender file, no matter how i import it and so on. when i replace the worn object in the prefab file with the rigged cloth object, this is the result

As you can see everything should be correctly rigged and imported. exported file with checked custom properties and unchecked add leaf bones as an .fbx file
 tidal latch
what did you used as template?
are you also exporting empty objects in Blender?
Character_Template has 162 elements in in Bones tab, where your character has 156
whole briar
I used the character animationrig example for the jacket and the rig
i now noticed that the crashes occur when there is more then one armature in the object
i opened up the character template in the samples and saw that the collider is a fully rigged person. my collider was just a cube, what could explain the stiffnes of the object on character. so i tried to copy the rigged collider into my project, when sorting it was recognized as collider.
problem is, when i delete the armature from the collider all the collider objects get deformed. when i leave it in there and load it into workbench it crashes again because of 2 rigs in the object
tidal latch
whole briar
I used the character animationrig example for the jacket and the rig
that files is just for animations
use Character_Template for rigging, animation rig, as name suggest, can be used to create animations. It's completely not designed for rigging of characters and equipment
whole briar
ok if i now look into the template, do i see that right that i need to split up my jacket into many different parts or can i just delete the body and parent it to the rig?
tidal latch
you can first transfer weights from base body to your jacket and then you can delete base body and just export the jacket
whole briar
For the BDU it is working now! Thank you very much!
whole briar
For my own jacket model it still loads very long time and when i reimport it workbench crashes again
tidal latch
Can you show some pic from Blender maybe?
I hope that you didn't copy pasted armature from the previous blend file. The FBX file which you want to import should contain ideally one armature
whole briar
no, i made the opposite of that. i saved the working thing as a kind of template for me. i copied the own jacket (without vertex groups or modificators) into the "template", weight transformed from the working jacket, deleted the jacket and sorted all objects. when moving bones in pose mode the new jacket moves with it.
will make a blend screenshot
 tidal latch
and do you have some errors in the Console Log maybe?
btw: your jacket is missing _LOD suffix
object should be called Jacket_LOD0
also equipment like jacket should have only fire geo for the jacket - not the whole character
whole briar
tidal latch
also equipment like jacket should have only fire geo for the jacket - not the wh...
the whole character collider worked well for the BDU, i thought if that works ill leave it like that. renamed the jacket now and looking for the console log in workbench now
is there a way to open the log from workbench or do i need to look it up somewhere on the PC?
tidal latch
bright raft


 tacit eagle
 delicate condor
Might try put this into Reforger when tracked vehicles become a thing
https://cdn.discordapp.com/attachments/331868308112408576/997326321053089842/0130-0850.mp4
https://cdn.discordapp.com/attachments/331868308112408576/997327937797890209/0130-0850_bright_01.mp4
which brightness level works best for your screen? (trying to gauge what to use in the future)
tacit eagle
tracks are going to be hard ; ~ ;
have you see how war thunder does theirs
its very strange it has a bunch of single sided meshes that are layed inside of the large track
delicate condor
its pretty much how older Arma games have done it too
maybe bit more layers
its preformance cost efficient
tacit eagle
its nothing like what ive seen from arma
delicate condor
the tech of scrolling texture on plane is similar
remains to be seen what Arma will have in the future
tacit eagle
I hope the devs make the view ports work like in il-2 ; ~ ;

this is how tracks are done 
bright raft
delicate condor
Might try put this into Reforger when tracked vehicles become a thing
https://c...
Nice one. looks like PL01 concept
sly bridge
slooowly adding more geometry to my A3 models. T1 re-uved and re-baked
 shell hedge
how can I control draw distance of my entity?
little kayak
Check the biki page about LOD's, which explains when and how a specific LOD is shown and how to manually set the LOD factor (which still takes user settings in account)
delicate condor
bright raft
Nice one. looks like PL01 concept
It is! (with few artistic interpretations since all I had to go on with was the few photos online and the model kit)
bright raft
I bet, I think it was just a mockup so there isnt much info on it. Nevertheless, model looks goood
bright raft
sly bridge
slooowly adding more geometry to my A3 models. T1 re-uved and re-baked
Nice one. Subd or bevel workflow?
sly bridge
openSubD
eager hill
sly bridge
slooowly adding more geometry to my A3 models. T1 re-uved and re-baked
What software have you used for baking? My bakes from Substance Painter don't look that good, so I'd like to know whether it's a software difference, my settings or my models
bright raft
eager hill
What software have you used for baking? My bakes from Substance Painter don't lo...
How do you bake them in SP? You might have better results with Bake by Mesh Name option enabled
 fierce shard
maybe is a dumb question but why cant my fbx model be imported with textures?
bright raft
fierce shard
maybe is a dumb question but why cant my fbx model be imported with textures?
Because you need to import them separetely. FBX contain information about materials assigned to model, but textures need to be imported and assigned in correct channels in Enfusion to said material
fierce shard
bright raft
Because you need to import them separetely. FBX contain information about materi...
so like manually?
delicate condor
yes
Also your model needs to be uvmapped and texturred accordingly.
sly bridge
eager hill
What software have you used for baking? My bakes from Substance Painter don't lo...
substance painter but with custom cage
it seem there is some issue with the AO bake, but will bake it for hp directly and transfer it
sly bridge
bright raft
How do you bake them in SP? You might have better results with Bake by Mesh Name...
you can also just explode the entire mesh, it was the only option before being able to hide meshes
bright raft
Yeah, that is also the option. And sometimes required because even if By mesh name is enabled, shadow is still present on AO on parts that are hidden by different meshes
eager hill
bright raft
How do you bake them in SP? You might have better results with Bake by Mesh Name...
Bake by mesh name is enabled
bright raft
And what issues you mean specifically?
eager hill
sly bridge
it seem there is some issue with the AO bake, but will bake it for hp directly a...
Custom cage is most likely the reason why your results are much better than mine
eager hill
bright raft
And what issues you mean specifically?
Weird artifacts on corners for instance. Like a black line on beveled edges
sly bridge
black lines on beveled edges is also a sign of bad UVs
a hard edge should always have an uv island split
bright raft
Sometimes issue can be with bevel itself in HP, like overlapping edges
 leaden trench
eager hill
What software have you used for baking? My bakes from Substance Painter don't lo...
leaden trench
eager hill
What software have you used for baking? My bakes from Substance Painter don't lo...
If you show me a screenshot of the issues with your bake and also your UVs I can probably tell you how to fix it. Seam placement is very important to get good results. If you have aliasing near edges set the supersampling to 8x.
tacit eagle
did you normal smooth your low poly? I know that non smooth low poly will have horrible artifacts
thorn topaz
tacit eagle
That particular sidewall does not lend itself well at all, its not so bad with the T26E1-1
Though it seems strange to me that they have several tanks with 3D tracks on some tanks but not others.
Though jittery behavior is also observable on the 3D tracks so that may be one of the cons


 tacit eagle
let me check in asset viewer
thorn topaz
seems to me that it comes down to performance and stability but only being able to have faces in two axis vs looking much better and getting some jittery motion in multiplayer. personally I'd take the 3D tracks if given the option, but they also work completely differently too
tacit eagle
yeah apparently in the asset view the tracks are 2d plans but in game they use the 3d meshes
thorn topaz
for all of them? even the M4 series?
tacit eagle
I checked the russian vehicles so BMD 4, 2s3, ww2 T80 and they are in fact 3d tracks not 2d
So I guess in arma we could make lod 0 use real tracks and for further lod switch to arma 2/3 style of track
delicate condor
 Im coming prepared
 thorn topaz
lookin good!
tacit eagle
how do you make your models goat, they look super sharp
softer edges tend too look better than super sharp ones
tacit eagle
you gonna bevel them with vertex selection
I hate using that method, complex geometry does not play well with bevel modifiers
thorn topaz
bevel modifier with the limit set to Weight and using the Bevel Weight in the Item-Transform tab works pretty well, plus you never having to re-assign the weights compared to verts, much easier to adjust.
 tacit eagle
is the scaling off?
thorn topaz
nope, that be the poor sacrificial starting cube
tacit eagle
; ~ ;
thorn topaz
there are just two different weights between the two sides, one has .87 and the other .20
 thorn topaz
yes you should, 3.1.2 is amazing, cycles performance is also SO much better
 unreal reef
delicate condor
Might try put this into Reforger when tracked vehicles become a thing
https://c...
unreal reef
delicate condor
Might try put this into Reforger when tracked vehicles become a thing
https://c...
I would love to test it when they do. Though you may be able to get it in before that since someone managed to get a working helicopter in so a tank would be possible to(when someone does something that we thought was impossible, it opens the door to other many other things we think are impossible)
tacit eagle
does it really matter who is first? I think is smart to wait for bi to release everything to see how its done.
solemn goblet
I hope they use some sort of modular skeleton array for tracks so you only need to make one 'link' and it just works. That's incredibly wishful thinking but it would be awesome and implicate a lot of systems within it.
thorny rivet
can someone please help me with bones for turrets?
shell hedge
solemn goblet
I hope they use some sort of modular skeleton array for tracks so you only need ...
I can definitely see bones used as tracks as it'd be one of the simpler methods
considering they already use bones for things like flag animation it doesn't seem too far fetched
 burnt surge
Is it still the same to make all the Geometries manual by hand (and being convex) and engine doesnt calculate it itself?
Or are there now some improvements?
tidal latch
burnt surge
Is it still the same to make all the Geometries manual by hand (and being convex...
you can use trimeshes for firegeo
https://community.bistudio.com/wiki/Arma_Reforger:FBX_Import#Collider_usage you have to do colliders by hand and here are few considerations
whole briar
I got a now full working model of a jacket igame, but when sun moves and shadow with it the model turns from its original colour more and more to black till one side is literally the darkest black i have ever seen. i think there must be an issue with AO. Someone got an idea what is causing this?
tidal latch
collision geometries have to be quite simple otherwise you are going to suffer from performance penalty
whole briar
ah and there is a light (AO) falling at kind of a spot on the right shoulder seems that only this spot is impacted and the rest of the jacket is not

 fluid fern
Hi, I'd like to come back to you to know if there was someone who was doing 3D modelling of railway tracks (like the A3 CUP mod)?
tacit eagle
railway tracks would not be so hard to model
just have to have consistent dimensions (track gauges size ) and create bare tracks / above ground tracks that have ties and stone and in sections such as 0,5, 10, 15, 22.5, 30
and also switches sections
bright raft
tacit eagle
https://i.imgur.com/kWo6jJG.png
Did oyu figure out custom animations and poses or will it use vanilla LAW anims?
 dire estuary
I got custom animations for weapons figured out. Still working on character animations at the moment
bright raft
Yeah same here. Got my Carl Gustav on hold because of that.
dire estuary
What CG version?
 dire estuary
Nice one!
fluid fern
tacit eagle
just have to have consistent dimensions (track gauges size ) and create bare tra...
Would it be possible to generate it via a spline afterwards? As for the roads
thorny rivet
can someone help me with making bones for turrets, please?
dire estuary
tidal latch
collision geometries have to be quite simple otherwise you are going to suffer f...
I have never succeeded in creating a UCL_ geometry, always fails at import. Is there a trick to get cylinders to work? Triangulated etc etc
calm rune
dire estuary
I have never succeeded in creating a UCL_ geometry, always fails at import. Is ...
If it fails to import you can just scroll down and manually set it and reimport Obvi this is not UCL but it is the same concept for every collider.

 plain galleon
calm rune
If it fails to import you can just scroll down and manually set it and *reimport...
plain galleon
calm rune
If it fails to import you can just scroll down and manually set it and *reimport...
oh thank you 🙂
dire estuary
But isn’t that just converting it to trimesh? That is the worst regarding performance? I mean I could do an _UTM from the beginning
It doesn’t solve the issue in the end?
tacit eagle
@fluid fern dont know never worked with splines in the terrain editor, but other things work with splines why not
whole briar
thorny rivet
can someone help me with making bones for turrets, please?
I could help you with that within the next days I am working on an ground turret myself atm. My turret basically works but got problems with ads of the mounted weapon. But with the turret bones I might can help out
thorny rivet
whole briar
I could help you with that within the next days I am working on an ground turret...
The problem is solved thanks Zelik, I can help you with the ads for the turret
calm rune
dire estuary
But isn’t that just converting it to trimesh? That is the worst regarding perfor...
No it keeps whatever collider mesh you imported. You just need to go in and set the layer preset to whatever it is suppose to be then hit the reimport button again. Also when naming colliders it is, ex: "UTM_" not "_UTM".
whole briar
thorny rivet
The problem is solved thanks Zelik, I can help you with the ads for the turret
Would appreciate that thank you!
tidal latch
dire estuary
I have never succeeded in creating a UCL_ geometry, always fails at import. Is ...
you can take a look at character example colliders - afair there are UCLs there
plain galleon
not sure for model or configuration, but in order to make a use magazine well, like we used to in a3, there needs to be the proxy (a3) or pivot/snap point..
now here is my problem, how have any of you solved it? (if you have)

guess perhaps best to follow bis lead.. but it seems our (that is Megadeth's model) is a better solution
delicate condor
oof the mag snap is not at the top?
plain galleon
not unless I am missing something
tidal latch
plain galleon
not sure for model or configuration, but in order to make a use magazine well, l...
Child pivot
What you have shown is just model center
Snap point is a separate empty object/bone
last parcel
granQ what i found out when i made my model is that the pivot and zeroing needs to be on point
same with the pivot point
plain galleon
yeah but for the mag? there is nothing beside the zeroing right?
last parcel
i think so yea if i remember correctly when i did it atleast
tacit eagle
do you think this will bake nicely? also do I have to just make a single wheel and copy the rest of the wheels in enfusion?
 stiff goblet
looks fine to me. you will probably have issues with this part of the wheel though since there is intersecting geometry. if the geometry is also like that on the high poly, it would be better to seperate the treads and the main part of the wheel and use bake by mesh name.
 stiff goblet
yeah, that's usually the best way to handle it. just do it and see what problems arise.
tacit eagle
because I made the hi poly treads to blend with the tire
so it looks like one single piece
stiff goblet
it might bake alright in that case, but i can't be 100% sure. just have to try it
light eagle
Is there a built in water occluder yet for vehicles?
tacit eagle
wut dat? is that what prevents water from being displayed inside the vehicle?
sly bridge
light eagle
Is there a built in water occluder yet for vehicles?
not yet afaik
bright raft
How do you guys add panel lines to models? For example some helicopter model. Would you add every panel in highpoly version?
I am considering doing them in Substance painter by hand, and using them as anchor points for generators
 bright raft
Hmm, didn't think about it. Must try it out
tacit eagle
I can even generate rivets that follow lines and each vertx has a rivet
and space those evenly
using space in loop tools
bright raft
Rivets are pain to place by hand in substance so I might try that as well
tacit eagle
you have to convert the instance rivets into real geometry and then you snap it to the plane with individual pivot point and align
stiff goblet
bright raft
How do you guys add panel lines to models? For example some helicopter model. Wo...
I would create a tileable texture that has the shapes and colors you want for the panel lines then use mesh decals to add them to the mesh if you are trying to be super performant and you're planning on using tilable textures.
if you aren't doing that, then you can paint them in substance painter. Here's a quick tutorial i found on how to make them using painting and masks
https://www.youtube.com/watch?v=JfDNyP0nDjI

3d store:
https://www.cgtrader.com/lucasbenicio
Twitter: @funkychavescat1
Artstation: https://www.artstation.com/lucas570
Create Sci-Fi panel lines, rivets and bolts in substance painter using anchor points and custom brushes.
https://www.artstation.com/artwork/Kagoyr
here's an artstation post and you can see how the guy used mesh decals to add detail without painting it directly into the texture.

ArtStation
After seeing some interesting Star Citizen articles, I thought I would experiment with what was a new workflow to me. The main premise of the workflow is depending more on geometry to negate the need for large baked normal maps, and the detailing comes from mesh decals, which act as stickers and are independent of the texture resolution of the s...
bright raft
That looks interesting. I'll check both ways. Thanks
stiff goblet
i usually use the mesh decal approach as you can also add high quality text, logos, etc with them. and don't have to worry about a low resolution since you aren't trying to fit small details into a texture that is made for a giant object. it also gives you the flexibility to use tiling textures, which is what most of the props in the game seem to be using.
tacit eagle
I like doing things with meshes because I can make changes, say making the AV-8 and TAV-8 with little effort
stiff goblet
in terms of workflows, i believe it's the industry standard for adding small details to large objects.
i had a tutorial somewhere on how to use mesh decals, but i can't find it :(
bright raft
Hmmm, but using decals for panel lines and rivets for example, I will not be able to use those later in Substance procedural textures and generators, right?
(I do intend to use them for markings etc)
stiff goblet
no. the decals for the panel lines only makes sense if you want to use tiling textures/the PBRMulti workflow that BI uses. If your entire mesh fits into the 0-1 UV space, then you can just paint them in substance painter.
how big is the mesh?
bright raft
Well its an Apache, and currently have 4 texture sets for it (exterrior)
 wary eagle
Hey this is probably not a good channel for this question, but is it possible to make an entirely custom playable entity with it's own animations? Like if you wanted to make a wolf or some kind of monster or something.
Like it would be playable, but it would operate differently from the normal human biped
shell hedge
I'm 90% positive it's possible
wary eagle
shell hedge
I'm 90% positive it's possible
have you ever done something similar?
shell hedge
not in reforger
 fossil crater
wary eagle
Like it would be playable, but it would operate differently from the normal huma...
fossil crater
wary eagle
Like it would be playable, but it would operate differently from the normal huma...
Yes it is, but not right now if you want different mechanics for it as long as scripted commands are broken
wary eagle
fossil crater
Yes it is, but not right now if you want different mechanics for it as long as s...
It would pretty much be identical to the normal human biped but just different animations.
Maybe more weapons slots than 2
fossil crater
wary eagle
It would pretty much be identical to the normal human biped but just different a...
Then just swap the anims
and the mesh/skeleton for your new entity and reuse the graph
wary eagle
fossil crater
and the mesh/skeleton for your new entity and reuse the graph
Sorry, I'm a lay man
The graph?
fossil crater
be careful though, some stuff there, in the script and in the c++ side would require certain bones to be present
fossil crater
wary eagle
The graph?
the animation graph
fossil crater
wary eagle
The graph?
wary eagle
@fossil crater So what's the simplest way to make a new biped? Is it as easy as literally copy and pasting the normal human and replacing the meshes and animations? Or is it very involved? Apologies for being lay.
fossil crater
wary eagle
<@272245679013888011> So what's the simplest way to make a new biped? Is it as e...
It depends how different it will be in terms of the skeleton tbh
If you are misssing some bones that are needed by the logic in the animation graph or the scripting or the c++ side then you will have a hard time
If you want to reuse the player stuff that is
You could also do it from scratch but that is not possible right now as scripted commands do not work yet
wary eagle
I'm going to commission one of my sculptor friends to make a Predator for me. The idea is to have a mod that just adds a Predator.
If that informs your logic about this at all
fossil crater
Scripted commands are basically where you control the simulation of specific modules/states of the simulation of your character and in the Command Handler you would handle each one of these individual modules, when to end them for example (although the scirpted command itself can ask for itself to be ended), when to trigger another one, etc
wary eagle
Could you give me an example of one that would be relevant to a Predator?

A Predator for example ^
fossil crater
wary eagle
Could you give me an example of one that would be relevant to a Predator?
If it fully resembles a humanoid then I recommend to just take and replicate the entire vanilla character skeleton so that you mostly do copy/paste and replace
wary eagle
I'm gonna pretend I didn't say that because it was dumb
Yeah that's smart
I'll ask my friend if he can make it with the normal Arma rig in mind
@fossil crater But like having the character operate differently from the normal human biped isn't currently supported? Like say him being based around melee combat for example, or having something like a more than two max weapon wheel/different inventory system layout.
fossil crater
wary eagle
I'll ask my friend if he can make it with the normal Arma rig in mind
Well the first one should be easy to implement. To clarify, with mechanics not being able to be done I meant mechanics that require animation related features to some extent
Like for instance, making a player being able to duck inside a vehicle
wary eagle
Oh I see
wary eagle
fossil crater
Like for instance, making a player being able to duck inside a vehicle
So having a hotkey mapped to him turning invisible and tapping on his little wrist gizmo would be an issue
But turning invisible with a hotkey could be done, just with no animation accompanying it
fossil crater
wary eagle
But turning invisible with a hotkey could be done, just with no animation accomp...
well, for your specific example. I would think a predator does not need to use the pointing gesture. So you could mod/hijack that for your turning invisible action
and then just replace the animation tied to that with your custom one
wary eagle
Oh, very interesting. That's a really smart idea.
fossil crater
Preferably it would be better to just be able to do your own but given the last dev report, what we are talking about is currently being worked on
so 
wary eagle
fossil crater
Preferably it would be better to just be able to do your own but given the last ...
I haven't really been following the mod tool news. Have they been updating the tools pretty frequently?
fossil crater
fossil crater
Preferably it would be better to just be able to do your own but given the last ...


Arma Reforger
Apart from past updates and planned changes, you will also find information about current issues and what we are doing to resolve them.
wary eagle
Very interesting.
Apologies for the spam but is it possible to make a custom hud for a custom character? @fossil crater


AVP 2 Predator hud for example
fossil crater
wary eagle
Apologies for the spam but is it possible to make a custom hud for a custom char...
yes but if you want to ask stuff like this then go to the proper channels as it is off topic for this one
wary eagle
Alright.
fluid fern
Hi, I'm using arma2 assets for everything related to railways and I had a question.
In blender, are all the game-materials in the geometry all functional? I think I tested with Wood but I had no shine on my object, moreover I was going through it while with the metal base it's ok
tacit eagle
 wary eagle
fossil crater
and the mesh/skeleton for your new entity and reuse the graph
wary eagle
fossil crater
and the mesh/skeleton for your new entity and reuse the graph
Could you show me how to do this, please? File paths and whatnot.
tidal latch
fluid fern
Hi, I'm using arma2 assets for everything related to railways and I had a questi...
Game materials controls physics, sounds and other game related things. Those game materials should be only applied to colliders
fluid fern
tidal latch
Game materials controls physics, sounds and other game related things. Those gam...
Is that so? I thought that was all there was
tidal latch
for sure, game materials are not affecting shine - this is purely controlled by emat assigned to visual mesh
in any case, if you were going through some object then most likely issue was with layer preset instead
fluid fern
Ok thanks
fluid fern
Hi, can you help me, on my picture i have my color on wagon but not in toolbar (extension .ent)
 light eagle
right click thumbnail and click the refresh Icon option
fluid fern
Thanks 🙂
zenith quartz
https://cdn.discordapp.com/attachments/834465694967136376/999438317974200460/unknown.png https://cdn.discordapp.com/attachments/834465694967136376/999438123056517160/unknown.png


Just finished this highpoly.


 dense thunder
can we add terrain surfces to mesh? if so can i get a point in the right direction
delicate condor
no guides on that at the moment I think. basically should be just assigning terrain surface material on mesh
dense thunder
i'll keep trying, i get it assigned it just turns black
zenith quartz
Maaan I really hate making low poly meshes.
It just feels wrong. Simultaneously too high poly and too low detail. D:
tacit eagle

 chilly temple
Me over here having 0 idea on how to make 3D models