#enfusion_model
1 messages · Page 39 of 1
 sly bridge
try importing without merged meshes ticked
also try collapsing the entire front part to a single vert (for a single bullet) see how that gets imported
 sick shard
Okay I'll give it a try I'll let you know how it goes
 prisma delta
Another amateur question: is there any benefit to modeling a vehicle mesh as a single object for Arma?
If a piece complicates a mesh too much, is there any downside to making it a separate object from the body?
 delicate condor
no downsides
does not need to be single mesh
in fact if you want moving parts it cant all be connected mesh
prisma delta
Will more "parts" affect performance or you don't think so
prisma delta
Alright, sounds good, thanks for your help
 solemn goblet
Would there be potentially more draw calls if you had separate object doors, hatches, etc?
sly bridge
draw calls has nothing to do with individual (not welded) meshes
best sort of advice is to model things like real things work in real life…
minus some nuts and bolts obviously
 karmic adder
How can I generate a separate collider for each material in a mesh? The provided option doesn't do that for colliders (at least for me).
 last hill
karmic adder
How can I generate a separate collider for each material in a mesh? The provided...
last hill
karmic adder
How can I generate a separate collider for each material in a mesh? The provided...
Make a primitive shaped box and work it around, give it a name and bring it across with the model after applying the required material to it? I have 4 colliders on my Block II mod, which is 4 primitive shapes using the ingame metal material. Plus the magazine using plastic.
 daring condor
solemn goblet
Would there be potentially more draw calls if you had separate object doors, hat...
daring condor
solemn goblet
Would there be potentially more draw calls if you had separate object doors, hat...
isnt that just if those use other mats?
solemn goblet
Nope. Separate objects referencing the same material create duplicate draws.
daring condor
but yeah modelling complex objects as seperate objects makes sense, there may be some uglyness with clipping geo but if you do your bakes right that should not be too much of an issue
solemn goblet
They don't 'combine' unless something in the entity creation process does something
sick shard
sly bridge
besides the fact that this could be optimized further a bit, looks like prt of t...
So I tried everything And can't seem to find the issue I did find something strange maybe you'd know but if I don't resize the object everything looks good but as soon at I resize it breaks the model
 daring condor
sounds like an issue with verts being merged or faces being hidden if they are too small
sick shard
I can however jut rescale it in reforger tools and that still works fine
sick shard
I'm aware lol I'll do an optimization pass shortly just been trying to get to the bottom of this lol
daring condor
also, ya made that rpd yourself or got it from somewhere?

 daring condor
no difference, ye
solemn goblet
sly bridge
draw calls has nothing to do with individual (not welded) meshes
I don't understand what you mean by this. Draw calls also correspond with materials within a mesh. If you have 3 seperate meshes (in enfusions case, 3 xobs) each mesh has the amount of materials draw calls applied to it. Something like Unity or Unreal draw call batching can fix this and that might exist similarly in Enfusion. If you have a mesh with 1000 materials but it's just a individual mesh you still have many many draw calls.
Or you could do it like Rage haha.
daring condor
we are talking about separate geometries in a single xob

objects as in objects in blender
solemn goblet
Yeah, separate geometries can have separate materials. This is how the Clone Troopers in BF2 work for example. I remember there are materials for the head and eyes seperate for example, but they are the same 'object' or in Enfusions case .xob
daring condor
its how almost everything works
solemn goblet
Yep, that's what I'm saying
daring condor
the amount of geo that would be needed to connect say a circular antenna to a tank is very wastefull
solemn goblet
So if it's all contained in a single xob referencing a single material, that's not an issue. But you can have separate materials within the same xob. The BTR70 does this for example with weld lines, the interior, etc. There are multiple materials on the same mesh.
Bohemia limits the footprint of last LODs material draws often too, with a 64x64 texture
daring condor
weak tbqh
solemn goblet
Like here is the BTR, as LOD's get bigger the amount of draws they give you is less on the shader and mesh front.
 daring condor
im more powerful, i just do raw 3d scans with no lods
karmic adder
last hill
Make a primitive shaped box and work it around, give it a name and bring it acro...
So there is no way to do this not manually?
solemn goblet
karmic adder
So there is no way to do this not manually?
A lot of Bohemia LODs look like a decimate modifier, and the last LOD is also collision. You could get lazy collisions this way yep. I'll show you the helmet.
Hmm... I'm a liar actually. For the headgear example they do this haha. The ones in-game do not. They are expertly handmade it looks like. One sec...
So here is LOD3 for the headgear example

And here is the UTM (Enfusion collision)

This is them overlayed and wireframe. One is slightly forward for some reason (maybe bone merging silliness idk) but they are exactly the same minus the chinstrap. I'm guessing they had the foresight to remove that since your chinstrap isn't bulletproof 😛

Does that make sense @karmic adder ? It's kind of confusing so if you need help I'll join a vc and walk you through it.
karmic adder
solemn goblet
Does that make sense <@301609257629908992> ? It's kind of confusing so if you n...
So I would duplicate the last LOD, somehow separate it by materials and make the results collider objects?
solemn goblet
Yep. Separating materials is super easy.
I think blender enfusion tools will do this automatically when you apply a new collision material.
If not, it's as easy as removing it from the mesh and using the tools for a new one.
With the material selected just click here. Blender will save it in the .blend file if you need it later but it won't save it to the mesh.

 normal quail
Really stupid question, but how do I change the placeholder picture when placing the new modded object in game
 bleak depot
any tips why my probe volume angle in wrong way after import in workbench? i work with maya https://prnt.sc/IXaZ6RUirOpx https://prnt.sc/ERu5e3DATHs0


 round orbit
Anyone know why my textures don't work? The shaders are set in blender, the BCR and NMO files are done through Substance Painter, the BCR and NMO files import into enfusion where I can see them properly but once set on my model the helmet is just all black.


 thorny galleon
round orbit
Anyone know why my textures don't work? The shaders are set in blender, the BCR ...
thorny galleon
round orbit
Anyone know why my textures don't work? The shaders are set in blender, the BCR ...
Check for vertex colour maybe? Could be wrong thou
 cedar stream
How do i model leaves?
 chilly dragon
you dont really model them you just put a texture onto a plane and apply that plane around the tree
or whatever
 slim silo
Use a tree/vegetation generator program
like speedTree
Or TreeIt
Maya has a tree plugin as well
 slim silo
ohh
 rain wadi
Use planes for leaves
cedar stream
how do i make the texture be applied to both sides of the plane?
Do i just copy the plane and invert normals?
chilly dragon
if your doing it in substance and you have an opacity channel it should just be applied to both sides
if not there are some tutorials online
sly bridge
solemn goblet
I don't understand what you mean by this. Draw calls also correspond with mater...
read what i wrote. The bloke asked if he should model everything as a single mesh it he can get away with intersecting parts
nothing to do with draw calls
sly bridge
chilly dragon
if your doing it in substance and you have an opacity channel it should just be ...
false
sly bridge
cedar stream
Do i just copy the plane and invert normals?
yes
rain wadi
cedar stream
Do i just copy the plane and invert normals?
Dunno how enfusion handles that but yeah you probably have to do that.
Or use the solidify modifier in blender
chilly dragon
sly bridge
false
It works for me 🤷♂️
 chilly dragon
sly bridge
but won’t work ingame
chilly dragon
sly bridge
but won’t work ingame
Well I dunno what I did but it worked for me.
sly bridge
 valid hill
is there no two sided option on alphad materials?
valid hill
is there no two sided option on alphad materials?
i dunno, that should be shader side of things, in general double sided materials can get heavy
sly bridge
chilly dragon
Well I dunno what I did but it worked for me.
can you post an image? from reforger?
valid hill
double sided materials are no different than duping and flipping the faces, other than it gets applied to the whole model. but for a tomato with only the leaves being needing to be double sided, i agree duping and flipping would be the way to go
sly bridge
that ^
chilly dragon
@sly bridge have a look in texture makers channel i was trying to figure it out last night and what seemed to make it work was chaning it to MatPBRTreeCrown from MatPBRbasic. I'll replicate it now
It isnt transparent until i change the material class

 cedar stream
is there any easy way to overlap these? I want them to have the same texture

ive been doing it vertex by vertex but there has to be an easier way


 shell hedge
tomato
cedar stream
Why are the leaves not casting shadow, though? I have it checked in the material
 frank robin
cedar stream
i found a stack overflow with the solution
frank robin
cedar stream
i found a stack overflow with the solution
gabe are you going to be putting these produce things in a pack? i would love them for my map.
basically need apples , tomatos , potatos , green jalepenos and cabbage to meet the vanilla needs
since those plants are in game
solemn goblet
sly bridge
nothing to do with draw calls
The context is important though, vehicles. Many .xob's in ArmA have multiple materials on them. You are saying draw calls has nothing to do with a single mesh (or in this case, .xob). With respects to the materials you still need to be careful. Maybe you just haven't spent time working with REALLY bad material bloat but I don't have faith in everyone to just read it and roll with that.
draw calls has nothing to do with a single mesh
let me introduce you to 17 .emats on a single mesh

So for making vehicles, avoiding excess draws in your LODS is important. Because LOD0 vehicles probably have many many draws (even if it's a single .xob)
Here is how bohemia does it:
 sly bridge
solemn goblet
The context is important though, vehicles. Many .xob's in ArmA have multiple ma...
sly bridge
solemn goblet
The context is important though, vehicles. Many .xob's in ArmA have multiple ma...
You keep pinging me, yet you didn't read what i wrote, and you didn't read what the original question was about, so here is a brief of it
- the modeling question
a. The question -should i model object X with parts, or do i need to model everything as a single welded mesh. Does that affect draw calls
b. The answer -no, having multiple meshes does not affect draw calls
you are confusing a 3d mesh with a .xob. That is on you, i never made a single mention in regards to .xob, nor did the bloke that asked the question. There was no mention of the number of textures and material files in any of the previous discussion...
Back in the OFP times, there were addons that had an individual .pac file for each individual planar face, the number was ridiculous. Case of point, we had most of weapons and magazines, and sometimes even bullets on the same UV sheet in A3 in order to reduce both textures and rvmats used.
And before you take this condescending tone with me around here, please do understand that i've been into 3d art for almost 16 years now...
solemn goblet
The question is specifically (which you chose not to quote): Another amateur question: is there any benefit to modeling a vehicle mesh as a single object for Arma?
If a piece complicates a mesh too much, is there any downside to making it a separate object from the body?
Do you really think this guy is just modeling it and then never importing it into ArmA? I mean that's just a bad faith argument. Sure, you're technically correct if you interpret it your way, but that's silly. I look at your post history and it's nothing but passive aggression and unhelpfulness by the way. I even saw one post call you out for it. This is a new, cultivating community where people are trying to help. Maybe reflect on that. A lot of these modders are new people and we do need to hold their hand a bit. Anyway, I'm done talking about it.
delicate condor
solemn goblet
The question is specifically (which you chose not to quote): Another amateur que...
Modeling and texturing are separate things and texturing was not in question here. Combined mesh or separate mesh does not affect possibility to assign any number of different textures/materials to an object
solemn goblet
Yep. You're right, I'm totally wrong, so let's move on then.
 solemn goblet
 hardy ginkgo
Have you gotten it driveable? A bike would be an awesome mod for folks
sly bridge
is there any benefit to modeling a vehicle mesh as a single object for Arma?
There is not benefit whatsoever. Be it Enfusion, Real Virtuality, Unreal, Unity or any other game out there, or VFX, Vizualization, with maybe the exception of Production
I look at your post history and it's nothing but passive aggression and unhelpfulness by the way.
I probably been doing tutorials and helping people since around 2004ish, have a look at wiki / forums etc. But sure, you do you then, sorry if i managed to roughen your feathers in the process
hardy ginkgo
not yet i just managed get my model into the workbench
other than that im a noob with the whole coding still
solemn goblet
I have a friend who is trying to code bikes soon, if you DM me we can maybe get you sorted.
hardy ginkgo
Sure, as soon as im done with the model ill hit u up, i have a few vehicles from the 1950s -> 1980s that will fit the Cold war era of arma is set in
solemn goblet
You made all these?
hardy ginkgo
well just a couple of bikes now
i will start modeling the others later on when i get the hang of these tools
solemn goblet
Any pedal bikes? There's a way to get them to work with IK that me and the fellas were talking about.
Potential way that is
 uneven seal
Does anyone know the size of the vanilla doors and windows?
 calm rune
sly bridge
You keep pinging me, yet you didn't read what i wrote, and you didn't read what ...
calm rune
sly bridge
You keep pinging me, yet you didn't read what i wrote, and you didn't read what ...
Damn, so when people use a bad tone with you like you do with 70% of your comments towards other people on here you really get but hurt eh LOL then you gotta throw the 17 years bit out. Dude your ego is so big I don't see how you can fit through your room door.
I've been in this discord for 3 weeks and you are literally the only person ive seen that responds with a rude tone towards people. It is literally you vs everyone. I really don't get why they let you have that mod tag.
hardy ginkgo
quick update
 round orbit
Anyone know why my textures don't work? The shaders are set in blender, the BCR ...
round orbit
round orbit
Anyone know why my textures don't work? The shaders are set in blender, the BCR ...
Anyone know why this isn't working?
sly bridge
calm rune
Damn, so when people use a bad tone with you like you do with 70% of your commen...
thanks for your observations. ps: thanks for the concern, no need to worry about my doors though.
 tacit eagle
hardy ginkgo
quick update
tacit eagle
hardy ginkgo
quick update
That's a fantastic looking Model, Great work
 late veldt
hardy ginkgo
quick update
late veldt
hardy ginkgo
quick update
This looks amazing!
prisma delta
@solemn goblet@sly bridge I apologize to you guys because I didn't mean for it to turn into an argument. I appreciate your guys' help and input on the topic, and every time I've asked a question someone has helped me which is very kind.
I have experience with 3D modeling vehicles but what I do is visualization and surfacing, so like I said, my modeling knowledge for games is extremely limited. That's why I was unsure about what might be different with the workflow or how the model might need to be optimized for the game.
sly bridge
prisma delta
<@112668416673853440><@105574759248437248> I apologize to you guys because I di...
you're more than welcome, also no worries, not your fault, no reason to apologies. Modelling wise, the best advice one can give is to model it as closely as the real life counterpart would be assembled.
solemn goblet
No worries man. I'm just looking out for future performance of your mod. PuFu has a way of talking that comes off negative but I don't think he means anything by it.
Do you use something like Fusion 360 instead of Blender or Maya?
prisma delta
I'd like to learn Fusion 360 and Maya but I've mostly used Blender and Autodesk Alias for modeling
solemn goblet
Oh sick, yeah those will work fine for Enfusion. With vis do you make high resolution meshes? Like really soft edged, 0 faceted models? I don't really have any experience with that area so I'm genuinely lost on what a workflow for you might look like
prisma delta
solemn goblet
Oh sick, yeah those will work fine for Enfusion. With vis do you make high reso...
Yeah the models are completely different which is why I'm amazed by all the optimization stuff lol. Our workflow in Blender starts out pretty simple with just a handful of faces, and we put a subdivision modifier over it and then readjust the mesh to fine-tune details like reflections. But by the end and with all the details, the model can be well over a million triangles.
solemn goblet
That's what I was hoping you'd say. This is actually part of most proprietary processes these days anyway. Using non-destructive workflows for a hi-res often works better too, since bringing it down is just a few clicks away.
solemn goblet
prisma delta
Yeah the models are completely different which is why I'm amazed by all the opti...
So here's a hi-res right, and this might be like 9,000,000 triangles/quads/faces whatever. And it might be dozens to hundreds of objects in the ouliner. This part I'm sure you're used to.

From here though, you can make a low resolution version that matches the overall silhouette. So from 9,000,000 you can go down to say, 25,000 triangles. This is what the game uses. Within blender, you would label these all the same as the high. So for tank_turret_high, you would have a corresponding low resolution tank_turret_low.
When you've got your lowres, it'll be kinda ugly in comparison but it'll match the shape of what you made.

Exporting all the selected objects (one for low and one for high) as an FBX and then using Substance Painters match by mesh name (or a similar addon for blender) you can get this:

So it's still the same wireframe as the more game accessible version, but it has the details of the high res version that you're used to working with.
There are WAY WAY better tutorials for this online but, this process is extremely common in games. There's a million ways to skin this cat though, so if you're more confident with poly modeling then do that. I personally think this method gets you the best look though.
prisma delta
Thanks for sending those images and describing it, I think that's the workflow I'll learn. It seems easy enough based on what I already know.
But I haven't actually used Substance Painter ever, and I've only done a little bit of texturing work, so that'll be new. Wow another Adobe product I have to pay a subscription for how exciting lol
solemn goblet
There's a perpetual license for like 500$ or whatever that I think is worth it. It's like the CS6 of programs and I can see it being used for the next 10 years.
That being said, there are potentially free addons for Blender that explode your model for you and let you bake just like Substance does.
delicate condor
It can be done in Blender yes. Setting up might take somewhat more time than using substance painter or some other 3D painter program that has ready made methods for many of the more tedious parts
but that is what one pays for with dedicated programs
time vs money
 unkempt grail
prisma delta
I'd like to learn Fusion 360 and Maya but I've mostly used Blender and Autodesk ...
unkempt grail
prisma delta
I'd like to learn Fusion 360 and Maya but I've mostly used Blender and Autodesk ...
Fusion 360 is quite intuitive to use. I've been trying blender over the past week or so and have considered going back to fusion 360 because I can work in it quite quickly
and I find the precision lines and obvious measurements helpful
solemn goblet
I think if you can make a good hires everything else is pretty easy though. A good lowpoly and a perfect lowpoly aren't too different and it only takes a month or so of practice to get good with that. Your good hires will give you more working room than almost all poly modeled objects will.
Any time I see a weapon made by god himself on ArtStation, the guy making it was using Fusion 360 😆
unkempt grail
hardy ginkgo
quick update
This is lovely, have you considered making a sidecar?
sly bridge
solemn goblet
There's a perpetual license for like 500$ or whatever that I think is worth it. ...
there is no perpetual license for adobe substance painter afaik...
that being said, the best alternative to paying subscription is to grab it off steam directly
https://store.steampowered.com/app/1775390/Substance_3D_Painter_2022/

Adobe Substance 3D Painter is the reference texturing app for 3D professionals and enthusiasts. From AAA Game Developers to Indies, from Feature Animation to Visual Effects studios, the industry uses Painter to bring their creations to life thanks to its unparalleled speed, flexibility and visual quality.You will get free updates on Steam up to ...
Price
$149.99
Recommendations
236
solemn goblet
I got one, it's pretty sick
I use the 2022 one as well for some of the smart masks
It's entirely possible all the perpetual licenses have gone the way of the birds though, I got my license in 2018
 dapper oar
sly bridge
there is no perpetual license for adobe substance painter afaik...
that being sa...
dapper oar
sly bridge
there is no perpetual license for adobe substance painter afaik...
that being sa...
Adobe nuked those within a year of buying Allegorithmic/Substance
sly bridge
yeah i am aware
daring condor
there is
Adobe Substance 3D Painter is the reference texturing app for 3D professionals and enthusiasts. From AAA Game Developers to Indies, from Feature Animation to Visual Effects studios, the industry uses Painter to bring their creations to life thanks to its unparalleled speed, flexibility and visual quality.You will get free updates on Steam up to ...
Price
$149.99
Recommendations
236
oh was linked
its perpetual for that version
no updates
mind you the steam license will end this year
well they will remain valid, but wont be sold post 22
solemn goblet
AH that's it, I have mine on steam.
sly bridge
daring condor
its perpetual for that version
there used to be perpetual license with a much lower upgrade cost before adobe
sly bridge
that is what uro was referring to
daring condor
best to grab it on steam while its still available
prisma delta
Yeah I should probably buy it then
sly bridge
according to allegorithmic, the steam version will stay up forever and be available as a 1 version buy perpertual license
solemn goblet
My holy trinity of anti-subscriptionness is Blender, Affinity Designer, and Substance Painter on steam.
sly bridge
i'll try and dig some of the forum post about it (could have been discord)
rain wadi
sly bridge
there is no perpetual license for adobe substance painter afaik...
that being sa...
Painter on Steam is the only way to get a perpetual license 👍
Asked the support just after the Adobe acquisition and they said the Steam license is perpetual
daring condor
yeah i also might be misremembering
rain wadi
but yeah you need steam to launch the software and steam can revoke your access to the software so...
daring condor
i remember reading somewhere that adobe plans to discontinue the steam version next year
no idea if its actually true now
sly bridge
yeah, i ended up on subscription in the end, because that is paid by via my office (just like all my subscriptions)
rain wadi
yep same, I have the subscription
sly bridge
daring condor
no idea if its actually true now
neah, irc the deal of the acquisition was that there is always gonna be some sort of perpetual license, even if it is one via steam
which lets be honest, it is aimed exclusively at hobbies and indies
rain wadi
but I also converted my old steam license to an allegorithmic license in 2019
or 2020, I don't remember
I'm not using it anymore, the latest versions are much better imo
dapper oar
Allego promised no changes like that to the licencing, then they got CE roles in Adobe and didnt seem to care anymore.
solemn goblet
I read somewhere someone uploaded a picture of their toaster as their school ID or whatever so I mean... We're all students on this blessed day.
rain wadi
haha I know someone who did that
I can understand but there are also free solutions if you can't pay for painter
dapper oar
There is ArmorPaint [https://github.com/armory3d/armorpaint], an open-source app, not sure how good it is now, when I compiled it before it was very basic.
Epic threw a load of money at him through their OSS grants and the main dev seemed to go off on a mobile-first trajectory.
I use Marmoset Toolbag 4 for a lot of stuff, baking especially since Substance sucks for that.
daring condor
we could always just use mixer 🤪
rain wadi
Mixer is cool
daring condor
i tried using that
rain wadi
but I'm just too used to Painter
daring condor
its a pain
solemn goblet
I'm wondering what Toolbag is. I see the previewer a lot on ArtStation and it looks really clean.
daring condor
then got the student license for substance
solemn goblet
I've never really looked into it though.
sly bridge
dapper oar
There is ArmorPaint [<https://github.com/armory3d/armorpaint>], an open-source a...
substance bakes decently, come on. You have less control than with marmo, but it isn't bad
daring condor
solemn goblet
I'm wondering what Toolbag is. I see the previewer a lot on ArtStation and it l...
baking software, they are breaking into 3d painting
dapper oar
sly bridge
substance bakes decently, come on. You have less control than with marmo, but it...
less control = sucks 😄
sly bridge
also, newer max version do bake properly this time around, including mikkt tangents directly
dapper oar
yep 2023 is nice
daring condor
i use a mix of xnormal and substance for baking xd
solemn goblet
I'm a sucker for substance baking, they changed my life.
sly bridge
dapper oar
less control = sucks 😄
try baking a cavity in substance
rain wadi
Used Toolbag a lot for my renders. It's fast, pretty, easy. It's great. It's also an awesome tool for baking.
dapper oar
xnormal is good for building interior AOs tbh
daring condor
dapper oar
xnormal is good for building interior AOs tbh
its great to get alphas for tank tracks
rain wadi
but I bake my models in painter anyway lol
sly bridge
rain wadi
Mixer is cool
mixer, while cool, is not a painter competitor, which is a pity, because neither is mari these days, and painter needs to have a real competitor
solemn goblet
I'll be honest, I don't really have a lot of experience baking with anything other than Substance. I've used it quite a bit. Maybe for BAF89 I'll tickle some other tools.
daring condor
on the free side there is xnormal and handplane
xnormal has a funky interface but is legit not bad at all
dapper oar
toolbag 4 has some nice painting stuff, substance is better in that regard though with more fine controls, I put a lot of effort in making my own substances so I'm kinda biased.
rain wadi
sly bridge
mixer, while cool, is not a painter competitor, which is a pity, because neither...
Hopefully they will improve it in the future. 👍
sly bridge
sort of unlikely, it is suppose to support their scanned dataset, and that's about it
rain wadi
Do any of you use Houdini?
sly bridge
rain wadi
Do any of you use Houdini?
lol
rain wadi
Not for Arma
daring condor
the interface is... arcane
solemn goblet
I 100% do use blender baking for normal stamps tho
daring condor
if you have to select a node in your node tree to get a proper bake, maybe the interface could be better
sly bridge
rain wadi
*Not for Arma*
not really, unless they changed it a lot, i am not savy enough for houdini
daring condor
or any bake at all
 limpid matrix
Anyone know why my emissive materials dont glow when press play?
daring condor
create texture node
select texture node
bake to texture file
who came up with this insanity???
why do i need to use the shader editor to bake god damn normals???
limpid matrix
They need a texture?
solemn goblet
Only thing I can think of is emissive materials are uh.. additive or multiplicative so you need to represent that in the nodes. At least in unreal. I haven't made emissive stuff in Enfusion yet 😵
dapper oar
rain wadi
Do any of you use Houdini?
not for a while, its good if you want to code your own meshes, more for technical artists and large-scene vfx imo.
I know a guy who modeled the space shuttle with Houdini, down to every single heat shield tile by programming it, he got a job with Vray off the back of that iirc. 😅
sly bridge
too many variables... ¯_(ツ)_/¯
solemn goblet
Huh. Yeah that sounds strange. Does it have LODs? I mean. There's 1000 things that could be slightly wrong to cause that.
solemn goblet
I figured maybe you bought a game ready asset with LODs and didn't set the LODs right (and subsequent materials). I'm just grasping at straws lmao
limpid matrix
Yeye no worries.
Like not touched Materials or imported my own model apart from a sign yet
sly bridge
limpid matrix
Its just a crap cube basically from Sketchup with a material on
sketchup in itself might be the culprit, just saying
sly bridge
firstly, don't use sketchup for game assets, not the tool for the job or for anything polygon modelling related
if you want help, post it on imgur
solemn goblet
Blender might be better for defining materials within a mesh. Using sketchup for ArmA is the most gigachad thing I've ever seen though. My brain refused to read it that way and read it as sketchfab.
sly bridge
including textures and material/shader settings
limpid matrix
Are nah
I know I'm just testing somet
I just know how to use it from when I used it at school a few years ago
solemn goblet
You could import your model from sketchfab into blender and tinker with it that way.
daring condor
solemn goblet
Blender might be better for defining materials within a mesh. Using sketchup fo...
only thing better is playdough and meshroom
solemn goblet
What's the one where you're like sculpting with a VR headset
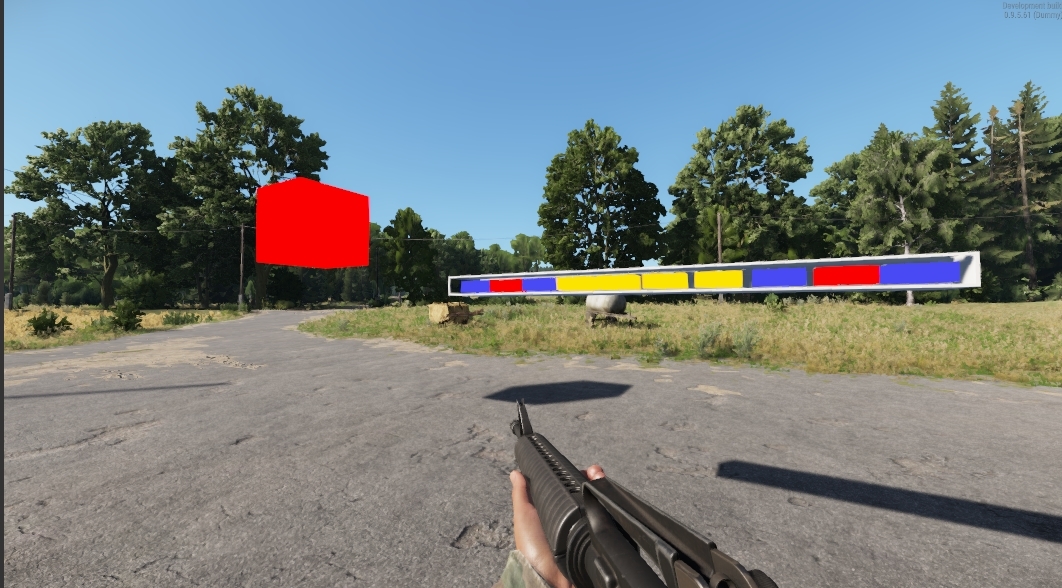 solemn goblet
Okay it actually looks emissive to me
limpid matrix
Huh you think?
solemn goblet
But in the shader it needs to be multiplied or something
daring condor
have ya checked at night?
limpid matrix
No lol
daring condor
breh
solemn goblet
Yeah someone smarter than me knows what I'm talking about.
For emissive to 'glow' they need multiplied within the shader output.
sly bridge
solemn goblet
You could import your model from sketchfab into blender and tinker with it that ...
sketchup and sketchfab are not the same thing man
limpid matrix
 solemn goblet
You have a '1' for your emissiveness vs like a streetlight which might have 50.
daring condor
sketchup is a cad software
solemn goblet
Haha yeah, Sketchup is like google earth modeling software, sketchfab is where you can buy a vest for like 20$
daring condor
sketchfab is pretty much the only website besides artstation id trust buying models from
dapper oar
and Epic Games owns both of them
daring condor
of course they do
solemn goblet
Hey, that's fine. I get 10 uploads a month now
sly bridge
daring condor
sketchfab is pretty much the only website besides artstation id trust buying mod...
ish, there are plenty rips on sketchfab.
daring condor
hell of a lot less than turbosquid or cgtrader from what ive seen
solemn goblet
rips being sold too 🤦♂️
sly bridge
or used to, less so than on cgtrader and tsquid
solemn goblet
Yep. The character is a model that is animated for example. Materials? Hopefully. That's a simple way of making tank treads.
Usually you'll need some sort of skeleton for the motion to be extrapolated onto.
A few good skeletons to look at are the M9 and some of the radios. You can modify them within Workbench and see how they move. Some of the templates are good to get an understanding of meshes outside of Enfusion.
tacit eagle
I got an issue where parts connected to bones moves when viewed in the prefab, but looks good when inspecting the .xob
any ideas?
solemn goblet
@subtle rose had this issue and fixed it here: <#enfusion_model message>
Maybe you have the same issue
I think in his case he made a single frame of idle animation
solemn goblet
Awesome
hardy ginkgo
unkempt grail
This is lovely, have you considered making a sidecar?
Probably when i make an Ural bike
 prisma fjord
Finally finished modeling the H Barrier... first time modeling anything in Blender...
 solemn goblet
Looks good man. Could probably smooth shade the inner faceting there and bobs your uncle.
I'd be weary about importing the mesh as a uh... mesh into Enfusion though. Bake it into a texture with alpha would probably work better for you. Baking it directly onto the bag behind it would be even better performance wise.
 subtle rose
That looks like some very high poly on the top there
solemn goblet
Yeah Kuks if you're interested I'll show you the jist of a proprietary process within Blender.
 prime notch
Using multires and then sculpting would solve that. Allows you to take a lower poly version out what youve already sculpted
Very handy
daring condor
prisma fjord
Finally finished modeling the H Barrier... first time modeling anything in Blend...
looks aight, i would subd the shell tho and as stranger said bake the mesh into an alpha
in general you would ideally use a trimsheet here
prisma fjord
Yall are speaking a foreign language haha, time to dive down the rabbit hole
daring condor
trimsheets are pre made textures
daring condor
prisma fjord
Yall are speaking a foreign language haha, time to dive down the rabbit hole
like this

 sly bridge
it also supports normals for decals

 prisma fjord
Ah so the reality is you are making the actual model with as little poly as possible and then adding the details with textures?
solemn goblet
Yep, that's the jist of it.
solemn goblet
If you're interested in some handholding I'm willing to give you a bit of a walkthrough on it.
daring condor
you also make a very high detailed model you take things like ambient occlusion and surface normals from
to fake detail
baking is really something magical
if you want you can even texture your high poly and bake the basecolour onto a low poly
but looks like you are mostly on your way there
shape is alright but could definitely use some work
solemn goblet
ID map on that wire with some normals onto the surface behind it 
ez metal material
solemn goblet
If you're baking it onto the surface behind it, anything else is just extra geo
daring condor
i mean in engine tesselation
solemn goblet
Maybe I'm not understanding
daring condor
 valid hill
thats not tessellation
daring condor
right, displacements
valid hill
thats Parallax Occlusion Mapping (POM for short)
cedar stream
prisma fjord
Finally finished modeling the H Barrier... first time modeling anything in Blend...
this doesnt look like an H at all, i made a much better H barrier
 daring condor
cedar stream
this doesnt look like an H at all, i made a much better H barrier
daring condor
cedar stream
this doesnt look like an H at all, i made a much better H barrier
real h-barrier
 prisma fjord
Thanks guys! Gave me some things to learn about for the week! Hopefully make some more progress soon
solemn goblet
Glad to hear it friend. If you have any hangups in Blender feel free to DM me.
daring condor
and if you are learning the very basics you can check the blender discord
 simple meteor
are we going to have an animation wiki specifically for vehicles?
delicate condor
👍 pbr shading does make it so much better
 abstract burrow
And most importantly - predictable. Unlike materials from A3
 split rampart
@zenith quartz Sorry for ping, finished that revolver lol

 zenith quartz
Nice. 👌
solemn goblet
I want to experiment with this myself. I saw one of the dev posts on artstation and it looks really intuitive. nice work 👍
 hoary herald
far from done but shes coming along

sticking with the 80s/90s era stuff is interesting
solemn goblet
You and me both 
 pure kayak
is there a way to "define" where certain holsters are placed?
like pistol holster, primary holster
simple meteor
@normal quail can I send you a friend invit to talk about vehicles ?
normal quail
Sure
 willow sage
hoary herald
sticking with the 80s/90s era stuff is interesting
willow sage
hoary herald
sticking with the 80s/90s era stuff is interesting
And it's also fun to fit in that period. Nice Anvis6 Socket you have there boi.
 clear oak
Hm, can I somehow attach a memory point to an object parented to a bone? For some reason they don't appear in .xob when I try importing that
clear oak
Nevermind, I just needed to attach the memory points directly to bones instead of their children objects
 pliant bolt
Any idea what the poly count is on buildings rn? (including and excluding interior objects)
sly bridge
can’t you check in workbench directly?
shell hedge
at least 7
pliant bolt
I'm gonna have another look but last time I checked there's not really fully built buildings in there, maybe I looked wrong last time
pliant bolt
Mhmm seems to vary quite greatly, some are over 120k and some are like 40k, what is also funny is that the highest ones are the destroyed house models, but atleast this gives me a rough idea
delicate condor
there are so many different kinds of buildings that its not really possible to give any meaningful target number
find an example in similar size you want to do and go from there
if you want best optimization you make it with as less polies as possible
tacit eagle
Is here a trick for making reflective materials? Like Chrome
sly bridge
procedural or textured?
tacit eagle
Preferaby both, i got a nice chrome in SP2 but it does not quite make it in the editor

 calm rune
zenith quartz
Horrific blockout in anticipation of Enfusion helis.
calm rune
zenith quartz
Horrific blockout in anticipation of Enfusion helis.
Almost looks like the alligator 🤣
clear oak
How do I properly parent my mesh objects to bones? I tried the usual "blender" method of Shift-Clicking an object then its parent bone, then Ctrl+P and parent to bone, but when I import the model the mesh does not follow the bones movement, like in blender
Memory points do follow the bones properly though
hoary herald
Add an armature modifier and set the root bone in it
clear oak
The upper part of this model is parented to the green bone on the right and seems to work fine in blender
 clear oak
hoary herald
Add an armature modifier and set the root bone in it
clear oak
hoary herald
Add an armature modifier and set the root bone in it
Is it done by naming the bone v_root?
hoary herald
Not sure if you have to name it root but you probably have to set the armature
clear oak
You mean adding an Armature modifier for the upper part? I've tried that, my model becomes weirdly out-of-scale when imported and the upper part still doesn't follow the bone
clear oak
Thanks, I'll try that. I might've misinterpreted the instructions on the wiki and thought that weighting is only needed for deformable/character-like models
delicate condor
hard surface animations are just 100% weighting per part per bone
clear oak
Just tried that, my model became insanely huge again. Maybe it scales the meshes according to the bone sizes? Also sorry for possibly dumb questions, I just started learning all the rigging stuff overnight
delicate condor
yes you should not scale bones
rotation and translation are the means to move things
clear oak
I did not scale bones, just used their default scale and extruded the bones in edit mode (like in my screenshot above)
daring condor
Did you apply scale on your main mesh
clear oak
Also I applied all the transforms to the mesh objects, so they're all 1 1 1
 tulip sail
can i say make a bottle translucent? tried using 50% gray opacity map but it did nothing .
delicate condor
did you use correct suffix on the source file prior to converting it?
calm rune
clear oak
How do I properly parent my mesh objects to bones? I tried the usual "blender" m...
Did you assign the mesh to the vertex group?
tulip sail
dont think u can make only part of the mesh transparent with the opacity mask sadly so its as good as i can fake it for now lol
 delicate condor
tulip sail
dont think u can make only part of the mesh transparent with the opacity mask sa...
delicate condor
tulip sail
dont think u can make only part of the mesh transparent with the opacity mask sa...
did you use the texture suffixes??
where are you applying opacity mask?
tulip sail
let me boot it back up 2 secs

op map seems to do nothing lol
opacity map isnt packed into any other map is it?
gathered it was just a blacj n white image
solemn goblet
You can get around this by making two separate materials on the same mesh (in most engines).
Be weary of performance though, transparency kills
tulip sail
tbh it looks fine without it lol its only a water bottle anyway
solemn goblet
No worries. I remember having this problem in Unreal 🙂
tulip sail
am just surprised the opacity map does nothing. clearly ive done it wrong lol
tulip sail
prob not 🙂 ta for that link tho
 spiral veldt
hoary herald
far from done but shes coming along
spiral veldt
hoary herald
far from done but shes coming along
Looking great!
I am in the early stages of making the monkey bomb 💣

 dry gazelle
 chilly dragon
whats an optimal face count for trees?
delicate condor
chilly dragon
whats an optimal face count for trees?
Depends a lot on the size and species. Best reference is to check polycount for the BI trees in the editors statistics
chilly dragon
delicate condor
Depends a lot on the size and species. Best reference is to check polycount for ...
Thank you very much
chilly dragon
delicate condor
Depends a lot on the size and species. Best reference is to check polycount for ...
actually Im having some difficulty finding the editor statistics, where are they?
 uneven vessel
very excited and curious to see what you learn from making item-attachments @hoary herald , should make implementing rank slides/patches more possible
 hoary herald
yeah gonig to experiment with it a bit
seems like a nice system
my biggest ? is the fact that they did some weird stuff regarding textures
the goggles for example has 2 sets of texture just for itself
i'm so used to trying to cram a bunch of stuff on one texture set
uneven vessel
Oh interesting
hoary herald
jsut seems wasteful but i do this for fun... so they might know something i dont
also may have been circumstantial
uneven vessel
Yeah it would hopefully suggest they've optimised texture loading so it's not as much of a concern as previous titles
and not just poor workflow
So for your helmet it's all on one 2k texture?
hoary herald
i put the helmet on a 2k and all the accessories on a 2k
for now
i'll see if this is the move or not
uneven vessel
yeah that sounds reasonable
hoary herald
i still have ton of space on the helmet one though so i can make additions like velcro etc on the sides
going to add to, to make varians
uneven vessel
yeah fair - one thing that is stuck in my mind that I haven't checked yet is whether users are able to add/remove 'attachments' from headgear/other inventory items in-game, like, is it as simple as a checkbox in enfusion tools or will it need to be scripted
uneven vessel
Yeah that's what I figured
Have to presume it'll be available as an option soon, and if not it's something worth suggesting be added - at least a property in enfusion you could set
last hill
uneven vessel
Have to presume it'll be available as an option soon, and if not it's something ...
The beauty of this workbench is how adaptable it is, hexcavate proves what is truly possible. I'd be surprised if modularity on all components was a thing that is possible given enough knowledge of the existing features and mechanics.
uneven vessel
It's definitely possible, my specific point is that currently appears to be hard coded which items can have attachments removed/added by the player - which ideally should be set to be an option in the enfusion tools
solemn goblet
It looks like the child system is recursive. So your radio attached to your radio pouch attached to your suspenders attached to your belt attached to your character is possible.
 fierce shard
is there a way to make automatic collections? i do them manually, i dont know if thats wrong


 lament solar
That was quick
delicate condor
Could be one of them models off the interwebs  Color is nice, reminds me of fallout
prisma delta
I think he meant he was already in the process of modeling it when he posted the reference...I hope
clear oak
calm rune
Did you assign the mesh to the vertex group?
Yes, I created a new vertex group in object data properties of the mesh object
calm rune
clear oak
Yes, I created a new vertex group in object data properties of the mesh object
creating the vertex group and naming it is one thing, then you have to go into edit mode, select that area of the mesh then assign it to the vertex group you created. If you did that then Im not sure what is wrong.
solemn goblet
Maddii knows the process p good so it's prob them makin it
sly bridge
@hardy ginkgo- look, i modeled the same vespa as you did /s
https://cdn.discordapp.com/attachments/107740897562636288/984128330234224660/unknown.png


this sort of stuff doesn't fly around here
@solemn goblet@prisma deltadefinitely doesn't looks like it....
@hardy ginkgosend me proof that this is your work via DM before i drop the ban hammer, because this mesh is not even free, is ripped - your message is deleted
prisma delta
Ah man, the big goof was posting it within an hour lol
rain wadi
oof
 sly bridge
- you didn't write that, you just made it look like you modeled it
- you didn't made a textures (plural for it), you just cleaned up the stickers and changed the colors for the albedo / base color etc
- this particular model is ripped, not bought
anything else you want to add?
to this particular post you made?
solemn goblet

 sly bridge
just a note here, even if you don’t post it on this discord, it won’t make it to the workshop, so anyone doing that is going to
- get his account banned
- get his mod removed
- waste his time for nothing
sly bridge
we have zero tolerance about that around here. i’m pretty sure i have posted about it several times now about this very issue - you have been banned indefinitely
rain wadi
Modelling your own stuff = ✅
Buying stuff and checking that the model is made by a serious person (and checking that the license allows to port it) from a serious platform = ✅
Buying stuff from a shady website = 
Stealing stuff from ANYONE =
- just because you bought something doesn't mean you can do whatever you want with it (check the license)
sly bridge
that also stands true for models downloaded for free from places like sketchfab / artstation and other reputable places
dapper oar
Those sites advertising free 3d models you find on a search tend to be ripped or stolen/resold without licence, so they are on shaky ground to start with, best avoid that type of stuff completely.
Besides, learning how to 3D model and 3D modeling your own stuff is fun and educational, the reward and sense of achievement at the end of the process when you get those beauty renders of your own work done, well nothing quite beats that imo.
last hill
This is why I stick to CGTrader and try my best to do my homework
lament solar
"Modelling this old vespa right now🙂"
posts finished, game ready asset 12 minutes later
solemn goblet
You can also pay people to model stuff for you if your heavy on money and light on time. Just checking ArtStation for profiles that are open to freelancing opportunities with contact info gives you the chance to see their former work and negotiate prices.
Generally the absolute minimum most people are willing to model for you is like 20$/hr and this assumes they are sorta new themselves.

The odds of getting scammed from ArtStation are pretty low because that's essentially the world stage. People use their personal info, linkedin, etc on there. If they rip an asset and scam you well... They are omega fucked.
Oh and I should post this: https://foter.com/blog/how-to-attribute-creative-commons-photos/
This is just a good guide on creative commons licensing. Most stuff you buy on say, CGTrader, will have some of these symbols. Idk might help someone 🤷
 eager hill
Do you think I should add holes in those places like on a real thing? Player won't be able to see them anyway, unless they try to look into other player's weapon which seems unlikely to happen.

For me it's kinda a waste of polycount
solemn goblet
This is a hires bake right?
eager hill
Yup, that's a high poly model
Everything is finished except of UV map and cleanup of lowpoly
sly bridge
eager hill
Do you think I should add holes in those places like on a real thing? Player won...
you can get away with floaters
solemn goblet
Yeah I mean why not. You could make separate stamps too. That's what I generally do for small inward bools
eager hill
sly bridge
you can get away with floaters
on the right one it's possible, but the left one should go straight through it
solemn goblet
Ah so it's a hole in the geometry that you can peephole through?
solemn goblet
If that screw is thumb sized and the hole is relative to that then I mean... Just a little puff of height in Substance would work for me 🤷
Depends on where this is though I have no idea what it is
sly bridge
ahhh, generally speaking reforger seems a lot more forgiving in terms of polycount. If you get proper lods, i see no problem having a real hole in
it also depends if you can actually see it from first person
daring condor
consider that bohemia added that sordid inspect button
eager hill
That's how it looks irl
 solemn goblet
Ahhhh okay I see
 last parcel
i would say add it
solemn goblet
You can add it yeah, it's an attachment that is gonna be LOD1 from arms length away anyway.
eager hill
Fine, I'll add it
eager hill
I'm not going to sell it. If I release it, it'll be open source so there is no point
solemn goblet
Nothing wrong with more hires to bake from IMO the question is will this every truly matter for the lowres: probably not. But just you wait you'll get comments in the addon
🤓 "UHMM AKTCHUALLY THERES A HOLE HERE"
And it's always the same person
eager hill
solemn goblet
Nothing wrong with more hires to bake from IMO the question is will this every t...
that's exactly the reason I'm asking about it. Some purists will get triggered because it's not exactly like the real thing
daring condor
Also more detail more gud
fierce shard
my collection crashes enfusion workbench when i import this is driving me crazyy
daring condor
When in doubt, bake it down
solemn goblet
fierce shard
my collection crashes enfusion workbench when i import this is driving me crazyy
is ArmA reforger updated as well as Reforger Tools?
solemn goblet
Do the colliders look like an LOD0?
I don't think having 50 colliders is an issue so much as the geometry of those colliders.
I don't know if Enfusion has a collision triangle limit but if it does it is certainly lower than the mesh triangle limit.
fierce shard
solemn goblet
Do the colliders look like an LOD0?
yes but its not named LOD0
im kinda new in modeling
solemn goblet
Colliders should look like they are made for a PS1 game
daring condor
fierce shard
yes but its not named LOD0
 daring condor
solemn goblet
Colliders should look like they are made for a PS1 game
daring condor
solemn goblet
Colliders should look like they are made for a PS1 game
Or just some primitives, afaik
solemn goblet
I can't think of a better analogy haha. A good lazy method for colliders is to give it a decimate modifier and get it to sub 100 triangles. Depending on what it is you can go as low as 20-30.
Yeah, and the best performance method is to just outline the object with cubes.
daring condor
 fierce shard
i didnt make the colliders, i just shift d the whole model (was pretty lazy to them manually)
solemn goblet
Someone smarter than me can tell you about convex vs concave and why it's important, but generally your collisions shouldn't have too much depth to them in order to save on performance. Why this is I don't know, and I could even be wrong now. But it was a thing back in the day 😛
fierce shard
oh that makes sense, didnt think that
solemn goblet
Lets see the model in question so I can better give you a good workflow
fierce shard
thank you gonna try that!
solemn goblet
I think it's better to have 5 convex cubes vs 1 concave mesh for collisions. technical artists tell me if I'm wrong here.
If you're making a milk crate for example*
daring condor

 solemn goblet
https://community.bistudio.com/wiki/Arma_Reforger:FBX_Import#Collider_shape
Okay awesome, there's actually a whole section of this on the wiki.
daring condor
I think this is from the sample car mod
solemn goblet
Yeah so there's two types of colliders, there's the ballistics model and the phsyics model. The ballistics one is much more in-depth.
It's still a simplified version of LOD0 though.
eager hill
First hole is done
 eager hill
nope, vertex bevel and transformed to circle
solemn goblet
Impressive
eager hill
that was made on lowpoly model and then used cylinder created like that as base for boolean for high poly
solemn goblet
Nah, it works. The worst method is one that looks ugly
Nothing is sacred for hires
daring condor
I use it all the time
Looptools is my most used add-on
Honestly no Idea why it isn't activated by default
solemn goblet
node wrangler isn't activated by default either. It's all a scam
daring condor
That's blenders way of telling you to stay away from texturing or baking in that software
Cuz it's ass
solemn goblet
Blenders compositor is pretty good though.
Need to be more tv shows done with Blender
Can't remember what the big studio one is, it's undoubtedly better but also not free
daring condor
You're literally the first person I've seen say anything good about that part lmao
calm rune
eager hill
First hole is done
When it comes to micro details like this is helps to just bake these into the low poly.
daring condor
I don't do renders, but I always see people shit on the compositor
solemn goblet
calm rune
When it comes to micro details like this is helps to just bake these into the lo...
Yeah this is his hires.
calm rune
solemn goblet
Yeah this is his hires.
Gotcha! I’ll shush now 🤣
solemn goblet
I'm just using Ian Hubert as my only example lmao I mean if that guy can pull it off then what am I doing with my life
solemn goblet
calm rune
Gotcha! I’ll shush now 🤣
No worries man, it's actually better to assume the silliest and help from there
eager hill
calm rune
Gotcha! I’ll shush now 🤣
It's definitely a highres model
 calm rune
Holy! Yes indeed it is haha!
daring condor
You work with subsurf on?
solemn goblet
it reminds me of the first substance painter tutorial I ever watched
 solemn goblet
Whats remesh doin in there
daring condor
Why do you weight normals before subdiv?
daring condor
solemn goblet
Whats remesh doin in there
Fix subsurf + bevel issues
eager hill
even without cleanup of lowpoly it's around 6,5k verts
daring condor
Basically it makes it so you barely have to care about proper edge control
solemn goblet
Interesting. I've never done it like that
daring condor
And you brute force a high poly
solemn goblet
That seems more efficient
daring condor
Depends on your system
eager hill
weighted normal is not needed here, but I'm used to do it because of some archviz I work on sometimes where I just use bevel + weighted normal
daring condor
I tried to do it on a tank
To get any reasonable level of detail my pc tried to remesh it for minutes
eager hill
so I always put weighted normal and bevel together
daring condor
And I have a Ryzen 7
Useful on small assets like guns
Utterly useless on vehicles imho
solemn goblet
Can't you just enable and disable on a whim though
daring condor
It takes some time every time you do
solemn goblet
yeah just to check 🔍
daring condor
I ended up with like 100 million tries or something on a tank
solemn goblet
In Blender?
 solemn goblet
I never really use it but I might start.
daring condor
This guy has videos on that workflow

Here is how to set up your high-poly model in Blender.
I highly recommend using the Hardops and BoxCutter addons for hard-surface modeling in Blender: https://blendermarket.com/products/hard-ops--boxcutter-ultimate-bundle/?ref=512
[This is an affiliate link, so thanks in advance for supporting the channel]
====================================...
sly bridge
eager hill
It's definitely a highres model
make sure you keep the parts you see on screen all the time around the glass pretty high
eager hill
sly bridge
make sure you keep the parts you see on screen all the time around the glass pre...
I know, those places are pretty dense
sly bridge
if you check a3, early sights models are 32 faces cylinders, later ones are 76+
solemn goblet
I keep facets on my models so that it may sparkle like a diamond in the sun
Here's a good way to check for faceting btw.

 bright cedar
hello guys! i have a problem that i dont know to resolve. I have created an uniform in blender, i export it with all the features needed to import into Enfusion Engine with all bones selected, but when i import it in Enfusion Engine, it only appears with 4 bones without the rest of them, somebody knows what is the problem? cause my mind its breaking
upper uniform part
solemn goblet
Hop into creativity lounge and stream your blender for me
bright cedar
oks
zenith quartz
AK wooo

 thorny rivet
RESOURCES (E): Non orthogonal transformation on collider 'UBX_Box' - Does anyone know how to solve this error?
eager hill
thorny rivet
RESOURCES (E): Non orthogonal transformation on collider 'UBX_Box' - Does anyone...
your collider is not a box
thorny rivet
so i created a box and scale it and resized it like this
 eager hill
UBX collider has to look like that
 thorny rivet
i cant resize it?
calm rune
doesnt the collider also need to be the same name as the model? ie: rifle_LOD0, UBX_rifle
so UBX_akm_7_62
eager hill
calm rune
doesnt the collider also need to be the same name as the model? ie: rifle_LOD0, ...
models can be built from many different objects so I'd say no
 bright raft
eager hill
It's definitely a highres model
bright raft
eager hill
It's definitely a highres model
Lookin good. I started doin XPS3 today, but using hardops workflow
 eager hill
That's how sample weapon is built @calm rune
 eager hill
bright raft
Lookin good. I started doin XPS3 today, but using hardops workflow
eager hill
bright raft
Lookin good. I started doin XPS3 today, but using hardops workflow
looks great. Mine is almost done. Just finished cleanup of lowpoly and it turned out to be 4225 verts
eager hill
bright raft
Lookin good. I started doin XPS3 today, but using hardops workflow
btw. use bolt factory addon for making bolts. It's much faster
calm rune
eager hill
That's how sample weapon is built <@165928416669990912>
Yeah I know that I already weapons in my mod rigged
thorny rivet
how can i add material assigns to .xob? I need wood and metal

 bright raft
eager hill
btw. use bolt factory addon for making bolts. It's much faster
bright raft
eager hill
btw. use bolt factory addon for making bolts. It's much faster
Thnks, will try it out
eager hill
calm rune
https://community.bistudio.com/wiki/Arma_Reforger:FBX_Import#:~:text=name%20for%...
here I just called it UTM_Weapon and it works flawlessly
 calm rune
eager hill
here I just called it UTM_Weapon and it works flawlessly
calm rune
eager hill
here I just called it UTM_Weapon and it works flawlessly
Thats fair but I'd rather stick to the documentation as good practice.
eager hill
calm rune
Thats fair but I'd rather stick to the documentation as good practice.
Well, that's a collider literally copied from the weapon sample
calm rune
again that's fair but I rather stick to the documentation that way I know if an error occurs later I know that would not be an issue because I followed the documentation.
 thorn topaz
bright raft
thorn topaz
bright raft
you may want to consider making that bevel wider to avoid aliasing, maybe not as wide as this example but just a bit more so that it has a wider curve visible while held in the players hands.
http://wiki.polycount.com/w/images/8/85/Normal_edge_thickness.jpg
 solemn goblet
Lods son
thorn topaz
should have specified, first person view but not aim down sights
simple meteor
thorny rivet
how can i add material assigns to .xob? I need wood and metal
Do it on blender
thorny rivet
simple meteor
Do it on blender
i has download a free model, so i dont know how to do that
daring condor
thorn topaz
you may want to consider making that bevel wider to avoid aliasing, maybe not as...
Counterpoint, just bake the bevel onto the mesh
Do vehicles not guns, you get away with more crimes
delicate condor
how bout buildings 
dapper oar
delicate condor
how bout buildings <:blobcatgooglythink:805173325226836039>
I might do some just to figure them out, dip my feet so to speak.
delicate condor

dapper oar
just to explore the required functions for buildings, doors, windows, ladders, hatches etc
pliant bolt
@dapper oar If you do, I'd be extremely grateful if you were to post something about it (in terms of how to do stuff). I haven't really looked into it myself but I've started working on modeling some buildings for reforger
dapper oar
I'll try to if BI devs don't beat me to it on the wiki, they are publishing some good docs so far.
pliant bolt
Awesome
cedar stream
Here it is, officer
 solemn goblet
dapper oar
I'll try to if BI devs don't beat me to it on the wiki, they are publishing some...
solemn goblet
dapper oar
I'll try to if BI devs don't beat me to it on the wiki, they are publishing some...
One of the BI devs might have beaten you on ArtStation haha.
https://www.artstation.com/artwork/Ar4w3y This post shows a pretty good setup with RGB masks.
dapper oar
solemn goblet
<https://www.artstation.com/artwork/Ar4w3y> This post shows a pretty good setup ...
ah, I meant more for the rigging, textures are easy 😁
cedar stream
I dont really know the workflow for these masks for different materials, sounds confusing to me
Using different textures is fine but how do i visualise the different materials with the masks in substance painter?
solemn goblet
There's a hacky way to set it up in substance.
Additive fills with exported masks set to their corresponding colors
I mean, I'm super generalizing it. It's way easier to do in something like Unreal
Or maybe it's the same in Enfusion. Once again I'm speaking from a different engine standpoint, maybe enfusion's node architecture is similar
Here's how I would do it in Unreal
 cedar stream
Also i dont get what the advantage is for using multiple materials if i can set layers and stuff in substance
solemn goblet
You can get floors and walls like this. The masks look similar to the one in Enfusion

I think the advantage is texel density. Since walls are probably tiled, and the grunge is also tiled. HUGE buildings can't have texel density without tiling textures unless you used massive 8k maps or something.
There comes a point where VRAM swings back around to be more efficient, even though you're using like 8 1k textures blended together.
cedar stream
ah makes sense
solemn goblet
Yep. Anyway I gotta go watch Dexter with my wife. I'll try and figure this out for Enfusion in the next few weeks and if I remember I'll @ ya
delicate condor
Ive used Blenders node materials to represent multimaterial and it has worked very well
for Arma 3 that is.. Have not tried MM in enfusion yet but Id suspect with both renderers being pbr the represetnation will be far more accurate between blender and enfusion compared to blender and Arma3
it was not bad for A3 either but some quirks had to be followed
simple meteor
thorny rivet
i has download a free model, so i dont know how to do that

then select your face and click on assign (edit mode)
bright raft
thorn topaz
you may want to consider making that bevel wider to avoid aliasing, maybe not as...
Thanks, will definitely improve this
 neon otter
Hello, I imported an object with its colliders but when I am in game this one is not present, as if there were no colliders

 thorny cobalt
neon otter
Hello, I imported an object with its colliders but when I am in game this one is...
thorny cobalt
neon otter
Hello, I imported an object with its colliders but when I am in game this one is...
You placed a prefab of this ingame right? can you show the components on the prefab
neon otter
yes @thorny cobalt
 neon otter
 thorny cobalt
neon otter
thorny cobalt
neon otter
Ah thanks, try adding "RigidBody" component
sly bridge
zenith quartz
AK wooo
nais, i see you are making the new stock, trigger guard and newer rear iron sights
cedar stream
anyone else getting errors when trying to set a material for the collider on a mesh? im 100% sure the name of the material is right

Im trying to set it to paper but for some reason it says metal on the error
solemn goblet
cedar stream
Im trying to set it to paper but for some reason it says metal on the error
Using blender enfusion tools?
I don't think you can just copy the material definitions, I think there's some technical artistry that science can't explain involved within the blender tools.
uneven vessel
hey gang, is the process for exporting a character uniform in to enfusion tools with proper skeleton/bones/armature documented anywhere? I felt like I saw a video tutorial of bringing in headgear somewhere but can't find it - I've got to the point where I have set up my uniform and the model changes when the character wears it, but none of the bones are appearing on import
Aha! Found it. If anyone else was wondering: https://www.youtube.com/watch?v=8o3WnGLIQ_4
 bright raft
 last hill
bright raft
last hill
bright raft
Would you be willing to share your knowledge of flipping up and down Magnifier? Script etc? Did you use PiP mode on the Magnifier, but standard sight mode on the red dot/eotech?
I am literally at the point of dropping mine but it doesn't function so it is literally just sitting there and has to be attached and removed to work :(
bright raft
last hill
Would you be willing to share your knowledge of flipping up and down Magnifier? ...
Basicly I wrote ScriptComponent which handles flipping , and made it toggle using custom action. Rest is pretty normal, PIP for magnifier, and reddot is currently just a dot. Dont have access to my PC with reforger stuff, but I'll probably push scriptcomponent as separate mod this weekend to be used by others
last hill
bright raft
Basicly I wrote ScriptComponent which handles flipping , and made it toggle usin...
No worries. Just rotates on a custom bone as pivot point?
bright raft
I think so, tho I had some issues with PIP if I remember
last hill
bright raft
I think so, tho I had some issues with PIP if I remember
Yeah I am still trying to sort out a few issues I had with mine, it was all wobbly and off center etc. I am still learning what each function setting means in the prefab, not even diving into the HDR stuff, apart from dropping on the reticle texture.
Sorry for the off-topic moderators, this is likely animation/scripting more than model makers itself.
sly bridge
last hill
Yeah I am still trying to sort out a few issues I had with mine, it was all wobb...
no worries, it’s a lot less offtopic than what i am used to…feel free to continue in other channels if required
thorny rivet
simple meteor
here https://prnt.sc/7lQuGMq0wZyM
is there any ways to make new material on this model?
 sly bridge
thorny rivet
is there any ways to make new material on this model?
sly bridge
thorny rivet
is there any ways to make new material on this model?
where's the model from...?
thorny rivet
sly bridge
where's the model from...?
I downloaded free model
from sketchfab i think
daring condor
If you downloaded from sketchfab you should have a file with the link and license in the archive file
hoary herald
almost done. still a bit of work to do, but they are in game and looking pretty decent i think

 hoary herald
Yeah one thing i gotta sort is the opacity on the goggles...
solemn goblet
Is there a goggles worn and googles on the helmet version, or do the goggles attach to the helmet like the canteens do the belt?
I think you said you got the attachments working in our last convo but I wasn't sure if you stuck with that
eager hill
It'll take some time
 eager hill
Baking finished. Went from almost 8 millions verts to just above 4k
 thorny rivet
daring condor
If you downloaded from sketchfab you should have a file with the link and licens...
thorny rivet
daring condor
If you downloaded from sketchfab you should have a file with the link and licens...
i dont have it
here it is
daring condor
strange
thorny rivet
i lost ton of time and here is my first weapon, it looks stupid now, but idk how to make second material for wood
solemn goblet
thorny rivet
i lost ton of time and here is my first weapon, it looks stupid now, but idk how...
Like in Blender?
thorny rivet
solemn goblet
Like in Blender?
yes
solemn goblet
I can show you how yeah. Go to Creativity lounge and watch my stream
daring condor
eager hill
Baking finished. Went from almost 8 millions verts to just above 4k

If you find my videos and giveaways helpful please consider supporting me at http://www.patreon.com/Arrimus3D. If you need a question answered send me an email at 3dtut@outlook.com. Also, giving me a thumbs up and subscribing shows you find my videos helpful. Thanks.
In this video I will show you how to bake normal maps for cylinders in 3D Stud...
calm rune
thorny rivet
i lost ton of time and here is my first weapon, it looks stupid now, but idk how...
What do you mean second material for wood? I can easily say substance painter but I doubt that’s the answer your looking for. Need to be more specific with what you are asking.
sly bridge
eager hill
It'll take some time
if you have gtx/rtx is almost instantly
eager hill
sly bridge
if you have gtx/rtx is almost instantly
I had to do it with cpu. I have my old gtx1050ti and SP was giving me some errors that highres can't fit into vram
all other maps I did with gpu
only AO had this issue
solemn goblet
calm rune
What do you mean second material for wood? I can easily say substance painter bu...
The model he bought has 2 materials instead of one. Not the most ideal scenario but not terrible either.
pliant bolt
Are there any video's out there that show the proces of texturing large objects and using multimaterials? I know arma 3 used to use it, and reforger also does now, but I'm not sure how to work with it with substance painter
delicate condor
dont think so. Substance painter is not the most optimal for multimaterial but I think I've heard some people making the multimaterial mask with it
basic gist of it is that it uses a 4 color mask (black, red, green, blue) to mix 4 different pbr texture sets together
daring condor
solemn goblet
The model he bought has 2 materials instead of one. Not the most ideal scenario...
that do be how boheme handles its ak too
solemn goblet
It would allow you to replace the furniture in the future so I mean 🤷
daring condor
also allows you more control over the material differences
with the enfusion material settings
cedar stream
solemn goblet
Using blender enfusion tools?
yes
cedar stream
It is
 solemn goblet
I got no idea
 fast notch
why didn't the textures transfer?
 sharp mist
Hi, i have a problem with my truck. Wheels are falling trough the ground, and it only has collision with the terrain on the "main" cab, not the wheels. I tried a lot of thing and i just don't know what's wrong. One thing i am suspecting might be happening is that there is only fire geometry attached to wheels. But tbh i'd find it really strange if that thing is causing the problem, cause on my previous vehicle everything works fine with just fire geometry.

 mortal sentinel
guys, are there any tutorials for making clothes for arma reforger? Like where do I start, I probably need the character model to make the clothes fit?
daring condor
for modelling?
simple meteor
I inherit from m998 why some parts are locked ? https://prnt.sc/LqCOlZbuFE0X
 daring condor
there is literally no difference between any other tut and refrogger
mortal sentinel
daring condor
for modelling?
yes, modelling a uniform, but I would need like a dummy character to fit it on probably? So I know how big to make the jacket, pants etc
daring condor
there is one on git
 ruby locust
anyone know how to add collision to objects i add into the editor?
cedar stream
Is there any guide on layer presets?
 opal moat
What is the process for retexturing a uniform?
Trying to get used to the Workbench and I need a simple project like that to work on
calm rune
mortal sentinel
guys, are there any tutorials for making clothes for arma reforger? Like where d...
You need to download the Arma Reforger samples off of GitHub then import the "character_sample" into any 3D application(Blender, Maya, Max, etc) then start to model whatever your heart desires. Marvelous Designer is a good application to make clothing but it also cost a monthly subscription.
opal moat
Circular array on jmesh broken for anyone else?????
karmic adder
When I import a mesh, it says "⚠ All interaction layers used" for it, but I don't see a way to specify interaction layers in the Blender Tools (only Game Material & Layer Preset).
How does this work?
 cedar osprey
eager hill
Baking finished. Went from almost 8 millions verts to just above 4k
cedar osprey
eager hill
Baking finished. Went from almost 8 millions verts to just above 4k
awesome model, cant wait for this
cedar stream
karmic adder
When I import a mesh, it says "⚠ All interaction layers used" for it, but I don'...
Maybe you havent checked custom properties when exporting from blender
lament solar
First time making a real weapon rather than sci-fi stuff

TT-M48
Basicaly Hungarian Tokarev

Let talk about how incorporating some non-destructive method of modeling is important for modeling realistic props in Blender.
Hard Ops and BoxCutter Bundle [affiliate]: https://blendermarket.com/products/hard-ops--boxcutter-ultimate-bundle/?ref=512
ARTSTATION - https://www.artstation.com/tosmo
DISCORD...
watching this guy to learn some new methods
 spring pond
simple meteor
I inherit from m998 why some parts are locked ? https://prnt.sc/LqCOlZbuFE0X
spring pond
simple meteor
I inherit from m998 why some parts are locked ? https://prnt.sc/LqCOlZbuFE0X
it aint locked... its disabled

 simple meteor
spring pond
it aint locked... its disabled
simple meteor
spring pond
it aint locked... its disabled
I can't edit or delete the component
But I will try again thanks
spring pond
simple meteor
But I will try again thanks
arma reforger prefab? if yes then send me link (RMB -> copy link) as i want to check it out cuz it sounds interesting
simple meteor
spring pond
arma reforger prefab? if yes then send me link (RMB -> copy link) as i want to c...
I'm not home rn, do that when I'm back
But I inherit from m998 base
And I was trying to remove glass in the component
And emissive lights
spring pond
for me its enabled and i can disable it

but in my case i wont be able to save that (with ctrl+S) as im currently editing reforger prefab and those are 'read only' but checked it with inherited prefab and it works too 🤷♂️ - keep in mind that workbench sometimes has some issues and best way to resolve them is to restart it 😉
any idea why when i spawn a soldier in game (or in play mode in world editor) then that radio is not mounted to their suspenders? i made it same way as it is for flashlight and that one works fine

they are both inside those suspenders


 lethal frigate
Nice uniform
Will someone make that m93 that alot of arma 3 uniforms were based of
Just texture changes
 runic sail
spring pond
any idea why when i spawn a soldier in game (or in play mode in world editor) th...
runic sail
spring pond
any idea why when i spawn a soldier in game (or in play mode in world editor) th...
most items arent visible by default on character (or else you would see them running with their entire inventory next to their feet heh)
in case of radio, you will have to override IsVisibleEquipped() in SCR_RadioComponent
solemn goblet
runic sail
most items arent visible by default on character (or else you would see them run...
Thanks, I had this question as well so you've helped 2 people on this blessed day.
 molten patrol
Is 11k polys LOD 1 for a weapon model too much?
solemn goblet
Nope, the AK is 19,000 for LOD0 so half that for LOD1 is within reason.
molten patrol
solemn goblet
Nope, the AK is 19,000 for LOD0 so half that for LOD1 is within reason.
Thanks!
solemn goblet
I guess I'd have to see the wireframe to be completely certain though
mortal sentinel
calm rune
You need to download the Arma Reforger samples off of GitHub then import the "ch...
thanks. I checked this sample character, but it seems to have only face and hands, the rest is modelled I don't know how, do they not use a skeleton/naked body to model around?
calm rune
mortal sentinel
thanks. I checked this sample character, but it seems to have only face and hand...
import the sample_character then import sample_head.
mortal sentinel
ok, i'll try that
spring pond
runic sail
most items arent visible by default on character (or else you would see them run...
it worked great, thank you! in my case i had to check in the script what it wanted and in case of radio its checking whether or not its set to "MANPACK" so instead of overriding script i just changed that in radio prefab (in SCR_RadioComponent)
 runic sail
spring pond
it worked great, thank you! in my case i had to check in the script what it want...
runic sail
spring pond
it worked great, thank you! in my case i had to check in the script what it want...
Thats probably not ideal solution because backpack radios have a bit different behavior in some parts of the script so it might create some unwanted behavior somewhere else
spring pond
so probably overriding this function and adding some additional exception would be better as it wouldnt have an impact on other functions that utilize that property
ill look into this, thx
runic sail
It shouldnt conflict with anything by default because this check is there only in context of equipment slots, and there are no equipment slots for personal radios in base game. Someone would have to add a slot for radios but at the same not want them to be visible (This is the case for wristwatch in game, equip slot for them makes sense because you could 'wear' them so they dont take space in inventory, but are invis so they dont clip)
But yes if you want super foolproof compatibility with other mods then you can do it as you described
mortal sentinel
which dude do I try to model clothes on? The big one or the small one?

it's from the sample mod
tacit eagle
the small one looks more detailed and is sculpted better so I'd assume that one
solemn goblet
The one that is about 1.8 blender units tall
prisma delta
what is the giga man for
 kindred thistle
Giga man is the collision. Actually he shouldn't be giga, the armature was probably deleted
Question about models in enfusion, can you make it so that they react to the wind or movement? Like, idk, a skirt
solemn goblet
kindred thistle
Giga man is the collision. Actually he shouldn't be giga, the armature was proba...
This is actually 100% what happened
daring condor
kindred thistle
Question about models in enfusion, can you make it so that they react to the win...
you could maybe fake the movement by assigning a little bit of influence to other parts of the leg?
karmic adder
What's the difference between Building and BuildingFire, is the latter for materials that would burn?
And what about BuildingView?
mortal sentinel
has anyone here made some clothes for reforger?
I imported the smaller guy into marvelous designer, but he's so freakin tiny
and I don't even think that's the correct arma body model, it already has a t shirt on, you dont have a t shirt when you remove the jacket
I really need the naked body to accurately make clothes
mortal sentinel
again, imported these lovers into marvelous design, they're like 10mm tall wtf
 daring condor
where did you get them from?
GitHub
Modding Samples. Contribute to BohemiaInteractive/Arma-Reforger-Samples development by creating an account on GitHub.
try this
mortal sentinel
it should be the same one
the main "new character" is just a clothes, head and hands, there's no body
at least when I hide the clothes in blender, there's no body
this is what I mean, there's no body under the clothes

I want to export the real reforger body to another app to create clothes that will fit 100%
this is from the sample btw, file Character_Rigify_Example.blend
daring condor
There was an issue with the character example in sample
Just use new character fbx from the one I linked
I checked it and the units seemed to fit
mortal sentinel
ok, I guess I don't have the updated one then, this was updated 15 days ago, I got mine almost a month ago, I'll try downloading this again
calm rune
Yeah you have the broken version. I can tell my looking at his broken feet lmao
mortal sentinel
ok, is this the right one? I still have to delete the collision guy, and this other model still has a shirt and underwear, nothing under them

this is from Character_Template.fbx and Head_Template.fbx
or is it just meant to have the shirt and underwear and I just model stuff on top of that?
solemn goblet
Eddie, try and use my weightref
The head is missing because the example head had to weights, but you can add it if you like.
mortal sentinel
thanks, I'll check that
daring condor
mortal sentinel
ok, is this the right one? I still have to delete the collision guy, and this ot...
That's not a shirt
The geo is just split up like that
Same at his ankles
mortal sentinel
oh lol, looked like a shirt
solemn goblet
I think that's the 'hitbox' of the character split up into firegeo skin materials or something
I really don't know how it works
thorny galleon
mortal sentinel
has anyone here made some clothes for reforger?
Make Character_example and head_example into one blender - sort object - export to FBX with custom properties turned on, leave everything expect mesh and armature. After that import the fbx into Avatar in MD with scaling set to Auto-Scaling and that should make it bigger
thorny galleon
mortal sentinel
ok, is this the right one? I still have to delete the collision guy, and this ot...
If the finished garment that you make is bigger in blender, just Press S to scale and just fit it to the character fbx that we just did for example like this.
For the collision no need to remove just use sort object and that should make the collision goes into hiding mode. Collision looks like that since When imported into Enfusion it will auto rotate it and fit the right place(not sure since my memory is vague about this one)
mortal sentinel
ok, I got the scaling working I guess, but still need to resize after importing into blender. I have no idea what's next though. I made a test hat, what should I do in blender to make it fit the character when I add it in enfusion? I've seen some stuff about bones, weight paints etc
thorny galleon
Yeah so if the lets say finish garment is smaller / bigger when put into blender, go to object mode and select the garment and press S to scale it properly into the character example / model example
thorny galleon
mortal sentinel
ok, is this the right one? I still have to delete the collision guy, and this ot...
You want to scale it so it's fit perfectly into the model which in this scenario is this model right here.
To make it simpler and cleaner use sort object on the enfusion blender tools, if u don't have it find some wiki on how to apply enfusion blender tools into blender, think theres some video on this
https://www.youtube.com/watch?v=8o3WnGLIQ_4 after you resize it to the model use this video to help you understand how to import into enfusion.
thorny galleon
No problem
mortal sentinel
I'll have to do this "tomorrow" probably, 5 am already lol
but if this will work, I might try making some stuff
thorny galleon
Yeah no worries, rough start but this should help you get going into doing clothes importing
mortal sentinel
for me everything's kind of hard at the moment, 3d modeling is completely new to me, I guess I can make something, but the next issue is getting something in the game. I guess I'll try with clothes first
thorny galleon
Yeah, there's alot of people explaining on how to do weight painting etc on youtube just need to search it up and should give you rough estimate on how to do weight painting. Good trick to do is just use transfer weight since the character example already been weight painted, just need to transfer it into your model and smooth everything out.
For head related stuff you can check the headgear example :)
clear oak
Why is my collider offset in .xob when imported from blender? I made sure to apply all the transforms prior to exporting .fbx, but for some reason my collider is offset and rotated by a random value
bright raft
Can I use multiple xob in one object?
Currently I used attachment slot component but it isnt working best
spring pond
bright raft
Can I use multiple xob in one object?
It depends what you want to do cuz for eg you can use SCR_EquipmentStorageComponent to add slot to cloths and if item has visibility set to True then it will show in that slot
bright raft
I'd like to add another object to my existing one. I have a magnifier and tried adding reddot with AttachmentSlotComponent. It kinda works, but when I open inventory, the added model is not visible, dont know if it is a bug or what.
Also I need to be able to find bones inside added prefab
spring pond
bright raft
I'd like to add another object to my existing one. I have a magnifier and tried ...
Idk about that at top but bones can be seen in when you open xob (located in assets sub folder) and seitching to bones in detail (right side in workbench)
 wide glacier
would like to learn how to make objects for this game where would i start :)
bright raft
spring pond
Idk about that at top but bones can be seen in when you open xob (located in ass...
I meant in script 😉 I figured that part out
But still, model is not visible in inventory, but everywhere else it is 😦
spring pond
bright raft
But still, model is not visible in inventory, but everywhere else it is 😦
when i wanted to add radio to the vest i had to modify radio function override bool IsVisibleEquipped() in SCR_RadioComponent class in order to make it visible nvm i see that u said in inventory


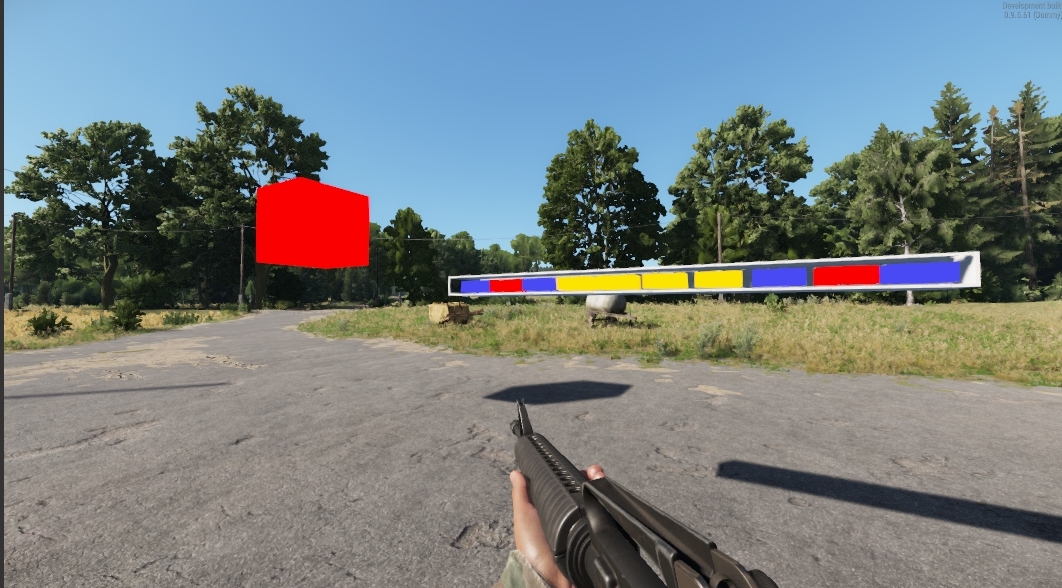

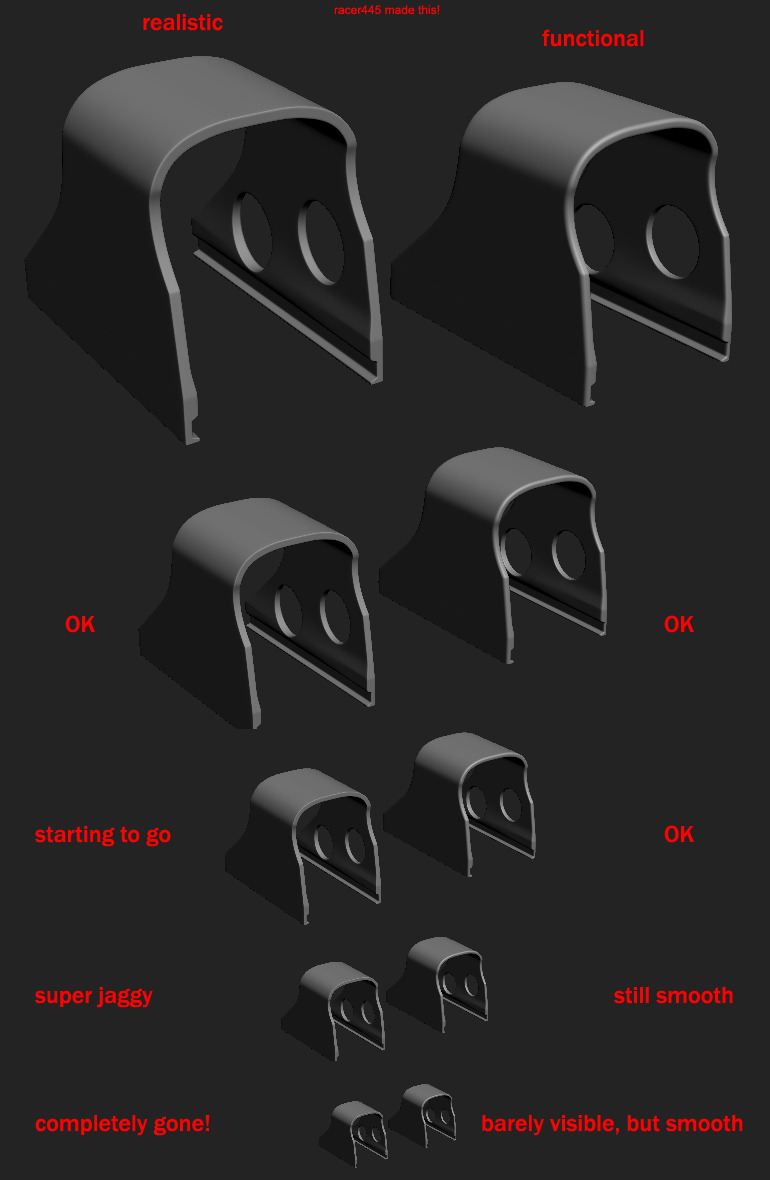 calm rune
bright raft
calm rune
bright raft
Looks like you have to scale down the size of the rifle as well.
 pine flame
bright raft
This is what I mean
pine flame
bright raft
This is what I mean
It may be an issue with inventory previews
I'd have to check, is the mod in question on workshop?
bright raft
Currently I made it in single mesh. Will get back to this subject with next publish
tacit eagle
Anyone working on a MP5sd?
sly bridge
tacit eagle
Anyone working on a MP5sd?
why?
tacit eagle
Just out of curiosity
sly bridge
tacit eagle
Just out of curiosity
maybe
tacit eagle
I'm eager to make some OFP missions but just need the correct equipment - a balaclava and MP5SD
karmic adder
What's the difference between Building, BuildingFire and BuildingView?
solemn goblet
SAS were using MP5SDs in 1989 no?
prisma delta
Is there a way that I can get the vanilla 3d models so I can attach them to my own model
I'd like to attach some weapons and backpacks specifically
sly bridge
prisma delta
Is there a way that I can get the vanilla 3d models so I can attach them to my o...
get how? attach in what sense?
prisma delta
I'm making a vehicle and I'd just like to throw a backpack on the side and a weapon hung on the interior but I don't want to recreate them lol
sly bridge
i think that’s possible be using existing .xob in a new .et, isn’t it?
i haven’t checked it but it should be possible to use the existing these models like that, see how the jeep is made from multiple individual.xob parts
prisma delta
ok that was actually super easy, thanks lol
sly bridge
👍
normal quail
Has anyone got around to checking how destruction models work. I created one, added it to the prefab but its spawning then falling through the floor. I do have colliders set up in the model however these wont be active unless there is a prefab. I have created one but the destruction model is only after the .XOB. I have checked how BI have done there's but I cant see any real difference. Feels like I am missing a step
 dim gate
daring condor
(joking)
dim gate
daring condor
(joking)
it actually does, the first person view LOD is detailed enough to still be used in games, just redo the textures with PBR and it become even better
only lacking weapon model so far is the M16/M4 since they are missing the mag release button and some detail around it but everything else still hold up
solemn goblet
Facets on your models give it character really
solemn goblet
I'm my own biggest critic what can I say
daring condor
18 sides are enough for a 90% of cylinders
solemn goblet
I'm gonna enlarge my screen and see if any facets exist and subd until they dont
daring condor
you would nbeed to make a completely new high poly and bake it again

at that point itd make more sense to just make your own model from scratch that you then actually own
solemn goblet
I might make MP5SD in the far flung future for SAS
If ArmA 4 is also 1989 that would be ideal
mortal sentinel
anyone had this?

the loaded world in workshop seems to be locked?
I can't drag a prefab in there
ok if I make a subworld out of it then it works, but strange that it's locked or something
 warped hinge
mortal sentinel
ok if I make a subworld out of it then it works, but strange that it's locked or...
warped hinge
mortal sentinel
ok if I make a subworld out of it then it works, but strange that it's locked or...
its how it should be :) So its normal :)
 cloud rampart
How can i disable the view of a helmet on first person?
When a i look up, i see it, but in third it goes with the head
mortal sentinel
cloud rampart
How can i disable the view of a helmet on first person?
on the emat files:


in workbench
cloud rampart
Thanks, it works!
calm rune
Attempt at making a little North American Police Station
 mortal sentinel
man, mask fitment is annoying. I fit everything perfectly in blender, but in game it's still clipping
and I'm fitting it on the sample character model's head, which is smaller than in game I guess?
 dense plover
you making a balaclava, shemagh or a bandana?, as the last 2 are easier to fit than a bala.
mortal sentinel
a balaclava, it supposed to be a tight fit
but anyway, I might be using the wrong model to make it on? Or are all heads not the same in reforger...
but I did scale and fit it on the sample character, doesn't matter in game though
calm rune
 mortal sentinel
holy moly the head differences. White guy has a bit of neck clipping, asian guy has a way more clipping, black guy not only has neck clipping but the face as well, so I probably should model on the black model? But can I get the model somehow?
calm rune
mortal sentinel
holy moly the head differences. White guy has a bit of neck clipping, asian guy ...
You'll notice this as well with the chin strap on helmets. Even the vanilla helmets. I personally do not think all the head models are the same size. Which is going to be a pain in the ass to work with.
mortal sentinel
kind of sucks, but ok I could manage by making it for the biggest head then, wondering if I can get it somehow into blender. I see the heads in workshop
cedar stream
Can I only have 2 materials per Mesh?
I mean, is it the limit? im trying to get 3 materials but its not letting me, it only recognises 2
delicate condor
mortal sentinel
kind of sucks, but ok I could manage by making it for the biggest head then, won...
No the models can't be taken out
delicate condor
cedar stream
Can I only have 2 materials per Mesh?
You should be able to have more
last hill
mortal sentinel
kind of sucks, but ok I could manage by making it for the biggest head then, won...
I can vouch for balaclavas being a pain in the ass. I have a possible workaround but yeah my AusG3 Pack balaclava was a PAIN and still has clipping in certain pose positions.
Will test my workaround idea and post back if I can get on my rig tonight to work on my mods.
spring pond
i might be wrong but it seems to be an issue with skeleton as on some heads bones are placed outside of head and thus chinstraps and stuff is not properly aligning with the head

like here (Head_White_10.xob)

 tidal latch
All heads are using same skeleton (they have to) but head meshes is different
mortal sentinel
guys, how long does it usually take to import fbx into workbench? I made a balaclava which imported fairly quickly, but now importing pants is taking a while and workbench is kind of frozen meanwhile
I did cancel the import yesterday and saw that one of the generated files was like 100mb, fbx is 30mb
mortal sentinel
been 20 minutes, only 30mb fbx and 99mb txo imported, still missing xob and whatever, interesting
workbench still frozen
mortal sentinel
yep balls, the thing is frozen completely, probably nothing's being converted anymore. anyone had this problem, is 30 mb fbx too big?
don't know what I can do if it is, just regular pants fbx
solemn goblet
30mb sounds pretty big to me. What's your triangle count on them?
delicate condor
That is a lot
Like 20x too much
XD
It will take ages and will not work as game model
mortal sentinel
dang
is there a max?
still interested in what's the max, but when I removed subdivision modifier in blender, it went down to 18k vertices and 36k triangles
but I added the modifier so it looked a bit better
delicate condor
It might be able to import it after a while
But for good performance you should make optimized models
bright raft
There is no point in making pants 800k tris for game
solemn goblet
Baking a hires into a low res is how most studios do it these days
Grant Abbit has a good vid on this. You can also use the bakes within Substance painter (if you got it). Opens up tons of opportunities.
<#enfusion_model message>
I simplify the process here
<#enfusion_model message> And here's the Grant Vid.
mortal sentinel
oh right, forgot about the high res and low res stuff, maybe I need to do that then
atm I'm just experimenting if I can get stuff in game, so far a balaclava worked, trying pants now. If everything works, might try to actually make something useful
solemn goblet
you got this homie
mortal sentinel
one weird thing happening though is some parts are transparent in workbench, while it's normal in blender

I have invisible parts, something like that happened on a hat I imported as well

here's the same pants in blender, but everything's almost fine
 solemn goblet
I'm pretty sure someone else had this issue and it had to do with weight paints for some reason
mortal sentinel
I transferred weight paints to these pants from Bohemia's sample character, but felt like it didn't really copy anything
solemn goblet
Also, wow that's an impressively good pants mesh. Make sure you got the right license to use that if you are uploading it to workshop.
mortal sentinel
thanks, I probably won't upload exactly these, as these have some issues and still need some work, atm just to test if I can make it work and wear them in game
solemn goblet
There's a solid vid on how to transfer weights in less than 3 minutes.
mortal sentinel
any chance you have a link to that? I transferred the weights the same way as one guy showed in a video for helmets, worked for my balaclava
solemn goblet
https://www.youtube.com/watch?v=IPQ2QVVIxLU
Yeah sorry, I was looking everywhere for it.