#enfusion_model
1 messages · Page 37 of 1
 woven swallow
 delicate condor
Let's say max 40k for cart like that
Recommendation
Max limits are probably in millions that the engine can run. Buuut no model should really go even near that
 normal quail
Agreed @delicate condor but its nice to know the limit as I am sure there is one
woven swallow
I understand that but all I'm looking for is a rough number. For example DayZ was 33k
delicate condor
Millions
woven swallow
No way enfusion can take models with millions of polygons
delicate condor
Arma 3 can too. Its not very good for performance
normal quail
Arma had a limit for sure
delicate condor
For sure. Its just alot
normal quail
I had to proxy out so much of models back in Arma 3
delicate condor
One should need not proxy anything in a3
woven swallow
Haha Goat you do 3D modeling bro?
woven swallow
We make high poly to bake details on low poly
woven swallow
Then you know. Okay. I didn't mean to offend you. Just saying.
delicate condor
I said it's not recommended to try to reach the m
Limits
woven swallow
DayZ limit is somewhere around 33k
delicate condor
Yes it's still the old A2 thing
It got improved in A3
I'd suspect same trend has continued onwards
woven swallow
That's why I would love to know the limits so I can have an idea where am at.
delicate condor
Millions
Limits and recommended count is 2 different things
I recommend max 40k tris for your cart
woven swallow
Not possible. Not even COD Warzone can handle a model with millions of polygons
delicate condor
I'd suspect cod Warzone is not the best comparison point then
woven swallow
Why not ?
I'm not trying to have a discussion here. Just want to be clear on the matter.
 rugged nimbus
In A3 I have loaded a couple of times a 95000 vertex model
No probs loading it and with 16 sections, textures weren't a problem either
woven swallow
How about the memory usage ? Imagine rendering multiple of those objects in a single scene
 swift goblet
woven swallow
Not possible. Not even COD Warzone can handle a model with millions of polygons
swift goblet
woven swallow
Not possible. Not even COD Warzone can handle a model with millions of polygons
Actually most engines support millions of verts, the limit commonly it's not on the engine, instead is on the graphic api
woven swallow
In game
Lol
The limit is when you start seeing loading times and memory usage, frame drops and all sort of lags
swift goblet
The engine what primarily does it's telling to the api what to render
 pearl otter
anyone know how to hide helmet in first person veiw?
swift goblet
woven swallow
The limit is when you start seeing loading times and memory usage, frame drops a...
That limit is hardware based, not software based
woven swallow
Then why do we make low poly versions of our models ?
swift goblet
Hardware limits
swift goblet
Yes
woven swallow
I'm sorry I'm trying to wrap my head around it
swift goblet
You can make a very high poly game, but if you need a 20k usd pc, then no one will play it.
There are limits based on software and limits based on hardware
woven swallow
But what would be the reason to upload a high poly model if only those with "high end computers" can use it ?
swift goblet
woven swallow
But what would be the reason to upload a high poly model if only those with "hig...
Stress test? Idk. I recommend low poly for playing
woven swallow
So. There is a limit to where you can't simply play the game. In dayz for example Models that get close to 30k they make your game laggy AF and even crash
swift goblet
Do you use LODS?
woven swallow
Yeah what's low poly to you ? Why not have a recommended count so we modelers can squeeze our models to get the most out of em.
swift goblet
Lods are very important
woven swallow
LODS are different subject in my opinion
swift goblet
It's part of everything
woven swallow
Those are for different distance
I'm talking about close up or models in your vicinity
swift goblet
It's all connected
 thorny galleon
pearl otter
anyone know how to hide helmet in first person veiw?
thorny galleon
pearl otter
anyone know how to hide helmet in first person veiw?
Use Arma Reforger Opacity Map called HeadClipping_A.edds on your data assets emats and enable Allow User Alpha Bias and Disable User Alpha in Shadow under general tab
woven swallow
Indeed. But that's not what Im looking for. My question is.
What is the limit or recommend poly count on 3D models for Enfusion engine. Before we start losing performance.
swift goblet
You always lose performance, if you are rendering 40k models moving of 40k poly count each it will crash your game, so everything is about what are you modelling, and how it's used.
For example, weapons commonly on reforger are around 10k verts, while other things are around 40k verts, and all have lods.
I recommend you take care for lods
Instead of poly count by itself.
Maybe not goin more than 100k verts, because it's an unnecessary level of detail no one will notice
But it's my recommendation
Which varies person by person
woven swallow
Other models are less quality because are not that important in the scene
But okay. I'll check the sample models from BIS if we are allowed to learn from them by opening them in blender. Thanks for the little discussion here haha no big deal.
 sly bridge
swift goblet
For example, weapons commonly on reforger are around 10k verts, while other thin...
sly bridge
swift goblet
For example, weapons commonly on reforger are around 10k verts, while other thin...
that is false. weapons are not 100k. lod0 is about 14k.
 hot pumice
There is a function for it in engine
swift goblet
sly bridge
that is false. weapons are not 100k. lod0 is about 14k.
Miss written
 last parcel
Yea was going to say that , a car could be as high as 40k
woven swallow
last parcel
Yea was going to say that , a car could be as high as 40k
So I'll take 40k as my poly count cap
sly bridge
it depends on what you are doing
also it depends on your skills to making lods properly
last parcel
Or take a look at the sample car and check the polycount to get a rough estimate on how much to aim for
swift goblet
last parcel
Yea was going to say that , a car could be as high as 40k
I did tests with cars UpTo 400k verts (with lods of course) and worked perfect
woven swallow
This @sly bridge
swift goblet
sly bridge
also it depends on your skills to making lods properly
This is what I say, lods are the important thing
last parcel
It might work perfekt but try it with allt and it wont work as Great
swift goblet
Of you have something with 1 million verts with lods correctly made, it will work.
It's an unnecessary level of detail, and will waste a lot of memory but it will work.
woven swallow
swift goblet
I did tests with cars UpTo 400k verts (with lods of course) and worked perfect
Now try spawning a bunch of those 400k models near you and enjoy the frame drops
Like a waterfall
I might be wrong haha
swift goblet
woven swallow
Now try spawning a bunch of those 400k models near you and enjoy the frame drops
That's the thing, thanks to lod it will not crash
You can make the lod to only appear if your camera is literally crashing on the model
 opal moat
I saw that bi is supposed to have documentation somewhere as a guide to all the modding in enfusion. Does anyone know where that is?
swift goblet
So all of the other 400k models are simply not rendering
woven swallow
Level of detail. In arma it goes a bit heyond just that though. You will have a few lods i.e. 1.000, 2.000, 5.000 and 10.000. Those basically scale your object in distance. I.e. the lower the number, the closer you are to the object, hence the more detailed it should be. The further away you get the more detail falls off. It will have a smooth transition if done right.
Found that on Reddit
swift goblet
You can set lod distance on arma reforger
You can make a lod appear only at 15cm from the camera, at 50cm other, and at a meter other
sly bridge
in arma3 you cannot set distance, it is auto generated
swift goblet
It's unnecessary do that, but you can
swift goblet
sly bridge
in arma3 you cannot set distance, it is auto generated
Correctly
opal moat
Will it do that automatically or do you need to make separate models for each distance?
woven swallow
@sly bridge could you confirm that ? You can use a 400k models and it will work great as long as you do the LOD's right.
swift goblet
opal moat
Will it do that automatically or do you need to make separate models for each di...
You make different models and it sets the distance automatically as I understand of how it worked on arma 3
woven swallow
So the LODs do ? Decimate your model ? 😂
swift goblet
Lods are models that are rendered based on distance
woven swallow
Then ? That's what I've been saying this whole time.
swift goblet
woven swallow
So the LODs do ? Decimate your model ? 😂
It's not decimate becouse you can make it look like a bike at 1 meter and as a car at 100 meters and as a plane at 500m (you are very troll if you do that)
woven swallow
Let's ignore the LODs for now. I understand what LODs do. However a model that is 400,000 poly counts can't be right
swift goblet
Also as I said, too much polys it's unnecessary, no one will notice it and just wastes memory and drive space
swift goblet
woven swallow
Let's ignore the LODs for now. I understand what LODs do. However a model that i...
That you can do something doesn't means you should do that
sly bridge
* AK74 - 16k verts / 18k tris | magazine - 2.8k verts / 3.7k tris
* m21 - 16.5k verts / 19.7k tris | magazine - 1.6k verts / 2.1k tris
* m16 (no handguard) - 12.8k verts / 14.4k tris | magazine - 2.2k verts / 2.9k tris
* SVD - 17.2k verts / 19k tris | magazine - 3.4k / 4.8k tris```So basically what you're telling me is that I can upload a 400,000 poly model and reduce the quality with LODs so it runs better ?
sly bridge
@woven swallowwhy would i confirm that
400k whatever is not a game asset
you need to learn to do game assets
woven swallow
So no one can give me an estimate limit on poly count for enfusion engine on models
swift goblet
That's becouse it varies person per person, and how you want to use it


 sly bridge
there is no asset limit, the limits is the DX12 limit, which afaik is 2^32 normal vertices
swift goblet
400k it's a monstrosity no one will notice, it's a waste if time working on that amount of verts, and just increases your mod size and memory consumption for nothing
sly bridge
woven swallow
I need to learn ?
ahh yeah....you do
sly bridge
back on the question at hand - always use vanilla as a sort of ball park number for assets
cheers
swift goblet
Having a 400k verts it's like having a Lamborghini to go to the countryside on a grass road.
No one will see you going on that Lambo. It will need repairs constantly becouse its not made for grass road. So it will consume a lot of money. While using a 4x4 truck would be cheaper and better for that work.
You can go to countryside with a Lambo of course, it's not recommended, and a 4x4 truck is better for that.
I hope this analogy helps (I'm not too good with analogies)
woven swallow
I'm done here. My question wasn't answered. I guess I'll have to investigate sample models. And this guy is telling me to learn when I'm a 3D modeler for years.
Thanks though. Have a great day.
Here's one my models. https://sketchfab.com/3d-models/camping-fuel-can-96804089d54649239cc48b3903180634
I need to learn 😂

Camping Fuel Can - 3D model by Enri.Henz
swift goblet
It's not about know how to model
It's also being able to run on real time becouse its a game
If you put a Pixar model on arma reforger without lods, it will probably crash players pcs
And dont waste resources
swift goblet
woven swallow
Here's one my models. https://sketchfab.com/3d-models/camping-fuel-can-96804089d...
Nice model btw looks great
sly bridge
woven swallow
I'm done here. My question wasn't answered. I guess I'll have to investigate sam...
- i answered your question - the limit is 2^32
- i told you to learn to model for games, not in general
- here’s a few cans i did, under 2k each - https://twitter.com/rhspufu/status/1288593677737222145?s=21&t=mXy4TNBCepdf9G7jUP0hUg

 swift goblet
sly bridge
1. i answered your question - the limit is 2^32
2. i told you to learn to model ...
swift goblet
sly bridge
1. i answered your question - the limit is 2^32
2. i told you to learn to model ...
Nice cans too
woven swallow
sly bridge
1. i answered your question - the limit is 2^32
2. i told you to learn to model ...
Then I apologize for misunderstanding haha no big deal brother. Once I get home I'll get back to it. I'll check out your cans too. Thank you guys.
delicate condor
@woven swallow I've given you rough 40k tris as max for your cart many times now.
swift goblet
Here's a bunch of questions that helps to do at the moment you do each model for a game:
Will it run correctly on low tier pcs?
People will see this level of detail on the asset if I put an extra work to have more verts? Does it worth?
Does it worth to increase disk and memory usage for having a better model?
How I will set the lods?
How performant is the model?
These questions helps a lot understand why high poly models are bad as game assets.
opal moat
Anyone attempted rifle grenades yet? I’m thinking that would just be tied to the grenade launcher mechanics just with different animations.
swift goblet
Rifle grenades? What's that? Im not a English native, you mean something like a m79 grenade launcher?
 mental onyx
swift goblet
Rifle grenades? What's that? Im not a English native, you mean something like a ...
mental onyx
swift goblet
Rifle grenades? What's that? Im not a English native, you mean something like a ...
 swift goblet
Oh I see
 willow sage
Nice conversation you had here guys.
 dense plover
L85A2 and up had UGLs
 patent flower
I’m enfusion can we hide sections of a model like we could in a3
For example a helmet with scrim added
Can we set it up for both variants using the same model
 white plover
is there something on the wiki about changeing hand anims./ location of the hands
 unique current
how do i get a helmet i've created to stick to the character's head? i don't see a clothing/helmet tutorial on the wiki
 plain citrus
How can i know what to add here ?

 wanton vigil
woven swallow
So no one can give me an estimate limit on poly count for enfusion engine on mod...
wanton vigil
woven swallow
So no one can give me an estimate limit on poly count for enfusion engine on mod...
Actually I have seen millions of triangles in one model and it worked ...but expect pretty bad performance then.
Pure Everon environment scene usually ranges very roughly from around 500k to 2 or3 mil triangles I believe + ground clutter + compositions + soldiers and cars.
As environment artist I right now do not remember the numbers exactly ...but soldiers and cars are done in around 50k I think...BTR might be around 100k maybe.. You should be able to check it in workbench yourself. Anyway LODs are essential so the game run smooth.


 tacit eagle
plain citrus
because i have a little problem x)
tacit eagle
plain citrus
because i have a little problem x)
the issue i had when doing that was, did you reimport with skinning or what ever its called
woven swallow
swift goblet
Here's a bunch of questions that helps to do at the moment you do each model for...
The mistakes I keep seeing in models specially in vehicles is that wheels and steering wheels are not round enough. If you make a car and the wheels don't look good then the rest of the model doesn't look good. That's something I learn from pros.
plain citrus
tacit eagle
the issue i had when doing that was, did you reimport with skinning or what ever...
i have reimport with skinning but i have 0 + 163 bones
 tacit eagle
plain citrus
i have reimport with skinning but i have 0 + 163 bones
tacit eagle
plain citrus
i have reimport with skinning but i have 0 + 163 bones
ok you added the vertex group, but did you add the weight to it?
woven swallow
wanton vigil
Actually I have seen millions of triangles in one model and it worked ...but exp...
We were talking about individual models.
tacit eagle
wanton vigil
Actually I have seen millions of triangles in one model and it worked ...but exp...
didnt that one FF14 model have 1.9mil tri's?
plain citrus
tacit eagle
ok you added the vertex group, but did you add the weight to it?
what do you means about weight ? I'm lost x)
 tacit eagle
plain citrus
Exactly here
tacit eagle
plain citrus
Exactly here
in here, you see how it says head?
with the helmet selected, go into edit mode, select everything with the A key then click assign

 tacit eagle
 plain citrus
better like that ?
 plain citrus
tacit eagle
in this menu
plain citrus
tacit eagle
in this menu
 wanton vigil
woven swallow
We were talking about individual models.
wanton vigil
woven swallow
We were talking about individual models.
Me too when I mention the soldiers and vehicles. Sorry for misunderstanding ...with the environment I just wanted to give you some overall image about the scene complexity.
tacit eagle
plain citrus
yes, now select your helmet mesh in the view port, and go to edit mode
opal moat
Where do I get the character models for building off of for Blender?
 merry python
any way that you can record the process when importing it into game?
 prisma delta
Hey guys, I noticed that hard bevels are rendered as soft corners. In the video above you can see the seat corner is only 3 rectangles but it's lit as if it's a soft corner. Is this something to do with engine lighting like Blender's "shade smooth" or is this done through texture work? Like I said before, hopefully it's not a stupid question but I'm not used to modeling for games.
 solemn goblet
The highpoly probably had rounded corners and is baked into it to give it this appearance.
tacit eagle
prisma delta
Hey guys, I noticed that hard bevels are rendered as soft corners. In the video ...
iirc blenders "shade smooth" just uses phong shading which is a common thing in modern engines
also high to low poly normal map bakes as stranger said
i think i misunderstood your question lmao and stranger was closer to the answer you want
prisma delta
Ah okay, so it's modeled high poly, baked, and then the poly count is optimized and the lighting is applied over it, right?
tacit eagle
prisma delta
Ah okay, so it's modeled high poly, baked, and then the poly count is optimized ...
basically when you bake high to low poly you are creating a normal map which basically uses the light to "trick" the end user into seeing detail that isnt there
 fathom bolt
for information :
Weapons :
AK = 15 926 faces (triangulates)
M24 = 19 715 faces (triangulates)
M16 = 14 325 faces (triangulates without handguard)
SVD = 19 081 faces (triangulates)
Vehicles :
BTR body = 165 016 faces (triangulates)
UAZ469 = 78 121 faces (triangulates)
solemn goblet
prisma delta
Ah okay, so it's modeled high poly, baked, and then the poly count is optimized ...
Yep, something like match by mesh name in substance. The normal map is information used by the engine. Light (shadow) might be applied over it like a baked AO but newer proprietary engines usually have some form of SSAO instead (like Unreal). Usually poly count is optimized first before baking a normal map.
Here's an example of the rounded edge on a sharp edge effect.
 prisma delta
Alright sweet, thanks for your help guys. That's a new workflow to me so we'll see how it goes lol
solemn goblet
Yep. Be sure to bake individually to avoid intersectional errors.
plain citrus
It's possible to automatically set correctly Vertex Groups? For a Plate Carrier here


 vocal belfry
How ya'll get so good at blender?
 eager hill
vocal belfry
How ya'll get so good at blender?
eager hill
vocal belfry
How ya'll get so good at blender?
Practice
I'm not good at blender, but that's basically the only way to create good models. Lots of practice
plain citrus
I have try automatic weights in blender for plate carrier but ...
Someone have solution ?
 tacit eagle
vocal belfry
How ya'll get so good at blender?
tacit eagle
vocal belfry
How ya'll get so good at blender?
same, i have 700 hours in blender and my one and only model is absolute shit
vocal belfry
eager hill
I'm not good at blender, but that's basically the only way to create good models...
So... Like clay and marble. Each art-form takes it's own skillset that you develop overtime
solemn goblet
plain citrus
I have try automatic weights in blender for plate carrier but ...
Someone have ...
It looks like you have splits in your mesh. The automatic weights did an okay job, you'll have to clean them manually though. I good strategy I learned is to duplicate the character mesh and reference the various vertex group 'heatmaps' on it.
If you export with any edge split modifiers these splits can happen. You can select the entire mesh by going into edit mode > a > and then hitting m > merge by distance
tacit eagle
solemn goblet
It looks like you have splits in your mesh. The automatic weights did an okay j...
A split mesh like that could be fixed by merging by distance
solemn goblet
Haha yep. Was saying that as you were saying it. Cheers.
It's totally fine to use edge splits by the way. They're an easy way to keep normal vectors completely planar.
 solemn goblet
Join sub alpha and stream your blender, I'll be in soon
plain citrus
Ok thx !
 fast notch
why is it taking so long to import?
 rain wadi
vocal belfry
How ya'll get so good at blender?
rain wadi
vocal belfry
How ya'll get so good at blender?
Practice. Getting good at something takes time and determination. Some people get there faster than others but everyone has to practice to get to a certain level.
 daring condor
fast notch
why is it taking so long to import?
daring condor
fast notch
why is it taking so long to import?
because its way to fucking large
800k tris for that is absolutely awful
fast notch
daring condor
800k tris for that is absolutely awful
understood thanks. I'm new, just experimenting 😄
tacit eagle
idk thought this would be a cool thing to fit in here
 tacit eagle
daring condor
800k tris for that is absolutely awful
tacit eagle
daring condor
800k tris for that is absolutely awful
lets more then double that
https://twitter.com/DeathChaos25/status/1505256711791255554?s=20&t=mBAQY7pt0KGdxYdqJATAXw

@UltimaShadowX There's a boss model in SoP that's 90mb (the geometry alone, no textures or anything) and it has like 1.8 million tris and im just like, who let this go through?
Likes
675
Retweets
150

 Twitter
·
tacit eagle
daring condor
what the actual fuck
vocal belfry
tacit eagle
lets more then double that
https://twitter.com/DeathChaos25/status/1505256711791...
Twitter
·
tacit eagle
daring condor
what the actual fuck
vocal belfry
tacit eagle
lets more then double that
https://twitter.com/DeathChaos25/status/1505256711791...
This was an attempt to see if the process worked... It did not.
 surreal ore
@mint hollow Not to target you specifically, you're just the BI person that I've seen the most. Could you possibly find out if we could get the pose library for the example rigify character or a full blend file? So we don't actually have to manually Tpose the character.
 ornate bane
Think I'm in the right place here but is porting a3 assets to Reforger Kosher?
white plover
if you have the source/ debinarised. and its not your asset yh its kosher
ornate bane
Forgive me if I am getting the nomenclature wrong... source/debinarised meaning a .fbx file?
Basically I just want to take some of the vanilla a3 assets (namely magazines) and bring them over to reforger.
Not sure where I'd find the source files though.
daring condor
ornate bane
Basically I just want to take some of the vanilla a3 assets (namely magazines) a...
nope
gotta wait for the a3dpl
opal moat
Still cant find the character models for making clothing in reforger please.
solemn goblet
opal moat
Still cant find the character models for making clothing in reforger please.
https://github.com/BohemiaInteractive/Arma-Reforger-Samples I found this, probably not great help but it's a good resource.
opal moat
Already looked at that but thank you. Not sure how I am supposed to get the proportions right for equipment if I cant build it around a character model in blender
I must be missing something
solemn goblet
I don't think the underwear man is in the samples but maybe there is a proprietary > fbx method out there ¯_(ツ)_/¯
opal moat
On my first attempt on making weapons someone told me to keep pieces like the stock, magwell, etc. separate objects. Is this good? I am mostly concerned about the magwell clipping into the stock, will that cause me problems when I port it to the engine?

 keen wigeon
if you can't see it then i don't think so
once you import it into the game, it will be just one big object right?
so the only thing you need to worry about is Z fighting in the case of visible overlapping geometry
solemn goblet
Yeah, I think he's worried about z fighting. What you see in Blender will be what you get in the engine. Obviously there are ways to interpret what I'm saying here to be not true but I'm mostly just talking about mesh display.
opal moat
So what I as long as there arent any problems with shading in blender it should be fine?
keen wigeon
yes
keen wigeon
since you're new to 3D modelling, make sure to make your mesh out of quads and not Triangles, and especially not N-gons lol
solemn goblet
Yep, what it looks like in blender will be how it looks in-engine. This includes normal vectors in crazy tangents and shade smooth/shade flat
keen wigeon
Ngons are a no-no, triangles aren't as bad, but it's good practice to try and not use them
daring condor
keen wigeon
since you're new to 3D modelling, make sure to make your mesh out of quads and n...
Good rule of thumb, not all that important (in hard surface)
But generally
Try to stick to clean topology (mostly quads)
And honestly
Don't start with anything you want to put in game
Your first couple of models will look like shit
Such is the curse of being a beginner
keen wigeon
daring condor
Don't start with anything you want to put in game
idk, i think this makes for some easy motivation, even if in the end it looks like shit and you fail miserably to import it
i find practice for the sake of practice hard
daring condor
Eh
solemn goblet
The best tutorial in my opinion isn't the donut tutorial but the apple one IMO. I'll try and find it
keen wigeon
yeah lol, i think my first model after the Donut was an AR-18
solemn goblet
https://www.youtube.com/watch?v=j14b25SnYRY&list=PL3UWN2F2M2C8-zUjbFlbgtWPQa0NXBsp0 This is a great tutorial to get you familiar with Blender
daring condor
Mine was an rpg-2 lol
keen wigeon
abandoned it and when i came back to it some months later i cringed at the topology lol
keen wigeon
keen wigeon
abandoned it and when i came back to it some months later i cringed at the topol...
the receiver surfaces were just one giant Ngon lol
daring condor
First actual model was an ak-12
Took months
Way too high poly
And trash topo
But regarding ngons
They can help you
opal moat
I did make a donut already, definitely need more practice
solemn goblet
I made a knife back in 2008 before blender could even calculate normal vectors for itself and I thought the poorly generated normals looked like a metallic shine
keen wigeon
my second decent project was an old school walkman, was very happy with the results
daring condor
Or stop the triangles on bevels
solemn goblet
Tell me you wouldn't hire me come on lets hear it
 solemn goblet
Does enfusion use metal/rough?
daring condor
I have not done anything I'm really proud with
Current WIP maybe
But egh
I'm soo slow

First finished project
Disregard the giant tris
Those are me fucking up proxies
I forgot to bevel bake on that one
solemn goblet
This is the most recent thing I have made, can you guess what universe it's supposed to be
 solemn goblet
That's ArmA 3 right?
daring condor
solemn goblet
This is the most recent thing I have made, can you guess what universe it's supp...
One that may get you in trouble here
daring condor
solemn goblet
That's ArmA 3 right?
Mine? Yeah
solemn goblet
Ah okay. Are tracks a thing in Enfusion yet? What makes my tank a troublesome thing?
opal moat
Disney copyright striked a star wars mod a few years ago
By striked i mean they sent a cease and desist
daring condor
Some people ripped tons of Star wars Vidya assets and caused an incident with Disney legal
keen wigeon
yeah, star wars stuff is basically Banned from official channels like this discord iirc.
for legal reasons
solemn goblet
Well, the image isn't specifically for Enfusion so much as it is showing my ability to make vehicles I guess haha
opal moat
Makes me nervous for the modders that are actually building their assets from the ground up based on that IP.
solemn goblet
I'd join a team asap if they were making Warhammer 40k stuff but I'm pretty sure that IP is even more dangerous lmao
opal moat
And as far as I know the SW mods that are active in a3 havent had any problems because they arent monitized and didnt steal their assets from battlefront.
I think they were only upset because they ripped assets.
solemn goblet
That makes sense.
I think the 40k mods use personal artwork at least and it's not really detracting from 40k miniature sales
 solemn goblet
It follows the form, what more do you need
They should probably follow a form more like this but I mean you have to ask yourself if best business practices really matter. Get the shapes right. Figure out the vertex groups and rigging. That stuff is way more important to know from a proprietary standpoint
 opal moat
Good to know, so from your illustration it looks like my main priority should be to make squares as opposed to rectangles right?
solemn goblet
If you're just poly modeling it, sure. It doesn't matter so much. Understanding the enfusion engine will take way less time than becoming a hard surface god and in my opinion it's more important.
opal moat
Got it. My goal isn’t necessarily to port this to enfusion, although that would be nice, it’s just to get practice on more complex models.
solemn goblet
Oh well that's different then
I'd suggest looking on ArtStation or Sketchfab at random guns and checking their wireframes.
Straight up copy people. Obviously don't sell it or share it online as if you made it yourself, but understanding how people make things can help you make things in the same way.
opal moat
I have only ever completed 2 other things in blender. My very first project was a few years ago and it was a gun similar to this one. Everything was wrong but I finished it. Just now getting back into blender after years and made a donut, that is the first time I have ever paid attention to topology and now here I am.
keen wigeon
What's the design of your gun BTW
Can you show the concept image you made?
Assuming that's what's in the background ofc.
daring condor
Modelling is more important imo
keen wigeon
I'm just curious on the design itself
daring condor
It's actually a transferable skill
Better to learn the stuff that's applicable more generally first
At least enfusion has less arcane workflows than real virtuality
daring condor
solemn goblet
They should probably follow a form more like this but I mean you have to ask you...
Also that cylinder is way to dense
32 sides is overkill most of the time
keen wigeon
Oof, yeah, I tried learning RV and just gave up.
daring condor
I generally stick to 18 or 24 sides for most circles
keen wigeon
16 has worked well for me
daring condor
I don't like going powers of two
keen wigeon
But that's personal preference at that point
daring condor
In my subjective experience ngons with odd number of sides pass easier for circles
And 9 sides is what if consider the minimum for something to look decently circular
keen wigeon
I usually just use grid fill to fill circles
daring condor
So it's good for lodding
I just fill it with an ngon
And then triangulate later
Ngons are your friends
If you know how to use them
And certain ngons really don't hurt you
Grid fill leads to excess tris
And blender allows you to get bevels with even the worst topo


The cone and cube aren't even Boolean unioned, they are just intersecting
opal moat
keen wigeon
What's the design of your gun BTW
This is a rough early version of it. I plan on refining the design and making it flow better during the modeling process.

 keen wigeon
Interesting design process
opal moat
Remember ‘Pimp my Gun?’
opal moat
It was a flash game where you could take parts of guns and smash them together.
opal moat
keen wigeon
What's the caliber btw?
6.68x44mm
This is a worldbuilding project of mine.
keen wigeon
Little short round then, makes sense why the magazine is skinny like that.
opal moat
Also telescoped.
keen wigeon
I'm guessing the ejection port on the right is just for the reference image?
opal moat
You can see the round below the magazine above 5.56x45 and 7.62 nato
keen wigeon
Left*
opal moat
It’s meant to be ambidextrous
There are just things in that program you can’t communicate very well. For example the stock is weird on that picture but makes a lot more sense when you see the 3d model.
(When it’s done lol)
So I’m mainly using that image as a reference and making changes on the fly to refine the design.
keen wigeon
I do think the Picatinny handguard fits a lot better than the G-36 style one
Actually, I could see it looking cool with a SCAR style charging handle near the front.
opal moat
I’ve considered doing that but I think I’m going to go with a G3 style charging handle.
keen wigeon
Yeah, I actually thought of that before the SCAR idea, but the Scar charging handle just seemed to fit a bit better
opal moat
Yeah it’s the rails on front.
keen wigeon
Having that slot to lock the bolt could impact the rails on top tho
opal moat
I just decided to go with the G3 style because the people using these rifles are typically wearing heavy gloves so an oversized charging handle is needed.
opal moat
keen wigeon
Having that slot to lock the bolt could impact the rails on top tho
Yeah that’s one of the things I’m having to work around.
keen wigeon
Nice, excited to see what it turns into.
opal moat
I’ll post updates 🙂
woven swallow
daring condor
this is interesting
wanton vigil
Do this tutorials and you will know how to do weapons or any hard surface in Blender. Also the flashbang and bullet tutorials are awesome...yet a bit more basic.
https://www.artstation.com/artwork/NxAoLz
https://www.artstation.com/artwork/8enBow
https://www.artstation.com/artwork/eae8Xw

ArtStation
Hello everyone! 👋🙂 I am happy to finally hit the release button on the all new Revolver Tutorial featuring Blender, Marmoset Toolbag 4 and Substance Painter for baking, texturing and portfolio ready renders! 💪
The tutorial is available on the following marketplaces where you will also find all additional information. (Also look out for the 80l...

ArtStation
Hi everyone! Today I am happy to share with you the latest free tutorial featuring Blender modeling and unwrapping as well as Marmoset Toolbag 4 for baking and texturing! All relevant information found at the description of each video. Hope you like it! 🙂 👌
A lot of effort goes into the creation of these tutorials nonmatter if they are paid or ...

ArtStation
Happy new year everyone!
Today I am happy to share with you what marks the first tutorial in a series of Blender tutorials! 🙂
A 2 hour and step by step free Blender beginners course. All the way from basic navigation, setting up shortcuts, installing and mastering free and useful plugins, modifiers, tools over to modelling a 20mm Vulcan cannon...
delicate condor
@shrewd kelp remove the posts and don't use ripped assets.
 shrewd kelp
So we cant use those assets?
delicate condor
Nope
shrewd kelp
So its not allowed on workshop?
delicate condor
Nope
shrewd kelp
lame
delicate condor
We do not condone stealing. Nothing lame about that.
shrewd kelp
I dont see the problem cause im not making money off of it at all. Also the game is almost dead on pc so the models aren't being used anymore. I dont see the difference in making the model myself or pulling it from the game its the same thing. Guess I wasted 30 hours of my time porting this. I feel like there is no difference in making it and porting it its both intellectual ip. You would think both would not be allowed.
delicate condor
Well for star wars you are not allowed to make it either. Not without permission from Disney to use star wars IP.
Game being old has nothing to do with anything either.
shrewd kelp
Such a shame. Disney has done a bad job at making star wars games so the fans want to make them for fun but cant legally which is a shame. The star wars mods on arma 3 look fun but it ran so bad that I didn't give it a shot. With this I was hoping to. Looks like I wont be able to either.
delicate condor
Nope
 split rampart
Just make custom assets that look similar and call it "Lazor Warz"
 eager topaz
https://www.youtube.com/watch?v=1Z5jYfh6mIw Finally, seeing this behemoth in game is surreal 🙂

My hard work and progress got a phenomenal upgrade with Enfusion!
sly bridge
it isn’t the same thing whatsoever ripping a model and making a model. The first is not yours, it is theft
eager topaz
I agree, if the license doesn't allow it, just make ya own 😛
 bleak depot
hey, i doing something wrong? i make a door and add a Hierarchy Componet. But my PIVOT ID is Empty... in model i have a scene_Root -> Door_axis (Locator/Bone). i check the vanilla doors. but gimme no information to fix that. any idea? I use maya
https://prnt.sc/XDmxrmzW80TW https://prnt.sc/Q0lXr2ldN_gE

 tacit eagle
Is anyone working on placeable explosives (aka satchel)
bleak depot
bleak depot
hey, i doing something wrong? i make a door and add a Hierarchy Componet. But my...
hierarchy Component - Pivot ID (Object properties) worked only with parent models in hierarchy of the world editor or prefab. first hierarchy objekt need locator or bones. https://prnt.sc/RTQPZi__IDua https://prnt.sc/FMbr0oMswofV

 sly bridge
bleak depot
hierarchy Component - Pivot ID (Object properties) worked only with parent model...
sly bridge
bleak depot
hierarchy Component - Pivot ID (Object properties) worked only with parent model...
would be nais when you found the solution to also post about it, if possible, so other people can use the search function on this discord to find out if they have a similar issue
bleak depot
@sly bridge rdy
sly bridge
@bleak depotthanks man
tacit eagle
@tacit eagle did the balaclava ever get completed?
Is it in the workshop?
Do you have plans to release it
willow sage
Hey guys, memory points have to be attached to root or something?

 zenith quartz
 pastel bluff
What tangent basis is used by the reforger?
pastel bluff
What tangent basis is used by the reforger?
Mikk worked for me.
split rampart
So im guessing recreations of weapons from known IP's isn't allowed?
 dim gate
split rampart
So im guessing recreations of weapons from known IP's isn't allowed?
dim gate
split rampart
So im guessing recreations of weapons from known IP's isn't allowed?
you meant fictional weapons used in other movies/games ?
split rampart
I mean I guess it doesn't matter if I just retextured it, but once there's a melee framework mod I might put dis model in game

 dim gate
technically yes, you can
split rampart
really proud of dat one 
delicate condor
Where's the model from?
If its from some game, then that's a nono unless you obtain permission to use the model
dim gate
i think
recreations of weapons from known IP
meant that he made the model
but he want to know if the model he made can have the same tex or need a different one
delicate condor
Let's just let them answer
split rampart
I mean I'd just retexture it because I have no love of the IP anyway lol
my model

delicate condor
So whose IP would you be breaching?
split rampart
definetly* from softwares
dim gate
if it's weapon from a movie, go with original tex, it's fine
but from an other game, i'll go with a retex, people will think you probably ripped it and report you
willow sage
Is there reason why it keeps happening ?

 split rampart
I mean people thinking that my model is ripped from someone who's a better modeller than me is flattering
dim gate
willow sage
Is there reason why it keeps happening ?
inverted normals
delicate condor
willow sage
Is there reason why it keeps happening ?
Show wireframe too
dim gate
select all > normals > recalculate outside
willow sage
 delicate condor
Triangulate it manually
delicate condor
The blue shows all faces are facing the camera
dim gate
oh my bad, i forgot about that feature
delicate condor
Stuff could happen on export though
willow sage
Ok, reimporting lets see if something else happens
delicate condor
Make sure there isn't inverted double face there
 tacit eagle
How much enfusion engine's maximum polygon limits?
delicate condor
You don't need to worry about maximum. Make optimized models and youre good.
solemn goblet
The trick is to import straight from zbrush
daring condor
With Tri count you always want as little as possible while maintaining the level of detail you want
daring condor
solemn goblet
The trick is to import straight from zbrush
Don't forget to subd it ones or twice too
solemn goblet
For optimal geometry use blenders decimate modifier. I'm sure it'll pump out an amazing wireframe
daring condor
Actually
I use that to optimise my models
But I set it to planar at an angle of like
0.2-1°
solemn goblet
On a serious note, it's interesting to see so many folks need help with 3D. I think it means Enfusion is so friendly for that.
daring condor
It's like a limited dissolve but Mon destructive
solemn goblet
Planar decimation, in my experience, gives you geometry similar to shaving a stick with a knife. I'm mostly used to 2.9 atm though
Best optimaztion tool is bought its uhhhhhhhhhhhhh
Retopoflo 3
daring condor
Yeah I ain't using that on hard surface
daring condor
solemn goblet
Planar decimation, in my experience, gives you geometry similar to shaving a sti...
Not that bad imo
I just make mostly angular stuff anyways
Since I do vics
I don't do full hp
Just a mid poly I subd
solemn goblet
subdivision and edge% workflow kinda deal?
daring condor
Dunno I'm not that advanced but I mostly use planar dissolve on pieces like this


Partially for viewport performance

I don't even need the track anyways lol
I only use it to bake it into an alpha
solemn goblet
This thing here
 solemn goblet
This is 0
 solemn goblet
I should try using bevels. I mostly use creases
delicate condor
Well we don't yet know how tracked vehicles will be implemented
daring condor
I'm buying mesh mashine today
daring condor
delicate condor
Well we don't yet know how tracked vehicles will be implemented
I sure as fuck hope they stick to a3 style
Even war Thunder uses it
solemn goblet
Does enfusion use animated textures
delicate condor
😝
daring condor
Tracks are in motion anyways
solemn goblet
There is a method that works well, used by claptrap studios I will find
delicate condor
But we will see what the solution is eventually
daring condor
delicate condor
Mesh track can be made work just fine too though
Yes but it is a pain
I'm sticking to a3 for a while anyways
That way I don't have to do implementation
I just toss stuff at stagler xd
solemn goblet
Sorry clapfoot of siege camp studios haha
daring condor
But yeah my issue with mesh tracks is that it's still arma
You usually don't have one or two tracked vics
But more
solemn goblet
2D texture that just cycles.
 daring condor
solemn goblet
2D texture that just cycles.
daring condor
solemn goblet
2D texture that just cycles.
These can be improved by multiple layers of cycling textures
solemn goblet
Yep. You could do it that way. You could optimize them to all be the same UV space just separate tracks.
solemn goblet
This is how I'd do it, that way there's a side track motion thing going on. But on close inspection it does fall apart
 daring condor
Check out csa38 for a3
solemn goblet
Inside you notice the puppet strings
 daring condor
Imo, looks better than optimised mesh tracks
Check the t-62 wreck in reformer
The tracks look so bad
solemn goblet
He's getting a lot from the bakes here. But this method was always interesting to me and made it a point of attempting recreation. It's really smart actually.
daring condor
That's texture tracks, right?
solemn goblet
Yeah, it's just a plane that has been duplicated and inverted so there's a backface

 solemn goblet
Yeah that works. I think I see what you're saying. This is how I intend to do it for now until I see a working rig that bohemia uses
daring condor
That's how bi has always done it
solemn goblet
Well, there's another way but it's using the mall stair method
delicate condor
Texture tracks can look very nice yes. Mesh tracks through bone chains can perhaps have more dynamic damage modeling.
Either way. Everyone wants tracked vehicles
 solemn goblet
My worry about mesh tracks is that it might get to be a lot of kb for just animation
I would use individual bones per track, it could get kind of big haha.
daring condor
Hard to see, but I have some more planes inset into the mesh to fill out holes
daring condor
delicate condor
Texture tracks can look very nice yes. Mesh tracks through bone chains can perha...
I'd think giving us an option to have a wreck model for the track would be neat
Also, kinda disappointed tires aren't their own Modules
solemn goblet
It'd be a shape key or in the action editor for wrecked tracks I would bet
 solemn goblet
dude that is an amazing render good work 😉
I maybe will experiment with mesh tracks in enfusion and report my findings here
If it works really well I will make a tutorial on the wiki for it. Maybe a video
daring condor
Tbh, I should 3d scan this and turn it into a trim sheet 😆
dense plover
LALA

 bitter quartz
How can i change the reticle of the existing optic ARTII?
 tidal latch
bitter quartz
How can i change the reticle of the existing optic ARTII?
tidal latch
bitter quartz
How can i change the reticle of the existing optic ARTII?
Change hdr texture
zenith quartz
Today is the day I shall slave away more on this AK-12 wooooo
Is there any way to proxy in BI bullet models into our magazines?
 wheat bay
zenith quartz
Is there any way to proxy in BI bullet models into our magazines?
wheat bay
zenith quartz
Is there any way to proxy in BI bullet models into our magazines?
I too would like to know this. I'm working on a g36 with a transparent mag and its weird without bullets lol.
zenith quartz
Yeah I don't wanna use my own bullets because this way is less work and I imagine better performance
Altho might have to to make polymer rounds :(
solemn goblet
I wonder if enfusion can reference bones with no groups or empties like source does, that's how I'd do the bullet thing
bitter quartz
bitter quartz
And is there a possibility to have like a Text Widget in the Reticle?
anyone knows if this is possible?
 last hill
Hoping someone can help, I am trying to make some LOD's for my imported pack that I've been working on, however running into issues with the vert counts being less than half on 3ds max compared to what the enfusion workbench is saying they are?
It's doing it for every model I have exported, I have no idea what I am doing wrong, heading to bed now but really hope someone knows what is going on, tried multiple export settings on 3ds and import on enfusion.
 solemn goblet
Is it possible you're exporting with some sort of edge split modifier which adds extra vertices?
delicate condor
Oh tru vert count, not tri count
solemn goblet
Also possible there are ngons which, yeah would add extra verts but if you're using 3DS Max I would imagine you understand that already 😛
opal moat
How do I make hard edges and faces after applying the subdivide modifier in blender?
sly bridge
last hill
Hoping someone can help, I am trying to make some LOD's for my imported pack tha...
send me a dm tmrw will try and help you sort it out
sly bridge
solemn goblet
Also possible there are ngons which, yeah would add extra verts but if you're us...
vertices number is the same ngons or not
solemn goblet
sly bridge
vertices number is the same ngons or not
Does enfusion not triangulate models automatically on import?
sly bridge
haven’t tested it, i always triangulate before export / bake
solemn goblet
In order to prove my point I made a cube with a shit load of random ngons and yep turns out I'm an idiot lmao no way to add vertices 
solemn goblet
Kinda reminds me of the Vindicare Exitus rifle lol.
What do you folks use for models in-engine? World Editor?
tacit eagle
Anyone have an issue when they update a model in a prefab it doesn't update straight away?
bleak depot
tacit eagle
Anyone have an issue when they update a model in a prefab it doesn't update stra...
the model in prefab updated automaticly. delete your .xob/fbx file and import again with the same name.
 bleak depot
First steps of door destruction
https://cdn.discordapp.com/attachments/247357056732889088/980182636758724678/test12.gif 🙂
 solemn goblet
Yep
daring condor
do share
solemn goblet
daring condor
nice
i like that duck foot pistol
good textures
although the grip looks awkward
too square
 daring condor
ah
unique current
this might be a common/dumb question but what is the unit conversion between blender units and enfusion units?
or i guess
how big is a unit in enfusion?
when i import models they are usually very large and i have to adjust scale manually, so i want to know enfusion unit size so i can adjust to that scale before import
solemn goblet
It looks about 1:1 to me. 1 blender unit is about 1 meter
tidal latch
take a look at sample helmet - this issue was fixed there in recent update. You need to add alpha material to opacity parameter and then check two parameters in material configuration
solemn goblet
Is there a version of this man somewhere I'm missing in the github? The current one has a long sleeve coat on (that I have). It'd be nicer to have this to make clothing and gear with. Thanks in advance.

^disregard, apparently the head and body are separate. I guess that makes sense but my monkey brain didn't want to piece it together.
 flint ivy
Hi everyone. Looking into learning making gear and what not as I've heard these tools are a lot more easier to work with.
At the moment I'm just trying to get the character sample fbx into Blender so I can try masking and sculpting to practice (I know sculpting isn't the best but I'm just experimenting.) But whenever I try to extract my mask, this happens.
Just wondering if anyone knows; do I need to 'simplify' or merge the imported character model? As it comes separated into hit locations, different lods, etc.
 solemn goblet
I'm figuring this out as well, hop into a VC and I'll talk to you, we can figure it out together
plain citrus
Is it possible to see the paint weights for the arma reforger assets ?
solemn goblet
plain citrus
Is it possible to see the paint weights for the arma reforger assets ?
Yep, I'm currently doing that now
Make sure you are in weight paint mode and you can see them visualized
 solemn goblet
The mode switch is here, top left

I can send you a file that is on the github and available to everyone
The heads are not currently weighted for some reason...
So I'm using this helmet lol
 solemn goblet
I have no idea how you'd get into that
Here's my reference weights now, it's a small file and just shows the weights
solemn goblet
Cheers, hope it helps
And if someone knows why the head reference weights aren't there I'd be keen to see a version where they are or how to fix it.
plain citrus
Yea helping a lot for transfert weight !
plain citrus
solemn goblet
Cheers, hope it helps
Loving your file its perfect for transfert weight !
 solemn goblet
Nice man, good work
vocal belfry
plain citrus
Loving your file its perfect for transfert weight !
Looks good!
opal moat
solemn goblet
Make sure you are in weight paint mode and you can see them visualized
Where did you find that sample model btw?
solemn goblet
opal moat
Much appreciated.
 hidden yarrow
solemn goblet
Here's my reference weights now, it's a small file and just shows the weights
hidden yarrow
solemn goblet
Here's my reference weights now, it's a small file and just shows the weights
.
solemn goblet
?
hidden yarrow
so i can find it later
solemn goblet
Oh haha
last hill
sly bridge
send me a dm tmrw will try and help you sort it out
Thanks for the help, heading to work right now, if the missus is OK with me going on the PC this evening I will give triangulation another crack and see if that does anything. It may have not worked properly, another thing to check.
Thanks for the responses folks, trying to optimise everything I am working on, my creation or not
 calm rune
This is an extremely weird body shape lmao
 woven swallow
Question. Does Enfusion supports double sided texture on planes ?
solemn goblet
Since I fell through the floor and saw sky, I'm guessing no.
merry python

any ideas what happening there? prefab is already set up
I can't equip the headgear
solemn goblet
Is it at his feet or anything?
 daring blade
Alright I've named the object UTX_stairs (Will change them to convex) but they're not showing up as a collider I'm so confused.
Ahh I needed to switch the name to UTM
Dunno why I wrote UTX
Okay it's not importing all colliders in the scene, so I'm just gonna go ahead and export them one by one.
merry python
solemn goblet
Is it at his feet or anything?
not really, it don't equip actually
solemn goblet
Just shooting ideas I guess. If it isn't world space issue I have no idea
merry python
I'm redoing the whole process to see if I missed something
 desert mist
merry python
I'm redoing the whole process to see if I missed something
desert mist
merry python
I'm redoing the whole process to see if I missed something
This I've found is a bug in the game drop it on the ground and pick it up using context menu.
Or once it in the slot just drag it to your characters head.
merry python
that worked, thanks!
desert mist
No problem!
solemn goblet
The collective mind of this discord channel astounds me daily
 dawn scaffold
how do you generate the .et in prefabs ?
tacit eagle
It's possible to import arma 3 Cup core assets to enfusion?
 knotty cedar
daring blade
Okay it's not importing all colliders in the scene, so I'm just gonna go ahead a...
knotty cedar
daring blade
Okay it's not importing all colliders in the scene, so I'm just gonna go ahead a...
If it's only importing one collider make sure your untick Merge Trimeshes in import settings
 urban valve
any good tutorial on how to import arma 3 uniforms into the reforger?
rain wadi
tacit eagle
It's possible to import arma 3 Cup core assets to enfusion?
Ask CUP
daring blade
knotty cedar
If it's only importing one collider make sure your untick Merge Trimeshes in imp...
Okay ill check that out! As per now I'm trying to figure out why the editor is freezing as I import the mesh. Anyone have any idea?
opal moat
wanton vigil
Do this tutorials and you will know how to do weapons or any hard surface in Ble...
Followed one of those tutorials
 opal moat
solemn goblet
<https://github.com/BohemiaInteractive/Arma-Reforger-Samples>
opal moat
solemn goblet
<https://github.com/BohemiaInteractive/Arma-Reforger-Samples>
Where did you extract those zip files to use them in blender?
fathom bolt
daring blade
Okay ill check that out! As per now I'm trying to figure out why the editor is f...
What is the number of faces ?
last hill
Fingers crossed pufu can assist, still can't figure out how Enfusion is saying there are double the number of verts present in the model itself. Wonder if it is related to the UV mapping coords, do I need to remap my UV's for each lod's vert positions?
I am new to most of this stuff. Will keep working on it and see what happens
bleak depot
anyone knows how can i change the GenericEntity to SCR_DestructibleBuildingEntity?
My Model:
https://prnt.sc/Nxpdfqamkp2r
Vanilla Model:
https://prnt.sc/J8LW7j7YmOaZ

 wanton vigil
last hill
Hoping someone can help, I am trying to make some LOD's for my imported pack tha...
wanton vigil
last hill
Hoping someone can help, I am trying to make some LOD's for my imported pack tha...
It should be possible to turn on also triangle count info in 3dsMax...if I remember it correctly.
knotty cedar
last hill
Fingers crossed pufu can assist, still can't figure out how Enfusion is saying t...
Issues with models showing double vertices in game engine compared to 3d software is often related to hard edges/split vertex normals/smoothing groups etc (terms depend on what 3d software you use). When you use hard edge in 3D software it won't count it as two vertices but GPU handles hard edges by duplicating those vertices, so engine does count them double. So if you want to avoid the confusion just only look at Faces in Enfusion and try to make each subsequent LOD <50% faces of the last one. Indeed in 3dsmax it may be called Triangles (Enfusion refers to triangles as Faces cause it triangulates on import.)
sly bridge
wanton vigil
It should be possible to turn on also triangle count info in 3dsMax...if I remem...
yes that is indeed possible
sly bridge
knotty cedar
Issues with models showing double vertices in game engine compared to 3d softwar...
ahh, so enfusion does triangulate on import no matter of the the original mesh topology (all quads for instance). good to know.
knotty cedar
sly bridge
ahh, so enfusion does triangulate on import no matter of the the original mesh t...
Indeed so the fbx source file will retain quad topology 🥳
sly bridge
knotty cedar
Indeed so the fbx source file will retain quad topology 🥳
that i am aware, but the .xob will not, is that what you are saying?
last hill
knotty cedar
Issues with models showing double vertices in game engine compared to 3d softwar...
I had to head up to the hospital to my wife and son but I will see if I can do that suggestion and check face count (I know how to enable face count) once home if not too late this evening
 sacred sierra
hello, would anyone find documentation on the geometry of buildings please?
pastel bluff
zenith quartz
Mikk worked for me.
well we did some tests and can't get synched bake of averaged cube, seems enfusion is generating tangent space differently
would be cool if we could find out what's used so maybe it can be changed to mikkt or make tools to convert normals to be more in sync
sly bridge
@last hill

not sure why the vertices number is completely different, have been checking both vertices indices etc
tri count is correct
delicate condor
tacit eagle
It's possible to import arma 3 Cup core assets to enfusion?
No.
sly bridge
sly bridge
<@293168886419947530>
i also tried some other meshes, same result
plain citrus
Does anyone have a tutorial on how to properly adjust the t-shirt?
 delicate condor
plain citrus
Does anyone have a tutorial on how to properly adjust the t-shirt?
delicate condor
plain citrus
Does anyone have a tutorial on how to properly adjust the t-shirt?
It's just standard modeling work. If you make models they should be made straight up on the reference model so their shape is correct.
 round orbit
plain citrus
Does anyone have a tutorial on how to properly adjust the t-shirt?
round orbit
plain citrus
Does anyone have a tutorial on how to properly adjust the t-shirt?
Proportional editing tool
plain citrus
round orbit
Proportional editing tool
like this ?
 thorny galleon
plain citrus
like this ?
thorny galleon
plain citrus
like this ?
Press O on your blender to enable proportional editing tools, then pick a vertices that you wanna adjust / refit to the character model, then mouse wheel to adjust the influence of the editing and lastly do whatever u want to the mesh (move/scale/rotate) to fit it accordingly
round orbit
thorny galleon
Press O on your blender to enable proportional editing tools, then pick a vertic...
∆
dim gate
plain citrus
Does anyone have a tutorial on how to properly adjust the t-shirt?
use lattice modifier on blender
thorny galleon
dim gate
use lattice modifier on blender
Or you can do this also forgot thanks for answering it
plain citrus
thorny galleon
Press O on your blender to enable proportional editing tools, then pick a vertic...

Thx MiKL
i gonna try lattice modifier
thorny galleon
That's perfect and yeah try lattice modifier and see if it's suits the character
last hill
@sly bridge thanks for having a look. I will work off of the face count instead of vert, per Sasha's advice. Many thanks all.
sly bridge
would be nice to actually know what the count is for though
also, as @pastel bluff said, knowing what type of tangent space is used would be lovely
plain citrus
Do you know how to force refresh Workbench after changing Worn model, because i need to restart for see my change in game mode ...
thorny galleon
plain citrus
Do you know how to force refresh Workbench after changing Worn model, because i ...
Shift + R
daring condor
delicate condor
It's just standard modeling work. If you make models they should be made straigh...
Not always possible and people sometimes make meshes for general use, not just arma
Then there's people like the Sus and Sus crew who are porting their a3 assets
 bright raft
New project

 hoary herald
having an issue, the brim of my hat is visible in first person. anybody any idea whats causing that?
 thorny galleon
hoary herald
thorny galleon
hoary herald
Try using Arma Reforger Opacity Map called HeadClipping_A.edds on your data assets emats and enable Allow User Alpha Bias and Disable User Alpha in Shadow under general tab and see if that works
hoary herald
hmmm i did include the headclipping map, works fine on my other 2 hats, just for some reason this one is acting up
aha it was the 2 check boxes you mentioned
@thorny galleon thanks bud, that solved it
thorny galleon
Happy to help
hoary herald
such a simple step to forget...
thorny galleon
Do be like that 😄
daring condor
bright raft
New project
nice rpg
eager hill
sly bridge
not sure why the vertices number is completely different, have been checking bot...
It's different because enfusion shows us the number of UV vertices

Even though a cube is built from 8 verts, it has to be saved in memory using 14 different points
When I imported this exact cube into the editor it showed me this
 bright raft
eager hill
It's different because enfusion shows us the number of UV vertices
bright raft
eager hill
It's different because enfusion shows us the number of UV vertices
Thats a nice find
Good to know
eager hill
It has a smooth shading as you can see. If it was shaded flat as it is by default in Blender, the number of verts would be higher - 24 iirc. The reason for that is that those faces would be separated just like edge split modifier does it
eager hill
bright raft
Thats a nice find
that's what you learn by messing around with DirectX
bright raft
eager hill
that's what you learn by messing around with DirectX
As for your model of Eotech, did you figure out a way of making holographic sights without PIP?
eager hill
bright raft
As for your model of Eotech, did you figure out a way of making holographic sigh...
not yet. I don't think it's possible as of now. I checked every component related to optics and none of them said anything about collimated reticle
And I still have to finish the model
calm rune
Anyone started making civilian clothing yet? Think im gonna make a couple outfits.
 solemn goblet
eager hill
It's different because enfusion shows us the number of UV vertices
solemn goblet
eager hill
It's different because enfusion shows us the number of UV vertices
Ah smart. I would have never thought about this. Is this similar in any other engines? I know Unreal and Source do not do this and maybe even Godot.
eager hill
To display the model, it has to keep in memory place of every UV vert. At least it needs to be like that in DirectX, I've never touched openGL or Vulkan. But I suppose every API works the same way in this case
Also I'm not sure how Unreal and other game engines work, because my gamedev knowledge is very limited. Perhaps they show number of mesh verts, but under the hood they have to keep them as separate UV verts
solemn goblet
I can't look at things through a lens like that so it's interesting to understand your thought process here. Thanks for sharing.
eager hill
It's caused by the fact that every 3d model is in fact made of triangles. In software like Blender we try work on quad meshes and it leads to some issues like this. One vert is removed, so Blender tries to connect those 3 faces into one, which because it is not planar is not possible

If we look at it from the side, it turns out to be made of triangles
 tacit eagle
eager hill
It's caused by the fact that every 3d model is in fact made of triangles. In sof...
tacit eagle
eager hill
It's caused by the fact that every 3d model is in fact made of triangles. In sof...
N-gons truly are my bane, its why I don't model as i cant be fucked to work in quads (which you can use the triangulate option to turn to tri's)
solemn goblet
You can also press alt+j to turn tris to quads :^)
(This isn't always ideal though)
daring condor
tacit eagle
N-gons truly are my bane, its why I don't model as i cant be fucked to work in q...
ngons are only an issue if they are not planar
ngons are based
you can use them to control edge loops etc
tacit eagle
daring condor
ngons are only an issue if they are not planar
Yes, and I only work in non-planor n-gons
daring condor
only time you really have to worry about them is when you are doing character art/ other stuff that deforms
personally my preferred workflow is to just put 3d scanned models into games without cleanup
swift goblet
calm rune
Anyone started making civilian clothing yet? Think im gonna make a couple outfit...
I did, but I had to stop because I'm traveling
Once I'm back home I will continue
I already did some backpacks and vests
swift goblet
hoary herald
I actually think that is cool that you see that, becouse you see it in real life
daring condor
you really dont
put on a hat and run around for half an hour
your brain starts blocking it out
same way as you dont see your nose
swift goblet
daring condor
your brain starts blocking it out
When you play it happens too
hoary herald
your brain will tune it out, just like your nose but it is very visible when you first put on the hat
swift goblet
If the screen is not small
swift goblet
hoary herald
your brain will tune it out, just like your nose but it is very visible when you...
Exactly
daring condor
can you set a seperate lod for the first person view btw?
swift goblet
daring condor
can you set a seperate lod for the first person view btw?
You can set lod0 to be super close
daring condor
ive been thinking about a maska helmet
and how you could use that method to render the visor in first person
next step, disable aiming down side while wearing it
 pine flame
daring condor
and how you could use that method to render the visor in first person
pine flame
daring condor
and how you could use that method to render the visor in first person
Rendering very close to camera is bad idea. Near clip plane is not close enough and if you try to make it cost you will show more z buffer fighting.
daring condor
there goes my idea
wanted to do one where the helmet isnt set to translucent and you just have some alpha on the visor to mimic your eyes trying to focus beyond it
tacit eagle
daring condor
personally my preferred workflow is to just put 3d scanned models into games wit...
My preferred workflow is to just not model anymore 
pine flame
Well you can play with it, but no guarantees
When we had a bug with visible helmet, it actually looked decent. But something which is straight in front of eyes may work or may not
daring condor
gotta finish my current projects first 😆
im still on arma 3 and will be for the forseeable future
but i am making something i do plan to bring to refrigerator
swift goblet
pine flame
Well you can play with it, but no guarantees
When we had a bug with visible helm...
Then it's not a bug, it's a feature ✨
🤣🤣
pine flame
swift goblet
Then it's not a bug, it's a feature ✨
I have same opinion 😃
daring condor
like when i leave some bad shading on a model in areas where its supposed to be stamped metal?
solemn goblet
pine flame
Rendering very close to camera is bad idea. Near clip plane is not close enough ...
The way you fix this is rendering on a seperate layer which most engines support. However, Enfusion was made for ArmA I believe, and uses 3rd person models for 1st person so it might be one of the few that do not do this easily (lmao)
daring condor
solemn goblet
The way you fix this is rendering on a seperate layer which most engines support...
i love that tbh
i dont like games that have seperate 3pp anims
or 1pp anims
all anims should be the same
solemn goblet
This is how most first person viewmodels are rendered for the player.
swift goblet
daring condor
all anims should be the same
Looks more natural
daring condor
solemn goblet
This is how most first person viewmodels are rendered for the player.
fully aware, i just do not like it
solemn goblet
Yeah sorry just an addendum not saying you don't know it xP
daring blade
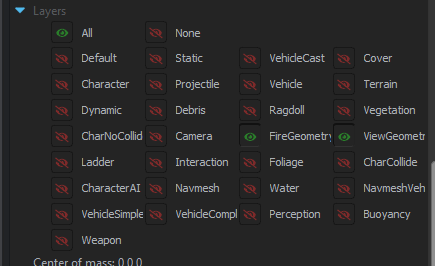
What interaction layers are generally used for buildings?
opal moat
 unreal reef
Just out of curiosity what is the exact round I am looking at here?
unreal reef
Just out of curiosity what is the exact round I am looking at here?
It’s the 20mm used in the vulcan
knotty cedar
daring blade
What interaction layers are generally used for buildings?
Building/Fire/View
daring blade
https://i.imgur.com/kUU6yGm.png I don't think I'm looking in the right place... I can't find building in it?
 knotty cedar
Sorry, Building contains Static & Navmesh layers
swift goblet
Debris isn't used?
knotty cedar
swift goblet
Debris isn't used?
Debris is used on small debris pieces which should not collide with dynamic assets
swift goblet
Oh ok
Ty
I haven't started making buildings, once I start I need to check that deeply hehe
knotty cedar
It's most of what I did for reforger production 😆
daring blade
I'm not sure why it's crashing, I split my mesh into separate pieces so I can see exactly what's going on. I closed all the holes, I got rid of ngons, it just won't let me view the colliders lmao
swift goblet
Idk If there's some sort of animation, or if it's like arma 3 that the building goes under terrain and debris is spawned
fast notch
how many tris should the object be? 59k hangs and is not imported
 spiral condor
someone make Walter white
daring blade
Anybody have sort of like a checklist that I can have up as I work?
I just don't understand, I'm still walking through the mesh
I'll start from the basic like a cube and I'll make sure I can get a cube to work
still walking through the cube so obviously I'm doing something wrong
fast notch
how to find the component "rigid body" at the root of the object like in the screenshot?

 swift goblet
Wtf is that? Roots?
fast notch
swift goblet
Wtf is that? Roots?
reference for one of the pieces on the game "Stalker"
 swift goblet
Oh lol
daring blade
That's pretty sick lmao
Okay let's start over. I have this cube. I'm trying to get colliders to work, what makes them work?!
 gloomy stump
If you look at the BIKI in the fbx document it explains how to create model colliders
you have to name it with a certain prefix
I dont remember what it is though
daring blade
UTM I have that
then it goes on for multiple paragraphs on why tris are bad
I need a step by step
fast notch
daring blade
UTM I have that
do you need a character to be unable to walk through the cube?
daring blade
Yeah
fast notch
daring blade
Yeah
okay. I found such a solution. in the blender, you should have LOD (the visible part is registered exactly like mine) and UTM (the physical part copying the object itself), after which you put the object on the map and add the "rigid body" component to it, ticking "static" and "model geometry"

okay. I found such a solution. in the blender, you should have LOD (the visible part is registered exactly like mine) and UTM (the physical part copying the object itself), after which you put the object on the map and add the "rigid body" component to it, ticking "static" and "model geometry"
daring blade
Hmm mine are all grayed out
OMG!!!
At the bottom! Thank YOU!! @fast notch !
https://i.imgur.com/URSlcFj.png
NOWHERE does it say that in the BIS tut
 plain citrus
Do you know why when i import tga texture on Workbench i got this error ?

And it doesnt convert to EDDS
fast notch
daring blade
At the bottom! Thank YOU!! <@368770144647905283> !
you're welcome, I've been suffering for 4 days with this myself 😄
daring blade
that shit needs to be pinned 100% lol
Heck, even in unity each model comes with all the components you need. In fact I think they load with a rigidbody
fast notch
daring blade
Heck, even in unity each model comes with all the components you need. In fact I...
I tried, but it didn't work out. Maybe I'm crooked. there is also this config, but I don't understand how to configure it

 quasi thistle
complete guide anywhere for importing models and making them game ready?
 mortal sentinel
is it possible to get the original m16 model into blender?
plain citrus
🪖

 solid tulip
plain citrus
🪖
solid tulip
plain citrus
🪖
uuuu very nice
mortal sentinel
why does evertything in workshop close if I just close one window wtf
fast notch
okay. I have an animation of how these spheres move, how to move them into the game?
 daring blade
If you figure it out I would like to know this too, it's definitely something to learn.
fast notch
daring blade
If you figure it out I would like to know this too, it's definitely something to...
😄
daring blade
Again the documentation barely has any info, and it's for 3ds max. https://i.imgur.com/sm0FKiU.png


We need a mega checklist where we can ctrl+f anything we want to learn
Do not say google, because when I google enfusion or reforger all I get is hits on how brand new the game is xD
 wraith forge
plain citrus
🪖
wraith forge
plain citrus
🪖
is it on the workshop yet ?
solemn goblet
plain citrus
🪖
Ayy you got it to work man good job. You will have to teach me the enfusion process 👀
daring blade
@fast notch https://community.bistudio.com/wiki/Arma_Reforger:Enfusion_Blender_Tools:_Import/Export_Animation not sure if this is useful but I found this
It just stops in the middle of the process, it doesn't go on to explaining how to make it work with the engine. It's just setup
fast notch
daring blade
<@368770144647905283> https://community.bistudio.com/wiki/Arma_Reforger:Enfusion...
as I understand it, this is a setup for a character
daring blade
Ah okay so I'm guessing you're using helpers to move the spheres?
I did see something about that, did you try this setting? https://i.imgur.com/sQDDUNp.png
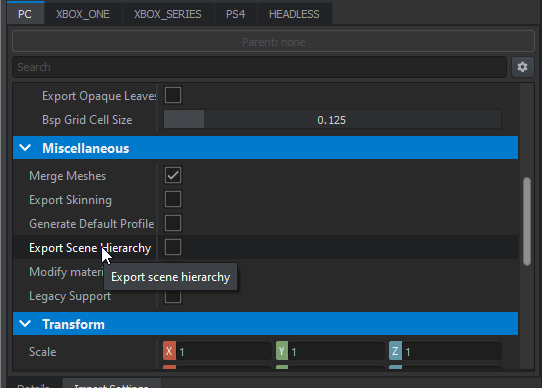 fast notch
daring blade
Ah okay so I'm guessing you're using helpers to move the spheres?
fast notch
daring blade
Ah okay so I'm guessing you're using helpers to move the spheres?
I don't quite understand what you mean
daring blade
If it's nested in another object, like a controller
fast notch
I think it's worth looking at how it's done on unity and already relying on something like that
daring blade
Actually more like this lol https://i.imgur.com/RczoZUH.png whoops
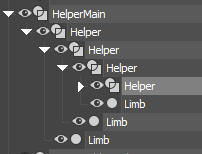
https://i.imgur.com/J2DyweH.png Like a skeleton but you made it yourself. Idk if blender has that
You can add all sorts of custom constraints and IK's and set it up exactly how you want it. I would imagine blender has it but I have no idea how I would do it
solemn goblet
I was taught that those helpers are called a control rig. And the handles are just called controllers haha.
delicate condor
Blender Armature works like that I believe
solemn goblet
I might be biased in saying they are great for everything and FK can go FK itself
(I don't like animation)
daring blade
Animations can break very quickly lmao, have lots of backups ready lol
solemn goblet
God have mercy on the abomination you might create with improper weights as well
There's a tool that lets you 'transfer' the weights of the base mesh onto your thing, it's called like MGs tools or something
I'll find it
nvm that's an old tool, you can just do it natively now
https://www.youtube.com/watch?v=IPQ2QVVIxLU Here's a vid on it
daring blade
3 minutes?! Omg yes ty lmao
plain citrus
wraith forge
is it on the workshop yet ?
Coming soon, maybe this week
opal moat
Made cartridges for my gun


Planning on doing two versions, this one which is polymer cased and the second which will have a disintegrating case.
Has anyone tried to make a custom compass yet?
 trail igloo
Anyone having an issue importing an FBX file and the reforger tool stops responding?
solemn goblet
trail igloo
Anyone having an issue importing an FBX file and the reforger tool stops respond...
Are you using Blender 3.1 or above? I haven't had any issues yet on import.
trail igloo
I am
Everytime I try and import a pretty simple model the reforger tool completely freezes and I have to kill the process
 lament solar
That happens when you import something that the tools don't recognize
make sure to enable "export selected" when exporting as fbx
trail igloo
Okay thanks
daring blade
Okay I have zero ngons, zero holes, the mesh is 15k poly, and yet it still crashes when I try to preview the colliders.
It worked before with all the errors then suddenly didn't want to work anymore
flint ivy
Is anyone able to give me a hand on getting the sample character into Blender? I was hoping to start creating clothing and gear this week as I'm off work and was planning to learn.
I import it as an .fbx with the Enfusion plugin import function and it shows up with all the hit locations, LODs, etc. Do I need to 'simplify' or convert it into a more basic joined model or just leave it all separate?
Wanted to try modelling clothes but also try to use the sculpt tools as well. But when I tried the latter, I just kept running into issues where it would only sculpt on one hit location and not allow me to try it on others. Not to mention not being able to extract masked areas.
daring blade
So, selecting the mesh as well would help.... I was just selecting the colliders when I exported. 🤦♂️ 🤦♂️ 🤦♂️ 🤦♂️ 🤦♂️
solemn goblet
flint ivy
Is anyone able to give me a hand on getting the sample character into Blender? I...
There is a version of weighted character mesh I made for simplicity here #enfusion_model message
Note that there is no head because.. The reference head has no vertex groups when I import it. I think this is a mistake from bohemia though 😄
Actually, the blender rig probably has vertex groups and I could use that instead... Hmm
fast notch
how can I make the door open in my building?
vocal belfry
opal moat
Planning on doing two versions, this one which is polymer cased and the second w...
Can you do one with a gunpowder casing that has a HUGE fireball out the muzzle?
flint ivy
solemn goblet
There is a version of weighted character mesh I made for simplicity here https:/...
It works! Thanks man!
flint ivy
solemn goblet
Actually, the blender rig probably has vertex groups and I could use that instea...
Give me a shout if you do the head. Perhaps the existing head on its own will work okay?
opal moat
vocal belfry
Can you do one with a gunpowder casing that has a HUGE fireball out the muzzle?
?
vocal belfry
opal moat
?
As a joke.
opal moat
I’ll see what I can do

 sonic path
Im still a bit new to blender(only about a year in) but I would inevitably like to make some content for arma. Heres a higher detailed churchill I made, and a low poly jltv

 opal moat
Now we're cookin with gas

From left to right: 15x120mm, 9.1x66mm, 6.68x49mm
The purple denotes that they are AP-Ball
Plan on making variants of all of these with correct color coding by projectile type
Any idea on how to get rid of the weird clipping when you get far away?
 vocal belfry
I love all of this
last hill
opal moat
Any idea on how to get rid of the weird clipping when you get far away?
Do you have LODs for the rounds or just a single mesh?
hoary herald
to help with some of the night fighting. working on throwable chem lights
 hoary herald
still a ways to go but
 hoary herald

just having issues with dynamically turning it on when thrown. its either always on or always off...

model turned out great though. modelled the interior of the chemlight to give a realistic look
sacred sierra
hello I have a problem on my door when the geometry is not on the door I have the action to open but if I put the geometry I no longer have the action would you know where it could come from please?
opal moat
last hill
Do you have LODs for the rounds or just a single mesh?
Single mesh at the moment. Don’t know how to make lods
solemn goblet
opal moat
Single mesh at the moment. Don’t know how to make lods
I'm not even joking, you can get passable LOD's with Blenders decimate modifier. It even retains weights.
opal moat
Interesting. So lods are just low poly versions of the original?
delicate condor
basically
solemn goblet
opal moat
Interesting. So lods are just low poly versions of the original?
Yep. Every game has a poly budget, some more than others. LOD gives the game some 'budget easing'. Lets say every triangle is 1$. If you have a budget of 1,000,000$ and each helmet is 10,000$, you have a limit of 100 helmets. LOD1 might be 5,000$, LOD2 is 2,500$... You get the idea. It lets the game run better for basically no impact on visual fidelity. LOD's aren't required but for your mod to be used in big servers of 100 people or more, they are very welcome.
calm rune
When setting up LODs is it just a matter of having a lower poly model named LOD1, LOD2, etc or do you need to also attach the bones, weights, etc with each LOD as you would with LOD0?
solemn goblet
Yep, the weights need to be the same
sly bridge
calm rune
When setting up LODs is it just a matter of having a lower poly model named LOD1...
everything
solemn goblet
I think LOD's can reference the same armatures so no need for extra bones
delicate condor
it must reference same armature/skeleton
solemn goblet
Yep. Vertex Groups 100% need to be the same I know that at least
sly bridge
he means bones ^^ for everyone else not using blender
solemn goblet
I don't really do a lot of rigging so correct me if I'm wrong
 lethal frigate


 calm rune
Yeah I figured the same armature would be needed not extra. Thanks all, question was answered.
solemn goblet
One method that works is dissolving edges of a duplicate if you want some precision
That way you retain weights, modifier stack, all that.
opal moat
What kind of objects need bones? I’m going to start off by importing simple objects into the game first, bandages, flashlights, grenades etc.
solemn goblet
Pretty much everything is using bones in one way or another
Even static props technically have a bone called "root" in most engines (idk if Enfusion does this).
calm rune
solemn goblet
One method that works is dissolving edges of a duplicate if you want some precis...
Ah, I think I understand. I use blender so I was just going to duplicate the original and decimate multiple duplicates for each LOD.
opal moat
Interesting. I thought bones were only needed for animation.
solemn goblet
calm rune
Ah, I think I understand. I use blender so I was just going to duplicate the ori...
Yep, that's literally how I do it.
solemn goblet
opal moat
Interesting. I thought bones were only needed for animation.
I can't really speak for Enfusion but some engines create a 'bone' at the root or origin of an object. You won't create a bone yourself as it happens automatically on import.
calm rune
For good practice is there a workflow we should follow for LODs such as LOD1 should be 50% of LOD0 and LOD2 should be 50% of LOD1?
solemn goblet
My theory is that bones impart rotational and positional information that geometry can't do alone but I'm not really into the technical aspects of it
I'd 100% check the helmet in the github to see what the math is
calm rune
Gotcha!
solemn goblet
opal moat
solemn goblet
<https://github.com/BohemiaInteractive/Arma-Reforger-Samples/tree/main/SampleMod...
How do I import these to blender?
solemn goblet
Blender has a native import FBX utility under file (top left) > import > FBX
delicate condor
helmet as wearable item follows the character skeleton
other items have their own skeletons
last parcel
Hi, need some help when importing my model into the game i seem to be getting a slight error with one small part of the model. its abit funky, so far i tried resettning normals, resmothing it. still not working :S any suggestions
 delicate condor
make sure you dont have any hidden mesh in the model that gets exported like that
it basically has to be in the source
last parcel
don't have any hidden, verts, faces or meshes, the only hidden stuff i have is a model of the magazine but seeing as I export only the thing I select that shouldn't be a issue. I think atleast
solemn goblet
I have seen artifacts like this with stacked vertices. Try a quick merge by distance pass and see if it still shows up
delicate condor
do you triangulate the mesh before you export?
last parcel
yep
solemn goblet
Is it rigged to a skeleton or something? It kinda looks like misplaced weights on individual edges or something.
sly bridge
last parcel
Hi, need some help when importing my model into the game i seem to be getting a ...
can you show a wireframe?
are these really long triangles? or really tiny?
eager hill
If you're using blender try select > by trait > non manifold. Maybe there is something but it's not noticeable easily
solemn goblet
eager hill
If you're using blender try select > by trait > non manifold. Maybe there is som...
This is a great suggestion as well
last parcel

don't use blender, i use 3dsmax i used the remove isolated verts, still nothing :S
could i be that is so small that is making it all disorted
sly bridge
is that line created via spline with a sweep modifier?
or is it a spline with thickness / render / viewport visibility?
solemn goblet
I'd guess maybe some of your ngon curves are making incredibly shallow triangles of less than 1 degree and that could cause some weird display issues at certain angles? This is mostly just a guess I only see visual distortions like this when something is overlapping somewhere.
sly bridge
do the following- select an edge loop of that mesh - > convert to spline -> add a sweep modifier and set the dimensions and offset similar - drop an edit poly on top - triangulate and try once more
 pure forum
What program are you using to bake the normal maps for vehicles and weapons?(or PBR materials)
last parcel
i use substance painter.
delicate condor
Blender works too
 plucky rover
use blender to bake normals, use substance to paint normals
delicate condor
for painting SubstancePainter is probably better off the top of the shelf. Blenders paint tools need some setting up to have more range
eager hill
plucky rover
use blender to bake normals, use substance to paint normals
tbh I think baking is substance would be a better choice. I don't know how results would differ, but it's much faster in SP
Baking normal map for the rifle I added earlier took around 40 minutes in Blender, while in Substance Painter baking all maps took less than a minute
pure forum
I use blender, but distorts normals 😕
eager hill
Almost finished, just need to make 3 more pieces of the model
 sly bridge
last parcel
yep that fixed it, Thanks
sly bridge
last parcel
yep that fixed it, Thanks
no worries....
pure forum
eager hill
tbh I think baking is substance would be a better choice. I don't know how resul...
yes it is faster.
In blender my CPU heats up to 97 degrees (4096x4096)🔥
plucky rover
eager hill
tbh I think baking is substance would be a better choice. I don't know how resul...
the only reason i prefer blender for baking normals is because in substance, my only attempt at baking normals from a higher poly mesh resulted in weird faces at spots where they didn't perfectly overlap
solemn goblet
plucky rover
the only reason i prefer blender for baking normals is because in substance, my ...
That sounds like an issue fixed with match by mesh name
plucky rover
for me it was an issue i fixed by baking my meshes in the same software that i made them in 👍
that's all
sly bridge
GPU raytracing engines are a lot faster at baking - substance, marmoset, some plugins offline renders