1 messages · Page 21 of 1
 pearl dagger
Hello, can somebody tell me what I am doing wrong because I cannot see my bones in workbench, but in Blender it seems like they work? 😐
P.s I did them by some addon called Rigacar
 ancient walrus
When you reimport (look import settings in your picture press that tab select the skinning box and click reimport at top ) select the box for skinning I think that brings in bones too
 wary inlet
Or hear me out... We fit the chin to the chinstrap...
pearl dagger
ancient walrus
When you reimport (look import settings in your picture press that tab select ...
Thank you now it seems like its finally working 😳

 nocturne quartz
no no im still trying out methods for creating realistic silk chuties, this is only for making the high poly btw
also its a little dense for animations. still usable for that but im not at that stage
 tidal latch
pearl dagger
Thank you now it seems like its finally working 😳
tidal latch
pearl dagger
Thank you now it seems like its finally working 😳
using auto rig and not vanilla making conventions will result in you needing to make a lot of your own stuff (export profiles), editing default components ( they are expecting vanilla naming conventions - you can change it of course but those little things will combine into larger pile which might be overwhelming in the beginning) or making anims ( proc anims might be expecting different setup)
pearl dagger
tidal latch
using auto rig and not vanilla making conventions will result in you needing to ...
So Reyhard, what do you recommend to do in my situation? Personally, I used auto rig because I couldn't find good tutorial for basic rigging
 polar vault
What would be the least time consuming way to test a new character model? Add a game mode in workshop and spawn in the model > play as?
ancient walrus
polar vault
What would be the least time consuming way to test a new character model? Add a ...
Change the preview model in the animations editor to your new one it will be in the .aw file for player iirc
 faint wyvern
pearl dagger
So Reyhard, what do you recommend to do in my situation? Personally, I used auto...
faint wyvern
pearl dagger
So Reyhard, what do you recommend to do in my situation? Personally, I used auto...
it seems you wont find any good tutorials on it, i been looking myself an only just figuring some of it out weeks later
tidal latch
pearl dagger
So Reyhard, what do you recommend to do in my situation? Personally, I used auto...
https://wiki.nabla.sh/books/creating-a-vehicle-from-scratch you can take a look at this tutorial - it is kind of expanded fork of official unfinished car creation tutorial

By MOONLGHT & Benjibossk
This topic allows you to create a vehicle from a 3D model, import it, make...
https://community.bistudio.com/wiki/Arma_Reforger:Car_Creation here is official car creation tutorial
 gusty needle
Hi everyone,
I have a question regarding modelling buildings for Arma Reforger.
Currently I'm making a mega building. (A building consisting with around 200+ Rooms)
And I'm unsure how I should "split up" the model.
My current workflow is I create for each room a own model which then can be placed in Arma Reforger. (Its a base model with only Walls&Floors, and some static details)
Is this approach good for performance? Since my thought behind this is, that this way the engine doesn't load the whole mega building. But only the rooms that the players sees.
Or is it better to make one big model with all rooms? Or is it better to split everything and put together inside of Arma Reforger? (Walls, floors, etc)?
For a small house I would go with one Model for the whole house. But this is not a small model....
 leaden trench
gusty needle
Hi everyone,
I have a question regarding modelling buildings for Arma Reforger.
...
leaden trench
gusty needle
Hi everyone,
I have a question regarding modelling buildings for Arma Reforger.
...
I think split up you would have issues setting up lighting. I guess if you use one model, the engine uses the BSP & Portals to compute visibility/occlusion, which would help with performance. But that is just A guess I don't actually know if it works like that.
gusty needle
Hmh, because the whole building would have more than 10million verts
leaden trench
gusty needle
Hmh, because the whole building would have more than 10million verts
10 million is a lot, that includes furniture, or just the walls?
gusty needle
Walls, floors and some details like arches, Pillars, etc.
As said, it's a mega building. Large enough for needing to drive with a car inside or taking a tram
leaden trench
I think nobody has done a building so large before, so nobody could answer your question accurately. Maybe have to experiment & benchmark it.
Unless reyhard sees it and shares some secret knowledge 😉
gusty needle
Well it would be already enough to know how the engine handels models.
Does it load the whole model when a player sees it? Does it only load the verts the player sees?
And was the engine build to be used for modelling maps inside of it.
Like Unreal, Unity, etc.
leaden trench
Any engine typically loads the whole model to VRAM
gusty needle
I will try the map as it is. (Splittet in rooms)
and see if the performance is good or not.
And also try one version as one single model.
But I won't split every single wall, etc. and place it ingame when it's unknown if this would gain performance or not.
Since this would be like 80h of work
leaden trench
Workbench will actually appear to hang for 30 minutes if you try import a single 10 million vert model
gusty needle
leaden trench
Any engine typically loads the whole model to VRAM
Yes, but every engine handels models different.
To many models would eat up the bandwith and causes lags since the gpu doesn't get the models fast enough.
Also one big model, when the engine is not designed for it, would just load the whole model.
So all 10million verts, which would be bad..
gusty needle
leaden trench
Workbench will actually appear to hang for 30 minutes if you try import a single...
My blender lags af
so ik
Thats why I splittet in rooms
Since I already knew my pc couldn't handle such a big model
 karmic adder
leaden trench
Workbench will actually appear to hang for 30 minutes if you try import a single...
karmic adder
leaden trench
Workbench will actually appear to hang for 30 minutes if you try import a single...
Unless they improved something, 30 minutes is a massive understatement.
Last time I checked, it only managed ~1.4m vert models in that time, with runtime complexity at n².
https://feedback.bistudio.com/T182248
Even regardless of import time, I would probably import it as multiple models.
This way the whole building isn't one model, and instead distant parts can be at lower LODs.
It's even better if you can make it somewhat modular, with some repeated parts being re-placed.
 unkempt geode
How do I get in touch with someone about modding? My group I am running with is wanting some patches, belts, reskin, etc and we were wondering who/where we need to get in touch with
 quasi valve
What would be the best way to take the RHS CAG Cross Patch and add a new Mesh to it to change the Patch. It has the same shape can anyone give any advice
gusty needle
karmic adder
It's even better if you can make it somewhat modular, with some repeated parts b...
yeah thats the question, would it be smarter to have modular walls, floors, etc. and build the rooms inside of Arma Reforger.
Or would it be smarter to split it in rooms in blender already.
Since I have the time, thats not the problem. But I don't want to waste my time and efforts when the end result is worse than before.
Also is there an Overdraw View mode in the engine to view which quads overdraw? (Like in Unreal)
Since with this it would be much easier to create LODs. Since it would be easier to know at what range is something not really visible anymore. (Brighter color)
I could optimize my Models in Unreal first, but idk if it's usable for enfusion engine then. (There will be a performance gain, but not optimized for Enfusion)
 nocturne quartz
why do you use unreal?
gusty needle
nocturne quartz
why do you use unreal?
Currently I don’t, but I’m very familiar with the toolbox from unreal.
 mighty bronze
how to find out that the .blend file you're using from the model maker is in a different scale

 stray bridge
Is it possible to add a pivot to clothing stuff like a belt without breaking the armature / bone count?
If I add an extra bone or whatever it just breaks everytime. But I need an extra "custom" pivot ID
 cold spindle
Anyone got a definition for each collider subnaming type?
Or even better anyone got a video of someone exporting a model from blender to enfusion where they use colliders and explain? All search engines for me are giving garbage results (Probably because of my governments overreach)
stray bridge
cold spindle
Anyone got a definition for each collider subnaming type?
https://community.bi...
 cold spindle
Thank you sir
cold spindle
stray bridge
Can you share the site/file you got that reference from?
stray bridge
cold spindle
Can you share the site/file you got that reference from?
just did
right above the picture
cold spindle
Ahh you legend tyvm
cold spindle
Anyone willing to pop in VC for like 10mins and help me understand how to get collisions working properly.
Just testing with a simple set of stairs and i can't seem to import right. Collision box is showing in model workbench but cant get any collision in map.
Im in a voice channel at bottom of this discord.
ancient walrus
Ah man I just been through all that but I’m off pc Now but
If you have static object ticked in the rigidibody component then I found in blender
You have your visual lod
Then a new collection called colliders in which is 1 geometry lod its prefix is UBX if its box and quad and UBX or something for tris Convexed Burn you select effusion tools and collider set up Choose a layer propfire or similar and a surface for armour Then export and import and send to your .et
You can change the layers and armour in import settings in workbench
cold spindle
ancient walrus
Ah man I just been through all that but I’m off pc Now but
If you have stati...
I really do appreciate your reply but i cant make heads of tails of what you just wrote...
Do i need to be applying rigidbody physics in blender? If yes am i applying it to the collision or the LOD0 mesh?
Or is this a setting hidden away in Enfusion?
cold spindle
ancient walrus
Ah man I just been through all that but I’m off pc Now but
If you have stati...
Holy crap i realise what you meant now. I've been trying to use XOB file as mesh. But none of them have any collision data tied in. So Im guessing instead i need to create a custom prefab and tie it all together in there. (Gotta say it's damn annoying there isnt an automatic method for this)
 flint ivy
This I believe is to do with a vanilla bug with the inventory not refreshing. Try dropping and picking the helmet back up whilst they are attached but invisible.
quasi valve
Can anyone answer this question? Is it Possible to Export a patch model to blender to reshape the model? I used EBT to send the patch to blender but it shows up as and .et file and unable to see it in the blender space. What am I doing wrong or is it not possible any help would be really appreciated
 sour shoal
Hey guys I'm not terribly experienced with weight painting in Blender but I have noticed that bone counts in Enfusion don't add up corrently sometimes after weight painting. Is there a reason for that? I'm sure I must be missing something
stray bridge
sour shoal
Hey guys I'm not terribly experienced with weight painting in Blender but I have...
same, couldnt figure out exactly why this happens
cold spindle
Are you saying there is a different number of bones in blender vs enfusion? How many different? If blender has more bones i think i have an idea why.
for obj in bpy.context.selected_objects: #for each selected object
    print(obj.users_collection)
    print(obj)
    print(obj.users_collection[0].name)
    ObjColStr = obj.users_collection[0].name # ObjectsCollection

    name = obj.name         # get obj name
    copy = obj.copy()   # Create a copy of obj data-block
    copy.data = copy.data.copy() # linked = False #Apply Obj data to copy
#STB-Input-Panel-String /// #STB-InitValue-f"UCX_{name}" # Change name of copy to UCX-END
    copy.name = f"UTM_{name}" # Change name of copy to UTM
    mod = copy.modifiers # get copy's modifiers

    #REMOVE THIS SECTION TO NOT ADD DECIMATE MODIFIER TO COLLISION MESH#
    #REMOVE THIS SECTION TO NOT ADD DECIMATE MODIFIER TO COLLISION MESH#
    Dmod = mod.new("Decimate", type = "DECIMATE")
    Dmod.decimate_type = "DISSOLVE"
    Dmod.ratio = 0.25
    Dmod.use_collapse_triangulate = True
    #REMOVE THIS SECTION TO NOT ADD DECIMATE MODIFIER TO COLLISION MESH#
    #REMOVE THIS SECTION TO NOT ADD DECIMATE MODIFIER TO COLLISION MESH#


    #REMOVE THIS SECTION TO NOT ADD THICKNESS TO COLLISION MESH#
    #REMOVE THIS SECTION TO NOT ADD THICKNESS TO COLLISION MESH#
    mod = copy.modifiers # get copy's modifiers
    Smod = mod.new("Solidify", type = "SOLIDIFY") #Add new solidify to copy
    Smod.thickness = 0.125 #12.5cm thickness
    Smod.use_even_offset = True
    #REMOVE THIS SECTION TO NOT ADD THICKNESS TO COLLISION MESH#
    #REMOVE THIS SECTION TO NOT ADD THICKNESS TO COLLISION MESH#


    ObjCol = bpy.data.collections[ObjColStr]
    ObjCol.objects.link(copy) #link to collision collection
we are talking about weird stuff happening when weight painting. Sometimes its one bone extra if you import it. I doubt that what you sent in there has anything to do with bones or our problem
cold spindle
No i was just sharing a script to help speed up peoples collision creation.
stray bridge
quasi valve
Can anyone answer this question? Is it Possible to Export a patch model to blend...
you would need the original file / fbx. from the owner. .et is a I think reforger? file type for prefabs. .xob for meshes. To edit stuff .fbx is the most common
stray bridge
cold spindle
No i was just sharing a script to help speed up peoples collision creation.
I see
there are plugins for it too
cold spindle
Yeh the enfusion plugin is missing this as an option hence why im posting it here.
Does it only create an extra bone randomly? It might be a root boot which is missing being hidden from the user. Alot of mod tools for blender create extra bones and then hide them from the user to fix rotation errors and scaling on imported meshes.
stray bridge

This addon allows you to create collider meshes more easily. It provides different operators to generate primitve colliders or convex mesh colliders out of a selection. - Weisl/simple_collider
stray bridge
cold spindle
Yeh the enfusion plugin is missing this as an option hence why im posting it her...
Creates it depending on what and how you paint it. I witnessed this issue mostly when painting smth to 0.0 (dark blue), but if paint it again or use 0.1 it might work
Im just missing smth most likely xd
cold spindle
If you need someone to bounce ideas off let me know. I know the frustration of talking to yourself trying to fix something to fix it in a second when someone else says one thing, xD
 patent wren
Guys, would you happen to know please how to set up my rail for foregrips? What class to use? i used RIS1913, but that makes lasers and flashlights go on it
 shell hedge
Why shouldnt they?
patent wren
shell hedge
Why shouldnt they?
They should, but i would like the foregrips to go to bottom rail ^^
I cant seem to access the files to see what class are the foregrips on
shell hedge
I did a custom class for foregrips
patent wren
shell hedge
I did a custom class for foregrips
Hmmm i guess copying the handguard class and renaming it?
shell hedge
I think this is covered in weapon creation wiki
patent wren
idk, i just want these wcs foregrips to work
 patent wren
shell hedge
I think this is covered in weapon creation wiki
patent wren
shell hedge
I think this is covered in weapon creation wiki
Alright ,thx
 tacit eagle
I thought it was a modeling channel
cold spindle
stray bridge
Im just missing smth most likely xd
Are you Cebus on Yt? Trying to understand building exports and requirements. That bloody biki has melted my brain.
stray bridge
cold spindle
Are you Cebus on Yt? Trying to understand building exports and requirements. Tha...
I think yea, why? I dont have any videos really. I think one old showcase
cold spindle
Yeh just saw the video of a bank building.
Im really struggling to understand the layers required to make a functioning building. And how to do the whole BSP portal volumes.. atm i've made the prefab, placed doors and windows but the doors keep moving to the 0,0,0 pos of the BP. I'm assuming i need to make some pivot points in blender but i cant find the info i need.. If you did all that with yours is there any chance i can get a copy /template to see how you've built it?
Ive been going through this https://community.bistudio.com/wiki/Arma_Reforger:FBX_Import
But it doesn't really explain the setup/process and why. It uses vague terms combined with absolutes that have no reference xD
An example is that this is all it says sockets are. Doesn't really clarify the uses or give any examples.
Sockets

    defined as dummy/null object
    dummies/sockets can be parented into hierarchical structure if needed
    points of origins for various things like particle effects, prefabs,...
    based on purpose of these, there are various naming conventions for different types of assets (weapon, vehicle, character,..)
    currently there is no naming convention that will influence the import, except for COM_ (center of mass)
that got changed I think around the 1.0 update so I cant 100% tell how its done now.
cold spindle
damn it, also says Material must be dummyvolume ( GUID: D3975B51F51E6BD5)
Yet no material exists within blender 0_0 AHhhhhh
stray bridge
just name it dummyvolume
cold spindle
just like that or dummyvolume_D3975B51F51E6BD5 like the other mats?
stray bridge
just „dummyvolume“ import it and see what happens
faint wyvern
does anyone know how to set up center of mass in blender an configure it in game. my models keep floating away
severell models i made do the same thing im sure its the center of mass
 last parcel
name it dummyvolume_D3975B51F51E6BD5 and it will use the BI's Emat from the start
 main kraken
faint wyvern
does anyone know how to set up center of mass in blender an configure it in game...
main kraken
faint wyvern
does anyone know how to set up center of mass in blender an configure it in game...
you managed to adjust the center of mass?
 abstract fossil
 stoic heron
can someone help me add a bone to a drone wing ?
ancient walrus
Have you seen the prop tutorial on the wiki it explains well . Basically add it In blender and tick export skinning when you import to enfusion via the tools and the bone will be registered
stoic heron
ancient walrus
Have you seen the prop tutorial on the wiki it explains well . Basically add it...
i did tha
but when i use it in proc animation
it crashes the software
ancient walrus
What does it say I the log in mydocs/ my game /Armareforger workbench logs
ancient walrus
Ooft that’s a proper crash does it crash without ticking export skinning ?
stoic heron
it crashes when i import skinning
then i try to use the model in proc animation tool
ancient walrus
What was the wing pap not found crash previously at 14:22:30
stoic heron
its not related
i fixed that and it sill crashes
here is the model
try add a bone a
and then use it in proc animation
ancient walrus
I will I’m home in couple of hours if you ain’t fixed
shell hedge
Maybe its proc anim editor that crashes and not your model specifically
I think it crashed me when I set a preview mesh lol
 wicked dirge
yes, proc anim editor is known to be buggy
 patent flower
I cant figure out what is causing this issue, Im trying to setup some glasses that appear when in the inventory of my helmet. They show correctly on the inventry preview but when i come out of the inventory view the glasses show in their item form on the floor. does anyone have any idea why its driving me insane.......


iv tried as suggested dragging the item out of the helmet inventory and back in but then they just do not show on the character at all
stray bridge
can you provide the components setup?
Are you using this equipment whatever comp as a child to slot the glasses or how you do it
ancient walrus
patent flower
iv tried as suggested dragging the item out of the helmet inventory and back in ...
I haven’t dabbled yet but is it related to the model being weighted differently per view , Ie one weighted to the head and one with no weights as an object to be picked up and viewed ?
patent flower
@stray bridge

 patent flower
ancient walrus
I haven’t dabbled yet but is it related to the model being weighted differently...
patent flower
ancient walrus
I haven’t dabbled yet but is it related to the model being weighted differently...
the worn model is weighted, its just showing in its item model instead of the worn model in normal view, but in inventory view it shows as it should
stray bridge
patent flower
<@393508675047784448>
Ok not sure if its the solution to ur problem but i think hierachy comp is missing on the prefab.
Also does ur prefab, the xob of the worn model, has 230 bones total?
btw the glasses wont be replicated I think. Did kinda the same thing with an holster and an m9, which wont show for other players
stray bridge
have you tried to wear the glasses, and I mean just the glasses. Not sloted or whatever.. just to make sure these are properly set up
patent flower
the worn model is weighted correctly and follows the skeleton
in the inventory preivew they move with the character as intented
just in normal view it is showing the item model instead of the worn model
i swapped out the item model for something else to test it
i also attached the vanilla goggles which did the same thing
ancient walrus
What in the et points to this is the model for normal view ?
patent flower
so im thinkingits something in the helmet prefab

thats where it points to the glasses prefab
@stray bridge i added the hierarchy component but nothing changed do i need to change anything in heirachy?
 stray bridge
patent flower
<@393508675047784448> i added the hierarchy component but nothing changed do i n...
stray bridge
patent flower
<@393508675047784448> i added the hierarchy component but nothing changed do i n...
na its fine, was just wondering
thats my setup


but its a storagecomp on the holster, so its a bit different
ancient walrus
stoic heron
Confirmed mate crash soon as i add it after export skinning im on EXP tools fyi even tried a simple box and that crashed
stoic heron
ancient walrus
Confirmed mate crash soon as i add it after export skinning im on EXP tools f...
so its the proc tool ?
ancient walrus
seems so but my old projects work ill try and see if i can reimport one of those and see if the import breaks it , are you on latest Blender for export i hear tools aint as well recieved , although for this we not really utilising blender tools ?
im gonna say tools most likely cause i swapped the model out in aworking .pa and then swapped out the model textfile .pap and loaded it and the model showed
so its the proc tool ?
 low iris
Im trying import a XOB building into enfusion, i have the object showing and i have it as a .ET with textures and working fine in game. The only issue i am having is making the building have collision i can just walk straight through the building. I have a rigid body component and have model geometry enabled. Will anyone have a idea what is wrong?
ancient walrus
did you tick the static box in the genericentity component and rigidbody component
tidal latch
missing layer presets or incorrect ones probably
stray bridge
tidal latch
missing layer presets or incorrect ones probably
this
 dim nimbus
what the hell is "VehicleFireDisc" ?
there is no mention of it on wiki, it is present in EBT as preset, but no description whatsoever
tidal latch
are you sure its not something from some mod?
dim nimbus
tidal latch
are you sure its not something from some mod?

it is preset in EBT
and it somehow got autoapplied to one of the colliders in my wheel, but not the other one
tidal latch
that is not VehicleFireDisc...
dim nimbus

i am sorry, yes, rotor disc
what is it and what is the purpose of it? why it got autoaaplied?
tidal latch
it is not auto applied
once model is imported, layer preset is converted into bit mask
tidal latch
and then resource manager is showing layer presets with same bitmask
in other words, both Layer Presets have same setting (aka bitmask)
and Workbench cannot say which one as applied to model originally since it doesn't have string name
dim nimbus
like metal 3mm and metal 5mm, are both "metal" ?
tidal latch
no
dim nimbus
it did separate 2 colliders in wheel correctly and added different materials to them, 3mm metal and 4mm rubber tire
but one of the colliders have this VehicleRotorDisc.
tidal latch
it has nothing to do with game materials
dim nimbus
i jsut dont get it what is it
tidal latch
dim nimbus
there is no vehiclerotordisc there.
tidal latch
it means VehicleFire and VehicleRotorDisc both have same active layers
Workbench cannot say which one as applied to model originally since it doesn't have string name
instead it has only Layer Presets stored inside
it tries to check all layer presets which matches that setting and then it lists it
dim nimbus
ah
i think i KINDA get it
so if some layers both have fore example, firegeo and viewgeo
AND sometihnd els different in each other
it will show both?
i am not a porgrammer guy, so its hard for me to understand these
tidal latch
no, they have to be exactly same
tidal latch
lets say you have information that this layer have "Vehicle" & "FireGeometry" layers active
dim nimbus
Question is. will 2 different colliders in wheel work properly? i dislike fact that in refunder, if you shoot metal rim - tyre gets damaged. so i made inner collision metal and outer collision - rubber.
tidal latch
you are trying to guess which Layer Preset it is
so you check all Layer Presets here https://community.bistudio.com/wiki/Arma_Reforger:Collision_Layer#LayerPresets_Setup
if there are two Layer Presets which have exact same setup then you list both - you have no idea though which one was originally selected though.
You only have info about "Vehicle" & "FireGeometry"
that's how it works more or less
tidal latch
dim nimbus
Question is. will 2 different colliders in wheel work properly? i dislike fact t...
only UTM colliders can have different materials on different faces
dim nimbus
tidal latch
only UTM colliders can have different materials on different faces
i ahve 2 separate colliders inside wheel, NOT one collider with different settings
 tidal latch
it will work
dim nimbus
inner collider is slighlty smaller so it does not overlap with tire
so if players will shoot metal, wheel will stay healthy?
is background logic ready for this?
wheeldamage controller or whatever is responsible
i will assume it will work, thank yo ufor your immense help, sir.
shell hedge
donut 
 timber lion
Is it possible to make the reforger cars as props?
stray bridge
surely
duplicate the prefab and remove all the comps except of the mesh and rigidbody, set the rigidbody to static
timber lion
But can I control the wheels then?? I want the make them look lake rundown a bit
tidal latch
you can also take a look at cinematic tutorial on youtube
dim nimbus
timber lion
But can I control the wheels then?? I want the make them look lake rundown a bit
Make new props prefab, put car body Xob and wheels xob into it if you want screenshottable thing, thats easisest way
stray bridge
timber lion
But can I control the wheels then?? I want the make them look lake rundown a bit
what do you want to achieve exactly?
the base game car but run down? So just new textures
timber lion
I wan't to use them on my terrain as props. The other wrecks are extremly destreyod. I want them not so destroyed just abandoned on the spot.
Little bit like this

They need to have collision
stray bridge
as this model is not available in base game you have to model / create a mod for this
the only base game models for vehicles are the one you know and the wreck ones
tidal latch
...I don't think he want to use exactly this model from pic 😅
in any case, if wheels are set as slots, you can perhaps rotate those slots as you want by changing their slot setting
stray bridge
tidal latch
...I don't think he want to use exactly this model from pic 😅
I guess, but still, he wants abandoned car /´s which he wont get from the base game besides the wrecked models
tidal latch
abandoned cars can mean cars which cannot be interacted and have different materials
stray bridge
tidal latch
abandoned cars can mean cars which cannot be interacted and have different mater...
Im pretty sure hes talking about cars like you would find in dayz, abandoned on the side of the road. Maybe not tho, maybe im just missunderstanding him
yes, props. Not interact-able
tidal latch
which is doable imo with available in game models of cars (not wrecks)
timber lion
Yes cars as props where I can edit the position of the wheels and the door. They are static and not interactable. I don't mean the model in the picture!
ancient walrus
Edit a wreck and replace the model ?
 vivid lake
hi, currently playing around with the Enfusion Engine... after importing my FBX model its turning red... any ideas what i am doing wrong? 😄 Textures and Material is setup correctly :/
 last parcel
looks like vertex color

I didn’t find it anywere… How can i remove vertex colors from my mesh? It paints my mesh in 3d view even if i’m in texture shading and my material dot use it. Only solution i found on google is to paint it all white, while it is still not showing my material color 😕
if you are using blender
vivid lake
"under properties / material panel, Vertex color paint is checked"
hmm... can't find it 😦
last parcel
under color attributes remove if there is anything there
 vivid lake
just found it (https://www.reddit.com/r/blenderhelp/comments/1fty0mr/remove_vertex_colours_from_meshes/)
But now the material don't export.... so i need to export it twice.... once with color attributes to get the material and once again without to get the mesh

Explore this post and more from the blenderhelp community
nvm i create the material in enfusion manually 😆 ... so i just need to export the model once.... but thanks for your help! 👍
 turbid tendon
Would anyone have a good suggestion for a building modding guide, specifically how to handle colliders in a building? Thanks
 sullen sable
Does anyone know whats causing all these black marks on my rifle when imported into tools?

 dim nimbus
sullen sable
Does anyone know whats causing all these black marks on my rifle when imported i...
dim nimbus
sullen sable
Does anyone know whats causing all these black marks on my rifle when imported i...
normals ok?
 sullen sable
dim nimbus
normals ok?
sullen sable
dim nimbus
normals ok?
I don't have any textures applied yet.
sullen sable

 dim nimbus
looks ok
can you do
select rifle > edit mode > verticies > A to select all >M > by distance > apply >export > import> screenshot from tools
do NOT save blender file, or make a compy for this
Or yo ucan jsut CTRL+Z after yo uexported model
sullen sable
Its not giving my an apply option after I click by distance. when I click by distance it says 0 vertices removed
dim nimbus
aha so its not that then
can you... send blender file?
remove all unnecessary stuff aside from mesh, and lets say remove half of the rifle to be safe

for example remove crossed part in edit mode
dim nimbus
sullen sable
Does anyone know whats causing all these black marks on my rifle when imported i...
this was vertex coloring, how to solve - select problematic part in blender
Edit mode > verticies > select all(hit A on keyboard), then on the right go to "Data", and remove all colorsets by selecting it and hitting MINUS on the right

 round lily
anyone know where i can find the unit dimensions for the doors in arma reforger? id like to create a building & itd be really helpful to have those on hand instead of eyeballing it (im under the pretense that doors are separate models due to the prefab system in workbench, as opposed to the A3 system of the doors being stored in the same .p3d as the building)
leaden trench
round lily
anyone know where i can find the unit dimensions for the doors in arma reforger?...
iirc the dimensions are in the names of the prefabs? e.g. SomeDoor_190x85.et
here is some dimensions also: https://community.bistudio.com/wiki/Arma_Reforger:Environment_Metrics
round lily
ahh
appreciate it big dog, i havent opened WB and was planning on doing that after i created the model (not anymore now :) )
 hybrid pond
how does the colour variants in prefabs work ie
House_Village_E_1I04/House_Village_E_1I04t_green.et and House_Village_E_1I04/House_Village_E_1I04t_red.et
they both inherit the same XOB but the material is different
dim nimbus
hybrid pond
how does the colour variants in prefabs work ie
House_Village_E_1I04/House_Villa...
they inherit same xob but materials inside are overridden? literally?
hybrid pond
dim nimbus
they inherit same xob but materials inside are overridden? literally?
yup, found the way to do so btw, you can change out materials from meshobject class in the prefab
cold spindle
But why? Why are UCL_ so funkey.... Have to export from blender at 90 degrees to get it line up in enfusion
 cold spindle
Anyone got a link to the page Vehicle Pipeline - Parts' page'
referenced in this doc in Naming of objects section?
https://community.bistudio.com/wiki/Arma_Reforger:Car_Creation/Asset_Preparation#Naming_of_objects
No hyperlinks where added to the BIKI...
 honest pine
cold spindle
But why? Why are UCL_ so funkey.... Have to export from blender at 90 degrees to...
honest pine
cold spindle
But why? Why are UCL_ so funkey.... Have to export from blender at 90 degrees to...
same
 remote palm
Hey, i seem to have an issue with my bolt...
Trigger, magrelease and firemode are working fine, and i have my bolt setup just the same way.
I have a vertex group of "w_bolt" the bone "w_bolt" has a parent to "w_root" and it also moves correctly in blender. My bolt also has a modifier with armature and the object is armature.
Once i export skinning in my .xob and reimport resource (PC) the bolt just moves somewhere it wants...
How could i fix this?


I also tried the way the AK74 is setup from Reforger, but that also does not work :/
cold spindle
https://imgur.com/a/Ortf61C
My experience modding vehicles so far. I feel just like that APC
cold spindle
Nah something funkey with the BTR turret being added to it. Not sure what exactly. Im confused why turrets have thier own rig that is a duplicate of the entire vehicles -_- soo much extra wooorrk
And like why does the BTR main mesh have wheel colliders and each wheel added has its own colliders -_-
ancient walrus
closing my eyes like i always do to hard work : Enjoy
cold spindle
Ahhh fix one thing then 99 more problems appear -_-
If i can just work out what makes an BTR a BTR then i can start actually making what i want 😢
ancient walrus
i took a break from vehicles my mental capacity was full that BTR workflow looks Mental on steroids LUL
 urban cove
not sure where to post this so, Can Arma 3 objects (in particular, buildings ) be used in Reforger?
ancient walrus
no arma3 assets can be used they haven't released any public data (yet)
urban cove
@ancient walrus maybe someday. Thanks
cold spindle
Anyone know a way to debug view collision in game?
found it - Alt+windowskey in editor or game.
 nimble talon
hello im getting started with model making for reforger. I wanna make some WW1 Western front assets, but am unsure on what applications to use or how to get started
 sly bridge
start with learning the basics. You can use any 3d package, but blender is free (and also close to industry standards)
start with some free tutorials, avoid the donut tutorial like the plague though
honest pine
remote palm
Hey, i seem to have an issue with my bolt...
Trigger, magrelease and firemode ar...
you need to make the animation
nimble talon
sly bridge
start with some free tutorials, avoid the donut tutorial like the plague though
ok thank you
tacit eagle
Hello I was wondering if someone could explain to me why when I change an existing prefabs model to mine lets say I want to use the M9 prefab and turn it into a glock when I select my object it appears with a magazine sticking out the top
 bitter warren
Hi.. Do anyone here have experience with adding custom houses/buildings to the workbench/reforge tools?
I have some houses from packs i use i unreal engine. Then are modular pieces that i can combine to one mesh.
So should they be exported with windows/doors, exterior and interior in separate fbx files?
karmic adder
bitter warren
Hi.. Do anyone here have experience with adding custom houses/buildings to the w...
Usually yes, since you'd want the doors/windows to be separate movable/destructible objects
Look at how it's done for existing Reforger houses
remote palm
honest pine
you need to make the animation
Okay! yeah i have not yet really watched the animation tutorial - i just thought since the other parts lign up correctly and are on their spot, it should also work for my bolt since it uses the same names as the original AK74 from reforger. Ill take a look at animations 🙂 ty!
stray bridge
tacit eagle
Hello I was wondering if someone could explain to me why when I change an existi...
because the m9 magazine is a unique mesh and has to be changed separately inside one of the components on the m9 prefab. Its slotted somewhere
honest pine
remote palm
Okay! yeah i have not yet really watched the animation tutorial - i just thought...
if your gun isn't placed the exact same way the vanilla gun was placed in blender, it will result in bones offset , those bones were used to export animation and your gun playing vanilla animation will then move the animated bone to where it was instructed in the vailla exported anim, resulting in your skinned mesh to change position
remote palm
Ahhhhhh roger!
I took a look at a video tutorial about animation, pretty simple looking for now 😄 thanks for the explanation 🙂
gusty needle
bitter warren
Hi.. Do anyone here have experience with adding custom houses/buildings to the w...
You would also need to add colissions, etc. In blender. Else your buildings will suck up your Performance like nothing else.
ancient walrus
Anybody know why the latest Character sample when exported from Blender as FBX and then imported to WB ( i havent touched anything other than stretched a few verts in Lod 0 ) would turn 180 % in Game ? TIA
tidal latch
thats how characters are done - it is due to fact those characters are also used in Motion Builder
see infobox
ancient walrus
tidal latch
https://community.bistudio.com/wiki/Arma_Reforger:Character_Gear_Creation/Headge...
Much appreciated thanks
 sleek forum
sly bridge
start with some free tutorials, avoid the donut tutorial like the plague though
sleek forum
sly bridge
start with some free tutorials, avoid the donut tutorial like the plague though
how dare you...😂 🍩
vivid lake
A few days ago i had the problem with red textures on my imported model (fixed by removing vertex colours on object)... now the material turns red already while creating (in Enfusion)... any ideas?
 shell hedge
opacity map does not go into the basecolor+roughness map slot
vivid lake
it should be basecolor... but after importing texture to enfusion it turns grey :/
last parcel
have you tried using the correct suffix for it, if you are not going to an alpha map on it then it should be named BCR this gives more information about textures and suffix, https://community.bistudio.com/wiki/Arma_Reforger:Textures
vivid lake
there we go, thanks 🙂
bitter warren
gusty needle
You would also need to add colissions, etc. In blender. Else your buildings will...
Thx for the heads up 🙂
 cyan girder
The hanguard on this model is an attachment. However, it doesn't appear at first when you initially spawn. Users must move it to their second slot then back to the first slot for it to be visible. This isn't happening to the stocks which are also an attachment.
How do I fix this?

 livid blade
I am new to 3d modelling or modding, I did this on my 1st day of learning blender. How can I export the beard only and add it as a mod to reforger for testing purposes??
 stray bridge
select just the beard and export it lol, but to actually make use of it you need to add vertex groups / attach it to the amature of the reforger character which you can find I think on the github
its a little more complicated
you need to weight it
livid blade
oh okay thanks
livid blade
stray bridge
select just the beard and export it lol, but to actually make use of it you need...
the one on the pic is the body weight template I downloaded from github.
Also the beard I made is connected to the head armature
 stray bridge
is it weighted, does it have vertex groups?
also not sure if you can export import curves, maybe you can I just never did it
if you can and its weighted, make in tools sure inside the import setting that you tick the box export skinning or smth thats named kinda like this
if all that works, for testing purposes, get a clothing prefab and swap out the meshes, especially the worn model. save it as a new prefab in ur mod and test it. Theres no beard slot in the base game so you need to use another slot or make an extra slot. There is beard mods on the workshop just have a look at them and how they were done
livid blade
stray bridge
is it weighted, does it have vertex groups?
shit no wonder it's not working, I really have no idea what I'm doing after all lmao
tidal latch
https://community.bistudio.com/wiki/Arma_Reforger:Character_Gear_Creation/Headgear you can try to treat it as a beard for tests
in any case, curves will have to be transformed to mesh
livid blade
tidal latch
in any case, curves will have to be transformed to mesh
I'll go look for a tutorial on that then
thanks!
 white plover
have i done my memory points right they dont show up in infusion when i check the bones. any1 know where i could have gone wrong.
 tidal latch
white plover
have i done my memory points right they dont show up in infusion when i check th...
tidal latch
white plover
have i done my memory points right they dont show up in infusion when i check th...
 stiff reef
I need to apply the wooden part of this texture Atlas ( ST_Tiles_House_02_BCR) to some faces of my model, but the details are too big and I need to scale it down and avoid UV overlapping at the same time, how can I achieve that or what's the proper workflow? Thanks!

 hazy vault
stiff reef
I need to apply the wooden part of this texture Atlas ( ST_Tiles_House_02_BCR) t...
hazy vault
stiff reef
I need to apply the wooden part of this texture Atlas ( ST_Tiles_House_02_BCR) t...
Really depends, are you using it for a floor? are you using only one of the materials? what does the UV map of the faces look like
 surreal ore
stiff reef
I need to apply the wooden part of this texture Atlas ( ST_Tiles_House_02_BCR) t...
surreal ore
stiff reef
I need to apply the wooden part of this texture Atlas ( ST_Tiles_House_02_BCR) t...
For buildings you should be using a multi-material. In which case you can adjust the uv scale in the material.

vs
 last parcel
don't do it like that, do it with an UVSet 2 instead
maskmaps and uvsets are the stuff you need for buildings
surreal ore
last parcel
don't do it like that, do it with an UVSet 2 instead
So don't do it like B.I. does it for base game buildings?
 last parcel
they still use UVSets 2 and uvsets 1 for maskmaps, the slite tiling could be becuse that building needed it to be a certain little bigger one just one side.
as you can see tiles like that one he wants to use do like that everytime,
 surreal ore
Yeah, Not sure exactly where I told him what uv set to use? I simply told him to change the uv scale to match the way the creators of the game did it.
stiff reef
Thank you all! Yes I'm using it for some building I'm creating... If the texture is single I'm using the tiling method without problems, but I can't figure out how to do that with texture atlases like the ST_Tiles_House_02_BCR one.
last parcel
you told him to set the uvscale in the material, and for that certain material it wouldnt work.
stiff reef
So I need to create 2 UVmaps, but then how to set up the first and the other one? Sorry for the dumb question but I don't have any experience with multiple UV maps
last parcel
you do it like this, UVSet 0 reads the tiling, and UVSet 1 Reads the maskmap

then setup it up with uv scr global maps UV Set 2 in enfusion like this.
 surreal ore
last parcel
you do it like this, UVSet 0 reads the tiling, and UVSet 1 Reads the maskmap
surreal ore
last parcel
you do it like this, UVSet 0 reads the tiling, and UVSet 1 Reads the maskmap
Oh I see, Because of it being an atlas, changing uv scale would then encapsulate other portions of the texture causing undesired results.
last parcel
yea, there is template for the floors, in Assets/sharedData/Floor that is a frame model for the floor atlastextures.
cold spindle
Anyone know how to export FBX from enfusion into blender? Clicking FBX export gives me
Looked through project settings couldnt find any refernce to EBT configs
Found it! It was a plugin not an base engine feature. Look in the prefabs tab (top of main enfusion window)
if you discover this post in a moment of fustration.
Aaand you cant even export locked files -_- pfpfpfpfpfpffffff.
last parcel
of course you can't export the locked files it goes against EULA
cold spindle
All i saw was export fbx and i wanted to use it to get a reference scale
 thin lagoon
It seems to do this in two cases
1 is that you've enabled text view under the View tab
2 is that there is an error in the project somewhere and it refuses to compile everything else - check your console and logs
tacit eagle
view is on normal view
so trying to import it by right clicking and importing files says error register and rn i just imported it by opening my files

its been stuck at 26 percent of a minute now
gusty needle
tacit eagle
its been stuck at 26 percent of a minute now
How many verts does you model have?
shell hedge
All of them
faint wyvern
hi can anyone explain to me about how i can go about making my own player animation graph for vehicles
tacit eagle
gusty needle
How many verts does you model have?
I found out the issue
my own model importa fine it’s just the second model i put on top of it doesn’t
surreal ore
tacit eagle
Putting an fbx in your mod folder isn't the same as importing, right click>Register and Import or use the import button at the bottom of the resource browser. Importing would create a txo and xob file. Xob files are the models used by Enfusion. Trying to "look at" an fbx in Workbench will just open it as a text file.
tacit eagle
surreal ore
Putting an fbx in your mod folder isn't the same as importing, right click>Regis...
Yeah I go to assets and import it by right clicking, but I found the issue the ski mask imports fine it’s just my skull mask that’s connected to the ski mask that isn’t
It’s causing that issue
surreal ore
Ah, maybe i misunderstood the issue then.
tacit eagle
Yeah so it’s like a blender issue mostly
timber lion
Can I manual rotate the car axel of a static car? Almost deactivated all of the componements!
 cold spindle
Hey all, I've spent the past couple of days putting together a vehicle model + prefab. Today on i've come across a problem where i cant get out of the vehicle. From either driver or gunner, I also cant change between gunner/driver if i move the turret from starting position? Any input would help.
nimble talon
is there a discord or something that beginners to model making and modding can join? im lost on where to start, im day 3 of learning blender
cold spindle
nimble talon
is there a discord or something that beginners to model making and modding can j...
What part are you struggling with? Have you used any modeling software before?
nimble talon
ive dabbled with autoCAD with classes about 2 years ago but havent touched anything until 3 days ago with blender. I wanna make WW1 weapon mods for reforger but im just lost on how to make a gun on blender. ive done the donut twice now
cold spindle
There is a channel about 10 above this one called reforger_samples Inside is links to a github with sample blend files and a sample project
From donut to working LOD compliant gun is a big step though.
LOD = Levels of detail. Lots of modders ignore this part but for performance you should always make multiple models of variable vertex/poly count to reduce impact on peoples GPU's.
Usually LOD's come last though but i cant stress enough the value of them
If you're looking for example videos of people doing it there are only a couple out there i have found. They are not that great. But the workflow from blender to unreal engine is very similar to enfusion.
I personally haven't messed about with guns yet. But i would image they would want to be rigged. A good test for understanding how the workflow from Blender to Enfusion works is to make something simple like a crate that you can open.
stray bridge
nimble talon
ive dabbled with autoCAD with classes about 2 years ago but havent touched anyth...
you cannot expect to be able to model such complex stuff like a weapon just because you did the donut twice lol
there a plenty blender tutorials on youtube, for importing a weapon there is a wiki
cold spindle
as an example this is a model ive spent a few days working on and its not nearly completed yet.

This stuff gets crazily confusing and a mess to keep ontop of. That collecion manager on the right goes for about 2 pages because i keep making backups mid workflow to avoid loosing progress on something as blender is a "Destructive workflow" program. Meaning some changes you make are irreversible.
Start simple and build a stable knowledge base
nimble talon
jesus
cold spindle
Also i am a messy worker. Self taught all off youtube though..
Look for hard surface modeling tutorials the short and simple ones are the best teaching you a little bit information.
I'd avoid any of them where the first thing you see is a guy in a flatcap and its 40 mins long because they are usually trying to sell you a course they run or hike branded merch in your face.
ill see i can find you any
nimble talon
ok
cold spindle
https://www.youtube.com/@DefaultCube I learnt alot of tricks from this guy. Simple tools that you would have no idea existed.

This is CGMatter's second channel used for longer tutorials and other kinds of videos.
He's gone more into geometry nodes recently so check out some of his first blender videos as they should be more up your alley
https://www.youtube.com/shorts/VJujwiAMqgg People who use references always make better models.

Join The Vital Blender Newsletter For Free:
https://blendervitalsnewsletter.beehiiv.com/subscribe
Receive a Blender tip that could potentially save you hours of headache, sent to you weekly - Don't miss out^^
Check me out on all Platforms:
https://linktr.ee/BlenderVitals
Learn to create a Christmas gift box in this 1 minute Blender beginner t...
Learning to use the reference image tool is key to success. But it fills your hardrive with millions of images. I wish someone would make a tool that imports from online.
https://www.youtube.com/watch?v=Bhvw1JByzqA Using curves can aid you in creating fluid looking items that are uniform.

Join The Blender Vital Newsletter:
https://blendervitalsnewsletter.beehiiv.com/subscribe
Receive a Blender tip that could potentially save you hours of headache, sent to you weekly - Don't miss out^^
Check me out on all Platforms:
https://linktr.ee/BlenderVitals
Learn to draw mesh in this 30 second Blender beginner tutorial! If you found this...
sly bridge
nimble talon
is there a discord or something that beginners to model making and modding can j...
cold spindle
https://www.youtube.com/watch?v=11WdVgWYP7I&t=467s Just watching people build stuff is usefull as well. Watch it slow speed and put on a mixtape. Their keybinds appear on screen meaning you can learn the keyboard shortcuts which is another vital speed element when creating.

Hi guys in this video i will show you how i model the new concept vehicle in blender 2.93.
You can download the file for free here: https://drive.google.com/file/d/15j_KRQDw4DzWUlBx8pDk1VT6gsLfQ7YW/view?usp=sharing
#blender #3dmodeling #animation
cold spindle
sly bridge
https://discord.gg/blender
Im stopping now dw. xD
TLDR: Practice is key to success. Start making smaller parts. Dont try make everything all at once. Search for the term "Blocking out a mesh" as i find this very usefull when starting out on any project.
nimble talon
ok ill check it out
cold spindle
Don't just check it out. Commit. 3D modeling is a game changer if you learn it and can literally change your life.
You can do it
I think enfusion has told me i've done enough today
BACKEND   (E): Curl error=Timeout was reached
BACKEND   (E): Http Error (TIMEOUT)
BACKEND   (E): Http Error (TIMEOUT)
BACKEND   (E): [RestApi] ID:[] TYPE:[EBREQ_NOTIFICATIONS] Timeout
BACKEND (E): [RestApi] ID:[] TYPE:[EBREQ_NEWSFEED] Timeout```i wonder if in my patch sample I can do sewing around it
 void field
Is there a sample player model anywhere I can use as a reference when modeling buildings / structures? I'm only going off the metrics page when trying to model stuff so it's a bit difficult
https://community.bistudio.com/wiki/Arma_Reforger:Environment_Metrics#Building
tidal latch
void field
Is there a sample player model anywhere I can use as a reference when modeling b...

Modding Samples. Contribute to BohemiaInteractive/Arma-Reforger-Samples development by creating an account on GitHub.
void field
Thanks @tidal latch. I had a look in there and only just found the right character model... thanks mate
 tall skiff
Does anyone know an easy way I can import a FBX, throw it in the world editor and use rigidbody to use the mesh as a collider? I just need to check clearances in my building. Performance is no issue at this point.
tidal latch
select LOD0 in Blender, duplicate it, rename it so it has UTM_ prefix, add proper layer presets/gamemats
tall skiff
Thanks
turbid tendon
Does anyone have a good suggestion for a tutoiral on building coliders that isn't the Enfusion Wiki?
surreal ore
turbid tendon
Does anyone have a good suggestion for a tutoiral on building coliders that isn'...
A collider is just a model. Building colliders work the same as any other collider. Not sure what kind of tutorial you're needing...
If you're actually talking about the probes/volumes/portals and bsp stuff the wiki is your only option that I know of. They don't have a building in the samples for some reason.
turbid tendon
surreal ore
If you're actually talking about the probes/volumes/portals and bsp stuff the wi...
Mayb I should have said I am looking for more of just a better tutorial on how to handle importing buildings adn their specific. I am good with colliders, but using them with a building seems very daunting.
surreal ore
They import the same as every other model. Except with a few other import settings afaik.
@last parcel Could probably tell you what import setting you need.
turbid tendon
surreal ore
<@154668893409902602> Could probably tell you what import setting you need.
Thank you!
last parcel
i use one sort of building coilder and that is BuildingFireView that is also needed to be able to press the generate the portal button. you are also going to need a BSP, which is a lowpoly version of the building where player are able to be.
turbid tendon
last parcel
i use one sort of building coilder and that is BuildingFireView that is also nee...
Ok you you turn the low poly model of the building into a giant collider, then add the glass and door as theri own things?
last parcel
doors and glas are seperate objects. and their own files, i would highly suggest you check what Bohemia did with their buildings.
turbid tendon
Will do, appreciate the help. I was worried I was going to have to make every wall and floor it's own collider
 fluid dragon
What could be the reasons that my uniform doesnt transform when my character wears it ? I made sure that the weighting got imported. when i move the bones in the xob file the mesh moves and transforms but when i equip the pants and shirt its just static
surreal ore
fluid dragon
What could be the reasons that my uniform doesnt transform when my character wea...
Wrong skeleton
Get the new one from the samples
fluid dragon
will try thats possible that i used an older version
faint wyvern
nimble talon
is there a discord or something that beginners to model making and modding can j...
check out Aryan on youtube
fluid dragon
surreal ore
Wrong skeleton
Thanks that was the problem
surreal ore
fluid dragon
Thanks that was the problem
I know lol. The bone count in your picture was wrong.
 faint viper
Hi, if i wanted to have a good looking character, like a humanoid but something to a monster what would be the best and max polycount that reforger can handle, or at least that doesnt break anything? thanks
sly bridge
faint viper
Hi, if i wanted to have a good looking character, like a humanoid but something ...
you should look over existing assets in terms of polycount, there is no best or max
shell hedge
As little as possible while maintaining acceptable quality ie. On par with vanilla assets
Pls remember about LOD
-# pls
 earnest badge
faint viper
Hi, if i wanted to have a good looking character, like a humanoid but something ...
earnest badge
faint viper
Hi, if i wanted to have a good looking character, like a humanoid but something ...
always least as possible without the player being able to see obvious sharp edges/points.
but otherwise, Consider things like: how close a player will ever be looking at the model? How many will ever be rendered in at one time? Will there be a lot of weight paint stretching? consider high poly so it doesn't get crunchy when animations play and weight paints start stretching faces. Or lower poly if that part of the mesh isn't going to be stretching a lot or at all.
 subtle stag
@earnest badge for this game what would you consider low and high poly? I usually make my gun models at max 20-30k and lowest 10k s
 fierce pawn
subtle stag
<@191619255085694987> for this game what would you consider low and high poly? I...
fierce pawn
subtle stag
<@191619255085694987> for this game what would you consider low and high poly? I...

This is the vannila M16
goes down to 1k at lod 5
subtle stag
way more than I thouht
sly bridge
subtle stag
<@191619255085694987> for this game what would you consider low and high poly? I...
you can check the existing data as i previously said to get an idea
fierce pawn
subtle stag
way more than I thouht
Yea some other have around 30k
subtle stag
sly bridge
you can check the existing data as i previously said to get an idea
yeah forgat that there is to see vertices feature in enfusion engine
sly bridge
main reason assets are more poly heavy is that textures are getting mip mapped on consoles, as such some data that would otherwise be texture driven is modelled in
earnest badge
subtle stag
<@191619255085694987> for this game what would you consider low and high poly? I...
I only just learned enfusion this last week, my experience is modeling for source, unreal, and unity. but I would for sure use existing vanilla assets as your center point.
guns make a lot of sense to be higher poly because that's going to be right up in your face
 idle hinge
sly bridge
main reason assets are more poly heavy is that textures are getting mip mapped o...
idle hinge
sly bridge
main reason assets are more poly heavy is that textures are getting mip mapped o...
Can you elaborate on that? Or whats the term Id have to google?
subtle stag
idle hinge
Can you elaborate on that? Or whats the term Id have to google?
I belive mip mapped is the same texture but in lower res therefore making the model look worse
if I understood him right he is saying that the poly count should be higher so the texture is not that noticable
sly bridge
idle hinge
Can you elaborate on that? Or whats the term Id have to google?
sure can, as soon as i understand what you wamt me to elaborate on
idle hinge
sly bridge
sure can, as soon as i understand what you wamt me to elaborate on
Why do I need more detailed geometry when mip mapping is used? Also are mip maps not a thing on the PC version and why?
sly bridge
idle hinge
Why do I need more detailed geometry when mip mapping is used? Also are mip maps...
a. geometry is faster and cheaper to render than textures by modern GPUs (including current gen consoles GPUs)
b. mip mapping is the equivalent of LODs for geometry, but for textures. Afaik consoles go to second LOD and second mip map anyways
in any case, generally speaking a good normals map can replace a lot of the geometry by baking a HP model into the LP model (game mesh)
but it needs the resolution to look nais, and if that is lowered, sometimes it is better to keep some of the details directly in the geometry
in any case, most modern games can get around with higher geometry meshes and lower texel density
we are still far away from full 4k/8k texture sets. Also it is a matter of data size = geometry is smaller in size than a single texture map (including case of reforger mutiple textures are already combined into fewer texture maps = BCR - base color (albedo) + roughness / NMO - normals map + Metalness + Occlusion etc)
idle hinge
Thanks for explaining. And to my knowledge mipmaps are generated automatically (unlike LODs in most cases)? Basically when creating models for the game they will be rendered different on consoles versus pc?
idle hinge
sly bridge
we are still far away from full 4k/8k texture sets. Also it is a matter of data ...
I noticed the combined texture maps. Havent seen that before in other engines
sly bridge
idle hinge
Thanks for explaining. And to my knowledge mipmaps are generated automatically (...
mipmaps are auto generated yes. In the case of enfusion lods are not (some other engine do that on import/ conversion)
sly bridge
idle hinge
Thanks for explaining. And to my knowledge mipmaps are generated automatically (...
models and textures are generally linked to graphical settings in the case of PC, where certain things can be individually controlled (model, texturs etc). That is not the case for consoles where there are only 2 presets
idle hinge
Definitely something to consider when creating assets for the game. Sounds like if we assume someone creates a nice hp model and handles most intricate details using a normal map on the low poly it would look worse on console than on PC (where the one making the asset would be able to preview and test it in most cases)
sly bridge
idle hinge
Definitely something to consider when creating assets for the game. Sounds like ...
it will look worse on console anyways. but it’s also a matter of optimization of resources and size
 proven finch
Hello, I was wondering if there was a way to add a patch to the pilot suit, I’ve made the patch and attached it via the slots in the BaseLoadoutClothComponent but I don’t get a pivot ID so it shifts around while moving
surreal ore
Hierarchy component
proven finch
thank you ill try that now
proven finch
surreal ore
Hierarchy component
could i pm you about this?
surreal ore
proven finch
could i pm you about this?
Why? Doing something illegal or super secret?
proven finch
lol no, just dont wanna take up space in here for more important questions
surreal ore
The reason questions are answered publicly is so they become public knowledge.
So when someone else comes along with the same issue they can find an answer here. Though most people don't know how to use the search function. Lol
proven finch
true, well ok then lol, i looked into it, and i tried the LeftPectoral, where the Patch should sit, but it still floats to the left more near the armpit
 surreal ore
It's just a static object?
proven finch
yeah, just sits there body stretches and moves without it

made a second one for good measure this time i did it the prefab basics way

and still floats
surreal ore
If you're using RHS why are you not just inheriting from their base patch prefab or whatever?
I don't know how their setup works but I'm pretty sure they have a patch "system"
proven finch
I tried it that way too, same thing added the RHS_LoadoutSlotInfo and made it a patches thing, I’ll try again, I’m sure I screwed something up
surreal ore
When you asked about the pivot ID I assumed you were just having a problem with the hierarchy component and you had everything else configured correctly.
So take a look at whatever base prefab they use for their patches. Inherit from it and change the model and wherever else to you stuff.
Your*
proven finch
F me, i didnt set it up right for RHS, ill retry it their way rq
surreal ore
There's no reason to reinvent the wheel, especially if you're already using a mod that has it
proven finch
mm, no patches will go onto it screw it ill figure this out thank you for the help
im just gonna inherit the base crye and go from there
holy guacamole
it works
proven finch
whole lotta trouble but worked out thank you zelik
 surreal ore
Glad you got it sorted
timber lion
Hey guys, I'm trying out this FBX Batch Conversion tool. But I don't seem to get it running! Where should I edit this default parameters?
 remote palm
Hey 🙂
What is the best way to make ResLODs for Reforger?
In Arma i had some decent merge points formular, but in reforger im a but lost. Do i have to "rebuild" the gun in simpler shapes the lower the resolution?
Or is there a tool in the workbench that does that for me? Or would the Arma 3 ResLODs also work in Reforger?
ancient walrus
Do it in Arma OB and import to blender using the tool
 hexed sandal
timber lion
Hey guys, I'm trying out this FBX Batch Conversion tool. But I don't seem to get...
hexed sandal
timber lion
Hey guys, I'm trying out this FBX Batch Conversion tool. But I don't seem to get...
Remember that there are two types of .P3D, encrypted (ODOL) and unencrypted (MLOD)... I guess you have to use an unencrypted one in order to convert them.
surreal ore
Also remember there are 2 other types of P3Ds as well, ones you can legally convert and ones you can't.
If they're your P3Ds or ones from the licensed data pack, go for it. If not, that's a legal issue and you're not gonna like the outcome.
hexed sandal
and the next step is, if they are under lincence... but come on, this is beyond the question.
surreal ore
I for one would rather let the stranger on the internet know that the thing he's trying to do may not be legal. I've seen a lot of people on the internet think that just because they have access to something they're allowed to do as they please with it. At least in this case, ignorance won't be a factor. The law won't excuse you for being ignorant on such things, if it goes that far you'll get convicted either way.
remote palm
Hey, whats your guys best practice to do the UTM colider?
I just cant get a good colider model ready..
ancient walrus
i add a decimate modifier in blender and adjust ratio till it feels right
timber lion
hexed sandal
Remember that there are two types of .P3D, encrypted (ODOL) and unencrypted (MLO...
Already imported some of the p3d models into blender and exported them as fbx so all good. My question was where I modify the default parameters: set objects and set script
 remote palm
ancient walrus
i add a decimate modifier in blender and adjust ratio till it feels right
remote palm
ancient walrus
i add a decimate modifier in blender and adjust ratio till it feels right
Ill look into that 🙂
Ty
hazy vault
Is there any documentation surrounding doors… I’ feel like I’ve tried it all and looked but can’t seem to get mine to open correctly
tidal latch
timber lion
Already imported some of the p3d models into blender and exported them as fbx so...
in batch file itself
timber lion
tidal latch
in batch file itself
In what line?
tidal latch
timber lion
In what line?
not sure but it should be obvious after opening that file
timber lion
tidal latch
not sure but it should be obvious after opening that file
I‘m not home right now but I remember it was not obvious where to put them. But I will try when I‘m back home
tidal latch
alright, I will check it then - perhaps something changed
timber lion
tidal latch
alright, I will check it then - perhaps something changed
So I put them in like this but it doesn't work..
 tidal latch
timber lion
So I put them in like this but it doesn't work..
tidal latch
timber lion
So I put them in like this but it doesn't work..
and was it working without making any changes?
timber lion
tidal latch
and was it working without making any changes?
No
tidal latch
was there some error?
timber lion
Just that there are values set wrong or not found
ERROR: The specified registry key or value was not found.
The command “”“” is either misspelled or
could not be found.
Press any key . . .
timber lion
tidal latch
and do you have blender associated with blend files?
If you mean I have the BlenderPlugin Installed then yes
tidal latch
no, I meant file association
timber lion
tidal latch
Are you using w10 or w11?
sorry, what do you mean by that?
tidal latch
so if there is blend file on desktop, double clicking on it file explorer will open Blender
are you use portable version of Blender?
from steam or from Blender site?
timber lion
tidal latch
so if there is blend file on desktop, double clicking on it file explorer will o...
I downloaded it from the Blender site
4.2
I just think I miss imput the values
tidal latch
input is what you drag and drop on bat file
finding of blender and script is now automatic
timber lion
I mean the parametern I need to modify
tidal latch
those are obsolete
they are set automatically although I guess it could be not working correctly always
timber lion
Hmm then I don't know why I shouldn't work
should I use the batch file where I have installed the EnfusionBlenderTools or should I use it on my desktop?
I generel it showes me this error:: ERROR: The specified registry key or value was not found.
tidal latch
which means it cannot find this path HKEY_CLASSES_ROOT\Applications\blender.exe\shell\open\command
I will need to check why its happening
 topaz willow
Maybe it’s too high poly for the engine..?
hazy vault
topaz willow
Maybe it’s too high poly for the engine..?
Got it figured out! Applied normals and Triangulated
plan on shaving it down, was just curious
 fallow pond
what model is it?
 clear kelp
Does anyone know what the ideal tri-count is for a helicopter at LOD0?
Never mind, found it! Looking at the UH-1 as an example
 remote palm
Jesus christ - going from 100k down to 180 😂
sly bridge
generally speaking i was thought that lodding should be in 50% increments, not 30% but if it works :))
 midnight path
hazy vault
Any advice for when high poly objects get stuck on 58% on import
midnight path
hazy vault
Any advice for when high poly objects get stuck on 58% on import
most likely is some ngons
hazy vault
fallow pond
what model is it?
It’s a very large building
hazy vault
midnight path
most likely is some ngons
Thanks, triangulating again after export from Substance fixed it
Turns out the engine really had no issues with it even the high poly version at 440K
white plover
is there any tutorials or documentation on turrets like how to add elevation controll ect
 lunar crow
white plover
is there any tutorials or documentation on turrets like how to add elevation con...
lunar crow
white plover
is there any tutorials or documentation on turrets like how to add elevation con...
would be a weapon slot comp on the turret itself no?
white plover
i have a turret it shoots ect but just dont have any elevation control can here the sound it plays ect when i should be moving the barrel. just not sure what i need to make the barrle it self move
as i only need it to go up and down
lunar crow
wanna send me files?
white plover
cant send em. sry
cold spindle
Anyone know how to make a UCS (Capsule shape) work when exporting from blender?
I've made it using a cylinder with pointed ends.
Keep getting
RESOURCES (W): Capsule has wrong extents. CapsuleCollider UCS_FG_Differential_02```Where is the origin of UCS?
cold spindle
centered
tidal latch
on geometry?
tidal latch
try perhaps Origin to Geometry again
cold spindle
Just found the sample shapes. They have origin at tip? Ill try that
 tidal latch
cylinder should be at center of geo
cold spindle
capsule shape not cylinder
I've been using the BTR as a reference and for vehicle driveshaft collision they are using capsules.
tidal latch
yea, yea, just mentioned it that at least I'm sure about cylinders so I would assume capsule would behave similar
cold spindle
wow really strange behaviour. I changed just the gearbox's origin to the tip and now they are all importing correctly...
Worked it out. For capsule shapes the origin must be at the bottom tip of the shape. And then it HAS to be rotated into position in object space not mesh space.
 tidal latch
ahh, I will write it on wiki then
 solar heron
Hey everyone, I have a question about model detail in the Enfusion engine.
I’ve made some models for the Source 2 engine before, with a decent level of detail and proper LODs. Do you think I can use them in Enfusion with the same level of detail, or will too many polygons—like in the images—cause performance issues?
Would love to hear your thoughts!


 cold spindle
Dont ever use direct photoscanned assets for basic environmental assets. You should always clean them up. Use blender to bake texture detail maps. (There are many videos on youtube). Then go about decimating the models to get their poly could down. For a bar stool like image 3 i would expect the model to be at most 300 vertices.
solar heron
cold spindle
Dont ever use direct photoscanned assets for basic environmental assets. You sho...
There are not scanned... I modeled these things by hand.. There are some sort of optimized with 3 lods.
I used Substance Painter for the materials
cold spindle
show the wireframe image of the bin
solar heron
cold spindle
show the wireframe image of the bin
I can do this later...turned of the PC 5mins ago
cold spindle
solar heron
There are not scanned... I modeled these things by hand.. There are some sort of...
you did well at Substance painter. I've only had it a week and coming from blender i find it very unintuitive
stray bridge
solar heron
Hey everyone, I have a question about model detail in the Enfusion engine.
I’ve...
if you want you can use models with a million polys, but its bad for performance. Just look at similar base game stuff and keep the polys as low as possible while maintaining quality
solar heron
stray bridge
if you want you can use models with a million polys, but its bad for performance...
They are optimized for a map like we have in Counter Strike... 1000-2000 polys. But my question is...can a massive map in arma handle many of this objects
cold spindle
Yes polycount is only an issue at near distance LOD levels
solar heron
cold spindle
you did well at Substance painter. I've only had it a week and coming from blend...
Thanks. I love this Tool. Looked hours of tutorials
stray bridge
solar heron
They are optimized for a map like we have in Counter Strike... 1000-2000 polys. ...
your questions is pretty general without much detail, I dont know
keep in mind also xbox players might play it
cold spindle
As long as you setup the LOD's correctly and you have the number of LOD's that work for you situation it shouldn't be an issue. If you are worried then you can always add a simple cube as the highest LOD mesh and then disable it later if its not used.
All LOD distances are set inside the editor mesh component as far as im aware.
 solar heron
stray bridge
your questions is pretty general without much detail, I dont know
solar heron
stray bridge
your questions is pretty general without much detail, I dont know
I wanted to know if it’s common to use relatively detailed models as decorative props in Arma, or if people usually avoid that to keep performance high and not make the world too detailed.
I started working with Enfusion two weeks ago, so I don’t have a full overview yet. I also haven’t played the game at all because the servers have been down, so I’m not really familiar with the props and the level of detail on the maps.
cold spindle
this is a chair that reforger uses and its mesh. use the editor to look for .xob files and see what kind of details they have for thier assets.
 stray bridge
solar heron
I wanted to know if it’s common to use relatively detailed models as decorative ...
stray bridge
solar heron
I wanted to know if it’s common to use relatively detailed models as decorative ...
I would say most maps got vast landscapes and a number of towns with a good amount of medium to high level of detail props.
Just look at montignac to ger a better understanding of how the base game did it
solar heron
stray bridge
I would say most maps got vast landscapes and a number of towns with a good amou...
Ah okay.. The chair from pathogens picture is pretty detailed... So iam okay with my models i think. Doesnt find the old Blender file with my Source 2 models... But this i did for Ready or Not last year... I think the polycount is okay.


For such an smal unimportant model
stray bridge
sieht gut aus
solar heron
🙂👍🏻
In Ready or Not, the structure was something like this:
mesh (base mesh = LOD 0)
UCX_mesh_001 (collision box 1)
UCX_mesh_002 (collision box 2)
LOD_mesh_001 (LOD model 1)
…and so on, if I remember correctly.
Is there a similar naming convention or structure in Enfusion that I should follow when setting up models?
stray bridge
solar heron
In Ready or Not, the structure was something like this:
mesh (base mesh = LOD 0...
idk about ready or not but seems very similiar
solar heron
stray bridge
idk about ready or not but seems very similiar
Ah okay. I watched some videos, but they didn’t explain it very clearly.
midnight path
 solar heron
midnight path
solar heron
midnight path
Very nice... Crazy good looking. Racing Game Quality in my eyes
midnight path
solar heron
Very nice... Crazy good looking. Racing Game Quality in my eyes
Thank you 🙂
shell hedge
Where all the other wheels go
midnight path
shell hedge
Where all the other wheels go
i got hungry
shell hedge
You call it rubber but I call it dinner
midnight path

 short mountain
Having a bit of trouble with Bone importing, checked my Export settings and nothings jumping at me
Blender FBX > Enfusion
The non imported Is the Armature
The IK Bone Handlers all import any ideas?
topaz willow
short mountain
Having a bit of trouble with Bone importing, checked my Export settings and noth...
Did you do “export skinning” in the import settings in Workbench for the model?
short mountain
That’s what showed the IK bones so I’m thinking it’s something with the Armature in Blender
topaz willow
Using the correct export FBX settings from Blender?
short mountain
topaz willow
Using the correct export FBX settings from Blender?
How so?
topaz willow
short mountain
How so?
Taking a look at the Wiki for FBX Import and such, there’s specific settings you need for it
I unfortunately can’t link it at the moment
short mountain
I didn’t enable the leaf bones
😂💀 I spent the better part of 6 hours pulling hair
short mountain
Well i have armature now but assignment is still giving me grief
Shown - Parented to Head Bone and Weight Painted

Post Import
 short mountain
Disregard managed to get it, adjusting to new tools is a trip
 signal oracle
thought little speed boats would be a cool mod

could make a map based off that old micro machines game
then have 128 player races
😛
i am pretty good with programs, started a blender tutorial, would like to eventually get into some 3d modelling but until then im just gonna throw my stupid ideas at those who are capable
cold spindle
Anyone got any tips/tricks for exporting blender>substancepainter>enfusion
The workflow seems very prone to collapse unless i am doing it all wrong.
Should substance painter only be done on final export of mesh (when the prefab is 100% completed)?
I can't find anyway to make any changes to a mesh in blender without completely mashing up the UV's in substancepainter forcing a complete retexture...
midnight path
cold spindle
Anyone got any tips/tricks for exporting blender>substancepainter>enfusion
The ...
dont use auto unwrap in substance
make your uv's in blender then all u should be doing in substance is painting\texturing
cold spindle
ahaha I did learn that the hard way... But even adding a single item to a mesh can throw off the uv islands causing all SubP texturing to be waay out
midnight path
generally painting after you have finished the uv's is best practice, otherwise you will run into things shifting around
cold spindle
yeh thought so. For a £200 software package it's actually leaving me desiring doing all texturing in blender.. and just polishing in SubsPainter
midnight path
its only an issue if you are editing uv's and painting at the same time
if you paint after editing u will never have any shifting
cold spindle
Ok and would you suggest one 8k texture map for a whole vehicle? Or 4x 2k texture mats?
midnight path
some of my vehicles have 40 mats
cold spindle
so seperate out the trims/ body etc
midnight path
ranging from 256x256 to 2k
if its a small object it doesnt need much resolution
2k would be only on like body or interior
cold spindle
midnight path
if its a small object it doesnt need much resolution
So my thinking was to unwrap all smaller objects onto a single 2k and body onto its own.
midnight path
yeah that would work fine
cold spindle
Ok good to know. Wasn't sure if there was a standard practice for this.
midnight path
4k textures are pushing it tho, its 32-50mb per
cold spindle
Very good point
Do you seperate internal and external body into seperate mats as well?
cold spindle
Because the issue i keep running into is SubsP wanting to export a file for each material. Which is kinda insane when i think about it.
I found this good tut of a guy explaining how to export a single mat where subsP uses mesh bounds but i'm worried it might cause edge issues if that mat is applied to a non seperated mesh.
https://www.youtube.com/watch?v=BHXk2rl01Og

While amazing for creating texture maps, Substance Painter has a very specific way of working which for Blender uses can often result in multiple sets of image maps were you only wanted one.
In this video we will look at how to take a model made up of various objects and prepare its UV’s and export for texturing in Painter.
CHAPTERS
-----------...
midnight path
cold spindle
Because the issue i keep running into is SubsP wanting to export a file for each...
do you have a export profile made for reforger, for substance?
cold spindle
Yes. Didnt follow any tuts just kinda winged it
seems to work
ill get a screenshot 1 sec
midnight path
cold spindle
 cold spindle
bcr vs mcr? Just tried googling it and all im getting is leukemia medical papers...
midnight path

pbr basic is a single mat

pbr multi uses the mcr stuff
mcr is for the addition of masks and stuff for mud\damage
im probably not explaining it correctly @shell hedge has a better handle on it than i do
cold spindle
So its just about how the engine treats the mat.
midnight path
im very familiar with single mats, i have not used the multimat\mcr yet
cold spindle
So multi would have layers that can be added/subtracted depending on conditions?
midnight path
the multi has a mask that defines what layers show where
cold spindle
inbuilt masking layers or is itself only a masking layer?
sorry im grilling for information xD
midnight path
cold spindle
inbuilt masking layers or is itself only a masking layer?

Learn to use multiple UV maps for a single material allowing you to layer and customize multiple textures or PBR sets on one object.
How to setup PBR materials
https://www.youtube.com/watch?v=y8uSR8V8olw
Make Scifi textures in Blender
https://www.youtube.com/watch?v=5pZSPDksc0w
Top 10 UV tricks
https://www.youtube.com/watch?v=CM8TOEUfbEE
Mat...
shell hedge
pbr multi is wish.com triplanar based on masks and repeating textures
Check out the houses, especially their exterior walls, it's a good demo
cold spindle
yeh so looking at that video and the BTR mesh. MultiPBR are best for Vehicles as they allow you to make mud/dirt/wetness masks that increase over time creating more worn/dirty looking vehicles.
And the BTR material also has a water mask which im assuming has something to do with cleaning its masks when driving in water...
 short compass
my new , but not simple to creat simple action with enfusion , script help in #enfusion script
 ancient walrus
hi does anybody know of a nice simple guide (that is NOT the WIKI) that explains the EBT or even the import settings in Enfusion tools in relation to Geometry and Fire Gemoetry . Im trying to understand the simple terms , lets say i have two boxes one for mass and collision and one for fire geometry , both these boxes are relating to a crate >
how do i set the Geometry lets call it UBX_Create01 . i have two options in EBT
What will the difference be here for the Geometry or mass and the Fire geometry or Hot effects do you even have two boxes now if its simple or does one box do both if you dont need a UTM for holes etc ?
Cheers iN Advance

 raven rock
I have a problem, when creating any type of collider in blender, it crashes
Does anyone know what it could be?
remote palm
What version of Blender you using? Never had that happen to me
surreal ore
ancient walrus
hi does anybody know of a nice simple guide (that is NOT the WIKI) that explain...
Depending on what you're creating you may or may not even need more than one collider.
It all depends on the layer presets the object needs.
For a prop you can have a single collider with the PropFireView layer preset.
It gets more complicated when you're creating vehicles and weapons
raven rock
remote palm
What version of Blender you using? Never had that happen to me
So, mine was working normally, it seems like it's been like this for a while now, I don't know if it's because of the BI...
I also thought it could be due to the size of the project, but I made a simple cube and tried to make the collider and crash too
remote palm
Are you sure you have the naming right? have you sorted the objects? are they convex hull ect..? I cannot confirm the crashes.. otherwise reinstall the Enfusion tools?
 vital parcel
I dont know if this is the right chat for this but how would you go and make a model with the green stuff on top for the terrain. Trying to make a bunker
 remote palm
vital parcel
I dont know if this is the right chat for this but how would you go and make a m...
remote palm
vital parcel
I dont know if this is the right chat for this but how would you go and make a m...
In blender, do you see this in your model? its the white point in the picture you showed - its the origin of your model. You would now need to select the lowest edges, to do so select your model -> enter edit mode ->select the lowest edges -> press shift + s -> cursor to selected -> exit edit mode -> right click on model -> set origin -> 3D cursor -> shift + s - > cursor to world origin -> select model -> Selected to cursor


 livid blade
So I'm doing the beard 3d model, do I need an actual collider for beards or shemagh/balaclava?
vital parcel
remote palm
In blender, do you see this in your model? its the white point in the picture yo...
I know that but im trying to figure out how they made the bunkers that the terrain forms over the bunker i probably should have made my question more clear
remote palm
That idk - sry :/
vital parcel
you are good thanks for the help tho
solar heron
I build a Windturbine for my map in Blender...textured it with Substance Painter.
Someone wants to help me animate the Rotor inside Infusion?

 ancient walrus
solar heron
I build a Windturbine for my map in Blender...textured it with Substance Painter...
ancient walrus
solar heron
I build a Windturbine for my map in Blender...textured it with Substance Painter...
i just did a windmill 🙂
solar heron
ancient walrus
i just did a windmill 🙂
You did one? How you done it? Do you animate inside Blender...or put the Rotor seperately from the rest in to enfusion and put all stuff together inside the editor?
ancient walrus
yeah bones in blender than pap with signal timeofday IIRC ill make a list for ya when ya ready NP
solar heron
ancient walrus
yeah bones in blender than pap with signal timeofday IIRC ill make a list for...
Should i join the whole Model into one? Or leave the Parts seperate?
surreal ore
solar heron
Should i join the whole Model into one? Or leave the Parts seperate?
It doesn't matter as long as everything has an armature modifier and everything is weight painted accordingly.
ancient walrus
solar heron
Should i join the whole Model into one? Or leave the Parts seperate?
Separate parts because it’s easier for moving with wind direction as well as rotation of fan
surreal ore
ancient walrus
Separate parts because it’s easier for moving with wind direction as well as r...
Again, it doesn't matter. as long as everything is rigged correctly and everything has an armature modifier when you export.
raven rock
remote palm
Are you sure you have the naming right? have you sorted the objects? are they co...
Yes, I used the UTM prefix, I've already tried reinstalling everything and it doesn't work, no errors appear either, it just hangs and closes... Are you able to create colliders?
I've tried reinstalling too
ancient walrus
surreal ore
Again, it doesn't matter. as long as everything is rigged correctly and everythi...
Yeah as long as the vertex isn’t weighted as fan and turntable it doesn’t matter i like to separate myself but it isn’t a necessity if the groups are weighted according to the need
surreal ore
ancient walrus
Yeah as long as the vertex isn’t weighted as fan and turntable it doesn’t matter...
I'm just trying to express the fact that it doesn't matter if all of it is a single mesh vs separate meshes. As long as it's setup correctly it will work. If it's already a single mesh no need to separate parts and vice versa.
ancient walrus
Exactly set up is subjective but in the end the outcome is normally the same . I like to make models in Arma 3 and port them to blender Via EBT this way affords me the luxury of operate objects and textures and all the collider collection set up in import and empty’s . Others will be sick at the thought 🙂
solar heron
@ancient walrus can you send me a friend invite..? Or should we use the public Chat for detailed conversion
ancient walrus
solar heron
<@339755513325682691> can you send me a friend invite..? Or should we use the pu...
I’ll be I tomorow mate we can grab a voice channel below around 18:00 gmt ?
solar heron
ancient walrus
I’ll be I tomorow mate we can grab a voice channel below around 18:00 gmt ?
Yes. Sounds good...it will 19:00 in my time
remote palm
raven rock
Yes, I used the UTM prefix, I've already tried reinstalling everything and it do...
Yep, having no issue 
Your version of blender??
raven rock
remote palm
Yep, having no issue <:blobdoggoshruggoogly:748124048025714758>
Your version of...
now it worked, I think it was a connection problem something like that
or even just need to restart the pc 
 tropic flicker
Does anyone have the 3d model of this?

 surreal ore
https://discord.com/channels/105462288051380224/976042826091622420 is a better channel for that tbh
cold spindle
I was thinking that but then i thought maybe it was only for "The blender tools" not just any... I should really sleep.
surreal ore
cold spindle
I was thinking that but then i thought maybe it was only for "The blender tools"...
cold spindle
done and done
I find it weird how discord lets you delete your own messages... It feels.. wrong somehow
last parcel
that's just to make sure the group chat is never leaked 😉
shell hedge
Yeah I wish it let me delete other people's messages instead
 spiral hedge
Hi, i see on the "S105_wheel.xob" there is only one rubber collider. Would it not better to make the wheels seperated? Rim as Metal and Tier as rubber? Otherwise the tier can damaged while hitting the rim with a bullet.
 final merlin
Hello Team!
I'm trying to add doors to my building. But I fail.
I enabled Export Skinning in the** Import Settings **of my Asset. The "Bones" now appear in the preview (Picture1).
After that, I added Prefabs to the **Slot Bone Mappings **, but they do not appear. (Picture2)
Is it because, the "bones" are just **Blender Plain Axis ** and not real bones ? (Picture3)


 final merlin
Hello Team!
I'm trying to add doors to my building. But I fail.
I enabled **Exp...
final merlin
final merlin
Hello Team!
I'm trying to add doors to my building. But I fail.
I enabled **Exp...
Im sorry for my bad explanation of my problem. I just wanted to ask if I need an armature to add "bones" to a budling.
I figured it out that the empty Plain Axis are enough, I just had to add the prefabs to my** building prefab** and then add a hierarchy components to it. In the hierarchy component I could assign my socket_door_ext... to the prefab. After that, the prefab snaps to the selected socket.
 last parcel
that's the slow way of doing it, the fast way is doing extactly like BI did with theirs, I highly suggest you look at theirs.
solar heron
ancient walrus
I’ll be I tomorow mate we can grab a voice channel below around 18:00 gmt ?
Are you there 18:00 gmt? 🙂
cold spindle
solar heron
Are you there 18:00 gmt? 🙂
its 16:26 GMT +0
ancient walrus
solar heron
Are you there 18:00 gmt? 🙂
I can make 17:00 gmt pal
solar heron
cold spindle
its 16:26 GMT +0
Yes i know.. i meant are you there AT 1800
solar heron
ancient walrus
I can make 17:00 gmt pal
Thats would be nice.. so in 30mins?
cold spindle
Was just trying to help 🫡
solar heron
cold spindle
Was just trying to help 🫡
Yes.. was my bad. my english isnt the best
ancient walrus
You can help when we discuss bones and such later in the voice come join us
solar heron
ancient walrus
You can help when we discuss bones and such later in the voice come join us
Okay. how can i join this channel?
ancient walrus
look voice channels on the left << some maybe hidden so unhide
 warped cedar
So I have a model helmet with a face mask but how do I make the mask a separate mode 🤔
I'm really trying my best to learn
cold spindle
If anyone has any really good blender > substance painter > Enfusion tutorials i would be very appreciative. Or simply a blender > enfusion style workflow that packs textures into correct channels for enfusion.
I am really struggling with substance painter workflow and ontop of that I keep getting dodgey AO and other maps when backing due to the collision shapes packed in the fbx.
remote palm
cold spindle
If anyone has any really good blender > substance painter > Enfusion tutorials i...
In the Arma-Reforger-Misc-Main under "Art" you can find the SP export profiles
cold spindle
Ty I've got the export profile. It's just all Substance painter tutorials i can find are for single items with one material texture(ie. a single axe). I've got a vehicle with interior/exterior/lights/trims and loads more. I can't work out the best way to manage these items to allow for best texturing. I hope this makes some sense.
remote palm
And for the AO stuff you´ll have to separate each object into its own material in blender, export to FBX, import to SP and then under the baking option in AO you have to set "Self Occlusion" to "Only Same Mesh Name"
In Blender you can use "L" to select parts of a mesh - that should make separation easier
cold spindle
"Self Occlusion" That was what was f***ing me. Why would anyone ever want to have that a default everything xD
Having learnt all i know through blender and gimp. Adobe products are really confusing layouts
remote palm
Well for static stuff
cold spindle
Crap well that fixed one problem xD arrrgg
When it comes to UVs. If in blender i have the UV size set to 2048 do i then HAVE to use a 2048 scale in substance?
Damn well it's all gone to hell now -_-

Hmm it's not my UV map as even getting Substance to unwrap is causing the oddness.
sly bridge
cold spindle
Hmm it's not my UV map as even getting Substance to unwrap is causing the oddnes...
if you unwrapped it blender make sure to turn off the auto-unwrap on import
and ideally, you need to match the the uv resolution since that is generally related to padding (irrespective of texel density)
sly bridge
cold spindle
oh quad sizing
texel density is basically number of pixels per mesh, generally pixels/cm
remote palm
You can get addons for blender like UVPackmaster 3 to pack, stack and scale your UV unwraps
cold spindle
Yeh used to be called quad sizing. I've been doing it
 cold spindle
Yeh it's filthy AF but here it is. Not putting too much work into it until i know how to port into engine properly...

all sizes are respected
remote palm
What i also see is that you export all geometries and stuff? Just do the model
You have stuff like "Armor_9mm" or "Metal_1mm" in SP
cold spindle
yeh the colliders are being imported into SP
sly bridge
cold spindle
yeh the colliders are being imported into SP
why?
cold spindle
sly bridge
why?
i've disabled them from the bake. but they are part of the FBX
remote palm
you can exclude them
cold spindle
from import?
sly bridge
cold spindle
Yeh it's filthy AF but here it is. Not putting too much work into it until i kno...
i cannot follow that uv, generally just do have a split where the hard edge is. there seems to be no padding just as well
cold spindle
Oh in blender export yeh i just thought this would prevent them interfering with bakes in substance.

As im said substance is nowhere near my strong suite...
remote palm
I just dont understand why you would export the geometry and stuff... just export your model and import that to SP
cold spindle
So i've been using smart UV to auto unwrap before i invest in properly doing a UV layout and wasting my time due to unforeseen issues. Here's just the body UV the empty space in the UV is for the other hidden objects (trims, doors etc) that i want to share the same material.

ok the reason I was using that model is about material seperation between blender and Substance. So now i've exported my OG file but because of reasons it has separate materials and will export 50 textures for each with no way to merge them in subtance.
Tbh i keep tripping over myself here...
So if im going to start again.
I don't know whether to separate my mesh materials into a very narrow list. say 5 material+UV's and then use substance. But i'm not skilled enough in substance to understand how to seperate what i want to paint onto.
Example. I seperate all the trims into thier own Trim material. How then in substance do i ignore the exhaust/radiator/headlights to apply a chrome material to the metal handle meshes?
 remote palm
Cant say much about proper UV unwrapping since im not that good myself, but that are far too many seams imo - this is my UVmap for my Kar98K
 remote palm
cold spindle
remote palm
cold spindle
Yes, you for example make a body material, wheel material and assign the according parts to it. For wheels for example you could assign all four to one material and afterwards give each wheel other types of damage or wear with a blackmask
I have two materials for my gun, wood and metal, but im running into the same issue where i have shadows on spots where parts move 😄 but i have not yet bothered to fix the textures since im still experimenting with Enfusion tools
cold spindle
It's really annoying that substance doesn't allow you to combine texture sets into a single material export...
All my UV islands don't overlap so why isn't then a checkbox to do this -_-
remote palm
Well i dont see an issue? Reforger also has wheels separate ect...
And when you separate the parts into materials, and your issue should be gone. And like i said, get a good UVpacker - that will fix so many problems man 😄
Best 30$ i have ever invested in UVPackmaster 3
cold spindle
Wait so you're suggesting i seperate the body into multiple FBXs? and what just use a slot manager on the prefab to combine them? hmm i hadnt considered that
remote palm


You can easily select different parts with "L" in edit mode so it will make the process more quicker
cold spindle
yeh i can use blender i think im just having a stroke
I'm just getting lost somewhere in the workflow but i can't put into words what i dont know. my life...
Thank you for helping anyway
when i realise what i dont know i'll come back
remote palm
If you join call rn i could show you what i mean
cold spindle
Ok lemme get my headset
Which channel you in i dont see you, Im in creativity lounge
 chrome crown
what would you do if you have lack of reference photo to model it but you really really want to make it?
topaz willow
keep searching (sometimes it's REALLY hidden) or find (and potentially pay) someone that owns whatever you want to model to take reference photos of it
chrome crown
sounds like i have to search more. got it.
topaz willow
Good luck! 😄
cold spindle
remote palm
If you join call rn i could show you what i mean
You sir are a saint! You have no idea how much that was stressing me out. Thank you for the help.
remote palm
cold spindle
You sir are a saint! You have no idea how much that was stressing me out. Thank ...
Haha no worries! You helped me, i helped you 😄
chrome crown

make engine room or skip it
it's hard to choose
hmmmmm maybe making engine room makes better overall quality and helps dynamic damaged models?
cold spindle
Engine room/components are simulated in enfusion with simple collision shapes. If you can't see the engine normally then don't do it is my advice.
cold spindle
.
Hey again I've been making more problems for myself. I think this is a continuation of the issue I was having yesterday.
See picture 2 : I'm getting some funky world normal generation in substance.
See picture 1 : I tracked down the offending mesh faces in blender. They are separate materials.
It looks like substance is painting mesh generation on top of other material layers.
I have 4 materials for my whole mesh but I only have 1 UV map. Do I need to have 4 UV maps? One per material?
If yes is there any setting in substance where i can force it to split UVs by texture sets into separate maps?
Solution Below
**It turns out that if you have any material in an objects material slot that isn't applied to any surface then substance painter will do some crazy shit and melt it on top of all other texture sets like it thinks it's being some culinary genius...
Thank you Adobe...
You can quickly clean up unused material slots in blender by using the command console panel.
Select all the meshes you want to 'clean' and use this code bpy.ops.object.material_slot_remove_unused() This command is not reversable so test it out first to save yourself a headache.
**

 cold spindle
I have to say I have been spoiled by learning design in blender instead of professional programs. For thousand pound software they really leave a lot to be desired.
honest pine
remote palm
I have two materials for my gun, wood and metal, but im running into the same is...
for the sadow thing, either export your model exploded for paint or do not check ambient occlusion map when baking
remote palm
Yeah, ill take a look at this later today - have not bothered to redo my stuff yet 😄
 floral cove
I am having issues with re-using existing materials on a new model for use as a terrain feature is flickering. Has anyone else had this problem?
cold spindle
@remote palm Is your shadow issue where the shadows stay in the area where the bolts was?
remote palm
Yee
remote palm
ik 🙂
remote palm
remote palm
And for the AO stuff you´ll have to separate each object into its own material i...
I mentioned it right here 🤓
Just didnt know when i firstly created the textures 😄
remote palm
XD just like me yesterday 😄
cold spindle
Once baked. You could find the area on the AO map that related to the bolt and just white them out in paint
Just use blender UV map to find the areas you need to white out
hmm actually the bolt should be its own seperate mesh? Depends if substance actually means mesh or all meshes in that texture layer...
floral cove
This is the flickering problem I am having https://www.youtube.com/watch?v=IOF53S6FeYs
might need to see it fullscreen to see the issue. The model faces are triangulized and single sided. I just imported the mesh and dragged and dropped an existing material on it
cold spindle
floral cove
might need to see it fullscreen to see the issue. The model faces are trianguliz...
Thats the material that is the issue. I noticed alot of the base game materials can act funky.
floral cove
it's odd that they work on the original models
cold spindle
Try the reforger materials called door metal they are very simple matte materials that i've been using for debugging. and let me know if that fixed it.
I think some of the materials have their normals/roughness/AO tied into vertical/horizontal world space meaning as character head moves the sub texture gets skewed.
OR
It's something to do with multiple LOD textures...
But i'm pretty crap at this so maybe im completely wrong
floral cove
cold spindle
Try the reforger materials called door metal they are very simple matte material...
Do you have the full texture name, anything without normal maps or ao maps doesn't have the flickering issue, infact it appears to be the ao that is flickering possibly
cold spindle
1 sec lemme launch
.
Door_Metal_01_V1_MLOD
Door_Metal_01_V2A_MLOD
Door_Metal_01_V2B_MLOD
Door_Metal_01_V3_MLOD
These worked for me without any texture issues.
But actually looking at them closely they are not textures. Just simple materials.
Which tells me your models UV's are funky in someway. Would be usefull to be able to preview UV's in engine
I have had luck before using only materials with MLOD prefix (Multiple Levels Of Detail).
It might just be a visual bug in editor or it could be an important part of texturing...
floral cove
Ok so if I use a basic PBR and no problems the issue appears to be using PBRmulti
which have blend textures on top of the base texture
cold spindle
Maybe if you've select a material and left slots empty it goes funky?
 floral cove
basic PBR has normals and ao but no wetness masks
cold spindle
Or if those textures in the slots dont merge with each other nicely it goes wrong? Like maybe there is some internal material transition interpolation that needs the next LOD material to be within x pixels of the next highest level? Just spitballing here
Your blend textures might have noise in the blank spaces then? Like if you have a mud mask. Maybe it has single very light grey pixels across the "blank space" meaning its adding weird noise to the mat?
remote palm
cold spindle
hmm actually the bolt should be its own seperate mesh? Depends if substance actu...
Yeah, should be but i did not do it 😄
cold spindle
remote palm
Yeah, should be but i did not do it 😄
How? isn't it attached to a bone?
You should able to separate it really easy without skewing your UV's
V key = rip edges/verts/faces
then right click to stop moving them once ripped
remote palm
Ik how to do it. I just assigned* all metal parts into one mat
cold spindle
So substance painter means material when that check box is ticked? Stupid adobe its not a mesh...
remote palm
Yeah
floral cove
cold spindle
Or if those textures in the slots dont merge with each other nicely it goes wron...
So after testing its the dirtmap that is causing the flicering in the PBR mutli materials
cold spindle
Eyy looks like im not completely useless after all
floral cove
I am wondering if there is some vertex information that is missing
cold spindle
Lemme find my MCR export
ok what you need to do is find an MCR for a ingame mat. Like btr or something. And go through comparing your export profile to what channels they have packed into each one. Im pretty sure MCR doesnt have roughness packed into its alpha channel. But i might be wrong.
I tried reading what i just wrote and im going to try again because that was gibberish.
I think MCR textures have to have thier RGBA channels packed differently to BCR textures.
remote palm
Just look at the export profile itself? They have provided one for SP for example
honest pine
Hello ! I'm struggling with an issue I didn't have before, when importing my model skinned it bring the whole armature as a supplementary "bone" like this :

"Weapon" is the name of the armature. It only appears when I have armature modifiers
cold spindle
There is a setting i found. Maybe in xbo import tab? I fixed it myself by naming my armature Scene_Root and it seemed to hack it
honest pine
cold spindle
There is a setting i found. Maybe in xbo import tab? I fixed it myself by naming...
tried the same workaround but skinned part don't move now
honest pine
cold spindle
did you try on import tab `Export scene hierachy`
yep no change
cold spindle
infact every imported armature has a scene root. This is normal
or is it the bone named weapon you want gone?
honest pine
What I really don't understand is why it act likes this now as I'm processing the same way I did several time
cold spindle
Let me look at my rig as i had the same issue and i think i fixed it by naming the armature w_root
You have to make sure the origin of the armature and the origin of the bone named w_root are identical
honest pine
cold spindle
or is it the bone named weapon you want gone?
yeah I did that too, indeed I then had the right amount of bones in resources but it brokes skinned mesh
cold spindle
ok what i did was remove the w_root bone from my armature and then name the armature w_root
cold spindle
didnt fix it for you?
 honest pine
and following the documentation should not result in such a behavior
cold spindle
Gotta be carefull removing the base bone though
Im trying to remember where i saw the reference to ignore armature name/sceneroot on importing.. It was somewhere i was digging about
it definatley was named something like Prevent scene_root generation with a tag like 'this prevents armature/scene root conflict on import
honest pine
And I have the same issue with character gear, and here I'm dependant on the game character skeleton, that I cannot touch if I want my gear to work
honest pine
so to illustrate, here are pants I made yesterday and to the right are shorts I imported some days ago :

They're both configured the same way, same skeleton, only things differents are more vertex groups for the pants
and when imported :
this for the pants

and this for the shorts
 honest pine
Allright finally found something for the pants : The issue was this spot in weight painting that I didn't notice before, correcting the weight solved the problem

But still can't find what could be "rigged" to the weapon armature as everything follow the "bone"
cold spindle
Did you try renaming the armature to Scene_Root capitlisation and underscore would be important too
This is my vehicle setup if that helps at all. renamed in 3d viewport using F2 key not renamed through the armature data menu.
 fallow pond
chrome crown
fallow pond
chrome crown
I would be using more verts for the turret ring tbh at least 64 maybe 96 or 128 I would be looking at how dense the models are in war thunder
chrome crown
can't we use subdivision surface? i can't handle too much of that
fallow pond
if you made it properly sure
 stoic zodiac
Can someone tell me how to make portals?
I'm trying to do it according to the guide, but I still get an error.
I'd like to have at least the source code with a working example...
surreal ore
stoic zodiac
Can someone tell me how to make portals?
I'm trying to do it according to the g...
Click the button to make a portal lol
If you don't have one update your EBT
stoic zodiac
surreal ore
If you don't have one update your EBT
What the EBT?
warped cedar
I got a question/help how do I make a collider for a helmet ?
I'm not really used to the 3d model just a nood
surreal ore
cold spindle
Making steady progress. Just wish i could find out about all these issue that are slowing me down like vehicle not reaching sleep state and one ammo prefab per muzzle...

 remote palm
Texturing looks good 🙂
cold spindle
Ty layers upon layers xD
 fathom elbow
cold spindle
I have to say I have been spoiled by learning design in blender instead of profe...
fathom elbow
cold spindle
I have to say I have been spoiled by learning design in blender instead of profe...
unfortunately substance is somewhat "one of a kind" in terms of capability, and now that adobe purchased substance ... welp... it doesn't help, because they seem more focused on pushing more BS subscription things than actual improvements
cold spindle
fathom elbow
unfortunately substance is somewhat "one of a kind" in terms of capability, and ...
True. Hopefully this guy can get this nicely smoothed out as it's actually a really nice idea to have it in blender. https://ucupumar.github.io/ucupaint-wiki/
I had a long play with it and it works very similarly to Substance but its just a bit more a hassle to use when its docked in the N menu of the main screen.
Adobe = The enshittification of everything...
Ucupaint is Blender addon to manage texture as layers for Eevee and Cycles renderer.
fathom elbow
having been spoiled by commercial 3d tools interfaces, i can't get blender - it's so unintuitive to me. Not saying it's bad, i just dont like the UI whatsoever. So yes, consider yourself lucky, you are now used to blender 😛
awesome armored car btw
cold spindle
Ty its been an adventure getting it this far.
Commercial vs OpenSource is always going to be a big debate.
I have to say after i got some help with substance painter it works well. It's just one of those things where learning it can be very frustrating.
shell hedge
cold spindle
True. Hopefully this guy can get this nicely smoothed out as it's actually a rea...
Is there some video of doing pbr with this?
cold spindle
Yes... Maybe... There are a few. I haven't seen any full PBR ones but I did work out how to do it. You just create a new layer using open images to single layer then add a black mask to the layer and it works.
Some caveats are:
For what this guy has done it's bloody amazing. David VS Goliath scenario.
 cold spindle
Collision model questions.
Is it possible to have multiple models for VehicleComplex and VehicleSimple Collision shapes? And for things like _slide
I want to stick with using UCX as they are cheapish.
Picture one shows a topdown view of my vehicle. As you can see it narrows in the middle meaning that a Convex shape cannot work.
Is it possible to have 3 UCX shapes representing the full collision and use some _prefix to tell then engine these are to be treated as one?
Picture 2 shows what ideally i want to do and they should be UCX not UBX as there is some convex geometry on the vertical axis that doesn't show in the pictures.

 cold spindle
Interesting information i've just found out.
You can import a vehicle model whole and fully rigged skeleton and all. Then for all the attachments/weapons/turrets you import only the skeleton no mesh. And under turretslot/weaponslot/attachmentslot you just tick inherit skeleton and it will use the vehicles rig to animate/control all the features... Who knew..
fallow pond
fathom elbow
unfortunately substance is somewhat "one of a kind" in terms of capability, and ...
On steamos you have it forevea
honest pine
cold spindle
Interesting information i've just found out.
You can import a vehicle model wh...
interesting, not sure i've understood everything but interesting
cold spindle
vehicle armature + mesh < turret armature < gun armature
You can mesh, rig and animate one model and then export only the armature for turret and gun. Then set the turret and gun to use the single model armature instead. So the turret and gun end up moving the parents rig based on anim data/ character movements as long as the rig + empties match.
In theory.
honest pine
gonna explore this
stoic zodiac
surreal ore
Click the button to make a portal lol
This don't work...

 surreal ore
stoic zodiac
This don't work...
surreal ore
stoic zodiac
This don't work...
Then you done something wrong.
Probably during importing
 quaint nacelle
Hey, how can i change EntitySlotInfo to RegisteringComponentSlotInfo in 1.3.0.76 ? I can't change class and when i create a new slot, my slot is automatically set to EntitySlotInfo

Is it a bug ?
wicked dirge
quaint nacelle
Hey, how can i change EntitySlotInfo to RegisteringComponentSlotInfo in 1.3.0.76...
wrong place to ask this. Try #enfusion_configuration but this probably means that RegesteringComponentSlotInfo is not a class derived form EntitySlotInfo and cannot be used in this property
 fluid fern
Hello all, how are you? I think I've seen it before, I've redone my PRTs by hand but I still have the error.
RESOURCES (W): UpdateAreaPortals(): Orphaned AreaPortal 'PRT_01' (0) inside area 0! Check the model, it's leaking
last parcel
stoic zodiac
This don't work...
I can see one big wrong you got that there, you don't have a BSP.
chrome crown

Slowly processing
Wait, don’t we have a AGT-1500 in ARMA 3 Tank DLC?
Can I put it on my hull? I heard BI provides assets for modder
sly bridge
chrome crown
Can I put it on my hull? I heard BI provides assets for modder
they do not
ancient walrus
They provide public data check their website not sure any tanks are in there
chrome crown
I ordered plastic model with interior which costs 100 USD.
This might be helpful when modeling engines and interiors
chrome crown
Could someone give me some tips for blender? I have a little problem
When you move the edge that on sloped face, how can I stick with slope while moving edge you want to move?
Um, I know the basic control but no one told me advanced control that I struggle to find out
topaz willow
quaint nacelle
Hey, how can i change EntitySlotInfo to RegisteringComponentSlotInfo in 1.3.0.76...
It is a bug, yes. I submitted a ticket for it and it was assigned, not sure when the fix will come. https://feedback.bistudio.com/T188483
Solution for now is to edit the component in the text file to change it to what you need it to be.
That or it’s what Soul mentioned
sly bridge
ancient walrus
They provide public data check their website not sure any tanks are in there
not from A3
ancient walrus
sly bridge
not from A3
"I heard BI provides assets for modder" they provide public data
sly bridge
ancient walrus
"I heard BI provides assets for modder" they provide public data
Wait, don’t we have a AGT-1500 in ARMA 3 Tank DLC?
public data = samples? yes. They do not provide the above, which is what i replied to :))
ancient walrus
i didnt answer that i answered him >?
sly bridge
ancient walrus
i didnt answer that i answered him >?
ok yes i did
 gritty gull
chrome crown
gritty gull
chrome crown
The insides are not really modeled. No point in making an engine if the user will never see it. The same goes for other details and parts.
In Arma 3 the „engine“ is just an invisible hitbox in the hull
 hardy egret
chrome crown
I ordered plastic model with interior which costs 100 USD.
hardy egret
chrome crown
I ordered plastic model with interior which costs 100 USD.
Order a laser scanner while ur at it
wicked dirge
Check
wicked dirge
hardy egret
Order a laser scanner while ur at it
 wicked dirge
i havnt really got it to work well with scale models yet but i havnt really had a chance to try too much
the software sucks a bit also
hardy egret
wicked dirge
i havnt really got it to work well with scale models yet but i havnt really had ...
I see
Just gonna stick to doing it all by hand 🫠
chrome crown
hardy egret
Order a laser scanner while ur at it
That’s kinda not bad idea XD
chrome crown
gritty gull
The insides are not really modeled. No point in making an engine if the user wil...
But what if destroyed model exposes engine room? I want make it look like something war thunder thing.
gritty gull
chrome crown
But what if destroyed model exposes engine room? I want make it look like someth...
I would focus on completing the working vehicle first before bothering about details like that. Leave it blank, or box out some basic placeholder, you can always complete the destruction model at a later stage.
(I can fully understand being obsessed with technical details like that, I’m dealing with the same problem right now on my Leo 2 model)
chrome crown
gritty gull
I would focus on completing the working vehicle first before bothering about det...
Okay got it.
Thanks for the advice
ancient walrus
Yeah in the sample of the car in the #reforger_samples
solar heron
2 Questions About Special Models
Does anyone know how this works in Blender and Enfusion? Specifically:
Do I need a special shader, or is there a built-in material that handles this?
How should I set up my UVs in Blender?
Are there any examples or documentation on this?
Is there a setting to disable this in Enfusion?
Am I missing a step in my workflow?
cold spindle
solar heron
2 Questions About Special Models
1. How to make a model that blends with terrai...
1: Its just a normal material inside enfusion. Never used it dont know its name.
2: Vertex colours must be cleared from your model pre export. Don't think you cant really do it automatically but it is tied into color attributes in blender. Deleting might work or might break the model.. Test at your own discretion.

Anyone know if a collision shape can have multiple Enfusion material properties applied to it? I'm looking to make different armour thicknesses across the model. Any input appreciated.
((Would be a beautiful thing if BI can decide to use vertex painting to determine armor thickness in Arma 4!! HINT* HINT* [Think like a heatmap]))
 gusty hatch
Q - how do you handle LOD's that are for meshes that are parented to bones? Parent to LOD0?
surreal ore
Exactly the same way you handle lod 0 being rigged and animated.
gusty hatch
so parented to the bone then
 last hill
gusty hatch
so parented to the bone then
last hill
gusty hatch
so parented to the bone then
Rig up LOD0 - copy/duplicate - make your detail changes, name LOD1, rinse and repeat with the next LOD
solar heron
cold spindle
1: Its just a normal material inside enfusion. Never used it dont know its name....
solar heron
last hill
Rig up LOD0 - copy/duplicate - make your detail changes, name LOD1, rinse and re...
Thats also a question for me. @ancient walrus helped me to set up my Windturbine...now i want to add lods to this model. Do you Name your base mesh _LOD0? Thats not worked for me..because the model not shown in Enfusion. I named it like the mesh...for instance "Windturbine" and then the Lods "Windturbine_Lod1" "Windturbine_Lod2" and so on.... Maybe im wrong but otherwise the Model dont show up for me.
cold spindle
last hill
solar heron
Thats also a question for me. <@339755513325682691> helped me to set up my Windt...
It would be Windturbine_LOD0, Windturbine_LOD1, you have to start at LOD0, then go from there or your model won't show up as you don't have a LOD0.
 glossy prairie
how the delete m16 barrel? I cant find GenericEntity
 solar heron
last hill
It would be Windturbine_LOD0, Windturbine_LOD1, you have to start at LOD0, then ...
solar heron
last hill
It would be Windturbine_LOD0, Windturbine_LOD1, you have to start at LOD0, then ...
For me the exact opposite is happen...if i name my base mesh "mesh_LOD0" and put it in collection LOD0 the mesh doesnt show up in the editor. When i delete the collection and Name it just "mesh" for example it works... Weird
cold spindle
Does anyone know how to stop crashes when loading a world after reimporting a mesh with different bone/empty positions? So far relaunching editor is the only way ive found.
 viral grove
im looking to create a weapon for workbench. im looking at cgtrader to get the model, what all should i be looking for for the smoothest modeling. should it have - Animated, Rigged, VR / AR / Low-poly ect.?
topaz willow
Game-ready
wary inlet
glossy prairie
how the delete m16 barrel? I cant find GenericEntity
that is because you will find it in the attachments component
glossy prairie
wary inlet
that is because you will find it in the attachments component
How do I find it?
wicked dirge
glossy prairie
How do I find it?
Check the 3 AttachmentSlotComponents, it's one of them
glossy prairie
wicked dirge
Check the 3 AttachmentSlotComponents, it's one of them
thx
warped cedar
I need help i've been trying to follow the modding boot camp And I Don't understand
And i can't find episodic page in blender window view Like in the video

And this is what I got
midnight path

 honest pine
midnight path
hexed sandal
warped cedar
honest pine
midnight path
hexed sandal
warped cedar
I'm not sure if this is your question?
1 Import Settings
2 Export Skinning
3 Rotate Y 180
4 Reimport resource
this will activate the skeleton and the position.
 warped cedar
hexed sandal
I'm not sure if this is your question?
> 1 Import Settings
> 2 Export Skinning
>...
warped cedar
hexed sandal
I'm not sure if this is your question?
> 1 Import Settings
> 2 Export Skinning
>...
Thank you so much
 civic holly
Trying to start with a simpler model import being the grenade. Can anyone point me in the right direction of setting up bones in blender? I’m able to replace a prefabs mesh with my own by simply exporting my model as an FBX and dropping it in. But it’s obviously breaking the animations (I can’t even throw it).

Ignore the scale lol 😂
wary inlet
civic holly
is that amcu I see?


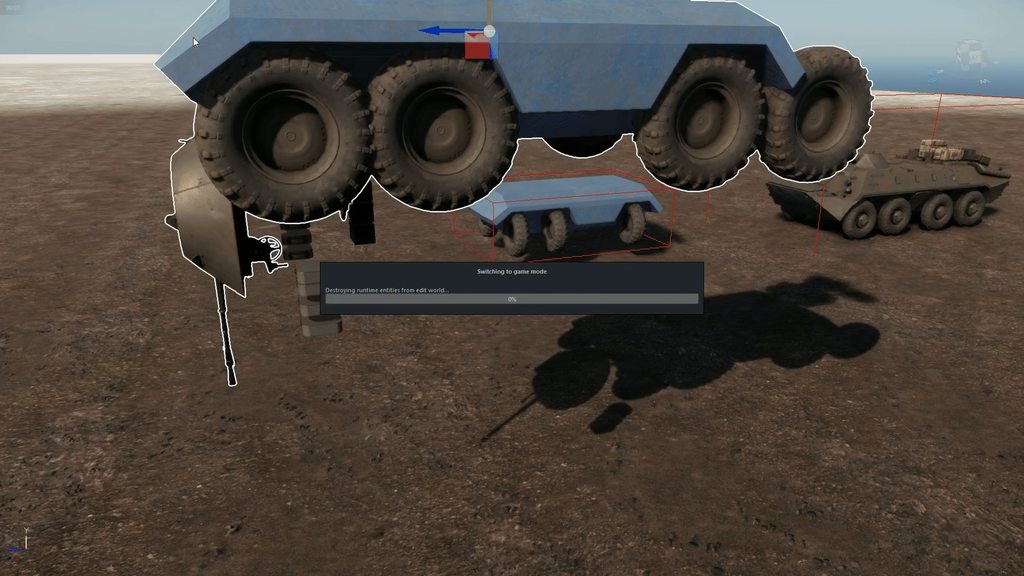


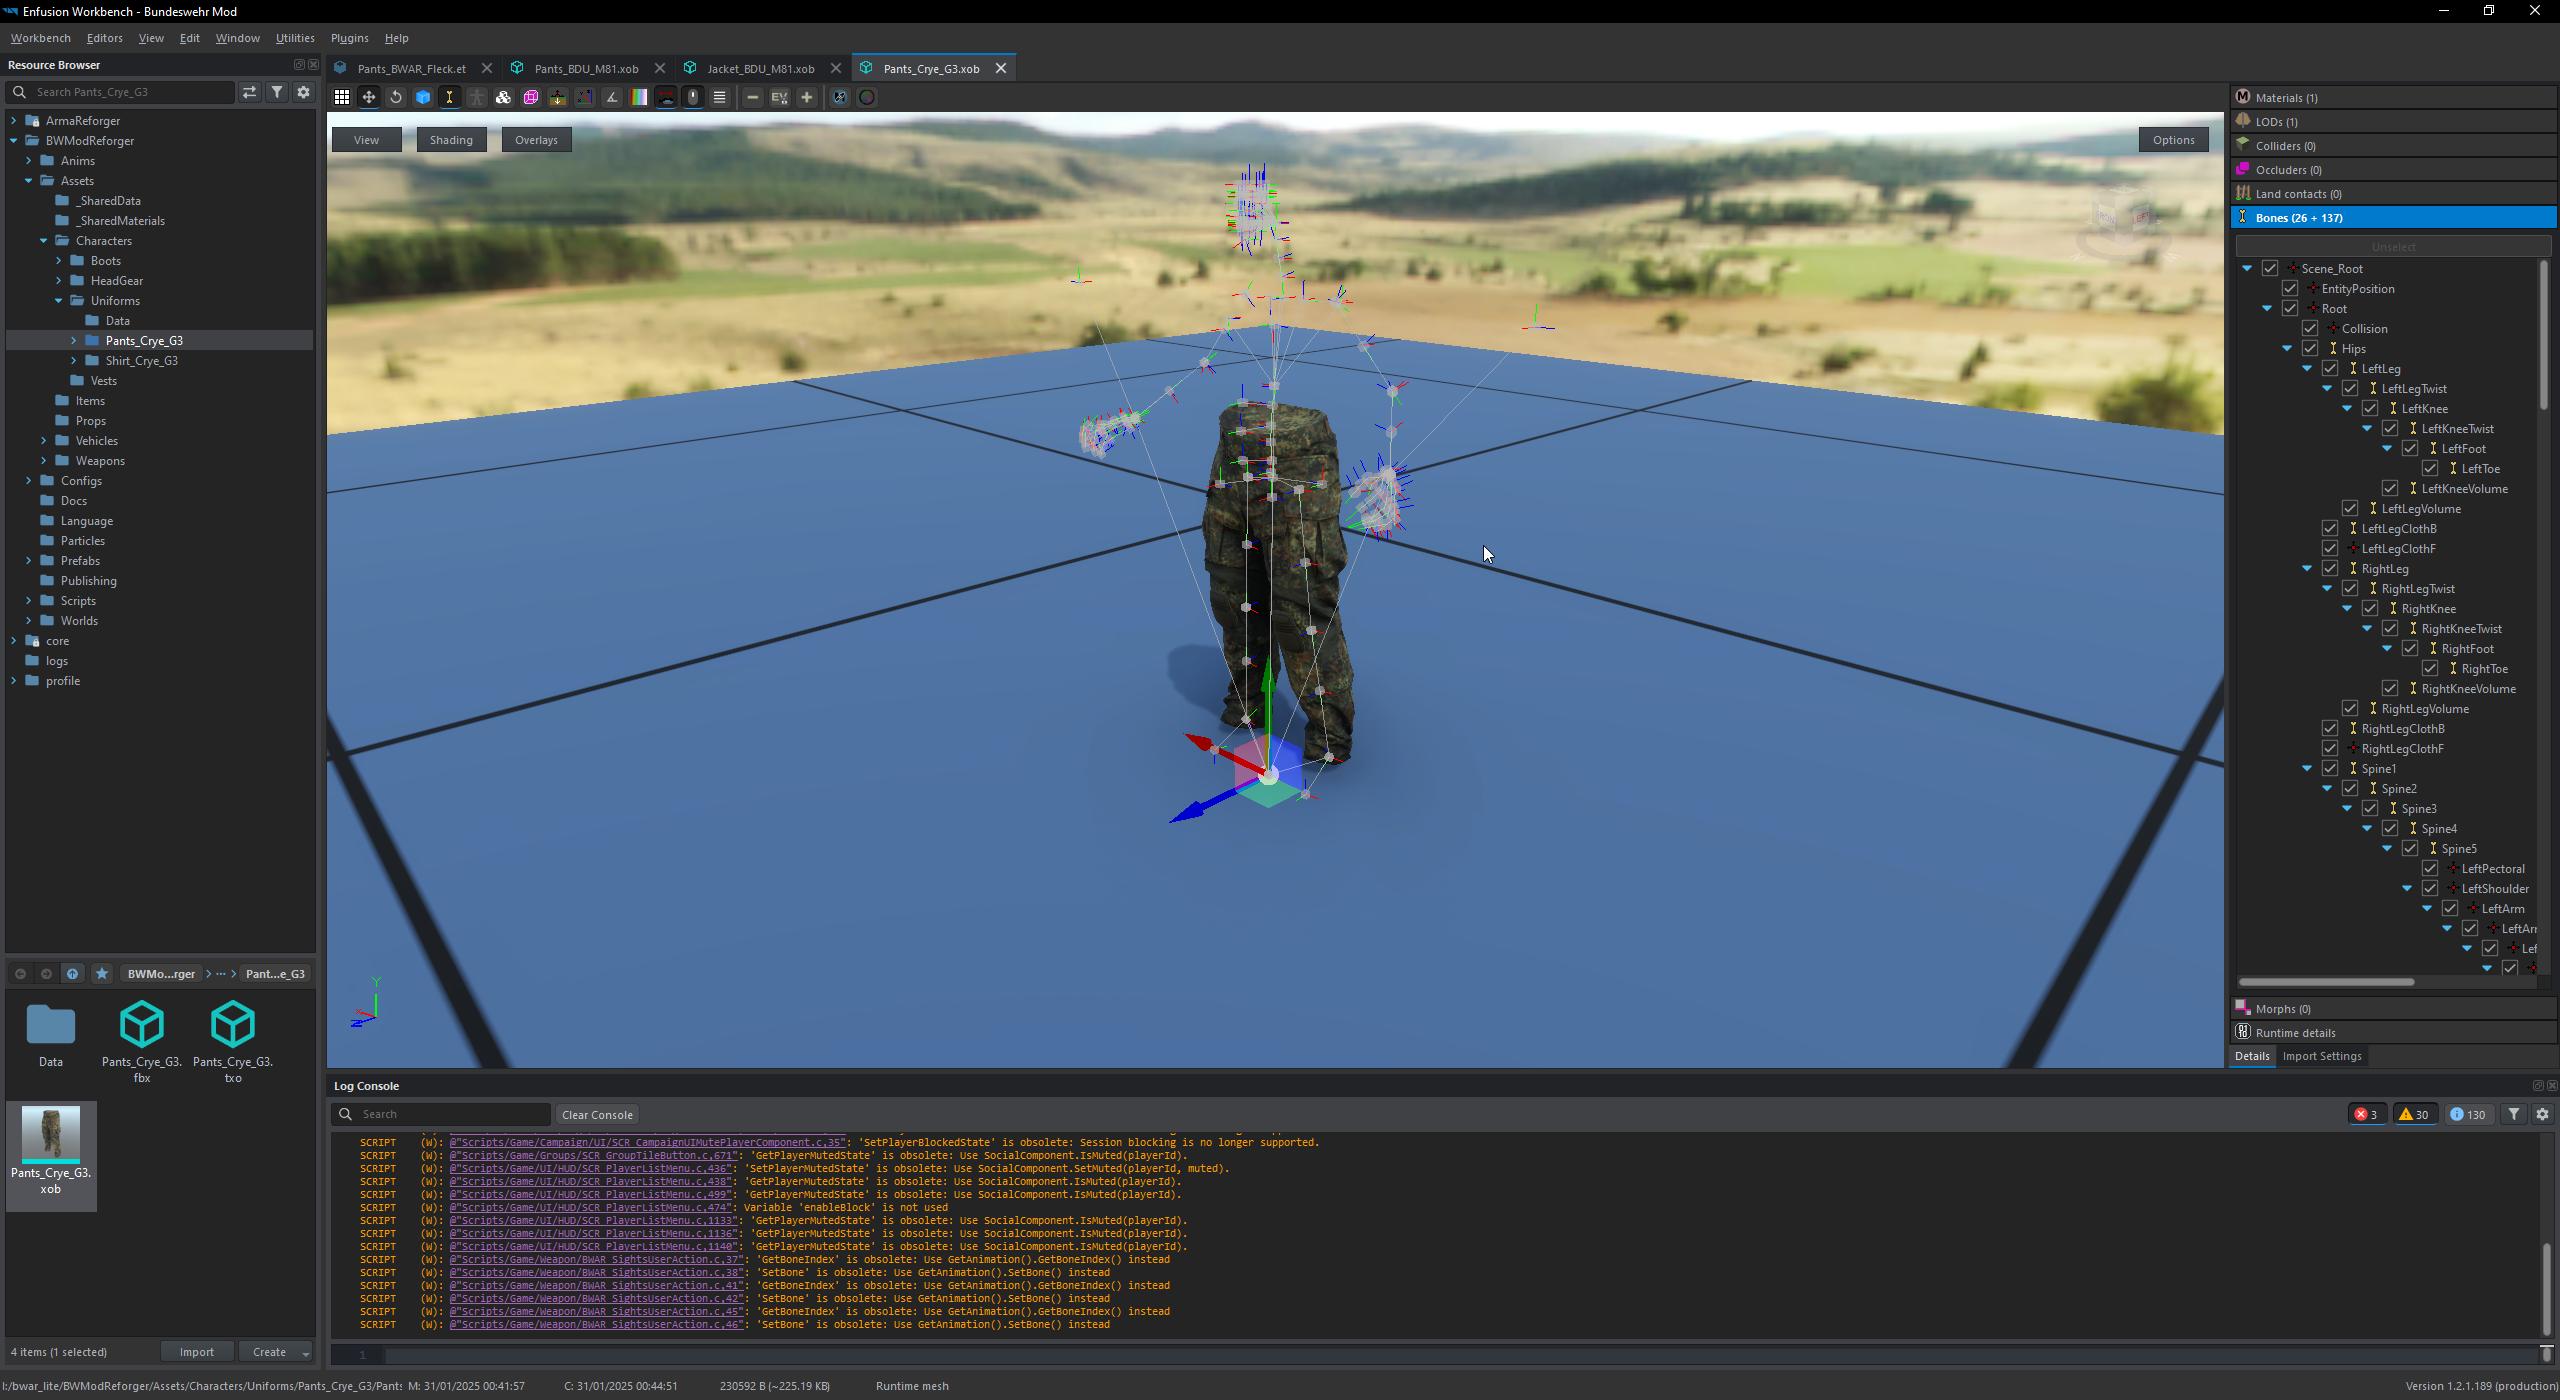
 cosmic parcel