
#enfusion_model
1 messages · Page 13 of 1


 lapis vault
K i will try to soften that then
lapis vault
I got it a little better I think, but man honestly I really wish I had something to compare it too.
 fathom elbow
lapis vault
I got it a little better I think, but man honestly I really wish I had something...
fathom elbow
lapis vault
I got it a little better I think, but man honestly I really wish I had something...
animate the skeleton in blender to have different extreme poses, and go through them while you work on the weights. Then you can check how your result looks, makes tweaking much easier.
lapis vault
potentially sounds like some really good advice, Thanks! Ive not messed with any animation before yet, but I'll check it out next time Im working on it
 patent finch
digged an old model and working on it for the arma life enjoyer

 neat canopy
Are lightportals already implemented and functional?
When I turned on GenerateBSP, like described in Wiki, in ReforgerTools it crashes instantly
This is what I got in blender, the VolBox is working with the InvironmentProbe but not the Portals... :/

 calm rune
lapis vault
calm rune
lapis vault
You want to leak it onto the other leg slightly then smooth out the edges.


 sullen yacht
calm rune
You want to leak it onto the other leg slightly then smooth out the edges.
sullen yacht
calm rune
You want to leak it onto the other leg slightly then smooth out the edges.
This helps alot! Also is your weight paint blender model still up to date?
calm rune
sullen yacht
This helps alot! Also is your weight paint blender model still up to date?
Not sure. You have to go in and tweak it regardless after transfering. Nothing everything transfers perfectly.
sullen yacht
calm rune
Not sure. You have to go in and tweak it regardless after transfering. Nothing e...
Yeah was using your "Arma Reforger Weight Ref" as a base for hats n helmets after watching your YT tutorial. Which is W's so thank you for that
 bleak depot
neat canopy
This is what I got in blender, the VolBox is working with the InvironmentProbe b...
bleak depot
neat canopy
This is what I got in blender, the VolBox is working with the InvironmentProbe b...
Click on force portals
neat canopy
bleak depot
Click on force portals
Do I still need the Portals in Blender then?
bleak depot
neat canopy
Do I still need the Portals in Blender then?
No, i work work Maya.
Click in reforger under bsp „force Portals‘‘
neat canopy
bleak depot
No, i work work Maya.
Click in reforger under bsp „force Portals‘‘
That worked. Thank you 👍🏻
 ancient walrus
Someone be a Gent and help an old fart out here will ya please
https://community.bistudio.com/wiki/Arma_Reforger:FBX_Import#General_rules_and_habits
Im importing a door but i cannot get the FBX importer to recognise the named properties for example Doors1 is the name of the door im importing ,however i lose the selection on import of the FBX/p3d etc the Blender tools. can any kind sole point in the tute where i`m missing the porting instruction ?
Cheers In Advance
 tidal latch
ancient walrus
Someone be a Gent and help an old fart out here will ya please
https://communi...
tidal latch
ancient walrus
Someone be a Gent and help an old fart out here will ya please
https://communi...
Do you have skeleton? Is that door rigged to Doors1 bone?
don't forget about export skinning - https://community.bistudio.com/wiki/Arma_Reforger:FBX_Import#Import_process_in_the_Workbench
ancient walrus
yes doors 1 bone and empty slots for axis pap and siga etc
but the model doesnt import to .xob or into blender with dorrs1 selection
doors1*
tidal latch
can you post pic from Blender?
https://community.bistudio.com/wiki/Arma_Reforger:Weapon_Creation/Asset_Preparation#Skeleton_Setup_.26_Mesh_Rigging here you have pretty detailed instructions about skinning and what could go wrong
ancient walrus
 tidal latch
you don't have vertex groups + armature modifier
see Mesh Skinning part of page that I've linked above
ancient walrus
yeah i deleted them and tried calling thw whole model doors1 for a test
even with vertexgroup doors1 on import just the bone would move because selection doors1 didnt seem to exist
tidal latch
you are missing armature modifier too
ancient walrus
hmm thats new ill check that out .
you mean the armature modifier in the skeletons lod isnt right ?
must be the import of original p3d messed up ill go through it again
tidal latch
no, I mean armature modifier in object
@ancient walrus
ancient walrus
ok i shall , i didnt see that because i was on Assset prep in Props
charcter stuff i understand (ish)
tidal latch
ah, I will add mention of it on Prop page
ancient walrus
thanks for help much appreciated
 woven swallow
I'm here to annoy with my house 😛
 lapis vault
ancient walrus
lapis vault
ancient walrus
@tidal latch im trying to understand the geometry naming convention and how to in blender , in this picture im trying to assign the geometry of the Vault door to doors1 (then animated part ) can you give me a pointer as to what it is that i need to do to achive that, ive read the wiki but for myself its not being intuitive on this part . cheers
 tidal latch
ancient walrus
<@105548653594193920> im trying to understand the geometry naming convention an...
tidal latch
ancient walrus
<@105548653594193920> im trying to understand the geometry naming convention an...

 ancient walrus
😉 cheers i need to get off the prop section
tidal latch
I see that in the gif this step is missing
"In Object property of Armature modifier select Armature (skeleton) which should influence this object - in this case it is Armature" - so don't forget to do this too
 ancient walrus
thanks that soreted it
do you know what causes the flickering of the action Ui ?
tidal latch
you are on the edge of action range?
some geometry could also obstruct it
there are debugs for actions
ancient walrus
Probably geometry I’ll look at Debug cheers
woven swallow
I'm almost done with this house.
Verts: 38k
Faces: 33k
Tris: 66.5k
 ancient walrus
Chuck some dirt at it 🙂
lapis vault
I am having the most confusing absurd bug in blender and its making me want to 😢
I cannot solve this
 zenith quartz
woven swallow
I'm almost done with this house.
Verts: 38k
Faces: 33k
Tris: 66.5k
zenith quartz
woven swallow
I'm almost done with this house.
Verts: 38k
Faces: 33k
Tris: 66.5k
Is this New England inspired?
calm rune
zenith quartz
Is this New England inspired?
I believe it is North American inspired in general. Games are over saturated with euro and Asian map/features.
zenith quartz
It looks a lot like the houses I see in New England haha.
 steel hare
Hej everyone, is there a poly limit for objects such as buildings etc?
woven swallow
ancient walrus
Chuck some dirt at it 🙂
those are just place holder textures. gotta finish some interior details, UV's then texture in substance 🙂
woven swallow
zenith quartz
Is this New England inspired?
Actually.. this is Dr. Earnhardt's mansion from far cry 3 or atleast that was my inspiration when I started modeling it. but yes. the style is victorian clapboard siding house.
zenith quartz
Ah okay haha.
 sly bridge
woven swallow
I'm almost done with this house.
Verts: 38k
Faces: 33k
Tris: 66.5k
sly bridge
woven swallow
I'm almost done with this house.
Verts: 38k
Faces: 33k
Tris: 66.5k
Very nice model of a pretty ugly house :))
is the exterior cladding 3d mesh i assume, hence the high polycount
sly bridge
steel hare
Hej everyone, is there a poly limit for objects such as buildings etc?
There is no hard limit but that doesn’t mean it should be pushed indefinitely
woven swallow
sly bridge
Very nice model of a pretty ugly house :))
is the exterior cladding 3d mesh i as...
The the siding is actual mesh not texture on a plane
woven swallow
sly bridge
There is no hard limit but that doesn’t mean it should be pushed indefinitely
I second that
woven swallow
lapis vault
I am having the most confusing absurd bug in blender and its making me want to �...
state your problem.
lapis vault
I fixed it. Freaking lighting was broken on an object because edges wouldn't retain mark sharp
lapis vault
nevermind I guess. Blender is ignoring sharp edges and lighting is fubar. sigh
It seems incredibly weird but you shouldnt need auto smooth on for marked edges to function properly but enabling it in blender appears to fix the issue, Ive never had this happen before so it baffles me.
 covert dune
sly bridge
Very nice model of a pretty ugly house :))
is the exterior cladding 3d mesh i as...
covert dune
sly bridge
Very nice model of a pretty ugly house :))
is the exterior cladding 3d mesh i as...
The siding can probably disappear for a 2D texture in one of the first LODs, so it should be pretty performant
steel hare
sly bridge
There is no hard limit but that doesn’t mean it should be pushed indefinitely
Am asking as big appartment building with interiors can get quite poly heavy after some time 😦
neat canopy
Just take a look on Bohemias buildings polycount/facecount and take that as oriantation. And for sure make distance LOD‘s 🙂
 indigo halo
Hello hello! Back with another super question! So i have a modular vest made of the main body and several pouches and related components. In blender it looks just fine as it sits comfortably on the model, weight paint has been done on the main vest + groin, collider set (UBX) armature modifier set on the main vest with all the other meshes connected with the "Relation" attribute in the different objects themselves.
I do the import procedure in Reforger and that is the final result:

the pouches are disconnected from the main body of the vest and are taking a little round trip on the countryside. Any suggestion on what i'm doing wrong?
tidal latch
indigo halo
the pouches are disconnected from the main body of the vest and are taking a lit...
are you sure your pouches have armature modifier?
indigo halo
They don’t when I place it and import it in reforger it becomes suddenly empty and no object is shown
Pouches are patented with relations to the object
indigo halo
Rephrasing: the armature modifier makes my mesh disappear once imported. Maybe it conflicts with the relation attribute?
tidal latch
indigo halo
Pouches are patented with relations to the object
That is not correct way
Yes, for pouches don't use relations
Use skinning instead. You can also put pouches in separate fbx files and then attach them via slot system in game
Take a look at Alice systém in game
indigo halo
Thanks! With skinning you mean the armature modifier + weight paint right?
tidal latch
Yes
indigo halo
I will try that, thank you very much. One last question: some pouch meshes have sub-meshes (like the radio pouch which has radio body and antenna sub mesh) is the procedure the same? Or should I join them first?
indigo halo
@tidal latch made some attempts and the process of skinning every single piece it’s very very lengthy in my case and I’m not sure I can do that without falling behind of schedule. I tried something a little bit different by joining meshes to the main object (removing attributes which were making my skin black hence not receiving textures from the .emats) however one problem remains: for some reason some items (e.g. radio+pouch meshes) remain “plastic gray” without any chance to be textured. Maybe you have a rough idea of what could be causing it?
tidal latch
Why it's lengthy? If you wanted to use relations, then skinning everything to one bone would be equivalent
As for plastic gray - might be because of vertex colors
indigo halo
Lengthy due to a lot of meshes and submeshes and because right now I always dealt with skinning by Mass painting body weights onto my object. Not sure that’s the right way to do so in my case though
The weapon mesh skinning guide confused me a bit especially about vertex groups creation
indigo halo
Yes I did, i saw it is an base vest and items are slotted into through separate prefabs, I wanted to add some snap points to use as a reference for this purpose but i'm struggling there too. I'm learning everything by trial and error so it gets a bit difficult. This model has a main mesh, with submeshes which contain yet other submeshes so i'm going a little bit crazy about it
I succesfully skinned the main mesh to spine 5 so it rests on the chest, however the trouble starts when I need to skin the other separate components to the main mesh in a specific place
tidal latch
I wanted to add some snap points to use as a reference for this purpose but i'm struggling there too
you cannot do it. You need to snap it by using controls
Can you perhaps share pic from blender?
 delicate condor
Never good idea to put deadlines or schedule on learning modding. It takes what time it takes
lapis vault
it is nice to have goals and challenge yourself though  even if you cant always meet it
indigo halo
I actually made it!!!
I took inspiration from your hints and I went the ALICE way
Skinned the base vest, created colliders for the rest and imported each piece separately as an indipendent fbx which I slotted on the vest. The result is a fully modular vest! Thanks everybody 😊😊😊
@tidal latch especially to you
 tulip nymph
Anybody make any nice palm trees or know where I can find palm tree models?
I need a good smorgasbord of tropical vegetation. Hornbeam kinda looks good but I need less temperate and more subtropical plants and brush.
 serene saddle
Hello, I was told by a friend that I can find some work here modeling guns and such for mods. Is that true? If not can anyone point me in the right direction?
sly bridge
@serene saddlework would be an overstatement - see #creators_offers
serene saddle
ah
 calm karma
Any idea how to fix this error with my prefab?
"can not be registered at ModelSwitchManger because it doesn't have valid mesh object"
 dreamy canyon
Hello, Can I get a document for "Material" in Enfusion Blender Tools?
I cannot find it 😥
I'm making a new weapon.
 surreal ore
calm karma
Any idea how to fix this error with my prefab?
"can not be registered at ModelSw...
surreal ore
calm karma
Any idea how to fix this error with my prefab?
"can not be registered at ModelSw...
That's pretty self-explanatory. The mesh object is invalid
surreal ore
dreamy canyon
Hello, Can I get a document for "Material" in Enfusion Blender Tools?
I cannot f...
I would suggest looking into blender tutorials and learning what a material is in relation to an object
dreamy canyon
I know the materials do, but it printed "Material001 is not an Enfusion material."
I made BCR and NMO textures referenced: https://community.bistudio.com/wiki/Arma_Reforger:Textures
calm karma
surreal ore
That's pretty self-explanatory. The mesh object is invalid
I figured it out. I was using a prefab as the preview model and enfusion didn't like that. Switched it to a .xob and it got rid of the error.
surreal ore
Makes sense as a prefab isn't a mesh lol
neat canopy
Hey, has someone experience with Lightportals? Workbench is always crashing on import... With ForceCreatePortals it´s not crashing but the Lightportals are not working. I got the Lightportals and Boxvolume set up in Blender like said in Wiki...
neat canopy
Also got the Lightprobe in the Prefab
surreal ore
@neat canopy Like this?
 neat canopy
surreal ore
<@393753954120499213> Like this?
neat canopy
surreal ore
<@393753954120499213> Like this?

Only Windows for now
Assigned the material names

 surreal ore
 neat canopy
surreal ore
neat canopy
surreal ore
Then like this?


But okkkk I understood more now. Will try now to make it work thx for now
dreamy canyon
tidal latch
https://community.bistudio.com/wiki/Arma_Reforger:Weapon_Modding#New_Materials t...
in Blender, Output fbx without Material?
 inner girder
Does anyone use Nomad to do hardsuface modeling? I did a crash course today and might have some questions


 shell hedge
just post your questions man
inner girder
shell hedge
just post your questions man
Lol sorry for the delay,
I can’t seem to get alphas to work correctly. When I try to use them, it seems to try to build a 3-D voxel version of the alpha instead of an overlay. Also, is there a way to start low poly as default with the shape or do I have to select a lower resolution with each shape and apply that with each one?
I’m also confused on how to change the size of the alpha that projects onto the model
sly bridge
sorry, would love to help but what is the question here in regards to this particular channel - model_makers?
tidal latch
which is more configuration problem, not model one
 brisk root
Would anyone be able to take the time to explain how to take the mag an scope to make it sepreate
lapis vault

New project who this? (if you can identify what this is you can have a metaphorical cookie)
 spice topaz
lapis vault
They're about the same I think actually
spice topaz
lapis vault
They're about the same I think actually
It’s the Czechoslovakian variant
Found it
VZ.52
 lapis vault
good job 🍪
right now Im having all sorts of trouble with the workbench but ah well
I might just have to figure that part out tomorrow or something
spice topaz
lapis vault
I might just have to figure that part out tomorrow or something
Good luck
steel hare
neat canopy
Just take a look on Bohemias buildings polycount/facecount and take that as oria...
thanks a lot! I will take a look! And do you know if there is a limit to model size? E.g. how big (length, wirdth, height) a model can be. I remember in the old OFP and ArmA Days there was an engine limit somehow
neat canopy
steel hare
thanks a lot! I will take a look! And do you know if there is a limit to model s...
I don‘t know if there is a limit for the model geometry, but for sure it is way beyond the one A3 had.
lapis vault

Can anyone help explain why the the bolt and trigger are out of place here? This only happens on the .et, while the .xob appears fine. Well actually, the bolt and trigger might be the only ones in the "correct" position

 neat canopy
surreal ore
<@372281870005567491><@393753954120499213>
neat canopy
surreal ore
<@372281870005567491><@393753954120499213>
But has it still a collission?

 tidal latch
lapis vault
Can anyone help explain why the the bolt and trigger are out of place here? This...
tidal latch
lapis vault
Can anyone help explain why the the bolt and trigger are out of place here? This...
Do you have your own animations or are you reusing vanilla ones?
neat canopy
surreal ore
So then 😌😁
steel hare
surreal ore
<@372281870005567491><@393753954120499213>
Perfect, thanks a lot! 🙂
lapis vault
Currenlty I am reusing the M14 as a base to get started with it. I assumed it might be animation related and the weighted bones are getting translated, but I haven't gotten that far yet. Would it be as simple as making adjustments to the animation positions?
shell hedge
surreal ore
<@372281870005567491><@393753954120499213>
borg reskin
tidal latch
lapis vault
Currenlty I am reusing the M14 as a base to get started with it. I assumed it mi...
you would have to make new weapon animations
and IK anim
if you want to reuse player animations, then you might need to position your weapon close to vanilla one
lapis vault
joy
inner girder
How do I add a dirt layer to the top of the helipad we have been working on? The multi texture shader has been difficult to understand enough to unlock that route. I need to make this thing dirty and used lol
 shell hedge
pbr multi would be reasonable to use here as it would make it fit in better with vanilla stuff
lapis vault

setting up for animations this still happens with the weapon, It seems parenting to RightHandProp sets the origin point of the weapon to that bone, not the snap_hand_right like I initially expected. Should I match the origin point of the weapon model to the hand position or is there an easier way to fix this?
surreal ore
The origin of your weapon has to be in the correct location or there will be an offset. Which is what's happening for you.
lapis vault
👍
can I not simply move Prop.R to a more appropriate position in the animation? Or will that cause problems in the engine?
surreal ore
Doesn't it make more sense to just properly orient your weapon, as to follow standards?
Instead of making all of your animations have an offset?
lapis vault
probably
I've literally never animated before, so this is all fundamentally new to me
surreal ore
I'd suggest properly configuring your weapon before trying to animate.
lapis vault
will do, reimporting the model to the workbench shouldnt be a big deal either
 young shard
Doing interior work for a Frigate.

 jade mason
Looks absolutely beautiful
young shard
Very WIP.
lapis vault


I cant figure out why for the life of me the magazine is higher up than it should be in the workbench. In Blender everything is correct with the rigging, but it appears that in the Workbench its snapping to Scene_root that is generated by enfusion, and not snapping to snap_weapon like it should correctly be. Thats all I could guess. Anybody able to identify what the problem is? Everything else so far has been correct but this one refuses to cooperate no matter what I do
 last hill
lapis vault
I cant figure out why for the life of me the magazine is higher up than it shoul...
last hill
lapis vault
I cant figure out why for the life of me the magazine is higher up than it shoul...
The workbench works off of slots and snap points, so the magazine positioned in the mag well on Blender, create two new empties, one for the mag, one of the weapon. Position identical position on the Blender workspace. Name one snap_magazine and have it be a part of the magazine hierarchy. Name the other slot_magazine and have it be part of the weapon hierarchy. Then in the prefab stage, set the snap point of the magazine prefab, to snap_magazine and in the weapon prefab, under I believe muzzle component, set the magazines slot snap point as slot_magazine
tidal latch
lapis vault
I cant figure out why for the life of me the magazine is higher up than it shoul...
lapis vault
last hill
The workbench works off of slots and snap points, so the magazine positioned in ...
Yep, this is exactly how I set it up. I can double check that the prefab is set correctly, but it's a weird issue, I don't think it actually happens once I load it in a running game, but animation is unfinished and broken there still anyway, so I'm not relying on that.
last hill
lapis vault
Yep, this is exactly how I set it up. I can double check that the prefab is set ...
Did you select export skinning on the model import settings on both weapon and mag?
lapis vault
Correct
last hill
Hmm seems to be something not correctly set but without shots of everything I can't say what
 wicked jasper
Can you show the xob with the slots and snap points?
lapis vault
I'm not at the computer now but later I can check the prefabs again. That's the only thing I can think of
 misty solstice
young shard
Doing interior work for a Frigate.
misty solstice
young shard
Doing interior work for a Frigate.
Very nice


 lapis vault
last hill
Hmm seems to be something not correctly set but without shots of everything I ca...
lapis vault
last hill
Hmm seems to be something not correctly set but without shots of everything I ca...
you can see here that the snap points should be all correct, in-fact, everything looks fine in the .et visually, and in blender. Only in the animation viewport does it appear out of place
wicked jasper
I would actually say they are not placed correctly. I just started with animation and weapon stuff, but from what i witnessed is that the Mag will get snapped to the slot_magazine of your weapon.
So basically

 lapis vault
Yeah, I see thats what happening, but thats Scene_root, not snap_weapon, even though above you see the prefab is set to use snap_weapon to slot_magazine
wicked jasper
nvm then
lapis vault
but this only happens in the animation editor, which is really confusing
animation is hard 
wicked jasper
I guess its just as everything else in life 😄 Once you more or less undestand how its working its just gathering experience
But understanding a new topic for the first time that you know what you have to do is always hard
lapis vault
I kind of wonder if its possibly related to a broken/missing node editor in the animation graph. I honestly have no idea what to do with that
I made a post in #enfusion_engine but basically, I followed the tutorials instructions on duplacting the .agf from an existing weapon, and I get back all sorts of errors which the tutorial doesnt have nor adress, and adding said graph will cause the workbench to crash if I equip the weapon in the world editor
 wicked jasper
oof
tidal latch
lapis vault
but this only happens in the animation editor, which is really confusing
Can you show how did you set preview models?
Animation editor does not read data from prefab - it is just a model
If you want to snap child prefab to something, then set it in animation editor
lapis vault
incredible, so yes, you are right. I did not have the child bone set in the animation editor. So thats fixed now

it did not occur to me to check that here
tidal latch
As for graph - what errors do you have?
wicked jasper
When you guys are done i might got a question for you also reyhard 😄
lapis vault

when I copy an animation graph, for expample here the m21, nearly the entire node tree has these errors that appear
tidal latch
How did you created .Aw file?
lapis vault
iirc I used duplication of the m21.aw
well I tried to make a change and now the workbench crashes if I open the weapons animation workspace. Guess I will delete that one and do it again
lapis vault
I think I might have found a reproducible crash @tidal latch Which is somewhat related or caused by following the initial steps of the tutorial https://community.bistudio.com/wiki/Arma_Reforger:Weapon_Animation/Setup
First, deleting the .agr and .agf files generated by the will make that animation workspace inoperable. Returning an error and loading and showing an empty workspace.
Replacing .agr files with duplicated ones from an existing weapon, in this case ak74 .agr will now cause that animation workspace to crash the workbench.
related to the topic, it appears in the tutorial that creating a new animation workspace only generates n .aw file, while in the case of the current workbench, creating a new animation workspace generates all the necessary files - .aw, .asi, .ast, .agr, agf to begin with.
This is all Version 0.9.9.104 of the workbench
lapis vault
I don't understand anything anymore, nothing I do related to this animation tutorial seems to work as intended or shown, stress
any attempts to duplicate existing templates or replace with existing bring back errors and dont work or change anything
lapis vault
Yup, it seems duplicating any existing .agr will cause the .aw to crash, and since if you delete the .agr it will brick that given .aw, there is no way to replace or fix it afaik if you do this. This will effectively force you to delete the entire .aw and make a new one.
 lapis vault
feel like I probably need someone who can guide me through this animation process because I've reached the end of the wiki and its not helping me with this at all.
tidal latch
lapis vault
Yup, it seems duplicating any existing .agr will cause the .aw to crash, and sin...
that thing is changed again in experimental - there is "Create empty" option
 lapis vault
So I need to follow that same process with "create empty" Checked?
lapis vault
Well thanks, I solved that problem. the animation is still warped like above though in world editing.
tidal latch
yes, in any case, this discussion belongs #enfusion_animation since quite few posts already 😄
sly bridge
@covert shore - wrong channel. Please keep this exclusively for model making discussions and not inquiring what other people might work/make or not
 spice topaz
inner girder
Working on a destructible object
spice topaz
inner girder
Working on a destructible object
somthing radio
inner girder

 spice topaz
inner girder
spice topaz
inner girder
i know now because the dish but i wont spoil it....
jade mason
I don't know if it's a handheld thing or a vehicle sized thing
If the latter I guess a radar?
 willow sage
From Left

 karmic adder
To elaborate:
Blue: Regular prefabs, you'll want to use these for the vast majority of applications.
Pink: PrefabLibrary prefabs are usually just their blue counterparts, except that they have some special randomization values (scale, rotation) on them. They can also not be edited otherwise. These are intended for some terrain making applications, but I'd still recommend going with blue unless you know better.
Orange: PrefabsEditable, these can be placed and deleted by GMs.
 spiral hedge
Hi, i have a question to clipping errors with a model (gun). I have setup two colliders (one easy for the world as Weapon and one more complex as FireGeo). But the gun can still look into stones and gravel with the whole barrel. Is there a way to fix this? And: Is there a way to limit the maximum angle while in laying down? TY
 crimson nexus
I have a new problem, imported a bunch of models and never seen this

some of the textures are appearing black without anything defined in the materials... and the black mesh areas are unaffected by the material colors
surreal ore
@crimson nexus the verts are painted. Open it in blender and repaint them from black to white.
Just open vertex paint mode and press shift-k.
With white selected as the color of course
crimson nexus
surreal ore
<@336655257553862677> the verts are painted. Open it in blender and repaint them...
Thanks for the heads-up
surreal ore
No worries


 dense plover
What air defence doing
indigo halo
Hey guys little question: I have the odd feeling that my weapon has a very light rotation, how can I make sure it is not the case and eventually fix this rotation in blender without having to redo all or fix it piece by piece? I have also the odd feeling this same rotation has been inherited by the memory points. Any suggestion?
inner girder
dense plover
What air defence doing
Pantsir with a tiny bit of mix of the 3-4 Pantsir models
indigo halo
Guys I’m debugging my optic, it looks like that and I’m not quite sure how to fix it. Any idea?

The texture is offset and i’m not understanding if it’s a problem related to the texture I created or if there’s an issue with optic placement. I’ve tried a lot of stuff but apparently nothing works
 wicked dirge
you are sure the optic reticle is dead center on the crosshair in the reticle texture?
indigo halo
I did solve that playing with offset 😊 now I’m stuck elsewhere. Although my collimator material shows the red dot, it is not visible on the glass 😅
It flashes just briefly and then it’s gone
indigo halo
Even following collimator guide closely I cannot manage to make it appear 🙁
tidal latch
you are not combining collimator and 2d optic?
indigo halo
I inherited attachment base and added the SCR_Collimator and Collimator controller. I modified then.emat as per the guide and the preview of the material shows the red dot with the effect. But when I go and@test it (but also from .xob preview) I just see the empty glass and nothing more
I was considering now building it as PiP optic but I’d like to make it work the right way
indigo halo
tidal latch
you are not combining collimator and 2d optic?
Before combining I was trying to make it standalone
indigo halo
I’ve actually downloaded and imported the sample following the guide and the issue unfortunately remains. Combining will be something I’ll do after but I need to make the standalone item work first 😊
last hill
It's grayed out when you can't use it, not that confusing. If it was clickable but not able to be used, then it'd be confusing.
sly bridge
@leaden wasp wrong channel
 wary inlet
i hate how i can read that so well 🙃 🇦🇺
indigo halo
Folks, my helmet when worn shows both microphone and chin straps in first person view. How can I hide those without having to remove it from my model?
 heavy musk
Yo i need some help, im working on some platecarrier again and ive got 2 issues the first is that 90% of my pouches are the same material wich definitely should not be the case, the second problem is that some of my textures are just black ive tried this vertex repaint stuff as @crimson nexus seemed to have the same problem but that didnt work after reimporting


 coarse peak
Anyone know what’s goin on
heavy musk
heavy musk
Yo i need some help, im working on some platecarrier again and ive got 2 issues ...
fixed the black textures it was indeed as easy as shfit-k-ing in blender so now the only problem are the pouches xD
last hill
coarse peak
Anyone know what’s goin on
Check your DMs
inner girder


 sand pagoda
brosky, you should use different 3d editor for this
you cant get models from this thing working in reforger
try blender, its simple enough for a begginer and also there is a ton of guides in internet
inner girder
sand pagoda
you cant get models from this thing working in reforger
I use blender for the smart UV unwrapping and the importing to arma. Blender is great and is powerful but not a beginner easy tool to use. I switched from blender for my main modeling process because I can take my iPad anywhere and work on projects with a stylus and blender is the end tool to clean up stuff and import to arma.
Very familiar with blender and used it for the past several years but switched to nomad due to the ease of use and the fact I can work on stuff anywhere and not be tethered to my pc.
 eager hill
Don't use smart uv unwrapping. It's anything but smart. Instead a free option would be uv packer addon. Paid (and better) alternatives are uvpackmaster or rizomuv
inner girder
eager hill
Don't use smart uv unwrapping. It's anything but smart. Instead a free option wo...
It’s like Einstein compared to nomads UV unwrapping lol
inner girder
eager hill
Don't use smart uv unwrapping. It's anything but smart. Instead a free option wo...
Will look into this
eager hill

Taking a look at the UV-Packer Addon for Blender. It works much better than the default packer included in vanilla Blender. Visit my website for links to my assets, addons, the discord, and other useful resources.
https://www.pzthree.com/
here is a quick demonstration
it's as good as it gets for free
you can also check uvpackmaster 2. It's an older version, but it's available for free iirc. I don't know how it compares to packmaster 3
default smart uv unwrapping is quite bad, so i wouldn't recommend using it
also an asset like the one you're doing should be textured with multimaterial workflow instead of the normal one
inner girder
Wait I might be mistaking pbr nodes for baking multimaterial
Looks like I can multi-material bake in nomad too
inner girder
eager hill
also an asset like the one you're doing should be textured with multimaterial wo...
Honestly I have no idea what I’m doing with model making but I’m a career artist both traditional and graphic and 3D is a semi new avenue for me and I’m *“faking it till I make it”*so to say 😅
Appreciate the help
 knotty ledge
Question for the model makers here, zbrush is coming to ipad soon (2024) is there anything i can do with it for reforger? I finished my donut in blendr then my PC borked so this gives me new hope.
sly bridge
knotty ledge
Question for the model makers here, zbrush is coming to ipad soon (2024) is the...
donut - the worst tutorial available. anyhow, you will still need a pc unfortunately. Looking forwards to zbrush on ipad (m1) as well, but i some nice 3d modeling software wouldn’t hurt either. Currently there isn’t any proper ones
knotty ledge
Ok thank you for your opinion 👍
 faint fractal
sly bridge
donut - the worst tutorial available. anyhow, you will still need a pc unfortuna...
faint fractal
sly bridge
donut - the worst tutorial available. anyhow, you will still need a pc unfortuna...
If the donut tutorial is bad what would you recommend?
zenith quartz
Chamferzone's revolver tutorial if you want to do weapons.
Or the flashbang by the same person, which is on YouTube.
covert dune
The flashbang one is great, deffo learned some new stuff. +1 
sly bridge
while not a blender user, i have been modeling (mainly max) for about 15 years. all tuts from this self titled blender guru are trash. Arimus 3d is an awesome dude that covers multiple software, including blender
also yes, chamferzone is decent
faint fractal
zenith quartz
Or the flashbang by the same person, which is on YouTube.
Perfect thanks for the suggestion, I finished the donut tutorial about a year ago and I didn’t really find it that great and I didn’t do anything since but I’ll give those a go
 languid current
I need some custom assets like huts trees tunnels etc where can I get them
inner girder
languid current
I need some custom assets like huts trees tunnels etc where can I get them
Plenty of places like art station,cgtrader, TurboSquid etc
 slim knoll
I think its pretty self explanatory but still
My normals are acting up weird. The red ones are shoving as "correct facing" while the blue ones are "incorrect"

 slim knoll
And bcs of that, making textures becomes a nightmare as it register those as wrongly facing faces.
eager hill
slim knoll
I think its pretty self explanatory but still
My normals are acting up weird. Th...
apply scale. It's negative now
slim knoll
Thank you. :)
wary inlet
faint fractal
If the donut tutorial is bad what would you recommend?
search up Aryan on yt, that guy has some really good stuff
faint fractal
wary inlet
search up Aryan on yt, that guy has some really good stuff
Thanks I’ll give it a look!
 tight pulsar
Okay so i have a bit of a bizarre question, how are the red dot sights on stuff like the MX 3GL actually modelled and rendere

I am considering doing a red dot for it but i don't quite know how Arma handles it best
eager hill
tight pulsar
Okay so i have a bit of a bizarre question, how are the red dot sights on stuff ...
tight pulsar
Oh. Does that apply for A3 too?
eager hill
No, it's a bit different iirc
That's not a channel for A3 tho
Here is a page for A3 https://community.bistudio.com/wiki/Arma_3:_Weapon_Collimator_Sights
tight pulsar
Aah okay cheers
eager hill
In the future i'd recommend to ask in #arma3_model
tight pulsar
I've been fretting between ladder or red dot in modelling and stuff cause of how techn-
You know, now i just realised i posted in the wrong channel lmao
Apologies my man
 kindred belfry
I'm looking to get my feet wet making props in Reforger. Besides terrain making I'm a modding noob. Is there a good step-by-step walkthrough?
Aiming to create relatively simple objects like street signs, post boxes, etc.
delicate condor
kindred belfry
I'm looking to get my feet wet making props in Reforger. Besides terrain making ...
Start from learning general modeling first, then look into game modeling and then what are the specifics of doing stuff for reforger
kindred belfry
Thanks! Working through Blender tutorials atm
sly bridge
kindred belfry
I'm looking to get my feet wet making props in Reforger. Besides terrain making ...
in general modelling for reforger is the same as for every other game out there. what is specific is the texture channels. Duplication and editing of vanilla content is pretty straightforward
kindred belfry
Well, that's a start 😅 Will report back in the distant future...
 wicked jasper
Idk if this one the right channel... Can someone point me in the right direction to where i can set the "wreck" model when my car is destroyed
Got it

 neat canopy
 primal prawn
one object was missing the armature
primal prawn
one object was missing the armature
Set the checkbox „Import Skinning“ in your Import Settings of your .xob in Workbench and reimport to apply
 unreal sable
Hi guys, I'm making my first building based in my homeland Colombia, in blender and substance painter and I have some questions on the next steps to follow.
- Which textures sizes are the best recommended for Enfusion, I think is 2048?

- I have the doors and windows modeled, which is the best approach? include then here in blender file, or create a separate file and add them to a prefab?
- How is better to export the textures? all packaged in the fbx? or it require them to be in a folder, seems substance created a bunch of textures for each layer. how can i aproach this?
- Finally, I think the best approach is to generate a standalone mod for the buindings and then import them into my terrain. how do I import other mods, do I need to publish it in order to import it on my terrain?
Thanks
 modest hemlock
this may be a silly questions as I haven't handled models, but if a model already comes with meshes does that mean it will have collison when imported into reforger?
modest hemlock
I just learned that is a solid no, can I add collision in the reforger tools or does it need to be added in blender?
neat canopy
modest hemlock
I just learned that is a solid no, can I add collision in the reforger tools or ...
You have to add it in Blender
Take a look here:
https://community.bistudio.com/wiki/Arma_Reforger:FBX_Import
neat canopy
-
I am not sure but with 2048 it should be fine.
-
I allways add them in as Prefabs. Makes it easier to add the glas prefabs to windows and you can later use them for other buildings as well.
-
I just drag and drop my textures in the folder of the worbench. Wich imports them directly. Then you have to create a material in the workbench and there you can combine each of your texture layers.
https://community.bistudio.com/wiki/Arma_Reforger:Textures
FYI: Reforger uses so called Multitextures for many objects. They are very good for big meshes like buildings, because they need less texture storage space on you harddrive and also give you a better texture resolution. Just you have heared of them. 😉
Look at Bohemias assets to understand how they work.
- You dont need to publish. Open your map and go to your Projekts options. There you can add project dependencies like your building.
modest hemlock
neat canopy
You have to add it in Blender
Take a look here:
https://community.bistudio.com/...
I've been staring at the site for ages and just can't seem to get it. I'm a total blender noob, may have to pay or beg someone to do it, lol
neat canopy
modest hemlock
I've been staring at the site for ages and just can't seem to get it. I'm a tota...
If you are a Blender noob you should first focus on learning how to use blender itself. After that, the site explaines it pretty well how to export and import to Enfusion/Workbench. Also, to use the Wiki side with blender, you should first install and activate the "Enfusion Blender Tools" plugin for blender, if you haven´t done it already.
https://community.bistudio.com/wiki/Arma_Reforger:Enfusion_Blender_Tools
I know how you feel, it´s just many things to learn and sometimes figure out by yourself. No one here can give you a private tutorial but if you have questions on a specific topic you can always ask in this channel. It´s just really hard and nearly impossible to explain such a huge topic from blender basics to tools to Enfusion just by text.
unreal sable
neat canopy
1. I am not sure but with 2048 it should be fine.
2. I allways add them in as ...
Thank you so much for answering. I saw and substance generated 200 texture /normals / rough files just for a single building. I think it is too much. I think is due to the pack blender process, how do you make this process more efficient without messing the UV. (found the UV unwrapping process a pain and boring.)
sly bridge
unreal sable
Thank you so much for answering. I saw and substance generated 200 texture /norm...
200 textures? for a single building?
unreal sable
Yeap, substance exported a file for each layer. Seems I will need to pack various elements in a single texture map.
For example grouping all the first floor elements inside the same uv map packed together
But when I do the uv/pack in blender some of the UV faces change orientation and distance generating distortion in the UV
 last parcel
right yea don't do buildings like that use Masks instead and do it like BI did it, its much easier
neat canopy
unreal sable
For example grouping all the first floor elements inside the same uv map packed ...
You defently should do that 😅 . Also make windows and doors or lamps there own object and add them later to your object as prefabs.
neat canopy
unreal sable
But when I do the uv/pack in blender some of the UV faces change orientation and...
Have you applied location, rotation and scale to you building in Blender? After that the uv packing should be better.
neat canopy
last parcel
right yea don't do buildings like that use Masks instead and do it like BI did i...
Also use Masks aka Multitextures/Multimaterials for texturing like @last parcel recommended.
 leaden chasm
If i have a model, which uses 3 different materials, does it matter performance-wise if textures for these materials are in separate bitmaps or in one atlas? Even with atlas it is still gonna be 3 drawcalls. So does it make any sense to bother compiling textures into atlas?
unreal sable
neat canopy
Have you applied location, rotation and scale to you building in Blender? After ...
How I do that inside blender, is the same as pin the UV?
or is there an addon that helps with UV unrawp, packaging and making sure all is grouped efficiently
neat canopy
To apply scale, rotation etc. You have to select your object and press STRG+A
neat canopy
unreal sable
or is there an addon that helps with UV unrawp, packaging and making sure all is...
There are addons but most of them don´t come for free.
unreal sable
here is my test on pack islands together

but the UV got distorted, so I will need to retexture it
neat canopy
unreal sable
here is my test on pack islands together
Did you apply the scale like I described above? The big squares in your UV still don´t look right
neat canopy
leaden chasm
If i have a model, which uses 3 different materials, does it matter performance-...
What do you mean by atlas?
leaden chasm
neat canopy
What do you mean by atlas?
 neat canopy
leaden chasm
neat canopy
leaden chasm
Ah ok
leaden chasm
leaden chasm
this or three separate texture files
sly bridge
leaden chasm
If i have a model, which uses 3 different materials, does it matter performance-...
the lower the number of individual materials/textures the better
unreal sable
Ok, I applied all the transforms, now should I try to select different elements (All first floor for example) and then pack islands?
neat canopy
unreal sable
Ok, I applied all the transforms, now should I try to select different element...
Yes, also unwrap again and then pack the islands, otherwise the transformations are not applied to the UV
leaden chasm
sly bridge
the lower the number of individual materials/textures the better
i know that, but given i have no option going below 3 materials (3 guaranteed drawcalls), does combining textures of these materials into single file/atlas makes any sense performance-wise?
eager hill
It doesn't. GPU stores all used textures as one big image
sly bridge
leaden chasm
i know that, but given i have no option going below 3 materials (3 guaranteed dr...
just load time into vram
modest hemlock
neat canopy
If you are a Blender noob you should first focus on learning how to use blender ...
Little update friend, I'm getting reforger to register the colider but it still dosen't seem to have collision. (I walk right through it) I'm hoping there's something as simple as a tick box that I'm missing lol
 sick shard
Have you setup the geometry in the import section of the model?
Should be in where you go to reimport the .xob
modest hemlock
sick shard
Have you setup the geometry in the import section of the model?
i have it set as the wood floor for surface properties and prop for the layer preset. same as exported from blender. i’m trying to import a wooden walkway. do i need to set mass or margin under geometry or should i be using a different layer preset? (im trying to import structures for fishing village models)
neat canopy
modest hemlock
i have it set as the wood floor for surface properties and prop for the layer pr...
Have you used the naming Conventions (Prefixes)?
 neat canopy
modest hemlock
i have it set as the wood floor for surface properties and prop for the layer pr...
neat canopy
modest hemlock
i have it set as the wood floor for surface properties and prop for the layer pr...
Wood should be good. Use something like BuildingView or BuildingFireView
modest hemlock
neat canopy
Have you used the naming Conventions (Prefixes)?
I used UCX instead of UBX for a cube shaped collider 🤦♂️ that's probably my issue
neat canopy
modest hemlock
I used UCX instead of UBX for a cube shaped collider 🤦♂️ that's probably my is...
Could be. If still Not working, use UTM_ . Then your collider only has to be a triangulated mesh, the shape is not important then.
woven swallow
I just made this in a couple of minutes. any inputs?
 modest hemlock
woven swallow
I just made this in a couple of minutes. any inputs?
modest hemlock
woven swallow
I just made this in a couple of minutes. any inputs?
Much better than anything I could come up with in a couple of minutes
woven swallow
modest hemlock
Much better than anything I could come up with in a couple of minutes
thanks
woven swallow
Another variant. trying to creat the oil painting effect by generating a normal map lol
any inputs are appreciated.

 woven swallow
 spiral hedge
Hello guys, i have a small problem with my new helmet. The Model itself and also the collider works well. But if i remove it from the Character or replace it with another one, it stays in the Air and does not drop to the ground. I also played arround with the ItemPhys in the prefeb settings, but nothing work.
 iron brook
spiral hedge
Hello guys, i have a small problem with my new helmet. The Model itself and also...
iron brook
spiral hedge
Hello guys, i have a small problem with my new helmet. The Model itself and also...
Do you have an item version configured? The item version needs to have a model wich is placed on the ground. you cant use worn version for item.
spiral hedge
Just used the same. So, i need the model without Bones and put this in the Item Model Slot of the Prefeb?
sly bridge
woven swallow
Another variant. trying to creat the oil painting effect by generating a normal ...
nais. can you show the roughness?
modest hemlock
neat canopy
Could be. If still Not working, use UTM_ . Then your collider only has to be a t...
I exported it using UTM and exported from blender with the “triangulate faces” box checked. i think it’s something between my export and importing into arma. it detects the collider but it doesn’t give it the priority of being static and i still can’t walk on it. i know it has to be a checkbox somewhere im not hitting but even following the arma tutorial im still missing whatever it is.
neat canopy
modest hemlock
I exported it using UTM and exported from blender with the “triangulate faces” b...
You Need to add the Riged Component to your model/prefab in Reforger Workbench.
modest hemlock
neat canopy
You Need to add the Riged Component to your model/prefab in Reforger Workbench.
Now I think I know where I'm messing up. I need to add an armature? I don't have any bones for my model
neat canopy
No, you dont need a Armaturen
modest hemlock
neat canopy
No, you dont need a Armaturen
I apoligize for being so new at this. Thank you for your patience
inner girder
woven swallow
Another variant. trying to creat the oil painting effect by generating a normal ...
It’s a little gritty looking verses oil paint strokes with brushes is my only input. (I paint and draw for a living if that helps)
woven swallow
inner girder
It’s a little gritty looking verses oil paint strokes with brushes is my only in...
Thanks for the input!
inner girder
Looks great though good job 👍🏼
The wood grain and the weathering on the frame looks legit.
modest hemlock
neat canopy
You Need to add the Riged Component to your model/prefab in Reforger Workbench.
I got it to work by adding rigid body as a componet in the world editor
neat canopy
modest hemlock
I got it to work by adding rigid body as a componet in the world editor
Yeah, thats what I meant. Nice.
modest hemlock
neat canopy
Yeah, thats what I meant. Nice.
I knew I was missing one thing! lol. That's what happens when I get in over my head on stuff.
 fast notch
The model has the UTM extension, but when I add it to the game, it is not visible. What should I do?
neat canopy
fast notch
The model has the UTM extension, but when I add it to the game, it is not visibl...
You need two objects in your Blender file. One is the UTM_YouName wich handels collision later on.
But you also need one object that represents your actual model. This one has to be named YourName_LOD0 (LevelOfDetail 0).
Thats how the LODs work and what for they exist 😉
https://community.bistudio.com/wiki/Arma_Reforger:Level_Of_Detail
unreal sable
Hi, I'm about to import my first building in enfusion, tried to do the best I Can. Whish Me Luck.


I dont know what are volumetric boxes, I didnt includ them
also I added some boxes in each window and door as light portals
unreal sable
seems my colliders are bad: Non orthogonal transformation on collider 'UBX_InnerWallPrimerPiso12'
how can I solve this?
Forget it, I appliead transfomrations
Hy Guys what means Wrong GUID/name for resource
unreal sable
😄

 vale cradle
Hiya anyone got the list of the bone that Hideable here ? or it is using bone name
 modest hemlock
it’s coming

 unreal reef
True
bleak depot
modest hemlock
it’s coming
Beyblade?
fast notch
neat canopy
You need two objects in your Blender file. One is the UTM_YouName wich handels c...
Thanks very much
https://youtu.be/NW0u6V7Kkh0
Why can't you go through the wall? There is a void in the blender in this place

 neat canopy
If you use UBX_ it will always make a Box shaped object out of your model collider. Instead use UTM_
To work for that, your collider needs to be a triangular mesh
modest hemlock
bleak depot
Beyblade?
The most symmetrical rice farmer hat you've ever seen actually 💀
 lost narwhal
bleak depot
Beyblade?
lost narwhal
bleak depot
Beyblade?
Ice cream mod
 rapid turtle
modest hemlock
it’s coming
rapid turtle
modest hemlock
it’s coming
Vietnam UNDEFEATED
fast notch
Please tell me how can I do two sided render on the plane?
shell hedge
fast notch
Please tell me how can I do two sided render on the plane?
go to material and change culling
 granite marsh
Current wip anyone know if it possible to import multiple materials for objects with multiple meshes

 modest hemlock
rapid turtle
Vietnam UNDEFEATED
modest hemlock
rapid turtle
Vietnam UNDEFEATED
SCORE BOARD
 tacit eagle
i think it has too much polygons.
last parcel
I can already tell you if that model is ripped from war thunder you will recive no help from here and that won't be allowed on this discord.
calm rune
That is stolen.
tacit eagle
calm rune
That is stolen.
yup it is i guess
I'm just asking question what if put this thing into arma. i'm not expecting finding some help or something. of course i'm not gonna make a mod with stolen modelings.
tacit eagle
last parcel
I can already tell you if that model is ripped from war thunder you will recive ...
I just got confirmed from who sent this model, it's definitely ripped model.
well, screw it, im not gonna use it
granite marsh

 tacit eagle
is this real life?
tacit eagle
impressive
spiral hedge
Hey, i have a small problem with "Mesh hiding" - I have a Combat Shirt (Rolled Up) where i hide the upper Arms and Torso in the Prefeb. But if now PickUp my new Vest, the Hiding will override/rest. Is there a way to set Priority of Mesh hiding?
sly bridge
tacit eagle
I just got confirmed from who sent this model, it's definitely ripped model.
don’t use / post and even think about using ripped models if you want to stay around
no mate, i meant the roughness channel :))
tacit eagle
sly bridge
don’t use / post and even think about using ripped models if you want to stay ar...
Sorry about that, I'll be more careful next time.
btw, I never said I'm gonna using ripped model tho
jade mason
I'm a ripped model 😉
 stable hemlock
Is it somehow possible and allowed to get buildings from DayZ SA into Reforger?
 thorny cobalt
not allowed no
 leaden trench
Any update on Arma 3 licensed data package?
thorny cobalt
negative
spiral hedge
@thorny cobalt DO you know somethin about "Mesh hiding" in reforger?
thorny cobalt
no
stable hemlock
thorny cobalt
not allowed no
Any chance that we get a SampleMod for new buildings and a tutorial into the wiki? Havent tried out anything by now, but I think doors and windows will be a problem
thorny cobalt
¯_(ツ)_/¯
 sullen sable
If I bought these models, how hard would it be to import into enfusion?

Royalty free 3D model TURKISH EGYPT ARAB DESERT ANCIENT SUMER BABYLON HOUSE COLLECTION for download as fbx on TurboSquid: 3D models for games, architecture, videos. (2075530)
 faint scarab
Hi, I would like to replicate this glow in the eyes of the NVG, does anyone have any advice?

 dusty plume
faint scarab
Hi, I would like to replicate this glow in the eyes of the NVG, does anyone have...
dusty plume
faint scarab
Hi, I would like to replicate this glow in the eyes of the NVG, does anyone have...
RHS has nvgs like that, maybe they would be able to help?
leaden trench
faint scarab
Hi, I would like to replicate this glow in the eyes of the NVG, does anyone have...
Make light with distance very small like few centimeters
same like you would put any light expect it's on character slot
shell hedge
theres a limit of like 30 (citation needed) dynamic lights at a time so using light here might make things like random lanterns in cities not working
 native forum
oh no, a3 light limit ptsd kicking in
 mint hollow
This is not like A3. If you hit the limit, lights further away are replaced by some faking of the light. You never have the same as A3, were all lights disappears, 😄
faint scarab
shell hedge
theres a limit of like 30 (citation needed) dynamic lights at a time so using li...
so, could it be a solution to create an emissive material on the lenses? And how can I direct the emissive light towards the operator?
 sleek forum
How do I add my models to Gamemaster?
sly bridge
faint scarab
so, could it be a solution to create an emissive material on the lenses? And how...
afaik emissive mats don’t shine on other objects
tacit eagle
When adding retextured clothing to characters in the BaseLoudout component, the engine seems to completely ignore the material and apply the default. Is there any way to fix this? I know it probably has something to do with the deflated model, but I can't figure out how to get around it. Adding my own prefab to the deflated also causes issues
sick shard
is scr_destructionmultiphase broken or something it used to work and now the model just ether disappears or I'm just not allowed to attach to it objects like helmets anymore?
 grizzled kayak
sleek forum
How do I add my models to Gamemaster?
grizzled kayak
sleek forum
How do I add my models to Gamemaster?
This might be the wiki page you are looking for to get models to show up for gamemaster. If its not the right one I think it also links back to some other gamemaster wiki pages.
https://community.bistudio.com/wiki/Arma_Reforger:Asset_Browser_Mod_Integration
spiral hedge
Hi, have a small Problem: "HeadClipping_A.edds" does not work on Slot components of the Helmet. So, they show up in First-Person view.
unreal sable
Does anybody how to create pbr multi materials?
because for a bulding i have like 24 materials weighting 300mb
 sleek forum
So how do I make my models placable via GameMaster?
shell hedge
you already got a response to your question when you asked it here
spiral hedge
I get a Error, that my Shirt does not have a Collieder... But original does also not have one?
ENTITY : Create entity @"ENTITY:1" ('GameEntity','Assets/Characters/CombatShirts/CombatShirt1.xob') at <0.000000 0.000000 0.000000> RESOURCES (E): Trying to create RigidBodyComponent on model @"Assets/Characters/CombatShirts/CombatShirt1.xob" without geometry
tidal latch
spiral hedge
I get a Error, that my Shirt does not have a Collieder... But original does also...
original is using _item variant in MeshObject, which has collider
spiral hedge
So, i can use _item Version on Mesh?
tidal latch
in MeshObject component, yes
wicked jasper
How do you set that up?
sleek forum
grizzled kayak
This might be the wiki page you are looking for to get models to show up for gam...
@grizzled kayak 🙏🙏🙏
Thanks
spiral hedge
Is there currently a bug with Texture overwriting? I Set different textures in the Prefab and they will show in the Editor. But inGame the model just use the regular one.
fast notch
Hi. What could be the reason that the arrows are not in the center of the object? Although in the Blender Set Origin in the center of the object
 spiral hedge
Applyed Transforms in Blender?
fast notch
spiral hedge
Applyed Transforms in Blender?
this?
 spiral hedge
Yes
last hill
spiral hedge
Is there currently a bug with Texture overwriting? I Set different textures in t...
Inflated and deflated model clothing item?
spiral hedge
i disabled deflated
last hill
spiral hedge
i disabled deflated
Applied to prefab and made sure to set the texture override to the right slot in the worn item material override?
spiral hedge
OMG
There is a + by worn Model 😦 shame
Ok, so now the Itam on the ground and the worn is right.. the Preview Render (inventory) is still wrong?
Ok, the problem is: There are the original Boots from BIS Set as Preview-Model. But i cant remove it. Update: Removed it in Notepad++

 calm rune
woven swallow
calm rune
woven swallow
When do we get to see something in engine?
young shard
calm rune
When do we get to see something in engine?
Probably when the High/Low poly models are done and textured.
calm rune
young shard
Probably when the High/Low poly models are done and textured.
Well that is a given. Just wondering because we have seen multiple posted over the last Year but nothing in engine yet.
young shard
calm rune
Well that is a given. Just wondering because we have seen multiple posted over t...
Of this shotgun?
calm rune
young shard
Of this shotgun?
Yes plus multiple other things.
woven swallow
calm rune
When do we get to see something in engine?
I'll put something in game when I want to. I've been looking for interested projects to join and help but so far nothing to see. I got invited to join other studios and i rejected them cause their project wasn't interested to me. I learn to model for fun and I ain't modeling something i don't like. plus I've been on and off.
young shard
woven swallow
I'll put something in game when I want to. I've been looking for interested proj...
Sounds like the same with me.
Ive got one active group that I'm in.
But do a lot of stuff I want to do in the moment that later I end up stop doing.
woven swallow
I mean. I'm not trying to start an argument or drama but the only reason i haven't toch the engine is because I have no use for this models in game for now.
I get bored and keep switching to other unfinished models.. but then again nobody is pushing me haha
I do have finished models tho
young shard
woven swallow
I get bored and keep switching to other unfinished models.. but then again nobod...
I've got maybe a 100 unfinished projects.
woven swallow
haha yeah
I feel ya
today i felt like working on my shotgun..
tomorrow i could work on my house model
and so on
young shard
Just like how I'm currently making a BF 109.
woven swallow
BF 109 ?
calm rune
WWII fighter
young shard
German WW2 plane.
young shard
Im probably gonna end up abandoning it though lol.
woven swallow
I do have a plane model somewhere (Unfinished model) haha
this is my lastest finished model haha nothing crazy..
 young shard
It is very nice.
woven swallow
thanks
woven swallow
young shard
Sounds like the same with me.
When a model gets a bit frustrating or boring I just switch to another one haha
So today i touched my Ithaca model 37 shotgun "trench gun" and here's an update. any inputs?
(those are just place holder textures "not final" ).

 sleek forum
also is it ok to leave LOD factors as they are? or is it better to change them? For FPS?
 sleek forum
this made me confused when checking out these two vanilla assets. Can someone explain please...

 young shard
woven swallow
When a model gets a bit frustrating or boring I just switch to another one haha
young shard
woven swallow
When a model gets a bit frustrating or boring I just switch to another one haha
Same. Or I just start a whole new model.
I want to try and make some unreal environment art so I can get a portfolio up.
So Im probably gonna start doing that.
slim knoll
Are there any good tutorials on how to make turrets? I tried to make one but it doesnt spin or do anything. I know I got the model rigged correctly ("v_turret_01" and "v_gun_01") but I am at an impasse right now.
wary inlet
wind on the vegetation material looks a little jank on fronds, but overall looks decent in engine despite my dreadfull screenshot skills 😆
 sleek forum
wary inlet
wind on the vegetation material looks a little jank on fronds, but overall looks...
sleek forum
wary inlet
wind on the vegetation material looks a little jank on fronds, but overall looks...
hey do you know mby if you can somehow flip pbrtreecrown wind animation so that is at the bottom rather then on top?
wary inlet
sleek forum
hey do you know mby if you can somehow flip pbrtreecrown wind animation so that ...
i have no clue how it works, i just tone down default values, is there a map specifically for vertex motion?
sleek forum
wary inlet
i have no clue how it works, i just tone down default values, is there a map spe...
idk... also one more question if you could help... been looking for interaction layer to add colision sound and I cant find it xD it is the interaction layer for sound right?
wary inlet
sleek forum
idk... also one more question if you could help... been looking for interaction ...
i think so? i havent dealt with this sort of thing before so i am guessing that it would have to be in there
sleek forum
wary inlet
i think so? i havent dealt with this sort of thing before so i am guessing that ...
yeah but I cant find where are these settings 😂 Well thanks for the help, trees look great btw! Great job!
fast notch
spiral hedge
Yes
No, it didn't help
wary inlet
sleek forum
yeah but I cant find where are these settings 😂 Well thanks for the help, trees...
thx
coarse peak
 spiral hedge
fast notch
No, it didn't help
spiral hedge
fast notch
No, it didn't help
Do you have already setup colliders?
fast notch
spiral hedge
Do you have already setup colliders?
I don't quite understand what it's about
spiral hedge
fast notch
I don't quite understand what it's about
fast notch
spiral hedge
https://community.bistudio.com/wiki/Arma_Reforger:Prop_Creation
Do you mean UTM and LOD0 model format? If so, they are there. A collision was added through the Reforger Tools addon
spiral hedge
fast notch
Do you mean UTM and LOD0 model format? If so, they are there. A collision was ad...
And its also centered in Blender?
Does anyone know how i can tranform the Value 120 to -120 in the Animation Editor?
fast notch
spiral hedge
And its also centered in Blender?
Okay It is clear that the model should be in the center of the blender stage, thank you.
surreal ore
spiral hedge
Does anyone know how i can tranform the Value 120 to -120 in the Animation Edito...
- -1
spiral hedge
surreal ore
* -1
Yeah, already got it TY

 blazing agate
Hey, I have a problem, I've made a simple prop, but I do not get it to have collisions. I think everything is "correct".


when placing the prefab on a worldtest
still passingthrough the object
if any more info is needed to know what's going on, I'll provide it
wicked jasper
blazing agate
if any more info is needed to know what's going on, I'll provide it
Can you screenshot your setting of the RigidBody?
 blazing agate
wicked jasper
Can you screenshot your setting of the RigidBody?
blazing agate
wicked jasper
Can you screenshot your setting of the RigidBody?
It's embeeding the Props_Base.et
blazing agate
blazing agate
As shown here
wicked jasper
Tick Model Geometry and try again
wicked jasper
👌
 covert rune
Hello, i want to try to import Jackal to Enfusion just for learn how to make a car.
I have installed blender 3.6 and the addon for blender inside Arma reforger tools.
I have import the p3d and after i want export them in FBX. But i have this error.
I have to rename to remove all " . " in Scene collection to work ?
Thanks for your help
 surreal ore
all of those materials have "." in the name. Remove the Invalid character from the names.
wary inlet
first time making helmet cover

 plush shard
wary inlet
first time making helmet cover
plush shard
wary inlet
first time making helmet cover
Nice, you should throw it in zbrush after retopo and give it some fine details 😄
inner girder
Almost ready for substance painter once I get the subframe on


 spice topaz
woven swallow
Done modeling parts. next UV's and textures.|
Any inputs?
spice topaz
woven swallow
Done modeling parts. next UV's and textures.|
Any inputs?
Good, was about to say the texture but then I reread 😂
covert rune
Hello,
I have some problem with my assets in fbx to import in workbench. I have read somewhere Reyhard said it's a wrong game materials assigned to colliders. But like you see in my screenshot no material are used. What i can do for resolve this ? Thanks for your help 😉

 tidal latch
covert rune
Hello,
I have some problem with my assets in fbx to import in workbench. I have ...
tidal latch
covert rune
Hello,
I have some problem with my assets in fbx to import in workbench. I have ...
ah, you don't have any materials at all - this is not allowed too. You need to assign there something - otherwise some default material might get randomly assigned
covert rune
Thanks, for the answers. Problem solved. Let's go next step to import this Jackal in Enfusion 🤣
plush shard
wary inlet
first time making helmet cover
can you show me the layout of the helmet /2d pattern view, just curios how you put yours together
wary inlet
plush shard
can you show me the layout of the helmet /2d pattern view, just curios how you p...
took a lot of inspiration of how m1 helmet covers are actually stitched together, trust me it isnt much, most of the excess bottom mesh will be cut off due to the liner occluding the view underside

also yes i eyeballed the vegetation slits 😆 they dont look too bad though tbh
plush shard
wary inlet
took a lot of inspiration of how m1 helmet covers are actually stitched together...
nice man 🤣 looks really good
wary inlet
plush shard
nice man 🤣 looks really good
lmao i dont use marvelous very much so thats the best you will be getting from me most likely 🤣
 turbid tendon
Does anyone have a suggestiong for a good weapon modding tutorial? The wiki is good but is still lacking
wicked jasper
I dont think you will find a better one tbh. The wiki for Weapon Creation/Weapon Modding is far more detailed compared to e.g the vehicle creation one
zenith quartz
Streamlight Sidewinder flashlight I did real quick.

 calm rune
wary inlet
took a lot of inspiration of how m1 helmet covers are actually stitched together...
calm rune
wary inlet
took a lot of inspiration of how m1 helmet covers are actually stitched together...
This is how you are suppose to use MD. Stitch your items as you actually would irl.
 reef sun
Why is this entrance floor not in the UTM_FG_brick collider? Is this intended? {B054B8C437B0154C}Assets/Structures/Houses/Town/House_Town_E_2I03/House_Town_E_2I03.xob
 wary inlet
calm rune
This is how you are suppose to use MD. Stitch your items as you actually would i...
wary inlet
calm rune
This is how you are suppose to use MD. Stitch your items as you actually would i...
its nice hearing that from the master 😉
indigo halo
Hello there model makers! Coming to you for support about an issue I’m experiencing. I have a uniform model I’m creating, I’ve made for it 4 custom parts: 2 patches on the arms (left and right) and 2 patches on left and right pectoral. I’ve skinned them assigning the vertex groups, I’ve given them armature modifier with preserve volume feature and I’ve placed them properly so that the texture are placed right above the jacket touching it but not intersecting. Then I joined the meshes and the result looks nice on paper. However as soon as the model is loaded in game right arm patch gets distorted by the arm movement and right pectoral patches gets so distorted that the text in it moves out of it. What am I doing wrong? Any idea on how I could make it so that it moves naturally with the jacket without being distorted with movement? Thank you in advance for your support!
coarse peak
That be a weight paint issue by the looks of it
That’s just a trail by error fix until you balance the painting the way you want it to react in game
@indigo halo
indigo halo
Mmm ok, I weight painted it the same way I did for other equipment pieces following the guide. At this point I think i have to change something. Like maybe reducing weights on the parts that should be more flexible?
indigo halo
My mesh is all blue, shall I paint it toward red to avoid it deforming?
surreal ore
You shouldn't be manually weight painting. You should transfer weights to begin with then alter them to get the desired results.
calm rune
indigo halo
My mesh is all blue, shall I paint it toward red to avoid it deforming?
Like Zelik said, transfer the weights then tweak certain areas.
indigo halo
Aye I did a full transfer weight, what I did not do up until now is assign it to specific vertex groups
Dunno if it might help
surreal ore
Transferring weights creates the vertex groups and assigns portions of the model to those groups.
indigo halo
Mmm fine, then I’m at a loss on how I could fix that 🙁
 lucid crystal
in regards to tansferring weights, so i have all these other vertex groups that aren't relevant to the items i wanna import over. Question is, am I supposed to delete them? Would there be any negative-drawbacks of leaving them? or deleting them?
 indigo halo
This is the distortion I’m having just to give you reference
 indigo halo
Last resort is that I’m going to paint it directly on the mesh without giving it a physical dimension
woven swallow
indigo halo
Last resort is that I’m going to paint it directly on the mesh without giving it...
then thats the problem.
show UVs
tacit eagle
indigo halo
Last resort is that I’m going to paint it directly on the mesh without giving it...
How is it weight painted? For something like a shoulder patch you pretty much just need a single vertex group for the most appropriate placement
So if I wanted a patch on the left side of the chest, I'd use strong weight paint to rig it to the left pectoral section
rapid turtle
modest hemlock
SCORE BOARD
What happened to your friend I killed that guy . HE CRIED LIKE A BITCH, VIETNAM
indigo halo
tacit eagle
How is it weight painted? For something like a shoulder patch you pretty much ju...
What I did was weight paint it starting from Body LOD0. So it has aaaaaaallll the vertex groups that body lod0 used in the Bohemia tutorials has. That’s where my limited knowledge stops
tacit eagle
indigo halo
What I did was weight paint it starting from Body LOD0. So it has aaaaaaallll th...
Delete all of them, find the most appropriate section of weight paint on your character model, and weight it to that section only. You just create a new vertex group, give it the same name as the section you want and then paint it
indigo halo
Will give it a go thank you 😊
So in principle is the same I did for the weapon when skinning the bolt
Will try to apply the same principle
tacit eagle
How the hell i put textuers on this
 karmic adder
tacit eagle
How the hell i put textuers on this
karmic adder
tacit eagle
How the hell i put textuers on this
You drag them into the BCR and NMO slots, if they exist.
If you don't have textures made specifically for that object, you will either need to create them (which is another topic), or to create multiple materials and assign them to triangles in your 3d software of choice.
indigo halo
did anyone else notice that colliders are not being imported from Blender anymore?
 ember fable
indigo halo
did anyone else notice that colliders are not being imported from Blender anymor...
ember fable
indigo halo
did anyone else notice that colliders are not being imported from Blender anymor...
check the log, export settings, import settings
indigo halo
no error in the log but it doesn't get in whilst it did in previous objects i built the same way 😦
delicate condor
tacit eagle
How the hell i put textuers on this
You'll want to create multimaterial for that
So properly set up uv mapping, creating mask to project correct materials on correct places and so on
surreal ore
indigo halo
did anyone else notice that colliders are not being imported from Blender anymor...
Validate that the geo is correct, otherwise it won't import.
indigo halo
Thanks mate! It did help. My collider wasn’t correct so it was not being carried over
covert rune
Hello, someone have already Import assets from Arma 2 ? I have try for the Jackal but it's Hard i think (and im a big noob too 😆)
tidal latch
covert rune
Hello, someone have already Import assets from Arma 2 ? I have try for the Jacka...
Hello, one of the official samples is ported vehicle from A2 😉 https://github.com/BohemiaInteractive/Arma-Reforger-Samples/tree/main/SampleMod_NewCar

GitHub
Modding Samples. Contribute to BohemiaInteractive/Arma-Reforger-Samples development by creating an account on GitHub.
covert rune
tidal latch
Hello, one of the official samples is ported vehicle from A2 😉 https://github.c...
Thanks, i look at it. Next step is learn and hope i can make my Jackal work 😜
 karmic hill
Hello everyone , i need to know if the part of tha animation of weapon is incoming on the wiki ? i realy need documentation for continue to work on my weapon project.If somones have information or tuto for me that's be cool
fast notch
Hi. Please tell me if there is any way in the Arma engine to change the size of an object along different axes, and not the entire size as a whole? For example, in height or width
tidal latch
fast notch
Hi. Please tell me if there is any way in the Arma engine to change the size of ...
In import settings of source model
Other than that no
Although you can use some script hacks to achieve that
faint scarab
HI. I'm having this problem with some backpacks I've imported into the game. I've also tried doing manual paint weight but that doesn't seem to fix anything. So, imho, maybe I didn't do a good job with the weight paint or is there some other kind of problem that I don't understand? Some advice?
 tidal latch
perhaps this part (single vertices over there) are weighted to more than 4 bones?
faint scarab
tidal latch
perhaps this part (single vertices over there) are weighted to more than 4 bones...
So, i just discover that the model fit with a bounch of bones, and the bones that have direct effect in the backpack are 7: Spine 5,4,3,2,1, and the shoulder. I delete two Spines (1 and 2), and it works better. Now i think to delete ore subtract paint in the Spine 3, hope this solve the problem!
faint scarab
@tidal latch solved. THX for help! Now i can finally import all the Backpacks!
tidal latch
its not component, it is a special material inside of the mesh
check materials assigned
 acoustic vessel
Hello I'm currently making some custom clothing for reforger in blender. It's the first time I've went through a process like this but I'm making decent progress. I've got to the stage of having a few clothing items complete and wanted to start importing in to enfusion. Does anyone have a good guide on armature rigging or knows of anywhere I can find a usable rig?
tidal latch
acoustic vessel
Hello I'm currently making some custom clothing for reforger in blender. It's th...
Hi, take a look here https://community.bistudio.com/wiki/Arma_Reforger:Character_Gear_Creation
acoustic vessel
Ahh perfect I missed that part on the wiki thanks!
reef sun
You can hover over that number: "inherited prefabs count". So how many inherited prefabs deep the component comes from. e.g if you add a new component on the top prefab its 0
 topaz cargo
reef sun
You can hover over that number: "inherited prefabs count". So how many inherited...
topaz cargo
reef sun
You can hover over that number: "inherited prefabs count". So how many inherited...
thank you sir
inner girder
Can anyone from Bohemia chime in on this? Is there going to be a helicopter example mod we can download in the near future like the car and gun one?
wicked dirge
There are helicopters in-game that you can just open in workbench, why have a seperate mod?
spice topaz
wicked dirge
There are helicopters in-game that you can just open in workbench, why have a se...
I mean same reason for all the other example mods, as an example.
wicked dirge
All game files are there in wb tho, what's in the sample mods thats different?
spice topaz
wicked dirge
All game files are there in wb tho, what's in the sample mods thats different?
I guess just to show it can be done, I mean I agree it’s in the files but why not yk?
sand pagoda
whats the difference?
last hill
Guessing because if it was a sample, it could be loaded directly with models in Blender to apply directly. Rather than looking at the xob and prefabs. Not sure why it's a problem to ask for samples to learn from. 🤔
 silk monolith
Are there any new optical packs on the workshop any know of? 😭 we need some spice if not! Lol 😂
lucid crystal
Hey guys,
So making lods for my clothing model.
Facecount:
LOD0 = 95833
LOD1 = 45432
LOD2 = 22689
lOD3 = 10424
Would this face count be feasible in regards to LOD performance in arma reforger?
sand pagoda
100k for a clothing is a huge overkill
lucid crystal
sand pagoda
100k for a clothing is a huge overkill
Well, it's a belt and gloves with some attachments on said belt. More-so asking what good and balanced face count look like(Using decimate function) is really the crux of my question.
 karmic adder
The ratio seems mostly fine, but that's still a lot of triangles
I would also recommend having a lot less triangles for your last LOD, so in your example maybe <5000 tris for LOD4, just in terms of ratio.
lucid crystal
karmic adder
I would also recommend having a lot less triangles for your last LOD, so in your...
Well i only got the LOD0, 1, 2, 3. I should add another level? will the engine even pick up more than the first four levels?
karmic adder
I just meant making your last LOD a lot less complex than just 50%.
lucid crystal
right so keep LOD3 under 5000k faces then?
karmic adder
It was just an example for ratio
Compared to the numbers you listed
For the actual numbers, I would suggest looking at the official assets
lucid crystal
okay gotcha
karmic adder
For example, Jacket_Pilot_USSR_01 has these face counts:
11000, 5000, 2500, 1250, 250
As you can see it decreases by 50%, but then for the last one by over 75% (basically skipping one)
It also shows that 100000 is a lot, you'll want to heavily decrease this even for LOD0
lucid crystal
okay thanks. So my statistics for my model look a little something like this. This includes the belt, attachments, and gloves that are attached to the armature. To simplify, what should my values for
Vertices:
Edges:
Faces:
Triangles:
look like for arma reforger?
 shell hedge
as low as you can before it starts looking like ps2 graphics
lucid crystal
aheem aheem
shell hedge
there are no precise target numbers, make assets have similar fidelity to vanilla
lucid crystal
Hmm, i see, alright, time to figgagle with this then. Thanks top g
shell hedge
you can probably reduce this a lot without it being visible by just decimating up to 1 degree angle or whatever it is you guys do in blender
surreal ore
Also the pistol and mags shouldn't be a part of the clothing. Should make those separate and attach them
And if you use my character mod I have slots for gloves 😉
karmic adder
You can do a lot with fairly few triangles. This is LOD4 of that jacket I mentioned, it has just 250 triangles but still looks good.
 lucid crystal
surreal ore
And if you use my character mod I have slots for gloves 😉
lucid crystal
surreal ore
And if you use my character mod I have slots for gloves 😉

Get outta here, get! get!
Nah i would, but i wanna make this fit into vanilla as much as possible without relying on another mod. but thank-you.
lucid crystal
karmic adder
You can do a lot with fairly few triangles. This is LOD4 of that jacket I mentio...

okay this clarifies alot. thank-you.
lucid crystal
shell hedge
you can probably reduce this a lot without it being visible by just decimating u...
Got it, thanks big dawg. That's why you're one of the goats.
shell hedge
Idk how it works in blender tho
lucid crystal
shell hedge
Idk how it works in blender tho
Alright so reduced everything down significantly. I think this should be good.
 last hill
lucid crystal
Alright so reduced everything down significantly. I think this should be good.
last hill
lucid crystal
Alright so reduced everything down significantly. I think this should be good.
Decimate modifier can cause issues once you attempt to actually use the model in engine, so be wary of that.
I would also suggest looking into learning how to retopologize from a high poly to low poly model, allows massive detail to be baked in with lower poly counts.
lucid crystal
last hill
Decimate modifier can cause issues once you attempt to actually use the model in...
Like messing up the weights im guessing?
last hill
lucid crystal
Like messing up the weights im guessing?
It can, because the vertices it's painted to won't exist and/or be in a completely different spot.
lucid crystal
last hill
It can, because the vertices it's painted to won't exist and/or be in a complete...
Alright, So I'll just transfer the weights again and see if that corrects it.
inner girder
wicked dirge
There are helicopters in-game that you can just open in workbench, why have a se...
For the sample rig more than anything but also to show the prefabs and submeshes etc etc.
wicked dirge
inner girder
For the sample rig more than anything but also to show the prefabs and submeshes...
but isnt it already possible to see in workbench?
inner girder
I’m not smart enough to distinguish between a bone and memory point so I need to see how it’s done. Low IQ problems on my end require example mods 😅
The example mods have been incredibly helpful
wicked dirge
i want aware that the samples came with full blender models, makes sense
shell hedge
doesnt it import unweighted joints as "memory points"?
red icon thing
or maybe it imports "memory points" as unweighted joints
crimson nexus
wicked dirge
i want aware that the samples came with full blender models, makes sense
not so much blends but a GitHub repository with all the source files for the sample mod, so the fbx files and textures. Real nice to have all the bones and dummies laid out already, wish there was an example one for the Mi8 and/or UH1... over 80 odd parts to the base rig, not to mention the rotors, etc (having example collisions up to date would also be nice)
crimson nexus
shell hedge
or maybe it imports "memory points" as unweighted joints
dummies and unweighted joints look the same to me, I just don't know if the engine will deal with them equally or if it would cause issues
shell hedge
I've only ever used joints in my mods but I don't know what the difference is
crimson nexus
all those dummies (one highlighted in orange), enfusion tools sorts into a 'memory points' collection in blender, and the rig/armature goes into a skeletons collection
 calm rune
lucid crystal
Alright so reduced everything down significantly. I think this should be good.
calm rune
lucid crystal
Alright so reduced everything down significantly. I think this should be good.
Like Aussie said the decimate modifier can cause some serious issues once you get down to the appropriate vert count. You need to have good edge flow in areas that bend like the knees, elbows, waist, etc. The decimate modifier will take good edge flow and destroy it. As for the belt you shouldnt have this issue because it can be all weighted to one or two bones. That being said 30k tris for a belt at LOD0 is still extremally un-optimised.
lucid crystal
calm rune
Like Aussie said the decimate modifier can cause some serious issues once you ge...
Right, so what are some things i can do to optimise it more? and i get what you mean by the joints and etc. So essentially try to retain more vertices at places like elbows, knees, knuckles and etc?
calm rune
lucid crystal
Right, so what are some things i can do to optimise it more? and i get what you ...
You dont need more verts just nice edge flow. Notice how my edge flow in the knee area(whole model to be exact) for LOD0 is nice and tidy. Now look at the edge flow as soon as I use a decimate modifer on it. These areas will not bend smoothly and youll notice stretching in your textures.

 lucid crystal
calm rune
You dont need more verts just nice edge flow. Notice how my edge flow in the kne...
lucid crystal
calm rune
You dont need more verts just nice edge flow. Notice how my edge flow in the kne...
Alright, back to the drawing board then. So what are some tools or techniques i can use to ensure good edge-flow? any guides on it?
calm rune
lucid crystal
Alright, back to the drawing board then. So what are some tools or techniques i ...
The best way is to learn how to retopologize your high poly models then bake the details from the high poly into the new low poly that you create by retopologizing. Retopoflow 3 is a great blender addon for it. You can buy it or download it for free from github.
lucid crystal
calm rune
The best way is to learn how to retopologize your high poly models then bake the...
Aheem, aheem, aheem, whimper. Aight, I'll check it out and try it out. Thanks bruv' appreciate ya.
karmic hill
yop guys i need help for fix this , i want make rolled version of shirt but the arms is transparant ?https://imgur.com/a/UsTf6E2
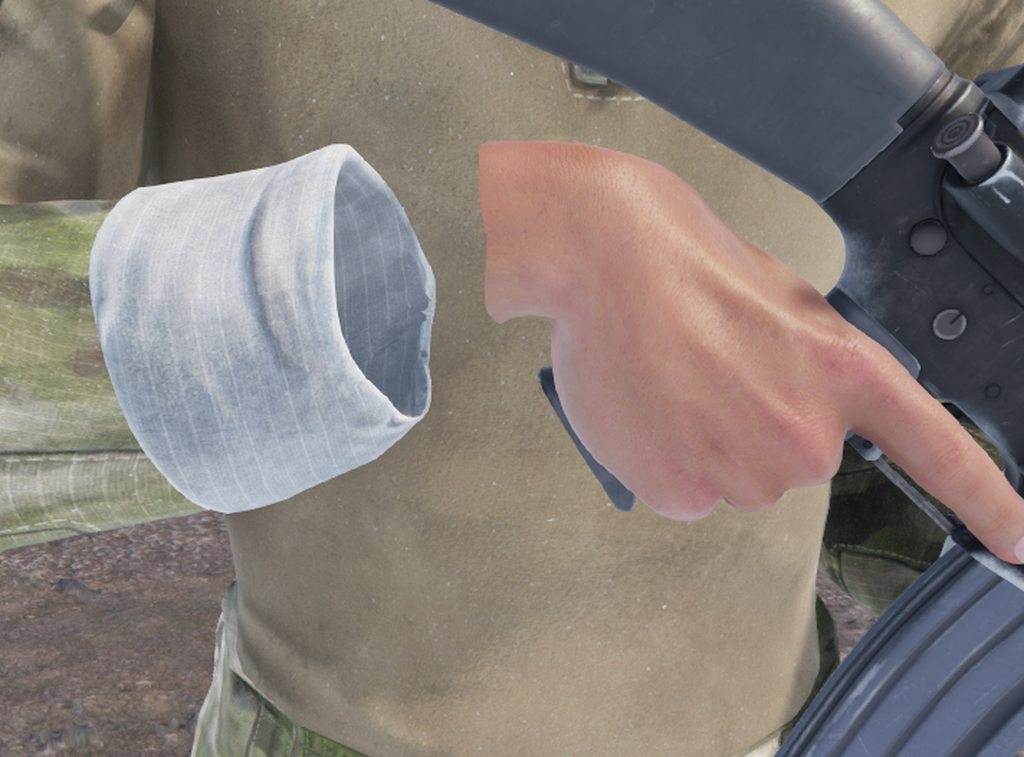 last hill
karmic hill
yop guys i need help for fix this , i want make rolled version of shirt but the ...
last hill
karmic hill
yop guys i need help for fix this , i want make rolled version of shirt but the ...
Prefab settings in the clothcomponent for override meshes to hide, remove arms and see if that unhides it.
karmic hill
@last hill is working but i have this result
last hill
karmic hill
<@293168886419947530> is working but i have this result
Can't view the image mate. 404
 karmic hill
Is okey , thank you
leaden trench
calm rune
The best way is to learn how to retopologize your high poly models then bake the...
On the topic of Blender add-ons, I can recommend mesh-online.net's bakers. Great for lazy people like me who can't be f*cked with weight painting and just want some buttons to click and get good results.
 untold halo
Hello Guys it's possible to remove some character in this game ? Because all time i make the weight painting , some of them appear good on the character and some time when the character change in game the 3D Model just get broke , but if i rework on it my model is not addapted for other character who appear great , with someone have an solution ?
 pure kayak
calm rune
You dont need more verts just nice edge flow. Notice how my edge flow in the kne...
pure kayak
calm rune
You dont need more verts just nice edge flow. Notice how my edge flow in the kne...
hey mate, would you mind if you have time to take a pic of the pocket on the pants in this image? i struggle to get my topology right with nice flow on pockets so that may help me a bit
surreal ore
leaden trench
On the topic of Blender add-ons, I can recommend mesh-online.net's bakers. Great...
Like 3 clicks in Blender will get you good results. Transferring weights is pretty easy. I think most of the problem is, people are trying to make things for Reforger in Blender without any experience using Blender. That's like trying to write scripts without knowing what OOP is.
shell hedge
I don't use blender but it's quite rare for me to have poly reduction significantly damage weights in c4d (but I hope blender is better)
surreal ore
And I use Blender often and don't have those problems either.
leaden trench
Idk why Blender has different terminology for everything; It's confusing coming from other software where Blender has some stupid name different to the rest of the industry for every function.
shell hedge
isn't it the same with autodesk? c4d, blender, autodesk call some things differently
leaden trench
A little, less extreme
shell hedge
even worse, blender uses the wrong letter for up axis
it's like countries that drive on the left side of the road
calm rune
pure kayak
hey mate, would you mind if you have time to take a pic of the pocket on the pan...
Hope this helps


 calm rune
leaden trench
On the topic of Blender add-ons, I can recommend mesh-online.net's bakers. Great...
calm rune
leaden trench
On the topic of Blender add-ons, I can recommend mesh-online.net's bakers. Great...
Never tried that one before. Been using simplygon for the last year. Just signed up for the free trial of InstaLOD so waiting to get my license to try that now. The pioneer license is free.
leaden trench
calm rune
Never tried that one before. Been using simplygon for the last year. Just signed...
It's nice to find a Blender add-on to replace other tools in your workflow just so you're doing less import/export
calm rune
leaden trench
It's nice to find a Blender add-on to replace other tools in your workflow just ...
Simplygon has given me great quick results but after looking into InstaLOD it looks so much more powerful so I am excited to try that.
leaden trench
calm rune
Simplygon has given me great quick results but after looking into InstaLOD it lo...
Interesting it uses Unreal. I'm using an Unreal plugin to bake tree/vegetation billboards for Reforger
Or maybe it doesn't I Just googled instalod and first result was blurb about unreal ol
Houdini Poly-reduce SOP is best LOD tool I've used
It can preserve quads and edge flow
calm rune
leaden trench
It can preserve quads and edge flow
Okay this is what i'd like to have if it can do that. Is it a paid subscrition?
leaden trench
calm rune
Okay this is what i'd like to have if it can do that. Is it a paid subscrition?
$270 a year. Not worth it for one SOP lol
calm rune
leaden trench
$270 a year. Not worth it for one SOP lol
Yeaaaaaaah, next, hahahah
leaden trench
There is a free "apprentice" version but it doesn't have any export SOPs so you can't get your model out of it. Maybe worth a try just to marvel at; it's an incredible software with a unique node- based workflow.
spiral hedge
Hello, im new in Blender (Learning since 4 weeks). I have a small problem with my normals. Can someone please explain why all looks fine in Blender, but if i import i have this strange edges?
 calm rune
spiral hedge
Hello, im new in Blender (Learning since 4 weeks). I have a small problem with m...
calm rune
spiral hedge
Hello, im new in Blender (Learning since 4 weeks). I have a small problem with m...
Are you adding the weighted normals modifer before exporting?
spiral hedge
calm rune
Are you adding the weighted normals modifer before exporting?
No, no modifiers
calm rune
spiral hedge
No, no modifiers
Add a weighted normal before exporting.
calm rune
Make sure when you use the modifier you use shade auto smooth
If it still looks bad then it probally your edgeflow.
 wooden whale
Idk if this is the right place to ask but how do you make the body/head go invisible/hidden when wearing something - to prevent clipping. I.E I want to hide the head/neck seams when wearing a helmet
 deft owl
wooden whale
Idk if this is the right place to ask but how do you make the body/head go invis...
deft owl
wooden whale
Idk if this is the right place to ask but how do you make the body/head go invis...

Under the cloth component there is an array of meshes to hide
this refers to the mesh on the character
wooden whale
amazing thank you
 crimson patio
What could be the reason that when I import .fbx models there just show lots of code?
woven swallow
spiral hedge
Hello, im new in Blender (Learning since 4 weeks). I have a small problem with m...
are you baking your normals?
plus I wouldn't be using blender for texturing..
sick shard
is there anyway to give an item a stackable quantity on the prefab with out scripting?
last hill
crimson patio
What could be the reason that when I import .fbx models there just show lots of ...
Because you need to right click the FBX and click import and register in Workbench. That will make you an xob file readable and workable in the tools.
sick shard
sick shard
is there anyway to give an item a stackable quantity on the prefab with out scri...
Got this sort out 🙂 if anyone in the future wants to know
surreal ore
@sick shard it's best to just share what you've figured out so anyone wanting to know can see what you've done.
wooden whale
Can you use any rig or do you have to use the new reforger rig? A friend told me any rig works but I havent been able to get other rigs to work
spiral hedge
woven swallow
are you baking your normals?
I baked in Substance Painter.
woven swallow
spiral hedge
I baked in Substance Painter.
Then there's something wrong with your mesh.
spiral hedge
woven swallow
Then there's something wrong with your mesh.
Ok thanks. i try to rebake it tomorrow, otherwise i check my vertex
woven swallow
spiral hedge
Ok thanks. i try to rebake it tomorrow, otherwise i check my vertex
Check for duplicates and flipped normals too.
 hazy vault
Does anyone have a reforger refrence model like to show how tall a person is
wary inlet
hazy vault
Does anyone have a reforger refrence model like to show how tall a person is
you can get a character model in the enfusion samples, it comes complete with character rig, mesh and other kit, great for making animations or in your case getting a good sense of scale 👍 go here: https://github.com/BohemiaInteractive/Arma-Reforger-Samples you will find the character model in the folder "modded character" you should be able to append the file with ease in blender
GitHub
Modding Samples. Contribute to BohemiaInteractive/Arma-Reforger-Samples development by creating an account on GitHub.
hazy vault
wary inlet
you can get a character model in the enfusion samples, it comes complete with ch...
Awesome thank you for the help!
 winter magnet
Hello everyone, does anyone know how to remove the visibility of the headgear in first person?
crimson nexus
winter magnet
Hello everyone, does anyone know how to remove the visibility of the headgear in...
add the opacity map to your material (.emat) and check off these two options in general

 wooden whale
im trying to hide the lowest part of the neck but all the neck options I've tried havent worked (neck 1 to 4) does this lower part have a different name? I couldnt find it in the bones category or in blender

 midnight path
last hill
wooden whale
im trying to hide the lowest part of the neck but all the neck options I've trie...
midnight path
last hill
wooden whale
im trying to hide the lowest part of the neck but all the neck options I've trie...
Yes, if you go into the xob itself, then look at the mesh components. I believe it is called Head_Neck
The bone names on the model sample are for the skeleton bones, not the mesh itself.
sleek forum
Why cant I move my objects in GM after placing them down?
wooden whale
last hill
Yes, if you go into the xob itself, then look at the mesh components. I believe ...
It was head neck a I found it in the end, much appreciated
shell hedge
midnight path
dope
crimson nexus
sleek forum
Why cant I move my objects in GM after placing them down?
did you place the objects while in GM or while in workbench? if the latter, did you put down a prefab or prefab-editable? (E_prefab.et) if prefab, that would explain it... just a hunch, don't ask how I know 😄
sleek forum
I put it down in GM
crimson nexus
it was a long shot, oh well - I've had trouble with objects before that didn't have colliders, don't know if that will help or not. Maybe someone else has the answer.
wooden whale
Is there a way to make someone taller or anything like that? like if I wanted a uniform to make someone like a foot taller or anything like that?
wooden whale
would I need to enlarge the skeleton or something like that?
shell hedge
a lot of the animations have absolute bone positions so just making everything chonkier doesn't really work
so the result is dudes get enlarged horizontally and not vertically
so the only thing you can do is a ben swolo character this way
shell hedge
I haven't tried resizing the character by editing the transformation matrix though
shell hedge
ok its "possible" by setting the scale every frame which is very inefficient...
colliders seem to get buggy though
colliders dont seem to scale

so, not worth it probably
hazy vault
midnight path
How hard is it setting up cars? I’ve been thinking about importing some that I have from A3
wary inlet
shell hedge
ok its "possible" by setting the scale every frame which is very inefficient...
kick him! harness the true power of ragdolls
deft owl
shell hedge
ok its "possible" by setting the scale every frame which is very inefficient...
that is terrifying
shell hedge
this is what happens when you resize the character mesh and the armature #enfusion_configuration message
 latent moon
Demn Goliath
midnight path
hazy vault
How hard is it setting up cars? I’ve been thinking about importing some that I h...
eh its not easy but also not too hard
theres somewhat of a tutorial for it
tacit eagle
shell hedge
ok its "possible" by setting the scale every frame which is very inefficient...
Oh shit, child soldiers mod. Win
wary inlet
I promise that this day forward, I will never think again about trying to make additional character heads for reforger, my skills seem to be a few arma series out of date 😆
 wary inlet
tacit eagle
Oh shit, child soldiers mod. Win
wary inlet
tacit eagle
Oh shit, child soldiers mod. Win
lmao there seems to be hot demand for this mod
 grizzled pivot
wary inlet
I promise that this day forward, I will never think again about trying to make a...
grizzled pivot
wary inlet
I promise that this day forward, I will never think again about trying to make a...
Honestly I would love this to be in the game, if we had a bunch of low poly ps2 soldier running around
shell hedge
I low key want to make a potato graphics mod
grizzled pivot
I’d use it
 open tree
wary inlet
I promise that this day forward, I will never think again about trying to make a...
open tree
wary inlet
I promise that this day forward, I will never think again about trying to make a...
Victor B, Spectacles, Adam, Pitch 1.0
perfection
tacit eagle
Anyone knows why i have a huge sphere in my prefab 😄
 tacit eagle
I generally avoid bools
sly bridge
grizzled pivot
Honestly I would love this to be in the game, if we had a bunch of low poly ps2 ...
topic please
sly bridge
tacit eagle
Anyone knows why i have a huge sphere in my prefab 😄
sphere without collapsed modifiers before export?
sly bridge
hazy vault
is it okay to use boleans on models?
ideally - nope (especially for game mesh)
hazy vault
sly bridge
ideally - nope (especially for game mesh)
So stick to loopcuts for windows etc?
sly bridge
yes (ish). You can further optimize these if you wanted to
wary inlet
shell hedge
I low key want to make a potato graphics mod
YES! defeat the whole purpose of enfusion!
wary inlet
open tree
Victor B, Spectacles, Adam, Pitch 1.0
tidal latch
tacit eagle
Anyone knows why i have a huge sphere in my prefab 😄
This is coming from one of the components - radio or supply iirc
plush shard
wary inlet
I promise that this day forward, I will never think again about trying to make a...
looks like something from gmod 🤣
 summer sierra
hey not sure if anyone can help me in here. but essentially im trying to add Redlines minigun to my Blackhawk to no avail. it is worth noting im trying to copy the BTR turret situation as reference. Any ideas to get this to work right?
shell hedge
can you explain the problem?
summer sierra
shell hedge
can you explain the problem?
i add the turret along the ways that the btr is setup but when i even try to teleport AI into the helicopter, it doesnt recognize anything other than the base passenger seats and pilot
the turret doesnt get recognized by the game when im test world
shell hedge
does the minigun turret work elsewhere? like on a hummvee or btr?
summer sierra
nothing to work off of
Redlines blackhawk would be the only one but its still down
or my Darkgru vics but also down
shell hedge
what about duplicating a vehicle and changing the turret?
summer sierra
i can try that
shell hedge
it would help to see if its an issue with the turret or your vehicle
shell hedge

covert dune
Have you tried the "Slot Mappers" at the bottom ? The BTR also has those. I never messed with them, but maybe that's the key 
Mentions stuff about a TurretCompartment and all
summer sierra


This is the update sofar, tried adding some components that were missing between the two
Got the ability for the helicopter to recognize the gunner spot but nothing happens when i occupy it. worth noting that the BTR turret is setup as a SCR_basemnager component or whatever and the miniguns to my understanding should be a slot manager
so i dont really wanna mess it up too bad
open tree
wary inlet
I'm not sure you're aware how faithful it is 😄
 twilit hamlet
I’m experiencing an issue where after adding the M2 Gun mount to either vanilla or modded helicopters (same method as UAZ tutorial), causes the tools to crash.
Once I’ve adjusted the X,Y or X of the Turret the tool crashes and all attempts to reopen the prefab causes an instant crash
granite marsh
Slowly but surely learning blender, starting to look like a fence lol
 woven swallow
wary inlet
I promise that this day forward, I will never think again about trying to make a...
woven swallow
wary inlet
I promise that this day forward, I will never think again about trying to make a...
lol that's why i don't like organic modeling lol
 fossil crater
shell hedge
so the only thing you can do is a ben swolo character this way
fossil crater
shell hedge
so the only thing you can do is a ben swolo character this way
@wooden whale You can, I did it for DayZ a few years back. You have to do quite some work on the animation graph though (The entrie thing is done there)
It's the same setup in reforger, I had to do some smart things with blending and differential animations to get the animations to play nicely to shorter or larger characters
If you want it to work properly then expect to do quite some animation work as well
wooden whale
fossil crater
<@783461939014795295> You can, I did it for DayZ a few years back. You have to d...
Ty
fossil crater
I might release it as a mod for both dayz and reforger
wooden whale

fossil crater
The main reason why I never did is because you have to modify the animation graph in multiple areas, and the animation graph is not moddable
It can only be replaced
meaning that I have to redo the entire thing on every update that changes the player graph
wooden whale
Damn
fossil crater
So it is a mod that is somewhat very expensive to mantain
wooden whale
I can imagine
wooden whale
I tried scaling the skeleton and uniform in blender but I just got lanky/wider depending on how I scaled
fossil crater
I did it before I joined BI, kind of forgot about it
wooden whale
But I appreciate the help
fossil crater
wooden whale
I tried scaling the skeleton and uniform in blender but I just got lanky/wider d...
Yeah I did no scaling at all
The game does not support scaling well to begin with
You should never scale an entity at all
or scale a transform in this game
wooden whale
Just out of interest, is there a good way to make a gun fit base game animations?
I tried moving the guns in blender but didn't have any luck
fossil crater
ask in animation, that is more workflow and i have not gone too deep into weapon anim workflows
wooden whale
Will do, ty for the help regardless 🙂
shell hedge
fossil crater
<@783461939014795295> You can, I did it for DayZ a few years back. You have to d...
yeah what I need is SetScale to persist
or something
fossil crater
shell hedge
yeah what I need is SetScale to persist
Yeah but it is not supported in the game
A lot of things expect rhe transform to have a scale of 1
shell hedge
fossil crater
Yeah but it is not supported in the game
this is because of absolute position of bones in anim right?
wish I could just scale up the armature
surreal ore
@shell hedge player armature?
surreal ore
wooden whale
Just out of interest, is there a good way to make a gun fit base game animations...
You have to recreate the bone hierarchy of the weapon you're trying to use animations for. And your model has to be pretty precise.
I just created a plugin to grab the bone data and spit it to a text file. Then made a blender addon to read said text file and create the bones in the correct orientation.
I may release a blend file containing the base weapon rigs at some point.
bleak depot
anybody knows where i can looking at for the real dimension of a ladder for Reforger? I think, i have seen it for a long time on the arma reforger wiki page...
bleak depot
bleak depot
anybody knows where i can looking at for the real dimension of a ladder for Refo...
indigo halo
surreal ore
I just created a plugin to grab the bone data and spit it to a text file. Then m...
Are those downloadable somewhere? That’d be pretty useful while attempting to create a weapon. My attempt at creating the M27 was successful but extremely painful 😊
woven swallow
messing around with textures..
 shell hedge
indigo halo
Are those downloadable somewhere? That’d be pretty useful while attempting to cr...
shell hedge
indigo halo
Are those downloadable somewhere? That’d be pretty useful while attempting to cr...
isnt there a sample weapon in github?
indigo halo
Aye and I started there following it step by step. It was quite the effort on my end but in the end it payed off, not without couple of struggles here and there. That works for rifles dunno if it might work for guns too and eventually heavier weapons like the M249 you did
Elaborating a bit: bone placement is vital to have the model working correctly and it has a huge role also on the animation part. If I want to make other custom weapons which are not rifles, but let’s say handguns or MGs, would that structure work as well?
I know I’m asking a lot of questions but I’m building my knowledge starting from 0 and sometimes i end up not knowing how to move forward 😊
shell hedge
you can see the bones in the xob preview, I don't know if there is a sample for a pistol
indigo halo
Aye that’s what I usually do, I was wondering if there’s a way to extract it somehow. Manually reproducing it in blender might lead to mistakes
surreal ore
If you're making custom animations then you don't need to follow the vanilla bone hierarchy. As far as recreating the vanilla rigs, it's not hard. Just a lot of adjusting and reimporting.
Pistol was the one I first recreated by hand. Then I did the M16.
indigo halo
I’m trying to use vanilla anims as a base whenever possible, I have to be honest here. I’m trying to go through all the tutorials and stuff I see but when it comes to scripting and animating it just melts my brain 😊
I’d need a teacher here I guess 😂
surreal ore
Modding is too broad of a subject to teach someone. Especially if the person you're teaching has zero foundation to build off of. I.e. if you don't know how to work Blender, then someone can't teach you to make animations without first teaching you how to work Blender.
indigo halo
I managed to make an M27 which was working. I know something of blender having made some uniforms and equipment which I imported (and I’m using) in some mods. But I’m no expert for sure. As I said I did make an M27 with custom IK pose and few other anims I’ve made using the sample files. It works but I wouldn’t be able to tell if that’s enough to start something else from scratch 😊
shell hedge
indigo halo
Aye that’s what I usually do, I was wondering if there’s a way to extract it som...
no, there is not, either eyeball it or make new animations
alternatively make a script to log all bone positions and put that in your blender bones
indigo halo
shell hedge
alternatively make a script to log all bone positions and put that in your blend...
That would be nice, if I knew how to do it 😊 I guess eyeballing is the way then!
tulip nymph
hello, I have question about collision model, I have a palm tree asset that has a UBX collider mesh, but for some reason collision is not working in world editor.
karmic adder
tulip nymph
hello, I have question about collision model, I have a palm tree asset that has ...
Did you just drag in the mesh? If so, you'll need to add a RigidBody component and check 'Model Geometry'.
tulip nymph
no mesh was already there, I got the model from a buddy, and he said the collider is not working, i opened the xob file in blender with enfusion blender plugin, and the collider is there and I asigned it its properties and in the workbench it recognizes the collider, but for some reason, the collider is not functioning in world editor, it acts as if collider is not there,

also, if i reimport the xob asset with new collider settings, will it automatically update for my trees in the forest generators?
if they are in prefabLlibrary
 tulip nymph
karmic adder
Did you just drag in the mesh? If so, you'll need to add a RigidBody component a...
tulip nymph
karmic adder
Did you just drag in the mesh? If so, you'll need to add a RigidBody component a...
nm you answered my question,
for some reason its all blacked out for the layers,
 karmic adder
tulip nymph
for some reason its all blacked out for the layers,
karmic adder
tulip nymph
for some reason its all blacked out for the layers,
You don't have to select a layer
Just tick model geometry
tulip nymph
oh, gotcha give me a sec, do i do it to the prefab or the xob?
karmic adder
These layer options are already handled by what you selected in Blender
tulip nymph
oh cool, yep cause i see the properties are already there in the xob
karmic adder
When you drag the XOB into the world, it becomes an entity with MeshObject. When you drag an entity into the Resource Browser, it becomes a prefab.
tulip nymph
yes, so do i just delete the old prefab and drag this new one?
with same name?
to replace
karmic adder
I don't know what you're trying to do.
You can also edit the old prefab
Just select another XOB in the MeshObject component
tulip nymph
still not working lol

I want this tree thats already placed down to have collision, the tree is in a forest generator
karmic adder
If you are sure it has a RigidBody component with "Model Geometry" ticked, then I would recommend having a look at the collider type.
karmic adder
tulip nymph
I want this tree thats already placed down to have collision, the tree is in a f...
Then edit the existing prefab
tulip nymph
k
tulip nymph
still not working, i believe its the collision mesh.
I checked the reforger xob tree, this one that I'm looking at has 6 colliders
each for diff parts of the tree
tulip nymph
lol wierd physics stuff is happening, collision is working, but it seems to fall over when hit...

Do i have to specify its weight?
it should be around 500 kg
negative, it should be around 2000 kg
so it should not move when hit
WORKS, i had to make it a static entity. then set layer to TreeFireLayer
otherwise the tree has wonky physids
Thank u again Til! I will never forget your kindness
tulip nymph
 surreal ore
I'd suggest looking at vanilla trees to determine the proper layer presets your geos should have.
 midnight gulch
Does anybody know how to convert a p3d to fbx?
I installed the blender tools but I still can't import the p3d into blender
surreal ore
What p3ds are you trying to convert? @midnight gulch
midnight gulch
surreal ore
What p3ds are you trying to convert? <@319843081710993408>
weapon models
surreal ore
Be more specific
Where did you get them?
They're obviously binned otherwise they would import.
Which means you've probably gotten them from somewhere you shouldn't have.

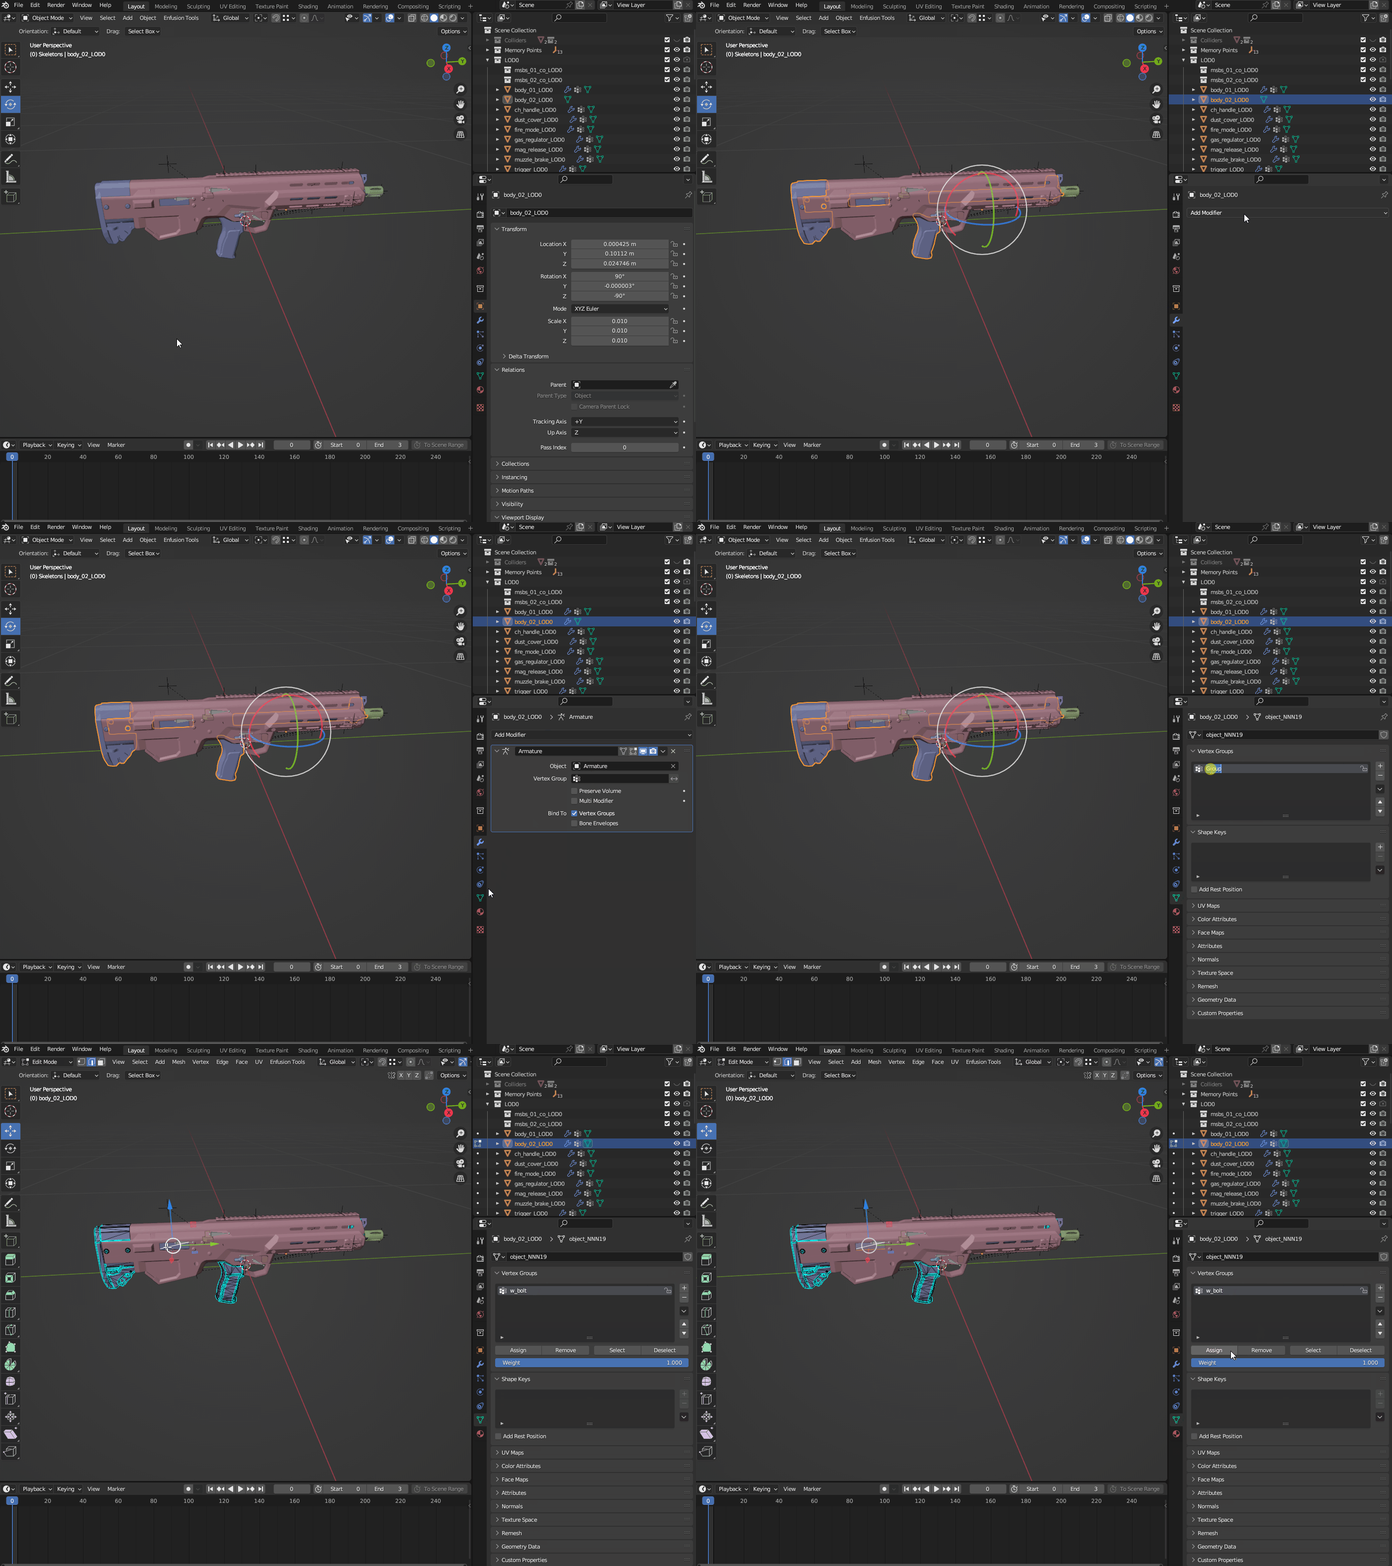
 surreal ore
Yeah, that's not how that works man. If you want to use models that belong to someone else you have to have explicit permission to do so.
midnight gulch
didn't know about that , im sorry
sly bridge
midnight gulch
Does anybody know how to convert a p3d to fbx?
use only the models you own - either made by yourself or purchased from a legit store.
midnight gulch
sly bridge
use only the models you own - either made by yourself or purchased from a legit ...
I couldn't find this flux raider anywhere else so I thought I could use this model, I'm pretty much new here and didn't know about premission and stuff
sorry about that
 willow sand
I'm trying to get the instrument in my mh-6 working but when I try to get it working the workbench keeps crashing
 tidal latch
willow sand
I'm trying to get the instrument in my mh-6 working but when I try to get it wor...
tidal latch
willow sand
I'm trying to get the instrument in my mh-6 working but when I try to get it wor...
are you trying to animate it with proc anims?
If yes, then proc anims require collider - this is known bug
willow sand
tidal latch
are you trying to animate it with proc anims?
I'm basically just replacing the uh1 cockpit xob
So I just need a Collider?
willow sand
tidal latch
if there is proc anim then yes
Yeah that fixed it thanks
coarse peak
Figured out my issue
faint scarab
Hi and Happy New Year to everybody. Someone have tips about rigging gloves? I have two different models but both give me some problem and the method I'm using seems a little tricky and I don't think it's paying off!
sick shard
The hands are pretty tricky I ended up just hiding the hands since I was still getting a lot of clipping issues
faint scarab
In the end I tried that too, but I still see that it doesn't work well because it doesn't grip the objects correctly. The phalanges do not tighten as they should. So I tried to move each finger of the glove into the skeleton position, but it's still not working because basically the gloves lack a skeleton, so I should first create the bones for the gloves and then try to position them in the best way, but I It seems like a bit of a complicated process, I was hoping there was a less laborious method. Furthermore, Reforger's reference model has fingers affected by arthritis, they are all bent, while generally the hands of the other metahumans I've tested on are open... I don't understand the point of making things more complex than they should be. UX Designer, these strangers! 🤣
calm rune
All you have to do is form the glove to the hand then transfer the weights. You can then choose to hide the mesh or no in engine. If you decide not to hide and see some clipping just assign the material to the glove in blender, then go to scult then start inflating the glove model. I say assign the material so you can keep an eye on the texture as you are inflating it so you can see if you are destorying the texture. Worked for me.
indigo halo
Hey there! I’m reworking a model with patches on the arms and I would like to ask if anyone has a better method of attaching said patch to a model in blender (separate meshes) maybe with modifiers. Curved surfaces are a bit of a struggle to attach stuff onto, is there a way with a modifier which doesn’t require (much) sculpting?
leaden trench
indigo halo
Hey there! I’m reworking a model with patches on the arms and I would like to as...
indigo halo
Thank you Stev-E I tried that but results are a bit fancy. Will give it another go!
leaden trench
indigo halo
Thank you Stev-E I tried that but results are a bit fancy. Will give it another ...
a couple of pointers; use "Project" wrap method, and make sure your patch has similar or higher density of verts than recieving surface. After projecting, move it very slightly above the surface of the mesh to avoid clipping.
indigo halo
Ok so I will start by subdividing it to increase the overall verts. I will try with your hint. Thank you very much!
Preferred method is on surface?
leaden trench
indigo halo
Preferred method is on surface?
yea, each vert moves along defined axis until it hits surface of target mesh, then it stops