#arma3_texture
1 messages · Page 16 of 1


 full quarry
since you use mikero tools you are not supposed to do double things with the arma tools launcher
what you do in mikero tools is the same thing as "mount the project drive" in arma tools launcher
but better
so use the mikero tools one only
full quarry
just one. not the other
and since you have mikero tools you should use pboProject to pack
as it would not allow you to pack with lot of these issues you have had
and it would tell you that there are issues
its even weird you got mikerotools but dont use them
except for this one double thing 
 manic roost
full quarry
its even weird you got mikerotools but dont use them
manic roost
full quarry
its even weird you got mikerotools but dont use them
I gues its inexpierence
manic roost
full quarry
and it would tell you that there are issues
Slowly Im also getting throught this. But I will need time to fully use it.
manic roost
Ive now placed the surf_wood_co.paa inside my FolderStructure.pbo and designated it like on the screenshot
 full quarry
nonononono
manic roost
full quarry
also maybe 🤏 too much speed 😅
|| weed not speed||
full quarry
manic roost
Ive now placed the surf_wood_co.paa inside my FolderStructure.pbo and designated...
no you need to unpack Arma3 data on your P drive properly
and then refert to its orginal path from those folders
manic roost
I need the break but I cant stop now on middoing
full quarry
then the game uses it from the arma3 pbos
manic roost
Alright so did Ive done it correct if the MikerosFiles are stored at the P:\Drive like they are at the first picture. Ive configurated like on the second one.
Im also not really sure about the Drive letter. It seams that needs to be P:\Drive
But if I try that it say that it cant contain itself. Like Ive attached at the third picture


 manic roost
full quarry
then the game uses it from the arma3 pbos
manic roost
full quarry
then the game uses it from the arma3 pbos
...because everybody already have it... 🤦♂️
So my path to use the vanila things usally start in the game files itself and just start with a3\data_f...
I hope that heureca is correct
full quarry
manic roost
Alright so did Ive done it correct if the MikerosFiles are stored at the P:\Driv...
no they should not be in folder called mikeroTools
arma3 pbos dont contain mikeroTools folder
manic roost
Alright, Ill use the vanila path at first so I also have done that and then Ill go on to mikero, I wouldnt even know what Im looking for I gues
That would be my try to do it
 full quarry
yep thats how it would be
manic roost
I can go sleep
90 mins then Im back
full quarry
P: represents the root of the ingame file structure
P:\Path\file -> in game -> Path\file
full quarry
manic roost
I can go sleep
*90 mins then Im back*
you got to sleep properly
manic roost
Just a break. Ive slept 7 healthy hours and started at 5am. Thats now ~7 hours ago, I would say ~15-30 minutes of socialising and talks.
Can I save that screenshot for me?
 full quarry
sure.
manic roost
Alright, hear you later probably 😄
I think there will be something more to do then..
or would that only work with Mikeros? Is THAT the THING Mikero does? I feel like Im still not behind that
 manic roost
Haha I really was over. But we have him back


 winter falcon
Anyone knows how I can fix this?
Is it the uv map that is bad or im doing something wrong
Ive tried everything but still the lines between the doors breaks
 lethal condor
You just need to align it properly
 silver adder
I was going too say you can export images and recreate it manually,
It is rather lengthy process, but is possible I did it the other week, automated wat would be nice
manic roost
Ive made my way some https://discord.com/channels/105462288051380224/122121444703338496 things and decided know to finalize the model scaling and everything and decided
that this is the best point to ask if anyone has fix idea why my textures are that pale
 full quarry
manic roost
Ive made my way some https://discord.com/channels/105462288051380224/12212144470...
full quarry
manic roost
Ive made my way some https://discord.com/channels/105462288051380224/12212144470...
what material shader does it use?
manic roost
SuperShader
full quarry
looks like overblown specularity
full quarry
yeah thats probably it
manic roost
Is a low value an high output of specularity?
Or does the alu fresnal cause it? || thanks btw for always fast response, its really not self understanding. I know and honor that a lot ||
full quarry
youll also want to play with the specualriy[] array values
and mabe create a specularmap texture to control it
so its not same all over the model
manic roost
full quarry
and mabe create a specularmap texture to control it
Ive got one. Lemme pick it out quickly
full quarry
manic roost
Or does the alu fresnal cause it? || thanks btw for always fast response, its re...
just happened to peek between waiting something to load up
 manic roost
full quarry
youll also want to play with the specualriy[] array values
manic roost
full quarry
youll also want to play with the specualriy[] array values
Array values? wait what 😄
Meanwhile Ive fixed it and found out that retexturing could fit as well because my sculpting is completly killed by the normal map


 thorn bolt
Inside Arma 3's RVMATS what stage do you use the CA texture. I can't seem to find online where inside my RVMATS I'm to use the _CA textures.
full quarry
thorn bolt
Inside Arma 3's RVMATS what stage do you use the CA texture. I can't seem to fin...
no _co and _ca are assigned on the model
thorn bolt
full quarry
no _co and _ca are assigned on the model
Can you help me understand where I put them then? I have my CO in the texture and have all other maps in the RVMAT. Where would I put the CA?

Or is it a case of one or the other? You choose CO or CA?
full quarry
thorn bolt
Can you help me understand where I put them then? I have my CO in the texture an...
you can have multiple textures on same model
they seem to be already assigned
the ... means your selection contains multiple files

but it is preferable to set up the textures where you made the model
thorn bolt
I assigned all my mesh their individual CO textures so all faces in that list are CO. For the screenshot I did a select all just for refrence.
I'm still not sure where I assign my CA texture if my CO occupies the Texture slot for my mesh.
thorn bolt
full quarry
you can have multiple textures on same model
So for example, my sights have the CO texture assigned to them like here. Is there a specific use case for the CA vs the CO?

 burnt fjord
you assign the CA to parts of the model that require transparent textures in the texture slot
thorn bolt
burnt fjord
you assign the CA to parts of the model that require transparent textures in the...
So for example glass scopes or the camera lenses in my use case?
burnt fjord
i think so yes
full quarry
if they are to be transparent
yes
transparent like a window glass
if they are just shiny then no _CA
thorn bolt
Problem I have is this now with the (Lens) CA texture where as when I had them as CO they were like a chrome/white. I want it to be like scope glass. Unsure if it's a mesh issue.
 full quarry
thorn bolt
Problem I have is this now with the (Lens) CA texture where as when I had them a...
full quarry
thorn bolt
Problem I have is this now with the (Lens) CA texture where as when I had them a...
is there anything behind them?
thorn bolt
full quarry
is there anything behind them?
They're a complete cylinder object. Yeah they have a cap on the end.
 full quarry
thorn bolt
Problem I have is this now with the (Lens) CA texture where as when I had them a...
full quarry
thorn bolt
Problem I have is this now with the (Lens) CA texture where as when I had them a...
ca texture needs alpha channel to be transparent
you should test your model in Object Builder Buldozer
faster to see
thorn bolt
full quarry
you should test your model in Object Builder Buldozer
You're gonna hate me 😂 But I have a problem with my Buldozer and I spent 2 hours scouring her for the answers. I get a missing DLL error when I launch the buldozer.
 full quarry
thorn bolt
full quarry
thorn bolt
 full quarry
thorn bolt
full quarry
thorn bolt
do tis
thorn bolt
Worked
Does buldozer only work with direct paths to textures? Because the object is all white.
full quarry
Object builder options need "path to textuers" set to P:\
so it substitutes the ingame paths
thorn bolt
Done but textures are still white, I'll check my paths for my assigned textures.
 thorn bolt
full quarry
Object builder options need "path to textuers" set to P:\
thorn bolt
full quarry
Object builder options need "path to textuers" set to P:\
Does the case of the text in the path matter in this case? As I have a few capitals in the folder names etc but that's not displayed in the error.
 full quarry
thorn bolt
Does the case of the text in the path matter in this case? As I have a few capit...
full quarry
thorn bolt
Does the case of the text in the path matter in this case? As I have a few capit...
case no, but does that path have other folders on P:\
p:\some\some\those\folders\paa
thorn bolt
full quarry
case no, but does that path have other folders on P:\

That's my structure, inside my tia_ folder I have my config and p3d
full quarry
do you mount P drice with Arma tools launcher?
thorn bolt
Yeah I do, would it be anything to do with my buldozer parameters? -buldozer -name=GaFilta -window -noLand -exThreads=0 -noAsserts -cfg=buldozer.cfg
full quarry
unlikely. the launcher P drive method is bit old and dont work with win10 win11 very well
follow this path #arma3_troubleshooting message
thorn bolt
full quarry
follow this path https://discord.com/channels/105462288051380224/141866231362879...
I've followed all 3 of the links you link out to there and same issue. Not sure what I'm overlooking
full quarry
did you replace P drive mounting with the bat file? (may need restart to disable the arma tools mounting (and its automatic mount needs to be disabled) )
thorn bolt
I'll do a windows restart and run the bat instead
full quarry
then you need to run the arma3P from mikeros tools to populate P drives arma3 data and get the buldozer to start from the real arma3 exe instead of the buldozer.exe copy
thorn bolt
full quarry
then you need to run the arma3P from mikeros tools to populate P drives arma3 da...
So done all that and I still am targeting the base arma 3 x64 exe in my game directory is that correct? I'm getting an application error now.
full quarry
thorn bolt
So done all that and I still am targeting the base arma 3 x64 exe in my game dir...
normally that should work yes
you can also try the 32bit arma3.exe
thorn bolt
full quarry
normally that should work yes
I get an error code 86 Steam - Game Launch Failed on steam when I use the x64. I'll try the x32
full quarry
do you have steam open?
I recall there might also be -nosteam launch parameter you can try out
thorn bolt
full quarry
do you have steam open?
Yeah I do, I'll give that a try
thorn bolt
full quarry
I recall there might also be -nosteam launch parameter you can try out
Same steam error, and get the message Attach Failed. No viewer found.
full quarry
I dont have any ideas off the top of my head. im pretty sure we have solved it here in the past though so you could check the chat history search for that attach failed mentions
thorn bolt
full quarry
I dont have any ideas off the top of my head. im pretty sure we have solved it h...
Fixed it I was missing the profiles and cfg parameters from here. https://pmc.editing.wiki/doku.php?id=arma3:tools:buldozer
I'm guessing it was using its old stuff or defaults, I'm not sure but now it's using the Arma3P generated ones.
Now, back to my original issue with my lens
full quarry
youll want one sided dome with alpha transparency texture on it for it to be seethrough
thorn bolt
full quarry
youll want one sided dome with alpha transparency texture on it for it to be see...
Ok so my CA texture alpha channel is a grey over the lenses and white over other. I'd guess black is fully transparent so might make it darker to test.
full quarry
thorn bolt
Ok so my CA texture alpha channel is a grey over the lenses and white over other...
which other?
the transparent texture should contain only the transparent parts
no solids unless its like a mesh with holes in it
thorn bolt
full quarry
the transparent texture should contain only the transparent parts
Hmm I wonder if I need to redo my UV's then because I have some glass mesh items in with the body which would be plastic
Actually thinking about I could just assign both mesh items a texture that is transparent
full quarry
Id recommend redoing the texturing properly
1 texture for the body for such a small object
and another for the transparent parts
thorn bolt
full quarry
Id recommend redoing the texturing properly
Yeah I think I might have to do that If I don't make progress. I have the lenses transparent now but I see weird artifacts of the mesh itself like a checkerboard visual artifacts. They match the geometry.
 full quarry
You'll have to do alpha sorting to fix the draw order. It's in the objet builder menus, select mesh - move to top
Also you'll want to apply a super shader rvmat on them
The default super from p:/A3/dara_f is ok for starters
thorn bolt
full quarry
You'll have to do alpha sorting to fix the draw order. It's in the objet builder...
Worked perfectly thanks for your help.
 dull tusk
can anybody recommend a good program for painting textures on my models?
silver adder
Quixel Suite .... Photoshop Based Workflow
Substance Painter .... Standalone Texture Painting
Mari .... Motion Picture Quality Texture Painting
then there is also Zbrush, Mudbox, 3DCoat to name a few
dull tusk
thanks, which could be considered best value for best price?
silver adder
Quixel is cheapest and probably best at making textures fast, Substance has some good payment options though, like Substance Live Indie, $20 month, 16 months, then you own it perpetually. They both have a solid market among professionals, it pretty much comes down to personal pref
 robust stone
what do yall use for uvmapping/ texturing weapons for arma3?
 raven wren
Blender, uvpackmaster3, textools
Then for materials, bake in marmoset 5 and do the mats in substance painter
full quarry
bake and stuff can be done in blender too
marmoset and substancepainter are pretty expensive professional tools
so just making note they are not mandatory
raven wren
Yeah ofc, substance has a student licence though that’s free
I can’t remember about marmoset
full quarry
raven wren
Yeah ofc, substance has a student licence though that’s free
for students
raven wren
True
 copper helm
 copper helm
Anyone know the fix to this?
full quarry
copper helm
needs alpha sorting on mesh, right type of shader in rvmat, _Ca texture with saved background color so the default white background does not bleed on the texture
 narrow pine
Hello, how important is the placement of edges between tris that make up a quad/poly in a UV map? I just noticed that the roadwheels of my tank are triangulated differently.
I'm asking because I plan on reusing the same wheel texture for all wheels, so I stacked them on top of one another in the UV map.
The points themselves are aligned properly, so the bottom points on each wheel is at the bottom of the circle of the UV map.

 full quarry
narrow pine
Hello, how important is the placement of edges between tris that make up a quad/...
full quarry
narrow pine
Hello, how important is the placement of edges between tris that make up a quad/...
The triangulation does not really matter
on flat surface like this
narrow pine
Thanks 🙂
 urban magnet
Hi. How set texture for optics?
urban magnet
urban magnet
Hi. How set texture for optics?
    class MyOptic: optic_Aco
    {
        model="\model\scope.p3d";
        hiddenSelections[]=
        {
            "section1",
            "section2"
        };
        hiddenSelectionsMaterials[]=
        {
            "\data\texture_1_co.rvmat",
            "\data\texture_2_co.rvmat"
        };
        hiddenSelectionsTextures[]=
        {
            "\data\texture_1_co.paa",
            "\data\texture_2_co.paa"
        };
or texture change only in model?
full quarry
urban magnet
```
class MyOptic: optic_Aco
{
model="\model\scope.p3d";
...
as in for the item?
urban magnet
full quarry
as in for the item?
The model has sections, but the texture is not applied.
It seems to me that the developers missed this option.


 vernal sage
You can't retexture weapon attachments through hiddenselections.
You need to make a unique model for each texture variant.
Discord search is absolutely rubbish, but IIRC either Dedmen or Reyhard gave an explanation for why retextures aren't supported for attachments. Here's Reyhard's explanation for why it doesn't work:
#arma3_texture message
#arma3_texture message
 spare marten
any1 got a good video or somewhere where i can learn basic texturing with photoshop?. Have done a couple of uniforms but i have only been using co and nohq wihtout adding any filters or so. All the videos jsut seem to be so old and every1 do their own way.
 desert grotto
Anyone got a tutorial for UV mapping to substance texture painting?
full quarry
desert grotto
Anyone got a tutorial for UV mapping to substance texture painting?
there are plenty of those if you just google the subjects
unless you work with some very obscure 3D modeling program 
full quarry
desert grotto
Was hoping someone knew of something newer than 8 years old though
the basics are same
nothing has really changed in that for ages
you can always try searhcing for something like blender 4 uvmapping tutorial
full quarry
desert grotto
Was hoping someone knew of something newer than 8 years old though
like u know

this is the kind of stuff it is beneficial to be able to search for
desert grotto
I believe I have that right. I went and got the uv unpacker 3 addon
desert grotto
But when I imported the fbx to SPP, its painting on parts that im not trying to paint ):
full quarry
you will still need to understand how to place the seams for the islands for best texturing shapes
full quarry
desert grotto
But when I imported the fbx to SPP, its painting on parts that im not trying to ...
youll have to go back to the model
I would suggest start testing with something simpler
you made yourself
desert grotto
Okay, thank you
full quarry
jumping ahead usually backfires in these things
 astral garden
Does Arma 3 accept coloured specular textures?
(Please ping me if you know, thank you).
full quarry
astral garden
Does Arma 3 accept coloured specular textures?
(Please ping me if you know, tha...
no
the specular stage texture is not "just color" but different channels have different use
astral garden
Thank you g
full quarry
astral garden
Thank you g
there are also couple of related pinned messages on this channel
 unique reef
Heyo, got a question :D
How would one go about retexturing something that does not have a plain color? There are a few uniforms / helmets / vests that only come with camo in the mod I am using. Texturing plain color stuff has been simple overall, and even applying camo to them.
But I can't seen to find any guide on how to get a plain color texture from a camo one or retexture it to a different camo.
If someone can provide guidance in that regard I'd really appreciate it.
full quarry
unique reef
Heyo, got a question :D
How would one go about retexturing something that does ...
it gets a lot more difficult with textures like that
and there probably is no guide for it as there is no simple techniques to get around it
unique reef
full quarry
it gets a lot more difficult with textures like that
Yea that is the answer I got so I was hopping maybe someone here would know the techniques and maybe learn from them 😅
desert grotto
is the shadows on this a shadow lod issue or rvmat issue?

 lethal condor
Neither, your normal is incorrect
 brittle rivet
unique reef
Heyo, got a question :D
How would one go about retexturing something that does ...
brittle rivet
unique reef
Heyo, got a question :D
How would one go about retexturing something that does ...
It's kinda the same method
It's a lot easier to do if you have a plain-colour texture to start with, but if you only have a camo texture to work with
(and you are willing to spend the time cutting out sections, and possibly un-distorting textures if the model has distortion in the UV)
Then the _NOHQ, _AS, and _SMDI textures can give you a lot of the separations if all textures were made well
Pasting a UV-grid can help with determining which parts of the UV are where on the model
Though how easy it is to do mostly depends on how good the UV unwrapping of the original model was. Most vanilla uniforms and vests are decent. Guns are a bit messy in my experience (from all the small faces).
(The paa is just a multicolour UV grid, I used it when retexturing a gun for figuring out where the faces line up with the texture)

(I haven't actually done a retexture from camo-only, but this is how I would go about doing it)
unique reef
brittle rivet
It's kinda the same method
It's a lot easier to do if you have a plain-colour te...
Ty
Yea overall camo seems to complicate things a lot
When I start making my own models I am making sure to include plain color textures in my mod
brittle rivet
A masking file helps a lot too
A good mask (or multiple masks) makes retexturing much easier, since creating templates becomes fairly easy
manic roost
Good evening. Im looking for a way to assign the vanilla ground texture to a mesh.
All Ive found in the "a3\structures_f_exp\data\Ground" was a Dirt_01.paa that would need to be converted back (wich I wouldn know how to do)
So Im asking you all: How would you implement a vanilla texture to your mesh/ project?
desert grotto
lethal condor
Neither, your normal is incorrect
oh...well, guess I need to figure how to fix that. Thank you
full quarry
unique reef
Yea overall camo seems to complicate things a lot
sometimes making a plain color base can be done by setting up the color and then overlaying that with the normalmap (0 saturation - multiply/overlay blend) and/or the ambient occlusion texture
experimenting how strongly they should be overlaid may be needed.
but yeah like you say it is far more difficult
unique reef
full quarry
sometimes making a plain color base can be done by setting up the color and then...
I shall try and see where that takes me, thanks
full quarry
unique reef
I shall try and see where that takes me, thanks
👍 like I said earlier there unfortunately is no fool proof method for this.
unique reef
full quarry
👍 like I said earlier there unfortunately is no fool proof method for this.
Yea, lessons learned for when I make mods, I shall not let others suffer ;-;
 summer oriole
yo... trying to make a texture. (ghosthawk) trying to test it in editor using setobjecttexture method. i have the .paa image saved in the mission file itself but cant seem to get it to work. ( this is my first attempt at a retexture. i am only trying to do the main body right now to learn the process. ) anyone think they can help? all i need is to get it to work in my editor file so i can check it before trying to make it into a mod
desert grotto
summer oriole
yo... trying to make a texture. (ghosthawk) trying to test it in editor using se...
Are you loading the mission after setting it?
brittle rivet
manic roost
Good evening. Im looking for a way to assign the vanilla ground texture to a mes...
If I need to convert
TexView2 is my usual method: open the file and save as .png or .tga
Img2Paa can work too I think, haven't used it though, probably better for batch conversion
Or I'll use the GIMP addon to get the texture directly into GIMP (only for GIMP2 right now) (there's one for photoshop as well, don't know if it still works)
Converting back is TexView2 or Img2Paa, just with paa as the output
Suffix needs to be correct for the texture type, otherwise it uses the wrong conversion settings
Using the texture directly, which is preferable if you don't need to edit it
Just set the path appropriately
For P-drive setup with pboProject, it's just the path to the file in P:/a3/
(Don't remember where the P: is required, some places need it (mostly the tools iirc), and some don't (the config and rvmat files iirc))
summer oriole
desert grotto
Are you loading the mission after setting it?
i have figured it out. though. i think im effecting the wrong texture layer (i.e. the first number in the brackets of the script. because as i back away from the heli the texture fades to a solid black and looks more shiney
i am using [0,"texture name"] as i understood it 0 was the main body.
1 should be the tail texture fallowed by the others such as AO, metallic, ect.
summer oriole
well i got my first skin working. needs some adjustments but im happy with it

 torn mango
I once had a really great collection of camo psd files on my Google drive. It was almost all seamless and of high quality. It was all broken into easily tweaked layers.
Turns out that it was just a shared link and the original person deleted it.
I don't suppose anyone here happens to have a good collection of camo textures?
brittle rivet
torn mango
I once had a really great collection of camo psd files on my Google drive. It wa...
Pete's texture templates are still around as far as I know
#arma3_texture message
There's Ample Camo Pack, templates weren't quite as good but had wider coverage of some stuff
There's Arma 3 samples, if it's covered, mostly Apex or Contact stuff
And best of all, the forums are back, so you can actually search the 2 or 3 threads of templates on there
 midnight kraken
Where are the A10 templates
i need me a A10 template
imean texture template
armaholic domain is now purchasable
midnight kraken
Okay can i change the texture of the wheel of the fennek
since its part of the interior
tag me of you know
full quarry
midnight kraken
Okay can i change the texture of the wheel of the fennek
If it has hiddenSelection then yes
 true roost
Hi, does anyone know the dimensions of the texture used on the whiteboard entity? I want to put something there but if use a texture (1024x1024) some parts are cutoff due to the rectangular shape
brittle rivet
true roost
Hi, does anyone know the dimensions of the texture used on the whiteboard entity...
It's 2048x2048 with black space above and below the board
This is the default texture for the map board (no maps, just with the edges and a couple of markers on the bottom edge)
Safe area is something like 22,305 to 2019,1710 if you want to keep all of the edges originally in the texture
TexView2 will work to open the .paa. I think there's an online converter as well
true roost
thanks
unique reef
Heyo, quick question.
So the _nohq file is used to add details in a way if I understand this correctly. I noticed that if I layer 2 on top I can "increase the details"? or make them more visible?
I am wondering if there are downsides to this, or if it is common in anyway to do that?
Please bare with me, I am brand new to retexturing and half the of the things barley make sense ;-;
full quarry
unique reef
Heyo, quick question.
So the `_nohq` file is used to add details in a way if I ...
normalmap is also used by the engine for light shading so that shading is not supposed to be very string in the color texture
its not a "normal" method of texturing
but in a pinch it can restore some details in full color replacement
unique reef
full quarry
normalmap is also used by the engine for light shading so that shading is not su...
I see... so when you say:
its not a "normal" method of texturing
but in a pinch it can restore some details in full color replacement
I guess at this point is fuck around and find out what looks good in-game?
full quarry
unique reef
I see... so when you say:
> its not a "normal" method of texturing
> but in a pi...
pretty much have to see how it goes yeah
how well taht can work also depends on how well the textures you have to use have been made
unique reef
Yea that's fair
So far I've been mostly working with RHS and looking at working with Vanilla
Though now I feel it might've been smarter to start with Vanilla instead...
Thanks again for the explenation.
full quarry
unique reef
Thanks again for the explenation.
I know some people have done very meticulous camo pattern removal by simply going over the image pixel by pixel basically
unique reef
full quarry
I know some people have done very meticulous camo pattern removal by simply goin...
Hmmmm now that sounds like a good way to spend a Tuesday evening
My image editing skills are basic at most but I will give it a shot
manic roost
brittle rivet
If I need to convert
TexView2 is my usual method: open the file and save as .png...
Thanks for the anwser brother 😄 Dont mind I wouldnt read or be thankfull ;D
 verbal smelt
Anybody know how to add custom textures to ops core and ach helmets ?
full quarry
verbal smelt
Anybody know how to add custom textures to ops core and ach helmets ?
would be same way as any other, via hiddenselections if they are made to support those
verbal smelt
full quarry
would be same way as any other, via hiddenselections if they are made to support...
Yeah I don’t understand any of what you just said
I was actually looking for somebody willing to do it
verbal smelt
full quarry
ah then this is not the place.
Thnx
full quarry
though be aware you may be targeted by scammers
verbal smelt
full quarry
though be aware you may be targeted by scammers
Yeah lol
 orchid wasp
What is best tools to make UV maps for texstures?
 main zealot
Oxygen (or a.k.a. "Object Builder")
Hell, I find it more easier to use than 3DS Max's UV mapper.
orchid wasp
what do you need for making the UV? only the model?
main zealot
Yes. But if you want to place the UV map where you want it, you may want to use the texture as guidance.
Don't even know if there are any users who actually map it without textures, anyway.
orchid wasp
allright thanks.
main zealot
No problem. 😃

 pale kraken
 frosty pumice
i swear ive had this problem before, but couldnt figure out what. Object looks fine in bulldozer but looks like this in-game.


i already have the o2script path
 lethal condor
Indeed I would suspect the Normal not being right. How it does look in OB not Buldozer?
 lethal condor
No, show the face, not wire
I don't recall how it does look. Somewhere around top bar
A box icon
frosty pumice

i think it happens everytime i switch blender versions between reforger and A3 modding
lethal condor
What about without rvmat
 balmy palm
i had this same problem - for me the solution was making the shadow LOD smaller
full quarry
good idea there. that does look like shadow bleed
full quarry
frosty pumice
i swear ive had this problem before, but couldnt figure out what. Object looks f...
like said above you probably need to make a proper shadowlod
frosty pumice
it is not a shadowLOD issue because i turned it off, re-exported it. and the issue still persists
and they were already smaller than the res LOD in the first place
 potent stratus
Can someone help me or walk me through how to convert my media folder full of .jpg images into .paa images. Chat GPT has been absolutely useless and confusing for the last hour and a half
full quarry
potent stratus
Can someone help me or walk me through how to convert my media folder full of .j...
jpg is worst format for textures due to the compression artifacts
and chatgpt is not good for this
youll want your textures (in correct accepted resolutions) in tga or png
then you can use imageToPaaGui
potent stratus
ahhh ok ill check that out, am i able to resize the images in .paa format?
full quarry
potent stratus
ahhh ok ill check that out, am i able to resize the images in .paa format?
no
textures need to be in power of 2 resolution
and paa is not editable format. it needs to be saved as png/tga to be able to edit them again
potent stratus
@full quarry So can I resize them to lower quality as png then save into a .paa? Like I have a image.png thats 1.72 MB but I reduce it to 400 KB ish in the power of 2 and converrt to .paa?
full quarry
potent stratus
<@150949769953411072> So can I resize them to lower quality as png then save int...
no
that would make them look like crap
you should follow common resolutions for textures
for consistent quality
potent stratus
But its possible to do so yea?
full quarry
potent stratus
But its possible to do so yea?
well sure you can make 4x4 pixel textures for exampple
they wont look like much but they will be small
potent stratus
full quarry
they wont look like much but they will be small
Yea I've no clue how to make these work. I resized the image from a 2510 x 1507 (296 KB) over to a 1024 x 512 (25.5 KB) Image and arma tools ImagetoPAA wont convert
full quarry
potent stratus
Yea I've no clue how to make these work. I resized the image from a 2510 x 1507 ...
did you save it as png or tga?
potent stratus
full quarry
did you save it as png or tga?
.png
full quarry
potent stratus
.png
what bit depth is the png?
does imageToPaa say why it does not convert?
potent stratus
full quarry
what bit depth is the png?
no clue what that means, also itonly says "Failed to convert 42 files(s)"
frosty pumice
frosty pumice
i swear ive had this problem before, but couldnt figure out what. Object looks f...
still having an issue with this.
I tried reinstalling the blender toolbox and moved the all the meshes to a new blendfile (to see if it was the blend file that was corrupted). No dice.
perhaps it has something to do with the config? I don't see anything wrong with it nor see why it would be a config issue if it was
 stray relic
frosty pumice
still having an issue with this.
I tried reinstalling the blender toolbox and m...
stray relic
frosty pumice
still having an issue with this.
I tried reinstalling the blender toolbox and m...
You've emptied out the hidden selections, might be that. Try removing that line.
frosty pumice
I had camo1 and camo2 before that. Still no dice
stray relic
Is it your model? What hidden selections should you have in the p3d? You don't just "try" random camo names, or none.
full quarry
also how did you disable the shadowlod? I asked this before
full quarry
@frosty pumice
full quarry
potent stratus
Seems paa.gruppe seems to be a helpful converter than arma tools
probably means your arma tools setup is not fully functional
potent stratus
full quarry
probably means your arma tools setup is not fully functional
Ah that’s a shame, figured it would work as a drag and drop of file and it should convert to .paa yea? I just get an error with no explanation so I just don’t sue the application anymore. Been using 3rd party programs for development work
I appreciate y’all’s help nonetheless
full quarry
potent stratus
Ah that’s a shame, figured it would work as a drag and drop of file and it shoul...
yes if the tools are installed right
potent stratus
I uhhhh just installed normally through steam and ran the application, is there an extra special way that I wasn’t tracking for Arma Tools?
full quarry
potent stratus
I uhhhh just installed normally through steam and ran the application, is there ...
id you run arma tools launcher 1 time?
did it create the registry entries?
silver adder
I would think the alpha channel getting mip mapped or something
raven wren
Have you got hideenselectionmaterials?
The problem deffo looks like a problem with the rvmat and maybe it’s pointing to an rvmat that doesn’t exist or is misconfigured
potent stratus
full quarry
did it create the registry entries?
The launcher being the box that pops up for Arma Tools? I’ll check it out when I get home
full quarry
potent stratus
The launcher being the box that pops up for Arma Tools? I’ll check it out when I...
yes. first time run should create the registry entries the tools need to work
another thing would be starting the imageToPaa from its own exe or direct shortcut
potent stratus
i dunno about first time run but I got all the pathways it seems and also used directly at exe not work
I'm actually being told now by several people to not use Arma Tools ;/
either way it seems the website alternative is working perfectly fine so I apprecaite the help
full quarry
potent stratus
I'm actually being told now by several people to not use Arma Tools ;/
ok so people simplify these things a lot unfortunately
and the message gets jumbled when repeated
potent stratus
No sweat! Thanks anyway!
 wooden lantern
small question about all this with the time that has past it wouldn’t explode people’s games to put a 8888 texture into a mod or should I hold off on using one
 smoky granite
Hullo! I'm currently working on a small mod to make some more survival fatigues. I want to use the CTRG stealth camos, and also want to preserve their ability to hide from thermal optics. Is there a way to do this in the config, or is it tied directly to the model?
for reference, the middle guy has the CTRG Stealth Uniform (Tee) on. I'd like to make the pants on the survival fatigues (right-most guy) similarly invisible to IR
 vernal sage
Yes and no. It can be changed via config using hiddenSelectionsMaterials[] and overriding the materials to use your own .rvmats that have a StageTI set to #(argb,8,8,3)color(0,0,0,0).
Issue with this approach is that it will break wound textures for the uniform, so whatever unit is wearing your IR-masked Survival Fatigues won't have blood spatters on their uniform if they're wounded or have been killed.
smoky granite
Gotcha... I'm totally new to setting up .rvmats. Is there a program with Arma 3 Tools that lets me create them, or can I modify them using notepad++ or similar?
looks like I can set them up using notepad++!
full quarry
smoky granite
looks like I can set them up using notepad++!
They are just text files
you can refer to the vanilla rvmats for reference
and also the default ones at P:\A3\data_f
smoky granite
yeah :3
is there a way, perhaps, to restore the wound textures using class Wounds?
burnt fjord
no, mby @severe rune fixes that bug/engine limitation one day
smoky granite
😭 so, in essence, I either get the correct IR Masking behaviour, or the correct injury behaviour, but not both?
burnt fjord
if your uniforms inherit directly from the CTRG ones, then those models will keep their working wounds class, and their default material with IR masking
smoky granite
yeah... issue is that I'm basically applying the CTRG textures to the Survival Fatigues model, so it's inherting the wounds and IR masking behaviour from the Survival Fatigues. and then I can't overwrite the injury.rvmat using the config file, though I can overwrite the IR masking with hiddenSelectionsMaterials
burnt fjord
yea, not gonna work for survival fatigues
smoky granite
dang
I wonder why it doesn't work, whilst mods that add custom assets can have their own sets of .rvmats that do... idk, maybe one day it'll be fixed or solved
 severe rune
wooden lantern
small question about all this with the time that has past it wouldn’t explode pe...
severe rune
wooden lantern
small question about all this with the time that has past it wouldn’t explode pe...
I don't understand the question
wooden lantern
severe rune
I don't understand the question
Can I use 8.8.8.8 yet
Or should I hold off because it’s not fully supported rn
severe rune
I don't know if we released the new TexView yet on A3 tools dev-branch, @terse agate ?
You'd need that to convert the paa
And then you can only use it on profiling/dev branch
raven wren
Is this 8.8.8.8 in contrast to the 8.8.3 RGB 0-1 I usually see in RVMATs?
Just curious what benefits it offers
severe rune
what you see in rvmat are procedural textures.
And no, 8,8,3 is the resolution (8x8) and number of mipmaps.
8888 is basically a uncompressed texture. So no compression artifacts
raven wren
Ah okay, so something to use sparingly
 modern tree
midnight kraken
<@539204353840381983> Do you have a template for the ADuke's Venom?
modern tree
midnight kraken
<@539204353840381983> Do you have a template for the ADuke's Venom?
No, and ADuke is somebody whos busy so getting a template is like... I don't know if he even will respond. I can shoot him an email though, and see if he does.
Even I don't have the template, or I would give it to you
modern tree
I fixed some Shadow LOD issues with the ball and sides, and added limited (I think all) AFM support
wooden lantern
raven wren
Ah okay, so something to use sparingly
yes
specifically for cloud noise textures
 proven prism
Can someone explain why when I import a terrain .tif into Terrain Builder there are sections missing? I got it to work once, but haven't been able to get it working since. I am using QGIS to edit and build my .tif file.

Also I am wondering if the tilt will dissapear when loaded in game. I had to convert the map from EPSG:2056 to EPSG:32632
raven wren
wooden lantern
specifically for cloud noise textures
Ah I see, Yeah i did notice when I was doing fusion coil textures the compression messed with it slightly
Not so bad for greyscale but I saw the effects it has further up in the disuccion on the multicoloured stuff
full quarry
proven prism
Can someone explain why when I import a terrain .tif into Terrain Builder there ...
try export it as ASC instead
wooden lantern
raven wren
Not so bad for greyscale but I saw the effects it has further up in the disuccio...
yeah realistically you should never use uncompressed 8.8.8.8 unless it’s something like a massive noise texture, like clouds
proven prism
full quarry
try export it as ASC instead
I'm pretty sure the only time I had it working was when I did export as ASC if I remember. It just took 4 hours to import.
full quarry
proven prism
I'm pretty sure the only time I had it working was when I did export as ASC if I...
🤔
asc is the fastest to import
unless you got some wrong resolution for it
preferably you would have it in same resolution and cell size as your map is going to be
proven prism
That definitely wasnt the case for me. .tif was significantly faster, less than 5 minutes to import. Thats the one thing I didnt do though was convert the cell size. My map is unconventional in the sense. I am running a very specific cell size, I ended up creating a post on reddit to get some answers and I have all of the information of my map there.
https://www.reddit.com/r/armadev/comments/1nzzcqj/missing_terrain_tiles_when_importing/
The original file had a resolution of 2m, while in TB I am running a resolution of 7.44m. So maybe I will convert it and see how much better it does. My map file is 3.5Gb roughly.
 full quarry
proven prism
That definitely wasnt the case for me. .tif was significantly faster, less than ...
full quarry
proven prism
That definitely wasnt the case for me. .tif was significantly faster, less than ...
what are your mapframe parameters?
proven prism
UTM 32T
Easting: 515000
Northing:5148200
Terrain Sampler
Grid Size: 8192x8192
Cell Size: 7.4462890625
Terrain Size: 61000
Satellite Surface Mask source images
Size: 81920x81920
Resolution: 0.744629
Tiles: 512x512
Overlap: 16
full quarry
ah
ok so cell size is crap
dont do that
7 or 8
and also 8K is highly unstable
so that is likely not gonna work
proven prism
I see. I ran the 8k for the detail. My area is going to be 61km(obviously). so I figured that the higher grid size would mean better resolution ingame.
full quarry
8k heightmap crashes terrain builder quite often
and also makes things very slow to process
it is very much "use at your own risk" type of thing
and can not really be debugged much so if you encounter issue we might not be able to answer other than 8K is buggy
proven prism
I see I will probably switch to 4K then. Do I need to ensure that my terrain size matches my import image exactly? I figured it did which is where the 7.446289 came from.
full quarry
proven prism
I see I will probably switch to 4K then. Do I need to ensure that my terrain siz...
you set terrain size first then get importable data that matches
not the other way around
data is flexible. Terrain behavior with odd values less so
also you want sat and mask m/px resolution to 1
there also the odd numbers are going to hurt the process
I've experimented with 8K quite a lot also seeking that sweet spot of map scale and cell size
but I can not recommend it
proven prism
Does it cause ingame instability or just in TB?
full quarry
proven prism
Does it cause ingame instability or just in TB?
game as well
and massive bump in memory use 😅
proven prism
Okay, this is what I decided. Does this look okay?
 full quarry
is the texture layer 30x30 closest it gets to 40x40? if yes, then this should work
proven prism
Yea, I get either 30 or 60
Also, the site I am getting my terrain data from used LV95 or EPSG:2056, while TB wants EPSG:32632 or UTM. when I do the conversion the map gets a tilt which shows up in TB, is there a way around this so I dont have to convert it, or am I stuck with it?
Also I just realized I was in the wrong channel the whole time. I don't know how I missed that. Sorry.
full quarry
proven prism
Also, the site I am getting my terrain data from used LV95 or EPSG:2056, while T...
ha didnt notice it either. Youll probably want to use different source or try reproject it through something like QGIS
proven prism
I did reproject using QGIS, thats how I am stitching the files together, and it developed the tilt. I guess I can untilt it using the GDAL command line.
 strange onyx
Hello. Wanting to make a building with both emissive and non-emissive textures and I'm not sure how
I am using a built in rvmat file for the emissive material and it does work, but you can only select one in object builder despite the config file allowing you to have multiple materials and textures
 outer needle
strange onyx
I am using a built in rvmat file for the emissive material and it does work, but...
outer needle
strange onyx
I am using a built in rvmat file for the emissive material and it does work, but...
separate the selection that would have a different material
strange onyx
The problem is there isn't a face on the object that has exclusively emissive textures
Because the emission blends
From looking at vanilla assets it doesn't appear to be possible to have that kind of blending
raven wren
Emissive textures need to have a seperate RVMAT unfortunately
theres no way to do an emissive map so mid polygon you can switch up to using an emissive texture.
Gotta have separate polygons for the rvmat to apply to
strange onyx
That's what I worried about, that does mean the nice blended texture on the top of the model (to simulate illumination without actually having a light source) will have to go, but I can work around that
Thank you
raven wren
Emissive’s do support transparency if that helps

These use emissives but use a _ca texture so the whole plane they reside on doesn’t glow
strange onyx
raven wren
Emissive’s do support transparency if that helps
That definitely does help
I assume that also includes partial transparency so you can have a glowing texture that fades at the edges
Actually it will be easier if I show pics
Here is the normal and emissive texture in arma, I want these to be slammed together

 raven wren
strange onyx
I assume that also includes partial transparency so you can have a glowing textu...
raven wren
strange onyx
I assume that also includes partial transparency so you can have a glowing textu...
Yes, the headlights for instance in vehicles use this
raven wren
severe rune
SuperExt material is Super plus Emissive
Interesting, any documentation on this by chance of how it’s setup?
Or examples in basegame
raven wren
Maybe I can find it in the licenced data packs
raven wren
Thank you, I may be able to use this for some door control panels I had planned to keep the section count down
 dense peak
Does anyone know what settings to use to make a .paa have transparency, that will work in a gui? When I try to display any picture aside from a rectangular one, there is no image displayed. I did it once, but forgot what I did, and I cannot seem to duplicate the result. I assume it has to do with the alpha?
full quarry
dense peak
Does anyone know what settings to use to make a .paa have transparency, that wil...
image with alpha transparency is needed yes
png or tga converted to filename_CA.paa
dense peak
full quarry
png or tga converted to filename_CA.paa
thanks, I will try that now. do the drop down settings matter for this case?
texview2
Still no luck. I know the script is good because a solid square displays any picture, and I made a similar circle work once. it is just a png with an alpha. That semi opaque area should be an image. I must have something incorrect.
 dense peak
It was a corrupted png. The transparency wasn't working. Made another from scratch and working. Thank you goat.
 turbid swallow
Hello everyone, quick question. Does this mean that you are able to have multiple Textures and Materials for the Face Properties?
 lethal condor
What is "this" mean in this context? Yes you always can do it
turbid swallow
lethal condor
What is "this" mean in this context? Yes you always can do it
I was looking at the position lights on a plane, next question would be how would one go about doing that?
lethal condor
If you mean you have other question, well, depends on what part is the question. Config? Model? Texture?
turbid swallow
lethal condor
If you mean you have other question, well, depends on what part is the question....
Related to the same thing (applying multiple textures and rvmat files) to same selection via Object Builder. Like in the screenshot above for the red position light, for example how would you add a3\data_f\lights\air_positionlight_red.rvmat and a3\air_f_gamma\plane_fighter_03\data\plane_fighter_03_glass.rvmat to the Material in Object Bulder. Would i need some seperator like ; or ,?
lethal condor
What separator? You might misunderstand something. A polygon can only have one texture and material
turbid swallow
lethal condor
What separator? You might misunderstand something. A polygon can only have one t...
You are right I just did not zoom close enough to see that there is a double selection
lethal condor
"Double selection"?
dense peak
I removed a question, as I wanted to b sure I had tried everything. I am attempting to place a paa in a GUI. I am able to place rectangular shaped images and everything works alright. When using rounded or irregular shapes, the transparency appears to work, but there is a faint grey opaque area where the image should be.
I was able to make it work from a png twice, but I am not sure what I did exactly. I have used TGA with alpha, pngs, and TexView2. I tried imagetoPAA, but it failed to convert either format. Any help to get this working is greatly appreciated.
full quarry
dense peak
I removed a question, as I wanted to b sure I had tried everything. I am attempt...
Image resolution should be power of 2
dense peak
full quarry
Image resolution should be power of 2
I will double check, maybe I did the math wrong. Changed everything to 8bit too.
dense peak
full quarry
Image resolution should be power of 2
I entered 1023, instead of 1024. a few hours wasted due to a wrong keystroke. Haha, I will go hang my head in shame, but it is working perfectly and will make a beautiful menu. Thanks again.
turbid swallow
lethal condor
"Double selection"?
There was one over the other.
lethal condor
I have no idea what does it mean. Double selection is not a term we know. Do you mean this:

 neat cape
turbid swallow
There was one over the other.
neat cape
turbid swallow
There was one over the other.
Every face can only have one selected texture (_co.paa or _ca.paa) and one material (.rvmat)
Multimaterial can be done via .rvmat and UVSet0 and UVSet1 needed
UVSet0 is for Mask(RGB)(defined in .rvmat file for Multimaterial), UVSet1 for tileable/unwrap too.. or its the other way around with UVSet0 and UVSet1.
neat cape
turbid swallow
Related to the same thing (applying multiple textures and rvmat files) to same s...
These need to be seperate meshes
You got selected 2 meshes there in your screenshot.
Lamp and glass mesh are very close to each
turbid swallow
lethal condor
"Double selection"?
 neat cape
These are 2 overlapping
lethal condor
Inside one is for "not enabled" outside one is for "blinking"
neat cape
In this you can select the selections so the lamp(glow)

If selections are made ofc
Might be position light or collision light
turbid swallow
lethal condor
Inside one is for "not enabled" outside one is for "blinking"
I get that now, sadly I did not zoom far enough to see that they are actually two overlapping.
midnight kraken
Anyone have a Template for the Reaction forces Couger Helicopter??? im trying to get my hands on one for a while
lethal condor
Google Docs
midnight kraken
i cant find a psd file or a xcf for it
midnight kraken
lethal condor
https://drive.google.com/file/d/1LNEwt50qIrxxVvcH2Eblm2KjF1HlsiYN/view
still thank you
manic roost
Hey texture peoples 😄
I gues that Im having a problem called "unmapped"
Can someone tell me what it means in detail? I already gues that its a UV thing
|| Ive reposted that and moved it from animation because I think that my issue isnt in the animation part ||
 manic roost
Here you can exactly see what I want to achieve/ what Im missing.
Im not an great experienced guy. But I want to do nice stuff. Maybe another guy achieved the same issue and can share his experience.
 full quarry
manic roost
Here you can exactly see what I want to achieve/ what Im missing.
Im not an gre...
full quarry
manic roost
Here you can exactly see what I want to achieve/ what Im missing.
Im not an gre...
it should be parts of mesh that have no texture/material assigned
and what is this UI layout 
manic roost
Ahhh okay. So Untextured parts return into "unmapped"
So that isnt the issue why this part of the class Damage isnt shown like in the Test_House_F
I gues that switching to the intel of class Damage could be the best for me now
So that will be my first sources to look at:
 manic roost
full quarry
and what is this UI layout <a:shakeeyes:702426088197849131>
manic roost
full quarry
and what is this UI layout <a:shakeeyes:702426088197849131>
Im honest now: I dont even know how to handle the ObjectBuilder.
I use it only for the Bulldozer
full quarry
manic roost
Ahhh okay. So Untextured parts return into "unmapped"
So that isnt the issue why...
should not be related to damage stuff correct
manic roost
manic roost
Here you can exactly see what I want to achieve/ what Im missing.
Im not an gre...
Im back now. Ive tried also multiple things.
But havent succeeded in finding out why my tex isnt connected to the rest so
its not showing up in the .p3d textures.
Do you have a gues where I could loose it? Like marked in the attached message
Its like searching a needle in a haystack 😄
|| sry for repost, Ive forget to attach the ment message ||
something offtopic
Is it possible to convert the .paa back into an usable type for Blender to
import it as background of the UV for better allignment?
-> Save as lol
full quarry
manic roost
*something offtopic*
Is it possible to convert the .paa back into an usable type...
texview can save it as png or tga
just save as and type in the file type at the end
manic roost
I like
 full quarry
manic roost
Im back now. Ive tried also multiple things.
But havent succeeded in finding out...
full quarry
manic roost
Im back now. Ive tried also multiple things.
But havent succeeded in finding out...
what destruction type does your building use?
manic roost
I gues the building.rvmat
a3\data_f\Penetration\building.rvmat
Is that what youve asked for?
full quarry
manic roost
I gues the building.rvmat
a3\data_f\Penetration\building.rvmat
Is that what you...
no
destruction type in config
manic roost
Im confused.
I gues we are talking about class Hitpoints and its inherits. (thats the only hit on "destruction" that I had)
But I had done that with the defined macro
#define HOHES_GLAS_HITPOINT(GlasNr,arm,rad)                 \
    class Glas##GlasNr##_hitpoint                             \
    {                                                         \
        armor    =    arm;                                    \
        material    =    -1;                                    \
        name    =    Glas##GlasNr##_hit;                     \
        visual    =    Glas##GlasNr##_ganz;                    \
        passThrough    =    0;                                    \
        radius    =    rad;                                    \
        convexComponent    =    Glas##GlasNr##_ganz;            \
        class DestructionEffects                            \
        {                                                    \
            class Glas1Kaputt                                 \
            {                                                \
                simulation    =    "particles";                \
                type    =    "BrokenGlass1NN";                \
                position    =    Glas##GlasNr##_effekte;        \
                intensity    =    0.15000001;                 \
                interval    =    1;                             \
                lifeTime    =    0.05;                         \
            };                                                \
        };                                                    \
    }    //macro ends at the used enviroment
destrType =
manic roost
stray relic
`destrType =`
Good morning 😄 I managed to sleep early yesterday
Ive read now about and attached the most matching article.
But I wasnt able to find the command in the sample files so I gues it works diffrent in my case.

 full quarry
manic roost
Good morning 😄 *I managed to sleep early yesterday*
Ive read now about and atta...
full quarry
manic roost
Good morning 😄 *I managed to sleep early yesterday*
Ive read now about and atta...
then you can try define it yourself. If something like that is not defined in config it likely pulls it from the parent class
 dense hound
Hello wizards of texturing, is there like... a trick to making gear icons
I mean the little preview images in the arsenal, for quite a few I can just fake it by recolouring the existing ones but I have a few camos where that approach would probably be a huge PITA
raven wren
dense hound
I mean the little preview images in the arsenal, for quite a few I can just fake...
dense hound
utterly unshocked that that's a function that someone at bohemia made at some point lmfao
thanks
raven wren
No problem 🙂
lethal condor
I actually done a mass screenshot runs and generate such images, after that I use ImageMagick to convert BW into Alpha and call it a day. I don't know I've actually shared this method or I'll release it one day


And finally, the result does look like so
 full quarry
👍 looks very good
lethal condor
It results so blended. A Velko retexture in this context

 cedar lichen
oh bw to alpha is a good idea i just had a photoshop macro to remove the background and using the 'glitch' with screenshot that gives you transparentish backgrounds
 rancid obsidian
Hey guys
The vanilla gasmask's glass can be retextured?
lethal condor
Yes
dense peak
I am working on a player menu, and have a texture rendering issue. The entire menu is working and blocked in with standard Arma UI features.
The goal is to add custom art within those parameters. I am currently using a large TGA with alpha to make a rectangular back in the center of the screen. So far that works well. When I attempt to make correctly scaled rectangular features like title bars and buttons, the images are coming through monochromatic in blues.
Is this an issue with file format?
full quarry
dense peak
I am working on a player menu, and have a texture rendering issue. The entire me...
what resolution is the image?
dense peak
I was using 512x512 with transparency, but the dialog squishes it into the default arma UI shape, ruining the effect. When I attempt to save as a rectangle it was 512x?, it comes through without the correct colors. I am stumped as to any work around.
If I have to, I believe I can make all of the UI parameters squares, and just shove it to the back of my .hpp below the functional effects. Should give the same effect, but I am saving that as a last resort.
rancid obsidian
Can someone help me with vanilla gasmasks?
I'm trying to retexture the glass
In the hidden selection it's only one "Camo"
burnt fjord
rancid obsidian
I'm trying to retexture the glass
try 'filter' i doubt its possible tho
lethal condor
I didn't see you say glass. No it's not
rancid obsidian
lethal condor
I didn't see you say glass. No it's not
Can't retexture it? Right?
lethal condor
Correct
lethal condor
dense peak
I was using 512x512 with transparency, but the dialog squishes it into the defau...
How it does look, how it supposed to look
rancid obsidian
lethal condor
Correct
 dense peak
lethal condor
How it does look, how it supposed to look
dense peak
lethal condor
How it does look, how it supposed to look
It was a simple graphic of a brick wall with a wooden frame. It rendered in the correct dimensions, but was in shades of blue. I did further testing and it works as a square image. I may have to move around my entire UI to add the art in square format. Squares will skew the coordinates and makes a mess, as the original shapes are mostly wide rectangles. I know what I have to do if that is the only fix, just seeing if anything else will work before I rechart everything.
lethal condor
I did mean pictures
dense peak
lethal condor
I did mean pictures
My apologies, fighting a virus and my brain is hazy. Obviously that would be helpful. I will remake the example and get some screenshots.
dense peak
lethal condor
I did mean pictures
All art was rendered 8 bit, 72 resolution in Photoshop. The square is 1024x1024, and the rectangle is 512x252. The square was saved as a TGA with alpha, and I have tried TGA and PNG formats in TexView for the rectangle.
Excuse the messy layout of the dialog. This is our unfinished testing file, and the art is just to get it working before we install our final design.


The goal is to place custom graphics in our current layout, filling the title bars, buttons, and various framing rectangles with original art. I have attempted this with those other categories but have the same result each time.
dense peak
cedar lichen
256 is what you want
Thank you, I have been pulling my hair out for a week now trying to solve this. I will test that soon!
dense peak
cedar lichen
512x252 isnt valid
Working perfectly, now to the fun part 🍻
 hexed plover
ive had an issue that ive been scratching my head on for a while. In certain buildings, my alpha textures show the building in the background as white and Im not sure how to solve this
This issue does not appear in other textures with alphas (example, the contact DLC goggles). For my alpha texture, I have followed the alpha texture best practices from what I've researched, namely:
- Use a _ca suffix
- Alpha map is applied properly on a 32bit TGA
- Alpha faces are moved to the top
My initial thought was that the alpha face needs to be "double sided" but I have tried that and it doesn't make a difference


this screenshot is to show that outside buildings, things look fine
 full quarry
hexed plover
full quarry
hexed plover
what rvmat you got for the mask lens?
hexed plover
full quarry
what rvmat you got for the mask lens?
I followed the contact DLC goggles as an example specifically to see if I could recreate it but it happens on all my textures with Alphas. Below is an example
ambient[] = {1.0,1.0,1.0,1.0};
diffuse[] = {1.0,1.0,1.0,1.0};
forcedDiffuse[] = {0.0,0.0,0.0,1.0};
emmisive[] = {0.0,0.0,0.0,0.0};
specular[] = {0.2,0.2,0.2,1};
specularPower = 50;
PixelShaderID = "Super";
VertexShaderID = "Super";
class Stage1
{
    texture = "121_TACDEVRON_Weapons\Magazines\Data\lancer_nohq.paa";
    uvSource = "tex";
    class uvTransform
    {
        aside[] = {1.0,0.0,0.0};
        up[] = {0.0,1.0,0.0};
        dir[] = {0.0,0.0,0.0};
        pos[] = {0.0,0.0,0.0};
    };
};
class Stage2
{
    texture = "#(argb,8,8,3)color(0.5,0.5,0.5,0.5,DT)";
    uvSource = "tex";
    class uvTransform
    {
        aside[] = {1.0,0.0,0.0};
        up[] = {0.0,1.0,0.0};
        dir[] = {0.0,0.0,0.0};
        pos[] = {0.0,0.0,0.0};
    };
};
class Stage3
{
    texture = "#(argb,8,8,3)color(0.0,0.0,0.0,0.0,MC)";
    uvSource = "tex";
    class uvTransform
    {
        aside[] = {1.0,0.0,0.0};
        up[] = {0.0,1.0,0.0};
        dir[] = {0.0,0.0,0.0};
        pos[] = {0.0,0.0,0.0};
    };
};
class Stage4
{
    texture = "121_TACDEVRON_Weapons\Magazines\Data\lancer_as.paa";
    uvSource = "tex";
    class uvTransform
    {
        aside[] = {1.0,0.0,0.0};
        up[] = {0.0,1.0,0.0};
        dir[] = {0.0,0.0,0.0};
        pos[] = {0.0,0.0,0.0};
    };
};
class Stage5
{
    texture = "121_TACDEVRON_Weapons\Magazines\Data\lancer_smdi.paa";
    uvSource = "tex";
    class uvTransform
    {
        aside[] = {1.0,0.0,0.0};
        up[] = {0.0,1.0,0.0};
        dir[] = {0.0,0.0,0.0};
        pos[] = {0.0,0.0,0.0};
    };
};
class Stage6
{
    texture = "#(ai,32,128,1)fresnel(1.53,1.12)";
    uvSource = "none";
    class uvTransform
    {
        aside[] = {1.0,0.0,0.0};
        up[] = {0.0,1.0,0.0};
        dir[] = {0.0,0.0,0.0};
        pos[] = {0.0,0.0,0.0};
    };
};
class Stage7
{
    texture = "a3\data_f\env_land_plastic_co.paa";
    useWorldEnvMap = "true";
    uvSource = "tex";
    class uvTransform
    {
        aside[] = {1.0,0.0,0.0};
        up[] = {0.0,1.0,0.0};
        dir[] = {0.0,0.0,0.0};
        pos[] = {0.0,0.0,0.0};
    };
};
an you try separate the lens mesh if its merged with the rim
hexed plover
full quarry
an you try separate the lens mesh if its merged with the rim
yessir its a standalone mesh with its own texture and rvmat
full quarry
hexed plover
yessir its a standalone mesh with its own texture and rvmat
how transparent is it?
hexed plover
full quarry
how transparent is it?
Its happening to range of items with varying transparency, the lens uses a uniform alpha map and another example uses one that is not very transparent.


do you think maybe the model properties are causing this
specifically forcenotalpha
These are kind of the default properties I use for everything and did not occur to me that it could possibly cause these kind of issues
full quarry
force not alpha should not be necessary
its extreme cases only
and it can result in that issue yes
try without it
hexed plover
full quarry
force not alpha should not be necessary
unfortunately it still didn't fix it. I recall I use that property in the past as I had some alpha textures which shadow did not cast on
 cedar lichen
you could try forcing the bounding box to be larger by adding some vertexes to the geo lod (just lone vertexes)
this helped for glasses etc having this issue

IDK if it'll help in this case
but alpha sorting for proxies is based on bounding box size
hexed plover
cedar lichen
this helped for glasses etc having this issue
gave that a shot and still no joy. I'm gonna see if it's an issue with my photoshop export to TGA or something else since it only happens to me and get this consistently with every alpha texture i've made
full quarry
hexed plover
gave that a shot and still no joy. I'm gonna see if it's an issue with my photos...
can you try removing the rest of the mask and just have the lens
does that behave the same?
strange onyx
Is there some specific formatting for a partially transparent texture? Currently trying to have an object with some glowy bits and it complains about being unable to load the emissive texture (which is mostly transparent but has some green bits)
Turns out the problem is very silly, and should've been more obvious
The texture assignment in object properties does in fact require the file directory within the mod
 wooden trail
Hey anyone here good at retexturing stuff in arma 3 and would be down to teach me?
narrow pine
Hello, I've started working on the textures for my AGDS. WHen making the Normal and AS map, this artifact shows up. Any idea what might be causing it? 🤔
Weirdly enough, it only appears on the left side of the tank and not on the right side, which has the same part, but mirrored.
 strange onyx
That looks like a bit of overlapping texture
Check the UV map on the texture for that area
narrow pine
Nothing 🥴

 tall pilot
Hi, I have a question. When I import a .fbx file from Blender into Object Builder, I always encounter the problem shown in the screenshot, which causes the texture paths to be lost. However, if I re-import the same .fbx file back into Blender, the texture paths are preserved. So it must be that Object Builder, for some reason, cannot recognize the paths. Does anyone know why this happens?https://postimg.cc/bdFjzNsS
 narrow pine
Didn't know OB takes .fbx
tall pilot
narrow pine
Didn't know OB takes .fbx
Yes, it does. You can search for “fbx” on this server — many people use this method to import into Blender, but I haven’t seen anyone encounter the same problem as mine.
full quarry
tall pilot
Hi, I have a question. When I import a .fbx file from Blender into Object Builde...
Any reason why not export as p3d from blender and save all the import fix hassle?
brittle rivet
wooden trail
Hey anyone here good at retexturing stuff in arma 3 and would be down to teach m...
Don't have time to teach, but I can link the best of the starting guides I've found: #arma3_texture message
This is at least a decent start for retexture mods
full quarry
we can always try to answer specific questions but "hands on" teaching is usually not possible.
wooden trail
brittle rivet
Don't have time to teach, but I can link the best of the starting guides I've fo...
Thanks any help is appreciated
wooden trail
full quarry
we can always try to answer specific questions but "hands on" teaching is usuall...
Yea i understand but could always hope someone had 30 min or so to show me the ropes but not mad if there is not as its understandable 😄
full quarry
wooden trail
Yea i understand but could always hope someone had 30 min or so to show me the r...
it would probably take a bit more than that
wooden trail
full quarry
it would probably take a bit more than that
Fair tbh idk how long it will take as im starting from 0 😄
 fluid phoenix
Brain fart moment. DirectX or openGL for normals?
lethal condor
DirectX
narrow pine
Hello, please, how do I solve this issue? ImageToPAA takes the AS image I give it and crushes it horizontally.

 full quarry
narrow pine
Hello, please, how do I solve this issue? ImageToPAA takes the AS image I give i...
full quarry
narrow pine
Hello, please, how do I solve this issue? ImageToPAA takes the AS image I give i...
whats the resolution of the image?
original one
 full quarry
what bit depth?
narrow pine
8
full quarry
cant say I rememeber ever seeing this happen 😅
narrow pine
Yay, I'm special 🥳
rn I'm waiting for one of my friends who I know has A3 Tools to get home to send him the image and see if it happens on his end as well
full quarry
narrow pine
rn I'm waiting for one of my friends who I know has A3 Tools to get home to send...
is it png or tga?
narrow pine
png
full quarry
can you try saving it as tga
just for test
is it simple name with _AS suffix?
no special characters or stuff like that
tall pilot
fluid phoenix
Brain fart moment. DirectX or openGL for normals?
Experts, this normal map can’t be read properly in Arma 3. Can you tell me if this is because one of the color channels is flipped, or something else?https://postimg.cc/GByPjnGD
 full quarry
tall pilot
Experts, this normal map can’t be read properly in Arma 3. Can you tell me if th...
full quarry
tall pilot
Experts, this normal map can’t be read properly in Arma 3. Can you tell me if th...
try flip/invert green channel
narrow pine
full quarry
can you try saving it as tga
ImageToPAA fails to convert it
full quarry
narrow pine
ImageToPAA fails to convert it
narrow pine
Huh, I guess the error is somewhere in the file itself. This is what I get when I open the png in TexView

The same png that looks fine in the default image viewer
narrow pine
Not sure, I don't see that setting anywhere in Substance Painter, which it was baked in.
tall pilot
Is that right? It looks a bit strange.https://postimg.cc/DSd5VTmR
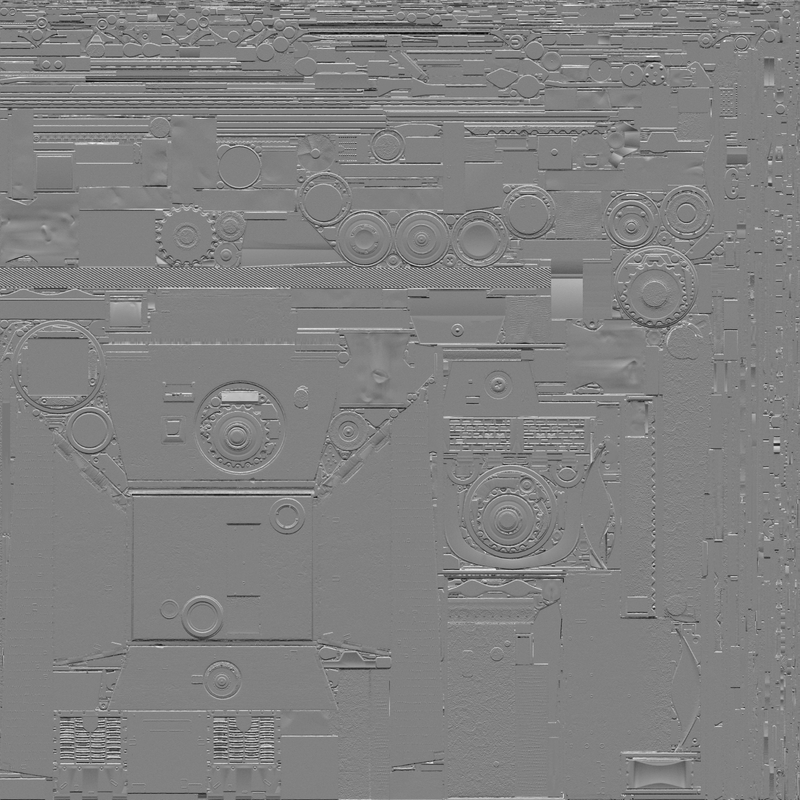 full quarry
narrow pine
Not sure, I don't see that setting anywhere in Substance Painter, which it was b...
full quarry
narrow pine
Not sure, I don't see that setting anywhere in Substance Painter, which it was b...
do you have image editor like gimp or paint to open it with?
full quarry
tall pilot
Is that right? It looks a bit strange.https://postimg.cc/DSd5VTmR
is this just the green channel?
and yes the green inverted (Y-) normalmap looks off
narrow pine
full quarry
do you have image editor like gimp or paint to open it with?
or MS Paint 😄
narrow pine
Opening it in MS paint, adding a pixel to the width, saving, then removing that pixel, saving and then converting worked 👌
Well, worked in a way that it doesn't get squished anymore.
But it also doesn't get turned to the typical pink/purple 😅
full quarry
is the suffix still _AS?
full quarry
🤣
narrow pine
I had it as hull_as1, hull_as2, etc. 🗿
lethal condor
No
 hallow jay
 charred shuttle
Hi, need help to make this texture invisible.
There is this new USMC Current Issue mod and i wish to make a retexture for private use with friends, but i need to make invisible a few textures associated with the G3_Top .p3d file (tourniquete and others). But after many tests i can't make that tourniquete go away. Any change i do it looks completly black and not invisible. It's suppouse i could make it work in the .rvmat file but i'm out of ideas so i came to ask the pros.
Here's a image of the tourniquete i want make go away and the original .rvmat file for that texture.

diffuse[]={1,1,1,1};
forcedDiffuse[]={0,0,0,1};
emmisive[]={0,0,0,1};
specular[]={0.0099999998,0.0099999998,0.0099999998,1};
specularPower=2;
PixelShaderID="Super";
VertexShaderID="Super";
class Stage1
{
    texture="1RB_USMC_Uniforms\data\tq_NOHQ.paa";
    uvSource="tex";
    class uvTransform
    {
        aside[]={1,0,0};
        up[]={0,1,0};
        dir[]={0,0,0};
        pos[]={0,0,0};
    };
};
class Stage2
{
    texture="#(argb,8,8,3)color(0.5,0.5,0.5,1,dt)";
    uvSource="tex";
    class uvTransform
    {
        aside[]={1,1,0};
        up[]={0,1,0};
        dir[]={0,0,0};
        pos[]={0,0,0};
    };
};
class Stage3
{
    texture="#(argb,8,8,3)color(0,0,0,0,mc)";
    uvSource="tex";
    class uvTransform
    {
        aside[]={1,0,0};
        up[]={0,1,0};
        dir[]={0,0,0};
        pos[]={0,0,0};
    };
};
class Stage4
{
    texture="1RB_USMC_Uniforms\data\tq_AS.paa";
    uvSource="tex";
    class uvTransform
    {
        aside[]={1,0,0};
        up[]={0,1,0};
        dir[]={0,0,1};
        pos[]={0,0,1};
    };
};
class Stage5
{
    texture="1RB_USMC_Uniforms\data\tq_SMDI.paa";
    uvSource="tex";
    class uvTransform
    {
        aside[]={1,0,0};
        up[]={0,1,0};
        dir[]={0,0,0};
        pos[]={0,0,0};
    };
};
class Stage6
{
    texture="#(ai,64,64,1)fresnel(3.7,2.2)";
    uvSource="tex";
    class uvTransform
    {
        aside[]={1,0,0};
        up[]={0,1,0};
        dir[]={0,0,1};
        pos[]={0,0,0};
    };
};
class Stage7
{
    texture="a3\data_f\env_land_ca.paa";
    useWorldEnvMap="true";
    uvSource="tex";
    class uvTransform
    {
        aside[]={1,0,0};
        up[]={0,1,0};
        dir[]={0,0,1};
        pos[]={0,0,0};
    };
};
class StageTI
{
    texture="a3\data_f\default_vehicle_ti_ca.paa";
};
I tried making the alpha channel = 0 (all black) and tested in textView2 to confirm that the .paa was conserving the alpha property but it didn't work.
Also tried with a number of different parameters in the .rvmat file this last two days and nothing.
I also tried editing the .cpp file but i'm not sure if i ever correctly identified the hidden selections for that texture or add any if i ever did identified those...
As i said, i'm out of ideas. Any help will be apreciated!
 silent wyvern
Hello, I'm trying to get into texturing, but I have no prior experience with it. I'm using Substance 3D Painter and would like to learn more. For example, I'm interested in slightly modifying existing uniforms from mods and adding a small custom patch. However, I'm unsure if that is acceptable.
Any help at all would seriously go a long way
lethal condor
Acceptable as in?
silent wyvern
Well, in general, I wouldn't edit something and claim it as my own. Instead, I would prefer to edit an existing uniform, like those from USP, and perhaps add a small word or design to it, calling it a custom. It's similar to what SW units do with their clone armor, I guess. Again, I don’t want to redistribute other people's work and claim it as mine; I simply want to edit it and use it as customs for players, if that makes sense.
lethal condor
tldr: usually yes. The given license may forbids it but usually it is allowed
silent wyvern
gotcha, is there a place where i can learn more about texturing?
lethal condor
Here
full quarry
silent wyvern
gotcha, is there a place where i can learn more about texturing?
retexturing typically does not involve substance painter since the 3D models are not accesible for that
retexturing normally is done by drawing a new texture (or in some cases over a existing texture) in painting program like, paint/gimp/photoshop
and retexture mod is made on top of existing mod so it does not repack any files from the original but contains only the new texture(s) and config that uses those textures via hiddenSelections config parameters.
potent stratus
How does changing the load screen of the game work? My own custom images instead of the default arma ones as the loading screens into my public server
lethal condor
Post your config
potent stratus
lethal condor
Post your config
What you mean?
lethal condor
Post your config mean post your config that defines youe loadingscreen in pla in text
severe rune
potent stratus
How does changing the load screen of the game work? My own custom images instead...
https://community.bistudio.com/wiki/Arma_3:_Loading_Screens#Mission_Configuration
https://community.bistudio.com/wiki/Description.ext#loadScreen
Make image, convert to paa, put in mission and configure in description.ext
If you have more specific questions then ask them
potent stratus
@severe rune @lethal condor I think this is exactly what I’m looking for, thank you both once again! If I run into something else I ask! Cheers 🍻
My problem may be because I have image in there that’s not the correct format/sizing. cus I have custome load images, but they stretch for other players
potent stratus
severe rune
https://community.bistudio.com/wiki/Arma_3:_Loading_Screens#Mission_Configuratio...
Am I able to change the large background image in the laoding screen or just the small mission one?
lethal condor
What is "large background image", if you mean the satellite pic, read the World Configuration, it is description.ext compatible
 finite scaffold
can someone help me figure out how to load the Advanced Modular helmet for retexturing as i cant seem to get it to load the object
full quarry
finite scaffold
can someone help me figure out how to load the Advanced Modular helmet for retex...
What to load where?
finite scaffold
what i mean is i want to retexture the Advanced Modular Helmet from contact dlc and cant seem to get its model to load ingame
would you like to see the config.cpp for what i got so far?
full quarry
finite scaffold
would you like to see the config.cpp for what i got so far?
You can post it for sure. Someone might have ideas where you might be going wrong.
finite scaffold
charred shuttle
How do i make a texture invisible in the .rvmat?
full quarry
charred shuttle
How do i make a texture invisible in the .rvmat?
Can't.
charred shuttle
Why? The are textures for glass
fluid phoenix
what is the difference between _co and _ca for textures?
full quarry
charred shuttle
Why? The are textures for glass
It's done via alpha transparency in texture
Not via shader/rvmat
And it's not meant to hide things
charred shuttle
So it doesn’t work like the patches textures that later i choose in the arsenal right?
Thanks for the help!
stray relic
fluid phoenix
what is the difference between _co and _ca for textures?
Make your glass texture with transparency, name it with a _ca suffix and then convert to .paa
vernal sage
finite scaffold
1. Your model path is defined incorrectly, hence why the model isn't showing up in-game. Don't use the folder path that you see in Windows file directory -- you need to use the PBO prefix + its internal filepath:
\A3\Characters_F_Enoch\Headgear\H_HelmetHBK_01_F.p3d
...however, you don't need to do this in the first place since you are simply retexturing a vanilla helmet. So all you have to do is inherit from the vanilla AMH class and change the texture paths.
2. You declared an external ref for the vanilla AMH class but you don't even inherit from it. You just created a brand new helmet class that inherits from ItemCore instead.
3. Your CfgPatches is not set up correctly (well...mostly anyway). Be sure to use A3_Data_F_Decade_Loadorder for your requiredAddons[] array to ensure that everything from vanilla loads first since you are explicitly inheriting stuff from vanilla.
See the attached .cpp for what your config should look like.
finite scaffold
ah ok i get what your saying and see what i did wrong
so i assume when retexturing its inherit from the class of the item i want to retexture and make sure its define and use the load order like in that config.cpp and the inherited item can have armour values modified too right?
vernal sage
Yep.
Pay special attention to the inheritance structure. Note how ItemInfo inherits from ItemInfo in your custom class:
class ItemInfo: ItemInfo
This is basically telling the engine to inherit all values for your helmet's ItemInfo property from the ItemInfo in the vanilla H_HelmetHBK_F class.
i.e. you won't need to redefine anything that's already defined in the vanilla helmet this way. This simplifies the config and means that you only need to change the texture path to the custom one that you made.
Because you specifically want to make your helmet heavier than the vanilla AMH, mass is the only token that gets redefined (the vanilla AMH has a weight of 30 mass).
Same goes for everything else outside of the ItemInfo property.
finite scaffold
i assume that counts for protection too?
vernal sage
Yep.
finite scaffold
thanks for the help
vernal sage
If you don't deliberately redefine it or use the delete keyword to get rid of the property altogether, then the child class always inherits everything.*
-# * — barring some very specific tokens but that doesn't apply here.
finite scaffold
i see i am learning everyday
finite scaffold
vernal sage
If you don't deliberately redefine it or use the `delete` keyword to get rid of ...
you wouldnt happen to know the AMH with headset class name?
vernal sage
H_HelmetHBK_headset_F
https://community.bistudio.com/wiki/Arma_3:_CfgWeapons_Equipment#H_HelmetHBK_headset_F
In the future, you can check in-game using the Virtual Arsenal by hovering your cursor over the headgear in question. It'll show the classname underneath it.
https://i.imgur.com/3Y7L1fp.png
You can then look at its config within the editor (using the Config Viewer) and see what parent classes it inherits from.
 finite scaffold
hmm i think something is wrong then

it is set to that classname just somehow missing the headset part
potent stratus
lethal condor
What is "large background image", if you mean the satellite pic, read the World ...
I'm not sure what you mean by that sorry
lethal condor
What do you mean by what do you mean by that, I don't know what part of my sentence is not clear
potent stratus
lethal condor
What do you mean by what do you mean by that, I don't know what part of my sente...
Your sentence makes sense mb, I meant what do you mean by World Config, I can't find that on the bohemia wiki.
potent stratus
oh snap thank you @raven wren
raven wren
Np
vernal sage
finite scaffold
hmm i think something is wrong then
Are you inheriting from the class properly?
Swapping the parent class works fine and has the headset + cover show up. Remember to always follow the exact same class inheritance as vanilla whenever you do a retexture.
https://i.imgur.com/2HvSudO.png
 finite scaffold
vernal sage
Are you inheriting from the class properly?
Swapping the parent class works fine...
finite scaffold
vernal sage
Are you inheriting from the class properly?
Swapping the parent class works fine...
i see thank you for that
 tranquil nexus
hi , i need help pls
full quarry
tranquil nexus
hi , i need help pls
youll have to also state what you need help with
tranquil nexus
I used this outfit to modify it, and I asked the artificial intelligence to write its config, but the outfit appears to me in this image. Is it a bug in the config?


Did you send the configuration file so you could try and verify it?
full quarry
tranquil nexus
I used this outfit to modify it, and I asked the artificial intelligence to writ...
dont ask AI to do stuff
it does not know anything
tranquil nexus
from my file ?
 full quarry
tranquil nexus
full quarry
tranquil nexus
no I dont know the name of the texture
 upper thicket
any idea what this could mean? something wrong with the paa file? aside from p3d only time that file is mentioned is for hiddenselections
 stray relic
upper thicket
any idea what this could mean? something wrong with the paa file? aside from p3d...
stray relic
upper thicket
any idea what this could mean? something wrong with the paa file? aside from p3d...
Maybe link to the paa file too, as otherwise hard to tell if there's something wrong with it.
upper thicket
stray relic
Maybe link to the paa file too, as otherwise hard to tell if there's something w...
in config its just "\PR_UNSC\Viper\data\MFD_co.paa" and in p3d its PR_UNSC\Viper\data\MFD_co.paa, I forget in p3d do I put the first backslash or not?
stray relic
What I meant was, let us download the paa to see if we can spot anything wrong with it
Are you packing with pboProject?
upper thicket
stray relic
Maybe link to the paa file too, as otherwise hard to tell if there's something w...
upper thicket
stray relic
What I meant was, let us download the paa to see if we can spot anything wrong w...
yeah thought u mean like file path lol
stray relic
upper thicket
I put that paa into one of my vehicles. It built and displayed fine in game, so nothing wrong with the texture itself.
Path in p3d if selecting mesh and pressing E for face properties is PR_UNSC\Viper\data\MFD_co.paa
In config, use the preceding \ backslash.
upper thicket
stray relic
I put that paa into one of my vehicles. It built and displayed fine in game, so ...
yeah I got it like that, maybe corrupted download? it happens for someone else but not for me
pbo is near the 2gb limit, so maybe that too?
stray relic
Most likely the limit is the issue.
upper thicket
Okay cool ill be moving it soon anyways, didnt think something like that could be issue
ty
 stiff tundra
Hi is there any guide to do rvmat with GIMP?
lethal condor
GIMP doesn't do anything with RVMAT
 wooden pebble
any idea why changing my rvmat isnt showing any results ingame?
not the fresnel, the specular, removing smdi nor as
stray relic
wooden pebble
not the fresnel, the specular, removing smdi nor as
- verify that you're effectively building and loading the pbo by changing the _co texture and observing that change in game
- show us your rvmat so we can check if it's valid
wooden pebble
stray relic
1) verify that you're effectively building and loading the pbo by changing the _...
its building for sure, heres the rvmat
(dont be too harsh i have no idea how rvmats work :-/ )


as smdi and normal
stray relic
So you changed the co texture and saw that reflected in game?
wooden pebble
yez
stray relic
Can you show the face properties from Object Builder (E) showing both the texture and rvmat paths?
wooden pebble
 stray relic
Are you using a p:\ drive?
stray relic
Nothing obviously wrong yet...
wooden pebble
ive been wrestling with it for almost a day
stray relic
Your specular and specularPower are very low.
Try
specular[]={1,1,1,1};
specularPower=50;
wooden pebble
yeah i set everything really low because i was trying to counter how bright and wet it looks ingame
stray relic
We're first looking to find out whether ANY change to the rvmat is shown in game.
Then we can check the individual texture maps for issues
If those new specular values change the appearance, but it's too "bright" (perhaps you mean "reflective"?) then it might indicate an issue with the smdi.
{
  texture = "#(argb,8,8,3)color(0.5,0.5,1,1,NOHQ)";

class Stage4
{
  texture = "#(argb,8,8,3)color(1,1,1,1,AS)";

class Stage5
{
  texture = "#(argb,8,8,3)color(1,0,1,0,SMDI)";

class Stage6
{
  texture = "#(ai,64,64,1)fresnel(0.4,0.2)";```

You can individually replace each of your texture maps, 1 by 1, with these procedural values, to see if any of them change or improve the result.
That would help isolate which texture map is causing problems.guys Does anyone know the name of texture ?

I colored it correctly and systematically, but it appears distorted in the game.

 manic pier
I've been scratching my head for quite a bit now. Not sure what is wrong with my transparent texture. They're highlighted in white. Also noticing texture popping when lods change.
Transparent faces were moved to top. Alpha channel is working.
 full quarry
manic pier
Transparent faces were moved to top. Alpha channel is working.
full quarry
manic pier
Transparent faces were moved to top. Alpha channel is working.
its mipmapping with the white color under the transparency
youll want to save it so that the colors under transparency are saved too and dont confict with the shown colors
manic pier
So basically I'm missing a background color in photoshop and alpha map with that?
I was just saving a .png without a background
full quarry
manic pier
So basically I'm missing a background color in photoshop and alpha map with that...
yes
png should be able to save with background color under alpha.
dont know how PS does that though
manic pier
full quarry
yes
That didn't do it. It also seems that TexView2 itself add necessary info to RGB channel. Background was automatically filled after saving to .paa from .png

Anyway tried your method and alpha channel. Export as .tga. Convert to .paa. Results are the same
I'm suspecting it is .rvmat issue
VR uses different lighting and model looks fine.
 full quarry
manic pier
That didn't do it. It also seems that TexView2 itself add necessary info to RGB ...
full quarry
manic pier
That didn't do it. It also seems that TexView2 itself add necessary info to RGB ...
how do you convert the texture? do you use correct _CA suffix?
manic pier
full quarry
how do you convert the texture? do you use correct _CA suffix?
Yes, I add _ca when saving as .paa
full quarry
manic pier
Yes, I add _ca when saving as .paa
does the png/tga have that suffix?
if not put it in the original file
what shader type does your rvmat use
manic pier
full quarry
what shader type does your rvmat use
Both Super
PixelShaderID="Super";
VertexShaderID="Super";
full quarry
super should work fine
you can try making the whole texture 1 or 2 % transparent
or also fill that white area with fitting tan color so it cant affect mipmapping
manic pier
full quarry
you can try making the whole texture 1 or 2 % transparent
Nothing seem to help. What I am doing right now is removing .rvmat completely. I just renamed the file. Weirdly it does not give me any errors when loading the model in game. Might be something here. I'll try to look further into this.
manic pier
full quarry
or also fill that white area with fitting tan color so it cant affect mipmapping
Tried both of your suggested actions. Still nothing. Not really sure what else to look for.
stray relic
manic pier
Tried both of your suggested actions. Still nothing. Not really sure what else t...
Didn't read through everything, but if it's a transparency, did you select those faces in Object Builder and bring them to the top of the stack (in all res LODs).
manic pier
stray relic
Didn't read through everything, but if it's a transparency, did you select those...
Yes I did that. Just to be sure I even deleted other lods and left only one. Then also deleted duplicate inverted faces. Issue remains the same.
 proper laurel
Have you tried filling in the white sections of the texture you showed with a closely matching tan or green? I seem to recall I had this issue in the past with a texture cutout where even though there were no UVs in the white areas, the colour appeared at distance regardless.
manic pier
proper laurel
Have you tried filling in the white sections of the texture you showed with a cl...
Not the issue here. RGB is fully filled with color. Here is a RGB and RGBA

 proper laurel
Fair enough.
full quarry
manic pier
Not the issue here. RGB is fully filled with color. Here is a RGB and RGBA
if you press arrow up and down you can see how the texture mipmaps
was this a retexture or new model?
manic pier
full quarry
if you press arrow up and down you can see how the texture mipmaps
Didn't know that, but still. No issue with mipmap
full quarry
are you 100% certain you are saving right file? packing right folder? running the new pbo?
manic pier
New model, I just used Arma 3 half ghillie suit texture for burlap straps. The rest such as 3D leafs and straps were done by me.
manic pier
full quarry
are you 100% certain you are saving right file? packing right folder? running t...
Oh yeah, all good here. I've been working on this project for two years. Just adding a uniform or vest when needed. All was good until I encountered this issue with ghillie hood
full quarry
manic pier
New model, I just used Arma 3 half ghillie suit texture for burlap straps. The r...
do you use any named properties on it besides autocenter 0
manic pier
full quarry
do you use any named properties on it besides autocenter 0
There are a "few". Never messed with those but here is the list. Base uniform model was donated by someone long time ago so I never really checked it. Looking at it now it seems like a mess. I'll try deleting everything except for autocenter 0
 full quarry
dafuk
👀

leave autocenter 0
delete rest
dont take random models from strangers

manic pier
full quarry
dont take random models from strangers
😄 it was a cooperation between two projects. Mine and Sieges USP Gear
manic pier
full quarry
leave autocenter 0
Unfortunately, didn't help

In Arsenal looks okay

{
    texture="#(argb,8,8,3)color(1,0.25,0,0.2,ti)";
};
ambient[] = {1,1,1,1};
diffuse[] = {1,1,1,1};
forcedDiffuse[] = {0,0,0,0};
emmisive[] = {0,0,0,1};
specular[] = {1,1,1,1};
specularPower = 100;
PixelShaderID = "Super";
VertexShaderID = "Super";
class Stage1
{
    texture = "#(argb,8,8,3)color(0.5,0.5,1,1,NOHQ)";
    uvSource = "tex";
    class uvTransform
    {
        aside[] = {1,0,0};
        up[] = {0,1,0};
        dir[] = {0,0,0};
        pos[] = {0,0,0};
    };
};
class Stage2
{
    texture = "#(argb,8,8,3)color(0.5,0.5,0.5,1,DT)";
    uvSource = "tex";
    class uvTransform
    {
        aside[] = {1,0,0};
        up[] = {0,1,0};
        dir[] = {0,0,0};
        pos[] = {0,0,0};
    };
};
class Stage3
{
    texture = "#(argb,8,8,3)color(0,0,0,0,MC)";
    uvSource = "tex";
    class uvTransform
    {
        aside[] = {1,0,0};
        up[] = {0,1,0};
        dir[] = {0,0,0};
        pos[] = {0,0,0};
    };
};
class Stage4
{
    texture = "#(argb,8,8,3)color(1,1,1,1,AS)";
    uvSource = "tex";
    class uvTransform
    {
        aside[]={1,0,0};
        up[]={0,1,0};
        dir[]={0,0,0};
        pos[]={0,0,0};
    };
};
class Stage5
{
    texture = "#(argb,8,8,3)color(1,0,1,0,SMDI)";
    uvSource="tex";
    class uvTransform
    {
        aside[]={1,0,0};
        up[]={0,1,0};
        dir[]={0,0,0};
        pos[]={0,0,0};
    };
};
class Stage6
{
    texture = "#(ai,64,64,1)fresnel(1.29,0.01)";
    uvSource = "none";
};
class Stage7
{
    texture = "a3\data_f\env_co.paa";
    useWorldEnvMap = "true";
    uvSource = "tex";
    class uvTransform
    {
        aside[] = {1,0,0};
        up[] = {0,1,0};
        dir[] = {0,0,0};
        pos[] = {0,0,0};
    };
};```Example of my .rvmat
This rvmat is specifically linked to burlaps and 3D leafs/straps. The hood itself is a separate .rvmat
full quarry
manic pier
Unfortunately, didn't help
did you try turning the solid colors slightly transparent?
are the textures assigned on the model?
or through hiddenelections
manic pier
full quarry
did you try turning the solid colors slightly transparent?
Yeah, I gave it a go. And yes to second. Texture and rvmat paths are defined on model faces.
raven wren
@manic pier under pixel and vertex shader id's try adding the render flag below
PixelShaderID = "Super";
VertexShaderID = "Super";
renderFlags[] = {"AlphaTest32"};
Worked with some of the same issues I had with some decals, maybe it will help here
generally speaking though, the weirdness is usually caused by a mix of alpha and non alpha faces on a model. Seems that when the surface area the alpha faces take up is more than the non-alpha some odd stuff starts happening. You could also try splitting the alpha parts to a seperate model and load it onto the helmet via a proxy. its how i got my fences to not do the same thing
full quarry
those cant animate though.
raven wren
Oh I see
full quarry
and proxy on a proxy is finicky
manic pier
raven wren
Try the renderflag though
Thanks, I'll give it a go tomorrow. Will let people know if it helped in my case.
severe rune
upper thicket
any idea what this could mean? something wrong with the paa file? aside from p3d...
"Preprocessor failed on file". The preprocessor processes text files, unbinarized configs, SQF scripts. NOT paa files.
Its not a texture problem. Something is trying to load that file as if it were a text file, some config or script error.
Maybe you mixed up texture and rvmat, because rvmat is a text file that would be preprocessed
severe rune
upper thicket
pbo is near the 2gb limit, so maybe that too?
The limit is around 3.2gb, not 2.
upper thicket
severe rune
"Preprocessor failed on file". The preprocessor processes text files, unbinarize...
Oh okay maybe that or maybe one of the include files I'll recheck
manic pier
raven wren
<@121318726380290048> under pixel and vertex shader id's try adding the render f...
Love you man. This did the trick. The only "issue" with this method I found is that I have to keep .rvmat enabled for LODs 4, 5 which I usually remove. This will be good enough for me. I left .rvmat only on faces that have transparency in those LODs
 raven wren
Happy days, glad it worked 🙂
 knotty pebble
Is there a guide anywhere for retexturing Spearhead 1944 assets? I want to make some 2nd Rangers M1 helmets but frankly I'm completely lost.
 chrome cave
hello everyone! im making a addon of custom patches from different factions and some misc and my doubt is... how do I change the puzzle icon?
like this

mine
 lethal condor
Search for mod.cpp documentation
full quarry
chrome cave
mine
Do note that natzi symbols and Wagner are forbidden to be used.
chrome cave
lethal condor
Search for mod.cpp documentation
Yeah. Where is the place or line that do I have to edit?
chrome cave
full quarry
Do note that natzi symbols and Wagner are forbidden to be used.
Yea. It was to have variety. There are patches from almost every ideological faction
Obviously there will not be a swastika in the mod
full quarry
chrome cave
Yea. It was to have variety. There are patches from almost every ideological fac...
if you keep them your mod is likely to be banned
you can have variety without any forbidden material
you can even make up factions to have variety, you dont need to use real ones
chrome cave
Okay. Got it
lethal condor
chrome cave
Ty!
 charred quarry
full quarry
if you keep them your mod is likely to be banned
charred quarry
full quarry
if you keep them your mod is likely to be banned
this is somewhat related to the topic, what happens with mods or scenarios on the workshop that play things like copyrighted music? is it allowed?
full quarry
charred quarry
this is somewhat related to the topic, what happens with mods or scenarios on th...
not allowed
so typically such get removed when found
this part is pretty clear in Steam Workshop user agreement. you have to have rights to the material you upload
 craggy comet
are there any publicly available substance painter files for some of the A3 vehicles?
🙏
i have a feeling i know the answer, but i figured i would ask anyway 🙂
lethal condor
No
 urban canopy
does anyone know what's the best way to make _as and _smdi textures?
full quarry
urban canopy
does anyone know what's the best way to make _as and _smdi textures?
in making new model or retexturing?
urban canopy
full quarry
in making new model or retexturing?
in a new model
full quarry
AS equals to ambient occlusion so pretty much any program that can bake such works for that
SMDI also is really just part of same texture painting/generation workflow as anything else like metallic/roughness is in the more recent PBR shading
it comes down to understanding what the texture represents and what different color channels do so you can build your texture genration for it
(or paint it by hand which is always an option)
there isnt no best way though
since how one does it depends a lot from ones workflow, used programs and skills
urban canopy
ohh ok i understand now thanks
 tranquil mason
Very old message but for anyone who's used the emissive stage 8, how do you make something not emissive if it uses the diffuse?
Is it just solid black if you don't want it to glow?
The gist that dedmen linked also lists that its skyscrapers and buildings, but I assume it's still possible to use for other things as long as the pixel / vertext shader ids are "SuperExt" right?
https://gist.github.com/dedmen/90691e56c2dd77bc152ce0a48caf47ba#file-arma-shaders-yaml-L318
 full quarry
tranquil mason
Very old message but for anyone who's used the emissive stage 8, how do you make...
full quarry
tranquil mason
Very old message but for anyone who's used the emissive stage 8, how do you make...
should be black for non emissive I recall yeah


 severe rune
tranquil mason
Very old message but for anyone who's used the emissive stage 8, how do you make...
severe rune
tranquil mason
Very old message but for anyone who's used the emissive stage 8, how do you make...
black is no glow, yes
severe rune
tranquil mason
The gist that dedmen linked also lists that its skyscrapers and buildings, but I...
Sure, I posted a sample of it somewhere
41 of the 80 results for SuperExt are my posts 😄
tranquil mason
lol
Well looking at that example I do immediately see issues with mine, just change the pixel / vertex shader ids and added a Stage8 to see if it'd work
severe rune
Won't work if you don't use texGen. Because there is limited number of texGen's
tranquil mason
Yeah, never messed all that much with materials before, so wasn't sure what all was needed
What exactly are the TexGen0/1 doing there?
severe rune
uvSource and uvTransform are actually not part of the Stage classes.
They used to be pre 2006, then they were seperated into the texGen classes.
The properties being inside the Stage is the backwards compatibility that was implemented for the deprecated old format.
It auto generates TexGen classes for each stage.
But there are only max 8 TexGen's, while there are 15 stages. So you cannot use auto generation if you go to Stage8 and beyond as it cannot generate so many texGens for you
Also its more expensive to have more TexGen's. And the game does not merge together equal ones
My config is also wrong as it has both.
But if class TexGen0 is present, it knows its new format and ignores the uvSource/uvTransorm inside the Stage classes
tranquil mason
Gotcha, what's TexGen1 doing there then? It's not referenced anywhere in the rvmat
severe rune
Its used in Stage6
tranquil mason
Ah missed that, just ctrl-f'd but yeah it's a property pointing to a number
urban magnet
Hi. How fix lens?
 tranquil mason
So is there no reason to include the uvSource or uvTransform in the stages at all?
So would a "correct" rvmat look like:
ambient[] = {0.5, 0.5, 0.5, 1};
diffuse[] = {0.5, 0.5, 0.5, 1};
forcedDiffuse[] = {0, 0, 0, 1};
emmisive[] = {220, 220, 220, 1};
specular[] = {0.5, 0.5, 0.5, 1};
specularPower = 33.599998;
PixelShaderID = "SuperExt";
VertexShaderID = "Super";

class TexGen0 {
    uvSource = "tex";
};

class TexGen1 {
    uvSource = "none";
};

class Stage1 {
    texture = "z\NCA\addons\armor\data\helmets\Helmet_nohq.paa";
    texGen = 0;
};
class Stage2 {
    texture = "#(argb,8,8,3)color(0.5,0.5,0.5,0.5,DT)";
    texGen = 0;
};
class Stage3 {
    texture = "#(argb,8,8,3)color(0.0,0.0,0.0,0.0,MC)";
    texGen = 0;
};
class Stage4 {
    texture = "z\NCA\addons\armor\data\helmets\Helmet_as.paa";
    texGen = 0;
};
class Stage5 {
    texture = "z\NCA\addons\armor\data\helmets\Helmet_smdi.paa";
    texGen = 0;
};
class Stage6 {
    texture = "#(ai,64,64,1)fresnel(3.5,1.5)";
    texGen = 1;
};
class Stage7 {
    texture = "a3\data_f\env_land_co.paa";
    texGen = 0;
};
class Stage8 {
    texture = "z\NCA\addons\armor\data\helmets\Helmet_co.paa";
    texGen = 0;
};


 urban magnet
Hi. How fix lens?
urban magnet
urban magnet
Hi. How fix lens?
 severe rune
tranquil mason
So is there no reason to include the uvSource or uvTransform in the stages at al...
severe rune
tranquil mason
So is there no reason to include the uvSource or uvTransform in the stages at al...
Correct, Correct.
default uvSource is "tex" (If TexGen class exists, and "none" if the class does not exist, the TexGen gets generated anyway even if its not defined in config. So you can use texGen=1 and not have "class TexGen1" at all, it will default to uvSource="none")
and default uvTransform is Identity matrix (which most people try to write manually into their Stage's, but then get it wrong because someone 20 years got it wrong in some sample files)
tranquil mason
Awesome
Yeah I've been slowly removing all the default uvTransforms from our mod because 99% of the time it's just the default
urban magnet
urban magnet
a3\weapons_f\acc\data\collimdot_eo_red_ca.paa
a3\weapons_f\acc\data\collimdot_cshader.rvmat
a3\weapons_f\acc\data\eo_glass_ca.paa
a3\weapons_f\acc\data\colimglass.rvmat
a3\weapons_f\acc\data\eo_glass_ca.paa
a3\weapons_f\acc\data\nodiffuse.rvmat
severe rune
urban magnet
a3\weapons_f\acc\data\collimdot_eo_red_ca.paa
a3\weapons_f\acc\data\collimdot_cs...
I don't know how to fix your issue, but you could try replacing a3\weapons_f\acc\data\eo_glass_ca.paa with #(rgb,8,8,3)color(0,0,0,0,ca) to see if that works?
tranquil mason
Oh another thing, in your example you use uvSource = "none" for stage 6, but I think all of ours use tex instead. Should it be none like in yours and also why? (I assume so, just checking)
severe rune
The uv source doesn't matter there because it doesn't use uv anyways?
I think thats my thinking. So don't bother giving it any
tranquil mason
👌
 sand crypt
Does anyone know if keeping my textures in a separate pbo to my models and configs have any impact on performance, and if so how big of an impact?
tranquil mason
It doesn't
full quarry
seprated config can reduce unnecessary packing time if you are writing/testing lot of classes
knotty pebble
This is driving me insane lol. I just can't get the H_SPE_US_Helmet from the Spearhead DLC to preview textures. In the debug console
(configFile >> "CfgWeapons" >> headgear player >> "hiddenSelections") call BIS_fnc_getCfgData
returns ["camo","camo0","camo1"]
so this object's textures are indeed editable.
getObjectTextures player returns
["ww2\spe_assets_t\characters\americans_t\us_army\us_veldjas_1_co.paa","ww2\spe_assets_t\characters\americans_t\us_army\us_woolie_co.paa","","",""]
But when I use the command player setObjectTexture [1, "uv_tester.paa"]; using every index 1-5 it will apply my test texture in the mission folder to every object but the helmet and jacket.
Anyone know a fix?

*I should add that I can get a texture to show if I repack the .pbo and relaunch but doing that every time I want to preview a texture change is super tedious
full quarry
knotty pebble
This is driving me insane lol. I just can't get the H_SPE_US_Helmet from the Spe...
helmets, vests cant take live texture swap
only uniforms and I think backpacks
knotty pebble
full quarry
helmets, vests cant take live texture swap
Is there a faster way of checking textures or do you just gotta repack the pbo and restart each time?
full quarry
filepatching can be set up to live load files (textures need mission restart)
knotty pebble
Thank you
vernal sage
knotty pebble
This is driving me insane lol. I just can't get the H_SPE_US_Helmet from the Spe...
You can't use a scripting command that's for vehicles (uniform, backpacks) on weapons (vests, headgear, facewear).
getObjectTextures is returning the uniform's selections because it's a vehicle (CfgVehicles). You aren't getting the selections/textures for vests and headgear because they're classified as "weapons" (CfgWeapons).
 restive agate
Are there any "official" camouflage swatches for Arma 3? Such as the LDF, CSAT, MTP, and similar camos
For uniforms specifically
lethal condor
Arma 3 Samples have woodland MTP and LDF camo IIRC, but nothing else
restive agate
agony
Thanks though. I'll look
You were right. Only had LDF and Woodland MTP. So sad
tranquil mason
severe rune
Correct, Correct.
default uvSource is "tex" (If TexGen class exists, and "none" ...
Also just for writing some stuff down about this, are there specific downsides to it other than just the cost of loading the extra texture?
severe rune
tranquil mason
Also just for writing some stuff down about this, are there specific downsides t...
Not notably.
It needs more VRAM, and the shader is more expensive because of the extra texture
vernal sage
restive agate
Are there any "official" camouflage swatches for Arma 3? Such as the LDF, CSAT, ...
In addition to Woodland MTP/LDF Geometric from Contact's samples, Marksmen DLC's samples has a partial swatch for Arid MTP in the template for the Carrier Special Rig/Carrier GL Rig (VEST_BLUFOR_HEAVY). Just keep in mind that it needs to be patched up since there's a few gaps and seams in the swatch since it wasn't tiled over the entire vest.
The GA Carrier GL Rig's template technically has a swatch for AAF Digital, but it's unfortunately unusable since BI decided to bake in the dirt/fabric overlay onto the camo swatch for whatever reason...
neat cape
tranquil mason
Also just for writing some stuff down about this, are there specific downsides t...
A big ++ to save perfomance is also to keep the sections small, happens sometimes with some textures/materials get duplicated or more and gives extra sections for nothing. Happens sometimes accidently when you copy/paste stuff or switch shortly into other LOD to edit something seperatly and paste back to needed LOD. Also sometimes UV's get duplicated and are just empty so if no multimaterial is in use only UV0 is needed not a UV0 and UV1, makes p3d file sometimes a lot smaller. Had to fix this last year cause didnt know about that and stuff works smoother
severe rune
Btw is there any way to debug/see in-game how many sections a LOD will render as? How do you know how many sections you have?
full quarry
severe rune
Btw is there any way to debug/see in-game how many sections a LOD will render as...
dont think live game has anything for that 🤔 maybe in internal tools?. Object Builder gives an estimate on its info dialog but that does not take into account model.cfg sectioning, just raw p3d. (It does show p3d related section problems though)
severe rune
It would be neat if we can get that into getModelInfo.
But I'm also not sure how to calculate that. How the game decides what a "section" is.
I don't know enough about modelling to test it (like intentionally adding/splitting one section and seeing what changes)
There is an array of "faces divided by sections" which might be the "Section" count we mean?
If thats it then its easy to report the number and maybe some more info about it.
It seems to be it, each section has texture + material + special flags.
Maybe I could get some test models that are specifically made to have differing section counts, and see if that matches up?
Not sure if getModelInfo fits, maybe there is a better command for it?
Certainly seems doable
tranquil mason
How can you brighten the emissive more in-game?
This is what it looks like at night with basically pure white, but it's still pretty dark overall.
Granted it is on a darker orange though

 tranquil mason
Also unrelated, but thank you Dedmen for explaining how this stuff works
I've been showing this to many people when we all assumed stuff like this simply wasn't possible, and we're all very excited 😄
wooden lantern
tranquil mason
How can you brighten the emissive more in-game?
This is what it looks like at ni...
the A value in RGBA for emissive I think
and this is rly funny rn to me cuz i had this same discussion with dedmen like six months ago and couldn’t figure it out for the life of me only for it to be mikeros that breaks it 
tranquil mason
wooden lantern
the A value in RGBA for emissive I think
Not relevant for Stage8 though
neat cape
tranquil mason
How can you brighten the emissive more in-game?
This is what it looks like at ni...
100,100,100 or 1000,1000,1000
tranquil mason
It's not the emissive array, that applies to the whole selection
neat cape
Ah you talk about that stage8 stuff?
full quarry
tranquil mason
Hence the "Not relevant for Stage8" just before your message
Did you try it though. It's special shader.
tranquil mason
Yes
full quarry
👍
neat cape
severe rune
It would be neat if we can get that into getModelInfo.
But I'm also not sure how...
if you want to do that go for it but i think its not really needed. While model and texturing process you can see it anyway (not sure if in Blender too? cause i still work only with OB), and if you know about / aware about to take care of section count you can fix it then.. not sure if its really needed to make a check ingame for this. but like HG has already mentioned, you can check it in OB.
severe rune
tranquil mason
How can you brighten the emissive more in-game?
This is what it looks like at ni...
I don't think you can.
It would be nice to have a multiplier but there isn't one.
I also wished for that, maybe I can make one, I could try
tranquil mason
Would be nice to have
raven wren
severe rune
I don't think you can.
It would be nice to have a multiplier but there isn't one...
Would be extremely useful, being able to make full emissive textures as part of a main material would cut down on the section count of assets
ATM obviously if you want to make a traffic light, you’d need the main material, then 3 emissive mats for each colour of the lights, if my understanding is correct with how this all works you could just make it 1 material
full quarry
raven wren
ATM obviously if you want to make a traffic light, you’d need the main material,...
one material would be enough
the different colors can use a rvmat that lits up all colors
wooden lantern
raven wren
ATM obviously if you want to make a traffic light, you’d need the main material,...
spoken like a man making a traffic light rn 😭
raven wren
full quarry
the different colors can use a rvmat that lits up all colors
Wasn’t aware that worked, I thought the emissive colour had to be defined per rvmat, hence why there’s different ones for break lights and headlights
full quarry
raven wren
Wasn’t aware that worked, I thought the emissive colour had to be defined per rv...
It might shine white at some power levels true. Separate color rvmatscan be cranked higher and retain the color.
tranquil mason
I found this but it seems to only be set up for met rough instead of spec gloss, does anyone know of a shader like this for spec gloss?
https://github.com/ianbanks/arma_3_substance_shader/blob/master/arma3apex.glsl

GitHub
A Substance Painter shader for Arma 3 super shader objects. - ianbanks/arma_3_substance_shader
There was a PR to update it to diffuse, but wasn't finished seemingly
wooden lantern
tranquil mason
I found this but it seems to only be set up for met rough instead of spec gloss,...
afaik that one is set up for spec gloss not met rough
tranquil mason
Tried it and it everything was just pink, looked at it and said it used base color which is mostly met rough afaik
wooden lantern
yeah so that’s the funny part
it’s pretty much just broken I’ve never seen anyone use it successfully or gotten it to work
made on a substance about 9 major versions ago and they redid shader code when Adobe bought it iirc
I did a bit of research on shaders to try to figure it out but didn’t have any luck debugging it
and no one in the substance discord was any help with it cuz no one makes shaders 😭
 manic mulch
ground texture works fine at distance, but not when close to the camera (parallax and normals stop working and the texture gets darker)

 full quarry
means parallax is done somehow wrong
maybe invert green color channel of the normalmap part
wooden lantern
manic mulch
ground texture works fine at distance, but not when close to the camera (paralla...
for something funny
downsize ur source image to 2k and resave for the nopx
it's what i did after having that issue and it solved it randomly
manic mulch
wooden lantern
downsize ur source image to 2k and resave for the nopx
that worked
wooden lantern
no shot
manic mulch
but it's weird, i was able to get 4k nopx textures working in the past
 wooden lantern
why the hell is that an issue that can be reproduced
wooden lantern
full quarry
means parallax is done somehow wrong
do u have any idea about this
like any feasible reasoning 😭
manic mulch
and now, the dark texture error is gone...
i have a theory of what could be the issue now.
 manic mulch
well, it seems the issue is really related with the parallax map, but while i tought it had something to do with making the height map use the entire 0-255 histogram, that's not really the issue.
But i believe the issue to properly fix the dark texture bug still lies on manipulating the histogram of the height texture somehow.
 rancid obsidian
Guys
Why I keep getting cannot load that rvmat thing
I have the material in my mod
And I gave correct material directory still says the same
tranquil mason
rancid obsidian
Why I keep getting cannot load that rvmat thing
Show the config and rvmat
You're probably just using a leading slash where you shouldn't be though if I had to guess
rancid obsidian
tranquil mason
Show the config and rvmat
Uff finally
Sent
Just check "uniformindep" for now
 ebon charm
anybody know where i can start off making a mao?
 graceful blaze
Am I missing something? The texture does not match the uniform.
I_E_Engineer_F has uniformClass of U_I_E_Uniform_01_F,
U_I_E_Uniform_01_F has hiddenSelectionsTextures \a3\Characters_F_Enoch\Uniforms\Data\I_E_Soldier_01_CO.paa
I_E_Soldier_01_CO.paa looks like 1st pic, but the solider's pants are camo as well.


I wanted to retexture with a custom camo and I need to know I have the right one
(also if anyone has a psd or xcf template for the combat fatigues I'd be eternally grateful)
lethal condor
Nah, you're reading wrong config. Uniform tex is defined in CfgVehicles
graceful blaze
This seems to be the one? Baffling that it's called deserter

I_L_Uniform_01_Deserter_2_co.paa
Or maybe I_E_Soldier_01_Pants_CO.paa
lethal condor
Maybe, can't tell rn
Just so you know it is not just about CfgWeapons but CfgVehicles
brittle rivet
graceful blaze
(also if anyone has a psd or xcf template for the combat fatigues I'd be eternal...
xcfs in INDFOR uniforms in Pete's texture templates probably will match
First one you posted is "officer_spc_co.xcf"
Second one is "ia_soldier_01_clothing_co.xcf"
(filenames are for the templates)
Forum post
https://forums.bohemia.net/forums/topic/185433-petes-texture-templates/
Google drive repository
https://drive.google.com/drive/folders/0B_oVNRg3HRrRUmN5ZHNEOXFndzg?resourcekey=0-r3Cta-gYs-n-yrM9PG-ugQ
Bohemia Interactive Forums
Petes Texture Templates Good evening, over the last year Ive gathered quite an amount of templates for A3s vanilla textures, allowing for quick re-texturing of units, vehicles, and gear. I thought Id share them here for others to use. Please note that theyre by no means professional or anything, ...
ig_guerrilla_6_1_co.xcf looks to be the same template as ia_soldier, but for the sweater textures
graceful blaze
Thank you!
Exactly what I needed
Wait no, ia_soldier_01_clothing_co.xcf doesn't seem to be the one. It doesn't have the jacket pockets or the belt
This is the one I'm after
 brittle rivet
This is the matching class from CfgVehicles
hiddenselections are hiddenSelections[] = {"camo1","camo2","camo3","insignia"}; from I_E_Man_Base_F
class I_E_Uniform_01_F: I_E_Man_Base_F
    {
        author = "$STR_A3_Bohemia_Interactive";
        _generalMacro = "I_E_Uniform_01_F";
        scope = 1;
        model = "\a3\Characters_F_Enoch\Uniforms\I_E_Soldier_01_F.p3d";
        uniformClass = "U_I_E_Uniform_01_F";
        hiddenSelectionsTextures[] = {"a3\characters_f_enoch\uniforms\data\i_e_soldier_01_co.paa","a3\characters_f_enoch\uniforms\data\i_e_soldier_01_pants_co.paa","a3\characters_f_enoch\uniforms\data\i_e_soldier_01_gloves_camo_co.paa"};
    };
So it's a blend of multiple
brittle rivet
Yeah
You'll need multiple templates for it
Unfortunately the shirt and pants textures don't use the same rvmat, so you might need to do more texture tweaking than usual
graceful blaze
