#arma3_texture
1 messages · Page 13 of 1
 sleek current
 sleek current
You maybe want to check it manually

Also set resolution to shadow volume to 0
Also not sure if it'll help, but it helped me atleast, to get buldozer working.


And in buldozer configurator

Also in settings of object builder

P:\arma3_x64.exe -buldozer -name=Buldozer -window -noLand -exThreads=0 -noLogs -noAsserts -cfg=buldozer.cfg
Also you might wanna check the res lods and their UVs, maybe they are different than res 0
If you done lods by decimating res 0 couple of times, that might stretched UV's of the res 1-5 etc
Also im fucking dumb, you prob have like 1 res lod for testing
 errant panther
res 0?
errant panther
i thought 1 was the closest
 distant aspen
8
errant panther
i tried but it didn't export and trying to read the console as to why
errant panther
my shadow volume is not contiguous, what'd be a recommended fix?
errant panther
do i have to touch anything here?

 full quarry
errant panther
my shadow volume is not contiguous, what'd be a recommended fix?
full quarry
errant panther
my shadow volume is not contiguous, what'd be a recommended fix?
make it properly
errant panther
i just fixed that thankfully
full quarry
easiest if you use simple box shapes
errant panther
i had a hard time finding out the exact little hidden piece of geometry that wasn't contiguous but it's all valid now
progress!

normals flipped for...some reason i guess?
one normal flip later! i think the as map might been screwed, at the very least it all works now ^^
 sleek current
Czech mysticism
 maiden hull
Continuing this on, since adding my T-Shirt Retextures I'm seeing countless broken texture t-shirts. I've also gotten a report of it happening with the vanilla ghillie that I haven't modified or touched in any way.


specifically its scooping the insignia texture from the persona and using it as part of the uniform texture. I know Polpox said it was most likely a mission thing, I'll be validating tonight on a different mission, but it didn't happen with the non-retextured shirts before this.
and it only happens if you join the server after someone has put on the uniform. If you are in the server when they put it on it seems to be fine
maiden hull
Well... damn. Outside of Liberation it will not recreate. I dont even know I'll try to figure out what in lib is breaking it
 mild narwhal
Hello, this is my first time making a modification and I've encountered a problem. (I can't send a better image yet) To make a fabric effect, I added opacity to the chevron (as you can see in the arsenal selection list). But when loading it onto the form, for some reason it has too pronounced a color, like in the stock image, as if opacity wasn't applied to it. Sorry for the translator's inaccuracies
 distant aspen
How can I get this texture for my own texture?

is the AS
and I already have my base

 stable swallow
distant aspen
is the AS
stable swallow
distant aspen
is the AS
if you have nohq i can tell you a workaround
stable swallow
mild narwhal
Hello, this is my first time making a modification and I've encountered a proble...
darken the color, and decrease the opacity more
distant aspen
stable swallow
if you have nohq i can tell you a workaround
I have the hq
up to the SDMI
full quarry
id really recommend stopping for a moment and going back to learning 3d modeling and texture baking basics so you can learn to understand the files you have
using ready bought models and textures is not a shortcut to learning
distant aspen
full quarry
id really recommend stopping for a moment and going back to learning 3d modeling...
the model is mine
the base texture is the same
and what are the NOHQ, the SDMI and all that, I also took it out
I'm missing the AS but I'm starting to think that it doesn't convert me to PAA because it's not done correctly.
full quarry
distant aspen
and what are the NOHQ, the SDMI and all that, I also took it out
You can read the texture descriptions on the wiki
if the model is yours then you bake out the respective texture types out of the model itself
mild narwhal
stable swallow
darken the color, and decrease the opacity more
Thank
full quarry
Its not really great result though.
 hallow jay
I mean, you get the AS the same place you get NOHQ and SDMI from?
Your texture making software
 zealous zephyr
Hi, I am new to modding and want to make the vanilla 7.62 tracers a custom color as a new ammo, any tips for going about doing that?
 narrow gazelle
zealous zephyr
Hi, I am new to modding and want to make the vanilla 7.62 tracers a custom color...
narrow gazelle
zealous zephyr
Hi, I am new to modding and want to make the vanilla 7.62 tracers a custom color...
look at the cfgAmmo of the bullet
 unborn ore
Would anyone here be able to tell me how to find clothing texture templates, for example the one for the CSAT Tracksuit
@full quarry
full quarry
unborn ore
Would anyone here be able to tell me how to find clothing texture templates, for...
no need to specifcally ping anyone. just got to wait until someone answers
unborn ore
Mb
full quarry
dont know if theres template for that tho
full quarry
theres link to template collecion in the pins I recall
unborn ore
Trying to make my own custom skin of it
unborn ore
And I have no idea where to look
full quarry
and then find the corresponding pbo in the game files to open up with the armaTools
full quarry
sorry Im in the middle of something. You should be able to find some info if you google arma retexturing. Though the BI forums are down for maintenance for now.
distant aspen
I get an error when converting to a file for this file. Any ideas on how to solve it?

 lethal condor
I firstly suggest to check bit depth, make sure it's 24bit
Resolution also does matter of course
 solid galleon
I’d like to create an enemy with a custom face. Can this be done by retexturing am existing unit or do I need to think about creating a mod? Looking for the easiest approach obviously. Also on a mac which I think is limiting. I’m able unpack and pack PBOs, convert PAAs, and have photo editing, but am not sure about configs if that’s needed. Thanks for thoughts on direction.
full quarry
solid galleon
I’d like to create an enemy with a custom face. Can this be done by retexturing...
Config is needed but configs are just text files.
It would be a mod that adds custom identities that can then be applied on units.
solid galleon
full quarry
Config is needed but configs are just text files.
It would be a mod that adds c...
Thanks! Is anything special required for a text editor?
full quarry
solid galleon
Thanks! Is anything special required for a text editor?
No. I use notepad++
solid galleon
full quarry
No. I use notepad++
Seems attainable, thank you.
distant aspen
lethal condor
I firstly suggest to check bit depth, make sure it's 24bit
That was it, I couldn't find the option, I only had 8 and 32
 full quarry
distant aspen
full quarry
distant aspen
path is set all wrong
 full quarry
this path does not exist inside your pbo

 full quarry
yes well thats the path inside your computer drive
but thats not the path that gets packed into the pbo
id recommend starting modding environment setup properly with P drive
full quarry
Sorry I dont understand what you mean by that
distant aspen
full quarry
Sorry I dont understand what you mean by that
that is, move the folder to one of the p drives
full quarry
Yes the whole mod folder and mod files should be in P drive and it should be packed from the P drive
distant aspen
Can I do it like this?
 full quarry
distant aspen
Can I do it like this?
full quarry
distant aspen
Can I do it like this?
no this is very wrong
you never put your files into the A3 folder
distant aspen
full quarry
you never put your files into the A3 folder
okok
full quarry
yours would be P:\Enrqiesmod\enrique_acpc2\
or something like that
and you dont need "addons" folder in P drive
thats where the pbo goes in the local mod folder
after the pbo is built
distant aspen
 full quarry
and pbo also dont belong to P drive
full quarry
distant aspen
invent yourself a modding tag
like ACE_ CUP_ RHS_
and prefix your folders and p3d and texture files with it
distant aspen

serves
@full quarry What happens is that when I enter the local mod it asks me for the addons folder
full quarry
distant aspen
<@150949769953411072> What happens is that when I enter the local mod it asks me...
yes thats somewhere else than P drive
distant aspen
I do it right there
full quarry
somewhere\not\p\drive\@yourmod\addons\yourmod.pbo
full quarry
distant aspen
I do it right there
dont do it on p drive
distant aspen
full quarry
dont do it on p drive
Not even outside?
full quarry
no
distant aspen
full quarry
no
So it is recommended to do it on the P drive to verify the model in the object builder or bulldozer?
full quarry
P drive represents the ROOT of the game engines internal folder structure
when you have P:\mymod\myfolder\myfile.here in game the path becomes mymod\myfolder\myfile.here
technically sure you can pack pbo form anywhere
but for you P drive is simpler to use
distant aspen
full quarry
but for you P drive is simpler to use
Therefore, I can do it in unit p
distant aspen
oks
the pbo is already separate
Can I create the files on the P drive and package the PBO elsewhere and will it still work?
distant aspen
full quarry
the files are then inside the pbo
I just did it and it gave me a lot of errors

I don't even load the model
full quarry
well youll naturally have to repath all configs and rvmats
distant aspen
 distant aspen
full quarry
well youll naturally have to repath all configs and rvmats
distant aspen
full quarry
well youll naturally have to repath all configs and rvmats
that's it
The routes are there but in unit p
full quarry
distant aspen
The routes are there but in unit p
is this how it is on P:?


 full quarry
since you have mikero tools try packing with pboproject
distant aspen
full quarry
since you have mikero tools try packing with pboproject

But it's basically the same.
full quarry
distant aspen
source is the P drive folder
and pboProject does different processing
more checking
it will tell you if you have errors
 distant aspen
full quarry
and pboProject does different processing
distant aspen
full quarry
and pboProject does different processing
okok
Yes, there was an error in the code.
 green sinew
so, do you guys know what is the best starter guide/video to basic Arma 3 modding?
I wanna start repainting vehicles n gun.
full quarry
green sinew
so, do you guys know what is the best starter guide/video to basic Arma 3 moddin...
Term is retexturing. basically you paint a new texture via painter program like mspaint, photoshop, gimp etc
for some things you might find template files or original textures to use as reference
green sinew
roger,
green sinew
full quarry
for some things you might find template files or original textures to use as ref...
is there a guide or video for a step-by-step protocal from getting the template from Arma/mod and then adding the new texture to the vehicle skin variation list?
full quarry
green sinew
is there a guide or video for a step-by-step protocal from getting the template ...
well, no probably not😅
green sinew
aw...
green sinew
is there any way I could do retexturing on a 3d model?
any guide on how to do it?
i don't wanna do 2D unwrapped retexturing if i can help it
 keen terrace
green sinew
is there any way I could do retexturing on a 3d model?
keen terrace
green sinew
is there any way I could do retexturing on a 3d model?
You would need the original source model to do that using substance painter, blender or another tool.
For a mod if you ask one of the creators there is a small chance that they might give you that.
But quite a few either won't want to or might not be able to for various reasons.
full quarry
green sinew
is there any way I could do retexturing on a 3d model?
99% cases it's not possible to do 3d painting
solid galleon
I saw a tutorial somewhere on BI that said you can test a texture mod by placing the paa file in the mission folder and using the set object texture function in the object’s init. Can the same method be used to test a face texture on a unit? Tried it but it wasn’t working for me.
full quarry
solid galleon
I saw a tutorial somewhere on BI that said you can test a texture mod by placing...
no the faces are set up different
there is however a sample bust p3d in the arma3 samples that can be used
solid galleon
full quarry
there is however a sample bust p3d in the arma3 samples that can be used
Is that included with arma tools? I’m on a mac and can’t get steam to download those.
full quarry
solid galleon
Is that included with arma tools? I’m on a mac and can’t get steam to download...
no it is separate install. I dont know why steam would not download them on mac
 smoky granite
is there an easy way to re-create the arsenal icons for equipment?
example: I want to replace the left images with the right images, but with the actual textured model I've created


 severe rune
"HEMTT" has a tool to create preview images like that
smoky granite
Cool, I'll check it out!
I managed to 'budget' my way through it by creating an .rvmat and then applying that to a person in an editor file
severe rune
It basically just launches Arma for you, on a green screen world, positions the object and takes screenshot
 cosmic vault
How can I mitigate some of the compression artifacting when converting to .paa with TexView?

 brittle rivet
cosmic vault
How can I mitigate some of the compression artifacting when converting to .paa w...
brittle rivet
cosmic vault
How can I mitigate some of the compression artifacting when converting to .paa w...
You could try different paa mode, jpg image, or just increasing the resolution
Make certain that you are converting from a lossless copy of a texture, since a lossy inbetween format will also cause issues (
paa is a compressed format, and I think it's lossy
If you want to play with different settings for paa conversion, you could edit TexConvert.cfg in steamapps\common\Arma 3 Tools\TexView2\TexConvert.cfg
This is what reference page I could find for it https://community.bistudio.com/wiki/TexConvert.cfg
Someone else might have a better idea, but I think it might be unavoidable in paa files for the standard conversion settings
cosmic vault
brittle rivet
You could try different paa mode, jpg image, or just increasing the resolution
M...
Oh, shoot, I'll mess with that. Thanks for the new rabbit hole to go down.
brittle rivet
Just be aware, the engine might not like paa files with a format that differs from the normal format for that type
Should still work though
cosmic vault
brittle rivet
Just be aware, the engine might not like paa files with a format that differs fr...
We shall see
brittle rivet
Let me know what happens with it
Could be useful for minimizing texture sizes when I get back to modding
cosmic vault
So the red turned to blue and the blue to red. The olive drab is now a sickly teal. Used ARGB8888. The texture quality is spot on, however. 😂 😵💫
brittle rivet
cosmic vault
So the red turned to blue and the blue to red. The olive drab is now a sickly te...
Probably you could fix that with the swizzle stuff
channelSwizzleB = "R"; ```
in TexConvert.cfg should be the right swizzleWhat's interesting is that TexView shows it correctly, but if I open the texture in paint.net or in game it has the red and blue flipped.
full quarry
cosmic vault
What's interesting is that TexView shows it correctly, but if I open the texture...
incompatible resolution most likely
cosmic vault
full quarry
incompatible resolution most likely
I have no idea, it's 2048x2048 🤷♂️
If that isn't compatible, then I don't know what is.
full quarry
cosmic vault
I have no idea, it's 2048x2048 🤷♂️
If that isn't compatible, then I don't kno...
check that its actually that
cosmic vault
It is, I've run into that issue before, because it was an extra pixel too wide,
full quarry
also are you using correct named suffix in the file prior to conversion
ie _CO in you case
cosmic vault
full quarry
ie _CO in you case
I used _CO with the ARGB8888 and 4444, with the same effect
cosmic vault
full quarry
make sure to remove alpha channel from the image
Tried saving it as a .jpg to remove any alpha channel and had the same effect.
 manic mulch
so, user textures rvmats don't work with other texture maps inside a mission folder, or i'm doing something wrong?

i can only load the normal color on it.
the rvmat can't pick the normal map, smdi, or as maps.
manic mulch
Arma 3: MudRunner


 manic mulch
where can i find the .rvmats for the roads of altis in the game files?
wanting to test if they work with super shaders.
lethal condor
There should be a RoadsLib or some name that contains road property
 faint cradle
someone able to explain to me how to get the texture of a model on it in blender
full quarry
manic mulch
where can i find the .rvmats for the roads of altis in the game files?
wanting ...
roads dont work with supershader
manic mulch
full quarry
roads dont work with supershader
oh, that's sad.
what shader to they use?

 manic mulch
thanks
full quarry
the latter are the newer roads with normalmap
techically they can also hold specularmap
but Im fairly sure using other than the default shaders breaks stuff
manic mulch
yeah, looks weird. (the one in the right is the road object from O&T editor expansion).
also, kinda interesting,the roads textures under roads, and roads_new aren't being used, instead it get the textures from roads_ae.
 full quarry
manic mulch
yeah, looks weird. (the one in the right is the road object from O&T editor expa...
full quarry
manic mulch
yeah, looks weird. (the one in the right is the road object from O&T editor expa...
where you get the textures? not quite following what you did or try to do
😅
each map has the roadslib.cfg that defines what texture/materials the shapefile roads use
 manic mulch
i made it with instamat, it's not on the right rotation.
full quarry
the model roads are not really used
manic mulch
hmm, i will take a look on those.
well my rvmat is working, and the actual road does load atleast until the normal map on it as well.


actually, i think it's loading even the ambient occlusion...
i guess i will create a blank texture just to see what texture maps are working and what aren't
manic mulch
so, the super shader kinda of works, it's that the roads themselves don't load all of it.
the reason why, probably only the devs know.
 full quarry
manic mulch
so, the super shader kinda of works, it's that the roads themselves don't load a...
full quarry
manic mulch
so, the super shader kinda of works, it's that the roads themselves don't load a...
like i said I dont think it works
Im pretty sure its been tried out before
manic mulch
well, it loads up to the normal map.
i was expecting it to not load the rvmat at all, or crash the game, something like that.
meanwhile, ground textures don't load the super shader rvmat at all.
 full quarry
manic mulch
meanwhile, ground textures don't load the super shader rvmat at all.
full quarry
manic mulch
meanwhile, ground textures don't load the super shader rvmat at all.
if you mean terrain surface yes that can not use other than the shader it has been designated with
manic mulch
well, it was a fun experiment.
faint cradle
does anyone have a texture for an avs i can use?
 restive agate
Does anyone have this file on hand? The BI forums are down for... who knows how long. And I am getting around to some simple vehicle retextures
brittle rivet
restive agate
Does anyone have this file on hand? The BI forums are down for... who knows how ...
Many of the templates were on gdrives, the only way to get to them now is through wayback machine, or through a saved link to the drive
I found Pete's Texture Templates a while ago: https://drive.google.com/drive/folders/0B_oVNRg3HRrRUmN5ZHNEOXFndzg?resourcekey=0-r3Cta-gYs-n-yrM9PG-ugQ
restive agate
🫡
You have saved me many an hour trying to dig through the wayback
There are hardly an opfor vehicles 😭
brittle rivet
restive agate
There are hardly an opfor vehicles 😭
https://web.archive.org/web/20210224123732/https://forums.bohemia.net/forums/topic/169972-arma-3-retexture-templates-by-dreamrebel/
This one has some more opfor vehicles, though you'll have to strip off the wayback part from the url to get to the file (assuming it's still there)
Bohemia Interactive Forums
Hi guys,Recently Ive made some templates to make it easier to create retextures.With these templates youll be able to maintain a certain quality standard and save a lot off time.I hope everyone will enjoy them.Templates ready: A-143 Buzzard, CH-49 Mohawk, MBT-52 Kuma, PO-30 Orca, Zamak, Su-35S Fl...
restive agate
It's all good, thank you for helping, though
restive agate
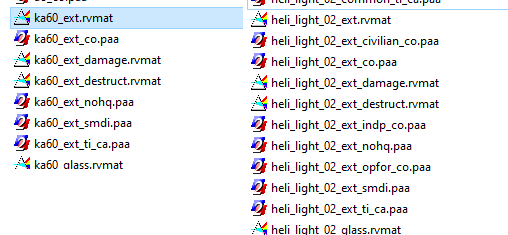
Is the AS.paa for the Heli_Light_02 missing?
 vernal sage
Not so much the case of it being "missing" but rather that it just uses a procedural AS for the exterior hull texture. Arma 3's Orca is an upgraded port of the Ka-60 from A2: PMC and it was the same there (no AS for the hull exterior).
https://i.imgur.com/j6BVR5O.png
 lethal condor
Is it possible to make an RVMAT that does not any lighting take into the count, so it shows the texture color without any shading?
full quarry
lethal condor
Is it possible to make an RVMAT that does not any lighting take into the count, ...
Not too high emissive value maybe?
lethal condor
That seems like it, thanks
 sleek temple
Good evening, gentlemen. I'm using Multimaterial for the walls. The normal map looks strange in Buldozer. How can I fix it? Or what could be the reason? Normal intensity?
I realized that the problem is with SMDI...
upd: problem solved. specularPower was 0 and so on

 full quarry
👍
narrow gazelle
manic mulch
Arma 3: MudRunner
it will be awsome if can be changed with weather, if its raining look moody, just changing the rvmat
ive notice its not the same driving on grass and over paviment, there is some ground propieties can be changed?
 weary pulsar
can someone help me ?
 edgy gull
hey im trying to learn how to do the retexture stuff for the baceball cap how do i setup the config for it i found that it is in the characters_fpbo file and then im lost from there
brittle rivet
edgy gull
hey im trying to learn how to do the retexture stuff for the baceball cap how do...
This is a decent starting guide: https://steamcommunity.com/sharedfiles/filedetails/?id=238437456 (mostly vehicles, but same principles for everything)
(links in the guide are mostly dead though, so I linked the important stuff below)
And this one for the config: https://community.bistudio.com/wiki/Arma_3:_Characters_And_Gear_Encoding_Guide#Headgear_Configuration
Arma 3 Tools are from Steam
paa addon, you can also use TexView2 in Arma 3 Tools
gimp: https://github.com/gruppe-adler/paa-gimp-plugin
photoshop: https://github.com/gruppe-adler/PaaPhotoshopPlugin
Mikero's tools, current official site: https://mikero.bytex.digital/
I suggest building your pbo using pboProject from Mikero's tools, it catches most config errors while packing, rather than you finding them halfway through starting Arma from crash code 0x0000DEAD
There's a bit more in the pinned messages that can help with understanding it
The _CO texture will likely need to be darker and less saturated than it looks like it should be in an image editor to appear correctly in Arma
edgy gull
Ok is all of that needed if im just trying to retexture a hat wit a logo it found it in the base files?
brittle rivet
Minimal is just the Arma 3 tools
You need to unpack characters_f.pbo to get the original image
TexView2 to save it as an editable image
Edit image, and then convert back, with a new name, and the same _co suffix
Create a config,
Pack with Addon Builder
Sign the mod afterwards if you want to publish, or use it on a server (not strictly necessary, but better to sign mods before publishing, unsigned mods are a pain for server admins)
edgy gull
ok
brittle rivet
BankRev is the Arma 3 tools pbo extractor
edgy gull
ah i was able to get it in game with that guide from steam thanks now i just gotta make the logo smaller it was way too big lol
 buoyant ermine
does anyone know if it's allowed to use the p3d files and convert to substance painter rather than using the .paas?
full quarry
buoyant ermine
does anyone know if it's allowed to use the p3d files and convert to substance p...
no
substance painter is part of workflow of making new models
but not really part of retexturing process
only exception is if you get model from the author to use like that
buoyant ermine
Ah ok thank you
 polar gyro
How do I actually make a .RVMAT?
I'm starting from a model with roughness metallic maps and have tried to convert it to some kind of SMDI map (i hope this worked)
also have a normal map
I think I need to write a coifing for it but is it just that and if so how and where do I insert the maps
full quarry
polar gyro
How do I actually make a .RVMAT?
I'm starting from a model with roughness metall...
rvmat is a textfile basically
you can find examples from the a3 files
and default_super.rvmat from P;\a3\data_f\ is good startingpoint
as it has all he stages with procedural defaults set up and you just need to plug in your textures
rough Metallic textures often need quite a bit of work to turn them into proper SMDI map
but it can be done
polar gyro
full quarry
rough Metallic textures often need quite a bit of work to turn them into proper ...
ist there guides for this or is it adjust until it feels good?
the current attemt looks like this
 full quarry
polar gyro
full quarry
polar gyro
pinned messages have some guidance. you can also find a lot of info on how the different rendering systems work online (metal/rough PBR vs older Specular/Gloss rendering)
polar gyro
full quarry
and default_super.rvmat from P;\a3\data_f\ is good startingpoint
And for the RBGA values in the rvmat to i just put the path to the map there?
 silver adder
doesnt look like it
 shadow marsh
So I am trying to make a retexture for the us parade uniforms but it isn't working but idk why,
    class NCO_Parade_Uniform: U_B_ParadeUniform_01_US_decorated_F
    {
        author="MfeChu";
        scope=2;
        displayName="[75th] NCO Parade Uniform ";
        hiddenSelectionsTextures[] = {
            "paradeTest\texturePAA\ParadeUniform_01_US_CO2.paa"
        };
    };
this is what I got so far I have also tried it with the suitpack instead and with hiddenSelections[] = {"Camo"} but none of it has seemed to work any ideas ?
"It does end up making a new parade uniform with the correct model just that the texture itself doesn't get applied so I assume it's either wrong texture file or theres a problem with the naming scheme "even though it's the exact same as what I found in the AoW character PBO
lethal condor
Post your full config
shadow marsh
class CfgPatches
{
    class Parade_Deimos
    {
        author="MfeChu";
        requiredAddons[]=
        {
            "A3_Data_F",
            "A3_Weapons_F",
            "A3_Characters_F",
            "A3_Characters_F_AoW"
        };
        requiredVersion=1
        units[]=
        {
            "[75th]NCO_Parade_Uniform"
        };
        weapons[]=
        {
            "[75th]NCO_Parade_Uniform"
        };
    };
};

class CfgWeapons {

    class U_B_ParadeUniform_01_US_decorated_F;

    class NCO_Parade_Uniform: U_B_ParadeUniform_01_US_decorated_F
    {
        author="MfeChu";
        scope=2;
        displayName="[75th] NCO Parade Uniform";
        hiddenSelectionsTextures[] = {
            "DeimosParade\texturePAA\suitpack_ParadeUniform_01_US_decorated_CO.paa"
        };
    };

    class NCO_Parade_Uniform2: U_B_ParadeUniform_01_US_decorated_F
    {
        author="MfeChu";
        scope=2;
        displayName="[75th] NCO Parade Uniform 2";
        hiddenSelectionsTextures[] = {
            "DeimosParade\texturePAA\U_B_ParadeUniform_01_US_decorated_F.paa"
        };
    };
};
"working in two different folder structures to try and get it to work but this one is the more active one
lethal condor
Where is your CfgVehicles?
shadow marsh
ah is thats whats missing?
lethal condor
You need both CfgWeapons entry and CfgVehicles entry and assign them accordingly to make it work
shadow marsh
wait isn't vehicles for placable units?
lethal condor
        units[]=
        {
            "[75th]NCO_Parade_Uniform"
        };
        weapons[]=
        {
            "[75th]NCO_Parade_Uniform"
        };```That's not how it works
```cpp
requiredVersion=1```missing semicolonUniform requires CfgVehicles
shadow marsh
oki
full quarry
shadow marsh
wait isn't vehicles for placable units?
uniform is 2-part. the cfgweapon item you put on in your inventory. and the cfgvehicle unit that is what the uniform looks like
shadow marsh
full quarry
uniform is 2-part. the cfgweapon item you put on in your inventory. and the cfgv...
btw do you know if there is a template out there for this that one can look at?
full quarry
shadow marsh
btw do you know if there is a template out there for this that one can look at?
template?
shadow marsh
full quarry
template?
nvm might have found one that might work
class CfgPatches {
    class {mod class name here} {
        units[] = {};
        weapons[] = {};
        requiredVersion = 0.1;
        requiredAddons[] = {"A3_Characters_F_BLUFOR"};
    };
};

class CfgVehicles {

    class B_Soldier_base_F;

    class Example_Soldier_F : B_Soldier_base_F {
        _generalMacro = "B_Soldier_F"; //unsure what this does
        scope = 2;
        displayName = "{what you want to call the soldier}";
        nakedUniform = "U_BasicBody"; //class for "naked" body
        uniformClass = "{give the uniform a class name}"; //e.g. "Example_Soldier_F"
        hiddenSelections[] = {"Camo"};
        hiddenSelectionsTextures[] = {"{path to uniform PAA file}"};
    };

};

class cfgWeapons {
    class Uniform_Base;
    class UniformItem;

    class {use uniform a class name from above} : Uniform_Base {
        scope = 2;
        displayName = "{Display name for the uniform}";
        picture = "\A3\characters_f\data\ui\icon_U_B_CombatUniform_mcam_ca.paa";
        model = "\A3\Characters_F\Common\Suitpacks\suitpack_blufor_diver";

        class ItemInfo : UniformItem {
            uniformModel = "-";
            uniformClass = "Example_Soldier_F"; //would be same as our made soldier class
            containerClass = "Supply20"; //how much it can carry
            mass = 80; //how much it weights
        };
    };
};
"wanted some example code
distant aspen
Is there any way to adjust the brightness of the handle or something like that?

since it is very dark
brittle rivet
distant aspen
Is there any way to adjust the brightness of the handle or something like that?
You can try increasing the brightness of that section of the texture, assuming that it was made with hiddenSelections for textures
(by far the easiest and fastest if it works, my usual method is to cut it out in GIMP, duplicate to new layer, adjust colour, and export as paa, reprocess with texview2 if needed for alpha textures)
If there is hiddenMaterialSelections, then you can put whatever material and texture you want on it
Otherwise, the texture is hardcoded in the model, and you need an unbinarized p3d to do anything
distant aspen
brittle rivet
You can try increasing the brightness of that section of the texture, assuming t...
What would that look like? It's with hiddenselections
brittle rivet
Same as retexturing for everything else
Simple mod config inheriting from the handgun, including hiddenSelections[] and hiddenSelectionTextures[] to replace the texture
(You can overwrite it as well, but probably easier to test when you can still see the original)
Modifiy _co.paa as desired, and add it to the retexture mod.
full quarry
distant aspen
Is there any way to adjust the brightness of the handle or something like that?
you adjust the texture
thats what defines the colors
 unreal magnet
Quixel Workshop now on Twitch! http://www.twitch.tv/quixeltools
distant aspen
full quarry
you adjust the texture
Any recommendations?
 distant aspen
It's weird, because in Substance it was done well but when I transferred it to Arma 3 it looks weird
full quarry
different rendering engines look different
distant aspen
The texture looked good, but when it was passed to the engine, quality and texture were lost.
This was passed to me, but I don't understand how I should apply it.
distant aspen
distant aspen
What this does is export with all the UV maps
full quarry
also thats for reforger
distant aspen
Yes
full quarry
so not really compatible with arma3
distant aspen
both
full quarry
at least what you have in that picture is not
distant aspen
 full quarry
well that puts different layers of your substance project into different textures
you can tinker with the export profile sure
or you can adjust the brightness in the sourfce project
or edit the exported textures

 full quarry
Substance painter and Arma handle shinyness different way
you wont get exact same look on both
you got to study PBR rendering and Specular Gloss rendering differences to understand it

 full quarry
polar gyro
Why is my rvmat not applying?
full quarry
polar gyro
Why is my rvmat not applying?
how do you know its not applying?
you seem to have colors on the model despite having only single procedural color texture on it?
polar gyro
it looks flat and the same as before i made an rvmat
i do apply the texture config.cpp
full quarry
id recommend applying default texture on the model itself too
and then test the gun in better lighting
VR has worst flat lights so its not very good for testing what things look like
polar gyro
i have a normal map so it should still be visible
full quarry
maybe the paths dont match and the texture cant be read in game
polar gyro
i dont get any errors that its not finding
all the things are in the data folder in the mod source
restive agate
Hey, ya'll. How do I get the textures for Reaction Forces content to do some gear retextures?
full quarry
restive agate
Hey, ya'll. How do I get the textures for Reaction Forces content to do some gea...
Youll have to ask in their discord
they do share when asked
restive agate
Ah! I did not know they had one, Thanks 🫡
 dapper jewel
Hey guys, I've got a question regarding the lighting on a weapon model. When hit by light, the ambient shadows on the model are all sorts of misshapen- for example, a star shaped shadow around a circular hole, or triangular diffuse lighting/shadows on what should be a rectangular part. What is the most likely cause of this?
(I'd share my RVMAT settings but I'm currently at work so I don't have access to it atm)
lethal condor
Pictures would help to understand your issue
dapper jewel
Stuff like this


Where the shadows/lighting are just not quite right and it causes the whole model to look pretty bad.
lethal condor
Likely Sharp Edge vs Smooth Edge issue
dapper jewel
Is that a model problem or within my RVMAT?
lethal condor
Model
dapper jewel
Gotcha. What do I need to do to correct that? The models are from cgtrader, brought into blender and exported as FBX for object builder
lethal condor
In Blender, Edit mode, ever had edges with lightblue highlight?
It is basically, the rendering engine tries to understand these edges are smooth so shadows are
dapper jewel
I dont have access to the models currently, but do I need to have those or remove them if I find them?
lethal condor
Lightblue is Sharp Edges in Blender. You may also need Edge Split Modifier
dapper jewel
Gotcha. Thanks!
dapper jewel
lethal condor
Lightblue is Sharp Edges in Blender. You may also need Edge Split Modifier
I was able to get into blender, this is what it's showing for sharp edges:
 lethal condor
Try Edge Split Modifier and export to P3D
dapper jewel
I'm not seeing any changes when applying edge split modifier
full quarry
It's possible your export is not configured right and does not export the sharp edges correctly.
Or your model does not update on new pbo packing
 teal juniper
If a texture is too bright, can it be adjusted in the RVmat or would it need to be adjusted in the paintingsoftware?
full quarry
teal juniper
If a texture is too bright, can it be adjusted in the RVmat or would it need to ...
the actual texture file should be adjusted
teal juniper
Darn, alright, thanks
 soft anchor
Does anyone happen to have the texture file for the Arma 2: BAF original "miscGear"
For the Osprey Mk2 vest
I know there's something funky with the ELUA but I don't know if it applies to texture files themselves
replicating the Brits from Arma2 for a submod from Queen and Country and I'd like them to be as close as possible
soft anchor
could you point me in the direction?
lethal condor
ALDP_A2OADLC_PBOs_DPL_APL.zip
https://community.bistudio.com/wiki/Arma_Licensed_Data_Pack
soft anchor
TYSM
 glossy whale
Any1 knows websites for Camouflage patterns
full quarry
glossy whale
Any1 knows websites for Camouflage patterns
commercial patterns are propriatary for their makers
but you can google up pattern generators
glossy whale
full quarry
but you can google up pattern generators
Tried but didn't find what I need
full quarry
glossy whale
Tried but didn't find what I need
then what is it that you are actually looking for?
glossy whale
Do you have any illustrating video about how to to make custom uniforms from camopedia
full quarry
no there isnt anything that specific
if you are looking to make retextures, those are made by painting new textures that fit the original uvmapping
or using the original textures as base and painting on those
if you are looking to make new uniform models you need to first get into 3D modeling and get to understand how texturing works
 rare ginkgo
glossy whale
Any1 knows websites for Camouflage patterns
rare ginkgo
glossy whale
Any1 knows websites for Camouflage patterns

Dropbox
Login to Dropbox. Bring your photos, docs, and videos anywhere and keep your files safe.
most are seamless
glossy whale
it doesnot work
 rare ginkgo
fg to share it
rare ginkgo
glossy whale
it doesnot work
 glossy whale
thnx
 unreal flume
Does anyone have a high quality version of the LDF 5th Regiment patch?
This one but in higher resolution

 lyric kettle
hello guys, I want the AOR1 camo and the AOR2 camo please anyone have it please send it to me
i want it as a PNG not clothes
 rancid obsidian
hey guys im trying to reskin this uniform but its kinda weird

i looked it in config viewer at hiddenselection textures it doesnt had any texture path for pants texture it just had the shirt texture path
full quarry
I guess here.
rancid obsidian
how to retexture the pants?
full quarry
rancid obsidian
i looked it in config viewer at hiddenselection textures it doesnt had any textu...
it may be it does not have the pants set up for texturing
rancid obsidian
@full quarry this is happens when i give texture path to the pants

thats nato vanilla shirt texture
full quarry
rancid obsidian
<@150949769953411072> this is happens when i give texture path to the pants
What does that mean?
rancid obsidian
full quarry
What does that mean?
his pants doesnt have texture path
full quarry
correct yes
rancid obsidian
full quarry
correct yes
so i gave texture path to his pants
rancid obsidian
rancid obsidian
<@150949769953411072> this is happens when i give texture path to the pants
and that happened
full quarry
rancid obsidian
so i gave texture path to his pants
how
rancid obsidian
full quarry
how
in config
full quarry
can you paste what you tried?
rancid obsidian
full quarry
can you paste what you tried?

i used that class name
in editor it added that into FIA\Men (Story)
full quarry
does the pants have Camo2 selection though
rancid obsidian
i watched it in the arma site
that place shows all arma items
with class names
it had 2 camo selections
also in config viewer had 2 one of them was shirt tex path and other one was empty
full quarry
rancid obsidian
it had 2 camo selections
this is what it has by default as far as I can see
 rancid obsidian
full quarry
hmm sure yeah looks like the model itself has camo1 and camo2 selections
rancid obsidian
full quarry
hmm sure yeah looks like the model itself has camo1 and camo2 selections
it was sarcastic or u dont know?
full quarry
rancid obsidian
it was sarcastic or u dont know?
? no I just looked at it with Mikeros Eliteness

although its not certain if these are set up right on model.cfg level. it looks like it should be though
rancid obsidian
full quarry
although its not certain if these are set up right on model.cfg level. it looks ...
so?
rancid obsidian
for a "c"?
rancid obsidian
full quarry
names can be case sensitive
so why the vanilla doesnt have texture path for pants?
full quarry
rancid obsidian
so why the vanilla doesnt have texture path for pants?
it uses default textues on the model I suppose
maybe just overlooked at encoding
rancid obsidian
full quarry
maybe just overlooked at encoding
still have the problem
full quarry
rancid obsidian
still have the problem
for which one is this rvmat for?
 rancid obsidian
full quarry
for which one is this rvmat for?
rancid obsidian
full quarry
for which one is this rvmat for?
pants
cuz i had a rvmat that removes those kneepads on the pants
full quarry
are the pants camo1 or camo2?
rancid obsidian
yes
full quarry
which?
rancid obsidian
oh i think its camo2
full quarry
then tight now the rvmat is going on camo1
the lists all respect the hiddenSleections order
camo1 takes first paa/rvmat
camo2 takes second paa/rvmat
you need to define both
rancid obsidian
so i must remove rvmat or make blank rvmat at first then add that rvmat to second
full quarry
rancid obsidian
so i must remove rvmat or make blank rvmat at first then add that rvmat to secon...
you must use correct rvmat
blank would just remove all normalmap etc from it
if you want to use vanilla rvmat thats fine
or you can make your own version
full quarry
i tjust needs to be pathed in if you want to retexture other selections than first one but not the first one
rancid obsidian
full quarry
i tjust needs to be pathed in if you want to retexture other selections than fir...
so i give the shirt rvmat for the first
then give pants rvmat for second
full quarry
yes
rancid obsidian
full quarry
yes
why not just leave it blank?
full quarry
a3\characters_f\blufor\data\clothing1.rvmat
a3\characters_f_epb\blufor\data\clothing1_dirty.rvmat
a3\characters_f_epb\heads\data\hl_hairy_dirty.rvmat
a3\characters_f_gamma\guerrilla\data\ig_guerrilla2_1.rvmat
these are teh rvmats the model has
probably one of these
full quarry
👍 👍
rancid obsidian
full quarry
👍 👍
is it correct?
 full quarry
👍 
rancid obsidian
full quarry
👍 <a:blobcatdance:1325989540392861706>
wait
i also have another thing
rancid obsidian
full quarry
👍 <a:blobcatdance:1325989540392861706>

they also added in FIA faction
rancid obsidian
full quarry
right now you are probably inheriting it
i used kerry class name
I_G_Protagonist_F
full quarry
well thats independent
rancid obsidian
full quarry
you need to set its sides
what side should i choose?
full quarry
the ones you want it to appear in
full quarry
everything has a faction
and all uniforms have the visual representation unit
I guess you can try set its scope to 1
so its hidden in editor
rancid obsidian
it also hides in arsenal
full quarry
youll need to choose then
rancid obsidian
full quarry
youll need to choose then
there is no scope 0?
full quarry
that would not work either
rancid obsidian
so i cant do anything about it?
ok 1 thing cfgvehicle its the models shows in game?
and cfgweapons are those that shows in arsenal list?
@full quarry
full quarry
try it out
rancid obsidian
full quarry
try it out
why u dont say?
full quarry
dont remember off the top of my head
narrow gazelle
there is any retexture template for the RHS AC130?
 azure bridge
Are there any mods that do water droplets on glass using UVanimations?
narrow gazelle
azure bridge
Are there any mods that do water droplets on glass using UVanimations?
afaik no
but its posible?
full quarry
azure bridge
Are there any mods that do water droplets on glass using UVanimations?
no I dont think there are any. but it cant really be added to things that do not have mesh for it
azure bridge
Right. I was tempted to animate windshield wipers and then thought "what if?" xD
full quarry
azure bridge
Right. I was tempted to animate windshield wipers and then thought "what if?" xD
Im gonna say it sounds pretty challenging 😅
maybe with uv animated mesh streaks that are then also bone animated to deform with the wipers
as you cant make the uv animation scroll incrementally so that you could have "frames"
azure bridge
oh the alternative being animated per frame?
no wait I see what you mean I think. I was imagining something way basic. moving across the glass based on velocity[?], and maybe a separate section for wiper coverage that hides the droplets on swipe.
full quarry
azure bridge
no wait I see what you mean I think. I was imagining something way basic. moving...
that could work too
 neat cape
azure bridge
oh the alternative being animated per frame?
neat cape
azure bridge
oh the alternative being animated per frame?
You could add it already and add a hide/unhide anim to it.. when rain you unhide it
The UVAnim
azure bridge
Right, HG immediately jumped to the most complicated part :)
 azure bridge
Can that handle streaks going at other directions at the same time? (Helicopter) Or I guess even on car would go up at speed
full quarry
well
ID suppose the streaks could have that kind of complexity in animation too but maybe the plane with hidden piece is better
trying to think what it would need to get the wiped part fill smoothly again
instead of just turning on and off
azure bridge
I was imagining Some rocking animation to push it in front/behind a z-fight
Oh nvm u mean like additional raindrops
full quarry
yes
azure bridge
I was thinking stretching the uv for streaks, but that doesn't help here.
Presumably don't want to Make the wiper coverage out of tiles xD
Maybe droplets texture at several stages of intensity/coverage (might be desired anyway) and flip through them up to matching the non-wiper area.
neat cape
You could also use the alpha sorting a empty alpha texture to each side of the swipers and also play with the hide and unhide value while swipes left to right
But this goes over to probably 3 faces
Behind you got the UV animation + the Raindrop
Ofc Raindrop should appear always so you got to sort it right..
 low helm
any suggestions how could i export gloss and specular or smdi maps easily from substance painter? Having troubles with those...
silver adder
do you want it to export arma specifc smdi? or the actual gloss and specular as seperate maps?
 vague iron
@low helm you can export using builded in preset PBR Spec Gloss into separate textures
as @silver adder said
and manually create smdi map by doing Red channel (white), G (specular), B (gloss), A (empty, white)
or you can create your own preset which is very easy
@silver adder you're doing something/using substance painter? or just quixel suite?
silver adder
i use both, depends on asset type
i have stuff that works for both, and substance designer to convert from PBR to RV4
vague iron
oh
i see
I have to start using designer
to create some materials/tileable textures
silver adder
i more like the ability to have procedural texture changes, that you can hook into variables in the game engine
vague iron
@low helm this is a configuration I use
yeah, but not Real Virtuality 😛
material creation in UE4 is awesome
low helm
@vague iron thanks for the pic, will help me and others for sure!
vague iron
sure, np
 cinder perch
Okay, so with the forums the way they are, searching for a solution for this issue has become significantly harder. I did a search for 'glowing edge' and 'alpha' within this channel to find solutions, however what I could find required PS (which I don't have) or mentioned export settings in GIMP but didn't elaborate any further. With that out of the way, the context and issue:
Trying to create functional IR reflective patches, here's the setup:
Section A - _Flag_IR - Base flag shape and _co texture, flat matte finish using a specified RVMAT.
Section B - _Flag_IR_G - Reflective portion of the flag shape, is a flat surface 0.3mm above the main flag. Uses a _ca texture that is the reflective portion of the flag cut out, with its own rvmat using increased emissive to glow under night vision.
Currently have the typical glowing edge issue when using a _ca type texture, as seen below (showing both daytime, nighttime, and IR views). Have also attached my GIMP export settings (going from .png to .paa using the ArmA 3 converter tool)


I will say that with the black/white IR patch, it's not terrible as is, however I am also working on a variant with multicam in place of the black with black IR reflective material, and it sticks out like a sore thumb for that one in daylight.
Regarding the RVMAT, the pixel and vertex shaders are set to Super.
lethal condor
Make sure your source image has no "white transparent" instead of black
cinder perch
lethal condor
Make sure your source image has no "white transparent" instead of black
And how would one check that in GIMP?
lethal condor
I usually use Layer Mask to split RGB and Alpha. Usually these issues are caused by transpatent pixels being 255, 255, 255, 0 (aka lost its data)
Altetnatively, check the texture in TexView2
cinder perch
lethal condor
I usually use Layer Mask to split RGB and Alpha. Usually these issues are caused...
Well that’s how I achieved the cutout variation of the flag, using a layer mask rather than erasing outright.
cinder perch
lethal condor
Altetnatively, check the texture in TexView2
My _ca’s show the soft-aliased edge. Is it the aliasing that’s causing the issue?
lethal condor
Oh wait, you actually set Save colors in export setting disabled
cinder perch
lethal condor
Oh wait, you actually set Save colors in export setting disabled
I hadn’t. Do I set that?
lethal condor
Yes
cinder perch
I shall give that a shot and report back.
lethal condor
This actually is a frequently asked issue and also common issue in any CG software which deals with transparency. I may write a quick explanation post later?
cinder perch
lethal condor
Oh wait, you actually set Save colors in export setting disabled
Wait, just to clarify: save colours from transparent pixels or save colour profile?
lethal condor
transpatent pixels checkbox yes
cinder perch
lethal condor
transpatent pixels checkbox yes
Zero change.
Still have the glowing artifacts.
lethal condor
You still sure your game actually reloads the texture
cinder perch
Exported from GIMP, converted to PAA, recompiled the PBO, and booted the game.
lethal condor
How does it look in RGBA and RGB mode in TexView
 cinder perch
 lethal condor
And RGB?
cinder perch
 lethal condor
Okay, what resolution?
 lethal condor
Okay, how does it actually set up (P3D/RVMAT as well)
Does it work with other textures (like vanilla insignia)
cinder perch
lethal condor
Does it work with other textures (like vanilla insignia)
Couldn't tell you, as the flag is specifically modeled with that texture in mind. Wouldn't be able to properly visualize it and get the edge of the texture visible.
cinder perch
lethal condor
Okay, how does it actually set up (P3D/RVMAT as well)
In terms of config:
P3D has the _ca texture and a specific glow-inducing .rvmat (with required normal, AS and SMDI's linked) assigned to it via the ArmABlender tools.
Config itself leaves the specific section blank as I use ACE-AX and it's setTextureOptions to change the flag texture as required. I have had success with this before in a similiar situation, with a combat shirt with cutoff sleeves and edge fraying. Initially I had glowing edges but somehow resolved it. But I did that over a year ago and I can't recall how I did it, nor do I have my files to review.
severe rune
You can user SuperExt material to make the emissive
 thick gate
severe rune
You can user SuperExt material to make the emissive
thick gate
severe rune
You can user SuperExt material to make the emissive
When I tried using this for the same outcome he is after, I still ended up with the entire patch being emissive. I used the template you posted way back when for SuperExt. I’m assuming I did that wrong? Is the emissive map supposed to be structured in a specific way?
severe rune
Emissive map is a texture black where not glowing
thick gate
severe rune
Emissive map is a texture black where not glowing
Is it a mask in a specific channel?
thick gate
That’s what I figured based on the template, I’ll have to try it again. I must of done something wrong
 rain vale
Is texturing easy?
lethal condor
In what sense?
 wooden lantern
rain vale
Is texturing easy?
wooden lantern
rain vale
Is texturing easy?
making a flat color a texture is easy but making something that looks photorealistic is hard
rain vale
wooden lantern
making a flat color a texture is easy but making something that looks photoreali...
Well, I’m fine with flat colours just as long as whats supposed to not be colored, isn’t coloured
I need to re-Textra a tank for a faction I’m making
 full quarry
rain vale
For this tank here https://cdn.discordapp.com/attachments/909126177095036988/130...
full quarry
rain vale
For this tank here https://cdn.discordapp.com/attachments/909126177095036988/130...
first thing would be to make sure the tank actually is set up for retexturing
rain vale
full quarry
first thing would be to make sure the tank actually is set up for retexturing
Yeah
rain vale
full quarry
first thing would be to make sure the tank actually is set up for retexturing
 full quarry
rain vale
https://steamcommunity.com/sharedfiles/filedetails/?id=3232033620
full quarry
rain vale
https://steamcommunity.com/sharedfiles/filedetails/?id=3232033620
it would be you who checks that
rain vale
full quarry
it would be you who checks that
ok
brittle rivet
You should be looking for hiddenSelctions and hiddenSelectionTextures in the config, and matching _co.paa textures in the data
There might be templates as well if you look around
rain vale
mhm
cinder perch
Still stumped with why my alpha-enabled texture is glowing on the edges (#arma3_texture message)
I've tried:
- exporting from png and tga to paa; testing _co, ca and no suffix to test the different effects: no change for the _ca and suffix-less versions, and _co gives me an unsightly harsh edge that isn't desirable.
- setting a barely visible background for the _ca (99% transparency): that made the entire texture opaque even as a _ca
- setting the relevant faces/section on the P3D as both the _ca and _co texture, and as "#(argb,8,8,3)color(0,0,0,0)" much like the clan/insignia sections of the vanilla uniforms: zero impact with removing the glowing edges.
- tested the cutout textures as standalone insignia textures and they do not show a glowing edge.
- tested export settings with both the .tga and .png (8-bit and 32-bit gamma integer, uncompressed for .tga, and color profiles saved for .png)
- different renderFlags[] in the .rvmats: they either kill the material properties outright (no glow or normal) or kill the transparency/colour of the texture.
Additionally, it's only glowing on the edge of the flag textures. The cutout text of the call sign patches I'm implementing in the same fashion do not glow, yet both the text and the flags were exported in the same manner: from GIMP using layer masks to extrude the relevant texture and exported using the same settings.
I feel like I'm missing something or overlooking something, but for the life of me I can't think of what it is.
And I've reviewed so many convos via searching "alpha" in this channel and have used the solutions I could understand to troubleshoot, but to no success.
brittle rivet
cinder perch
Still stumped with why my alpha-enabled texture is glowing on the edges (https:/...
Have you tried loading and saving the .paa using TexView2?
I found that the GIMP exporter didn't have the right mode for partial alpha textures. (Found it with ghille leaves stuff, but might be the same issue)
full quarry
Png needs to be saved with background color. And those colors must not be white
cinder perch
full quarry
Png needs to be saved with background color. And those colors must not be white
Can you elaborate?
full quarry
What is unclear? 😅
cinder perch
Because that doesn’t make any sense to me on its surface. If it’s transparent, there’s no colour. And the alpha channel shows black.
full quarry
Due to how game graphics work there can be bleed between pixels
And textures soften/blur at distance because of mipmapping
cinder perch
I get that. But the source backgrounds that these were cut from were black and multicam, no white.
full quarry
If the color information under the transparency is white which it is by default the that white causes interference
Also some things don't work with partial transparency but cut off at 50%
cinder perch
full quarry
If the color information under the transparency is white which it is by default ...
Right. Is there a back-end setting in GIMP to change this, or am I going to have to fill the background black and then re-cut the required parts out again?
brittle rivet
My method for partial alpha was to export from gimp topsa using gruppe adlers tool, and then open and save the paa in TexView2 to fix the encoding.
Other step I did was to make certain that everywhere that was supposed to be 0 alpha, was actually 0 alpha.
full quarry
cinder perch
Right. Is there a back-end setting in GIMP to change this, or am I going to have...
You can transfer alpha to alpha mask
Then you can edit both color and alpha separately
cinder perch
full quarry
You can transfer alpha to alpha mask
That’s how I extracted the stars and stripes of the flag initially.
I used an alpha layer mask rather than hard erasing.
full quarry
And on export the png you'll need to save with the option to keep transparent color info
cinder perch
full quarry
And on export the png you'll need to save with the option to keep transparent co...
Did that too.
Hence why I’m tearing my proverbial hair out over this.
full quarry
Do you have picture of the issue?
cinder perch
I linked my initial post with the screenshots and first round of solutions offered in my follow up
cinder perch
full quarry
Do you have picture of the issue?


And these are the RGBA, RGB, and A channel views in TV2


Admittedly on the black/white IR version of this flag it’s not as bad, apart from nighttime without NV
full quarry
What resolution is it saved at?
cinder perch
1024*1024
Original texture was 4k, and the masking/editing was done post-downscale.
full quarry
What texture quality video setting you have?
cinder perch
full quarry
What texture quality video setting you have?
In the game? I honestly can’t remember, it’s a mismash of custom settings.
full quarry
Put that to ultra
cinder perch
full quarry
Put that to ultra
You suspect it’s a video setting issue and not a texture issue?
Or just ruling that out?
full quarry
A possibility
What's rendered in the game does not look as crispy as the texview image
cinder perch
I disagree, purely because of the fact that I didn’t have this issue with another similarly configured patch I’m doing on the same uniform.
full quarry
I suspect it's being mipmapped down
cinder perch
I have a callsign patch setup identically, and it does not have the same edge artifacts.
So whatever it is is affecting the flags specifically.
full quarry
It's a very simple test though
Are you sure about the resolution? The flag don't look square?
Or is it just zoomed
full quarry
You can scroll through.paa mipmap levels in texview btw
In case you want to see how it mipmaps
cinder perch
full quarry
In case you want to see how it mipmaps
Is that the DTX1/3/5 stuff?
full quarry
Was it with arrow keys
full quarry
cinder perch
Is that the DTX1/3/5 stuff?
No that's the image compression type. You generally don't need to worry about that
The naming suffix in the original texture tells the conversion to PAA what to do
You would be using _CA suffix
cinder perch
full quarry
No that's the image compression type. You generally don't need to worry about th...
Gotcha. I’ll have to experiment with all this later on when I’m back in front of my rig.
cinder perch
full quarry
You would be using _CA suffix
Indeed.
full quarry
cinder perch
Indeed.
Just to make sure you have the suffix in the png file prior to PAA conversion right
cinder perch
full quarry
Just to make sure you have the suffix in the png file prior to PAA conversion ri...
Yeah, way ahead of you there.
full quarry
Just making sure
cinder perch
Any issues if I DM you with my findings once I get back to attack this SOB?
full quarry
cinder perch
Any issues if I DM you with my findings once I get back to attack this SOB?
You can put them here, all these problem solvings can benefit others too. Or someone else might get idea for solution
cinder perch
full quarry
You can put them here, all these problem solvings can benefit others too. Or som...
Will do.
cinder perch
full quarry
You can put them here, all these problem solvings can benefit others too. Or som...
Set to Ultra. No change/improvement in the artifacing.
 urban bramble
Anyone can help me for retexture
 light parcel
Anyone got an idea of where i can get most vehicle texture templates for the arma 3 please.
brittle rivet
light parcel
Anyone got an idea of where i can get most vehicle texture templates for the arm...
Try here
#arma3_texture message
Most were on the forums, I recovered the link for Pete's texture templates a while ago
 thin atlas
I have custom faces I want to add face camo to, but they turn out wrong/discolored. is there anyone who could help me?
full quarry
thin atlas
I have custom faces I want to add face camo to, but they turn out wrong/discolor...
Typically camo is done as separate rvmat layer
thin atlas
Yeah I am having trouble figuring out how to create an rvmat with the right values to not look shiny or too dark
Everything I searched up doesn't give a step by step and is really hard to figure out otherwise
 opal wren
Yo do you have any more photos of this? Especially in game? Looks sick
full quarry
opal wren
Yo do you have any more photos of this? Especially in game? Looks sick
necromancer?
opal wren
?!?!
full quarry
that was just pretty old message to reply to
opal wren
yeah but it's the coolest thing here
full quarry
the uv map?
opal wren
the potential
 oak pollen
opal wren
Yo do you have any more photos of this? Especially in game? Looks sick
oak pollen
opal wren
Yo do you have any more photos of this? Especially in game? Looks sick
Maybe probably
cinder perch
@full quarry So I changed my graphics settings to Ultra, and no improvement whatsoever.
cinder perch
full quarry
I dont have any other ideas at the moment
Okay so here's something interesting. I overlaid the cutout flag texture on the callsign patch, and I don't get the artifacts.
 full quarry
maybe something broke with the file
and it didnt export right
and then didnt convert right
cinder perch
But it's the same texture file, just repathed to a different section on the model.
The callsign patch and flag patch parts of the model are UV'ed differently, which is why there's an offset.
I have that _ca flag associated with it in the p3d data, same for the callsign patch _ca.
If there was an issue with the Alpha channel, I'd have expected to see the glowing regardless of what part of the model it's on (provided it's alpha-enabled)
full quarry
cinder perch
Okay so here's something interesting. I overlaid the cutout flag texture on the ...
now Im lost. I thought you overlaid the text over the texture and resaved/reconverted to paa
lethal condor
It actually might be much more easier to troubleshoot if you share the actual PAA or PNG, maybe
cinder perch
The _ca's
For the flags.
I've included the callsigns for reference as they work perfectly.
However both had the same export settings in gimp.
For the model itself, this is how I have it configured:

Green base is the patch model itself, and it has the _co's applied
The blue face is the alpha surface for the glowing IR section

Expanded for better visualisation
 lethal condor
cinder perch
lethal condor
cinder perch
And this is Flag_L_US_IR_BW_ca overFlag_L_US_IR_BW_co?
cinder perch
lethal condor
And this is `Flag_L_US_IR_BW_ca` over`Flag_L_US_IR_BW_co`?
Technically both.
_co on the back part, _ca on the front part.
lethal condor
I meant that, so clarify again, you have to faces to apply both texture
cinder perch
Yes? The _co is applied to the main section of the patch model, and 0.3mm in front of that is another face that the _ca is applied to.
lethal condor
Yeah
In P3D, the face where _ca is applied, which kind of texture and RVMAT is applied? (not config wise, P3D wise)
cinder perch
_ca texture is applied on the p3d with the glow-enabled .rvmat.
I have different AS/SMDI/NOHQ and RVMATs for the glowing segment and base flag.
(though the normals for glow and no-glow are identical, just seperate files)

 lethal condor
Actually, just tried it on a vanilla uniform, and it doesn't seem to have the issue. If you cannot reproduce the issue on a vanilla uniform, it is actually likely a P3D issue


 cinder perch
lethal condor
Actually, just tried it on a vanilla uniform, and it doesn't seem to have the is...
cinder perch
lethal condor
Actually, just tried it on a vanilla uniform, and it doesn't seem to have the is...
That's what I was beginning to suspect... any steps to diagnose?
lethal condor
Actually, if the P3D have transparent texture (such like _ca) the face itself is flagged to optimize the rendering for transparency (basically. I'm no engineer here so don't ask the specifics)
Vice versa is true. _co and non-transparent
I actually think it could happen, but not 100% sure
cinder perch
I'd done that, as seen above.
lethal condor
Which is why I'm not sure about my theory
cinder perch
Ah, I follow.
lethal condor
How is your RVMAT? Especially glow one
cinder perch
Practically identical apart from the emissive values.
I was experimenting with the renderFlags[] in the glows, but they're commented out currently.
lethal condor
Can you actually try your setup in a vanilla uniform using setObjectTexture and setObjectMaterial?
If it actually is a P3D issue, we cannot try it without your P3D (at least the problematic part of P3D)
full quarry
so the flag is a separate piece of gear, not applied as a insignia?
cinder perch
full quarry
so the flag is a separate piece of gear, not applied as a insignia?
Correct.
cinder perch
lethal condor
If it actually is a P3D issue, we cannot try it without your P3D (at least the p...
Give me ten mins, I can transplant it onto another model for testing.
cinder perch
Plot twist. Has to be a P3D issue or something, because the transplanted patch doesn't glow.
 full quarry
is the rvmat and the _CA paa assigned on the p3d
full quarry
ah
you may need alpha sorting
so that the op faces are top alpha level
and faces under it are on alpha levels below
cinder perch
full quarry
you may need alpha sorting
Rightyo. How does one configure that?
full quarry
its p3d thing
cinder perch
Yeah, is that done via Object Builder or is that something that can be done with the ArmA3Toolbox in Blender?
full quarry
 full quarry
cinder perch
Yeah, is that done via Object Builder or is that something that can be done with...
full quarry
cinder perch
Yeah, is that done via Object Builder or is that something that can be done with...
I recall toolbox has flaging for that too
but dont remember exactly where
in OB simplest way can be to select all
then move top
then select next level move top again
then next level and top again
 cinder perch
full quarry
I recall toolbox has flaging for that too
cinder perch
full quarry
I recall toolbox has flaging for that too
I think I found it.

@full quarry I could kiss you.
That solved the issue.
I think.
Yep, that fixed it.
cinder perch
So, quick step-by-step troubleshooting for anyone else in the future
-
- Ensure texture has a properly configured alpha channel.
-
- Ensure that the texture has the _ca suffix at the end of the file name.
-
- Export from a compatible format: 8-bit RGBA PNG or 32-bit TGA - for PNG exporting with GIMP, ensure that "Save color values for transparent pixels" and "save color profile" are ticked in the export window; for TGA, disable RLE Compression.
-
- In your P3D, make sure the _ca texture file is assigned to the section of the model you want transparent.
-
- Make sure that the faces of the model you want your alpha-enabled texture are set to the top - in OB: with the relevant faces selected, go to Faces > Move Top. In Blender with the ArmAToolbox: in edit mode with the faces selected, open the ArmA 3 Tools side tab, go to Transparency, and click "Set Transparent" with a priority of 0.
All goes well, you should have a functional alpha texture with no glowing edge artifacts.
Idk if we wanna pin that or save that elsewhere for anyone else? I've leave that up to the moderators.
full quarry
I think because I didnät understandt the patch being separate piece of gear before it didnt occure to me before
if it were a normal insignia retexture the mesh selection would have all this done already
cinder perch
full quarry
I think because I didnät understandt the patch being separate piece of gear befo...
All good mate. I don't think I made that 100% apparent in my earlier posts. Appreciate your patience and assistance greatly though.
Now just to figure out how to get the black to glow as much as the white under night vision.
urban bramble
How we can open p3d file
 full quarry
urban bramble
How we can open p3d file
full quarry
urban bramble
How we can open p3d file
what for?
 gusty forge
hello is there any1 that can send me a composition or a mission where a bunker komplex is in?
would be really helpfull
full quarry
gusty forge
hello is there any1 that can send me a composition or a mission where a bunker k...
wrong channel
what game do you mean?
gusty forge
arma 3
full quarry
what do you mean by bunker complex?
gusty forge
someone that builed in a mission a bunker where u can get in per teleport or smth else
full quarry
I guess you sould be looking through the workshop
but you can also ask in #arma3_questions
gusty forge
ok I will do
 lucid halo
I am so confused as whats going on. Its supposed to be a stucco wall, brick sections and concrete. I have set the smdi with the correct red blue and green channels or so I think I have. Would it be the SMDI or would it be the AS that would cause this?

 full quarry
lucid halo
I am so confused as whats going on. Its supposed to be a stucco wall, brick sect...
full quarry
lucid halo
I am so confused as whats going on. Its supposed to be a stucco wall, brick sect...
black can indicate path to textures dont work
does it work in buldozer?
lucid halo
yeah, the second pic shows the texture are there at night time
lucid halo
full quarry
black can indicate path to textures dont work
Works fine in Bulldozer. Seems to be daytime causing the problem because the textures show fine at night.
 full quarry
lucid halo
Works fine in Bulldozer. Seems to be daytime causing the problem because the tex...
full quarry
lucid halo
Works fine in Bulldozer. Seems to be daytime causing the problem because the tex...
is this multimaterial?
lucid halo
it is different textures for each section
lucid halo
didnt have this problem with other models and made them the same way.
full quarry
well could be bad AS
or just some typo in the rvmat to break it
you can remove rvmats and see if it works better
lucid halo
on a AS is it the black that does the shadow or white?
full quarry
lucid halo
on a AS is it the black that does the shadow or white?
black is shaded
but it may not need to be full black
depends on the depth of the shade wanted
lucid halo
I just looked and the image is fine but I'll recreate it and see if that works
full quarry
could then be pathing issue
or bug some lines missing in the rvmat
also id really recommend making buildings with multimaterial
lucid halo
full quarry
also id really recommend making buildings with multimaterial
Do you know of a tutorial that I could watch explaining how to do that? I read the wiki and dont fully understand.
full quarry
ive written about it somewhere here few times I believe
here or model channel
there also blender setup sample in the pins
lucid halo
How does Arma know what is emissive in a texture? Is there an Alpha on the AS or does there need to be an emissive image that gets added to the RVMAT?
full quarry
lucid halo
How does Arma know what is emissive in a texture? Is there an Alpha on the AS or...
2 ways. most rvmats apply emissivity on whole mesh the material is applied to
but the RGB values in the emmissive property define what colors will be emmissive
the special rvmat type SuperExt
Can use a emissivity mask stage
restive agate
Hmmmm I think I did my SMDI wrong lol
 full quarry
shiny?
restive agate
Set my glossiness to 0 without knowing what it did lol
restive agate
What is a good "base" number? It seems to always be "wet" lol
AH
It's because I'm still using the wrong export lol
RAH my specular is wrong!
much nicer. My specular was set to 1 in my rvmat for some reason
 severe rune
cinder perch
I have different AS/SMDI/NOHQ and RVMATs for the glowing segment _and_ base flag...
severe rune
cinder perch
I have different AS/SMDI/NOHQ and RVMATs for the glowing segment _and_ base flag...
You can also combine both into one SuperExt material. Then you don't need two sections (is also more efficient to render)
That's how I did https://cdna.artstation.com/p/assets/images/images/011/597/570/large/dedmen-miller-20180630233103-1.jpg?1530394262

Its just a separate emissive texture. That is linked in the material
cinder perch
severe rune
You can also combine both into one SuperExt material. Then you don't need two se...
I see… will experiment with this.
Appreciate it.
severe rune
The annoying thing about it, is that you have 8 stages.
But you can only have 7 uvTransforms.
That is why texGen is used.
texGen is basically a lookup table for uvTransforms.
Instead of setting the uvTransform and uvSource for every stage, you set up one or two texGen's once, and then just refer to them in the stages.
My material there is actually kinda bad because even though its using texGen's, its still writing the uvTransform/uvSource even though they're unused
not using texGen's is actually the "old style" that is not recommended to be used anymore. But everyone bases their rvmat's on old samples, so everyone still uses it.
ambient[] = {1,1,1,1};
diffuse[] = {1,1,1,1};
forcedDiffuse[] = {0,0,0,0};
emmisive[] = {0,0,1,10};
specular[] = {1,1,1,1};
specularPower = 100;
PixelShaderID = "SuperExt";
VertexShaderID = "Super";

class TexGen0 {
    uvSource = "tex";
    class uvTransform
    {
        aside[] = {1,0,0};
        up[] = {0,1,0};
        dir[] = {0,0,1};
        pos[] = {0,0,0};
    };
};

class TexGen1 {
    uvSource = "none";
};

class Stage1 {
    texture = "z\wolf\addons\wolflogo\tex\wolflogo_nohq.paa";
    texGen = 0;
};
class Stage2 {
    texture = "#(argb,8,8,3)color(0.5,0.5,0.5,1,DT)";
    texGen = 0;
};
class Stage3 {
    texture = "#(argb,8,8,3)color(0,0,0,0,MC)";
    texGen = 0;
};
class Stage4 {
    texture = "z\wolf\addons\wolflogo\tex\wolflogo_as.paa";
    texGen = 0;
};
class Stage5 {
    texture = "z\wolf\addons\wolflogo\tex\wolflogo_smdi.paa";
    texGen = 0;
};
class Stage6 {
    texture = "#(ai,64,64,1)fresnel(1.29,0.01)";
    texGen = 1;
};
class Stage7 {
    texture = "a3\data_f\env_co.paa";
    texGen = 0;
};
class Stage8 {
    texture = "z\wolf\addons\wolflogo\tex\wolflogo_em.paa";
    texGen = 0;
};
This is how a "new" style rvmat looks like. You do not repeat the uvTransform/uvSource
The new style is both less text to write, and more efficient for the engine to render.
The old style just generates 7 texGen's internally. Even though you generally only use one or two. And the engine needs to process each one of them.
full quarry
severe rune
not using texGen's is actually the "old style" that is not recommended to be use...
@knotty marsh wiki update needed
I guess we process this into SOGPF for 10 year anniversary or something 😅
 cedar lichen
hmmm regarding the _em file
does that allow you for example to have a texture glow a different colour in the dark than it is in sunlight
cedar lichen
I remember playing around with the _em stuff but the problem is the texture is meant to be white but glow green at night/darkness
maybe I should play around with it again it seems like I misunderstood it
severe rune
TexGen has a small caviat when using WaterAnim/ShoreAnim uvSource. texGen1/2/3 need to correspond to stage1/2/3.
But thats a special thing that most people wouldn't touch
But for CDLC might be something
 knotty marsh
full quarry
<@137855151120711680> wiki update needed
knotty marsh
full quarry
<@137855151120711680> wiki update needed
I, huh, perhaps, what is it about 🤣 what is texgen, can someone break it all down for me in #community_wiki please :3 Cc @severe rune
knotty marsh
severe rune
The annoying thing about it, is that you have 8 stages.
But you can only have 7 ...
I will read that ↑ first
cedar lichen
cedar lichen
maybe I should play around with it again it seems like I misunderstood it
got it to work, the rvmat doesn't look much different from how I had it originally but it works now??? idk
wooden lantern

 full quarry
wooden lantern
full quarry
wooden lantern
stripes?
wooden lantern
sorry im testing out the texgen and i cant post images in the community wiki chat
new one
class TexGen0
{
    uvSource = "tex";
    class uvTransform
    {
        aside[] = {1,0,0};
        up[] = {0,1,0};
        dir[] = {0,0,0};
        pos[] = {0,0,0};
    };
};
class TexGen1
{
    uvSource = "none";
};
class TexGen2
{
    uvSource = "tex";
    class uvTransform
    {
        aside[] = {10,0,0};
        up[] = {0,10,0};
        dir[] = {0,0,0};
        pos[] = {0,0,0};
    };
};
class TexGen3
{
    uvSource = "tex";
    class uvTransform
    {
        aside[] = {1,0,0};
        up[] = {0,1,0};
        dir[] = {0,0,1};
        pos[] = {0,0,0};
    };
};
class Stage1
{
    texture = "OPTRE_Weapons\ar\data\MA5K_NOHQ.paa";
    texGen = 0;
};
class Stage2
{
    texture = "#(argb,8,8,3)color(0.5,0.5,0.5,1,DT)";
    texGen = 2;
};
class Stage3
{
    texture = "#(argb,8,8,3)color(0.5,0.5,0.5,0,MC)";
    texGen = 0;
};
class Stage4
{
    texture = "OPTRE_Weapons\ar\data\MA5K_AS.paa";
    texGen = 0;
};
class Stage5
{
    texture = "OPTRE_Weapons\ar\data\MA5K_SMDI.paa";
    texGen = 0;
};
class Stage6
{
    texture = "#(ai,64,64,1)fresnel(3.48,2.79)";
    texGen = 3;
};
class Stage7
{
    texture = "a3\data_f\env_land_co.paa";
    useWorldEnvMap = "true";
    texGen = 0;
};
old one
class Stage1
{
    texture = "OPTRE_Weapons\ar\data\MA5K_NOHQ.paa";
    uvSource = "tex";
    class uvTransform
    {
        aside[] = {1,0,0};
        up[] = {0,1,0};
        dir[] = {0,0,0};
        pos[] = {0,0,0};
    };
};
class Stage2
{
    texture = "#(argb,8,8,3)color(0.5,0.5,0.5,1,DT)";
    uvSource = "tex";
    class uvTransform
    {
        aside[] = {10,0,0};
        up[] = {0,10,0};
        dir[] = {0,0,0};
        pos[] = {0,0,0};
    };
};
class Stage3
{
    texture = "#(argb,8,8,3)color(0.5,0.5,0.5,0,MC)";
    uvSource = "tex";
    class uvTransform
    {
        aside[] = {1,0,0};
        up[] = {0,1,0};
        dir[] = {0,0,0};
        pos[] = {0,0,0};
    };
};
class Stage4
{
    texture = "OPTRE_Weapons\ar\data\MA5K_AS.paa";
    uvSource = "tex";
    class uvTransform
    {
        aside[] = {1,0,0};
        up[] = {0,1,0};
        dir[] = {0,0,0};
        pos[] = {0,0,0};
    };
};
class Stage5
{
    texture = "OPTRE_Weapons\ar\data\MA5K_SMDI.paa";
    uvSource = "tex";
    class uvTransform
    {
        aside[] = {1,0,0};
        up[] = {0,1,0};
        dir[] = {0,0,0};
        pos[] = {0,0,0};
    };
};
class Stage6
{
    texture = "#(ai,64,64,1)fresnel(3.48,2.79)";
    uvSource = "tex";
    class uvTransform
    {
        aside[] = {1,0,0};
        up[] = {0,1,0};
        dir[] = {0,0,1};
        pos[] = {0,0,0};
    };
};
class Stage7
{
    texture = "a3\data_f\env_land_co.paa";
    useWorldEnvMap = "true";
    uvSource = "tex";
    class uvTransform
    {
        aside[] = {1.0,0.0,0.0};
        up[] = {0.0,1.0,0.0};
        dir[] = {0.0,0.0,0.0};
        pos[] = {0.0,0.0,0.0};
    };
};

i dont think im missing anything, all the UVtransforms have been mirrored into the texgen
wooden lantern
yeah
 full quarry
just 1 uvset yes?
 full quarry
well the deafalt buldozer lighitng is dull anyway
you woyuld need the real light incorporation to get porper look
but at least the textures look to be in right places


 wooden lantern
not the full rvmat, that stuff is all unchanged
super pixel and vertex
and changing the specular and specular powers do nothing in the viewer, so im led to believe it's something with the texgen
full quarry
yeah probably so
dont have time to test unfortunately
maybe just carry on with the old method now 😅
wooden lantern
im gonna test some more stuff 
severe rune
wooden lantern
new one
```cpp
class TexGen0
{
uvSource = "tex";
class uvTransform
...
0 and 3 are the same.
Or rather, 0 is invalid, but the engine will try to auto fix it for you, the dir should be 0,0,1
And your TexGen2 should have dir 0,0,10
Your stage6 shouldn't need any uvSource and uvTransform. Fresnel has no UV. So that should use TexGen1
wooden lantern
class TexGen0
{
    uvSource = "tex";
    class uvTransform
    {
        aside[] = {1,0,0};
        up[] = {0,1,0};
        dir[] = {0,0,1};
        pos[] = {0,0,0};
    };
};
class TexGen1
{
    uvSource = "none";
};
class TexGen2
{
    uvSource = "tex";
    class uvTransform
    {
        aside[] = {10,0,0};
        up[] = {0,10,0};
        dir[] = {0,0,10};
        pos[] = {0,0,0};
    };
};
class Stage1
{
    texture = "OPTRE_Weapons\ar\data\MA5K_NOHQ.paa";
    texGen = 0;
};
class Stage2
{
    texture = "#(argb,8,8,3)color(0.5,0.5,0.5,1,DT)";
    texGen = 2;
};
class Stage3
{
    texture = "#(argb,8,8,3)color(0.5,0.5,0.5,0,MC)";
    texGen = 0;
};
class Stage4
{
    texture = "OPTRE_Weapons\ar\data\MA5K_AS.paa";
    texGen = 0;
};
class Stage5
{
    texture = "OPTRE_Weapons\ar\data\MA5K_SMDI.paa";
    texGen = 0;
};
class Stage6
{
    texture = "#(ai,64,64,1)fresnel(3.48,2.79)";
    texGen = 1;
};
class Stage7
{
    texture = "a3\data_f\env_land_co.paa";
    useWorldEnvMap = "true";
    texGen = 0;
};
like so?
severe rune
yeah
severe rune
The image looks like one of the textures has a different scale.
But if I actually paste in the texGen data, into the stages (like the opposite of what the game does for the legacy handling), then you have the same data before and after.
So even the invalid dir ones, would get "fixed" the same way before and after and should behave the same 🤔
wooden lantern
yeah i think it's the AS map that has the diff scale in that
im not sure tho but that's what the details look like
severe rune
Alternatively. It could be that you cannot use TexGen0, and must start at 1 🤔
Because also Stage0 you usually don't set in the rvmat (but you can), that one is the texture you assign in object builder.
severe rune
But my logo example, uses TexGen0 and doesn't have a problem with it 🤔
wooden lantern
could the type of mesh have anything to do with it
severe rune
I don't think so
severe rune
Mh actually I think you need to start with TexGen0, because the game checks if it can find the first one. If not it falls back to legacy handling and generates one per stage.
And it also working fine for me with TexGen0, yeah that can't be it


 severe rune
I am just as confuzzled as you are
wooden lantern
glorious arma code...
severe rune
But it doesn't really make sense.
If it were the texGen at fault, why are the normals and SMDI's then not also F'ed the same way. They use the same texGen, so they should be the same 🤔
I can probably grab the mod tomorrow, and see what it does differently
wooden lantern
severe rune
I can probably grab the mod tomorrow, and see what it does differently
class StageTI
{
    texture="#(argb,8,8,3)color(0,0,0,0)";
};
ambient[] = {1,1,1,1};
diffuse[] = {1,1,1,1};
forcedDiffuse[]={0,0,0,0};
emmisive[]={0,0,0,1};
specular[]={0.05,0.05,0.05,1};
specularPower=64;
PixelShaderID="Super";
VertexShaderID="Super";
class TexGen0
{
    uvSource = "tex";
    class uvTransform
    {
        aside[] = {1,0,0};
        up[] = {0,1,0};
        dir[] = {0,0,1};
        pos[] = {0,0,0};
    };
};
class TexGen1
{
    uvSource = "none";
};
class Stage1
{
    texture="optre_ins_units\bj\data\helmet_nohq.paa";
    texGen = 0;
};
class Stage2
{
    texture="#(argb,8,8,3)color(0.5,0.5,0.5,1,DT)";
    texGen = 0;
};
class Stage3
{
    texture="#(argb,8,8,3)color(0,0,0,0,MC)";
    texGen = 0;
};
class Stage4
{
    texture="optre_ins_units\bj\data\helmet_as.paa";
    texGen = 0;
};
class Stage5
{
    texture="optre_ins_units\bj\data\helmet_smdi.paa";
    texGen = 0;
};
class Stage6
{
    texture="#(ai,64,64,1)fresnel(3.21,4.01)";
    texGen = 1;
};
class Stage7
{
    texture="a3\data_f\env_land_co.paa";
    useWorldEnvMap="true";
    texGen = 0;
};
it's literally just that one mesh

 severe rune
Bugs are also possible. #arma3_tools message
Back then armake and Mikeros tools used to struggle handling them, and also the game itself (I don't even know if that is fixed by now :D)
But by now it should all be good, probably
wooden lantern
oh this is just super shader
not ext
severe rune
yeah shouldn't matter, the shader has no influence on this
wooden lantern
tho i think im gonna start using ext now that i know it exists and works
time to forward this information to ppl 🙏 thank u
wooden lantern
severe rune
yeah shouldn't matter, the shader has no influence on this
one last question
is the performance impact by hundreds of rvmats switching to this system measureable?
severe rune
measurable yes, noticable is a different story. I can measure down to nanoseconds 😄
wooden lantern
😭 im asking is it worth it
severe rune
🥺
severe rune
To invest the time not to convert all old rvmat's over, probably not.
To keep it in mind to convert a rvmat if you are already touching it anyways, probably yes
All is a tradeoff between time investment and uh reward
wooden lantern
alright
cuz i was debating going back into the entirety of optre and the prolly gajillions of rvmats to change this
wonder if i could make someone cook up a bat script to do it cuz it's mainly predictable text changes
severe rune
Time to write a script to automate it 😄
Back then, armake/armake++ could do it automatically at pack time.
Afaik mikero and hemtt don't do that
wooden lantern
@grim kraken 👉 👈
wooden lantern
rvmat lore
 grim kraken
hi
full quarry
wooden lantern
```cpp
class StageTI
{
texture="#(argb,8,8,3)color(0,0,0,0)";
};
ambient[] =...
your TI stage dont have texgen defined
wooden lantern
there's a slightly more optimized way to do rvmats
grim kraken
waow
severe rune
full quarry
your TI stage dont have texgen defined
it would fall back to uvSource=tex and 1 scale identity transform. Which is probably fine for this case.
But I don't know which texGen index it would choose by default, it might bloat the rendering by passing a bunch of unused texgens
wooden lantern
and since it's all decently predictable text line edits i was wondering if u would be interested in writing a bat script for it
1.1 kb is the new one
severe rune
Actually, that StageTI is a single-color procedural, it just doesn't use any uv, or well. It does, but it doesn't matter because the color is the same everywhere
full quarry
severe rune
Actually, that StageTI is a single-color procedural, it just doesn't use any uv,...
whatabout if it was assigned a texture
since some things do that
wooden lantern
class StageTI
{
    texture="#(argb,8,8,3)color(0,0,0,0)";
};
ambient[] = {1,1,1,1};
diffuse[] = {1,1,1,1};
forcedDiffuse[] = {0,0,0,0};
emmisive[] = {0,0,1,10};
specular[] = {0.05,0.05,0.05,1};
specularPower = 64;
PixelShaderID = "SuperExt";
VertexShaderID = "Super";
class TexGen0
{
    uvSource = "tex";
    class uvTransform
    {
        aside[] = {1,0,0};
        up[] = {0,1,0};
        dir[] = {0,0,1};
        pos[] = {0,0,0};
    };
};
class TexGen1
{
    uvSource = "none";
};
class Stage1
{
    texture="optre_ins_units\bj\data\helmet_nohq.paa";
    texGen = 0;
};
class Stage2
{
    texture="#(argb,8,8,3)color(0.5,0.5,0.5,1,DT)";
    texGen = 0;
};
class Stage3
{
    texture="#(argb,8,8,3)color(0,0,0,0,MC)";
    texGen = 0;
};
class Stage4
{
    texture="optre_ins_units\bj\data\helmet_as.paa";
    texGen = 0;
};
class Stage5
{
    texture="optre_ins_units\bj\data\helmet_smdi.paa";
    texGen = 0;
};
class Stage6
{
    texture="#(ai,64,64,1)fresnel(3.21,4.01)";
    texGen = 1;
};
class Stage7
{
    texture="a3\data_f\env_land_co.paa";
    useWorldEnvMap="true";
    texGen = 0;
};
class Stage8
{
    texture="optre_ins_units\bj\data\helmet_em.paa";
    texGen = 0;
};
now im trying out an emissive texture but it doesnt appear to be working period
even made an incredibly garish texture so id be sure lol
severe rune
full quarry
whatabout if it was assigned a texture
The default for all that are not specified, are texGen = stageNumber, uvSource = tex, uvTransform = Identity.
StageTI, code says "it doesn't matter which texGen we use" and sets the default to 0.
full quarry
👍
severe rune
wooden lantern
```cpp
class StageTI
{
texture="#(argb,8,8,3)color(0,0,0,0)";
};
ambient[] =...
My emissive model doesn't have StageTI, but that wouldn't matter.
Mine has
specular[] = {1,1,1,1};
specularPower = 100;
But I think that shouldn't make a difference.
Your rvmat and texture look fine 🤔
 median oxide
I noticed that we have a texture defined as rgb (not argb) and with <1 alpha, but it still works. Is this intentional behaviour or is there a possibility of data being written beyond boundaries? I ask because we also have rare map icon crashing.
full quarry
median oxide
I noticed that we have a texture defined as rgb (not argb) and with <1 alpha, bu...
Image cant contain data beyond its resolution.
Where is the texture defined as rgb?
Are correct naming suffixes used prior converting to PAA?
median oxide
It's procedural. "#(rgb,1,1,1)color(0,0,0,0)"
full quarry
You do give it an alpha there though
wooden lantern
might be one of those things where when it gets parsed it just assumes if it’s empty
full quarry
median oxide
It's clearly incorrect :P
Where is it used?
median oxide
In our new UI code. Which very occasionally has map icon-related crashes.
full quarry
median oxide
In our new UI code. Which very occasionally has map icon-related crashes.
So it colors map icons?
median oxide
It's just using an invisible icon with DrawIcon so it can write text.
full quarry
Is there a vanilla equivalent of such use?
median oxide
No idea. There's a similar example in DrawIcon docs but that uses a 1,1,1,1 color instead.
But you can test the general case yourself. Make a procedural texture with rgb type and non-1 alpha, and it'll draw with blending.
Question is whether there's any low-level distinction between rgb and argb that would make this dangerous.
 fluid dawn
Is there a way to make a uniform support insignias from the arsenal?
wooden lantern
fluid dawn
Is there a way to make a uniform support insignias from the arsenal?
yeah, it’s a hiddenselection that is on the sample files character
think it’s insignia
full quarry
fluid dawn
Is there a way to make a uniform support insignias from the arsenal?
Only if the 3d model itself has that support built in.
fluid dawn
ohh ok, thats a bummer then, thanks for the help anyways
urban bramble
Anyone can help me for rifle wrap
full quarry
urban bramble
Anyone can help me for rifle wrap
Help how?
thick gate
severe rune
You can also combine both into one SuperExt material. Then you don't need two se...
How do the values for emissive play into this? From what I’ve seen with the common emissive RVMats for cars and what not. Is there any sense it changing the X,X,X,X values if color is managed by the emissive map?
manic mulch
Is there some way to make all rvmats readable, or atleast, mass convert them to a readable format in one go?

 full quarry
manic mulch
Is there some way to make all rvmats readable, or atleast, mass convert them to ...
full quarry
manic mulch
Is there some way to make all rvmats readable, or atleast, mass convert them to ...
is it something unpacked?
Id recommend using mikeros extractPbo
severe rune
thick gate
How do the values for emissive play into this? From what I’ve seen with the comm...
The emissive texture is additive.
pixel.indirectLight += sampleTexture(Emissive) * NightEmissiveCoefficient
indirect light already contains the specified emissive color from the shader. And the texture is added onto it (depending on whether its day/night)