#arma3_texture
1 messages · Page 4 of 1
 full quarry
 potent yoke
Damnnn…
Isn’t it possible to put a folder in the Addons folder, so that it replaces the standard texture?
If there’s a serverside check that doesn’t allow modded files, im sure i can make him remove the check
full quarry
No
 outer needle
which are the textures I'm supposed to overlay over the diffuse (_co) to make the textures not look so plain?
I have my _as, _co, _nohq and _smdi correctly set upt but my textures looks incredibly bland.
Im assuming there is some sort of multiplication lack going on that makes the intensity of my shadow and roughness be super mild?
 livid knot
Do you have an rvmat setup?
outer needle
yes
full quarry
outer needle
which are the textures I'm supposed to overlay over the diffuse (_co) to make th...
Pictures might help to understand the problem
outer needle
full quarry
Pictures might help to understand the problem
sure, just ignore the hands, im not binarizing everytime xD

the textures setting is not complete, that why the handguard is untextured, but the rest of the weapon looks bland, way to bland. I understand that the export from susbtance to arma is not 1:1. We are using the moonie presets (https://github.com/MoonieFR/SubstanceToArma).
I read some suggestions about including normals and occlusion in the diffuse, but even doing so doesn't really changes the texture
full quarry
outer needle
the textures setting is not complete, that why the handguard is untextured, but ...
are you sure your changes get packed in? 😅
what rvmat type do you use?
outer needle
full quarry
are you sure your changes get packed in? 😅
yes, ive noticed the changes, they are subtle but where there. However just a very VERY light change
give me a moment for the rvmat
basic metal:
ambient[]={0.9, 0.9, 0.9, 1};
diffuse[]={1,1,1,1};
forcedDiffuse[]={0,0,0,1};
emmisive[]={0,0,0,1};
specular[]={0.30, 0.30, 0.30, 1};
specularPower=32;
renderFlags[]=
{
    "AlwaysInShadow"
};

PixelShaderID="Super";
VertexShaderID="Super";

class Stage1_base
{
    texture=""; //Nohq.paa
    uvSource="tex";
    class uvTransform
    {
        aside[]={1,0,0};
        up[]={0,1,0};
        dir[]={0,0,0};
        pos[]={0,0,0};
    };
};

class Stage2
{
    texture="a3\weapons_f\data\DetailMaps\Metal_detail_DT.paa";
    uvSource="tex";
    class uvTransform
    {
        aside[]={0,7,0};
        up[]={7,0,0};
        dir[]={0,0,0};
        pos[]={0,0,0};
    };
};

class Stage3
{
    texture="#(argb,8,8,3)color(0,0,0,0,MC)";
    uvSource="tex";
    class uvTransform
    {
        aside[]={1,0,0};
        up[]={0,1,0};
        dir[]={0,0,0};
        pos[]={0,0,0};
    };
};

class Stage4_base
{
    texture=""; //as.paa
    uvSource="tex";
    class uvTransform
    {
        aside[]={1,0,0};
        up[]={0,1,0};
        dir[]={0,0,1};
        pos[]={0,0,0};
    };
};

class Stage5_base
{
    texture=""; //smdi.paa
    uvSource="tex";
    class uvTransform
    {
        aside[]={1,0,0};
        up[]={0,1,0};
        dir[]={0,0,0};
        pos[]={0,0,0};
    };
};

class Stage6
{
    texture="#(ai,64,64,1)fresnel(1.5,3.0)";
    uvSource="tex";
    class uvTransform
    {
        aside[]={1,0,0};
        up[]={0,1,0};
        dir[]={0,0,0};
        pos[]={0,0,0};
    };
};

class Stage7_base
{
    texture=""; //co.paa
    uvSource="tex";
    class uvTransform
    {
        aside[]={1,0,0};
        up[]={0,1,0};
        dir[]={0,0,0};
        pos[]={0,0,0};
    };
};
ah
wait a second
perhaps its because of the renderFlag?
full quarry
yeeep
outer needle
LOL
full quarry
aaand all your other settings look a bit scuffed
maybe
and no reflection mapping
aaand no normalmap is in use
outer needle
i do have them, this is my base rvmat, paths are assigned in each individual area/component
full quarry
Id recommend using the default_super.rvmat form a3\data_f\ as base
outer needle
yeah, i've been thinking of changing rvmat because the changes on textures even when visualized in the paa viewer are wildly different from what I have ingame
what about the co including the nohq and the as for faked depth?
is that ideal?
full quarry
some people like adding some shading to the _CO too and it can look nice
but Id reset your rvmat first and try again before doing such
outer needle
thanks, i shall try with the default_super rvmat
outer needle
full quarry
some people like adding some shading to the _CO too and it can look nice
Definitely helped increase the depth a ton, same with the super_default, made the color of everything more vibrant, the shadowflag def was screwing me over.
Thanks, now i just have to play with the colors and the ammount of shadow in the diffuse until satisfied 🙂
full quarry
best results typically can be achieved by keeping the shader attributes mostly default and use the texxtures to modulate them
specularity and specular power are the ones most often altered for different material looks
 waxen shoal
Does anyone know of a way I can correct the AO on the side rails and other small wonky areas on this rifle here? or if its an issue with the model/UV thats causing the AO to apply strangely?

 quiet hedge
Any advice as to why my uniform is appearing very "glossy" for want of a better term?
The trousers are fine as the rvmat for the top and bottom are the same (with the specifics changed, obvs)
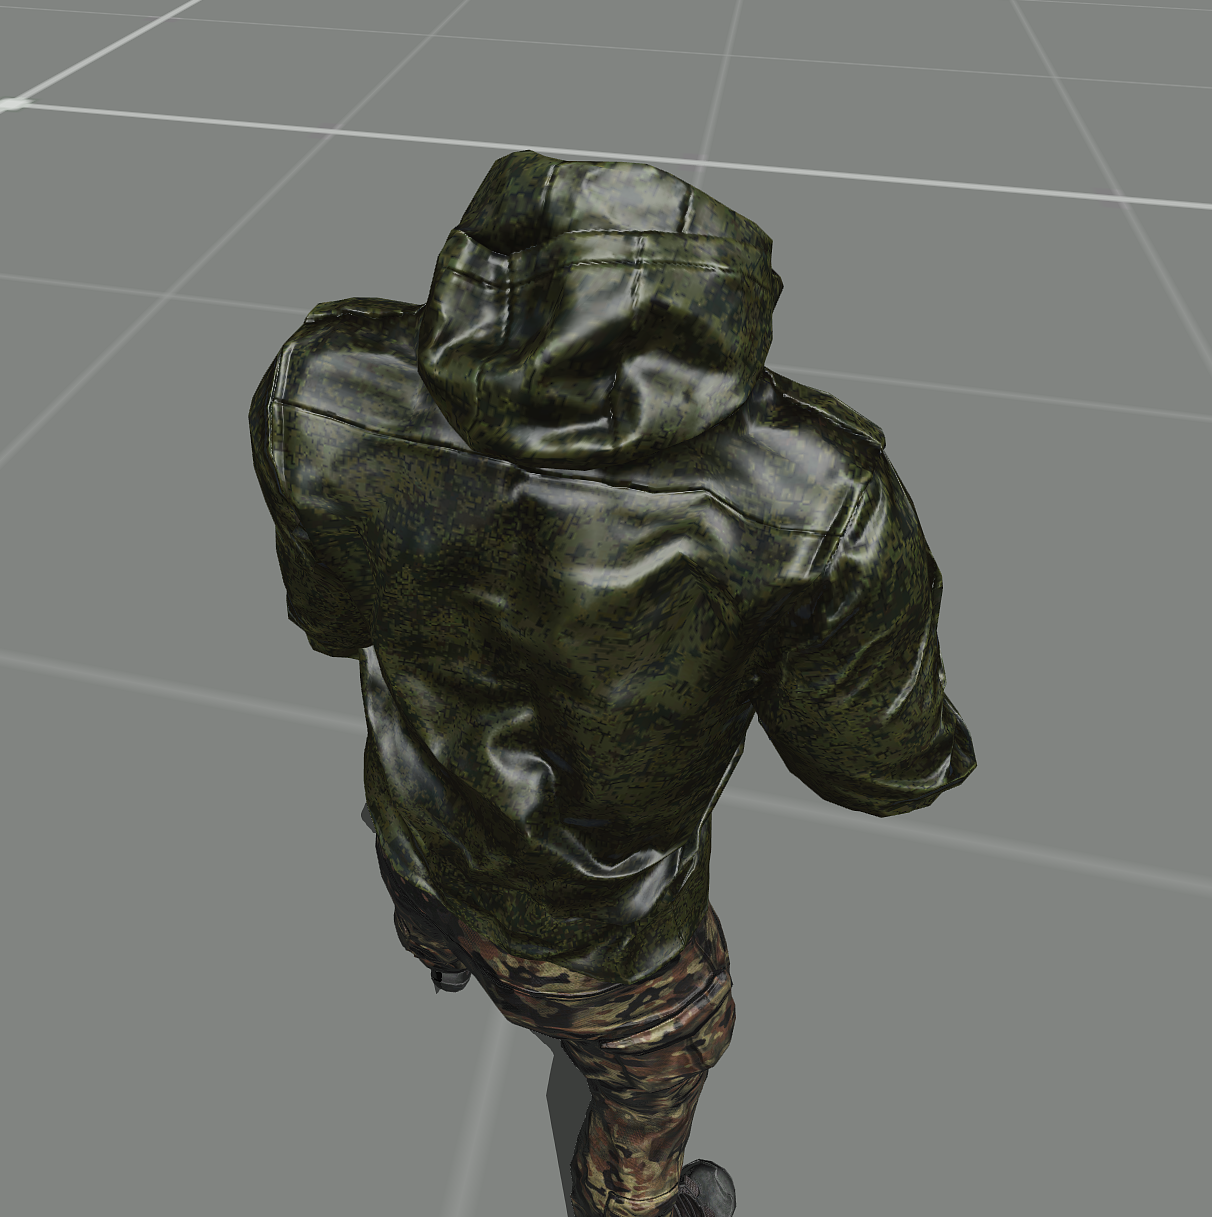
Here is the same in substance painter: https://imgur.com/iHObdPz
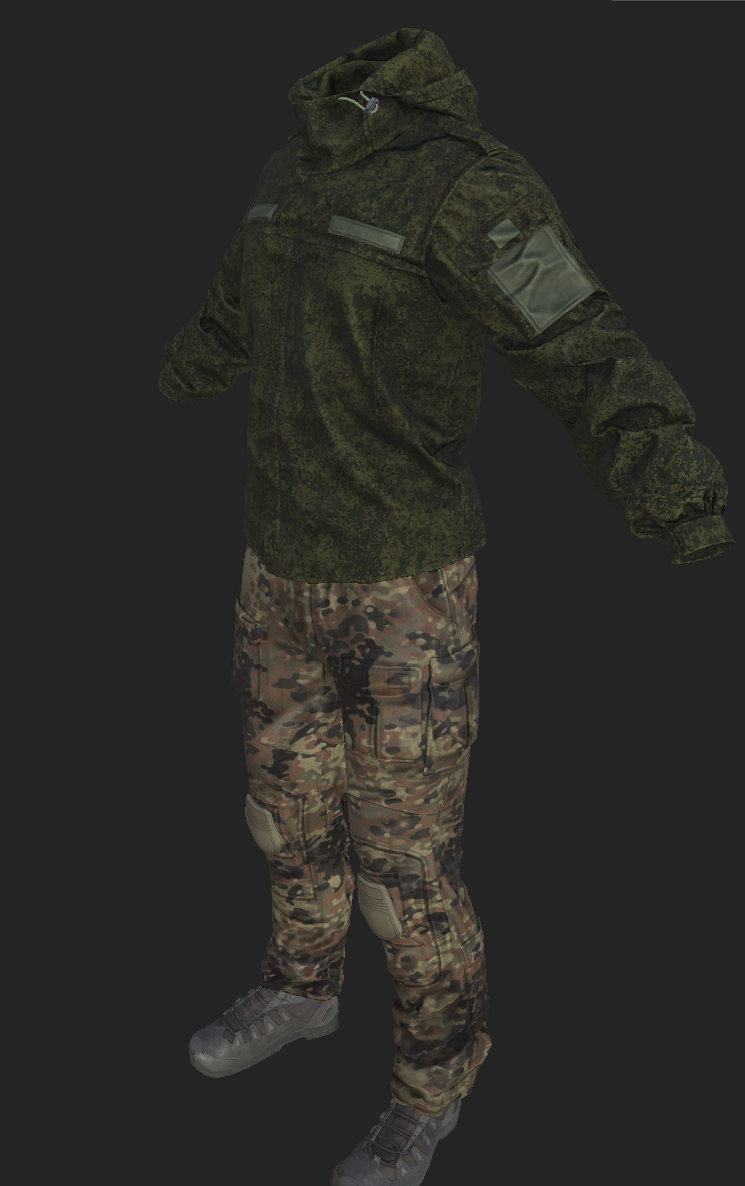
So it's gotta be the rvmat right?
full quarry
Yep
 grizzled sky
anyone out there that is willing to work with a noob on something?
 tropic crater
so i have this as a 64x64 png that I saved as a .paa from texview2

ingame it shows like this

what did I mess up
 vernal fractal
tropic crater
so i have this as a 64x64 png that I saved as a .paa from texview2
vernal fractal
tropic crater
so i have this as a 64x64 png that I saved as a .paa from texview2
If i remember coreclly paa dosnet have alpha if you are using transperent background so you want to save it as TGA ?
tropic crater
vernal fractal
If i remember coreclly paa dosnet have alpha if you are using transperent backgr...

i thought it had a tranparency setting. btw the project is set to 8bit. let me try tga. nope. still same
grizzled sky
I have some uniforms that someone was working on for me and we are stuck. Got some things done but now when we update it makes the uniform invisable. Just trying to add name tags to a garrison uniform.
 lethal condor
tropic crater
lethal condor
tropic crater
You want to make white part alpha and make black part white
 tender storm
When packing PBOs for use with Addon Buiilder, it's copying all files over ect correctly, creating a texHeaders.bin file, however when loaded in game, it throws an error saying it is unable to find the textures
Addon builder reports no problems with the packaging however.
22:13:17 Warning Message: Picture \weapons\ui\icon_glock.paa not found
 mint hare
PBO prefix strikes again. AFAIK by default Addon Builder uses the name of an Addon source directory as a prefix. So if your stuff was stored at D:\projects\arma3\mytotallyawesomemod, then prefix would be set to mytotallyawesomemod and D:\projects\arma3\mytotallyawesomemod\weapons\ui\icon_glock.paa would be accessible in-game by mytotallyawesomemod\weapons\ui\icon_glock.paa 
outer needle
^
tender storm
Ok so I can't get around this. I've set the Prefix as suggested to be the project header - Vanguard

 mint hare
can you please post a screenshot of PBO contents in PBO manager?
 inner ingot
Trying to get a multimaterial set up for my floors/ceilings in a building I'm making, I'm getting solid black but no errors in compile from pboproject or in-game, the config SEEMS right, the UVSet 0 is the over-scaled UVs and UVSet 1 is the in-bound scale.
https://cdn.discordapp.com/attachments/973614527889428480/1119467377755697313/image.png

Pastebin
Pastebin.com is the number one paste tool since 2002. Pastebin is a website where you can store text online for a set period of time.
Oh  Missing the DTSMDI / specular maps.
 floral fiber
tender storm
floral fiber
tender storm
if its an inventory icon it needs a preceding backslash
 shell rock
Hash of C:\Users\olive\OneDrive\Desktop\Mod@TCamo Pack\addons\Tropentarn.pbo not loaded
What does this MEAN
Can't sign the PBO because of it
Had to start from scratch 3 times, I've retextured shit, Remodeled, i've remade the mod, always comes up with this error
lethal condor
Not even sure if is a texture issue but which software you use to pack?
 winged shuttle
I don't get how uploading to the workshop functions, can anyone explain it to me?
I'd like to upload a texture for a patch and I'm using the publisher. I don't know which folder to designate as "Mod content", since whatever I pick gives me the same error

This is probably something really dumb
Still, I've created an "Addons" folder and put the .pbo texture in it in the hopes it would work, but nothing.
floral fiber
show the mod structure
winged shuttle
This?
 winged shuttle
 winged shuttle
Anything wrong with it?
floral fiber
you need to select the @insignia_addon folder not the addons folder of it
winged shuttle
Ahh, I see, thanks a lot :)
shell rock
lethal condor
Not even sure if is a texture issue but which software you use to pack?
Arma 3 tools?
 rocky spruce
Hey im trying to preview a new texture i created on a test mission with this init MB setObjectTextureGlobal [0, "m114_co.paa"];
but cant get it working, any ideas?
full quarry
rocky spruce
Hey im trying to preview a new texture i created on a test mission with this ini...
Is that file in your mission folder?
rocky spruce
full quarry
Is that file in your mission folder?
Yes
Ive done it plently of times before with other textures, but this one just refuses
 thin atlas
I am looking to create a 3d unit patch mod, I been looking at how S.O.G. Cdlc patches are done, and I see the file structure, but am unable to find a tutorial on how to implement the same for a standalone mod
I know I need an rvmat, nohq(normalmap) and the patch itself
but when it comes to creating scratch configs, I am unable to do so
full quarry
thin atlas
I am looking to create a 3d unit patch mod, I been looking at how S.O.G. Cdlc pa...
you cant make 3d patch really
there is no such gear type
thats not how unit patches work
 olive gale
I searched for guides but nothing
livid knot
Its a missile you're doing right? The as covers ambient shadows, your missile doesnt have many if any crevices and shouldnt have a ton of areas that arent shadowed, you might be ok not having one
full quarry
olive gale
is there a way to make an AS file
It is often also called ambient occlusion
olive gale
I found a guide for photoshop and xnormal for the Ambient occlussion
can I post it here to help people with their Ambient occlussions
 pallid trail
how do i put a custom patch on a helmet (from a modpack)?
 versed nacelle
If the helmet supports custom textures for that area you can create a custom config to make a new version of that helmet with your own texture (= patch) on it. ~~Or run a script to modify it: https://community.bistudio.com/wiki/setObjectTexture~~
Alternatively you could take the full texture (when the above is not possible) and modify it to include your own texture with patch on it.
full quarry
versed nacelle
If the helmet supports custom textures for that area you can create a custom con...
Helmets can't be targeted by setObjectTexture. Config/mod addon is only option
versed nacelle
true... totally forgot about that...
 gloomy island
hey yall, do you know if soda cans from the base game can be used with hidden selections?
pallid trail
versed nacelle
If the helmet supports custom textures for that area you can create a custom con...
I just ended up opening the addons and replaced the patch options with mine
livid knot
Terrains in arma use parallax occlusion mapping right? Is there any way to utilize this outside of just terrains? Maybe cheekily through an rvmat or something
full quarry
livid knot
Terrains in arma use parallax occlusion mapping right? Is there any way to utili...
not possible
livid knot
Darn, thankyou!
full quarry
Id suppose there areny really that many mysterios in "can something be done" anymore 😅
doesnt hurt to ask though
livid knot
full quarry
Id suppose there areny really that many mysterios in "can something be done" any...
Ya I figured that, makes it a lot faster to just ask then waste my time trying to find a way to do it lol
 cyan mason
Question regarding textures in A3: Am I doing something wrong with texture export or is this just how A3 deals with files? My photoshop files look way different then what's ending up ingame. Any suggestions? (can't add pictures unfortunately
full quarry
cyan mason
Question regarding textures in A3: Am I doing something wrong with texture expo...
complete your account verification at #✔role-selection and you should be able to post pictures
or upload to someplace like imgur and link here
without pictures your description unfortunately says very little
cyan mason
I had to run out of the house for a bit so can post a picture in like 30 minutes. But for lack of better images: my png (and paa) is way darker ingame then in TexView.
full quarry
cyan mason
I had to run out of the house for a bit so can post a picture in like 30 minutes...
Probably problem with your model
as in you have not set o2script path in the arma toolbox addon settings and it exports broken
cyan mason
I'm converting an existing modpack for visual, so maybe I'm doing something wrong there.

Basically repacking the mod, and something might go wrong there..
full quarry
cyan mason
Basically repacking the mod, and something might go wrong there..
umm
thats not quite what you should be doing
youre not supposed to pack up anyones work
if you make retextures, you can only make them by hiddenselections
and hiddenselections retexture mod only contains your new textures, your new config that refers to original mod and changes your new textures to the unit classes
and then uses the original mod as a dependency
cyan mason
To be honest, I'm not going to publish anything. I'm trying to teach myself how to do it and was looking at others on how they do it. Learn by example 🙂 But maybe what you said is a better way anyway 😛 Sorry if I did something horrible .. wasn't under the impression that doing it this way to learn a bit was doing a booboo
full quarry
you are learning nothing from what you are doing right now so yes best to scrap that and start doing it the right way.
what you do even if you dont publish it, gets you booted out of here for beginning
cyan mason
franctically deletes all of this ..
 cyan mason
My apologies then.
thin atlas
@full quarry I have deleted all the files I had, and am willing to learn the right way, if you are willing to lend a hand to me
full quarry
thin atlas
<@150949769953411072> I have deleted all the files I had, and am willing to lear...
https://www.youtube.com/watch?v=qZoI7f0ApSI this might work as starting point
Welcome to my Arma 3 tutorial series where I show you all the basics required to start creating your very own Arma 3 mods, from retexturing existing game assets to importing and implementing new ones.
Project Files Download:
https://drive.google.com/file/d/0B6voDxYIREkgQ2I4VXdubkN6VG8/view?usp=sharing&resourcekey=0--WkZzElEp_FzlbE1Nqqhog
Elite...
thin atlas
thanks homie
full quarry
well the pbo manager part is a bit boop. but the retexturing part seemed ok at quick look
thin atlas
right, and the end goal is to learn how to create a config that uses the results from the tutorial to create an arm patch mod that looks beveled like the ones in the cdlc
because currently, my patches are pretty crappy honestly, they suffer from the glitchy texture problem, that actually the clotheslines outside the old man house has
They look like they have a radial fuzz from gzdoom on them
gloomy island
gloomy island
hey yall, do you know if soda cans from the base game can be used with hidden se...
any answers on this? if not thats a ok too
gloomy island
or if anyone can explain how to check
lethal condor
Check in Config Viewer
 vernal sage
gloomy island
any answers on this? if not thats a ok too
vernal sage
gloomy island
any answers on this? if not thats a ok too
Not possible, I'm afraid. Each of the drinks (water bottle, RedGull, etc.) use their own unique model:
can_v1_f.p3d, can_v2_f.p3d, can_v3_f.p3d, bottleplastic_v1_f.p3d, etc.
Probably best for you to just make your own model since BI didn't bother setting up hiddenSelections for them. Either way, they're not super complex models since Eliteness shows that the cans don't even have more than 1x LOD (other than shadows+geo).
 thorny tusk
I'm new to arma 3 Modding, I have managed so far just based on loose information gathered around old forums to make a reskin mod for the vanilla van. I am having trouble getting the texture to apply to the vehicle, seems to not have the correct path to the paa file, if any one has advice I am more than ready to listen. (reposting this here because it seems more appropriate)
Honestly i'm pretty much clueless with this and I do need assistance and a lot of practice.

 silver adder
anyone use Knald?
 severe lark
thorny tusk
I'm new to arma 3 Modding, I have managed so far just based on loose information...
severe lark
thorny tusk
I'm new to arma 3 Modding, I have managed so far just based on loose information...
At the start of the path you need the P: drive and the .pbo's name, so in your case the path should look like P:(pboname)(rest of the path)
Can probably help better with the path if we can see how the folder layout is for your mod
 mint hare
well, unpacked game data would end up in P:
 waxen heron
Yep, but the unpacked data is in the a3 folder, which is recognized by the game.
mint hare
eh, no? I don't think the game touches P: drive at all?
waxen heron
When you set an a3/[...] texture path or anything like that, it's well recognized and works.
The P: disk contains the game files in the same organization as they are originally, so ... yes, the disk itself doesn't exist for the game, but its content does (well, the content that comes from the game ofc)
severe lark
all of my paths include "P:" though... so how the hecc does it work then
well not all
but my texture paths do
waxen heron
Maybe the packing process overwrite the path ?
idk
In Object Builder do you have setup the texture path in options ?
severe lark
I'm using the Blender arma toolbox, but yeah I set up the texture paths in there
And the only way I've gotten it to work is by including the "P:", it didn't work otherwise
severe lark
Yeah
waxen heron
As the saying goes, "if it works, don't touch it again" x)
full quarry
severe lark
And the only way I've gotten it to work is by *including* the "P:", it didn't wo...
It might not work for anyone else.
If you have P: in toolbox it does remove it on P3d export. But if you have P in P3d that is a nono
severe lark
Gotcha, makes sense
thorny tusk
mint hare
~~P:~~(pboprefix)(rest of the path)
thanks, and you too @severe lark
the mod seems to be working well, the other issue i'm having is my texture is not the one that gets slapped on the van when spawning it
 rigid spindle
Is there a good like, list of default RVmats I can try assigning to this / look at a comparison image of
It's a userTexture item with just a black texture on it, but you can see the sky and trees through it
full quarry
rigid spindle
Is there a good like, list of default RVmats I can try assigning to this / look ...
Stuff in p:\a3\data_f
rigid spindle
mmk. I'm not sure quite what property is making it see-through to the shaders and such
waxen shoal
just finished a big texture overhaul for the studio I joined last month, and they hit entirely different now 🔥


 level up
rigid spindle
level up
rigid spindle
.....Are there any built-in RVmats that actually block the sun instead of letting it shine through slightly
like I'm standing behind this default-material object and I can still see the sun's corona
full quarry
rigid spindle
like I'm standing behind this default-material object and I can still see the su...
Needs non alpha texture.
rigid spindle
full quarry
Needs non alpha texture.
What's the #rgba stuff for that, do you know off the top of your head?
It's just black
but I assume 0,0,0,0 would be transparent instead of More Black
full quarry
As far as I can tell that should be transparent surface. Off the top of my head don't have a clue why it don't work for you
rigid spindle
I think I need to use #rgb instead of #rgba ?
full quarry
I'd use a texture as a basic surface cover. I find that more reliable.
 ornate stream
Do these videos help you guys?

Patreon https://www.patreon.com/plasmo
Facebook page: https://www.facebook.com/DavidDamek42
Instagram page: https://www.instagram.com/plasmo.plastic.models/
My second adventure channel: 🤪https://www.youtube.com/channel/UC56s2CAob0589ttJffeEU8Q/featured
My web: http://www.plasticmodels.eu/
David Damek
Sponsors:
Kit - dream model https://drea...
full quarry
I've used videos similar to that to figure out some hard to see details. They can be very useful
 frozen blade
@rose minnow does
silver adder
i try to use it to replace xnormal, but i load up high poly, low poly and a cage then preview, the textures are all flat, bake the same results
using triangulated fbx files, the low poly loads fine in the 3d preview
 dapper grail
SMDI or RVMAT issue?

If SMDI here's what I tried or know I can do:
-Base : Emit bake, inverted roughness bake, or greyscaled _co.
-Overlay on pink layer, or play with color channels.
-Use the tex2view specular map finish filter.
If RVMAT:
-Specular issue?
dapper grail
dapper grail
SMDI or RVMAT issue?
Here's the model in sunlight for reference.
 full quarry
dapper grail
SMDI or RVMAT issue?
full quarry
dapper grail
SMDI or RVMAT issue?
What do you see as a problem?
dapper grail
full quarry
What do you see as a problem?
The lighting in the dark. Some parts are too bright. Look at the tail section for example.
It's not meant to be that different from the rest.
full quarry
Could be normalmap issue the tail seems to shade different in sunlight too.
dapper grail
Ook.
dapper grail
Hmmmm.

I will try exporting larger textures today and see if that makes things better.
full quarry
dapper grail
I will try exporting larger textures today and see if that makes things better.
Larger textures won't make a difference, but something you have done play pretty funky in there.
What does yourr normalmap look like?
And make sure you don't have inverted faces on the model
dapper grail
If it's cursed I'm sorry, but I use premade blender mats, export them separately and then combine them in gimp 💀.

And yes these are 1024 x 1024 textures for now.
UV map is quite small so details look funky.
lethal condor
Maybe it doesn't have o2script?
dapper grail
lethal condor
Maybe it doesn't have o2script?
Elaborate?
lethal condor
Aka you may have exported it wrongly. How does it look in OB?
dapper grail
Looks fine to me.

 lethal condor
Hmm looks fine. Although you want to have a smooth edge, but whatever
Just in case - how does it look when no light source nearby in night?
It might just reflects the light too much
Also your rvmats, please
dapper grail
class StageTI { texture="a3\data_f\default_vehicle_ti_ca.paa"; }; ambient[]={1,1,1,1}; diffuse[]={1,1,1,1}; forcedDiffuse[]={0,0,0,1}; emmisive[]={0,0,0,1}; specular[]={0.1,0.1,0.1,1}; specularPower=30; PixelShaderID="Super"; VertexShaderID="Super"; class Stage1 { texture="ModelTesting\Elephant\data\ER_NOHQ.paa"; uvSource="tex"; class uvTransform { aside[]={1,0,0}; up[]={0,1,0}; dir[]={0,0,0}; pos[]={0,0,0}; }; }; class Stage2 { texture="#(argb,8,8,3)color(0.5,0.5,0.5,1,dt)"; uvSource="tex"; class uvTransform { aside[]={1,1,0}; up[]={0,1,0}; dir[]={0,0,0}; pos[]={0,0,0}; }; }; class Stage3 { texture="#(argb,8,8,3)color(0,0,0,0,mc)"; uvSource="tex"; class uvTransform { aside[]={1,0,0}; up[]={0,1,0}; dir[]={0,0,0}; pos[]={0,0,0}; }; }; class Stage4 { texture="ModelTesting\Elephant\data\ER_AS.paa"; uvSource="tex"; class uvTransform { aside[]={1,0,0}; up[]={0,1,0}; dir[]={0,0,1}; pos[]={0,0,1}; }; }; class Stage5 { texture="ModelTesting\Elephant\data\ER_SMDI.paa"; uvSource="tex"; class uvTransform { aside[]={1,0,0}; up[]={0,1,0}; dir[]={0,0,0}; pos[]={0,0,0}; }; }; class Stage6 { texture="#(ai,64,64,1)fresnel(0.4,0.2)"; uvSource="tex"; class uvTransform { aside[]={1,0,0}; up[]={0,1,0}; dir[]={0,0,1}; pos[]={0,0,0}; }; }; class Stage7 { texture="a3\data_f\env_land_ca.paa"; uvSource="tex"; class uvTransform { aside[]={1,0,0}; up[]={0,1,0}; dir[]={0,0,1}; pos[]={0,0,0}; }; };
Rvmat.
Will get night pics 1 sec.
lethal condor
specular[]={0.5,0.5,0.5,1}; this maybe too much
dapper grail
K, will reduce by half.
dapper grail
lethal condor
Just in case - how does it look when no light source nearby in night?
This is before lowering spec values.

After lowering spec to 0.15.

 lethal condor
Hmm 🤔
dapper grail
SMDI issue?
lethal condor
Maybe. How it looks and where are the problematic part of the smdi?
dapper grail
This is the one I'm using rn. greyscale _co with the tex2view specularmapfinish filter.

I also used several other methods.
lethal condor
Blur parts are them I guess?
dapper grail
Yes blueish parts on the upper right corner.
Other parts are the same color but don't have the issue though 😵💫.
lethal condor
Bottom left are the tip of the warhead I'd assume?
lethal condor
https://community.bistudio.com/wiki/HQ_Normal_Maps#Specular_map
Basically this explains what they represents
dapper grail
lethal condor
Blur parts are them I guess?
Actually, they are to the left of the blueish part.
lethal condor
I've just realized the typo 😓
dapper grail
It's fine.
lethal condor
So, let's say, if you make the smdi solid color? e.g.#(argb,8,8,3)color(1,0.5,0.5,1,smdi)

 lethal condor
Is this... solid smdi?
dapper grail
Yes.
lethal condor
Strange
dapper grail
I think I will repack UV and try again. I had a similar issue and it was because they UV was too small so the details were pixelized.
full quarry
I'd say it's combination of wrong smdi and all sharp edges
dapper grail
full quarry
I'd say it's combination of wrong smdi and all sharp edges
But like we tried a solid smdi and it was the same no?
full quarry
1but you have not fixed the edges
dapper grail
full quarry
1but you have not fixed the edges
I have to smooth them correct?
Sharp is for shadow lods.
full quarry
Sharp can be used but as you can see from close up, it shades all edges sharp. The ones that are supposed to be smooth/round too.
Only edges that are supposed to be shat should be set as sharp
 rose minnow
knald very sensitive to coords
always make sure you reset xform just before exporting and i use obj for both hp and lp
silver adder
will give it a shot
 formal vigil
anyone know how to put textures from arma 2 into blender? or convert them into png/tga?
dapper grail
Just use tex2view.
formal vigil
does it let me convert it into png/tga?
dapper grail
Yes.
formal vigil
what really?
dapper grail
That's how I convert pngs to paa and tga and viceversa.
dapper grail
Lol.
formal vigil
or any textures
dapper grail
That's not how that works. You convert from paa to png. Rvmats are not images they are text files.
dapper grail
formal vigil
anyone know how to put textures from arma 2 into blender? or convert them into p...
What's your purpose?
formal vigil
making videos of characters
dapper grail
formal vigil
or both
Neither, Arma 2 data packs exist, but not sure if you can use them in your context due to licensing.
full quarry
formal vigil
making videos of characters
Videos how?
The datapacks exist only for use withing Arma
using them for rendering is not included in that
this is the texture MAKERS channel not tht texture TAKERS channel
full quarry
@formal vigil?
dapper grail
dapper grail
Hmmm, so back to it being a normal map issue.
Smooth edges. >Rebaked all textures to 2048 x 2048. >New SMDI texture. >Had some (It was too bright for some reason) and still do ? nohq issues.

Moving the light source creates different artifacts, so the issue is not limited to a certain part of the rocket.
New SMDI and NOHQ.


Next solution : get substance painter 💀.
mint hare
and how does your .rvmat look?
also dat typo in https://community.bistudio.com/wiki/Mondkalb's_Addon_Tutorial#SMDI 💀 y = green p * ((sp * blue p + 1) / (sp = 1)); instead of y = green p * ((sp * blue p + 1) / (sp + 1)); as shown in https://community.bistudio.com/wiki/HQ_Normal_Maps#Specular_map
also dat epic TexView speed 💀
dapper grail
dapper grail
`class StageTI
{
texture="a3\data_f\default_vehicle_ti_ca.paa";
};
ambient[]...
^RVMAT
grizzled sky
Trying to see if anyone can help me understand why when we update a uniform now, it makes it invisible.
full quarry
grizzled sky
Trying to see if anyone can help me understand why when we update a uniform now,...
update what uniform and how?
grizzled sky
So we were adding a nametag to a garrison uniform. And when saved it went invisible
thorny tusk
what is an rvmat exactly?
lethal condor
Real Virtuality Material - RVMAT is a material file that define how it looks of an object
mint hare
what shader to use, configuration values for that shader, some bullet penetration specifics...
thorny tusk
how would I go about adding glass and wheels to a custom vehicle? currently they are missing on my mod.
full quarry
Same way any other modeling/texturing is made
 full quarry
No idea how you managed to do that.
Well probably missing hiddenselections
Or maybe damage/hit point config
thorny tusk
it was working in testing on my pc but the workshop version is cleary missing something 😄
textures[] = {"Norm_Van\Data\Textures\normalVan_co.paa","\a3\soft_f_orange\van_02\data\van_wheel_co.paa","\a3\soft_f_orange\van_02\data\van_glass_dirty_CA.paa"};
would it be something like this?
full quarry
Perhaps
thorny tusk
okay i'll try this
 plain blade
i need a new paint job done to my ww2 planes and tanks im 65 yrs old so i cant spell or type well so i need to voice chat pls can someone help me tyvm
 flint badge
how i can get typhoon medical texture? to reskin? i could not find but theres p3d but i am noob as im new to this
full quarry
flint badge
how i can get typhoon medical texture? to reskin? i could not find but theres p3...
P3D you cant do anything with
but also what is typhoon?
 full quarry
you would either use scripting commands ot draw said texture on screen for screenshotting or you extract the pbo the texture is in as .paa and resave that as .png or .tga for editing in image editor
flint badge
aye i found the pbo but only can extract cargo, ammo, covered and fuel into png from paa via txtview2
there is medical version and repair vehicle version aswell BUT issue is they in P3D
since you say we cant do anything to P3D files
full quarry
flint badge
there is medical version and repair vehicle version aswell BUT issue is they in ...
textures are never in a p3d
they are always separate paa files
you are possibly looking into wrong place then
check the paths in the in game config viewer and the medical versions hiddenselection textures
flint badge
thank i will look
game config viewer ? is it ingame config to enable hiddenselection or?
hiddenSelectionsTextures[] = {"\A3\Soft_F_Exp\Truck_03\Data\Truck_03_ext01_ghex_CO.paa","\A3\Soft_F_Exp\Truck_03\Data\Truck_03_ext02_ghex_CO.paa","\A3\Soft_F_Exp\Truck_03\Data\Truck_03_cargo_ghex_CO.paa","\A3\Soft_F_Exp\Truck_03\Data\Truck_03_cover_ghex_CO.paa"};
full quarry
Well if the symbol or texture you are after is not part of hiddenSelections then it cant be retextured
thorny tusk
@full quarry thanks, the hiddenSelections was what I needed 😄
 tender swan
Hello, why do I have my texture shifted? THANKS

 full quarry
tender swan
Hello, why do I have my texture shifted? THANKS
full quarry
tender swan
Hello, why do I have my texture shifted? THANKS
probably bad uvmapping
full quarry
tender swan
What is that ? I'm a newbie
how did you make the model is probably the first question then? if you dont know what uvmapping is, you will probably need to go back to basic tutorials first
full quarry
tender swan
Sketchup
ah, skethcup is not proper 3d modeling program for this kind of stuff.
you will have a lot easier time if you learn proper 3d modeling program like blender
tender swan
thank you, i will improve on blender
 sudden hatch
Hello, I'm working on a building on blender, but I'm a bit lost with the texturing process, mainly to transfer correctly the texture to arma III. I check the game pbo and I see multiple set of texture that I don't understand all of this work, I look at the wiki page from mondkalb but I'm still a bit lost. For example I see (looking at the livonian military barrack) a color file that seems to be a seamless texture but there is also a color map with the uv unfold how does the two combine I don't see it in the rvmat file ?
full quarry
multimaterial rvmat uses 2 uv sets, one for single uv space textures (MASK, AO, MC) and then second uvset for tiling texture alignment the 4 colors of the mask texture get replaced with the same rvmat defined tiling textures
sudden hatch
Thank you for the reply, if I have a simple shed for example with texture for door/window/wall+roof/floor, I need to export from blender an image with all the geometry unwrap, put it in gimp add some color (I'm limited to 4 ?) for each material and add the seamless textures to the addon folder also and link the two with rvmat file ?
but what is AO and MC ?
In the livonian barrack data, I saw a CO file with the low res bake texture from the model, what it is for ?
full quarry
sudden hatch
In the livonian barrack data, I saw a CO file with the low res bake texture from...
last lod that is usually justy few boxes
HorribleTip of the Day:
multimaterial rvmat uses 2 uv sets, one for single uv space textures (MASK, AO, MC) and then second uvset for tiling texture alignment the 4 colors of the mask texture get replaced with the same rvmat defined tiling textures
This sample blend contains an example on how multimaterial can be represented and live painted straight in Blender.
full quarry
full quarry
HorribleTip of the Day:
multimaterial rvmat uses 2 uv sets, one for single uv s...
@sudden hatch you can also try this 👆
sudden hatch
thank you very much, it's really helpfull, for the mask we are limited to 4 color?
For the SMDI and MC Map does it is the same as normal and height map ?
What is AO ? I see AS and NO in the wiki page and there is no clear definition.
full quarry
sudden hatch
thank you very much, it's really helpfull, for the mask we are limited to 4 colo...
yes 4 colors, but an object can have more than 1 multimaterial
if needed
full quarry
sudden hatch
What is AO ? I see AS and NO in the wiki page and there is no clear definition.
ah yeah its AS in Arma. AmbienOcclusion/AmbientShadow
 blissful knot
What is the rgb value (the 0-255 values) for blufor, opfor, and indfor?
rigid spindle
So, the "User Texture" items are really nice, but if I have say, transparent writing on there, how can I make that writing shiny? Is that where using an RVMAT comes in?
full quarry
rigid spindle
So, the "User Texture" items are really nice, but if I have say, transparent wri...
Yes
 manic mulch
hey guys, i was wondering something. Is it possible to change the ground textures of a terrain?
Like for example, replacing Altis textures with highres ones.
full quarry
manic mulch
hey guys, i was wondering something. Is it possible to change the ground texture...
in a way yes but its a bit hacky and usually not really worth it
for example high res ground textures give very little value in this game
most of the time they are hidden by clutter
and they would likely eat frames too
rigid spindle
So, is there a way to make a texture reflect zero light but have the non-black parts of it emit light
or well
have it just visible even when it's dark, like for a fake "night sky" skybox
full quarry
rigid spindle
So, is there a way to make a texture reflect zero light but have the non-black p...
can you be specifc what exactly you want to make?
its usually easier to answer the specific case
especially when someone wants to make something "weird"
rigid spindle
so I'm using UserTexture objects to show these (converted to paa)

So naturally, the void should not reflect their flashlights
but should be visible without them, even at night
I'm therefore pondering how to make an RVMAT that does this
or if it's even possible
full quarry
you can make it emissive at least that could solve it
rigid spindle
Yeah, that sounds right.
I just didn't know if you could make it emissive at all.
or rather, if "emissive" meant what I thought
manic mulch
First try doing a texture (as well as a addon) for arma.


I upscaled the gdt_dirt texture with AI to 4k, and replaced the beach texture with it.
For some reason, it doesn't seem like the normal map is working.
manic mulch
Seeing a tutorial, i understand that i need to combine a heightmap with a normalmap.
But how should this be done?
lethal condor
AI upscaling normal? I think it can be done by doing RGB separately and combine later
manic mulch
the normal was done above the diffuse map
so i have the diffuse map (the basic color texture), the normal map, and a height map
 azure matrix
Is it necessary to use a low poly and a high poly version of an object to create a proper texture in substance painter? im trying it the first time and my curvature map is feeling like shit, all cylindrical objects are complete white on the curvature map. I just only have a low poly model, is there a workaround or do I also need a high poly mesh?
manic mulch
still no luck on getting the heightmap to work

 floral seal
https://cdn.discordapp.com/attachments/1122541679824609341/1127131537016627232/image.png is there some way to mask alpha? I've got showing geometry inside out because the body rvmat contains alpha imagery. Is there a particular rvmat method for achieving alpha / no alpha areas on the geometry?
 manic mulch
finally got NOPX to work.
BUT... for some reason i got this strange darkening when too near of the texture.
Does someone knows the cause of it?

 full quarry
floral seal
https://cdn.discordapp.com/attachments/1122541679824609341/1127131537016627232/i...
full quarry
floral seal
https://cdn.discordapp.com/attachments/1122541679824609341/1127131537016627232/i...
no
I dont think body texture should have alpha either 🤔 why does it?
full quarry
manic mulch
finally got NOPX to work.
BUT... for some reason i got this strange darkening w...
you might have broken terrain lighting maybe 🤔
or something went wrong with the nopx
floral seal
oh, i fixed it with alphatest32
 near warren
Do you think this looks kinda like it could already be in game for something on the display?

oh maybe a little too detailed for the game's icons
Ok not quite x3

 stable swallow
azure matrix
Is it necessary to use a low poly and a high poly version of an object to create...
stable swallow
azure matrix
Is it necessary to use a low poly and a high poly version of an object to create...
No i made a complete new texture of an AK i bought with Substance Painter and the outcome is outstanding. I advise you use the normals from the model and the AO
 full quarry
You most likely did not do the P drive setup as its told in the beginning
 strange lodge
I have retraced my steps multiple times but the only thing i can figure is my mapdisk is not right
Quote from the page
Use this for “mapdisk.bat”:
subst p: /d
subst p: "c:\arma3work"
Replace “c:\arma3work” directory to where you want to keep your work drive.
I cant figure out what they mean by saying "work drive"
is that where arma3work folder is located? or is it the p drive where buldozer folders are located?
I will also say that both my arma3 and arma3 tools are in my d drive. does this effect it?
full quarry
its the folder you want to use as "arma work drive"
work drive being the virtual P drive
once you mount it
full quarry
strange lodge
I will also say that both my arma3 and arma3 tools are in my d drive. does this ...
tool or game location does not affect it
but dont put the subst folder under tools or arma 3
strange lodge
what does "subst p: /d" mean?
full quarry
strange lodge
what does "subst p: /d" mean?
It removes any previous mounting just in case
you can find subst command documentation online if you want to learn more about it
strange lodge
got ya
I think I figured it out
when I downloaded the Arma3P, DeOgg, DePbo, etc files, I put them into the C file folder. not the P drive
full quarry
no they dont belong to P drive
they install on C by default and belong there
@strange lodge no need to do anything what the tutorial does not say
strange lodge
It worked when I did it
full quarry
well you did something else then. they do not belong into the P drive
stable swallow
strange lodge
I think I figured it out
The P Drive is basically your Virtual Arma 3. This means you can see the model you import how it would look like ingame. Rvmats, Textures, model proxies if you split one model up in seperate pieces.
So its basically you see how its in Arma without beeing in Arma
strange lodge
Got ya
I was able to make a pbo for it and tomorrow I'm gonna try to figure out how to put it into arma editor
As time consuming it is, I would say that most of my time was retracing steps and figuring out what I did wrong
It took me a while to realize I misspelled a .cpp file as a .ccp file
manic mulch
is there someway to replace the terrain textures (and the MidDetailTexture) on the fly, while ingame?
While working in the MidDetailTexture, i noticed how much that texture can change the whole map atmosphere. Being able to change it on the fly could led to some interesting mod possibilities (my idea would be to create a rainy atmosphere, where the textures look soaked)
full quarry
manic mulch
is there someway to replace the terrain textures (and the MidDetailTexture) on t...
No
you are not the first one to explore wet surfaces like that
but its not possible
manic mulch
ok. thank you
rigid spindle
Uh, with RVMats, what's the maximum amount a thing can glow?
currently I have ```sqf
ambient[]={2,2,2,1};
diffuse[]={0,0,0,0};
forcedDiffuse[]={0,0,0,0};
emmisive[]={4,4,4,2};
specular[]={1,1,1,1};
specularPower=550;
PixelShaderID="Normal";
VertexShaderID="Basic";
fogMode="none";
class StageTI
{
texture="a3\data_f\default_vehicle_ti_ca.paa";
};
but I think maybe 550 isn't doing anything
rigid spindle
and like, it doesn't say precisely how far you can take emissive or what the variables actually do in it
like is 2 better than 1 for alpha? I don't know
rigid spindle
Hmmm
I think I've got some very good results with sqf ambient[]={2,2,2,1}; diffuse[]={0,0,0,0}; forcedDiffuse[]={0,0,0,0}; emmisive[]={5,5,5,1}; specular[]={0,0,0,1}; specularPower=40; PixelShaderID="Normal"; VertexShaderID="Basic"; mainLight="Stars" fogMode="none"; class StageTI { texture="a3\data_f\default_vehicle_ti_ca.paa"; };
I had no idea raising it up would make it glitchy
that said, I'm very happy with it
silver adder
Yeah it turns out that it doesnt like my FBX files, not sure if it is just a year thing, i didnt try setting 3dsmax export to older formats, 2010 etc. but it doesnt like my 2014 fbx's........OBJ works fine
 severe rune
It shouldn't make it glitchy
I have a thing with emissive of like.. 100 or so and it's fine
 young patio
so ive recently baked my normal maps onto my model but when i try and move it into Tex2View i get slapped with this error

problem is its a generic error code and i dont know why its giving me that error.
Things ive tried:
Saving the image from Blender to a JPG, then Converting it to a PNG in GIMP (no success)
Saving the image as a copy (no success)
Saving the image as a render (no success)
Saving the image with the _NO file extension (no success)
Never mind figured it out i added an alpha channel in GIMP and seemed to fix it
full quarry
young patio
Never mind figured it out i added an alpha channel in GIMP and seemed to fix it
It likely was of incomaptible bit depth
however alpha channel is unnesessary in normalmap so that is just modly bandaid instead of a real fix
young patio
full quarry
It likely was of incomaptible bit depth
i mean i did play with some other sliders as well as the alpha channel addition but at this point i felt like a monkey operating a heavy equipment

 teal charm
How do I add textures for two different materials
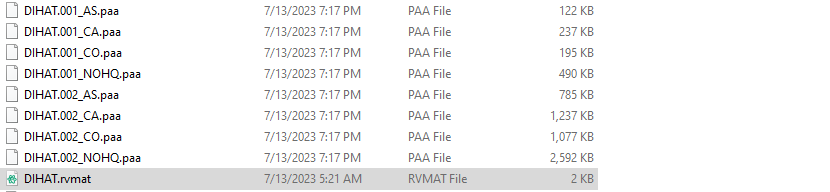
Two different texture selection materials
I'm trying to add it to the rvmat correctly
Is this the same as multimaterial ?
full quarry
teal charm
Is this the same as multimaterial ?
what are you texturing?
lethal condor
- Path actually may be incorrect
- Bit depth is wrong maybe
- Also how do you debug?
livid knot
I want to double check im in the clear here (pretty sure I am since how else do retextures work) but am I allowed to take a vanilla paa file, edit it, and upload it to the workshop?
sudden hatch
@full quarry Hello, sorry to bother you, you send me a blend example (Horgo) for texturing and I'm a bit lost (or totally :/). Does this example make the MASK file or does it just extract the mask file info (colors) to put texture on the right place ?
I would like to know if anybody work directly with blender in order to create the texture map instead of using substance painter.
full quarry
sudden hatch
I would like to know if anybody work directly with blender in order to create th...
I do textures directly in blender yeah
and teh example is set up so that you can paint the mask and save it out
sudden hatch
Sorry to bother, I'm slowly learning the texturing.
I don't really understand the workflow.
When you can paint the mask, you mean manually with the texture paint or there is a macro that does it I'm a bit confused.
full quarry
sudden hatch
Sorry to bother, I'm slowly learning the texturing.
I don't really understand th...
manyally paint it
for any automation you will have to create your own procedural nodes
you will need to do basic texturing tutorials and learn hoiw it works before the example is of any use to you
sudden hatch
I know how to basically texture on blender using the node editor, but I'm not sure how it correlate with the MASK texture for arma.
So in the example if I understand it well, you take the Mask image (that you made yourself) and with the node editor you're seperating the color (RGB value) to assign to each node of texture map, you're mixing each color one by one but what the macro is for at the end ?
I try to reproduce your example but all I got applied is the MAsk texture and not the individual texture by itself. I use to create a material for each set of texture, but in your example I see only two one for exterior and one for interior.
full quarry
the node setup is just a preview of what it could look like in game
the mask is the only thing really important
it mimics the behavior of a multimaterial RVMAT
sudden hatch
Ok so all the node editor stuff in the example doesn't really matter for the export to arma 3.
Can you tell me what is your workflow from UV unwrap to export to arma 3 ?
Do you create a material for each texture, what I don't understand is how the information will translate from blender to arma ( I mean the streching of the texture).
full quarry
sudden hatch
Ok so all the node editor stuff in the example doesn't really matter for the exp...
uv mapping handles what texture looks like or how they fit
Id recommend forgetting Arma for a while and just looking up unwrapping and texture baking to understand how the basics work first
after that it is easier to understand how it works in Arma
manic mulch
doing some tests with midrange textures.

 manic mulch

 fervent wagon
Idk if this is the right channel to ask but can someone help me out make a skin for a plane?
Or does anyone have a tutorial for it
lethal condor
If you want to let someone make one, #creators_recruiting , if you want to learn, here
manic mulch
is there something like a reflection texture for objects like the water spill?
 full quarry
manic mulch
is there something like a reflection texture for objects like the water spill?
full quarry
manic mulch
is there something like a reflection texture for objects like the water spill?
is it a custom object?
manic mulch
full quarry
is it a custom object?
no, it's from the vanilla game
full quarry
then no dont think anything can be done about that
it already has a bit of specular reflection since it shines blue from the sky
manic mulch
is there a global value for specular reflection that can be changed?
lethal condor
rvmat thing
 mossy estuary
So I make a model in blender, i make a custom texture and have a uv map in blender. When I import the model into arma how do I take the texture with it? Does the texture just stay as part of it?
livid knot
You have to assign it to the selection
@mossy estuary this video covers it https://youtube.com/watch?v=TboTYArmi2s&si=xwRQAbBd7D5pwqfE
full quarry
mossy estuary
So I make a model in blender, i make a custom texture and have a uv map in blen...
Texture needs to be external file and it's assigned to the model I. Separate place that points to the file in correct path where it will be in the pbo.
 heady trout
Hey, I’m not new to Arma but I’m new to making textures does anyone know how to put textures on objects like on Computers, TVs, and billboards.
 dawn bough
heady trout
Hey, I’m not new to Arma but I’m new to making textures does anyone know how to ...
dawn bough
heady trout
Hey, I’m not new to Arma but I’m new to making textures does anyone know how to ...
And some of the billboards have attribute value in attributes (Eden editor - RMB - Attributes - last line of attributes) where you can add your own img
heady trout
Ok I’ve been using setObjectTexture but it comes up with an error Init: Missing;
full quarry
heady trout
Ok I’ve been using setObjectTexture but it comes up with an error Init: Missing;
you dont have the command right
heady trout
We fixed it the scripting chat
 wary mortar
So, in Blender, I'm trying to use a HDRI image for baking the AO texture map for my object, but I'm worried I'm missing something.
I set up the HDRI in the world properties, as an environmental texture. Here's the nodes:

I can see the HDRI when I go on material preview mode, but not on Render. I've tried everything I've found online, double-checked the set up, and everything at least as far as I can tell.
When I baked the AO texture map, it looked exactly the same as before I set up the HDRI. I'm not sure where I'm going wrong.
--I opened up a brand-new blender file, and did the exact same HDRI setup process, and it worked just fine there, so not sure what's going on.
I'd love any help from y'all.
wary mortar
Anyone?
 zenith mulch
wary mortar
I can see the HDRI when I go on material preview mode, but not on Render. I've ...
zenith mulch
wary mortar
I can see the HDRI when I go on material preview mode, but not on Render. I've ...
Did you select cycles as your renderer?
You might be in eevee
full quarry
eevee has no baking option so has to be cycles
wary mortar
I was in Cycles. For whatever reason, my HDRI wasn't showing up, or helping for the AO bake.
I solved by just copy-pasting my res1 model into a brand-new project in Blender. Bake came out well.
I do have a question about textures in Buldozer, the OB preview. How accurate is Buldozer for how the textures look in-game?
(I assume it's fairly good, but figured I'd ask).
My model preview is coming out very shiny, and I'm not sure how accurate that'll be. I should probably reduce the Specular power in the rvmat, and mess with some of the values of the smdi, no?
full quarry
wary mortar
I do have a question about textures in Buldozer, the OB preview. How accurate is...
Default buldozer is way off. There is a guide to set up the new lighting in pins. Though it may not always work as easily. Depends a bit how P drive and tools are set up
wary mortar
full quarry
Default buldozer is way off. There is a guide to set up the new lighting in pins...
How exactly do i do it? I downloaded the file, extracted the files to the bin folder in my p drive.
Then I opened the buldozer config page and in the path box, I copied the path+parameters you had on your guide (with path adjusted to my own steamx64.exe).
Is that it? Or did i miss something?
(I took a redeye flight and am waiting for my next flight so mind is groggy, in case I missed something obvious)
full quarry
Should be it. But sometimes buldozer wants to read the config from Arma3 folder and you might need to rename the bin.pbo from arma3\dta\ temporarily to get the buldozrt to recognize the config on P
 midnight crown
Is there a way to make camouflaged texture solid green?
 tropic crater
midnight crown
Is there a way to make camouflaged texture solid green?
tropic crater
midnight crown
Is there a way to make camouflaged texture solid green?
yeah, individually cutting the shapes out, filling in the camo texture, then overlaying a color on it
aka, a good amount of work ahead
 bronze crypt
midnight crown
Is there a way to make camouflaged texture solid green?
bronze crypt
midnight crown
Is there a way to make camouflaged texture solid green?
If i were u and I had them available, Id overlay the color just with a normal map thats greyscaled then cut out parts you want not colored from the original image (i.e. lights and exposed/unpainted parts) and just paste em into your texture
I use gimp, idk if you can do it better with photoshop or sometbing
Something
 mighty crest
folks this might be on interest that I discovered the other day -- https://forum.allegorithmic.com/index.php?topic=4869.0
Allows to go from 3dsmax directly to substance painter.
near warren
I have some how managed to break my object in game-
Messing with textures, loading into the senario by mistake and then the model in game was invisible, even when placing new of the objects and in new missions. Commands showed material was correctly made to be default. Other versions of the objects worked fine. (8x8 variant wasn't working but a 4x4 was)
I am attempting to restart the game to fix, but- yes
like, working, load into the game, exit to editor, not working. No matter the texture, material. So- interesting
hmm- maybe it cached a material but it was made incorrectly, so it was breaking just that object?
restart fixed it, it seems. Also, is this the right channel for material questions?
 gloomy patrol
is anyone able to simplify the textures or geometry of some large assets for me? im looking to reduce asset costs
full quarry
near warren
restart fixed it, it seems. Also, is this the right channel for material questio...
Yea. Though very obscure issues may be difficult to answer. 
full quarry
gloomy patrol
is anyone able to simplify the textures or geometry of some large assets for me?...
You can post on #creators_recruiting (use template)
Though I'd advice just simply not using some random models from interwebs since making them game compatible is usually a nightmare.
gloomy patrol
i am mildly capable i might be able to create my own textures or models
ill see if it can import blender
wary mortar
gloomy patrol
ill see if it can import blender
Theres a couple of good tutorials for importing blender models to arma on youtube, as well as a blender extension for doing that.
 sonic dagger
Hello ! Do you know where I can find D3S's templates ? They don't seem to be available anywhere
 golden lotus
Hey everyone 👋 I’m trying my first crack at creating a custom vehicle texture. I want to create a custom skin for the Flatbed HEMTT. Can someone please tell me where I can find the texture image for the outside of the truck? I want to create a Flatbed HEMTT
lethal condor
outside of the truck
What do you mean? The entire exterior textures?
lethal condor
I wanted an answer in yes or no
golden lotus
Yes
lethal condor
a3\soft_f_enoch\Truck_01\Data\Truck_01_cargo_CO.paa should be it
golden lotus
Thank you
golden lotus
Anyone want to make a bit of money? I dont got much to offer but I really want a custom IDAP skin for the flatbed HEMTT and I cant find a template to edit anywhere. I could paypall or Zelle someone if they helped me make an IDAP HEMTT Texture. I tried watching youtube and finding the texture file. Its just not working
lethal condor
Before asking someone to make one elaborating
Its just not working
is a wise choice
golden lotus
I just dont know what im doing. Ive done vehicle skins in other games. I cant fint the Hemtt flatbed outer texture image.
lethal condor
That tells me nothing
lethal condor
lethal condor
`a3\soft_f_enoch\Truck_01\Data\Truck_01_cargo_CO.paa` should be it
Also this
golden lotus
I went to that file location and found the file but when I decompress it it is giving me an error message and showing no texture
lethal condor
Okay, in case you don't know what troubleshooting 101:
- Tell what you've done, with what software, what config, what code etc
- Tell what error it gave you, exactly, word to word
golden lotus
I got the PBO Manager and I opened up soft_f_enoch.pbo and followed the path you gave me. I attempted to open Truck_01_cargo_CO.paa in gimp and paint.net and both couldnt open the texture
lethal condor
PAA is not a regular image file, only Arma compatible one
You need convert with some software like TexView2
golden lotus
Ok. Ill try that. Thanks very much
full quarry
texview is part of arma 3 tools package on steam
near warren
for testing, if ya don't need transparency, ya can use a jpg and set hidden selection texture in a single player mission
Also, texview, ya can save as, select file type to all, then put '.png' at the end and it will convert from paa to png.
Question, is "send to... Pal2PacE" there for everyone? Or did I manager to do this somehow without realizing it xD
 bright dust
Hi, any ideas why when making a texture 2048x1024 still cuts some of my image off on either side?
full quarry
bright dust
Hi, any ideas why when making a texture 2048x1024 still cuts some of my image of...
texture for what?
bright dust

 full quarry
the mesh is likely not unwrapped to cover the whole texture space
bright dust
Never had an issue before, usually just goes straight on but with this size im having that issue where it cuts some off
ahh
is there a way to do that in object builder?
full quarry
bright dust
is there a way to do that in object builder?
uv unwrapping? yes there is uv editor incorporated
not really any guides around on how to use that
unless BI wiki had some?
dont rember anymore
lethal condor
You never should edit your mesh in OB by any means
full quarry
true 😄
bright dust
you mean like this? https://gyazo.com/11b50a8ae45460a2f072ec7ad417cb4e
 lethal condor
You must only done your very, very final touch
full quarry
though I still know people who do all their modeling in OB xD Crazy people
bright dust
if so, it still does the same thing and cuts some off
bright dust
full quarry
though I still know people who do all their modeling in OB xD Crazy people
my cousin does it all in OB.... too many lines for me lol
full quarry
do you have multiple uvsets in the uv editor?
would be tabs right under the top toolbar
lethal condor
More like you should curse Arma or RV engine
 onyx sequoia
That's funny
Illegal/dead textures
 onyx sequoia
full quarry
though I still know people who do all their modeling in OB xD Crazy people
onyx sequoia
full quarry
though I still know people who do all their modeling in OB xD Crazy people
Well you can add cube and cylinder in object builder
You can do everything with cube and cylinder
full quarry
sure
and I've done a lot of stuff in there back in the day
and can not recommend it xD
onyx sequoia
🐸
lethal condor
It works is not always ideal
onyx sequoia
The macro is nice
 lethal condor
Urm... is this in Blender?
 real torrent
Substance Painter, why
lethal condor
This is a violation of Arma 3 EULA 3. A.
3. End User's Obligations
A. As a Subject to the Grant of License herein above, you may not, in whole or in part, copy, duplicate, reproduce, translate, reverse-engineer, modify, disassemble, decompile, derive source code, create derivative works based on the Program, remove any proprietary notices or labels from the Program or otherwise modify the Program without the prior written consent of the Licensor.
real torrent
damn
severe rune
If you do things in private, for yourself, don't show anyone and don't tell anyone and don't share any of the violating content with ANYONE. We don't care.
But anything else will very quickly get you banned and may get your mods banned too.
 frozen jolt
for any OPTRE users i need some help, does anybody know how to retexture the WHOLE transport hog. for some reason I can only change the back of the warthog but not the front

this is the transport hog PNG and its just the back, if anybody knows where i can find the front of this pls let me know
 neat cape
frozen jolt
for any OPTRE users i need some help, does anybody know how to retexture the WHO...
neat cape
frozen jolt
for any OPTRE users i need some help, does anybody know how to retexture the WHO...
probably you should ask OPTRE devs for such help
 deft bolt
What's the difference between SMDI and DTSMDI? Ive been looking through the a3 folder for multimaterial references and wiki is no help
 sage copper
A DTSMDI is an SMDI, but with a detail map in the red channel
deft bolt
So just a _co texture in red?
sage copper
deft bolt
So just a _co texture in red?
nah, a _dt in the red channel
https://community.bistudio.com/wiki/Texture_Map_Types#DetailMaps
I think PuFu did a nice job explaining why DTSMDI exists here
#arma3_model message
 twin bane
For those that might have missed it
From Joost: http://polycount.com/discussion/157651/800-free-textures
Torrent (7GB) https://drive.google.com/open?id=0B25w8bE0paQqQkR2bXZiZkVPUzg
frozen blade
would be nice to pay a few bucks to the lad
twin bane
^^ i did :)
mighty crest
+1
golden lotus
Hello again. By any chance can someone tell me where the PAA file is for the Default Offroad Comms truck? I’m guessing it’s multiple textures like the HEMTT. I need the camper shell texture file location. if anyone could point me in the right direction I would really appreciate it.
full quarry
golden lotus
Hello again. By any chance can someone tell me where the PAA file is for the De...
you should be able to find the texture path in the vehicles configs hiddenselectionTextures
golden lotus
full quarry
you should be able to find the texture path in the vehicles configs hiddenselect...
I’m completely new at this. I found basic textures on a Arma 3 forum describing where their file was located. Can you tell me how to find individual vehicle configs?
full quarry
golden lotus
I’m completely new at this. I found basic textures on a Arma 3 forum describing ...
ingame config viewer
golden lotus
full quarry
ingame config viewer
Oh ok. Thank you
frozen blade
👍
 jovial urchin
Hi everyone,
I'm trying to reskin a base model from the game, to make it into a French firefighter outfit.
The problem is that the "residues" of the nohq from the old texture persist. Is there a way to correct this?
 young patio
howdy people so ive a question for you all How do i make my textures look "nicer"
right now they look for a PS1 game but im missing out on how to add in the other bits that make em look nice things like normal maps, AO maps etc
i have no idea how to add these to my textures in game. ive got them made up the programme i use for my textures "Quixel Mixer" allows me to make normals, AO maps, Displacement, Gloss, Metallic etc a whole host of options but none of that matters
because i cant get it to translate to ARMA 3.
i thought i figured out how to add in normals the other day and succesfully baked a HP to a LP moustache so i thought but when i imported it in game it was just a low poly brown smudge on a guys top lip.
ill be honest i know im not great a texturing but thats mainly because theres not much info out there on how to do the textures/make textures look nice like i can follow as many texturing tutorials online and i can make great set pieces in blender but that doesnt matter when you try to export it to ARMA 3.
so any help would be greatly appreciated folks. cheers.


examples of the sort of textures that quixel makes below:


 lethal condor
jovial urchin
https://ibb.co/DzG1Xfw
Hi everyone,
I'm trying to reskin a base model from the ...
lethal condor
jovial urchin
https://ibb.co/DzG1Xfw
Hi everyone,
I'm trying to reskin a base model from the ...
Is that an American parade uniform?
jovial urchin
lethal condor
Is that an American parade uniform?
No, it's this basic outfit: "U_I_E_Uniform_01_officer_F".
And I transform it into regular service clothing for firefighters.
 placid panther
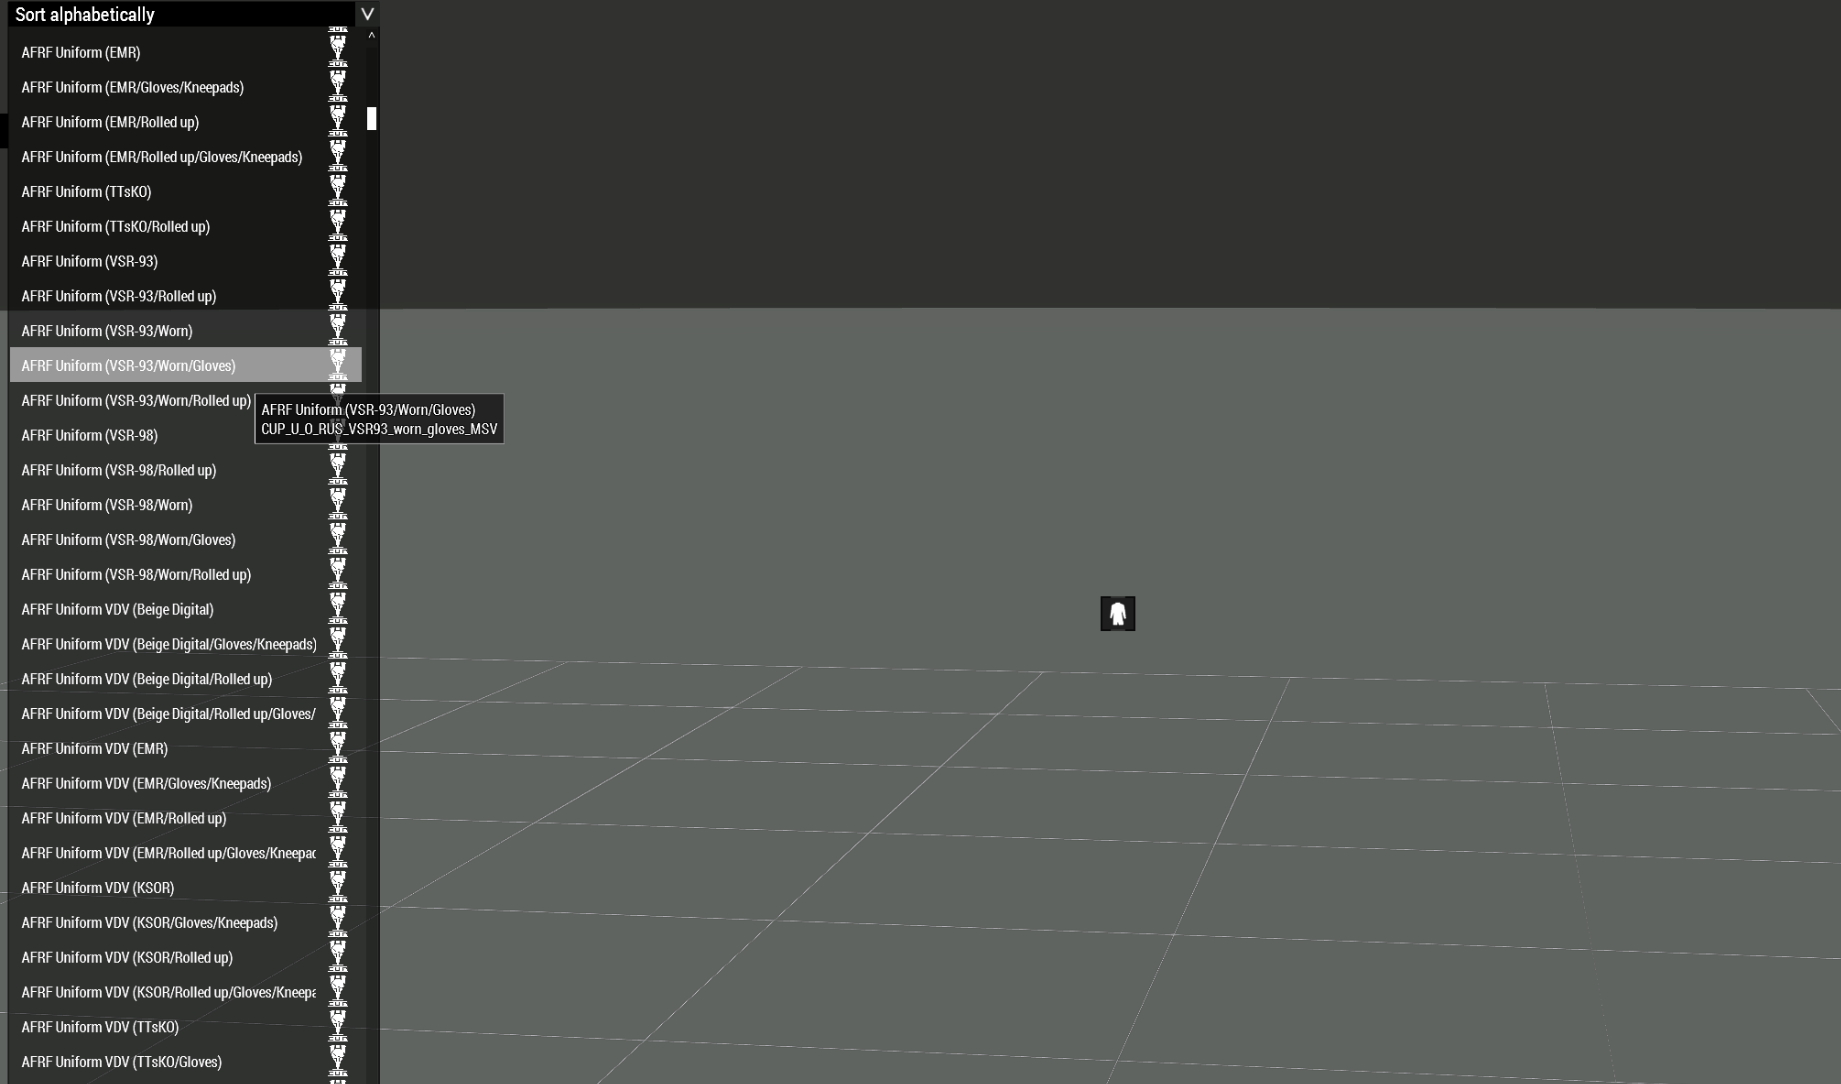
does anyone know why this is happening
I unpacked the CUP PAA for the uniforms, replaced a single uniform texture with my own and repacked it and now it's done this
when I try to apply any uniform from that PAA to a soldier, it just turns them invisible
lethal condor
How do you "unpack", "replace", "repack"?
placid panther
lethal condor
How do you "unpack", "replace", "repack"?
it doesnt let me share images here directly hang on

through pbo manager 'extract to'

then I replaced this with my own texture
exact same dimensions

repackaged it through this then replaced the original file
lethal condor
That definitely is not the proper way to make a Mod, like, generally
placid panther
then as shown in the last image everything from that file just becomes invisible in-game now
i'm not making a public mod just retexturing for personal use
placid panther
how am I supposed to retexture uniforms then? I don't want to create a whole separate mod because it takes like 1000 lines of code
the video I watched literally does it exactly how I did there and it works fine
Please like and subscribe to keep the content flowing
Your comments and likes are appreciated
lethal condor
Then forget that video and unsub and vote negatively. That is a way to mess anything
placid panther
how do I do it properly then?
lethal condor
- Pick a PAA (s) to retexture not entire data
- Modify the textures
- Apply via a config
- Using a software other than PBOManager to pack it into PBO, and make into a Mod
placid panther
what's wrong with pbo manager? and also how do I make a config? There isn't one in CUP
lethal condor
PBOManager can break anything silently. You at least should use the one from Arma 3 Tools
And every Mods have config. If you say CUP doesn't have one, it is simply wrong or misunderstanding
placid panther
where is the config?
it's not in the files
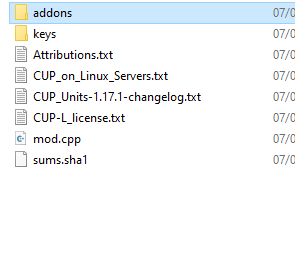
it's not here
or in the other two folders
lethal condor
It is in the pbos not there
placid panther
there's already one in the pbo though
lethal condor
I said you want to make one
placid panther
replace the one that's already there then?
lethal condor
Modding PBO 101: you SHOULD not to just unpack, change one file and repack
Instead, a PBO can change other PBO's content. That is the way you should to take
placid panther
oh right
so make a new mod with my own pbo, and a script to replace CUP's textures?
lethal condor
It is a config not a script, but that is the idea. And bring up a software than PBOManager to pack one
placid panther
okay how do I do that? create a new @Modname folder, make a config and then what?
I have no idea how to do that, I don't even know what programming language arma uses
lethal condor
Neither do I. I just recognize it as a "Arma's config"
I'm not available to teach A to Z right now, so I just can place a summary:
check Bohemia Interactive Community Wiki (we abbreviate BIKI), check Uniform Config or some words and search
placid panther
I opened up another retexture of CUP and it has over 6000 lines of code in config ._.
lethal condor
That's really unnecessary if your intention is just to retex one uniform
placid panther
I can't even find a simple guide on how to do it or even start
lethal condor
lethal condor
I'm not available to teach A to Z right now, so I just can place a summary:
chec...
I told you already
placid panther
nothing explains it from the ground up, the wiki page assumes you already know what these things mean
lethal condor
Or wait someone who can teach you the ropes, I can't right now after I'm on the phones
placid panther
like, why is the uniform texture defined in cfgWeapons?
lethal condor
It is how it is. And you're misunderstanding. Both CfgVehicles and CfgWeapons define an uniform
lethal condor
Blame someone who thought that is a good idea a decade ago
There's a Creating Addon 101 article or something in that wiki IIRC. You may want to check that too
 dark pollen
placid panther
I have no idea how to do that, I don't even know what programming language arma ...
dark pollen
placid panther
I have no idea how to do that, I don't even know what programming language arma ...
According to ChatGPT all Armas use Arma 3 as a language 🤣
Anyway, here's some help on how to set up your addon:
Step 1: Create @modname etc. incl. addons and keys folders, plus mod.cpp file (edit one from another mod)
Step 2: Not exactly necessary to do it this way, but you should copy and unbinarize (via Arma 3 tools package's CfgConvert tool) the config.bin from the addon that contains your desired uniform in it. You should end up with a config.cpp file; put it in your mod -> addons > addon_name
Step 3: Find the uniform config in either CfgVehicles or CfgWeapons
What you have to do is delete most of the file's config barring the uniform's entries in both Cfg types, and of course CfgPatches should be left intact as well as the classnames the uniform is inheriting from
dark pollen
dark pollen
Step 3: Find the uniform config in either CfgVehicles or CfgWeapons
Why this? Because if you find one, you can easily find the other. Just look for an entry called "uniformClass=" or similar, it'll point to the classname you're interested in
Step 4: Change the classnames' names to your liking, adjust the texture paths, etc.
Also remember to:
A) Use common sense
B) Pack your addon into a PBO once you're finished, check "CfgConvert" to binarize your config (and find any errors), and possibly sign your addon (not required for SP).
severe rune
mod.cpp is optional. As beginner just skip that
floral fiber
dont need to use cfgconvert for binarization either
placid panther
dark pollen
Step 2: Not exactly necessary to do it this way, but you should copy and unbinar...
So, just copy the entire config from the PBO that has the armor I'm trying to retexture into my mod?
then look for where the texture is defined and change that?
placid panther
Does anyone know where the armor config files are located for RHSAFRF?
placid panther
^ I tried the exact process again for Project Opfor but for some reason it doesn't work, does anyone have any idea why that happens?
It worked for the uniform from CUP, but it is not replacing the texture for the helmet from PO
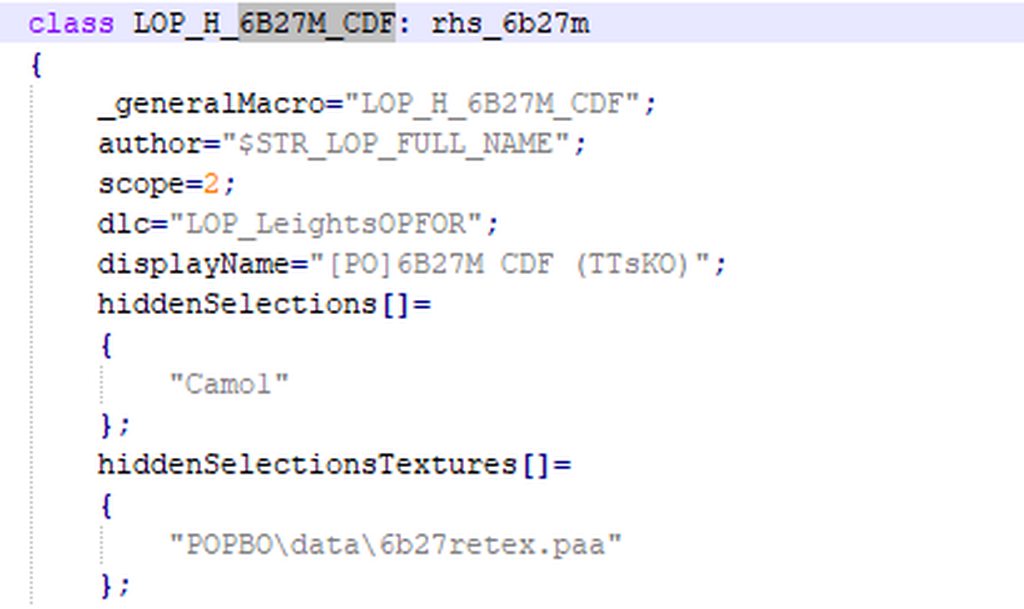
this is the line of code, POPBO\data\6b27retex.paa is my texture
dark pollen
Maybe you're missing a bracket at the end, or you didn't make the addon required in your addon, or worst case scenario, the helmet lacks hiddenSelections (I know it has them in your screenshot, but I'm not sure if the model has it)
full quarry
the huddenselection could be called something else than camo1
 heady solar
Hey, I'm very new to texturing and was wondering if anyone can recommend a beginner friendly tutorial? I'm uneducated on most of the terminology and procedures one should know (not just Arma related).
 mild olive
heady solar
Hey, I'm very new to texturing and was wondering if anyone can recommend a begin...
mild olive
heady solar
Hey, I'm very new to texturing and was wondering if anyone can recommend a begin...
Do you know what software you plan to use?
heady solar
mild olive
Do you know what software you plan to use?
I've used a bit of GIMP for basic color changes and marking, but I'm now trying to learn Adobe Substance 3D Painter
I'd like to further elaborate that while I was able to get decent results with GIMP, I really had no idea what I was doing or what anything meant. I'm looking to learn much of the general terminology and aspects of texturing in general. As of now, I'm at the point of not knowing what I'm supposed to know.
mild olive
heady solar
I've used a bit of GIMP for basic color changes and marking, but I'm now trying ...
I don't know much on the proper terminology, so someone might correct me in here. But I can give a general overview.
I'd start with any youtube tutorial that covers baking models and generator use within substance painter.
For Arma 3, I use the PBR specular glossiness (A material workflow in substance painter). and pinned in this channel are painter export settings that you can download and use.
The more obscure side of the workflow that you wont find much on youtube about is creating rvmat files. These are essentially config files that you link to the different texture maps that you get from your painter export, and in these you can tweak the overall material settings.
People in the arma discord are good at helping with specific problems that you come across in the process. If you throw them in this channel, they tend to get answered pretty quickly.
heady solar
mild olive
I don't know much on the proper terminology, so someone might correct me in here...
Man, you can't begin to understand how much I appreciate the help!
wary mortar
A good “cheatcode” re rvmat files is that you often dont need to make your own. You can find an rvmat file for a material already in arma (rubber, wood, etc) and just sub in your own texture files’ paths in, and prest-o.
 boreal ether
Guys
textur list empty?
After extracting from blender as p3d, the texture names are empty in the texture list
full quarry
you probably have not defined the arma texture paths in the blender matererials
boreal ether
full quarry
you probably have not defined the arma texture paths in the blender matererials
How do I do what you said in the blender?
 heady solar
How would I go about adding reflective gold accents onto a model that is a dull grey metal? It looks decent when I'm editing, but does not have the reflective metal look in-game.
Pic for reference:
 full quarry
heady solar
How would I go about adding reflective gold accents onto a model that is a dull ...
full quarry
heady solar
How would I go about adding reflective gold accents onto a model that is a dull ...
Poorly I'm afraid, shiny gold parts would need to be separated and have their own rvmat as gold and dull metal are so far away from each other that single rvmat won't be able to represent both.
heady solar
full quarry
Poorly I'm afraid, shiny gold parts would need to be separated and have their ow...
But it is possible?
full quarry
Yes
heady solar
full quarry
Yes
But I'll hate myself, huh?
full quarry
Vanilla game does not really have any examples though
full quarry
heady solar
But I'll hate myself, huh?
You'll have to learn how rvmat works to be able to tweak it right
Correct base color, correct specular settings, correct fresnel settings etc
heady solar
full quarry
You'll have to learn how rvmat works to be able to tweak it right
Any good way to learn it? The Arma wiki didn't really seem to enlighten me.
mild olive
If you have a proper P drive setup, you can use buldozer to see changes to your rvmat in realtime. I've found messing around with that to be the best way to get my head around the parameters
heady solar
mild olive
If you have a proper P drive setup, you can use buldozer to see changes to your ...
I'm not really sure what a P drive is. Is that where you have multiple PCs on a shared network?
sage copper
You can mount the P drive using Arma 3 tools (see attached). You'll probably also want to run Project Drive Management >> Extract Game Data and then follow this pin (#arma3_texture message ) on setting up Buldozer to use in game lighting

 unkempt lake
I'm having an issue with importing a reticle made in photoshop where there's a white outline around it. This isn't present in the texture when I export it from photoshop but seems to occur when converted to a .paa. Any help would be appreciated.
 full quarry
unkempt lake
I'm having an issue with importing a reticle made in photoshop where there's a w...
full quarry
unkempt lake
I'm having an issue with importing a reticle made in photoshop where there's a w...
what format do you save the original image? do you use the proper naming convention of _CA suffix before converting it to .paa?
unkempt lake
full quarry
what format do you save the original image? do you use the proper naming convent...
It was exported as a .png and has the _ca suffix before conversion
I also tried .tga with an alpha map but experienced the same issue still
mint hare
looks like an anti-aliasing artifact with white background and slightly inclined lines (red is vertical)

quick fix in something like Krita (or GIMP) would be to use Color to Alpha on white color, i guess. I'm not sure PS can do that
mint hare
and in absence of Color to Alpha quick and ugly fix would be to select all non-transparent pixels and fill with solid color (i.e. black) 🙃
unkempt lake
mint hare
quick fix in something like Krita (or GIMP) would be to use Color to Alpha on wh...
this fixed it tyvm
full quarry
unkempt lake
It was exported as a .png and has the _ca suffix before conversion
make sure the background under the transparent is also red and not white as that will bleed thourgh if it i s white
 dense peak
So where do I find the drone backpack pbo?
full quarry
dense peak
So where do I find the drone backpack pbo?
what do you need it for?
dense peak
i want to make a big red medic bag in that shape
full quarry
so retexturing?
dense peak
yes
full quarry
so you are looking for the texture?
dense peak
yes
full quarry
well cant remember it off the top of my head but you can find the path to the model in the config viewer (advanced config viewer mods got better search too)
and the path to the model in the backpack class should point to the pbo
dense peak
ohhhhhhh and do you think its possible to remove the drone part of it? and give it a storage capacity like a regualr backapck?
full quarry
sure the model itself does not have any of that its all config
dense peak
awesome
full quarry
so you can configure that particular backpack to contain anything
dense peak
C_IDAP_UAV_01_backpack_F

ohhh i think i found it here.
well im having trouble finding it in the file explorer.
dense peak
Took a while but I got it.

 atomic jolt
Quick question, I'm trying to retexture a vest with a 2 part texture, and the command i'm using to check how the texture looks isn't applying the texture to the vest, but to the uniform for some reason. Anyone here have a script that does this properly?
cursorObject setObjectTexture [0,"TestChest.paa"] --> This is what i'm using rn, i've run that 0 up from that to 9 with no luck
full quarry
atomic jolt
Quick question, I'm trying to retexture a vest with a 2 part texture, and the co...
you cant use scripting commands on vests
only the uniform/unit and backpack
rest of the gear has to go through config
mint hare
well, if you createSimpleObject the vest's model, though... 
lethal condor
Even if you do you can't
atomic jolt
full quarry
rest of the gear has to go through config
Can this be a config in a mission file, or does it have to be a config in a mod?
lethal condor
Mod only
 kindred tinsel
I am struggling with transparency. I tried making a door with a semi transparent panel and while it looks great in certain positions, the non transparent parts do this crazy interference pattern which strobes as you move your POV or the door position. I've defined texture as _ca and made it a 32 bit TGA, is it the rvmat that's causing my grief (I just used a bog standard NormalMapSpecularDIMap with no extras at this point). What's interesting is you can see the outline of the outside window behind. Geo LOD I am currently (after lots of diffferent settings) using forceNoAlpha 1 and sbsource ShadowAlpha, becuase this worked in another model. What am I missing? Is this an rvmat thing, a Geo LOD property thing, or something to do with shadows (I'm not using a shadow LOD at the moment)
https://ibb.co/1XmHnzz
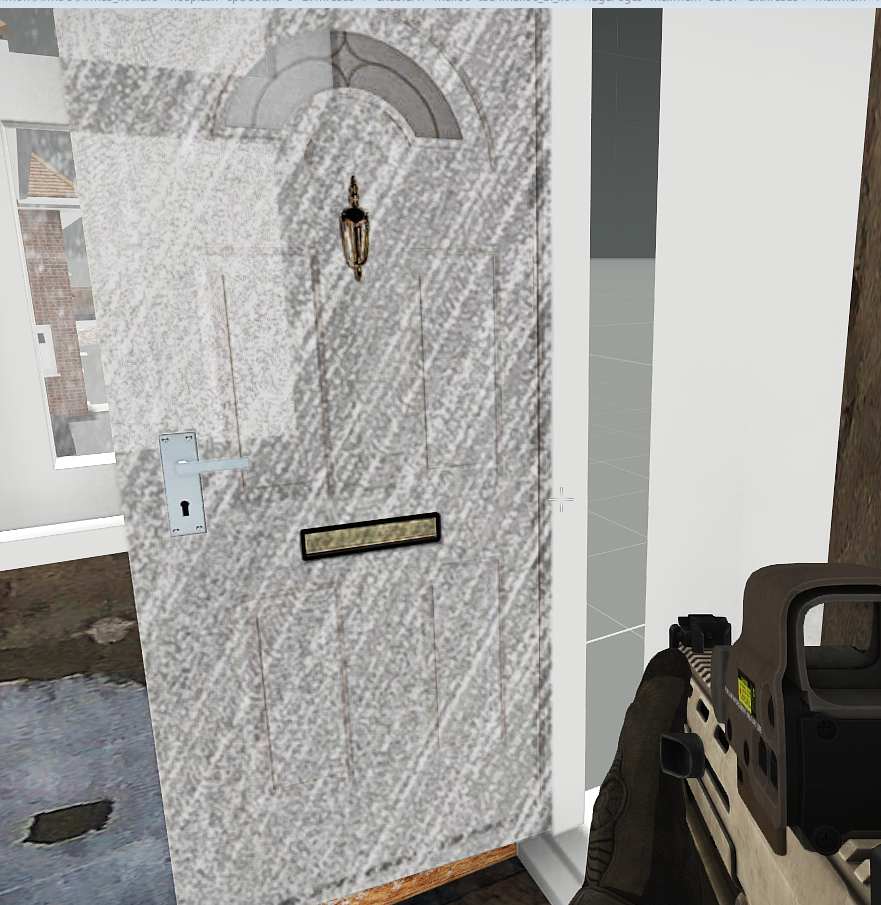 lethal condor
This is a GPU related issue I swear and nothing you can do
kindred tinsel
lethal condor
This is a GPU related issue I swear and nothing you can do
What's the workaround? How do people use textures with opaque and semi transparency? Split it up into several faces and handle them separately?
lethal condor
I think I've said very obviously, but this is a GPU related issue I do believe and there is no way around. If you can closely you can find a lot of this... What's up Ded?
severe rune
That looks like the shadow banding issue on models.
Try switching your shadow to shadowBuffer instead of ShadowVolume. or other way around
full quarry
kindred tinsel
I am struggling with transparency. I tried making a door with a semi transparent...
transparent parts are typically split to separate texture and material
and separate mesh
kindred tinsel
Thanks peeps, I guess I was looking for a quick way to mass produce loads of different doors to vary the house models I'm making but I guess like all things there's no easy way
lethal condor
I've always thought this artifact is related with a GPU 🤔
lethal condor
Well that's true, but after I changed my GPU to Nvidia one I can see this in almost everywhere, even in vanilla objects, can't recall when and which objects I've seen though
kindred tinsel
Well I think I got to the bottom of it - Polpox you were right in a kind of roundabout way about it only starting when you got a better GFX card - and it was your comment got me going down the rabbit hole all afternoon - turns out it's the ambient occlusion setting. If I disable AO, the semi transparent/opaque texture works beautifully in game. Any one of the other settings in AO makes it go batshit artifact crazy. It's kind of not the answer I was looking for, but it might jog someone's memory on workarounds - it is possible to do what I was doing, sort of, just need to find a way to pursuade the engine to cooperate 🙂
I mean, trees work, without artefacts, and the leaves are just planes with transparency, so wtf do trees do that I'm not?
severe rune
Are you using a AO texture?
kindred tinsel
No, but I have a feeling I am about to start understanding what one does!
full quarry
When you set a surface with a texture with transparency it gets flagged as transparent. such surfaces are not meant to be solid
you can set a named property forcenoalpha to the model but that can cause problems with surfaces you actually want to be transparent
but basically what you are doing is not intended way of doing that kind of a piece
young patio
question for yall peeps
how do you go about making SMDI maps
im in GIMP now trying to make one but when im adjust levels its doing Nada
im following this tut
https://www.youtube.com/watch?v=B448O4vftnU

Hello all this is my new tut on how to make smdi for dayz/arma 3 you'll have to play around with the rvmat/texture into order to get the best result but base import is usually good with out much tweaking hope this helps and sorry for the lack of editing I just don't have much time to create videos like this.
i understand its a different software but thought ok ill just try the equivelant in gimp
livid knot
@young patio
 young patio
livid knot
<@815180273398448138>
young patio
livid knot
<@815180273398448138>
thats great but doesnt tell me how to get there? like whats the process?
Im using Quixel mixer to make my textures and its great can generate things like normals, shadows, metallics, albedos etc but nothing for the
SMDI now i know the SMDI = Shadow map Diffuse right? but HOW do i make it?
livid knot
young patio
thats great but doesnt tell me how to get there? like whats the process?
Im usin...
do you have the textures exported as seperate image files?
young patio
livid knot
do you have the textures exported as seperate image files?
wait one
i have 5 files of png
and 1 displacement
So yes all seperate
albedo, AO, displacement,metalness,normal, roughness
livid knot
you could look up a tutorial online about how to seperate the rgb channels in gimp
young patio
yeah i can do that thats fine but what am i doing with it just playing the values until it looks this pinky neon colour?
is it that simple? seems like a trap if it is
livid knot
No. You arent editing any values. Assuming you understand that an image is made up of Red Green and Blue (RGB) then what this is is setting your texture maps to populate those color spaces. So the diffuse channel becomes Red and will be redish in hue, the Green is specular, and Blue is specular power multipler (white likely). And then when you combine these red, green, and blue images into one it ends up looking neon pinkish
young patio
livid knot
No. You arent editing any values. Assuming you understand that an image is made ...
So dont touch anything just let it be? the tut i posted the guy was taking the roughness map and making the SMDI from that hence why i was asking
livid knot
ah apologies, didnt read your msg about the materials you had close enough. Specular is a non pbr method of creating something shiny, the new method is with metallic and roughness. Id suggest googling if you can just use the roughness or if some combination of the metallic and roughness need to be used. You could try it with just the roughness if youd like
young patio
copy that its first time trying this so far my textures have been only CO textures and they look like PS1 graphics basic as hell and oversaturated im hoping to bring some grunge and realism with the help of these maps and mats
livid knot
I just looked it up, and quixel might be able to simply export your textures in the specular format
full quarry
thing about them is that the SMDI does not really always follow whatever color you got
gimp is not the easieset tool to make it
young patio
livid knot
I just looked it up, and quixel might be able to simply export your textures in ...
ive just found it yeah theres a drop down arrow on the export to swap between metallic and specular
ill see if that does anything
full quarry
using roughness map as a base is different matter though
@young patio if its your own model it migth be easier to make the textures in specular gloss to begin with
as the metal/rough translates only so well to spec gloss
young patio
full quarry
<@815180273398448138> if its your own model it migth be easier to make the textu...
yah its mine, so what would i do for that just add specular to all my textures?
young patio
yes i think thats half the issue -_-
full quarry
just adding random specularity does not work
basically the more specularity on a pixel, the more shiny it is
young patio
this right?
 full quarry
you can find a lot written on the subject online if you are interested in the technical side
full quarry
young patio
this right?
yes
the texture modulates the rvmat attributes set specular inensity (specular[] = [0,0,0,1}) and the specular power
young patio
full quarry
you can find a lot written on the subject online if you are interested in the te...
i would but im under a time crunch and im looking to get it running ASAP
my dumb ass decided to try and make it so im running an op using new assets (my assets) but the textures arent done, i can run it now techincally but the textures are awful so this is why im looking into this.
Only recently like last week got told what an RVMAT is and what it does this how new i am when it comes to textures
ive got 10 days
full quarry
time crunch is realistic only when you know what you do Im afraid
young patio
full quarry
time crunch is realistic only when you know what you do Im afraid
can i run without it for now then like in the RVMAT the other textures arent dependent on them?
full quarry
sure
you can set the default procedural color on the specular stage
or fiddle with the procedural color a bit to make it look closer to what you want it to be
young patio
id share the rvmat that i got from a YT tut but Clyde is telling me NO
its got an SMDI in that but its for a clothing so not sure if itd look cursed or not
full quarry
you can always test it. a texture for something else wont work for you though
young patio
full quarry
you can always test it. a texture for something else wont work for you though
got the normals to work but the metallics look like cheese
 full quarry
young patio
got the normals to work but the metallics look like cheese
full quarry
young patio
got the normals to work but the metallics look like cheese
the metal parts look like its smooth shaded, might want to turn the hard edges to be actually hard in the model
also the metal surface looks prettly low resolution
is the metal separate rvmat?
there is specific ways to make metals shiny but they need to be on their own rvmat because it goes into so far end of shinyness that rvmat cant properly do other types of surface at the same time
young patio
full quarry
the metal parts look like its smooth shaded, might want to turn the hard edges t...
i turned on smooth shade because it wanted it to be not so flat but yeah i think something somewhere got lefucked
full quarry
young patio
i turned on smooth shade because it wanted it to be not so flat but yeah i think...
to not have it so flat you need to make more mesh 😅




 surreal hearth
Pretty new to texture making, I wanted to make some custom models for a unit, just adding small things to vests and helmets, and what have you. I'm not getting any errors, but when I use this vest with my textures, it doesn't appear in the game at all? Any help would be appreciated, just ask me what you need, and I'll send it.
full quarry
surreal hearth
Pretty new to texture making, I wanted to make some custom models for a unit, ju...
you cant add things to existing models.
unless your unit has their self made gear
and you have access to the source files
surreal hearth
gotcha, ppreciate the help, didn't know, my bad.
full quarry
you can do retexturing which is just texture file + config
it does not violate any existing models
and is done by painting over existing texture or drawing completely new one
surreal hearth
full quarry
you can do retexturing which is just texture file + config
I just wanted to do that, I wasn't trying to steal models or anything lmao, I just wanted to take a vest from like RHS for example, and add a patch or something like that, no remodeling, I suck at 3D work.
I think I just explained poorly tbh.
full quarry
surreal hearth
I think I just explained poorly tbh.
possibly. you did say the key words of custom models
in any case retexturing generally is possible. most things are made to support it
surreal hearth
full quarry
possibly. you did say the key words of custom models
yeah, i noticed that after the fact, misttype and a half on my part.
surreal hearth
full quarry
in any case retexturing generally is possible. most things are made to support i...
Well, I have two follow up questions if you're willing to hear them then.
full quarry
surreal hearth
Well, I have two follow up questions if you're willing to hear them then.
you can ask here, no need to ask me to hear them. I usually lurk around and answer if I know answers and others do too.
surreal hearth
full quarry
you can ask here, no need to ask me to hear them. I usually lurk around and answ...
Fair enough, number one being can you take a look at my config.ccp and tell me what I'm doing wrong, number two being, can I have it setup to use the models from the mod themselves and only have my textures in my mod pack so It doesn't look like I'm straight just stealing the model. Not trying to be that guy.
full quarry
surreal hearth
Fair enough, number one being can you take a look at my config.ccp and tell me w...
number 2 yes, your config would need to have the original mods cfgPatches class as required addons so yours load after it and then you would just use same path to the model as in the original config
copying models is not part of the correct retexturing process as you have already gathered
surreal hearth
full quarry
copying models is not part of the correct retexturing process as you have alread...
yeah, didn't quite get that idea.
full quarry
from quick look structurally your config seems to be in right direction
you do need the required addons though and then Id recommend you clear your custom class from anything else but new displayName = parameter
that way you can more simply test to get it show up in game first
and once that works you can add the texture stuff
the model= parameter you dont need at all since you will inherit it from the original class
beyond that I cant look into it more right now
surreal hearth
Gotcha, I'll work on it, appreciate your help greatly.
dapper grail
I have a seam that only appears when zoomed out and it is driving me insane.

Disappears when removing smdi.
Same place as uv seams, uv not going outside the filled areas of the texture.
dapper grail
Please tell me something along the lines of "it's ok, no one will notice. No need to redo the smdi texture for the 5th time today".
😢
 floral fiber
nobody will notice what
floral fiber
i have successfully gaslit someone
dapper grail
floral fiber
nobody will notice what
The black bars.
floral fiber
now to find someone to gatekeep from
dapper grail
I have read what you wrote but only understood what I wanted to it seems.
Issue in blender as well ahahahahahah. So not an arma problem.
Changing image texture interpolation to closest fixed it 🫠 .
full quarry
Could be your texture does not have bleed around the uv islands which can cause pixels to cross over
@dapper grail
dapper grail
Unfortunately not. I have 16 pixel bleed.
 unreal bear
Hello everybody. Is there anyone who can provide me with a texture templates for the RHS Klmk suit and suspenders? Im working on a mod and I really need them
dapper grail
RHS
In Arma 3 Discord.
floral fiber
rhs has no discord
dapper grail
True.
dapper grail
full quarry
Could be your texture does not have bleed around the uv islands which can cause ...
I tried 32 pixels even.
I will try redoing everything again.
Tomorrow...
 harsh jolt
does anyone have a general idea on how to make NVG overlays fit Widescreen monitors?
had a couple people ask if i could add compat for it but dont really know where to start

 fleet apex
Would anyone with knowledge of retexturing 2d textures, be open to doing a few? Not looking for a crap load of custom textures (unless you really wanted to) but just like 3-5 base sets
lethal condor
fleet apex
lethal condor
<#292271129303842817>
Didn't even realize I had that channel. Thank you 
 barren ginkgo
harsh jolt
had a couple people ask if i could add compat for it but dont really know where ...
barren ginkgo
harsh jolt
had a couple people ask if i could add compat for it but dont really know where ...
that actually looks cool
harsh jolt
barren ginkgo
that actually looks cool
if only i wasnt ignored 💀
floral fiber
you just have to change the texture iirc
barren ginkgo
yeah say the texture was 1920x1080, make it 1920x1440, the texture will look strange on normal screens
probably some aspect ratio trickery is possible but it might also be related to using custom FoV / Aspect ratio
can see the border of the texture that slight mismatch in contrast
 river prairie
hey, how can I get rid of these white outlines, does someone know ? https://ibb.co/cNWdP2H

Image Arma3-x64-2023-08-18-22-30-47 hosted in ImgBB
full quarry
river prairie
hey, how can I get rid of these white outlines, does someone know ? https://ibb....
need png with backgroung color saving for the transparent parts or it defaults to white
or tga with appropriate transparency background
otherwise it bleeds through
river prairie
full quarry
need png with backgroung color saving for the transparent parts or it defaults t...
ah nice thank you. is there still a way to keep the transparency ? I saw the default texture of the ghillie had some transparence in it
full quarry
yes like I said its you just need to save also the transparent parts color into the file
its still transparent
river prairie
full quarry
yes like I said its you just need to save also the transparent parts color into ...
ah nice, it workedm but it still has some white bordes left, I guess thats normal and I have to remove some pixel there to get rid of it

Image Arma3-x64-2023-08-19-01-01-09 hosted in ImgBB
 wanton vine
hey people, anyone know the best way to view an ofuscated model's hidden selections? and is it possible to view which textures are assigned to which selections? object builder does not work and I have been using eliteness
lethal condor
Via config
They are essentially nothing related with model itself but config thing
full quarry
wanton vine
hey people, anyone know the best way to view an ofuscated model's hidden selecti...
In game config viewer
wanton vine
Yeah the config viewer is pretty useful, I just had the idea that the game was hiding possible selections from me for whatever reason.
I have been trying to retexture humvees from CUP but it seems like a lot of their textures are hardcoded so I've been foolishly trying to assign textures to random named selections.
gonna postpone work for now, but thank you for the help
full quarry
wanton vine
Yeah the config viewer is pretty useful, I just had the idea that the game was h...
Basically if a thing supports retexturing, you can see it in the hiddenselections of the config. If they don't exist the thing likely won't support retexturing
wanton vine
gotcha
 sullen vapor
pretty sure you can also see it via Eliteness, part of mikero's tools
it shows you some p3d properties like LODs, face count and a reconstructed/approximated model.cfg
 kind dirge
Can someone help me!!
Really wanting to make my own textures for armor, more acurate decals etc can someone run me through al this
really new to it all lol
sitting in #107506974056280064 wont take too much of yalls time 🙂
If someone could just sit down with me and go step by step, i can sense id fuck it up lol
frozen blade
kind dirge
Really wanting to make my own textures for armor, more acurate decals etc can so...
what armor? what do you use for texturing?
kind dirge
Id like to do M2A3, M1A2, and some Russian IFVs
and no idea what to use just starting out
Dont wanna do to much, just some small decals, unit identification, etc 😄
i have some things downloaded already like bi tools
but idk where to go from there
full quarry
what you want to do is called retexturing
it is only possible on things that are set up for it with "hiddenSelections"
those can be swapped with a config patch addon (addon that contains a config for the new vehicles and the new textures [nothing else])
the texture painting is done in your choise of paint programs like MS paint, Gimp, photoshop etc
 solar shuttle
i am pretty sure after making the texture you have to convert it to .paa
kind dirge
dapper grail
😢
so this right here is more of just viewing it
?
so it says its an invalid file type (pbo file) how do i convert it to the right file type
full quarry
kind dirge
so it says its an invalid file type (pbo file) how do i convert it to the right ...
pbo is the container all the mod files are in
also please dont ping random old messages
solar shuttle
kind dirge
so it says its an invalid file type (pbo file) how do i convert it to the right ...
you have to extract the pbo then change the .paa's inside it
then after changing the paa files
u have to make it a pbo again
dapper grail
kind dirge
so this right here is more of just viewing it
?
full quarry
solar shuttle
then after changing the paa files
one important detail here is that you dont pack up the original files or make "same pbo"
you make new pbo with new files
solar shuttle
full quarry
one important detail here is that you dont pack up the original files or make "s...
if hes trying to retexture it just for him i think he can do it
same pbo
solar shuttle
full quarry
one important detail here is that you dont pack up the original files or make "s...
i dont get it
full quarry
proper retexturing is done by making a new addon
full quarry
solar shuttle
if u gonna post it in workshop no
Like I said we do not give bad advice like that here
we advice on how to do things properly
solar shuttle
kind dirge
so it says its an invalid file type (pbo file) how do i convert it to the right ...
think of it like a .zip file, you cant use the zip until you extract it, pbo is the samething
frozen blade
solar shuttle
if u gonna post it in workshop no
either way it is a no
frozen blade
kind dirge
Id like to do M2A3, M1A2, and some Russian IFVs
did you make these vehicles? Where are these from (which mod)?
 torpid lance
Would anyone happen to know what type of Shader the Tin Foil hat from contact used? I couldn't find it and I am trying to get a model to look like the tin foil hat.
lethal condor
You can just open PBO and check rvmat around there
 steel geyser
Would anyone happen to know if you use a 4k Material for a lower pixel density object if that would cause memory issues or crashes ? Been making materials that fit resolution parameters and was curious if anyone has experience or knowledge about this