#arma3_model
1 messages · Page 177 of 1
 terse sail
thanks for this link, helped out alot 😄
 glad crystal
Looking at a model in ODOL, I see a MassReciprocal of .000238 .... which seems small, but I can't find a definition of what that variable is, or how it interacts w/ the engine. Does anyone here have a definition (or better yet, a link)???/ TIA.
('Seems' because to my vastly limited recollection, I've only ever seen a '1' in that variable... )
 runic iris
Been working on a pool table and here is my current progress:
https://youtu.be/uDlvLuCsRJw
Was curious if I could fine tune any of the physics to behave better, currently I have a custom surface to remove friction between the table and balls but it seems that there is very little rebound and the transfer of momentum between balls doesn't work very well. It'd be nice to get it to behave a little bit better if possible. I think being able to modify the elasticity of the collisions would be the most desirable
 white jay
I think the texture on a pole I'm making is being rendered transparent, any idea how to fix this?
https://cdn.discordapp.com/attachments/566060230824165383/925879601102717048/20211229173345_1.jpg
 stuck oyster
use correct suffix and dont have transparency in the texture
 foggy finch
in ob select your alpha faces and move them to the top.
 leaden sun
that's the result of a _ca with 100% opacity, it always shows the scene generated ambient occlusion behind it
strongly advise against using it for solid objects, use _co to convert the transparency to a mask (saves a texture with an alpha channel to include opacity but it's 0-1, it is transparent or it is not) if you must, but _ca files do not recieve shadows casting on them.
white jay
stuck oyster
use correct suffix and dont have transparency in the texture
That's what I did, I used _CO.png and the image is opaque
And converted it to paa
I'm gonna try saving it as a jpg
Then converting to paa
 junior prairie
Hello comunity.
Somebody can help me.
I need use player name like text on hidden texture uniform
stuck oyster
you cant have dynamic text on texture
so you would need to have enough letters as separate hidden selections to be able to write name dynamically
terse sail
duplicated physical lods 0 and 1, resolution 1.0 - how to fix this? resolution as far as can see is 1.0 already, but, LOD? 0 and 1?
stuck oyster
it means lods 0 and 1 are same
terse sail
stuck oyster
it means lods 0 and 1 are same
replied to in #arma3_config
leaden sun
white jay
That's what I did, I used _CO.png and the image is opaque
It may have converted oddly since you did not use a .tga
white jay
I don't think it's the image that's the problem
I deleted the alpha channel, still does it.
I tried other textures that are known to work on other models and they give the same issue when on this fence object
https://cdn.discordapp.com/attachments/566060230824165383/926173045826154566/20211230130042_1.jpg
it's almost as if the whole model is rendered as transparent
stuck oyster
so the pole is part of a fence with transparent texture?
white jay
yes
so the texture works fine on other objects
https://cdn.discordapp.com/attachments/566060230824165383/926176307006537778/20211230131348_1.jpg
but it acts up on the poles of the fence
stuck oyster
what type of rvmat shader does it use?
white jay
one sec lemme check
a pretty basic metal shader
super shader
I've used the rvmat on other objects and it works fine with those
stuck oyster
those objects probably dont have the transparent wire fence on texture also on the model?
white jay
only on the faces that make up the transparent part
no they dont if you're talking about the other objects
stuck oyster
is the wire and solid parts on same texture?
white jay
no, 2 separate textures
stuck oyster
what rvmat does the wire part use?
white jay
one sec
stuck oyster
white jay
this https://pastebin.com/SA9zwBwt
you could perhaps check out vanilla wire fence rvmats for comparison. for example the wire part on one from apex has "noZwrite" flag in it
ambient[] = {1,1,1,1};
diffuse[] = {0.9,0.9,0.9,1};
forcedDiffuse[] = {0,0,0,0};
emmisive[] = {0,0,0,1};
specular[] = {0.03,0.03,0.03,1};
specularPower = 70;
renderFlags[] = {"NoZWrite"};
PixelShaderID = "Super";
VertexShaderID = "Super";```you could also test yours with the vanillla textures and materials applied to see if there is any difference
white jay
I'll try it out
 round bloom
Has anyone here played around with using Marvelous Designer at all for clothing? I can see a few things on art station etc that suggest it work for arma, but I'm having trouble with getting it to accept an FBX of the character samples
stuck oyster
some people have worked with it to make highpoly models yes.
you would need a cleaned up version of the sample character though
that has only the character, nothing else
is my guess at least
round bloom
I've got a version I normally use to get scale for buildings: https://i.gyazo.com/3635ac4ba38670af182130ea3dfa96ce.png
But Marvelous just seems to kick it out
round bloom
Trying to get back to it to screenshot, but before it shows the error it gets stuck on "load arrangement point.. 99%" for a long time
So will be a while before I see the error again
stuck oyster
could be it does not like the version of the FBX 
round bloom
Turns out it was just a weird issue with scale, as soon as i put it to auto-scale it works
stuck oyster
the programs likely work in different units
 rough jewel
speaking of uniforms, any tips on creating them in blender?
stuck oyster
use Arma man as reference so you can put similar topology on joints and get the shape correct.
 pale valley
I have a little issue regarding shadows, my shadow has this strange effect where it's "zebra striped" and appears below the ground and odd bits seems to be on the surface and below the model, which can be seen here;
https://media.discordapp.net/attachments/892303619418914836/926225534088798308/SHADOW.jpg?width=1356&height=676
I've been following the guides included with arma 3 and as far as I can tell I've done everything correctly (so far).
could this be an issue with the model I'm importing or a missing proxy or something of the like?
stuck oyster
No your shadow lod is just badly made. It needs to be made out of closed shapes.
pale valley
Hmm good to know, thank you
Out if interest can it be made of closed shapeS or just one single closed shape?
stuck oyster
Can be many shapes as long as all are closed
Should also aim to have about 1000tris at max
So very simplified shape
pale valley
Excellent, thank you
 dull lagoon
Is there a way to remove the miniguns on the Hellcat without needing to edit the model?
stuck oyster
No
dull lagoon
ok, thx
terse sail
duplicated physical lods 0 and 1, resolution 1.0 - error message via pboproject, but cannot see anything on LOD (if LOD even exists in blender) that has the value 2? only thing can see is resolution 1.0, but canot find anything on LOD in blender?? can someone please advise
stuck oyster
In blender lods are set up in the Arma properties that the toolbox adds.
terse sail
stuck oyster
In blender lods are set up in the Arma properties that the toolbox adds.
yes but all i see is 1.00, not 0.00, but its still saying there is a 0.00 LOD? this is what confuses me
stuck oyster
terse sail
lod and resolution are the same thing right?
stuck oyster
Resolution is the number of a lod
terse sail
and lod only affects objects,not animations, right?
stuck oyster
Yes
terse sail
stuck oyster
Yes
when i change the resolution of the one object, from value 1.00 to 0.00, it changes from in pboproject;
duplicated physical lods 0 and 1, resolution 1.0
to
duplicated physical lods 1 and 2, resolution 1.0
any idea?
stuck oyster
Your export something wrong. Idk.
terse sail
ok so trying to export the rig with object into .p3d and this is why its saying what it does
stuck oyster
rig?
terse sail
character rig
leaden sun
white jay
I deleted the alpha channel, still does it.
I tried other textures that are know...
You mentioned that you deleted the alpha channel, but are you saving the image as a png still? Or a tga? And if you are saving it as a tga are you saving the file as a 24bit or 32bit?
white jay
leaden sun
You mentioned that you deleted the alpha channel, but are you saving the image a...
it should be 32 bit right?
leaden sun
@white jay 32bit only if you want transparency included, you can delete the alpha channel but the moment you save the file as a 32bit it will automatically generate a solid white one.
saving the file as 24bit will save the RGB channels only
white jay
alright I'll try that
leaden sun
For anyone interested to getting into modelling and looking at blender, CG Cookie has been publishing some short basics videos which should assist newcommers.
and they have some awesome new stuff there for people with experience as well, always something new to learn
This one also has a great general message for just about everybody who wants to model, timestamped when it begins, highly recommend having a listen
https://youtu.be/EnEWjuigTUU?t=392
 coral cobalt
pale valley
I have a little issue regarding shadows, my shadow has this strange effect where...
coral cobalt
pale valley
I have a little issue regarding shadows, my shadow has this strange effect where...
in blender check if arma edge split modifier has the "sharp edges" box ticked
white jay
Hello. Is it possible to edit a model from arma and bring it back by pulling out model.cfg (skeleton) using mikero tools?
 shrewd jay
coral cobalt
in blender check if arma edge split modifier has the "sharp edges" box ticked
shrewd jay
coral cobalt
in blender check if arma edge split modifier has the "sharp edges" box ticked
Note that with later versions of the Arma Toolbox for Blender, you should not longer use an edge split modifier.
 tender hemlock
Hello, I am experiencing performance loss in the vest models I have made, what can I do about it?
Is there any other setting left after setting LOD in Object Builder program?
stuck oyster
you will need to optimze the models and textures
if you got performance loss you got some serious design issues
tender hemlock
How can I optimize textures?
stuck oyster
how many do you use
tender hemlock
there are about 14 vest models
stuck oyster
no textures
tender hemlock
Around 15k polygons on average
tender hemlock
So with what program can we reduce the number of polygons while adjusting the LOD? I tried to lower it with blender.
stuck oyster
do you have distance lods made for it?
and how many textures do you use?
and what resolution textures do you use?
tender hemlock
stuck oyster
do you have distance lods made for it?
Of course there is, the number of polygons decreases to half in each of them. https://prnt.sc/25poxza
 tender hemlock
1 minute
tender hemlock
stuck oyster
and how many textures do you use?
close to 10
tender hemlock
stuck oyster
and what resolution textures do you use?
Varies between 2048x2048 and 4096x4096
stuck oyster
ah
thats the problem
you should fit it to 1
max 4k
but 2k would work better
youre now wearing 10 vests together
no wonder performance takes a hit
tender hemlock
😅 I will try to implement what you said. Thank you very much for your help.
 runic plover
tender hemlock
😅 I will try to implement what you said. Thank you very much for your help.
runic plover
tender hemlock
😅 I will try to implement what you said. Thank you very much for your help.
1078 Sections is to much, should be 1 or max 2
tender hemlock
How can I set sections?
shrewd jay
Are you using the Arma Toolbox for Blender?
tender hemlock
Yes
shrewd jay
The latest version optimizes automatically on export, earlier versions should have a button someone in the Arma 3 Tools.
If not, you can always sort polygon faces by material
runic plover
means, if you are using 10 textures + every texture has its own shader, you should have 10 sections
if you merge your 10 textures in 1 texture file, and use 1 shader for it, you should get to the 1 section
but you have to redo your UV map then to use 1 texture file
shrewd jay
Yeah, or rather by number of used RVMats since you might use different rvmats with the same texture.
And I agree, 10 textures with 2k or 4k is way too many...
runic plover
shrewd jay
Yeah, or rather by number of used RVMats since you might use different rvmats wi...
happens as example for headlights or tail lights
shrewd jay
Yeah, or if you use the same texture for metal and plastic parts
tender hemlock
I will take into account what you said. Thanks a lot for your information. 🥰
runic plover

shrewd jay
Oh man, another spammer
 livid canyon
Is there a way to snap move a point to pin in OB?
 drowsy sail
Which memory point controls where the camera looks when looking down an attached optic?
And is is a single vertex, or an axis?
Cause my ironsights work fine, but when attaching weapon sights, it looks off to the right for some reason
I've tried with a number of different optics from two separate mods and vanilla, same effect - which is what convinces me that it's a memory config issue
 small olive
it should be opticEye in memory LOD and no it's just a point but it becomes the start of the axis with your direction in game
drowsy sail
Hm, seems to make no odds. In terms of positioning should be behind the sight?
Additionally, is the value defined in config anywhere?
drowsy sail
Okay this is starting to drive me a bit nuts!
My understanding is that once an optic is attached via proxy, it uses the eye point & direction memory points from the optic itself - is that right?
With that in mind, I don't understand why the view is directly to the right when when the optic itself is mounted correctly on the weapon
 inland pawn
drowsy sail
Okay this is starting to drive me a bit nuts!
My understanding is that once an...
inland pawn
drowsy sail
Okay this is starting to drive me a bit nuts!
My understanding is that once an...
Do you have a view pilot LOD?
drowsy sail
inland pawn
Do you have a view pilot LOD?
Yes, proxies included in that LOD too
runic plover
drowsy sail
Yes, proxies included in that LOD too
You defined the viewpoint opticEye in your config too?
Sounds more like you got problems with the config.
drowsy sail
runic plover
You defined the viewpoint opticEye in your config too?
Sounds more like you go...
Within my weapon config I have:
cameraDir = "opticview";```both of which correlate to memory points in the memory LOD
Just FYI I'm moving this over to #arma3_config since I agree that this is probably more of a config issue
 polar fiber
Do you have autocenter 0 named property in the geometry LOD?
 fair leaf
(not sure if exact correct chat) In theory, how hard is it to put a custom model in to replace the model of a grenade/make a "new" grenade with custom model?
foggy finch
no different from making any model to import to the game.
 marsh jewel
fair leaf
(not sure if exact correct chat) In theory, how hard is it to put a custom model...
marsh jewel
fair leaf
(not sure if exact correct chat) In theory, how hard is it to put a custom model...
I think importing models without animations is not too hard
stuck oyster
It is hard to learn all the first steps though
marsh jewel
Really? What are they?
marsh jewel
Well actually i just tried a couple hours ago to import a small object with no animations and it seems pretty easy, got it in game within like 15 mins
So i was wondering if i probably missed something ?
I got rvmats, shadow lods and geo lods done too but there’s one problem tho:
The object has collision with helicopters, boxes, etc just fine, however it has no collision with the player 🤔
Do you know what might be the problem?
stuck oyster
You've been around for a while. That can take the edge off of the process.
stuck oyster
marsh jewel
The object has collision with helicopters, boxes, etc just fine, however it has ...
Is it very small?
marsh jewel
stuck oyster
You've been around for a while. That can take the edge off of the process.
Hmm i guess you’re right, but i still think the most complicated part is messing with model.cfg and animations
And also the controls for OB😂
marsh jewel
stuck oyster
Is it very small?
Yes it’s the size of a skateboard. I read in wiki that “Geometry objects should have a thickness of at least 0.5 meters in order to work properly.” But i see some vanilla objects that are smaller than that have working collision??
stuck oyster
collision to work it needs to have convex geometry parts, they need mass and they need componentXXX naming
white jay
marsh jewel
The object has collision with helicopters, boxes, etc just fine, however it has ...
Assign mass to the geometry LOD
Geometry Phys LOD does collision for vehicles, grenades etc..
The regular geometry LOD handles player collisions and a few other things
However it needs a mass to work
 odd garden
Hello everyone, sorry I’m new to Arma 3.
I’ve been trying for a few days to make a pilot’s uniform.
Unfortunately parts of the characters keep the textures of the basic model bare.
Thank you in advance for your help.
shrewd jay
Check if you have a selection called "hl". Make sure that that selection only contains things like hands and exposed skin, nothing else. @odd garden
 lavish aspen
I am not sure if this is the right channel, but does anyone know if there are improvised or makeshift mortar/rocket mods like insurgents use in the Middle East?
Seems like something that would be pretty cool but not sure if it has been done before
marsh jewel
stuck oyster
collision to work it needs to have convex geometry parts, they need mass and the...
ok it did have all the requirements, and the collision worked with other objects but the mass was 3.5. after some testing, i found that the collision with player only works if the mass is above >=10. Below that you just clip right through
can someone verify, if its true then we can ask lou to update the biki
odd garden
shrewd jay
Check if you have a selection called "hl". Make sure that that selection only co...
Thank's you very much; big thank !!! you are the best. My mod airwolf is soon ending thanks to you @shrewd jay
stuck oyster
marsh jewel
ok it did have all the requirements, and the collision worked with other objects...
From my experience, this is true
marsh jewel
stuck oyster
From my experience, this is true
awesome thanks for verifying, @turbid cove can the geometry LOD biki entry be updated too https://community.bistudio.com/wiki/LOD#Geometry
 turbid cove
marsh jewel
awesome thanks for verifying, <@!137855151120711680> can the geometry LOD biki e...
turbid cove
marsh jewel
awesome thanks for verifying, <@!137855151120711680> can the geometry LOD biki e...
rhaaa
how
marsh jewel
turbid cove
_rhaaa_
how
i feel like im not experienced enough to actually write what to update lol so maybe goat can help?
stuck oyster
@marsh jewel @turbid cove maybe like this

 stuck oyster
turbid cove
stuck oyster
turbid cove
👌👍

marsh jewel
turbid cove
I'll type with normal characters but OK
no! it must be in comic sans MS so people would actually read it
turbid cove
marsh jewel
no! it must be in comic sans MS so people would actually read it
C H A L L E N G E A C C E P T E D
 rich frost
Is anyone familiar with the reason this would happen when looking through windows? Seemingly the entire texture of the window is entirely gone when looking at the ocean of any map (default game and custom maps)
https://i.imgur.com/hYEjrqB.png
https://i.imgur.com/hOPVxyn.png
This happens on any building I've looked at for both default game and custom, for this building in particular, I'm using "Land_i_House_Big_01_V1_F"
 wise ibex
Does anyone got a tutorial or way to do multimats using blender (Arma Toolbox)?
stuck oyster
toolbox has not much to do with it
This is a example material setup that mimics Multimateral enough that you can paint mask and MC pretty accurately in Blender
wise ibex
Thanks, will check it out.
 charred bolt
@rich frost bring your glass texture to the top of the stack in Object Builder
stuck oyster
sea shader does that too. since it happens also on vanilla stuff
rich frost
charred bolt
<@!333123113200123912> bring your glass texture to the top of the stack in Objec...
I've tried that a few times on different models and nothing has helped so far
And yeah I assume it was something related to the water itself being an issue
 rugged bear
Do base game tanks have spaced armor in the turret? I'm not sure by look at it in the virtual garage.
 sonic valve
rugged bear
Do base game tanks have spaced armor in the turret? I'm not sure by look at it ...
sonic valve
rugged bear
Do base game tanks have spaced armor in the turret? I'm not sure by look at it ...
Not Spaced armor, but the Rhino has a Up armor variant with ERA plating on it's turret.
rugged bear
Explains why HEAT is not implemented correctly in game.
 lone fulcrum
I'm looking to start doing basic modeling for arma, is there any way that you guys recommend?
 quick terrace
yeah, start with something simple
sonic valve
lone fulcrum
I'm looking to start doing basic modeling for arma, is there any way that you gu...
I don't have any tutorials on hand. But for the most part, you can follow any Blender tutorial up to the point of using the now dated importing tools (although a savy person could get all the correction versions to use it).
You can then import the model to O2 and go on from there. Only major challenge I have is scaling which doesn't always work well. You can solve this by making your own scaling set up by adjusting Blender params, and just porting in cubes back and forth tell you find that sweat spot.
lone fulcrum
sonic valve
I don't have any tutorials on hand. But for the most part, you can follow any Bl...
Thanks!
sonic valve
I also recommend learning High Poly to Low Poly model baking if your new to modeling in general. It seems like a lot of extra work, but it pays in the future by having nice models to use for either other games, or future products.
lone fulcrum
ok, i'll check it out, thanks for the tips
 tulip gyro
Can I select faces by texture in the object builder?
tulip gyro
polar fiber
ctrl+dblclick the texture name
where do I do that?
polar fiber
the texture list window in object builder
If it's not showing by default, press Alt+T
tulip gyro
thank you so much
tulip gyro
polar fiber
If it's not showing by default, press Alt+T
how do I make a selection off of that?
polar fiber
When the faces are selected, right-click the named-selections window and "New"
tulip gyro
thanks
stuck oyster
Id recommend doing such edits in the source model with a program you dont have to learn again
 austere current
im trying to export my fire geo from blender to object builder but every time i export it as a p3d it merges its verts and becomes non convex. dose any one know how to fix this?
stuck oyster
you sure they are split in the first place?
stuck oyster
do you have some modifier on that would do it?
austere current
no i checked
stuck oyster
that does sound like the mesh is not actually separate
stuck oyster
can you link up some pictures of what you see in blender and what you see in OB
austere current
i think i figured it out
white jay
Hi to all! Was created model uniform. And at this stage is the animation of points to display the movement of the uniform during the movement of the unit. We do it in the following way - at each point we make a dependence, but there are many of them and it just doesn't look unreal, so there is an opinion that we are moving in the wrong direction. Tell me how to unify animation of points of the uniform, or it exists something easier, because somehow it is hard to believe that there is no easier way to do it, maybe there is a guide to understanding how to do it properly.
stuck oyster
you would likely want to copy weighting from the sample character and then you will likely need to manually tweak it so it works right
there is no magic to make it automatically work with a click of a button
also if your uniform would need to have similar topology at joints as the sample character so that they bend correctly
white jay
that is, you mean if my model has 5100 points then I have to configure each of them separately and have no other option?
stuck oyster
no
or well I suppose depends where you have made it in
Blender for example has great weight painting tools
white jay
I do not understand. I meant when the model is already ported to the object builder and it is in it that the animation of points is set, isn't it?
https://cdn.discordapp.com/attachments/860578182083903518/929460365681655838/unknown.png
if you saw in the screenshot there is a problem with some defect that stretches the model to the bottom I still can't figure out how to fix it. Can you tell me what it is?
stuck oyster
Object builder does not have the best weight paint tools but its possible to do there too
I dont recommend it
your will want to read up on skeletal animations and vertex weight groups to understand how it works
white jay
ok and in what program to do it and why I have these defects with what they are connected
stuck oyster
usually people do it in the same program they model the whole thing
what program do you use to model?
white jay
3Dmax
stuck oyster
ah
well you can probably do it there too. I dont use it so dont know how
you can probably find tutorials on web for how it works
white jay
is there a way to make a fence where ai will walk right through them but players cant?
white jay
I was wondering about making paths with objects that don't have roadways
stuck oyster
the path wont work without roadway and geometery
white jay
Can I effectively make path lods for gates without roadways?
ah
do gates typically have a roadway?
white jay
ok
white jay
can ai open gates?
I figure its like a door but that would need a path and subsequently a roadway which would cause some problems like ai floating when placed on a slope
stuck oyster
you can check AI behavior in vanilla maps 😉
white jay
I just tested it looks like they cant
so basically either you open gates for ai or have broken fence segments
stuck oyster
well if you want AI to open them, give it a foundation with paths that AI can use
white jay
Hello, I'm getting into faction creation in Arma 3. I use other preexisting mods and vanilla assets. Just getting into it and I love it
 gloomy hemlock
Heyo im getting models by a model maker.
Those models contain texture maps yet, BUT the model is separated (uniform/gloves).
What do I need to do to combine those?
And what do I need to do now when I want a gloveless version?
stuck oyster
you probably would want your model maker to do that stuff
gloomy hemlock
He isn’t doing that. Just telling me it’s possible to combine those 2 in the ArmA tools
stuck oyster
how much 3D program experience you got?
gloomy hemlock
Nearly nothing. Because of that I got a 3d modeler
stuck oyster
then you need to start from basics to learn a program where you can do stuff in
ready models are no shortcut if they are not really ready
gloomy hemlock
So it’s not like just kitbashing those 2 via ArmA tools?
stuck oyster
no such thing as "kitbash stufff in arma tools"
nothing is automatic
in short and if the models are made right and fully ready otherwise it could be as simple as copy pasting from one model to another
buut Im gonna take a guess that if your model maker did not do this, there may very well be other stuff missing too
but even copy pasting from one model to another is not as simple as it sounds if you got no clue on what to do
gloomy hemlock
I guess he knows what he does since he made models for a couple of mods
He just told me he will make uniform and gloves separate and that they could easily be combined via ArmA Tools and that they would just have like 2 rvmats then
Also other question. Would the model without gloves and just with texture maps then work when getting configs? Or is there some extra steps between?
stuck oyster
you would need to copy the skin parts from the sample character unless you want hands to be invisible
gloomy hemlock
fuck that sounds like something i have no idea of
where would i need to copy the skin parts to? like in the texture maps as well or like with a second map and all that stuff
stuck oyster
in the model.
gloomy hemlock
so i could like forget the texture there because the hands would miss in the model?
stuck oyster
not sure I understand the question
gloomy hemlock
if i would need to add the hands to the model it would need a whole new texture because of the missing hands?
stuck oyster
yes the skin texture
that is pathed on the sample model though if I remember right
and it also gets replaced by the character identity
gloomy hemlock
would that be a separate texture then or would that need to be integrated in the uniform texture?
stuck oyster
separate
gloomy hemlock
hm ok. ill ask him if he can still combine them so we just have to do like basic config files instead of all that modeling stuff
thanks for your help
stuck oyster
in case you have paid for this stuff, in the future it is good to have clearly wrttten contract on what you expect as end result
gloomy hemlock
yeah ok ill keep that in mind
@stuck oyster little update. i guess i misunderstood him a bit. model will be just one but i would only need to add an rvmat pathing for the gloves via arma tools for the gloves since paid armatools work isnt allowed
 sleek estuary
Anyone has any idea why my tank is using like 20 seconds to spawn in editor?
 desert notch
sleek estuary
Anyone has any idea why my tank is using like 20 seconds to spawn in editor?
desert notch
sleek estuary
Anyone has any idea why my tank is using like 20 seconds to spawn in editor?
do you see any errors in the rpt?
stuck oyster
too complex model
too many textures
not packed correctly into pbo
possibilities are endless
sleek estuary
It's not causing a crash, thanks @stuck oyster i'll test some different things
shrewd jay
How big are your textures, and how many of them?
sleek estuary
currently it dosnt have textures, and model is as complex as arma 3 tanks
stuck oyster
well you can list here
triangle count
texture count
rvmat count
are you packing with pboProject
stuck oyster
make sure you are not accidentally exporting other stuff in there
how big is the p3d?
sleek estuary
100k kB
stuck oyster
whats that in mb
100?
then youre definitely exporting something else than 65k tris
stuck oyster
how complex geometry do you have?
sleek estuary
i just tried exporting just the LOD1 in an own p3d now
came out at almost nothing
so its something in there messing it up
just the LOD1 came out at 10 mb
geometry is 50 components atm
stuck oyster
use the exprot with selected objects only so you know what is exported
sleek estuary
as an .obj?
sleek estuary
blender currently
stuck oyster
then arma toolbox is your friend
sleek estuary
yeah i use that
stuck oyster
so select the lod objects in blender and export as p3d
and tick the "selected only" box in the export settings
Im wagering you are currently pushing in your whole project into the p3d
and not just the lod parts
 woeful viper
if it takes long, then your file is likely not binarized
 neon trail
i made a model for an inventory item and now when i place it down from the inventory it has wrong orientation
the only thing google told me was to maybe define land contact for the model
i dont know how to define it
i made the model in blender and followed a youtube video to get textures on the model using object builder
i dont know anything else about object builder
stuck oyster
have you asked about this recently? I've just answered this somewhere before
most objects when they are put down go to their side
so if you want something to stay up, you have to tilt it 90 degrees
stuck oyster
neon trail
im sure it gets asked frequently
seems to be so recently. What type of item did you make it?
magazine?
neon trail
Ok, i had first hacked together a config for the item to be placed in the editor. I made the model after that. It looked fine in the placeable item so I convinced my self I did something right. But when placing it down after picking it up it changed orientation. I noticed now that the vanilla placeable items have the model "\A3\Weapons_F\DummyItemHorizontal.p3d". Using this model also in my placeable item the orientations match.
@stuck oyster thanks anyways
stuck oyster
👍
 molten fractal
Is there any way to do alpha sorting in Blender using the toolbox?
stuck oyster
if you can get latest dev build from Alwarren then yes
 wicked kite
Hello, I am trying to port over a .obj to the game as either an armor set or some type of skin but am having issues. I exported the .obj from blender to .p3d and convered the textures to .paa. I also made the .RVmap, but when I open the file in Object Builder it is HUGE and the textures do not load properly if at all. Guides online haven't been very helpful, they either have a different version of Blender than I, or the guide is very outdated. I also cannot find anything on rigging the model I have to the arma 3 skeleton
stuck oyster
you should use arma toolbox addon to export directly to p3d from blender, instead of OBJ.
scale issue: you quite possibly have scaled the objects and have not applied that scale to it so when you export that scaling reverts. as in scale is 0.01 and when you export it turnst to 1.0 and thus is 100 times larger
guides are yes for older version of blender, but what you need to do is the same but find where the buttons etc are in the new version.
for rigging you need to find general blender tutorials
wicked kite
I do have armatool box installed, along with a P drive set up. I guess I can continue trying to follow a long with some of these videos, a lot of them gloss over things asuming the viewer already knows a lot about Blender which sadly I do not. Such as scaling which all I did was just hit S on my keyboard and shrunk the model to the rough size of the Arma 3 skeleton rig.
quick terrace
nothing to do with this channel
quick terrace
wicked kite
Hello, I am trying to port over a .obj to the game as either an armor set or som...
port from where? who made the model etc
wicked kite
Ran into an issue, yesterday I set up my P drive and followed a couple videos making sure I did it right. I had been saving all my models to the P drive specifically but today everything I saved there was gone. Additionally my arma tools are coming back with errors saying Bulldozer may not be working properly, and Object Builder no longer previews models, has this happened to anyone else? Not really finding much online
stuck oyster
you have followed videos on p drive setup which likely has been wrong way
so far have not seen any setup video worth following.
P drive is commonly a virtual drive that reads a folder from somewhere on your computer as a drive called P:\
so that original folder usually is still there somewhere
wicked kite
I used both these videos to set mine up
https://www.youtube.com/watch?v=2YMC6MrTLII&t=906s
https://www.youtube.com/watch?v=E5qjsjdE7Q8
stuck oyster
longtime at least I know to have so much crap in it that not worth using
the other one is waayy too long to check out
wicked kite
The P drive is still there along with all the extracted arma 3 models, textures, and all that. But none of the models or textures I made were saved
stuck oyster
I'll stand by my earlier assesment of setup videos
you have possibly set it up again to read from different folder than earlier
or worst case you have done the setup wrong somehow and deleted your old files
its not impossiblity either
PMCwiki has simple steps to set up arma tools, P drive and Mikeros toolset.
follow that
gloomy hemlock
heyo im back again. i got my 3d model now along several textures.
ive got a model uniform+vest (both in one fbx but separated).
also i got full texture maps for the vest, the uniform and the gloves.
my goal now is to separate the models so we are able to add the configs for them.
but im not really sure what i need to do now in order to get to that goal.
My guesses are:
1st separate the fbx parts into uniform and vest.
2nd add some kind of pathing to the glove texture to be able to have 2 textures (gloves and uniform) in the uniform configs later on
3rd adding the configs
some tips would be highly appreciated. im a newbie so also some advice like "get someone to make that for you since its too hard" would help me a lot
inland pawn
gloomy hemlock
heyo im back again. i got my 3d model now along several textures.
ive got a mode...
Uniforms are separate from Vests. There’s no gloves slot so they need to be apart of the uniform
There’s also the ARMA sample vest config
Look at that
gloomy hemlock
inland pawn
Uniforms are separate from Vests. There’s no gloves slot so they need to be apar...
Uniform and Vest are altogether in one single fbx. Whats the way of splitting those up so i can make each a single thing. I guess those are 2 different models in one fbx
btw sorry for maybe stupid explanations. Im not experienced with that kind of work
inland pawn
gloomy hemlock
Uniform and Vest are altogether in one single fbx. Whats the way of splitting th...
- Put fbx into Blender
- Delete uniform
- Export as fbx/p3d
Repeat for uniform
Make sure to save a copy just in case
gloomy hemlock
Ok woll try that tomorrow since its really late here. Would it be ok to ping you again if i have any questions?
Also thanks for the help
inland pawn
Sure, I guess?
 lusty ginkgo
Hey, I can't seem to get my old solution to fix fire geometry materials after using the "component convex hull" to work now. Doing the operation removes all face materials and textures so the penetration .rvmat's are removed.
The issue is, when you do this operation, any existing named selections you make before hand don't fully survive the process either, and only the vertices remain. So you can select vertices, but not faces. I normally would just do the operation, import into blender, and then use the vertex groups there to reassign materials, since the selection included faces there. It would take less than a minute, and would save a ton of time for structures or objects with a bunch of different penetration materials.
Problem is, the selections don't seem to remain when I import to blender. I know there were other, slightly more time consuming solutions, but I think this was one of the fastest if I recall correctly. Normally I just manually rename any new components I add and I only do it this way when there are a lot of changes or new additions
stuck oyster
hmm that sounds odd, the selections should remain
it does clear all rvmat assignments as it remakes the component
the old mesh does not exist anymore
gloomy hemlock
I’ve a problem importing my fbx model into blender. Any ideas why this doesn’t work. The 3D viewer has no problems showing that
shrewd jay
Define "Problem"
gloomy hemlock
Whenever trying to load the model into blender blender crashes or at least doesn’t reacts anymore
And the model itself has been made in blender and then made to fbx
Could that have something to do with file locations?
shrewd jay
Not very likely, but Blender's FBX handling is pretty shitty. It has to be binary, it doesn't work with ASCII FBX files
You might want to look for FBX converter, that's a program that can convert between versions, maybe you can get it back into a binary format.
gloomy hemlock
Ok thanks i will try that
shrewd jay
Good luck
gloomy hemlock
Ah great it worked. First thought it did not load but then I’ve seen the model was hidden in the default cube. 
Thanks for the help
shrewd jay
Ah, I have long deleted the default cube and saved a new startup file, I hardly ever used it 🙂
gloomy hemlock
Yeah to be honest I was expecting the cube to be replaced by the model. Only caused my attention that there were more parts then just the default cube stated in the list
shrewd jay
Yeah, it's a bit weird, but in Blender only a complete scene will replace all the objects, so you need to load anything that qualifies as a scene. FBX I think counts as an object loader
gloomy hemlock
Ah understandable. Would be uncool to load a table for your restaurant scene and the whole restaurant vanishes
shrewd jay
Yeah
gloomy hemlock
maybe i instantly have another question then.
i now have 2 models (uniform and vest) as well as 3 textures (vest, uniform and gloves)
we would just do the vest config now since i guess theres everything prepared for that.
so i would still have the uniform with 2 texture sets.
the model maker said the glove textures need a pathing to the gloves in the uniform.
he couldnt do that because of non-payment on arma tools.
so what do i gonna need to do now in order to get the uniform with the 2 different textures ready for configurating?
 rough idol
lusty ginkgo
Hey, I can't seem to get my old solution to fix fire geometry materials after us...
rough idol
lusty ginkgo
Hey, I can't seem to get my old solution to fix fire geometry materials after us...
you can "fix" selections with this o2script https://github.com/reyhard/o2scripts/blob/master/refineSelections.bio2s as for rvmats/mats - I'm not aware of any solution
GitHub
various o2 scripts, automating encoding process. Contribute to reyhard/o2scripts development by creating an account on GitHub.
 lethal crag
Hello everyone, who can make 6 models of Mandalorian armor? And how much will it cost?
gloomy hemlock
lethal crag
Hello everyone, who can make 6 models of Mandalorian armor? And how much will it...
Ask in #creators_recruiting and use the same message Lay-out as the other people there. Also you need to decide if you want a custom model or may retexture yet existing ones.
Custom modeling is way more expensive but also has the advantage your mod won’t need a dependency.
Retexturing is faster and cheaper but needs to rework textures of existing models so it’s Limited to those models and you need to add a dependency since it’s ripping if you just reuse them
stuck oyster
lethal crag
Hello everyone, who can make 6 models of Mandalorian armor? And how much will it...
Do you hold license to produce Star Wars IP?
lethal crag
Yes
stuck oyster
Hahahhaha
lethal crag
xD
stuck oyster
I highly doubt that.
gloomy hemlock
gloomy hemlock
maybe i instantly have another question then.
i now have 2 models (uniform and ...
anyone with any tips? would be highly appreciated
stuck oyster
There isn't really any tips on assigning texture, not sure what you are missing in the process.
gloomy hemlock
I have 2 different textures that need to be on one uniform and im not sure if that is done via config or some other way
stuck oyster
initial textures are always assigned on the model first
retexture stuff can be done later in config
gloomy hemlock
Yes but those are 2 different textures not retextures.
One is the basic uniform and the other texture set is the one for the gloves
stuck oyster
yes and you assign those textures on the model
gloomy hemlock
All of that within the configs?
gloomy hemlock
How do i do that?
 alpine matrix
could i have a second with someone soon
im trying to import a tank but i have some issues '
 median bough
@alpine matrix
https://forums.bohemia.net/forums/topic/207631-from-blender-to-arma-3-complete-process-tutorial/
Bohemia Interactive Forums
Hello, As I had many requests, I did this all-in-one tutorial I am sharing today. I hope it will be helpful to you. All important stages are available in videos description. I will try to make more tutorials in the future, so dont hesitate to guide me to parts of the videos that were not explaine...
white jay
shrewd jay
If you want to ask "why is this backpack on the floor", the answer is "wrong weighting"
It would help though if you could post more than just an image
white jay
I added more photos of model.cfg and config
shrewd jay
That still isn't a question
It's neither a config nor a model.cfg problem. Most likely is that the backpack has no bones defined
shrewd jay
Hm, spine2 should do the trick.
You don't seen to define a model in your model.cfg, only a skeleton
You need to define a class ArmaMan and your backpack, for example
class CfgModels {
class ArmaMan: Default
    {
        htMin = 60;// Minimum half-cooling time (in seconds)
        htMax = 1800;// Maximum half-cooling time (in seconds)
        afMax = 30;// Maximum temperature in case the model is alive (in celsius)
        mfMax = 0;// Maximum temperature when the model is moving (in celsius)
        mFact = 1;// Metabolism factor - number from interval <0,1> (0 - metabolism has no influence,1 - metabolism has full influence (no other temperature source will be considered)).
        tBody = 37;// Metabolism temperature of the model (in celsius)

        sections[] =
        {
            "osobnost","Head_Injury","Body_Injury","l_leg_injury","l_arm_injury","r_arm_injury","r_leg_injury","injury_body","injury_legs","injury_hands",
            "clan","clan_sign","Camo","CamoB","Camo1","Camo2","personality","hl","injury_head","insignia"
        };
        skeletonName = "OFP2_ManSkeleton";
    };
class NameOfYourBackpack : ArmaMan {};
};
(sorry for the shitty formatting)
NameOfYourBackpack is the name of your backpack's p3d withouth the .p3d
white jay
Thanks
shrewd jay
np
lusty ginkgo
stuck oyster
the old mesh does not exist anymore
It only preserves the vertex part of the selection, but not edges or faces. You can move the mesh around as expected, but hiding and unhiding the selection only affects the vertices. The slow solution is to make a selection, move it x distance, and then manually reselect the components to assign a material, before moving it x distance back
alpine matrix
i import my custom tank but it doesnt move and is able to be walked through how do i fix this?
stuck oyster
add correct geometry lod
convex shapes
each with componentXXX name
and each with mass
check out Arma 3 Samples on steam for reference
alpine matrix
how do i add a new LOD?
im pretty new to all this
could i hop into a vc with you?
im fairly lost
stuck oyster
soz, no Im going to sleep
check that link you were given above
and explore the tools with time
tank is
lets say very difficult task to make as beginner
its better to start with something less complex and specific
stuck oyster
a box
alpine matrix
lmao fair enough \
alpine matrix
box
stuck oyster
and lot of programs that need learning
alpine matrix
im currently making a tiger 1
and it trook 4 hours for the import
took*
and now im making a texture
then im gonna double check all my LODS
stuck oyster
4 hours to import where?
stuck oyster
right
well that can get you a thing in game yes
well best advice I can give is to study the sample models and what they have in them
and then practice with the programs
alpine matrix
Will do
whats a good way to texture my tank?
or good program because i currently dont have one
stuck oyster
what did you model it with?
good program is the one you can afford and want to learn I suppose
technically its possible to make textures in MS Paint if you like
alpine matrix
i got a model from a website for a "high detail tiger 1"
i didnt make it myself
i just do imports
and then fix what needs fixed then pray to god it works '
gloomy hemlock
You may use substance painter to do the textures. Don’t buy it though.
The have a free version for students.
For legal stuff I may have to say you can’t just put a picture of a cheese at the part where you should add a photo of your students Id but you can and it works fine
shrewd jay
Can we not talk about how to circumvent copyright?
white jay
ello. i was wondering if anybody's got input regarding a model not being fully opaque for some reason. basically 2/3 of the uniform model i created has this visual noise which i initially thought was a problem with the shadow LOD and later the AS map. neither of which proved to be the case. on top of the noise, i can apparently see the silhouettes of objects immediately adjacent or on the uniform itself from the other side of the model.
been racking my brain around this and it's not an issue with any of the maps or the rvmats being used and i am headed nowhere fast with this problem.
stuck oyster
you have alpha channel in the texture
and engine is counting it as transparent
most likely
white jay
stuck oyster
and engine is counting it as transparent
well, this is what boggles me, i use the same workflow for the textures of the pants, shirt, and boots, but it seems only the pants is unaffected by this issue.
i also tried changing my color maps from CA to CO and it made no difference
stuck oyster
you still have the alpha channel there
CA for solid models is a big mistake
and it has to be done before conversion
and alpha channel removed
just renaming the texture wont change how it has been converted to paa
white jay
ahh, wasn't aware of that. thanks.
stuck oyster
and the texture needs to be set as CO in the model
all p3d need default textures and materials
white jay
just to be clear as well, the alpha channel thing you mentioned is just for the color map or does it go for all of them?
white jay
aight. thanks for the input. 🙂
woeful viper
CO also has alpha channel possibility, but its 1bit
stuck oyster
yes but it has only use for actual transparency using parts
stuck oyster
https://imgur.com/gallery/soGBSAn when you put wrong penetration material on your object 😄

 kind lion
where can i find the list of animation sources for ammunition, like missiles and such? im trying to animate a bomb but i dont remember how the animation sources work on those and i cant find the proper page on the wiki right now
shrewd jay
kind lion
https://community.bistudio.com/wiki/Arma_3:_Vehicle_Loadouts#magazine i found it, it was this page, but i dont think it's quite what im looking for
🤔
shrewd jay
What exactly do you want to achieve?
kind lion
have a rotation animation once the bomb is deployed
shrewd jay
🤔
kind lion
think like a fin on the tail of a bomb unfolding
shrewd jay
Hm, I think the Titan missiles actually do that
 marsh canyon
Did Titan ever done similar?
shrewd jay
I think so, the fins on the titan extend when it is fired IIRC.
kind lion
yes!
marsh canyon
🍻
shrewd jay
Looks like it, yeah. Nice!
kind lion
thanks!
marsh canyon
BTW looks like that's a #community_wiki time, we don't have bay anims in the Model Config article
quick terrace
spanking @turbid cove :)))
turbid cove
quick terrace
spanking <@137855151120711680> :)))
mraw
quick terrace
turbid cove
_mraw_


 balmy mirage
stuck oyster
https://tenor.com/view/goat-standing-wax-figure-creepy-gif-17526503
balmy mirage
stuck oyster
https://tenor.com/view/goat-standing-wax-figure-creepy-gif-17526503
oh hell nah man
shrewd jay
WTF 😬
white jay
Hello! Not really sure where to ask this but I'm remaking Sahrani for DayZ and been hearing loads about the A1 buildings that some guys made interior for for A2 back in the day. Was wondering if anyone knew about this and if it was possible to come into contact with them. I know it's been a few years but It would be great if anyone knows anything.
 grand cloak
Is anyone familiar with how to get rid of a "Cannot open object" error that appears in-game when equipping the modded weapon?
The model appears in-game just fine however the error still appears.
grand cloak
Our model inherits from Launcher_Base_F though and we've quadruple checked our model = path to make sure it is correct.
stuck oyster
you may have broken some vanilla class if your inheritance chain is not right
does the error say anything else?
grand cloak
stuck oyster
does the error say anything else?
No, even checked .rpt for errors and only record was the same error I have just described.
grand cloak
stuck oyster
it does not refer to the model by name or anything
Correct.
The full error is "Cannot open object".
 stuck oyster
what you could try is to comment out your new class first and pack and test to see if it causes the error
then comment out the parent class to see if that causes the error
and so on
to try to find the source
grand cloak
I'll give that a try, thanks.
stuck oyster
with obscure errors like this exclusion of added stuff is pretty much only way to figure out where the break is
grand cloak
yeah
 narrow jay
 stuck oyster
Very kool guns! Nice to see model pics here!
 wispy orchid
what might have happened that the UV editor no longer opens on a p3d?
when hitting UV in blender with arma toolbox, blender quits
seems uv editor became minimized
stuck oyster
yes it does that sometimes
have to maximize it from taskmanager and then it pops back into view
runic plover
grand cloak
The full error is "Cannot open object".
Could also be a proxy, as example muzzleflash proxy or rocket proxy
Had this issue on my SAM Site, cause of changing my folder structure and forgot to change proxy pathes in the .p3d model 😅
grand cloak
runic plover
Could also be a proxy, as example muzzleflash proxy or rocket proxy
Had this is...
I'll look into that, thank you.
grand cloak
runic plover
Could also be a proxy, as example muzzleflash proxy or rocket proxy
Had this is...
This solved the issue, thank you!
wispy orchid
hi, working on a new static ship project, but running into a problem: In Eden the flight deck is not recognized as a surface and anything placed on the flight deck is on sea level, if not raised manually
I checked getPosATL, getPosASL and getPos for the ship and compared it with Nimitz (n vs c in the screenshot): https://media.discordapp.net/attachments/393837867547492363/933477954980315176/Carriers-getPos_ATL_ASL_none.jpg

the ASL and ATL are ok, but getPos is at the height of the road lod of 16.98, negative
it's a composed ship, like the Freedom and Nimitz
I now placed a road and geo lod at 0 height on the center piece of the geo/road lod p3ds, no change
desert notch
wispy orchid
the ASL and ATL are ok, but getPos is at the height of the road lod of 16.98, ne...
you seem to have another surface above that
wispy orchid
yes, the flight deck roadway height is 16.98 exactly, the geo height is 16.975.
woeful viper
is there some autocenter=1 shenanigans going on maybe?
wispy orchid
haven't set this property at all, only class = vehicle and sbsource = visualex
desert notch
wispy orchid
yes, the flight deck roadway height is 16.98 exactly, the geo height is 16.975.
I meant another roadway surface above the plane.
negative z for getPos means the object is under the surface
getPos for the ship
oh for the ship
then it's correct 
wispy orchid
I don't understand it - for the Nimitz the getPos returns ~0 and the flight deck is recognized in Eden
for the new carrier, the getPos returns -16.98 and the flightdeck is solid, but not recognized in Eden, e.g. objects don't snap to it
desert notch
how big is the object?
wispy orchid
276 meters
desert notch
a single part?
wispy orchid
the geo and roady is split to 40 meters
desert notch
that's too big
wispy orchid
the res lod, yes, seems to work nowadays
woeful viper
whether 40m works or not depends on the map you place it on (or rather the gridsize of it)
wispy orchid
as said, it's a composed ship
I used Doung from Unsung, the Nimitz and Freedom work both there
I tried Stratis as well
woeful viper
what happens if you spawn in the air above it and fall down - do you collide with the deck or not?
wispy orchid
will try, thanks for the suggestion!
height is then negative the new road lod height 😦
I replaced the p3d with those of Nimitz and still the same problem, maybe more a config issue then or a script issue
total weirdness now: if I hover 2-3 meters over the flight deck, everything works, I can place units and vehicles close by. If I move further away with the object, the deck is no longer recognized.
stuck oyster
Id maybe try autocenter= 0
how is the model positioned in models space? is it above 0 level
wispy orchid
yes, but for the submerged part of the hull
no change with autocenter = 0 in the main p3d
thanks for the ideas and suggestions, calling it a day now
stuck oyster
all destroyer parts have autocenter = 0
stuck oyster
wispy orchid
no change with `autocenter = 0` in the main p3d
so it might be worth adding to all of them
autocenter can do crazy thigns when the centering happens
white jay
woeful viper
whether 40m works or not depends on the map you place it on (or rather the grids...
I've never been able to find an exact limit on size, I think roadway is the first thing to cause me trouble and that was at 70m
@wispy orchid did you give the geometry mass and apply scale before exporting?
And does the geometry mesh have any concaveed parts or flipped normals?
wispy orchid
yes, geo lod is really really basic, a combination of cubes for the form of the flightdeck right now. There are no concaved parts or flipped normals unless F7 in object builder would create them.
The autocenter = 0 property did make things even worse, somehow getPos reported -5,...e5 as height then
runic plover
wispy orchid
hi, working on a new static ship project, but running into a problem: In Eden th...
How you did your 40m parts?
Defined them as static ship and used the compartement command? Or you did it with a other way?
wispy orchid
runic plover
How you did your 40m parts?
Defined them as static ship and used the comparteme...
it's a p3d with the res lod, and 12 p3d with geo+roadway lods
the config for the res lod p3d calls an init script that builds the 12 geo+roadway objects
runic plover
Its a static object?
runic plover
Im on phone and dont got it in mind, but big static ships have splitted parts like you did and in the config is a entry, it calls the defined cfgVehicle class and memory point, as example
"TeTeT_Ship_01","pos_Ship_01"
pos_Ship_01 is defined in your main object p3d with a memory point
Its like a composition at least but done as placeable object
You have to place a BI big ship like Destroyer, and look in configviewer how its done
I got in mind, Destroyer or the other big one has a entry for the US Flag, memory point pos_flag
You will find it
Its something like multiple anything, i cant remind
wispy orchid
yes, the Freedom and Liberty use also an init script to place the different parts. I'm using a probably older system which is used on the Nimitz and BHR
runic plover
wispy orchid
yes, the Freedom and Liberty use also an init script to place the different part...
played around with this and did a pos_Flag memory point on top of Cabin
multiStructureParts[] = {{"ShipFlag_US_F","pos_Flag"}};
Didnt needed any init script
 wispy orchid
ok, thanks, I'll give it a try
 opaque robin
hello i have made a model and the textures how dose one make the rvmat for it or is there a template i can use, its a building with no doors just the shape
wispy orchid
runic plover
played around with this and did a pos_Flag memory point on top of Cabin
```mult...
are you certain you're not inheriting an init eh script from somewhere? I checked the config for Freedom and Liberty, and for example the destroy explicitely calls https://community.bistudio.com/wiki/BIS_fnc_destroyer01Init
runic plover
wispy orchid
are you certain you're not inheriting an init eh script from somewhere? I checke...
Thats for adding your own numbers etc
You have to test the Destroyer ingame, you can add your own numbers or text, cant remind what it was
I have used the flag of it as only a test, this has maybe that EH
You have to try it out, i tested only like 5mins on it to check for future plans
wispy orchid
so the destroyer01Init actually calls ```sqf
_dummy = createVehicle [_dummyClassName, _carrierPos, [], _carrierDir, "CAN_COLLIDE"];
...
_carrierPartPos = _carrierBase modelToWorldWorld (_carrierBase selectionPosition (_x select 1));
use google and search for multimaterial
wispy orchid
OMG. The mission is somehow broken that I used for the tests. When creating a mission from scratch on a different map it suddenly worked. Thanks for all the help!
terse sail
not sure if this is the right channel to ask, but how does one make the picture and uipicture?
 blazing geyser
blazing geyser
https://media.discordapp.net/attachments/922488467982782505/933462595233525841/u...
blazing geyser
blazing geyser
blazing geyser
https://media.discordapp.net/attachments/922488467982782505/933462595233525841/u...
embed fail
😩
blazing geyser
narrow jay
https://sketchfab.com/Petr.Tlach/models
Hey, hate to bother, but I really don't advise you post on sketchfab, all of your models can be ripped
I did the same mistake
narrow jay
blazing geyser
I did the same mistake
All Models Its me old Models. Small part i use from Armed Assault And ArmA2 Era. Use too IFA3, FF, RHS 😋
narrow jay
blazing geyser
Hey, hate to bother, but I really don't advise you post on sketchfab, all of you...
BTW, i added at sket... only part old me models. PBR test.
blazing geyser
narrow jay
BTW, i added at sket... only part old me models. PBR test.
aa ok
 plucky ginkgo
I hope this is the okay place to ask, but I'm wondering if there's somekind of model in the base game that resembles scrap metal on the floor that could be used for inventory items ground loot model?
Currently it's using the default magazine pouch model and it gets confusing when looting.
stuck oyster
#arma3_scenario would be the place @plucky ginkgo
plucky ginkgo
thanks
inland pawn
Is it possible to accurately edit a models center of mass? Or is it just, set weight and guess
polar fiber
apply the majority of the vehicle's mass to small cubes and move them
See the test_heli_01 example model
inland pawn
polar fiber
apply the majority of the vehicle's mass to small cubes and move them
I did that, but then the commanders MG turret stopped working and the commander was left with his SMG
While inside the vehicle
Ok, it did it with the original p3d now
Wtf
Let me reset to what we have on our github
Nope
WTF happened
stuck oyster
mass does not affect turrets, something else must have happened
inland pawn
stuck oyster
mass does not affect turrets, something else must have happened
I've made no changes to anything else besides the mass
I'm stumped
inland pawn
stuck oyster
mass does not affect turrets, something else must have happened
Have you encountered this before? https://pastebin.com/GLMb8ws4
I have 0 clue
inland pawn
The commander is now no longer able to use the commander turret even though nothing changed
stuck oyster
nope, something must have changed
did you delete a proxy or add a wrong ; or}; somewhere in your config?
inland pawn
stuck oyster
did you delete a proxy or add a wrong ; or}; somewhere in your config?
No, I even reset back to a working version on our github and that wont work
Though, it works in the mod currently
inland pawn
I'll try deleting my temp files
inland pawn
stuck oyster
mayhaps something does not update in the temp files
Nope
Unable to control the turret
It's like the weapon doesnt exist
inland pawn
@stuck oyster Everything works except the commander is unable to use his turret. Instead, he uses his assigned weapon inside the vehicle
Know the fix for that?
inland pawn
Went in and grabbed the working code from the released version of our mod
It's fixed
stuck oyster
Do you still have both files? Would be good idea to compare their differences
terse sail
what is the dimensions of the weapon pictures in the loadout?
 boreal jolt
1024x512px (most used for Alpha/Beta/release and pre-Apex icons) or 512x256px (for Apex/post-Apex icons).
 sharp coral
is it possible that a model can have more hiddenSelections that are listed in a config.cpp of a mod? I wanted to make a retexture of a vest part, it has its own .paa file, but unfortunately its not listed in the hiddenSelections, so I assume it may be used only within the model.cfg (which I can't view, obviously). Is there any way I can view all sections/selections in other place than CfgWeapons in config.cpp?
terse sail
boreal jolt
1024x512px (most used for Alpha/Beta/release and pre-Apex icons) or 512x256px (f...
ok, but these dimensions you mention arent compatible with the power of 2 rule used in https://paa.gruppe-adler.de/
what to do next?
sharp coral
use TexView2 instead of that website
boreal jolt
...?
How is it not compatible with power of 2???
Why are you using a third party tool anyway? You can convert them just fine using TexView2.
Or imageToPaaGUI.
sharp coral
boreal jolt
How is it not compatible with power of 2???
GRAD's website only converts square images
terse sail
boreal jolt
Or imageToPaaGUI.
dont know how to use texview2, or how to use imagetopaa
imagetopaa - got as far as the weapon.jpg and process, but it fails to process convert said 'weapon.jpg'
any advice please?
sharp coral
texview:
- open the software
- drag the jpg inside (but better have it as png or tga)
- press File -> Save as
- save as yourfile.paa
work done
terse sail
boreal jolt
...?
according to your specs @ #arma3_model message
these arent powers of two, so link https://paa.gruppe-adler.de/ wont work
boreal jolt
Yeah, so don't use that.
Just use ImageToPAA.
Drag your image to the list and then click on Process files. It'll automatically convert it to paa.
That's literally all that's needed.
terse sail
boreal jolt
That's literally all that's needed.
failing to process/convert still, name is gear_unk_rifle_X_CA.paa
nvrm, found out why, x/y is off
terse sail
boreal jolt
That's literally all that's needed.
sorted issue, thanks @boreal jolt and @sharp coral for your contributions 👍
runic plover
sharp coral
is it possible that a model can have more hiddenSelections that are listed in a ...
If its not listed in sections in the cfgModels you cant
stuck oyster
not all parts of model or all textures are necessarily defined as hiddenselections. they just use the texture assigned on the parts in the model itself in that case
foggy finch
terse sail
according to your specs @ https://discord.com/channels/105462288051380224/105462...
1024x512px (most used for Alpha/Beta/release and pre-Apex icons) or 512x256px (for Apex/post-Apex icons).
those dimensions are power of two.
1024x512 == 2¹⁰ x 2⁹
512x256 == 2⁹ x 2⁸
a refresher: https://en.wikipedia.org/wiki/Power_of_two
quick terrace
:))))
grand cloak
Anyone have any idea why my launcher, when disposed of via the CBA eventhandler, is offset significantly? Deleting the temp folder solved the issue.
sharp coral
runic plover
If its not listed in sections in the cfgModels you cant
sorry for ping, but I don't think I understand that at all. In Object Builder, in Named Selection window there is a named model part that is not defined in model.cfg, and it has custom, separate texture. So adding it into sections[] (and in hidden Selections within config) would be enough, right?
stuck oyster
cant add it if its not your model
as model.cfg is baked into the p3d
the author of the mod would need to do that
sharp coral
i have the source files if that's what you mean, both P3D in MLOD format and the cfg file
stuck oyster
then give that part some distinctive name on new selection and put that into sections array
hiddenselections must not overlap each other
and preferably they are separate dedicated selecetions
runic plover
Also take attention to the order
As example:
"Screen","Wall","Door"```
```HiddenselectionTexture:
"Path/YourScreen_co.paa",Path/YourWall_co.paa",Path/YourDoor_co.paa"```
Same with HiddenSelectionMaterial if needed sharp coral
the table on the bottom of this page doesn't list any vests or backpacks so I thought it's impossible
runic plover
Vests/BackPacks/Helmets arent vanilla possible
With scripting it could be possible
sharp coral
do you know of any mod that tried to do that?
runic plover
I dont, maybe others do
stuck oyster
not possible as you cant access the vest via script to texture it.
wicked kite
I am having some issues with removing vertex groups form the character example from Arma 3 Samples. I am using Sokolonko's 'Uniform Implementation' video as a guide for making a uniform, however after he copies over the example character he selects all 'proxies' vertex groups and deletes them. Now I am not sure why but even though I am in edit mode I cannot select any of them, only way I am able top delete the proxies is going to object mode and clicking delete for each individual proxy, for each selection, which seams to be leave random vertex groups behind that are also supposed to be deleted. I tried looking up the issue but I couldn't find any relevant info on why this is happening. This is all so that I can rig and add weight to my uniform.
wicked kite
Does the pose of my model matter when trying to set it up in ArmaRig? The model I made is in the generic T-Pose, not the Arma upsidedown V pose. I am also still stumped on trying to get these vertex groups set up properly. I might use the skeleton from Arma Samples instead of the model Sokolonko used, they share similar vertex groups so I think it could work.
 true barn
i’m fairly certain the A pose is what it needs to be, because that’s how the arma rigging needs to be
there’s nothing stopping you from modellling it in a T pose and then making it an A pose though @wicked kite
 marble steeple
Is there a way to change the uvsource and other rendering properties of the main texture?
For example, in Super Shader there are stages for all other maps but not the main albedo. Where do I change its properties?
marble steeple
Oh, I guess there is a Stage0 for CO. It just wasn't in the BIS Wiki for Super Shader
quick terrace
it's not albedo, because albedo is a PBR texture
color texture, or color alpha texture are assigned directly, rvmats handle secondary textures, as weird as that might be
quick terrace
you can do that using the uv editor
quick terrace
can you describe what you want to achieve?
marble steeple
I want my object to blend with the ground texture
to get the UVs from the terrain
it says here that the uvsource can be from world, but I can't seem to get it to work
it's always aligned with the object
stuck oyster
If I remember right that don't work. But could be i remember wrong
quick terrace
marble steeple
I want my object to blend with the ground texture
see if #arma3_terrain have more knowledge
stuck oyster
They don't make models that much
It's fine to discuss here.
Main thing to consider here is that we have not seen anyone do it in all the years Arma has been played.
Now that does not mean it can't work, but I am a little bit skeptical
polar fiber
AFAIK the surfaceTexture script command was introduced so that it could be done by retexturing ingame
stuck oyster
It can match the texture yes but not the uv mapping
marble steeple
I remember we did it in OFP, there was some setting where you could basically project the terrain texture onto a surface
but the engine has changed so much it might not be possible anymore
I guess I just have to use UVanimations to align the UVs
stuck oyster
That could work yea
marble steeple
I can get the texture from the terrain, but not the material though
marble steeple
yup
stuck oyster
Also you won't get clutter or the parallax effect
marble steeple
yeah, it's kinda moot since having just the texture would look different from the terrain anyway
stuck oyster
Yeah was just about to say that it does not really matter if the texture aligns
stuck oyster
Indeed. Next engine maybe
desert notch
marble steeple
some kind of terrain blending shader would be nice
you can use terrain surface textures on objects using scripting, but I guess that's not what you're after
marble steeple
desert notch
you can use terrain surface textures on objects using scripting, but I guess tha...
Yes, I know, but I can't get the material from the terrain.
stuck oyster
@marble steeple out of curiosisty, what kind of elements are you doing? As this is something I tinker on mysself too and I've come to conclusion that only very old ground disturbances would really blend with the surrounding ground
craters, trenches and such are very raw when they are made
marble steeple
stuck oyster
<@!139822114197733376> out of curiosisty, what kind of elements are you doing? A...
I'm just messing around, but yes something like trenches and dirt piles would make sense for this
in any case, it's very hard to make the mesh - terrain intersection look good without some kind of blending in the textures
marble steeple
maybe some kind of alpha texture on the edges, dunno
stuck oyster
and making it rough enough so the seam is jagged
stuck oyster
yeh that wont quite work
wicked kite
true barn
there’s nothing stopping you from modellling it in a T pose and then making it a...
Honestly didn’t really think about that, I’ll try it out
stuck oyster
modeling stuff in correct pose does usually have better results though
joints need to be made in correct positions and preferably joint topology is similar to vanilla so that they deform nicely with animations
round bloom
What actually is the firm limit on geo size from 0,0,0 before it breaks? Can't find an agreed answer online
stuck oyster
its terrain dependant. 50 meters across is safe
also bigger the object, bigger its simulation footprint is
this can also cause issues
my advice, stick to the 50 meters
 slate forge
Hey guys, im new in modeling\modding and im stuck in problems... first i cant import .obj models to object builder, actually can, but with weird normals...
and second, when im importing in .fbx, it smooth all edges so hard, that i dont need
stuck oyster
did you make the object?
stuck oyster
what program do you use
slate forge
cinema4d
stuck oyster
no youll need to link them
slate forge
can we pm?
stuck oyster
slate forge
cinema4d
uh 😅
no sorry I dont have time to do private help
Cinema4D is not really best program for this
slate forge
im open to explore new 3d editor, so...
slate forge
im tried for fast smooth in blender, but nothing help
stuck oyster
fast smooth?
slate forge
likely in cinema i can smooth all edges by specific angle, but oxygen smooth, like, all edges with in 180 degree
stuck oyster
is your model textured?
slate forge
stuck oyster
this is irrelebant to the smoothing, but relevant to the overall process
and yeh that smoothing there is a bit different thing
slate forge
i made some textures, but they not in finish
stuck oyster
is your model uv mapped?
slate forge
yes
stuck oyster
well. I know next to nothing about C4D but if you export from it, you likely want to use FBX. you may just need to figure out correct export settings and import setting to Object builder
slate forge
when i export it i have some setting, but when import only "mesh import" and "UV set"
nothing else
problem in level of smooth, oxygen smooth too hard, and in places where i didnt want
stuck oyster
I dont remember fbx import settings off the top of my head but Im pretty sure there was something about smoothing too
quite possible its a problem in how smoothing works in C4D and in OB.
hard to say since I dont use it
Blender is nice in the way that its smoothing with hard and soft edges is same as in OB
and not via smoothing groups
stuck oyster
probably yes
just not automatically
you may need do the hard and smooth edges manually
in case you end up using Blender Id suggest getting the ArmaToolbox addon for it so you can export directly to P3D file
slate forge
is there some difference between arma p3d and dayz p3d? im actually work for dayz, but there is same oxygen2
only in moddeling
wicked kite
I know this is probably trivial but I am having trouble trying to repose my model. I asked for help in a Blender discord group but it got drowned out. Long story short when I try and move my models rig, the mesh starts to stretch and contort, and parts of it separate. I turned stretching to 0 but that didn't really help with the distortions and parts separating. If I try and grab the hand most of the torso will move with it. Is this a rigging issue? A model issue? Couldn't find much on google either but I don't think I'm asking the right question
stuck oyster
post pictures (you need to link them here)
hard to understand the problem from description
wicked kite
stuck oyster
<@!280140455952384000>
I am moving it by grabbing the red portions of the rig if that make sense. Such as the red square near the hands, and feet, and the arrows by the arms and legs. And I assembled the model in segments, and joined them all together. But I did not make the segments themselves.
stuck oyster
where is it from?
wicked kite
stuck oyster
where is it from?
Metal Gear Rising, it's one of the troops you fight
stuck oyster
alright so for starters you are not allowed to use that model
its stealing
you should start learning modeling from the basics so you can get better handle on how it works
wicked kite
stuck oyster
you should start learning modeling from the basics so you can get better handle ...
Ah I see, is recreating the model a thing I could do? Or am I not able to make anything in the style of the model?
stuck oyster
sure you can make your own that is similar
wicked kite
stuck oyster
sure you can make your own that is similar
Ok, I can try doing that. Guess I can start with headgear again.
stuck oyster
I would recommend just fiddlign with the tools and looking/doing tutorials to learn how stuff works
wicked kite
stuck oyster
I would recommend just fiddlign with the tools and looking/doing tutorials to le...
Am I allowed to use an Arma 3 body as a base or do I need to make everything 100% from scratch?
Considering my goal is to pretty much make one uniform and helmet and have different color variations I feel this can be very doable, but being able to use an Arma 3 body would save me time
stuck oyster
you can use it as a base yes.
slate forge
@stuck oyster i fixed it, thanks at help
fixed by right export configuration in blender, it have more settings to export in .fbx
if anyone have same problem with smooth edges in oxygen2, solution is export in blender with:
-only mesh
-geometry > smoothing:edge
-export subdivision surface (dont think it need it actually)
stuck oyster
usually you dont want to export subdivided stuff as that gets very polygon heavy
optimized models with details baked inot the textures is the way to go for game assets
slate forge
total 10k polys, 6.5k points in cinema, and same after export in oxygen
in my case subdivision did nothing :)
 hoary knoll
what geometry or selection defines how an object can be seen by the player via UserActions?
it seems its viewgeometry
stuck oyster
geometry lod components can be set as action trigger components
so when you look at the component you get the action
hoary knoll
well im in arma 2 and using the built-in useractions
and for those it seems to be viewgeometry
stuck oyster
always mention all details in the question 😛
hoary knoll
i dont think a3 is doing it much different
stuck oyster
it is
it has the geometry action components
that can be used instead of memorypoints
its far more accurate and reliable
but A3 only
 steep scroll
hello im fairly new to arma modeling and modding and i appear to have a issue with my model (uses the helicopter flight model to achieve flight) and in game when i start up the engine it runs for a second and then the main and alt rotors all die and break is anyone willing to get with me and help me figure out whats wrong; or know a good link to help direct me towards an answer
 north sundial
Anyone interested in ww2 modding?
gloomy hemlock
the iron front guys i guess
tulip gyro
When I make an object in blender, do modifiers like the subdivision modifier transfer over to object builder?
shrewd jay
Object Builder doesn't support modifiers. If you are using the Arma Toolbox for Blender and have a relatively new version, that can apply the modifiers when you export.
shrewd jay
Check the samples package on steam, it contains a character model
tulip gyro
Okay. Thanks!
shrewd jay
👍
 stone cargo
What is the max polycount limit for a uniform in arma?
stuck oyster
Not unlimited but theoretical maximum is pretty high. Would probably fry gpu.
quick terrace
@sharp coralit isn't unlimited mind you...


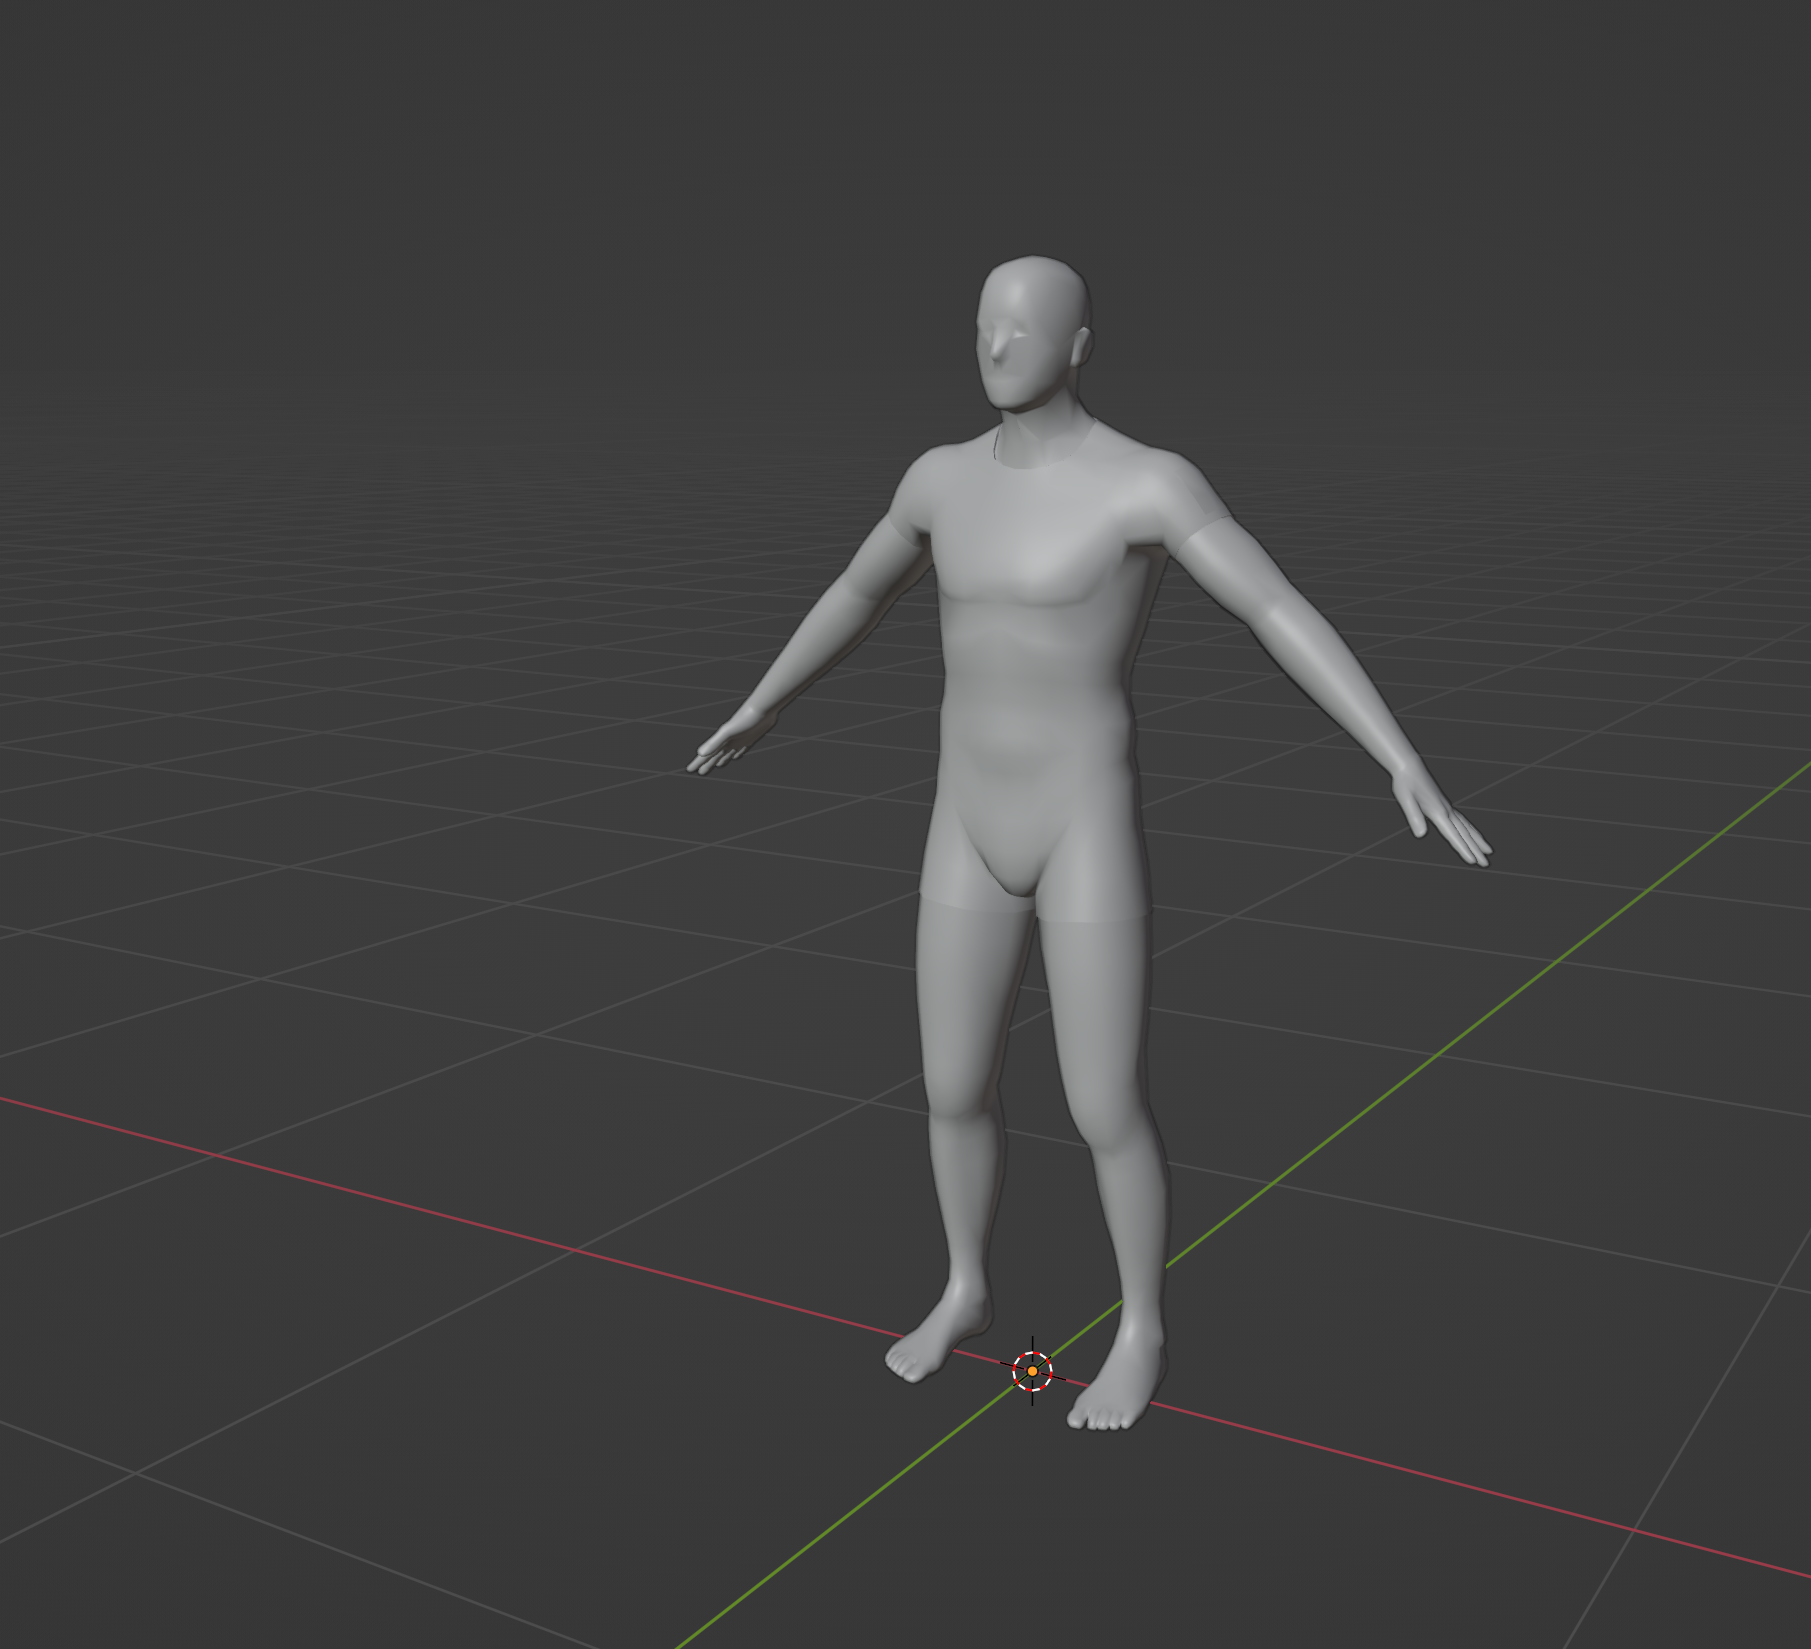


 woeful viper
its in the biki...
sharp coral
https://community.bistudio.com/wiki/Arma_3:_Modding_Characters guess I'm blind then or this is the wrong article
woeful viper
its pinned...
sharp coral

quick terrace
Bohemia Interactive Forums
Hello guys, I heard that with dx11 the poly limit in arma is now raised. Is that true? If so, whats the new limit? Thanks for you answers :D Regards Tobi
the upper poly limits is irrelevant altogether
because it's not actually usable
also the limit is DX11 general limit, not ArmA specific. a simple uniform should be a lot under 10k tris
wicked kite
getting issues with x mirror editing. I understand that if the model is not symetrical it doesn't work but it looks fine. I am using the example model from https://community.bistudio.com/wiki/Arma_3:_Modding_Characters as a base. Is there needed prepwork I am unaware of for this model? Parts of the chest work but that it. I also do not have a full body mesh in my samples for some reason. It's mostly arms and legs, except for some ver low poly torsos.
stuck oyster
the man model is not completely symmetrical
so basically you cant do edits with x mirror
wicked kite
stuck oyster
so basically you cant do edits with x mirror
I assume I could edit and make the model symetrical, however that almost sounds like moer effort than just editing both sides and trying to make them look the same
stuck oyster
if you are making a uniform it is far easier to keep the man model as reference and then build another model on top of it
wicked kite
stuck oyster
if you are making a uniform it is far easier to keep the man model as reference ...
sad, I thought using "snap to symmetry" or "symmetrize" would work but it did not lol. I can grab vertices but connecting them doesn't work still in mirror mode, which I should have honestly knew would happen
white jay
Hello! I have a problem with my tank turret, (i dont know if its in model or configure) when i try to move my turret main gun upward the gunner view always goes up first its not fixated or doesnt follow the turret main gun, the turret will also go up if i move the gunnew view upward but its not fixed and doesnt follow the view properly Does anyone know the solution for this?
stuck oyster
view memorypoints need to be part of the gun selection so they move with the gun animation
white jay
You mean the otochlaven? Yes the gunnerview and otochlaven are in the same selection
In the memory point
There's two Otochlaven in my memory point one with uppercased O and one is not
In my Otochlvane selection consists of gunnerview, coaxial gun beg, main gun beg, osahlavne,
In the otochlaven, there is the two vertices near the osahlavne and thats it
stuck oyster
that does not sound right
steep scroll
how do you dictate where a player looks from in a vehicle? mine appears to be stuck underneath mine looking straight up instead of out of the cockpit
stuck oyster
crew proxies
steep scroll
stuck oyster
crew proxies
awesome thanks now i just need to dial it in and ill be set
stuck oyster
what is set as the real gun selection/bone in your model.cfg?
thats what it needs to match with
white jay
this is my turret as you can see works perfectly well on this level
https://imgur.com/a/mv5MEXa
and this is where i move it up, the turret goes up as well, but it doestn follow my crosshair
https://imgur.com/a/BvBLpwU
white jay
stuck oyster
what is set as the real gun selection/bone in your model.cfg?
}; class MainTurret { type="rotationY"; source="mainTurret"; selection="OtocVez"; axis="OsaVeze"; animPeriod=0; minValue="rad -360"; maxValue="rad +360"; angle0="rad -360"; angle1="rad +360"; memory = 1; }; class MainGun: MainTurret { type="rotationX"; source="mainGun"; selection="OtocHlaven"; axis="OsaHlavne"; };
and this is my entire model cfg
https://pastebin.com/hJfx1Ltu
and this my cfgvehicles
https://pastebin.com/EztRi6eP
(ill move this to config_makers if this is about configure problems dont worry haha)
stuck oyster
no dont move it, the context gets lost
its pretty much same people all around
and the problem as model component too
not just config
remove the otochlaven selection and just use OtocHlaven
white jay
copy that, ill test the tank now
white jay
I remove the otochlaven, but problem still occurs the gunnerview still moves first and the turret can't keep with the angle 😫
Maybe something wrong with my configure perhaps?
inland pawn
white jay
I remove the otochlaven, but problem still occurs the gunnerview still moves fir...
Sounds like you aren’t using memory point groups for the gun and turret
For the gun to follow the gunner view, you need to include everything gun wise in a mainGun(or Czech word equivalent) memory group
Or some weird model.cfg pairing
white jay
oh no, i am using memory point groups here https://imgur.com/a/3WL6ld6
all are moving well in game, the problem is whenever i raise my main gun upward like higher, the main gun cant reach it.
the gunner view moves faster, and the main gun follows the gunnerview but it doesnt zeroes in the crosshair
this is the problem:
https://imgur.com/a/6c3VXhg
main gun and gunner view cant zero in maybe problem in angle on configvehicle?
https://imgur.com/a/tBWEp6P
inland pawn
Are you pairing gunner view with the gun
white jay
here i used paint hahaha
white jay
inland pawn
Are you pairing gunner view with the gun
yes i did in the otochlaven selections of memory pint groups: there is gunner view main gun and coaxial gun all complete there's just some problem with the main gun not following the crosshair of the gunner view
inland pawn
That happens when the gun/turret doesn’t have the correct memory points in its group
You’re missing something memory point wise most likely
Or your config is not labeled correctly
white jay
inland pawn
Or your config is not labeled correctly
this one yess probably i checked the memory point of main gun all are in there in otochlaven
and this is my entire model cfg
https://pastebin.com/hJfx1Ltu
and this my cfgvehicles
https://pastebin.com/EztRi6eP