#arma3_model
1 messages · Page 50 of 1
 livid canyon
 sleek echo
thats what I though
sleek echo
livid canyon
There's also config
```cpp
VehicleTransport {
class Cargo {
dimensions[] = { "B...
yeah thats what I use to calculate my loading. I get all that and as you can see it works in the photo, im using the geometry lod too but just for the assult boat it has a super high maxpoint for the geometry lod I can only assume for boats they put some tollerance in or something idk.
livid canyon
it's high because of proxies
sleek echo
this is loading it with armas ViV and as you can see the line showing the geometry lod goes way outside the cargo dimension

 sleek echo
livid canyon
it's high because of proxies
sleek echo
livid canyon
it's high because of proxies
yeah I guessed that but somehow armas ViV still lets it load. (assuming we are correct and it uses the geometry lod to check size for loading) it shouldnt fit... lol
livid canyon
 sleek echo
oh I couldnt find where it was, can you tell me where or how you found it? or send a copy of the load script 😄
sleek echo
livid canyon
oh... What command are you using to pull that BB then?
Im using boundingBoxReal [_veh,'geometry'];
and it gives what I showed in blue
 desert notch
sleek echo
oh I couldnt find where it was, can you tell me where or how you found it? or se...
desert notch
sleek echo
oh I couldnt find where it was, can you tell me where or how you found it? or se...
it's not script. it's engine code (source code)
sleek echo
desert notch
it's not script. it's engine code (source code)
you have access or you somehow decompiled it ?
ahhh
desert notch
I'm assuming only the land contact is different
you can get the land contact using getModelInfo
sleek echo
yeah I built my own because the engines ones dosnt let you slide them out like they would IRL with a parachute ejection system 😄 but the boat is the only thing having some issues with size... I wonder how @livid canyon got that smaller hit box 🤔
desert notch
and do _bbMin set [2, _landContact#2]
sleek echo
desert notch
and do `_bbMin set [2, _landContact#2]`
yeah I used the placing point from getModelInfo as its where it interacts roughly too.
desert notch
did you actually draw the bounding box?
sleek echo
This is the drawn BB of the geometry lod
the blue line, as ampersand said its bigger because of the proxies
desert notch
you say it's bigger but it only seems higher not wider?
sleek echo
true
higher only
thats the problem, its higher than the actual boat so the z axis said it dosnt fit in the back of the chinook
desert notch
sleek echo
yeah I used the placing point from getModelInfo as its where it interacts roughl...
even when you did this it was still higher?
sleek echo
desert notch
even when you did this it was still higher?
thats only adjusting the min point though the max point is the same
livid canyon
i'm only looking at mempts, not boundingbox

 desert notch
sleek echo
thats only adjusting the min point though the max point is the same
desert notch
sleek echo
thats only adjusting the min point though the max point is the same
ah I didn't see the blue line
sleek echo
livid canyon
i'm only looking at mempts, not boundingbox
oh... I though that wouldnt work for finding the size of the object because not all objects will have memory points that near the mins and max of its shape?
livid canyon
I'm guessing it tries to find config mempts first then falls back to boundingbox, Leopard?
desert notch
sleek echo
yeah I built my own because the engines ones dosnt let you slide them out like t...
apparently the engine uses something called cargoDimensionsOverride
sleek echo
livid canyon
I'm guessing it tries to find config mempts first then falls back to boundingbox...
I hate that this seems so illogical and yet it works, it should get the max and min dimensions of the memorypoints but it seems to perfectly get a better geometry lod
I guess ill change my code over to using these points and hope its better with testing
desert notch
sleek echo
I hate that this seems so illogical and yet it works, it should get the max and ...
the cargo itself has its own dimensions

did you try using this? (in boat config)
sleek echo
I dident know that exsisted. That is definatly what ampersand was using as the mem points are named the same.
I hope most people set those up but I have a feeling some dont. I guess ill write a system to look for those and then fall back on the geometry lod unless ampersand is right in his comment?
desert notch
that's how the engine does it. it uses the config dimensions, if it doesn't exist, falls back to geometry
sleek echo
desert notch
that's how the engine does it. it uses the config `dimensions`, if it doesn't ex...
right okay. But does when using this command
boundingBoxReal [_veh, "Memory"];
Do you know if it will fall back to geometry if those points dont exsist or not ? I think thats what ampersand was suggesting
(that it does automatically fall back if they dont exsist)
desert notch
livid canyon
I'm guessing it tries to find config mempts first then falls back to boundingbox...
oh I missed this. yeah
desert notch
sleek echo
right okay. But does when using this command
boundingBoxReal [_veh, "Memory"];
...
it doesn't uses the memory bounding box at all
sleek echo
desert notch
it doesn't uses the memory bounding box at all
what? So using that command it would check the memory lod then fall back to the geometry if it dosnt have the ViV points
But the engine dosnt use that?
desert notch
all you have to do is:
private _dim = getArray(configOf _veh >> "VehicleTransport" >> "Cargo" >> "dimensions");
private _bb = if (count _dim == 2) then
{
  _dim apply {_veh selectionPosition [_x, 1e15]}; // memory
}
else
{
  boundingBoxReal [_veh, 1e13]; //geom
};
It seems in some casses the memory bb can be larger than the geometry one. This is the memory lod

and geometry
 sleek echo
desert notch
all you have to do is:
```sqf
private _dim = getArray(configOf _veh >> "VehicleT...
sleek echo
desert notch
all you have to do is:
```sqf
private _dim = getArray(configOf _veh >> "VehicleT...
yeah thats what I was going to, I was just checking it dident do as ampersand said with that fall back method.
alright thanks for all the help guys I had it all working great except boats seemed to have a higher geometry, this fixes that if it has configured cargo points. If not oh well. Thanks again!
livid canyon
mem lod bounding will include getin mempts which are almost always outside of the vehicle
sleek echo
desert notch
all you have to do is:
```sqf
private _dim = getArray(configOf _veh >> "VehicleT...
out of curiosity is there a rason you used the numbers for the lods instead of the string values? Maybe its faster?
I normally use the string values that it would convert to nums, just for readability
desert notch
yeah it's slightly faster
sleek echo
desert notch
yeah it's slightly faster
enough that it warrents it over readability of the code or?
desert notch
you can use macros if you want better readability:
#define LOD_MEMO 1e15
#define LOD_GEOM 1e13
#define LOD_FIRE 7e15
...
not much
sleek echo
alright thanks
 finite stump
whats the lowest mass an object can have before you can walk through it?
Ok, nevermind about that question. My Geometry is all faces and not blocks. Has anyone seen where you use find components and it makes each face a component instead of the whole block?
 stuck oyster
finite stump
Ok, nevermind about that question. My Geometry is all faces and not blocks. Has ...
stuck oyster
finite stump
Ok, nevermind about that question. My Geometry is all faces and not blocks. Has ...
Find components works only if you have continuous mesh parts.
Your model must have split into faces for some reason
Maybe use of a modifier
finite stump
I select the original named object and its a cube from what I can tell
stuck oyster
Select it how?
finite stump
in the
 stuck oyster
It can still be split up even if there is is part of same group
finite stump
oh ok
stuck oyster
That's a lot of components you got there.
finite stump
lol, when it becomes all faces
stuck oyster
You'll have to go look at the source model instead.
If you have some edge split going on or something.
finite stump
weird, I dont remember doing anything crazy. Built this the same as my little cheesers but this house just want to be annoying.
 astral cairn
Hiya, my texture is all black.
It works normally when just a solid colour, but when I apply a image texture it goes black.
stuck oyster
astral cairn
Hiya, my texture is all black.
It works normally when just a solid colour, but ...
Common issues are wrong pathing, wrong uv mapping
astral cairn
Wrong UV mapping? Is there a specific way I should be doing it?
 warped mural
When creating a weapon model that can use different magazines (ie 15rnd mag and 30rnd mag, ofc assuming these magazines have different 3d models) i should model just the weapon and put a magazine proxy somewhere in the model correct?
stuck oyster
warped mural
When creating a weapon model that can use different magazines (ie 15rnd mag and ...
Yes pretty much nailed it.
stuck oyster
astral cairn
Wrong UV mapping? Is there a specific way I should be doing it?
You might have multiple uv sets so the uvmapping ends up in place where the engine does not read it
warped mural
stuck oyster
Yes pretty much nailed it.
how would i set up this proxy? what is the path of it?
second question, does the size of the triangle of the proxy matter at all?
stuck oyster
warped mural
how would i set up this proxy? what is the path of it?
second question, does the...
Size does nothing.
I recall there should be wiki page about it.
 charred bolt
warped mural
how would i set up this proxy? what is the path of it?
second question, does the...
charred bolt
warped mural
how would i set up this proxy? what is the path of it?
second question, does the...
Arma 3 Samples, test_weapon_01_f.p3d has all the info you need.
 stuck oyster
charred bolt
Arma 3 Samples, `test_weapon_01_f.p3d` has all the info you need.
stuck oyster
charred bolt
Arma 3 Samples, `test_weapon_01_f.p3d` has all the info you need.
It don't have the magazine proxy unfortunately
It was never updated for that 
warped mural
thanks
charred bolt
I skip read and saw weapon/proxy/size/path - guess it's slightly helpful to answer some of those questions still.
livid canyon
PhysX wheel center and rim should be part of the selection that moves with the visual right? or should they be disconnected?
livid canyon
Looks like they are separate in vanilla cars
charred bolt
livid canyon
PhysX wheel center and rim should be part of the selection that moves with the v...
Seperate. The car physx is largely code based (+ memory points and Geometry weight mass distribution), so the res LOD animations are irrelevant.
livid canyon
ok. I'm reviewing this msg. Since the damper animationsource goes from 0 to 1, should the modeled position of the visual wheel be at max droop?
charred bolt
livid canyon
ok. I'm reviewing this msg. Since the damper animationsource goes from 0 to 1, s...
Model it at mid-point.
livid canyon
as in 0 droop and 0 compression? or (droop+compression)/2
 livid canyon
ohhhh
charred bolt
Usually best to model it as it would sit normally on it's wheels. Often taken to be a half-way position, but doesn't have to be.
But don't forget to leave out the wheels from the Geo Phys LOD, as you don't want physx mesh interfering with the cars physx code based simulation.
livid canyon
if it's at the midpoint then wouldn't offset0 and offset1 need to be equal in magnitude?
charred bolt
livid canyon
if it's at the midpoint then wouldn't offset0 and offset1 need to be equal in ma...
Yes. But like I said, you can make it not exactly a mid point if you want there to be more droop than compression or vica versa, but guidance is to model the wheels as they would sit under it's own static weight, often conveniently taken to be a mid-point.
finite stump
Im kinda confused on doing the hitpoints for breaking glass. Looking at the sample Test House and Im not seeing where they are referencing the Glass_1 HitPoints LOD in the model.cfg or config.cpp. What am I overlooking or is the sample wrong?
 umbral shuttle
charred bolt
umbral shuttle
charred bolt
time to bookmark 
charred bolt
finite stump
Im kinda confused on doing the hitpoints for breaking glass. Looking at the samp...
You may be overlooking the glass macro definitions at the top of config.cpp which are referenced within class Hitpoints { }
config.cpp
3: #include "config_macros_glass.hpp"
114 - 124: class Hitpoints { }, hitpoint definitions
132 - 133, 159 - 161: class Damage { }, material swapping
180 - 213: class AnimationSources { }, animation sources used by model.cfg
model.cfg
37 - 61: skeleton bones, visual representation for switching between undamaged and destroyed mesh
115 - 122: sections, for damage texture swapping
238 - 324: damage hide animations
finite stump
I got something weird where I can open all 5 doors of my building but can only close one with the normal interaction but the other 4 wont close. I get the interaction pop up, but they wont animate. Now if I do the ctrl+space method of peeking the doors, I can then close them. Im inheriting the open and close from door_1 and changing the position, condition, and statement names to match the other door names. Has anyone seen a similar problem?
 modest perch
pretty happy with this model, is there any functionality that we can add to make the flash lights on the side able to be switched on and off?
 stuck oyster
modest perch
pretty happy with this model, is there any functionality that we can add to make...
stuck oyster
modest perch
pretty happy with this model, is there any functionality that we can add to make...
not by default. needs scripting. there are mods like that out there though
 lapis basin
modest perch
pretty happy with this model, is there any functionality that we can add to make...
lapis basin
modest perch
pretty happy with this model, is there any functionality that we can add to make...
WebKnights has headlamps. Those are items you can get from the arsenal, separate from a specific 3D model.
umbral shuttle
can backpacks have fire geos?
modest perch
lapis basin
WebKnights has headlamps. Those are items you can get from the arsenal, separate...

lapis basin
modest perch
<:thinkingchief:737373771815714817>
You could ask him how he made them. But honestly it shouldn’t be that complex just add two proxy to your model and then via script add two spotlight that triggers when using a key bind.
Or just ask webknight how he made it I think he has a public GitHub with it but I might be wrong you will have to check.
modest perch
its crazy how much improvement can be done in 2 years. the armour was done in June 23. its always painful, you see your old models and wonna improve them and redo them, but then its causing an even more workload on the community cause they gotta redo their textures if they want to use the improved stuff
 lapis basin
modest perch
its crazy how much improvement can be done in 2 years. the armour was done in Ju...
lapis basin
modest perch
its crazy how much improvement can be done in 2 years. the armour was done in Ju...

 bold flare
desert notch
all you have to do is:
```sqf
private _dim = getArray(configOf _veh >> "VehicleT...
bold flare
desert notch
all you have to do is:
```sqf
private _dim = getArray(configOf _veh >> "VehicleT...
dimensions also allow position arrays, not just strings
 white jay
What are you using to model uniform or armor?
I want to start learning how to model and there is so much application or website I am lost rn
 stark plaza
Hello everyone, I’m working on a nuclear crater texture. The .p3d file only has one surface, using a single crater texture .paa. However, this surface is quite large—a 400m × 400m square.
I’ve encountered a strange issue: when generating the texture in some maps, everything runs smoothly, but on certain maps, the game’s main thread freezes for 5-7 seconds, which is completely unacceptable. Does anyone know why this happens and how to fix it?
By the way, I’ve noticed that the smaller the surface, the shorter the freeze time (while keeping the same .paa file).🤔
 pallid nexus
white jay
What are you using to model uniform or armor?
pallid nexus
white jay
What are you using to model uniform or armor?
Most people use Blender for modeling for Arma.
A few use Maya or one of the other proprietary modelers.
Blender is also preferred because you can do direct export to p3d with one of the 2 addons made for it
And Blender is completely free
white jay
pallid nexus
Most people use Blender for modeling for Arma.
A few use Maya or one of the othe...
Nice I guess there is tutorials how to use it
I will try
To use it and self teach myself
 austere drift
Hey there, can someone explain me why shadow lods are flat (or parts of them)?
For example, shadow lods of vanilla MX are flat except lower reciever and part of stock
 marsh canyon
What is "flat"? Sharp or blurry shadow you mean?
modest perch
white jay
What are you using to model uniform or armor?
blender is best imo
white jay
modest perch
blender is best imo
Do you know a tutorial on how to make uniform or gear on it I tried but I don’t seem to be able to
modest perch
dont start with anything arma, start with the donut
stuck oyster
white jay
Do you know a tutorial on how to make uniform or gear on it I tried but I don’t ...
youll have to start from very basics
modest perch
you will only hurt yourself if you dont do anything basic

The complete beginner blender donut tutorial course in one video for those who prefer it over the multipart series.
Watch it in parts: https://www.youtube.com/playlist?list=PLjEaoINr3zgEPv5y--4MKpciLaoQYZB1Z
===Links🔗===
Blender Guru Discord: https://blenderguru.com/discord
Keyboard Shortcut Cheat Sheet: https://docs.google.com/document/d...
stuck oyster
3d modeling is a skill you need to practice to be able to make complex things
modest perch
Uniforms are probably the highest on the complexity list
stuck oyster
it is up there for sure
modest perch
i started back in january 2021 with this, it was probably a really bad idea because i learnt a ton of bad habits, then i slowly worked out of them with help


and now after years of practice, im able to say im doing some good stuff - but you HAVE to start with the donut


 stuck oyster
👍 exactly
modest perch
my biggest tip would be work on learning high poly / low poly workflow when you start making stuff
my biggest regret is taking 4 years to start learning it
finite stump
I can not seem to get my glass to break in my building. I have copied all code and names from the Test House. Linked the config_macros_glass.hpp. All LOD's named and setup. Swap happens in bulldozer so the skeleton is right. I must be missing something but cant figure it out.
stuck oyster
finite stump
I can not seem to get my glass to break in my building. I have copied all code a...
is it nondestructible type?
finite stump
Its copied from the sample test house. As far as I know it isnt nondestructible
It has hitpoints and effects with damage levels.
austere drift
marsh canyon
What is "flat"? Sharp or blurry shadow you mean?
Literally flat, 2D plane (kinda)
 austere drift
Arma 3 Samples
stuck oyster
the sample does not seem to have the better shadow lod in it
that one is same as the loooong distance shadow 10.0
shadowlod does need to be simple though so youll want to make it completely separate model and not waste time with trying to reduce your mesh to work as shadow
austere drift
Is there any other usage of that simple shadow lod but very far lod?
stuck oyster
austere drift
Is there any other usage of that simple shadow lod but very far lod?
not really
and I dont think those are even always made
austere drift
Ok, thank you

 charred bolt
stuck oyster
left shadow 1.0
charred bolt
stuck oyster
left shadow 1.0
Should be SV0, not 1. Maybe the number doesn't actually matter, but it's convention to use SV0 and SV10.
 lusty mortar
Quick (probably very dumb) question: I am using Blender to model, but I wonder do I have to texture the model in "Blender" or do I have to do that within "O2"?
stuck oyster
lusty mortar
Quick (probably very dumb) question: I am using Blender to model, but I wonder d...
uvmapping is done in blender
and you can assign Arma textures and materials in blender too if you use the armaToolbox addon
lusty mortar
Thanks @stuck oyster - Hmmm am using a Blender Addon that is called "ARMA 3 Object builder", have seen that ARMAToolbox mentioned but there was never a good link to that - do you recommend it and happen to have a link?
stuck oyster
lusty mortar
Thanks <@150949769953411072> - Hmmm am using a Blender Addon that is called "ARM...
That works too
its remake of the other addon with some extra tools
either one is fine
lusty mortar
Thanks :) much appreciated
pallid nexus
modest perch
my biggest tip would be work on learning high poly / low poly workflow when you ...
Do you know of any good tutorials for high poly/low poly workflow?
(Better methods than just decimate and triangulate I mean)
stuck oyster
pallid nexus
Do you know of any good tutorials for high poly/low poly workflow?
(Better metho...
you will want to look into retopo. But no tutorial will make you a master at one go. you will need to practice to find out what workflow fits you
there are tons of blender tutorials out there
 south badge
Is there any way I can get the ammo source to work together with rotation / translation animation types, instead of just hide type animations?
I don´t understand how to, say, have rotational animations for 4 selections based off of the ammo source´s current value
stuck oyster
south badge
Is there any way I can get the ammo source to work together with rotation / tran...
Yes it should work just fine
Nothing special needed
south badge
Ah yeah, skill issue
stuck oyster
south badge
Ah yeah, skill issue
can not rule that out 😅
can you explain more what you have tried?
south badge
I already fixed it
south badge
I had incorrect minValue and maxValue values
Hm, but I am now trying to replicate what the rhs Djigit is doing, where different missiles originate from different muzzles, and I assumed this would be defined somewhere in the weapon, but it doesn´t seem to be the case.
It only has muzzles = this 🤔
I obviously assume I´ll need some memory points defined, but I can´t find the corresponding config entries
stuck oyster
eventhandler is often used for that
charred bolt
south badge
ah, I assume I have no way of checking that in-game
class EventHandlers {} are visible in the config viewer just like any class.
If they call a function, you can also use the built in function viewer to see that code too.
If the asset you're trying to model is like an MLRS, then the muzzle memory points will indeed be animated to move from one barrel to another.
south badge
ahh, I alt F4´d it too quickly then 
 whole junco
Does anyone know why my iron sights can't be flipped down?


The code of model.cfg is lost after binarization

 stuck oyster
whole junco
The code of model.cfg is lost after binarization
stuck oyster
whole junco
The code of model.cfg is lost after binarization
model.cfg is written into the p3d on binarization that is normal procedure
does the animation work in buldozer preview
whole junco
My bulldozer cannot be used
whole junco
stuck oyster
model.cfg is written into the p3d on binarization that is normal procedure
But it only lost this section
stuck oyster
whole junco
My bulldozer cannot be used
Id recommend fixing your modding setup so you can use the tools properly
stuck oyster
whole junco
But it only lost this section
the model.cfg is probably written poorly
so as said, fix your setup so you can actually test things
id recoomend using P drive properly for mod developing as the tools are designed for that
you get lot smoother experience in making things
whole junco
stuck oyster
Id recommend fixing your modding setup so you can use the tools properly

This is my attempt to transplant the ARMA2 model to 3, but only the crosshair cannot flip this issue
whole junco
No, I obtained it through PBO with the consent of the original mod author for decompression
stuck oyster
riight
whole junco
I think this may not require the use of a bulldozer, as it involves determining whether the center of sight is open with or without a scope
But after countless tests, even with a scope, I still couldn't flip the center of sight, and cfg also lost its code during binarization
stuck oyster
whole junco
I think this may not require the use of a bulldozer, as it involves determining ...
buldozer would be the tool to test what you write in model.cfg
only when that works should you pack it to test it in game
whole junco
whole junco
I am unable to use Bulldozer due to this issue
stuck oyster
I am bit busy to write how to set that up right now. but if you search the channel history for buldozer you should be able to find how its done (using Mikeros toolset as teh way armatools launcher does it dont usually work)
charred bolt
whole junco
I had this recently too.
Solved for me by changing the Object Builder path to viewer to point directly at arma3_x64.exe in the game folder, rather than a copy renamed to buldozer.exe on my p: drive.
south badge
Ah, which LOD do I see when turned out of a vehicle? Distance or ViewCargo?
livid canyon
south badge
Ah, which LOD do I see when turned out of a vehicle? Distance or ViewCargo?
res/distance unless you set it via LODTurnedOut
whole junco
charred bolt
I had this recently too.
Solved for me by changing the Object Builder path to vi...
This issue may not require the use of Bulldozer to solve
whole junco
stuck oyster
does the animation work in buldozer preview
Just found it invalid, Bulldozer did not display the animation
whole junco
Solved the issue, it was a mistake in writing model.cfg
stuck oyster
whole junco
Solved the issue, it was a mistake in writing model.cfg
Great! Having all the tools working helps! 👍
 visual thicket
In 3ds max how can I find a center of a Pentagon ?
 past canopy
Group it to itself and the center will be reset
south badge
Ah please, how do I create custom slot names? As in, not default Cargo 1 through 10, but Cargo Top or Side or whatever? I can´t figure it out off the samples
livid canyon
south badge
Ah please, how do I create custom slot names? As in, not default Cargo 1 through...
I think all non-ffv cargo is "Ride in back", and the ffv ones use gunnerName
south badge
Uh, so is it actually turret names then?
I have people sitting on the roof but they arent FFV
livid canyon
For example offroad has
class Turrets {
  class CargoTurret_01 {
    gunnerName = "Passenger (Right Seat 2)";
Hmmmm, so technically all passengers are turrets? 🤔
livid canyon
the only passenger is the codriver, and the action there is "ride in back"
livid canyon
 reef gate
Specifically jets
reef gate
Specifically jets
landing gear is model.cfg animation
livid canyon
I saw you asking that in #config. Reference here if you haven't yet https://community.bistudio.com/wiki/Model_Config
reef gate
Ohh thank you
charred bolt
south badge
Hmmmm, so technically all passengers are turrets? 🤔
Basically driver, cargo or turrets.
Turrets allow you fine grain control of the proxy functionality, including naming each seat if that's important.
south badge
Ah, I see. Intricate.
charred bolt
A "turret" class does not have to be matched with an actual physical turret.
south badge
I´ll need to take a look at how the indexes are done then. I assume I´ll need to redo all the cargo proxies´ indices in blender.
charred bolt
Cargo proxies are typically numbered from 001 upwards, as is each type of turret proxy (commander, gunner).
south badge
Yeah, I have cargo 1 through 16 or something, but I reckon I cant turn these into turrets while maintaining the existing indices. Basically I´d love to redo this without having to touch blender or OB
charred bolt
You can have proxy:...\cargo.001 and proxy:...\commander.001 and proxy:...gunner.001 all in the vehicle.
You'd need to change the proxy type in the p3d at least. Renumbering indices is about as simple as vehicle modding gets.
south badge
Yeah, but I have too many vehicles with all the LODs 
I reckon I´ll need to reexport everything then
charred bolt
You change the proxies in one LOD, then cut and paste to the other LOD's.
livid canyon
FFV turret does use cargo proxies. Each seat sets proxyIndex = n;
charred bolt
This is where being proficient in OB is useful. Most people despise it, but I quite like it.
south badge
charred bolt
You change the proxies in one LOD, then cut and paste to the other LOD's.
I am not sure why, but I think once or twice this did not quite work correctly for me. Not sure if it was because of some existing empty @@armaproxy.X vertex groups being left behind in some of the LODs or not.
It worked fine if I went through all the LODs and removed all these vertex groups, but still, was a a pain
charred bolt
I'd usually recommend having gunner proxies in turrets, and cargo proxies for cargo. Makes things easier to debug.
south badge
charred bolt
I'd usually recommend having gunner proxies in turrets, and cargo proxies for ca...
Yeah the thing is I simply need to indicate that cargo 4 is, say, passenger in the back, and cargo 13 is top left and so on. Right now it is impossible to make sense of which slots sit where exactly in the vehicle
So you are just guessing if you pick a slot inside or outside and so on
charred bolt
You want proxies, I've got proxies. 😉
 south badge
I guess the lesson is to make sure the first vehicle is working properly before creating 20 derivations. It´s just quite hard to pinpoint the moment when the vehicle is "working properly"
charred bolt
south badge
I guess the lesson is to make sure the first vehicle is working properly before ...
Yes, that's a critical lesson. When we start a new vehicle series, we spec it up on paper first with all the variants required, work out what common parts there will be and build simple low poly prototypes for crew fit and basic animation verification. Only after that's done do we move to high poly work. Then further stages involve QA testing the alpha "LOD 0" mesh before committing to UV/texturing, and potential split into interior/exterior LOD's. A further set of tests is done to verify artwork before resolution LOD's are produced. All with the aim of not having to go back and edit 8 variants x 7-10 LOD's.
south badge
That sounds way too sensible 
visual thicket
Sorry that not what I ment, for eg. I have a pentagon face and I have no edges on it and I want to insert a vertex in the center of the pentagon. If it helps I also use Rapptools.
Still have stuff to figure out with them.
 frank gazelle
does anyone have any idea how I could get a 3d model of the map takistan from arma 2 samples or something like that? I want to 3d print it to try it out
 analog garden
frank gazelle
does anyone have any idea how I could get a 3d model of the map takistan from ar...
analog garden
frank gazelle
does anyone have any idea how I could get a 3d model of the map takistan from ar...
you could grab the asc heightmap with gruppe adler meh then convert that to a 3d model in blender
not sure how to actually open the asc files that the mod gives u tbh, importing into terrain builder doesn’t seem to work, I think headers need to be edited
 quick terrace
@visual thicket is it equal edge pentagon?
visual thicket
Yes
quick terrace
whel then it is simple
connect any vertex with the middle of the edge on the oposite side
the middle of the new edge is the center
 silver zenith
Hi, how do I match my helmet model position to the head?, I used the A3_headgear_example as a reference but the location is completely off and I'm doing it by guessing where the head would be, but getting it right is a bit difficult. Can somebody help me with this?
south badge
Uhm, is there an engine supported animationSource for the azimuth of the turret?
ah, maybe "direction"?
actually not, that probably does not follow the turret
livid canyon
reef gate
Would I be able to make this whole bit a rudder?
Yes. Make that whole thing the selection(vertex group) which the rudder animation points to.
livid canyon
south badge
Uhm, is there an engine supported animationSource for the azimuth of the turret?
livid canyon
silver zenith
Hi, how do I match my helmet model position to the head?, I used the A3_headgear...
See pinned
silver zenith
livid canyon
See pinned
Ty, I wrote Autocenter in the wrong place I didn't select geometry when doing it.
reef gate
livid canyon
Yes. Make that whole thing the selection(vertex group) which the rudder animatio...
Alright perfect, btw if it’s destroyed does the collision disappear too?
I don’t want the plane to have some weirdness when crashing
livid canyon
A hide animation can be sourced to the hit point. Sample car wheels does this.
reef gate
livid canyon
A hide animation can be sourced to the hit point. Sample car wheels does this.
Does that hide the collision?
livid canyon
If you put the part of the collision mesh into the selection to be hidden, yes
reef gate
livid canyon
If you put the part of the collision mesh into the selection to be hidden, yes
Okay perfect, thank you
visual thicket
Yeah thats what I did.
Thought their is an esier way
well kinda when you make the object you set cap segments
to 2
Then you have to kinda remove the exta
 tribal rain
so this is meant to have a speed limit of 60kmh and yet im low key just doing half the speed of sound you know 😅 it currently gets to 479KMH and then proceeds to start flipping out of control wildly
Any help with this?
Here is my code below i dont think its that though i have a sneaky suspicion its the PhysGeo LOD.
APC tank code
  simulation="tankX";
        fuelCapacity=18;
        brakeIdleSpeed=0.1;
        maxSpeed=60;
        normalSpeedForwardCoef=0.75;
        slowSpeedForwardCoef=0.34999999;
        waterResistanceCoef=0.25;
        engineMOI=15;
        minOmega=73.300003;
        enginePower = 450; // kW
        peakTorque = 2500; // Nm
        maxOmega = 210; // max engine RPM in radians/s
        idleRPM=700;
        redRPM=2400;
        torqueCurve[]=
        {
            {0.29166701,0.54054099},
            {0.41666701,0.67567599},
            {0.58333302,0.81081098},
            {0.66666698,0.89189202},
            {0.75,0.97297299},
            {0.83333302,1.02703},
            {0.91666698,1},
            {1,0.94594598}
        };
        thrustDelay=0.8;
        dampingRateFullThrottle=0.30000001;
        dampingRateZeroThrottleClutchEngaged=8;
        dampingRateZeroThrottleClutchDisengaged=0.25;
        clutchStrength=50;
        latency=1.5;
        switchTime=0;
        changeGearType="rpmratio";
        changeGearOmegaRatios[]={1,0.5,0.625,0.45833299,0.97916698,0.45833299,0.95833302,0.5625,0.95833302,0.58333302,1,0.58333302};
        class complexGearbox
        {
            GearboxRatios[]=
            {
                "R1",
                -3.5,
                "N",
                0,
                "D1",
                5,
                "D2",
                2.9000001,
                "D3",
                1.8,
                "D4",
                1.1
            };
            transmissionRatios[]=
            {
                "High",
                7.5999999
            };
            gearBoxMode="auto";
            moveOffGear=1;
            driveString="D";
            neutralString="N";
            reverseString="R";
        };
        tankTurnForce=850000;
        tankTurnForceAngMinSpd=0.69999999;
        tankTurnForceAngSpd=0.91000003;
        accelAidForceCoef=5;
        accelAidForceYOffset=-2;
        accelAidForceSpd=2.9000001;
 charred bolt
tribal rain
so this is meant to have a speed limit of 60kmh and yet im low key just doing ha...
charred bolt
tribal rain
so this is meant to have a speed limit of 60kmh and yet im low key just doing ha...
Those config values look ok, but they're only half the story.
It could be some issues with your wheel memory points, potentially GeoPhys LOD, but let's first look at two other things:
- post your
class Wheels {}config? - what is your Geometry LOD total mass for the tank?
tribal rain
charred bolt
Those config values look ok, but they're only half the story.
It could be some i...
30,000 but ill admit its distributed shitly
wait one ill grab it
tribal rain
charred bolt
Those config values look ok, but they're only half the story.
It could be some i...
had to post it as a file clyde was being a byatch
stuck oyster
do you have wheel cylinder components in the geometry lod? (should not have)
charred bolt
tribal rain
had to post it as a file clyde was being a byatch
Doesn't look too far off either, although I'd recommend you try these values for tankx
dampingRateInAir = 1;
dampingRateDestroyed = 5000;
sprungMass = -1;```

Also post your Memory LOD wheel points and namesLike this

Geometry LOD can have tracks modelled, but not named.
Geometry Phys LOD can also have tops of tracks modelled, but no wheels or tracks that could interfere with the code-based physx wheels.

 tribal rain
stuck oyster
do you have wheel cylinder components in the geometry lod? (should not have)
tribal rain
stuck oyster
do you have wheel cylinder components in the geometry lod? (should not have)
negative
i think its the named tracks
tribal rain
charred bolt
Geometry LOD can have tracks modelled, but not named.
Geometry Phys LOD can also...
yah i watched this https://www.youtube.com/watch?v=NH-k47jnmvY&list=PLbyLM76MffqwN3IpgZ63WOhuyNBFZIhd9&index=3 and like the 13 minute mark the homie explained how the tracks are kinda funky in the Phys LOD so you have to either move them UP or remove them entirely
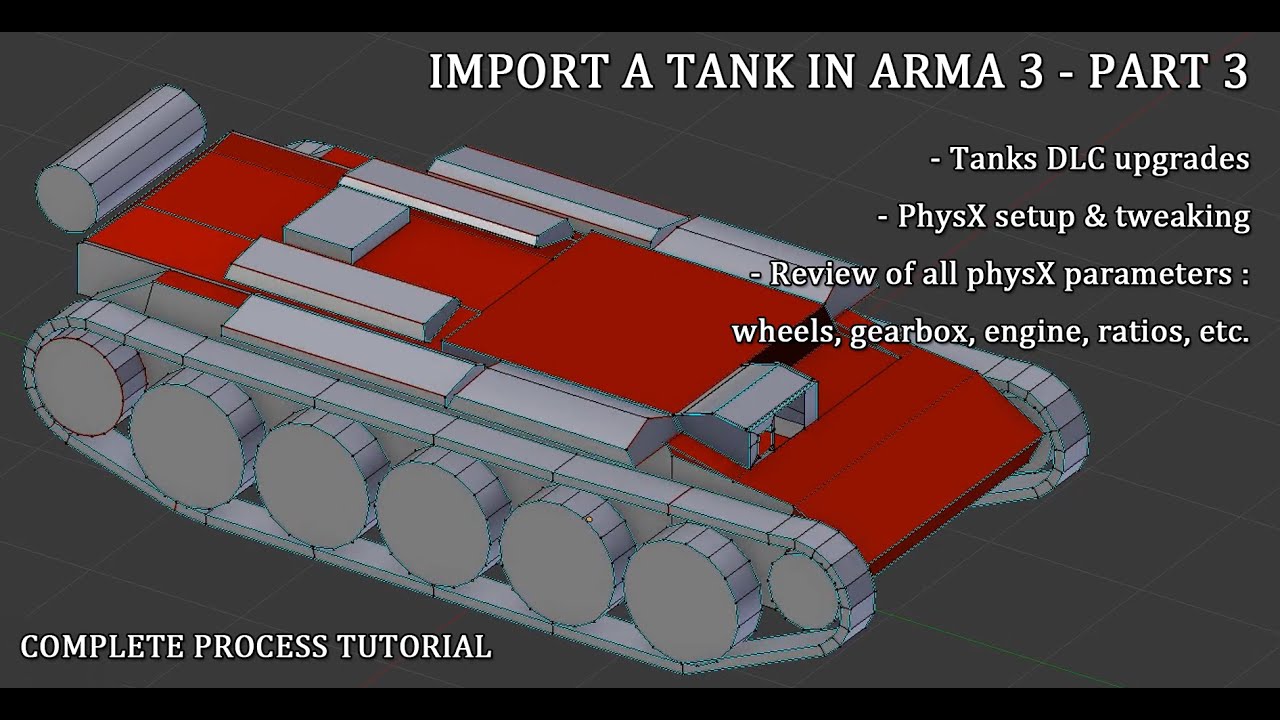
Check the time stamps below :
0:50 Tanks DLC standard : model changes
4:00 config upgrade for a previously imported tank
9:54 wheels configuration
19:21 artificial forces
21:25 physical wheels and physX wheels
25:45 begining of parameters review
26:44 engine config
30:37 general parameters
32:11 Torque curve
34:41 Gearbox
38:01 ingame environem...
charred bolt
tribal rain
yah i watched this https://www.youtube.com/watch?v=NH-k47jnmvY&list=PLbyLM76Mffq...
Tank wheel/track physx interaction is entirely code based, with exception of memory points giving definition of positions, so you don't want anything in the Geo Phys LOD (or Geometry LOD if you don't have a Phys LOD) that could interfere.
tribal rain
my tracks in blue this is the GeoPhys Lod

so get rid of these little shits is it?
also
on an seperate note theres only 1 named selection on both the GeoLod & the GeoPhys LOD which is the "RearDoor"
 charred bolt
Try yes, but usually you want something higher up to still give physx collision.
tribal rain
so i looked at an example tank version and theres has their tracks almost in line with the the rest of the hull but ill try to move it up first and if it dont work just remove em entirely
charred bolt
Note request to show your memory points. I still suspect them to be the issue.
charred bolt
Copy my screenshot example
tribal rain
 charred bolt
- Not in OB
- Doesn't show 4 views
- Has more than just wheel points
- No named selections
tribal rain
side on ortho view
 tribal rain
charred bolt
1. Not in OB
2. Doesn't show 4 views
3. Has more than just wheel points
4. No na...
tribal rain
charred bolt
1. Not in OB
2. Doesn't show 4 views
3. Has more than just wheel points
4. No na...
is this any better as my OB isnt setup for 4 views

wait one i just seen the wheels request
adjusting
charred bolt
In OB, Window>Four views
tribal rain
this any better?
 charred bolt
Sort of.
tribal rain
if i knew how to change the selections window id make it bigger but im 0 clue with OB as you can tell
charred bolt
Ok, so I'm fairly sure the issue will be because you have the wheel boundary points below the track base
tribal rain
but heres my PhysXWheels taken from blender
 tribal rain
charred bolt
Ok, so I'm fairly sure the issue will be because you have the wheel boundary poi...
tribal rain
charred bolt
Ok, so I'm fairly sure the issue will be because you have the wheel boundary poi...
so move em up like 0.005? or something?
also on a slightly related unrelated note would this affect the vehicle being able to "Swim" i.e. move in da water
it floats ive got that down
charred bolt
Take a good look at my example - boundary points bang on the "ground", as are the track bases.
Boundary points directly vertically underneath the wheel axis points.
Boundary and axis points in the centre of the tracks.
tribal rain
 charred bolt
Forget amphibious for a minute, that's a complication
 tribal rain
charred bolt
Forget amphibious for a minute, that's a complication
tribal rain
charred bolt
Forget amphibious for a minute, that's a complication
your telling me 😅
 valid charm
im trying to open the character template fbx from Arma 3 Samples into blender, but im having no luck with getting it working; does anyone else have this issue?
marsh canyon
What exaxt issue
stuck oyster
valid charm
im trying to open the character template fbx from Arma 3 Samples into blender, b...
Id recommend arma toolbox addon and importing the p3d directly
valid charm
yeah i figured, im just flipping through the previous releases of arma toolbox because 4.2.3 isnt working
stuck oyster
probably depends what blender version you are on
latest toolbox needs latets blender
valid charm
i know :)
 woeful viper
just make an inset and collapse the inner face
finite stump
To do the lighting trick in Buldozer, do I need the torrent file? If it is needed does someone have a different link?
visual thicket
Thanks never used collpase before
Handy tool
Oh and is it possible to hide parts of an object that has material applied to it ?
 round summit
hello does anyone know of a tutorial regarding on how to make a mask/facewear ? (all the ones i find are headgear related)
finite stump
Im not positive but should be similar to head gear, just different class names.
round summit
oh alright ima try it out then thanks
 gilded bane
Hi all having bit of an issue
Basically my car is doing that, I'm positive it's not the Geometry because I have replaced it about 3-4 times now.
stuck oyster
finite stump
To do the lighting trick in Buldozer, do I need the torrent file? If it is need...
I linked it somewhere here recently
stuck oyster
round summit
oh alright ima try it out then thanks
Same requirements yeah
visual thicket
God damn it my OCD is driving me crazy spend 6 hours UV mapping a Compound Bow xD
At least the UV map Makes me Emmm yeah,, fell good.
visual thicket
When I added material to my UV map this http://prntscr.com/9q8sej happend why is that Line grey ? Does it have to do with the UV map ?
 cosmic idol
Hey does anyone know a good set of videos or place to find info on how to get started. I am mainly looking at wanting to right now create a custom scope/s and possibly some drones in the future but I am having a hard time finding any videos or what not on it
visual thicket
Nvm figured it out.
stuck oyster
cosmic idol
Hey does anyone know a good set of videos or place to find info on how to get st...
youll want to learn basic modeling and texturing first
anything Arma specific is far more easier to learn after you understand how modeling works
cosmic idol
stuck oyster
youll want to learn basic modeling and texturing first
I work in modeling software already such as blender and autocad softwares and more so I know that and I have another person that knows more about texturing but I as well have some basic knowledge
finite stump
stuck oyster
I linked it somewhere here recently
Do you know how long ago?
stuck oyster
finite stump
Do you know how long ago?
week or two maybe
might have been the terrain channel
stuck oyster
finite stump
Do you know how long ago?
hmm well cant seem to spot it
woeful viper
toys for my tank drivers : http://abload.de/img/driver57qxt.png
 obtuse rain
If only we had the TOH instrument interactions. 😉
woeful viper
pft... starting up a vehicle is just menial work and checklist clicking on things... that's boring
i'd rather have proper vehicle controlls and handling (manual gear shifting anyone?)
obtuse rain
I noticed there's a gear animation driver, is that ever used?
woeful viper
not sure about vanilla vehicles... But the anim source for it it is fully functional
 carmine gull
@woeful viper i'd rather have proper vehicle controlls and handling (manual gear shifting anyone?)
It's Q/E in DayZ! (No pun intended)
woeful viper
they could have pink dinosaurs and i wouldnt care... as long as it's not in arma it's useless to me
livid canyon
finite stump
Do you know how long ago?
For cockpit switches which are syncd for 2 players, instead of using a bone to animate, would it be more performant to have the mesh in all positions, uv'd into a grid, using ui2tex to change the texture to show/hide switch positions?
I'm thinking that way all the 2-position switches can be in a single section, and it can be sent directly from one player to the other, instead of broadcast globally.
stuck oyster
livid canyon
For cockpit switches which are syncd for 2 players, instead of using a bone to a...
I think the performance cost of the shared animations are not really a concern
modest perch
reef gate
Would I be able to make this whole bit a rudder?
honestly i dont think this would do anything for the movement, rudder or aleron
MAYBE roll, MAAAAAAYBE
Because weight?
maybe
umbral shuttle
Okay hello I am trying to learn a bit witho multimat and I think I got most things working except for what I am tryna do for the blue group. I am using a3\structures_f\data\tile\tile02_old_co.paa and I just wanted the top right corner to be repeating. I thought I did it right where in the first uv set I place all the blue stuff in the top right hand corner of the uv tile and scale it but alas I guess that wasnt it 😦
red and green seem to be working fine, I dont really care for black area right now since ahhhh one problem at a time 🙂


Here is 1st uv set which is the scale

and here is 2nd uvset which is mask stuff (idk the right words)
 umbral shuttle
I figured it out 
I just have to keep it in the uv square and in the top right hand corner
 lone robin
umbral shuttle
and here is 2nd uvset which is mask stuff (idk the right words)
lone robin
umbral shuttle
and here is 2nd uvset which is mask stuff (idk the right words)
That’s not going to work well, you’ll need to find a texture of just the stone to achieve what you’re trying to do. The image you’re using is a trim sheet which is better for a smaller pieces, that’s if you want the actual texture to be scaled correctly.
umbral shuttle
I just kept trying random things 
 umbral shuttle
lone robin
That’s not going to work well, you’ll need to find a texture of just the stone t...
umbral shuttle
lone robin
That’s not going to work well, you’ll need to find a texture of just the stone t...
Yes I did see that there was a upper limit of sorts for how much I could get the pattern to repeat but the goal wanst to actually make anything good looking just to learn how to limit to a section
had to cut up a few islands to make it "look" better
lone robin
umbral shuttle
Yes I did see that there was a upper limit of sorts for how much I could get the...
Also for future reference, if you just wanted to use a single texture you can use a super shader. You have a mask but using a single texture is a waste of opportunity.
south badge
Could someone please give me a hand?
I am trying to animate the weapon origin point using the ammo_source, so that the point where the shot spawns moves based on how much ammo is left in the magazine.
Issue is, the source goes from 1 to 4, and I am struggling to get the animation to line up properly with the 4 possible origin points, because the distance between then is not constant.
I assume using only one animation class in model.cfg is not correct? Do I need to somehow create multiple animation classes? I just cant figure out how to properly set up the offsets for the translations so it ends up in the middle of the "barrel"

 stuck oyster
south badge
Could someone please give me a hand?
I am trying to animate the weapon origin p...
stuck oyster
south badge
Could someone please give me a hand?
I am trying to animate the weapon origin p...
you can make multiple animation classes each for different range of ammo baing left by using the min and max value
maximum ammo is 1
and zer ammo is 0
half ammo is 0.5
and so on
south badge
Oh, is it 0 - 1? I thought the value depended on the max ammo count
I did it differently for the opening of the gun ports, but it seems to work correctly for some reason, even tho the value isnt from 0 to 1

How does even the offset in the translation animation correlate to real physical distance in blender?
I have always just used trial and error up untíl now
stuck oyster
south badge
I have always just used trial and error up untíl now
id you dont define axis points for the direction in memorylod offset of 1.0 unit is a meter
if you define axis points and memory="axispoints selection name" then offset of 1.0 unit is the distance between the points
stuck oyster
works only for translation type. TranslationX translationY are always 1 meter for 1.0 offset unit
you could have each animation use different memorypoint pair I think
each with right distance to move between them
south badge
Makes sense, cheers 👍
stuck oyster
or if you have the offset numbers you can calculate it with the offset0 and offset1
 slow pine
Is there some good tutorial somewhere about how to make structures/houses for Arma 3?
stuck oyster
slow pine
Is there some good tutorial somewhere about how to make structures/houses for Ar...
I think there may be one for a static emplacement or something like that
but dont think theres any specifically for a house
south badge
stuck oyster
id you dont define axis points for the direction in memorylod offset of 1.0 unit...
Honestly I dont know, I am animating the gunBeg, gunEnd, muzzlePos and muzzleEnd memory points, but the origin of the missile remains the same
and I added dummy objects into the visual lod with the same vertex group names to make sure it is moving, and they are moving
south badge
the dummy cube is the visual representation of the memory points
cosmic idol
cosmic idol
Hey does anyone know a good set of videos or place to find info on how to get st...
anyone able to help with this?
south badge
cosmic idol
Hey does anyone know a good set of videos or place to find info on how to get st...
What exactly do you mean? You need to learn how to model in a 3D software first if you want to be able to create what you what / need.
cosmic idol
I know how to model in 3d software I just am not sure what I need to do after that for like memory points and everything else that I would need to do in order to have it work properly in game
like step 1 is creating the model which I can do its steps 2-whatever that I am not sure how to do and or where to find any info on it as youtube doesn't have much and the forms half the time I click on them show as down so
stuck oyster
cosmic idol
like step 1 is creating the model which I can do its steps 2-whatever that I am ...
so theres very little in way of "specific I want to make X" tutorials
theres some that go over the workflow
and then there is the BI wiki that documents some of the basics
and then theres the Arma3 samples on steam that have some examples of config and models
cosmic idol
where can I find the samples and can you link the wiki cause everything I find half of them show as down
stuck oyster
cosmic idol
where can I find the samples and can you link the wiki cause everything I find h...
Steam Arma3 samples should come up with google
I dont have other links at hand right now but you can find stuff in the chat history and pinned messages too
cosmic idol
alright thank you cause I also found in my arma 3 folder a curator folder with what looks to be samples as well
stuck oyster
cosmic idol
alright thank you cause I also found in my arma 3 folder a curator folder with w...
no thats not samples
its separate download
nothing in the arma install folder helps you with this
but it is essential you are able to find stuff on your own as there is a lot to learn the more complex thing you want to make and the information is spread around
cosmic idol
alright thank you
livid canyon
south badge
Honestly I dont know, I am animating the gunBeg, gunEnd, muzzlePos and muzzleEnd...
Missile is missileBeg = "spice rakety"
south badge
I overwrote spice rakety to usti hlavne for missileBeg, but no dice
Every vehicle that uses this seems to be using a fix function in the fired EH, so maybe there is some issue?
stuck oyster
yeah I think missiles need that fix or proxies where they are launched from
livid canyon
south badge
I overwrote spice rakety to usti hlavne for missileBeg, but no dice
And Missileend too? Darn
 foggy finch
can you guys go upvote this issue its in relation to ladders ignoring geometry -> http://feedback.arma3.com/view.php?id=27392
thanks 😃
stuck oyster
star wars things being prohibited we cant help with that.
also models cant be taken from other games
so youll have to start from the basics of making stuff. no shortcuts
 hearty narwhal
stuck oyster
star wars things being prohibited we cant help with that.
hearty narwhal
stuck oyster
star wars things being prohibited we cant help with that.
Thank you very much, I will take that into account and start with something much more basic.
 wraith tendon
Hey, you can't remove that Feature! It's in there since forever! Leave it in there (forever :D)
 warped stump
Is the texture of the Rope ("\A3\Data_f\proxies\Rope\rope.p3d") baked into the model? If so, what would I need for a new rope model that I could retexture?
livid canyon
It uses a3\data_f\proxies\rope\data\rope_co.paa. You can check model info such as this using mikero's tool eliteness.
bold flare
I think ACE mod has their own rope model, and its open source so you can look at how they do it
livid canyon
Yes fuelHose
warped stump
Thanks, gents
woeful viper
this would lead to broken ladders on stuff. bad idea
 round bloom
As if they are not already broken enough @woeful viper 😃
 radiant cliff
Not sure if this is the right channel but are there any mods for the Leonardo AW149 in development?
As far as I'm aware there's literally no games that include that helicopter
stuck oyster
radiant cliff
As far as I'm aware there's literally *no* games that include that helicopter
probably not then if google does not reveal anything
 wanton rampart
I believe my issue is related to the model. For my workflow I've set up a master file for each type of helmet I'm working on. For a part of it I have a texture with a part of it being trasnparent. It's been working fine, but recently, exporting that same model from blender causes the background to not be transparent, but black. Which is not the intended behaviour. Any change happen that might've messed this up?
The model itself is still using all the same paths for textures/mats, nothing with it has changed. But just exporting it out now makes the background of the texture black, and not transparent.
stuck oyster
wanton rampart
The model itself is still using all the same paths for textures/mats, nothing wi...
How do you pack the pbo?
wanton rampart
stuck oyster
How do you pack the pbo?
So I take it from Blender and export as P3D, then pack it using A3 Tools Addon Builder
stuck oyster
I dont think the model can cause such an issue unless it does not have transparent texture set up on it as default texture
do your textures use correct suffixes in source files _CO _CA etc?
livid canyon
radiant cliff
Not sure if this is the right channel but are there any mods for the Leonardo AW...
Probably closest https://steamcommunity.com/sharedfiles/filedetails/?id=1852631379
 wanton rampart
stuck oyster
I dont think the model can cause such an issue unless it does not have transpare...
wanton rampart
stuck oyster
I dont think the model can cause such an issue unless it does not have transpare...
Strange thing is, is that it was working completely fine, no paths, or anything at all changed, but now once I try to export it from blender it gets fucked up. So I assume it's something with how its exported from blender as a P3D
And on helmets I made previously its working fine, its just anything new that I export
radiant cliff
livid canyon
Probably closest https://steamcommunity.com/sharedfiles/filedetails/?id=18526313...
Yeah j found this one looking for the 49
Maybe I could commission?
stuck oyster
radiant cliff
Maybe I could commission?
you could pay someone to make the model. but not the put it in game part
so unless you can do that yourself then unlikely
slow pine
how much polygons, are too much, for the RV engine?
charred bolt
slow pine
how much polygons, are too much, for the RV engine?
#arma3_model message
Use as few polygons as you can and make good lower detail resolution LOD's.
 short plaza
Ello, having a but of trouble taking a model and getting it into arma 3
Ive managed to get it into object builder but im lost as to what I need to do here
Any help is appreciated. I can also VC to help be guided through the process if thats easier, just @ me please
 pale valley
Where would a good starting place be for getting a human model into arma 3? the samples include several versions of both bodies and heads - which would be good to start with? (IE - Arma 3 samples include "TemplateRTM" which itself includes a bust, a skeleton, "male" which itself includes several edits with seemingly different information - likewise "test_character_01" also contains several versions of a body.
TL;DR - Which aram 3 sample(s) do I want to use to learn to make a character
slow pine
is this the right way to define the paths?
 stuck oyster
pale valley
Where would a good starting place be for getting a human model into arma 3? the ...
stuck oyster
pale valley
Where would a good starting place be for getting a human model into arma 3? the ...
Test character is the one to use
pale valley
stuck oyster
Test character is the one to use
Understood, thank you. would I be correct in saying creating a head would be from the "bust.p3d" in "TemplateRTM"?
stuck oyster
pale valley
Understood, thank you. would I be correct in saying creating a head would be fro...
Yes.
 mossy violet
hello, wondering if someone could help with with my geo fire lod. I have this lod set up where sides are sold peices for more armour (set to 100mm armour) and the middle pieces are all individual plates to the correct thickness. However, i've found the armour to very very inconsistent.
First Issue (Hit Hull is not accurate): When I fire at the tank the global health goes down but the Hull itself does not. This is despite having both set ups in the lod and hitpoint lod. When I fire at the front the hull sometimes goes down but at the back and the sides of the vic only the global goes down or the engines component health goes down.
Second Issue (Weak spots): It seems that the heavier the armour is in some spots the weaker it gets? I have the plating with a block behind it to protect the front. But when i shoot in that spot about 90% of the global health is taken away. While shooting at the less armoured spot with the hitpoints behind it only results in maybe 20%. On the side armour there will also just randomly be a 1 hit kill spot despite it being pretty uniform.
Here is pictures of everything.
Fire Lod:

hit point lod

and hitpoints config:
            {
                armor=0.8;
                material=-1;
                armorComponent="hit_hull";
                name="hit_hull_point";
                visual="zbytek";
                passThrough=0.9;
                minimalHit=0.1;
                explosionShielding=0.2;
                radius=0.3;
};```\I would recommend (and Im pretty sure Apollo concurs) that using the geometry hit components instead of hitpoint clouds is the best way to go

hitpoints are needed for explosive damage though
so you still need some
woeful viper
the "ability" that they ignore geo lod is why they work in the first place in some cases
mossy violet
stuck oyster
hitpoints are needed for explosive damage though
Would you suggest the side armour be one chunk like the picture or also individual plates? I had them as individual plates but the thing blew up every time.
Also, thanks for tips. I will try to edit it tomorrow night.
stuck oyster
I prefer individual plates to control the thickness
it blowing up might mean the components were not valid or were not thick enough to block any fire
or the hit hull hitpoint drains too fast
hitting nothing essential should not really break the tank
mossy violet
Hmm. I'll look into that. Might also be inheriting stuff from base arma tank as well it doesn't like or something
The fascinating part is the shooting and the hull staying white until 0hp
Obviously I don't want my players to randomly explode and not know why. Haha
But as always, played around with it for 10 hours and came here when nothing else works, so I appreciate the suggestions.
stuck oyster
Id start from simpler setup with just hull damage first
then once that works Id add the more weaker internal components
slow pine
Hey guys, so i made a cube that has a different material for each face (so, 6 materials).
How can i add hidden selections for each face of it?
So i can change it's texture and RVMAT in the eden editor?
 stuck oyster
select faces and add named selection
in its basics
named selection list is where you have the component01
then those named selections need to have sections defined in the model.cfg
and corresponding hiddenSelections[] listed in config
 slow pine
F3 should be the key to select faces, right? because it's not working for me.
 late jewel
What scale should I be modeling in for Arma in Blender? I had a realistically sized hangar and when I imported it in, it was probably over 50x larger than it should have been. Forums are down again so I have no place to find the info.
marsh canyon
Try Ctrl+A the object and apply all transformation
stuck oyster
late jewel
What scale should I be modeling in for Arma in Blender? I had a realistically si...
real scale. 1 blender unit or blender meter is 1 meter in game
but as Polpox there says you need to apply your object mode transformations
best to not scale things in object mode
late jewel
marsh canyon
Try Ctrl+A the object and apply all transformation
I had done that before I exported it. Maybe I didn't know how to export it properly
marsh canyon
Then how you've done
late jewel
Huh?
marsh canyon
Your workflow to export
If you export it into FBX then import to OB, it is wrong and problematic
late jewel
Ah, yes. That's exactly what I did lol. Do I need to export OBJ?
marsh canyon
No. Export as P3D
late jewel
Noted
marsh canyon
ArmaToolBox is your friend
late jewel
So I need to try and use it as often as possible for any exporting/importing?
marsh canyon
That addon is industry standard for A3 modeling, yes
late jewel
Alright. Heard that. Thank you
 runic iris
I downloaded the public arma 2 data but it doesn't come with the textures, where can I grab those?
runic iris
Thanks 😃
 wheat ledge
One of my Reforger models inside A3. My god does A3 butcher the textures lol.


 stuck oyster
wheat ledge
One of my Reforger models inside A3. My god does A3 butcher the textures lol.
stuck oyster
wheat ledge
One of my Reforger models inside A3. My god does A3 butcher the textures lol.
Rendering tech is different so the textures or the rvmat values may need tweaking.
Also VR has the worst lighting
wheat ledge
I am green asf when it comes to A3 modding so this should be fun to tweak 😭. Didn’t even know what an rvmat was until 15 hours ago.
stuck oyster
wheat ledge
I am green asf when it comes to A3 modding so this should be fun to tweak 😭. Di...
 livid canyon
The fake ik for hands and feet of vehicle crew is engine side and doesn't extend to any other bones, right?
charred bolt
livid canyon
The fake ik for hands and feet of vehicle crew is engine side and doesn't extend...
Correct, as far as I know.
livid canyon
Gotcha. Just dreaming of pintle mounts for small arms.
stuck oyster
livid canyon
The fake ik for hands and feet of vehicle crew is engine side and doesn't extend...
it is a little bit configurable I think. But would be pretty difficult to change per weapon
if you wanted to swap the weapon that is
livid canyon
Ah I was thinking of moving the unit weapon but rotating about something that isn't the spine, like FFV does.
stuck oyster
livid canyon
Ah I was thinking of moving the unit weapon but rotating about something that is...
hmm intersting idea.
short plaza
short plaza
Ello, having a but of trouble taking a model and getting it into arma 3
Ive man...
Sorry for the double here, Any thoughts?
All ive been able to do is get the model from blender to object builder
umbral shuttle
Okay this is something that I never knew the answer to, I have an axis that is for a turret rotation and right now the controls are inverted so i need to flip the axis. Problem is its at a weird angle. How do I in object builder change what is considered the start point and wat is the end point of an axis? pic is the axis in question
 pallid nexus
short plaza
Sorry for the double here, Any thoughts?
All ive been able to do is get the mod...
pallid nexus
short plaza
Sorry for the double here, Any thoughts?
All ive been able to do is get the mod...
The best way is to back up and use one of the 2 blender addons. Armatoolbox or Arma 3 Object builder.
You can do it all in object builder from the Arma 3 tools, but it's painful
https://github.com/AlwarrenSidh/ArmAToolbox/releases
https://extensions.blender.org/add-ons/arma3objectbuilder/

GitHub
Arma Toolbox for Blender. Contribute to AlwarrenSidh/ArmAToolbox development by creating an account on GitHub.

The Arma 3 samples are a good place to start for most things
All the samples are working simplified models that show the setup (sometimes nearly working, since they haven't been updated in a while, but still are mostly fine)
If you import the .p3d from the sample into blender, it should show how all the blender proxy stuff works
And the Aegis Sharealike repository is good if you need a second reference, or for something that you couldn't find the Arma 3 samples (I used it for a suppressor sample, since I couldn't find that in the samples)
short plaza
I see, thank you much
charred bolt
umbral shuttle
Okay this is something that I never knew the answer to, I have an axis that is f...
Using the 3 orthographic views (left, top, front), select the axis memory points and apply the mirror transform.
My process is normally in left view, mirror vertically, then mirror horizontally, switch to top view and mirror vertically (from memory so may not be quite right, but result will be mem points in same positions but swapped places).
stuck oyster
umbral shuttle
Okay this is something that I never knew the answer to, I have an axis that is f...
Turrets should be modeled pointing straight ahead. And preferably have straight axis as well.
Skewing/tilting risks AI ability to properly aim.
umbral shuttle
charred bolt
Using the 3 orthographic views (left, top, front), select the axis memory points...
oh okay ill try that, now wat is the ramifications of doing this? switching the direction like that?
 umbral shuttle
stuck oyster
Turrets should be modeled pointing straight ahead. And preferably have straight ...
umbral shuttle
stuck oyster
Turrets should be modeled pointing straight ahead. And preferably have straight ...
😮
honeslty I prefer that 🙂
turrret does point ahead but its like canted 30 degrees or something like that
sorry canted like 10 degrees
stuck oyster
umbral shuttle
sorry canted like 10 degrees
It may require redesign to point forward to work reliably
stuck oyster
eh?
 short marsh
What does "memoryPointTaskMarker="TaskMarker_1_pos"; do? I'v seen it added to the BIS configs, and added it to my own stuff more or less, but even BIS has not much in regard in what it does
It's a memory point, so I guess it fits here
livid canyon
umbral shuttle
Okay this is something that I never knew the answer to, I have an axis that is f...
Alternatively, select the axis 2 verts and look in Points Properties, see which vert is first, then select that one and cut and paste it. that will reverse the order of the verts and the direction of the axis.
umbral shuttle
livid canyon
Alternatively, select the axis 2 verts and look in Points Properties, see which ...
oh okay thats wat I was looking for. still gonna make turret not canted but alas this will be useful for other stuff
umbral shuttle
Is there a problem with having multiple proxies with id 1? how does in turret config when I say use proxyindex = 1; it knows to use gunner 01 not say pilot or cargo?

 bright echo
proxyType
umbral shuttle
ah okay, tryna find out if this was the problem with this I was having here #arma3_config message
but I guess not so thats good
carmine gull
@runic iris There's also the Licensed Data Packs (basically the aforementioned PBOs)
livid canyon
As I understand it, emissive bits (for ~20 indicator lights) using hiddenselections/setObjectTexture are each a section and cause draw calls, and impact performance.
Would it be better to have all of them in the same section and set the state for each by changing the texture or uvanimation for the whole selection?
 sour bough
It's probably not measurable on a vehicle
Or rather, probably not noticeable or relevant
But if you really wanna optimize, have the emissive bits be over top of non emissive states and keep em all on the same uv and rvmat? Then just hide and show with anim sources
livid canyon
Is that mainly a house concern, then?
stuck oyster
setobject texturing would increase section count yeah. hide animating little bit of extra mesh would be technically better.
but Id wager the performance impact is not even measureable either way
 sick junco
guys i need you help
a friend of mine created me some 3d models of a rifle plus accessories, but I'm in FXB and I don't know how to create a PBO with these models, could you help me?
stuck oyster
sick junco
guys i need you help
Id suppose you got to start learning how configs work and likely need to learn some 3d modeling too to make the models actually fit for game use
sick junco
which I have done in the past, I taught myself how to modify vests or helmets
but some help and kindness would be welcome.
stuck oyster
sick junco
but some help and kindness would be welcome.
I mean we can try point you to right way
like to look at the Arma3 samples
and see how weapon configs work through there
dont know what you mean by modifying stuff since models are typically not accessible for that though
 steep sonnet
heyo, did you ever figure out how to do that? Ive managed to make a billboard LOD with one flat mesh, but im having trouble with the second one.
(basically I have one flat mesh on the Y axis, but my second mesh along the X axis doesnt show up)
wait this is arma 3 I work on reforger. idk if its the same or not. damn
umbral shuttle
for geo lod I wanna add some cubes to artificially move the center of mass around but not be considered for collision, do I jus not include them for ComponentXX selection?
lone robin
steep sonnet
heyo, did you ever figure out how to do that? Ive managed to make a billboard LO...
I ended up doing it in speedTree
stuck oyster
lone robin
I ended up doing it in speedTree
Ive rendered orthographic views of my trees in all axis directions
with transparent background
made that into an atlas
and aligned uvmapping to match the tree model with the billboard
lone robin
steep sonnet
You guys are awesome
I would absolutely go with HGs method if you don’t want to spend money/learn another program.
lone robin
I used SpeedTree to make my branch atlas’ and billboard atlas. It worked pretty good but learning and paying for SpeedTree just for that might not be worth it if you have a good grasp on blender. I just wanted to speed up the process a little lol
I also used ST to make some clutter, although it’ll need some manual touch ups in blender
stuck oyster
clutter I've made with ortho renders from blender too
charred bolt
umbral shuttle
for geo lod I wanna add some cubes to artificially move the center of mass aroun...
Correct.
umbral shuttle
cool
reef gate
this is really dumb but how do i actually get the model ive made into arma for testing (i think ive set up all the config correctly
stuck oyster
reef gate
this is really dumb but how do i actually get the model ive made into arma for t...
Is there some error related to this?
What kins of object? What do you expect to happen vs what happens/does not happen?
reef gate
stuck oyster
What kins of object? What do you expect to happen vs what happens/does not happe...
It's an aircraft
stuck oyster
so if everything works right you would have the plane in the editors vehicle lists
and could place it down
thats about it
if it does not show up in there, somethings not done right
if the listing shows up but throws errors or model dont show up when placed then somethings not done right
etc etc
you will need to run the pbo you made for the mod as local mod
reef gate
okay
stuck oyster
reef gate
okay
so is there any problem or?
like
need info to understand if there is a problem
reef gate
So far I have a model in blender (ive set it up with the different LOD’s) and a config that im hoping is right
I don’t really know what to do you from here
livid canyon
Briefly: export it to p3d, pack into mod pbo, and load the mod. Recommend you do that with a cube first to understand the process.
reef gate
do i need to do each thing individually?
livid canyon
yes, there is no blender to arma button
stuck oyster
livid canyon
yes, there is no blender to arma button
blender ArmaToolbox exports P3d with all lods
reef gate
livid canyon
yes, there is no blender to arma button
i mean do i need to export each type of LOD seperately
reef gate
stuck oyster
blender ArmaToolbox exports P3d with all lods
ahh okay
stuck oyster
no if you use the above mentioned blender addon
reef gate
i do
livid canyon
ah, I understood thing to mean step, not blender object
stuck oyster
but like Ampersand said, it is far better to learn the configs and object importing with something simpler
if plane is first thing you try to put it in 100% you dont have everything right 😅
reef gate
i've done a few other objects
but this is my first time with an aircraft
it's a lot more complex
I'd really appreciate it if someone could have a look at this and see if I missed anything crucial before I export
 storm wave
 stuck oyster
reef gate
I'd really appreciate it if someone could have a look at this and see if I misse...
stuck oyster
reef gate
I'd really appreciate it if someone could have a look at this and see if I misse...
export and try it out
that will show errors if/when there are any.
its far easier to solve that way
lone robin
storm wave
A random picture with no context is not going to get you help
stuck oyster
storm wave
buldozer donset work in object builder
this information is what was missing
 late jewel
Hello everyone, I'm making a drone, I set 250,000 faces in blender, but it's still not enough to load the model, please advise what to do, I even tried to change the number of faces for the ellipse separately (the main part of the drone), but it requires 200,000 faces, but because of this amount it takes a long time to load it https://youtu.be/7iCFkSICKyE
 stuck oyster
late jewel
Hello everyone, I'm making a drone, I set 250,000 faces in blender, but it's sti...
stuck oyster
late jewel
Hello everyone, I'm making a drone, I set 250,000 faces in blender, but it's sti...
this is way way way waaaay too muc faces for this kind of simple object
its few 1000 that it needs max
also in games faces draw only front side
so you need to make sure all your faces point out
you can enable backface culling in blender to see what faces are visible and what faces are not
late jewel
stuck oyster
its few 1000 that it needs max
it's just that with a smaller quantity you can't see the drone parts from the outside, like in the video
late jewel
stuck oyster
you can enable backface culling in blender to see what faces are visible and wha...
its weird but all faces is visible in a blender, but not visible in the arma
 muted lintel
Most vanilla A3 vehicles are only around 30k verts, 200k+ is definitely overkill for such a simple object
stuck oyster
late jewel
its weird but all faces is visible in a blender, but not visible in the arma
like I said you need to turn on BACKFACE CULLING
 twilit seal
late jewel
it's just that with a smaller quantity you can't see the drone parts from the ou...
twilit seal
late jewel
it's just that with a smaller quantity you can't see the drone parts from the ou...
A lot of detail is baked into textures and normal maps
late jewel
stuck oyster
your modeling process is basically wrong for games right now
I'm just new to this, there are no normal guides, especially in Russian, I would learn, but I don't know how people learn this, I try as best I can, and if I turn on Backfage culling will it display the model correctly?
stuck oyster
late jewel
I'm just new to this, there are no normal guides, especially in Russian, I would...
yes
but you will need to reduce the face count to something more reasonable
people learn this stuff from online tutorials or some might go to school and learn some there
most you learn by practice though
late jewel
stuck oyster
people learn this stuff from online tutorials or some might go to school and lea...
I'm a schoolboy, I don't have money for this, I'm self-taught, thank you for helping.
stuck oyster
late jewel
I'm a schoolboy, I don't have money for this, I'm self-taught, thank you for hel...
is alright it also takes time to learn
im self taught too, nothing wrong with that
blender tutorials are usually free so money is not really needed
just time and patience
late jewel
i turned on backfage culling, create just elipse but not working
stuck oyster
late jewel
i turned on backfage culling, create just elipse but not working
you have the faces flipped inside out for some reason
maybe you scaled it to negative value
that flips faces
 late jewel
omg
late jewel
late jewel
omg
fixed*
late jewel
i think I figured out the mistake, I saved it as obj and then worked with it in Object builder, and as soon as I saved it in p3d, everything was fine right away, I'll try to do this with my drone now
stuck oyster
late jewel
i think I figured out the mistake, I saved it as obj and then worked with it in ...
you may have some flaws in your method still though
and youll need to figure out uvmapping and texturing too
late jewel
stuck oyster
and youll need to figure out uvmapping and texturing too
I already know how to import a UV map into Object Builder, but I'm not very good at adjusting textures in Photoshop, it turns out crooked
stuck oyster
late jewel
I already know how to import a UV map into Object Builder, but I'm not very good...
you can do the texturing in blender
late jewel
stuck oyster
you can do the texturing in blender
for this you need plugins?
stuck oyster
not really
I would recommend looking up things like texture baking
maybe "highpoly to lowpoly workflow"
stuck oyster
late jewel
and sorry for my bad english)
your english is fine. 👍
late jewel
stuck oyster
your english is fine. 👍
thanks, but i was use translator, this text i writing without translator
late jewel
late jewel
i think I figured out the mistake, I saved it as obj and then worked with it in ...
also helped to duplicate and flip the normals so that now the two shapes display normals from different sides, forming one shape
reef gate
late jewel
Hello everyone, I'm making a drone, I set 250,000 faces in blender, but it's sti...
200,000 faces img
short marsh
storm wave
You gotta copy a couple of files from the A3 folders into the P drive, that's how I fixed it
Go into your Main Arma 3 directory, and go to the dll folder, and you'll see two folders
x64 and x86, open those folders and copy the RTDxxx.dll into your Buldozer folder, and that'll fix the problem by placing the dlls in the appropriate folder, so the RTDxxx.dll from the x64 folder goes in the same Buldozer folder, and so on with the x86. Then run Buldozer and it should work.
steep sonnet
lone robin
I used SpeedTree to make my branch atlas’ and billboard atlas. It worked pretty ...
this software looks cool af
 lyric bloom
hi, do you have any p3d tank example? the one contained in arma 3 samples is really poor, thanks in advance
stuck oyster
lyric bloom
hi, do you have any p3d tank example? the one contained in arma 3 samples is rea...
the basic example should show all the basic necessary things
are you looking for something specifc that it does not show?
it does not show how to make high detail model of course
but thats different thing from technical sample
lyric bloom
yes, suspensions and rear lights are missing
stuck oyster
suspensions in what way?
im pretty sure it has dampers set up
and rear lights are pretty much same thing as front lights but with tiny variation in config for what controls them
these things are basically the step beyond the basic samples and where you need to first study the samples for how things works and then be able to derive those mechanics into other features
also the other samples like the car can be crossreferenced with
lyric bloom
mm ok I try
lyric bloom
Since I'm working with an OBJ file, I'd like to know what components should be related to each other. Should the dampers stay attached to the hull or not? and what if I use the arma 2 models? is there a big difference between 2 and 3?
stuck oyster
lyric bloom
Since I'm working with an OBJ file, I'd like to know what components should be r...
arma2 models are close compatible. Some things like physX wheels setup needs to be redone
OBJ is transfer format but not really great one for Arma purposes
what program you made your model with?
if you use Blender you can export directly to P3D with the Arma toolbox exporter
But I would recommend practicing with simpler objects than a tank first
as you will need to learn how model.cfg animations and such work
that is easier to do with simpler things
like a box with a lid that opens
if you just copypaste things from samples without understanding, you will have trouble
lyric bloom
I made it with blender, I'm using the arma 3 plugin
stuck oyster
then you dont need obj file
but animation things you need to practice with simpler things so you can learn how to write and use model.cfg animations
there are few wiki pages about how that works that can be useful to read
lyric bloom
ok thanks
 eternal jasper
Could someone help me out with my helmet?
I've managed to get it into game and visible, however it appears to be locked into the chest cavity. I've noticed in 3rd peson it follows the direction the characters head moved; it just doesn't want to sit on the head. Additionally it appears with this odd dotted texture, but when dropped it appears with it's actual texture. Would anyone know a possible cause of this?


Well i fixed the position goof
stuck oyster
eternal jasper
Well i fixed the position goof
To get the model move with body the requirements are listed in one of the pins
eternal jasper
Aye i saw it right after
stuck oyster
The texture issue is weird. How do you pack the pbo?
eternal jasper
With the addon builder
stuck oyster
Are your project filed on P drive?
 wind cedar
Anyone able to link a video that explains how to get my gear in game and setup configs and stuff
round bloom
Did A2 not include a iron sight M16A4 (I am porting A2 weapons)?
woeful viper
can anybody tell me where i can find the russian tankdriver headgear in the A2 samples?
 craggy gust
Is there a way to set up dynamic signs that can be edited via EDEN?
marsh canyon
What is dynamic signs
craggy gust
Where you can edit the text and stuff on them. Road signs, business signs, etc.
marsh canyon
Theoretically possible:
- peepare a model
- use procedural texture to write texts on it
- ???
- profit
craggy gust
I know I’ve seen either RHS or CUP do something similar…think it was RHS, you could put in a three digit number to change the unit number.
 unkempt token
craggy gust
I know I’ve seen either RHS or CUP do something similar…think it was RHS, you co...
unkempt token
craggy gust
I know I’ve seen either RHS or CUP do something similar…think it was RHS, you co...
You could put procedural text on a texture, yeah. And a list of available fonts here: https://community.bistudio.com/wiki/FXY_File_Format#Available_Fonts
So you could do something like
#(rgb,512,512,3)text(0,0,"RobotoCondensedBold",0.25,"#ffffffff","#ff0000","Fornite Battlepass")
And since this is the models channel, if you wanted to make it an attribute you can custom change in 3den, then add this subclass to your CfgVehicles entry for whatever you're making:
        {
            class ObjectTextureCustom0
            {
                displayName="$STR_3den_object_attribute_objecttexturecustom0_displayname";
                tooltip="$STR_3den_object_attribute_objecttexturecustom_tooltip";
                property="ObjectTextureCustom0";
                control="Edit";
                expression="_this setObjectTextureGlobal [0,_value]";
                defaultValue="(getObjectTextures _this) param [0,'',['']]";
            };
};```Do you mean this one @woeful viper? http://i.imgur.com/piZmAKs.png?1
gilded bane
Anyone experienced models just breaking? I have a car model from ArmA 2 which I ported, and after about an hour of playing arma 3, the right hand side wheels stop working.
None of my friends have this issue, Im just wondering wtf is up
warped mural
my pistol model is throwing out 556 size cartridge casings when firing, what parameter should i change to fix it?
marsh canyon
class B_762x51_Ball: BulletBase
{
    cartridge="FxCartridge_762";
};```It should be defined in CfgVehicles (yes, for whatever reason it is a vehicle)
sour bough
You cannot open binarized p3d's
stuck oyster
no need to say that even
this is a absolute NONO situation
you can make new things
but you cant take other people things.
warped mural
marsh canyon
```cpp
class B_762x51_Ball: BulletBase
{
cartridge="FxCartridge_762";
};```
so is this not a proper bullet config, or do i need to define same class in cfg vehicles?
 stuck oyster
you have received official warning but the bot could not message you so Im letting you know here.
stuck oyster
warped mural
so is this not a proper bullet config, or do i need to define same class in cfg ...
this is more a #arma3_config thing but simplest way is to use vanilla ammo
or inherit from them to get all the properties you dont need to change
marsh canyon
warped mural
so is this not a proper bullet config, or do i need to define same class in cfg ...
What I posted is a part of CfgAmmo
woeful viper
yes thats the one i mean
 celest arch
evening Gentlemen, I have a question for you. What controls the position of a backpack on the character? I made one, so far it works the onyl issue is that it's attached to the character leg
stuck oyster
 stable steppe
can you explain what exactly you try to do?
hypotheticals are often hard to answer or completely misconstructed
it is easier to approach helping with the actual thing
stable steppe
I have the class defined above in cfgvehicles, currently i can spawn the object using createvehicle in-game with no issue. I then apply velocity to the object using SetVelocity. This makes the object above, a ball move when spawned.
I want to be able to make the ball spin as well, i try to use the SetTorque command, however it does not apply rotation to the object because that command only works with physx objects, i.e thingx not thing like above.
I modify the config to thingxfrom thing and repack the mod - after this, the object no longer spawns in game. Any ideas on what could be wrong?
stable steppe
Is this part of the model .p3d file?
stuck oyster
yes
to get the configs easiest right Id recommend inheriting from any similarly working vanilla object
and then change only the things you need to change
stable steppe
stuck oyster
for physx stuff to work you need valid goemetry lod with mass
is it possible to add this into the p3d using object builder? - how is it done? Im a noob with models im a programmer
stable steppe
stuck oyster
to get the configs easiest right Id recommend inheriting from any similarly work...
Do you know a good class to inherit from off the top of your head?
I see my model has a geometry lod but no phys, is this the problem? Is it good enough to just duplicate the geometry lod and change the duplicated to geomatry phys?
 stuck oyster
stable steppe
I see my model has a geometry lod but no phys, is this the problem? Is it good e...
stuck oyster
stable steppe
I see my model has a geometry lod but no phys, is this the problem? Is it good e...
other geometry lods will default to it so thats fine
the mass is set in the geometry lod
and yes that can be done in the object builder
there is a mass dialog you need to toggle on
stable steppe
I did that and set the mass on the geometry lod to 10, should it be good?
stuck oyster
then select he geometry component and set the mass
the mass is in kg
but sometimes small mass can work poorly in the game
experiment with it
there is also a geometry lod requirement explanation in the pins if I recall right
stable steppe
So I did all that, now when i spawn it with createvehicle it just floats in the air?
it stays where it was spawned and doesnt move
stable steppe
@stuck oyster
my lod is just a simple box with 6 faces 8 vertex, i see the part about naming collision?
I select the whole geometry lod but the name panel is blank, is this the problem?
 stuck oyster
stable steppe
<@150949769953411072>
my lod is just a simple box with 6 faces 8 vertex, i see ...
stuck oyster
stable steppe
<@150949769953411072>
my lod is just a simple box with 6 faces 8 vertex, i see ...
yes
there is a convex component tool in the top menu you cant try out
or find component
in the structure menu I recall
stable steppe
@stuck oyster
so so i seelected the entire lod, and in structure-> menu click component convex hull, now i see the named selection with component
Is this what i needed?

hmm still floating
stuck oyster
try more mass
round bloom
\Creatures\CA\Characters2\Rus\Soldier_Crew.p3d @woeful viper
stable steppe
stable steppe
<@150949769953411072>
so so i seelected the entire lod, and in structure-> menu...
It worked btw, my class was inheriting another thingx class - i changed it to implement the base class instead and it worked like a charm
 bleak tangle
@celest arch do you have sections for body parts?
For example spine3, spine2, spine1, leftshoulder, rightshoulder
celest arch
I think I'm missing the shoulders
that's probably why, how should these named selections be?
vertices or planes?
bleak tangle
I tried messing around with it just now and if i had no sections the backpack was down near my feet. If I had any section, even leg or head, it showed on the back but followed the animations of the head/leg
celest arch
the backpack base is just the a2 czech packpack
I got its mlod and workd from there, but there's no shoulders section in it
it's got spine 1,2 and 3
and there's no sample in the a3 samples of course...
bleak tangle
Do you have a model.cfg?
round bloom
FailFish
wraith tendon
model.cfg for a backpack? Thats new for me @bleak tangle oO
Since A3 or was that earlier also needed?
woeful viper
well if you want it to deform when the character is moving you need the default character skeleton
round bloom
Is there not any way to see a weapon attachment proxy (defualt A3 attachments) in bulldozer to you can see if they line up? (instead of loading into game every time)
livid canyon
It seems like animation source Throttle doesn't work for boats. Is that right?
charred bolt
livid canyon
It seems like animation source `Throttle` doesn't work for boats. Is that right?
Yes, think that is true. Usesource = "speed"; instead.
umbral shuttle
for the bound memory point for tracks, do I put it at the bottom of the wheel, or at the bottom of the track?
 umbral shuttle
@charred boltI suppose since we doing model stuff we should be here, so I made the wheel axis 2 memory points , I have the bounds point directly below. Unfortunately the tank has entered the space program
now from wat I am trying the space program is enabled by the new wheel_x_x_bounds I have


so like this one makes space program https://cdn.discordapp.com/attachments/457505629729325056/1380483149838159893/image.png?ex=68440a9f&is=6842b91f&hm=2126bac6a0c744b5a37b58e922a935b637c0eca9f92f00352c262875d9d7687e&

and then this one does not https://cdn.discordapp.com/attachments/457505629729325056/1380483340301500486/image.png?ex=68440acc&is=6842b94c&hm=9599e0bbc17ce9892445f0a27772121dc602c1e66e0ce28730b42125d84d2f53&
 umbral shuttle
Okay so wat I did here was I fix the alignment of all the points, I had the bounds for the sprocket wheels moved up to be vertically at same level as axis like u had mentioned in config chat so I guess thats progress? So maybe the slight unalignment of the points was the issue
maybe I just messed up somewhere
charred bolt
umbral shuttle
maybe I just messed up somewhere
Positioning those boundary mem points is important yes. So it looks like it's all working as intended now?
umbral shuttle
charred bolt
Positioning those boundary mem points is important yes. So it looks like it's al...
yeah its now going 40-50ish which is kinda wat merkava does, so now its just config editing, I guess I just didnt make my memory points correctly the first time
but yes all is good now, just an interesting place to have to fix
round bloom
What do you need to do in order to make a magazine hide/invisible when there is no mag in a gun or if someone is reloading?
 modest quarry
Ok im confused as fuck, So when I start in first person my hands go through the ground (I assumed a proxy issue and reimported them), However if I go third person and back into first person the hands are fixed ???
modest quarry
I reimported everything except res 1 and its fixed so cool I guess
stable steppe
Greetings all, one of my models is causing this error in arma 3.rps whenever it is created using createSimpleObject
SW animation used for (pathtomodel).p3d - Not all levels have Keep Height set
Anyone know what i need to do with my model to fix this? Im a programmer not a modeler so im a noob with this stuff
The bi community post doesnt seem to know what it is either, was wondering if someone here knew

Made some progress, opened up the properties panel with all of the vertices selected
Currently they are all on "Above Surface" - will changing them all to Keep height get rid of the error? What exactly does this change, do i need to change something else also?

Also, does anyone know what causes this in arma 3.rpt? I believe it is being caused by a model
 lyric bloom
hi there, Does the geometry need to be manifold?
sour bough
for a geometry lod yes
Convex as well
And it triangulates on bin iirc so triangulate and test convexity before thinking it's okay
stuck oyster
👆 👆 👆 👌
stuck oyster
stable steppe
Greetings all, one of my models is causing this error in arma 3.rps whenever it ...
What kind of model are you making?
stable steppe
stuck oyster
What kind of model are you making?
Its a plane to hold a texture
Setting the verticies to keep height seems to have gotten rid of the keep height warning
@stuck oyster do you know what could be causeing the obsolete and vertex buffer messaged?
stuck oyster
stable steppe
Its a plane to hold a texture
Decal kind since ypu mention the on surface draw?
stable steppe
I believe so
stuck oyster
stable steppe
<@150949769953411072> do you know what could be causeing the obsolete and verte...
Not off the top of my head.
What lods do you have?
And what type of object have you configured it to be?
stable steppe
im not sure if its related to that object or not, i have a lot of models and textures in my mod - can this be caused by a bad model or a texture?
stuck oyster
Sure.
Could be some other model too.
Time to simplify and test stuff in small batches
First you have to isolate where the problem is coming from
stable steppe
is there something obvious to look for that would be causing this?
could obsolete be caused by an outdated sqf script command being used?
stuck oyster
stable steppe
is there something obvious to look for that would be causing this?
At least don't think so.
Can't say that's very common error. You might even be first one to mention it here.
Testing your own stuff should always be made with no extra mods loaded too to make sure they don't mess things up.
stable steppe
What causes this error?
17:22:06 Vertex Buffer too small (16540<16384)
It seems to be caused when spawning a model - i checked out the model and it only has 7k verticies and 14k~ faces. Is this model too detailed?
A buddy made these models for me but hes also a modeling noob, trying to fix the problems with them - why i keep asking noob questions
astral cairn
What's going on with my model? I have two materials, one for the tracks and one for the body.
It sorts rotates the texture around and breaks it.

It's set to a image texture on the body and a colour texture on the tracks, is this something that isn't compatible.#
 rapid tree
So i made minigun doorguns via proxies with geo and fire geo etc, the shadowvolume works from the proxies but the fire geo does not (its validated)
Do i have to paste the proxies into the fire geo of the heli aswell ?
charred bolt
rapid tree
So i made minigun doorguns via proxies with geo and fire geo etc, the shadowvolu...
Yes
rapid tree
Alright thanks for the quick answer
woeful viper
model.cfg
south badge
astral cairn
It's set to a image texture on the body and a colour texture on the tracks, is t...
Literally what?
The game requires .paa formatted textures to work.
The _co texture is assigned directly to the mesh in question, while the _as, _nohq and _smdi textures are linked through the rvmat.
astral cairn
I have two separate materials on two separate UV maps. This is the results of setting the PAAs up
For reference, the arma 3 addon in Blender allows you to bypass using a PAA and set a colour instead.
stuck oyster
astral cairn
I have two separate materials on two separate UV maps. This is the results of se...
Are you using 2 different uvsets?
Even if you have different materials they all share the first uvset
You probably have multiple in youe model and the game can't use that
astral cairn
Fair enough, I'll fix that
stuck oyster
Uvmapping can overlap if different material/texture is used.
stable steppe
stable steppe
What causes this error?
`17:22:06 Vertex Buffer too small (16540<16384)`
It se...
Also, does anyone know what Generating ST on the fly is very slow means in the rpt log? What do i need to do to my p3d to get rid of this warning?
Sorry for all the questions, I would google search and use some of the many useful forum posts on this topic, unfortunately they are all inacessable and and even an archive is completely inaccessible because of "spam" - would hope a developer could respond because of this....
stable steppe
stable steppe
Also, does anyone know what causes this in arma 3.rpt? I believe it is being cau...
To answer another one of my previous questions, it seems configuring CfgCoreData with the following settings causes Obsolete to be spammed in your rpt log
{
    slopBlood = "path\tomodel.p3d";
    footStepBleeding0 = "path\tomodel.p3d";
    footStepBleeding1 = "path\tomodel.p3d";
};```
The spam would start after shooting someone, my guess is it tried to replace the default blood model with something else but it didnt work
Presumably because these settings are obsolete. I would assume anytime Obsolete is spammed in rpt, its likely an outdated config that is being usedThe model that is causing this is binarized, so im not sure what can be causing this problem - but i dont want to leave something in my mod that is purposely slow
stable steppe
stable steppe
The model that is causing this is binarized, so im not sure what can be causing ...
More specifically, the item in question is being spawned as a uniform on a unit, not its own object
Does anyone know how to configure a models hit impact particles? Currently, when shooting at a certain object, it kicks up dirt - i would rather it instead shows blood spray, like how when you shoot a person - is there a config option in cfgvehicles for it or somewhere else?
stuck oyster
stable steppe
To answer another one of my previous questions, it seems configuring `CfgCoreDat...
People typically don't touch there I'd suppose
charred bolt
stable steppe
Does anyone know how to configure a models hit impact particles? Currently, when...
Each fire geometry material (rvmat) references a .bisurf file which contains information about that surfaces reaction to ballistic penetration.
This includes the sound and particle effects.
stable steppe
charred bolt
Each fire geometry material (rvmat) references a .bisurf file which contains inf...
I see, i assume that bi objects reference a .bisurf in the game files to achieve the effect - would you happen to know any?
charred bolt
stable steppe
I see, i assume that bi objects reference a .bisurf in the game files to achieve...
 stable steppe
charred bolt
stable steppe
charred bolt
What a chad, thank you!
 azure pier
Can anyone venture a guess on why this bag has a blue texture instead of green? Also it's in the wrong position


 stuck oyster
azure pier
Can anyone venture a guess on why this bag has a blue texture instead of green? ...
stuck oyster
azure pier
Can anyone venture a guess on why this bag has a blue texture instead of green? ...
wrong resolution texture
and model does not meet the conditions to work 😅
same requirements basically as headwear (mentioned in pinned messages)
azure pier
stuck oyster
wrong resolution texture
What would the resolution be then?
azure pier
Understood
azure pier
stuck oyster
but your bag might be 512 or 1024
Would failure in that aspect result in weird colors?
stuck oyster
yes
azure pier
stuck oyster
yes
Then that is the problem, thank you
 bleak tangle
@celest arch Did adding a model.cfg resolve the issue?
celest arch
actually I didnt have time to try it yet
using eliteness on a standard a3 backpack I indeed see a model.cfg
stuck oyster
azure pier
Probably for the spine
Yeah need right selections
celest arch
I''m not really sure how to make this model.cfg tbh
obtuse rain
You should be able to use the one from the Test_Character_01
celest arch
ah ok straight from that
obtuse rain
Also you'll need to put the backpack in a selection that matches the bone name.
celest arch
yeah should already have that
let me try
well on the backpack I have Spine 1,2 and 3 - the model itself is the regular arma 2 czeck bp
I can see those selections in the skeleton, but the backpack still is on the ground
checking an arma3 backpack with eliteness I just see leftshoulder and rightshoulder as an extra
but there's no shoulders on this backpack so I should be good to go.... yet its on the ground
bleak tangle
And you have your model.cfg with YourBackpack: ArmaMan{};?
celest arch
yes
obtuse rain
And the p3d is called YourBackpack.p3d?
celest arch
yeah yeah ofc, just double checking if I'm pointing pbopro to the right folder
obtuse rain
Drop your binarized .p3d into Eliteness to see if it ended up with a skeleton.
azure pier
stuck oyster
Yeah need right selections
I have not done clothing or accessories before, so I need more info
celest arch
bleak tangle
lol well worth it for that
celest arch
its just the beginning, wanted to experiment some alternative camouflaging
umbral shuttle
Okay blender question time, for the green parts on this track, wat do i gotta do to make them straight in uv editor? rn they all curved cause they bend (they all have a seam at the end )


 azure pier
Wait...
class RPD_drum_pouch_single : ArmaMan {};
Does the class name in model.cfg need to be the model file name or the class name in CfgGlasses?
Before it was the CfgGlasses class name
umbral shuttle
azure pier
Wait...
```
class RPD_drum_pouch_single : ArmaMan {};
```
Does the class name ...
file name
umbral shuttle
umbral shuttle
Okay blender question time, for the green parts on this track, wat do i gotta do...
ah nvm I think I found out how
azure pier
umbral shuttle
file name
I see....
Then that's probably why my model was acting up :P
azure pier
azure pier
Odd, I did assign the mesh to the Head vertex group
See this for an example
lone robin
umbral shuttle
Okay blender question time, for the green parts on this track, wat do i gotta do...
Kind of as your picture shows, placing seams where a “straight” edge is and selecting those individual pieces for unwrap instead of unwrapping as a whole
azure pier
It's assigned to the spine bones now btw
umbral shuttle
lone robin
Kind of as your picture shows, placing seams where a “straight” edge is and sele...
I just did this https://www.youtube.com/shorts/g3uemf1XUR0
I forgot I could use google 🙃

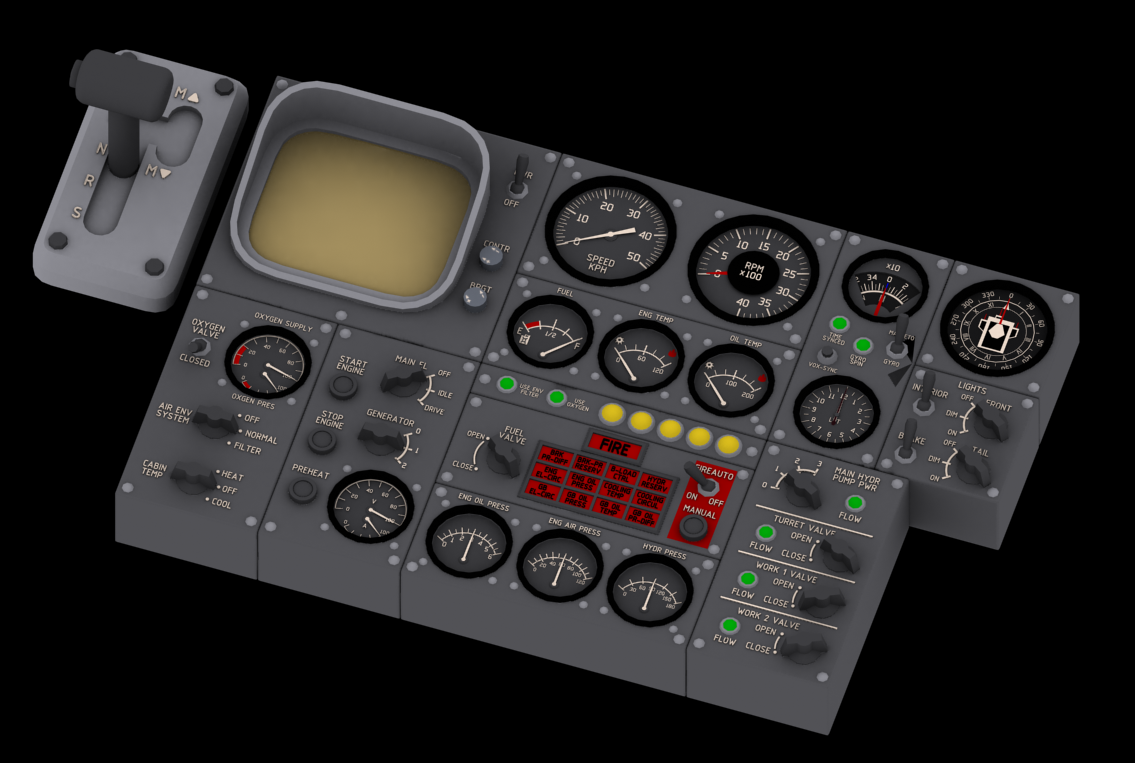


 stuck oyster
azure pier
It's assigned to the spine bones now btw
stuck oyster
azure pier
It's assigned to the spine bones now btw
Yeah the slot does not matter. The weighting to head or spine or any needed combination of bones and model space position need to be correct
Then the model.cfg needs to be set up right
And the geometry lod must have the autocenter 0 named property (not named selection)
astral cairn
I've been messing around with generating more textures. It's doing something, but seems to be rotated relative to the vehicles.
Only one UV set this time.
All transforms applied.
Is there any pointers for what could be causing this?
I've spent a fair bit of time trying to isolate what could be causing it but nothing's really affected it.

I have two materials, one track, one body and two separate sets of PAAs
stuck oyster
astral cairn
I've been messing around with generating more textures. It's doing something, bu...
can you screenshot the uvmapping
astral cairn
 stuck oyster
astral cairn
I've been messing around with generating more textures. It's doing something, bu...
stuck oyster
astral cairn
I've been messing around with generating more textures. It's doing something, bu...
can you show the track alone?
and do the textures work in buldozer?
rapid tree
Another Question about Proxy Guns for Vehicles, how can i make the animations work ? It seems that the proxy dont animate...
Do i really have to seperate the gun in all bone parts and make every bone a proxy ?
marsh canyon
Proxy doesn't animate, so you answered your own question
stuck oyster
rapid tree
Another Question about Proxy Guns for Vehicles, how can i make the animations wo...
Guns usually are not proxies.
rapid tree
stuck oyster
Guns usually are not proxies.
I know im just experimenting, i just wonder how BI made it to work in A2 since the MH60S doorguns are proxies
stuck oyster
No moving parts in the proxy is my guess. If the model is in the sample pack you can check yourself.
rapid tree
stuck oyster
No moving parts in the proxy is my guess. If the model is in the sample pack you...
There is something in the mem points like it looks like the proxy path but without beeing a proxy
marsh canyon
You sure it isn't a zasleh?
rapid tree
Yes im 100% Sure
marsh canyon
Then they did it despite it is unanimated, I guess
rapid tree
I check later in A2 but i think the belt and feedtray are still animated
marsh canyon
🤔
 cunning temple
In the blender plugin how do you add an empty Geometry? Or do you just add one vert 😕
stuck oyster
cunning temple
In the blender plugin how do you add an empty Geometry? Or do you just add one v...
I think making a cube, setting that to geometrylod and deleting the mesh in edit mode should work
but not absolutely sure if I've even ever done empty geometry lod like that
astral cairn
stuck oyster
can you show the track alone?
Sorry, fell asleep

Also, a solid nope for working in Bulldozer
stuck oyster
astral cairn
Sorry, fell asleep
this track uv wont work for Arma
astral cairn
Ah, that scans.
stuck oyster
the track itself needs to be vertically continuous so it can scroll up and down
and wheels are separate
astral cairn
So, it needs to be one contiguous track that's vertical?
stuck oyster
astral cairn
So, it needs to be one contiguous track that's vertical?

so what it looks like unwrapped is about this
so it uses the repeating texture
evenly along the whole length of the track
astral cairn
Understood, that makes sense.
Can you have both track on one material or done separately?
stuck oyster
astral cairn
Understood, that makes sense.
Can you have both track on one material or done se...
both on same

you can play a little bit on the uv map vertical position to get different patterning on both tracks
astral cairn
Okie doki, thank you again
cunning temple
stuck oyster
I think making a cube, setting that to geometrylod and deleting the mesh in edit...
That did it, thanks!
charred bolt
astral cairn
Okie doki, thank you again
You will ask at some point 😉 tracksSpeed = 1.0;
astral cairn
charred bolt
You will ask at some point 😉 `tracksSpeed = 1.0;`
Cheers
 toxic apex
radiant cliff
Not sure if this is the right channel but are there any mods for the Leonardo AW...
toxic apex
radiant cliff
Not sure if this is the right channel but are there any mods for the Leonardo AW...
I have one at a very early stage of dev. Nothing in game or even painted yet though.
radiant cliff
toxic apex
I have one at a very early stage of dev. Nothing in game or even painted yet tho...
Do you plan to include a Polish livery?
toxic apex
radiant cliff
Do you plan to include a Polish livery?
I can easily add one. But it will also come with a full paint kit and config template so you can creat your own skins.
radiant cliff
toxic apex
I can easily add one. But it will also come with a full paint kit and config tem...
That would be nice, thanks for saying.
Good luck with it
tribal rain
question for you all im trying to setup my smartgun backpack rig and have it lock on with the weapon i.e. follow the bones of the hand/weapon if possible but for some reason the left hand side does not want to follow?
Ive got a backpack that has a hard ammo feed that follows the hand anims etc etc but its on the right hand side when i switch to left side it doesnt want to follow the bones.
 stuck oyster
tribal rain
question for you all im trying to setup my smartgun backpack rig and have it loc...
stuck oyster
tribal rain
question for you all im trying to setup my smartgun backpack rig and have it loc...
odd
but you are also using separate stance mod so things may not always work as expected
also you probalby want to make it weapon at one end and spine2 or spine3 at one end
and not use the arms etc inbetween
tribal rain
that is true but on the sister backpack even when the stance changes it works a dream the issue is for whatever reason the "bone" is not where youd expect it to be?
Like for example if i were to set it to "Weapon" itd be about 0.5m (1.6ft for the americans in the audience) offset to the right of it? its really weird
tribal rain
stuck oyster
also you probalby want to make it weapon at one end and spine2 or spine3 at one ...
so the main backpack part be spine 2/3 and then the weapon attachment point be weapon and then hopefully it Interpolates the difference between?
stuck oyster
tribal rain
so the main backpack part be spine 2/3 and then the weapon attachment point be w...
well smoothly from 100 weapon to 0 weapona and 0 spine to 100 spine
imo thats the only way to get it work proper
using the hands will add lot of weirdness because their movement arcs are totally different
tribal rain
yeah im finding that
ok question as well right as i try to avoid weight painting as much as possible but if needs must im willing to learn
Normalizing weights
ive tried that function in blender does exactly bumpkiss so what exactly am i looking for in terms of transition here? i know RED like scarlet red is 100% influenced by that selection and Deep Blue is 0% affected but like whats a good kind of gradient to look at?