#arma3_model
1 messages · Page 26 of 1
 turbid pollen
turbid pollen
turbid pollen
oh wtf
the smdi texture seems 'squeezed'
which isn't the case with the .png of it I made the PAA from
in fact, the metallic png isn't also fully red either

as soon as i open it in texview2, it's squashed

 stuck oyster
looks like its pooped then
dunno why
bought files are really hit and miss if they are good to work with
if you got that amount of 4K textures that is indeed crazy
you would fit that whole weapon on a single 4K uvmap
turbid pollen
stuck oyster
if you got that amount of 4K textures that is indeed crazy
they're not all 4k
stuck oyster
Id try to resave that as tga maybe
maybe the png is in wrong bit depth
also all textures need to have correct _suffix before converting to paa
 hearty root
i've created a custom object, but i can't seem to get holdActionAdd to work on it, and i can walk straight through it.
i think i'm missing some sort of prerequisite for collision and general interaction? if so, could anyone lead me in the right direction in implementing it for my p3ds
stuck oyster
hearty root
i've created a custom object, but i can't seem to get holdActionAdd to work on i...
pinned messages have list of geometry requirements
 real crow
Hey peeps, i'm stuck in a strange issue: despite my static rocket proxy has camo selection and zbytek correctly configured in model cfg and config, no changes happen to the texture, be it damage or simple camo changes from the garage. Am i missing something?
stuck oyster
rocket proxy?
real crow
Yes
stuck oyster
proxies dont get hiddenselections
if you need it to change and its ammo
you would need to make it a pylon
so different ammo can be loaded in
real crow
Damn, and if i set it to pylon, texture changes will be possible? Ammo it's always the same
stuck oyster
real crow
Damn, and if i set it to pylon, texture changes will be possible? Ammo it's alwa...
can you explain a bit more what exactly you want to do here 😅
real crow
stuck oyster
can you explain a bit more what exactly you want to do here 😅
Sorry, i will re elaborate again: I made a SAM system mounted on a vehicle which uses 1 rocket at time. In order to achieve this i basically created two different p3ds of the rocket: one static and one in flight,the first is a modelspecial proxy, the latter is a maverick simulation weapon, and the static is a proxy that will disappear when firing. I would like to change the camo on the rockets, so that it matches the vehicle on which they sit, and make the rocket texture subject to visual damage through the zbytek selection.
stuck oyster
if you want to change the texture of the missile and make it damageable youll need to make it part of the vehicle instead of proxy
if you make it a pylon you could have multiple missile classes for different camos that you can swap as ammo as you like
but that wont support damage
wreck could incorporate fully burned looking missile husk
but that would show up also when its empty
so simplest would be empty wreck
real crow
Got it, i will make it part of the vehicle then.
 grizzled halo
oh whoops, found the issue. The path was miss spelt for my generalized rvmat folder LOL
grizzled halo
uh, fellas, by any chance, attachments rvmats require any special considerations?
I just noticed none of them have maps beside _co
grizzled halo
 marsh canyon
As in weapon accessories?
marsh canyon
As in weapon accessories?
that is correct, my weapons accesories rvmats are not being applied
marsh canyon
How do you apply that?
grizzled halo
like any other rvmat, I assign it by adding it to object builder material for selections
I use a "template" file to inherit from it and just replace the textures for each item by themselves
it works on everything besides attachments
marsh canyon
So do you mean hiddenSelections?
grizzled halo
I wonder if there is some sort of character restriction for names/relative paths
grizzled halo
marsh canyon
So do you mean hiddenSelections?
no, for accesories im not using hidden selections
heres a sample of how i do it, nothing special
#include "\KMP_Essentials\Textures\RVMats_Base\metal_blackNitride.hpp"

class Stage1 : Stage1_base
{
    texture="KMP_Essentials\Models\Optics\OKP-7\Textures\scopeBody_nohq.paa";
};

class Stage4 : Stage4_base
{
    texture="KMP_Essentials\Models\Optics\OKP-7\Textures\scopeBody_as.paa";
};

class Stage5 : Stage5_base
{
    texture="KMP_Essentials\Models\Optics\OKP-7\Textures\scopeBody_smdi.paa";
};

class Stage7 : Stage7_base
{
    texture="KMP_Essentials\Models\Optics\OKP-7\Textures\scopeBody_co.paa";
};
Besides accessories don't accept hiddenSelections (I mean I know this is not your case now) but texs/mats don't do anything special for very specific accessory
grizzled halo
this is the rvmat i inherit from for this one
class StageTI
{
    texture="a3\data_f\default_vehicle_ti_ca.paa";
};

ambient[]={1,1,1,1};
diffuse[]={1,1,1,1};
forcedDiffuse[]={0,0,0,1};
emmisive[]={0,0,0,0};
specular[]={1,1,1,1};
specularPower=30;
PixelShaderID="Super";
VertexShaderID="Super";

class Stage1_base
{
    texture=""; //Nohq.paa
    uvSource="tex";
    class uvTransform
    {
        aside[]={1,0,0};
        up[]={0,1,0};
        dir[]={0,0,0};
        pos[]={0,0,0};
    };
};

class Stage2
{
    texture="#(argb,8,8,3)color(0.5,0.5,0.5,0.5,DT)";
    uvSource="tex";
    class uvTransform
    {
        aside[]={1,0,0};
        up[]={0,1,0};
        dir[]={0,0,0};
        pos[]={0,0,0};
    };
};

class Stage3
{
    texture="#(argb,8,8,3)color(0.0,0.0,0.0,0.0,MC)";
    uvSource="tex";
    class uvTransform
    {
        aside[]={1,0,0};
        up[]={0,1,0};
        dir[]={0,0,0};
        pos[]={0,0,0};
    };
};

class Stage4_base
{
    texture=""; //as.paa
    uvSource="tex";
    class uvTransform
    {
        aside[]={1,0,0};
        up[]={0,1,0};
        dir[]={0,0,1};
        pos[]={0,0,0};
    };
};

class Stage5_base
{
    texture=""; //smdi.paa
    uvSource="tex";
    class uvTransform
    {
        aside[]={1,0,0};
        up[]={0,1,0};
        dir[]={0,0,0};
        pos[]={0,0,0};
    };
};

class Stage6
{
    texture="#(ai,64,64,1)fresnel(0.4,0.2)";
    uvSource="tex";
    class uvTransform
    {
        aside[]={1,0,0};
        up[]={0,1,0};
        dir[]={0,0,0};
        pos[]={0,0,0};
    };
};

class Stage7
{
    texture = "a3\data_f\env_land_ca.paa";
    useWorldEnvMap = "true";
    uvSource = "tex";
    class uvTransform {
        aside[] = { 1, 0, 0 };
        up[] = { 0, 1, 0 };
        dir[] = { 0, 0, 1 };
        pos[] = { 0, 0, 0 };
    };
};
Also again, CO shouldn't belong to a RVMAT
grizzled halo
yeah, im already removing them from all my mats.
However that is not the reason for this fail, I've had the rest of my maps show correctly on guns for example even while using the co in stage 7
marsh canyon
Does your last code represent the hpp you include?
grizzled halo
yes
here

the gun is actually using the same rvmat structure
yet the scope nor the can show materials
marsh canyon
Not quite sure your RVMAT is actually define things well
grizzled halo
hence why* I was wondering if accesories had more requirements
marsh canyon
Because if what you say and my understanding is correct, the RVMAT will simply throw an error
grizzled halo
the only difference is that most of the rvmats no longer use stage 7
hmm
I wonder
if the materials are failing silently because of that
since only accesories still have the stage 7 reference
marsh canyon
Or wait, sorry I think I misread the config a bit
Yeah guess at least an error wouldn't happen. But are you sure in your PBO, your RVMAT config is written as you expect?
marsh canyon
Do you binarize your files?
grizzled halo
yep
marsh canyon
Just in case what if you don't use include but just write as a plain text?
grizzled halo
Ill try and let you know if something changes
grizzled halo
marsh canyon
Just in case what if you don't use include but just write as a plain text?
yeah, writing as plain text work. Gonna purge the rest of the failing rvmats and make sure only the stages I require are used.
Didnt know rvmats failed silently, I could have sworn at some point they mentioned missing textures/references
marsh canyon
Which software you use to pack, then?
grizzled halo
addon builder
marsh canyon
I suspect your RVMATs are not properly binarized by AB
grizzled halo
I could check with mikero's later
marsh canyon
Or you probably can check your RVMATs by unpack youe PBO
 finite stump
What value is needed to make a fence fall over if hit by vehicle?
 white oak
finite stump
What value is needed to make a fence fall over if hit by vehicle?
white oak
finite stump
What value is needed to make a fence fall over if hit by vehicle?
damage named property
Think it was wall but doesn't hurt to check the docs
real crow
stuck oyster
dont know if you can setobject texture on the flying rocket live though
Then i might make different p3ds of the rocket in flight for each camo variant 🤯
 neat iris
Id guess this is some kind of model.cfg issue, but when using proxy mags and reloading, the mag doesnt move at all?

 marsh canyon
This makes n-gons that is not supported
 tribal timber
marsh canyon
This makes n-gons that is not supported
tribal timber
marsh canyon
This makes n-gons that is not supported
Are there any alternatives?
tribal timber
marsh canyon
Also, you better to use ArmaToolbox for Blender to export P3D
I use it 🙂
 marsh canyon
Then why you are trying to import OBJ file into OB?
tribal timber
marsh canyon
Then why you are trying to import OBJ file into OB?
After unsuccessful attempts to export p3d
marsh canyon
marsh canyon
This makes n-gons that is not supported
It is because the same reason with this
tribal timber
stuck oyster
tribal timber
+
Triangulate your mesh before export..
tribal timber
stuck oyster
Triangulate your mesh before export..
Can I have a little more detail?
marsh canyon
You seem you just don't know what is N-gons?
tribal timber
marsh canyon
You seem you just don't know what is N-gons?
I'm just getting used to it.
I used to work with models for another game
marsh canyon
Answer in yes or no can help it to answer your question more precisely, though
https://resources.turbosquid.com/training/modeling/tris-quads-n-gons/
Learn about using Tris, Quads, and N-Gons in 3D modeling and which ones to identify and avoid. For CheckMate Pro certification, your model’s topology must be quad-based with no more than 20% tris used. To…
tribal timber
marsh canyon
Answer in yes or no can help it to answer your question more precisely, though
h...
Thanks
neat iris
how do i make eye pos for optics? and how does hasoptics actually work? cause i cant get it to work at all
stuck oyster
neat iris
how do i make eye pos for optics? and how does hasoptics actually work? cause i ...
Should be just a memorypoint in the optics model
neat iris
ah, i dont mean for optic model, but like so that the dude actually looks through the optic when its on
stuck oyster
neat iris
ah, i dont mean for optic model, but like so that the dude actually looks throug...
Yeah each optic has its own point
neat iris
okay, so how i fix that its not aiming through any optics on my gun?
stuck oyster
neat iris
okay, so how i fix that its not aiming through any optics on my gun?
Attached optic or build in optic/ironsight
neat iris
attached
stuck oyster
Vanilla or custom?
neat iris
both
stuck oyster
neat iris
both
does any aiming work?
neat iris
i fixed problem, was just my messed up viewpilot
stuck oyster
👍
neat iris
only hasoptics and rail visibility remains
stuck oyster
first thing to make sure is that the animation works in buldozer
neat iris
stuck oyster
first thing to make sure is that the animation works in buldozer
well, doesnt seem to be working, damn
stuck oyster
well thats a good lead since then it means you got some mistake in your modelc.cfg
neat iris
yeah i did! wrong class name for model
neat iris
is viewmodelfov based on handanim or just weapon placement in the 3d space?
stuck oyster
neat iris
is viewmodelfov based on handanim or just weapon placement in the 3d space?
how its in the model
if you got pin sight irons they dont really work right in arma since the eyes/view is just simple camera
neat iris
thought so
finite stump
How do you get bullet holes to appear on a building texture like vanilla buildings?
 strong plaza
anyone have any recommended settings for rendering AO maps on buildings with interiors with xNormal?
 charred bolt
finite stump
How do you get bullet holes to appear on a building texture like vanilla buildin...
charred bolt
finite stump
How do you get bullet holes to appear on a building texture like vanilla buildin...
If it's the same as vehicles, make your Fire Geometry mesh closely match the building wall positions in the first res LOD and use isDiscrete = 1; in model.cfg.
 pale valley
having another small problem, what causes this "white out" when viewing through glass?
glass uses standard arma glass & glass_in .RVMATs

it is also a problem viewing items inside, or though the vehicle from the exterior
stuck oyster
pale valley
having another small problem, what causes this "white out" when viewing through ...
this is typically issue of alpha sorting
but also you can try using supershader type rvmat
pale valley
i will give supershading a look, is there any other way to change the alpha sorting? it's not something I'm familar with
charred bolt
pale valley
i will give supershading a look, is there any other way to change the alpha sort...
Object Builder,
Select glass faces
Faces > Move Top
pale valley
ah, thank you both, I will give them both a look
neat iris
what will i need to fix, if when using iron sights my bullets just cover targets?
ie they dont got straight, so to say
stuck oyster
your gunBeg gunEnd points might not be straight
 inland pawn
neat iris
what will i need to fix, if when using iron sights my bullets just cover targets...
inland pawn
neat iris
what will i need to fix, if when using iron sights my bullets just cover targets...
Konec and usti need to be lined up exact
 rapid tree
does someone have an tutorial on how to set O2 to Arma 3 stratis lighting in Bulldozer viewer ?
stuck oyster
rapid tree
does someone have an tutorial on how to set O2 to Arma 3 stratis lighting in Bul...
pinned messages
 quiet citrus
can someone teach me how to make custom helmets and such plz .
stuck oyster
quiet citrus
can someone teach me how to make custom helmets and such plz .
there is a headgear sample in arma 3 samples that you can use as reference
also the technical requirements are listed in pins
quiet citrus
how to i make the file into something i can put in unity
stuck oyster
you cant
quiet citrus
oh
stuck oyster
unity is in no way related to Arma either
quiet citrus
ahhh i see
 cloud zealot
What is the maximum bone count i can have in a skeleton in CfgSkeleton ?
stuck oyster
cloud zealot
What is the maximum bone count i can have in a skeleton in CfgSkeleton ?
254
but it seems other things add up to that too than just plain bones in skeleton
cloud zealot
stuck oyster
254
thank you very much 🙂
 vivid valve
Hello everyone, does anyone need a 3D designer for a server in Arma 3?
 vast nimbus
May I suggest advertising in creators offers
 valid widget
what can i do to fix these shadows?
 stuck oyster
valid widget
what can i do to fix these shadows?
stuck oyster
valid widget
what can i do to fix these shadows?
where at?
valid widget
stuck oyster
where at?
the ones on the hands
idk if its shadows or if thats something else
stuck oyster
could be your shadow lod bleeding through yes
It is recommended to copy the hand mesh and shadows for hands from the sample model
so they match
valid widget
when i redid the model the only thing i changed was the shoes, so if i copy paste the hands you reckon that may work?
stuck oyster
redid the model?
valid widget
poor wording, but ill see if i can fix from what you said 
neat iris
what does this error mean, i dont get it?
google isnt helpful either
 marsh canyon
You have end parameter there but no begin I guess
neat iris
i dont
marsh canyon
Then how is your model.cfg?
neat iris
you do want me to paste the whole thing?
marsh canyon
Only related part is necessary of course
neat iris
            class ammo_belt
            {
                type="translation";
                source="reload.0";
                selection="ammo_belt";
                sourceAddress="clamp";
                minPhase=0.3;
                maxPhase=1;
                minValue=0.3;
                maxValue=1;
                memory=0;
                offset0=0.184;
                offset1=0;
            };```
this is the relevant part, i guessYou have no axis
neat iris
hmm interesting, cause the one i copied this from to use as learning and base doesnt have it neither, but i will try to work it out
charred bolt
neat iris
hmm interesting, cause the one i copied this from to use as learning and base do...
It would be typical to place an axis memory point at the start point and one at the end point of the translation, then set offset0 = 1 and offset1 = 0. You can get rid of the min/maxPhase and memory entries. Even sourceAddress = "clamp" can be removed as it is the default value.
real crow
https://imgur.com/a/MCIiSJs What would be the reason why the fly model get spawned in this way? If i understood correctly, it is related to the missile move mem points, which i assigned in the mem points of the "static launcher". In addition to that, i can't see why the static rockets won't hide despite testing the assignement of the hide animation of the rocket tying it to revolving, reload and reloadmagazine sources. Ofc i did reported the hide animation in the config "animation sources" class.
 neat iris
another dumb question, but how do i change which way a part of model rotates? (I.E. down instead of left)
real crow
neat iris
another dumb question, but how do i change which way a part of model rotates? (I...
rotationx/y/z
neat iris
ah of course, thank you!
stuck oyster
real crow
rotationx/y/z
@neat iris best to use type "rotation" and axis memorypoints imo
charred bolt
It rotates around the axis memory points
stuck oyster
rotationX/Y/Z forces it to model space axis
it can be used of course if certain axis is desired
neat iris
im even more confused now lmao
stuck oyster
real crow
https://imgur.com/a/MCIiSJs What would be the reason why the fly model get spawn...
looks like the weapons pointing direction is to the side
theres 4 different rotation types
neat iris
im just trying to get weapon bipod to rotate down instead of just in its axis
stuck oyster
neat iris
im just trying to get weapon bipod to rotate down instead of just in its axis
you need to define axis memorypoint pair to get it to rotate around a specific axis
and your memory= parameter needs to be 1
real crow
stuck oyster
looks like the weapons pointing direction is to the side
All the memory points are on the same vertical axis 🤔
neat iris
stuck oyster
you need to define axis memorypoint pair to get it to rotate around a specific a...
i have an axis memorypoint tho
stuck oyster
neat iris
i have an axis memorypoint tho
memory=0 to memory=1
charred bolt
2 points make an axis
real crow
real crow
All the memory points are on the same vertical axis 🤔
I’m testing the swapping of the spice/konec rakety tied to the missile pos/pos end points
neat iris
stuck oyster
memory=0 to memory=1
member already defined is the error
nvm
im an idiot
stuck oyster
neat iris
member already defined is the error
 neat iris
reading is not one of my strong points, it seems
charred bolt
You can get rid of the min/maxPhase and memory entries
#arma3_model message
neat iris
im still doing something wrong cause it still rotating wrong direction even with memory=1 in bipod parts
charred bolt
Flip the two axis memory points.
neat iris
in which way?
charred bolt
 real crow
neat iris
in which way?
real crow
neat iris
in which way?
Try to get a 2 point axis perpendicular to the bipod, then the rotation animation will take place on that axis. If you already did this, i can send you the model cfg i have for my rifle bipod
neat iris
yeah cant get it to work
real crow
real crow
I’m testing the swapping of the spice/konec rakety tied to the missile pos/pos e...
Nothing 🤷♂️
stuck oyster
the order of point selection defines its direciton
but you can also just change the angle1 value
to negative to what it is now
as in 90 to -90 and so on
real crow
stuck oyster
looks like the weapons pointing direction is to the side
What controls the pointing?
charred bolt
In the p3d all weapons must point to the left
real crow
mmm, in this case is the fly model that should point to the left. Ok, will check it quickly
On top view looks like it is pointing south yep
 charred bolt
In the left view, it should point left
real crow
charred bolt
In the left view, it should point left
Oh, and it does yes
stuck oyster
real crow
What controls the pointing?
is there a class turret where the weapons?
stuck oyster
real crow
yes, it is the main turret class.
is there gunbeg, gunend points?
even if it does not have gun/cannon type weapon
real crow
Mm i think so, let me check
Nope
absent
Gonna slap them in the weapon config then. I can create their selection out of existing mem points, like the spice and konec rakety isn't it?
real crow
stuck oyster
is there gunbeg, gunend points?
Wait, it has missileBeg and missileEnd
class MainTurret: MainTurret { minElev = -15;//-10//0 maxElev = 45;//90 initElev = 0; minTurn = -360; maxTurn = 360; initTurn = 0; maxHorizontalRotSpeed = 0.6; maxVerticalRotSpeed = 0.55; soundServo[] = {"",1.4125376,1,40}; hasGunner = 1; gunnerName = "$STR_A3_Mk21_operator_displayName";//change? primary = 1; primaryGunner = 1; startEngine = 0; enableManualFire = 1; turretinfotype = "RscOptics_APC_Tracked_01_gunner";//change? forceHideGunner = 1; gunnerforceoptics = 1; gunnerOutForceOptics = 1; viewgunnerinExternal = 0; outGunnerMayFire = 1; inGunnerMayFire = 1; castGunnerShadow = 0; showAllTargets = 2; body = "";//MainTurret gun = "";//MainGun animationSourceBody = "";//MainTurret animationSourceGun = "";//MainGun uavCameraGunnerPos = "pos_gunner_view"; uavCameraGunnerDir = "pos_gunner_view_dir"; memoryPointGunnerOptics = "pos_gunner_view"; selectionFireAnim = "zasleh"; missileBeg = "pos_missile"; missileEnd = "pos_missile_end"; gunnerlefthandanimname = ""; gunnerrighthandanimname = ""; weapons[] = {"TNO_Wasserfall_Launcher"}; magazines[] = {"TNO_1Rnd_Wasserfall"}; optics = 1; gunnerOpticsModel = "\A3\weapons_f\reticle\Optics_Gunner_AAA_01_w_F";
stuck oyster
so it has no moving parts either
Id add the gunBeg gunEnd points into config and model to give the weapon a direction
stuck oyster
try the gunBeg/End points first
 wise stone
hey guys im trying to import a weapon to arma 3, but when i try to pack it with mikeros tools with pboProject v3.89 im getting the same error, even though the root that im trying to pack is correct,
My folder structure is
DCA
|
L weapons
     |
     L data
     |   |
     |  models
     |   |
     |   L ringo.p3d
     |
   config.cpp
this is the error that im getting
creating joblist...
Processing \DCA\weapons...
verifying model.cfgs(if any)...
testing chain for \DCA\weapons\models\model.cfg
        verifying \DCA\weapons\models\model.cfg
<scanning files to pack (and verifying mlods if any)>
M.M...</end scan>
<using bis\binarize_x64.exe" for wrp, p3d or rtms>
<copying/crunching to temp>

**********missing file(s)***************
\DCA\weapons\config.cpp circa Line 27: data\models\ringo.p3d
**********missing file(s)***************

\DCA\weapons\config.cpp Rapify:**********missing file(s)***************
raperr7
failed
failed
my config.cpp
class CfgPatches
{
    class dca_weapons
    {
        units[] = {};
        weapons[] = {"dca_ringo"};
        requiredVersion = 1.00;
        requiredAddons[] = {"A3_Weapons_F_Launchers"};
    };
};

class CfgWeapons
{
    class Launcher;
    class Launcher_Base_F : Launcher
    {
        class WeaponSlotsInfo;
        class Eventhandlers;
    };

    class dca_ringo : Launcher_Base_F
    {
        author = "Liron Kruchinin";
        _generalMacro = "dca_ringo";
        scope = 2; // 2 is for public
        displayName = "Ringo grenade launcher";
        model = "data\models\ringo.p3d";
        picture = "\A3\weapons_f\data\UI\icon_regular_CA.paa";
        UiPicture = "\A3\weapons_f\data\UI\icon_regular_CA.paa";
        magazineReloadTime = 0;
        reloadMagazineSound[] = {"", 1, 1, 10};
        weaponType = "Launcher";
        canLock = 0;
        reloadAction = "GestureReloadKatibaUGL";
        recoil = "recoil_gm6";

        opticsZoomMin = 0.275;
        opticsZoomMax = 1.1;
        opticsZoomInit = 0.75;
        distanceZoomMin = 50;
        distanceZoomMax = 375;
    };
};

class CfgMagazines
{
    class RocketBase; // Base class for launcher ammunition

    class Your_Grenade_Ammo_Type : RocketBase
    {
        author = "Liron Kruchinin";
        _generalMacro = "Your_Grenade_Ammo_Type";
        displayName = "Your Ammo Type Display Name";
        ammo = "Your_Ammo_Class_Name";
        count = 1;      // Number of rounds in one magazine
        initSpeed = 75; // Muzzle velocity
        picture = "";   //\path\to\your\ammo\icon_name.paa
        descriptionShort = "Your Ammo Description";
        model = ""; //\path\to\your\ammo\model_name.p3d
        // Additional magazine parameters here
    };
};
your path to the model is missing thses
 wise stone
im packing the weapons
so the root folder itself should be weapons
when packing with mikeros tools the mod path that im getting is @DCA->addons->weapons(pbo)
wise stone
stuck oyster
your path to the model is missing thses
should i try to pack with the path of DCA\weapons\data\models\ringo.p3d?
 plucky depot
it does not matter which folder you try to pack, the Virtual Filesystem Path is starting from P:/
or is overriden by $PBOPREFIX$ if you're using one.
wise stone
i dont have $PBOPREFIX$,
and the dev path that im working on is with P:/
starting with P:/*
plucky depot
then you path is \DCA\weapons\data\models\ringo.p3d
wise stone
same error, i tried different paths, and no luck
creating joblist...
Processing \DCA\weapons...
verifying model.cfgs(if any)...
testing chain for \DCA\weapons\models\model.cfg
        verifying \DCA\weapons\models\model.cfg
<scanning files to pack (and verifying mlods if any)>
M.M...</end scan>
<using bis\binarize_x64.exe" for wrp, p3d or rtms>
<copying/crunching to temp>

**********missing file(s)***************
\DCA\weapons\config.cpp circa Line 27: \DCA\weapons\data\models\ringo.p3d
**********missing file(s)***************

\DCA\weapons\config.cpp Rapify:**********missing file(s)***************
raperr7
failed
failed
 wise stone
but with manual packing it works, im just annoyed with the thing with mikeros tools 😦
should i abandon working with pbopacker?
stuck oyster
wise stone
should i abandon working with pbopacker?
no
you have issues with your setup
dont abandon the tool that complaints about your mistakes
fix the mistakes
wise stone
yeah? can you send a screenshot for your setup?
plucky depot
or switch to HEMTT 
can you open terminal in P:/DCA/ and run tree | clip and copy paste the file struture here
stuck oyster
can you spot the mistake
real crow
stuck oyster
Id add the gunBeg gunEnd points into config and model to give the weapon a direc...
HG, as model you intended the p3d right? Or the model cfg?
stuck oyster
real crow
HG, as model you intended the p3d right? Or the model cfg?
p3d
real crow
Ok, then i'm out of possibilities. I managed to reduce that effect by tweaking a bit of thrust/friction and init speed. But i cannot understand what's going on with it.
One last thing, is the source "Reload" the right one to use even in the cases of missile firing? I need to hide the rocket selection on the pod when the launcher fires, but despite using the following code in the model cfg it won't hide
class CfgModels
{
class Default
{
sections[] = {};
sectionsInherit="";
skeletonName = "";
};
class TNO_Wasserfall:Default
{
skeletonName="TNO_Wasserfall_SK";
sections[]=
{
"camo_0"
};
class Animations
{
        class magazine_hide
        {
            type="hide";
            source="reload";
            selection="rocket";
            sourceAddress = clamp;
            minValue = 0.0;//rad 0.0
            maxValue = 0.5;//rad 28.64789
            hideValue = 0.56;
// unHideValue = -1.0;//(default)
animPeriod = 0.0;
initPhase = 0.0;
};
};
};
(ofc the relevant selection is a bone in the skeleton)
Even by using this within the config, it still doesn't hide:
class Magazine_hide
{
source = "reload";
weapon = "TNO_Wasserfall_Launcher";
};
 bright echo
it depends, how many missiles are in the magazine? reload doesn't play on the last shot of a magazine
revolving or ammo might work better
stuck oyster
real crow
One last thing, is the source "Reload" the right one to use even in the cases o...
use the ammo source
inland pawn
If you use reload, it'll do it after every shot except on the last one
Which, another source is needed, reloadMagazine
So, just go with what goat said
real crow
Alright guys, i’ll check it out, thanks. It’s a 1 rnd system
 final kayak
My shiny silver boy #arma3_texture message has a problem with the mesh being distorted.
I've made sure to triangulate the mesh which from memory solved a similar problem I had in the past.
Does a solution for this problem jump to the front of mind for anyone?

Ahaha yes. Something is more wrong than I thought. It goes a bit wonky when I add a weapon to the hands.

 still trail
in OB, is it possible to intersect 2 boxes to create a single box?
 hollow fulcrum
haha, i can honestly say i have no clue.
stuck oyster
and that the weights are there
 last spindle
 cedar coral
@last spindle This is great, thank you.
real crow
real crow
Alright guys, i’ll check it out, thanks. It’s a 1 rnd system
It's incredible. It still won't hide jeez. In buldozer it works fine, but not in game. I suspect this line in the config might be the culprit maybe?(missileFireAnim = "rocket_fire_hide";//CULPRIT? )
stuck oyster
no
marsh canyon
Technically ui2Tex can do it I guess
stuck oyster
set object material can change what TI texture is used on TI stage
but cant make tank look like a jeep
in TI when they are hot, they are both hot
not really difference there
there is also this
inland pawn
final kayak
My shiny silver boy https://discord.com/channels/105462288051380224/105781923573...
Yooooooo! Silver Surfer
 glass pine
I might be exceedingly dense here but I'm having some trouble getting the sample optic working. I'm using the Test_scope3D_01 in the Arma 3 samples, I've binarized it, added the compatibleItems[] = {"Test_scope3D_01"}; to the weapon config, and while the model shows up on the gun and gives no errors, right clicking to aim down the scope doesn't actually do anything. Did I forget to add something?
inland pawn
glass pine
I might be exceedingly dense here but I'm having some trouble getting the sample...
The samples are only to be followed. They don’t work
glass pine
I was just about to say
I am indeed quite dense, the modelOptics field being empty was the problem.
final kayak
final kayak
My shiny silver boy https://discord.com/channels/105462288051380224/105781923573...
Took me a while to track down what the problem was. Turns out there was some bad skin weighting on some of the vertices.
 marsh canyon
Ah... Sample's Bust somehow has bad weight
final kayak
I took that head mesh from the ArmaRig model that was made for blender. Which appears to have been a mistake. The A3_character_example.FBX which comes with the samples is all good.
 stuck oyster
Well maybe with changing to different material with different TI texture, it would not really look like a car from all angles though. The example images are bit cheesy. It is an advertisement after all.
And in game players would expect it
Likely it would not be very useful after a while.
 celest arch
Amazing!
neat iris
Well first things first is to learn to 3d model the tank in blender
https://youtu.be/03xvuAWFcvw?si=S7OVwHAAlE8YbQ5n
This series might help
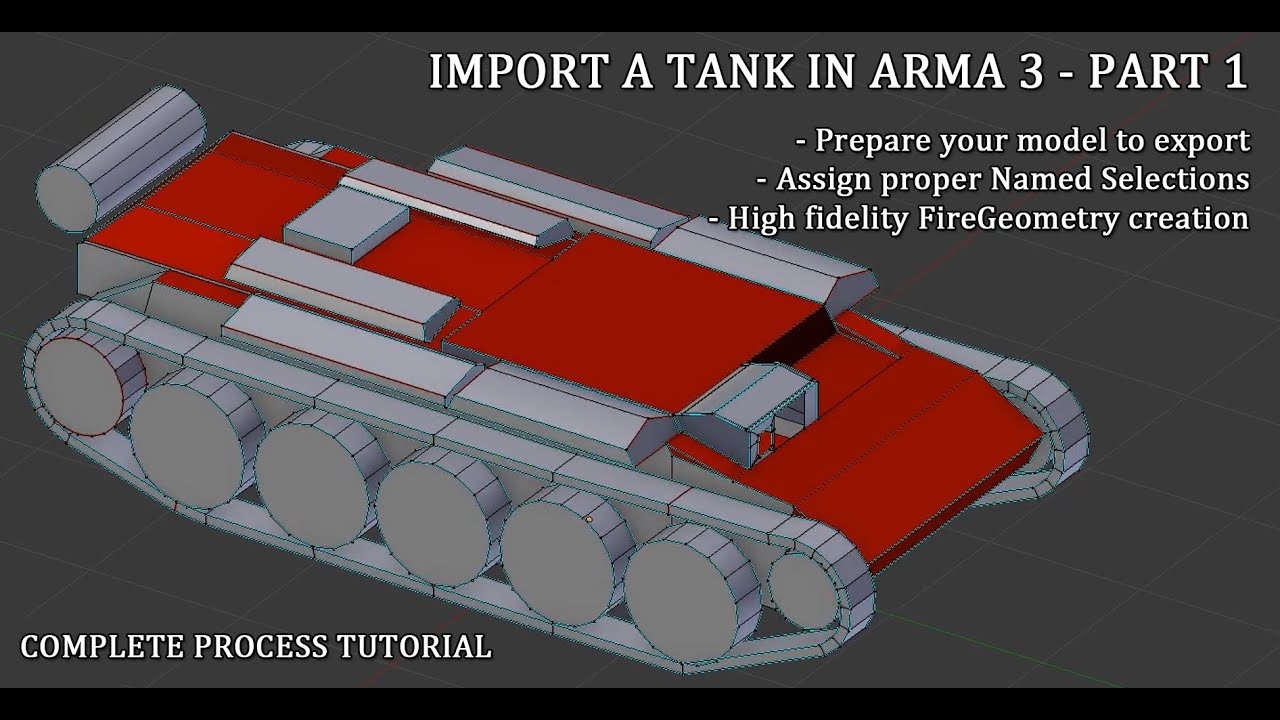
Check the time stamps below :
04:10 Isolating turrets from common hull and reviewing LODs
19:40 Named selections verification and review
35:40 Begin of Fire Geometry creation and track system
41:56 Fire geometry : hull creation
57:09 Fire geometry : why you want as simple components as possible
1:00:58 Fire geometry : tracks cover (explained tim...
stuck oyster
Config understanding can be difficult at first but it can be learned. Main thing is to not try to know everything at once. It's a process that is easier to handle in chunks
charred bolt
Wheels are animated to rotate around their individual axis.
Translation animations are a thing too, but for the specific case of tank tracks, those are handled differently...the mesh doesn't rotate, but the UV of the track texture is animated to give the impression of movement.
charred bolt
It's usual practise to split the tracks into sections with a "join" being underneath each wheel centre, so that when the tank goes over bumps the dampers move the wheels up and down, and the track is then able to follow that translation.
The same can be applied to the top of the tracks to either simulate tight or slack return.
neat iris
is there a tutorial for backpacks somewhere?
cant figure out at all how to get it to not to spawn at feet
neat iris
ive tried that, and it should be weighed properly, how do i double check that?
 mossy mulch
check res vertex group is assigned to like spine2 or something
neat iris
it is
neat iris
yes
mossy mulch
check the vertex group is properly assigned and its properly possitioned on armaman
neat iris
it is
neat iris
wdym with a huge gotcha
not sure about weird origin points
but generally things that are in czech need to be in czech
 wide tapir
neat iris
is there a tutorial for backpacks somewhere?
cant figure out at all how to get i...
wide tapir
neat iris
is there a tutorial for backpacks somewhere?
cant figure out at all how to get i...
if it's at feet it's either a model.cfg issue, autocenter issue, or transforms werent applied (if you are using blender)
for vests and backpacks, I usually make it 50/50 on spine2 and spine2
neat iris
ah yeah it was missing spine selections in model.cfg
charred bolt
No, very few hard coded czech words, however as you'll be mostly inheriting parameters, it's usually easier to stick with the czech in many cases rather than redefining them.
Vehicles need to point to the left in the isometric side view. As do their weapons, regardless of where they might end up pointing afterwards through animations.
 quick terrace
@still trail - you mean booleans ? most likely no
@strong plaza - AO maps for buildings are a bit more complicated. It requires a 2 step process and manual compositing of the 2
@last spindle nice!!!
inland pawn
What do I need to do to get my vehicles lights being "on" when L is pressed instead of flares?
 tacit karma
@quick terrace care to explain more? would be interested in knowing how to do that
quick terrace
what?
tacit karma
how to make AO for buildings
final kayak
final kayak
My shiny silver boy https://discord.com/channels/105462288051380224/105781923573...
I fixed the issues and made a release. Here it is if anyone's keen to take a look.
https://steamcommunity.com/sharedfiles/filedetails/?id=3156991415

 granite berry
What kind of problems can happen with objects larger than 50x50x50?
Heard thats some kind of upper limit.
 woeful viper
mossy mulch
woeful viper
mossy mulch
gonna use that for extraterrestrial stuff probably, pretty sweet looking 🙂
quick terrace

Bohemia Interactive Forums
multimaterial - posted in ARMA 3 - MODELLING - (O2): Hello modders
Got into terrain building and have the need for new buildings (we dont need another greek island do we?) and have moved into addon making.Ive become proficient enough with blender and OB to be able to make some structures and get them working in game with uv mapped textures but have found that i should be using multi.rvmats for quality texturing.Im a bit lost with this.Ive looked at mondkalbs tut and looked through sample...
granite berry
Ok ty X3KJ
 pastel heath
mossy mulch
gonna use that for extraterrestrial stuff probably, pretty sweet looking 🙂
pastel heath
mossy mulch
gonna use that for extraterrestrial stuff probably, pretty sweet looking 🙂
For my DND campain that i did in arma i was looking for something like this and i found it 😄 https://steamcommunity.com/sharedfiles/filedetails/?id=2359395889
 real crow
What would be the reason behind the fact that my commander can't access its vehicle's position, despite having correctly setup the pos_commander and dir mem points? Only way i can access to the commander seat is by switching seats inside the vehicle. And when exiting the vehicle, or ai accessing the commander seats from the outside, the point where the ejection/entrance takes place is high above the tank, almost like it's something not defined.
stuck oyster
real crow
What would be the reason behind the fact that my commander can't access its vehi...
missing getin/out actions
real crow
stuck oyster
missing getin/out actions
gunnerGetInAction = "GetInLow";
gunnerGetOutAction = "GetOutLow";
They are there. Maybe something is conflicting?
stuck oyster
perhaps
woeful viper
we need to train a model maker bot that answers the questions that constantly pop up xD
 sour bough
Is it more performant in Arma to have 2 (or 3) 2k textures than to have one 4k texture?
rapid tree
real crow
gunnerGetInAction = "GetInLow";
gunnerGetOutAction = "GetOutLow";
Commander get in in memory points maybe ?
sour bough
(I ask because Arma is old and sometimes the current conventional wisdom doesn't apply)
rapid tree
sour bough
Is it more performant in Arma to have 2 (or 3) 2k textures than to have one 4k t...
SOG uses a lot of 4K Textures
sour bough
rapid tree
SOG uses a lot of 4K Textures
But Is It Better
rapid tree
sour bough
But Is It Better
I would say 2K, because even if you convert to 4K it takes longer in texiew2
sour bough
rapid tree
I would say 2K, because even if you convert to 4K it takes longer in texiew2
In modern engines it's the other way around, hence the ask
Since it's fewer draw calls
stuck oyster
1 4k would be less drawcalls
so better in that regard
but 4K would only show best quality at ultra texture settings
and might mipmap more aggressively on lower end machines
sogpf 4k textures are not made to reduce drawcalls though
they aim for texture quality (at ultra settings)
rapid tree
So performance wise 2K Textures and Quality Wise 4K
stuck oyster
but the effect of that is likely marginal in this scale
as in overthinking this leads to hairloss
rapid tree
Lets say my Mod has a lot of Assets, so its better to use 4K for all ?
stuck oyster
no
if they are already made into 2k textures having any benefit from 4k would would be complete remake of uvmapping and all the textures
which is silly
sour bough
stuck oyster
but the effect of that is likely marginal in this scale
I'm the sort of person to spend an hour saving 0.003ms on a script execution time
stuck oyster
yes that leads to hairloss
sour bough
I'm insane, yes
mossy mulch
she drives me insane with it
sour bough
Omg what if we start using 2048 x 4096
stuck oyster
well section count between that and 2x 2048x2048 is less so better in that regard.
one thing to keep in mind thouhg is retexturing
if parts are separated into different sections like pants and shirt
or turret and hull
that already splits it
sour bough
We do it all in house and separate by rvmat for sheets, so we can set it up for whatever retexturing we want
stuck oyster
unless you have 1 big section that covers the whole combined texture
sour bough
Yeah that'd be it
mossy mulch
we have 3 guns, a scope and a pistol on the same texture sheet 🙂
stuck oyster
but those are not in same model?
mossy mulch
correct
stuck oyster
I dont think that saves you anything 🤔
sour bough
It saves us texture space kind of
mossy mulch
almost certainly not but its cool anyway
sour bough
It's also cool
stuck oyster
might actually be worse for perfomance
mossy mulch
45px/cm^2 texel density too
stuck oyster
but effects may be marginal again

there arent really any metrics done for that as far as I know
in Arma
rapid tree
Does it make a difference if a weapon have like multiple textures(reciever, stock, barrel etc) or just one ?
stuck oyster
at least not public ones. BI might have run tests
stuck oyster
rapid tree
Does it make a difference if a weapon have like multiple textures(reciever, stoc...
yes, multiple textures/materials are a drawcall/section each
on a single model
sour bough
I bet you could do a thing where you spawn 300 of them as simple objects and stare at them while monitoring fps
mossy mulch
probably
sour bough
Then do one sheet and do the same
stuck oyster
one could sure. Personally I dont bother xD
stuck oyster
👆
sour bough
(insane)
rapid tree
stuck oyster
yes, multiple textures/materials are a drawcall/section each
Alright but is it a big impact of performance ?
stuck oyster
it stacks
sour bough
Omg what if I re-optimized my medical scripts for the second time
stuck oyster
remember, third time is the charm
 dense quest
i need mod on the normal jet sound RHS!
charred bolt
I did those tests a long time ago. Also measured fps v poly count.
Pretty much meaningless results now though many years later with modern computers
mossy mulch
did you test hiddenselections perchance
rapid tree
stuck oyster
it stacks
Alright thank you, now i have to comission a new gun 😂
sour bough
rapid tree
Alright thank you, now i have to comission a new gun 😂
Wanna go halfsies
charred bolt
mossy mulch
did you test hiddenselections perchance
I may have done as at the time I was experimenting with using hiddenSelections to hide stuff. Now know of course that it's a bad idea and should use hide animations.
stuck oyster
😅
mossy mulch
me trying to do hide anims on a facewear
stuck oyster
wont work 😅
sour bough
me doing hide animations on a uniform
mossy mulch
jenna made me import so many things i was able to make my first model today with only minor pathing errors as the only problems in it
stuck oyster
wont work either
mossy mulch
i actually used 5 32 side cylinders for something that was an inch across or so
charred bolt
Far more important to fps are particle effects and AI.
sour bough
actually could you hide, like, Head, if you added it? Uniforms are vehicles
stuck oyster
but the kind of gear model cosmetics is not meant to be done in Arma
stuck oyster
sour bough
actually could you hide, like, Head, if you added it? Uniforms are vehicles
no the model.cfg procedural animationd dont seem to work
at least last time I tried them
mossy mulch
bye bye head :/
sour bough
stuck oyster
no the model.cfg procedural animationd dont seem to work
nooooo my headless horseless horseman mod
stuck oyster
empty head exists
mossy mulch
you can do with identity
stuck oyster
or have no head proxy in uniform
real crow
real crow
What would be the reason behind the fact that my commander can't access its vehi...
I tried playing with multiple tokens like hasGunner, isPersonTurret , outGunnerMayFire and defining proxyType = CPCommander. It still doesn't work. And yep, memoryPointsGetInCommander and CommanderDir are set up in the config. I guess this is config makers issue then, i will post my disgraces on this up there from now on
 lofty comet
Helmet is made out of 5 parts. What is best way I can make so later in object editor would be easy to select part by part and add them rvmts and texures?
 stuck oyster
lofty comet
Helmet is made out of 5 parts. What is best way I can make so later in object ed...
stuck oyster
lofty comet
Helmet is made out of 5 parts. What is best way I can make so later in object ed...
there is no need to combine it at all if you dont want to.
but such a small object would typically have just single texture
charred bolt
real crow
What would be the reason behind the fact that my commander can't access its vehi...
Check for typo's between the config entries and the memory points.
Check you've got only 1 turret using each of the points.
Check these parameters are in the correct turret sub class.
memoryPointsGetInGunnerDir = "pos_commander_dir";
okay, but how I can make it work with 5 parts, the problem is when I come to obj editor I dont know how to select all 5 parts
stuck oyster
lofty comet
okay, but how I can make it work with 5 parts, the problem is when I come to obj...
you can assign the material in blender
and do the uvmapping and just about everything else in there too
how many triangles is that?
is that a highpoly model?
lofty comet
stuck oyster
is that a highpoly model?
 stuck oyster
it is quite high for a helmet
lofty comet
stuck oyster
it is quite high for a helmet
is that problem?
stuck oyster
well its not optimal
if you do good distance lods for it, it will not be as big issue
but basically a unifrom might have that amount of tris
or even a small car
lofty comet
stuck oyster
if you do good distance lods for it, it will not be as big issue
okay, its has already uv maps, can you give any guide what it needs in blender?
charred bolt
Helmets would typically be around 3-4k tri's in first resolution LOD iirc. Maybe rising to 8k for complex helmet.
stuck oyster
lofty comet
okay, its has already uv maps, can you give any guide what it needs in blender?
does it have uv mapping matching texture?
stuck oyster
charred bolt
Helmets would typically be around 3-4k tri's in first resolution LOD iirc. Maybe...
this sounds decent amount yeah
lofty comet
stuck oyster
does it have uv mapping matching texture?
yes it got uv mapping matching textures, in all needed formats for arma and all rvmts
stuck oyster
lofty comet
yes it got uv mapping matching textures, in all needed formats for arma and all ...
textures? 😅
like I said this should have single texture
are they baked textures?
lofty comet
stuck oyster
are they baked textures?
yes
stuck oyster
is there any chance you would fix them to be on single texture instead?
if you have the original model they are baked from it should not be a big thing to do
real crow
charred bolt
Check for typo's between the config entries and the memory points.
Check you've ...
Roger that
lofty comet
stuck oyster
if you have the original model they are baked from it should not be a big thing ...
but I dont know how to do uv map
yes I have original model
 lofty comet
stuck oyster
I suppose this is a chance to learn that part too
lofty comet
stuck oyster
I suppose this is a chance to learn that part too
I done everything already just need way how to select which rvmts goes where
stuck oyster
lofty comet
I done everything already just need way how to select which rvmts goes where
do you know how to assign materials in blender?
lofty comet
stuck oyster
do you know how to assign materials in blender?
yes but in model there is already something done
 stuck oyster
lofty comet
yes but in model there is already something done
stuck oyster
lofty comet
yes but in model there is already something done
am I correct to assume you did not make the model?
lofty comet
stuck oyster
am I correct to assume you did not make the model?
yes I got it to put in arma
lofty comet
stuck oyster
are you being paid to do so?
no, that ILLEGAL
stuck oyster
well what you have there is not suitable for Arma
arma does not use that kind of shader so you need to learn to convert the textures in what works in arma
lofty comet
stuck oyster
arma does not use that kind of shader so you need to learn to convert the textur...
the textures are not there
lofty comet
stuck oyster
arma does not use that kind of shader so you need to learn to convert the textur...
I got it like that without textures

I made my textures using Substance painter
lofty comet
stuck oyster
why didnt you get the textures if you bought the model?
I didnt but it was gived to me, I wanted new textures so I made new one
lofty comet
stuck oyster
why didnt you get the textures if you bought the model?
anyway how to add my texture to it (in blender)?
stuck oyster
sure there should be plenty of blender guides you can check out to learn how to use it
lofty comet
stuck oyster
sure there should be plenty of blender guides you can check out to learn how to ...
I know how to add them, but dont know what to do with old textures(in shading) do Idelete them?
stuck oyster
sure
lofty comet
stuck oyster
sure
I done it but lines from uv map are showing
 stuck oyster
lofty comet
I done it but lines from uv map are showing
stuck oyster
lofty comet
I done it but lines from uv map are showing
yeahh looks like it may need some fixing
Id remake the uvs, those look weird
I dont specically like to spend time figuring you how to fix someone elses models
 lofty comet
stuck oyster
looks just automated uv mapping and packing
lofty comet
stuck oyster
looks just automated uv mapping and packing
so if it is in arma, you would see lines from uv?
stuck oyster
maybe. depends how good the textures are
lofty comet
stuck oyster
maybe. depends how good the textures are
okay, what is consider good texture?
stuck oyster
something that looks good
charred bolt
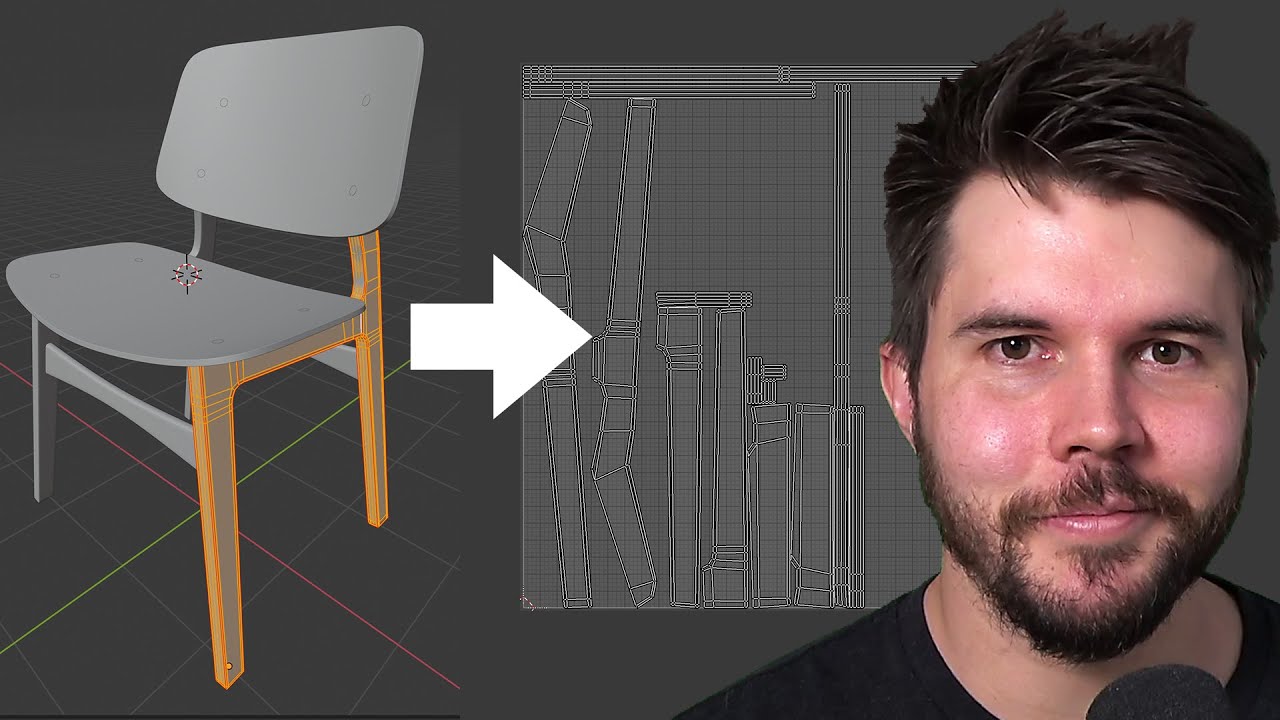
Blender chair tutorial continues! In this part we discuss what UV unwrapping is, why it's needed and how to unwrap several types of objects.
Join the free newsletter to get a Blender Keyboard Shortcut PDF: https://mailchi.mp/ef5b15a32043/subscribe-to-the-newsletter
Follow me:
Twitter: https://t...
lofty comet
stuck oyster
something that looks good
okay, what I need to do next, texture are added true blender
charred bolt
The tutorial goes over the importance of seams and where they are placed.
stuck oyster
yeah that can be good starting point
charred bolt
If you don't make a good UV, your textures won't look great either.
stuck oyster
hes not the original modeler so basically to get it good youll need to learn modeling basics
lofty comet
stuck oyster
hes not the original modeler so basically to get it good youll need to learn mod...
okay, thanks for help, I found solutions I would use just 2 parts of 5, these parts can be easy selected in obj builder

and second will ask him if he can make it into one part
glass pine
Here's a question, so I'm working on a custom gun model with a custom scope to go along with it. The issue is that the scope for my gun sits too high - if I shoot exactly at the center of my optics reticle the bullet goes way too high basically. How do most people adjust for this sort of thing? It's a sci-fi gun model I've been working on, and the optic is supposed to sit high (so I don't want to bring the scope further down on the model itself).
lofty comet
stuck oyster
hes not the original modeler so basically to get it good youll need to learn mod...
the texture comes great but I messed up something, any help?


 glass pine
lofty comet
the texture comes great but I messed up something, any help?
glass pine
lofty comet
the texture comes great but I messed up something, any help?
Do you have your helmet defined in a model.cfg? You probably want to set the autocenter 0 property on it as well.
grizzled halo
lofty comet
the texture comes great but I messed up something, any help?
see pinned messages
final kayak
In case someone searches for this.
bysta is the proxy for the head
https://forums.bohemia.net/forums/topic/177554-invisible-head-for-full-face-helmets/
if you don't want the game to display a head, helmet, glasses, vest or backpack on your character, then simply erase those appropriate proxies in all LODs. Note: a head proxy is called \A3\characters_f\Heads\bysta
Bohemia Interactive Forums
Hello everyone! I am currently working on a full face helmet. This helmet will provide protection to the entire head of the user. There is a problem though! The ears are clipping out of the model in a unrealistic way. Heres the picture of what I mean. http://oi60.tinypic.com/2llkj6u.jpg (102 kB) ...
glass pine
glass pine
Here's a question, so I'm working on a custom gun model with a custom scope to g...
Well I might be dumb. This entire time I've been trying to make it as a 3D scope, but apparently I can just use modelOptics to point to a 2D overlay instead which looks much better. I think this way I can lower it down to shoot where I want without having to actually edit my scope's model.
 dim mica
Im trying to create house destruction with a3 sample house and every time ill try to start my addon it gives error regarding smoke1 destruction effect. Any idea why?
 agile osprey
give the exact error
dim mica
bin\config.bin/cfgbehicles/house_small_f/destructioneffects/smoke1 cannot find base class smoke1
mossy mulch
what is it that usually causes a pistol's muzzle flash to not hide when not firing? cannot remember aside from probably a model.cfg issue 
stuck oyster
mossy mulch
what is it that usually causes a pistol's muzzle flash to not hide when not firi...
Muzzle flash selection defined in the weapon config, muzzle flash model part with same selection and possibly same selection defined as section in model.Cfg
mossy mulch
hmmm
ill double check my weapon config
i copy pasted it all from another one of our pistols including the config etc so i have no idea why its not working
ah i had it as class pistol when it was not pistol.p3d
next question, is there a reload anim example anywhere in the samples for model.cfg? cant figure it out
charred bolt
mossy mulch
next question, is there a reload anim example anywhere in the samples for model....
Reload animations for weapons are handled in .rtm files.
The Samples Test_Weapon_01 has
reloadAction = "GestureReloadMX";
which can be found in:
class CfgGesturesMale > class States
and references this file:
file = "a3\anims_f\data\anim\sdr\gst\gesturereloadmx.rtm";
mossy mulch
charred bolt
Reload animations for weapons are handled in .rtm files.
The Samples Test_Weapon...
i mean for the magazine movement with said anim 😅
charred bolt
In that case, what you need is in the model.cfg of the Samples Test_Weapon.
magazine_hide, reload_ammobelt_hide, ammobelt_hide, no_magazine etc
mossy mulch
yeah i have the hide anims etc i just need to sort the magazine moving into the gun during the anim
which i cant seem to find
charred bolt
{
    type = "translation";
    source = "reloadMagazine";
    selection = "magazine";
    axis = "magazine_axis";
    minValue = 0.145;
    maxValue = 0.170;
    offset0 = 0.0;
    offset1 = 0.5;
};
class magazine_reload_move_2: magazine_reload_move_1
{
    minValue = 0.573;
    maxValue = 0.602;
    offset0 = 0.0;
    offset1 = -0.5;
};
ah i see it now thanks 😅
charred bolt
line 299 of model.cfg
That's a simple linear translation for the magazine, sliding it out, hiding it, then unhiding and sliding a new one in.
Generally the only weird thing to get your head around is that many of the animSources for reload run from 1 to 0.
mossy mulch
where 0.5 would be how far out the magazine goes right?
or is that minvalue and maxvalue
or heaven forbid is it the length of the axis
mossy mulch
i hate that
mossy mulch
having some difficulty understanding the magazine_hide... what's the difference between the min/max values and the hide/unhide values?
i.e diff between min and hide
stuck oyster
You would want mun and max as 0 and 1, that's what the reload source plays between. And then the hide u hide are like percentage between the min and max value
If I remember right
 tribal rain
not sure if this is the righ channel to ask or not but has anyone got a good RVMAT for a uniform mine is a bit fucky wucky

 stuck oyster
tribal rain
not sure if this is the righ channel to ask or not but has anyone got a good RVM...
stuck oyster
tribal rain
not sure if this is the righ channel to ask or not but has anyone got a good RVM...
This works for asking. However good is a bit relative here as each rvmat play together with the technical textures assigned on its stages.
But if you explain what you like and don't maybe guidance can be give to what you could tweak
tribal rain
ok what if i specified a bit more basically i dont want him to look like hes covered head to toe in baby oil
its too shiny atm
which im guessing is an issue with the SMDI? also the weird shadowing is that an AS issue?
stuck oyster
Smdi texture/stage modulates the specularity and specular power parameters
So yes tweaking that can already help
What shader type are you using?
The shadows at the back look like shadow lod peeking through
tribal rain
stuck oyster
What shader type are you using?
yes
I have no idea XD
i basically ran an rvmat generator and went huh thatll do, im useless when it comes to textures i have a rough idea if what to adjust values etc etc
Also this has no shadow LOD, deleted it. thought dont need it just takes up performance.
ill post up the RVMAT for the one im using now see if that can give any indication of whats going on
ambient[] = {1,1,1,1};
diffuse[] = {1,1,1,1};
forcedDiffuse[] = {0,0,0,0};
emmisive[] = {0,0,0,1};
specular[] = {0.5,0.5,0.5,0};
specularPower = 150;
PixelShaderID = "Super";
VertexShaderID = "Super";
class Stage1
{
    texture = "TestHead\Uniform\Data\RogueUni_NOHQ.paa";
    uvSource = "tex";
    class uvTransform
    {
        aside[] = {1,0,0};
        up[] = {0,1,0};
        dir[] = {0,0,0};
        pos[] = {0,0,0};
    };
};
class Stage2
{
    texture = "#(argb,8,8,3)color(0.5,0.5,0.5,1,DT)";
    uvSource = "tex";
    class uvTransform
    {
        aside[] = {1,0,0};
        up[] = {0,1,0};
        dir[] = {0,0,0};
        pos[] = {0,0,0};
    };
};
class Stage3
{
    texture = "#(argb,8,8,3)color(0,0,0,0,MC)";
    uvSource = "tex";
    class uvTransform
    {
        aside[] = {1,0,0};
        up[] = {0,1,0};
        dir[] = {0,0,0};
        pos[] = {0,0,0};
    };
};
class Stage4
{
    texture = "TestHead\Uniform\Data\RogueUni_AS.paa";
    uvSource = "tex";
    class uvTransform
    {
        aside[] = {1,0,0};
        up[] = {0,1,0};
        dir[] = {0,0,0};
        pos[] = {0,0,0};
    };
};
class Stage5
{
    texture = "TestHead\Uniform\Data\RogueUni_SMDI.paa";
    uvSource = "tex";
    class uvTransform
    {
        aside[] = {1,0,0};
        up[] = {0,1,0};
        dir[] = {0,0,0};
        pos[] = {0,0,0};
    };
};
class Stage6
{
    texture = "#(ai,64,64,1)fresnel(1,0.7)";
    uvSource = "none";
};
class Stage7
{
    texture = "a3\data_f\env_co.paa";
    useWorldEnvMap = "true";
    uvSource = "tex";
    class uvTransform
    {
        aside[] = {1,0,0};
        up[] = {0,1,0};
        dir[] = {0,0,0};
        pos[] = {0,0,0};
    };
};
//};
oh according the RVMAT the shader type is "Super"
stuck oyster
tribal rain
oh according the RVMAT the shader type is *"Super"*
Indeed
Your specular power is very high
tribal rain
stuck oyster
Your specular power is very high
which one is that and what do i need to edit to make him less oily
stuck oyster
tribal rain
**yes**
I have no idea XD
i basically ran an rvmat generator and went huh th...
For no shadow you need to use named properties that disable it. You won't really gain much with that though
tribal rain
stuck oyster
For no shadow you need to use named properties that disable it. You won't really...
ah fair
stuck oyster
tribal rain
which one is that and what do i need to edit to make him less oily
Specularpower
At the near top
tribal rain
stuck oyster
At the near top
thanks amigo!

 quaint pawn
Hello, I recently wanted to learn how to create my own skeleton for arma 3. After testing different skeletons for a long time I had a lot of problems, sometimes the skeleton didn't apply, sometimes the animations would drop in game and such. I was wondering if there are any instructions on how to import a skeleton with an animation package into arma 3? I'm currently learning how to do all this using the free model and animations from the mixamo website, in the future after learning I plan to use my own model, skeleton and animations.
rapid tree
mossy mulch
i copy pasted it all from another one of our pistols including the config etc so...
missing muzzleFlash selection in the p3d or missing selectionFireAnim
mossy mulch
already sorted
inland pawn
quaint pawn
Hello, I recently wanted to learn how to create my own skeleton for arma 3. Afte...
No. There isn’t. Theres a reason that there’s so few mods that work with skeletons
stuck oyster
How I learned it was I first learned "basic modding" and normal unit, vehicle and building creation
how to write and read/understand configs
then I applied that to learning how different parts of animation config connects with other parts
and slowly I began to understand how it plays together
there is also the non arma component of "how to make animations"
in whatever program(s) you want to use
I would not try to start learning from mixamo
it does things in very different way and with its own rig systems
 heady terrace
Hi, i was trying to create a fridge mod that gives food with using addaction, first i started modeling and imported to object builder. then i add lods but i can walk through inside object. can anyone help me maybe i can miss anything in object builder

and i applied these before exporting from blender


 marsh canyon
Geomery that controls collision and such requires some weight
heady terrace
i already added and check corners

gave 100 mass
in geometry lod
i you want i can send p3d file
marsh canyon
How do you spawn ingame?
 marsh canyon
Well it was more of a question how/what config defines that fridge
heady terrace
 charred bolt
heady terrace
in geometry lod
charred bolt
heady terrace
in geometry lod
You need to have the ComponentNN selection names in the Geometry LOD, not the LOD 1.
Make sure Geometry is closed and convex.
heady terrace

now i'm gonna duplicate geometry and make it geometry phys and phys old

3 of them is same
charred bolt
Just the Geometry LOD will be enough for collisions with people for testing purposes.
heady terrace
same :(
 marsh canyon
How do you run/pack PBO/test?


 marsh canyon
And you restart your game everytime you do?
marsh canyon
One thing I can suggest is you really shouldn't use PBO Manager to pack one
heady terrace
purpose of using this time saving
easier for me
do you have advise for pbo converting
marsh canyon
Well sort of... there is a better way but I actually just realized it doesn't make a big difference terms of binarizing/validating
You sure your Geometry is Convex, closed as Apollo suggests?
heady terrace
i can share my screen if you available for this
or i can record my screen and post here
marsh canyon
No need to. Screenshot is better for logging purpose
heady terrace
while everything is selected (in lod 1)

 marsh canyon
So do you mean you duped LOD1, and if you do find non-closed/non-convex, everything turns red?
heady terrace
all red edges turned to black
oh
in lod, if i do find non convex it turns this
 marsh canyon
This means the game is going to fail to detect a proper collision

 marsh canyon
Sort of. But try not to expect a perfect solution
Easiest and reliable solution is, make your geom LOD by hand
charred bolt
Make your Geometry mesh out of ONE rectangular box. 6 faces only.
charred bolt
Give it mass 100. Check it is closed and convex (should be if you make one box).
Give it selection name Component01.
Build and test in game = collision works
 marsh canyon
It should work if you configure it
stuck oyster
geometry lod descriptions and requirements also in the pinned messages
 pallid cape
My turret has a sight that has a _ca tga with alpha for the glass component. When I pack and binarize using AddonBuilder, it becomes opaque. Anyone have any guesses?
stuck oyster
pallid cape
My turret has a sight that has a _ca tga with alpha for the glass component. Whe...
does it have rvmat?
have you done alpha sorting for it?
pallid cape
no rvmat
pallid cape
Is it faces > move top or faces > sort alpha?
pallid cape
no dice
pallid cape
added rvmat, move to next alpha, sort alpha move top, all didn't work
pale valley
I'm starting to learn to play with animations, and I want to tie 'Light_L' & 'Light_R' to an 2nd animation (beyond 'hide'), but those hide animations are inherited and therefore not included in all the Arma 3 samples, is it possible to be cheeky and ask for a sample of the light hide animation config for the model.cfg?
I also notice that Light_L, Light_R & 'zadni svetlo' dont seem to be tied by a selection in my model, yet they all work as they should, are all three tied in the config (which I dont have a sample of)?
charred bolt
pallid cape
added rvmat, move to next alpha, sort alpha move top, all didn't work
Change the texture and rvmat for these, to check whether it's the packing process causing the issue:
\a3\data_f\Vehicles\armored_glass_ca.paa
\a3\data_f\glass_veh.rvmat
charred bolt
pale valley
I'm starting to learn to play with animations, and I want to tie 'Light_L' & 'Li...
There will be an inherited parameter in the config.cpp
selectionBackLights = "zadni svetlo";
and probably also some inherited class Reflectors for the headlights with Light_L and Light_R.
pale valley
charred bolt
There will be an inherited parameter in the config.cpp
`selectionBackLights = "z...
so, in theory, would I be able to tie an animation to whatever the selection would be for turning the headlights on without having to mess with Light_L & Light_R?
charred bolt
So you want an animation to play (such as a headlight cover to raise up) when the player switches on the headlights?
pale valley
exactly that
charred bolt
Hmm, I can't immediately think of a way. Perhaps there's an eventhandler for lights?
pale valley
possibly, selections can be added to animations in the model config, right?
my thinking is, if I tie everything to a new selection in oxygen, then write a bit of config to say, this selection moves when "mysteryselection" is pressed, it should work, i would have thought?
or "mystery source" i should say..
charred bolt
You can certainly add a user AnimationSource to move or hide selections, triggered by a userAction, but that would be a manual process separate from switching the lights on using the hard-coded "L" or mouse option which come from the class Reflectors in the root config.
pale valley
what im thinking is, I can probably make it work, even if it is hard coded..
If there was a :
source = DayLights;
I could just use that.. as it's the source, I dont think it would break anything
it's just, I don't know if it is
source = DayLights;, or it is source = HeadLights; , or it is source =svetlomety;... or so on
charred bolt
class Reflectors {} do not have animationSources to switch them on and off.
If they're in the root of the vehicle the game puts a userAction "lights on", or if they're in a turret it gives a "searchlight on" option. There are no "hide" animations in model.cfg for them.
pale valley
oh, damn.
that's a shame... I'm not overly bothered but the option would have been nice 😅
charred bolt
You can still do it manually but possibly not automatically
pale valley
I might do that anyway, I do need to get experience with the animations, shame I cant have it "just so"
thanks for the help though!
actually.. sorry to relight this, "zadni svetlo" - the rear lights, come on when the headlights are turned on, but there is no mention of that in the reflectors section..
bright echo
hard coded engine behaviour
think you can change the selection name in config somewhere, maybe
there's another for dash backlighting too
and yeah I don't think there's an easy way to animate lights, rather annoying. ran into something similar when setting up the P-47 for spearhead, ended up just tieing the animation to the gear (it's a landing light anyway, so it made sense)
a model source and/or an eventhandler would be nice
pale valley
hmm, so it seems that, "selectionBackLights" is tied to the reflectors, but it is a selection.. so I tried this
class popups_rot: rotation
{
source="selectionBackLights";
selection="popups";
axis="popupaxis";
memory=1;
maxValue=38.900002;
angle1="rad -265";
};
but it doesnt seem to pick up the animation at all in bulldozer
OMG, lads...
think I've done it
charred bolt
bright echo
think you can change the selection name in config somewhere, maybe
As noted here:
#arma3_model message
charred bolt
bright echo
and yeah I don't think there's an easy way to animate lights, rather annoying. r...
Planes have a parameter lightOnGear = 1; which switches them on and off automatically with gear up/down.
pale valley
So, it is there as an animation in bulldozer, but it seems to not trigger in-game.
Now, selectionBackLights is obviously triggered by pressing L in-game, but in turn does not trigger this animation... is this just another limitation of the game engine or is it more likely I've messed up the syntax somewhere?
bright echo
charred bolt
Planes have a parameter `lightOnGear = 1;` which switches them on and off automa...
Yea that's what I used
bright echo
pale valley
So, it is there as an animation in bulldozer, but it seems to not trigger in-gam...
https://community.bistudio.com/wiki/Model_Config this lists the model animation sources, selectionBackLights is not an animation source
you can define your own but this is for scripted etc
bright echo
charred bolt
As noted here:
https://discord.com/channels/105462288051380224/1054625412153589...
whoops missed that
pale valley
bright echo
https://community.bistudio.com/wiki/Model_Config this lists the model animation ...
Understood. The only thing i'm getting hung up on is that in the main config there is the line 'selectionBackLights = "zadni svetlo";'
there is no mention of it in the 'Reflectors' class, and no other connection to the model itself, so how does the game know when to hide the rear lights? (to confirm, not the brake lights)
charred bolt
pale valley
Understood. The only thing i'm getting hung up on is that in the main config the...
Your experiment with source = "selectionBackLights" worked in buldozer, because it just pulls any animation source it sees in model.cfg and assumes that it's real. It doesn't look at all at config.cpp to check whether it's valid or not (which it isn't). Hence why it didn't work in game.
Backlights are, iirc, switched on with the vehicle engine.
So in other words, the game engine monitors the vehicle engine state, and when it is switched on it looks for the config entry selectionBackLights and unhides that particular selection (which usually consists of emissives).
The word "back" I don't think means "rear" in this case, but perhaps more refers to background lighting, such as you might see on the dashboard on instrument dials.
pale valley
charred bolt
Your experiment with source = "selectionBackLights" worked in buldozer, because ...
if this is true then my model doesn't do this, the rear lights turn on and off with the headlights (by a press of L) but everything I said it still true - there seems to be no connection to reflectors
and "zadni svetlo", in my model, is only connected to the rear lights, not any other lights or the instrument panel (though the instrument panel does indeed work correctly)
i started building this model based off of the samples bohemia gave, so in theory everything -should- be correct, otherwise
charred bolt
selectionDashboard = "podsvit pristroju";
There are several ways to set up vehicles, and a number of hard coded effects based on the selections in the "selection..." parameters
As mentioned, selectionBackLights are hard coded, and as you say you have checked and they come on when you turn on the lights, then that's what they do.
pale valley
Understood. that's a shame, but thank you for your help
 trim isle
Hello I have an issue like on screen below. I want to make SPAAG/SPAD vehicle based on vanilla MBT Kuma and the turret of vanilla Cheetah, which would look similar to real Leopard 2 Marksman so it's not possible to do this without breaking the Arma EULA rights, even if I want this only for me and don't have any profit from this?
 stuck oyster
trim isle
Hello I have an issue like on screen below. I want to make SPAAG/SPAD vehicle ba...
stuck oyster
trim isle
Hello I have an issue like on screen below. I want to make SPAAG/SPAD vehicle ba...
not possible
can be done only when BI releases Arma3 datapacks and if those models are there available for editing
trim isle
stuck oyster
not possible
So in this case I have to find for example Leopard 2A7 model (I think I saw it on workshop) which is most similar to vanilla Kuma looks, get permissions from this mod/model author and make turret by myself?
trim isle
stuck oyster
can be done only when BI releases Arma3 datapacks and if those models are there ...
In near future BI plans to release this datapacks or no-one knows when it might happen?
stuck oyster
trim isle
In near future BI plans to release this datapacks or no-one knows when it might ...
it has been soon™️ for few years now I think. so time is unknown
stuck oyster
trim isle
So in this case I have to find for example Leopard 2A7 model (I think I saw it o...
that is one way yes. or you can make the chassis model yourself too
stuck oyster
trim isle
So in this case I have to find for example Leopard 2A7 model (I think I saw it o...
or you can check if there is any that fit your purposes in the Arma2 released datapacks
trim isle
stuck oyster
or you can check if there is any that fit your purposes in the Arma2 released da...
Oh that can be a great idea! Thank you very much for answers 😄
white oak
Goat, I got some objects with less than 1000 faces
can I be lazy and not make distance lods?
stuck oyster
white oak
Goat, I got some objects with less than 1000 faces
can I be lazy and not make di...
no
😈
white oak

wide tapir
If you don't make distance LoDs please reconsider your life choices
white oak
I know they're bad, I make stuff for arma don't I?
stuck oyster
white oak
I know they're bad, I make stuff for arma don't I?
no no, you have chosen to challenge yourself, thats worth something
 white jay
wide tapir
If you don't make distance LoDs please reconsider your life choices
white jay
wide tapir
If you don't make distance LoDs please reconsider your life choices
Are you Turkish
pallid cape
charred bolt
Change the texture and rvmat for these, to check whether it's the packing proces...
Unfortunately did not work. Entire vehicle tinted darker and the glass is still opaque.
charred bolt
pallid cape
Unfortunately did not work. Entire vehicle tinted darker and the glass is still ...
When you say it's a "turret sight", is this glass on the outside of the vehicle in the first resolution LOD?
pallid cape
Yes
charred bolt
You could post some screenshots of the faces in Object Builder and what it looks like in Buldozer and in game?
pallid cape
with the a3 glass texture and rvmat or the one I am using?
charred bolt
As it didn't work, go back to your original
Check what named selections you have on the glass
nothing silly like camo, camo1
 visual thicket
Made myself a wallpaper xD https://i.imgur.com/mMouK25.jpg
I know nothing too special
Just wanted somethign simple.
woeful viper
doesnt have cannons... meh .
1 out of 4 dakka


 charred bolt
pallid cape
charred bolt
pallid cape
- Copy and paste the glass faces into a brand new LOD, show what named selections are present
- Select the glass faces, press E for face properties, screenshot with the texture and material showing
- Show your rvmat code for the glass
- What transparency level do you have on the glass _ca?
 waxen moon
Quick question. I am making a concrete pavement piece.If i use class road in properties the piece reflects light correctly when baked into terrain.But i dont want to use class road.Without class road the headlight lights of vehixles passing over it is ugly and distorted.What do i have to do to get the light on surface correct without the class road property? I have had a dig around in A2 samples and did some googling but cant seem to find a solution.
white oak
waxen moon
Quick question. I am making a concrete pavement piece.If i use class road in pro...
It might not be possible tbh
If this is related to the thing you asked about runways a while back, one thing you can attempt is to have a seperate rvmat for your distance lods thats configured to reflect more aggressively
stuck oyster
waxen moon
Quick question. I am making a concrete pavement piece.If i use class road in pro...
Class road should not have anything to with it
What rvmat type do you use for it?
Which Shaders
waxen moon
PixelShaderID="NormalMapDetailSpecularMap";
VertexShaderID="NormalMap";
If i bake into terrain with class road the lighting is perfect.But iam not using the class roas anymore preferably.
The rvmat is actually the rvmat for the A3 runway piece.
ambient[]={1,1,1,1}; diffuse[]={1,1,1,1}; forcedDiffuse[]={0,0,0,0}; emmisive[]={0,0,0,1}; specular[]={0.1,0.1,0.1,1}; specularPower=50; PixelShaderID="NormalMapDetailSpecularMap"; VertexShaderID="NormalMap"; class Stage1 { texture="a3\roads_f\runway\data\asphalt_runway_nohq.paa"; uvSource="tex"; class uvTransform { aside[]={1,0,0}; up[]={0,1,0}; dir[]={0,0,0}; pos[]={0,0,0}; }; }; class Stage2 { texture="a3\data_f\detailmaps\asphalt_dt.paa"; uvSource="tex"; class uvTransform { aside[]={10,0,0}; up[]={0,10,0}; dir[]={0,0,0}; pos[]={0,0,0}; }; }; class Stage3 { texture="#(argb,8,8,3)color(1.0,0.03,1.0,1.0,SM)"; uvSource="tex"; class uvTransform { aside[]={1,0,0}; up[]={0,1,0}; dir[]={0,0,0}; pos[]={0,0,0}; }; };
waxen moon
white oak
It might not be possible tbh
If this is related to the thing you asked about run...
Its sorta related.Iam tryin to make my own pieces now
Iam not usin class road in the properties and cos of that the vehicle headlights on object is faulty.Was wondering what the object is missing
and what i need to add to make the lighting correct
stuck oyster
is it still a decal object?
waxen moon
no. they are not.
ive tried class land_decal but same issue
its based from the A2 ep1 runway piece
i shine my headlights on all objects and they are good and they are not class road objects.
stuck oyster
does the lights bug on editor placed object or on terrain baked object or both?
waxen moon
if i remove class road both.
stuck oyster
can you place a working thing and broken thing next to each other and show screenshot of light behavior
waxen moon
yep. wait 1
waxen moon

broken

good/class road
default A2 setup
bi use class road to bake the objects and use lighting from terrain i think
brb, kettle boiled
stuck oyster
bi road like parts in A3 are class land_decal as far as I can remember
waxen moon
not sure. didnt know they were unbined
stuck oyster
they are not
waxen moon
ive used that class but still the issue remains.:(
stuck oyster
class land decal is one way to make them follow the ground
stuck oyster
other way from before is to make the mesh itself have vertex property to follow ground
waxen moon
k.thnx:)
stuck oyster
I've posted about that somehwere recently
class road might do something similar, dont recall using it before on anything
waxen moon
i cant remember if i tried class house
stuck oyster
when you changed the class in p3d
waxen moon
1st LoD
stuck oyster
did you re pbo the map when you changed the class?
waxen moon
no iam just repboing the roads pbo.iam testing with takistan CUP
i might quickly try class land_house
no, no good
if it was a building and the lights shining on it were buggy like the pic,what would be the issue then.Without class road property it is prolly being treated like a building
stuck oyster
waxen moon
if it was a building and the lights shining on it were buggy like the pic,what w...
if you dont remake the map the object type is not updated on the map
that could be a reason too
waxen moon
its coded in the map to be class road ,in the wrp?
stuck oyster
I believe that info is saved there yes
 stuck oyster
you would want to use the old method of vertex property surface draw
land_decal is tied to road render distance
which is rather limited
waxen moon
ok thnx
iam tyrn to avoid clas road..:(
in the pic above the runways sow at object view distance
*show
this vertex property surface is lighting related?
stuck oyster
this is one of the long distance drawing cliff decals in sogpf

geometry lod

roadway lod for clutter cutting


on all mesh it has the [ on surface ] vertex property
and because its "class house" it draws with the object view distance
instead of the shorter road view distance
waxen moon
Ok, cool Thank you !!
stuck oyster
but with the vertex property it hugs the ground like a decal
waxen moon
Np, thnx.
Havnt had that issue yet.Just the lighting issue.Tought theremight have been some file i was missing that houses have that the road stuff doesnt.
stuck oyster
ambient[] = {1,1,1,1.0};
diffuse[] = {1,1,1,1.0};
forcedDiffuse[] = {0.0,0.0,0.0,1.0};
emmisive[] = {0.0,0.0,0.0,1.0};
specular[] = {0.02,0.02,0.02,0.01};
specularPower = 100;
PixelShaderID = "NormalMapDetailSpecularMap";
VertexShaderID = "NormalMap";

renderFlags[] = {"NoZWrite"};

class Stage1
{
    texture = "vn\env_assets_f_vietnam\rocks\decal\data\vn_cliff_decal_01_nohq.tga";
    uvSource = "tex";
    class uvTransform
    {
        aside[] = {1.0,0.0,0.0};
        up[] = {0.0,1.0,0.0};
        dir[] = {0.0,0.0,0.0};
        pos[] = {0.0,0.0,0.0};
    };
};
class Stage2
{
    texture = "a3\rocks_f\data\decal_rock_dark_dt.paa";
    uvSource = "tex";
    class uvTransform
    {
        aside[] = {3.0,0.0,0.0};
        up[] = {0.0,3.0,0.0};
        dir[] = {0.0,0.0,0.0};
        pos[] = {0.0,0.0,0.0};
    };
};
class Stage3
{
    //texture = "#(argb,8,8,3)color(1.0,0.0,1.0,1.0,SM)";
    texture = "vn\env_assets_f_vietnam\rocks\decal\data\vn_cliff_decal_01_sm.tga";
    uvSource = "tex";
    class uvTransform
    {
        aside[] = {1.0,0.0,0.0};
        up[] = {0.0,1.0,0.0};
        dir[] = {0.0,0.0,0.0};
        pos[] = {0.0,0.0,0.0};
    };
};```rvmat looks like this
stuck oyster
waxen moon
Havnt had that issue yet.Just the lighting issue.Tought theremight have been som...
my guess would be its related to not remaking the map but changing the p3d class types
waxen moon
Hmm, si it might work.I just need to make a test map/edit my old wrp file.Its an old format snakeman did in A1 when it was proted from Ofp.
*ported
Ok, Thank you again for your time and expertise.:)I'll let that sink in and plan my next move.:)
👍🏻 👍🏻 👍🏻 
just thinkn, if i put a house on the map in 3den the lights shine on it correct.So why doesnt it work for this object?
waxen moon
k, will do.:)
waxen moon
Ok, i copied the above example.The lighting is still distorted..:( for headlights going over them at night.
heres the p3d if ya hve the time to load it up

MediaFire
the houses i place in edn work.If this is class house now the lighting should be ok too..?There must be something iam missing...hmmm
stuck oyster
by the way if your runway is properly drawn on the satmap it should blend between the object and satmap almost seamlessly
 waxen moon
its alot of work to get it right and still doesnt look right.It dissovles way too early.
Bi just put our graphics options up so much its crazy but the runways still dissovle too early even for Arma 1 standards.hasnt changed.We should be able to improve that a bit more by now. 2024..:(
stuck oyster
yes but the game is 10 years old 😄
waxen moon
yup..:)
...but...40klm view distance but no improvement at all for runways..:(
well.. a lil improvement..if you turn upto 40klm view distnace the runways are visible for another 150m...lol
 stuck oyster
Id be fine with that 😅
waxen moon
me too.atm i think the runways dissovle at about 700m?
stuck oyster
I tested that object of yours and my cliff decals
and it turns out the cliff decals also suffer from that same lighting issue
waxen moon
wow
stuck oyster
I'll have to look into that
waxen moon
np cool.
confession - i dont know what iam doing with models and tex.just started learning..:)Was expecting you to say i butchered the hell out of it..:)
stuck oyster
it has come up with before, just dont remember exactly what the reason was
waxen moon
gonna do some more googleing in the morning
stuck oyster
waxen moon
gonna do some more googleing in the morning
looks like its is an issue with the shader type in the rvmat
im testing a bit more but using default supershader rvmat from a3\data_f\ worked
stuck oyster
with the rvmat pasted above and the shaders in it the lights dont quite work right

with super shader they do

also the bumps from the normalmap stand out properly
but did super shader cause some other issue with these 🤔
stuck oyster
ah yes
the super shader did not like overlapping objects
might try some of the other shaders to see if any fit this purpose better
stuck oyster
supershader could work for your use @waxen moon since you dont have overlapping decals like my cliffs are
 peak isle
hello gamers so making a boat i added proxies and in obj builder they are sitting how i want but in game some are sitting right others are sitting wrong i have set the cargo action https://i.imgur.com/LEdltc1.png
set transport solider to 8
charred bolt
In what way are they not sitting right in game? pic?
peak isle
they are a dif sitting position like they are sitting like they are in a car seat
ill get pic 1 sec
this is how another is sittting https://i.imgur.com/To8ETil.png
neither are cross legged but i would be fine with second one
charred bolt
How many cargo proxies are in the p3d? Are they all the same type of proxy? What are their numbers?
Do you have any class turrets in the vehicle?
peak isle
7, yes except 1, cargo.002-007, no im not sure what that is
charred bolt
Your cargo proxies are named 002 to 007... so that's 5?
charred bolt
What kind of proxy? Not cargo?
peak isle
a3\data_f\proxies\passenger_flatground_crosslegs
stuck oyster
the shape of the proxy does not matter, it needs to be called cargo
peak isle
yeah its cargo.001/2/3 etc
charred bolt
You can use any proxy you like as long as it is a cargo one.
The actual animation used is set in the config.
So make all your cargo proxies the same, start them numbered at 001 to 007.
Change transportSoldier to 7.
Remove one of the animations from the array (as you have 8)

cargoProxyIndexes[] = {1,2,3,4,5,6,7};``` charred bolt
Are you just changing the config or did you make and can edit the model too?
peak isle
edited the model as well
stuck oyster
did you change the proxies in all lods?
charred bolt
Might be worth seeing a screenshot of the model LOD 0 in Object Builder, with the proxy names visible.
peak isle
stuck oyster
did you change the proxies in all lods?
yeah i did, is the proxy the only thing that determines the way they look in the seat?
charred bolt
That question has already been answered twice
The proxy must be called Cargo. Other than that it doesn't matter which one you use, as the animation of the character in the seat is set by the config.
charred bolt
We're trying to help...what was the last question I asked you?
peak isle
i dont have a lod 0 just 1 and 2
charred bolt
ok LOD 1...they can start at any number, so just the first resolution LOD which is the one that you see in game in 3rd person
peak isle

this what you want?
\a3\data_f\proxies\passenger_flatground_crosslegs\cargo this the file path of them
 warped raven
how can i fix that bug
 stuck oyster
warped raven
how can i fix that bug
stuck oyster
warped raven
how can i fix that bug
How did you make it?
woeful viper
how do you rotate the light in 3DO 2.0 ? I can turn it along the a horizontal axis via strg+left drag , but not a vertical axis
stuck oyster
warped raven
just tshirt
but you change the model?
wheres the model from?
its not retexture if you change the model
woeful viper
in fact the controlls for camera and light seem utterly confusing... when i enable light turn, view panning doesnt seem to work anymore. When i disable it, viewpanning and rotating works ok, modifying light doesnt work at all however
when using my pen tablet the interface for the painting stuff doesnt properly work... sigh why did they need to make their own interface for brush and tools -.- Its not like we are using photoshop or anything...
 terse elm
hold alt
stuck oyster
these channels are not for advertising
you can use #creators_offers
also do remember that you can only offer model creation for money, not mod making
 neon harness
Let's say I am making a rocket model. How many faces should I aim for? Is 1k before triangulation too much? (I want 3 versions. 1 to be proxied on a launcher model and 2 to be used as the actual ammo, so they will automatically get set to the lowest resolution lod)
marsh canyon
Rocket as in?
neon harness
marsh canyon
Rocket as in?
 marsh canyon
So... is this a pylon-mounted aircraft launched rocket pod?
neon harness
marsh canyon
So... is this a pylon-mounted aircraft launched rocket pod?
No, a Type 63 107mm rocket copy.
So it will be fired from a vehicle.
marsh canyon
Well my intention of the question is, who is going to see the mesh, and how? I was about to ask if it was a handheld weapon or vehicles
stuck oyster
Can it be seen?
Cannon shells are rarely visible in tanks
Will there be a vehicle where the shells can be seen in
woeful viper
i did that
neon harness
stuck oyster
Will there be a vehicle where the shells can be seen in
Yes. Theoretically, if you look down the barrels of the launcher or at the back of it, it should be visible.
However, I have 2 use cases here.
One being in the launcher and one just being a projectile like for example the 230mm? missiles from the base game.
marsh canyon
Thing is, you want to consider how you can see it, in very normal playthrough. In normal game speed, normal FPS, normal perspective. If you can see it very carefully, you want more, if you can't, less
neon harness
marsh canyon
Thing is, you want to consider how you can see it, in very normal playthrough. I...
So essentially less.
8 vertex cylinders it is.
charred bolt
I'd suggest something like that could be around 300 tri's.
More complex missiles (with rotating fins etc) can be 1500 tri's.
Of course, in flight they're not generally seen in the first res LOD, so will often be in a much lower res LOD with far fewer polys, but it's nice to have a good first res LOD for those freeze-frame close-ups that cinematographers might aim for.
neon harness
charred bolt
I'd suggest something like that could be around 300 tri's.
More complex missiles...
I usually made the 1st LOD of these at around 2250 tri's. 💀
 uneven ginkgo
Hi there
stuck oyster
uneven ginkgo
Hi there


 jolly ermine
Bro it's wild that there's not a single quality cv90 of any kind in a3
stuck oyster
jolly ermine
Bro it's wild that there's not a single quality cv90 of any kind in a3
ah you are so gracious to volunteer to make one
excellent news indeed
we eagerly wait for your progress on it
👏 👏 👏 👏
 real obsidian
hello
im new, i've just started learning clothing in arma, does anyone have any tips
stuck oyster
do you know anything about 3d modeling?
stuck oyster
real obsidian
im new, i've just started learning clothing in arma, does anyone have any tips
as in trying to establish a baseline on what kind of tips might be useful
also dont dual account here
real obsidian
stuck oyster
also dont dual account here
aplogeis my brother was helping me type i have dyslexia
real obsidian
stuck oyster
as in trying to establish a baseline on what kind of tips might be useful
ive been using blender fore a year now i think yeah
stuck oyster
well then clothing for Arma has only few specifics. There is the sample man model you can use as reference, all uniforms must match its size and joint areas always need extra care in desing so they work with animations properly (sample man joints are good reference)
weights can be transferred from the sample too
beyond that you can use any techniques you like
waxen moon
stuck oyster
supershader could work for your use <@434294485321646081> since you dont have o...
Wow, thanks for sharing and helping!! Runway/taxiway pieces will prolly overlap at some point.So iam still keen to hear of any developments.If i come across anything I'll let yeaa know.Also, i did try using the shaders that are for terrain and it CTD's ...Hard..lol.I'll keep dropping in here.Thanks again!!
stuck oyster
yeah terrain shaders dont work for objects
 wispy orchid
Is there a way to merge selections from one model to another? Background is: TheSn4k3 re-textured the Mk29 sea sparrow launcher from the Nimitz mod, and sent me an obj file. I imported it into blender and none of the peripheral lods or original selections are there. Can I somehow merge that stuff from the original p3d file with the new exported from blender?
 still hatch
hi guys, 11k tris for arma 3 is it ok or too much? its a detailed drone
grizzled halo
no, its not too much. Really depends what for and for what lod I guess
charred bolt
still hatch
hi guys, 11k tris for arma 3 is it ok or too much? its a detailed drone
It's probably fine, but you should also make distance resolution LOD's (2,3,4 etc) which half that number each time.
So 11k, 6k, 3k down to 1.5k.
stuck oyster
?
trim isle
Hello, anybody can relate a video tutorial with blender to 3d modelling some military vehicles like tanks etc.?
stuck oyster
trim isle
Hello, anybody can relate a video tutorial with blender to 3d modelling some mil...
while you wait if anyone has any recommendations you can check out what google has to offer in that regard
but in general there is little or no difference in modeling things, the tools are all the same
so you can benefit from following any tutorial and practicing different techniques that you can then apply to create anything you want
trim isle
stuck oyster
while you wait if anyone has any recommendations you can check out what google h...
Sorry, I wanted to ask that someone can relate a tutorial, which was used by him/her and was favorable for him/her 😊