#🍼┃learn-to-play

1 messages · Page 1 of 1 (latest)

dense questBOT
#

Updated for Star Citizen 3.23

Getting Started
• [Star Citizen System Requirements](#🍼┃learn-to-play message)
• [Creating an account](#🍼┃learn-to-play message)
• [Game Packages](#🍼┃learn-to-play message)
• [Installing the Launcher](#🍼┃learn-to-play message)

Launching the Game
• [Persistent Universe](#🍼┃learn-to-play message)
• [Character Creation](#🍼┃learn-to-play message)
• [Primary Residence Selection](#🍼┃learn-to-play message)

Exploring the 'Verse
• [Your First Step](#🍼┃learn-to-play message)
• [Personal Inventory](#🍼┃learn-to-play message)
• [The mobiGlas](#🍼┃learn-to-play message)
• [Maps](#🍼┃learn-to-play message)
• [Personal Hangars](#🍼┃learn-to-play message)

Using Your Ship
• [Your First Flight](#🍼┃learn-to-play message)
• [Heads-Up-Display](#🍼┃learn-to-play message)
• [Quantum Travel](#🍼┃learn-to-play message)
• [Master Modes](#🍼┃learn-to-play message)
• [Landing Your Ship](#🍼┃learn-to-play message)
• [Vehicle Maintenance Services](#🍼┃learn-to-play message)
• [Vehicle Loadout Manager](#🍼┃learn-to-play message)

Medical System
• [Tools of the Trade](#🍼┃learn-to-play message)
• [Injuries & Incapacitation](#🍼┃learn-to-play message)
• [Medical Facilities](#🍼┃learn-to-play message)
• [Self Treatment](#🍼┃learn-to-play message)

Things To Do
• [Missions & Contracts](#🍼┃learn-to-play message)
• [Trading](#🍼┃learn-to-play message)
• [Mining](#🍼┃learn-to-play message)
• [Salvage](#🍼┃learn-to-play message)
• [Careers in the 'Verse](#🍼┃learn-to-play message)

Shopping in the Verse
• [Personal Gear and Utilities](#🍼┃learn-to-play message)
• [Purchasing Ships with aUEC](#🍼┃learn-to-play message)
• [Ship Rental](#🍼┃learn-to-play message)

Ship Insurance
• [Insurance in Alpha and Public Test Universe (PTU)](#🍼┃learn-to-play message)
• [Insurance Implementation in the Future](#🍼┃learn-to-play message)

Criminal Life
• [CrimeStat](#🍼┃learn-to-play message)
• [Clearing CrimeStat](#🍼┃learn-to-play message)
• [Prison Sentence](#🍼┃learn-to-play message)

Game Progression
• [Exiting the Game](#🍼┃learn-to-play message)
• [Long Term Persistence](#🍼┃learn-to-play message)

[Glossary](#🍼┃learn-to-play message)

For technical issues, please visit #📚┃help-faq and #helpdesk

#
STAR CITIZEN SYSTEM REQUIREMENTS

Star Citizen is a high demanding game where having a "decent" gaming rig may not be enough. Which is why it's upmost important to find out which category your PC falls under before making a pledge or downloading the game.

#
CREATING AN ACCOUNT

Creating your account is a simple and straight forward process. To begin, click this link. This will bring up a form.

Account Name: This will be your Handle. Choose this carefully as this will be the public facing name that will identify you to all other players, both in game and out.
Email: The email address that will be associated with your RSI account. You will use this to login to your account, along with the password.
Password: When typing it in, you will see the requirements and an estimate of how strong the password is.
• *Referral Code: Has a friend given you a recruitment code? If so, click the Add code button and enter it now.
Stay Informed: This checkbox will sign you up for RSI and CIG newsletters.

#
Mustang Alpha Starter Pack

In comparison to Aurora MR:
SCN3 Slightly better weaponry
SCN3 Better flight performance in space and atmosphere
SCN3 Exterior cargo box
SCN2 No bed

#
Aurora MR Starter Pack

In comparison to Mustang Alpha:
SCN3 Has slightly higher damage/energy resistances
SCN3 Able to transport other player(s)
SCN3 Has interior inventory
SCN3 Equipped with missiles
SCN1 Has a bed

Both ships are very similar with what they are capable of. And as of Alpha 3.17.2 they are about an equal match.

Just remember that there is no right or wrong when selecting a Starter Pack. You can always exchange/melt your Game Package and purchase a different pack (or even upgrade) later should you change your mind.

Once you have decided, head towards the Game Packages page to make your purchase.

#

Other Starter Packs

These ships are arguably better than the two ships mentioned above. But they're also slightly more expensive. At the end of the day it's entirely up to you!

Cutter Starter Pack | Light Freight | $60
100i Starter Pack | Luxury | $65
Avenger Titan Starter Pack | Courier | $70
Anvil Arrow Starter Pack | Light Fighter | $90
Nomad Starter Pack | Light Freight | $95

Tip: You can still acquire ships in-game with in-game currency (aUEC). Jump to [Purchasing Ships with aUEC](#🍼┃learn-to-play message) to find out more.

#
INSTALL LAUNCHER

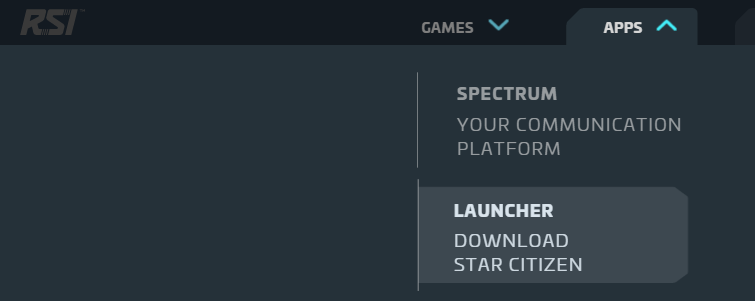
Once you have acquired a Game Package, it's time to download the Launcher. Click Apps in the top left of the RSI website. You will see a Launcher link under the Apps menu.

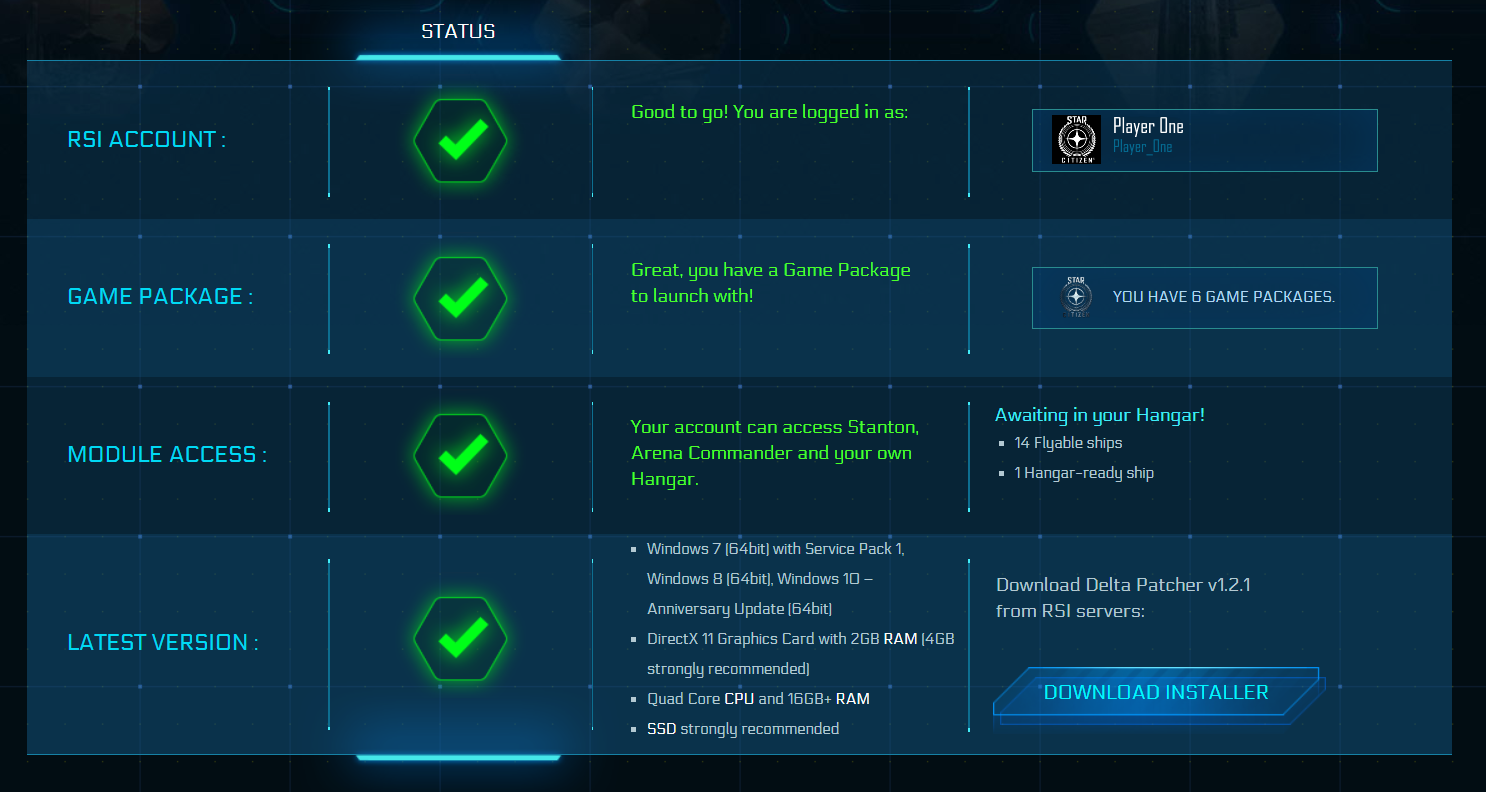
Here you can verify that you indeed have a Game Package, and overview the minimum specification for your machine to play Star Citizen. If all options are green, click Download Installer to download and install the RSI Launcher.

After installing the launcher, you will be prompted to log in. Enter your username (Login ID) and password. If you have an authenticator, enter the code provided by your chosen method of authentication, and set a duration that you wish for the login to be authorized.

Click Install to start the installation, and when complete, you should see the following screen:

#
PERSISTENT UNIVERSE

After launching the game, you'll be greeted with a fancy background and a few game modes to choose from. For now, we're only gonna focus on Persistent Universe mode.

You are free to adjust the settings however you see fit. Once you're ready, simply click on the Persistent Universe button to begin.

#
CHARACTER CREATION

The Character Creation tool has the ability to:

  1. Select your Body Type
  2. Choose your Base Head and Sculpt them
  3. Various types of Hairstyle and Facial Hair which comes with HEX colours
  4. Beautify your character with make up
  5. *Review and Save/Load your character preset

You can always go back and customize your character. So don't worry too much if you don't fancy that red hair and purple eyes combination.

#
PRIMARY RESIDENCE SELECTION

Before entering the 'verse for the first time, you must first select your primary residence from the main menu. You can choose between the following cities and associated space stations:

• Orison, Crusader (with Seraphim Station)
• Lorville, Hurston (with Everus Harbor)
• Area18, ArcCorp (with Baijini Point)
• New Babbage, microTech (with Port Tressler)

Once selected, all your items and vehicles will be stored at your primary residence.

#
YOUR FIRST STEP

"Wake the f$%k up samurai. We have a city to burn"

Actually, that's an entirely different game. But the game's premises are very familiar if you have played other First-Person-Shooter games. Eventually, you’ll wake up in a hab in the city and planet of your choosing. "Hab" is short for "habitat", which are small apartments for the pilot on the go.

Press Y to get out of bed, and begin moving around with A, W, S, and D. You'll also notice there are some objects (cups, door panels, drawers) with the letter "F" hovering above them. That means they are interactable. Simply press F to interact.

Do keep in mind that some objects require you to hold F to interact.

After you've familiarized yourself with the surroundings, head out to the city's spaceport to retrieve your ship. You can find directions from hab to the vehicle retrieval console and hangar elevators at each spaceport for the major landing zones in the following video guides:

Lorville
Area 18
New Babbage
Orison

Once you are at the hangar, you may jump to [Personal Hangars](#🍼┃learn-to-play message) section to familiarize yourself with the hangar area.

#
PERSONAL INVENTORY

Pressing I will open your inventory.

In this menu, you'll be able to view inventory slots (and items stored) on your character. Backpacks, armor, and clothing have their own inventory space when equipped.

You'd want to find a Storage Access terminal in order to retrieve items stored in Local Inventory. More on that below.

Storage Access

Storage Access (or Item Bank) terminals can be found in cities and space stations. Once you found one, simply approach the terminal and press F to access it.

In the upper right corner, you'll notice you're looking at your local inventory, which is where all of your items are initially stored. If you hover the mouse cursor over one of your items, a detailed description will appear. Particularly important here is the storage space each item will use in your personal inventory. This required storage space is displayed in microSCU (μSCU). So Pico, for example, would take up 44000 μSCU.

If you find yourself with nothing to equip, you might wanna purchase something from shops scattered around the 'verse. Find out how in the [Shopping](#🍼┃learn-to-play message) section.

Equipping Gear

To equip a wearable item, simply double click or drag and drop it onto your character.

Discarding

Items that you want to discard, drag them to the hand symbol.

Filter Tabs

Cycle through Filter tabs to switch between categories quickly. Click on Custom if you're looking for something more specific.

More Options

You can also right click on an item to open up more options such as Equip, Carry, Drop Item and Split.

Weapon Attachments

To equip weapon attachment, simply drag an attachment such as an optic or a barrel to the appropriate part of the equipped weapon.

Wear Normal Clothing

If you wish to wear your normal Clothing, you're gonna have to unequip all of your Armor and Undersuit first. Only then you'll able to equip your t-shirts, jackets, footwear, and etc.

Similar rule applied if you want to reequip your Undersuit and Armor. Which means you'll have to remove any Clothing from your character first.

Backpacks

Purchase and equip backpacks to gain more personal storage space. You may end up finding a few items worth looting at an outpost, a cave, or even a space station.

FPS Looting

In some cases you'll encounter a container or a body with loot. Interacting with them will pop up the FPS Looting screen. This screen is the simplified version view of loadout and inventories.

Holding I will also open this screen whenever you're not looting.

#
THE MOBIGLAS

Let's get familiar with your personal mobiGlas (F1 keybind by default); your One Stop device which features many functionalities.

Home: The default tab (after pressing F1) that provides information such as Personal Details, Vitals, External Atmosphere, Bank Balance, and Crime Stat.
Health: Info on the player's health and medical conditions.
Comms: Access to Social features such as Global Chat, Friends, Party Creation, and more.
Contracts: View, accept, and create contracts.
Maps: Navigate through the World with local maps and Starmap.
Journal: Latest Journal Entries such as your performance evaluation and various info from certain Orgs.
Assets: The Nik Nax app is designed to keep track of every item or ship a player owns in the universe.
Rep: Reputation UI which keeps track of your reputation with various Organisations and contacts.
Wallet: Secure and convenient personal transactions from anywhere to anyone.
Landing: For ship repairs, restock, and refuel.
Vehicles: Customize your ship loadout.

#
MAPS

Getting around the 'verse becomes easy with the Maps app (F2 keybind by default). With maps, you'll be able to:

• Search stores, outposts, planets, space stations, etc.
• Set routes for FPS and Ship
• Place a pin

In FPS, the Local Maps will be the default view when you open the app. Left Click/Right Click to rotate/drag the map. Zoom in and out using the Mouse Wheel.

Set Route by pressing R on desired destination.

Use the Search (magnifying glass icon) function to search or navigate through available places.

When you're sitting in a cockpit, opening the Maps will show you the Starmap. From here, you're able to view the entire Universe. In this case, the Stanton system.

The controls are similar (if not the same) to Local Maps. The key difference is when setting a route. More on that in the [Quantum Travel](#🍼┃learn-to-play message) section.

#
PERSONAL HANGARS

Personal Hangars are available specifically for you and your ships. The style of the hangar itself varies differently to match the location's aesthetic.

To access it, head to the spaceport and use one of the elevators located at the hangar lobby. If you're unsure how to get there, refer to the video guides in [Your First Step](#🍼┃learn-to-play message) section.

Your Own Personal Space

Personal Hangars are instanced areas. Therefore you're free to stay as long as you like. Some of the things that can be done in a Personal Hangar such as:

• Use the ASOP Terminal to Retrieve/Store ships and vehicles
• Transfer/Equip items via the Storage Access
• Decorate and customize the interior with cosmetics and furniture
• Load/Unload cargo via the Freight Elevator

The available hangar sizes are: Small, Medium, Large, and XL. The size of the hangar assigned to you depends on the largest ship you pledged from the Pledge Store.

Freight Elevator

Freight Elevator is mainly used to store/retrieve items in bulk (or simply big in size). Some of the items that can be stored/retrieved such as:

• Personal items (weapons, armour, clothing, ammo, etc.)
• Personal storage box (purchasable at Cargo Deck)
Land vehicles (not yer implemented)
• Cargo for Hauling Missions
• Commodity cargo

Transfer Items in Bulk

Since almost every item in the game is physicalized, moving them one by one can be cumbersome. In order to ease this process, it's highly recommended to purchase one of the Self-Storage Containers. You're also gonna need a Multi-Tool with Truhold Tractor Beam attachment to help you carry heavy objects.

Once you've obtained them, use one of the containers to store your personal gear and consumables (even ship components, if it fits) via the storage access:

As soon as you're done transferring the items, it's time to retrieve the container via the Freight Elevator:

From here, it's a straightforward process. Simply equip the Multi-Tool or MaxLift Tractor Beam, and carry the box (L-Click) to your ship's cargo hold (make sure you have the ship retrieved beforehand). Use the mouse scroll to move the object closer/father.

#
YOUR FIRST FLIGHT

Now that you've finally got to your ship, you'd most definitely want to take it for a spin. Here are the key things you should know in order to take off from your hangar:

Right Alt + R: Flight Ready (turns on everything).
Alt + N: Request ATC for take off/landing
Space Bar/Left Control: Strafe up/down.
W, A, S, D: Strafe forward/left/back/right.
Q, E: Roll left/right.
N: Raise/Lower landing gear.
K: Switches the VTOL thruster configuration (when available).
B: Toggle between SCM and NAV modes
C: Coupled/Decoupled mode.
Alt + C: Cruise Control.
Mouse Wheel: Adjust your ship's max velocity (speed).
Left Shift: Afterburner.
X + Left Shift: Space brake.
U: Power on/off.
I: Engines on/off.
O: Shields on/off.
P: Weapons on/off.

First Flight Video Demonstration

Click here for a video demonstration (with instructions) of a ship taking off from a hangar.

#
HEADS UP DISPLAY

Learn how to read the Heads Up Display (HUD) on your cockpit.

#
QUANTUM TRAVEL

Knowing how to use the Quantum Drive is rather important if you want to get around the 'verse quickly. Basically, all you need to know are the following:

F2: Open Star Map to set route
B: Toggle NAV QTM mode

Use the Star Map to Set Route

To set your destination, you're gonna have to make sure you're seated on a pilot's seat first. Only then will you be able to Set Route via the mobiGlas' Star Map:

• Press F2
Double click on a planetary object/Lagrange point
Mouse wheel to zoom in/out
• Left/right click to rotate/drag
• Select a destination
• Click the ROUTE button (# of jumps and fuel required should be displayed on the right)
F2 to close

Another option is to use the Search function to find a specific location, and set route from there.

Begin Quantum Travel

Once you have set a route and exited the Star Map, you can begin your jump sequence:

• Hold B to toggle NAV QTM mode
• Align with the marker
• Calibration will begin if aligned properly
• Once at 100%, hold Left Click to initiate Quantum Travel

Pro Tips

There are a few things that you wanna take into account when performing Quantum Travel:

• You are only able to Quantum Travel once you are out of atmosphere:

  • 11,000m elevation for planets (Hurston, ArcCorp, microTech)
  • 90,000m elevation for Crusader
  • 3,000m elevation for moons
    • Some missions don't accommodate quantum beacon at the target's location. You'll have to jump to the nearest location with a beacon, and fly manually from there.
    • It's a good practice to jump to locations without setting a route. Familiarize yourself with the Quantum Markers and what they represent by checking out the image below.
#
MASTER MODES

All ships in Star Citizen are equipped with two separate modes: Standard Control Mode (SCM) and Navigation Mode (NAV Mode). Turning on your ship will set you in one of these modes. To toggle between modes, hold B.

In SCM mode:
• Weapons & shields are available
• Max speed is limited to the SCM top speed (200m/s - 300m/s)
• Quantum Travel is unavailable
• Specialized modes (such as QED and Mining) are available

In NAV mode:
• Weapons & shields are unavailable
• Able to reach the ship's top speed (900+ m/s) once fully spooled
• Quantum Travel is available (switch to NAV QTM)
• Specialized modes are unavailable

While in one of these modes, press Mouse 3 to cycle between Operator Modes (Quantum Travel, Scanning, Guns, Missiles, etc.).

Click here to watch a ship combat demo with tips on when to use the suitable mode.

#
LANDING YOUR SHIP

You can pretty much travel/land anywhere in the 'verse without much restrictions. But some key areas require certain knowledge and know-how in order to land.

No Fly Zone

Certain locations in the game, especially in Cities, have No Fly Zones. A Caution would appear if you're nearing to one of the zones. For city areas like Area 18, your ship will Auto-Pilot itself to steer away from the zone. Some Restricted areas (such as a Security Outpost) will slap you with a Crime Stat if you do not leave the area within a given time frame. So keep an eye on where you're flying.

Request Permission to Land

Major landing zones such as Lorville and Area 18 require permission to land. Typically, a ship needs to be within 5km-7km of the location you will be landing before the Landing Services appear in your Comms list.

Requesting permission to land is basically the same as taking off from your hangar:

F11: This will open up the Commlink, then navigate to Friends > Current Location Landing Services.
• Interact with Commlink menu on an MFD.
Alt + N: The default keybind.

Once requested, the Landing Service will assign you a hangar or a landing pad. Simply follow the marker appeared on your screen. Sometimes the marker may appear behind you, so keep an eye on that.

Use what you've learned about flying a ship and when taking off. The concept of landing is similar to taking off except in reverse. Oh, and don't forget to lower your Landing Gear [N].

Landing Demo

Click here for a video demonstration (with instructions) of landing a ship at a space station.

Lorville - Teasa Spaceport
Area 18 - Riker Memorial Spaceport
New Babbage - New Babbage Interstellar Spaceport
Orison - August Dunlow Spaceport
#
VEHICLE MAINTENANCE SERVICES

Your ship may need refueling/repairing/restocking after making a journey. Once landed and still in the pilot seat, simply open your mobiGlas and select Landing app.

You can select whether you wish to repair, restock, or refuel your ship. Select the appropriate service you would like to perform when available. Once an action is performed, it will begin Processing before it turns to No Service.

#
VEHICLE LOADOUT MANAGER

Use the Vehicles app (or Vehicle Manager App (VMA)) to install or remove components on your ship. Here are a few things to keep in mind before outfitting new components:

• Ship or vehicle needs to be stored at your location.
• Each ship and vehicle comes with different component sizes. Make sure you select the right size when purchasing ship components.
• Rented ships can't be outfitted with different components.
• Use ships with enough inventory space to transport components between locations.

Website such as #DPSCalculator can help you figure out which components (and where to buy them) fit onto your ship.

Jump to [Shopping](#🍼┃learn-to-play message) section to find out how to buy items.

#
TOOLS OF THE TRADE

Before you plan on heading out for a few missions, it's best to stock up on healing tools. Hospitals, clinics, and a few other shops in the 'verse provide enough stocks for players to purchase. Below are some of the tools that should be useful in medical:

Medical Pens: Medical pens are an easy, straight-forward way to treat either yourself or another person in the field. Hold the C key to open a radial menu and select the pen you'd like to use.
Multi-Tool: The Pyro Multi-Tool can be equipped with the LifeGuard medical attachment in order to be used as a life-saving device. This attachment is however limited to administering Hemozal only.
Curelife Medical Tool: This tool can administer any of the five medical drugs in precise amounts, or simply apply Hemozal as needed. It can also provide detailed medical scans of another person, highlighting specific injuries and recommending treatments.

Press 4 to equip Multi-Tool or Curelife Medical Tool. From here, either press B to use it on yourself, or use Mouse 2 to apply it to someone else. This applies to all medical tools.

#
MEDICAL PENS QUICK REFERENCE
#
INJURIES & INCAPACITATION

Injuries are inflicted when a player received sustained, repeated damage. Injuries can be received on any limb, your chest, or your head. Injuries are shown to you either via your helmet HUD in the bottom left corner, or via scan using the Curelife Medical Tool.

Below are the different types of injuries, how they affect you, and how and where they can be healed.

Tier 3: Minor injuries. No effect on movement. Can be treated in a Tier 3 med bed or better.
Tier 2: Moderate injuries. Can cause your character to start limping and audibly grunt in pain. Requires a Tier 2 med bed to heal.
Tier 1: Severe injuries. Escalate the effects of moderate injuries even further, with even more detriments added. Requires a Hospital med bed to heal.
Incapacitation: Once your health hit 0%, you'll be incapacitated. You must receive a dose of Hemozal before the timer runs out. Send out Rescue Beacon (press M). Anything equipped on you will stay with your corpse in the event you could not be revived in time.

#
MEDICAL FACILITIES

Medical facilities can be found all over the 'verse, from massive cities to small space stations. There are even a select few ships that offer medical care within them.

If it's a public facility and not a ship, feel free to admit yourself using the Patient Check-In console or set your Regeneration location at the Insurance kiosk. Below are the three types of medical facility, as well as what services they provide.

Hospitals: Tier 1 medical facilities, can be found on all major landing zones. Able to treat any injury, and bring back a person from death.
Clinics: Tier 2 medical facilities, can be found in most space stations around the 'verse. Able to treat minor and moderate injuries, and bring back a person from death.
Ambulances: These are ships/vehicles with med beds:

SCN1Origin 890j & Anvil Carrack: Both are equipped with Tier 2 med beds. Able to treat minor and moderate injuries, and bring back a person from death.
SCN1__Drake Cutlass Red, Anvil Pisces C8R, RSI Ursa Medivac __: Tier 3 ambulance. Able to treat minor injuries, and bring back a person from death.

#
SELF TREATMENT

If you happen to sustain an injury, you should immediately go to the nearest Medical Facility to get yourself treated at a medbed. The steps are as follows:

• Check in a room by using one of the Self Check In terminals.
• Locate the checked in Room (they're on different Floor if you're at a hospital).
• Lie down on the bed, and get yourself treated.

If you're unsure how the whole process looks like, do watch the Self Treatment Video for a complete walkthrough.

#
MISSIONS & CONTRACTS

Doing missions/contracts are some of the ways to earn your keep to buy bigger/better ships and equipment. Use your mobiGlas (F1) to access the Contracts app and select from various types of missions/contracts available.

Delivery: Player is tasked to deliver item(s) to its destination(s). This is the best way to get to know various locations around the Verse safely.
Maintenance: "Clean-up" duty to remove wreckage or waste from a location.
Investigation: Tasked to go to a location and search for missing persons or objects.
Mercenary: Requests to go out and destroy a target or several targets.
Salvage Contracts: Players are given exclusive rights to a single salvage ship.
Bounty Hunter: Contracts given by Organisations to capture/terminate bounties (players and npcs).
ECN Alert: Distress calls from civilian ships requesting assistance.
Service Beacon: Mission spawned from another player or npc sending out a request for assistance.

Do note that contracts are separated by Verified and Unverified (may contain illegal missions) tabs.

Visit this page for a complete list of available missions (and its payout/standing) in the game.

Mission Video Demonstrations:
Delivery
Mercenary
Bounty Hunter

How to Accept/Share Contracts

To accept a contract, simply click Accept Offer button located on the bottom right. Once accepted, you'll be brought to the Accepted tab automatically. From there, you have the options to Abandon or Track/Untrack the contract.

If you are already in a party, Share option should appear in the Accepted tab. Once shared, your party member(s) will be notified about the contract.

Note: Contract Reward and Reputation are split evenly among party members.

How to Accept a Shared Contract

If you are on the receiving end of a shared contract, a notification like the one below will appear. Just press Left Bracket to accept or Right Bracket to decline. Accepted contract will appear in the Accepted tab under Contracts app.

Reputation

Some contracts are tied to Reputation. Organizations such as MT Protection Services would offer more lucrative contracts if you rank up your reputation with them. To rank up, simply do missions that are relevant to the Org. MT Protection Services, for example, is tied with Bounty Hunter mission types located around microTech.

#
TRADING

Commodities in the 'verse are some of the resources that can be traded for aUEC. But before you step into the world of Trading, it's important to own a ship with enough SCU:

Trade and Transport

Jump to [Purchasing Ships with aUEC](#🍼┃learn-to-play message) section to find out how and where to buy.

In layman's term, Trading is a method of buying commodities with low price at Location A, and sell them for higher price at Location B to gain Profit.

Basically, the bigger amount of SCU you can purchase, the higher profit margin you can gain from selling them.

SCU: Standard Cargo Unit (SCU) is a unit used for cargo volume in game.

Where to Buy Commodities

Most commodities can be bought at any location (outposts, space stations, major cities) with a Trade Terminal. Use website such as SC Trade Tools to find suitable Trade Routes for your ship.

You can also check your Journal's Commodities Price Alert entry. From there, you can find out which locations have Overstock commodities that can be sold at Understock locations.

To buy commodities:

• Land your ship at location.
• Go to Trade Terminal.
• Select your ship, and buy any available stocks.

Outpost such as Shubin Mining Facility SM0-10, for example, has their Trade Terminal located at the Storage building. Make sure to check the signage.

Where to Sell Commodities

Selling your cargo is pretty much the same process as buying. Once you know where to go, repeat the same process:

• Land your ship at location.
• Go to Trade Terminal.
• Select your ship, and sell all remaining cargo.

Most of the time you'll find yourself selling at major city's Trade & Development Division (TDD). Use the maps below to find out where it's located at each Major Landing Zone:

Lorville - Central Business District (green)
Area 18 - ArcCorp Plaza
New Babbage - The Plaza, The Commons (green)
Orison - Cloudview Center (blue)

Note: Your cargo is not covered by insurance. Therefore, any cargo aboard your ship will be gone if your ship's destroyed or claimed.

#
MINING

Mining specializes in extracting Raw Minerals and Gems. They are valuable resources which are sought after by Trading community. Just like Trading, you're gonna need the right vehicles and tools before you begin:

Pyro RYT Multi-Tool with OreBit Mining Attachment (FPS mining)
Greycat ROC or ROC-DS (ground vehicle mining)
MISC Prospector (solo mining ship)
Argo MOLE (multi-crew mining ship)
• A Ship to Transport Greycat ROC and/or Refined Ore.

Jump to [Purchasing Ships with aUEC](#🍼┃learn-to-play message) section to find out how and where to buy.

Basically, once you've learned the basics of mining, you can apply it in any mining situation (FPS, ship, or ground vehicle).

Surface Scanning

A planetary surface is huge. It's almost impossible for us to scan for resources with naked eye. This is where we have to rely on a ship's Ping and Scanning modules.

These are the steps when scanning for resources:

• Press TAB to Ping.
• Press , or . to change the FOV angles.
360° FOV angle is used for wide scanning.
FOV angle is used for precision scanning on an area.
• Press V to activate Scanning Mode.
• Hold Left-Click to scan the rocks.

You can watch the video demonstrations below for visual aids:

Scanning for Ore Deposits
Scanning for Gemstone Deposits

FPS Mining

This type of mining involves mining small gemstone deposits.

Besides Pyro RYT Multi-Tool and OreBit Mining Attachment, you're also gonna need a backpack to store the gems.

Once you have everything, search for caves. The easiest way to locate one if by accepting one of the Investigation missions that require you to find Missing Person in a cave (read the mission description). |

Basically, you're gonna be looking for:

• Hadanite (most valuable)
• Aphorite
• Dolovine (least valuable)

Watch this FPS Mining video for a walkthrough on scanning and mining a gemstone deposit.

ROC Mining

Using the Greycat ROC or ROC-DS when mining for gems is what we call ROC Mining in general.

Both ROC and FPS mining extract the same gems (Hadanite, Aphorite, and Dolovine). The only difference is the gemstone deposits for ROC are generally bigger than the ones found in caves.

For reference, a big gemstone deposit has an average mass of 0.8, while a small gemstone deposit has an average mass of 0.1.

Unlike ship mining, you're gonna need a ship with a cargo bay large enough to fit and transport the ROC.

Once you have all the requirements, and have scanned the right rocks, you can watch this ROC Mining video for a complete walkthrough when mining gemstones.

Ship Mining

MISC Prospector and Argo MOLE are currently the only two flyable dedicated mining ships. Because of that, you're gonna need another ship with enough SCU space to store and transport Refined Ore.

Note: Argo MOLE is a multi-crew mining ship. It's most effective when doing mining operations with a proper crew.

Learn the basics of Fracturing and Extracting ore deposits by watching our Ship Mining Walkthrough video.

Refer to this Chart when scanning for Ore. It would help you determine which Ore to mine or avoid based on the value.

#
ORE REFINEMENT

Raw Ore from ship mining can be sold directly for low price, or refine at a Refinery for higher selling price. If you choose the latter, there are a few things to keep in mind:

• You'll have to wait for the Work Order to complete. Process may take hours (can wait while offline).
• Acquire a ship with enough SCU to transport the cargo.
MISC Prospector and Argo MOLE are not able to store/transport Refined Ore.

But first, bring your mining ship (with Raw Ore) to one of the following stations:

• ARC-L1
• CRU-L1
• HUR-L1
• HUR-L2
• MIC-L1

Once landed at one of the stations, store your ship, and locate the Refinery Deck.

Watch our Ore Refinement Walkthrough video for visual guide on getting to Refinery Deck and starting a Work Order at the Refinement Processing terminal.

Tip: It's entirely your choice when it comes to Refining Method. It all depends on how much you are willing to spend and wait. You may refer to Refining Method Chart for more information on each method.

Collect & Sell

Now that the ore's been refined, it's time to Collect & Sell! Refer to the GIF image below to find out how to collect your completed Work Order.

Once stored at your ship, transport to one of the Major Landing Zones and sell at Trade & Development Division (TDD) terminal. Refer to the city maps below for reference:

Lorville
Area 18
New Babbage
Orison

Jump to [Trading](#🍼┃learn-to-play message) section to learn how to sell your cargo.

#
SALVAGE

SALVAGE is a new gameplay introduced in Alpha 3.18. The introduction of "soft death" means player ships won't always be fully destroyed upon death, leaving the hull salvageable. Any player with the right tools can fly out there and salvage the abandoned ships.

The gathered material can then be sold for profit or used to repair damaged vehicles. But before you do all that, you're gonna need the following:

Pyro RYT Multi-Tool with Cambio-Lite SRT attachment (FPS salvage) - locate in Item Finder
Drake Vulture (single-seater ship) - purchasable in-game
Aegis Reclaimer (multi-crew ship) - purchasable in-game

Hull Scraping and Repair

The first salvage iteration introduced us Hull Scraping and Repair. They both go hand in hand as the materials (RMC) you gathered can also be used to repair your ship.

Locating Ship Wrecks

There are a few ways to locate ship wrecks around the 'verse:

• Accept a Salvage Mission via the Contracts Manager (F1), and go to the designated location.
Follow party members who do ship combat missions and scrap the leftovers
• You may get pulled out from Quantum Travel and find ship wrecks
• Travel to Asteroid fields (Lagrange Points, Aaron Halo, and Yela belt) and scan for wrecks

When scanning (press Tab) for ship wrecks, you''re gonna want to look out for rock icons like in the image below. Once you find them, simply fly towards them and you should find the wrecks.

Salvage Mode

If you're aboard the Drake Vulture or Aegis Reclaimer, here are the basic steps when hull scraping:

• Press M to activate Salvage Mode (automatically in Salvage Mode if you're in a Salvage turret).
• Activate the Salvage Head by pressing Left Click.
• Toggle between modules by pressing Right Click.

Run RMC

RMC, which stands for Recycled Material Composite, is the commodity gathered while hull scraping. At the top of the HUD will show you the current extraction rate and SCU progress. Once filled, the containers will be automatically ejected into the ship's cargo hold.

You're gonna have to move the container away from the conveyor belt if it's obstructed (you'll receive a warning). Use a multi-tool with a tractor beam attachment (locate) for this task.

Note: You're gonna need a friend to help you with this task if you're using the Aegis Reclaimer

Sell

Once you have your cargo hold filled with the SCU containers, it's time to transport and sell them at one of the Major Landing Zones' Trade & Development Division (TDD) terminals. Refer to the city maps below for reference:

Lorville
Area 18
New Babbage
Orison

Jump to [Trading](#🍼┃learn-to-play message) section to learn how to sell your cargo.

Repair

If you have the Pyro RYT Multi-Tool with Cambio-Lite SRT attachment ready, you can use it to repair your or your friend's ship hull.

With a filled RMC canister equipped, press 'B' to switch from salvage mode to repair mode.

Structural Salvage

Once you're done hull scraping and gathering any valuables off of the derelict you're salvaging, it's time to break the vehicle apart!

• While in Salvage mode, Alt + W to activate Fracture tool
Left Click to toggle Fracture mode on/off

After the ship's been fractured, it's time to disintegrate:

Right Click to toggle Disintegration tool
Left Click to toggle Disintegration mode on/off

Click here for a full demonstration on ship munching.

#
CAREERS

Eventually, every player can choose their own path in the game. These are some of the known careers that are already in-game or are coming soon.

SCN3 Mining
SCN3 Trading / Cargo Hauling
SCN6 Exploration
SCN3 Salvage
SCN6 Smuggling
SCN6 Passenger Transport
SCN6 Science
SCN3 Mercenary
SCN3 Bounty Hunting
SCN3 Racing
SCN3 Piracy
SCN3 Ship Repair
SCN3 Medical
SCN6 Info Running / Hacking
SCN6 Engineering

SCN3In game
SCN6In development

Do note that the ones already in-game are not final and will continue to evolve as the development progresses.

There are obviously more ways to make your mark than the ones listed above. But these are considered the "official" careers that are supported by ship designs, and Comm-links.

Keep an eye on the Roadmap and see how the game progresses.

#
PERSONAL GEAR AND UTILITIES

There are many chain stores and street vendors in the 'verse which offer a unique selection of equipment or clothing. You can use Universal Item Finder to search for any in-game item and where to buy them.

Once you're at a store, you can either approach the item you are interested in directly, or use one of the terminals (some locations have no terminals available) to browse the store's inventory.

You can return to [Personal Inventory](#🍼┃learn-to-play message) to learn how to equip or store your newly purchased item.

Buy an Item Directly

To purchase an item on display, simply approach and interact (hold F) to quick buy when prompted. Once transaction is complete, the item will be transferred to Local Inventory.

Browse Through Store's Inventory

You can browse through the store's entire inventory by using one of the terminals (if available) at the store. Browsing and purchasing via the terminal is pretty straightforward. Once purchase is complete, the item will be transferred to the location of your choosing.

Image below provides an overview of a typical store terminal screen.

Sell Your Stuff

The terminal also has an option for you to sell items from your Local Inventory. Do note that some stores do not accept everything you have in your inventory. For example, an armor only store may not take your FPS guns and attachments.

#
PURCHASING SHIPS WITH AUEC

Besides pledging with real money for ships, you can also acquire them in game with aUEC. The following locations offer a wide selection of ships with options to purchase or rent:

Hurston
New Deal - Lorville: Sale
Vantage Rentals - Lorville: Rental
Cargo Deck - Everus Harbor: Rental

ArcCorp
Astro Armada - Area 18: Sale
Traveler Rentals - Area 18: Rental
Cargo Deck - Baijini Point: Rental

microTech
Regal Luxury Rentals - New Babbage: Rental
Cargo Deck - Port Tressler: Rental

Crusader
Crusader Showroom - Orison: Sale
Travelers Rentals - Orison: Rental

Others
Refinery Stations - Lagrange Points: Rental

You can visit website such as Star Citizen Wiki Shops listing to search for ships that are available for sale by each store listed above.

Just like buying personal gear and utilities in previous section, you can buy ships on display directly, or browse through the store inventory from one of the terminals.

Note: Click here for list of ships (flyable and concept) in Star Citizen.

Ship Gets Delivered

After you've made a purchase, the ship will be delivered to Local Inventory. That means if you buy a ship at Astro Armada in Area 18, the ship will be stored in Area 18's Local Inventory.

#
SHIP RENTAL

There's also an option to rent a ship if splashing big amount of aUEC for a ship is not your thing. Refer to the list above or use Universal Item Finder to find a Rental Terminal. Once you find one, simply approach and interact with it and make your selection, followed by the duration of the rental.

Things to keep in mind:
• Rental duration: 1 day, 3 days, 7 days, or 30 days.
• Ship gets delivered to your Home Residence.
• Access the rented ship from ASOP terminal.
• Timer begins right after you complete the transaction.
• The rental duration uses real world days. Not in-game days.
• Unable to swap components on a rented ship.
• Ship is claimable if destroyed/lost.
• You don't have to return the ship once the timer runs out. Ship will be locked from use (if stored).
• You can still use the ship as long as you want when the timer runs out while flying the ship. It will be locked once you store it.

#
INSURANCE IN ALPHA AND PUBLIC TEST UNIVERSE (PTU)

During Alpha stage of the game, all (pledge and in-game purchase) ships and vehicles come with a Lifetime insurance plan to facilitate testing. Players do not have to worry about having to pay any recurring fees.

Here are the common steps when claiming a ship/vehicle:

  1. File a Claim for your ship/vehicle from an ASOP terminal.
  2. Claim process begins with a timer.
  3. You may Expedite (with a small aUEC fee) your claim to receive your ship/vehicle quicker.

Note: Your custom ship components should be covered by the insurance.

You might encounter a problem when attempting to file a claim. If that ever happen, be sure to check #📚┃help-faq for a potential workaround

#
INSURANCE IMPLEMENTATION IN STAR CITIZEN 1.0

Do keep in mind that this system is an evolution of the intended implementation, adding additional functionalities and comforts to the players, while maintaining every functionality that has ever been detailed.

The info below is taken directly from here.

In-Game Purchased or Created Vehicles

UNCHANGED PLAN: You can choose to purchase insurance that will last for varying durations, just like it's always have supposed to. (No change.)
UNCHANGED PLAN: Level 1 is chassis and original, purchase-included components only and is the insurance that has always been offered since the project began. (No change.)
UNCHANGED PLAN: If your vehicle is destroyed without insurance, it is lost forever. There will be ways to track its duration in game when the system is implemented, and a warning when you summon your vehicle if it is without active insurance. The choice to operate without insurance will be deliberate, very noticeable, and entirely yours. (No change.)
FUTURE NEW ADDITIONAL OPTION: Level 2 adds custom components coverage to chassis. This is new and cool and especially important in a universe with massive crafting options and will be addable in game.
FUTURE NEW ADDITIONAL OPTION: Level 3 adds coverage to all your upcoming ship decorations, and still includes chassis and custom components, which is awesome and will be addable in game.
NEW IMPLEMENTATION: Just like in much of the real world, in Star Citizen 1.0 vehicle insurances at each level will pay out appropriate credit value for your destroyed vehicle chassis, components and decorations instead of replacing your vehicle outright.
NEW IMPLEMENTATION: There will also be separate, in-game earnable warranties that you can attach to any vehicle so that when it is destroyed AND you have insurance, you will receive the covered assets back instead of the credits value. This is intended as a nice convenience so you don't have to go spending the time re-acquiring anything, and these warranties will be things you can work towards and earn through gameplay if you are so inclined.

Vehicles Attributed Through the Website, and not Earned In-Game

UNCHANGED PLAN: All insurance will last for varying durations, just like it's always have supposed to. (No change.)
UNCHANGED PLAN: Level 1 is chassis and original, purchase-included components only and is the insurance that has always been offered since the project began. (No change.)
UNCHANGED PLAN: If your vehicle is destroyed without insurance, the intention is that there will be an additional in-game cost to recovering it, but it remains on your account and accessible forever. There will be ways to track its duration in game when the system is implemented, and a warning when you summon your vehicle if it is without active insurance. The choice to operate without insurance will be deliberate, very noticeable, and entirely yours.
UNCHANGED PLAN, AND UNIQUE TO WEBSITE PROMOTIONS: Lifetime duration means you never have to bother with renewing it in-game. All other durations are intended to be renewed through in-game means once the system is fully implemented. This has always been chassis and stock components, meaning it is Level 1 insurance with a lifetime duration.
FUTURE NEW ADDITIONAL OPTION: Level 2 adds custom components coverage to chassis. This is new and cool and especially important in a universe with massive crafting options and will be addable in game.
FUTURE NEW ADDITIONAL OPTION: Level 3 adds coverage to all your upcoming ship decorations, and still includes chassis and custom components, which is awesome and will be addable in game.

The Big Difference Between the Two

• Regardless of whether you have Lifetime duration or one month to ten years or anything else between or beyond, if you have a vehicle attributed through the website, EVERY ONE OF THEM, regardless of its insurance duration, will ALSO have an automatic, permanent warranty that guarantees you will always get your chassis and stock components back instead of credits, provided you are also within the duration of your original insurance, or have renewed it in game to keep it active, or pay the additional premium cost to recovering it mentioned above.
• Put another way, you can NEVER permanently lose your pledge ships.
• If you add-on to your Level 1 insurance with Level 2 or 3 in game, your permanent warranty will recover the custom components and in-vehicle decorations respectively, instead of credits.
This effectively means there is no functional difference at all to the pledge insurance as you've always known it, but you will now benefit from the addition of new in-game addons that let you cover your custom components and decorations as well.

Special Additional Pledge Insurance Note

• Adding additional in-game Level 2 or 3 insurance does not invalidate your existing Level 1 Pledge insurance.
• It's easiest to consider these addons and not replacements. You will not invalidate your existing insurances by engaging in this new system designed to bring additional functionality and comfort to all players.

Here's a diagram to help you understand the info above in a simplified way:

#
CRIMESTAT

At some point in your Star Citizen playing career, you'll end up with a CrimeStat (CS) one way or another. CS is a feature which determines how much amount of crimes a player has committed.

There are 5 CrimeStat Ratings; with CS 5 being the highest:

CS1 & CS2: Minor offenses which can be paid off at a designated terminal easily.
CS3 - CS5: Major offenses and player will be listed as Wanted by Bounty Hunter guild.

Players with CS1 or CS2 can go about their day as usual. Security won't fire at them and will remind the players to pay off their fines (all crimes accumulate which can build up to CS3).

Meanwhile, having a CS3+ to your name means:

• Landing privileges at major landing zones and space stations revoked.
• Player becomes a red target and will be shot on sight by security.
• Grim Hex will be your only base of operation (outside UEE jurisdiction).
• Hunted down by player Bounty Hunters.
• Get sent to prison upon arrest.

Note: Click here for the full list of felony and misdemeanor definitions.

#
CLEARING CRIMESTAT

There are a few methods to clear CrimeStat:

  1. Pay fines at Fines & Citation Payment System terminal.
  2. Hack an Imperial Criminal Database terminal.
  3. Serve your prison sentence at Klescher Rehabilitation Facility.
Pay Your Fines

Vast majority of crimes can be paid off at a Fines & Citation Payment System terminal such as the one in the image below. Simply approach and interact with the screen.

Do note that players with CS1 and CS2 are able to request/receive landing permissions at ATCs. Players with CS3+ however, won't be able to request permission to land and will be shot on sight by security.

Tip: Open your Journal via mobiGlas for more info about your committed crimes.

Hack a Terminal

Another way of clearing your CrimeStat is to hack an Imperial Criminal Database terminal located around the 'verse. But before you're trying to locate one, you need to acquire a Cryptokey (Tigersclaw) first.

Where to acquire Cryptokey:

• Grim HEX - Technotic (locate)
• New Babbage - Factory Line (map)
• Area 18 - Cubby Blast (map)
• Loot containers (outposts, bunkers, derelicts)

Once you've acquired a Cryptokey and have it equipped, head towards Security Post Kareah station in Cellin, Crusader.

Make sure you are well equipped with FPS armor and weapon (don't forget the Cryptokey too) before entering the station. They are occupied by NPCs who will fire at you. Once you're at the location, locate the hacking terminal like in the image below.

The final step requires you to slot in the Cryptokey to begin hacking. Watch this Terminal Hacking video for a walkthrough on removing your CrimeStat via the terminal.

#
SERVE PRISON SENTENCE

If arrested, you'll be serving the prison sentence which will clear your CrimeStat at the end of it. To get to the prison, you might wanna:

• Surrender yourself via the Fines & Citation Payment System terminal.
• Fly to a Space Station (other than Grim Hex) and surrender yourself to the security by powering down your ship.
• Get yourself terminated by security or Bounty Hunters. - longer prison time

Once arrested, you'll find yourself waking up at the Klescher Rehabilitation Facility (a prison located on Aberdeen).

Note: You will get your gear and ship back safely once you've served your sentence.

Check Your Sentence Status

Head towards the center of the facility to find multiple terminals which contain your information such as inmate ID, merit, and time left until release.

The length of your prison sentence depends on your CrimeStat rating. For example, a CS 3 results in a sentence from 1 to 2 hours. The sentence can be served while offline. So waiting 2 hours in-game is not mandatory.

Shorten Your Sentence

The Warden believes in second chances, and what betters ways to do that other than doing work for the institution! There are two known activities which will reward you with Merits:

• Mining Labour at Work Mines.
• Help repair one of the Oxygen Dispensers.

Merits are currency used in Prison to shorten a sentence and to purchase tools/commodities such as MedPen or Pyro Multi-Tool. You can earn those by completing tasks mentioned above.

Familiarize Yourself with the Facility

Before you begin any of the tasks (or attempting to escape), it'd be best to familiarize yourself with the Prison facility beforehand.

Use this Klescher Rehabilitation Facilities Map for reference. It'll certainly help you navigate through the facility. Especially at Work Mines where it's got multiple Routes and Depths.

Mining Labour

One of the jobs from the program is Mining Labour at the Work Mines. This is a straightforward task where you'll have to mine gems and deposit them at the Mineral Deposit checkpoint for Merits.

You should already be provided with a Pyro Multi-Tool. Use the map provided above to navigate through the Mines and begin searching and mining for gems.

Depending on your CS rating, a single Dolovine deposit should provide enough Merits to exchange for shorter sentence if you are on a CS 2.

If you aren't familiar with mining, then this FPS Mining video can guide you through the process.

Fixing Oxygen Dispenser

One of the Oxygen Dispensers is broken. You've been given a task to:

• Navigate and locate the broken dispenser (Route and Depths should be provided on the HUD) at the Work Mines.
• Vent the dispenser tanks to repair it (no tools required).

Again, use the map provided to navigate through the Mines easily.

Once the task is complete, you'll be rewarded with Merits which can be used to shorten your sentence.

Free At Last

Oh? Looks like the time remaining on your sentence is 0:00:00. Congratulations! You have served your sentence and are now free to leave the facility!

To leave the facility, simply navigate to the Inmate Processing, go through the doors, and use one of the elevators to get to the Surface Level.

You'll find yourself waking up in a hab at Everus Harbour station with your gear and ship stored safely. You're free to go back to normal activities from here.

#
EXITING THE GAME

There are three methods to exit the game (and its pros/cons):

  1. Return to a Landing Zone/Space Station and exit the game.: The first method is what you'd call the common way to exit the game. If you're flying your own ship, simply return to the nearest Landing Zone/Space Station, and you can exit to menu/desktop once you've stored your ship.

SCN1 Ship is stored safely and no insurance claim is required between sessions
SCN1 Cargo/Vehicle aboard your ship is stored and persists between sessions
SCN1 Player will spawn at the location's Hab in the next session
SCN2 Travel time
SCN2 May get interdicted/ambushed along the way

  1. Exit anywhere in the game: The second method is a straightforward one where you just logout/exit the game from anywhere in the 'verse.

SCN1 Fastest way to exit the game
SCN2 Player location does not persist between sessions (player will spawn at the last landed Landing Zone/Space Station)
SCN2 Ship needs to be claimed if it was outside

  1. Bed logout: The third method requires a ship with a bed for the player to logout from. Simply Lie Down on the bed, and click on Logout via interaction (Hold F).

SCN1 Player and ship location persist between sessions
SCN1 Quickly get back to flying your ship in the next session
SCN2 Only works best if the ship's located in deep space
SCN2 A major bug where an infinite loading may occur when you try to login the next session (check #📚┃help-faq for a workaround)

SCN1 Pros
SCN2 Cons

#
LONG TERM PERSISTENCE

Long Term Persistence (LTP) is a system introduced in Star Citizen Alpha 3.8.2 to allow player purchases and aUEC earnings to persist between database resets (major patches, character repairs).

Known things that persist between database resets
SCN3 aUEC
SCN3 Reputation
SCN3 Ships (pledge and in-game purchase)
SCN3 *Personal equipment (pledge and in-game purchase)

Known things that DO NOT persist between database resets
SCN2 Player character (you'll need to create your character again)
SCN2 Home Residence
SCN2 Mission progress (e.g. Bounty Hunting certificates)
SCN2 Consumables (FPS ammo, medpens, food, drinks, etc.)
SCN2 Rented ships
SCN2 Refinery jobs

As things stand, the current stage of development will undoubtedly encounter scenarios that require Database Wipes. And when there's a patch with a Database Wipe, LTP will be disabled. Any persistence mentioned above will become void for that particular patch.

Players would be informed ahead of time should these scenarios arise.

#

Below are some of the words, abbreviations, and acronyms commonly used by the Star Citizen community. (0-9, A-Z)

30K: CODE 30000 - A general timeout message. This appears when the player loses connection to the game server (server crash) or times out connecting but remains connected to the hub server.
Alpha: An early phase of a game development which focuses solely on adding features and content.
aUEC: Alpha UEC - This is a temporary currency specifically designed for Alpha testing the in-game economy and balance.
Avocado: Evocati Tester - Selected NDA testers from the community to test the Evocati builds.
CCU: Cross Chassis Upgrade - Also known as Ship Upgrades. Players can pay the difference between pledged ships to upgrade from one to the other.
CS: CrimeStat - Ratings used to determine the crime level of a player or an NPC.
Concept Ship: A ship or vehicle which goes on sale before it's been made flight ready.
Concierge: A backer who has directly pledged at least $1000 or more.
EVA: Extra Vehicular Activity - Moving in zero G.
GIB: Give - A German version of the word "give". For example, "GIB 400i!".
IAE: Intergalactic Aerospace Expo - An annual in-game event which showcases ships/vehicles from many manufacturers. Ship sale and discounts on Starter Packs also happen during this time.
IC: Issue Council - Where bugs and other issues are reported on the RSI website.
LIVE: The current version of the game available to all backers.
LTI: Lifetime Insurance - A ship insurance which usually comes with a Warbond Pledge.
Melting: Also known as "Exchange". Players are able to turn their digital items into store credit.
MFD: Multi Function Display - Information screens located on ship's cockpit.
o7: Salute emote.
OM: Orbital Marker - Nav points which are located around planet's orbit.
PO: Port Olisar - An orbital Space Station located around planet Crusader's orbit.

PTU: Public Test Universe - A test version of the Persistent Universe before it goes to LIVE.
PU: Persistent Universe - Combines the gameplay aspects of the Hangar, Arena Commander, and Star Marine modules into a single massive multiplayer platform.
QD: Quantum Drive - A ship component that allow ships to move at fractions of the speed of light.
QT: Quantum Travel - Interplanetary travels using the Quantum Drives.
REC: Rental Equipment Credits - Earned in Star Citizen's Arena Commander game modes, and allows you to rent equipment, weapons and ships in these modes.
SCU: Standard Cargo Unit - The universal measure for cargo storage and transport measurements.
SOCS / SSOCS: Server Side Object Container Streaming - A measure of intuitively loading sections of the Star Citizen universe as players encounter them by putting desired objects in actual boxes within the play space.
SPK: Security Post Kareah - A brand new outpost built to house an extended Crusader Security presence in this sector.
UEC: United Earth Credits - When the final game goes live, this will be the currency used to purchase everything in the games virtual economy.
UEE: United Empire of Earth - The name of the current Human governmental body.
VTOL: Vertical Takeoff and Landing - Some ships in the game have dedicated VTOL thrusters that allow for smoother atmospheric take offs and landings.
Warbond: Special promotions offered through the year that may include a price discount or special items, like extended insurance plans or special ship skins. Store credit cannot be applied to these orders.

https://scfocus.org/glossary/ for the full list.