#🔀┃art-asset-workflow
1 messages · Page 32 of 1
you could stick in any 3 meter part
or a 2 meter and a 1 meter
and then of course you texture it so any tiling starts/ends on those edges
so the textures line up at the breaks
the texture part is less important if it's something flat shaded
Ya I'm probably going to go for a more simplistic, flat look.
Alrighty then, time to learn wtf a blender is
its saddening when you've got the coding skills to make something functional.... just not look good >_>
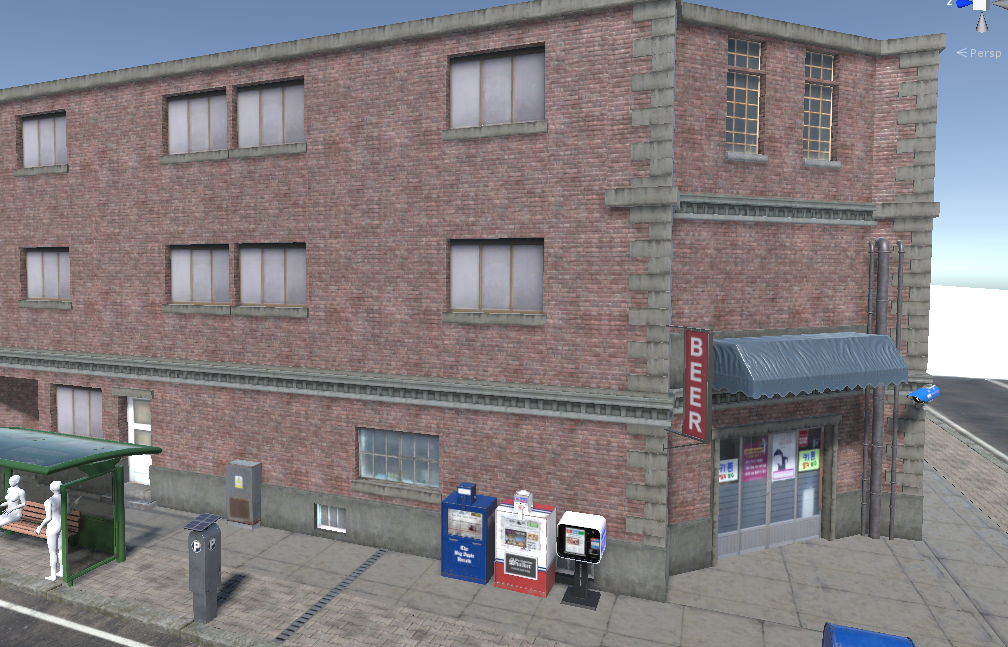
this building is done with a kit
all the pieces are regular sizes with matching tiling
i think they use 1, 2, and 4 meter parts
though they do have a few large pieces to save you from going crazy lol
but you can turn on snap and just make them line up

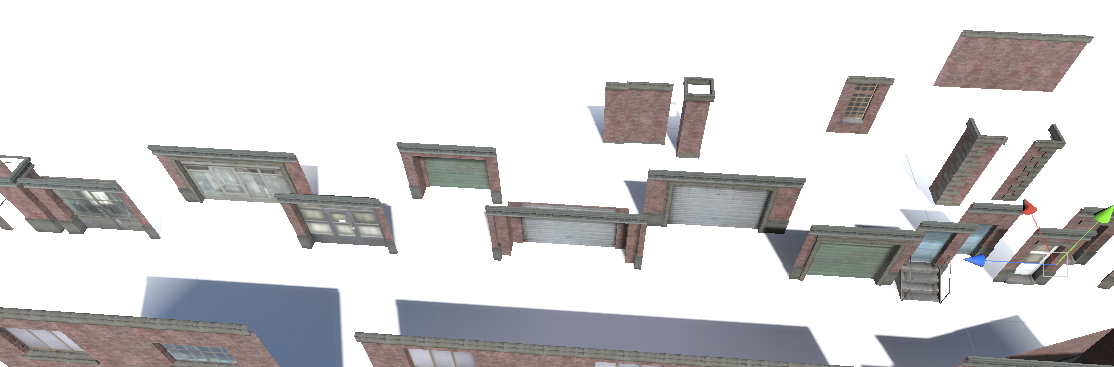
before

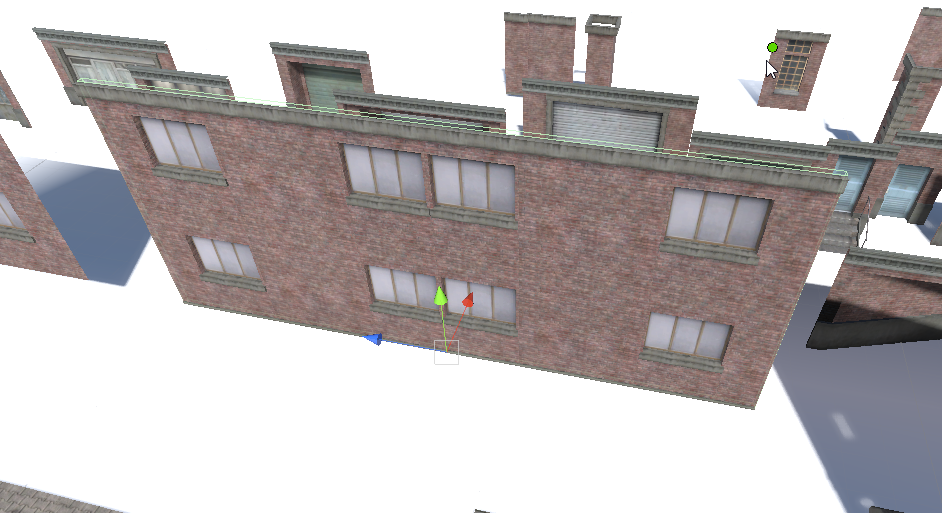
after (lol i did't have snap set up, had to set it up again)
Would you suggest probuilder?
i can't say, i honestly have never tried it
any actual raw building i do, i usually do in blender and import over
i keep meaning to try it sometime but there's always other things to do and really i'm much happier with blender anyway, I doubt I'd change over.
i think it mainly aimed at people who don't already use some 3D modeling software.
ya it just seems to be a "you just wanna get shit done" solution
sort of like how Visual Scripters are to just... regular coding
You can use the V key to snap things togehter.
Pro Builder is mainly for prototyping, not full asset production
It can be but it depends on the game. It won't give you the full detail that standard modelling can give.
yah, it's used lots for greyboxing
Although, I'm like you, and have just begun to rock my very minimalist look 😛
but.. peeps who play weird art games, dont really care. So maybe I've just found my audience 😛
@novel garden probuilder is fast, easy and does basically box modelling live. For blockout it's very relieable.
unity can export it as OBJ and FBX for retopo lather
is it impossible to use materials created in substance designer in unity nowadays?
No, for Unity 2018.1 forward you will have to get the substance plugin Substance in Unity from the asset store to be able to use SBSARs
It also comes with the live link plugin to Painter as well as easy access to Substance Source

Open Beta Release: We are currently in beta. Be sure to back up all work and projects before upgrading or using the plugin. Before upgrading, please read our documentation for upgrading projects and Substance materials.
Beta and upgrade information
The Substance plugin...
yeah reading the reviews saying it deleted all of their files and stuff, not gonna bother with that
thats really sad
how am i supposed to create materials now?
If you dont want to use the plugin (Currently still in beta) you can use Substance Player and export the textures
then you can import them into Unity as any other texture file
allegorithmic
i'll give it a shot, thanks
anyone saying the plugin 'deleted their files' just don't know what they are doing, or didn't read the description which points to the page explaining the upgrade procedure.
I'm not sure where to ask this. I installed the Shadergraph via package manager and suddenly all of my game objects are invisible, the scene is extremely heavy and I get these errors
What's going on?
Alright, I just reimported the HDRP package and all is well
Can someone please explain to me where are the smoothing options are in blender? I have used before but I forgot where they are.
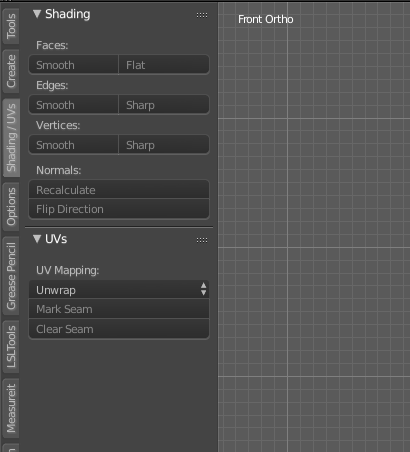
what did you press
you should only use smooth faces unless you're doing something very advanced
Ok if a make verts and edges sharp that happens
yeah you made every edge sharp hehe
you need to carefully select only the edges that make sense to be sharp
or use the edge split modifier to auto-decide based on face angles.
and no there's only sharp or smooth, nothing in between
Ok then it must be a different program I was thinking of. Thank you for the help.

sturdy and comfy hehe
so uh this rock looks kinda low-poly
will it look better in unity? if not, how could I improve it
well it seemed to look better if I just subdivided it a ton
but I wish I could've had it those kinda square sides
you just need to set smooth shading on some of the faces
but not the most angular ones, so you retain the sharp, rocky edges
just like i told someone about an hour ago, you should be able to scroll up a bit and see what i wrote about the smooth settings
well 2 hours ago, dang time flies

minium would be 12 tris
but i was referencing a meme hah
ending scene of the movie Seven
oh rejected 😦
It is between 190 and 210 tris
Lol
Game is super cpu intensive (because I have been doing stuff like making primary objects like guns take only 3000 tris) so I figured I might as well start making some slightly higher poly assets for some scenes
that's good, as long as the tris add to the realism of a model. but a box is pretty much a box
Beveled edges are part of why
you would probably be better off baking any surface wrinkles or dents to a normal map
well that's true, those can help a lot
still i wouldn't think that would take up that many
unless it's a lot of subdivisions
I also am going to have it switch to a smaller asset when further
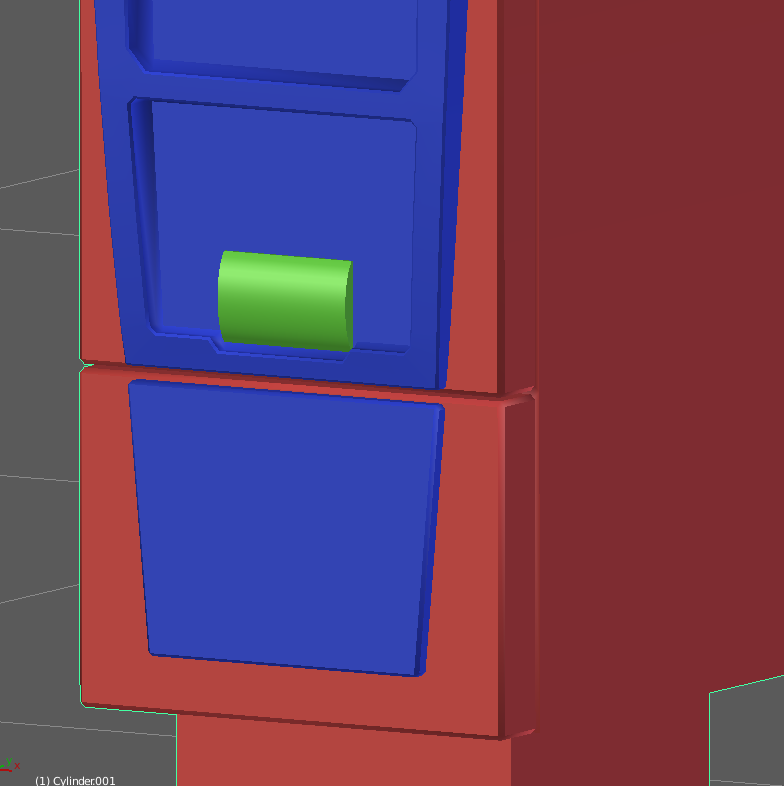
when I made my parking meter i beveled almost all of it
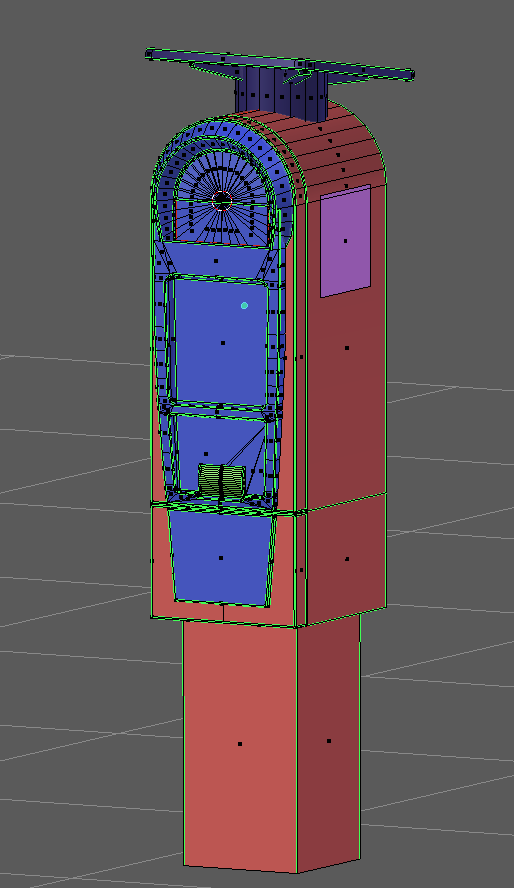
entire thing is 1,220 triangle
i baked most of the detail into normals

this was WIP, i changed a few things since
looking good so far
I also need to finish an mp5 because the last one I made I real was dissatisfied with the look of
yeah it can be tricky to get all the proprotions right
best to find a nice engineering drawing so you can make exact measurements
What I do is get a nice Left or Right picture with low perspective then any round part you see, barrel, receiver (G3 or MP5), etc you create that then you have a base to go off of in terms of proportion
I do that if I can’t find any measurements
I should use measurements as well. So far the other method works like a charm
yeah if you can find nice profile shots, that's nearly as good
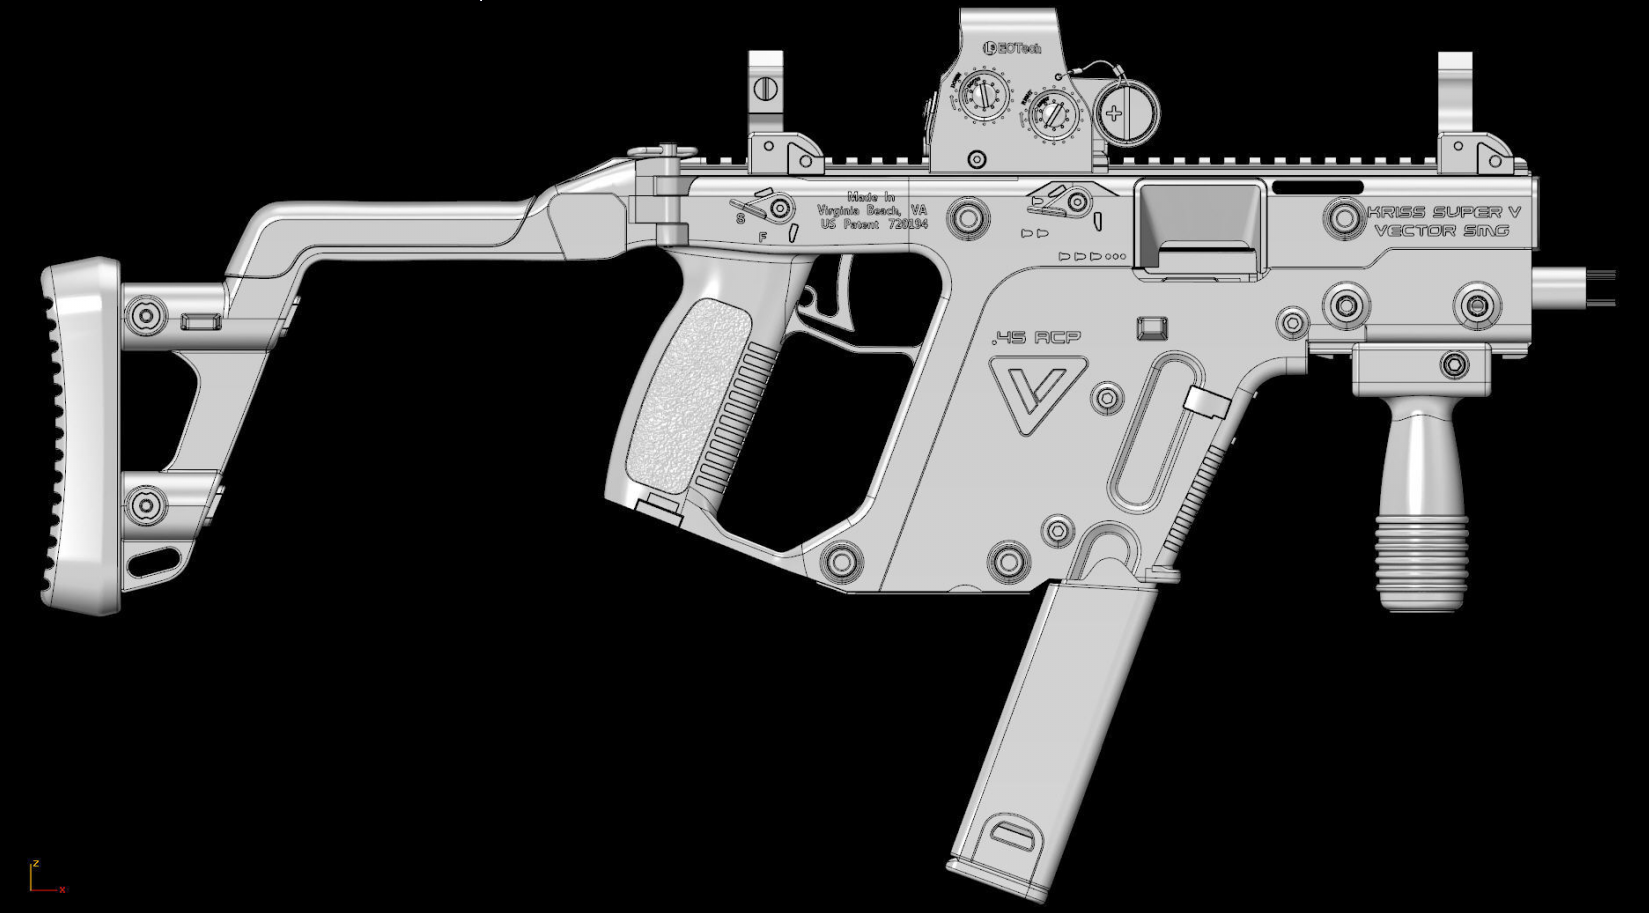
like i found this, but it's actually a profile shot of someone else's model, so I have no idea how accurate they were when making it lol
if i used it i would probably end up replicating any mistakes they made
but it looks pretty spot on
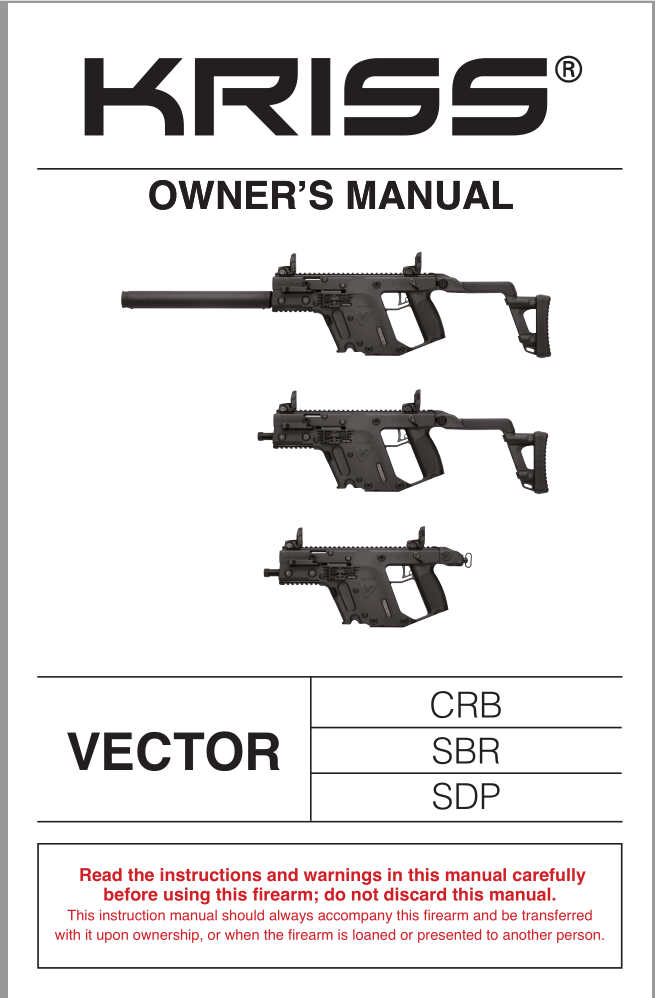
one good source is the owner's manuals of the actual gun
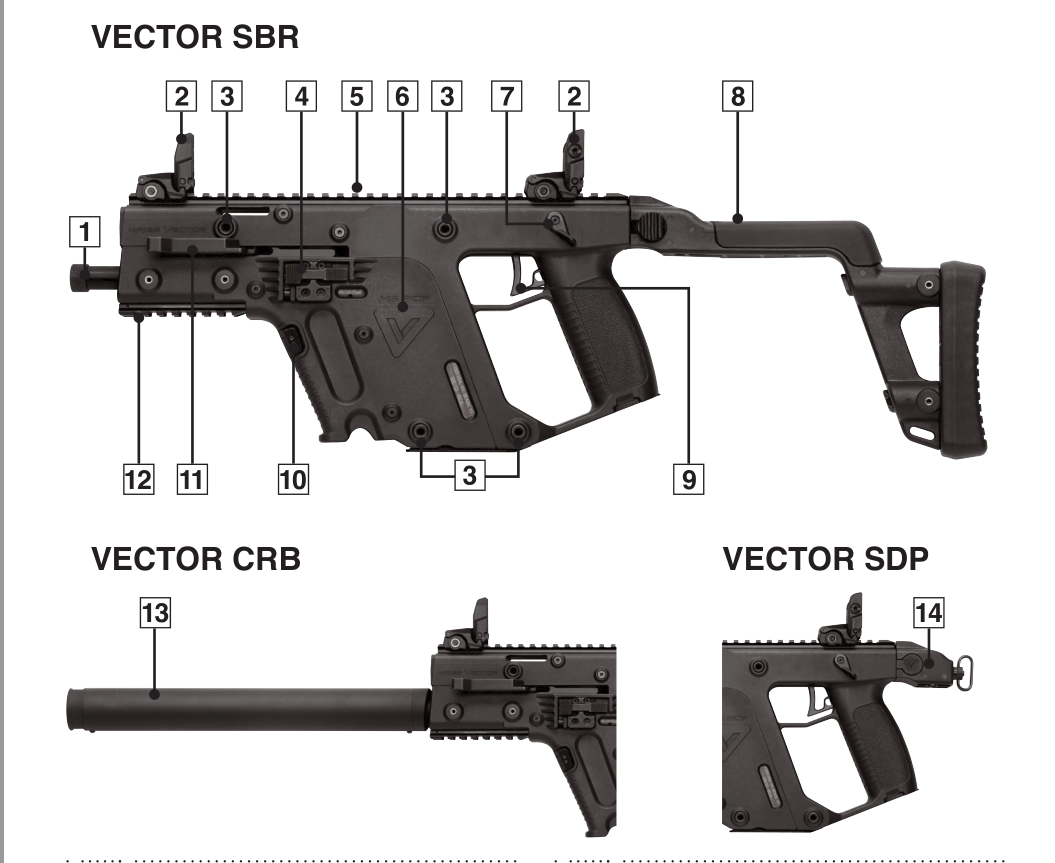
they can have pretty detailed photos
With the other reference images you gather you can work around mistakes if using someone else as ref.
ah yea, nice
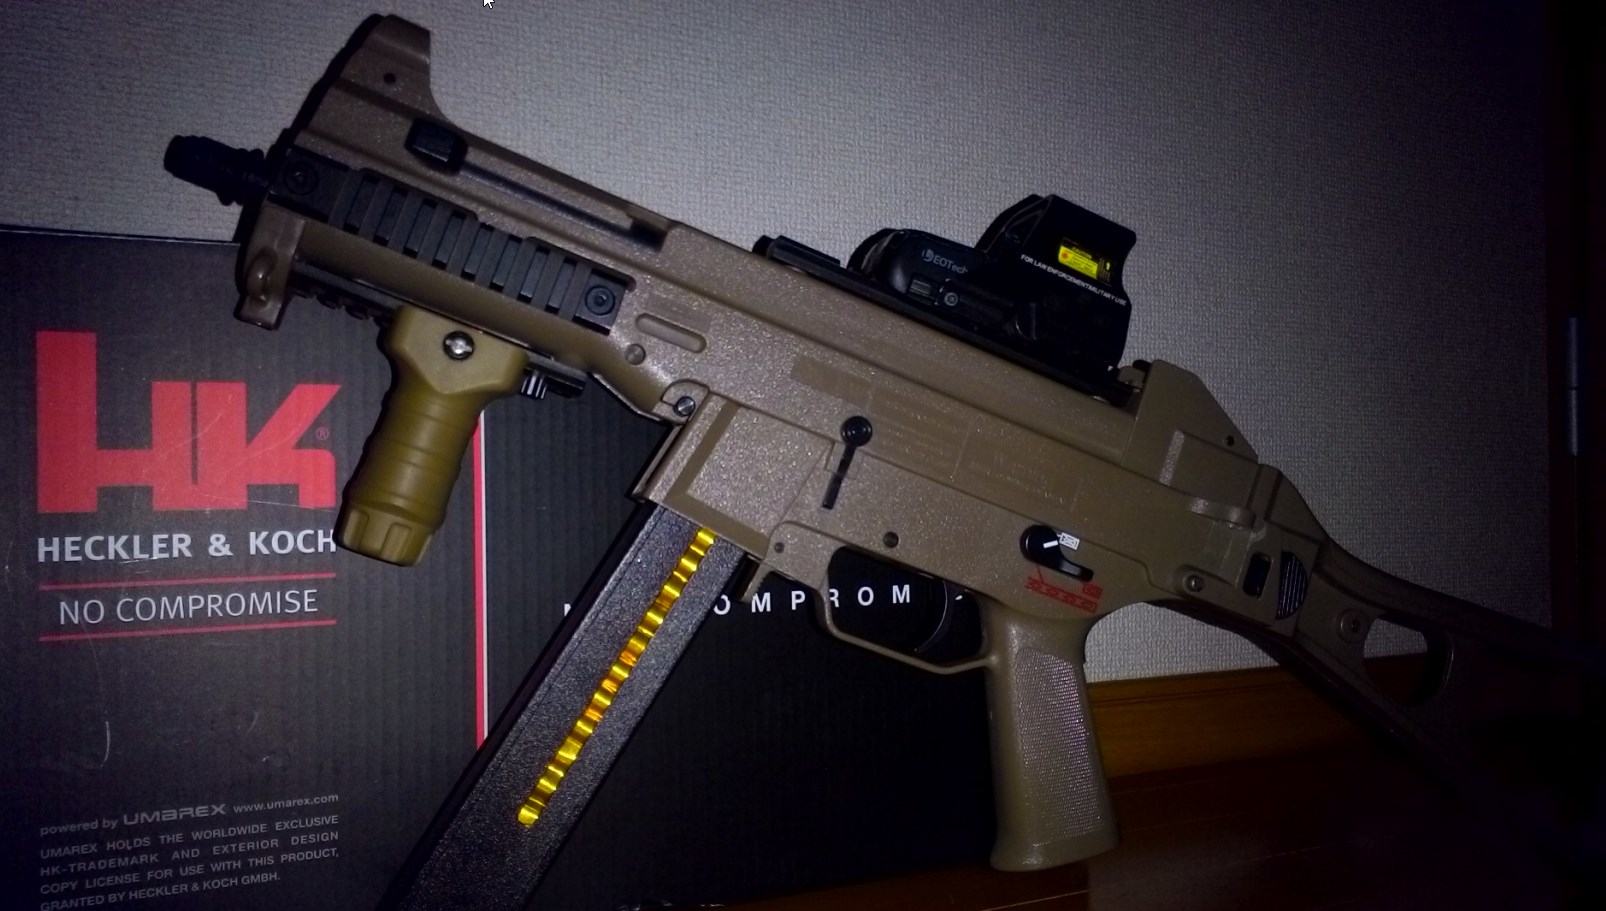
and photos like this aren't great for design, but it dose show how the surfaces look in directional light
is good for getting a feel for how the various gun textures are
(this color makes the gun look like cheap plastic, yuck)
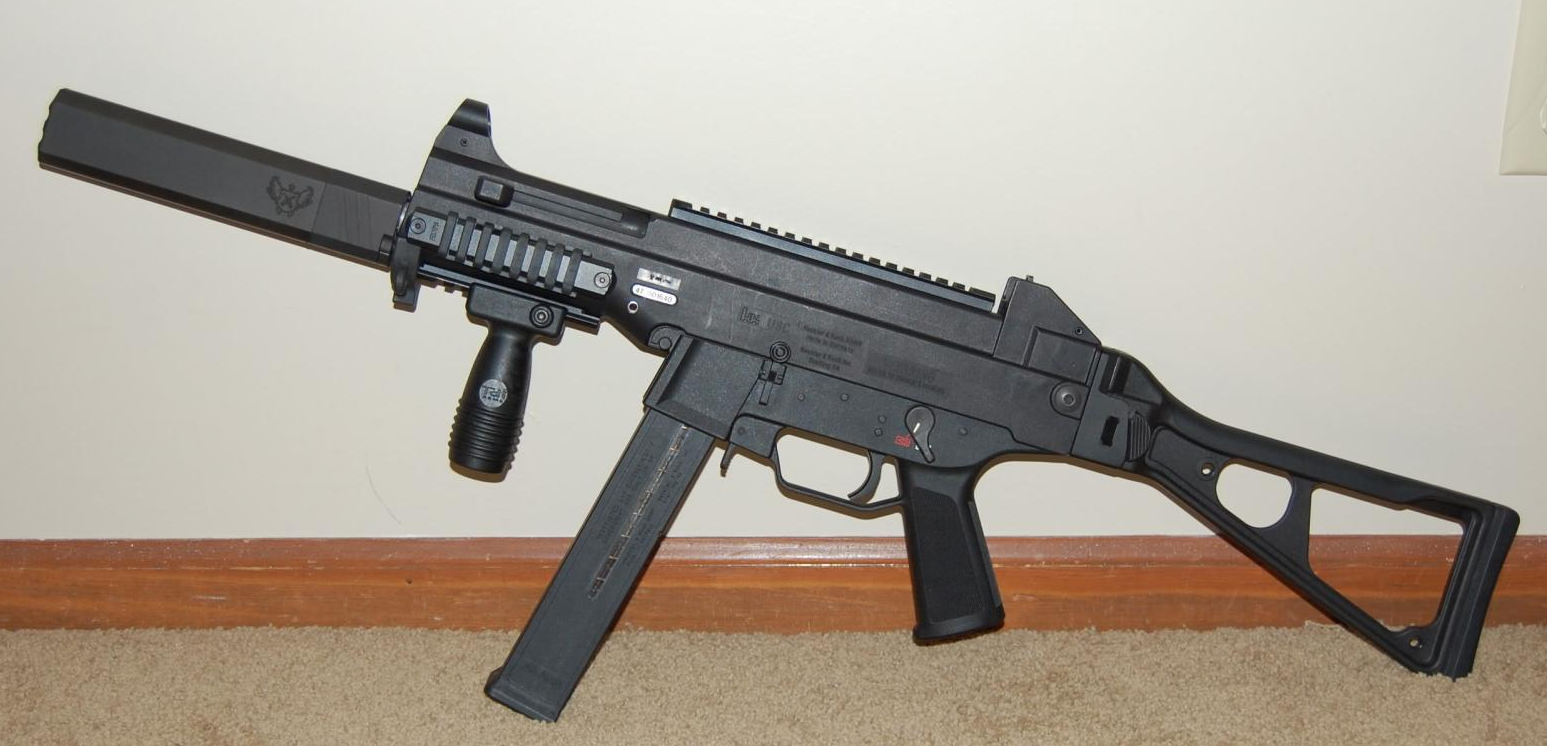
looks a lot sharper in black
Dark Earth looks nice on some weapons
Yea, Only ever textured a SCAR and SRS with Dark Earth
nah just meant on that particular one
I did this Captain Marvel inspired Art Cartoon Style. Thanks for viewing 😊

I made this #CaptainMarvel inspired #3d art in #Blender3d
#artistsontwitter #b3d #gamedev #indiedev #gameart #blender #animation #3dmodeling #Marvel #marvelcomics @brielarson @captainmarvel https://t.co/OlrezSOPwu
Boo.
@frosty steppe you need to post late at night to ensure nobody can sleep lol
Thanks! To be honest I wasn't sure where to go with this model. It's more of a doodle I suppose.
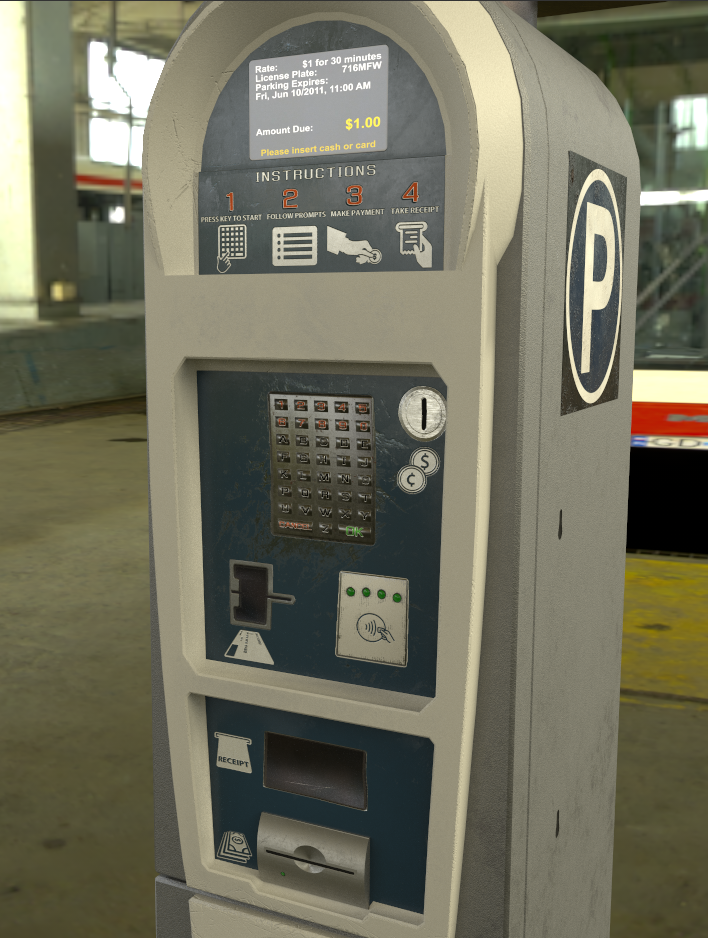
@zealous stream wow that's an amazing parking meter model
Thanks 😃
does someone know how to export the right channels from substance designer? metal + smooth should be RED + ALPHA, right? but how do i get the stuff i need into the red channel, and how do export the alpha channel at all?
oh screw me it was just that png didnt support an alpha channel that was throwing me off
still, i'd love to hear if anyone has any good export setup for this
I do roughness on Green, Metallic on Blue, and Ambaint Occlusion on Red. These colours can be any.
I am having an issue importing an asset into unity after softening edges in Maya LT. Here's what it looks like. It imports fine when it's not smoothed but I was sure Unity accepted smooth meshes?
Don't know for Maya, but in 3DS you need to collapse the smooth modifier to export correctly
I'll try to delete history, thanks! EDIT: Yep, deleting history after smoothing the mesh worked. Thanks Remy!
Some useful Blender sculpting tips:
Anyone know how to make Unity NOT generate an animator for every .blend file that I import?
you can create a model import preset. and uncheck import Animations in the preset
There's a way to turn off animation imports in Animation tab of your model import
it's near the top of the tab view
i'm at work and cannot snap pictures of my screen for legal purposes
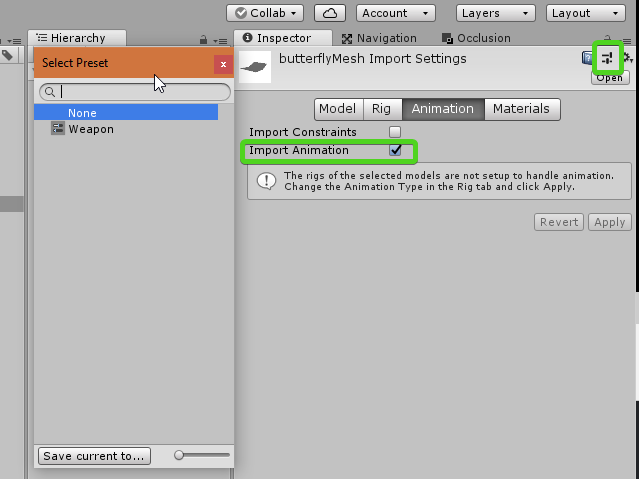
when you're on any mesh, you can click that icon in the upper right
and save the current settings as a preset. if you uncheck import animation then an animator won't be added.
hmm, its already there, is there any way to delete it?
you can then bulk apply a preset to all the models you have selected
apply the preset
it should update any model already in a scene too
as long as they still have a prefab connection
if you've saved them as a different prefab, remove it from that prefab
So I'm kinda confused about how blender works with unity. Do you guys do all the modeling, materials, meshes, and animations in blender THEN import it to unity?
for the most part, yes, it's just like maya or 3ds max
there's some live link functionality, and you can export to fbx from the engine and reimport into blender
if you make something in the editor and want to clean it up (like using probuilder for prototype geo and handing it to an enviro artist for cleanup)
hmm ok - but the lighting is all handled in unity, correct? might be a dumb question
like if your object glows
yes
i do modeling and animation in blender, but I mostly do all my texture work in Substance painter
and all my shader/effects in Unity
ohhh textures, ok
you could do your texture work in blender too
as long as you bake it out to textures
i think i get what you're saying
Cycles didn't have baking for awhile, so I kind of got out of the habit of even using it
found Substance Painter easier anyway, I'm more used to a Photoshop type interface
Hi
short question
When making a game and you want to keep the right size. Whats the best way to do this?
You have progrid, but it looks like it's not really something you can use to track the size of objects
with 2d, you have the texture sizes, in 3d it's different
1 unity unit = 1 meter
i just use meters in my 3d software (Blender). and everything is great
but with something that works inside Unity like Progrids, just realizing 1 unit = 1 meter should be enough
Texel density you mean peter?
hi cebee thanks for the feedback, not for texel density, but you may give some tips Thanks
ah ok
Hey guys I'm working on my own RPG and try to make some stylized props. What do you think of this:
I like them! But maybe add some dirt/grain/something to break up the uniformity? It looks a little like plastic.
My own evening project.
Nice materials.

Anyone here worked with Oculus medium before? Thinking about using it for sculpting
I have a question if anyone would b3 able to answer im not an artist but my buddy is we're trying to make a 3d pixle art character and graphics what would be the best means to go about this make 3d models, buildings....ect then texture them or is there another way?
3D Pixel Art character. Interesting. Do you have any example what you mean by that?
Do you mean model things in 3d and then convert them to pixel art?
Something like this?: https://www.gamasutra.com/view/news/313026/Art_Design_Deep_Dive_Using_a_3D_pipeline_for_2D_animation_in_Dead_Cells.php

"To make up for the lack of bandwidth and still deliver on quality, we had to find a pipeline that could give us great looking pixel art, without having to hand draw each and every retake," writes Dead Cells artist Thomas Vasseur.
Check it out. 😄 https://skfb.ly/6IvLB

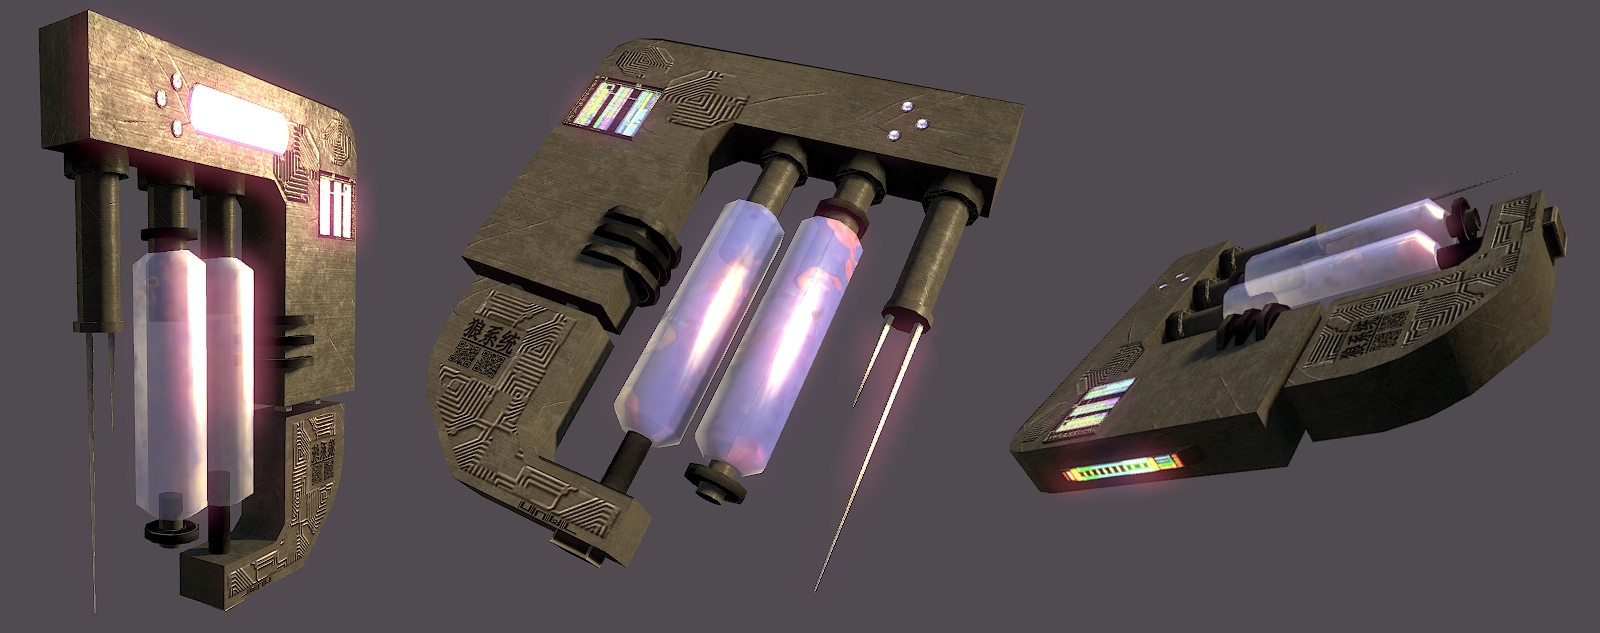
An electric glow stick asset. I didn’t base this on any particular designs. Made it without any reference images. I’m quite new to Substance Painter but I think I did a good job. For use in FPS and TPS games. Also great for horror games.
Comes with two 2K texture sets: cl...
@orchid sparrow @hallow canopy
One of these is poke.on 3d so like that for the 3D but the second picture for the type of art design thats probably the best examples i have for it at the moment
If that makes sense
with Maya, is there a way of having it so the sizes of the meshes come up on the scene view
for example
Same question: is there something like that in blender? :D
Yeah that would be great if there was!
There is? What's it called?
Yes blender comes with a built-in addon you can enabled called MeasureIt. @tawdry mountain
Thanks!
not bad, i wouldn't know the difference really
progress on animations
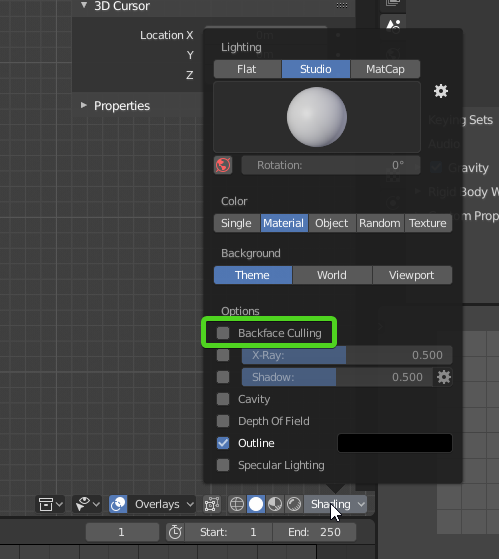
Unity uses Backface Culling, but by default Blender does not, so you can't see those types of errors.
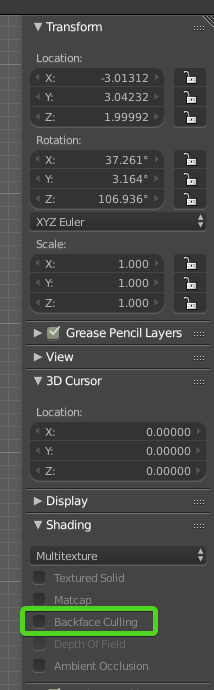
Turn Backface Culling on in the Right hand pane in the 3d view
(if you're using Unity 2.8, it's under the "Shading" settings:)
https://i.imgur.com/ngxGmMg.png
Yes, I am found this check box ... But still import into Unity this problem remains
well yes
you have to fix the problems
the checkbox just makes them visible in Blender
you'll have to create internal geometry for the switch body, etc
probably for the handle, you just need to flip normals
My goodness 😄
triangles in games aren't like RL surfaces
a pieces of paper in RL has 2 sides
in game world, a piece of paper has only 1 side
topologically impossible but this is how it is
you have to make both sides
Can't we do that both sides will exist without modeling the outside and the inside?
there are special shaders
but it's generally not hard to just stick a simple box in to make the inside
it looks better because if you do it with a shader, the 'wall' is paper thin
which looks bad for a lot of use-cases
I found a some C# script about this problem and its looks it work ... But is an ordinary solution?
@analog creek You have to recalculate the normals in Blender. Google it.
Unity doesn't render backfaces for performance reasons, so you don't want to force them on.
@zealous stream
that script is doubling the faces at runtime...
i wouldn't use that. it's not going to fix just the problems, it's going to duplicate everything and double your triangle count
is ther some reason you can't just go in and fix the issue properly?
it's is only like 3 minutes work
No engine by default renders backface but it can be a great option to enable per material /object depending on what you are trying to do.
Sometimes a complex shader can be more resource consuming that a few extra polygons.
I am very happy that SRP allows this directly on the material. Not being possible on a Standard material of the past was retarded.
One question...
Some things in my game only look good with bloom activated. Like Lanterns, fire, glowing orbs and some weapons like enchanted swords with glowing runes etc...
Can I "force" all users to experience this effect ignoring the quality mode like low medium high or ultra?
bloom is a PP effect
i don't think quality settings even cover it
or are you telling setting quality to low disables the bloom?
@tawdry mountain
this page explains what you can adjust with the built-in quality settings: https://docs.unity3d.com/Manual/class-QualitySettings.html

if you use LWRP or HDRP, that list will be way shorter as those handle some of these in their own RP assets
but for bloom, you'd adjust it directly from PP solution you use for it
Alright. Thank you! :)
I made a thing.
More detail
Looks like it has scales on its back
reminds me of the headcrabs from Half LIfe lol but a lot bigger
Yeah it does a bit. With a pinch of Houndeye too.
10 minute sculpt.
Some progress steps for concept vehicle design I did using Blender. Thank you for viewing 😊

Work progress steps for the vehicle design I made for #ArtStationHQ Nvidia Metropia 2042 challenge. #blender3d
#artistsontwitter #3d #b3d #nvidia #gameart #screenshotsaturday #gamedev
#indiedev #blender #madewithblender https://t.co/l6YT6HFV04
Good morning.
More detail.
There's something in the woods...
now with easy carry handles 😛
And the uncomfortable feeling of knowing somebody touching your hip could make your skin crawl.
lol
Hi! Could anyone tell me how to start with modeling realistic-ish organic shapes / characters for games? My biggest issue is that I can't find anything explaining to me how to properly make basic organic shapes for games. 🙂
that's kind of a hard question to answer because it's so broad and open-ended.
all modeling is basically the same thing: looking at real-world reference and recreating it in 3d software.
I guess the first question to ask is, what 3d modeling software do you use?
@zealous stream Blender 🙂

Blender Artists Community
This is a stuffed animal I modeled. I made a low poly mesh and subsurfed it. I did not use background images, but I did have the stuffed animal at hand. I didn’t do any fur because that wasn’t the point of the model, the point was the shape. Anyways, I’ve attached a ble...
i'd probably start someplace like this, which has a lot of advice from various artists about how to get started.
everyone has their own techniques
theres no one right or wrong way
some people like to make a 'ball' of high poly mesh and mush it around like clay
some like to start with blocky forms and refine them (me)
i'm sure there's other ways
no matter how you do it, there's one ingredient that is universal: Practice, practice, practice
first few years my attempts were laughable
but it's all part of the learning, you keep trying things and improving your technique
cest la vie
That's the point where I'm a bit lost in tbh, that there are multiple techniques for a lot of things which also not always fit the right goal. I know a couple of techniques to make a bit more smooth looking models, however the main things like how to keep my (not sure how it's called) 'model flow' good and at the same time get that exact shape you want is something I find quite hard. I also really can't find any good tutorials out there which cover stuff like this. Only persons which speed model things. Let alone make sure that my model doesn't reach that point where it's inside a game unusable because it's simply too big in faces etc.
yeah what you're talking about it topology
and it is difficult at first.
but there's a lot of good resources that talk about creating efficient topology
and yeah I'd stay away from "speed" tutorials
nobody cares about speed
Or timelapses, sorry. Wrong word choice xd
that link has many links in the thread to good resources about topology and proper modeling techniques
in the end though it's just going to come down to experience and getting a feel for how topology should flow
there's no substitute for experience
so just model every chance you get, look for how to improve, search for resources that give good information
that's all I know to say 😃
I'll look around on the website for a while, thanks a lot ❤
I had another question btw @zealous stream , I’ve seen people which made characters from low poly to high res to low poly-ish again. Is there any reason people do this?
I don't know per se. they may start out with simple forms to get proportions right, etc
they do a final sculpt
or they may simply like working simple and then use subsurf to 'round off the rough edges' as a high poly.
again, it's very much a personal preference thing.
you can do it either way, sculpt high and then decimate low
or work low and then subsurf high
each has it's plusses and minuses
✅
@zealous stream What do you think would be some good exercises to practice? Because I feel like I'm thinking way too large right now.
hard to say, something that's not too complicated but interests you
And that's my problem, in my head I'm like. Oh maybe I should make a fish, but then I'm like. "That's probably way too hard for my self".
yea you just gotta start
after a while you'll be able to look back and see your progress and see that you've improved.
when I started this was the first weapon I ever made and best I could do (didn't know anything really. Not even about smoothing)
now this is one of the latest
so you'll get better for sure. Just gotta start
That first weapon still looks a lot better than I can do 😂
same xD
Morning!
noice
Why did that turn dark so quickly 😂
It sure did.
is there any good amplify/shader that change your scene more toon like? Like the trees you see in this scene:
Question, I've some lighting issues on my model. Is that because of this, or what did I'd wrong? https://gyazo.com/e0f4393b846200ce8cb37e36f44f1719

@quiet tiger That's because the whole model uses one smoothing group. You'll have to separate the smoothing groups at sharp angles.
In Blender this is done by sharping edges
The mark sharp thing you mean right?
yes
I used that.
there's also an auto smooth option
My main modeling program is 3ds Max.
I've been looking into Blender 2.8 for a little while now as well so not too familiar with blender especially 2.79 and below
but those are the two ways I know you can do smoothing for Blender
Use an edge split modifier and disable auto.
Question, i'm using projector to fake shadow on ground and it works great but when projects on that crosswalk( a plane with mobile/cutout shader) it gets really ugly anyone knows what is the problem and how to solve it?
Oh... Hey.... Are you using lightweight, @runic spruce?
Ah... But check everything... It could be how it's sorted.
that black part is actually happened because projector is drawing two shadow(one in asphalt and one in crosswalk transparent part) how do i avoid drawing on transparent part
hey I'm really new at blender. I accidently applied an animation on the wrong object and it changed my transform to something crazy. CNTRL-Z doesn't undo it, is there a way to undo this?
Morning.
your models are pretty nice
do you make them for fun? do you sell them? or use them for a game?
@wanton snow Thank you! For fun but I also plan on making game-ready models too.
Morning.
Rom, the vacuuming spider
Morning.
Folds!
good morning
heya
Tried out substance alchemist today, amazing software. I used a non-seamless photo of some bamboo wood, and got something usable:
That's tessellated
and PBR
never heard of substance alchemist, i'll have to look into it.
you know bitmap 2 material?
it's basically evolution from that
but you can mix all kinds of pbr substances/materials with it
quixels mixer is somewhat similar app atm, altho they are moving into different direction
yeah i found some videos about it
seems you can only access it if your substance subscription is active, which mine isn't
will have to check it out next time i activate it
Hi! Can't believe quebec residents cannot participate Into The Vault 😦 So many 3d artists in here
they cant?
you are eligible if: you are NOT a resident of Cuba, Iran, North Korea, Sudan, or Syria, due to U.S. Export regulations and you are NOT a resident of the Quebec providence of Canada or the countries of Brazil or Italy
here is why:

The Balance Everyday
Ever wonder why many competitions are void in Quebec? Why Canadian sweepstakes law protects Quebec residents and makes it harder for them to enter contests.
so don't blame Unity, blame Quebec Government
I ran across this guy's work, it's amazing:

The Rookies
My goal here was to take an asset being the Engine mounted on a Crane from the planning stage right up to final composition, my main focus being Modeling and Texturing/Lookdev. This is my first demo reel at Think Tank Training Centre under the mentorship of Jon Catapia.
he did the engine and the red lift, the rest is an actual video background
but man, the detail on that engine is amazing.
yeah I didn't even notice he had added a reflection into the surface of the car until I watched the video. it's very seamless
Pathfinder Fanart I did in Blender Eevee Realtime from Apex Legends. Thank you for viewing 😊

Did a Pathfinder inspired design in #Blender3d from @PlayApex :)
#artistsontwitter #gamedev #indiedev #fanart #b3d #blender
#ApexLegendsFanartChallenge #ApexLegends #3d #marchofrobots #gameart #animation https://t.co/fabpfQgLa1
Hi. Any fix to exporting Cd to vertex color? Doesn't seem to happen...Vertex color are just empty once I open my fbx somewhere.
Wrong channel my bad.
someone have good night HDRI
@lusty flint https://hdrihaven.com/hdris/category/?c=night some of the highest quality, and all CC0. Use this site all the time. 🙂
thx 😄
but there all HDRP has trees or houses
im doing scene in dune
and horizon should be clean
use a painting program like photoshop to fix it.
Free, good, and useful. Pick 2 ;p
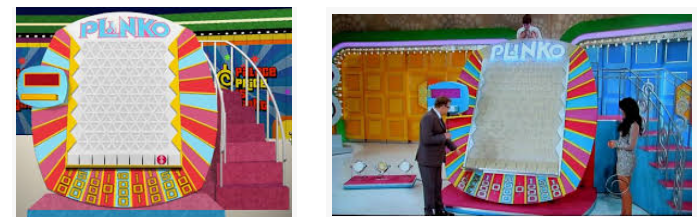
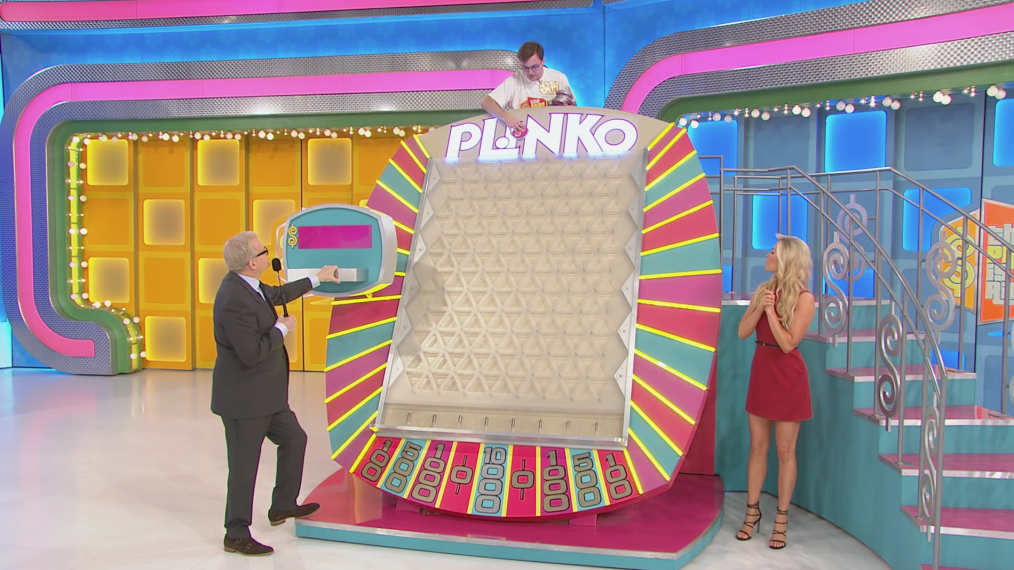
Can I get a critique? Colors and lighting looks off but I can't tell why
It's a blender render that I'm gonna eventually import to Unity. Sorry if this is the wrong channel - I don't know of any blender discords
do you have an image to compare to? i'm not sure how they are off

yeah i think it's going to be hard to say since every TV might show them as different shades
in yours the numbers look blue
in mine to the right the numbers look yellow
Yeah I messed up from the start because the youtube videos of Plinko look way different when presented in different angles
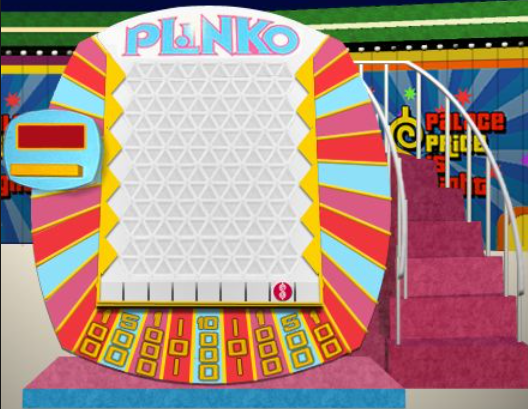

The light refraction (?) of the plastic transparent panel disperses the light of the plinko logo differently
anyway it's probably best it's NOT 100% accurate
to avoid trademark infringement
i think people get the idea hehe
ok
I was gonna import it into unity for my own personal 1 week project
the blender model itself took almost 2 weeks, so I'm gonna take a break from it for now
maybe work on another tutorial in unity cuz I haven't opened unity in 2 weeks
hi! i've got a folder with a jpg. what's a clean way to, via c#, load the file and stick it onto an existing Plane?
@supple stratus the other thing to remember is the real life board is printed or painted whereas the render is direct colors on pixels, your render is just more "perfect" representation of the colors whereas the pictures of the actual object are through a lossy camera, with changing stage lighting, onto real film translating ink on medium.. there are ways to simulate that, just poke around guides on photorealism.. I Don't think you renders are off, they just need some filtering/lighting adjustments depending on your end goal for environments
@drowsy pond can you elaborate on what you're trying to do? something triggers in the scene and it changes a plane to reflect a jpg image?
hey I'm having an Issue i dont know how to solve,
basically i have a gameobject with multiple children.
the player is able to look at one of said children and press the interact key
and therefore should interact with one of the objects (the one he'S looking at)
but my code tries to interact with the parent object
if I had to guess, the collier of the parent is covering up the collider of the children ( or you didn't put colliders on the children)
children have colliders
parent has not
every object you wan to be detected has to have a collider and the tag
they have
when it prints out the 'hit the usable'" debug line, is it the right or wrong object named?
I see for layer mask you use '2f' instead of properly creating a mask
are you sure the mask is right?
mask must be all the layers you do NOT want to detect
best way to make a mask correctly is like this:
so i should change that to what exactly?
LayerMask mask = LayerMask.GetMask("Wall");
mask = ~mask
this would only detect the "Wall" layer
the 2f is actually supposed to be the length of the raycast
you assign what you want to detect, and then the second line inverts it to everything but that
oh so you're using the variant with no mask
yea
could be part of the problem then, maybe it's hitting something by mistake
because if you say the parent has no collider, there's no way it could hit it
so must be hitting something else
also I notice at first you use hit.collider.gameObject
then later you switch to hit.transform.gameObject
you may be referencing differnet gameObjects this way
cool
@hollow timber Those are some great points, thanks for the feedback!
Yeah I was bothered by how perfect the gameboard looks
Like, there was no texture or "feel" to them
Hey I have a broad question: when creating a building for a scene, would you create the entire building in blender, or would you create "pieces" of the building in blender, then assemble the building in Unity?
So if I wanted to make a small house, would you do the entire structure in blender?
It's up to you, both of those are acceptable methods, It just comes down to how you want to work.
hi, is there a way in unity to make wallpaper embossed with correct lighting
ee
btw that means I am excited
ok so half the time my models are actual garbage and the other half they turn out good
this is a case in which it turns out really good
@short shard you mean like a screenshot?
its ok, i think im getting somewhere with your awnser in the other channel
wait i need help
what is that tool that uh
it lets you split a mesh into more vertices
it shows like a pink outline
oh ctrl + r
i only remember like 5 of the thousands of blender key combinations
blender's transform vector3 things are so inconsistent
sometimes y is up
sometimes it's sideways
and i'm talking about the default meshes with a rotation of 0, 0, 0
you mean exporting from blender to unity?
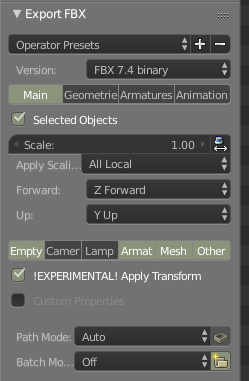
i recommend using these settings, meshes are far more consistent when exported this way.
(and that's exporting as FBX, not just dropping blends into unity, I don't recommend you do that)
that is one thing that annoys me
and another thing is when you like add a cylinder into blender and change the y scale but instead of getting shorter it gets skinnier
might have an unapplied rotation
idk
maybe
also how do I export the material on a mesh?
it looks fine in blender but in unity it doesnt work right
you can't
unity won't use blender's shaders and such
you need to either find a way to bake it to something unity can use, or do your texturing in an application with unity support, like Substance painter.
ohh ok
you could easily bake out the diffuse and normals
getting something close to unity's Metallic/smoothness PBR maps would be trickier
you might could bake out specular and use specular workflow
but that doesn't look as good really
maybe I'll just apply the materials in unity
like make my own
i'm not sure I have much to paint on anyway
so uh
my submarine is hollow
and when i try to apply a material to the inside
it's just white
Is there anyway to fix this?
I’m 90% sure it has to do with the UVs or something but it could just be that the light is too bright
...
it would help if you showed anything to assist in determining the issue.
like, the materials you're using, the Mesh component you put the materials on
the models' UV maps and material setup in blender
etc
otherwise people just have to use their imagination to try to understand what you might be doing
and well, that's not really viable lol
also you kind of answer it yourself in that it's probably UVs, too high an emission, or improper material setup in blender.
Ok so what I did was
I started with a metaball sphere (because it has more polygons) then converted it to a mesh
I then just solidified it and clicked the Add Simple UVs button
The material is just a unity material dragged and dropped into the material slot in the import settings
idk much about UVs also
it turned out to be the lighting

ArtStation
This prop is part of a project i'm working on called "Mansion". An old mansion level in the style of "Uncharted" environments.
https://www.artstation.com/hassensamaali/blog
finished ❤ https://www.artstation.com/artwork/9eRoOo

ArtStation
My recent work, based on sohyun kim's awesome concept art: https://www.artstation.com/artwork/AJn15
don't you hate when a mesh "rips" itself?
or is it just me that this happens to
that is supposed to be a flat plane
ok finally fixed it
always blame the mesh 😄
any thoughts on how to make this more "submariney" ?
it's supposed to look like it's from the future
in the future everything is green

ArtStation
A new Rig I have created, Exploring the creation of mechanical rigging again but blended with organic rigging in the form of a tentacle.
Character originally designed by Jacob Naylor.
I'm finishing up a bunch of older projects. :0
Sci-fi stuff likes smooth surfaces with a mix of curves, Tesla are good at showing this off.
You can also try playing around with some panelling., Pipes and lights.
subnautica :>
Idk but maybe #archived-lighting
@eager mist light bios/distance settings
yeah that would remove it
but its still strange how it shows up
could it be because the walls are so thin?
Yes.
iirc you can fix that in the baked lightmap settings
Place geometry around light bleeding areas with shadows only in the mesh renderer settings.
When I am trying to create mesh in runtime, I encounter this error. Can someone guide me on my mistake? https://gitlab.com/snippets/1840576
Ok something looks off with this creature
I’m not done but I think I should fix the body before doing anything else
What should I change?
Well making it longer seemed to help
I would say the head is huge compared to the body, so make it not only longer but bigger ? Somehow like a dune worm from the film.
Yeah it looks a bit better now that I have made the body much larger
Unfortunately in this screenshot the water ruins the texture
And I had to remove the teeth because they were getting stretched by the bones
Tbh I should make the body just a bit more larger
I have a gameobject with a mesh on it. Is there any method callback that would let me know when that gameobject goes out of Camera’s FOV and back in?
Maybe OnBecomeVisible and OnBecomeInvisible? I know there’s something like that but I doubt I stated the correct name
I tried using it once... it worked, but was a bit unstable
https://github.com/tbg10101/SubstanceProceduralCubemapGenerator Hey, I wanna help this tool I helped inprove! This tool makes it possible to author skybox textures in Substance Designer. I helped make it work in the new Substance setup from the old one and now it's on github, so I hope someone out there find it handy!
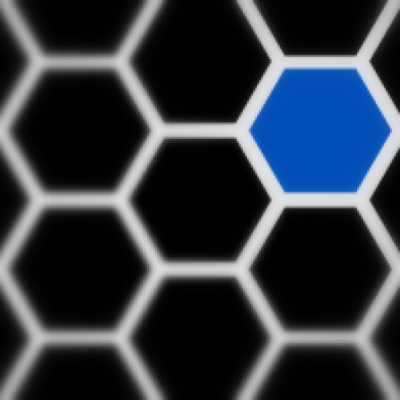
GitHub
Generates cubemaps based on Substance Designer assets. - tbg10101/SubstanceProceduralCubemapGenerator
anyone know how i can pan the camera around a selected object in the overview?
Select the object. Press F to center on it
Hold down alt and press Left mouse button to pan around the object.
Hold down Alt and press Right mouse button to zoom in and out on it.
Hold down Alt and press Middle mouse button to pan the screen around the object.

gotta give you a hand for that one. 🙌
;>
Using here Unity and Cinemachine. Thank you for viewing

Vehicle design presentation #madewithunity that I did for #Nvidia Metropia 2042 challenge. #unity3d realtime and #cinemachine for setup. Model in #blender3d
#artistsontwitter #gamedev #indiedev #blender3d #b3d #realtime #animation #ArtStationHQ #polycount #3d @madewithuni...
Recommended Blender FBX export settings:
For Static Objects or Rigged Characters :
https://i.imgur.com/TwCuwbT.png

Anyone proficient with Maya? I have a situation where I'm trying to paint the skin weights. The following picture shows that there's a patch of influence hidden under some geometry. I can't figure out how to paint it, any suggestions? https://imgur.com/a/SL8W8lK
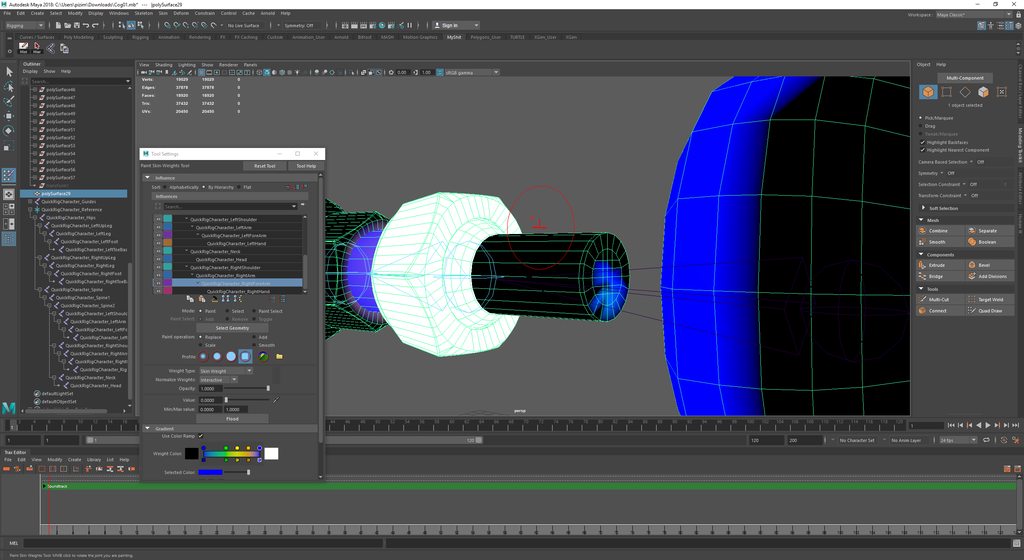
I hid the geometry, but it seems like that doesn't matter when painting skin weights
I use blender so I don't know much about Maya, but sometimes I have similar issues. Blender allows you to select vertices in weight painting mode to make it easier to paint things (only selected vertices will be painted)
I don't know if Maya has something similar.
Yeah, I tried that also, selecting the vertices, but painting still didn't work. I'm not sure what's going on
if not, you may have to temporarily split your mesh up so you can get at the interior parts, then join them back.
though i'd also say, if the interior parts really aren't visible from outside the outer shell, they probably don't need to even exist.
might be best to just remove them, unless they have some specific purpose.
That's a fair point
Hi, I am using blender to create 3D assets for my game and I am wondering whether I need to / should triangulate my assets before exporting the fbx for Unity? I am asking because I noticed e. g. the Windows 3D Viewer Sometimes has weird artifacts if I don't. Not sure how Unity handles things.
Helli, i have an issue, i made a flat mesh in blender and import it as obj in unity, but when i implement the material it just get a single color
@dreamy tide ohh ok thanks for that
anyone have ideas for getting a box out of a corner in a puzzle game where you move boxes? i want the player to have a solution if it gets stuck in the corner and i dont think pulling is a good option https://cdn.discordapp.com/attachments/497874004401586176/566048832886931457/unknown.png

As a matter of curiosity - Have any devs here found any downsides or limitations to using Probuilder? :c)
I ask as I'm wondering if its a viable notion to use it for modeling characters and such.
@zinc mortar Yes and No, Probuilder blocks are kind of "broken" from my experience with trying to create and animate things. If you're using them as parents and minor MecAnim, they work fine. But if you start parenting and childrening objects then un children, they warp and distort.
Any probuilder masters in here? I'm sure this is a simple issue. Everything looks good except for one thing... the trianglular bit circled in yellow. It's a single probuilder mesh, duplicated from the other side, rotated around, and UV's on that face rotated so boards are vertical. Problem is it's way too dark
Removed from the house
The other side of the triangle looks fine
Got it, nm, selecting the face, and triangulating it did the trick
@Dilute#4192 maybe make it so the player can stand on the cube and since they are a ball then they could spin and push the box back
Nvm they left
hi.. this is a 3d setup top to down so it looks like 2d ... n i have rotated the sprites so they look top to down ..... and the unit moves automatically toward its target using NAV MESH
problem is i need the unit to only move on the road.. any ideas how i can achieve this?
@mild kernel #🔀┃art-asset-workflow is not a great place to ask this. Try #💻┃code-beginner maybe
Would this be the place for getting help with importing models?
Would anyone happen to know why when i export a mesh from Blender as a .fbx into unity the weight painting isnt the same? I use one mesh model and copy it, modify it then export it and the other versions of the mesh objects, like the base avatar and clothes as multiple objects then ues in unity but recently its been messing up
why are my animations only sometimes showing up in the export?
I'm sick of FBX being so unreliable
I just used my saved blender project for now 🤷
Can i have help? I am trying to make a third person camera, but it says input axis mouseX is not set up. I've been to it and i can't seem to make it setup? Please help!
Do you need a screen shot?
@obsidian moon Sounds like an issue with your InputManager. Go to Edit > Project Settings > Input and check if you have mouseX setup
Basically you want to add an axis. See the "Size" thing?
Yes
you want to make that a number higher
That will duplicate the last axis you have defined
I'm not sure off the top of my head to how set up a mouse axis but there's a ton of tutorials on setting up axis in Unity
Just search on youtube and you'll get it
but you're in the right place now
Ok thx
no probs
@eager mist what is that you're working on
Does anyone know what causes these weird light patterns on the model?
Hello guys. I need your help 😉 Is there the way to convert somehow old X 3D models?
Or maybe some kind of lib for it....
.x models with DDS textures.
@stiff patio Smoothing groups/surface normals are incorrect
Thank you Renardo, I set it all to flat normals and then manually selected the few faces that need to be smooth and it works now
Now to model some bicycle wheels, the real fun part 😄
Does anyone know what is actually going on with the relationship between Blender and Unity?
now no .blend files seems to work in Unity, and of course 2.8 doesn't work with older stuff, or older Unity?
is there a conversion process going on? I haven't heard anything of it, and the error it gives is super not helpful. As in literally inaccurate
Guys trying to import chars you gotta use Specific naming for bones for it to work orrrr specifically generate it using the generic animation and then use the rig hierarchy if you need more info I can try to post pics of it
hey all, I have a situation in a top-down style game designed such that the world (walls, doors etc) are rendered as normal with height going straight up in the Y direction, while the characters are rotated 30 degrees on the X axis so players can see the faces more clearly.
The problem to be solved is the characters' heads will clip through walls and doors above them. I've solved this using a secondary camera, however the issue now is the characters will be visible in front of the walls at all times, even when they're behind them.
Would anyone be able to point me in the right direction for how this might be solved? Is this something that requires shaders for example?
Here's a sample mock up that breaks zero NDAs:
@viral quest why not just make them up right and tilt the camera slightly?
Or just tilt the heads to look up slightly. Sounds like what you're trying to do will not be easily fixed with reliability
yeah I haven't seen a game like this, but it's not my design, i'm coming in halfway
hello
I'm trying to create the overlay/hud for a game
should look like this in the end, roughly
but I'm struggling with positioning the canvas elements
I have a canvas, and put 3 panels in it, with a horizontal layout
and each panel has a vertical layout
but it doesnt look right
Can you post a picture of how its looking? It's a bit dificutly to diagnose otherwise. (this would be better suted in the ui-ux chanel)
well in the end it works somewhat. I'll do the selection indicator later
the cylinders are placeholders for the characters
and sorry, I thought since it was a problem with something in 3d mode I thought it should go in the 3d channel
another question: I have 4 transforms I want to make the camera move smoothly between (I use Vector3.Slerp and Quaternion.Slerp for that, and it works fine), but it doesnt seem to detect my key presses all the time
I used to use Input.GetAxis("horizontal") but it didnt work there either
Good day all. I am starting to mess with blender.
I quickly ran into a bit of a dilemma. Sculpting a single model versus using multiple objects for parts of the model (e.g arms, legs, etc.)
So the question is: Do you prefer to model with a single mesh or multiple meshes and why?
hello, I have a question about the performance, I have a group of palm trees that share the same material, in this material there are several textures of different leaves and trunk, all this to be able to do batching later, but that also means that it would have to increase the resolution of the textures so that they look good and I do not know how that would affect the performance, so what do you recommend, leave them like this or create more materials for the other palm trees and thus not have to increase the resolution of the textures?
my pc sucks and i use an potato
Your name is evil nerd-sniping.
Question about probuilder. How is dragging a face (extending the mesh) different then using the extrude command? When dragging a face how can I input a specfic value? I know I Can snap but ... it would be nice to use the inspctor to set this but it seems that is read only?
@brisk pawn moving the face does just how it sounds extruding creates a new face and moves that. It may be easier to see if you extrude and the switch to edge/vertex mode.
If you want something even better than ProBuilder, I highly recommend checking out UModeler while it's on sale. It's worth it full price, but RN it's 50% off: https://assetstore.unity.com/packages/tools/modeling/umodeler-80868

Do you still use ProBuilder?
UModeler was nominated as Best Development Tool in Unity Awards 2018. UModeler has been ranked 2nd there.
Website
| Forum Thread
|
Manual |
Tutorial Videos | Facebook | Contact.Support@tripolygon.com
Release note
UModeler ...
I started using it for my next game and it's awesome! Just wanted to spread the word and support this one.
https://i.imgur.com/m1iFYrI.jpg
Doodling with some basic asset I created and trying to get the best out of HDRP
Do you guys knows if there is a better way to share picture through discord and avoid their hard compression ? Or no other way than to click on the source link ?
How can I connect an armature and mesh together in blender?
@wide elk preferences > procore > snap to single axis. That should fix it.
@gentle folio thank you, will test and report back. This behaviour seems to happen when I centre pivot.
@eager mist First select the mesh, than the armature, press ctrl - p and choose "with automatic weights"
@gentle folio that looks like it did the trick!

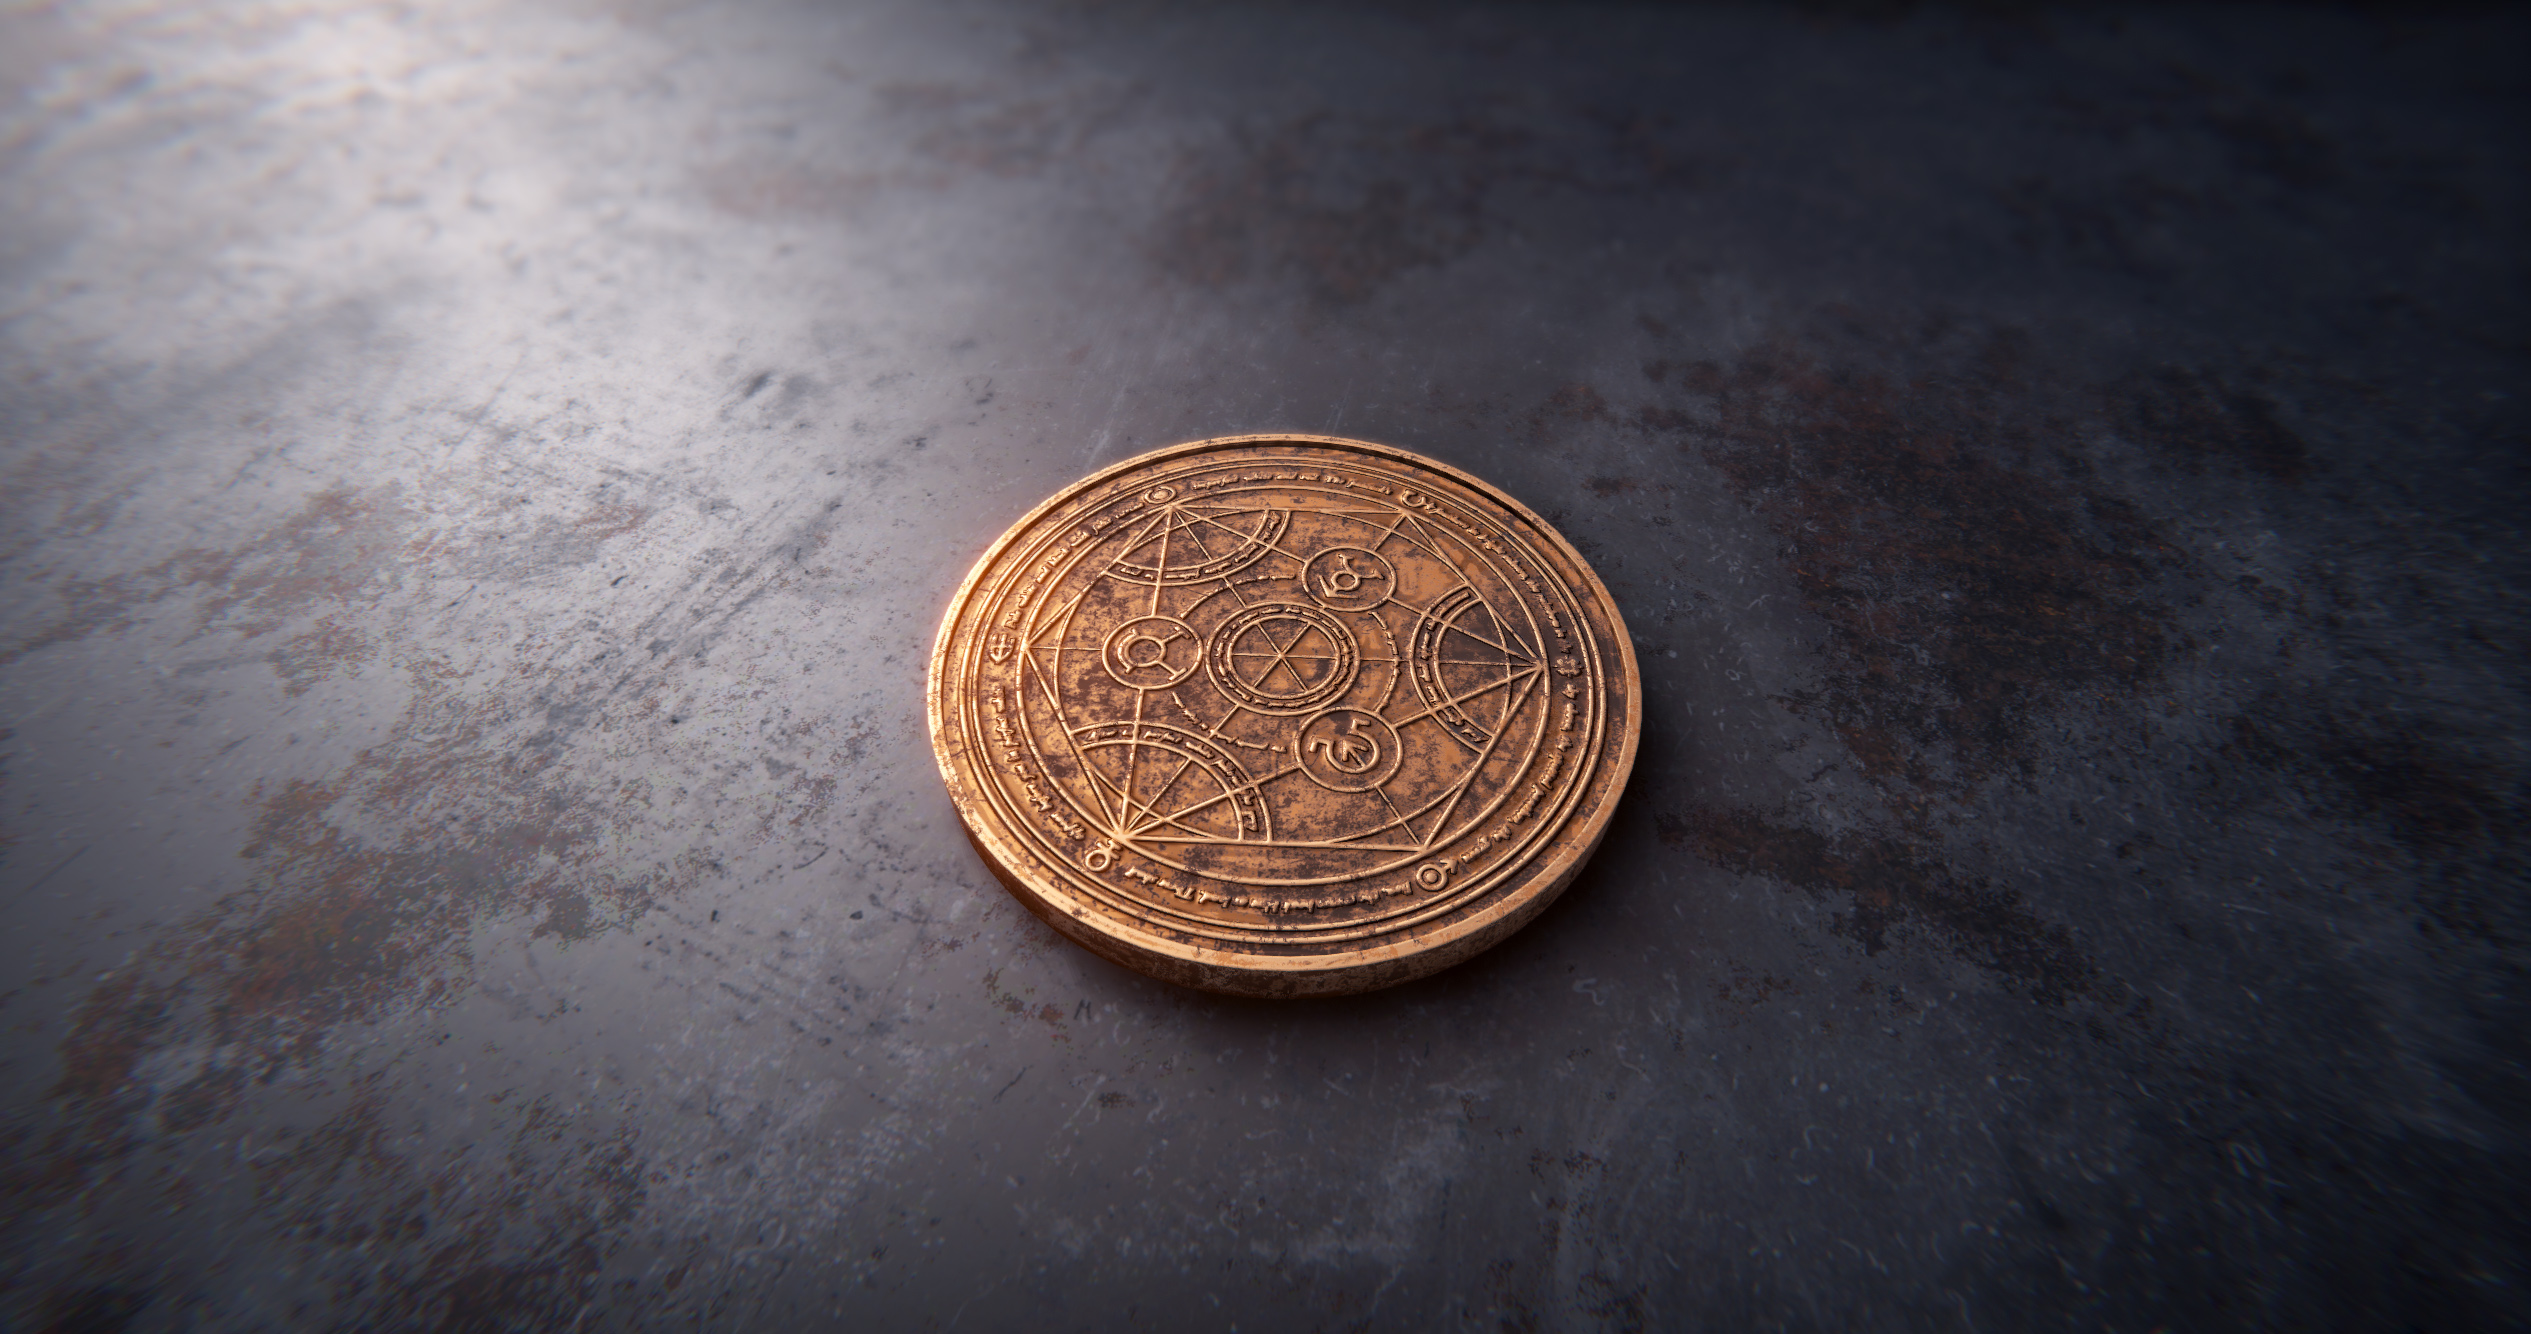
https://i.imgur.com/LxbushS.jpg Hi guys 😃 Just completed another quick exercise to train on render and materials and I hope there are alchemy lovers over here.
Textured in Substance Painter, screenshot in HDRP Unity.
I think I could do in 3DSMax
Does anyone know (in the unity editor) how you decrease the sensitivity when rotating objects? In blender for example you can move your mouse away then rotate and the rotation is much smaller, more precise
Hey , hi here 😃
Just posting again some personal exercise here to share the love for Unity HDR pipeline and Substance Designer.

@YerBoiLogi#1764 you can do it in blender, here's one way to do it https://www.youtube.com/watch?v=YOQ0aspIn9c
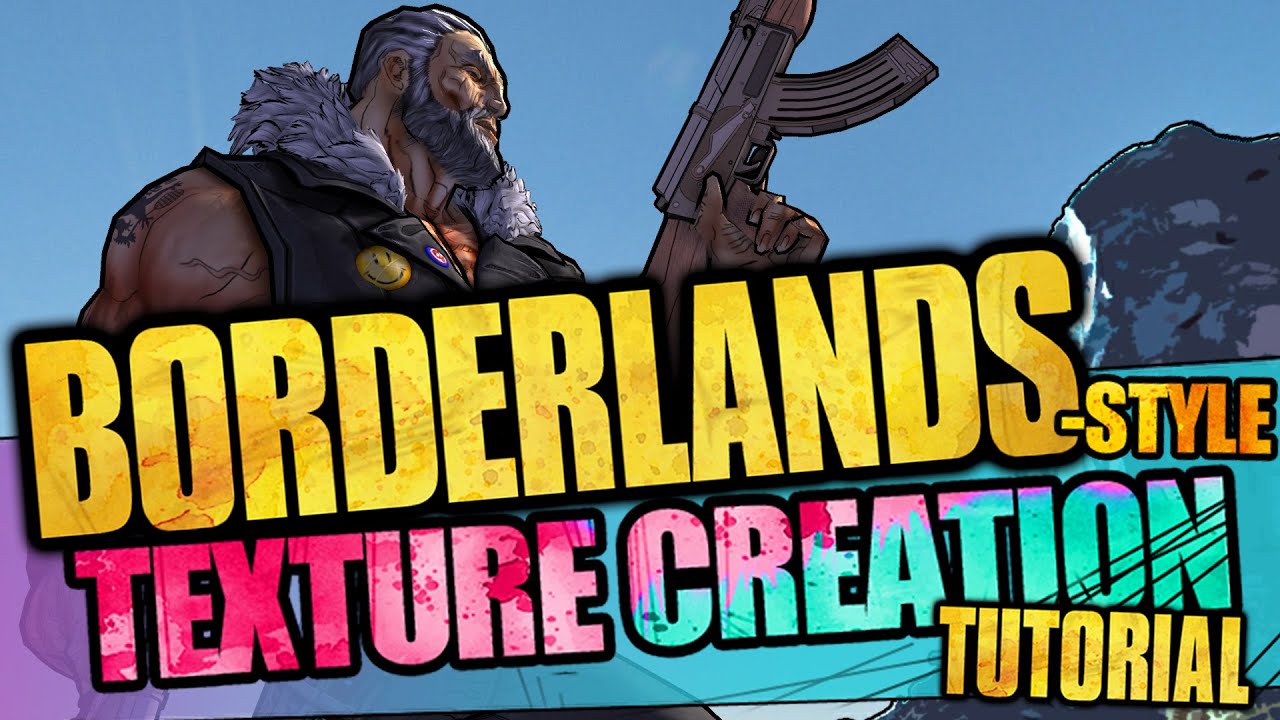
The Borderlands games have a unique art style - and that style is all about textures! In this tutorial, I reveal the trick to painting character textures in ...
hi all, is there a tool to paint the vertex color directly on Unity plz ?
(and a free one ^^)
Hey @zinc tide maybe you should check out https://assetstore.unity.com/packages/tools/modeling/polybrush-beta-111427
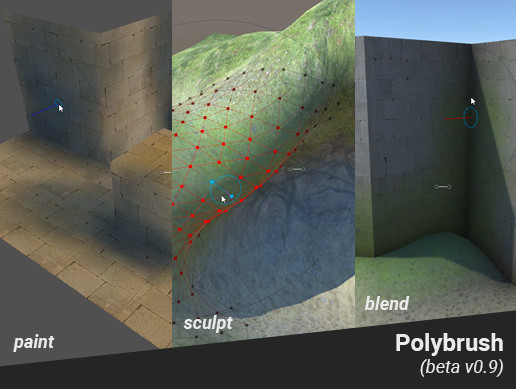
Now an official Unity tool!
Read more: www.procore3d.com
Terrain-like tools, for Meshes!
- Sculpting
- Vertex color painting
- Texture Blending
- Mesh Scattering
Create spherical worlds (or any shape), sculpt organic shapes, blend geometry, paint on gru...
thx 😃
@zinc tide polybush is what you are looking but what is on the asset store is about a year old, the latest versions are now in the package manager.
ay... sorry for the assetstore link!
No problem
Did this 3d fanart of Goku in Blender using realtime Eevee. Thanks for viewing ☺

Did some #Goku inspired 3d art in #blender3d with realtime eevee.
#artistsontwitter #b3d #blender #gamedev #indiedev #GokuDay #DragonBallFighterZ #DragonBall #dbz #fanart #3dmodeling https://t.co/kPZwEl2K4B
So I've been trying to import my objects without Unity tinkering with the default transform and scale settings. I've been successful with setting the scale to a proper default value by modifying the object's .meta file and set useFileScale to 0 instead of 1. However, the object is rotated by about 90 degrees as default compared to the original model. I've applied everything in Blender including the rotation, but it doesn't work. Strangely enough it does automatically rotate it back like it should be, but that should never be needed. Any one know how to fix this? (Mention me please)
@void berry I think what you want to look at is the import settings in unity. But know that when you place a object in the unity scene it trys to place it in the view port not at 0,0,0. The rotation thing I think is do to a difference between blender and unity where in unity +y is up in belender I think it is +x or +z. If you are using unity 2019.x you can open the prefab when it is selected and see it in its default state.
@gentle folio I tried that. didn't work. The original model shows up rotated.
Fixed it by exporting it as obj instead of fbx or dae
Q: do you guys have an efficent workflow for making indoor scenes with collisions using probuilder?
i made a room as one mesh, and trying to do collisions with a mesh collider won't work, so i have resorted to remaking the walls and ceiling with an invisible material, but if there's a handier way I'd love to know
Meet this silly pig. He is not going to production 😂
But this one lil boy does
awe


IS there a way to separate clothing from a mesh in blender?
@eager mist is the clothing verts connected to the body in edit mode
if not go in edit mode select a vert on the clothing and press L,then p
i can do if if you want
Hey, what do you think is the best practice with exporting geometry mesh from 3DsMax to Unity? I have separate terrain / level elements, and I would like to know if it is good to export them separately in different files. Or should I bring them together in one FBX file? Which way gives me more freedom in further development of level, what do you think?
Hello, I'm almost completely new to Unity, 3D modelling and GameDevelopment as a whole, I'm looking to make some basic models for units, buildings etc. in the RTS i'm making. From the research I've been making, Blender is the way to go (I want to keep it free). Do you have any better alternatives for a beginner with a $0 budget, or any good beginner guides for Blender?
https://sketchfab.com/3d-models/buildings-58b4be684bb741798932b04c489e3a8b sharing my art stuff

Made with blender 2.79
experimenting with squares and planes with pbr reflect and emit - Buildings - 3D model by OddNick (@heredis12)
Alright, Thank you :)
Yes, obviously I would get Photoshop and such if this becomes more of a serious hobby or profession for me, but since I will spend months or even years of just learning, I don't want expensive subscriptions to be ticking
Thanks for your answer 😄
Some faces arent drawn when using models I made from Blender
You have flipped polygons
Hello everyone ! I'm a newbie into Unity 3D (I used 2D before) I want to know, what's the best modeling tool for you ? Thanks
Maya and max are standards bust costs 1500€ a year +-... blender does the same things and is free + open source.
Alright so I want to get into environment design. Anyone know a good 0 to 100 tutorial for 3ds max (for game dev)? I'm already proficient enough in Unity
And I mean tutorials that cover at least all the basic and some advanced stuff like UV maps in 3ds max, everything necessary for good lighting
@Naeso#9447 I been a 3D modeler for about 14 -15 years everyone has there own likes and dislikes.. now many studios AAA will use Max, Maya, Modo.. Indies will use some of them as well but since Blender is free and fairly good many will use that... Now I used them all, but 90% of my modeling I use Modo, and own Maya and find Modo to be way better . I still use Maya for animations, rigging and so forth, and use some mods I made or bought for some work as well...in Maya but other work is in Modo..... I love Modo. it also has some amazing mods. Now Blender has a new UI with 2.8 and a few mods that make it worth using.. like BOX cutter, Decal machine stuff like that.... again, some people love Blender, I personal use it very little due to my love for Modo. and Maya. ( I own Max also) 2016. Full
but you need to use what you like and works for you. so I suggest to try them and use what you like at the end of the day..
I personally can get more work done using Modo than Maya.. by hours.. for most work. so I like the work flow and add ons I made and own..and the built in tools for Retopo, UV and so forth over others... I also like just the over all feel, UI in Modo... over others...
So, again try them all, you can get most as a TRIAL ....
so I wouldn't use what others TELL you to.. because if you get a job, you will need to be able to use ANY of them..depending who you work for..
one question. I'm noob in blender/unity and I've imported my first model in Unity from Blender and I'm facing an issue now. Please see for yourself.
why I can see through the model, and can't see sides of the object (no matter how i turn the camera).
Try pressing ctr n on the model in edit mode in blender
And select make insides consistent on the side
The face not showing is marked as a inside one right now
@dreamy flint
Thanks I'll try 😃
Alright, let me know if it solves it
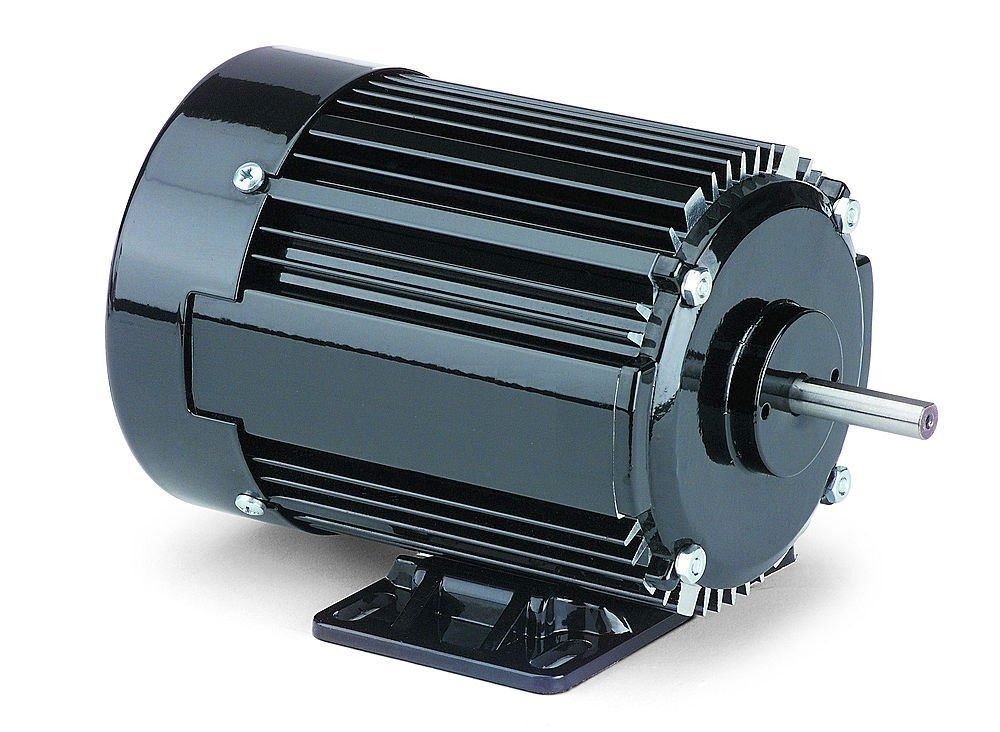
i'm trying align objects to the cylinder surface in 3ds max, but i don't understand how to do this with align tools
i'm trying to do something like this https://static6.industrybuying.com/category/2015/02/motor-images-14.jpg

i tried to create circle spline and use it as path for my edges, tried to use spacing tool, but rotation directions are incorrect
thanks, i'll try to do this at monday
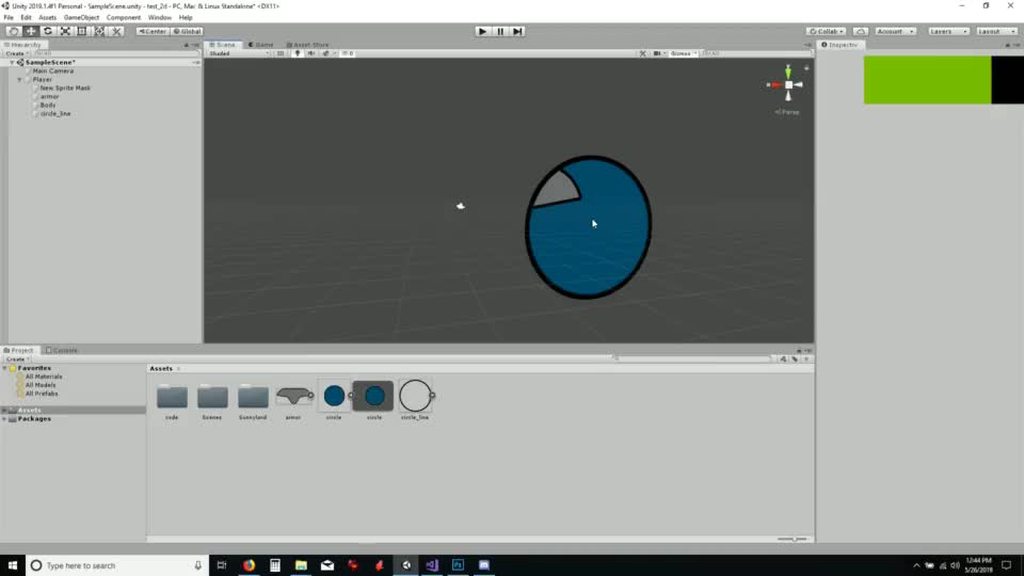
interesting effect i noticed, sprite renders with a sprite mask act like an interesting "portal" when viewed in 3d
https://imgur.com/Cm78SqR
trying to import a model from blender, but the forward and up direction seem to be off by -90 degrees in the X axis... Should I be doing it differently?
it imports facing down and needs to be rotated which is messing with wheel colliders
Exporting it as an obj causes the names to have _ instead of spaces, and mess up the parenting and materials.
Alright - seemed to have fixed it with these settings:
Hey guys, anybody know anything about anisotropy in the Lit Shader? What does it work with besides point lights? I can't get it to work with an HDRI sky
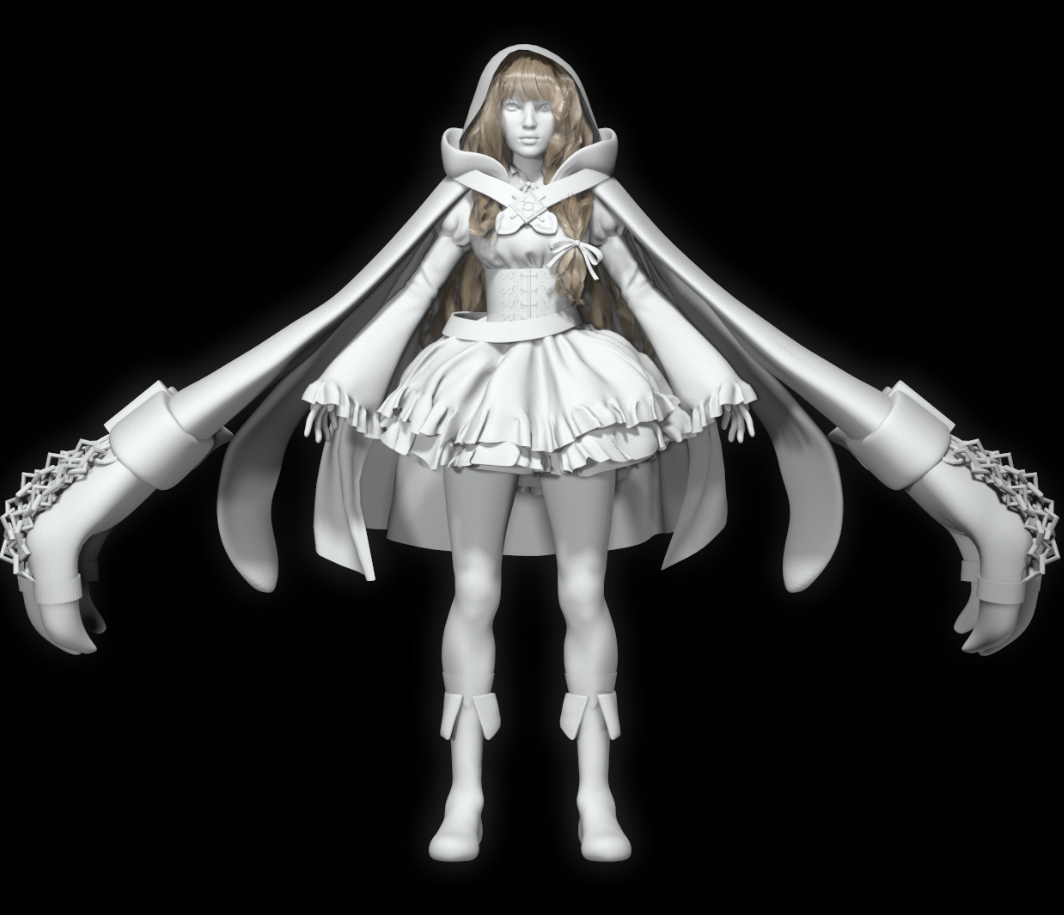
modeling the hair and clothing on this character must have taken forever
How do I edit the move tool to move by 1 space every time?
@serene girder There's a "snap settings" under one of the tabs up top, to set the range an item moves when holding shift 😃
Ok I have a question
In Blender i modeled my character but when i import it into unity, its bigger then a regular primitive or object. How can I fix this?
There is an import scale option in the Model's import settings. Alternatively, you can setup blender export options but I'm not a modeler and I don't know how to do that.
Hey guys, i have a problem with Blender3D origins going into Unity3D. Everything i see on google says it should work, but i can rotate my item in Blender and it rotates around the set origin, but when imported to unity, it looses all the origins.
Does anyone know how to fix this?
I haven't used blender in ages, but is there an option you have to select in the export settings?
Scratch that, i just checked and its not
Spent awhile searching with more obscure / less obvious search terms and someone thinks its an issue with having more then 1 object in a blender project. Since i have made a mitre saw and need the saw to move independently of the rest its made as its own object.
I don't think you want to rotate a thing
like just rotating a game object isn't going to store out anim data is it?
the mitersaw blade probably needs to be parented to the mitersaw parent in a way that you can genrate a bone and then rotate the bone over time
someone with more experience animating in blender might be able to give you more guidance but that's the way I'd approach it
I've been trying to use blender but every time I use it to model something I get some wired stuff like this:
what should be a simple unwrap has become bug tracing torture
does maya/3ds max have these problems too?
I've changed the shortcut so now it's happening less, damn extrude
blender killed my high poly mesh after baking I think I'm gonna test maya
I've been more than patient with blender all these years but I can't take that inconsistency anymore
what use are blender features if one can't create an asset without wasting a lot of time on bugs
I've had that problem years ago with blender and thought it was more stable now but I guess not
holy shit maya is 250$ a month are they crazy???
I'm beginning to hate gamedev....
once apon a time you needed 3d studio max for around $3k, photoshop for around $1,200, an IDE for around $200, and a game engine that could run $500 or more. The subscription models have made the barrier to entry a bit easier, but at the same time overall more epensive.
well in those times it was easier to earn $$$ with games too
I wouldn't say that. Better odds of making money perhaps, and people had lower standards for what was acceptable
@stoic arch just use blender. 100% free
y but blender messes with me too much
I hate that
I have other choice anyway
the rest is too expensive can't afford them
what exactly you hate so much about it?
hmmm... Donno about bugs. Haven't used it for that long, but didn't encounter any bugs. Anything that I thought was bug ended up being my lack of knowledge...
but I think it's the same with any 3d software
I still get them from time to time
and then I often loose my work
got lucky today the high poly was still in the blend1 file
but blender bugged it out of existence in the .blend file
yep and I get these problems all the time
that won't save you from lost time just from total loss
maybe that's some particular problem that can be solved once and forever?
or something specific to your config
no idea I just noticed over the years that it still happens and I've never had these problems in any game engine or 2d software
just with blender
I mean there are many people using it in their work professionally. It can't be that they encounter these problems on a daily basis...
it's not daily otherwise nobody would use blender
those file bugs only happen to me very 1/2 year or so
oh, so it's not that bad
nah but there is other stuff that makes ones life hard using blender
but they happen exactly when I've forgotten that blender does this sometimes
but than again, if you're a professional 3d artist and it really bugs you, I think 500$ won't be a big hit for your wallet
for 2 month I'd just stick with blender imho
you said these bug happens once half a year, so it probably wouldn't happen during these 2 month
I kinda do everything coding, drawin, 3d modeling, sound etc.
that is just an estimate can happen whenever
I just need to remember to make tons of backups
I normally did with blender but I forgot since I've been concentrating on coding this year
I see
that is also a big problem since I switch a lot I forget how to use stuff properly if it's flimsy and get into the beginner traps over and over
my player is not colliding with object. Need HELP!!!
@worn spruce Please post this in the appropriate section.
Josfe, this is a bit late but thank you for that idea. More of a coder so new to all this art stuff, but your right, rigging it with a bone is a really simple solution and probably the way its supposed to be done.
is there a big difference between cavity and bump maps? Is it even possible to use cavity maps in unity?
I've baked some textures and added everything inside a shader together and it looks like this:
why not use normal maps?
@stoic arch
whats that texture map called when you have multiple things on it?
i completely forgot and i need to google it
I did I fixed it had flipped normals
but the texture maps still look like crap:
could it be uvs?
I know them as uv, textures, maps
but it's not one thing
you just have at least one
and the most simple one is a color texture
the first problem was flipped normals as in the the polys were the wrong side
the 2nd no ida
well check ur uv map
the problem is what do I check?
I have a normal map, an AO map and for color I just use an color node
normal created with maya:
this is what the normal looks like:
I get the feeling that unitys shader sucks badly
@stoic arch look like your unrap is QUAD 1:1 side, but your model have long side faces
that's not the problem I ditched shader graph and just used it the old way and it works
I'm at a loss as to how you got it to work, because with uvs that stretched, it shouldn't
it wasn't that good looking but there were no artifacts
As you can see it's stretched but not a complete mess:
how do I use 3 maps? I have AO, Normal & Cavity
but when I chose legacy bump diffuse I can only use 2
nvm found it: Lightmapped bumped diffuse
You could have used the Standard shader which has AO and normal map slots
If with cavity you refer to height you can use the parallax map slot
And if you want better results than parallax get a tesselation shader (there is a free one in the asset store)
when ur having fun but u noticed ur a new model but u arent good and u know ur gonna be replaced soon
No wonder i kept screwing up modeling. I was following this guy's exact moves, when all i had to do was look at the vertices and line them up
Is this bad?
Generally you want the lips to be the highest poly
Alright how about everything else?
You've got an unneeded triangle underneath the eye, when you're building faces, try to make quads as much as possible
It's getting there though
ok im gonna feel like an idiot asking this but what are quads? I know they're like planes
sorry first time actually ATTEMPTING to model lol
Quads are faces with 4 sides
ah
np man, we all gotta start somewhere
ngons, which you should avoid at all costs, are faces with more than 4 sides
Also, I wouldn't start by modeling the head, I would recommend you start by modeling some environmental stuff
Plates, Chairs, tables, cups
Is it possible for someone who is just learning how to model self teach themselves and learn from every model you make?
Definitely! A lot of industry professionals started off that way, all you gotta do is keep trying!
Getting there, though right now it looks to me like the bridge of the nose goes to high up his head
Do you have a reference you're working from?
yes
Anyway, I've got to sleep, good luck with that head!
Rocks!
how do i color daves head i cant do it
Why don't you do it just like you did for the other parts ?
"Joined" ?
Maybe he means that he had different objects for the body that he joined together?
yea
i cant color the head
@eager mist That doesn't make a lot of sense to me. If you joined all the objects into one, there should be a list of materials assigned in the mesh renderer. One of those should be white, and you should be able to change it.
k
@eager mist No they won't.
Ok good
Hi everyone, I need help. There is a way to keep UV when we decimate a mesh in blender ?
I need to make LOD of characters
So I want to preserve my texture even if I reduce the number of poly
hi all, I recently get this error "requires the mesh to be marked as readable in order to be usable with the given transform." but I don't understand why ... could you helps me ? I do not have negative scale ...
in the mesh import settings, there should be a toggle marked "Read/Write". be sure that it's checked on
Is it possible to put a smaller cylinder inside a cylinder and subtract from the larger one, so I can make a circle with a hollow middle?
Like how might you achieve making this https://koenig-media.raywenderlich.com/uploads/2016/12/Reticle.png

is this model for dave good this is the first player model i ever made and im not that great at making 3d things
if u say no the model texture for dave will be sent in ur dms
@unique cove i dont want tout check it ...
I want to understand why this object, in some case, do this error ...
@zinc tide Ryan was talking about this (borrowing image from forums) https://forum.unity.com/attachments/readwrite-png.166071/

I know that
but I don't want to enable this option xD
I want to understand why this object do that in some case :p
I'd like to share some of my stuff. Its very rough technically speaking but I enjoy being able to make my own things in my own visual style:


Here goes 😃 I dont want to spam the chat.
send to us topology photos of your work =)
Everyone can do 3d models, but not everyone can do 3d models CORRECT 😉
can someone help me how do i put the texture on dave i imported him into unity
vanta black
Tried drag'n'drop the texture to the object ?
no
let me try
didnt work
i think the model broke
either that or the UV changed
somehow
poor Dave
I need to make about.. 300 houses, any good modular systems I can throw prefabs into?
They're very specific, so not auto-gen, just need a good system I can use for building
@lusty flint Haha! I am glad that not quite everyone can model, otherwise I wouldn't be able to sell these things. :P
These are triangulated lowpoly models. I learned most of these by doing so I doubt that anything about my workflow is particularly correct. 😄 However, you can pick any and I show you the wireframe if you are interested.
This is my whole collection:
https://serygalacaffeine.com/assets-for-game-creation-3d-models/
Uncle Wolfs 3D Bazaar Hello and welcome to the Bazaar! I deal in prestigious polygons woven around the finest vertices! Here I will present my 3D Models that are either related to my own projects o…
im see, topology of models is fine
Oh, there is a lot of room for improvment but thanks 😃
Hello everyone,
i have a quick question i am making a game where the player controls a cube through a parkour and i wanted to implement some effect on the cube that would make it look like it scratches the floor
does anyone have a idea how that could be possible
?
hey guys I have a little c4d file which I wanted to convert into fbx for importing unity
its hospital room 3d model and I dont have cinema 4d as a programmer, can someone help me to convert it and post here? its size below 10mb
this is the file I'm mentioning
One message removed from a suspended account.
Hi, I'm following a tutorial making a 3D game about a cube that dodges obstacles.. I tried to add fog to it so the obstacles are harder to see like in the tutorial but it gives me this error:
Any idea how I solve this?
does anyone know how to fix this occlusion bug
the barrel is rendered behind the rest of the model
the trigger is missing some faces
i already checked the normals
the problem is most apparent from this view
Your normals look funky
Blender? 2.8 or 2.79?
In Blender 2.8 edit mode, select all, mesh-> normals -> recalculate outside
I need help
I selected my mesh + armature in blender did ctrl + p and selected automated weights but when i go into pose mod and change the bone position, the mesh doesn't move with it
cant e or scale down.. it affects other borders parts
Hey guys. Is there any way to use wrinkle maps in HDRP? I know they used some on The Blacksmith back in 2015, but that seemed kind of finicky and special case
@thorn stag Technically that would be the same as implementing footprints or tire marks. Just look into code of that and adapt it 😃
I got a modular house pack from thje asset store, but I'm wondering whats the best way to snap it together to build them
@unique cove use spectial snap tools in asset store or press V to vertex snap