#3D printing
1 messages · Page 3 of 1
Pain

Ah ha!
I think I found the one component that broke

This little resistor didn't give me a reading when I tested everything with a continuity test
No idea what the rating on the resistor is though so I'll need to do a little digging to find the exact match
Felt
Oh wait actually I may be dumb I think thats a capacitor
even still
let me see if i can get a friend to take a look at the videos you sent me

@whole wind

Yeah I looked at those mosfets too with the continuity checker as well but they seemed just fine
Only the one I circled seemed abnormal compared to everything else
@ebon dragon
Check them with a multimeter.
Have the fans set to max speed.
On one of the pins the voltage should be 3 or 5v.
I believe that they're doing high side switching so one should probably be 24v or 0v if they're doing low side switching.
Alright i'll have to recconect some stuff gimme a couple minutes
I'm trying to remember do 3D printer boards use AC or DC current?
DC i think
sounds about right
check with a scope 
mmm
well this is unfortunate
might take a little bit
For some reason I can't connect to the pi anymore. I guess I may not have used the static IP
epic dhcp moment
yeah mine went from 10.0.0.53 to 10.0.0.54 without any notice and i was so confused
slide to the left
Got it!
Looks like this one is the troublesome mosfet

No signal through it but the other two work fine
I do still kinda wonder whats up with the capacitor from before that I didn't get any continuity with
eat the capacitor
Yeah the fet is probably bad
yay!
Not a big deal though that should be easy enough to replace
I just gotta figure out the correct one to replace it with
part number AO3400A
I'd kiss you if I wasn't straight tyty
of course, I'll get extras just in case since they're so cheap
yeah 30 cents?
44 cents on digikey
that being said I can't even afford it atm lol. If I get this new job I'll be able to afford things again
@whole wind
allo
Thats good! I still can't afford anything though lol
But in other news I got done with my third interview yesterday so there's a good chance I'll have that job soon
congrats bro!
Thanks! But we'll see, nothing is set in stone yet
Doing another huge print, looking good so far 😁


laughatthisuser~1 bambu lab printer /j

Not a bambu
understandable have a great day
0_o
Magneto X user laughatthisuser~1
real
its beautiful really

"yeah but its better than a reprap tho" -every ender user ever
literally ANYTHING is better then Reprap. Even marlin is better. Reprap shit, marlin is ok, Klipper is life
im pretty sure they mean the reprap idea not the reprap firmware
even then its true lmfao


spiral z hop is magic
It's a hell of thing
Better to not need z-hop...but when you do...
my e steps have been off by 50
no wonder i get underextrusion
goddamnit
That'll do it
nice
so i fix this and im now getting the best first layers i've ever had
unfortunately bridging is still terrible and overhangs are even worse
cranking cooling made it better but its still awful
What tool head are you using?
uhhhhhhh
the hotend is stock ender 3 v2 apart from bimetal heat break
the mount is also stock e3v2
and i printed the single 5015 satsana fan duct for it
seems like the bridges just don't wanna stick when they reach the other side
im printing petg

Thingiverse
BRIDGE is a ≈8 minute object for tweaking your bridging settings. I think that the most important layer of a bridge is the first layer because it's what everything else builds onto, so we can save a lot of time by printing the first layer only. BRIDGE tests a range of unsupported bridging lengths from 5 mm to 50 mm, in 5 mm increments.
Here's a ...
does this

for shits and giggles i also tried the default ender 3 v2 petg profile in orcaslicer

Bridges with PETG are always a bit finnicky, but looking at your print that actually looks like wet filament to me
Have you dried it?
This looks like it was bridging fine but failed to adhere
should be dry
it's been sitting in a drybox at 65 for 8 hours
Try printing this, it might also be your ducting...
brb

looks the same all around
meanwhile on a benchy with the same settings

Yeah, benchy has a more extreme overhang, that test I sent just is checking for directionality in your cooling
Could be layer stacking, how wobbly is your print head on the carriage?
i cant get it to wiggle
What about the bar it rides on, can you rotate it like your rev-ing a motorcycle at all?
Or do you see any deflection in the print head while printing
so my printer mainboard exploded, neat or well stepper driver did but its one of those where its hard mounted to the board
i have a spare but its a stock board from ender
I have spare prusa mk3s board so it’s fine
ok, thought id offer it if needed
It work
yippee!
my arm based single board computer should be arriving soon so i get to setup klipper
yay!
me when x86 based sbc
wait thats just a laptop
theres plenty of chinese "mini pc's" out there that fit the sbc description a lot closer
some of them actually have great price-perf taking size into account
i was half expecting it to explode
thats fair i kinda did that as well
6 hours per 1
im thinking of making at least 8

@whole wind if ur still using a g10 build plate, how thick is it?
1 millimeter
Despite how thin it is, it's still very strong. and heat transfer is pretty good with 1 mil
4

Jesus Christ, funnily enough, this was the first thing I printed with my ender 3 too
The modular wall mounted system, right?
yeah hsw
bought 3 more rolls of black petg yesterday
arrived today early morning

Do not use calibration cubes for esteps
(if that's what you're doing)

Head to http://squarespace.com/CNCKITCHEN to save 10% off your first purchase of a website or domain using code CNCKITCHEN.
Too many people seem to calibrate their 3D printers with calibration cubes. I think this is a bad idea. In this video, I’ll show why calibration cubes are bad, how you properly tune your printer's dimensions, and how accur...
@slender trail
im not dw
as it turns out prusa has a scuffed usb to serial chip with a broken firmware making my klipper not work
im going to post this, if anyone wants them, lmk, and @whole wind plz pin if you can
Free Emergency Pinter Boards
These boards are here for anyone in need of a board if theirs fails spectacularly. They are not great but they are good drop in replacements in the event your board breaks on a chip level. You can either keep it, or return it once you fix your stuff so others can use a board in an emergency case!
The following boards are available
- Creality v4.2.2 (-Board is fully functional.) | Available
- BTT SKR Mini E3 V2 (-Board requires a replacement mini-usb port. Either you can do this or wait until i have it repaired.) | Available
The Following boards are on Loan
Yall are poggers, love you all <3
Very cool of you, I think I can flash a new firmware on to the usb to serial chip. If not I can always go the Uart route
Yeah why not
ty <3
debian 12 doesnt package python2 at all...
i just wasted at least 2 hours...
yippee!

along with klipper i got a better 5015 and cranked the cooling some more, seemed to do wonders for the benchy overhang
i've been able to triple my printing speed
bridges still fail to attach on the other side...
nvm bridges are great now
dunno what fixed it
i have no idea what the fuck im doing
but things are getting better so its clearly working
https://www.youtube.com/watch?v=gBKsBhFbQNk man makes a diy 5 axis 3d printer and im just happy i got my old printer working with a new board lol

Hello everyone! After months of hard work, I’m thrilled to share the latest progress on my 5-axis 3D printer. In this video, I walk you through the steps and upgrades that made this possible. 🛠️
Despite unexpected issues, moving houses, and taking a holiday, we’re finally here! I’ve made several mechanical and software improvements that I can't...
should try to design a corexy system for the old printer though
what printer
original wanhao i3+
yeahh its not a new printer exactly lol

holy shit
i have pushed my ender 3 v2 to 250mm/s
i think i can go further but petg is doing petg stuff
Making custom add-ons for ikea furniture lul, this is the first time I model and 3D print something. 


W in chat for this man
@ivory magnet working on anything fun in the 3d printing world?
@whole wind hows all been going for you?
@woeful parcel anything from you as well?
i need all the updates
It's been pretty great so far, finished training for my job so now I'm on my own


Toaster spotted
Beep boop
teach me your ways
Congrats! There's that entire peg board to fill up, I see.
Ye it's almost empty 
I got many things on my desk that could go on the pegboard though
Measuring something with calipers and printing a custom fit holster feels so satisfying.
I used the plastic ruler in the photo to take measurements lul, but I'm considering getting a caliperr for future projects
Mine wasn't that expensive and all my prints fit like a glove with 0.2mm clearance. I've also seen someone with a digital projector scale the screen to the table, so they could lay the object down and trace it in fusion.
Ye I know an already decent caliper is "just" 20€
I was just waiting until I find one which has the circular readings part
You mean to take the radius of a fillet along a corner?
Nop I mean something like this

Oh, that's fancy. It's like flex'n an expensive mechanical watch while a 5$ casio is just as accurate. XD
I could also take one of the ones with the linear reading but I have somehow unlearned how to read them
I mean I haven't checked the prices yet, if it costs like 30€ it's fine tho
Mine's a cheap digital, sadly.
Well it's the easiest one to read, but you can't approximate by yourself
Oh, it's been annoying having to overnight a battery because it started to die in the middle of a project.
Yes also requiring a battery isn't the nicest thing ever
But yeah, something else to put on the peg board.
I've been doing so much random home improvements. My bathroom fan is a jet engine so I printed a safety cover for the switch so I don't shit myself when taking a morning piss.
Ye 3D printing is quite useful when you need something very specific that doesn't already exist or is difficult to get
But also for many other things
hear me out
i have like 3 of those shitty things
I love 3d printing. Just upgraded my resin printing set up.........
I lovbe it so much
Ayyy
Thats either a genuine happy comment about resin or a sarcastic statement about the annoyances of 3D printing
either one completely valid lol
No, that’s a legit comment hahaha
Every print has been beautiful.
Well, after I replaced the fep after tearing it slightly on accident because the prints weren’t sticking to the build plate.
Now it sounds like I’m being sarcastic again. But legit, happy 😂

forgot to press the cooldown button before unscrewing a nozzle by hand

yeahhh done that a few times

that's an insane volcano extruder
although that being said
I bet you could get some insane speed out of that bad boi
It has something like 110mm^3/s of throughput
But you can’t print super fast due to it mounting to a v6 heat sink iirc
It would move at high accelerations
Well more like flex
Oof
how often do you guys replace nozzles
Depends on how often the printer is being used but I'd say maybe once every month or so
at least thats with the cheapo brass nozzles
in reality you just change it pretty much whenever you start seeing a change in print quality
yeah about the same for me it seems
hmm

You have to replace nozzles?
What is that causes the nozzle to not be as good anymore?
That would be the constant grinding of material, some fillaments are more coarse than others so the wear down time will differ depending on what your use. You can think of fillament as a kind of fine grit sandpaper. As it forces its way through the nozzle the opening will open up little by little. The very tip of it also rubs against the material that already got extruded too.
Ye makes sense, thankies
Of course!
What upgrades? And what printer? :D

The dream
hacksmith industries
Man that's a big ass box

First print looks good so far, might need to adjust some settings though
0.2mm layer height?
Thickness of the layers, not diameter of the nozzle
I guess it's 0.2mm then, I also just printed the preload boat on my 3D printer, then opened the file in a slicer and compared 0.2mm layer thickness preview and they looked exactly the same
Gotcha
I kinda messed up my benchy because after loading the filament I didn't remove the oozed material


But it got basically inglobed by the print
Everything after that didn't have issues though
nice!
did you use the sample material the printer came with or was that from a spool?
all my filament is wet as shit
I used the sample material but I have the spool too
dried my filament
used the 0.6 generic klipper preset
added a G28 to my start gcode
seems to be printing perfectly
glad to see things just working sometimes
I gotta figure a way to attach this to the desk without going on the desk area (absolutely impossible without magnets)

Or I could go on the desk just a bit, but it would be nicer the impossible way
I could use double-sided tape positioned vertically though
And also orizontally
Wouldn't be easily removable though, but that's fine since I'm probably not gonna ever need to remove it
Does anybody know if double-sided tape gets weaker with time? (when used indoors)
i mean kinda, you do have a pulling force of whatever the weight is of the part plus the weight of the headphones that are gonna end up with a bit of a leveraging effect. just get some double sided tape that is rated for higher continous loads then what the headphones and the part is going to produce
I think I could use the metal part so that I have some tape vertically so that there's at least some kind of friction holding the thing other than the strength of the adhesive on the tape

I mean if you do have some Metal why not use magnets?
I was thinking about it, but where the heck do I get magnets strong enough?
Amazon should have strong enough magnets
Considering that there are those 5/6 cm of lever between the metal part and where I want to put the holder they would have to be really strong magnets
And even then the printed part would have to be strong enough
Or I could just put the hanger right under the metal part, but it wouldn't be as easily accessible
hm.

dual z motors?


wavy as the high seas what the fuck is this

Are those the auto-leveling results?
this benchy i just printed feels so solid i dont think i can break it with my hands
i cant get the chimney off wtf
petg with high part cooling
i thought layer adhesion was supposed to be bad
thats what happened
lol
i had a roll of clear petg that printed white somehow
@pliant nebula feel free to ask for help
nah we balling
whats the other side like
god
sunlu petg is the worst piece of shit filament i have ever had the displeasure of using
i still have 2 rolls left
i bought a bunch cuz it was super cheap in my local store
worst mistake of my life
i got a cf pattern on the other side

Ohhh luckyy
Hows that look after a print

ilove that
Finallyy loaded the spool! (I was using this white thing before)


Finished the print, and man black looks nice


Do not ask me why I left that space 

It still works but without that it would be betterrr

Next ones gonna be like this


teeny!
i would say thats average sized
some might even say that's at least 6 inches
Went through a few iterations but finally got something that works nicely for my practice lock

Even got storage in the back for pins and springs


Nothing provides the STL files for the CMF Phone (1)'s back cover! it's nice especially since an original back cover is 30€

How often should I be doing auto bed leveling and Z offset calibration?
WHAT PRINTER DO YOU USE
sorry caps
and what are you using as far as firmware goes
Ender 3 v3 KE
Latest one I think
tf do you mean "latest"
Options are
Klipper
Marlin
Reprap
I'm on and ender 3 but just that, the Ender 3
and i use klipper
I have the latest firmware from Creality
It's based on Klipper
What?
firmware
You want me to send you a link for the firmware of the Ender 3 v3 KE?
the one youre currently on yes
because based on your answer, there are plugins that make the leveling easy and painless

GitHub
clone from https://github.com/Klipper3d/klipper/. Contribute to CrealityOfficial/Ender-3_V3_KE_Klipper development by creating an account on GitHub.
It already is easy and painless, I just wanted to know how often I should do it, because I don't think it's something that you only do once and then forget about, is it?
i really wouldnt do once and done. i tend to do it right before each print
that helps me ounteract any warping the bed has gone through during cooling or heating
you can also use things like KAMP to make it only level the parts of the bed the print physically touches
It is indeed usually activated by default before each print, but it usually takes like 20 minutes which is often more than the actual printing time, so I just do it once a couple of days, but it never gave me problems
that way you arent waiting for minutes calibrating the whole thing when youre only using a small area. it also helps with adheison so it sticks better
I would look into Klipper Adaptive Meshing Protocol(KAMP) and making your probe only probe each spot once or twice and at a higher speed
that way its only takes upwards of 45 seconds rather then minutes for no reason
incase youre wondering if i do indeed know what im talking about

That might be useful for calibration before each print, but still if I'm printing 3 times in a row I don't need to calibrate each time, do I?
well its good practice just incase you move something in a way you didnt mean to and it changes the offset
I modeled and 3D printed a grip extension for the EOS R10! It's fixed with tape right now because I don't have a 1/4" screw yet


hell yeah!
Updates to the grip extension because I only had this 1/4" screw at home


I'm also moving the Z seam and rounding some corners though
I'm probably also gonna make a hole so that I can move the screw with 2 fingers rather than 1
But first I'll try to add some rubberised material to the top of the current one, since it should make a big difference if I find the right one
I've added neoprene! It makes lots of friction without sticking to the camera, which is exactly what I needed

sick!

Head to https://squarespace.com/nathanbuildsrobots to save 10% off your first purchase of a website or domain using code NATHANBUILDSROBOTS
High Resolution Photos: https://www.nathanbuildsrobots.com/blog/fiberreinforcedfilaments
I'd just rather use normal PLA and PETG. https://amzn.to/46flv6I
The Siratech ABS+GF didn't look bad though: https:...
No, I’m definitely dying 10 years sooner due to resin printing.
real
but first drink it all then swallow a mini uv light
/j
Das a Lotta poop

fr
Currently printing a clear fractal vise.
I have always wanted one
it's like, 50 components though lol
Good luck with that, sounds like a mess lol
All components printed. Now for ordering hardware.

Looks really cool, what are you gonna do with it?
Use it like a vise hahaha
😂
Does it being clear have any particular advantage over being opaque?
nah, I just like printing clear resin stuff.
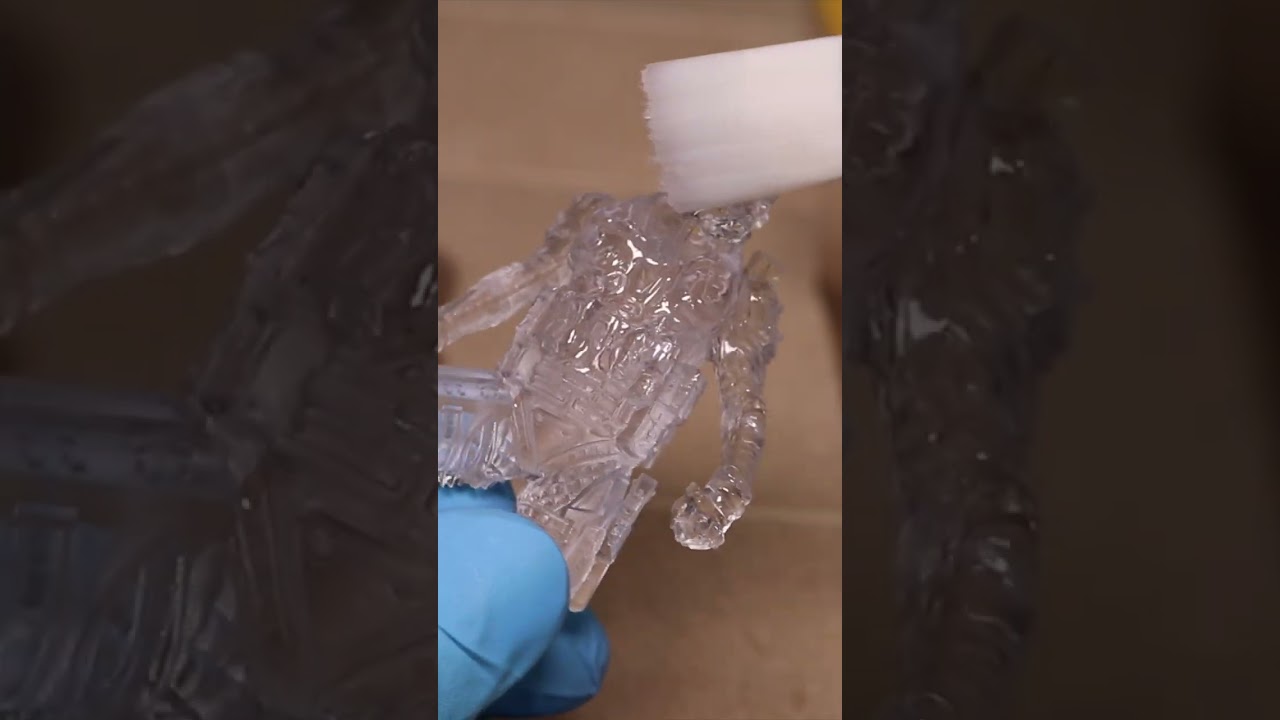
Create water-clear resin 3D prints, no polishing required!
MORE BELOW -------↡↡↡↡
Anycubic Water Washable Clear Resin: https://amzn.to/3K3s4P9
Anycubic High Clear Resin: https://www.anycubic.com/collections/high-clear-resin/products/anycubic-high-clear-resin
Cali-Dragon by McGybeer: https://www.printables.com/model/209121-cali-dragon
Loot ...
I wish I could do that with FDM printing. Need to make a custom panel for my Raspberry pi computer case


my ender 3 just nearly jiggled itself off my table
i caught that shit as it tipped over
holy fuck
1.5 hours into a 3 hour print too
you can
ive had this happen before
woah its one of those banana shaping vices
whats the strength quality like

Visit https://voxelpla.com to get their reliable yet affordable filament for only $16.99 a spool!
It's a pity that the Prusa MK4 hides its beautiful planetary gearbox under a cover. I wanted to see it and made transparent covers using FDM, resin, and my new CNC router. Which result is the best?
Prusa MK4: https://geni.us/PrusaMK4
Carvera CNC: ...
yeah that's still showing a clear distinction between fdm and resin.
I dont think anyone would want something this cloudy for a computer case window.

printing a mini north case?
hey, i'd like to set up a printer in my apartment's shared basement and need opinions from people who know their stuff:
-I'm planning on getting a resin printer, since i mostly want to print finely-detailled small objects (in the realm of dice for mold-making, tiny miniatures, etc)
-the shared basement is not ventilated at all, only a tiny window (less than 25cm) lets in air. my partition is sufficiently separated from the others to ensure safety though.
-but then again, people rarely go down there anyways
should i, if i do this, install some sort of active ventilation pipe to the window? or would it be enough to use the filters often sold with the resin printers, to not stink and gas up the basement?
The filters sold with resin printers are a joke. They do not use activated carbon, instead using fish tank carbon filters which remove smell, but and do not remove the toxic elements resin off-gasses.
planned on getting an elegoo, not a single purifier they sell doesn't use activated carbon, unless they're lying in their specs
The ones of theirs I've cut open did not have activated carbon. It's possible they have changed, but I doubt it...
worst case I'll activate it myself 
Regardless, there isn't enough carbon mass
I would reccomend getting a VOC detector and leaving it down there
hmm, perhaps I'll put the one from amazon there then.
I'll still add the elegoo filters to at least reduce the smell; as long as the other tenants don't smell too much they shouldn't start complaining to the landlord
If you want to be safe, id reccomend something like this:
https://mandalaroseworks.com/products/nevermore-stealthmax-hardware-kit
MandalaRoseWorks
Assembled and verified by @Drevic of Central 3d Printing, we are pleased to present our latest hardware kits. These kits are compatible with the most recent version of Nevermore StealthMax on Github. Please be aware that this package only includes hardware; the printed components must be produced separately. BOM: De


@ivory magnet sorry for the ping but thought id ask, how much do you know about creation for things for 3d printing? i only know it through blender a bit but i have issues sometimes. Im just trying to make a drive bay for my Homelab server but im having some troubles coming up wiht a design
Im using a Dell Optiplex 3080 as the base for the server

Hmmm
sup
what do you do if your prints are pulling off the bed
my prints are like STUCK on but the edges are pulling up
Glue stick/hair spray/vision miner nano adhesive
Make sure the bed is clean, etc
is it just the bed or can it be cooling?
room temp etc
cause again my prints are like locked to the bed until it fully cools
plus im on a textured bed
I hope there's vents for cooling on that
my rooms pretty cool
Bed temps are probably too low
its 65c
it did improve when i went up 5c i think so i could try 70c maybe
but that mightve just been cause it was a different part


i just tried 65 for one print
should i try lower
should i try 55 or 50 idk how severe the warping is
this was 60c
its only happening on big prints which is pissing me off cause i cant test whether it fixed and adjust when the print is like 6 hours
Use what the roll says
Bed temp recommendation should be based on the vitrification temp, the bed temp should be just below that
Usually if it's from big prints it's because the bed heating is uneven across the plate. A lot of cheap heated beds suffer from that exact issue. Something you can try is adding a large brim to your print or even better, add something called mouse ears to the corners which is basically a targeted brim.

Post on my Patreon, about the patents:
https://www.patreon.com/posts/115566868
CNC Kitchen original video, by Stefan:
"Brick Layers - Why did no one do this before?"
IMPORTANT:
- Patents are public documents and include the names of inventors.
- My focus in this video is on the patent itself, not on the inventor ...
whats the best 3d printer that can hot swap 2 different filaments
i wanna be able to print one of those water soluble filaments for support structures
I haven't used my printer in a bit is there anything aside from dust I should be looking at to get it back up and running properly? I'll probably do a test print later today see how it goes.
look for any gunk on z axis rod if you have one, dust the filament if its been exposed, and definitely run a test print before printing something important
Alr. My filament should hopefully be fine since its permanently in a box. I'm more worried about humidity here. (I'm currently running it through the dryer.)
I do have a z-axis rode that I'll clean
I kind of want to move things around soI can have a box to protect my printer from dust build up but it currently wouldn't work.
Oki gunk has been removed, printer bed levelled. I need to dust some part but I should be ready to do a test print later once I fill it with filament
And hopefully I should be able to print this thing out https://github.com/ww123td/mini-trackball/tree/BTU/hardware/mechanicals_BTU

GitHub
A small, open-source trackball, powered by QMK. Contribute to ww123td/mini-trackball development by creating an account on GitHub.
Probably going to be the longest print I've ever done 🙏
I'll try printing and then buy the Ball transfer unit in case something goes wrong with that
hell yeah
Alr
aah I might have to change the settings again. I think I lost the settings I was using before 😩
At least it's eating up
I'm gonna be printing a benchy
oh uh
do you have lithium grease
you may or may not need it after wiping down the z rod
I wiped it this morning so that should be fine. It's the speed settings and all that jazz that I don't think I've saved.
I'll change that later once the benchy finishes printing. Should be done in like 40m
oh kinda like a suped up ender 3?
Kind of yeah
damn dual z axis
I've been hearing the creality has been falling off a lot when I was looking for a printer so I got this one instead
When I was looking there's been a lot of report of lower quality parts being used and the support was bad on the 3dprinter subreddit.
ah I see
Lower quality parts compared to previous version of the Ender just to be clear
the hell 😭
I've been thinking, since I've been meaning to learn FreeCAD I might try and make a stand for my phone so I can use it to remotely see the print.
gonna use the phone to host octoprint or something?
Already doing that
ah
I just don't have anything to hold it
For any lurkers https://github.com/feelfreelinux/octo4a

GitHub
Use your old Android device as an OctoPrint server. - feelfreelinux/octo4a
Not bad, there's some webbing but it doesn't seem too bad.

Blurry pic shall be enough
Since the last time I used the webcam it seems to have improved
It used to stutter 90% of the time and now it seem consistent
It makes it actually useful
Nice
It's time to print some towers to see what settings work or not.
I'm doing a fan speed tower. I'm aware that the fan is not super great to cool the filament so that might be a mod I do if I am to print more often.
Hmmm I think I'll have to play with the belts a bit


For the fans it seems that 100% is the way to-go with the current fan
Is this tower even useful to tune these kind of inconsistency 😭

The 3d benchy looked fine overall so it might just be the speed. Though some people have been able to print at 150mm/s on theirs 🤔 oh well it's something I'll have to figure out over the week.
I might have an idea on what's going on. The gears starts grinding if I tighten the Z-axis belt too much as it goes up so perhaps they aren't straight or something like that. 
Oh that's awful
I know on bed slingers there should be a tiny bit of slop
I'm not sure with z axis though
I might have found why
The left spinny rod isn't straight
The other one doesn't do that
As it goes up it might move the nuzzle a tiiinny bit which causes the jitter when printing.
I'm not sure how I've never noticed that
yeah thats really bad
you might need to replace the rod if tightening it doesnt work
you can roll it on a desk and if it doesnt roll straight or kinda wobbles, it needs replacing
I can see it's not straight just based off the straight rod next to it. It's not by a huge amount but it goes back and forth as it spins.
z axis belt? i think you have your axis confused

X axis yeah
also before spending money on a new z axis rod/ leadscrew. try checking if its something else, some movement on a z rod is not uncommon and usually shows up more consistenly on the model
if the printer has 2 z axis motors the X axis might have become askew
not sure how common that is on newer printers with 2 z motors though
also curious what temp and material are you using?
Pla+ at 210/60
I haven't played with temp yet but it seemed fine. I'll probably drop it again to see if it helps with stringing
Guess I'll be printing a lot today to get that figured out. I know that printers should compensate for a tiny bit of wobble in the rod. I'll be checking if at least the layers are consistent.
The benchy I printed seemed to not have nearly as much wobble overall. It seems to be mostly present on the towers I printed.


dangggg
Ok I'll go balls deep and try a 4 hour print for fun
The print looks pretty good
show :3
Some parts bent a little bit a the bottom but it's a usable piece.

It do be holding USB sticks and SD cards fine 🫡
nice :3
yea I've noticed too when printing long and relatively thin pieces, but usually never bends enough for me to care
Oki today I'm gonna try printing the shell. See you all in 9 hours 🙏
Second layer started 🙏
hell yeah, hows it going so far?
I'd say it's going well

its going super well yea :3
I'm more worried of the flat surface near the top but assuming the support all print well it should be fine
the support looks really good in the pic, you should be fine
Ahh crap oneof the support just fell
It's halfway through so I'll leave it printing and see how it goes. Maybe it won't be needed.
Nvm I think I should abort. Another one is on the verge of falling.

You know what. It's time for an experiment. I'll keep it going and see I managed to get the second support straight and it seems to be holding
Looking at the layers they don't seem to be the most important so maybe there's a chance I'll get a successful print. Though I'll have to watch out for extra filament. I don't have the plugin to remove portion of prints installed.
holy
aw that really sucks
you could use hairspray or a gluestick maybe
ah i see
The print is almost finish and looks really good atm. Still 50 minutes to go.
Nice :3
Though I'll ask if supports were even needed. The design seem to suggest that it might not. The hardest part is that there's a pretty medium sized bridge at the bottom. Everything else seem to slowly go up and naturally bridge together.
Usually it'll say from the source you downloaded it from if supports were needed or not
Or did you do some 3d modeling?
Its a design I found on GitHub for the Ploopy Mini
It's modified to use BTU instead of the usual roller bearing
Ah I see, I dunno about there, but on thingiverse there's a little place for printing specs like that
Oh I see
Not bad. Hopefully the supports aren't too much of a pain to remove.

This is the moment I'm starting to regret using support
I think I removed a good portion and I might be able to use it for the most part. There's still bits inside the BTU sockets though. I think I might use a dremel to get it all removed.
Anyways I guess it's time to order these BTU thingies
oop
OK Just confirmed that I'll have to remove more support.
Oomgaaa 18$ a pop

holy
Welp that's 130$ down the drain with shipping. I ordered 4 just in case but that's so expensive.
There are cheap clones but they are apparently inconsistent so I decided to go with something safe.
https://libreddit.bus-hit.me/r/ploopy/comments/1csajbz/ploopy_mini_btu_mod_plus_extra_40mm_ball_mod/
View on Redlib, an alternative private front-end to Reddit.
I got the shell ready and just need the BTUs
Expensive sons of beaches
Ah understood
They are apparently coming today but I honestly think it'll be a tomorrow or Friday thing
Beautiful

I'm having difficulties getting them in the holes so I might just open them up enough to insert them and if necessary I'll use some glue or something to keep them in there.
I'm not sure about glue as that could be annoying for longterm maintenance 🤔
oh glue into what holes?
gawd dammit I almost got it...the ball is a little too far from the sensor
The BTUs probably need to go deeper still
Though I can tell why people like this mod. It's so smooth in all direction.
Although much noisier
I just looked at this
are you making a track ball mouse..
I'm modding the one I already have
Ah okay
This is getting quite frustrating
I'm like almost there but the last one is hard as I don't have an easy way to push it deeper with some tools
It moves the mouse but stutters because of the distance. The tease is real with this one....
I'm super close. It's mostly smooth but skips a bit.
nice!
Ok I think I got it
working flawlessly?
Not entirely. Still need a little bit but it seems smooth when I press the ball a tiny bit. I think once I get the screws in tight enough it should be fine
ah i see
hmm not sure what the problem is now but when I tighten the top down, the lenses move around when it's not supposed to 
Ok seem to work now
Still a bit of play but much better
Moving the mouse is so much easier. to the point of being kind of too sensitive lmao.
hell yeah
I have encountered a deadly combo
Cold room and silk pla
It'll print but god
First layer doesn't stick at all
Tolerances are intolerant
Underextrusion is an understatement
Layer lines print fine, but the vertically aligned walls just don't stick at all
So my springs are like
50/50

Look at those gaps between the walls

Working on a counter and it's horrible lol
For the love of god don’t use silk filament for anything that is not purely cosmetic, the additives in silk filament kills all layer adhesion
It also tends to be more hygroscopic even pla versions of it
I've learned this now
Underextrusion+silk is wonderful
I love on the southern East Coast of the US so humidity is horrible lol
Looking at sunlu petg
But I'm spooked by it being more hygroscopic than pla is
I don't normally have issues with that tho
Even with my high humidity
Ive had year old exposed filament work fine
I need new filament but idk what to get 
Ehh fuck it I'll just grab some
While petg is hygroscopic it should be fine for a long time tbh

i have a textured build plate and i have a print now that i really dont want the texture on can i potentially flip it over if its only for like a couple hour long print?
assuming i recalibrate the bed leveling and stuff
z offset
Use a layer of glue stick and it should be fine, yeah
You can put glue stick on sheet metal and it works
cool
did i put too much glue or is this normal finish

im fine with the part either way so just curious
Probably just bad leveling
what are the effects of needing to change the nozzle
Inconsistent extrusion and bad adhesion usually
It is usually pretty obvious when you compare to a good nozzle

:3
Printing perfect first layers for first try after levelling :3
(Second try tbh, was being lazy with settings on first one lol)


got a cr touch but i dont have an sd card so i cant use it yet

all my sd cards have been eated by this printerrr

you are obligated to run them all in raid 0
Do you have a serial port or something like that on your printer?
If you do save yourself some pain and use
https://octoprint.org/download/ on a Pi or an old Android Phone @umbral edge
OctoPrint.org
Learn how to setup OctoPrint using the preinstalled OctoPi image for Raspberry Pi, or how to install from source on Windows, Linux and Mac.

GitHub
Use your old Android device as an OctoPrint server. - feelfreelinux/octo4a
Good lord how many Jays are there in this server
too many
idk
e3 pro
i dont have a raspi to use for octo
i dont have an old android with a functioning port, or a functioning screen
uuh look for one on the used market idk. It's going to save you a lot of time.
how?
Allows you to upload your print wirelessly. No need for SD card
It connects directly to most slicers
i dont have an sd card period
implying that i dont use those
i run it via usb
with my laptop
i can do it wirelessly already
Am I misunderstanding something then
in order to flash firmware you have to use an sd card
mhm
literally any time i have a printer issue people tell me to use octoprint and it has never been the solution
honestly pisses me off
not mad at u
just how often i get told to spend 50$ on unneccesary hardware
I was like "Are you one of those weirdos still using mSD card to print?"
Total misunderstanding on my part 
mhm
i just use a laptop
im having amazing issues with the filament i got now tho
"thermal runaway"
my fuckin ass
its not
the temps literally arent even going down or up any
its shitty firmware
As long as it's not hardware
and i have to update it to use my damn cr touch anyways
so i might as well just restart with marlin
to hopefully fix this POS printer
it works fine for fuckin years
and now i cant do basic things
That's the classic
the thermistor works fine
but it just fails randomly
because it cant use its fans properly
like once it starts printing
fucking mint
really nice
but itll get 10 min into a print
"oops we dropped 5c because the auto temp regulation is really bad, time to scream extremely loudly and stop the print, buring a glob of filament into the hotend"
im extremely pissed off rn

Nooo
Bambu printers forced cloud dependency :(
Updated terms of sale and everything
This is a huge L
You have to get an account and shit
It's for "cyber security" updates
But like
You can use it via LAN
Or just not connecting to Internet
But not anymore
Restrictions on the third party tools they use and everything
It sucks cuz their firmware is fucking great
That's unfortunate.
"thats informative, and unfortunate"
Bambu was already a huge L in many ways before that tbh
Proprietary parts and until they fixed that you also needed internet for it to even work
The fact it's connected to the cloud should als scare anyone who wants to do prototyping professionally because of NDAs
Informative and unfortunate
https://youtu.be/aIyaDD8onIE

https://wiki.rossmanngroup.com/index.php?title=Bambu_Lab_Authorization_Control_System
👉 Merchandise: https://store.rossmanngroup.com/memes-dreams.html
🔵 Cheesy mugs & t-shirts: https://bit.ly/rossmannstore
👉 Rossmann chat: https://matrix.to/#/#rossmannrepair:matrix.org
👉 Recording equipment used upstairs:
🔵 HDMI capture: https://amzn.to/4bcXE...
yup
I'm still gonna probs buy one of their printers eventually
Just cuz like
They are really fucking reliable and high quality
Same reasoning behind me owning a qpro
That is true, I have no plans on getting rid of my A1 after this. but tbh I'll probably avoid buying any future printers from them.
Mhm
If I ever get the money and time imma make a large corexy printer
A proper linear rail one
They are relatively simple machines
I'd look at Prusa for reliability honestly
Bambus are until they aren't and I've seen nightmare stories of people trying to fix them
I've seen the same for prusa
But prusa stuff defo does seem more serviceable lol
Only issues there is the bambu printers are faster and more precise at the same price point
For now imma just update the firmware
Of my lil fucker
Repaste the thermistor
And try again
So...here's the thing about faster. Its extremely relative. If a print gets done at 6 hours vs 8 hours, objectively one of those is faster. But as a consumer, that still only equates to me doing 2 prints in a given day. Something always comes up, or I'm not paying attention to my phone, or any number of 1000 other things. I have 3 printers. A Magneto X, an AnkerMake M5c, and a Bambu x1c...guess what? I get the same number of prints per day out of all 3, even though the Magneto SMOKES the other 2 on speed AND precision. At the end of the day...unless you are talking about SIGNIFICANT differences, going that fast really does not make any meaningful difference.
Build volume, on the other hand, makes a lot bigger of a difference than speed if you are printing stuff that actually uses it.
I end up spending a full 14 hour day doing rapid prototyping, so having it be repeatably precise for like 40 small prints in a day, and having it be enclosed does fucking wonders for my kinda workflow
I don't make big things, just complicated small things
Extremely repeatable precision across multiple materials without much fucking around, while still being very affordable, is what is attractive to me
id say the precision is about the same or better on prusa from the very short time i used a X1C at an old school

https://wiki.rossmanngroup.com/wiki/Reverse_Engineering_Bambu_Connect
https://wiki.rossmanngroup.com/wiki/Bambu_Lab_Authorization_Control_System
👉 Merchandise: https://store.rossmanngroup.com/memes-dreams.html
🔵 Cheesy mugs & t-shirts: https://bit.ly/rossmannstore
👉 Rossmann chat: https://matrix.to/#/#rossmannrepair:matrix.org
👉 Recording eq...
B)
lmao


Yeah so my thermal issues seem to have just been my psu being on 230 rather than 115v...


It's often the simple things isn't it
My slicer settings are super refined now tho

using the flat side of my glass bed now
cleaned very carefully
coated in hairspray
and WOW

this has good adhesion now
first layer i didnt even "squish" it against bed so it had higher surface area and pressure against bed
it just stuck perfectly

hopefully results in something
They really did say “eat shit bambu”
can you damage the printer by printing way below the correct temperature
accidentally printed my 230-240 petg at 195 for a while
Not generally but depends on your extruder
Usually just results in shredded plastic in the extruder
Clean it out and your probably golden

Just try not to make a habit of that then 😁
(I'd still probably open up the extruder and clean it out, you might miss steps if there's enough shreds in there, and if you try and print PLA the shredded PETG might cause a clog)
Switching what out?
No, the extruder is above the hot end
how do you fix this

Reprinting it
what if it just happens again
Nah but fr what happened with that? Is that the print bed grid sticking to the bottom of the print?
yes
Yikes
i mean that was the best bed adhesion ive ever had so💀
What printer you using?

Did you use glue for it?
no
which is crazy
my nozzle mightve been too low but i mean the print came out flawless so
Possibly but the bottom of the print looks fine too albeit with the grid stuck to it
polymaker petg is just sticky af i guess
I guess lol
well as usual I'm gonna make the suggestion that you try getting a print bed made of G10 (garolite)
its the same stuff circuit boards are made of and it's amazing for printing
Gives a nice almost glass like surface, sticks really well when printing and parts will just pop off with a gentle breeze after it cools down
no extra adhesion required
The only issue is you'll need to cut the G10 to fit your print bed size/shape
but other than that it's awesome
ill look into it cause my printer has been really good about adhesion so i dont see a reason not to switch to something thatll give me better surfaces
Does it work with inductive sensors
You always want to use some kind of release agent with PETG on a smooth surface
Yes if there is a metal plate underneath (which most printers will have anyway) I haven't had any issues with inductive sensors. Just need to make sure you get the right thickness of G10. I think mine was 1.5 mm thick
This video is what got me into using it

Even if you only print PLA I highly recommend giving G10, otherwise known as FR4 or Garolite a go. I've been testing this cheap print surface on a range of materials and it's quite impressive indeed!
Join the Maker's Muse Community - https://www.makersmuse.com/maker-s-muse-community
Where to find G10 (regularly updated, send through your sugg...
Even says it works with petg
Personally I did not like G10, I found it too sensitive to the plate being touched, but I also prefer to use Vision Miner Nano Adhesive where you can touch the plate as much as you want and it still sticks like 🔥🤣
But it does work
Fair enough, to each their own.
You can get G10 plates made by light-year in a lot of different sizes these days, fwiw
thats true, it's getting more available now
Well, they sell them already attached to magnetic plates in some sizes too, which was nice when I was trying it out
ooh thats nice
If G10 is so graet where is g11
g17
it was textured that counts?
i never had strong build plate adhesion till now so i didnt know about that
Textured it can depend on the plate material. Was it PEI or something else?
@past kestrel petg tends to bond to weird things, it likely bonded chemically to the bed
It can also bond chemically to borosilicate glass
(what glass beds are)
Which is why it's so important to put something on the glass (clean it then hairspray is fucking amazing)
Also @whole wind fixed the lifting issues I had
It is mostly an issue of adhesion to the support
Cuz it doesn't have any pretty much
There is just enough upwards pull to make it rip off the supports with that intense overhang
So I just added a solid cylinder and it works well
Nice!
definitely something chemical cause i just printed the same gcode with esun petg and had minimal problems

theres still paint on it but im not having to scrape off little bits of filament
fine with it for now
@past kestrel also petg doesn't need to be squished against the bed like pla
It should be just under the layer height above the plate
I'm...not sure who told you that, but that's not correct...it still needs to be squished, it just behaves differently so it needs a different z-offset. You still want to give it a good first layer squish just like any other material.
I read it online and then tested it myself and it was true
Setting the offset to just under the layer height squishes it a good bit still
I never said it didn't need to be squished at all, I said it doesn't need to be squished the same way you would pla
@vast hill
I misunderstood what you meant then, sorry 😁
I'm excited, managed to get a really small gap when testing my printer for some dovetails I'm using on an upcoming part
3D Print all the things!
Hi my name is Peter and I am a 3D Printer addict 😅 but no seriously I have 10 printers and another one that I need to build lol.
Dayyym
Although I'm a little dissapointed there's no multi fillament option like the a1 with it's AMS system
later this year
ooh nice
its literally like
100% the same
just a lil unstable cuz
yknow
just came out
camera feed cant hold a stream well
lighting is bad, easily fixed with led strips
tinted glass doesnt help with that
granted its not out yet
it still seems goated from the reviews
unpaid, but free hardware
also some wierd slicer stuff but easily fixed
it has a carbon filter n shit
and is quiet asf
input shaping
auto levelling
Gotcha
Thats fair
and non beta
buuuuuut
like
it seems like my next box
it 100% looks like a ripoff of the p1s lol

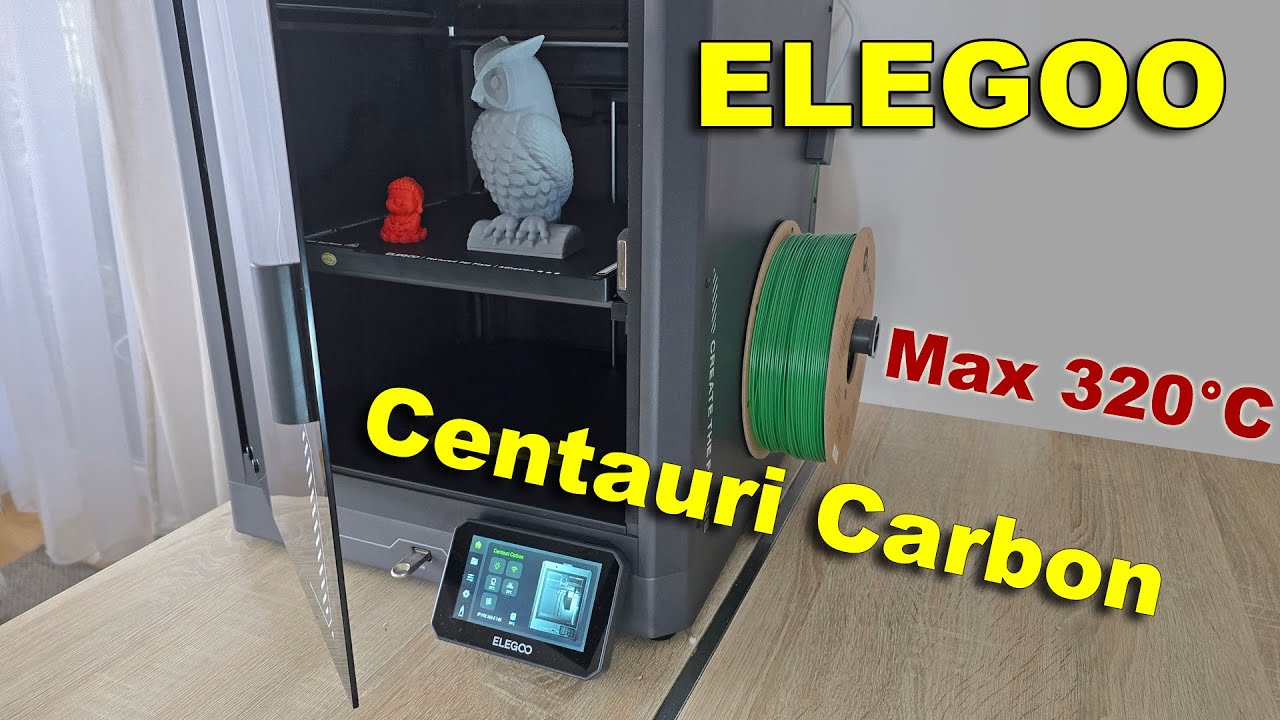
In this video, I’m reviewing the Elegoo Centauri Carbon, Elegoo's first enclosed CoreXY 3D printer designed for technical filaments too. With a hardened steel nozzle and a max temperature of 320°C, it's ready to handle materials like ABS, PC, PET and more. The best part? It’s budget-friendly at around $500, making it a serious contender against ...
it rips
this is the most negative review ive seen so far
good visibility which is always appreciated for me lol

thats not too good, very tight there

brittle filaments are probs not an option here
they really should have made this come in at a diff angle
eeeeeeh
i think its fine as long as you store your filament properly long term
which you should be doing regardless of any printer you have
eeeeeh maybe but that still feels like a lot of stress to put on it
that is a loot of stress
its fineeeeee
depending on the filament that is a large increase in chance of break
it problems wouldve arised from i feel like they wouldve fixed it immediately
this is a cheap and complex printer
they likely found out later in production and to keep costs down didnt fix
only one way to find out
its not that bad 😭
fair
other issues is it auto levels only on cold bed
so if you are doing 100c beds
its not gonna be all that level
oh weird
i dont like that
at all
im sure its just a gcode fix
order of operations for startup
not hard
same with the other issue with its gcode that it starts print before bed is fully heated
which is like 10 second fix
but this was all on the beta firmware in my eyes
it still is a sick printer
also has a good runout sensor
web interface
wireless uploads n shit
good stuff
for 300$?
like
ok yeah
absolutely
whats the build area?
hm
too lazy more fun to bother people
I'm gonna dox u
working on a dumb mtg health counter


its my first thing that uses magnets
working prototype is already done and it looks really good:3
the rings are built with 1x2mm circle magnets

and this geared shape for lower friction

@vernal ginkgo here
this looks neat midway thru


Nice
With stock parts
Getting reliable petg prints on a e3 pro
I'm a god
I would count glass bed and putting it in a box as stock
Cuz I haven't actually modded it
Other than klipper and a cr touch
So functionally to the printer running, nothing changed
:3333
Hair spray is the most important thing easily
Holy shit, that centauri carbon looks great
Indeed.

When I made my preorder the fbt bundle was out of stock
I might try to cancel it and re order the bundle


Their ams system combined with a even bigger knockoff Bambu printer
I think it's obvious
Also the scope keeps creeping with this project

It's so bad

This thing is all but done, designed fully just reprinting parts for better quality
Made little alignment jigs to glue it all together and everything
Works flawlessly
But I wanted to make a lil box for it
And now I'm designing a whole ass sheikah chest
