#help-with-makecode
1 messages · Page 3 of 1
 rigid mulch
 stiff hazel
you won't be able to download a windows app on a chromebook
oh... we haven't fully release that one yet. try https://makecode.adafruit.com/?webusb=1

Adafruit Circuit Playground Express - Blocks / Javascript editor
A Blocks / JavaScript code editor for the Adafruit Circuit Playground Express.
it should go live in a few weeks by default
rigid mulch
What does "CPLAYBOOT is a drive " mean? I have my CPX plugged into the Chromebook and see not drives on any window on the machine.
 elfin lintel
You need to press the reset button twice on the CPX.
The pin #13 LED should start flashing, if I am correct.
rigid mulch
ok, now I see CPLAYBOOT after double clicking reset and clicking on an icon.
elfin lintel
Okay good.
rigid mulch
Now problem
Sorry to be such a pain, guys (gals). I see a .uf2 file shown. clicking on it I again get the message: :"Select an app to open this file. NO results found.
elfin lintel
Do not click on it. You need to copy that file to the CPLAYBOOT drive/folder.
Also, it's okay. We are all here to help one another in a time of need. I joined, asked a question, got it answered, then I started helping people. I don't mind if you don't understand something. Everyone is different and everyone learns differently.
rigid mulch
OK , after double clicking the reset button, i click on remote drive detected and see the CPALYBOOT screen. It shows three files under NAME, one is , in order: INFO_UF@.TXT, one is INDEX.HTM and one is CURRENT.UF2. All there have dates modified of Dec 31, 1979. There are Recent, My files, Google Drive and a data symbol CPLAYBOOT which text is blue aith and up arrow on the left side of the screen. Now what? I have my remote mouse hooked to the Chromebook so i can copy and paste anything necessary.
elfin lintel
You downloaded your code correct?
rigid mulch
Yes, from the adafruit edit for makecode screen, i clicked download.
elfin lintel
Find that file and copy it to the CPLAYBOOT drive.
stiff hazel
@elfin lintel is correct: take the .uf2 file and copy it into the CPLAYBOOT drive
rigid mulch
ok, i got a warning which starte with "Whoa...." but I couldn't read all of it before it went away. Then the LEDS on the CPX changed to OFF and clicking the left of the 3 buttons did turn on the coded LEDs so I must admit that it seems to work. Thank you all for helping out. I think I may be able to progress now.
elfin lintel
Thank you for making sure I was correct @stiff hazel.
stiff hazel
the CPX tricks the computer into thinking it is a USB drive
this is the most efficient way to allow flashing microcontrollers without having to install native applications
it is a bit of a learning curve because the younger generation does not know about files
it's a tradeoff between availability (can't use it at all) and usability (drag and drop is not easy)
WebUSB is a rather new technology and it will help with streamlining this experience
elfin lintel
The messages was more the likely the "Whoa... be careful when removing drives" it just means the device was not ejected properly. In the case of the CPX it is fine. When you load the bootloader to it, they drive goes away. Your code has been transferred sucessfully.
rigid mulch
I really do need to make a YOuTube tutorial about this. I have not seen any of this info. anywhere else on the internet. Do you know of any link which explains it? I do understand that CPX is a fairly new board. : Yes, the younger generation does not know about files....thanks for the compliment, I'm 68 years old and just learning coding !
elfin lintel
Also, you are very welcome @rigid mulch! If you need anymore help with MakeCode ask @stiff hazel, if I am correct. If he or she is not available, I am here to help to the best of my ability even if I have no clue what I am doing.
Congratulations for learning how to program at 68 years old! You are never to old or young to learn how to program.
rigid mulch
I hope to master astrophysics next month and then brain surgery in Jan. of 2019. They surely will be easier than electronics and programming.
elfin lintel
Lol. Good luck. Have a great night!
stiff hazel
check this out https://www.youtube.com/watch?v=fI41GNNKZrY

In this week's MakeCode Minute: Bootloading Circuit Playground Express for MakeCode. How do you use a MakeCode program on a board that is running an Arduino ...
we really to put that playlist on our home screen 😃 https://www.youtube.com/watch?v=IU_iUcOIWm8&list=PLjF7R1fz_OOU5gFO10qxLlbtN0YzZTyvk
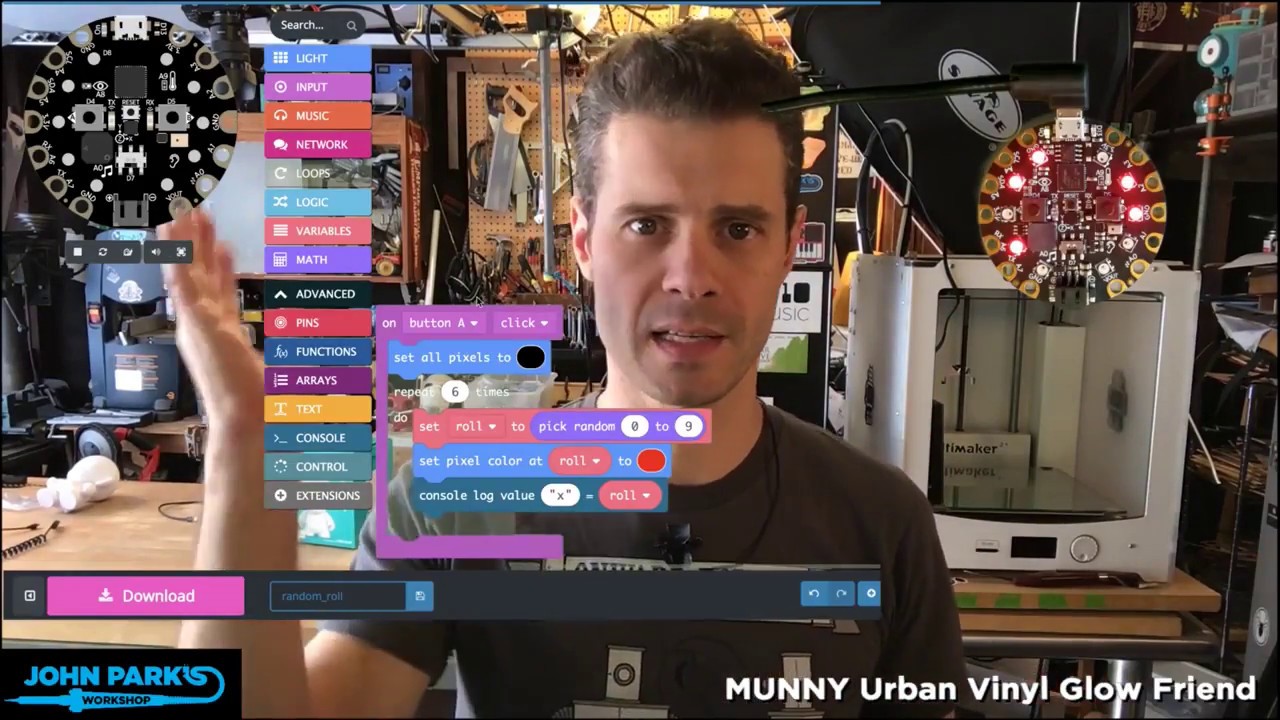
In this week's MakeCode Minute: Randomness in MakeCode. Use the random block to create chaos with each button press, and select a different set of NeoPixels ...
elfin lintel
Lol.
stiff hazel
John's got a whole bunch of really good movies
rigid mulch
Oh, and by the way...we're talking about tricking the computer or some such. I find that ESP8266, very cheak NodeMCU boards are not supported in (thanks for the Pelikhan) Arduino Create web editor because those boards are not an Arduino product but cost $3.15 are are Wifi enabled. I have to use Chromebooks and on-line areduino in some cases. Do you suppose we could trick on--line Arduino Create into thinking ESP8266 was a correct board choice somehow? Just wondering, I'll explain my question more if it is not clear enough.
stiff hazel
Sorry "Arduino Create" is owned and operated by Arduino... ask them.
elfin lintel
Chromebooks are nice but the program support is terrible.
Granted they are mainly used for being on the internet.
rigid mulch
We'll try to make use of a few CPX and Crickits in the classroom and after school for STEM now that it looks like we can make Chromebooks and MakeCode work with them. Signing off, thanks again.
elfin lintel
You are very welcome. STEM is great! Good luck!
rigid mulch
Have a question about using a GUI .exe in chromebooks with Makecode to manipulate a robotic arm using sliders in the GUI. Arm is LittleArm 2C and I have a video of it from yesterday's assembly on my YouTubeChannel: FrankSchmidtTinyLabs, latest video. I uploaded the code to the on-board Nano from Arduino Create Web Editor. Then I tried to upload the same sketch to control the arm to Adafruit Circuit Playground Express; it worked ! But, I cannot interact with the robotic arm eventhough the 4 servos with 3 pins each are connected to the Crickit and I changed to code to match the servos.#'s. The reason is the GUI does not work on Chrome the way it does in Windows. Are there any smart gals (or maybe guys) out there who can tell me how to make a GUI . exe work on a Chromebook? Please don't say that I have to learn Linux.
stiff hazel
I think you're on the wrong forum, this seems like an Arduino issue.
 tight oar
I'm trying to make some music with a micro:bit
I can't seem to find a way to play multiple notes at a time
stiff hazel
correct, only one tone at a time.
tight oar
...
Really?
There's no way?
Well, then, how do speakers simulate the sound of multiple notes at once?
@stiff hazel
stiff hazel
they don't in makecode at least. the sound is just a square wave (PWM signal) so single tone.
 velvet sand
@tight oar It's possible on the micro:bit to play complex sounds, using MicroPython's audio module: https://microbit-micropython.readthedocs.io/en/latest/audio.html
tight oar
Hmm
 distant marten
Can you pass a constant, like HIGH or LOW in as a parameter in a function?
not really familiar with c++ unfortunately
aha, you can! I was using const instead of uint8_t 😃
stiff hazel
@distant marten context?
distant marten
void ledOn()
{
// digitalWrite(LED_BUILTIN, HIGH);
analogWrite(LED_BUILTIN, 255);
delay (10);
}
Whoops!
here let me refine this
void ledOn(uint8_t high_or_low_value)
{
digitalWrite(LED_BUILTIN, high_or_low_value);
delay (10);
}
ledOn(HIGH); //TURN ON or ledOn(LOW); to turn off
 slender hare
ok, in Makecode, I built a short program, and it produces a .uf2 file.. what do I do with it?
 twin merlin
@slender hare , double tap your reset button while plugged into your computer and you should see a new drive called CPLAYBOOT. Drag the uf2 to that drive
slender hare
ok
twin merlin
you may have to install drivers or something if you're using windows. I'm not quite sure.
it doesn't sound like you do actually
slender hare
The tap the button worked thanks @twin merlin
stiff hazel
no drivers needed anywhere 😃
tight oar
Hi - I'm bit puzzled as to how the pxt extensions across devices. I wanted to use https://github.com/philipphenkel/pxt-powerfunctions/ with CPX, however, it's not an extension to CPX, rather it's for micro:bit and for some other. So I went ahead and imported the project from github - it loaded, and now I'm faced with couple of errors which indicate API differences

GitHub
MakeCode package that turns your micro:bit and Calliope-Mini into a remote control for LEGO Power Functions - philipphenkel/pxt-powerfunctions
so - 1st question is - if I want to use it, do I need to fork that project? Or can it be made somewhat "cross-platform"?
stiff hazel
We are working towards making pxt cross platform compatible. What is the incompatible api?
I see. It is using the enum based pin addressing + pin names that are incompatible.
Give us a day to think about this.
Meanwhile, you should fork that repo and use the OObased apis for pins
tight oar
Meanwhile I've found out the IR led is not exposed at all so I've went ahead and started working on extension with cpp code
even if it was - the extension I've referred to was operating on assumption that IR led is connected to PWM pin, and it was using the it for modulation
for CPX, the IR TX is connected to a digital pin, so it has to be handled differently - therefore, it's probably just unfeasible to make such extension fully cross-platform?
thanks for the reply, and I'm curious as to what could be the most clean solution potentially 😃
stiff hazel
We have added a compatible pin layer for both Microbit and CPX. So it should be mostly possible minus specifying the default pin.

GitHub
A Blocks / JavaScript code editor for the micro:bit built on Microsoft MakeCode - Microsoft/pxt-microbit
tight oar
@stiff hazel - thanks, but like I outlined above - the fact that it was relying on the PWM capability for given PIN means the code cannot be easily converted to CPX. I've succesfuly created a CPP extension though (it currently lives in my fork of pxt-adafruit, under libs, was just my first time trying to grasp the process of writing the extensions, so I've found out it's more convenient this way (even if it would make sense for it to live in separate repo, I will look into that in the future)): https://github.com/BartAdv/pxt-adafruit/tree/master/libs/powerfunctions

GitHub
Microsoft MakeCode editor for Adafruit Circuit Playground Express - BartAdv/pxt-adafruit
on the top of the diff https://github.com/BartAdv/pxt-adafruit/commit/07617b64cac52be04d632e384cae8d82c03a3734, there is a change in device.d.ts, in which I've tried to expose the CPX' IR led to the TS land, but that was when I discovered it won't help me, as it's DigitalPin, and not PwmPin.
all in all, I'm wondering what's the most comprehensive guide to grasp the PXT, yesterday I was following guide to write extensions, and the code from pxt-common-packages to arrive at (fortunately, working) solution 😃
tight oar
btw - when I try to separate out the directory for this extension, I cannot build it:
  target: v1.2.7 /home/bart/sources/pxt-powerfunctions/node_modules/pxt-adafruit
  pxt-core: v5.1.2 /home/bart/sources/pxt-powerfunctions/node_modules/pxt-core
building /home/bart/sources/pxt-powerfunctions
error: Package not installed: core, did you forget to run `pxt install`?
(running what's suggested at the end is not helping either)
stiff hazel
Here is a guide on authoring an extension from the web editor itself https://makecode.com/extensions/github-authoring
Microsoft MakeCode
From the beginning of MakeCode, a facility was provided to extend the editor with user extensions hosted on GitHub. These extensions can even introduce their own user interface in the editor. Extensions first need approval to surface in search but, unless they are banned, can...
Hopefully easier than forking the entire repoes
tight oar
@stiff hazel many thanks, I will check the process later. But my questions don't end 😃 I've written this extension in C++, just because the (arduino) code I was basing this on, was in C++, and because I see that for CPX the IR LED is not exposed. So - I've a question, what would it take to expose it? I've poked around the codebase, found out that one would have to add line in device.d.ts - once that would be done, how one would make this extension portable? In my C++ code I have lookupPin(PIN(IR_OUT)) (which I blatantly copied from other extension), and as I've figured out, each board that has the IR_OUT specified would work with my extension
although the portability questions are just out of my curiosity - it's not my need at all, I just found it extremely interesting how one can try to abstract over many devices etc 😃
stiff hazel
Yes we can add the IR OUT/IN pins in the device configuration so that you don’t have to go down to c++
Using typescript allows us to shake out unusued code and keep the binary smaller.
tight oar
I think I could try out that approach. I've already reworked so many of the original C++ code I could just as well rewrite it from scratch ;P (on the other hand it WORKS, and it's always painful to rework something that is working already;) )
should I just file an issue about the IR OUT/IN? I'm not offering a PR because I'm too confused about how one would do that 😃 ?
tight oar
@stiff hazel: https://github.com/Microsoft/pxt-adafruit/issues/894. If someone would point what files needs to be adjusted for that, I'd happily open a PR 😉
tight oar
don't know if that's all, but I've tried it locally, and seems like the IR led is blinking (as shown by my camera): https://github.com/Microsoft/pxt-adafruit/pull/895
GitHub
Expose IR out and in as DigitalPins in the pins namespace
tight oar
ouch, I've ported the code to TypeScript (with the change above), and now it doesn't work :S
tight oar
Cool, thanks!
stiff hazel
watch out for divisions in typescript, it's floating unless you use Math.idiv
tight oar
I'm going to set up some IR receiver and try to debug what's wrong, but I'm wondering - are there any gotchas one has to be aware?
Oh, I was typing that question when you replied yeah, things like that...thanks
stiff hazel
just don't try to mix the IR blocks with your code
tight oar
You mean the default "infrared" library ones?
As for the timings - implementing such protocol requires alternating the pins state and waiting some microseconds in between - is typescript enough for such fine grained stuff, or are there some gotchas here as well?
stiff hazel
yes the "infrared" sets timers and pretty takes over the IR pins
you should be able to use control.waitMicros but I don't think there is a way to disable interrupts from typescript
let me come back to you with the best way to do this. we are currently moving our C++ runtime away from mbed, and have to rewrite the infrared layer.
we've also added a single-wire serial support which might be useful for you.
tight oar
Right - but the cpp version wasn't disabling interrupts either
tight oar
Ok, so I've finally found the time to fire up the arduino with IR receiver and perform some debugging
I've found the readings to be totally unstable (as opposed to the CPP version)
now - before I'll blame something else than my code - could it be the case the resulting code is not performant enough for this kind of things (it's basically just pin switching on and off with some control.waitMicros inbetween)
tight oar
alright - cooked up some ticket with short repro: https://github.com/Microsoft/pxt-adafruit/issues/905
GitHub
While trying to implement a custom IR protocol without resorting to C++, I've found out the results are unreliable compared to counterpart implemented in C++. To Reproduce Following MakeCode pr...
stiff hazel
Thanks!
tight oar
No problem - fortunately I can bail out to c++ version (and I managed to built it separately)so that's not a blocker to me 😃
stiff hazel
awesome. we are currently busy migrating out of mbed
tight oar
yeah - so just to satisfy my curiosity - where could I find out how such migration would help/what potential problem is?
(not urgent, like I said, just out of curiosity)
stiff hazel
this is the new codal repo: https://github.com/lancaster-university/codal-samd

GitHub
Contribute to lancaster-university/codal-samd development by creating an account on GitHub.
PDM still needs migration: https://github.com/lancaster-university/codal-samd21/blob/master/source/SAMD21PDM.cpp
GitHub
Contribute to lancaster-university/codal-samd21 development by creating an account on GitHub.
and pulse timer stuff: https://github.com/Microsoft/pxt-common-packages/blob/master/libs/pulse/samd21.cpp
GitHub
Common packages for Microsoft MakeCode editors. Contribute to Microsoft/pxt-common-packages development by creating an account on GitHub.
we have a partially migrated build in maker ( https://github.com/microsoft/pxt-maker )
GitHub
MakeCode target for "Maker" boards (beta). Contribute to Microsoft/pxt-maker development by creating an account on GitHub.
GitHub
MakeCode target for "Maker" boards (beta). Contribute to Microsoft/pxt-maker development by creating an account on GitHub.
so PDM for microphone, clocks for IR and USB for storage and we're good
tight oar
cool, thanks for pointers!
What I found lacking, when I first stumble upon pxt, was some kind of architectural overview of how this all works 😃 I'm slowly finding things as I go, but I often still feel overwhelmed 😃
stiff hazel
right, we have a big backlog around that
basically CODAL is our C++ layer and we build on top of it
MakeCode is a mix of C++ runtime, compiler, editors
tight oar
although I maybe should stop going down this rabbit hole and start actually doing things 😄
 rose cloak
Can anyone help me with this ? , im really new to programming , i want to pulse a pin on the mircobit or cpx , pulse time needs to be in the micro seconds . on button press , to drive a SSR . i want to make a battery tab welder , any help with this would be great thanks
stiff hazel
you can use control.waitMicros and pins.A...digitalWrite to bit bang
 slender trellis
hey
can anyone hellp me out with my arduino project
im p new and im almost done this project but i need to play a sound for my game which is in processing every time a new round begins
i thought about it for quite some time and i have no clue how i would approach it
like idk anyway for arduino to recognize its a new round
stiff hazel
@slender trellis sorry this forum is about makecode
rigid mulch
Chip sets? I have a newbie question for those of you working with MakeCode and hardware. Are there standards for which CPUs work with MakeCode? Like do all ARM M0 chips work and other Mx chips also? Are there other manufactured chips that work? I'm trying to collect an inventory of all the MakeCode and Maker MakeCode hardware products and am finding more than are listed on either site, such as BrainPad by GHI. Maybe if I start with all CPUs that work with MakeCode and then search for educational boards using those chips then I can do a complete inventory with product specs. and pricing . Just a thought. Thanks
 snow island
@rigid mulch its much more specific than just the CPU core itself. The implementation also has to account for the other peripherals within the chip such as the I2C hardware. Even when the chip is identical there is a little work to account for how its used on a specific board.
rigid mulch
That helps, tannewt , thanks. So might there be ways to start with the known CPUs that do work with MakeCode and add other parameters when doing an internet search for possible MakeCode boards or am I going about this search all the wrong way? I suspect as it evolves, there will be no central control over the implementation ; who can use MakeCode or Maker MakeCode, and who can't employ it . Is MakeCode truly open source? Must it be purchased to use it with your development or educational hardware? There is a huge push in many USA states for STEM and this system is a perfect fit as the instructor has one board: Circuit Playground Express or BrainPad and all the students work on simulators on their notebooks until time to test via download to her real hardware. All for a cost of $25 for the CPX. or $29 for the BrainPad.
stiff hazel
MakeCode is truly open source under MIT
@snow island is right. We have a compiler that targets ARM thumb, so M0/M4 is support but you also need all the stuff around: ADC, I2C, Clocks...
pxt layer:
https://github.com/Microsoft/pxt
https://github.com/Microsoft/pxt-common-packages
https://github.com/Microsoft/pxt-adafruit
GitHub
Common packages for Microsoft MakeCode editors. Contribute to Microsoft/pxt-common-packages development by creating an account on GitHub.
GitHub
Microsoft MakeCode editor for Adafruit Circuit Playground Express - Microsoft/pxt-adafruit
codal layer
https://github.com/lancaster-university/codal-circuit-playground (periphericals branch)
https://github.com/lancaster-university/codal-samd
https://github.com/lancaster-university/codal-core
GitHub
Contribute to lancaster-university/codal-circuit-playground development by creating an account on GitHub.
GitHub
Contribute to lancaster-university/codal-samd development by creating an account on GitHub.
GitHub
Contribute to lancaster-university/codal-core development by creating an account on GitHub.
slender hare
How do I address the LED's in my newly aquired "Jewel RGBW" through Makecode?
stiff hazel
what is "jewel RGBW"?
 hollow oracle
 slow rivet
They're wondering about controlling external RGBW NeoPixels using MakeCode.
stiff hazel
oh
do something like this: https://makecode.com/_HvkHocUsrHYa
under light -> neopixel, you'll find blocks to instantiate light strips. since those are RGB+W, change the mode before using them
here's a better one: https://makecode.com/_hTYLh98mjJAX (untested)
hollow oracle
@slender hare in MakeCode, looks like you can use the Neopixel blocks under "LIGHT". You can create a new external strip and then set it to rgbw mode
oops, that was delayed and I missed @stiff hazel's post 😃
slender hare
@stiff hazel Thanks!!
stiff hazel
it worked? video!
slender hare
It hasn't yet, I can't find the block for the create strip on A1
stiff hazel
Click on the plus
rose cloak
Omg this is driving me crazy , i want to click button A and set pin high for a short duration , even if i keep the button pressed i need it to pulse pin high , dont know if you know what i mean .
rigid mulch
When I click on "download" it responds with "download to CPX" . I have that but I also have ordered 3 Adafruit Trinket M0's. When I get them I'll try uploading the JavaScript code for the RGB LED program to the Trinket to attempt to drive a light ring on a bread board. Think it will work?
stiff hazel
Use maker.makecode.com for trinket m0
Richard, in the button pressed event, you can set the pin high, pause and set it low again.
rose cloak
i can not see how to do that in the blocks , sorry im a total noob :{
@stiff hazel
far as i got
stiff hazel
Use the “on button pressed” instead of “forever”
MakeCode is event driven - you typically don’t poll
You’re close... keep trying
rose cloak
yay that worked thank you :}
rigid mulch
Powering MakeCode CPX using USB to barrel jack: 99 cents on E-Bay. Plus $5.88 5volt battery bank from WalMart. https://youtu.be/c0IO2ynw86g
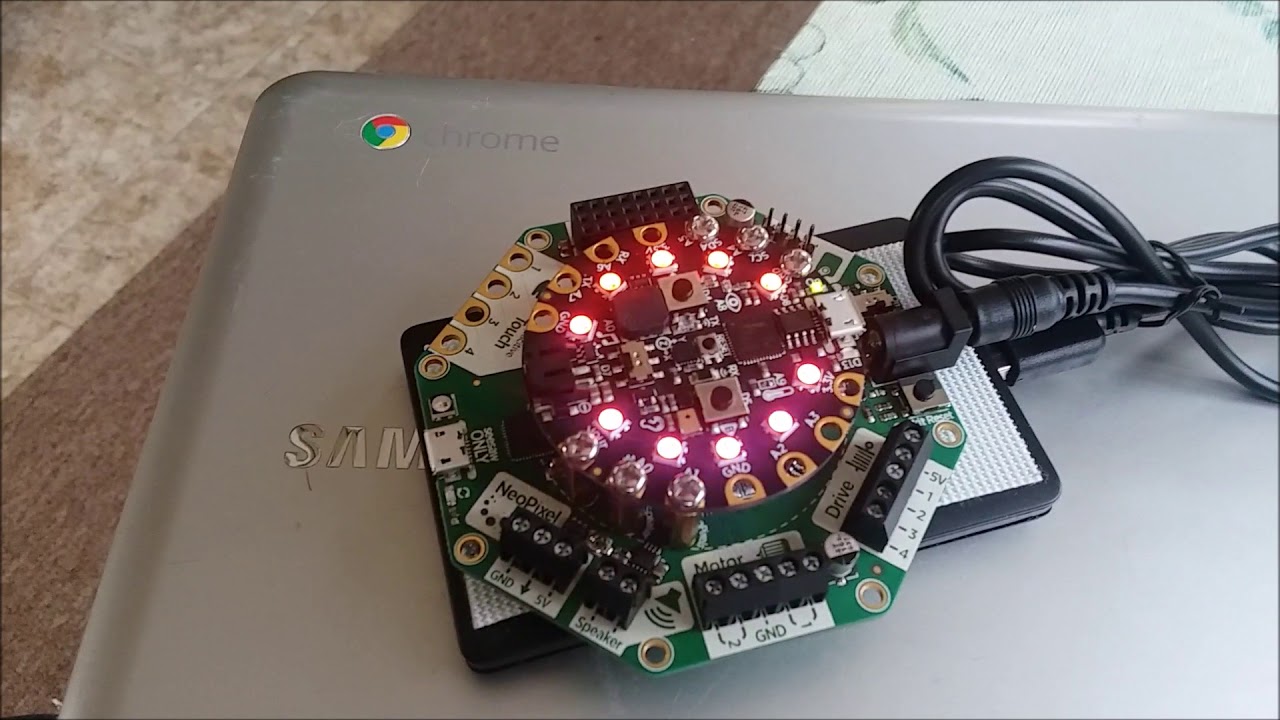
5 volt rechargeable power bank; 2500mAh with Velcro on both sides powers Circuit Playground Express on Crickit and Arduino Uno or Leonardo or Mega using 99ce...
stiff hazel
Send pics!
tight oar
How does the win10 makecode app works in that it allows to read data back from the device? is it serial via usb?
I'm just on linux and I'm wondering what are my best options to have something close to that
okay, try to use win10 VM, it can flash to device with my program, but then app can't connect to it after reset and so I can't monitor any outputs..but at least I'm somewhat close
wohoo, cool, it works. after restart, the usb device identifier is different, so I had to add that one filter to virtualbox settings a swell
rose cloak
will do when im done , need to order some parts first :}
rigid mulch
I'm still studying the various hardware which works with MakeCode and Maker MakeCode and the similarities and differences between hardware. I notice that CPX functions and can be programmed in different ways depending on whether you're working in MakeCode vs. MakerMakeCode and that MMC is labeled as "Beta" . But I wonder why that would be since they both convert blocks to JavaScript but the MMC version does not show, for example, "Music" while the MC does? Are both MMC vs MC platforms that different?
tight oar
Hmm, why the variables are always numeric? I just started to explain to.my daughter how we need to create boolean variable to remember that something happened, and now we created variable only to see we can't set it to true/false. Hoe anticlimactic 😃
rigid mulch
If your board or wiring diagram does NOT show up in Maker MakeCode on the monitor screen as Simulator: here's one way to activate them....https://youtu.be/Ytu8xse8slg
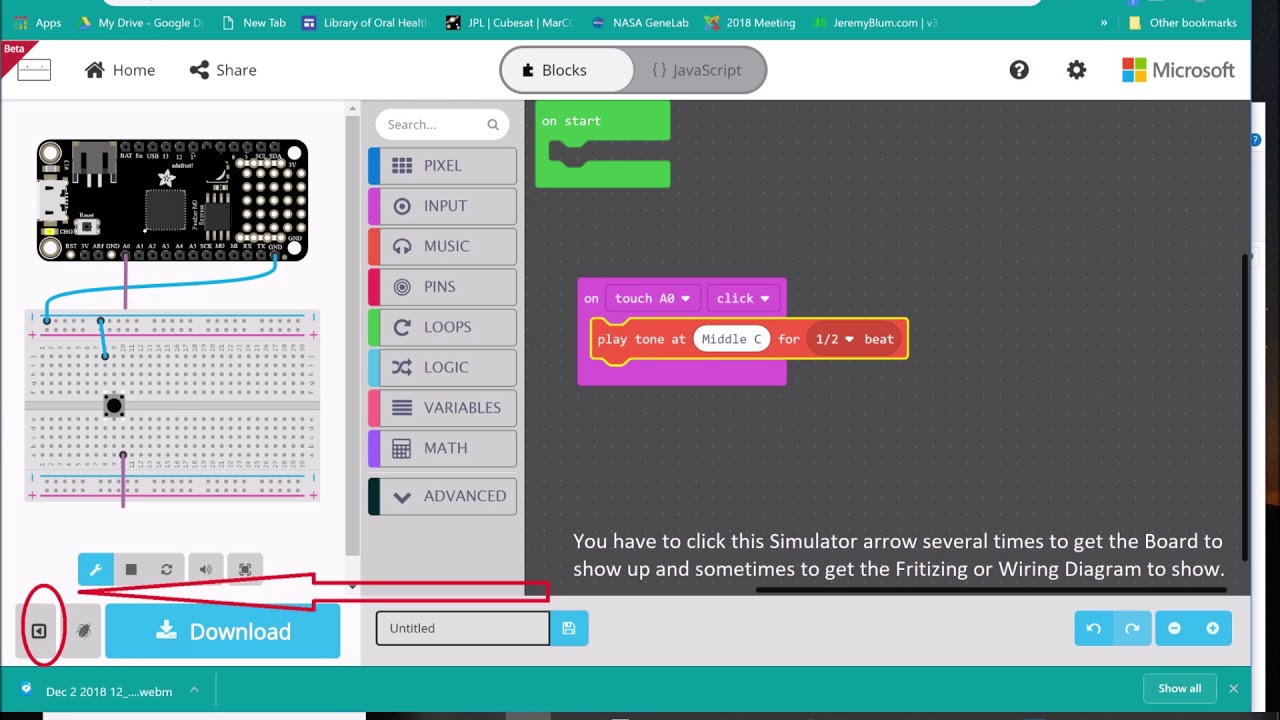
Sometimes the circuit board does not show up as a simulator on the monitor while you are block coding the Micro Soft Maker MakeCode. Sometimes the wiring dia...
tight oar
oh, I see I can just drag the constants <true> or <false> as the arg to "set variable value to....", but I've found it by directly modifying the code, not by UI, as the shapes differ so I didn't even know it would work 😃
stiff hazel
Maker is meant for a more advanced audience using traditional “bread boarding” maker boards
Also we are testing our new C++ runtime in maker (which removes the mbed dependency).
tight oar
So, I assume I can get some help with a micro:bit here right?
I need external switches to behave like buttons A and B
I can check which one of them is being pressed, or I can check if they're both pressed at the same time
But, I have a problem
I'm making a 2-input passcode program with 2 external switches. The sequence is coded like this:
// The sequence used to know which button is supposed to be pressed when
// 1 = Button 1 pressed
// 2 = Button 2 pressed
const SEQUENCE = ["12112212"];
I want to iterate through this array, and wait for the correct button press accordingly for each number
If the correct number is pressed, move to the next one, if the end of the array is reached, the "correct code" response arises. If, at any time, the wrong number is pressed, give the "incorrect code" response
Wait a second.............oooohhhhh my goooossshhhhhhhhhh. I am a bit dumb...
My original idea was to have the program take multiple inputs and have a reset button in case the user types the wrong code by accident. But now I realize there's a response for an incorrect input now that I wrote my ideas out, making a reset button totally worthless.....
Sorry about that, guys 😄
 waxen oak
Adafruit Trinket M0....I'm getting a strange message when failing to download a simple program to the Adafruit M0; that it fails because there is "not enough space". Does this mean that the Cortex M0 does not have enough capacity or that the "copy" function cannot work? With my several other pieces of MakeCode hardware I have not seen this message and have never had a failed download of a program.
stiff hazel
@final cedarejandro look at the pin out, you can access the pins for buttons and use the usual blocks.
@waxen oak could you file a bug on maker?
 frozen lotus
@stiff hazel Wouldn't the bootloader for the Trinket M0 need to be changed to a UF2 bootloader from this list? https://github.com/adafruit/uf2-samdx1/releases/tag/v2.0.0-adafruit.7

GitHub
MSC bootloader (based on UF2) for SAMD21. Contribute to adafruit/uf2-samdx1 development by creating an account on GitHub.
stiff hazel
@tight oar it uses Windows Runtime APIs
on linux, I would expect to use WebUSB to work
we're still working on that one in maker
frozen lotus
I just changed the bootloader in the Trinket M0 to the one in the previous message. My blink sketch on pin 13 now uploads fine but does not work.
stiff hazel
this one "update-bootloader-trinket_m0-v2.0.0-adafruit.7.uf2
19.5 KB" ?
waxen oak
pelikhan, I would file a bug on maker if given that option. I have not seen that as an option on the second window shown in my post above. I have seen some reference to filing a bug when using other boards maybe with a Windows Surface but with the Chromebook and this new Trinket M0 I don't see that option.
frozen lotus
no, the bootloader-trinket_m0-v2.0.0-adafruit.7.bin 8KB
the Trinket now shows up as TRINKETBOOT and as the correct files: CURRENT, INDEX.html and INFO_UF2.
INFO_UF2 contains :
UF2 Bootloader v1.23.0 SFHR
Model: Trinket M0
Board-ID: SAMD21E18A-Trinket-v0
stiff hazel
you are just doing blinky?
frozen lotus
yes
stiff hazel
we'll take a look today
 pearl oasis
@waxen oak delete circuitpython or double-reset and try again
frozen lotus
It appears that the Trinket M0 IS receiving the UF2 code and running it. Blink on D1 does work. Just D13 and LED don't work.
frozen lotus
@stiff hazel It is just a pin mapping problem...for the Trinket M0 D13 and LED should be PA10 and not PA17. I'll create an issue.
frozen lotus
Will do!
stiff hazel
Config.ts
waxen oak
This program on MakerMakeCode with the Adafruit Trinket M0 causes the tiny LED next to the Adafruit symbol to turn on bright red (as opposed to faint red/green) when uploaded but the LED does not flash as coded; on my hardware. I did double click on the reset pin to get out of Circuitpy so now TRINKETBOOT shows up as mentioned by bborncr above. But no blinking on the board but the code does make the simulator blink as coded.
stiff hazel
this is the pin assignment program that @frozen lotus fixed
frozen lotus
how long before the fix is reflected in the web app?
waxen oak
I don't see the options of PA10 nor PA17 if that is what you are referring to.
frozen lotus
@median basin The Dotstar LED isn't working for me either.
stiff hazel
we've had programs from the start with that one. not clear what's going on there.

GitHub
I'm getting a magenta status color on the Gemma M0 when I load a .uf2 onto it. The code runs properly, just a funny color for the status light.
frozen lotus
Adding a Neopixel strip to the Trinket M0 works fine. It's just the onboard Dotstar that doesn't work. I'm still trying to figure out how everything is laid out in pxt. Normally, a specific Dotstar library is used that is different from the Neopixel library. I have no idea if it is relevant but in pxt-common-packages/libs/pixel/pixel.cpp there is only "#include neopixel.h" -- no mention of Dotstar. This comment in pixel.cpp (just before the Dotstar parameters) make me think that this never worked: "// TODO this code is untested (no hardware), lifted from bootloader"
waxen oak
"Adding a Neopixel strip to the Trinket M0 works fine. " I tried this a few minutes ago and got the note that compile failed. When I looked at error messages in JavaScript, it complained that "Light" was not recognized in the code. What I had done was I went to Adafruit CPX on MakeCode and activated the Neo Pixel strip and then copied that code from JavaScript then went back to MakerMakeCode and inserted that copied CPX code into JavaScript for Trinket M0. Fail. I tried to use correct pin numbers. This code is what failed when pasted into MakerMakeCode JavaScript for Trinket M0: let strip: light.NeoPixelStrip = null
forever(function () {
strip = light.createStrip(pins.A1, 30)
}) Any suggestions on using Neo Pixel Strips or Rings with Trinket M0 would be appreciated.
stiff hazel
@frozen lotus your fixes are in maker.makecode.com/beta
@frozen lotus and yes we’ve never really took a second look at that dot star. It is in pixel.cpp as you found it.
Teddy has been driving strip from the stichkit but it is basically the same code. Will check tomorrow.
waxen oak
Thanks for all you've done , guys. I am able to make my Trinket M0 work with digital IO pins and single LED bulbs, but not dotstar nor onboard LEDs. I have hope regarding Neopixel strips.
stiff hazel
We did work for DMA Neopixel recently to support jacdac on samd51
we should get those strips working on trinket.
 dense parrot

Progress making an @MSMakeCode Package for @adafruit HT16K33 LED Backpack 😀 #JavaScript on things!
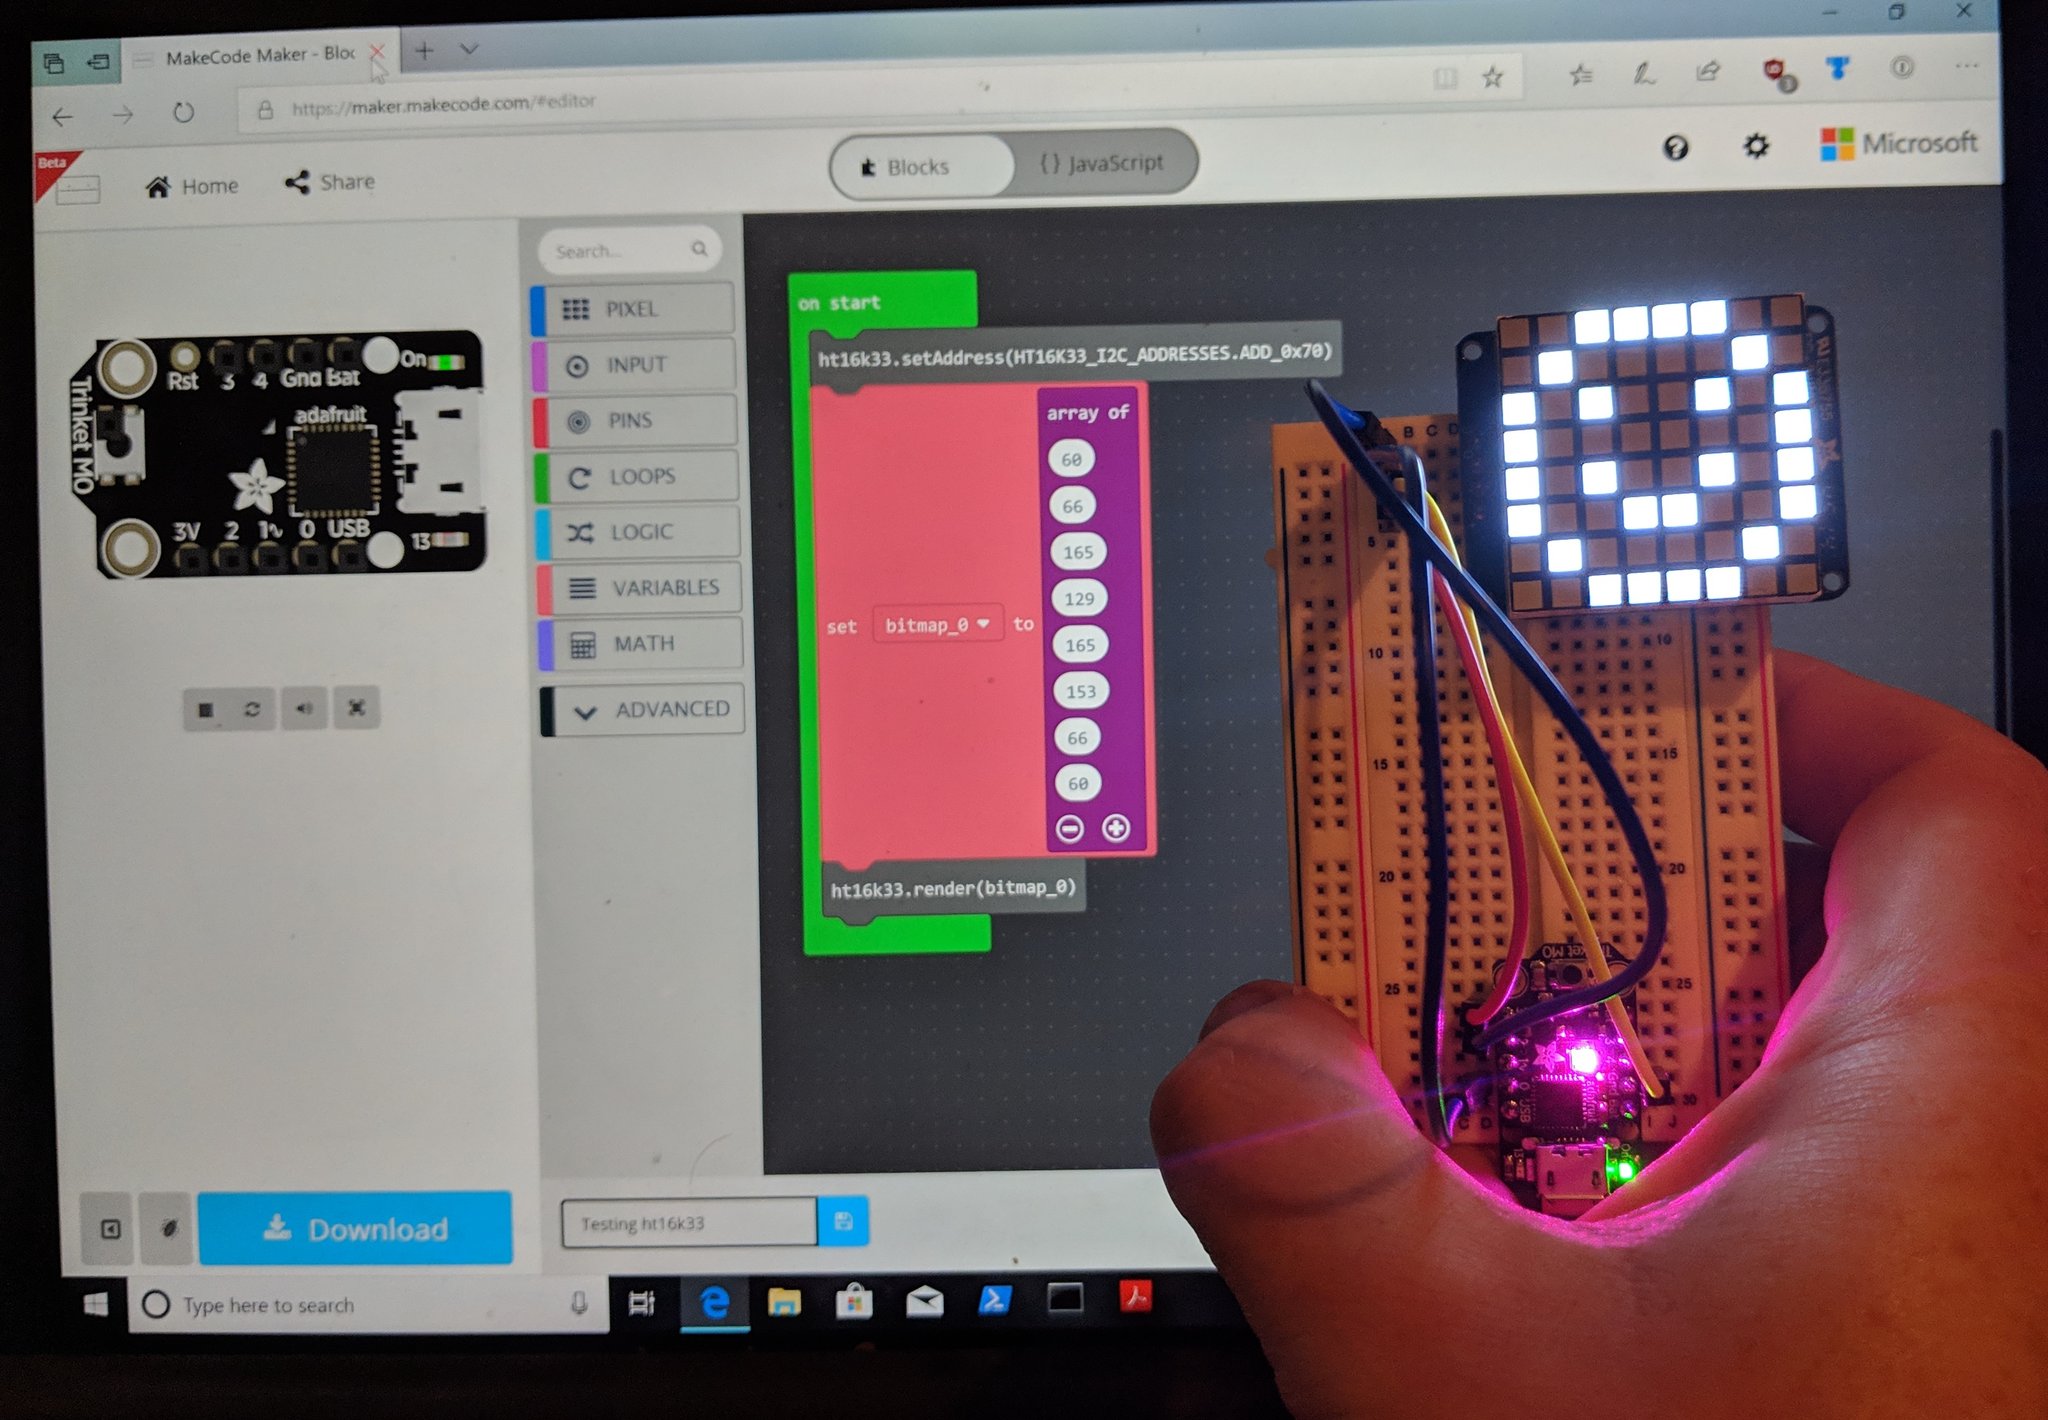
 Twitter
😃
stiff hazel
yes!
dense parrot
🙇
When downloading the extension of github is there a way to get the typescript defs for pins etc?
stiff hazel
click on javascript -> explorer, then you can look into the source of all files loaded
look for "config.ts"
dense parrot
Ah, that's for pins for each board, just looked in base and I see buffer 😃
I was looking for pins.buffer 😃
stiff hazel
you'll find the pin mapping in files like "config.ts"
and they the pin typescript objects in "device.ts"
dense parrot


Created some custom blocks in @MSMakeCode. This animation can be made without typing a line of code! https://t.co/aRkeVKSWZM
Twitter
A little animation with blocks defined
If the forever loop stops. Is that because the board has ran out of memory?
stiff hazel
it's probably locking
could you share the code?
we should have better support in blocks for these screens
dense parrot
Sure

GitHub
MakeCode Extension for Adafruit HT16K33 LED Backback - beta - chalkers/pxt-ht16k33
stiff hazel
looks good. i've filed a bug on our side to track the lock
dense parrot
Thanks, do you have a link so I can follow 😃
stiff hazel

GitHub
sleep_us(1) a bunch of times. @mmoskal
this is a fairly fresh new runtime layer
to move out of mbed
frozen lotus
@waxen oak Here is the code for the Neopixel strip. First I added the Light extension.
waxen oak
Thanks: I'm looking up : "How to add an extension" now.
Or is that something that you did in the cloud on MakeCode ? So I don't do it?
frozen lotus
@waxen oak I am using https://maker.makecode.com/beta
Click on Advanced, then Extensions and select the Light extension
MakeCode Maker - Blocks / Javascript editor
A Blocks / JavaScript code editor for MakeCode Maker Boards
waxen oak
OK Thanks for that. I'll have to let the teachers know that there are more blocks available than are shown .
waxen oak
It works on a 4x4 neopixel square matrix which is supposed to be 5v. but does light up with 3v. hookup. I do not know why pin 0 on the Trinket M0 responds to pin 13 in the block code ; Create strip on D0 but write to D 13, hum. I did not use LED color assignment but did use "show animation" and that does work on the matrix of WS 2812 B -16 RGB LEDs. I'll do a video on it for my "MakeCode and Hardware" YouTube Channel and post that later today. Thanks to all. If I can power 2 neopixel light rings 12 LEDs each off the 3v. pin then we can finish the welding goggles on a hat project for wearables.
Thanks especially, bborncr for your work and informative postings on this.
The important use of MakeCode is the animation and that fact that it works with Chromebooks without the need to buy a Google extension as with Arduino Create Web Editor extension (app.) I made up 10 electronics kits using Pro Micro boards (Arduino Leonardo based) plus 5v power supplies and extra components for an afterschool kids club. The kids instantly broke the Micro USB hardware ports on the boards--just messing around with them. And we worked hours installing the paid-for Google exension on each Chromebook. MakeCode system allows us to learn block coding with only one Trinket M0, in the possession of the teacher. Now the kids can code and see the animation on thier $79 Chromebooks , then download the program to teacher's Trinket. No breakage, less hassle, more learning. Vast improvement ! And all at a lower cost.
frozen lotus
@waxen oak The writing to D13 is to blink the built-in LED. Its not related to the Neopixel strip. It was just a test to show that the built-in LED on D13 now works.
I agree that MakeCode has so much potential. Technically inclined teachers have been using Arduinos for years now but we are trying to use MakeCode with teachers who don't normally teach technology. MakeCode allows technology to be an easy to use and low cost data acquisition and control for many different school subjects.
waxen oak
Like "Music" and "Fashion-electronic wearables" . I posted a link to my piano 88 key conversion from standard notation to Hz for each note on the keyboard as a PDF file to another MakeCode site and will do so here too. It allows music teachers to see how to code in JavaScript each note used in Hertz so the PCB - computer works for music playing. Much more to do with this: i need to find a midi translation system for MakeCode for the Trinket M0 so we can hook up a small Hamburger Speaker ? Also, EL thread so girls can make electronic fashion (or boys too). This is to make STEM appealing to girls as well as boys in classrooms outside of science.
waxen oak
Trinket M0 plays LED lightshow on split breadboard mounted on 5V. ($5.88) 2500 mAh rechargeable battery pack. Wearable with Velcro.
Code here (I hope): https://drive.google.com/open?id=1FZBB0mfJhmCF_YzjfQP5I54sXZypurn5
stiff hazel
@waxen oak do you still have the D13/D0 issue on maker beta?
@waxen oak you can use the "share" button to easily share your makecode project
we have a midi package (https://github.com/microsoft/pxt-midi) and we also have a package that imports midi files brewing up
waxen oak
I'll have to look at it. I suspect not a problem now because the above code includes D13 and D0 because the light show works but I will look into it. Is it necessary to delete each old .uf2 code from TRINKETBOOT when I download a new program to the board ? I have been doing that, wonder if it is necessary ? Yes, I hit "Share" for the code but didn't look to see where it was shared. I would like to create a .uf2 folder on my Google Drive acct. so teachers can find it easily; these files do seem to download to my Chromebook as the Arduino sketches do, right into the program which is good. I will study up on the midi package. I have a YouTube video saved where the guy makes an SD card reader play music to a hamburger speaker using Arduino Uno; that 's what I want to emulate for music education/JavaScript writing but I think he uses some other file type than midi, will go back and watch it again..Thanks for all your work.
stiff hazel
Is it necessary to delete each old .uf2 code from TRINKETBOOT when I download a new program to the board ?
no, the TRINKETBOOT is a fake file system, delete has no effect.
the uf2 replaces the previous program
waxen oak
ok, thanks for that info. Noob here, as you know.
waxen oak
ps, In the photo above, I split the 400 tie hole bread board so it will accommodate an Adafruit Feather ESP 32 when spread open to give more pin holes on each IO pin. This makes the power pack and breadboard ready to advanced learners getting into IoT and electronics beyond block coding; just thought I'd explain why the board is split. It is mounted to the flat 5v. power pack with Velcro so it can be spread wider if need be.
stiff hazel
i need to fix the midi package so that it is supported in maker out of the box
dense parrot
@stiff hazel I tried blinking pin 13 on the trinket before heading out to work re the locking issue but the pin wasn't working (I think) I didn't have time to test an external LED
stiff hazel
we've pushed out the fix to master otherwise, make sure ot use https://maker.makecode.com/beta 😃
MakeCode Maker - Blocks / Javascript editor
A Blocks / JavaScript code editor for MakeCode Maker Boards
dense parrot
👍
waxen oak
Yes, the on-board red LED on my Trinket M0 does now work when programmed to D13. The Dotstar, on the other hand just sits there in the magenta color and does not respond to any coding using the Pixel function, on my board. In simulator, Dotstar responds as programmed.
Just to show that the Trinket M0 will drive 2 12X neopixel rings off of the 3 v. pin when powered by a 5v. battery pack . Now I'd like to alter the .cpp code (?) to give the sparkles in some of the Neopixel library code . Anyone think this is possible?
stiff hazel
we take pull requests in https://github.com/Microsoft/pxt-common-packages
GitHub
Common packages for Microsoft MakeCode editors. Contribute to Microsoft/pxt-common-packages development by creating an account on GitHub.
what are you trying to do?
waxen oak
I'd like to change the "strip" code for LEDs to sparkle and then flash and pulse. As in Lady Ada's Arduino LED code for RGB WS2812 B rings, squares et. That code, even if written for the strips does work on other shaped RGB LED hardware. The "Fire " code by FastLED works also on individually addressable LEDs as well.
stiff hazel
you should be able to create your own animations
implement a new NeoPixelAnimation class
GitHub
Common packages for Microsoft MakeCode editors. Contribute to Microsoft/pxt-common-packages development by creating an account on GitHub.
then expose a new constant like here
GitHub
Common packages for Microsoft MakeCode editors. Contribute to Microsoft/pxt-common-packages development by creating an account on GitHub.
you'll get integrated in the "show animation" block automatically
waxen oak
This (above) looks like computer programming instructions , in pxt ? I'm afraid I don't know what implementing or exposing or integrating means . I'm just new to block coding having come from cut and paste Arduino so this pxt is over my head. If I could be pointed to step by step instructions then I might be able to learn it.
stiff hazel
That is the typescript underlying the blocks. There is a bit of overhead to learn it but just like any text lab gauge.
Language
What animations are you looking for? Copy pasting of Arduino code won’t work.
waxen oak
I made a work around this afternoon at our wine cafe using a new , raw, Chromebook and the Light extension which I modified and will post the code this evening. Here's the video of the results: https://youtu.be/4DoKEUnekOk

Block Coding using Microsoft Make Code and Adafruit Trinket M0 processor board with 8 x RGB LED WS 2812-B neopixel ring. See links to code and hardware.
stiff hazel
looking great 😃
dense parrot
@stiff hazel updated the issue with the lock on the trinket m0.
stiff hazel
thanks!
waxen oak
ok, This is the best I can do for the above blinky LED light show on an 8 neopixel ring. I'm posting the uf2 file, I can't seem to get the block code nor JavaScript because I have it on a Chromebook which is not logged into Google. I don't want to apply my name and password to a notebook which will be given away for Christmas. You may be able to convert the uf2 file back to the block code or JavaScript: https://drive.google.com/open?id=1FZBB0mfJhmCF_YzjfQP5I54sXZypurn5
Basically I shortened the on time for the "strip, show animation" block in LIght which is under "Advanced" and "Extensions" ; I shortened the duration from 500 (half second) to .002; some tiny fraction of a second. That makes the light animation flash almost like sparkling , Then I added more actions under Light with a pause of .5 second or .1 second between each block.
dense parrot
@stiff hazel is there an npm module to convert binaries to uf2?
dense parrot
Found it...I think 😃
tight oar
is it possible for the makecode created program to send MIDI instructions via USB?
basically, I'd like to recreate this: https://learn.adafruit.com/circuit-playground-fruit-drums/midi-drums, but with makecode
stiff hazel
people have done it via a PC
tight oar
I mean, I want it to control a drum machine software
so it's gonna be connected to a PC anhyway
stiff hazel
sorry we have limited experience with midi
tight oar
right, I don't need specifics. if there's not ready-made MIDI extension (quick googling showed there's not), then I can try rolling something on my own basing on the arduino one (since the above tutorial shows how to do it with arduino code)
just wondering if I don't miss anything obvious how makecode-created program handles USB
stiff hazel
we currently do not have a USB stack for the non-mbed builds
tight oar
right, so that's exactly a showstopper I wanted to find out about 😄 (if I understood this correctly, that is)
stiff hazel
you'll have to wait on the USB. Our first priority will be WebUSB.
tight oar
hehe, I said to my daughter "we can make this" (the fruit-capacitive-touch beat machine), now I just need to roll up my sleeves and re-evaluate my options 😄
stiff hazel
you can pipe MIDI messages via serial, then use some software on PC to play midi
GitHub
A MIDI interface for MakeCode. Contribute to Microsoft/pxt-midi development by creating an account on GitHub.
tight oar
ye, that was my idea. maybe it could be even simpler as I see there's keyboard extension
so I could just check use some virtual keyboard-driven MIDI device
who cares that the fruits and CPX is not needed then, it's waay cooler with those 😄
although writing a program to read MIDI instructions via serial would also be cool experience, not sure if I have time though 😉
wait wait wait, this hairless thingy seems to solve it
frozen lotus
@stiff hazel Will WebUSB enable the Device Console in the webapp?
frozen lotus
Is there a MakeCode roadmap?
stiff hazel
not public unfortunately
we are currently working on a release of https://arcade.makecode.com
MakeCode Arcade
which is tighly coupled to maker
and we want webusb for arcade
frozen lotus
ok, so no WebUSB before next Thursday? 😃
What is the target hardware for MakeCode Arcade?
stiff hazel
i would not count on it 😃
unless you write to write that stack...
for arcade, we are looking at STM32f401, SAMD51, rpi zero. Maybe more...
frozen lotus
I would love to but I have to figure out how all this works. First step, I'll try to write a basic extension this weekend.
stiff hazel
GitHub
Casual game editor based on Microsoft MakeCode. Contribute to Microsoft/pxt-arcade development by creating an account on GitHub.
i'm afraid webusb in deeper than extensions 😉
frozen lotus
Yep, I see that. 😦 The arcade is going to be great . I was playing with it a few months back.
stiff hazel
feedback welcome!
frozen lotus
Is there any way to install the MS MakeCode App without the Microsoft App Store?
stiff hazel
no but you can run it locally use node
waxen oak
Repeating a question that I asked on "wearables" : How do we make extensions for other Cortex M based boards? Is the 'light' extension only good on the Trinket M0? Are all add-on extensions board (CPU) specific? There are other board that are non-Adafruit which do have GPIO pins and I'd like to use a 'light' function for neopixels with the strip of RGB LEDs or rings or squares with some other boards. Thx
stiff hazel
How do we make extensions for other Cortex M based boards?
Your extension will apply to any board as long as the feature you need support it. Eg, if you need serial comm, not all of our boards have it implemented.
Is the 'light' extension only good on the Trinket M0?
The "light" package relies on Digital IO so it works for any board that has digital pins.
waxen oak
Thanks for that, @stiff hazel. I will pursue this further.
 plush marsh
@stiff hazel something defintely weird with i2c recently
i opened an issue, but getting an 'error code' on the neopixels, never seen it before!
waxen oak
Has evidence of cyborg gremlins been documented in MakeCode as yet? And BTW, I was sorry to see the Trinket M0 out of stock today. Can we expect to see it back on the shelves soon? I hope? I'd like 10 please.
I see this "overrides" on GitHub regarding "light" and 'NeoPixelStrip" might this code not always translate board to board? I'm copying code from micro:bit for NeoPixelStrip and trying to paste it into Adafruit Trinket M0 program; when clicking on the switch from JavaScript tab into Block tab I get an error message and NeoPixelStrip can't be found (for Trinket M0). Does this mean that JavaScript (or the MakeCode system) does not 'mate' the two designations for RGB/LEDs in the code? and if so, what are the implications for importing "extensions' under 'Advanced" in MakeCode for other boards, which I'm trying to use: GHI BrainPad and others. ? https://github.com/Microsoft/pxt-adafruit/search?q=neopixel&unscoped_q=neopixel (sorry for my lack of correct programming grammar- noob).
GitHub
Microsoft MakeCode editor for Adafruit Circuit Playground Express - Microsoft/pxt-adafruit
stiff hazel
Not all extensions are cross compatible between editors. We are still working on aligning apis
The light package is a superset of the Neopixel package. You should not be copying code from there.
waxen oak
Thanks for that, suggestion well taken.
plush marsh
@stiff hazel im doing a little jacdac stuff
if i can ask you some quick q's might be faster than email voley
stiff hazel
shoot
plush marsh
so
sorry had to get 🍵
@stiff hazel ok so the weirdness is that on the sadm51 i have dual dacs
and id like them to be on the headphone jack cause DACs rule
and ive got so many pins...
instead of trying to do a switcheroo on the audio, beacuse its complex w/DACs - how about a separate PWM output for the buzzer
then, when jacdac is detected, it just floats the two DACs
i dont think the capacitors will affect the data transission, because they're not tied to anything on the other side
ok gonna snak 🐔 bbiab
stiff hazel
@sleek rampart you here? 😃
 sleek rampart
@plush marsh we use the DAC on the buzzer as well - we can now mix several sound sources and this doesn't really work with a simple PWM
floating them sounds good
we'll have Steve Hodges (who unlike me knows everything about electronics) here next week, we plan to hash out exactly how this thing is supposed to work - our thinking was that for arcade we would rather focus on networking and not sound output - so in case we can't get the audio+networking to work, we would be happy with just networking, provided nothing fried if you connect headphones or amp (even if it doesn't work)
we can also drop power, or maybe only enable it with a jumper or something
plush marsh
@sleek rampart ok
if we're gonna go with true DAC on buzzer we need an amp like on the CPX
no biggie, just FYI 😃
thing is with buzzers, they dont 'like' DACs, the CPX is a hack
you can do multivoice with PWM
arduboy does it
n square waves is how to make it loud
sleek rampart
but you seem to heave a real speaker on the board right now
plush marsh
yah
well thats my proto
if we wanted to keep price low, i would go with a buzzer
we're both sorta going at the design in different manners 😃
we'll get to the middle soon
actually, yknow...
i wonder if it wouldnt just work as is right now
hold on...lemme try somethin
@sleek rampart the SENSE line doesnt seem to make 'sense' (ha!) to me
how does it detect anything
i think you need a light pullup on the spring-connected pin
sleek rampart
so if SENSE is floating, something is connected
I check that with internal pullup/pulldown
and I guess connecting power for a short while
and if the TX line is pull low all the time, we assume headphones
(there's is internal pull up on the TX while we're checking and also while the jacdac is running)
plush marsh
@sleek rampart according to the schem on github tho, if the jack is not used, sense is not connected to anything either
so i added a light pullup on the left contact, see above
i think that should work
and is a lot more elegant
sleek rampart
we enable power for a short while and look at sense
plush marsh
ahhhh dont do that 😄
sleek rampart
sense is connected with power when the jack is out
plush marsh
use a light pullup
sleek rampart
oh
plush marsh
yah not good for hedphones
sleek rampart
cool
plush marsh
never put DC thru them
i mean, you probably havent/wont do any damage, but its a risk
also, makes a pop
a resistor is cheap, and 100K wont affect the bias on the headphones
i think this will work
and fits nicely
twin merlin
#LEEKS
plush marsh
@twin merlin yep we LEEKED this before
its a python video badge 😄
starring the samd51
sleek rampart
yeah, the schematics looks good
it's a bit of pity that when you connect networking the buzzer will go silent but we can live with that for now
stiff hazel
no sound while networking?
plush marsh
i cant see an easy way to do it
without adding another chip
we would have to add an spst analog switch :/
sleek rampart
could we maybe how mono audio?
on headphones
and use the other dac for buzzer?
I guess if the caps are connected together it might mess with the signal? Though both PWR and TX are high most of the time
plush marsh
yeah the audio needs to be fully disconnected so they dont interfere with DATA
have ya'll done anything with other prototypes that have DACs
 pliant iris
there's a ton of cool gizmos on the prototype you sent...
plush marsh
1 Circuit IC Switch 2:1 15 Ohm SC-70-6
maybe that would be good
the 'transistory' design y'a have on the pdf wont work as is
so we need a special chip
or at least, it shouldnt work as is, for analog signals
sorry this is so complex but i want to try to get it right for rev B
pliant iris
the neopixels are blindingly bright, as usual
I wonder what the BOM on a minimal arcade board would be around...
for the given set of components, minus the goodies
plush marsh
tb, i can cut down a lot
but i wanted to have a fully featured design
and then just not place things
pliant iris
oh, yes please!
plush marsh
e.g. feather headers wont go on, maybe not neopixels either
ok this chip is popular and inexpensive
i can try it
nice its even in eaglecad
sleek rampart
We have no other protypes with DAC, only this PWM with DMA clocked real fast with a low pass
sleek rampart
Sound is important part of user experience in these games
plush marsh
sleek rampart
I still need to get that dac working on 51. Was stuck in garbage collector land the past few days. But hey! We can now visualize the heap :))
plush marsh
nice
you've get awesome graphics when it collides with the stack 💥
heehee
@pliant iris @sleek rampart @stiff hazel ok any other hardware changes
before rev B is routed
sleek rampart
Are the buttons / and not ?
And not \
Does the amp need DC signal? Ie no cap?
I would rather have reset as one of these big buttons on top. But I can do it in software i guess. Also once we have webusb no need for reset so I guess it's fine
stiff hazel
@plush marsh following michal on this. i'm afraid i'm just struggling to follow here.
😃
plush marsh
/?
the buttons are active high - i need resistors anyways, might as well make logic logical
the amplifier needs AC coupled input
thats C9
there's a reset button on the back
routin' in a nother window
so ping me if u have Q
sleek rampart
@plush marsh i meant if the left button is physically lower than the right ;like on original Gameboy etc?
plush marsh
oh
sleek rampart
Sorry missed c9
plush marsh
yeah i can change that
sleek rampart
Please
sleek rampart
:))
stiff hazel
the neopixel might be too blinding right next to the screen
can they be on the back?
i guess we can put some diffusive stuff over it
stiff hazel
no worries
plush marsh
ok almost done routing
stiff hazel
we love those thingies
plush marsh
the jack is next to the light sensor
i left a spot
ok hopefully i can route the extra lines
jacdac data can be any pin or has to be a sercom?
sleek rampart
SERCOM pad 0 with extint
sleek rampart
Right
plush marsh
hows PB16 sound
twin merlin
MakeCode Arcade
pliant iris
😃
twin merlin
#LEEKS
pliant iris
don't press the Download button!
twin merlin
😱 f103 ❤
plush marsh
now you've done it!
pliant iris
I told you not to press it!
twin merlin
you know saying "don't press the button" is the #1 way to get a button pressed
pliant iris

NBC
Watch Saturday Night Live highlight 'Blowing Up a Building--Aaron Film' on NBC.com
my favorite button-pressing video
twin merlin
blocked in canada
plush marsh
@pliant iris ok almost done routing
twin merlin
why is pizza an enemy
I had an f103 but I seem to have blown it up
good thing they're $2.50 on aliexpress
sleek rampart
you need the 64k RAM version
or better
and it's not very well supported yet
but I did have some games running
twin merlin
ya I tried your bootloader and I couldn't get it to work
sleek rampart
works on STM32F103RE
sleek rampart
yeah, need the bigger one
plush marsh
ok one airwire remaining huzzah
sleek rampart
but it's unclear we'll support it long-term in Arcade, 64k isn't much
plush marsh
@sleek rampart wanna check schem now?
sleek rampart
yes pelase
sleek rampart
if you need a pin at some point, I think it's fine to just ground the TFT_CS pin; but would need to validate
plush marsh
nah
i ended up reusing D4 feather pin on sense
i dont think we'll have feather headers placed
so it wont be usable
sleek rampart
the A/B are still inverted
A is higher and to the right
I think also some people said they would rather have buttons somewhat lower on the board for ergonomics
oh wow, it's tight around that jack 😉
plush marsh
yeah so theres Reasons we made it higher on the board
yeah i have o do buttons now
i wanted to finish routing
ok flipped
sleek rampart
sweet
plush marsh
its easier to hold when buttons are higher
sleek rampart
I guess one could argue both ways; I think it's cool the way it is
plush marsh
thanx
here's rev b final
theres a lot goin' on but i think its ok
i tested the lis3dh and lite sensor in arduino so i know they work
stretchbrek
brb
waxen oak
$79 Chromebook off EBay (refurbished) plays Arcade for MakeCode while off-line. Totally safe for kids gaming.
plush marsh
nice!
sleek rampart
yeah, you have to type-in your own game, like in the good ol' days!
plush marsh
ok ill send off these board for prototypin then
sleek rampart
awesome! can't wait
twin merlin
or drag it in, as the case may be
plush marsh
ok 💤 boards being sent for proto
stiff hazel
wow! amazing night!
pliant iris
sweet
dense parrot
This is great!
frozen lotus
How do I figure out what resources and methods are available when creating an extension? For example the target is pxt-maker and the board is CPX. How do I reference pin A2? A2, PIN_A2, DAL_PA06, DigitalPin.PA06, DigitalPin.A2? Then how do I digitalWrite? I've tried all the combinations and methods that I find in pxt-maker and pxt-common-core.
frozen lotus
Figured it out by going into the editor and switching over to Javascript. Used some of the example blocks and the autocomplete to see the methods available.
sleek rampart
@frozen lotus you can also search in the JS editor, but you're right it's not as clear as with blocks
frozen lotus
@sleek rampart Now I see I can even refresh my extension from the JS Editor.
sleek rampart
are you using github integration?
waxen oak
Anyone have an idea what this "console' function is for under "Advanced" in the Adafruit Trinket M0 board for MakeCode ? Just curious about "Console".
stiff hazel
General logging infrastructure like in JavaScript.
It pipes output to WebUSB/serial/BLE when available
dense parrot
When I've console.log on the trinket it doesn't show as a serial port
stiff hazel
Well we don’t have serial yet wired up for console. Should work though we need to mount a sindledmaserial wire on the tx pin
dense parrot
Ahhh
frozen lotus
There is a beta for WebUSB downloading for the CPX but unfortunately does not support Console. https://learn.adafruit.com/makecode/webusb
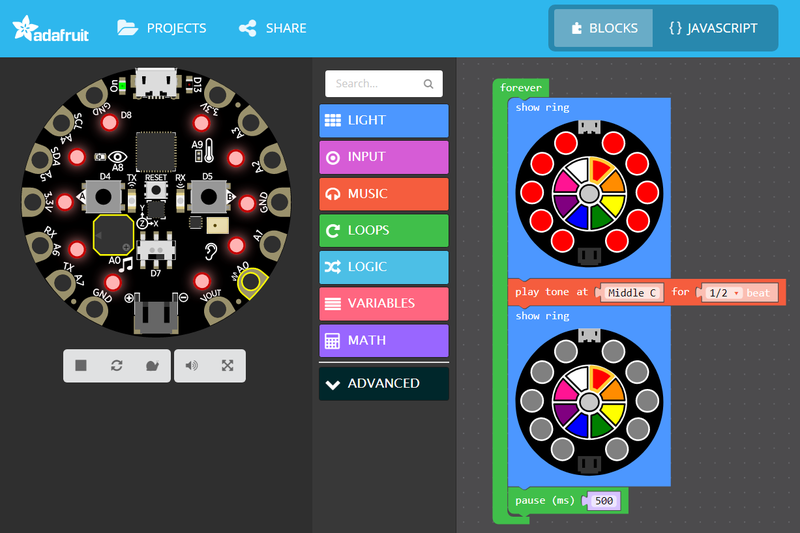
All you need to know to get coding with Microsoft MakeCode
rose cloak
i use the windows app .
frozen lotus
Yeah the window app works great. However, the teachers I am working with have Windows 8.1 and can't use the Windows Store.
tight oar
Hey - just wondering what's most hassle-free method of communication between CPX and Arduino (in my case arduino knockoff, but it doesn't matter). Serial would need logic level shifter. IR would need to port 'pulse' library to arduino (or some arduino IR library to CPX)
Somehow I think the serial, just don't have logic level shifter at hand...
waxen oak
Working on building a repository of MakeCode files, .jpgs, details of various boards that work with MakeCode and some general text files : all on the subject of music and electronic fashion. I have had trouble in the past sharing the contents of files which are hosted on my Google Drive repository. I'd like to be able to publish and send by e-mail and also post as links on YouTube videos the link to a file so that others can retrieve the contents without need for memberships nor sign-ins. I don't want to share a single sketch but all the contents of a file folder. Here I will post such a folder which is stored on my Google Drive account with one text file in it which has one link to a MakeCode program. I would appreciate if readers here would download this Google Drive file and try the MakeCode link to see if it in fact opens in your browser as an Adafruit Trinket M0 program with the simulator active and the code blocks showing. Thank You. https://drive.google.com/open?id=1jnq6xKGLE4XO57lHKIoZMNcdPftA50tA
 odd jacinth
Hello, recently I have the featherwing LED, which I need to control using an arduino uno. I suppose there should be a way to do that, and if so, could someone point me to some resources on how to set that up?
pliant iris
@odd jacinth MakeCode doesn't support the Uno (or any AVR-based boards)
@waxen oak when I open the file it has the text of the link, but it is not a hyperlink.
stiff hazel
@waxen oak we are building jacdac to help with electronic fashion - stay tuned
pliant iris
also, jacdac will make it easier for different boards with different processors to interface together
waxen oak
Yes, my file is a text file with a url, it is not intended to be a hyper link so students and teachers will have to copy the url and paste it into any browser and from there I would like to know if it does as expected; bring up the TrinketM0 page where you see JavaScript of the program , blocks and simulator? If so , that is a good first step. Maybe I can make it a hyper link in the text file. Next will be to add many files in that folder and determine if any user using any browser can see all of the files with just one shared link to the folder. That has been the problem in the past. The folder can be opened but not the files therein. I am working on this system. As per the jacdac with electronic fashion: This is so wonderful ! ! ! This will be one great way to get girls involved in coding and electronics. I will be watching your progress. One of my projects will be for dolls' clothing and electronic fashion for them. "Barbie lights up ! " The more boards that work with all this, the better. Thanks for all you are doing.
pliant iris
yes, it worked fine, @waxen oak
waxen oak
Thanks so much for that feed-back. This is the only way I can determine if sharing works as hoped; "tball".
sleek rampart
@waxen oak you can always use incognito or in private browser window
To test how stuff you share appears for others
tight oar
Hey - in the pulse library, in the void PulseBase::send(Buffer d), where the Buffer is defined? My grep-foo is failing me (looking in pxt-common sourcecode)...
tight oar
ouch, I've just written some (not that short) message and it got blocked by dyno, bah, not even sure what the issue was :S
if only I could see it..
snow island
@tight oar sorry about that I can only see the start of the message and nothing is obvious
the bot is kinda dumb because it'll alert on bad prefixes of a word
tight oar
No problem.
Different question though - how one would get functionality akin to Arduino's interrupts? How events compare to those? I'm thinking of sampling some IR codes
stiff hazel
All blocks/JavaScript run outside of interrupts, you’ll need to implement it in c++ probably.
@tight oar we are working on the pulse library
tight oar
That was my hunch, but then there are couple of abstraction layers ahead of me and I was swondering whether I can get down to interrupts level at all:)
If I read it correctly, pulse uses devMessageBus.listen (in setupGapEvents). Need to find out how close to the metal it is
tight oar
ok, not that easy to find some info on MessageBus, but by reading the pulse library code, I concluded it can be used to detect mark/gaps so probably all I need
 sinful dagger
CODAL, which supports makecode, evolved from microbit-dal, and is very much the same
Messagebus will never be as good as an interrupt as it has to go through the list of listeners... f you place an immediate listener, it will delay invocation by around 60 us
You can also read the paper... 😃
waxen oak
I have another question about MakeCode and hardware so I'll post it here; regarding this: Adafruit Feather nRF52 Bluefruit LE - nRF52832 (0:20) https://www.adafruit.com/product/3406... as featured on Youtube , March of this year ('18). I see it listed as a board choice on Maker MakeCode: see picture . The issue is, although I have not yet bought one of these boards I do try them out in simulator first to see if the board is actually supported ; in this case the simulator DOES work but the board which is simulated is the Adafruit Feather M0 Express, not the nRF52 bluetooth version. I realized that both boards are listed as being in "beta" but without actually buying a Bluefruit board I can't tell if it will work with MakeCode . Has anyone tried this Adafruit bluetooth nRF52 board with MakeCode? We would like to use it as our MakeCode "communications project to teach students the next step beyond the basic Trinket M0, that is bluetooth controlling electronics.
stiff hazel
It is not ready for classroom use. Last time we tried, it did not come with UF2 bootloader and we will need work to build the basic BLE stack.
tight oar
@sinful dagger - thanks. I've read pulse sourcecode bit more, did some googling and I now know how those pulses are handled, and whereas I haven't found any info on the 60us delay, it shouldn't be of concern, as the pulses lenghts are carried as the timestamp, so I don't need to make any calculations involving time at such precisions.
waxen oak
OK, thanks @stiff hazel, I assume your response above is to my question about the nRF52 Adafruit board, so I wonder if the UF2 bootloader can be later installed if a person already owns the board? Also, I know you're very busy but just wondering if this Bluefruit board might be in demand enough that it is worthwhile to do the work to make it MakeCode compatible? I mean, is there some other bluetooth enabled board that is ready for classroom with MakeCode or is the one I mentioned above the most likely candidate ?
stiff hazel
We are focused on SAMD21 migration out of mbed currently.
plush marsh
@stiff hazel which is amazing and we thank you for it 😃
Frank, the 832 will never have UF2 bootloader. for bluetooth with makecode right now, use a microbit! 😃
waxen oak
I have ordered the microbit and it is being shipped. I also ordered , from Ladada the 832 and am told this afternoon that it shipped from NYC. We will have to manage it with Arduino I suppose. Also, as of today I am working on my "fashion and music" project to interest girls in coding and hardware. I'll post videos of the progress on my MakeCode and Hardware YouTube channel with links from here (and from 'show and tell') over to that channel as progress is made. At this point it is based on the Trinket M0. Thanks for all you've done my friends ; we are introducing our work in after school programs at this time.
stiff hazel
@plush marsh any plan to get a trinket that exposes a jacdac compatible pin? 😃 trinket-m4?
tight oar
Hm, I'm puzzled about raising custom events. Again, looking at pulse' source:
Event evt(id, PULSE_PACKET_END_EVENT)
where's the payload??
the specific event the infrared library exposes is raised like that:
Event evt(id, crc == pktCrc ? PULSE_PACKET_EVENT : PULSE_PACKET_ERROR_EVENT)
then, the infrared subscribes like:
registerWithDal(PULSE_IR_COMPONENT_ID, PULSE_PACKET_EVENT, body)
ahh, it's not carried around..it's accessed via singleton instance in Buffer infraredPacket
plush marsh
@stiff hazel trinket m4 is challenging because there's no small chip version, they went big not small
@stiff hazel can u use the trinket m4?
er itsybitsy
stiff hazel
yes, we can use itsy-bitsy-m4
the problem with trinket is that we don't have a routed compatible pin 😦
waxen oak
I hope the links in this video work. Coded off line in MakeCode on a cheapo Chromebook with Adafruit Trinket MO: Christmas gift and the 8 yr old girl can re-program it with her own Chromebook. https://youtu.be/ytmhmHOdb7Q
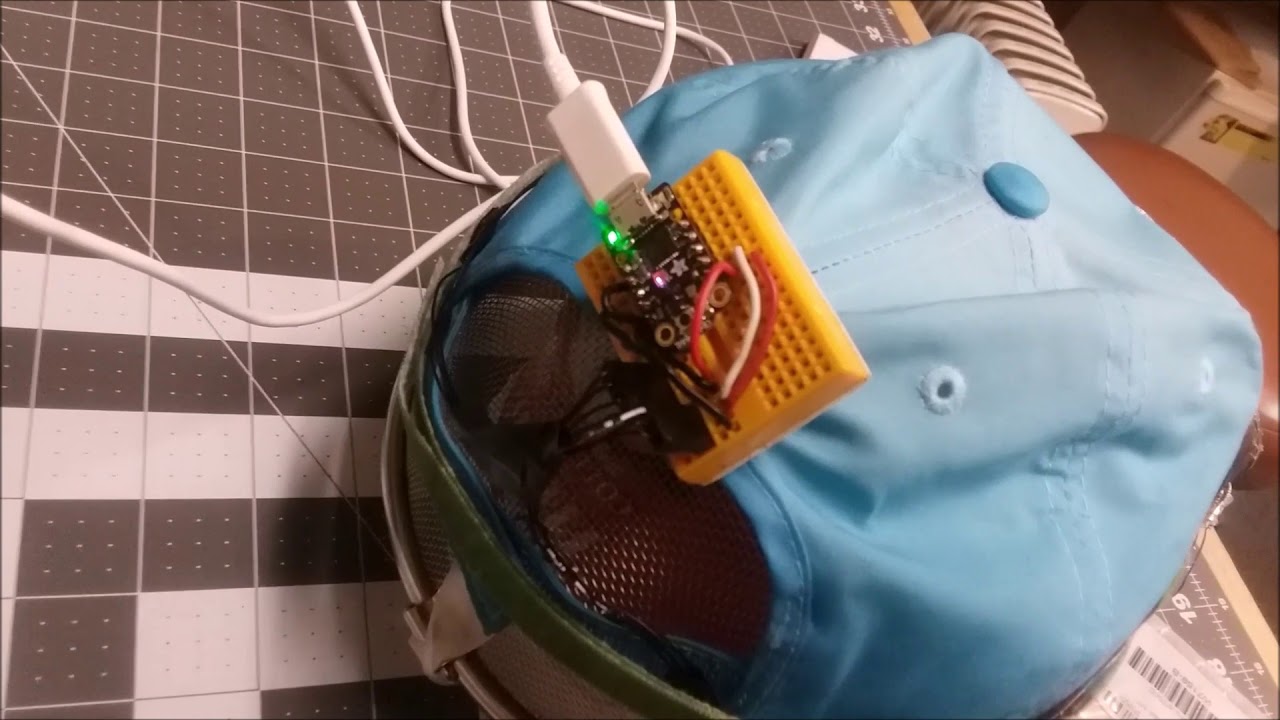
Here's a hat with googles and 12 x LED Neopixel light rings for fun, wearable lightshows! Click SHOW MORE below for links. The whole thing was programmed wit...
plush marsh
Frank, awesome! we'll blog it
waxen oak
Thanks Ladyada, there are good reasons to use Chromebooks to develop teaching kids STEM. Most schools have them at some level. They are super cheap, especially for hundreds of thousands (1.5 mil ? https://www.nheri.org/homeschool-population-size-growing/) of home-schooled kids learning STEM.Vastly under-served population of girls. Very safe way for kids to work off-line using MakeCode to learn electronics with the simulator diagrams shown. I have a fashion project in the works using a mannequin or model of Barbie found at Walmart. Hope to post often about that; and include music ;all with MakeCode.

Homeschooling is growing. Number of homeschoolers in the U.S. 2017-2018. State-level data show increase and growth in homeschool population size 2012 to 2016 and later. Now over 2.3 million homeschool K-12 students in the United States (U.S.). Research and state-level empiric...
stiff hazel
@waxen oak keep sending those videos!
waxen oak
Only because you guys figured out how to drive neopixels using MakeCode and the Trinket M0 was I able to use that board for the goggles project which the 8 year old can now reprogram with her Chromebook and do more electronics ! Thanks again for all the work you've done to develop MakeCode @stiff hazel.
stiff hazel
I’ll add a section of examples using lights
plush marsh
@waxen oak we agree! they're awesome, check out our guide if anyone needs help https://learn.adafruit.com/using-circuit-playground-express-makecode-circuitpython-on-a-chromebook 😃

A chromebook works just as well as other computers for using MakeCode and CircuitPython!
waxen oak
Hit another snag. Anybody want to hazard a guess why 16 RGB LED lights work with MakeCode and Trinket M0 but same code (altered for 10 neopixels and also using designation of 16) fails on strip of neopixels plugged into the same board, same power? This is to test strips for fashion . https://youtu.be/Gtuj5zN4dIo

MakeCode and Trinket M0 control 16 RGB LED neopixels with 5volt power pack. But, same code, power and Trinket M0 neopixel strip behaves completely differnent...
waxen oak
I need to study Mike Barela's description that you linked to @plush marsh because it is more in depth than I have found anywhere else. A couple of comments: I do not see the definitive statement that Chromebooks and MakeCode do work off line. This is important information for parents and students not near wifi. They can still MakeCode. Also, my Chromebook has a very weak mousepad as do others I have seen. Copy and paste only work with key strokes not the pad (or with extra wireless mouse) so, if duplicating several lines of music I go to the JavaScript tab and highlight, then press Ctrl+c and then Ctrl+v to copy and paste "stanzas" and then change notes in the text using Hz designations for each note rather than block "keys" on the block tab. My cordless mouse does copy but does not paste (neither mouse nor mouse pad paste) so I have to use Ctrl+v to paste into JavaScript . Peculiar ! Somewhere here I posted the keyboard note conversions from notes to Hz. for coding in JavaScript as a PDF file.
stiff hazel
Microsoft MakeCode
MakeCode is an HTML5 web application that’s automatically cached locally (saved to your computer or device) when first viewed in your browser. After the web app has loaded you will have everything you need to continue working without an internet connection. If you decide to...
Microsoft MakeCode
MakeCode is an HTML5 web application that’s automatically cached locally (saved to your computer or device) when first viewed in your browser. After the web app has loaded you will have everything you need to continue working without an internet connection. If you decide to...
waxen oak
This is good information ! The machine must first go on-line to get the web app. and then it is stored on the Chromebook and then we can work off line. Well done @stiff hazel . I just spoke to a home schooling mom this afternoon who : a) has misgivings about her daughter going on-line to learn STEM and b) their access is via her smart phone which consumes minutes her monthly plan. 2 reasons that look like barriers but are not with the system that you developed. Again, Thank you.
stiff hazel
Note that adding C++ will require to download a new native image and might require cloud connection.
waxen oak
The basis for a MakeCode and Chromebooks project: Fashion and Music. I'll do a proper video with links tomorrow. $29 mannequin (Barbie) at Walmart. I couldn't figure out the LED strips so went to a Neopixel pendant and haven't done the music part yet. She came with pink streaked hair, I don't know who in the World would want pink hair but, Oh, well, "not to judge".
stiff hazel
@golden silo fyi
waxen oak
Finished Barbie Pendant video with links to code and to the Adafruit Trinket M0 web page. https://youtu.be/KOGR9LZYuvI

Lightshow of colored LEDs programmed with Chromebook.Click SHOW MORE below: The LED lightshow is based on a 7 neopixel ring, the type LED is WS 2812, that is...
waxen oak
Is it normal to have this conflict between the standard blink program on pin D13 and "Serial" when that extension is called up? Wonder what I'm doing wrong or don't understand ? I'd like to use a simple serial code to activate an HC 06 bluetooth module with the Trinket M0 so I can use the cell phone to turn on an led (built-in if possible). Thx for any answers.
The blink program works as long as I DON'T have the 'serial' extension called up.
 golden silo
Oh this is cool!
waxen oak
I have not tried to load the program to a board yet, @stiff hazel , I was using the Trinket M0 as a board choice and was including D1 or D 13 in the program which failed to download on both an MS Surface and Chromebook. Will try including D0 if that's what you mean. Will let you know if it works for me.
Nope, even using D0 and when I have NOT invoked any serial functions or code but just called up the Serial extension (next to last in the column) the MakeCode system will declare an error when I click "Download" even before connecting a board to USB. This is with the Trinket M0 board choice for the MakerMakeCode program.
There are no indications in the JavaScript where the 'error' is.
frozen lotus
@waxen oak In maker.makecode.com, the Serial Extension gives me the same compile error you show in your post for both the Trinket and the CPX. The Feather Proto does create the UF2 file but does not send anything on TX. In makecode.adafruit.com the Serial extension compiles for the CPX. The send code does work and sends data from the CPX. Any receive code locks the CPX. I submitted an issue (#890 in pxt-adafruit) about three weeks ago. No news yet.
Successfully sending from the CPX in makecode.adafruit.com
stiff hazel
We are still in the process of moving away from mbed which is a tedious process.
frozen lotus
ok, that's what I suspected 😃
waxen oak
Ok, will follow your progress.
waxen oak
Do you think micro:bit is migrating Runtime away from mbed also ? Can anyone discuss what the replacement is or point me to more info? Thx
stiff hazel
Ask this question here: https://github.com/lancaster-university/microbit-dal
GitHub
Contribute to lancaster-university/microbit-dal development by creating an account on GitHub.
waxen oak
thx
waxen oak
Ugh ! I hate to annoy people but why did "light" extension go away? I was using this for my fashion MakeCode programming. Now I can't find it. Just wondering....
This was for the Adafruit Trinket M0 and it worked and I had a good extension for about a week; now it's gone.
stiff hazel
it preloaded now
it is still there but built-in the trinket project now. see the "light" category
waxen oak
OK, sorry to be a complainer ! I see it now. My oversight. I see it as "light" category. Thanks @stiff hazel
stiff hazel
We should really have check marks in there.
waxen oak
I'd like to wish you a happy weekend, @stiff hazel , if you ever get any time off. Thanks for all you do for us !
stiff hazel
I’ve been meaning to hack this DMX light for a while...
waxen oak
Devices are daisy chained together in a single cable and terminated with a special plug; a single DMX master is used to control, while every other device is known as a slave. https://www.makeuseof.com/tag/an-introduction-to-dmx-lighting-control-take-your-lighting-to-a-whole-new-level/ (If this is it, I'd love to see you do something with it. Wow !)

Intelligent lighting systems used to be an expensive domain for professionals only; but with the proliferation of cheaper electronics and computer control systems, incredible lighting effects are now firmly within the reach of the hobbyist. Whether you’re planning the most ...
 steel sonnet
I know DMX-512 really well, if you need help with something, ping me 😃
I also recently made this, and it accepts DMX-512 input: https://github.com/kbx81/RGBBinaryClock

GitHub
RGB Binary Clock project files - PCB and source. Contribute to kbx81/RGBBinaryClock development by creating an account on GitHub.
stiff hazel
We have serial now so I should be able to talk DMX over it... when I get the time 😃
Unless someone is up to try a dmx impl in makecode!
dense parrot
FYI: @stiff hazel I don't seem to be having the timer lock up issue after I upgraded to the latest uf2 bootloader and makecode. Made a comment on the issue (https://github.com/lancaster-university/codal-samd/issues/8)
GitHub
Contribute to lancaster-university/codal-samd development by creating an account on GitHub.
tight oar
How would I debug the CPP extensions? I see that some libs use DMESG for that...where is DMESG dumped? I also spotted serial.writeDmesg()...now checking that...
hm, it's not exposed it seems
so - to restate the question, if I use DMESG somewhere in my native code, how would I make it visible on a console (that is, in MakeCode win10 app)?
tight oar
for better or worse I've exposed pxt::dumpDmesg() on my own and I'm now enjoying wall of text of debugging output
is it possible to disable autocompilation? Editing cpp files is impossible with that:) Alternatively - are they available somewhere on disks to edit externally?
stiff hazel
try pxt serve --rebundle
i think we have control.dmesg(...) in typescript as well
for DMSEG, run pxt serial or pxt dbg for hardware debugging
stiff hazel
@tight oar it is easier to run “pxt build —local” from the project folder while doing the c++ side
sinful dagger
@waxen oak I'm not sure on the foundations position, but I started work a while ago to do this: https://github.com/lancaster-university/codal-microbit/tree/pktserial
All drivers are written from scratch, which is probably a bad idea. The limitation with a no-mbed solution is that there is no bluetooth, however, you could swap in another OS like Zephyr to sit underneath codal. Requires a whole bunch of dev though!
rose cloak
does make code have midi atm ? thanks
stiff hazel
Search for pxt-midi in extensions
rose cloak
ok thanks :}
plush marsh
@stiff hazel @sleek rampart hiya im about to build the rev 2 of the gameboard
should i not?
sleek rampart
@plush marsh I'm taking a look at the schematics
I'm pretty sure we don't want audio multiplexed on the connector since we think it might damage the chip (because the -1.5V can land on the input line of the MCU)
also there are diodes that would be needed on the power bus
so, could we skip fitting R13 Q4 R20 R4 C13 C16 and IC3 and connect the RIGHT_DAC directly to SPEAKER_IN ?
this way the basic networking scenario of two arcades playing game together will work
and we can also connect it to a jacdac network with sensors
JACDAC schematics
this is the current thinking - I think it's close to final, just got some advice from the person behind Project Torino about running power on 3.5mm networks operated by kids - https://blogs.microsoft.com/ai/project-torino-microsoft-creates-physical-programming-language-inclusive-visually-impaired-children/

The AI Blog
These days, most kids get their first introduction to coding through simplified tools that let them drag and drop blocks of commands, creating programs that can do things like navigate mazes or speed through space. A team of Microsoft researchers and designers in the company...
sleek rampart
@plush marsh also the on/off switch on my board fell apart; I had it in a plastic box, but there was also some other boards in the box
waxen oak
I don't see an Arcade for MakeCode topic or thread. Am I missing it or could we start such a topic? Or on some other discussion forum? Thx.
pliant iris
on the makecode discord: https://discord.gg/pemQbF
frozen lotus
@waxen oak Serial now works on maker.makecode.com (first test with CPX)
waxen oak
Thanks for that @frozen lotus , I will try it this A.M. on my CPX. Progress ! Good work; and to you developers at MakeCode.
waxen oak
Using "attack" tool under "animations" in the Advanced and Extensions menu in Arcade for MakeCode. I introduced Arcade to our Boys and Girls Club after-school program yesterday and it was amazing to see the reaction ! Of the adults ! (and kids). All are interested in this system of creating games by coding. Well done MakeCode developers ! https://youtu.be/3h1BFOUtWZk

An example of "Animation attack"and Sprite with swordplay vs. Hamburger in the Arcade program of MakeCode. Code Link: https://makecode.com/_D5mC1xdwaHkA You ...
frozen lotus
@waxen oak No go with the Trinket M0 and Feather Proto and Serial. The code now compiles but I see no output on any pins. I don't think that the Serial code has been updated at makecode.adafruit.com or in the MakeCode App because the CPX locks on serial receive just as before.
But the progress is great!
waxen oak
Thanks @frozen lotus . Does it make sense to you that a board with one of these CPUs might be compatible with the Serial function using MakeCode? My Trinket M0 and CPX have SAMD21 's so I can't upload an Arcade game to them but with one of the pictured CPU's maybe I could use serial (if that is needed) using MakeCode to wire up the 128x64 OLED tiny screen to then play the Arcade game on hardware that is portable. Just wondering; you know of such a board?
ps, I tried it on a BrainPad and the Arcade code won't upload. Guess the JavaScript is specific to the board or I'm doing something wrong.
stiff hazel
You can use a itsybitsy M4 to run Arcade games
waxen oak
And can use MakerMakeCode to wire up a 128 x 64 OLED display so as to make it mobile with 4 momentary switch buttons? Or am I dreaming ?
sleek rampart
@waxen oak arcade currently needs 160x128 tft screen with St7735 chip
waxen oak
Thx for that, looking for it to buy. The "next level" for our kids' projects.
sinful dagger
@frozen lotus the serial only works when TX is on PAD0 atm until I do a lil bit of work.
frozen lotus
@sinful dagger Thanks for the info! Looking forward to Serial on the official adafruit MakeCode site and app!
waxen oak
Following your work, jamesd.
sinful dagger
😃 thanks guys!
tight oar
Hey everyone... new here and pretty new to Discord so still trying to figure things out. I had no idea there was an Arcade for Makecode! The kids I work with will love this! What type of hardware is used for this? I've only used the CPX with MakeCode so far.
sleek rampart
@tight oar there will be multiple hand held consoles you can buy, you can also hack your own, or you can use Rasberry pi zero with a TV
Or you can just play it on your computer or phone
tight oar
Thanks! Is that something that would work with the Adafruit Joy Bonnet and a Pi Zero?
waxen oak
I am very intersted to know how teachers and others find out about Arcade. Please let me know how you found Arcade ? It helps inform the public.
sleek rampart
@waxen oak don't inform public too much yet
We should have wider announcement in mid January
Just low key feedback collection now
waxen oak
Ok, understood. I was about to post another vid. about Arcade. Didn't realize it was still slightly underwraps.
sleek rampart
@tight oar yes it works with that one. I will put up a guide how to set it up on near future
tight oar
Thanks! Looking forward to that. I am trying to look for an affordable solution for a place I volunteer at. They already have Pi Zeros, so I think that may be a good fit. I found out about it here on the Discord #help-with-makecode by reading some of the past messages.
waxen oak
@tight oar. Thanks for the info.
sleek rampart
@MissMari#7516 you can do it with the joy bonnet or you can have the kids build a cabinet with wood or cardboard. You can connect any buttons and joystick with switches. You may need jumper cables but that's it.
tight oar
@sleek rampart . What a great idea. I bet they would love to build their own cabinet with cardboard. They could easily personalize it with stickers, paint, etc.
stiff hazel
yes we're planning to get lots of cardboard, glitter and other crafty things around those electronics. Kids should be able to reinvent the physical playing experience beyond the traditional arcade button layout.
tight oar
I've found that kids are great at thinking outside the box and come up with things I never would have
 foggy swan
kids are amazing, but for the ones who teaching kids and all the work we put in it...the AHA moment in the eyes of a kid...it is all worth it..
waxen oak
I see that when "Download" is clicked after writing a block/JavaScript program using MakeCode, the program will be downloaded to my "downloads" folder as either a .uf2 file or a .hex file depending on which board I propose to upload it to. It seems: .hex for my Micro:Bit board (just recently got this in the mail and so I notice the different file type) or .uf2 for all other board types, Adafruit and BrainPad. I think I have this correct. As far as we know...are these the only 2 file types which MakeCode is created in?
pliant iris
@waxen oak : this is correct. hex files for microbit. uf2 for everything else
waxen oak
OK, Tom and @stiff hazel and @sleek rampart , the reason that I'm asking is because I want to get the facts and details correct for a proper posting on Wikipedia about MakeCode by Microsoft. There is no such site or page now on Wikipedia. But there should be. But, it looks like credit should be given to you guys where credit is due. And more information to people who are just now finding out about MakeCode as it develops. Often they will go to Wikipedia for information., but there is none as of today. (go to Wikipedia and search it). But see the picture. I'll take it on unless someone not connected to MakeCode wants to take it on. Thanks for all your work, you deserve credit IMHO.
waxen oak
Thanks, will get that and try to use it as a basis of your valuable work.
For example: june 19th , 2018 , this was published. Do you think it is pertinent to MakeCode as presented on Wikipedia? I ask because I am not an expert but am willing to build the Wikipedia site to inform the public about MakeCode and the people behind it. Just asking: http://www.research.lancs.ac.uk/portal/en/publications/makecode-and-codal(ca142522-fd36-40df-904b-95bbf3ca5859).html If it pertains then I will add it.
Find out more about Lancaster University's research activities, view details of publications, outputs and awards and make contact with our researchers.
pliant iris
@waxen oak - well that paper does sum up the work we did over several years that forms the basis of MakeCode and CODAL, so yes, it is a good reference.
@waxen oak - here's the PDF of the paper; https://www.microsoft.com/en-us/research/uploads/prod/2018/07/lctes18main-p12-p.pdf
Here's the home page we maintain for MakeCode at Microsoft Research: https://www.microsoft.com/en-us/research/project/microsoft-makecode/

Microsoft MakeCode is a joint project between Microsoft Research and Visual Studio to make it simple to program microcontroller-based devices using a modern web app. For information about the devices that MakeCode supports, see http://makecode.com/blog. We work closely with a...
waxen oak
See, this is information that is no where to be found on Wikipedia. I have searched it pretty hard. You 4 guys have put in a lot of effort to build a coding system and maintain it and expand it and I had never heard of this page, but maybe it's not meant to be public. I can see where people with some programming experience should know what you're doing for STEM education. This is the big push, as you know, in North American education. I'm just saying something should be out there to give credit to the people behind this electronics/coding educational work. I only have a draft Wikipedia page; nothing published as yet. When near to final draft I'll run it by you guys for correction and critique .
pliant iris
Thanks, @waxen oak! To be honest, we are very partner-driven so most of the knowledge of MakeCode comes through our partnerships. I appreciate the effort you are making. -- Tom
rigid mulch
Continuing on with my Wikipedia, MakeCode project. (let me know if this is the wrong place for this discussion). I'm looking at how JavaScript is described on Wikipedia as a close example to MakeCode. I've outlined the first few JavaScript entries by type and I'll post the link to that text file on my Google Drive acct. and the Wikipedia JavaScript link. If this appears to be the right path to follow, let me know; not that any of you guys have time to do it, but filling in some of the blanks in these categories would be helpful, since I don't know the background behind MakeCode. I'm reading through the Wikipedia policies and proper layout with references so as to satisfy the editors and with the Holidays it may be a while before I have proper entries for their approval. Thanks
waxen oak
JavaScript (), often abbreviated as JS, is a high-level, interpreted programming language that conforms to the ECMAScript specification. It is a language that is also characterized as dynamic, weakly typed, prototype-based and multi-paradigm.
Alongside HTML and CSS, JavaScrip...
stiff hazel
Here is the reference https://makecode.com/language
Microsoft MakeCode
PXT programs are written in a subset of TypeScript
called Static TypeScript. Currently, we are using TypeScript version 2.6.1.
TypeScript itself is a superset of JavaScript, and many PXT programs,
especially at the beginner’s level, are also just plain JavaScript.
Might be slightly outdated 😃
waxen oak
Thanks for that Peli. I'll include it and I'm sure updates and corrections can be made if needed.
 winged willow
 tacit apex
Aaaah Make code is cool
waxen oak
Question on ItsyBitsy M0 Express, I don't see on the Maker MakeCode site that this board is any more in Beta than others such as Trinket M0 but when I plug the ItsyBitsy in to USB and find the "CIRCUITPY" designation I should (as per the Trinket) double click the reset button to put the ItsyBitsy into "ItsyBitsyBoot" mode, right? Then I should be able to upload the uf2 file from MakeCode to the ItsyBitsy. Double clicking the reset button does not shift the SAMD51G into bootloader mode it just stays in CIRCUITPY mode. Any ideas?
stiff hazel
Is it the Itsybitsy M4 or M0? Depending on which bootloader, you would need to press once or double press? What bootloader version do you have in there/
waxen oak
Hi @stiff hazel , the packing slip and plastic package say "M4". and Adafruit ItsyBitsy Express. Not sure how I would know what bootloader version I would have but I need to know how to find that info. for sure. Where do I look? Thx
waxen oak
I guess uf2 bootloader; so should I see "ItsyBitsyBoot"? I don't regardless of reset pin presses.
waxen oak
Hint: on upload the pulsing dotstar near the USB plug flickers as if it is getting signal but then returns to pulsing green no matter what color is chosen for it in the code. . The red dotstar next to the reset button stays off . light coded signal on digital pins 7 or 5 do not send signals to 16 RGB LED square. I tried putting ground wire and 3 volt directly to the pins on the matrix (not via the breadboard) and also indirectly via breadboard tie holes. Still no go on the program.
waxen oak
making a video about this , nothing urgent about this. I know it's late in the day, we can work on this tomorrow if needs be. Uploading to YT soon.
waxen oak
Thank Goodness for ScreenCastify ! Love it. Here's a vid of dragging the .uf2 code onto the CIRCUITPY driver but no go on the play of the dotstar nor the RGB LED. The upload dotstar did blink while uploading to the ItsyBitsy so I must be doing something wrong. I tried various wiring but none worked (this is not urgent, just curious )...https://youtu.be/K9q2YOetw6w

The text in the vid. should say "Note, the dotstar should be purple but is in fact still green". I chose code for both the RGB LED matrix (16x) and the dotst...
stiff hazel
looks like it does not trigger a flash. The Adafruit docs specify that a double click on reset should put it in bootloader mode

Choo choo! ItsyBitsy M4 Comin' Thru!
waxen oak
Someone else alerting Adafruit to this issue: Also, I did double click but ItsyBitsy stays in CIRCUITPY mode, I will try my other ItsyBitsy today; haven't taken it out of the package as yet.
Sorry to waste your time @stiff hazel , I realized I should have contacted Adafruit customer service first; will report back with the solution when I find it.
stiff hazel
no worries
waxen oak
Nope, I'm now of the opinion (noob opinion) that there is a problem with the way that MakeCode runs (does not run) the ItsyBitsy M4 Express. I have run an Arduino .ino sketch using Neopixel library and 16 x RGB LED matrix. That works with the matrix on the IB M4 no problem. I then was able to double click on the IB reset button and for the first time, "ITSYM4BOOT" appeared. Previously only CIRCUITPY appeared. Now I tried to upload a MakeCode program, the dotstars flicker to indicate uploading but the matrix did not light up and the onboard dotstar did not change color as programmed. Next I downloaded the most recent bootloader program as instructed on the Adafruit ItsyBitsy web page and installed it; again, dotstar flickering to indicate that yes, the most recent bootloader did install. Now, again, I used MakeCode to make a program to run the "light" code and also change the color of the onboard dotstar. Both of these showed in the simulator correctly. When uploading, the onboard dotstars flickered as expected and as happened while uploading .ino sketch previously. But, no output to drive the 16 x RGB LED neopixel matrix and no change to the dotstar colors as programmed. I have tried analog and digital pins in the MakeCode program, several different pins for each. (My 2nd ItsyBitsy M4 is completely dead, no dotstar lights up when plugged in and no indication that the computer senses it via USB.) Any ideas would be appreciated. I do not see anyone else trying to use MakeCode with the ItsyBitsy M4 Express. Anyone know if @glad berry has tried it? Or anyone has done this sucessfully?
It is definitely a different bootloader than what came on the ItsyBitsy (which arrived in the mail yesterday); the installed version now is: UF2 Bootloader v2.0.0-adafruit.7 SFHWRO
Model: ItsyBitsy M4 Express
Board-ID: SAMD51G19A-Itsy-v0
stiff hazel
we've been buliding arcade prototypes with itsybitsy M4
waxen oak
That's why I bought it. In anticipation. I'll get this one working one way or the other !
waxen oak
I tried the simple LED blink sketch thinking there might be a problem with the "light" extension but the single LED plus resistor blink does not work using MakeCode. Also, I tried manually deleting the previous .uf2 file before uploading a new one (I know you said that this is an automatic deletion and is kind of a non-issue) just to see if that would make any difference. It does not. I've tried this ItsyBitsy M4 on both MS Surface and Samsung Chromebook. Same behavior for both machines.
Curious thing, this may be a hint. When uploading an Arduino .ino sketch the ItsyBitsy correctly controls the LED blink and the dotstar near the reset button turns off if there is no code to control it in the sketch while the dotstar near the USB port turns from green to magenta and stays on -constant. This is not true when uploading a MakeCode program; in that case the distant dotstar flickers red and then pulses red after uploading whilst the near (near USB) dotstar is constant green, no pulsing. : but still no activation of single LED for blink program on D9 with the MakeCode system.
pliant iris
@sleek rampart : any ideas?
sleek rampart
I doubt it's a bootloader problem. The neopixel is only going to work on specific pins since it uses spi DMA. Generally it's not quite ready yet.
waxen oak
OK, I quit with neopixel and went to one led blink. no go. any help appreciated.
we're developing Wikipedia article now on MakeCode guys. Thank you so much for your work on this system !
stiff hazel
most of us are on a break so checking this will most likely happen in jan
waxen oak
Good, no rush. And enjoy your time off !
waxen oak
I guess @sleek rampart 's comment that neopixel is not quite ready yet applies to MakerMakeCode for the CPX? I was kind of hoping to use CPX as a board that I could connect jumpers to breadboarded ins and outs, like use the 'light' extension which does show up in MakerMakeCode for the CPX , use this function to drive a 16 x RGB LED matrix on a bread board but that does not seem to work as yet and the simulator does not show a data wire when you select : "set strip to create strip on A0 with 16 pixels. " (There could very well be something that I am missing here and maybe this all does function in fact. ) I see that the animation for on-board neopixels in the ring is simply one neopixlel blinking, I think it is # 5 on the CPX but all the neopixels onboard do react in the actual CPX hardware when "light" program is uploaded. I'm still looking into the CPX with MakerMakeCode and Chromebooks and it seems as though this is partially functional. Thanks for all you've done on this guys. Enjoy the New Year !
stiff hazel
For CPX, use makecode.adafruit.com
stiff hazel
The Neopixel display is being fixed in maker soon.
Light is not available because it is already pre-added.
The maker version of CPX is running the newer runtime, IR and storage not implemented yet.
waxen oak
Thx, @stiff hazel , for that. I am seeing that i can swap code from mmc to mc on CPX and it works ...sometimes.
stiff hazel
we are missing a few blocks in maker to make it completely interchangeable
waxen oak
Oops ! To late, I already posted a vid. over on "Show and Tell" about using MakerMakeCode with CPX and extra outputs and breadboard.
waxen oak
Odd that this program works in simulator using input of "on tilt" but if input is "on touch" or "button press" it seems not to work in simulation. I have not downloaded the button press input to see if CPX responds as it should: https://makecode.com/_4f2TyCRfH6u2
 slender blaze
is it possible to edit the cpx's usb name/device id with makecode or would i need circuitpython or modifying the firmware itself?
pliant iris
@slender blaze - it's in the firmware
stiff hazel
@waxen oak CPX on maker now has buttons for touch
waxen oak
Thanks, @stiff hazel , and have a great New Year ! Thank you for all you do.. M. Barela is still wrorking on MakeCode Wikipedia article.
stiff hazel
Got my first 2019 project done, new table 😃
waxen oak
In a motor home ?
Working on Barbie with LED/music speaker earings with Trinket M0 and HC 05 bluetooth, Arduino. Can't figure it out with Maker...yet.
Sorry, HC 06 blue tooth.
pearl oasis
@waxen oak What commands are you using with hc-06? I can make an example for you
waxen oak
I will upload the Arduino sketch to my Google Drive and post the link here. Thanks for looking at it.
https://drive.google.com/open?id=1eGGpCri9Tes1h4MWJbPzQrIOCAZeHM0o : This should be link to Arduino sketch controlling the HC 06 bluetooth and one neopixel ring. It does work in Arduino. (there is a slight problem in that one neopixel always stays on full brightness without flashing regardless of how many pixels are in the array, 7 or 8 or 16 etc. One always stays on full and the others flash as they should do. Thanks
stiff hazel
I have rebuilt a school bus, Blue Bird TC2000
pearl oasis
great project @stiff hazel
waxen oak
Sounds super cool, @stiff hazel !
pearl oasis
@waxen oak first the trinket m0 has the sercom0 pad 0 in PA08 (D4), change serial to D4 and D2 for work serial , test with this code https://makecode.com/_WHF5UtPWpe0b
stiff hazel
@pearl oasis can you file a PR with that fix?
waxen oak
Well, I downloaded the code in your makecode link: WHF5UtpWpe0b and then clicked copy and paste into the TrinketBoot M0 ....I did not see any lights flashing upon upload though. What next? I have used D3 for RX and D4 for TX ; with Arduino sketch, are you suggestion to change that?
slender blaze
i wish usb.cpp wasnt locked so i could actually make a cpx controller work with the playstation classic
pliant iris
@slender blaze - what usb.cpp are you referring to?
slender blaze
in base folder in the makecode explorer
pliant iris
the firmware is available open source, but the usb.cpp file you are seeing isn't part of that
are you looking for the firmware?
waxen oak
On CPX in Maker, I wonder if the ".buttonA" is supposed to be highlighted. Since it is not, in this JavaScript, could that be the reason that pressing Button A does not activate the led light show but when using the 'tilt' command, that does activate it; I mean in simulation? At least this is true on my machine.
stiff hazel
working on buttons right now, let me see
 onyx lantern
I must be doing something wrong here. I've bought both a feather m0 express and a metro m0 express and Makecode won't work with either. When I upload code to either board the pixel goes dark and the tx light turns off. I haven't been able to find any documentation on the problem I'm having and would really appreciate any assistance. Thanks!
stiff hazel
Can your share your program?
stiff hazel
click on the share button, top left
waxen oak
try this, @onyx lantern , I am new at this but this changes the led from red to blue for me. You might have to click on "edit" to see the code. https://makecode.com/_VFyfiKW7fDh2
waxen oak
@stiff hazel , Peli, you're a genius ! For the first time the buttons on CPX Maker work, like a charm. I'll take this CPX plus an LED on breadboard to our afterschool program on Friday to show it off. Thank you so much ! https://makecode.com/_9rLKdMYCp0ou
onyx lantern
@waxen oak It didn't work for me, I think it's either a problem with my computer or my board. When my board is plugged in initially the tx light is red and the pixel is green. When I press the reset button to run the onboard code the tx light turns on and the pixel remains green as if frozen. When I drag code onto the board while it's in bootloader mode and the pixel is off the tx light turns off and the pixel remains off. Any idea what I'm doing wrong? It was doing this on my feather m0 as well
rigid mulch
I dont have either of the boards you are using, @onyx lantern , all I could show you was simulation. Have you tried double clicking the reset button? Have you tried right clicking on the code icon after downloading it and then pasteing it onto the bootloader screen? Do you get an idication of "Feather boot" or "metro boot" so some indication that you are out of CIRCUITPY boot? This would help to know. Sorry i'm not much help.
onyx lantern
@rigid mulch No worries! I really appreciate the input. I've tried double clicking the reset button and I'm getting both METROBOOT and FEATHERBOOT respectively. I'll try right clicking and pasting in a few minutes.
I've also tried re uploading the firmware on the feather
I tried the right click pasting method but no dice
waxen oak
One last idea, @onyx lantern , if you have a 5mm or 3mm LED with a resistor, 220 or 300 Ohm or the like, and a couple of jumper wires, you could try declaring a pin output number and wire the LED via breadboard to that pin and write the code to turn the led on and off. I remember that we had a problem with the on-board dotstar on the Trinket M0 when I first started with MakeCode; and we could not get it to respond to the block coding. The Trinket M0 works well for all functions that I've tried EXCEPT blinking the on-board LED. Have you tried a remote LED on the breadboard?
waxen oak
See my note on advances with Maker MakeCode by the guys here: video over on "Show and Tell" Discord.
onyx lantern
@waxen oak Nope, still no luck. It appears that the board becomes completely unresponsive when it tries to run the code.
stiff hazel
What code are you running?
onyx lantern
I've tried three things so far. I tried to turn the pixel a different color, I tried blinking pin 13 to turn on the onboard led, and I tried turning on pin 8 to turn on an external led.
waxen oak
@onyx lantern , if you could click the "share" button (I think it will tell you to publish first and then it will do that for you) then paste the share link here, I could at least try that code on one of my boards. They are not the ones you have but i could at least see if your code worked for me.
waxen oak
ok, when i get home i'll try it on Trinket m0 and ItsyBitsy m4 and CPX
waxen oak
Guys, is there a way to "comment out" code in JavaScript like there is in Arduino? I'd like to try some simplistic re-writes to see what is allowed and what's not by the JS editor. Thx
waxen oak
OK, I got it.....but.. inserting /* followed by */ works but when I switch back from JS to blocks , that erases the entire code from the JS tab. When I switch back to JS from block, JS is blank.
 humble talon
When you have a block floating in space it persists but does not create JS. When you come from JS it attempts to match to existing blocks and fails if it cannot.
My recommendation.. make a variable called comment and set it to the text value of your comment .... A waste of space and processing but it works
@waxen oak found it ... right click the block .. add comment ... or use // in the js to comment a whole line
waxen oak
Thank you @humble talon . Met with Boys and Girls Club STEM teacher today. We will begin adapting (porting?) JS code from MakeCode for CPX to MakeCode Maker for CPX using commands or declarations which "editor" will not object to. This will be to try to use sensors not on CPX , like soil water sensor, as inputs via breadboarding. We are not sure that this is possible but would like CPX to be our board of choice for these MakeCodeMaker projects. Thanks again for the coding tip.
humble talon
Binary Counter (Learn to count to 1023 on your fingers) https://makecode.com/_WVk3510uVDL2
waxen oak
Thanks for your Binary Counter , @humble talon , could you post your same note over on our Reddit MakeCode sub/Reddit? I set it up and Phil Torrone helps manage it and Mike Barela has been invited to manage it and if you have a Reddit acct. and have time I'll invite you also, we are trying to get a core group to start using it and I often re-post to r/programming which has a million and a half subscribers. Thanks: https://www.reddit.com/r/MakeCode/
reddit
waxen oak
I should have said "I am trying to get a core..." I don't mean to speak for Phil or Mike.
waxen oak
I guess Adadruit Metro M4 Express is not ready for primetime with Maker ? Just playing around with it, no urgent need for us to use it as yet.
stiff hazel
We’ve done a lot of work with the itsy
waxen oak
@stiff hazel , I guess I'm totally confused about MIDI and CPX. It may not be ready as yet with MakeCode and Maker but I thought Adafruit suggested that JavaScript code works with CPX this way: https://learn.adafruit.com/web-ble-midi/web-midi ; yet I get error messages both in MC and MMC when pasting this JavaScript into the workspace. I'm not pushing for it as yet, just curious.

MIDI goes wireless & around the world
waxen oak
Ok , maybe this isn't actually javascript, that would explain it.
humble talon
What are you interested in doing? CPX doesn't have BLE. And I don't think make code interprets MIDI but haven't looked for it.
pearl oasis
is web USB MIDI and ble midi
stiff hazel
The JavaScript in that page is meant to run in Chrome itself
GitHub
A MIDI interface for MakeCode. Contribute to Microsoft/pxt-midi development by creating an account on GitHub.
It’s a bit confusing 😃
waxen oak
more study needed by me. I have seen John Park do some CPX stuff with MIDI, ...just curious. I see some keyboards output MIDI I think, possible to record that to micro SD card module and then playback via small speakers?
All coded in MakeCode?
stiff hazel
Lots of people use http://projectgus.github.io/hairless-midiserial/
I think they keyboard can also be used to drive a web page that uses web midi
 cursive egret
I'm trying to refer to a pin in a function, void SwapPinState (my own function). If I want to use a regular digital pin, then I just use a number. But if I'm using a digital pin, which is referred to as A0, A1, etc. then what type do I define it as?
void SwapPinState(int pin) would work for just the digital, but obviously A0 isn't a number.
 brave quail
@cursive egret is this for Arduino or Makecode?
cursive egret
I guess I posted this in the wrong channel. Sorry about that. Arduino. @brave quail
waxen oak
I have not tried this comparison for Circuit Playground Express with MakeCode but with Maker MakeCode the CPX shows a few inputs while off-line but many more while on-line. This suggests to me that 'inputs' functions are stored somewhere on the internet , not in my browser. Note the red circle in the lower right corner showing on-line vs off-line.
humble talon
I wouldn't expect make code to work without the internet. If I bring up make code with the internet, it shows everything. If I disconnect the internet I can still use it in that same tab (but I doubt it would save anything in the browser). If I start a new tab without the internet, make code does not load. Is it possible that in your first example make code wasn't fully loaded? The only other thing I can think of is clicking advance brings new items in. In adafruit make code I think all of those may be there ... I can't really go back to my initial make code state anywhere so am unsure.
waxen oak
If I enter "MakeCode" in the Google search box while off line, I get "you're not connected to the internet" but If I click on bookmarks and then choose MakeCode editing or MakerMakeCode edit , that brings up the program. From there I can choose any board (if I have coded on that board choice previously while on-line) and the simulator does work and the program will upload to a physical board. This even works for Arcade. But , you are right, if I have NOT downloaded an extension then I cannot do it off line. Still I am somewhat limited. Curious. I set up 7 Dell computers, Microsoft based, yesterday so we can work in a library but we may not be fully functional off-line.
and i see that my previous programs for a given board are available.
humble talon
Interesting. It does save new versions while offline. Closing the tab, going online, and googling make code still has those saved versions. They must be storing a lot as cookies or cache. Hopefully the library does not clear those when the computer starts up.
waxen oak
I work with Chrome browser exclusively while MakeCoding on Chromebook, ASUS-Windows and Toshiba-Windows and MS Surface-windows and now Dell-Windows. Chorme does seem to save all programs even after shutting down and re-powering the machine. I see some differences between MakeCode and Maker MakeCode but these may be board differences: ie: Trinket M0-Maker and CPX MakeCode vs CPX in Maker MakeCode.
Even GHI Brainpad and the Micro:Bit seem to save programs in the browser. But much of their JavaScript does not swap between other boards...at least for me.
humble talon
My guess is that each instance .. adafruit make code, maker make code, etc. has thier own code base so the translation on each will be different. Maybe have adafruit reach out to Microsoft to attempt to keep the code bases the same at least for adafruit boards (or at least the ones you are using). I understand example wise why there are two sites but maybe they could work to make the background stuff more common between the two.
stiff hazel
@humble talon it should work offline
We don’t pre cache the c++ images so you would have to download at least once
Translation info at https://makecode.com/translate

Microsoft MakeCode
Microsoft MakeCode supports localized content for both MakeCode web app and target documentation.
The default language is currently always English.
 glad berry
Is it possible to have multiple photon instances running on a single NeoPixel strip in MakeCode @stiff hazel ?
Someone asked me about doing raindrop effects on a strip and wanted to know if photon could work for that showing multiple "drops" on a strand simultaneously.
stiff hazel
You can define a range over the entire strip and each has a photon
Might lead to weird effects
glad berry
how do you define a range over the entire strip and give each a photon?
Will it let you define multiple strips on a single pin?. ```let stripB: light.NeoPixelStrip = null
let stripA: light.NeoPixelStrip = null
stripA = light.createStrip(pins.A1, 30)
stripB = light.createStrip(pins.A1, 30)
stripA.setPhotonPosition(0)
stripB.setPhotonPosition(10)
forever(function () {
})
Weird, this kinda works: ```let stripB: light.NeoPixelStrip = null
let stripA: light.NeoPixelStrip = null
stripA = light.createStrip(pins.A1, 30)
stripB = light.createStrip(pins.A1, 30)
stripA.setPhotonPosition(0)
stripB.setPhotonPosition(10)
forever(function () {
stripA.photonForward(2)
pause(50)
stripB.photonForward(1)
pause(50)
})
Use the “range” function instead of createstrip
stiff hazel
Create 1 strip and spawn multiple ranges out of it
waxen oak
Thanks @glad berry , for the suggested code. That makes Barbie's jewelry really bling! I will try @stiff hazel , "range" suggestion later today. I tried to add "on button press" but that failed so went back to "on Start". Also I have a wiring problem , the pendant shorts out the circuit so I have not yet got it to sparkle. The error code that i got with "on Button Press" in Maker was not recognizing 'null'; whatever that means. Here's the vid : https://youtu.be/MN8yKweaK0o

This code uses the Photon function and Maker MakeCode: https://drive.google.com/open?id=1peyzXqhxqo4ac6tWm-apOyH8hSUyFHi2SOcooJQl9Ks , I loaded it onto the A...
stiff hazel
Can you post your broken script url here?
waxen oak
yes,just a minute
if you want the JavaScript i can post it but there are NO underlines errors in it; curious !
I get the same white over yellow error message here too but my "paint" screen cuts that off the bottom of the image.
So, it's ok to use on Start with Forever but not to use on Button press with Forever. Also, if I take the code out of Forever and place it with onButton press then no error, only when lines of code under Forever are in that block do i get the error, not when those same lines are in onStart nor inserted to the onButton press blocks. If that's clear. Probably all my misunderstanding of what this system is supposed to do.
glad berry
super bling @waxen oak !
waxen oak
Thanks @glad berry , following your work.
stiff hazel
Click on share and paste the url
Make sure you declare the strips in on start otherwise it’ll fail in the forever
You really want to use ranges
File a bug in microsoft/pxt-adafruit so that we add a sample
stiff hazel
something like this: https://makecode.com/_gkCWE9Eaui13
not sure if photon supports ranges
waxen oak
ok, I will try these both and report back. Thanks for looking into it.
Does anyone here know Stephen from Core Elect. in NewCastle, Austraila? he's doing a series on CPX and MakeCode on YouTube and their web site. Just wondering if comes here?
waxen oak
https://youtu.be/mpWRCwjHkEI, with some of the above code.
stiff hazel
it's been a while since i've looked at the photon stuff. i need to see how multiple of them would interact
 spiral owl
Can i get some help I want to do ir so I won't accept any more touches while waiting for the led to turn off
stiff hazel
and arcade beta is live https://makecode.com/blog/arcade/01-18-2019

Microsoft MakeCode
snow island
congrats @stiff hazel ! looks cool!
stiff hazel
thanks!
humble talon
@spiral owl I made this to show what you are talking about. Sometimes it easier to share the blocks.
This is what is happening
waiting false presses 0
{I pressed once}
waiting true presses 1
waiting false presses 1
{I waited for that press to complete}
{then I pressed twice}
waiting true presses 2
waiting true presses 3
waiting false presses 3
{it did wait between the presses but it still did both presses}
The desired behavior is not to get to "presses 3" .. I'm stumped ... Help us @stiff hazel you're are only hope 😃
humble talon
Figured a way to do it https://makecode.com/_5DAfFw2E402m
@spiral owl When we pause, all the clicks get stored up and come in after the pause is over. The 2nd example looks at when the click was made. If there hasn't been a click in four seconds this is a good click and we record the time of this click and go do our four second thing. If the last click was less than four seconds ago we ignore it. Hope that will work for your IR project.
FYI the example ignores everything for the first four seconds .. you can fix that by setting last_run_start to timer minus 4
spiral owl
Epic, I fkng love you man
stiff hazel
I love you figured out a way. We’ve been heads down on the arcade release - a bit lacking on discord...
waxen oak
Can we start talking about Arcade now; we were told last month not to promote it to the general public but it looks really fun and I have kids wanting to try it out. Thanks for this , guys ! If ok, @stiff hazel , I'll start putting it up on my MakeCode and Hardware YouTube Channel.
waxen oak
sprite attacks TACO: https://makecode.com/_4JJCpURsYifK
stiff hazel
Getting there... 😃 time to build it
humble talon
@stiff hazel That Retro game looks really neat. If things calm down a bit next week for you, I wanted to ask about https://makecode.com/cli/buildsprites I was able to set it up but it didn't see my png and just created a blank file. Not sure I understand the relationship between the other files and what the name and location of the png should be. Thx.
Microsoft MakeCode
Encode sprite sheets into a Jres resource
stiff hazel
Here are better docs for integrating sprites https://arcade.makecode.com/developer
Microsoft MakeCode
There are a number of examples you can try out on the MakeCode Arcade homepage.
We also have several courses in development that are located here.
API reference docs are located here.
Here is an example of folder https://github.com/Microsoft/pxt-arcade/tree/master/libs/device/space
GitHub
Casual game editor based on Microsoft MakeCode. Contribute to Microsoft/pxt-arcade development by creating an account on GitHub.
humble talon
Thank you https://makecode.com/_PL0JEEFx06Df
 spiral owl
I make the code on makecode then drag the uf2 file, it works great, but once I unplug it and plug it back un it won't work, either a power supply or laptop
humble talon
I don't have a Trinket M0 but cpx instead. And two of them so I don't notice when prior cpx is there or not. One of them had the makecode siren example .. that is super irritating thing to forget you left on the device 😃 .. anyway I never got the hang of single click reset vs. double click reset on these devices vs. anything else ... Sry ... maybe the forums would have an older post on this .. if you post something new just make sure to mention makecode, trinket M0, and the color of the status led (I don't have those colors memorized either but they have a meaning)
stiff hazel
@humble talon creating a library of adafruit characters?
humble talon
That was my thought. If @lavish jasper wanted to put them out in the arcade it would be really cute. They would have to buy in. The png I took is a little too big and someone with a graphic arts background might want to produce 8x8 and 16x16 versions. My guess is if I shrank that one down it may not look as good as they would like. The best way for them to do that is via extension rather the code example I did, yes?





stiff hazel
Extension is best for sure. They will integrate into the sprite editor gallery
You need to fit those drawings in our palette 😃
waxen oak
This might help, @humble talon , I don't know. I clicked on extensions under advanced and found some interesting things. At one point I found the graphic display for the boy with the sword that could be altered at will. I'd like to see what you find out from your trials: https://makecode.com/_DocXzuAJFHjC
waxen oak
This code does not upload to BrainPad (only Arcade board that I have) or maybe it uploads because the green ready light does blink as if code is uploading to board but then the OLED screen does not show the sprite nor any action. https://makecode.com/_DocXzuAJFHjC
ok, i see 'attack' is not in the extensions anymore so maybe that explains it.
Well, now i see attack under animations on the main toolbox so I'm stumped; will start over with coding.
I guess the screen size is too small on the brainpad? so it won't pair?
stiff hazel
Brainpad is running an older version o the game engine.
glad berry
@stiff hazel I'm getting an error in the CF2 patcher when I drag on either .uf2 from the Arcade guide: ```# detected UF2 file
Found CFG DATA at 0x77a0
Fatal error: config data not zero terminated: 210,32
Exception: config data not zero terminated: 210,32```
I'm trying to connect the TFT FeatherWing to a Feather M4 Express, so I think I'll need to change some pin assignments
stiff hazel
@sleek rampart
slow rivet
@stiff hazel @sleek rampart Hey! We've done a channel reorganisation to make it clearer where to ask for help (see the #help-with category and channels to the right). We didn't add a #help-with-makecode yet. You are the ones providing all the MakeCode assistance, so I wanted to find out from you if you'd like a #help-with-makecode channel added, or whether you'd rather continue to both provide assistance here as well as have your development discussions.
We're perfectly happy to add it, but I didn't want to make the change without your input since you would want to monitor the new channel as well if we add it.
stiff hazel
Probably best to keep as a single channel for now. Too many places to track.
slow rivet
Sounds good!
stiff hazel
Thanks!
sleek rampart
@glad berry I'll take a look tomorrow. You could try to build the bootloader yourself in the meantime - you can patch the .h file with the patcher
But it won't work with screens that are not St7735
Ie the 1.77 inch spi tft
glad berry
Thanks @sleek rampart I have one of those screens on order now --I'll hold off on building the bootloader for now and stick with the standard hardware.
Oh, just realized I do have a TFT shield based on that chip https://www.adafruit.com/product/802 so I may try to use that in the meantime.
This lovely little shield is the best way to add a small, colorful and bright display to any project. We took our popular 1.8" TFT breakout board and remixed it into an Arduino shield ...
sleek rampart
That one has buttons and some display.stuff hooked up.over i2c, so it might be also problematic
glad berry
Yes, it's acting a little odd -- I was able to get it to show the Arcade bootloader screen but only when the reset button was being held.
I'll wait for the proper one at this point.
sleek rampart
@glad berry I fixed the bootloaders in the guide, you should be able to patch them now
glad berry
excellent.
sleek rampart
I think you'll have hard time with that shield though
best to just use plain screen and plain buttons
glad berry
OK, thanks, I'll have the proper one here tomorrow, so I'll hold off on stubbornly trying to force the shield to work :)
sleek rampart
:))
also, I once soldered on to test pads on this baby https://www.amazon.com/Logitech-940-000110-Gamepad-F310/dp/B003VAHYQY/ref=sr_1_1?ie=UTF8&qid=1548262487&sr=8-1&keywords=logitech+game+controller
and plugged a screen on top
glad berry
Very cool.
stiff hazel

Build your own DJ controller using a cardboard pizza box, conductive paint, and a Circuit Playground! The PZ-1 pizza box DJ controller uses a Circuit Playgro...
PLEASE!
glad berry
I have a couple of these that would be fun to use like that @sleek rampart https://www.adafruit.com/product/131

A third-party SNES (Super Nintendo/Famicom) controller. Works great with Fuzeboxen as well! ...
stiff hazel
Pizza Box arcade
glad berry
@stiff hazel heck yeah!
stiff hazel
so with JACDAC you can connect any number of CPX to control the game as well
(we still need to write the guide on that)
glad berry
I saw the JACDAC extension in there, what is that?
stiff hazel
JACDAC
Joint Asynchronous Communications; Device Agnostic Control.A single wire broadcast protocol for the plug and play of accessories for microcontrollers. Authors: J. Devine, M. Moskal, P. Halleux, T. Ball, S. Hodges, J. Finney, T. Seyed.
it's a communication protocol for IoT
it uses a single wire as the idea was to use audio-cables mainly