#show-and-tell
1 messages · Page 16 of 1
 plush gorge
 obtuse walrus
https://cdn.discordapp.com/attachments/480464358674006026/629445264998137896/IMG_20191003_183020040.jpg Wee tiny bench power supply is a success

USB PD input, outputs Vin - 3V to 0V at up to 5A, costs less than $20 of eBay parts (though the enclosure is 3D printed)
I need a better way to mount the PD trigger board though. It keeps getting pushed into the body. Might just dump in too much hot glue, or at least some sugru
 upbeat geyser
Nifty!
 bitter hazel
Back posting on my blog a project I did back in 2017. I guess this counts as a #throwbackthursday https://madcomputerscientist.ninja/2017/04/16/particle-photon-universal-remote-raspberry-pi-smart-lamp/
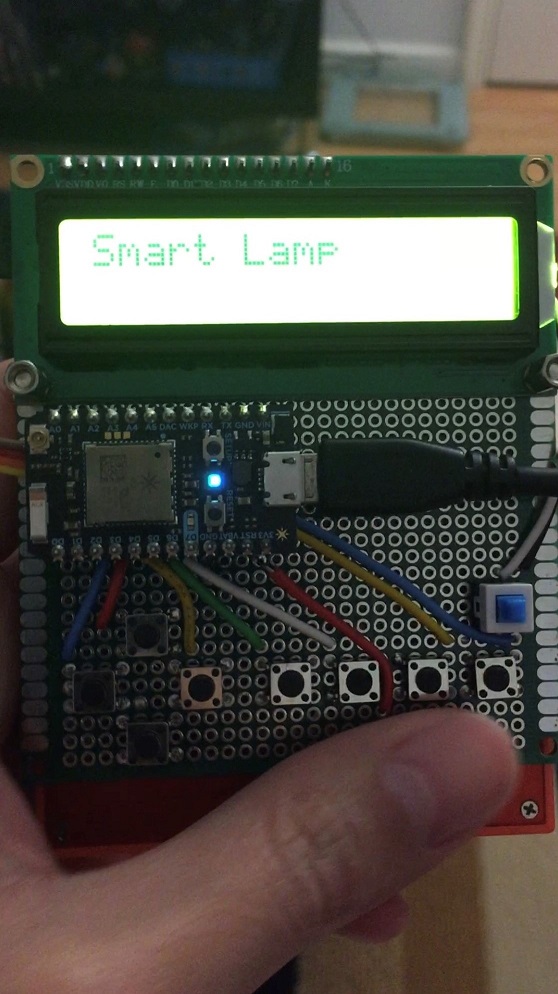
What good is a programmable lamp if you don’t have a cool way to control it? So I built one. Even made it work for the tv and cable box. I also put a “manual” switch on the lamp i…
 solar yew
C-Cube board came today
dont have any drivers for it, ones ive seen seem pretty sketchy
upbeat geyser
Linux or BSD?
solar yew
windows
solar yew
probably putting it in a early-2000s dell dimension when i find one
pairing it with a sound blaster 5.1 live
 modest lion
windows can support that crazy looking thing?
it sorta looks like an PCI-E interfaced FPGA. is that what you mean by windows? the PCI host bridge is Windows?
solar yew
pretty much the 90s equivalent of turning a PC into a DVD player
i can also connect it to a Creative Sound Blaster Live 5.1
 torn viper
fired up the minimig core for de1
 hallow plover
An adafruit HTU21D-F being placed in my beehive's quilt box so I can keep track of the temperature and humidity during the winter. The data is gathered by a raspberry pi zero, pushed into a message queue, and ultimately displayed on a raspberry pi powered weather station inside my house.
 ocean osprey
Anything to help bees is good imo
bitter hazel
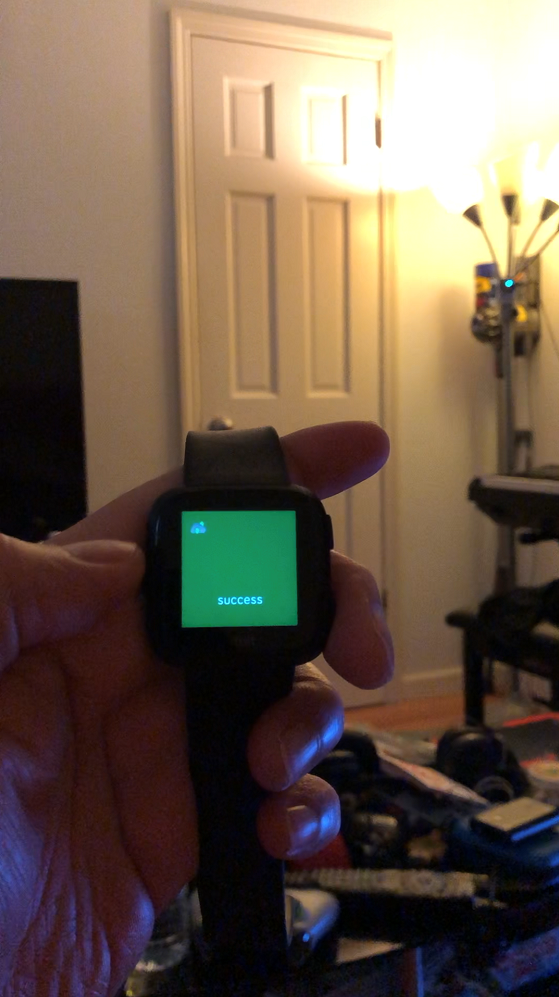
Using the Web Triggers app written by Jason Tomsic, I was able hook up my IR blaster Pi that controlled my TV and my Particle Photon smart lamp to my Fitbit Versa. I already have an Alexa skill, a …
For those times I can't be bothered to pull out my phone or ask Alexa
 winged swallow
they'll helpfully "hot glue" it into place for you too 🙂
 sage pike
So I got this email saying Google+ has ended... And I immediately thought of Adafruit show and tell. It's been a while, I watched... Is that still a thing where viewers get to show? Because the couple of last episodes I watched seemed to be all affiliated people. And the Google+ link to register in the playlist description is broken.
torn viper
They use something else now
 junior agate
Streamyard!
 scenic siren
@sage pike If the last few episodes were all affiliated people, it's coincidence. The process now is you wait in the #live-broadcast-chat channel for the StreamYard link to be posted, and then click to join. Everyone is still welcome to join and show off their projects.
sage pike
@scenic siren Cool. Thanks for the info. If I'm awake I might do that. Could be fun.
 wicked sun
I could use some feedback on my project was thinking of going with the SAMD51 But anyone else have any thoughts. Does anyone know if circuit python would work with this. I have no experience with it

Open Power Product Showcase. https://hackaday.io/project/164913-open-power - - - - - - - - - - - - - - - - - - - - - - - - - - - Track: Blue — Declan DP [AL+...

Open Power is about providing Makers, Students, and Hobbyist with a Portable, Versatile Intuitive and Cheap power supply for all their projects.
Prototype 1: Simple and Cheap Constant Voltage/ Constant Current Power Supply variable from 0.6V to 12V with led voltage indicat...
Mainly concerned with fast enough analog reads and writing to the display fast enough
 vernal ferry
@wicked sun good question to pop in CP channels.. I know CP has displayIO and the display you are using is supported.
wicked sun
@vernal ferry Will do thanks
 verbal holly
Attached the MONSTER M4SK to a cat clock. Has "snake" eyes now, but I'll find or create cat eyes!
upbeat geyser
Amusingly, Bigclive just did a teardown on the sort of pendulum module that swings the tail.
solar yew
Someone needs to tell Waveshare their battery hats and other devices that uses the same chip are junk.
You can't even plug in power or plug out power without a brown out.
i have made sure this is not related to drain by testing with a pi zero 1.3 with everything disabled and a cell rated for 10 times the work.
Everything works till you need to charge.
i'm starting to think.. no one tests this stuff.
ocean osprey
Could just be a faulty board
junior agate
@wicked sun I love the design of that, it's perfect for classrooms
wicked sun
@junior agate Thank you that is exactly what we are going for. Its not going sampale 200khz signals but it should be more than enough for a classroom setting.
solar yew
found another Novatek chip when taking a look at a panel from AU Optronics
bitter hazel
Someone tell me I'm not the only crazy person that needed this: https://madcomputerscientist.ninja/2019/10/09/tiny-keyboard-phone-car-mount-crazy-genius-or-crazy-genius/

I have been trying to figure out a way to consistently blog during my commute to work. I have a 45 minute bus ride in the morning and evening. That’s an hour and a half every weekday I could use fo…
if I'm not... then who wants to fund my new revolutionary keyboard on kickstarter? 🤣
solar yew
@ocean osprey No it's 100% flawed as this is one of 3 devices all doing the exact same thing.
Brownouts are so frustrating i am considering writing a manual on how not to frustrate PI users.
That is it.. i'm going to start a group dedicated to testing devices
with 0 remorse.
no prisoners.
ocean osprey
That is very dissapointing
solar yew
it is sad because you obviously test something properly before tweeting "i made a flying taco"
nvm making a batch of a million
solar yew
the industry needs regulation.
upbeat geyser
Hard to regulate international commerce, and regulation tends to be inefficient. The usual approaches are reviews (as you suggested), and pressuring resellers not to carry substandard merchandise.
upbeat geyser
Inspired by @ocean osprey 's experiments in robot locomotion, I designed a simple robot leg for testing. The basic shape is formed by subtracting an offset cylinder from another cylinder. Then I made a 3D model of a servo horn and subtracted that. Now I can easily get good solid attachment to a servo.
ocean osprey
useful!
upbeat geyser
Closeup of the servo horn and matching recess. I really like how it came out.
ocean osprey
That came out real nicely
bitter hazel
@upbeat geyser what 3d printer are you using? I’ve always wanted one but never know which one is good
upbeat geyser
That was printed on a Prusa i3 Mk3S. Not cheap, but well behaved and I really like it.
I bought the kit version, and managed to get free shipping during a sale.
ocean osprey
The generally recommended budget model is the ender 3
not the cheapest you can buy, but its decent
bitter hazel
do these printers still take forever to print? how long did that thing take you to print @upbeat geyser
upbeat geyser
That took about 34 minutes to print. It's about 13cm long and 3mm thick.
bitter hazel
200-400 for a 10 inch doesnt sound ludaris price wise imo
they used to cost like 1000 bucks for a 3x3x3 so i never got into it
but i know i need one, there are just some parts easier to manufacture
but i do enjoy repurposing things for my projects. cant count the amount of tin cans, plastic cups, bottles, boxes, random cases i hoard in the hopes i may someday use them in a project 😂
upbeat geyser
You can have a 4.7 x 2.6 x 5.9 inch build volume for $2,099 if you want an SLA printer. 🙂
bitter hazel
is your printer good enough to print out a decent case for like a game boy?
or would it still be rough?
upbeat geyser
It does a pretty nice job. Maybe I should take a picture of a bracket I recently printed to modify a laser cutter.
bitter hazel
i tried to have a case printed but the company was asking for like 500 bucks for the nice version
upbeat geyser
That seems high to me. There are a bunch of 3D printing bureaus out there that probably offer good quality at better prices than that.
bitter hazel
so i ended up with this: https://madcomputerscientist.ninja/2018/06/24/retro-pie-upgrades/

Added a MAX98357A I2S amp with an 8 ohm speaker just under the screen. This allowed to have a smaller build as I was able to get rid of the USB hub and sound card from the back. I replaced it with …
from my box of random plastic cases
took like 2 hours to file holes into it and find a hinge that works
and it still looks like a rat-rod
i dunno, i guess thats part of the appeal for me :p
upbeat geyser
I repurpose stuff like mad, but even so having a 3D printer is really handy for cranking out adapters, in-between parts, brackets, etc.
bitter hazel
is there a 3d printer that can use recycled plastic bottles as the material? or you really need to buy the right kind of plastic material?
that might be a billion dollar idea. a 3d printer that uses plastic bottles. like a mr fusion 🤣
upbeat geyser
There are some intriguing home recycling projects out there, but due to the way they work, these FDM printers want a really consistent diameter filament (so they can control the volume of plastic extruded accurately), and low moisture content (so it doesn't boil and make defects).
There was a discussion on it a couple of weeks back in #help-with-3dprinting if you want to look
bitter hazel
tbh im really a software guy, that knows a bit of electronics but cannot save my life to design physical cases/housing
i really should buy one of these 3d printers. ill put it on my xmas list
for this year
upbeat geyser
When I'm going for a "real" product, I work with a design house for cases/housings. They have a really nice 3D printer for prototypes.
solar yew
ahh many of you are so lucky, 3d printers, laser cutters, bench equipment and tools.
i need to literally source components, gut toys, melt plastic and preform voodoo for what is a online order away for most.
Prices of tools.
a oscilloscope "cheapest bench scope" is about R20000
That's about $1600 US
a deposit on a car
 soft condor
@solar yew IMHO some of the best hacks have come from people who couldn't buy something they wanted. If you need a car to get to work and earn a living, you buy a car. If you need a nice 'scope to earn a living, you buy a nice 'scope. If it's a hobby, we're all doing what we can with what we've got, one way or another. 😁
That said, do you have anything with a SAMD21 in it? It has a really fast ADC and can sample from just about any pin.
I had to dig for a little while to figure out how to turn on "differential mode" but then I didn't even need to use DC-blocking capacitors.
solar yew
@bitter hazel nice lil build
upbeat geyser
@solar yew I couldn't afford a scope, so I ended up picking up an old broken vacuum tube scope on the cheap at a hamfest and repairing it. The laser cutter I mentioned, I scrimped and saved for months, then bought the cheapest one I could find, as it was cheaper than the individual laser tube, power supply, steppers, etc. I assumed that being a cheap unit, it would not really work, so I'd treat it as a kit of parts.
That's exactly what happened. The control board had oozing capacitors out of the box, and the laser power supply didn't work. I didn't care much about the control board, as I wasn't going to use it anyway (it only worked with a computer I didn't have), I replaced it with an Eibot board. I debugged the laser power supply myself. I made a bunch of other fixes and tweaks before I got it working, and (as my comment about the bracket illustrates) I'm still working on it.
I traced a similar path with 3D printers, opting for a Monoprice Mini Delta, which needed a bunch of modifications and tweaking before it would work reliably, but hey, it's cheap and doesn't take up much room.
ocean osprey
i went even cheaper with 3d printers hah
upbeat geyser
Cool! Do tell!
ocean osprey
I bought literally the cheapest kit 3d printer i could find then fixed it so it didnt burn my house down
or probably wont burn my house down...
upbeat geyser
As a matter of morbid curiosity, how much was the cheapest kit you could find?
upbeat geyser
Only barely cheaper than the MPMD, which came fully assembled.
upbeat geyser
Exactly: many such choices are tradeoffs, which is why when someone asks me what the "best" of something is, I start off with a bunch of questions about what's important to them.
ocean osprey
for sure
i mean, if you ABSOLUTELY had to get the cheapest... https://www.aliexpress.com/item/32966879962.html?spm=a2g0o.productlist.0.0.557350adP7Buav&algo_pvid=1c0bfb18-35ea-44cc-8d23-2ba955abf6b2&algo_expid=1c0bfb18-35ea-44cc-8d23-2ba955abf6b2-47&btsid=57138db6-5cc3-4c68-87fc-ceaae1da0e8b&ws_ab_test=searchweb0_0,searchweb201602_7,searchweb201603_52

aliexpress.com
Smarter Shopping, Better Living! Aliexpress.com
upbeat geyser
Which echoes my internal process of choosing what to buy for myself. When I bought the cheap laser cutter, I did so because I didn't want to spend thousands of dollars, and fully aware of the fact that I wouldn't be starting with a working unit.
ocean osprey
for sure
ofc i dont live in south africa, so i cant speak for the prices of things there
and i am generally aware things are more expensive
upbeat geyser
Heh, where anyone lives also has a weird mix of advantages and disadvantages, but that's not something I expect to change often, so I learn to work with what I have.
ocean osprey
for sure
also it may be possible to purchase many of the parts and construct a 3d printer even if you cant get one delivered
i know some people go that route
upbeat geyser
There are a bunch of instructables on building 3D printers with laser-cut parts and other inexpensive approaches. Then bizarre things like the Ditto one made out of cardboard, which costs CA$1000 for some reason.
Looking closer, the Ditto appears to be more humour than reality, it uses "Tinkerine invisible filament" and has no extruder jams due to no extruder.

Tinkerine Canada
Meet the Ditto Cardboard, the world’s first cardboard 3D printer.
upbeat geyser
Yeah, probably. There are real cardboard 3D printers out there, but they seem to be individual efforts (happily, documented) instead of kits. https://3dprint.com/185735/inexpensive-homemade-3d-printer/
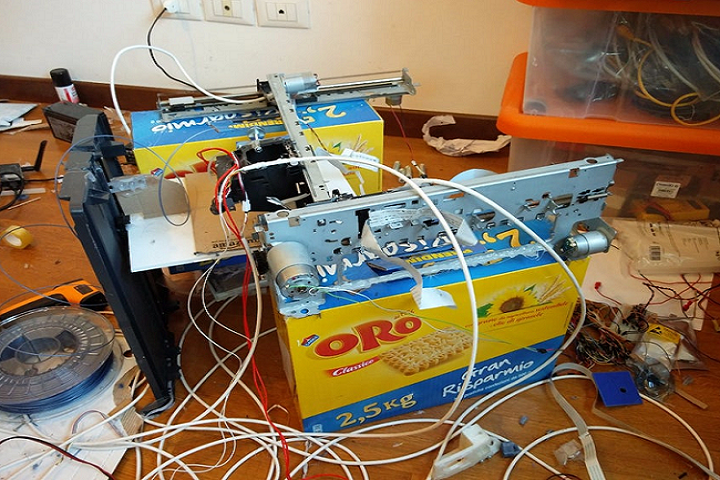
There have been many homemade and DIY 3D printers - even 3D printers made from a dot matrix printer, e-waste and recycled components - but I think the 3D printer constructed by Italian maker Michele Lizzit is the first one I've seen that has cardboard biscuit boxes supporti...
It takes clever advantage of the cost-optimized drive mechanisms in inkjet printers (DC motors with encoder feedback replacing steppers).
ocean osprey
they are pretty amazing
i collected a bunch of old flatbed scanners with big old dc motors with encoders to build my own once
but ended up not bothering, when i had to move they got skipped
upbeat geyser
I tore down a pile of printers and laserdisc players instead of binning them when I moved, so I have several boxes of parts. I'm eyeing an old SCSI flatbed scanner too.
ocean osprey
haha nice, i had to toss like 3 boxes of parts
lots of pretty oldish, 70-80s through hole boards and stuff
all sorts of interesting bits and pieces
i have a broken zx spectrum i bought for like £3 that i cant commit to tearing down
upbeat geyser
I have a broken one too that I got as a gift. I'm slowly trying to debug it.
upbeat geyser
If you scroll back on this channel (or search for ZX81) you can find the picture of it with the adorable 4" TV I found to use as a monitor for it.
ocean osprey
i have a playstation LCD screen i was going to use for that
upbeat geyser
I picked up a working ZX81 for $5 at a swap meet. I was also gifted with a dead Commodore 64 I haven't gotten to yet (still working on the dead KIM-1).
Oh, good choice (I'm sure you know about the back porch issues with LCDs and ZX machines).
ocean osprey
i actually dont
upbeat geyser
The video generation circuitry doesn't build a complete horizontal synch signal. With the analog TVs of the day, this wasn't a big deal, but newer TVs use a portion of the waveform (known as the "back porch") to set the black level of the video signal. Since it's missing, the picture can be weird and low contrast.
ocean osprey
ah, good to know, if i ever pull that project off the old backburner
upbeat geyser
There are various fixes out there for it.
upbeat geyser
Aye, I know indeed.
Went through my browser history and found this useful page explaining the ZX80 video issue http://www.fruitcake.plus.com/Sinclair/ZX80/VideoGeneration/ZX80_BackPorchGeneration.htm
Describes a circuit to add a back porch signal to the TV output waveform from a Sinclair ZX80
ocean osprey
ty ty
solar yew
A cheap laser cutter was one of my first projects when I got back into electronics and was the excuse I used to buy my first 3d printer.https://www.thingiverse.com/thing:965244
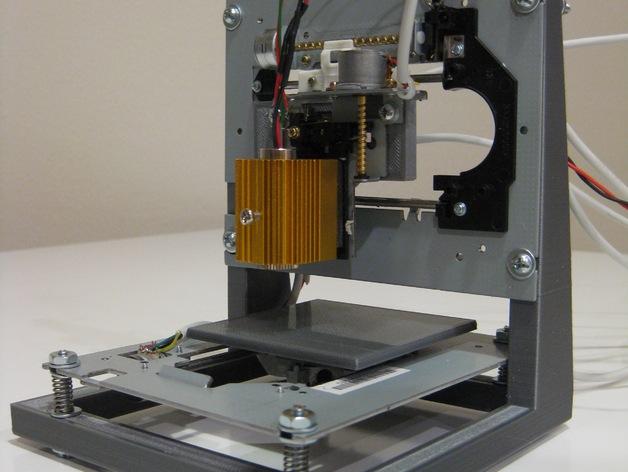
Mini laser cutter/engraver created from parts salvaged from CD-ROM drives, a DVD-Rom burner and a 3.5" floppy drive. It was inspired by this Pocket laser engraver by Groover. If you want to build one read his Instructable for details.
It is powered by a Arduino Pro Mini r...
upbeat geyser
Heh, fixing up my laser cutter was my excuse to build a CNC milling machine!
solar yew
Iv'e been fighting the urge to make a CNC milling machine now that my K40 laser is running well.
bitter hazel
has anyone made a reprap? https://reprap.org/wiki/RepRap
ocean osprey
Cant say I have, i have only bought some kit 3d printers
upbeat geyser
I seriously considered the Reprap, but ended up buying one of the Reprap derivative kits.
 warped cobalt
I want to, but been kinda on list of things to do
bitter hazel
doesnt exactly save you money. total cost seems to still be around 500 bucks
ocean osprey
fair amount of cash foir a 3d printer
ocean osprey
If a reprap is $500 im not convinced its worth making haha
warped cobalt
It more so depends on what you really want
If you're going for custom 3D printer, totally worth it, since you can replace parts yourself.
Some brands make it easy to replace parts also
So Repairs isn't an issue
Some even come as a kit so if you want cost effective, that's usual route to go
Which is why reraps are kinda going wayside
ocean osprey
you can buy a kit printer for far less and still replace most of the parts yourself
warped cobalt
Far less?
I can see less, but not much
Then again, I can do rerap for less than $500, then again, I get parts for free that most people can't.
"One man's trash . . . " sort of thing
ocean osprey
kit 3d printers start around $80
warped cobalt
That can suffice for you
I have done a kit before, which works fine
Not saying not to go with a kit
But my next printer won't be
solar yew
My first 3d printer was a printrbot kit. The kit was nice because I was familiar with how it worked by the time I got it assembled.
ocean osprey
i was just sayin gthat in general you can get a 3d printer for far less than $500
 sterile lodge
@bitter hazel I've built a reprap a little over 5 years ago from scratch. The one I built was the Prusa Mendel i2 with the classic triangle frame and has been slowly upgraded over time. Unfortunately I've used cheap parts, so the quality was never that great. I have plans to do a major overhaul to it soon so it'll be more on par with a Prusa i3 MK3S.
bitter hazel
Was it worth it? Guys on here basically pointed me to <500 printers that are pretty good for my needs. I have been eyeing the reprap project for awhile but dont really see the cost of building one going down
ocean osprey
I kind of see it as more of a novelty
upbeat geyser
The Prusa mini is only sort of a kit (3 pieces you put together), and <500. It's pretty attractive.
ocean osprey
It's true, not cheap but made by prusa you know it will be pretty decent quality.
solar yew
Make good presents when turned into a nightlight too.
 glass moss
Hi all. I’m looking for ideas for simple (2 hour) Halloween projects with Circuit Playground Express and maybe a motor or two, for elementary and middle school students. One idea is a little plastic pumpkin whose lid opens, NeoPixels light, and sounds play.
solar yew
upbeat geyser
That's a nice minimal walking robot. Does it lift its legs by swinging them out or what?
solar yew
Basically swingimg them out in different directions there is a rubber foot on the bottom that it lifts and drops when moving
small wheel on the back
ocean osprey
Haha thats cool
solar yew
the wheel is the original mouse wheel
bitter hazel
@solar yew this is pretty awesome. you have detailed pics and parts? ive been fascinated with spider bots lately and just might build one. ive not tried it before
solar yew
basically a m5stickV,
running Yolo2 object recognition.
it feeds back the identified object and it's coordinates and accuracy.
i'm hooking that up to a micro as a servo driver via i2c.
driving 6 servo's
i'm waiting for delivery of a few parts.
Things i need to still add
8 microphones for positional audio input.
wireless interface.
local positioning.
a few sensors..
 rugged ibex
And I have finished with the electronic and software parts of my first ever Pi project kit, the PiGrrl 2
ocean osprey
That's always a cool project, I put one together a while back but frankly it was half kitbashed and just generally awful. Worked though!
upbeat geyser
I'm building a "tool ladder" modeled after the one Adam Savage built to have his tools accessible
upbeat geyser
Cool! Do they work?
torn viper
why does the breadbin have a white keyboard?
ocean osprey
Oh nice, i have like, 3 commodores in my cupboard
if you live in the UK i swear they breed
 topaz flicker
Both work. Also have the 1541 floppy drive too. (Bought a bundle for $100,usd, and got a c64, c64c with box, 1541, and some other stuff (weirdly there is a dell thing).
Dell thing^
 bright wind
Docking station for a laptop.
topaz flicker
Oh.
winged swallow
the finally moved away from that style after ages because the docking connector is thicker than many of the laptops these days
topaz flicker
Well, I have no idea what to do with it.
upbeat geyser
It's a box of connectors, basically. You could use it to provide some USB ports and a DVI connector on a Pi by hacking up the cables, for example.
bright wind
Yep. Scavenge it for parts. 👍🏻
topaz flicker
Looking into getting some serial to usb for the commodore 1541.
Hopefully will have something soon, but for now I will sleep.
solar yew
still have my dell PA-10 dock but the D630 had oofed yesterday (motherboard)
 dusk zinc
Distraction for today... Wi-Fi geiger counter. Starting with https://github.com/ESP-EOS/ESP32-WiFi-Sniffer, modified just to look at wi-fi probe requests and expanded parsing to a few of the fields at the start of the packet body. The piezo chirps whenever certain conditions are met (piezo can be silenced with the switch), and the LEDs indicate certain patterns of packets (like whether an SSID is included or whether there's MAC randomization). Next step: connect it to a CircuitPython device with Wi-Fi to do vendor lookups of the client MAC addresses (already have that server code running).
 faint lily
Nice!
That's a super cool idea honestly
Though I think you can do a table of vendor IDs in a fairly small amount of space
dusk zinc
The vendor database is a 1.6MB file (https://code.wireshark.org/review/gitweb?p=wireshark.git;a=blob_plain;f=manuf), but I'm sure it could be reduced to its essentials. An online lookup would also let me do other things, like ignore known devices (easier to edit a server file than reflash an Arduino).
 cinder imp
I put the components that came with the Neotrellis Adabox onto a board, and into a case for a Pi 3A+ 🙂
 compact furnace
Just got my Halloween duds in the mail. I designed them in Photoshop, myself. I am gonna be ||MoCap Mysterio|| from Spider-Man: Far From Home.
bitter hazel
This is the dumbest/most awesome build ive seen in a while 🤣 https://youtu.be/vWGquxvqI_Y

8 Knifes 1 belt = Easy Chopping SUBSCRIBE so you see more projects like this http://bit.ly/2I6f0bv Follow me on other platforms to get behind the scenes vide...
 signal loom
Started to work on our FTC 2019 CAD. Thoughts? https://youtu.be/Nih2ytp7CtI

Hi! We are the Mamaroneck Robotics Team. We were founded in 2014 and the first competition challenge we competed in was “Cascade Effect.” Our team has partic...
ocean osprey
@bitter hazel Colin Furze is wonderful but its a miracle he hasnt exploded himself or something
 junior dust
nice servo adapter for monster m4sk case. could be handy for animatronic https://www.thingiverse.com/thing:3932758
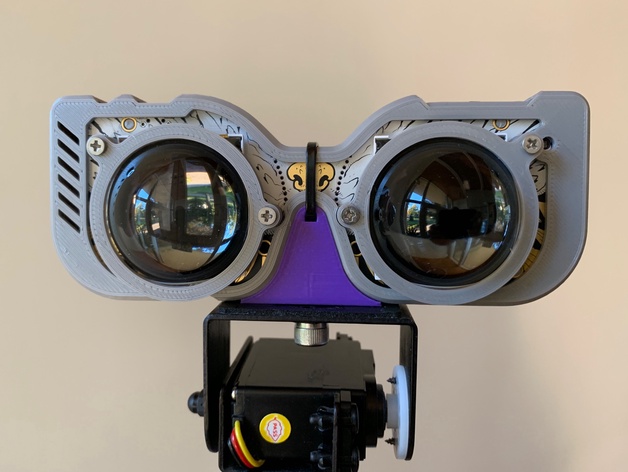
Adapter to mount Monster M4SK case to something with a 1/4-20 bolt (tripod or pan/tilt) using a zip tie and 1/4-20 nut.
Two versions provided, with different positions for the nut.
ocean osprey
@compact furnace yeah still waiting on the switch version though
compact furnace
It's part of this update, @ocean osprey !!! 😄
I got the Switch dev unit right next to those laptops in the background. 😉
ocean osprey
Woo
 grizzled cedar
@upbeat geyser and @grave bone This is what you were helping me with the other day with the power layout.
 grave bone
@grizzled cedar WOW!! Are you showing that on Show and Tell today?
grizzled cedar
Wasn’t planning on it but I could
grave bone
It's so worthy! You could just show that exact video, and talk for one minute or two about what you used.
Congrats!
upbeat geyser
Nicely done!
grave bone
@grizzled cedar Doing a big NeoPixel project is a rite of passage, and teaches you so much about power estimation, distribution, common grounds, and performance.
 stark lava
Unifi voucher wifi vending machine
I had trouble on counting the pulses from the coin acceptor at first
upbeat geyser
Cool! I wondered what you were building with the coin acceptor!
Did you end up changing the pulse speed?
stark lava
I had to add delay of .05 seconds to properly count them
upbeat geyser
Ah, that makes sense. That's a nice build!
 supple falcon
I just got these in the post - super stoked but I’m not excited about having to learn how to SMD solder :/
upbeat geyser
Nice! I like the ground via stitching. Are you planning on using an iron, hot air, or reflow?
Diplexers are generally passive, but it looks like there are power supply components, what are they for?
 dry idol
ocean osprey
dry idol
ocean osprey
Thats super cute
upbeat geyser
Like LadyAda says, build robot friend, not robot enemy!
 gritty charm

^ I'm building a way to port pico-8 games to samd. unfortunately samd21 is probably going to be too slow
I'm estimating that 60% of cpu time on samd21 would just go to generating audio. So if your update() and draw() times were zero you might be able to get 15FPS spent just copying pixels to the LCD
on samd51 (pygamer) It looks more like 6% of cpu time for audio alone.
[I expect you'd have to port the lua code to c++ because I don't think any samd chip has the enough ram for the lua heap]
ocean osprey
I kin do flove the pico-8
 upper creek
i know that this isnt much, but its the first thing that ive soldered together after building it on a breadboard. Its a diy multimeter created from an ardino nano, and a small pcb. i followed a tutorial on how to do it on a breadboard, from somewhere on the arduino.cc site, and then decided it i really needed to keep it going! It is SUPER accurate, although at larger capacities it can take a few seconds to get a reading from it, and ive only tested up to a 5600uF 50v cap.
ill take a photo of the bottom too, to show of my crappy soldering skills. there is no lcd connected obviously, so I use an OTG adapter to connect to my phone, and open up my serial terminal on it at 9600 and tada!
the read cable is just a snip off of a regular dupont wire, leaving the head instact so its easier to test, by just putting the leads in them!
ocean osprey
What are you doing xeon
soft condor
Being awesome!
solar yew
faint lily
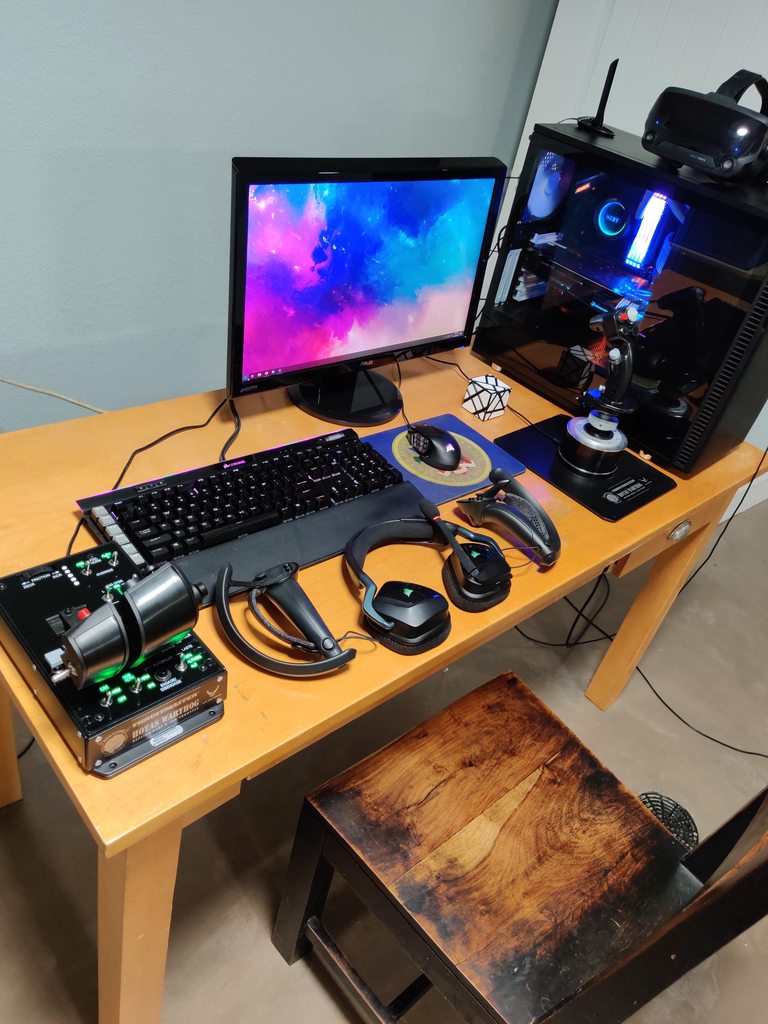
Not exactly DIY
But after a ton of time with a few microfiber cloths and an hour of disassembling and reassembling my keyboard, I've finally got a photo-worthy setup
Also, I guess there is a tiny DIY component in that I have a Particle Photon (not in any of the pics) that acts as a Wake On LAN device to power up my PC from anywhere for RDP/SSH
bitter hazel
Im an idiot for not buying a power drill sooner. This bracket mounting took 10 mins from inspiration to implementation. I would have still built it without a power drill but would have probably taken half an hour w the carve tool on my leatherman just to bore the holes on the case
bitter hazel
Of course the 10 min idea has spiraled into another chaotic building spree. Im going to hate myself again later when I get up for work
upbeat geyser
Yow, that looks familiar.
warped cobalt
My room/workbench, yea . . . it always looks like a chaotic building spree
FYI, drill ownership is another rabiit hole towards projects
For intence when you're on your 3rd brand change over because of how it relates to projects you do . . .
Or availability
Yea . . . that mess gets to be like 3X as bad & you realise your mine-field walking skills has improved.
Not gonna lie, I do enjoy the internet speeds & computer I got now . . .
soft condor
There's drill ownership and then there's drill press ownership. Just sayin'... 😄
upbeat geyser
I inherited a clunky old adapter that makes a hand drill into a sort-of drill press. However, none of my drills fit it. I found a nasty $16 drill that would fit, but I splurged on the fancier $22 one. Actually works fairly well.
warped cobalt
Hey! I like goin outside . . . ocassionally 😄
soft condor
The little drill presses go on sale at popular import tool retailers pretty often. Mine was mid two digits, less than a decent name brand rechargeable hand drill. My old AC Black & Decker variable-speed reversible is less trouble a lot of the time, but there's the occasional job where it makes a big difference.
warped cobalt
If I'm gonna bother, I'll get an old ac one
soft condor
@warped cobalt Outside is nice too.
warped cobalt
I just haven't had actual shop space lately for one
soft condor
I don't leave mine out. It isn't too big to carry so I store it when I'm not using it.
warped cobalt
Then again, my old all aluminum framed ac hand drill sumpliments nicely 😅
Yea, I mean, I don't have any space to even put one currently
I'm fudging for space to sit my toolbelt down
soft condor
Space, the final frontier. Captain Kirk had it right. I think it's a challenge for all of us.
warped cobalt
Then again, maybe because I'm excusing Ryobi drill set for the soldering iron they have
soft condor
Not sure what you mean. Is the soldering iron good or bad?
warped cobalt
Soldering iron may be best part of the set
upbeat geyser
I do a lot of my woodwork outside, so the lightweight drill press adapter is handy, I just take it out, drill some holes, get some fresh air, and leave the sawdust outside.
Used it to drill all the rung holes for this
soft condor
Beats sweeping for sure.
warped cobalt
It's more annoying getting up metal shavings
soft condor
Lots of fun making them though!
upbeat geyser
It left a fair sized heap of sawdust on the deck, so I did sweep it off the side, but I didn't have to be thorough about it, so it was a lot easier than sweeping up inside would have been.
warped cobalt
Miss some wood, oh well, miss some of metal, your feet hate you
I prefer concrete floor
Easiest to sweep
soft condor
Speaking of making holes in metal, I had this out last night. They still look exactly the same as when I bought mine. https://www.amazon.com/Hand-Power-Punch-Sheet-Metal/dp/B0058VEE9Y
warped cobalt
Then again, if I leave pile of dust anywhere outside, it's unwanted attention
Cool
soft condor
Oh, we don't get expanded descriptions from that site. Just as well really...
bitter hazel
Space truly is the final frontier. But for people like me who used to live in a country where space was small and expensive (Singapore) and now live in a city with the exact same problem (New York) I’ve learned to maximize and value space. This is why its taken me forever to buy a power drill 😂
 humble dew
I have the final test of my joker pumpkin up. A proper video will be coming soon. https://youtu.be/wq-z9Oe0e0k

Final systems test. Proper video will be forthcoming in the next few days.
soft condor
@bitter hazel I'm sure that I could learn a thing or two from you! But I can say that it's much easier going from a small space to a bigger one than vice versa.
junior dust
sweet circuitPython candy bowl by sudowermy https://www.youtube.com/watch?v=JX84nleX454
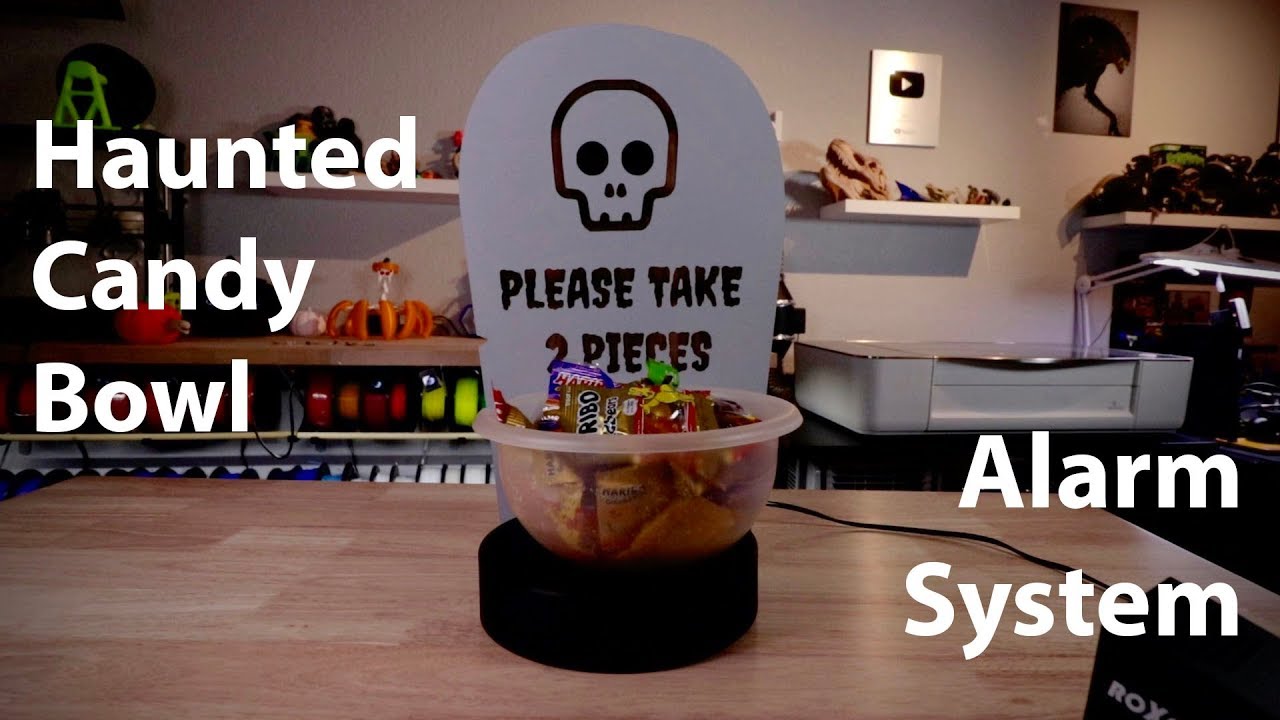
Blog post: https://sudomod.com/halloween-candy-bowl-alarm-system/ Spooky Arduino Eyes project: https://www.youtube.com/watch?v=uYIc1pLO6Xk Motion-activated P...
 jaunty aspen
M4SK for the Halloween win
torn viper
how are the acoustics on that pumpkin?
 cobalt dove
Used some RGB LED strips to make some stick figure costumes for the whole family this year! https://gfycat.com/hilariousprecioushogget-destiny2

My daughter's had legs but they were really bothering her so I took them off shortly after we started Trick or Treating
humble dew
@torn viper as it turns out a pumpkin makes a surprisingly good speaker enclosure.
torn viper
rad
gritty charm
it's kind of rigid and has a lot of mass
upbeat geyser
And a fair amount of damping (both due to flexibility and an irregular interior).
solar yew

GitHub
Cortex Forth for STM32F405 November 2019. Contribute to wa1tnr/Cortex-Forth-STM32F4x development by creating an account on GitHub.
humble dew
@faint lily I've been watching a YouTube channel where they resin stabilize stuff a lot lately. I should look into it.
 wanton rampart

I'm planning something for CoderDojo
Still need to add letterboxing and audio but I have six days, totally enough time...
That's running on a Pi 1 B+
 shy shale
This rack was initially not deep enough for what I needed so mount in it so I used some Unistrut and some right angled brackets. I just recently relocated some of my electrical panels (Salvaged, repurposed for new tasks) because they were hard to access. I had to change some of the wiring around because my diodes in one panel were overheating. Had some grounding issues caused by a single device (Had a screw that would tie DC - to the chassis, caused issues with Earth GND when the negative line was disconnected. It all seems to be working now. 😃
Several devices were salvaged and repaired (if not properly repaired, it was hacked so it would work. Such as the 1 Gigabit Network Switches.)
topaz flicker
I'm making a video game.
 lucid bloom
PSB - Pi Spam Blaster. It picks up on spam calls/blocked caller ID calls with a modem and makes some unpleasant sounds before hanging up. Code is on GitHub I will be expanding it and making a tutorial. Hardware cost is around $30.
https://github.com/matt-desmarais/PSB-PiSpamBlaster

GitHub
Telephone spam silencer based on caller id. Contribute to matt-desmarais/PSB-PiSpamBlaster development by creating an account on GitHub.
upbeat geyser
I used to use a Phlink for that, but it died and the software is no longer supported. What are you using for a DAA?
lucid bloom
@upbeat geyser some generic one I found on Amazon that was plug and play with the pi
https://www.amazon.com/gp/product/B077YBTC2J/
upbeat geyser
Ah, generic USB modem.
lucid bloom
the code is pretty straightforward, because my service provider tags some calls with "SPAM?" in the name and the number of a blocked call is "P". 1 if statement will capture both.
if("NAME = SPAM?" in str(line) or "NMBR = P" in str(line)):
str(line) is the serial output from the modem
 ruby ledge
Connect your Arduino to a BLE HID gamepad
https://github.com/bitbank2/Nano_33_Gamepad
https://www.youtube.com/watch?v=de_Gk3HZxjk&lc=UgxU4JmvFh9OY0xymV94AaABAg
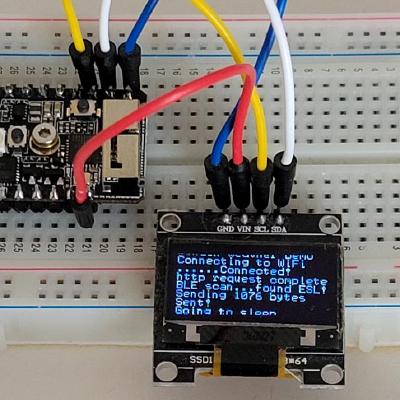
GitHub
A sketch to connect BLE HID gamepads to the Arduino Nano 33 BLE - bitbank2/Nano_33_Gamepad
 wanton rampart
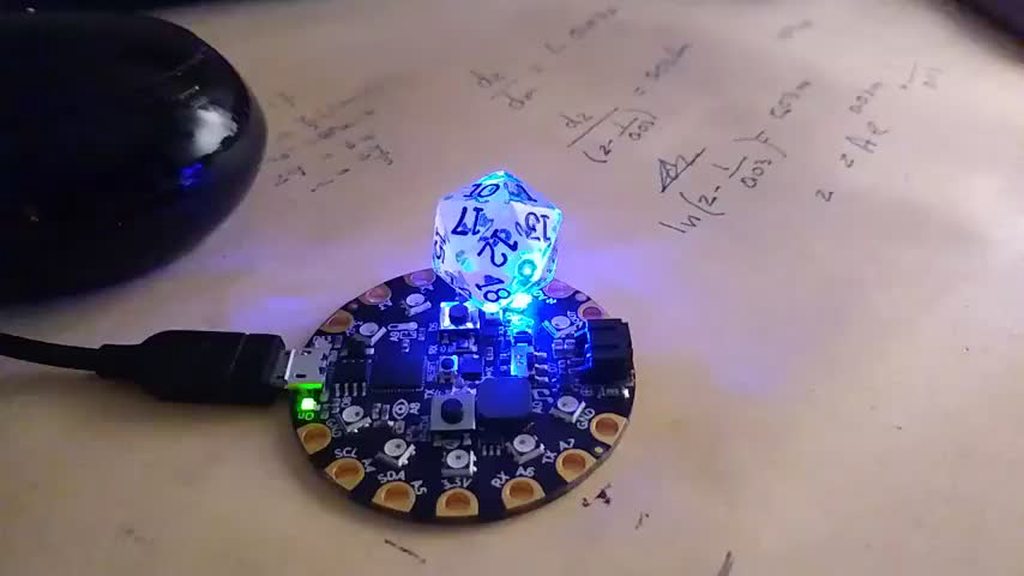
some really simple Arduino code running on a CPX to show off this really cool D20 die
upbeat geyser
Shiny!
 solar yew
Not sure what I'm seeing but the overview looks promising!
 obtuse cove
Hey - Drew Fustini and me (Helen Leigh) would like to joind show and tell tonight
is that okay?
bitter hazel
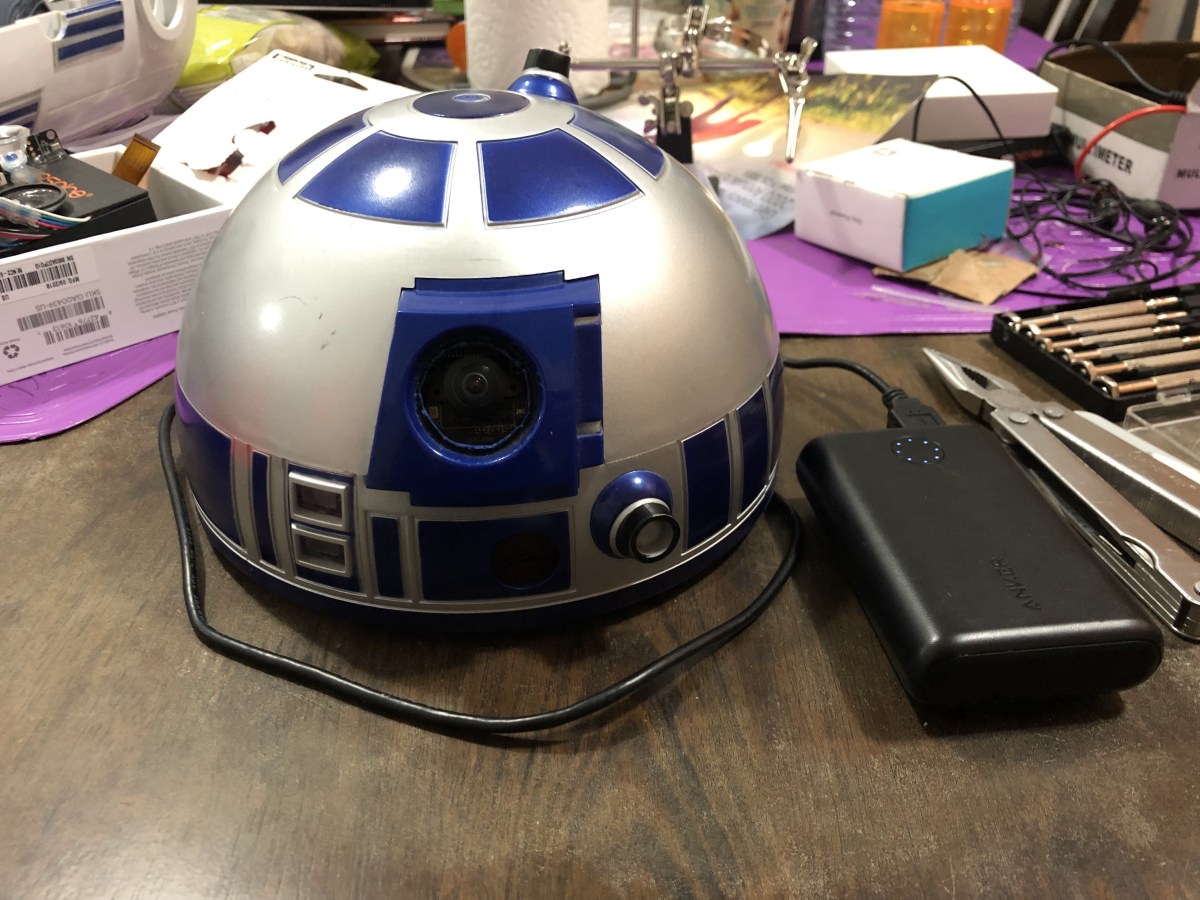
I noticed that the camera I had inside my Pi2-D2 fell out of its mounting. Not surprised though as it is literally held together with tape and cardboard (not kidding, literally). I decided to take …
upbeat geyser
That sounds pretty familiar. Nice build, too! I am also a fan of cardboard and styrofoam builds (my proton pack is basically cardboard, styrofoam, an Arduino and some LEDs). I lean more toward hot glue than tape, but that's just a personal preference.
scenic siren
@obtuse cove Show and Tell is tonight. You're welcome to join! Check the #live-broadcast-chat channel before 7:30EST for a Streamyard link to join.
bitter hazel
@upbeat geyser thanks. there was once a time when I tried to actually schedule and plan out these builds. it just reinforced what people at work have been telling me all these years. I have zero organizational and planning skills. this is why "I will be an engineer for life and never be a manager" - Woz
upbeat geyser
I've done one-day builds, but I'm rubbish at scheduling and planning. Somehow I manage to design and build things that work, but I'm not entirely sure how. My organizational skills have improved over the years, but are still sadly lacking.
bitter hazel
To be fair I do spend a lot of time dreaming up these silly projects and thinking about how they could be put together. Of course it rarely ever goes the way I have it in my head but I would like to count all that day dreaming time as planning 😂
upbeat geyser
Oh, I totally count all my daydreaming as planning/designing!
bitter hazel
now if I can only convince people that napping time is me in the deep planning phase
solar yew
🤣
 half reef
oh by the way, here's my project so far since i didn't fit it into the frame very well on last night's stream 😛 ✨
the four directional buttons can move the dot around!!
by next week i hope to push it further
 ancient skiff
mini project: 3D printed mounting hardware for a supa bright COB LED panel (ebay seller claimed "70W" but .. I didn't measure power yet so who knows)
upbeat geyser
If you did run it at 70W and it survived, it would probably melt the 3D printed pieces.
ancient skiff
it does get "painful to touch" hot. I was afraid the plastic was going to be markedly deformed after an hour, but that was not the case.
upbeat geyser
Not bad.
upbeat geyser
Giant LED project continues. Here it is in a matching breadboard, with an 9V battery and an ordinary T1¾ LED in a breadboard for scale.
 cedar root
just in case you're interested, i've been working on what I call FitHome. The goal is to get us busy homeowners to use at least 15% less electricity. https://github.com/BitKnitting/FitHome/wiki
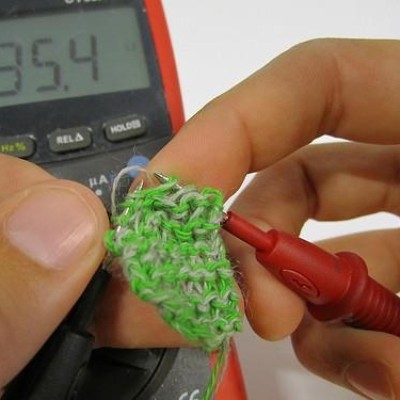
GitHub
Contribute to BitKnitting/FitHome development by creating an account on GitHub.
solar yew
@cedar root there was a recent conversation in #help-with-projects - @bitter blaze is presently working in AtmelStart.
Your:
*https://github.com/BitKnitting/wakey_circuitpython/tree/master/ItsyBitsy_Atmel_Start*
comes to mind.
cedar root
Thanks for letting me know @solar yew. I found from wakey that I still don't know what I am doing 🙂
ancient skiff
After running my panel at 12V all day on a bench PSU, the current slowly rose from about 900mA to currently 1160mA and there is some deformation visible on the plastic. (not sure how calibrated the bench supply is, it's a surplus item I picked up 5 years ago so..)
Reprinting in ABS would probably be a good idea, and it gives me another iteration to figure out how the wall-mount is going to work.
(So it's probably a "10W" class panel and 12V input voltage is a bit too high; a 1ohm 2W resistor or a couple of 1N4001 diodes to drop the voltage would be in a better operating range if what I want to use is a regulated DC supply)
soft condor
@ancient skiff Could this be a case where a current-regulated supply was a better fit for the job? Randomly chosen eBay listing... https://www.ebay.com/itm/LED-Driver-Adjustable-Constant-Current-DC-DC-Power-LM2596-Step-down-Module-US/254413831424

eBay
Output short circuit protection: Yes, constant current (constant current setting values). Turn lamp current: constant current value (0.1), turn the lamp current constant current value Linkage. Constant current range: 0.2-3A (adjustable, default transferred 1A).
I'm interested in those panels now btw.
warped cobalt
@cedar root is there a somewhere I can input suggestions?
lucid bloom
Another mini project bites the dust. An omxplayer video player in python. It plays all the .mp4 files in the video folder randomly and looped forever. I am using a button shim to control playback.
Here is the code. The buttons do this
A: play/pause
B: previous video
C: next video
D: stop
E: restart video
https://gist.github.com/matt-desmarais/99e19b63bd6ebb3dd98dbaa56d50b955

Gist
play video folder, randomly and looped. with buttons for playback controls - omxplayerButtons.py
cedar root
@warped cobalt - ooh! Thank you. You can either email contact@fithome.life or leave suggestion here.
ancient skiff
@soft condor yes I think you're right that a constant current supply is more appropriate.
 harsh cave
Commanding an autonomous drone via the Raspberry Pi Zero W: https://youtu.be/Lwigo4IXpAY

I'm adding a companion computer to communicate directly with the drone through MAVLink while running python to direct the drones search patterns. I chose the...
solar yew
lil raycaster ported from lodev
for the esp32 M5stickC
not optimized
did this half asleep in 10 mins
ruby ledge

Intro This blog entry doesn't have anything to do with optimization, but due to the interest shown for my Twitter posts about it, I'll ...
I wrote a blog post on how to construct a Nano 33 BLE "hat" to control the M5Stack Beetle-C mini car
solar yew
sweet
@ruby ledge Dude.
Suggestions.. your good with fast code.
i got a stickC.
what display driver would you suggest?
i'm doing all kinds of junk buti keep feeling i am drawing wrong to get the best speed
ruby ledge
check out my bb_spi_lcd library
it's built for speed and supports the M5Stick-C 🙂
it's in the Arduino Library manager
@solar yew
demo video coming...
solar yew
i actually saw it how are you storing bmp data?
ruby ledge
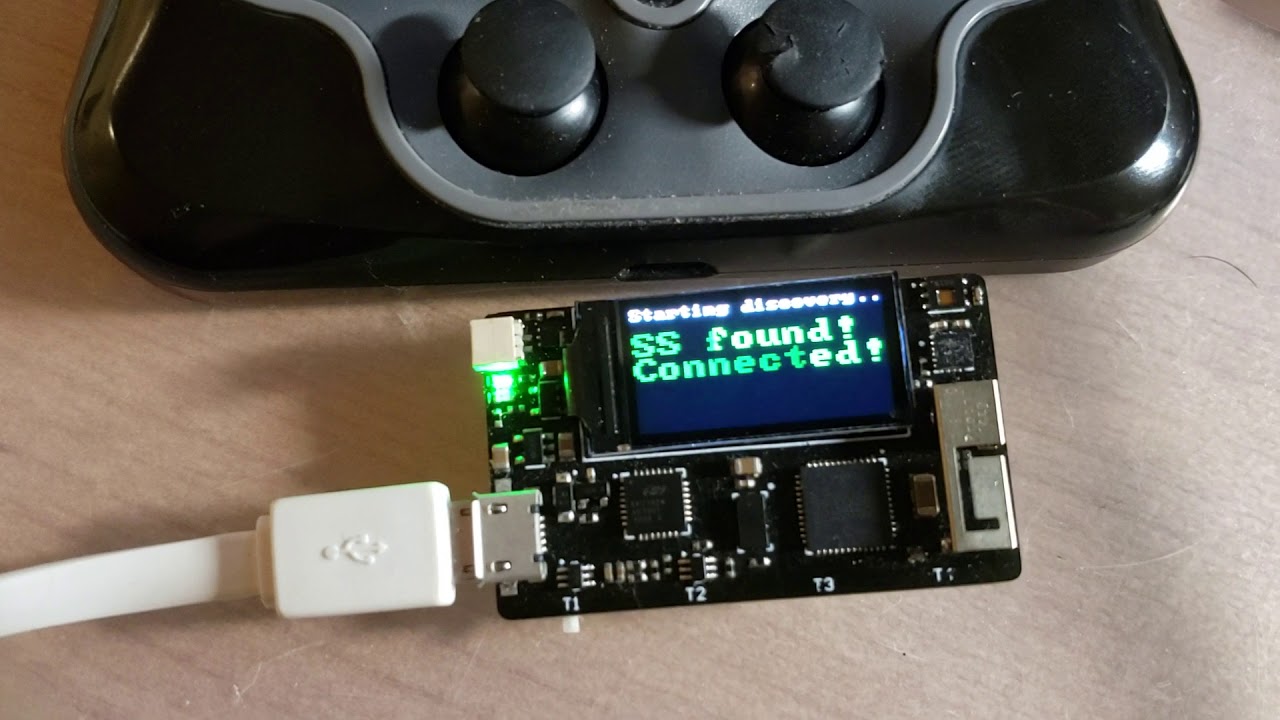
You can run it with or without a back buffer
160x80x2 = the size needed for the back buffer
solar yew
perfect
ruby ledge
with the back buffer you can do delayed rendering operations such as transparent text, translucent blending, etc
ruby ledge
you can do the rotated bitmaps without a back buffer
solar yew
ahhh
ruby ledge
you just need to allocate a buffer large enough to hold the rotated image
ruby ledge
hmm - there are a few simple examples in my GitHub repo and in the code I wrote for Mike Rankin's little color coin cell board
let me find the links
solar yew
ty
ruby ledge

GitHub
Based off of the CoinCell Board but with more sensors and a 80x160 ST7735 color tft lcd - mike-rankin/ESP32_CoinCell_Color_TFT
I really like the Stick-C, but I have an early one with the power management messed up. If I leave it off the charger for 2+ days, it dies and needs a special procedure to bring it back to life. Also, 80mAh is too little to run an ESP32 + display 😦
solar yew
thanks
solar yew
@ruby ledge just check there has been a recent update to the power management code.
ruby ledge
yes, and the hardware changed a bit too
ruby ledge
yes
solar yew
oof
 steel dust
NeoMatrix's layouts and tiling always confused me so much, so i did the only logical thing and started porting it to JS to build a visualizer and learn how it actually works!
Now i just have to actually decipher the tiling part 😅
(Also, first post in this server, hiya, hope this is the right place to put this 👋 )
solar yew
upbeat geyser
I used to default to BASIC for quick hacks like that too!
 inland wagon
https://github.com/hatsunearu/kicad_align made a kicad plugin to align two pins horizontally or vertically (for RF/MW layout)

GitHub
A KICAD pcbnew plugin to align two pads on two modules horizontally or vertically - hatsunearu/kicad_align
topaz flicker
Working on this in java. Should be a cube...
https://cdn.discordapp.com/attachments/418189644723650560/647635747800612879/unknown.png
 upbeat geyser
Reminds me of my old "spaceship ID" program I wrote for the Atari 800. It would choose a bunch of points, connect most of them, and add a randomly generated caption. I originally wrote it to show on a screen in the background of a space movie I was filming, but later ended up using it as a screen saver.
topaz flicker
Cube like shape now.
solar yew
I’m working on 3D printing an entire clock
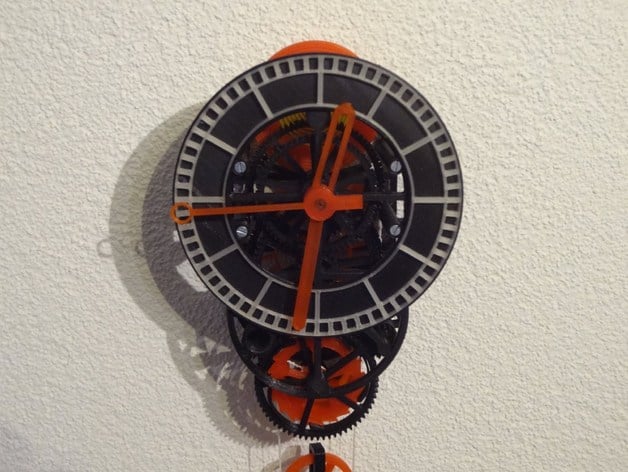
This mechanical clock demonstrates that 3d-printing is not just for decoration. It's possible to create intelligent, living things.
The clock has an anchor escapement, and a balance-wheel with a spiral spring. The clock shows Seconds, Minutes, and Hours. The winding has a n...
The files came from here
I have multiples of parts because I’ve tried to restart this project a few times
upbeat geyser
Looks like a Swiss lever escapement, eyeing the parts.
solar yew
Here’s a tourbillon escapement I made
Wasn’t working real smooth
Still works kinda
 upbeat geyser
I'm fond of tourbillon escapements, but can't really afford a watch with one!
solar yew
Yea
solar yew
hey i hope u guys can help me out.
i salvaged a YM2151
teach me anything you know or can share
i am now fascinated as i heard these were a GOTO for arcade audio
there was a junkyard keyboard and just a glimpse i saw a exposed pcb with a ym2151
the board was damaged but the chip is intact
i heard you can combine L and R to get broader sounds
now i wish i had that dude's email "look mum no computer"
ruby ledge
YM2151 is the pinnacle of Yamaha FM audio. It uses multiple "operators" to modulate sine waves. Multiple channels can be combined
old Yamaha DX7/DX9 keyboards/synths used this chip or something similar
it was "overused" during the 80's by many rock/pop bands
You can easily recognize its distinctive sound in many songs

POLYPHONIC MERCHANDISE: https://store.dftba.com/collections/polyphonic Huge thanks to Yamaha's synthesizer team for helping me put this video together. They ...
solar yew
i am very much in love
ruby ledge
The reason I know about it (besides living through that era and friends having that synth), I wrote video game emulators for 10 years and had to emulate a bunch of Yamaha sound chips for various coin-op games.
The YM2151 was in some of the best games of the late 80s
upbeat geyser
Unfortunately the game I'm restoring used a custom AMI chip (rather like the ULA chip in the ZX81) for its sounds that's considerably harder to come by than the YM2151.
upbeat geyser
Quite true, you can get little bitty DSP chips or just dedicated CPUs to crank out audio in various formats. The trick is to get something that will interface to the existing logic properly, and produce the desired sounds when signalled to do so.
topaz flicker
"Camera" is getting better.
topaz flicker
Rotation!
upbeat geyser
How are you doing your coördinate transformations? Lookup tables?
topaz flicker
upbeat geyser
Ah, you have trig functions available, that does make it easier.
solar yew
My first CircuitPython project is alive: https://youtu.be/zISHdD3Hmpg

This is my Circuit Python Turtle Graphics drawing robot powered by an Adafruit Feather M4 and Unipolar Stepper Feather board. It has a fairly complete versio...
upbeat geyser
An actual physical turtle! Neat! Hershey font?
solar yew

The Hershey fonts are a collection of vector fonts developed c. 1967 by Dr. Allen Vincent Hershey at the Naval Weapons Laboratory, originally designed to be rendered using vectors on early cathode ray tube displays. Decomposing curves to connected straight lines allowed Hersh...
solar yew
My clock that I printed. Not my files tho, all 3D printed except some screws and the brass rods that the gears are on
topaz flicker
 upbeat geyser
The thumbnail looks like a laser beam speckle pattern ❇️
topaz flicker
¯_(ツ)_/¯
upbeat geyser
Wrote a Python script to convert an image to a height map and emit it as an STL, then fed it a picture of the cat and 3D printed the result.
When I hold it up to the light, violà! The original image is visible.
scenic siren
@upbeat geyser Nice!
 woven relic
Soooooooooooooon. these are just the first parts to my current project. if im lucky and print fast enough I can have the full model printed and assembled in time for show n tell next week!!!
 vocal eagle

 solar yew
you know your sister married the right guy when he gifts you a soldering station.
woven relic
17 and a half hours later and my parts are done. Time to turn the printer right back on and begin printing again!
woven relic
On a sad note I immediately broke one of the printed parts testing it out and another of the parts didnt fit my component properly. ive been reprinting one of the new parts and I will have to print the other one tomorrow
upbeat geyser
What layer height are you using? You might be able to print them faster, unless you need the best smoothness and detail.
I used to print everything at 0.15mm (the default on the slicer), but these days I print a lot of stuff at 0.2mm, which is decidedly faster and easily good enough for most of my purposes.
woven relic
Im printing at 0.2mm
upbeat geyser
Ah, you already thought of that. 🙂
woven relic
On a positive note I got 2 more rolls of metallic blue PETG from DASFilament today :3 since im burning through this one like crazy trying to get these parts right.....
upbeat geyser
Oh, nice! I dislike worrying that I'll run out of filament while I'm debugging a design.
Those are some good-looking parts.
woven relic
Thanks @upbeat geyser I really should be doing my debugging in cheap PLA.... but i got a little cocky thinking i had all the parts correctly modelled/measured up so i decided to print in the final material... The filament from DAS is really nice, and a decent price. its just the international shipping that costs as much as a single roll that kills me.... so thats why I ordered 2 rolls this time....
upbeat geyser
I haven't tried PETG yet, but I'm eyeing it for a few projects. Looking for a good filament supplier with cheap shipping to the US, so DASFilament won't really do for me.
Happily, some of the folks on #help-with-3dprinting had some good suggestions I'm going to try.
woven relic
Definitely not!!
I HIGHLY recommend Atomic Filaments!!! Their PLA IS SUPER FREAKING NICE and so is their PETG. I print them using the stock prusament pla/petg profiles in prusa slicer
upbeat geyser
You're like the fourth person who's recommended them, and they are going to be my next stop!
woven relic
DO ETTTTT!!! They have uv reactive filaments that are really nice!!!
upbeat geyser
And thanks for the heads-up on profiles: some filament (like Colorfabb) has really different characteristics, even though it's basically PLA.
woven relic
SnoLabs has some nice filaments tooo. Their Black Amethyst is sooooooo beautiful
upbeat geyser
I'm looking at the clear PETG at the moment, but that UV reactive stuff would make some cool projects with embedded UV LEDs.
woven relic
You've got a prusa as well dont you?
Ive got their translucent PETG. Prints beautifully
upbeat geyser
Yes, after I became frustrated with the limitations of the Monoprice Mini Delta, I waited for a sale and picked up the Prusa. I really like it.
woven relic
Very nice.
upbeat geyser
If you scroll back to December 3, you can see the lithophane I printed after writing a 2D image to STL converter.
woven relic
Ohhhhhhhh nice!
upbeat geyser
Thanks! I was pleased how well the first try came out.
woven relic
Ive spent toooo much money on filament from atomic. Although it's nothing close to what some people order lol
upbeat geyser
Heh, that's always a danger.
 mortal sinew
Oof, all their PLA starts at $30. I've been spoiled by $20 rolls of Hatchbox.
woven relic
I like hatchbox as well. But i love Atomic sooooooo much more
mortal sinew
How's it better? I'm not opposed to paying more but I don't have any complaints work Hatchbox. Granted I have only printed PLA so far but I'm looking to try PETG eventually.
 dire meadow
Guys am I the only person who buys filament from aliexpress?
 velvet dune
I also love AtomicFilment. Their tolerances are tight, colors look great, and I have never had a problem with them. I also like to support USA businesses, so that is an added plus.
There are so many variables already when printing, I don’t like to have the filament be one.
 regal shard

Self-fabricated electronic "shooting gallery" for a client's charity event hosted at a regional theme park. The back end of the show is controlled by an Ardu...
solar yew
got LibreELEC on a Optiplex 755 that i using as a HTPC, had ubuntu on there before
upper creek
Nice! Does it run pretty smooth? That's the optiplex with a p 4 or a core2duo?
Here's that oscilloscope from Heathkit that I found the other day at a garage sale
it seems to be missing some if the ic's, but im sure i can find a schematic somewhere online
upper creek
oh wow, just found a video that shows an old magazine from heatkit, that has the price of this thing in kit form: 549.95 USD
almost a thousand assembled
upbeat geyser
It's a nice scope. Let me know if you can't find data on it.
IC301 is a 74132 quad Schmitt trigger NAND gate, IC302 is a 74122 monostable multivibrator, IC303 is a 7472 dual AND-gated J-K master/slave flipflop, IC304 is a 74121 monostable multivibrator with Schmitt trigger inputs, IC401 is a TIL115 transistor output optocoupler.
upper creek
man, howd you find that? i havent done a search yet, but still. lol
thank you!
i think i actually have a few of those laying around here somewhere
upper creek
found four out of 5, still trying to see if i have the TIL115
im almost thinking that this is it... but one of the pins is snapped halfway down
i may have an alternative though, but im not very good at reading datasheets yet. so it may take me a while to come up with whether or not it would be safe to use one of these other ones
that socket is also 8-pin. hmm
solar yew
Just before ditching that scope, they probably said "ah I can pry these off and put them in the junk drawer with little effort." ;)
(maybe another person who first found the discarded scope)
upper creek
haha probably. unless they just didnt (if it was bought in the kit form) put them in, in the first place
never know though
solar yew
The original kitbuilder leaves the scope behind in their 'estate' and that starts this chain reaction; first the nephew inherits the scope and has no idea what to make of it, and it goes on from there.
solar yew
You could get lucky - could be an easy fix once the parts are all found and restored.
solar yew
Heathkit had a "We won't let you fail" policy where you shipped it back to them to get it working the first time, if it didn't for any reason.
upper creek
thats pretty cool!
solar yew
Their first kit was an airplane for a human to fly, iirc. ;)
upper creek
haha!
solar yew
(as in getting inside it)
solar yew
Depends who the kitbuilder was, I suppose. ;) /john_denver_dotcom
On vintage equipment you usually must replace all filter caps in the power supply.
(they go bang if you don't)
upper creek
ah thank you for linking this. i didnt know
solar yew
Yeah I blew up like four antique radios before deciding this is pretty much always the case.
It's still a bit confusing to me what the minimum repair is wrt the capacitors.
Safer to replace any as thick as a (really thick) pencil more than 7/8" long or so.
upper creek
yeah, theres some super thick ones on this thing. in styles that ive never seen before (that could be because im new at actually knowing anything about this stuff)
upbeat geyser
@upper creek Here's a PDF of the manual https://ia800706.us.archive.org/34/items/HeathkitIO45415MHzPortableOscilloscope/Heathkit IO-4541 5MHz Portable Oscilloscope.pdf
In general, you want to replace any electrolytic and paper capacitors. Other types are generally okay.
upper creek
thank you!
solar yew
@upper creek Core 2 Duo @ 2.33 GHz
upper creek
would it happen to be the e7400? lol. i guess that I could just go over to my workshop and check to see if this is ne that I have and run lshw or something
yeah, optiplex 760
has the e7400 in it
thats actually what im using as my server haha
oh wait
yours is the 755
solar yew
this one is using a E6550, optiplex 755 USFF
 bronze kite
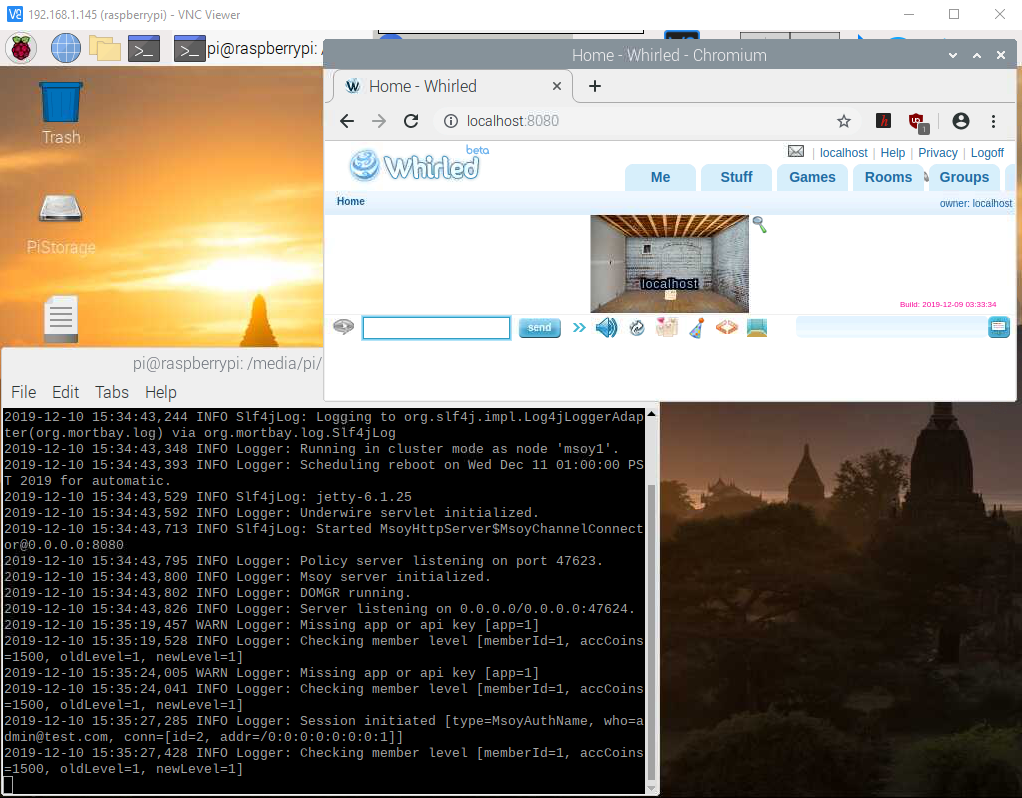
http://prntscr.com/q928za Whirled server running on a raspberry pi 4 with 4 GB and an attached 2 TB disk space. (Whirled was shut down and luckily the owner of the source code made it open for anyone to host a whirled server. The project was named msoy and it was built back in 2007 when flash was still around that year.) Just sharing what I did on my pi. I thought it was impossible to do until my curiosity started.
 vocal eagle

Demo video for Santa Bot is up on YouTube! Thanks again to @highenergybeams for collaborating with me on this project and @PCBWayOfficial for sponsoring the PCB. Tindie link will be posted soon. https://t.co/r5O9UMyQXo
 Twitter
modest lion
Twitter
modest lion
using only USB-C power delivery, i've developed a driver to create a variable power supply with an MCU
it can analyze the capabilities of any USB PD charger you plug it into, and can dynamically select one of those pre-configured power profiles, or you can request any arbitrary voltage/current combination from 5V, 0A up to 20V, 5A (100W)
i made a little demo application with a touch screen and an STM32G031K8 (arduino nano footprint): https://www.youtube.com/watch?v=thoVPrLF_sA
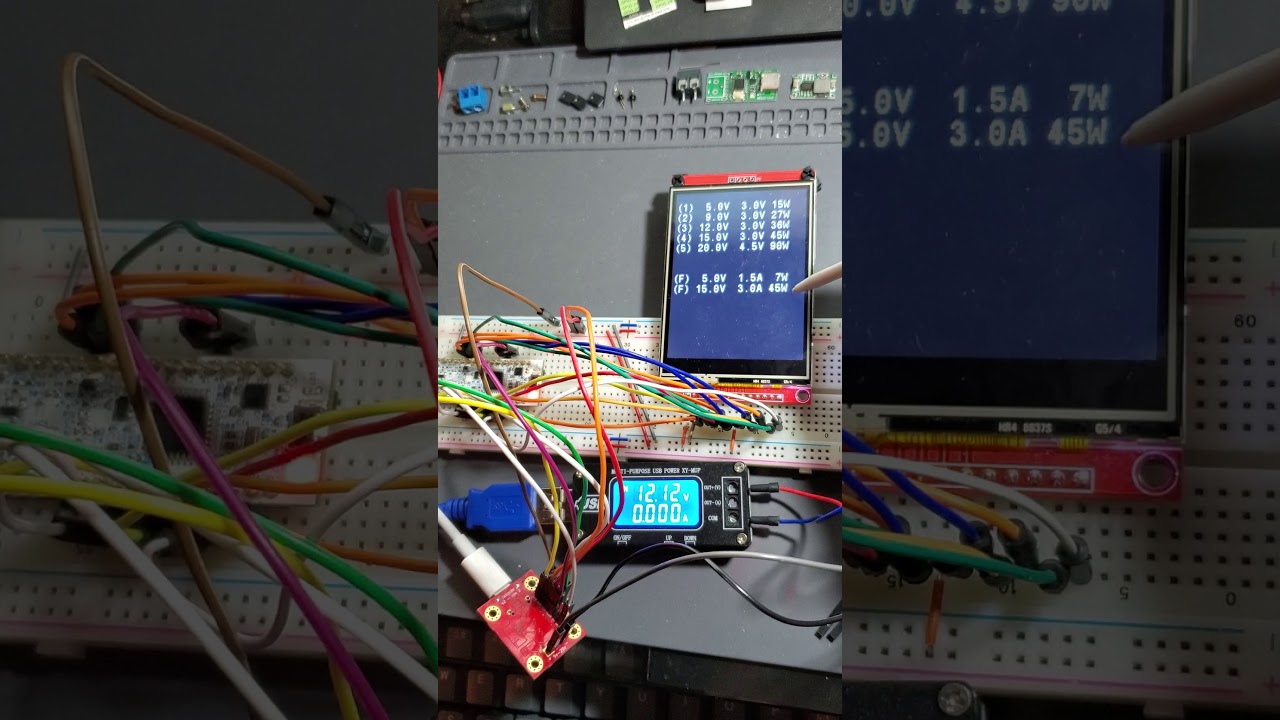
Using an STM32G031K8 to control an STUSB4500 via I²C and an ILI9341 with touchscreen via SPI. Custom HAL drivers for both devices were developed.
This demo application reads the source capabilities of any USB PD power supply, printing them to screen, and cycles through eac...
and added the core STM32 HAL driver on github here: https://github.com/ardnew/upd-touch/tree/master/Core/STUSB4500

GitHub
STM32 USB PD sink controller with touchscreen . Contribute to ardnew/upd-touch development by creating an account on GitHub.
signal loom
That’s awesome
modest lion
the demo just cycles through the PD charger's built-in power profiles when i touch the touch screen. note that the voltage on VBUS is not lost when transitioning to different voltages, so you can actually power the whole system using the same power source
seems to work great with an apple macbook charger, i was able to power the macbook with it
but the apple charger can only support up to 60W
signal loom
Some sneak peeks of our FTC robot this year. Full video coming soon. For more information, visit https://bit.ly/MHS-robotics
modest lion
FTC ?
modest lion
very neat
signal loom

FIRST
 prime widget
Ok, now I'm more ready to share this on Show and Tell. Here's a video that talks about the project. https://youtu.be/oQxAFZWZkcg

This is a Sphero RVR project to recognize and chase the kitten. It uses a Raspberry Pi on the RVR, then a custom-soldered Adafruit Proto-Pi hat, and then a Pimorini Pan/Tilt Hat with an Adafruit pan/tilt mast. On the mast are a Pi Camera, a MaxBotix ultrasonic rangefinder, an...
 lapis jasper
nice @prime widget ! would love to get the rvr working with circuitpython
seems similar to @molten hull 's face tracking uncanny eyes
prime widget
Not familiar with that project, but I'll go look at the learning system. It would be cool with CircuitPython! Does using Blinka count? 😉
Or do you mean "for any given project?"
That would mean porting the Sphero RVR SDK to CircuitPython, which seems like a worthy project.
sterile lodge
Getting the RVR working with CP is something I'd definitely be interested in helping with. I know it communicates with serial and we would most likely need to make a custom library for it. FWIW, I've been playing around with the RVR too for the past few days. My plan is to get it running with a Coral Dev board using the Sphero Python SDK to get more familiar with it and then look into what it would take to port it over to CircuitPython.
prime widget
@sterile lodge I got it running on the Raspberry Pi without too much trouble. I still need to map things like "azimuth and range" to RVR heading, speed, and time. I'll have to go take a look at CircuitPython, since the Sphero RVR SDK relies heavily on things like asyncio, and I'm not sure CircuitPython supports that yet....
sterile lodge
I took a look and there were 2 versions. One was the asyncio version and the other, which I believe would be easier to port to CircuitPython, is the observer version.
prime widget
Yeah, the problem with the observer version is it can't do two things at once. For example, if you want to check battery state, the rover has to stop. Even if you want to change the LED color, the rover can't be doing anything else while doing it. I guess it depends on what you want to use it for. I need the asyncio for my project, so I didn't mess with observer much.
sterile lodge
That's good info. I know there has been discussion of incorporating asyncio into CP and I got a free book on asyncio at PyCon, which I gave to @glad roost, but I haven't heard anything further on it.
 glad roost
Long discussion here: https://github.com/adafruit/circuitpython/issues/1380 but we don't have a solution in the works at the moment. However maybe after 5.0.0 is out we will think about it again.
prime widget
Thanks, Dan! I'll jump over the SDK and see if there are any other gotchas.
lapis jasper

GitHub
Sphero SDK to run on micro:bit using Python. Contribute to sphero-inc/sphero-sdk-microbit-python development by creating an account on GitHub.
GitHub
Sphero SDK to run on Raspberry Pi using Python. Contribute to sphero-inc/sphero-sdk-raspberrypi-python development by creating an account on GitHub.
☝️ these are the two links I have pulled up for the sphero api
sterile lodge
Oh yeah, good call @lapis jasper. The Microbit one might even work better for porting to CP.
signal loom
I made a Photobooth for a upcoming party
Nothing open source but I’m gonna release the plans for the housing on my website
 toxic stirrup
I'd like to show some Star Wars projects my students made for this semester. I'm finding it difficult to make the Wednesday night Show and Tell show due to family life, so forgive the forthcoming dump of photos. I teach high school 3D modeling and Middle School programming. I had a combined theme of Star Wars this semester. High School designed lightsaber hilts and 3D printed them. Middle School programmed the electronics (M4 Feather + Propwing) that went inside. Middle School also made a bunch of Circuit Playground based Star Wars projects as well. (Everything is Circuit Python). We then showed everything off to the 3rd to 5th graders in a big Start Wars showcase.
Lightsabers designed in Blender. I wrote a Python script in Blender to form the base pommel, hilt, and blade holder. Students then designed their own lightsaber from there. Time of fun. Used both CP Express and some alpha CP Bluetooth.
Had a teacher do a lightsaber battle at the end with one of my students!
scenic siren

Adafruit Industries - Makers, hackers, artists, designers and engineers!
In the Adafruit Discord, middle school/high school teacher Daniel writes: I’d like to show some Star Wars projects my students made for this semester. I’m finding it difficult to make t…
toxic stirrup
@scenic siren Thanks for the post!
scenic siren
@toxic stirrup Thank you for sharing!
bitter hazel
@toxic stirrup I love what you do. Giving kids the opportunity to actually experience this is special. I was lucky enough to accidentally stumble upon coding by myself when I was 8 years old and have never stopped since. If you can make just 1 kid say to themself “This is what I want to do for the rest of my life”, you sir, are a hero. I hope to someday be able to do this myself with a large number of kids. Right now I have a captive audience of 1. He doesn’t have much of a choice because I tell him “I am your father!” 😂
 dusky kestrel
Hi, I just finished my little experiment. Adafruits MQTT lib is now working with UARTService.
MQTT -> Bluetooth -> JavaScript WebSocket -> Mosquitto and back
dusky kestrel

GitHub
A browser-based WebBluetooth to MQTT relay getawey for Nordic UART - Tasm-Devil/BLE2WebService
toxic stirrup
@bitter hazel Thanks for the kind words. It's enjoyable to give kids an exposure to something they may not have had before or thought wasn't for them. It's almost more fun to find those kids who are turned on to it for the first time than those that are already more capable.
ancient skiff
https://www.thingiverse.com/thing:4056040 I just posted a little openscad module for a panel mount USB connector https://www.adafruit.com/product/3258
sterile lodge
@ancient skiff, that's similar to the one I posted a couple months ago: https://www.thingiverse.com/thing:3897144

This is a adapter so that you can use an Adafruit Micro USB Panel Mount Extension (https://www.adafruit.com/product/3258) in an Altairduino. Mine didn't ship with one and I happened to have this panel mount on hand, but noticed the screw holes didn't fit. So I designed this a...
ancient skiff
@sterile lodge nice! this is planned to be an integral part of the 3d printed keyboard I'm working on. also, neat to learn about altairduino!
sterile lodge
Yeah, it was an emergency part I designed in Fusion 360 in about 15 minutes, but it worked great. Looking forward to seeing your keyboard.
 exotic pagoda
Finished my design of Echo's Yokai drone from rainbow six siege
I plan to have it 3D printed soon and have it hopefully be able to fly
I think I will have a forward facing camera for a bit of fpv racing and also add ultra sonic sensors on the rear and side to make a form of colision avoidance so it doesnt run into obstacles
Heres the model before raytrace
ancient skiff
ugh so many standoffs and stuff growing inside my keyboard. feather, seesaw, battery, and neopixel strips...
the odds all these will be right on the first try is small
also still need some internal posts from the bottom to support the plate, and some dowel holes for mounting the left and right halves together
 long bison
I have confirmed you can plug a USB armory mkII into a Titano
need to... do something useful with that, heh
seems like it would make a pretty nice touchscreen programmer
 burnt wyvern
Talking lemon
glass moss
I’m making a smart thermostat. Here’s a graph of temperatures over about 16 hours.
solar yew
That little jog downward at the end is interesting. ;)
glass moss
That’s me getting out of bed (no remote control yet) and cooling it a few fractions of a degree.
long bison
after discovering the Titano and USB armory mkII can be plugged together over USB-C, I just had to build a little project box with them...
some fun hax with the 90 degree USB-C cable protruding just enough I had to notch out a section of the project box 😅
modest lion
i have -finally- finished my prototype implementation of my USB PD protocol analyzer and PD sink controller with touchscreen
this tool, along with its library i wrote, is exactly what common makers around the planet need to make USB-C more accessible for hobbyists
it makes it so easy to take a USB-C cable, plug it into this screen, and bam, you now have a desktop variable power supply you can fit in your pocket, only dependency being a USB host port to plug it into
originally ran this on a Feather STM32, but it was having all sorts of issues, ended losing a neopixel in the process of migrating to a teensy 4.0
now i just need to build the thing, soldering it all together and somehow figure out how to put a case on it
solar yew
@modest lion Good on you for bringing it to completion!
modest lion
@solar yew thanks. i will have to make a video to show all of its interactions. it has a lot of dynamic behavior
but first, im going to actually build the board. so far its been developed just on a breadboard with wires everywhere. gonna hopefully tuck all of the little boards (teensy main MCU, STUSB4500 breakout, INA260 voltage/current meter) underneath the screen
also want to add some RGB LEDs because i lost my neopixel when i ditched the feather/GC. also because RGB LEDs
solar yew
@modest lion DotStar RGB LED's much easier to program for.
If you didn't have a libarary for some reason, doing a DotStar driver from scratch is fairly simple.
solar yew
Yeah, they take up two port pins.
Trinket M0 and Gemma M0 both use DotStar's for reference' sake.
That drives Pimoroni Blinkt on D6 D7 (this is an Atmel Start project)
(Blinkt is an 8-position APA-102 array) (DotStar)
modest lion
`
Language files blank comment code
C++ 5 649 327 2300
C/C++ Header 6 205 223 986
Arduino Sketch 1 21 21 24
Markdown 2 0 0 4
SUM: 14 875 571 3314`
just a bit of code... there's actually -no- C++ (theoretically) though, its all pure C
GitHub
STUSB4500 library for microcontrollers. Contribute to ardnew/libstusb4500 development by creating an account on GitHub.
GitHub
Demo application utilizing libstusb4500 on an Arduino with ILI9341 touch screen - ardnew/upd-touch-arduino
 rustic stag
For folks looking to show and share their projects (besides here!) we're helping to get the word out for these folks! Enjoy! https://discord.gg/ebznuQw
 paper moon
We had a deck the halls door decorating contest at my school, my students (mix of 6th and 8th graders) did an awesome job and we won. Here's a video of the final product: https://youtu.be/zokI_GXlNDE It's all based around circuit playground express and Crickit. The kids used MakeCode to program the music and servo movements. They designed the robot in TinkerCAD and 3D printed it. The Santa's workshop lettering was laser cut and painted. Lots of hot glue and blue tape were involved!

Our winning door for the Deck the Halls competition. We used an Adafruit Circuit Playground Express and Crickit add on to play the music and control the servos. The toy robot was 3D printed and the Santa's Workshop sign was laser cut and painted.
ancient skiff
Just did my first board with stencil + hot air reflow
pretty happy with the results
white LEDs, contrary to how the photo looks
signal loom
Some rough designs for the team identifying side panel for our FTC robot.
ancient skiff
 restive sentinel
solar yew
restive sentinel
solar yew
Successfully modded one of my radios with the bhi dsp finally. https://www.instagram.com/p/B6qzYduAGei/?igshid=14u4yjhbpfv93

Instagram
3 Likes, 0 Comments - Tactiham (@tactiham) on Instagram: “Finally installed my #DSP. This is was just a receive test of the DSP. I was using a 40m beam…”
solar yew
interesting transparent plastic becomes weaker than most other plastics due to how easily uv penetrates it.
solar yew
I read somewhere that the Sun deposits something like 10,000 lb of matter, annually, onto the surface of the Earth. ;) (PKD said it, iirc). (bot won't let me say who that is) (haha)
(author of A Scanner Darkly)
 marble snow
Used my Adabox to make my own souvenir of my trip to France to see the women’s World Cup.
Turn it up to hear “7 Nation Army” 😄
 west dune
Was trying to make a DIY power supply and I used an ATX power supply and I made a mistake somewhere. When I plugged it in I heard a loud BANG #sparky
It turned out great in the end
(here is the messy wiring if anyone wants to see it)
solar yew
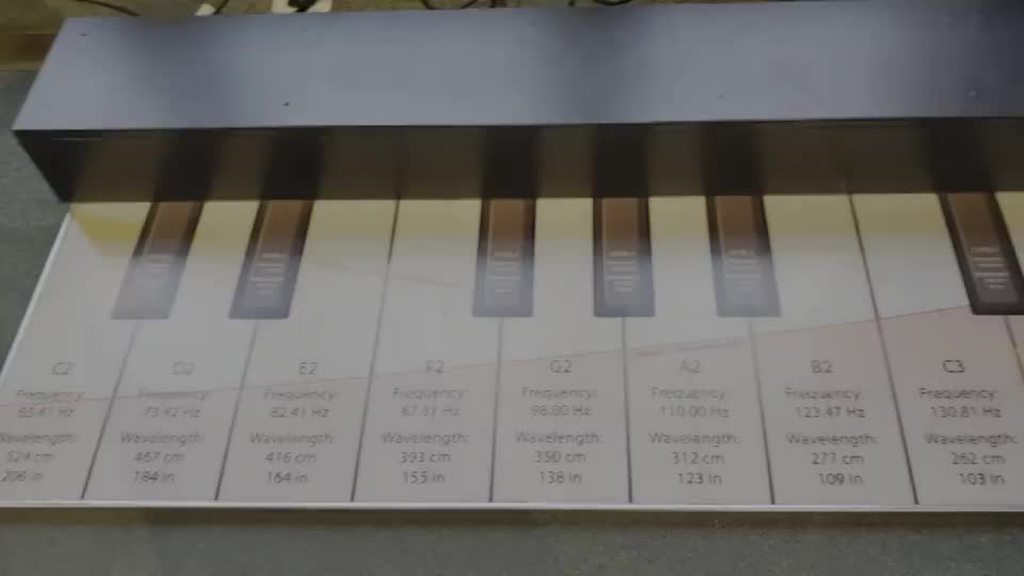
here's a macgyver i pulled a little whlie back... an exhibit at work needed to receive 10 key presses at the same time from a physical pushbutton (to support a legacy local flash SWF), but as it turns out, the USB spec only allows for 6-key rollover! through some research i found out that normal keyboards which advertise more than 6-key rollover actually technically show up as multiple USB devices to the computer... so i plugged in two feathers to do the job
it works! lol
solar yew
a bigger one... here's a walk-on piano exhibit that i gutted down to the wood and remade https://streamable.com/8is3f

build album is here https://imgur.com/a/vbMVQjV
 bitter hazel

Black Friday is upon us again so I was inclined to check out deals on new gadgets. As with any Black Friday season, you begin to justify why you need to buy something just because it’s on sale. Thi…
This is more of a show and rant that it is a show and tell 😂
solar yew
the band-aid shows that it's a true project
torn viper
nand2tetris pong running on MiSTer FPGA (de10 nano) https://github.com/sajattack/Hack_MiSTer

GitHub
Nand2Tetris Hack Computer for MiSTer FPGA. Contribute to sajattack/Hack_MiSTer development by creating an account on GitHub.
@upbeat geyser @modest lion I finally did it
upbeat geyser
Awesome! Well done!
torn viper
tyvm
 mossy carbon
Just printed some train tracks for my son. Nothing hard or anything but he played with them immediately
 marble pilot
Trying something a little different with the Adabox. Will try to get a write-up done soon.
marble pilot
Now with lightning and a 3D printed base. (Huge thanks to @wicked horizon for the F360 model of the globe from the dice roller - saved me a ton of time).
(The base needs some revision, but it did fit on the first try - always a plus!) 😬
solar yew
that's wonderful @marble pilot . love the pearlescent fluid look
i would definitely have that object in my creepy cave lair
solar yew
blinking eyes! https://streamable.com/vfe3m
 upbeat geyser
Nicely faired contours! Should be strong and hydrodynamic, and it looks cool too.
ruby ledge

My Arduino BLE thermal printer library is starting to take shape. For now, it works like my OLED library and allows you to draw text and gfx into a memory buffer, then you connect and send the image to the printer. #ESP32
 Twitter
solar yew
Twitter
solar yew
I have a question. If cyberbullies with quite alot of skill were attacking you.
What would you do to secure your computers?
I have recently been cut up pretty badly due to a angry guy in a video game.
I am quite shocked that he managed to setup a ssh client and put all my computers into dev mode
a video game...
upbeat geyser
A firewall is probably a useful start.
solar yew
today, we got our giant exercise wheel delivered!
(context: i work as an exhibit tech at a hands-on science museum)
action video
glass moss
My “smart” thermostat project is coming along: https://github.com/dcbriccetti/smart-thermostat
signal loom
All set up and ready to rock this saturday! https://youtu.be/SCizMNKgwwM


 solar yew

Samsung may have the highest-end options for hardware if you want an Android smartphone, but that hasn’t stopped them from making some questionable decisions on the software they sometimes lo…
plush gorge
My little robot friend has a new set of shoes. 🙂
bitter hazel
@solar yew as @upbeat geyser said start with ensuring you have a firewall setup on your modem/router. then make sure all the standard incoming ports for things like ssh and http are turned off (22 and 80). It might even be safe to turn all port forwarding off for incoming traffic if you are that worried. The only bad news is if someone with malicious intent has already penetrated one of your devices on the network, they would have most likely already installed a vpn to get in and out of your network even if you turned off inbound ssh port. You will need to go thru every device you have that can have vpn installed on them (e.g. pc, mac, rpi, jailbroken ios, android) and make sure that is removed. Virus/malware scanners do not usually detect these type of things
but some real world advice though if you are really worried about this. someone who spends a lot of time gaming online will probably not have the time or energy to track your ip, penetrate your network, install a back door and do something bad. online gaming communities are typically toxic to begin with so their tolerance is quite high and to tick off a really skilled, focused, hacker like individual to do something like this is, well, unlikely
 sinful trout
So I got the parts I needed to make a Pi-top for Christmas. I could never justify buying the official touchscreen or the SmartiPi case, but my sister-in-law on the other hand just picks stuff from our Amazon wishlists. Behold:
I zip tied it to a 20,000 mAh Anker battery, added an Adafruit RTC, a USB wifi adapter to function as a secure hotspot and share internet, and wired the fan for temperature control
The thing gets better battery life than anything else in the house
bitter hazel
@sinful trout pretty cool. I too worked on a pi top project last Christmas. I see you even got the fancy SmartPi case which was just too much for me. I had the same problem as you with justifying the cost of putting one together but told myself it was the holiday season I should get myself something nice to play with 😂
Did you use a pi 4?
Ooohhh it is a pi 4
I see you really splurged on this one 😁
sinful trout
Yeah, pi 4 4gb.
bitter hazel

Ever since I put together the Raspberry Pi with a 7” touchscreen I haven’t exactly figured out what to do with it until I put it on top of a Google AIY Voice kit. What if I made a google home hub? …
sinful trout
I already had the pi. The SmartiPi case was a gift. I wouldn't buy it myself
bitter hazel
That was my build last year. I really couldn’t figure out what to do with it and ended up attaching a google aiy voice kit to it and setting up magic mirrot
sinful trout
That is nice. I've been wanting to make a magic mirror for my wife too. Going to eventually use an old TV for it
bitter hazel
Also attached a camera module to it and uv4l to use as a security cam
I actually tore this build down a few months ago and used a 17” monitor instead that was lying around
I repurposed the 7” screen and built another retro pie handheld
Well. It was sort of a hand held retro pie + wrist exercise as it was a bit heavy to be truly portable 🤣
sinful trout
The Pi-top is a sub project of a larger plan. I'm trying to turn a feather into an oscilloscope and it made sense to have something with a screen somewhat portable (and not a $1000 computer) to go with it.
bitter hazel
sinful trout
That does look a bit heavy 😂
bitter hazel
Its balanced enough that you can play it for a few minutes before giving up 🤣
Extra challenge
sinful trout
I need to rebuild my PiGRRL. I got a replacement power boost from DF Robot that can supply more current than the Adafruit models. I was getting a lightning bolt
Haven't had the patience to reprint the case to fit the new board
Also just recently did this. Found plans online for a USB isolator that also can handle 400 mA to the connected device. It's just USB 2.0, but it is enough for my needs right now. I was designing my own to build when I found this design. It's a lot bigger, but it was a good opportunity to practice my SMD soldering and I didn't have to do any of the math 😁. Props to the designer http://lemmini.de/USB Isolator/USB Isolator.html
DYI USB Isolator with 400mA supply and full speed support
Now if Analog Devices would just update their USB isolators to support USB 3.0 and USB C, I would do the math and make a better one
bitter hazel
Did you print your own PiGRRL case? That was the only reason I didnt do it that way because having it printed by third party was too expensive and i had no space in my apartment to have 3d printer. Im going to have to throw away the microwave in the kitchen first 🤣
sinful trout
I don't have my own printer at home. I'm a member of a local Makerspace. We've got lots of printers there
I would love to build a printer, but we have no where to put one
And it would probably test my wife's patience. She doesn't care for my desk organization on a good day. In the middle of a major project? It can get a little too cluttered
bitter hazel
Need help with stepper motors. Planning to build a simple rig that draws the curtains. Which kind of stepper motor would be able to do the job? I’ve used smaller stepper motors before good for panning small cameras. Im sure those wont cut it
sinful trout
Probably best to ask in help-with-robotics. I guess DC motors could do the job too
bitter hazel
I need a bit more accuracy so stepper was what i was considering
solar yew
@sinful trout what is the stuff in the third picture at the bottom of the screen?
is it an application? or what i would like that
sinful trout
It's called conky. https://github.com/brndnmtthws/conky

GitHub
Light-weight system monitor for X. Contribute to brndnmtthws/conky development by creating an account on GitHub.
sinful trout
sudo apt install conky
solar yew
ok
sinful trout
Highly configurable system monitor. If you Google, you'll find example configs people have shared. I cobbled together that one. It's pretty basic. You can go crazy with colors.
solar yew
so i would like to use this with just NOOBS desktop
also another thing, how do you get the command box for discord?
sinful trout
If you're installing it on a pi it's a little limited. The PIXEL desktop doesn't have the capability of a normal computer running linux. If you have trouble setting it up message me, I might be able to help. It took me a few hours to figure out how to stop it from flickering
solar yew
so wait, i can use it on my linux laptop?
sinful trout
Hell yeah
solar yew
oh cool
sinful trout
Conky is awesome
sinful trout
It writes that system info to basically a transparent window
solar yew
ok can you help me set it up?
plush gorge
I've posted the files for the Adafruit logo Sphero RVR Adafruit logo rim as well as a bare version & the Fusion 360 files for complete customization. Enjoy!

These are a customization option for your little robot friend, Sphero RVR. In case your not familiar with them, the flower looking emblem on my RVR's wheel, is an Adafruit (Adafruit or Adafruit.com is an open source electronics manufacture located in New York city USA that ha...
bitter hazel
When you buy Bose headphones are you paying for the hardware or the software? I had to ask myself that question during my little repair adventure with this industry leading active noise cancelling state of the art device 😂 https://madcomputerscientist.ninja/2019/12/28/everyone-knows-no-highs-no-lows-bose-blows/

I am not an audiophile nor am I an headphone snob. I am a cheap and practical person who wanted to see what all the fuss was about with these Bose active noise cancelling headphones. Of course bein…
solar yew
i actually did a mod to my logitech
i fit 2 bass drivers
it could theoretically destroy my ears
need to do a fix again soon will photo
solar yew
Some one threw a perfectly good avrisp mkii in the trash.
i scored big.
slavaged a slew of chips ne555's pic 62xxxx, a bunch of unused resistors and caps
it's xmass
i dont care i smell like a dumpster
lol even a Microchip demo board "pickit v2 low pincount"
upbeat geyser
Nice haul!
 gusty shard
Five years ago I made an indoor thermometer using a DS18B20, an RGB LED and a Raspberry PI B. Unlike most of my projects this one ran for five years with very few problems. This year I'm upgrading to the PCT2075 temperature sensor and miniPiTFT 1.14" display on a Raspberry PI 3B. Now that I have a proper display I can show the current temperature and a graph of the past 24 hours.
 modest raven
8 MCU pins to read 8 buttons? Maybe a 6 pins if you get clever with a 2x4 diode matrix. But what if you could just use 1 pin to read all eight buttons?
Enter, the binary-weighted voltage divider (also known as an R-2R ladder). This can read 8 buttons with a single ADC pin, provided one builds/sources an appropriate R-2R network.
So far I've only ran AnalogReadSerial on the attached ADC pin to see what values I'm getting. If I were to implement any actual functionality, I would be limited to one keypress at a time.
The inspirational link:
https://www.tek.com/blog/tutorial-digital-analog-conversion-r-2r-dac
Pics:
https://cdn.discordapp.com/attachments/620457733979897857/666530562722496534/image0.jpg
https://cdn.discordapp.com/attachments/620457733979897857/666530564723179530/image3.jpg


The eventual PCB that it will lead to:
https://cdn.discordapp.com/attachments/620457733979897857/665954660074651676/8packanalog.png

With the recent announcement of the world’s fastest Digital to Analog Converter (DAC) from Tektronix Component Solutions, I thought it would be interesting to take a quick tutorial tour through one of the simplest DAC architectures – the R-2R resistor ladder network as sh...


 signal loom
My photo booth in progress. Learned a lot about roller painting when making this. Pardon my messy shop, it’s midterm season and I have 3 simultaneous project going
@eager pine ^ electronics are going in tomorrow!
 snow knot
do i connect to the 4 pin?
 unreal hound
Making a watch using circuitpython and adafruit boards of course
Going to use the new itsy bitsy ble board though
Overall height is 14mm
solar yew
Those header pins really take up real estate inside the chassis.
upbeat geyser
Had that issue with the ISP header on one of my projects. I went to pogo pins, but am looking at other more compact solutions like Tag Connect for the future.
 delicate basalt
Made a minor revision to the Adafruit pi zero stand, the black filament looks great with the nylon standoffs and screws 😊
upbeat geyser
Yes, I like the look!
delicate basalt
wanted it to match with my printed cable guide insert
upbeat geyser
Oh, slick! I have a monitor stand like that, maybe I should try it (although I'm not sure how I'd get cables through those little openings when they have chonky connectors on both ends)
delicate basalt
upbeat geyser
Oho! Clever!
delicate basalt
it means only the middle row is reasonably usable, but it seems to accommodate even my thicker power cables
unreal hound
@solar yew There will not be any header pins in the final build when everything goes in the case
Header pins are just prototyping the prototype
upbeat geyser
Say cheese!
 maiden wedge
@johnedgarpark a while ago, you described how to connect Trellis Circuit Python code through AutoHotKey to effect programs. In my case on Windows 10. I was able to get a number of connections working but I am stumped when I try to get Python IDLE 3.7 to send F5 via AutoHotKey to trigger the Run command. IDLE ignores the F5 when sent via a ctrl-alt-l from button 0,5 on the Trellis to AutoHotKey. If I type that set of characters on the keyboard it mostly triggers Run activity in IDLE. Sometimes I need to send ctrl-alt-l multiple times. How do I figure out why it works for some stuff and not for others? Any help would be appreciated. If there is a better way to contact you, please let me know.
solar yew
interesting story
for over 7 years i have been plagued by a constant infection on my pc
the remote attacker constantly managed to get in.
here is how
he got into steam
subscribed me for a 3rd party mod
that would constantly update and infect
this went on until the recent update to windows
😫
i finally wiped my mods from all of steam
seems to point to azure sheep from the hl1 mod
7 years this guy beat me up and zombiedomed my pc
and he just gona get away with it
plush gorge
U know, I tell ya, it's kindness that truly makes this world really work! Had a random guy today, that I'd never met be 4, give me this thread overlock for free so cld give it to a friend of mine who can very much use it to help her build her maker business.
#KindnessROCKS!!!
upbeat geyser
Those baby overlock machines are nice. If they start to misbehave, check the knife that trims the cloth as it passes through: if it's not sharp, things can get wrinkled/jammed easily.
plush gorge
Makes sense @upbeat geyser madthanks 4 the heads up!
Hand blown glass tree, thought I'd add a little light to help it glow!
upbeat geyser
That's a great pic!
signal loom
That looks amazing!
plush gorge
Thanks guys. :-D @upbeat geyser @signal loom
 tropic oyster
I don't know if this counts but I made a really cool logo
signal loom
That is pretty cool! Totaly counts
tropic oyster
:D
ruby ledge
New blog post about BLE on embedded systems --> https://bitbanksoftware.blogspot.com/2020/01/my-ble-adventures.html

On my continuing quest to learn "The IoT", I've explored a long list of sensors, displays, microcontrollers, LEDs and some forms of wireless...
soft condor
20 new old stock dsp56002 digital signal processors, because $.40 each and flat-rate shipping.
 cedar dew
I made a mount for programming my playground express on the go. Can you make it out?
 sweet chasm
a dog? Cool
 median raptor
I see a snek 🐍
I would love to see a v2 with an articulated body for that cable to feed through. Have you shared the file online?
cedar dew
I have interlocking pieces to make up the body but it’s more like ribs. Happy to shar the file
topaz flicker
It's just a clock. Top in hh:mm in binary, but the bottom is hh:mm:ss in our normal number system.
It goes like a normal 12hour clock, but there is no AM/PM to show yet.
Built with a 1602 lcd, 4 tactile buttons, cases provided by an old table saw power switch, and an arduino nano.
 coral gull
did 2 simple mods on my Vox Amplug2 Cabinets:
speaker out and super-bright SMD LEDs for the power indicator
I cut a piece off a PCB spacer to use as a light pipe for the indicator hole
It looked like these. I cut off the "nub" and what you see light up is it's little shaft
I had to cut the round piece (that's now inside the device) into a "D" shape otherwise it would not fit over the LED
then I secured it with a drop of superglue
It originally had a regular 3mm red LED in there, but the spacing of the pads in the PCB is perfect for SMD ones that are much brighter.
These mods actually came up from me screwing up. Originally I had only one of those devices, and I wanted to add a speaker out coming from the top of the device. I mismeasured the placement of the jack, and when I went to use it, the 1/4" plug scraped the PCB and knocked off a few SMD components.
Needless to say it stopped working. So, I ordered another one and left it sitting for a while.
this weekend i decided to try fixing the damaged one, so I opened the newest one to compare them, and all it was really needed to get it back to work was a 1k resistor! The rest of the components knocked out were part of a filter that isn't necessary for the device to work.
so, since I had both units open, I thought I would go ahead and have some fun.
Now, one interesting thing is that they use a BD5638 Class D amplifier chip, and power it from a 5V linear regulator off of 9v from either a battery or an external power supply.
My guess is that this gave a longer/more efficient battery life rather than using, say, a lithium 3.7v and a boost circuit.
and also would be much less noisy, so no HF filtering necessary to keep weird squeals and other artifacts off the audio path.
I did tweet @ Vox Amps telling them about adding a speaker out from the factory. These little amps only output 2.5w in 4 Ohms MAX but that's plenty around the house
IMHO all mini amps and combos should have a Speaker Out. Gives them more flexibility and useability.
upbeat geyser
A linear regulator is not more efficient (it's quite the opposite), but it is quieter.
coral gull
In this case it is in the sense that it doesn't cut out if battery reaches under 5 volts, it conducts instead, and the amplifier works from 2.5V to 5V. So it allows longer battery life.
Although a 9v battery going down to 5v would be so weakened this doesn't really matter, but at least they can claim they're "squeezing every little bit" of power from it 🤷
I'd have gone with a higher power amp chip + higher impedance speaker myself, but hey I'm not a multi-billion company so what do I know!
 scarlet galleon

8 Channel Relay Module
139mm x 52mm Accurate for models and clearances in designs.
Hand Painted and Uv-Mapped in Substance Painter - 8-Channel Relay Module - Buy Royalty Free 3D model by TWGVFX (@trevorwgraphics) [344ea8d]
I originally made it just so I could adjust a printable standoff.
upbeat geyser
I admire that kind of dedication, and the kindness to share the fruits of your labors as well. Well done.
delicate basalt
http://ryantwalton.com/projects/auto-router-rebooter not the prettiest or most complicated project, but it works 🙂

RyanTWalton.com
There was a time before WiFi (1997) and before broadband internet (early 2000's) where a user wishing to access the internet would have to sit down at their computer and manually connect to an internet access provider, which usually included
maybe need to add neopixels to the next one 🤔
modest raven
Two giant buttons. Illuminated with two Neopixel rings. Powered by a Feather.
https://cdn.discordapp.com/attachments/388401386984833044/669411379102613514/image0.jpg
https://cdn.discordapp.com/attachments/388401386984833044/669411380117372933/image1.jpg
https://cdn.discordapp.com/attachments/388401386984833044/669411380599848970/image2.jpg
https://cdn.discordapp.com/attachments/388401386984833044/669411381187182594/image3.jpg


 solar yew
NOT TO SCALE ;)
alternate title: eff what?
@coral gull pcb standoff == light pipe << NICE
coral gull
@solar yew I was going to use a dab of hot glue, but I found the standoffs before the glue gun. This is more "elegant" and MUCH less of a mess! I bet translucent 3mm 3D printer filament would work fine too, but I don't have a 3D printer myself.
solar yew
Do you have to goos the yuknowhat out of it to get that PCB standoff to glow decently bright?@coral gull aka make the LED burn near the limit of its capacity to burn brightly
coral gull
Nope. I didn't even mess with the current limiting resistor in that board (they're SUPER tiny SMD ones and I don't have tools nor components for that level of SMD soldering). I'll check it later but I bet it's some 4k7 or so jobber. These little LEDs I got are very efficient.
solar yew
I'm using a white plastic rubbing alcohol bottle (has flat sides) as an optical filter over an 11" RGB matrix (96x8 px).
I cut out a 4 inch piece of the white plastic from that bottle.
The arrangement is super sensitive to distance.
Basically acts like a rear projection screen at very close range.
Blooms like crazy at < 2mm (I'd guess).
Softens the visual just enough to make a fairly convincing discrete LED look-alike for a bank of 16 LEDs (to form a binary output panel on an old school computer).
I decided to simply light up another row to mark places, rather than to (say) circle the places where LED's should light up (so you can tell when one isn't lit at all).
With the old school setup, you just looked at the LED itself, or at its bezel.
The matrix I'm using is basically freeform, so that method is a bit too much of a cognitive burden.
(have to estimate distances to guess if they're on or not).
(if enough are off that's very obvious ;)
upbeat geyser
I was going to do that for some diffusers for another project, but then I ended up just buying purpose-made LED diffusion material, which works very well.
modest raven
@solar yew I'm pretty much calling this the Twin Peaks
solar yew


 fading cloak
Hello Everyone,
Working on this beautiful piece for months now. Get Ready for some positive updates in near future at crowd supply
Link: https://www.crowdsupply.com/embedinn/iotsdr
Wish me Luck
Cheers 🙂
torn viper
atsamd-rs now has working usb on samd21 and samd51 🎉 https://github.com/atsamd-rs/atsamd/pull/155

GitHub
The main issue was the clocking: Driving a 48Mhz closed loop from a 32khz oscillator is a 15k multiplier, and with usb correction enabled, it was really throwing it off. Every time the USB bus woul...
 dreamy hollowBOT
The main issue was the clocking: Driving a 48Mhz closed loop from a 32khz oscillator is a 15k multiplier, and with usb correction enabled, it was really throwing it off. Every time the USB bus woul...
solar yew
@torn viper USB isn't easy - congratulations!
I didn't find the time to make a proper ring buffer for USB comms.
So I was limited to about 5 bytes per utterance. ;)
torn viper
yeah I got a lot of help from contributors on this one
usb scares me
so does dma
the coolest part is we got usb midi for free just by implementing some simple low level stuff
we're effectively providing functions to an upstream library that does all the heavy lifting
torn viper
yeah
just look how nice the midi code is https://github.com/jacobrosenthal/atsamd/blob/midi/boards/pygamer/examples/usb_midi.rs#L62

GitHub
Target atsamd microcontrollers using Rust. Contribute to jacobrosenthal/atsamd development by creating an account on GitHub.
and we didn't have to write anything to do with midi
I really love how the rust community is standardizing stuff like this
solar yew
This is my new distraction from what I want to do which is a distraction from what I'm supposed to be doing (lately):
https://github.com/dhansel/Altair8800
torn viper
oh cool
solar yew
One of the fellows did a kit . comes in at USD 179 or a bit more for the fancy chassis version.
torn viper
I have a MiSTer fpga which has an altair emulator
solar yew
Did you ever wish you could just fork() self and be two people to get twice as much done/read/learned? ;)
torn viper
haha
solar yew
there's good reasons why we don't do that
I hope they never come up with silicon platforms to 'upload' yourself to. oh please no. ;)
torn viper
idk man, ghost in the shell makes it look pretty cool 😉
solar yew
This is the higher end of the two versions (price wise).
https://www.tindie.com/products/kb0wwp/altair-duino-pro/
I just love that they did this.
solar yew
When you visit a computer museum you cannot just sit down and hack the machine for 5 hours.
Oh no that's dirt cheap.
The guy has probably sold only a handful. That's a lot of work he put into it and will never see a dime of profit.
torn viper
for a due in a box?
torn viper
I quickly scanned the docs and it said it was a due
solar yew
To call it a due in a box is missing something I think is important. ;)
torn viper
yeah it's quite a fancy box
solar yew
lol
I would say the main expense you're avoiding is in the construction of that front panel.
torn viper
yeah
solar yew
Doing it yourself that's a massive ratsnest of wires, or a (discovered) PCB (or one you make from scratch).
solar yew
Well the point of an IMSAI or the Altair is the 'keyboard' is a bunch of front panel toggle switches.
torn viper
yeah
solar yew
You can simulate that on a qwerty I suppose.
anyway .. I don't get a cut .. and I don't really want to put in the time right now to do this one. ;)
(plus i really hate soldering)
torn viper
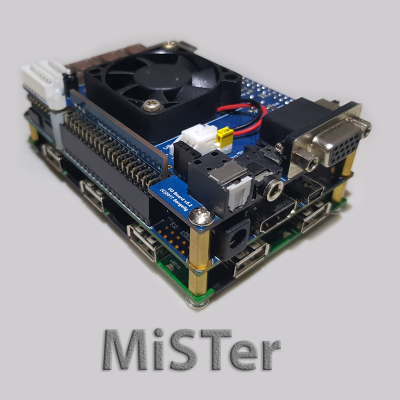
GitHub
Altair8800_Mister. Contribute to MiSTer-devel/Altair8800_Mister development by creating an account on GitHub.
dreamy hollowBOT
Altair8800_Mister. Contribute to MiSTer-devel/Altair8800_Mister development by creating an account on GitHub.
torn viper
yeah I get what you mean about wanting the right interface, but for that price you could buy one of these with over 100 other fpga recreations computer/console/arcade
solar yew
I don't mind paying money if I like the creator of the work and I think they deserve a little compensation. ;)
You only get to do so many of those each year.
solar yew
Pretty soon no ad copy will be remotely true and it'll be time to go stone-hearted whenever the 'story' is recited by the vendor. ;)
My brother's tight with a dollar.
My dad and I aren't. It's a different personality.
torn viper
yup
solar yew
I had a friend who used to chirp 'don't be cheap .. be free' ;)