#help-with-3dprinting
1 messages · Page 36 of 1
 glad shuttle
 tight cove
when doing the linear advance k factor test, how thick should the lines be?
with a .4mm nozzle
nozzle line ratio at default (1.2)
am i looking for a line thickness closest to .4? or does that not matter and i want what ever looks the most consistent
without thin/thick spots, if they all look fine do i choose the closest to .4?
also is a K factor of 0.39 considered high?
 empty sedge
@glad shuttle is the extruder drive gear slipping on your motor shaft?
@tight cove yeah the default ratio is fine, the absolute width doesn't matter much
@tight cove 0.39 is high for a direct-drive machine but may be okay for a moderately sloppy bowden machine
@tight cove my delta has 500mm bowden tube and BMG mini clone (dual drive & geared) extruders and ended up closer to 0.1-0.2 but I forget the specifics
 bitter crypt
anyone here make 3D model on Fusion 360 for fun but doesn't have a 3D printer
empty sedge
machinists?
 iron remnant
I mean, you can always use any number of the services on the internet that will do the printing for you.
 karmic brook
Yeah, I use it for CNC designing
 tawdry forge
I use it because Im bored and like designing things sometimes 😛
glad shuttle
@empty sedge So turns out, there is a pretty solid difference in Cura when you select Marlin (Volumetric) over just choosing Marlin (SPECIFICALLY in my case..... THE FRIGGIN RETRACTS)
empty sedge
@glad shuttle does volumetric imply hardware retract?
glad shuttle
Honestly I have no idea, I had the retracts turned on in hardware as well. My extruder would not move in the retract direction at all with volumetric selected)......brightside, it literally on took me 2 weeks to figure out it was button inside of Cura, rather than something i missed inside Marlin
😦
 violet needleBOT
Adafruit Industries posted Cube Puzzle #adafruit

Every week we'll 3D print designs from the community and showcase slicer settings, use cases and of course, Time-lapses!
Fidget Cube Puzzle
DerFloh89
https://www.thingiverse.com/thing:4246261
CR10S Pro
Silver PLA
2hr 30mins
X:154 Y:180 Z:34mm
.2mm layer / .4mm nozzle
10% Infi...
violet needleBOT
Adafruit Industries posted MIDI Solenoid Drum Kit

Build a MIDI drum kit using solenoids and CircuitPython! 3D print parts to create a solenoid driven mallet to trigger snare drums, cymbals and much more! Use the Adafruit Feather M4 and ULN2803A darlington driver to create your own custom USB MIDI percussion ensemble.
Learn G...
 shadow mica
alright i need someone smarter then me to look at my gcode for the cura slicer in repider host i want to start it 0.01mm - 0.1mm closer to the bed
; Default start code
G28 ; Home extruder
;G29;abl (disabled because of firmware)
G1 Z15 F{Z_TRAVEL_SPEED}
G92 Z15.14
M107 ; Turn off fan
G90 ; Absolute positioning
M82 ; Extruder in absolute mode
{IF_BED}M190 S{BED}
; Activate all used extruder
{IF_EXT0}M104 T0 S{TEMP0}
G92 E0 ; Reset extruder position
; Wait for all used extruders to reach temperature
{IF_EXT0}M109 T0 S{TEMP0}
for refence this is what i am getting with the brim of my prints https://cdn.discordapp.com/attachments/708653339541504072/737176337684496514/JPEG_20200727_021457.jpg

 tawdry forge
your bed is too low
can't you just raise it?
or set first layer height in Cura without mucking in the gcode
shadow mica
not unless i want my nozzle crashing into the bed a good bit when it homes
first layer Hight is 0.3
but part of the problem is when it's running the head is to high and i can see it's to high it homes to the right place but after it homes the head is too high
violet needleBOT
Adafruit Industries posted 3D Hangouts – Solenoid Drums and Lego Neon LED signs
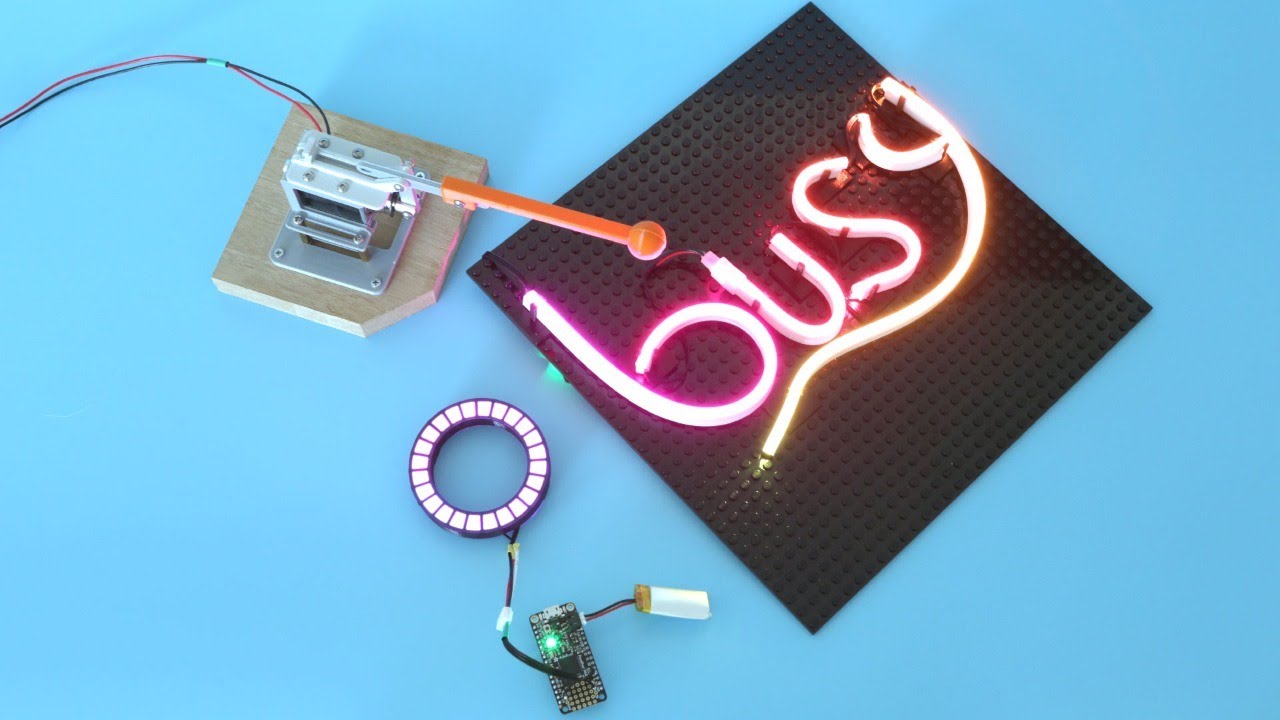
Learn Guide
https://learn.adafruit.com/midi-solenoid-drum-kit/
YouTube Video
https://youtu.be/dhKYxDzyXqI
Code on GitHub
https://github.com/adafruit/Adafruit_Learning_System_Guides/blob/master/MIDI_Solenoid_Drum_Kit/code.py
Adafruit Feather M4 Express
https://www.adafrui...
glad shuttle
@empty sedge im not sure what this section of firmware would do if you were using Marlin (volumetric) in cura, just thought I would sent this to you since you were responding. Thought you might know or might be interested.
Pastebin
Pastebin.com is the number one paste tool since 2002. Pastebin is a website where you can store text online for a set period of time.
violet needleBOT
Adafruit Industries posted 3D Hangouts – Solenoid Drums and Lego Neon LED signs

Learn Guide
https://learn.adafruit.com/midi-solenoid-drum-kit/
YouTube Video
https://youtu.be/dhKYxDzyXqI
Code on GitHub
https://github.com/adafruit/Adafruit_Learning_System_Guides/blob/master/MIDI_Solenoid_Drum_Kit/code.py
Adafruit Feather M4 Express
https://www.adafrui...
empty sedge
@shadow mica you can use G92 to set the current position coordinates without moving
so after the startup gcode you pasted you could do
G0 Z0.25 ; move up to 0.25mm
G92 Z0.3 ; without moving, change what current position is to z=0.3mm
I'm assuming your Z home position is zero
 agile finch
@shadow mica if you’re nozzle crashes while homing I think that something is wrong. Maybe you need to move your homing switch higher in Z so it won’t crash.
glad shuttle
looks like your shift or control keys are sticking @hushed lotus
 hushed lotus
No not that
I was wondering why 90-20= 69.5374936193$.!,&;8.’bdydkwifmwodo
Instead of 70
 elder oxide
Float subtraction
It’s really weird
If you do explicit casting you might be able to avoid these strange outcomes
hushed lotus
huh
karmic brook
I'll often do a little thinking ahead of time to decide which point to use as a datum point from which the other measurements are made, and parametrically describe them. However, after enough calculations (especially if switching units), errors can creep in. There can also be issues with nearby parallel lines.
agile finch
@karmic brook I documented three of the options for connecting 3d printed gears/pulleys to random stepper motor shafts. I came up with a third option that just uses one bolt, I think I prefer that. Thanks for the suggestions!
https://hackaday.io/project/174013-stepper-motor-shafts-connecting-gearspulleys

Stepper motors of various sizes and shapes can be scavenged from all kinds of equipment. It’s a shame to throw these away since they can rarely go bad. But they come in all kinds of shapes and sizes.
The main issue I've run into is how to mechanically connect to the shaft wi...
karmic brook
Cool! Nicely documented!
 clear kindle
I wonder if Charlge Babbage Analytical engine would work as a 3d printed version...
Would be awesome to make a project to make a 100% working model. Tho, I believe scale would be have to be kept quite large because of diffculty po print too small parts
karmic brook
That's a cool idea, but wow. I did 3D print a six speed transmission with two planetary gear sets, but it will need a little fine tuning with a file before it works smoothly
clear kindle
😛
I think his machine has over 40000 parts
mostly gears... I wonder if plastic can even take the stress
karmic brook
There is an operating replica, there are videos on youtube, it's amazing to watch in operation
 wide blade
I heard that one of the reasons he wasn't able to build it at the time that gears couldn't be produced with enough precision.
iron remnant
Naw, before they started on the difference engine, they took measurements of objects from the time period as to set a standard for what the level of precision was.
When it was at the Computer History Museum, I got to see it work. It's amazing.
Thing I really wonder about is that, with a fully constructed difference engine, there's a lot of fairly obvious bugs and unintentional features. It has to be very carefully cranked by hand, for example. So it works, yes, but it's quirky.
I really wonder what a v2 post-difference-engine design would have looked like.
Also, there were some noises when MEMS stuff started to get interesting that maybe a mechanical computer would end up being less annoying than trying to make transistors work with quantum effects and whatnot, but I don't know if that panned out.
Either way, given the difference engine was a base-10 decimal computer, presumably you could make a binary mechanical computer and gain the same sort of benefits that electrical binary computers have. And you could probably also make it very carefully print-in-place.
 elder mist
Hi, i was recently lucky to get a modified second hand Prusa Mk2. It is modified to have a volcano hotend. It's a bit dusty and Needs cleaning. Will be doing that tomorrow, and will test out some prints. Any tips or pointers before I start?
 livid echo
@elder mist
Besides cleaning the printer, I would check if there are any loose plugs on the mainboard. Make sure that the latest firmware is installed. I would suggest running the calibration wizard again before printing the first time. The wizard can be found under: main menu -> calibration -> wizard.
I would also check the belt tension and the set screw in the pulley at the motors. If the extruder or the print bed wobbles, check the screws securing those components.
Happy printing! 😁
elder mist
Thanks for the tips! Looking forward to tomorrow for this
 shy kelp
Im going to be building my first 3d printer, but im stuck on the X axis carriage design
I cant find any documents for hot end mounts
 lilac patio
@shy kelp what hotend do you plan on using? There are a lot of V6 mounts out there
shy kelp
saw this one on ebay for 11$,

eBay
3D Printer J-head Hotend extruder nozzle. 1 x J head Hotend with a cooling fan (0.4 mm brass nozzle). Cable Length: approx. Durable in use. We will do our best to reduce the risk of duties. Material: Stainless Steel, PVC, Nylon.
not sure about its quality though
it doesnt include any dimensions for mounting it which is pretty annoying
lilac patio
I'd recommend a more reputable seller if you can afford it
shy kelp
what sellers should i use?
karmic brook
It depends somewhat on where you are in the world, but I've had good experiences with printedsolid
violet needleBOT
Adafruit Industries posted Fusion 360 Tutorial – Emboss is BOSS!

Taking a look at the new emboss feature recently added to Fusion 360. It's pretty boss! I made some examples of applying circular and rectangular patterns to embosses. Can we apply an emboss to a surface that has been embossed? Some limitations with self-intersecting and how t...
empty sedge
@shy kelp the e3d v6 groove mount and heatsink shape are described on their wiki: https://wiki.e3d-online.com/images/b/b5/V6-175-SINK.pdf
@shy kelp my SBHXY mounts a v6 lite which has the same mounting features https://cad.onshape.com/documents/41c3b12e742c4d2f9961aa9b/w/31453eda78b442e38c3c81aa/e/978accfb881f477f9a1b51fc
Login / Signin to Onshape - the modern CAD system used by thousands of companies worldwide.
SBHXY extruder and carriage, designed to be direct drive extruder and as compact as reasonable. It's only 40mm wide on the X rails.
clear kindle
@karmic brook You sure you are not thinking of the Differential Engine?
Its a smallever version. Non-programmable, but for solving differential equations.
The full analytical engine would have been 20 meters long and 4 meters tall. Featuring programmable input. Variables, registers and input and output. 50 digit numbers and 1000 internal storages
3 registers to be precise. 2 input registers and 1 output registers. And a data bus to transfer data either from punch cards or from internal memory.
karmic brook
Could be, I saw this quite a while back. It was pretty big, but I don't think it was that large
wide blade
I don't think the Babbage machine was for solving differential equations.
 waxen coral
Hey this is only tangentally related to 3d printing but I was wondering if anyone knows what file type KiCAD works in. I am switching my CAD files from PCB123 to KiCAD and I am wondering what file type to transfer my files too.
karmic brook
I think it's its own XML format, but the folks in #help-with-hw-design might be more help
waxen coral
thanks!
 sick citrus
anyone recommendations for a new Mainboard for a Ender 3? (My problem is that I got a Ender 3 with a Mainboard on the bottom and many are on the top plate only)
karmic brook
BigTreeTech makes some nice ones.
sick citrus
Iam searching for some mainboard, where I dont need to buy extra Drivers or so.. and it should be a quiet one.. One that stops the Nemas from making these noises.. (Also accepting direct links to a purchase Page..)
elder oxide
Noise comes from nema steppers. If you want I quiet, go for linear drive
 shrewd rose
ok so I added an inductive probe
It gives light when there is metal under it and it doesn’t give light when there isnt metal
seems ok to me
I used the TH3D firmware
when I type m119
it shows triggered when there is no metal under it
it shows open when there is metal
so I was like lets invert the Z_MIN_ENDSTOP thing
nothing happens
I invert for other axis it does work
But the probe seems to be having no effect
also side note when I invert the plugs on motherboard It stays open all the time irrespective of things under it
even tho light still blinks it still stays end stop Z open
Im this close to making a separate circuit and testing what’s wrong with the sensor circuit
but if some mad lad previously tried this and knows a way out do tell
And I got that probe cause well bl touch aint available where I live (India)
If this doesnt work Im ok with just manual level i honestly wanna do other stuff than to tinker more with the printer
empty sedge
@shrewd rose sounds like you were really close with just needing to invert the endstop logic for the probe but for some reason that didn't work
lilac patio
@shrewd rose you could see if anyone on the TH3D discord could help, idk
 humble dawn
I am looking into getting a 3D printer and a was wondering what printer would be good for a beginner and be affordable
elder oxide
Ender 3 is probably the best build volume for the $$
A little over $200 gets you 220mmx220mmx250mm build space. Prints right out the door for PLA and ABS.
Some assembly required
humble dawn
Ok thanks i will look into it
 steep stump
Does anyone have experience using 3d printed bushings in the y axis of a i3-style printer? I'm using them in my Wilson TS and I suspect that they're causing issues with vibration in the y axis.
The belt is already as tight as it goes, and I also noticed that the endplates of the y axis are a bit flexible in the middle. Would that have an impact on vibrations causing artefacts in the print?
shrewd rose
@steep stump show the pics of artefacts that you are talking about
steep stump
Sure, this is the side of one of the calibration parts I made. They're only present where the y axis is moving
shrewd rose
if the linear bearings are in their holders as in there is no slipping and there hasn’t been any damage to bearings ( the metal balls )
consider loosing a little bit of belt
also are your motor drivers and motors running cool
cause things also start to go funny when they heat up
steep stump
they do run pretty warm, but I had issues with slipping when I set the current lower
steep stump
the bearings aren't metal lm8uus, I printed them from pla
it's a tmc2208 with skr 1.3
tmc2209, actually
shrewd rose
then you should check how much voltage is going thru it and find a suitable voltage spot for it and keep at that
steep stump
I'm curious if going to 32 microsteps instead of 16 would have an impact since I notice the y axis vibrating during some of the moves
shrewd rose
usually I had .6 on x and y and .9 on z ( for A4988 and ramps 1.4 ) yours may vary
steep stump
I'm setting the current limits in the firmware, if that makes any difference
shrewd rose
@steep stump i mean as long as you change it in firmware there shouldn’t be
@steep stump as long as appropriate value is being set things should be ok
and while using its rare for motors to go hot
either there are being subjected to too much load which is causing the heat ( assuming rest of things are right )
or check for appropriate microsteps configuration although that kinda leads to missing of steps
I'm curious if going to 32 microsteps instead of 16 would have an impact since I notice the y axis vibrating during some of the moves
@steep stump oh yea one difference here would be in the torque of motor higher the microstepping lower will be your torque on motor
that’s on very high microstepping you see people add a gear box to balance things
maybe try lowing the microstepping for once to see if motors and cool
set the right current values
and do your test to make sure
steep stump
I tried 32 microsteps and also readjusted the y belt tension, and the vibration seems to be reduced. I'll keep experimenting with it
 latent smelt
im sure this has been asked a billion times on this channel. what is a good starter 3D printer that would let me print out basic things like enclosures for my projects? I live in an apartment with little space so thats important. cost of printer plus availability of print material is probably second. printing speed and good resolution would probably be next. any ideas and advice very much welcome. tia
 knotty laurel
The two printers which tend to come up in suggestions here are the Ender 3 for people who are very price sensitive, and the Prusa i3 for people who prioritize reliability and performance. The Prusa Mini is probably in the middle of that spectrum, too. (Disclaimer: I have none of these myself, just repeating what others have said.)
latent smelt
thanks. theres just so much options on amazon i cant even decide which ones are good. prusa mini and ender 3 looks like it covers most of what i want. anyone heard about the Flashforge Finder Lite? i like it just because of the enclosure. i worry about leaving this thing printing overnight in the corner of the room with no protection
 teal stag
I'm in the same situation (3d printing inside a studio apartment)!
My solution was to build the ikea table enclosure depicted here https://blog.prusaprinters.org/cheap-simple-3d-printer-enclosure_7785/
with fire alarm, raspi running octoprint with webcam, and cut an extra hole with an inline attic fan to vent any fumes
I went with the Prusa i3 mk3s, but the enclosure could probably be modified to fit any number of printers.
Key features: low noise level (I sleep in the same room), reliability and maintainability, and printer community
the Prusa printers cost more but come with very helpful features
any printer will be an adventure in learning the mechanics and quirks of whatever model you select though
shrewd rose
@latent smelt Ender 3 if u wanna learn printing and prusha if u just want prints and nothing else
ofc budget is the big thing
for the price of one mk3 I can get 4 ender 3
What you should be looking for is
do you want fast prints
do you want smaller but high quality
or you just need to make 1 or 2 vase and then use printer as basic enclosure tool ( design chassis and stuff )
latent smelt
@teal stag cool set up. i may need to consider something like this or a shelf that has ventilation of sorts. is the smell really that bad that you will need to ventilate it when printing? i would probably leave mine in a separate room but it would still be an issue if it starts smelling weird when I have it printing. maybe an enclosure is required for my needs then. nice touch with the pi!
@shrewd rose lets say im price conscious but not averse to getting the more expensive one as long as it fits my needs. i dont need fast prints and the print sizes i would need would probably not go beyond 8x8x8 inches (maybe even smaller). quality is prob not top on the priorities too given that the parts im most likely to print are brackets, enclosures or parts for small robotics projects. what i do need is flexibility on print materials e.g. hard plastic/soft-ish plastic
another dumb question. are all these (or most of these) printers capable of using models from a fusion 360? (i see a lot of demos using that software)
if not. what are the best software to learn design on. again, not looking for best in class. just good enough for a hobbyist. i have a software engineering background and little experience with cad work
shrewd rose
another dumb question. are all these (or most of these) printers capable of using models from a fusion 360? (i see a lot of demos using that software)
@latent smelt you just need to export it as stl and it works
fusion does have support for direct printing
but ehh export it as stl and be happy
I mean see thing is soft and hard material
that right there is a cost consideration
for soft/elastic material you defo need direct drive
if you just wanna make basic structures with pla at 0.2mm
ender will do
( this one is with 0.4mm nozzle at 0.3 layer height
 boreal thunder
Also: your questions aren't dumb. This is new to you, so there's naturally going to be a lot you don't yet know, but please try not to feel bad about that. You want to learn and you're actively seeking out the answers. That's awesome.
shrewd rose
I will be printing a gear box arrangement with my ender 3 I’ll let you know how it goes
boreal thunder
Doesn't matter if the question's been asked a billion times before. You hadn't asked it yet, and you have every right to. That's why this channel is here. :-)
shrewd rose
also if u really want flexible, don’t expect high quality from it cause they do be kinda hot to print
latent smelt
thanks @boreal thunder @shrewd rose
shrewd rose
@latent smelt get this one if you can

Introducing our new compact 3D printer with all the bells and whistles you would expect from the creators of the award-winning Original Prusa i3 MK2 and MK3S! The MINI is a big printer in a compact body. We did our best to squeeze as many features into the lowest possible pric...
since you are new to this
its worth investing
you wont be printing soft plastics with it
but pla, abs you will have good time with those
elder oxide
Wow, could almost buy 2 Ender3 for the price of that Prusa
shrewd rose
unless you are ready for big time mods ye its kinda worth
elder oxide
For the average user, ender3 is totally worth it.
Though honestly I’ve had a lot of issues with prusa and bed leveling and keeping their level during prints. Had to resort to printing everything on rafts for the one in the Makerspace I’m a super user at.
boreal thunder
Don't print ABS without ventilation of some kind. I will beat this drum until my arms fall off.
karmic brook
Aw man, how am I going to duct fumes out of the basement? Venting them into the room upstairs seems like a bad idea.
boreal thunder
Is that a serious question or are you snarking me?
Genuinely can't tell. I'm sanguine either way and all's cool, I just don't know if you're actually asking for advice there.
karmic brook
No, I'm just grousing that there isn't an easy way to get fumes out of a belowground basement.
boreal thunder
Righto. I'm sorry for getting jumpy there; my brain hasn't full kicked in for the day. And that does suck. Your basement is fully enclosed? No exterior windows at all?
karmic brook
None. Zero. The realistic options are just open the Bilco doors when I'm doing something that makes fumes (awkward, can't do it if it's raining, also animals might wander in), or run ductwork to the chimney (need to figure out how to make sure it doesn't interfere with the furnace draft or push furnace fumes back out into the basement via the printer enclosure).
boreal thunder
Yeck. Well, if you do MacGyver a solution, let me know, please? I'd be curious to hear.
teal stag
@latent smelt I don't print with ABS, which would definitely require ventilation for safety. There is not a lot of data yet on the health effects of printer emissions, so I took the approach of adding ventilation anyways. There is a huge debate over going with lower cost printers and upgrading them piecemeal vs more expensive printers that have better parts/features from the start. (personally i'd get the Prusa mini, its very compact)
Software engineers tend to like openSCAD which is a programming/scripting language for CAD design. Fusion 360 is probably the best thing to go with if you want to learning something new.
boreal thunder
Avoid Sketchup. The learning curve is a lot less intimidating, but it’s comparatively underpowered and you run the risk of getting stuck in its paradigms and then having to dig your way out again. Which is me right now. Fusion 360 bothers me for being cloud-based and for causing my computer’s fans to sound like a 747 taking off, but I acknowledge that it’s the de facto standard for valid reasons.
 latent coyote
@boreal thunder i've not had that issue with fusion 360.
there is a really good 16 part (modeling) course on youtube that really helped me learn fusion 360. Now i'm making my own stuff.
boreal thunder
From what I gather, it seems to very much vary from person to person and setup to setup. Encountering any hardware issues, I mean. The cloud thing is just personal taste. I’d love the YouTube link if you don’t mind sharing it, please and thank you.
latent coyote

Click this link to download the drawing and then print it off so that you can follow along and see the dimensions and the shape you're modeling.
https://mailchi.mp/07adc6c270fd/partoneofsixteen
This is the first of sixteen parts where you will learn Fusion 360. All totaled ...
each video has a new part to model
lot of practice and new techniques. it was fun.
i get the cloud thing. that is bothersome. but it is a pretty rich tool kit. So you have to weigh the pros and cons. Do you know if solidworks is cloud base. That is another one i've heard about.
So from his videos I went from knowing nothing about fusion360 to make this part for a friends' standing desk.
nothing super exciting. but really helps get the basics down .
shrewd rose
Fusion is good
But like raw performance wise solidworks feels better
even blender feels better
but like fusion is still reliable cad
when you work on project with homies with super useful
plus the ability to pull any face

violet needleBOT
Adafruit Industries posted Drink Boat #3DPrinting #timelapse #adafruit

Drink Boat
Donovan Smithson
https://www.thingiverse.com/thing:4547341
CR10S Pro
Green PLA
43hr 22mins
X:254 Y:244 Z:149mm
.2mm layer / .4mm nozzle
10% Infill / 1mm retract
210C / 60C
80g
50mm/s
LIVE CHAT IS HERE! http://adafru.it/disc...
violet needleBOT
Adafruit Industries posted Lego Neon NeoPixel Sign with CircuitPython #adafruit

Build a Neon-like sign with NeoPixels and CircuitPython! Make 3D Printed clips and a LEGO compatible base plate to build a light-up Neon sign!
Learn Guide
https://learn.adafruit.com/lego-neon-sign/
Code on GitHub
https://github.com/adafruit/Adafruit_CircuitPython_LED_Anima...
violet needleBOT
Adafruit Industries posted 3D Hangouts –Neon Sign and Pixel Squares
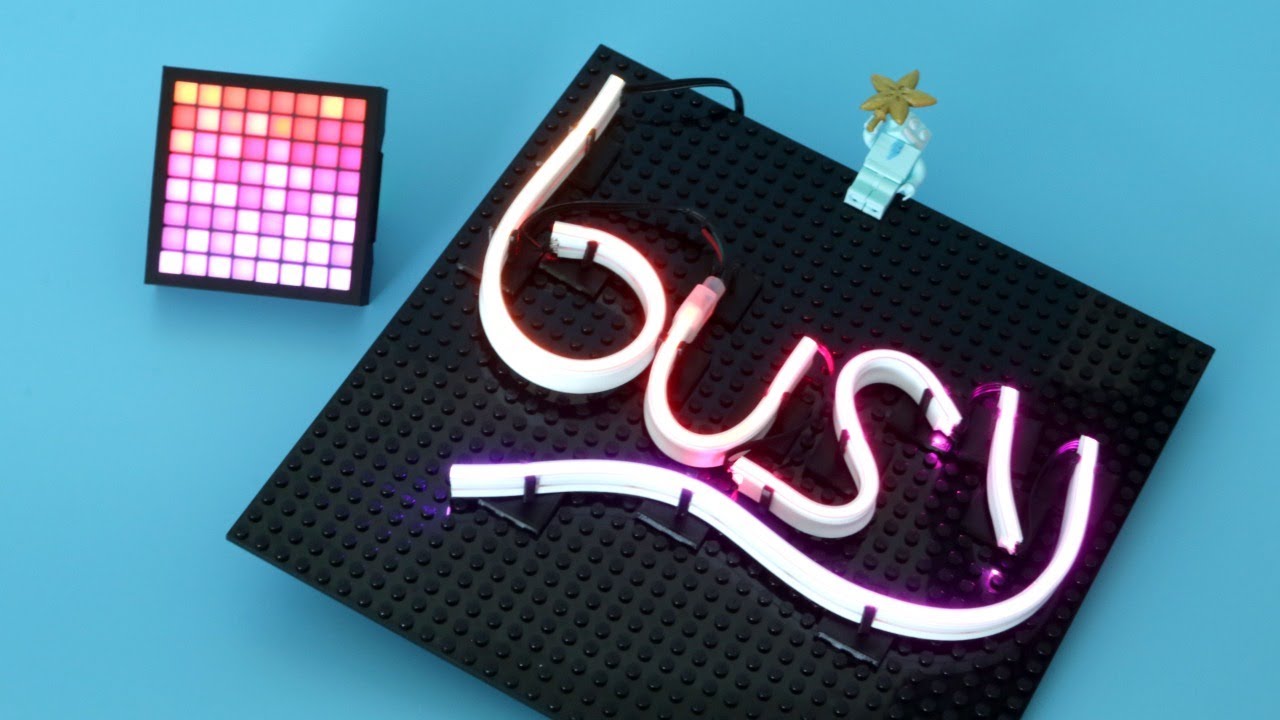
Learn Guide
https://learn.adafruit.com/lego-neon-sign/
YouTube Video
https://youtu.be/UpLfFeXYoqU
Code on GitHub
https://github.com/adafruit/Adafruit_CircuitPython_LED_Animation/blob/master/examples/led_animation_rainbow_animations.py
Adafruit Feather M4 Express
https://w...
 blissful marlin
SLA printers are not a good idea if you have pets, right?
teal stag
afaik the resin in resin printers is pretty toxic, so a very well ventilated area and out of reach of pets and the curious. https://all3dp.com/2/sla-3d-printing-is-3d-printer-resin-toxic/
 crude kettle
Hey has anyone print with resin?
I have a question about how an object that I'm designing should be printed
 naive cairn
What's your question ? @crude kettle
Anyone have any info on building SLA printers from scratch?
karmic brook
There are two major approaches I'm familiar with. One does the imaging a layer at a time, with something like an LCD, light engine, or MEMS micromirror display, the other does the imaging a vector at a time with a laser and deflection mechanism. Height is adjusted by either the resin level or support fluid level, using a delivery system that can move an accurate amount of liquid when commanded.
empty sedge
@naive cairn the "little RP" was produced at my hackerspace. it uses a DLP projector as a light source
crude kettle
Okay I got two questions on SLA prints. I want to do some key caps for fun. Is there any restrictions on how I can print a part?
Also, I want to know if I can fill a hollow model to save on resin. What can I fill a model with to make it more solid afterwards.
@naive cairn
naive cairn
@crude kettle I'm not sure what you mean by "restrictions on how I can print a part." Resin printing is about the same as FDM in that there are some orientations that will print better than others. Dealing with the supports can be a little different in Resin printing though. Depending on your slicer, you can have a little more control in the resin world and most resin slicers that I've seen all use tree supports.
Yes, you can hollow a model to save resin. You'll just need to leave a hole for the resin to drain from as the print moves up. Otherwise you'll have a hollow model full of uncured resin. Depending on how big of a drain hole you leave, you could refill it with pretty much anything you wanted, Sand, powdered metal, rice, BB's, etc. Then you can just fill the hole up with Super Glue or something that you can sand and finish.
karmic brook
Some SLA printers don't require supports at all.
crude kettle
Okay, I'm really new to this. I'm using a Elegoo Mars, it's 24 bucks cheap than when I bought it, and I want to know what I need to do for printing. The clean up and stuff after printing I know how to do.
 spark sable
You must be claen printing with cleaning solution and cure with UV light
tight cove
I did a extrusion with G1 E50 F120
the thin area is when it wasnt extruding and started extruding
there are small bubbles at the ends also
sometimes it will bubble badly mid way extruding
do i need to dehydrate my filament?
PLA Snow White 3Dfilaprint 1.75mm
ender 3 pro
210C
0.4mm nozzle
 serene quest
I normally don't have this issue but now whenever I level the bed (which I do while the printer the heated to normal print temps) and then print, its always way the low and the gap between the nozzle is more than when I leveled it, I am using a Ender 3 and a single sheet of paper to level the bed
elder oxide
That’s odd
How many times to you check each corner?
When you adjust each corner it slightly changes the others so you need to do each corner twice to ensure.
serene quest
2 passes of leveling
yes
I do that
still
The entire bed is equally far away from the nozzle
elder oxide
Okay, how loose is the paper when you slide it under the nozzle?
Does it slide freely or slightly drag?
serene quest
Drag alot
elder oxide
Hmm... what about your initial layer height?
serene quest
elder oxide
Hmm.. that is odd. Let me consult a buddy of mine who has put like 8000hrs on his Ender 3 and 3D prints professionally
serene quest
Thank you
tight cove
pretty sure you should use card to level your bed not paper, since paper is too thin
if you have octoprint check M206 Z value
with M206
steep stump
or if you use paper, more than one sheet would be better
elder oxide
I use a sheet of printer paper and level just fine
elder oxide
But I don’t do a hard drag, just a slight drag. But I learned this from my friend who has been printing for a couple years.
tight cove
i did a slight drag also
with my card
but slight to me is not slight to you
so who knows
tight cove
i say just level it best you can, consistent drag on each corner
then do a live adjust with baby steps
until its good
and set that value with M206
and save to EEPROM with M500
serene quest
The issue is that the bed is too far not too close, using a card would make the issue worse
tight cove
with baby step Z you can go in the - also
if its already as low as it can get
then put shims under your bed to raise it
use some washers
or something similar
my bed was also too low when i got my ender 3 pro, i had to use 3 washers on each corner to raise it
or you can move the Z stop switch but then you need to grind off the mount
i guess i used 5 washers
i used enough so that the springs were all full compression and then loosen 1-2 turns
then level
serene quest
hmm thank you for that I'll do that, but the issue isn't leveling the bed, its that when the bed is leveled, in prints the nozzle is waay to high
tight cove
the washers should raise the bed making it closer to the nozzle
steep stump
actually, if the paper drags a lot on the nozzle but the nozzle is still too far when you start running the printer, there might be a z home offset in the printer
serene quest
How can I check if there is?
steep stump
there's usually a gcode command to check settings. for marlin it's m503
 idle star
Hey all, first time poster, long time admirer of all the great Adafruit tutorials and hardware. I'm trying to adapt the solenoid mallet (https://www.thingiverse.com/thing:4561678/files) to smaller solenoids that I already had. I'm a bit stuck in Fusion360. It looks like there is a constraint used that works between sketches or components. Can any one explain the name of the little block and plane icon that appears when I select the holes on the "noid holder" component? It seems it is some sort of constraint to the holes on the "large solenoid 413" component, but I can't figure it out. When I have the name of the thing, I can probably Google it and go from there.
It's marked in red on the image
karmic brook
I suspect that's a "mortise" icon, not block and plane. Possibly used to remove areas in a rectangular way (instead of drilling cylindrical holes)?
tight cove
@steep stump to check Z home offset use M503, then look for the line that says M206
also maybe you are under extruding?
giving the illusion the nozzle is too far
lilac patio
Hey all, first time poster, long time admirer of all the great Adafruit tutorials and hardware. I'm trying to adapt the solenoid mallet (https://www.thingiverse.com/thing:4561678/files) to smaller solenoids that I already had. I'm a bit stuck in Fusion360. It looks like there is a constraint used that works between sketches or components. Can any one explain the name of the little block and plane icon that appears when I select the holes on the "noid holder" component? It seems it is some sort of constraint to the holes on the "large solenoid 413" component, but I can't figure it out. When I have the name of the thing, I can probably Google it and go from there.
It's marked in red on the image
@idle star iirc that's the "Project" feature, which allows you to add things to a sketch so you can reference it
latent coyote
@idle star that looks like an Offset Face icon
@idle star Its probably an offset for the printer to give it room for the filament width.
Thats my best guess
idle star
Thank you all for the replies. @lilac patio is right: http://help.autodesk.com/view/fusion360/ENU/?guid=GUID-6EE7B230-A280-45B7-8868-D96E4CE44B62
It looks like I did my edits at the wrong point in the timeline, because they should move together if you edit before project. Thanks!
lilac patio
@idle star yw
 leaden slate
I'm getting an ender3 with a few upgrades for free. It has a glass bed and a full metal hot end. I'm going to add a bed leveling sensor/new firmware/octopi. Is there anything else I should consider doing to it?
empty sedge
@leaden slate trinamic drivers? filament sensor?
I'm not sure if people do extruder upgrades on ender 3
leaden slate
I might as well upgrade the motherboard, it's the original 8bit one. The 32bit board comes with the better drivers.
This will be my first 3d printer. My plan is to upgrade it/use it/learn for a few months, then I'm gonna buy an mk3s and donate the ender to my local makers club.
karmic brook
That's kind of what I did: bought an inexpensive printer to get some experience (I chose a Monoprice Mini Delta), then upgraded to an MK3S.
leaden slate
The reason I'm getting the ender is my brother in law upgraded to a mk3s 😅
tawdry forge
start small so you can learn how to treat that gorgeous MK3S right
shy kelp
anyone autodesk fan here?
 elfin stag
I use fusion 360 primarily and I've used inventor in the past, ya need help with something?
@shy kelp
violet needleBOT
Adafruit Industries posted 3D Hangouts – Square Pixels and Tractors

This week we take a look at the learn guide for the square pixel led display with the 8x8 neomatrix and feather m4. Demos features black LED acrylic and assembly. Prototyping a new flame torch prop inspired by Nick Dimelow using a GEMMA M0, mini 5VDC fan and the new Adafruit 5...
violet needleBOT
Adafruit Industries posted Duplo Tractor #3DPrinting #Timelapse #adafruit

Every week we'll 3D print designs from the community and showcase slicer settings, use cases and of course, Time-lapses!
Duplo Tractor
Rigitrac
https://www.thingiverse.com/thing:4524179
CR10S Pro
Green PLA
27hr 40mins
X:380 Y:150 Z:110mm
.2mm layer / .4mm nozzle
10% Infill / ...
violet needleBOT
Adafruit Industries posted Square LED Pixel Display
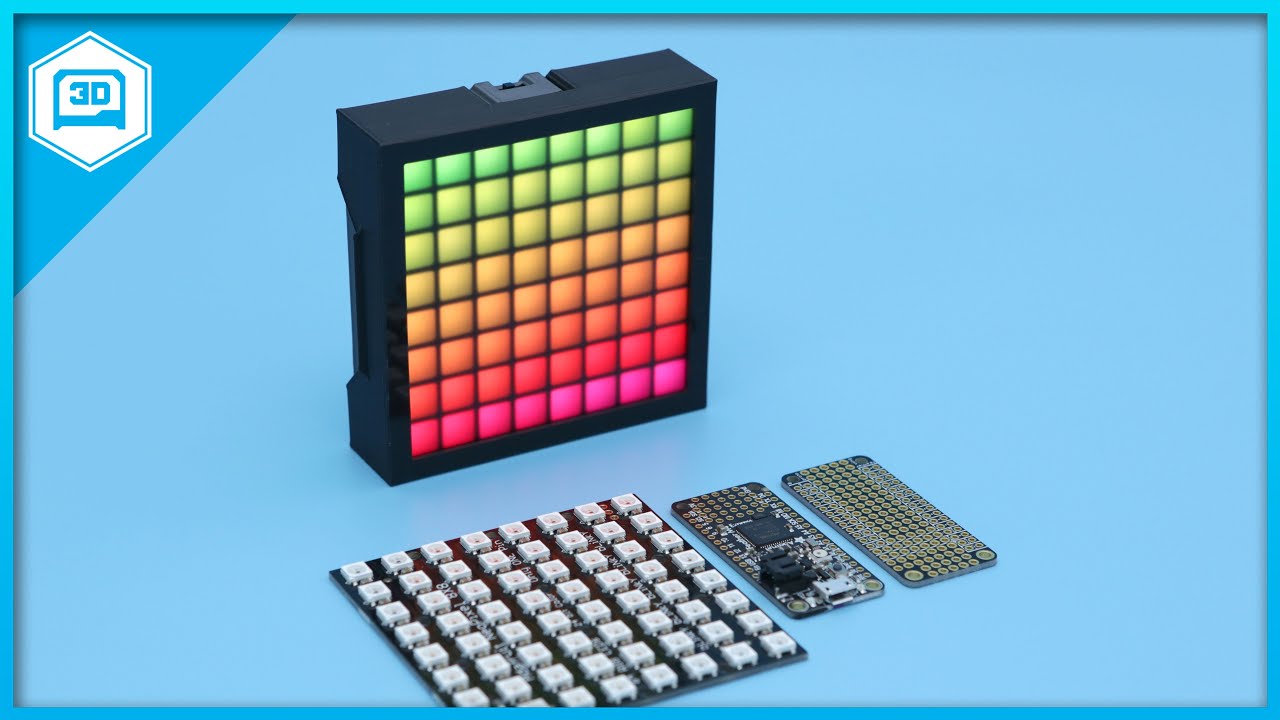
Build a square pixel display with Adafruit's 8x8 NeoMatrix and Feather M4. Use Black LED acrylic and 3D printed grid to create an evenly diffused LED effect. Electronics are housed in an elegant looking snap fit case with built-in on/off switch. LED animations are easily custo...
 ornate raven
Finally getting around to installing and testing a glass bed for my E3 Pro . Bought the bed about 3 months ago. I will say this, the bed is MUCH flatter.
 manic grotto
Fairly inexperienced 3D printer here, I have an Ender 3 Pro that seems to frequently just stop extruding mid print. The printer keeps going but nothing comes out of the nozzle after a certain point. What might cause this/ what can I do to stop this?
empty sedge
@manic grotto your filament could have broken before the extruder
or stripped in the extruder
or your hot end could have clogged (you'd probably hear clicking from the extruder though)
if it's grinding through the filament you need to clean out the extruder drive pulley teeth, and make sure the tension isn't too tight or too loose. This is more likely to happen if you're trying to print too fast, your retractions are too fast, your nozzle temp is too low, or your cold side is too warm, or if the extruder idler idler tension is either too tight or too loose
 silent veldt
Has anybody played with the Anycubic resin printer?
I impulse-ordered one, and I'm starting to have doubts.
In my defense, it was on sale for $200
empty sedge
@silent veldt yeah I think my hackerspace has a photon
 cunning oyster
A friend gave me a Lulzbot Taz 6 to "store" for a while. So, I did my very first ever 3D print last night. It's just the default first print design that auto loads into Cura when it first starts. And so it begins...
cunning oyster
Thanks!
I'm guessing the fact you can see the layers so clearly means something very obvious to most of the people in this channel. I'll get there.
latent coyote
I believe its your layer height
smaller layer height means more layers and smoother transition between them. I have mine set to .15 mm
or .2 mm
yeah there are a lot of settings in cura. Many are not visible unless you click the gear next to the category to find them.
cunning oyster
I suspect there's a lot to learn about all the settings. I just used the spool of "Tough PLA" that was hanging on the printer when I got it.
...and whatever default settings came up in Cura.
I'm generally prone to over-analyze everything before doing anything with stuff like this, but last night I just powered-up and hit GO.
latent coyote
yeah, most of the defaults will work. Looks like the print you did turned out really well. There are some videos on the important ones. Mostly the layerheight, infill, speed, adhesion, and supports are the ones you will tweak the most
i like how granular you can get with the settings.
shy kelp
I wanna Make A Pen Cup For My Pena But I Don't have A 3D printer 😓
 sullen zinc
TFW you realize that some some of your dimensions were placeholders ... after the print has been going for 45 minutes
https://cdn-shop.adafruit.com/970x728/2670-03.jpg It's a stand for a couple of PCBs, including this "perfboard". I love how no two of the holes even seem to have the same distance from the board edge.


Mounting holes distances: 82mm x 62mm / 3.2" x 2.4"
doesn't quite seem to cover it
https://www.adafruit.com/product/2670 I'll muddle through though

Make your next project as you imagine it with prototyping perfboards that can easily be cut with scissors like these Bakelite Universal Perfboard Plates!
We wanted a ...
karmic brook
I remember designing a stand for a Trinket and realizing the holes weren't in a rectangular arrangement, but at least not like that.
cunning oyster
So, anyone else seeing problems on Thingiverse?
agile finch
I saw their Twitter said they are having issues.
cunning oyster
Darn. 2nd night with a new printer, and now this...
agile finch

MakerBot's Thingiverse is the community for discovering, making and sharing 3D printable things.
Tweets
42572
Followers
104627
 Twitter
Maybe check grabcad
cunning oyster
Thanks. I'll do that. That's a new one to me.
 rare comet
anyone found a pygamer 3d printed case that fits the little carrying case from the kit? so far I've printed two of them but they were too big to fit. I'm thinking I think need to recreate the acrylic design to be able to fit: https://www.adafruit.com/product/4238

You've got your PyGamer, and you're ready to start jammin' on your favorite arcade games. You gaze adoringly at the charming silkscreen designed by Ada-friend ...
empty sedge
carrying case?

UPDATE August 6 2019 Version 2 is 2mm thinner and includes an updated bottom half with cutouts for female headers.
Fit Enclosure
This enclosure is designed to secure the PyGamer PCB without any hardware screws. The PCB rests on bottom half with built-in standoffs. The top half...
rare comet
yes doesn't fit into the case sadly

Please note: you may get a royal blue or purple case with your starter kit (they're both lovely colors)What fits in your pocket, is fully Open Source, and can run CircuitPython, ...
the one that comes with this
i bought it all separately because the acrylic was out of stock for a while
was planning to just 3d print something

that one wont fit either

simple case 2 for Pygamer(audio Vol+)
This thing was designed based on "simple case for Pygamer" (thing:3654450).
A variable resistor adds the ability to adjust the speaker volume.
However, a dummy plug must be inserted into the earphone jack.
Therefore, the earphones can not ...
neither that one
and it's the tightest
the case basically has zero room for extra width
I honestly like the Acrylic design. Some see through 3d filament would be nice
would be nice if i could perhaps somehow find the design files for the acrylic to print them
empty sedge
the PCB and snap fit case design files are available
rare comet
maybe the pcb design would help?
ah i see there is a 3d model of it
oh wow the acrylic case design is there too
thanks
rare comet
with a little work i was able to convert the adobe illustrator files to extruded prints so we'll see how it goes in a few hours lol
rare comet
Came out extremely well. It still amazes me how precise it lines up! It even had a pleasant snapping together feel with tiny bit of force.
The back face I will have to reprint at 3mm as well because 1mm it's much too flimsy.
I will upload the completed STL files to thingiverse once it's all complete.
sullen zinc
I just learned that github's svg viewer can be embedded in arbitrary web pages! <script src="https://embed.github.com/view/3d/arnholm/acdocs/master/stl/csg_wikipedia.stl?height=300&width=500"> </script>
pardon the slightly mangled paste
leaden slate
I got an ender 3 yesterday. Flashed the bootloader, did the firmware upgrade and added a bltouch. Had a little trouble until I realized the bltouch has its own z offset. This is a first layer test and I think it looks pretty good.
I also added a pi 4 with octopi and it's working great
leaden slate
It has a .6 nozzle and I'm not brave enough to change it yet, what are the advatages of a smaller nozzle?
empty sedge
thinner bead widths mean slightly sharper corners and slightly better details at the expense of print time
rare comet
love my ender
 jaunty canopy
same here methods
cunning oyster
Did my first ABS prints yesterday, and the results were not super. I started with this Clue case, and you can see what's going on. I actually aborted this print.
Started over using a raft, and it was better, but the bottom was still kinda wonky. Still learning. A lot to scroll into in terms of materials, temps, etc. Still fun.
lilac patio
Abs can be difficult
empty sedge
@cunning oyster looks like you need a slightly warmer bed or less cold air blowing over your printer
cunning oyster
Yeah, I was thinking I'd tinker with the bed temp
empty sedge
@cunning oyster also I've seen several taz PEI sheets get big bubbles under them because of the thermal cycles required to print ABS
cunning oyster
I've also been told that ambient temps around the print surface can have an impact
empty sedge
so if you print a lot of ABS expect to replace the entire print heater/glass/pei assembly or have to remove the PEI
cunning oyster
Thought I'd try running an ABS print with the cover on
Good intel...
I don't need to print ABS.
I'm just learning with the materials I have on hand.
empty sedge
https://forum.lulzbot.com/t/taz-5-pei-plate-bubbling/1658/10 <- bubbles like that. They get bigger and bigger over time

Lulzbot
On my TAZ 5 the bubbles aren’t between the heater and the bottom of the glass bed, they are between the PEI and the top surface of the glass bed, because you can feel them. Mine have been getting more numerous and larger. Mark -
cunning oyster
Yikes. Ok. I'll keep an eye out for that
empty sedge
I wonder if it will be less of an issue with lower humidity. it seems like water gets in there, when you heat it up it evaporates into a bubble and warps the PEI and when it cools somehow more water gets in there
 graceful kite
what would you recommend for abs (brand wise)? Time is very much of the essence here.
empty sedge
@graceful kite I haven't had bad ABS in years. I've had good luck with other plastics from overture, and hatchbox sold through amazon that I'd expect their normal ABS is fine. ( metal filled, or glow-in-the-dark aren't normal ABS)
graceful kite
unfortunately, due to the pandemic, everything seems to be delayed. oh well.
empty sedge
@graceful kite do you have a local fry's?
or micro center
last time I went to the fry's around here they still had ABS they hadn't sold yet
empty sedge
call the fry's at least when they're open. that ABS has been on the shelves for years and is probably still fine
violet needleBOT
Adafruit Industries posted 3D Hangouts – Torches, PCBs and Skeletons

This week we take a look at the learn guide for the LED torch with the gemma m0 and neopixel jewel. Demos features silk flame construction and parts assembly. Prototyping a new PCB holders for STEMMA boards. Timelapse tuesday showcases a skeleton tea light. No Make Alerts this...
violet needleBOT
Adafruit Industries posted Skeleton Tea Light #3DPrinting #adafruit #Timelapse

Every week we'll 3D print designs from the community and showcase slicer settings, use cases and of course, Time-lapses!
Skeleton Candle Holder
magiczztab
https://www.thingiverse.com/thing:1342681
CR10S Pro
Glow PLA
5hr 24mins
X:187 Y:180 Z:97mm
.2mm layer / .4mm nozzle
10% I...
crude kettle

Enjoy your ride to #ELEGOOMars2Pro🚀,
Our brand new Monochrome LCD 3D Printer with 🔹3 times faster printing speed per layer and 🔸4 times longer durability on the screen.
Besides the super-detailed printing effect we always pursue, the 💎COB UV solution inside provides ultra-u...
Anyone excited for the new mars?
Elegoo said it is coming sometime in September.
violet needleBOT
Adafruit Industries posted NeoPixel LED Torch
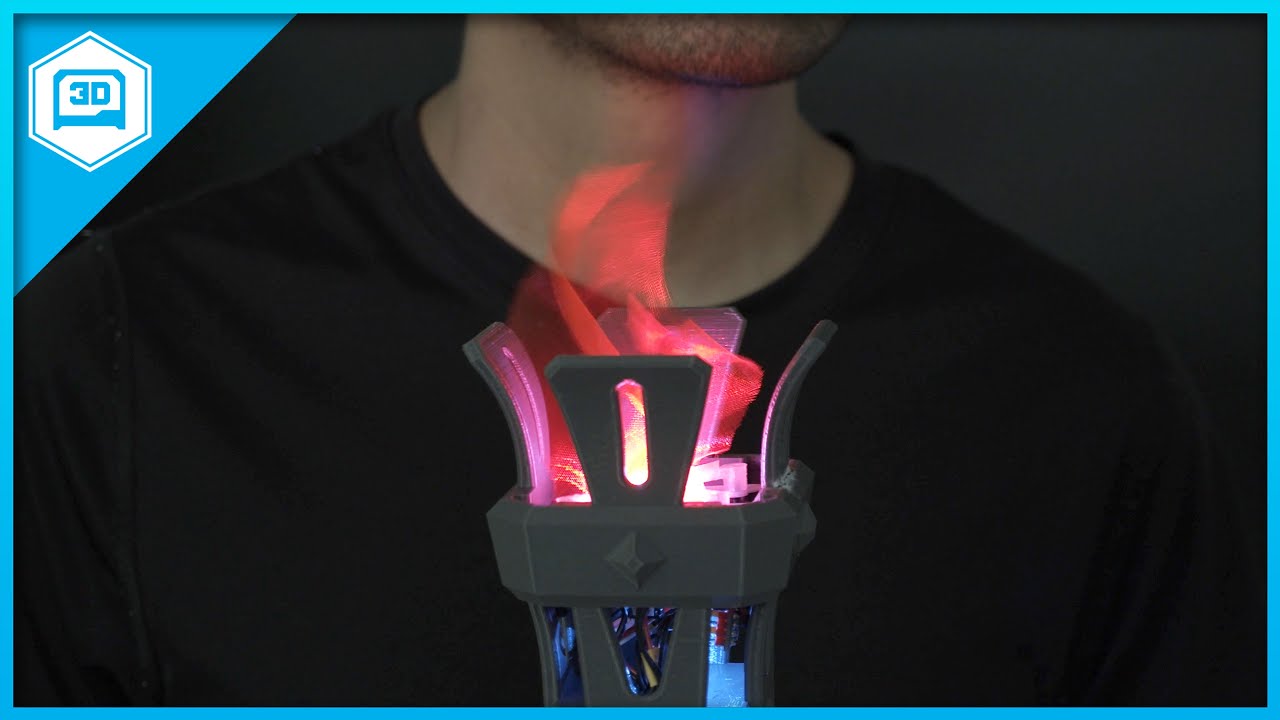
Build a 3D printed prop with a realistic looking flame! Use NeoPixels and GEMMA M0 to create a faux yet realistic looking torch. Hidden inside the torch is a mini fan and silk fabric. Use CircuitPython to easily program GEMMA M0 and NeoPixels.
Learn Guide
https://learn.adafru...
 humble hull
Upgraded my hotend... Mistakes were made
Any advice for cleaning off the excess PLA?
agile finch
I use a paper towel when it’s hot. But don’t burn yourself. 200C is super duper hot Hot HOT 🔥
humble hull
Ohhhhh now I remember what happened. I was having a hard time getting it tightened without also twisting the whole block, so that's probably why I didn't tighten it down enough
at least I got hte PLA cleaned off
figuring out how to get it tightened up again is a problem for Future Me, after I finish my tea
humble hull
Okay, cleaned and reassembled. Something's still not right, though. Running a bed leveling test and things are squiggly
empty sedge
@humble hull if your hotend is like the e3d it needs the heat break threaded deep enough into the heater block that the nozzle bottoms out on the heat break, not on the bottom of the block
if you didn't get that right before it would explain the plastic leaking out of the threads and why you weren't able to get it tight
and why it's higher now
humble hull
I think I got it all tightened down now. Fingers crossed
oh, it's higher now and that's the problem?
empty sedge
to tighten the nozzle correctly you should get it maybe finger tight when cold, then heat up to your max temp and tighten a bit more than finger tight with pliers and a wrench on the heater block
humble hull
yeah, that's what I did this time
empty sedge
yeah, if you didn't have it fully correctly threaded on both ends before now your nozzle should be higher up
humble hull
took it apart so that I could hold the block really tightly with a face clamp and screwed it in as much as I could while hot
I thought I leveled the bed correctly
Hrm
then again, I was also messing with the z offset a bit because I added a glass bed. I sholud probably remove that
I forgot I did that until just now
humble hull
Cable and spool management on this thing are driving me absolutely bonkers
Much better
humble hull
Eyyyy it's a thing! Can clearly use more tweaking but it works again
as far as calibration of the calibration cube, everytihng's dimensionally accurate enough for me (and more importantly, consistent across all axes)
corners are bumpy but the interwebs can probably give me some clues
...real dumb question time. I'm printing on the side of the glass plate that has some kind of texture coating on it, because it's the one with the writing and the writing only goes the right way if that side is up. But don't you normally print on a smooth surface? Anyway the PLA doesn't really want to come off cleanly
empty sedge
printing PLA directly on glass isn't something I'd recommend. it's easy to have your part stick well enough to pull shards out of the glass
humble hull
huh
empty sedge
petg can too
humble hull
impressive
this is why people use tape on the glass?
I just went with glass because it seems to be the typical way to ensure a really flat surface
empty sedge
blue tape, kapton, pet tape, white glue, hairspray, PEI yeah
humble hull
oh the hairspray is to make it stick less
I thought all those were to make it adhere better
empty sedge
it's both more and less
you want a layer of something so when the part shrinks it can come off
humble hull
got it
all right, I'll hit it with whatevre of those is closest to hand next time I print
empty sedge
just use the textured side
humble hull
I am
humble hull
Weird. I did a temp tower and the cleanest print was at 190. Maybe my thermocouple is off
karmic brook
For a bridging test like that, it could be correct.
humble hull
But they all look reasonably decent up through 200
humble hull
all right, next calibration: retraction!
although tbf I'm not usually a fan of 3D printed finishes and only use 3d printing to get a rough shape that I can clean up and make a mold of, so it doesn't matter all that much
but hey, it'll help me understand the printer better
calibration is clearly needed, anyway
even if none of hte things I expect to print in the near future would be prone to retraction issues
dunno if the blobbing is also a retraction issue, or if it's just the stringing, but I'll get the stringing sorted out and see if that affects the blobbing
knotty laurel
Anyone have recommendations for favorite 3D printing services in kind of the Protolabs style... friendly prototype quoting with a good variety of fabrication technologies?
 undone nymph
Hi....Just a stupid question: I got to update the printer firmware but I have no laptop. My pc is in a different room. How do you organise these things? Is it possible with my octo print pi?
leaden slate
this is the side of the print that was touching the bed, what would cause those lines?
agile finch
Could the spool not be unwinding smoothly and cause under extrusion?
empty sedge
@leaden slate your first layer is too low and the extrusions are buckling as more plastic is laid down
@undone nymph yes you can for example run arduino on the pi over ssh with x forwarding but if you have to ask how it's probably not worth the effort
[or install platformio and run platformio run -t upload if your firmware can work with platformio]
undone nymph
Thanks. I'll take a look for the Arduino packages. I should be able to run these from cli. I don't want to have a JVM on my pi
(more a religious thing)
empty sedge
@undone nymph arduino requires JRE
undone nymph
All the components? Well, then I probably just drop my java-antipathy 
empty sedge
or you can check out platformio
undone nymph
I'll check that out in any case. La
At time I played with Arduino I made it a makefile project so I could use it within code::blocks ide
That platformio has Vs code integration
And I really like VS code since Covid19
elfin stag
VS code with platformIO has been my goto these past few months, much easier to use than the default IDE
If only it weren't such a pain to get setup
undone nymph
I managed, that GitHub compiles my Arduino sketches. Therefore I need a new challenge ;)
Next big dream: openscad integration in Vs code
 brave mica
I was given this very helpful, clearly legit and 110% not a malware vector popup/redirect when visiting manufactur3dmag.com:
just to be clear, the above is sarcasm and the page in the screenshot is CLEARLY an attempt to get the person viewing it to install software or click links that will do harm of some manner
@undone nymph not sure if it's what you're looking for but there is an octoprint plugin for updating your firmware, though you have to provide the .hex file
edit: nm, it looks like you've got it covered
@frail hare you're using actions to compile your code I assume? If someone hasn't done it already, it would be super helpful for someone (other than me 😅 ) to set up a CI system that automates builds of Marlin or whatever for a ton of different printers with common config options
undone nymph
Yes, the only challenging thing is downloading proper drivers etc. But I think CI for Marlin is doable using GitHub actions
Is there no external CI? @brave mica
brave mica
what do you mean by external?
karmic brook
If you like parametric modelling and mathematical descriptions, OpenSCAD. If you like parametric modelling and a visual interface, Fusion 360. For organic shapes, Blender. If you just like doodling, maybe something like SketchUp or Tinkercad?
jaunty canopy
I use tinkercad only because im procrastinating learning fusion
empty sedge
so of the things madbodger listed you could make that in:
- fusion
- blender
openscad could but you'd have an interesting time getting those curves
 cyan heart
Let's get Open AI GPT-3 to take in technical docuemnts with dimensions and output 3D printed design files
 full sand
for over a decade i've been saying i'd get into 3d printing once the more serious machines (made out of metal) reached affordable prices.. and this week i suddenly realize it's within grasp
cyan heart
@full sand Link?
jaunty canopy
@full sand metal machines have been around for like 5 years
i got mine about a year ago
full sand
i ordered mine today with all spices for around 250€ shipped
i used to say i would get into it when i can get everything i need for no more than €300 and here we are 🙂
@cyan heart it's the Creality3D Ender 3 Pro sale on aliexpress right now with free EU shipping
cyan heart
what can i print?
full sand
im gonna start by printing the improvements for the printer itself 😄
seems like a fun way to get started
iron remnant
OK, for a second I thought you were waiting for a machine that would print metal, not one that was made out of metal.
cyan heart
oh me too. it doesn't print metal?
full sand
a lot of the printers i've seen on lanparties have been made out of wood and plastic and often seemed lacking rigidity and polish
empty sedge
my wood-framed mendel 90 is pretty rigid. it's always been an option to be plentry rigid and cheap but the commercial machines have prioritized cost
full sand
and even those ones used to cost more than what aluminum ones cost now
(assuming you didn't have somewhere to print parts)
karmic brook
There are a few ways to print metal. There's some filament available that works like PMC, you print it then sinter it into the finished object. Another way is lost PLA casting.
sullen zinc
Is anyone able to load thingiverse? e.g., https://www.thingiverse.com/thing:2209964 seems to have content for a moment and then the whole page is replaced by the text "something went wrong". verified in firefox (but firefox has a LOT of blocking scripts via ublock origin) and a fresh-profile chromium (does NOT)

YouTube: https://www.youtube.com/watch?v=jy7a-z19UEQ
NEW UPDATE April 8, 2016 – Added new parts for Adafruit 2.4" TFT Feather Wing
This is our 3D printed case for the Adafruit Feather. It’s for anyone looking to put their project in a box. It’s a multipurpose enclosure, so you...
(yay I found a local copy of those files)
sullen zinc
https://www.thingiverse.com/thing:2209964 eventually started loading
YouTube: https://www.youtube.com/watch?v=jy7a-z19UEQ
NEW UPDATE April 8, 2016 – Added new parts for Adafruit 2.4" TFT Feather Wing
This is our 3D printed case for the Adafruit Feather. It’s for anyone looking to put their project in a box. It’s a multipurpose enclosure, so you...
sullen zinc
I wonder -- in designs like this, why use the clamping screw instead of a setscrew where the rods enter the motor mounts. Especially as there's no provision for a captive nut or threaded insert that I can see, it seems likely to work poorly.
(the upper grey parts are smooth rods, the lower cyan parts are threaded rods) https://www.prusaprinters.org/prints/32878-drawing-machine-and-vinyl-cutter-high-precision-co
empty sedge
@sullen zinc setscrews don't constrain the direction of the rod as much as clamping does. Also they can mar the rod which would suck if you're using bushings and ever have to take apart your machine
sullen zinc
makes sense, thanks!
would a provision for a captive nut make sense in this situation? I think it would not be difficult to add to this type of design. I did read the text further and it recommends tapping the hole. I haven't tapped any 3d printed holes yet..
empty sedge
sure, the mendel 90 rod holders have a captive nut for example. Even with it, you need to be careful to not tighten too much or the printed part will break


GitHub
A RepRap Mendel variant using sheets for the frame instead of rods - nophead/Mendel90
GitHub
A RepRap Mendel variant using sheets for the frame instead of rods - nophead/Mendel90
humble hull
My 3d printer absolutely loses its mind at this one point in my ball and socket joints print. I suspect I made bad decisions with my model somehow
probably need supports somewhere
An Attempt Was Made
my attempt at benchy was also fail, possibly something to do with retraction?
karmic brook
I know that feel
humble hull
ouch
someone on /r/fixmyprints had exactly the same problem and "fixed" it by replacing the extruder with a better aftermarket one
this is poor capsized benchy on default settings
on the other hand, my first fit tolerance test came out just fine, so... shrug
not sure what's happening
well, mostly fine. a couple blobs
karmic brook
Mine turned out to be an adhesion issue.
humble hull
Huh. You mean between layers, or to the build plate?
empty sedge
yeah usually that's caused by the part coming off the build plate
looks like yours hit the print and lost steps though
humble hull
hit the print? you mean the nozzle just smacked into one of the printed parts? (or are you talking to madbodger)
empty sedge
yeah, the nozzle hit the print
it looks like that happened because the small contact patch wasn't enough
humble hull
there are some spots on benchy and another thing I printed where it looks like the layers didn't stick to each other either
empty sedge
but it can also happen because overhangs in PLA tend to curl upwards if they don't get enough cooling
yeah, the vertical parts of the benchy are a lot of small retracts which might also be a problem with your printer
humble hull
I assume you're not referring to the brim when yo usay the small contact patch, right?
I can try printing just one of the joints, which should at least keep it from smacking into anything other than itself... I hope
ah well, these sorts of things always need calibration
empty sedge
you might also try setting a z-hop distance
which will lift the nozzle up during travel
humble hull
and the stock extruder on the enders seems t obe one of the things people usually replace immediately if they want to do upgrades
empty sedge
prusa uses 0.6mm in his profiles for i3 mk3s
humble hull
hm, that sounds like a pretty straightforward thing to try
might as well
poor thing. it does its best. it just has to deal with my noob skills
humble hull
my extruder also seems to be having a bad day
serene quest
Ever since I bought my ender 3, there was a tiny dent in the bottom aluminum extension that the bed rides on, causing the bed to move slightly downward at 2 points near the start and the end of the bed, where could I buy a replacement aluminum extension for the y axis? the 2040x330 one
empty sedge
I wonder if the openbuilds v-slot is a drop-in replacement
serene quest
problem is the original v-slot has multiple threaded holes in the v-slot and it would be extremely difficult to replicate them by hand precisely
 quasi scaffold
What if you flip the aluminium profile over? wouldn't the hole be less problem?
serene quest
I thought of that, but the screw holes aren't mirrored
quasi scaffold
only holes for screw heads should be missing - you could drill them, they dont require precision
quasi scaffold
I am not familiar with it
 silk mango
anyone on who can help me getting two CD Drive stepper motors working on an UNO with a HW-130 shield using Universal G-Code Sender?
empty sedge
@silk mango I don't think grbl works with that shield
 white spindle
I'm interested in possibly learning some 3D printing
karmic brook
You're in the right place, there are several people here doing things with 3D printing
white spindle
Reason why my interest is because a cosplayer I watch, to top tier Patrons, is offering some of the files he made to build some of his stuff via 3D printing
karmic brook
Ah, that makes sense. 3D printing is really useful for many cosplaying items.
white spindle
Mmhm
I was told if the files are provided, its relatively easy to print it
Thing is, idk if the size of the printer will affect it at all
karmic brook
The size of the printer is how much room the printer takes (need room for moving parts too). The size of the build volume is the maximum size of pieces you can print.
Many larger items are printed in pieces and assembled later
white spindle
Right
I think two of the things provided is a Protogen helmet frame, and the inner visor, which I can tell are gonna need to be in pieces
I can link pics to show
karmic brook
Basically if you know the sizes, you can figure out how much build volume you would need.
Some people get hung up on big build volumes, but it's much easier (and cheaper) to build a small rigid frame than a large one, and realistically most of the stuff we print will fit in a small volume (huge prints take many days to run)
The main drawback I see to the Prusa Mini is it uses a Bowden drive, so it's not suitable for printing flexible filament (like TPU).
white spindle
Don't you have to put the Prusa's together?
karmic brook
The Mini comes in 3 pieces and is easy and quick to assemble. The MK3S is available as a kit or already assembled.
I bought the MK3S in kit form, it took me a couple of evenings to put together. I did end up buying a miniature torque wrench for the job but that's because I'm a bit of a perfectionist.
white spindle
There anything bit bigger then that?
karmic brook
Bigger than the Mini? There's the MK3S.
white spindle
What's the build volume for that?
karmic brook
9.84 x 8.3 x 8.3 inches
white spindle
Hm, doesn't sound too terribly big, though it may work for some stuff
karmic brook
Yes, that's why I pointed out people normally print large objects in pieces. Bigger print volumes get right out of the "somewhat inexpensive" territory. For example, a Lulzbot Taz Workhorse is $3000 and gets up to 11.02" x 11.02" x 11.22".
elfin stag
I have a jgaurora A5 that has a 12x12x12.5 build volume and it's only ~$400
white spindle
Ooo
elfin stag
Decent printer, but not a huge community like a lot of other hobbiest machines
white spindle
So not much help in the case of troubleshooting?
elfin stag
There's definitely some, the wiki is pretty good tbh
But there aren't a lot of parts on thingiverse
It's biting me rn because I'm converting to a skr 1.4 and E3D V6, but I can't find parts to mount everything
empty sedge
I'm going to keep being that guy
@white spindle If you want a beginner friendly printer that's reliable and has a good (but not giant) build volume, get a prusa i3 mk3s (the kit is fine)
yes, it's like twice as expensive for the kit than for a creality or something, but the auto bed leveling, lost step detection, excelent slic3r profiles in prusa slicer, removable flexible steel sheet and dual-drive extruder make it much more reliable at getting good prints than the cheaper machines. It won't need any upgrades to print well and the instructions and support are excelent on top of the good hardware and software
the cheaper creality and other brand printers do work, but often need tweaking to work reliably. Tweaking printers is a fun hobby, but if you want a less frustrating reliable workhorse get the prusa
empty sedge
yeah, the creality machines are popular and cheap but even in this channel people keep asking why they can't print faster, why the plastic is jamming, what to do about manufacturing defects (poorly drilled Y plate, dented Y extrusion). They are the ones I was comparing to
white spindle
Oh
empty sedge
all of those are solvable issues but you shouldn't have any of those problems with the prusa was my point
white spindle
I see
karmic brook
That's why, when you originally asked for a "really good" 3D printer, I suggested the Prusa. Since you also said "somewhat inexpensive", I suggested the Mini which is cheaper, easier to assemble, and still a really good printer.
white spindle
Ah
Like I said, idk the size of the helmet frame, someone said you'd need like 350×350×400 or something like that, but idk if it's for doing it all in one go or something
I think?
karmic brook
I'd be surprised if any of the pieces were that large. Printing something that size all in one go would be a multi-day process and I would be doubtful of success with an inexpensive printer at that size. If that's the case, you're right, sending it out to a printing bureau is probably what I would do.
white spindle
Would it be pricey to have someone print it for me?
karmic brook
I really don't know, but once you have the files, you could get quotes from a few services and see if they're reasonable. If you don't have the files yet, you might be able to get estimates based on the expected size.
white spindle
Yeah, I mean this is something meant to be worn around my head
karmic brook
Yeah, you can probably get the rough dimensions fairly easily.
white spindle
If I commissioned it out I could have any customizations done too
white spindle
I have a picture of roughly what the object is I'm after
knotty laurel
Can anyone recommend a laser-cut service? I need a specific type of acrylic, so I'd probably have to send them a piece to cut. Thus I'm looking for more of a small, flexible shop rather than going through Ponoko, etc.
karmic brook
I like Pololu for custom laser cutting, they offer stock acrylic, or you can ship them your material for cutting. They're nice folks, too. https://www.pololu.com/product/749

Our laser cutting service is ideal for making custom parts out of various sheet materials. Pricing starts at $25, and most orders ship in three business days. We also offer expedited services, up to our same-day service; local customers can pick up parts the same day, or hav...
Alternatively, if you have a local hackerspace, they might be able to do some cutting for you.
knotty laurel
Thanks! I knew of them for robotics parts, but didn't realize they did laser cutting too... excellent! 😁
iron remnant
Then, I guess they are a cut above...
So, question: I want to make for 3D printing a snap-fit joint kinda like how the old construx toys were built. Without printing fifteen different versions, are there any good "rule of thumb" rules for how flexy a print is going to be?
tight cove
Is there a setting in cura so I can print in "vase mode" but use a support blocker to print the first 20 layers normally?
empty sedge
@tight cove I highly doubt it
elfin stag
Iirc you can set how many bottom layers a part in vase mode has
 hasty nest
I have some small holes in a print, I would like to fill them in, a lot of people say to use wood filler which I don't have, does someone know of another good filler?
karmic brook
Epoxy works, so does ordinary auto body filler. Model cement would do.
white spindle
Yeah I think I might wait and see if I can get access to a 3D printer at a community college I may be attending
violet needleBOT
Adafruit Industries posted Curved Collapsing Dagger #3DPrinting #timelapse #adafruit

Every week we'll 3D print designs from the community and showcase slicer settings, use cases and of course, Time-lapses!
Curved Collapsing Dagger
the_qsr
https://www.thingiverse.com/thing:4567504
CR10S Pro
Silk Black PLA
14hr 58mins
X:20 Y:150 Z:558mm
.2mm layer / .4mm nozzle...
violet needleBOT
Adafruit Industries posted 3D Hangouts – BusyBox, Stemma and Collapsible Props

Visit the Adafruit shop online - http://www.adafruit.com
LIVE CHAT IS HERE! http://adafru.it/discord
Adafruit on Instagram: https://www.instagram.com/adafruit
Subscribe to Adafruit on YouTube: http://adafru.it/subscribe
New tutoria...
empty sedge
saved a lot of trouble by the fan speed detection on prusa i3 mk3s again: printer shut down before clogging the cold side
empty sedge
eh, it's probably time to add bltouch to my mendel 90
 jaunty void
I have a bluetooth module: https://www.amazon.com/gp/product/B0762FF6MS/ref=ppx_yo_dt_b_search_asin_title?ie=UTF8&psc=1: that I would like to connect to an iphone, what is the best library/resources to learn how to connect them? The ones I've found are kind of vague
empty sedge
@jaunty void maybe ask in another channel?
violet needleBOT
Adafruit Industries posted Fusion 360 Tutorial – Align and Capture Screws

In this tutorial we'll take a look at adding screws to designs using the align and capture position features in Fusion 360.
Learn Guide
https://learn.adafruit.com/busy-box-interruption-sign/
YouTube Project Video -
https://youtu.be/JvqsdFKqftU
Fusion 360 Share Link
https...
brave mica
If anyone here has experience upgrading their printer's main board, please @ me; I'm doing some research and am trying to get perspectives on what the state of things is with regards to main boards, stepper sticks and 32 vs 8-bit boards
empty sedge
@brave mica yes
brave mica
@empty sedge 👋
empty sedge
what are you hoping to change?
brave mica
I don't have any specific things for myself, just trying to get a sense of what people like, don't like, wish was available, etc.
I've only just recently started looking into board upgrades so there is mountains of info to grok to get a sense of these things. My end goal is to see what hardware I could work on to fill any unmet needs
empty sedge
the bigtreetech SKR boards are probably the latest fancy hobbyist boards
I don't think panucatt has any new boards recently
duet is what people building fancy toolchangers use
good luck. There's a lot of competition in 3d printer accessories right now that make it difficult to have enough margin to stay profitable
empty sedge
huh, now that I think about it that monster 7 axis smoothieboard I built could run marlin now
brave mica
@empty sedge thanks, that's about what I was looking for
 junior bloom
Anyone know of any decent designs for a reduction gearbox for a servo? smaller the better.
karmic brook
Servos already have a reduction gearbox, do you need something like 30° of swing very slowly or what?
junior bloom
yeah sorry it is a continuous servo just want to rotate something very slowly
karmic brook
The gearbox from this might be adaptable https://www.adafruit.com/product/4641
The first step in a robotics project is to get a motor spinning. Once you've done that you quickly learn that not all motors go the same speed, even if they are the same part number! ...
junior bloom
Thanks I'll take a look at it
empty sedge
@junior bloom pololu has a ton of gear motors with various reductions
tight cove
I have an Ender 3 Pro with a SKR mini e3 v2 setup with octopi. When i cancel a print there is a long delay before it actually cancels, does anyone know why this happens? I click cancel, octoprint says its cancelling, but the printer is still printing like normal and about 10-60s later it will actually cancel
empty sedge
@tight cove marlin has to empty the buffer of queued-up moves
full sand
how is the SKR mini with ender? wish i had known about it before i went and ordered the crealitys simplified version of it :/
tight cove
@full sand ive got no issues with mine, its working great. The steppers are silent, I can print at slightly faster speeds now, from about 45mm/s to 60mm/s I could go higher but I start to loose a bit of quality
definitely worth the upgrade
full sand
ill hopefully get same improvements from cralitys version of the board, it's just missing some of the connectors that the SKR has :/
tight cove
the specs look similar so it should fine
full sand
SKR has additional neopixel and tft support compared to crealitys board
but then again, i'll probably just end up using Octoprint and installing more advanced led lights with esp8285 running Tasmota
because i have a server PC right next to the printer 😛
humble hull
Ok guys, Dumb Question O'Clock
I'm replacing the bowden tube
and this metal hotend doesn't need the threaded fitting, apparnetly
so I think it only needs the plastic piece, but I don't know how to acquir eone by itself or remove it from the fitting
iron remnant
Well, thread carefully.
 cerulean anchor
Hey guys, I am loving this discord so far. It's amazing how people just come here to answer questions to help educate others. Anyways, I wanted to replace my nozzle on a sovol Sv01 to start using other filaments. I want to try printing carbon fiber with pla soon. Does anyone know if the nozzles on 3D printers are just universal to an M6 thread?
empty sedge
@humble hull it should've come with the part. For e3d hotends they're this one https://www.filastruder.com/products/bowden-couplings-all-types?_pos=2&_sid=5a4b592ed&_ss=r&variant=32354109764

Filastruder
Price is per single coupling. All items in stock. All types of couplings and adaptors available on this page. Scroll down for more details. Embedded Bowden Couplings - For Metal These pneumatic fittings have a brass metal body which is designed to provide a simple and cost eff...
humble hull
this is an aftermarket hotend
empty sedge
@cerulean anchor yeah, 90% of the time are interchangeable with the M6 threaded ones in e3d style. Unfortunately I didn't find good enough pictures to be sure
humble hull
ohhh the doohickey is called a "bowden collet". thank you interwebs, I can acquire a replacement now
iron remnant
It's so much easier if you know what to collet.
humble hull
8/10 
cerulean anchor
Alright, I want to make a payload that is strong to impact, so I was wondering what you guys thought about getting Carbon fiber+nylon. Would that be overkill? I also have a sv01 printer, so my max tamp is 260C, but I read you might want to print from 250 to 270. Should I stick to getting a PETG filament or Nylon without carbon fiber? Does anyone know downsides that might be a problem with nylon? or Nylon+Carbon fiber. The payload I am talking about is an eggshape that will eject from a rocket at 500 feet with a parachute, but I want a strong material as a failsafe.
 shadow dagger
Does anyone here woodwork? I have a simple question about a simple project
 brave maple
I'm brand new to 3d printing and I have my Ender3 setup. I've been trying to do a test print and running into some issues. I picked something small so it would finish quickly and it prints maybe 7-8 layers then the whole thing starts sliding all over the bed and messes it up.
empty sedge
@cerulean anchor Just nylon would be most durable, but it would also be a little flexible. If you want even more durable you can print in one of the many TPU filaments but that becomes even more flexible
@brave maple what does the bottom of the print look like? Does your printer have a heated bed?
brave maple
It does have a heated bed, picture of the bottom coming shortly. I also tried something much bigger just now (a filament arm) and it looks like the piece warped? sending pics of that too
empty sedge
your nozzle is too high above the bed on the first layer
brave maple
So I need to keep playing with the leveling to get it tighter?
humble hull
@brave maple also I've heard that the filament that comes with it is awful and you will get better results printing literally anytihng else
empty sedge
sure, that would do it
brave maple
I am using what came with it but I have another spool so I'll try that too
empty sedge
yeah, PLA doesn't usually shrink that much to come off after a couple layers like that
brave maple
Thanks!
empty sedge
I don't have a photo handy to share, but I adjust the bed so the infill beads get pressed completely together, but not so far that they start pressing under each-other. When you have the nozzle too low the infill line going say northwest will press under the line going the opposite direction so on the bottom of your part you will see the infill lines aren't all the same width, but toggle between too narrow and too large
and if you keep going too low past that the nozzle will have one giant squished bead or will stop extruding entirely because the pressure is too high
 willow wren
@brave maple I also recently got an ender 3 v2 and there are two things I will suggest. 1) make sure the bed does not have any movement, mine had that problem and I had to adjust the rollers to prevent any movement on the heated plate, 2) thing is what others have suggested level your bed for this I suggest make the printer got to the home position (there is a menu option for this), disable the steppers (menu option as well) or turn it off then make adjustments on each corner until you can barely are able to fit a sheet of paper between the bed and the nozzle. If in doubt look for an ender 3 leveling tutorial in youtube, there are plenty of resources for your machine. I hope it all works out for you and happy printing!
brave maple
Still not perfect but much better results today thanks everyone who offered advice 🙂
 round wyvern
My dad said I could get a 3D printer for my birthday as long as it's not over $400. Which one should I buy? I'm just going to use it for personal projects and for Science Olympiad.
also any recommendation on filaments?
I've only used the 3D printer in my school a few times, and it's an Original Prusa i3 MK3S. I'm also relatively new to engineering.
Also, I prefer filament over resin, but change my mind if you think resin's better.
I asked my friend and he said, "if you want a large print space, the cr10 ($380) / cr10s ($395) are good options. otherwise, he said the anycubic i3 mega s ($240) is the way to go"
wide blade
I don't have any recommendations, but keep in mind that you'll have to buy filament etc on a regular basis. If your budget is small, perhaps include some of that in the $400 too.
empty sedge
@round wyvern prusa mini? but the lead time is kind of long
round wyvern
I'm not sure about the mini. I think it might be too small for some projects.
empty sedge
sure, but unlike the other machines you can buy for that price you get:
- removable spring steel build plate with PEI (get the smooth one if you're printing PLA, textured for petg)
- auto bed leveling
- lost step detection
- power loss recovery
the filament sensor on the i3 mk3s has saved me dozens of times too but it looks like the mini doesn't have that built-in yet
I'd say buy a i3 mk3s kit but that's outside your budget
I've been frustrated enough by the cheaper printers being "okay once you work on them for a while". the i3 mk3s is a workhorse
 sage bear
Creality Ender-3 V2 works great out of the box. Bed leveling is manual. If you're willing to learn a bit, you will have good results quickly.
I've got a CR-10S with thousands of hours on it over 2 years and I've been extremely happy with it. I've used a Prusa i3 Mk2. I got the same print quality.
empty sedge
a friend of mine bought an ender 3 and the Y plate holes are too far apart to set the rollers tight enough. ALso someone in this channel said their Y rail was dented or bent in the past 2 weeks
sage bear
That's not good.
empty sedge
yeah, prusa mk2 didn't have new control board with trinamic drivers, spring steel sheet and a bunch of other stuff
oh, the dual drive gears in the mk3 extruder work very well
sage bear
I wonder if Prusa is working on a 300x300mm build volume printer yet. That's the minimum for me. I print things that size all the time.
empty sedge
300mm build height must take forever
sage bear
yeah you can get some 30+ hour prints
empty sedge
I've had 30 hour prints that are under 200mm tall
sage bear
well I was talking x/y
iron remnant
I mean, it does seem like the height of machine development.
humble hull
ugh, my printer STILL stops extruding
switched to a bigger nozzle, changed to capricorn tubing
also I managed to burn myself on the nozzle, so this has been A Day
burns are more painful than they have any right to be
karmic brook
Burns are horrible. I like to put some ice on the burn as soon as I can, on the theory that the ice arrests the injury process (I don't know if it's true, but I act as if it were)
elder oxide
You should run the burn under warm water first
humble hull
if nothing else, it numbs things tmeporarily
of course, there's always the danger of eating my improvised cold pack when it is made of things like delicious frozen blueberries
anyway this printer is driving me bonkers >.<
elder oxide
By putting a burn under running warm water, it more quickly evens the temperature around the burn
Cold water on it would have the same effect as blanching a tomato
iron remnant
You know, a lot of people talk about getting burned from buying the cheap versions of things, but only with 3D printers are you actually getting burned from buying the cheap version.
humble hull
Well... there are a lot of cheap electronics that could conceivably set things on fire
iron remnant
I'm just waiting for improved 3D printers that come with pick-and-place tools and solder paste dispensers and stuff so that when you forget to put a password on your octopress instance you come home to a house full of killbots.
humble hull
I'm pretty sur esomeone's already invented that. Minus the killbots
wouldn't it have to include a reflow oven before it could truly be self-replicating?
iron remnant
Or conductive epoxy, I guess.
Oh, and I've probably totally told this already, but I was prevented from naming a piece of software that would drive SLM printers "sparkler"
Because those things can really set things on fire.
humble hull
🎆 🎇
empty sedge
@iron remnant "Voxel 8" did that then pivoted to printing shoe prototypes
iron remnant
Well, if you've got the technology to 3D print circuitry, multi-material footwear is not that big of a feet.
humble hull
@iron remnant I'd give you a  but I actually do make shoes... and being able to make cup soles for athletic shoes is something that hadn't occurred to me
also, I think I'm going to switch back to the original hotend. all metal hotends were so hyped that I thought it was a good upgrade, but who knows, maybe it was a bad plan
also, I think I'm going to switch back to the original hotend. all metal hotends were so hyped that I thought it was a good upgrade, but who knows, maybe it was a bad plan
at least I understand how it works much better after all the times I've taken it apart and put it back together
iron remnant
I mean, it's kinda reduced in importance in these days of pandemic because I don't wear shoes in the house, but I have weird sized feet and I'd absolutely love to have 3D printed athletic shoes that actually fit perfectly.
empty sedge
PTFE lined hotends work well until the PTFE degrades or you get a gap between the PTFE and your nozzle
humble hull
3D printing the entire shoe isn't a great plan, but soles should be reasonable

using a type A machines 3d printer to dispense solder paste onto a circuitboard, instead of using a stencil. see http://typeamachines.com for the 3d printer, http://github.com/hzeller/rpt2paste for the software, and https://github.com/hzeller/bumps for the board we're actuall...
iron remnant
Yah, I think I'm really interested because it seems like you will run into a lot of more uncomfortable issues trying to make a 3d-printer + CNC-mill on account to the forces that the milling quill will apply to the support structure and stuff than you will doing solder paste (or, for that matter, glues or conformal coatings).
humble hull
not seeing any really complete designs on the interwebs, and it's not a project I feel like tackling from scratch, but yeah - 3D printers seem quite suited for it
elfin stag
mechanically speaking it doesn't' seem too difficult. I think the hard part would be programming the gcode
iron remnant
Yah, it feels like this would be A Project, not just something you can make all quick.
brave mica
If anyone has experience debugging a marlin build, please @ me! I'm trying to get a SKR 1.4 Turbo working with the LCD from a CR10 V2 and marlin boots (shows up as MSC and CDC) and when i last tested, M300 works, however the LCD backlight is on
FWIW I've addressed the "CR10 lcd EXP1&2 ports are backwards" issue
I've to my nose in another window, so please @ me if you have any insight
elfin stag
@iron remnant do you have an idea of what software could work? I've got a few ideas for extruders and nozzles that I could make, but I really don't know where to start programming it.
elfin stag
too bad, maybe I'll get an extruder built and post it to see if I can attract some help
iron remnant
Yah, there's already Gerber to GCode converters out there.
elfin stag
good to know, thanks!
iron remnant
So, it might be fairly simple once you get it dispensing precise dots of solder paste, or there might be tricky problems lurking there.
But it lacks a lot of hard problems, like you don't really need to worry about the tool crashing into things.
You know, if you want to know how hard the software is or isn't, @elfin stag, you can probably just try printing a single layer of fillament.
elfin stag
That could work well, especially if I could convert the solderpads to an SVG from the Gerber file
then I could just extrude it a little in fusion and as long as I get my board location aligned, it would be pretty easy
karmic brook
It might be easier to go Gerber->GCode than Gerber->SVG but I don't really know for sure.
violet needleBOT
Adafruit Industries posted Collapsible dice tower #3DPrinting #Timelapse #adafruit

Every week we'll 3D print designs from the community and showcase slicer settings, use cases and of course, Time-lapses!
Collapsible dice tower
Adam Clugston
https://www.thingiverse.com/thing:4542200
CR10S Pro
Silk Black PLA
11hr 44mins
X:70 Y:140 Z:140mm
.2mm layer / .4mm no...
violet needleBOT
Adafruit Industries posted STEMMA Lego boards #3DPrinting #adafruit
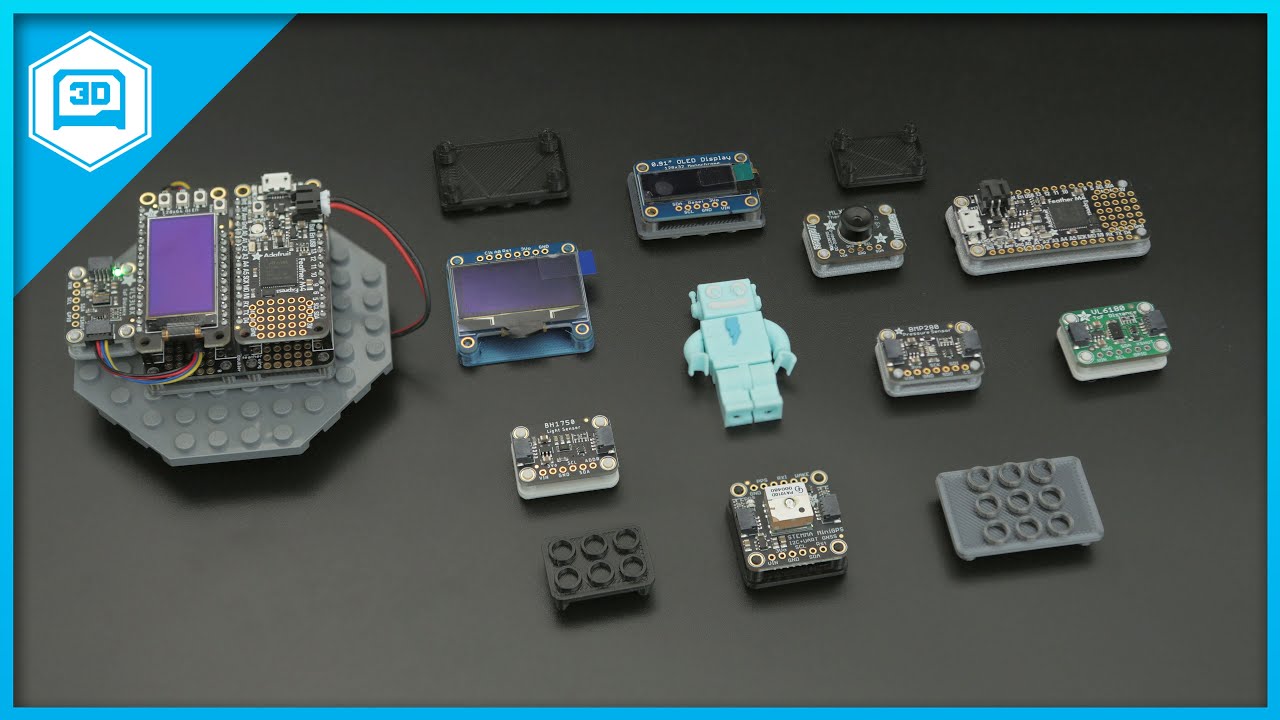
Lego base plates for STEMMA boards! These 3d printed holders feature built-in standoffs for press fitting the PCBs. STEMMA board and sensors allow you to plug-and-play together various devices and accessories, without any soldering!
humble hull
Did the tube melt inside the nozzle? Is it supposed to do that??
omg I can't snd the picture because discord thinks it's spicy
ok, cropped it down
 river cipher
What temperatures were you printing at
river cipher
huh. your ptfe wouldn't have melted at that temp
humble hull
ok, then maybe it's just a filament buildup
river cipher
yeah
or nozzle wasnt tightened enough and filament oozed out the side, giving the illusion of melted ptfe?
humble hull
do I need to clean this out separately, or can I just crank the temp up and push cleaning filament through?
this 3D printer is giving me such a headache >.<
river cipher
the nozzle is totally clogged?
humble hull
yeah I think so
river cipher
i mean, regular brass nozzles are pennies apiece so I usually buy them 10 at a time and if one clogs, if it takes more than 5 minutes to unclog I just put in a new one
humble hull
true
river cipher
I know thats not a satisfying suggestion
humble hull
I'd like to figure out why it keeps happening, though
otherwise I'm going to use a nozzle per print and the prints are all going to fail halfway throug hanyway
river cipher
By any chance is the filament kinda old? Dust settling on the filament, then clogging the nozzle?
humble hull
no, it's relatively new
river cipher
You can make a little filament dust filter, id reccomend that regardless
What printer is it?
humble hull
I suspect that part of the probem is that the interwebs convinced me that all-metal hotends were the Awesomest Best Thing Ever, and so I upgraded, and they seem to have unique care and feeding requirements
ender 5 pro
river cipher
Oh well if its an all metal hotend there (shouldn't be) a ptfe tube in the heatbreak/nozzle
humble hull
ok, that's one potential cause eliminated then
humble hull
Let me clean it out and switch to a non-blue filament
can I clean it out on the printer, or do I need to bake it or something?
er, by using the heat of the printer
river cipher
Reinstall the nozzle, with the hotend heated to printing temp (always have it heated when dissasembling or assembling the hotend, this makes sure it doesn't leak)
Yeah you can use the printer heater
You can try cranking the temp and forcing it through, id suggest a cold pull- heat up, push some filament through as far as possible, let it cool to about 160 and give it a yank
humble hull
part of my issue with tightening is that I have to hold the block that has the heating element with a clamp, or else it rotates instead of the nozzle, so half the time I end up screwing it on while it's disassembled
river cipher
And hopefully youll get a piece of filament out with the same shape as your nozzle
humble hull
I have cleaning filament - should I use that for the cold pull, or regular filament
?
humble hull
I think so, yeah
river cipher
Yeah that's best, use it if youve got it
In that case heat up to nylon temps, though
not PLA
humble hull
what's nylon temp?
river cipher
240-260
humble hull
kk
river cipher
But uh, don't do that unless you're very sure theres no PTFE in your hotend
Or else you will definitely melt the PTFE and get some spicy neurotoxic fumes
humble hull
okay, so the plan is:
- reinstall nozzle
- heat to 250 and tighten
- stick i nsome nylon filament, let cool to 160
- yank it out
- repeat until I get something the shape of my nozzle
those are the correct steps?
river cipher
Let me verify, but you can get the nozzle installed in the meantime
humble hull
I emailed the hotend seller and he got back to me a little bit ago, and he agreed that it wasn't possible to be the tube
river cipher
I typically hold the heatblock with channel locks and use a ratchet to screw the nozzle in like a bolt
humble hull
I actually grew up a mile away from the teflon plant in West Virginia and uh. you should read about the C8 contamination sometime, it's special
so believe me, I have a healthy respect for PTFE
we had a very statistically interesting pattern of cancer and autoimmune diseases
river cipher
Might want to try a little higher than 160 for nylon, it really depends, if you yank and it doesnt come out try a higher temp, if you yank and its still liquid try lower temp
Sorry to hear that
humble hull
To unclog I've mostly been heating it up and pushing more filament through, but I guess that's not going to take care of any big chunks
river cipher
I've got to go, but hopefully a cold pull (or 2 or 3) will unclog your nozzle
humble hull
I'll give it a shot!
humble hull
The hard part is going to be keeping it from happening again
since this is a recurring problem >.<
time for tea. everything seems easier to handle with tea
river cipher
Yeah it could be bad quality filament or bad quality nozzle or a combo
humble hull
the filament is gizmodorks and the nozzle seems OK? this is the second nozzle I've tried, and it's from a different vendor
decided to switch to a 0.5mm nozzle to make things a bit easier on the machine while I got things sorted out
empty sedge
@humble hull make sure you change your nozzle diameter in your slicer settings. Sometimes there's a different profile for different nozzle diameters because your extrusion width should change too
humble hull
Yep, I did
Sigh. SOMEHOW I managed to lose the Bowden collet within ten seconds of removing it
Cold pull round 1
empty sedge
@humble hull when I do a cold pull I'd cool down well below the glass transition temperature, then heat up again and pull when it reaches it again. If doing PLA with PLA then I'd cool down to say 40C then pull when it reaches 65C
eventually you should get a tip that has the shape inside your nozzle without any debris
humble hull
Wait. So 250 to 40 to 65? Or was 250 just to push the nylpn filament through?
empty sedge
you shouldn't need to go up to 250C unless printing nylon or doing final nozzle tightening. It should more than go through your nozzle at 220C
humble hull
So cold pull with nylon is 40-65 then?
empty sedge
let it drop below 40, then when heating up when it gets past 65 try to pull.
when you get more of it out it might not go until 85C or hotter though
I wish cold pulls were reliable. I've been lucky a few times and managed to clean the nozzle with both a cold pull and jamming a bit of wire-wrapping wire or an accupuncture needle up the "out" side of the nozzle while hot
humble hull
It might not have been as clogged as I thought - I was able to push the nylon through pretty easily
empty sedge
nice. I forgot to mention you should keep pushing the filament as it cools
humble hull
But I'll keep going with the cold pull as a learning exercise
Okay the nylon definitely does not pull out at 60c
Let me do this with pla
humble hull
What's a reputable brand of PLA? I vaguely recall hearing that hatchbox is good
I don't necessarily want to spring for the good stuff all the time, but might as well reduce the number of variables
elder oxide
Hatchbox is a strong choice
SUNLU has been fairly reliable
Their PLA+ is tricky to figure out
empty sedge
we've had good luck with hatchbox and it's not expensive
atomic has also printed well, and is more expensive than hatchbox
humble hull
I'll grab some hatchbox
lilac patio
I've been using Matterhackers build series
humble hull
I succumbed to temptation and ordered one of these from tindie a while back. Just got here today, seems to be super high quality https://www.tindie.com/products/danm/dm-solder-paste-and-adhesive-dispenser/
and conveniently... https://dmdispenser.wordpress.com/advanced/connecting-to-a-3d-printer/

Tindie
Bring your electronics and hobby projects to life with the best dispenser for makers!

Note: This section is a work in progress. Here you’ll learn how to connect the DM dispenser to a CNC or a 3D printer and dispense dots or lines, you’ll also see examples of g-code that …
violet needleBOT
Adafruit Industries posted Fusion 360 Tutorial – Servo Wings

Taking a look at designing a pair of animatronic wings powered by Adafruit Feather M4 and metal gear servos.
Feather M4
https://www.adafruit.com/product/3857
8-Servo FeatherWing
https://www.adafruit.com/product/2928
FeatherWing Doubler
https://www.adafruit.com/product/2890
...
river cipher
I like where this is going
 inland sage
i have a creality cr10s pro V2 that has been giving me hella problems. The most recent is the heatbed won't heat. The solders are still intact where the wires meet the heat-bed. When I manually heat to 60degC it reads 60/50 but does not heat up. I have had suggested it could be a mosfet inside or something to do with the Pinda? Wondering how to tell or what should do next to narrow down the source of the problem.
empty sedge
@inland sage are the temperature sensors all working correctly on the correct channels? leave the heaters off, and keep your hand or something on the hotend and verify it reports just the hotend heating up, then do the same test to the bed and make sure it reports just the bed warming up
[your hands can probably raise the temps up to 30C or so]
inland sage
good idea, brb
@empty sedge the hotend is responding to my hand but the bed reads 60/0 and does nothing
empty sedge
so it thinks the bed is already at 60C for some reason
so check your bed thermistor connections everywhere. it shouldn't be doing that
inland sage
am i to peel off this tape & insulation?
empty sedge
no
if you have a multimeter you can unplug where the thermistor plugs into the control board and measure the resistance. I think it should be around 100k ohms when room temperature
inland sage
my multimeter is fried...
empty sedge
you can also try swapping the two thermistor plugs but remember not to leave them that way or your printer might catch fire if you turn on one heater with the thermistor wires going to the wrong inputs
inland sage
good to know. how do i tell which one is the thermistor from the bed?
empty sedge
the thermistor should be the thinner 2 wires of the 4 wires coming from the bed. I'd have to look up your control board to see which connector is which
inland sage
@empty sedge this thing has the thermistor & power supply for the bed leading into the base. there is a big ribbon cable leading from the base to the control board where the hotend thermistor and heat block plug in.
empty sedge
the hotend is a giant ribbon cable that plugs in in just one place to the control board?
it doesn't split into 4 or more cables?
wow, looks like it does. about time someone makes that happen. Makes it hard to troubleshoot though

 inland sage
um... the hotend (where the prints come out) has 2 wires for the heater and 2 wires for the thermistor. each set of wires plugs into a small control board on the left side of the machine that rides along with the vertical screws. on the BED there are the same 4 wires. 2 for 24V power and 2 for the thermistor. They connect to the bed and then go through a hole in the back of the base of the machine, i assume to a mother board or something. On the side of the base there is a wide ribbon cable that leads from the left side of the base of the machine and plugs into the side of that small control board. The same one the hotend leads and thermistor wires are connected to.
empty sedge
yeah, I think the best thing to check would be open the cover over the control board and make sure the thin two wires coming from the bed go to the correct plug on the control board pictured above
inland sage
would this control board pictured above be inside the machine?I'm not sure this machine is the same layout as the cr10
It's a cr10S pro V2
empty sedge
I wish people would post instructions online with photos, ugh
looks like there's a control box with the LCD on the front. The bottom comes off and that's how you access the control board
unplug from the wall before you open that
no, that's another machine. I'm not sure yet how the 10s pro v2 comes apart yet
inland sage
ok. Thanks for your help! This machine has been such a pain. if didn't have so many hrs into fixing it as is, i would probably take a sledge to it.
empty sedge

In this video, we will show you the tutorial of how to replace the CR-10S Pro Motherboard. Thank you for always support, and we will continue to improve, please sub for the latest news of Creality!
#Creality #CR10SPRO
You can also find us here!
------------------------------...
so the bottom cover comes off
looks like the thermistor wires are both white, and should be in the socket next to the 30 pin ribbon cable.
the black/red wires plug goes to a fan
see if those are installed in the wrong position on your machine
elder oxide
Not really a help thing but more of a comment. Wood PLA is generally okay on a 0.4mm nozzle, but i'm finding that it's much smoother on 0.5mm and 0.6mm nozzles even when print settings are for 0.4mm nozzles.
inland sage
thanks @empty sedge much appreciate the advic e
inland sage
My thermistor is hooked up to the correct port and seems to be intact. Do i need to flash the firmware or calibrate it or something maybe?
empty sedge
I highly doubt it
 rocky spade
I need help with 3D printing and the fact that I don't even have one. Is there any DIY ones? Proper.. Ones... Please @rocky spade me with answer. Thanks all!
elder oxide
@rocky spade Ender 3 has a very DIY feel to it. Easy to use and setup
rocky spade
 Ender 3, what model... Or am I stupid?
rocky spade
OK lemme look
Howwlii that's 400aud Def not my price tag :(
Actually its 273aud..
Hmm.... Defiantly worth it...?
How much is filiment usually?
karmic brook
For max cheap and max DIY, there's this: https://hackaday.com/2017/08/26/a-functioning-3d-printer-for-10e/
There was a time when crowdfunding websites were full of 3D printers at impossibly low prices. You knew that it would turn out to be either blatant vaporware or its delivery date would slip into th…
elder oxide
It used about as much filament as any other printer
I have an Ender 3 pro and it’s been great
elder oxide
I love 1Kg spools though sometimes I don’t get through them fast enough
karmic brook
Fast enough for what?
elder oxide
Before it gets expanded from moisture
I don’t have a dehydrator yet to extend the life of my filament
karmic brook
I just store mine in containers with a foam gasket, along with a couple of cans of dessicant.
rocky spade
Hmm that ender 3 one is reasonable
karmic brook
The cheapest you can get in the door without full DIY is probably something like the Monoprice Mini Delta, but it's pretty limited.
 tulip isle
Not exactly help with printing itself but
Anyone know how anycubic shipping is?
I’m not quite sure if the shipping was 20-30 days from ordering or 20-30 days from arriving in the US
Ordered mine around mid August so I’m not sure if it’ll be here in a few days or not considering my order says arriving in the US 4 days ago
humble hull
Changed my retraction settings, upgraded the tubing, and switched to name brand filament. Printer is being much better behaved so far, or at least, it hasn't completely barfed during a couple short test prints (which is an improvement)
we'll see how benchy comes out
iron remnant
Clearly a stepper in the right direction.
humble hull
Suggestions for reducing blobs?
elfin stag
Either less retraction or more part cooling if I had to guess
 gaunt stream
Change you’re Z seam to align at the sharpest corner
humble hull
Ok! I'm guessing that will at least put all the blobs in hte same spot
 lapis flame
Hi, I am looking at an entry level printer with good support to shorten the learning curve. Any thoughts on the Prusa Mini?
elder oxide
What’s your budget?
I always recommend the Ender 3 because it’s the best price for build volume, it works with basically any slicer software, easy to assemble and maintain. And there is tons of videos on most any problem you’d have
Prusa is basically a supped up Ender 3 and the price isn’t always worth it
lapis flame
$600-$700 Cdn
elder oxide
I’ve used diy printers and I’ve used $5000 fusion 3D printers. So far I like the Ender 3 the best
lapis flame
I have considered the Creality line but I am also deciding on geopolitical reasons
elder oxide
Makes sense
lapis flame
I have read a lot issues with the Prusa extruder being repeatedly clogged. Anyone had any issues with that particular problem?
elder oxide
Any of those issues are usually fixed with minor upgrades like getting all metal hot ends and stainless steel nozzles
lapis flame
I just don't want to upgrade the mini to become the price of the MK3S😆
elder oxide
And proper maintenance too
You’d be surprised how many issues are solved with cleaning, calibrating, and whatnot
lapis flame
The Prusa units are all out of stock in the Great White North. I will likely have to order from Prusa directly and accept the rough shipment handling...
karmic brook
The stepped heatbreak in the Prusa was an issue for me until I replaced it with a stepless titanium one.
I don't know if the Mini has that one (I'm guessing not, as the stepped version was to give MMU capability, and I don't think they offer MMU with the Mini)
lapis flame
Was the heatbreak a problem from the beginning or only after using the Prusa MK3 for a few months?
karmic brook
I'm not completely sure. I'd get occasional filament jams (admittedly, with cheap filament).
lapis flame
From what I have read, I believe a lot of the issues are likely filament specific but hard to nail down which brand of filaments are the culprit.