#help-with-3dprinting
1 messages · Page 35 of 1
 alpine stag
e3dv6 with a direct drive extruder limit is about 12mm3/sec or so. so at 100mm/sec print speed with 0.4 nozzle you'd be limited to layer heights of 0.3 or smaller... well, which you're limited to anyway because layer heights bigger than 0.75*nozzle diameter don't stick well
@empty sedge
Thanks that really good to know 🙂
I knew about the nozzle diameter and layer height ratio that's why I am going to buy diverse nozzles but the rest is really interesting and it helps
And my printer has a bowden setup but with a really short ptfe tube
I'm printing with exactly the same GCODE but I have checked all screws so we will see how it turns out
 empty sedge
did you check your pulley setscrews?
alpine stag
oh no... You're right

They are hidden away so I didn't think about them
Otherwise I checked the exentric nuts and the screwsthat secure the frame so I think the setscrews are the only ones I forgot
alpine stag
@empty sedge
Actually i does seem to be because it was set like that and I wasn't the one to do it 😂
@alpine stag
I was wrong I got confused with another setting and looking at the printer, it does print the infill before the perimeters but unfortunately, I was not able to find the setting in Cura...
empty sedge
my cura version calls it "infill before walls". it's under the infill section and might be hidden by default
on my printers printing infill first really shows the infill on the outside of the print
alpine stag
On all photos the part printed after tightening the screws is on the right. I think it helped but I need to reset my nozzle height for the first layer because it seems to now be to high
my cura version calls it "infill before walls". it's under the infill section and might be hidden by default
@empty sedge
Thanks just found it and it was enabled by default
The one at the bottom is the new one
The holes are more round and lines are straighter
Shoot now it's the one at the top 😅
This is the bottom
Found this article so I'm going to try it out
https://www.simplify3d.com/support/print-quality-troubleshooting/gaps-between-infill-and-outline/
empty sedge
On this page you'll be able to visually try to match the problems you are having with your print and hopefully find enough information so that you can eliminate
alpine stag
Thanks 🙂 fortunattly I think my belts are tight enough because I also checked them but I was not sure exactly how tight to get them because I know I shouldn't overtighten them. My circles seem to be really round because They are made to fit a bearing and an axle and they really fit in snuggly (a bit to much in fact)
empty sedge
ok try slower speeds
alpine stag
I'm still printing with the settings I found in the article and my first layer was looking really nice. Everything is looking really good so I'll let you know how it turns out and if the top layer isn't consistent, I think I can turn down only the top layer printing speed but I need to check
alpine stag
I think I'm almost there. I'll keep tuning the printer and the profile a bit. Thank you very much for your help 😊. You have out good advice 👍😉
empty sedge
these marks are inconsistent micro-stepping and hitting the resolution limit from your printer. You might be able to reduce them with different current setpoint, different stepper drivers and/or different motors but I don't think it's worth the trouble
alpine stag
From what I heard it's a common issue with delta printers called "salmon skin" and can be fixed using TL smoothers. You could also change the motor divers, as you said, but in my case they are soldered to the mainboard
and I also don't think it's worth the upgrade
empty sedge
does your control board use TI DRV8825?
alpine stag
I actually don't know I'm going to check on the internet
That's the most info I was able to find
https://www.youtube.com/watch?v=g2cAJXle6t0

Quick guide to reflash your Trigorilla Pro board to Marlin or any compatible firmware (Klipper for example) without any additional programing devices.
Firmware(you need build it by VSCode and Platformio):
https://github.com/SXHXC/Marlin-Anycubic-Predator-Trigorilla-PRO
Thank...
Well it doesn't answer the question but it shows the mainboard
and I didn't open the "hood" yet
empty sedge
80 steps/mm means probably 20 tooth pulleys and 1/16 microstepping. I doubt it's DRV8825 because they do 1/32 microstepping
alpine stag
I must say I'm not really informed about this part so I don't really know but I trust you 😂
alpine stag
Hi !
I'm having issues with my prints (again...)
This time it seems to be totally underextruding some layers and on another print job in some spots there was quite some ringing so I slowed down the print to 40mm/s but then had the underextrusion problem. I don't really understand how my prints can be so unconsistent because some prints are just perfect right of the printer
alpine stag
210 °c 8mm at 100mm/s
empty sedge
wow, that's really long
how long is the bowden tube between extruder and hotend?
on rostock max I used 4.5mm at 40mm/sec (stock extruder) which has maybe 1m of tube and on my kossel mini I use 1.5mm at 40mm/sec (BMG mini) which has maybe 500mm of tube
 ornate raven
Have you tried a different filament? I had similar issues with a filament that had chunks of carbon in it. Eventually a large enough chunk completely clogged the nozzle.
alpine stag
My Bowden tube is really short (about 20 cm) and I did try another filament before encounting this issue but I didn't think about my nozzle being clogged and know that you talk about it I thing this may be the issue
Because I used the spaghetti detective yesterday night to send a print about the air but at the end of the print the nozzle just stayed in place rather than homing and there was a bit if filament on the nozzle which I removed but it may have clogged it a bit
empty sedge
@alpine stag I think you should try some retraction tests and reduce your retraction distance a lot, and speed some. Maybe just try 1.5mm @ 80 on a retraction test and if that works without stringsthen try your print again
here's one of a million simple retraction test objects
alpine stag
Okay thanks 👍 I used 3d optimizer to build my profile that's how I determined my retraction distance so I'll try another test to see
 sonic siren
I'm about to try to print the vise shown in this recent Adafruit video: https://www.youtube.com/watch?v=aR1r6ZRi7BY. But I'm curious: was it actually printed without supports? How is that possible? I'm new to printing, and my printer only handles ABS. Maybe PLA works differently and can harden quickly enough to cantilever out like that?
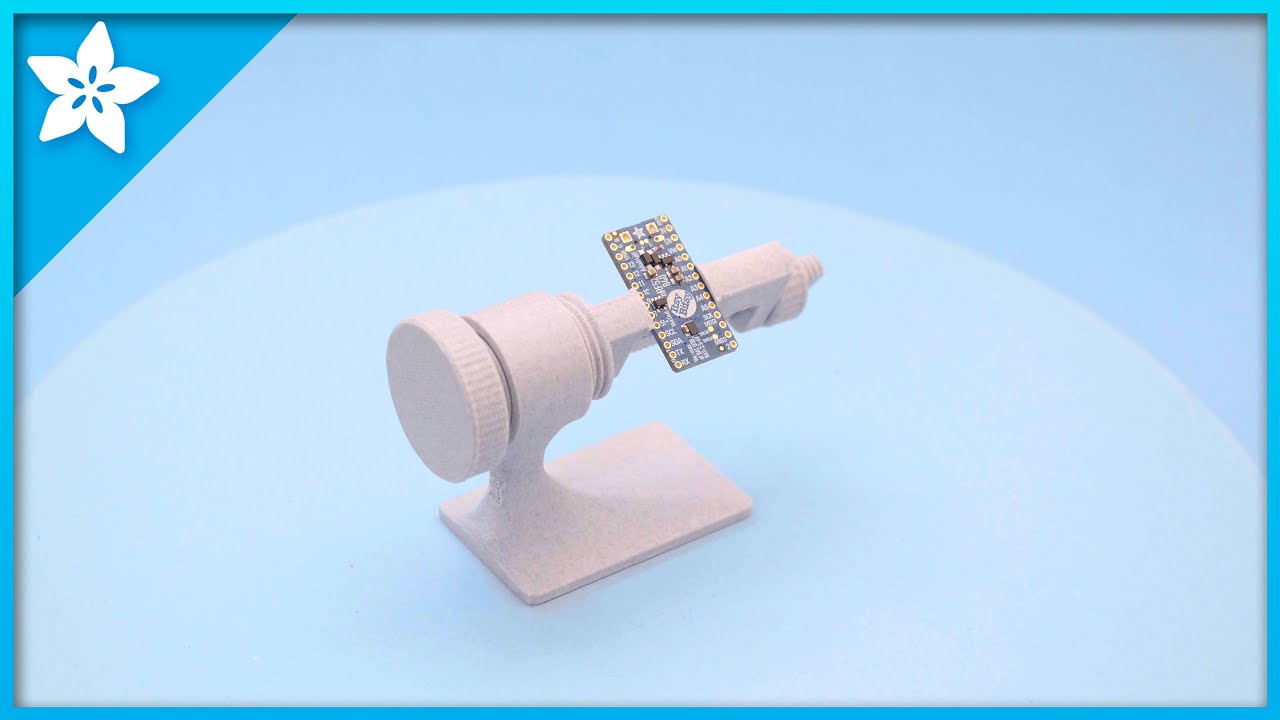
Every week we'll 3D print designs from the community and showcase slicer settings, use cases and of course, Time-lapses!
Rotating Vise V shape jaws
revsin
https://www.thingiverse.com/thing:4364584
CR10S Pro
Marble PLA
04hrs 40mins
X:224 Y:180 Z:70mm
.2mm layer / .4mm nozzle
1...
 viscid ruin
Just got my ender 3 printer today
One thing I hate is that it's so loud
It works perfect too
Any ideas how I make it silent
I think I need new fans
I'm noob when it comes to 3d printing
ornate raven
Welcome to the world of 3d printing @viscid ruin . Best way to lower the noise imho is to replace the motherboard with the newer one with better and more silent stepper motor drivers.
There's a bunch of other things you can do instead and in addition to that will make it a fun experience but again imho, not much better at printing. Slicer settings can have as much to do with print quality as anything else.
viscid ruin
I'm thinking on Replce that nozzle fan
How much cfm is that fan can I go with noctua Also it's 24v don't I need a voltage regulator
Is Fractal Design Silent Series R3 40mm and 60mm good fans
They are a bit cheaper
 violet needleBOT
Adafruit Industries posted Mini Vise #Adafruit #Timelapse #3DPrinting
Every week we'll 3D print designs from the community and showcase slicer settings, use cases and of course, Time-lapses!
Rotating Vise V shape jaws
revsin
https://www.thingiverse.com/thing:4364584
CR10S Pro
Marble PLA
04hrs 40mins
X:224 Y:180 Z:70mm
.2mm layer / .4mm nozzle
1...
 pallid hornet
empty sedge
pallid hornet
empty sedge
@pallid hornet I don't understand. "level" is just a shorthand for "aligned with the axes of travel"
alpine stag
already a lot better but I'll try to tweak the settings a bit more
thanks for your help @empty sedge
Have you tried a different filament? I had similar issues with a filament that had chunks of carbon in it. Eventually a large enough chunk completely clogged the nozzle.
@ornate raven
I also checked my nozzle wasn't partially clogged before the print
I also need to add a line of gcode at the end of the print because when printing through octoprint, the hotend stays where it finished the print rather than homing
wich leeds to the nozzle melting part of the print
ornate raven
Nice case. Is it me or did it miss a layer about half way through?
alpine stag
Yes it did it always does this... but it's getting better
@ornate raven https://www.thingiverse.com/thing:1165227
Here is the design I printed

UPDATE 12/8/15 3pm et Version added for mounting screws. Includes threads for M2.5 and thicker stand-offs for stronger hold and secure mount.
UPDATE 12/3/15 5pm et The cutouts for USB ports and miniHDMI has been opened up (0.2mm on each side) to accommodate for cables with la...
ornate raven
Hmmm... I been lookin for a NinjaFlex project and this will be interesting to see if it works. @alpine stag you might wanna heat up the hot end, remove the nozzle and the bowden tube. inspect them for signs of a gap between the nozzle and the tube. It appears to me that your issues start when the printer uses retracts.
alpine stag
Okay I will have a look thank you very much it is true that I already heard about this issue. for now it is printing the same case with lowered retraction so I think I'll try just after
ornate raven
Sounds good. I'm interested to hear how it works out.
alpine stag
Did not finish the print it didn't seem good so stop it and had a look and it seems like you were right
Should I actually remove the Bowden tube or just put the nozzle back in place
?
empty sedge
you're probably going to have to take the whole thing apart
you need to screw the other side of the heat-break deeper into the heater block so that the nozzle seals against it instead of bottoming-out on the heater block
once you've got the nozzle off you can do the rest cold
I'm heading out, but you can follow the corresponding portions of the e3d v6 manual
 alpine stag
Thanks
empty sedge
I try to keep about 1mm between the hex of the nozzle and the heater block
then once you have it fully assembled again, you heat it up to the max temp and tighten gently (with a single finger on wrench maybe 2 inches away from the nozzle). This is also described on that page
I don't know how the rest of that effector comes apart but I'm sure you can find instructions
alpine stag
Thanks you very much for your advice
ornate raven
Yea, what @empty sedge said. The idea is to compress the tube against the nozzle. I use Capricorn tubing and I love it. Tighter tolerance and better heat tolerance.
alpine stag
I think I'm better of with using the replacement part for now but I may order some capricorn tubing to print flexible materials
ornate raven
Yes, never a good idea to change many things at one time. Harder to find the real culprit.
ornate raven
For instance, I just started a Ninjaflex print with a higher nozzle temp and a lower feedrate. It looks great but, which change made the difference?
alpine stag
Yes I do understand I'm doing what we call " a scientific cursus" here in France 1nd you always need to isolate the changes you do to know which one is the one which actually plays a role
 karmic brook
Completely off topic, but I would have guessed you might spell it “rôle” 🙂
alpine stag
😊😂
empty sedge
weird, I'm hitting a speed limit in firmware on my first layer for some unknown reason
ornate raven
Wow @alpine stag , that's quite an improvement. Glad that anything I offered up was helpful.
alpine stag
Yes it was 😊 now I learned from my mistakes and I know that my retraction settings were totally wrong which led (not sure about the spelling) me to this problem. I'm really happy the makers community and the 3d printing community are such helpfull and kind communities. Ready to give out advice to fellow makers
ornate raven
You inspired me to try something new. I printed the same case as you have there however, I did it with NinjaFlex. The base I printed at 5mms and 230 degrees. The top at 10mms and 230 degrees. The bottom was "acceptable", the top is on the printer right now and is doing well.
alpine stag
Please send a pic when you're finished @ornate raven 😊
ornate raven
👍
For anybody (with an Ender 3 Pro with heated bed) considering printing NinjaFlex, this stuff is a bugger to get off the bed. You will be thankfull for your flexible bed like no other time before. Just my opinion.
empty sedge
turns out my "slow prusa i3" issue was the linear advance K-factor change I made
 unkempt patio
Hey everyone, I found 3dponics the other day and I'm trying to put a drip system together, but supports have been making it hard to get clean threads for screwing into a bottle. Is it a matter of tweaking support settings or do I just need to put in some elbow grease to clean it all up? Here's the thing I'm printing https://www.thingiverse.com/thing:379061

Screws on to bottle like a bottle cap and ensures that the water drips at a controlled rate. To attach to the next bottle, thread zip ties through the four holes. Fits 3/4-inch tubing (if you’re using tubing to transport the water to the plants).
Know how to make this part b...
empty sedge
@unkempt patio what slicer are you using?
unkempt patio
@empty sedge I'm running cura, my printer is an anycubic mega-s but it's a prusa clone
empty sedge
what's the part cooling on that printer?
unkempt patio
I'm pretty new to printing, what do you mean? There's a fan on the extruder
empty sedge
that part has a bunch of overhangs that you'd need good cooling to print well. A 50x50x15mm blower would do a better job of this than a smaller fan, but a good duct can help a lot too
I'm trying to modify the part to have built-in supports for only the overhang on the inside and not the threads. that's another option
unkempt patio
oh cool I hadn't thought to do that. I have some experience in blender so that's probably a good way to go. The printer was pretty cheap so an upgraded fan probably wouldn't be a bad thing either
unkempt patio
thanks, I'll give that a shot and get back
 devout sparrow
Hello, I'm new in 3d printing and i want to know if, in Cura, the ender 3 "is the same" that the ender 3 pro. Someone can help me. Thanks
 minor ingot
Should be the same . Double check bed size and z hight limit
In machine settings in cura . If using ender 3 profile
@devout sparrow
devout sparrow
@minor ingot Thank you so much
empty sedge
@twilit crystal could it be temperature related? I have one printer whose bed behaves differently if I start a print from cold vs starting print when bed has been hot for a while
like the bed warps when warming up, and eventually reaches a different shape when left warm for a while than it did if I just let the print heat it and start printing when reached temp
violet needleBOT
Adafruit Industries posted Raspberry Pi HQ Camera Case #3DPrinting

3D Print a modular case for the New Raspberry Pi 4 and Pi HQ Camera! Snap fit pieces makes it easy to swap out covers and can be printed without any supports! #3DPrinting #Raspberrypi #PiHQCam #Adafruit
Learn Guide
https://learn.adafruit.com/raspberry-pi-hq-camera-case/
Fus...
ornate raven
@alpine stag , I have to agree. That looks very good.
alpine stag
@ornate raven I'm impressed how good "cheap" printers have became over the years
ornate raven
Yes, the first print I made after assembling my E3 Pro was probably the best I ever made. Cause I almost immediately started fiddling with it
🤓
alpine stag
😅😂
 heavy ether
ornate raven
heavy ether
ornate raven
@heavy ether make sure your belts are all tensioned and any guide rollers are not binding. Also check your Bowden tube (if you are using one) isn't binding.
alpine stag
It depends on your printer
Mine uses a wing nt
Nut
Anyone ever printed litophanes ? I'd like to print one but I heard it could be really challenging so I was wondering if I needed to know anything before trying
empty sedge
well, looks like the octoprint LDAP plugin has been broken for at least 2 years
 forest wyvern
@alpine stag I have some very extensive experience with flat lithophanes (printed and sold hundreds of them), and my biggest recommendations 1) Turn Z hop off - it causes lithophanes to feel 'spikey' 2) Ensure your nozzle is completely purged of any other colors and nozzle exterior is clean - any imperfections are extremely noticeable 3) Some people print lithophanes vertically, I prefer printing them flat on the bed - they turn out just fine if not better laying flat on the bed with better adhesion 4) If you want to round corners or add loops / lettering I would recommend using NetFabb for such things 5) Over extrusion is often better than under - you don't want any gaps for light to get through 6) The thinnest parts should only be ~0.4-0.8 mm thick to take full advantages of the grayscale - I usually print them 1.4-2.6 mm thick but this varies on preference more 7) I print at 0.07 - 0.1 mm layer heights - There is almost no noticeable difference between 0.05 and 0.07 mm other than a lot longer print times. Let me know if you have any questions
alpine stag
Thank you very much @forest wyvern .
I'll try to print one taking into consideration ebeeythin you just said 😊
karmic brook
I printed one a while back, after I realized the software I had written for CNC carving reliefs would also serve for lithophanes.
I was pleased with the result.
alpine stag
Nice 👍
 vernal ice
Hey all!
First time discord post. :)
Wondering if anyone knows if there is a way to modify the Fusion 360 Design that the Ruiz Brothers created for the USB Mini Fume?
I'd like to use a 50mm X 50mm X 20mm fan.
Seems like it should be easy to increase the depth/extrusion of the fan box, but I'm still pretty new to Fusion. Any help would be greatly appreciated.
 lilac patio
Is the design you're modifying an STL file?

 livid echo
@vernal ice .step Files can be opened edited in Fusion 360.
The fume extractor was designed in Fusion 360. So it might be better to use the direct link to Fusion 360 ('download CAD files from Fusion 360' on the Adafruit project page). There, the file can be opened in Fusion 360 or the file can be downloaded in various file formats. .f3d might be better, because there ist no need for file conversion (done automatically by Fusion 360), because .f3d is the native file type used by Fusion 360.
karmic brook
If you can get the original Fusion design, it's probably pretty easy, as Fusion is parametric, so by changing the parameters (if the design was set up that way), the design would adapt itself.
vernal ice
Ah, that might be the issue. I don't see any .f3d files, but I do see a .f3z.
I was trying with the step file, but eventually overwhelmed my Mac and Fusion stopped responding :(
I'll try the .f3z file. Thanks folks!
karmic brook
I'm guessing .f3z is a compressed version of .f3d, but you should find out soon.
vernal ice
Yup, that did it!
Took me a bit to find the parameters, but looks like I can just reprint that deeper fan box.
Cheers!
 surreal scroll
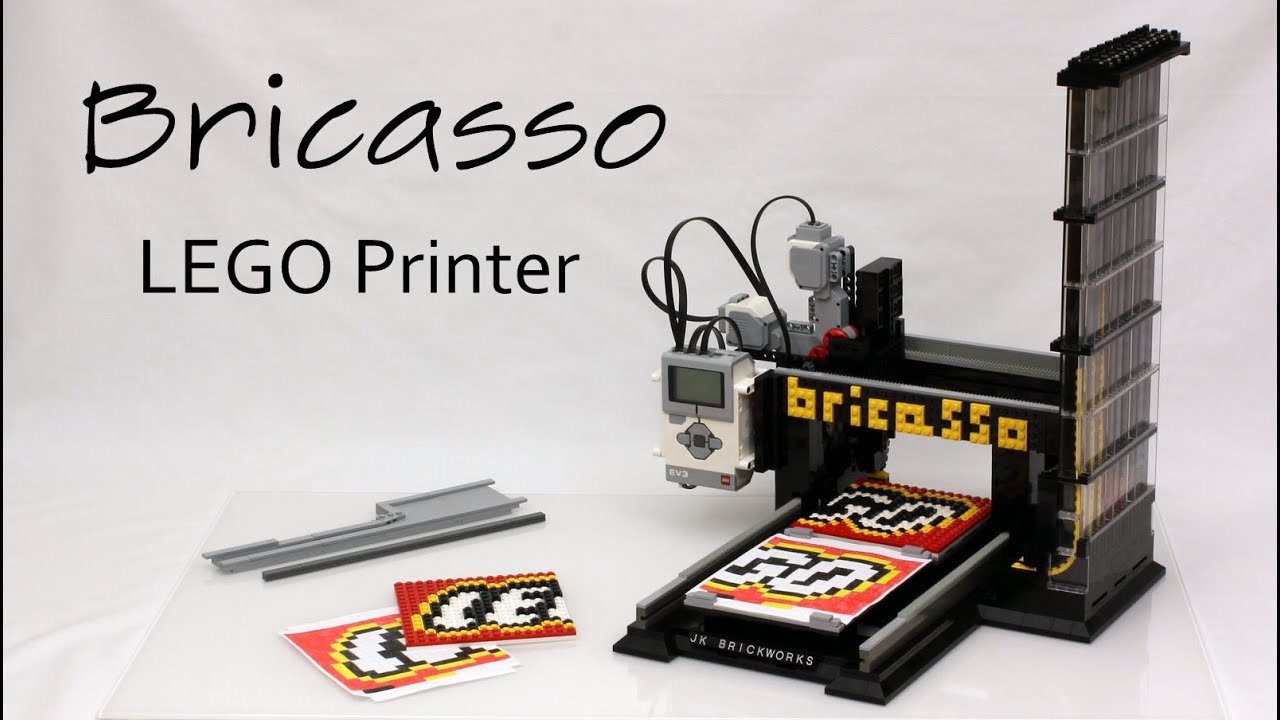
The final version of my LEGO mosaic printer. It uses the LEGO Mindstorms EV3 to scan an image and recreate it as a LEGO mosaic using 1x1 LEGO plates. Here I have it scanning and printing the LEGO logo.
It is build entirely out of LEGO parts. For more information on how this p...
 vocal flax
violet needleBOT
vocal flax
violet needleBOT
Adafruit Industries posted Raspberry Pi HQ Camera C Mount to EF Adapter #adafruit #3DPrinting #Timelapse

Every week we'll 3D print designs from the community and showcase slicer settings, use cases and of course, Time-lapses!
C Mount to EF Adapter
Joseph Waters
https://www.thingiverse.com/thing:4425290
CR10S Pro
Black PLA
02hrs 18mins
X:181 Y:180 Z:30mm
.2mm layer / .4mm nozzle
...
violet needleBOT
Adafruit Industries posted PyPortal Guitar Tuner
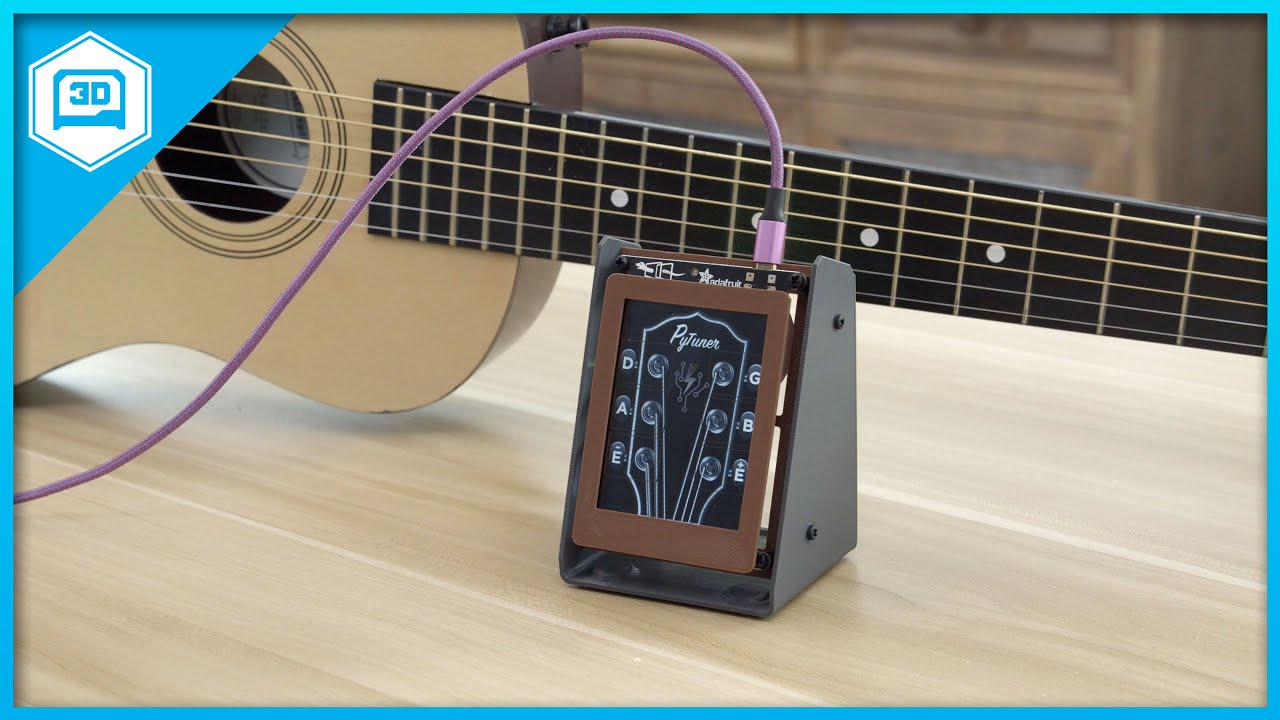
Build a simple Guitar Tuner with CircuitPython and Adafruit PyPortal! Use the touch screen to tap on tuning pegs and play music notes. The notes are pre-recorded wav audio files of guitar strings. The graphic of the head stock is a single bitmap. This uses the displayio librar...
violet needleBOT
Adafruit Industries posted 3D Hangouts – Python Cameras and Tuners #3DPrinting

PyPortal Guitar Tuner Learn Guide
https://learn.adafruit.com/pyportal-guitar-tuner
PyPortal Guitar Tuner on YouTube:
https://youtu.be/3Dv8U8P0iCo
Fusion 360 Share Link
https://a360.co/2XHthEY
Adafruit PyPortal
https://www.adafruit.com/products/4116
Mini Oval Speaker
ht...
 vocal ginkgo
Hey guys, i gonna build for myself a small 3d printer for learning. Which design is best suit for it? Can you share some sources?
empty sedge
@vocal ginkgo do you have one already?
vocal ginkgo
I know how to use it, have bought one(prusa i3) . Now i want to build another one for learning.
empty sedge
the i3 kit is well documented if you'd like to build another
karmic brook
BigTreeTech makes a nice control board.
 elder lintel
I just put a BigTreeTech board in, it's REALLY nice, they're awesome people too
 devout pewter
Yeah, I have a BigTreeTech SKR 1.3 in my ender 3 at the moment. At some point I may upgrade it to SKR 1.4 as I have an extra.
karmic brook
I decided to give Atomic Filament a try. Most filament will have a label like "print 235°C, bed 30-60°C". But Atomic says "190-230°C". Wow, that's quite a range. Does anyone have some slicer settings they like for Atomic filament that they care to share? I suppose I could go print some temperature towers.
empty sedge
@karmic brook the prusa slicer defaults for i3 mk3s have worked on atomic filament for me
though, I'm not using the stock heat break on one printer so I've had to reduce the M900 K-factor
karmic brook
Hmm, I'm not using the stock heatbreak either (I replaced the stock one with a stepless titanium one). Thanks for the tips!
 neat bluff
I'm thinking of 3D printing a custom faceplate for my (yet to come) 2DS XL
(3rd picture is of a different colour)
The top part of the 2DS XL splits into 2 sections - the part with the screen (white) and the faceplate. They clip together
For someone who would be just getting started with 3D printing, is that sort of thing feasible?
 solid hazel
i have one of those mine is white and orange tho
lilac patio
For someone who would be just getting started with 3D printing, is that sort of thing feasible?
Looks pretty reasonable to me
 sullen zinc
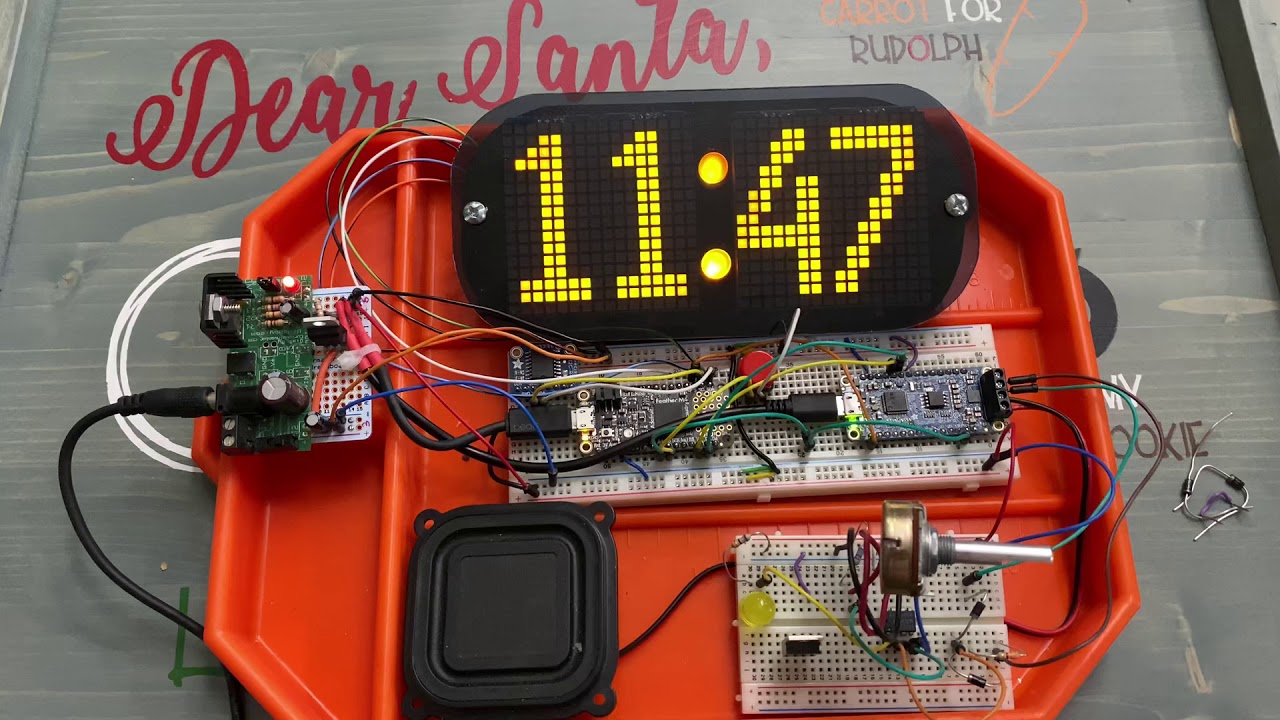
I need to figure out a 3D printed enclosure for my new project, which is going to be a clock and is on a featherwing quad...
sullen zinc
https://www.adafruit.com/product/4253 hmm maybe I should have gone with the alternate "quad" arrangement, then I could have fit 2 rows of 4 numbers

This is the FeatherWing Quad 2x2 - a prototyping add-on and more for all Feather boards. This is similar to our FeatherWing Proto except there are four! The magic of the Quad comes when you ...
forest wyvern
Are you looking to diffuse the LEDs or just hide the boards?
empty sedge
it works!
 frank lichen
I need to figure out a 3D printed enclosure for my new project, which is going to be a clock and is on a featherwing quad...
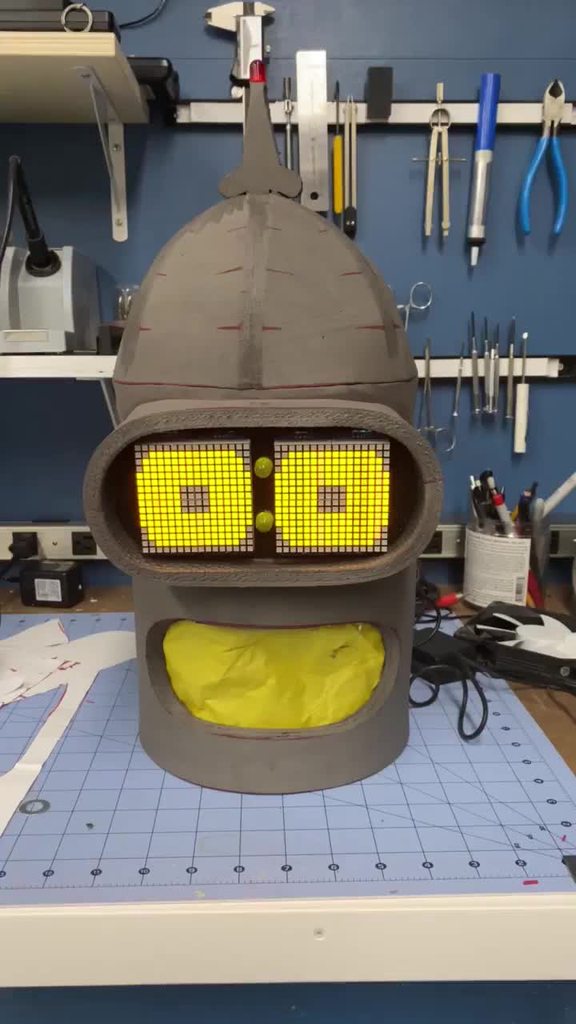
@sullen zinc Cool clock! I'm working on a clock using Feather too. https://imgur.com/gallery/rERZgwm
 sullen zinc
@frank lichen excellent
frank lichen
@frank lichen excellent
@sullen zinc Thanks, Here is my code https://github.com/brett-martin/BenderBot

GitHub
CircuitPython library to control animatronicBender - brett-martin/BenderBot
I'm looking at 3D printing the entire head as a case, Interested in how you print your case as well.
frank lichen
@sullen zinc I'm using a smoked acrylic over the display which I think helps alot. https://www.youtube.com/watch?v=sxOvvKbt8dM&t=4s
Also looking at whatever film adafruit is using over their displays here. https://twitter.com/adafruit/status/1271237770632183811?cxt=HHwWhoC6-YuBrKQjAAAA


Build a digital protest sign with CircuitPython.
Learn Guide coming soon. https://t.co/oJWvDkTxfh
Likes
130
 Twitter
karmic brook
Twitter
karmic brook
I'm looking at Lee Zircon 810 LED diffusion material myself, it seems nice but there are likely cheaper alternatives out there.
 knotty laurel
When I looked at this recently I was pointed to acrylic color codes 2064 and 2074 as a neutral translucent gray: https://www.eplastics.com/blog/plexiglass-solar-energy-visible-light-transmission

ePlastics
PLEXIGLAS®SOLAR TINT SERIESSolar Energy and Visible Light Transmittance - Full RangeNote: STANDARD colors at ePlastics.com are: Gray 2064, Gray 2074 Bronze 2404, Bronze 2412, Bronze 2370 All other colors would be special order - full sheet only - possibly case quantities and 4...
frank lichen
Thanks for the links @karmic brook and @knotty laurel It looks like adafruit is using some kind of diffusion/ND combo material that would be ideal in my application for hiding the underlying grid and make pixels appear floating. I am looking into laser cutting mine (due to radiuses) from this material https://www.ponoko.com/materials/gray-translucent-acrylic I have a sample that looks good. I'd rather use clear + a filter though as it would be easier to get the look right I think.
Online laser cutting for business - Free instant proofs, quotes & ordering - Make just 1 or 10,000 - Delivered as fast as tomorrow - Free shipping
karmic brook
Might be able to use clear material and ordinary window tinting material
 swift bay
is their a way to 3d print a 3d printer?
 scarlet edge
you can
swift bay
LOL
scarlet edge
it's just very time consuming and probably low quality
swift bay
yea
scarlet edge
there are a few parts that you need special stuff for
pretty sure you need a 3d printer that prints metal
swift bay
oof
scarlet edge
it does exist though
swift bay
yea lol
karmic brook
That's the "reprap" concept: a self-replicating printer.
violet needleBOT
Adafruit Industries posted Star Wars Rogue One Trooper #3DPrinting #Timelapse #adafruit

Every week we'll 3D print designs from the community and showcase slicer settings, use cases and of course, Time-lapses!
Rogue One Trooper
Geoff.W
https://www.thingiverse.com/thing:1904115
CR10S Pro
Pink PLA
80hrs 35mins
X:300 Y:300 Z:220mm
.2mm layer / .4mm nozzle
10% Infill...
violet needleBOT
Adafruit Industries posted RGB Matrix Slot Machine

This features emojis from Circuit Playground and works just like a fruit style slot machine. The handle is 3D printed and features a print-in-place spring loaded mechanism. The display is powered by an Adafruit Feather and the RGB Matrix FeatherWing. It also has a speaker and ...
violet needleBOT
Adafruit Industries posted 3D Hangouts – RGB Matrix Fruit

Learn Guides
https://learn.adafruit.com/rgb-matrix-slot-machine/
https://learn.adafruit.com/rgb-led-matrices-matrix-panels-with-circuitpython/example-adafruit-machine
YouTube
https://youtu.be/oTJibE0OcBQ
32x64 RGB Matrix Display
https://www.adafruit.com/product/2278
RGB M...
 warped belfry
hi people, someone knows the g code to make the hot end go to the left limit of the printer in the X axis??
so i can calibrate the print area because my prints are outside by a little bit.
 shy kelp
I'd assume something like G90 to put it in absolute coordinates, then G1 X0 F3000 to move to X0
that's going to be wherever the printer thinks X0 is of course
karmic brook
I know some controllers have the ability to sense a limit with a limit switch or monitoring stepper load, but I don't know the GCode for that offhand
empty sedge
G28 is how you home.
once your movement and homing directions are correct, in configuration.h in marlin you can edit your min (can be negative) and max axis positions to make zero line up with the edge of your travel
[you can even make 0,0 the center of the bed if you want to do like nophead the mendel90 guy or you have a delta]
violet needleBOT
Adafruit Industries posted Apex Legends Pathfinder x Sugru Build @adafruit @johnedgarpark @sugru #apexlegends #sugru

The Pathfinder interactive, 3D printed robot friend is here! John Park teamed up with Sugru and Adafruit to build a companion bot with Pathfinder's on-screen emotes and in-game voice-over lines.
► Click the link https://sugru.com/go/makers-and-creators-competition?utm_sourc...
 hushed lotus
I have been making a bike chain model for my dad for Father’s Day (you print twice and glue them together so that my printer doesn’t have to bridge like crazy and would reduce print time.) However, the way that I designed the joint makes part of it need to be p-i-p. I am kinda worried about how well it will work. Any help? I can send the fusion360 files if that helps.
 river cipher
Id say that looks reasonable, even if it cant handle that overhang the plastic is unlikely to fuse completely to the other piece
How big is the gap?
hushed lotus
.5 mm
I’m not too worried about the slanted part, more about the main area of the top part
Do you think that it could bridge that?
Also do I need supports?
hushed lotus
Is it possible to connect these (curved) faces?
empty sedge
@hushed lotus you can fillet the inner corner, or model the shape you want and relvolve it
river cipher
Yeah I was focusing on the pin, didnt even notice how it was at the top.
Vertical tolerance meaning how big of a gap between two parts to have them not fuse and be seperable? On my support material I use a .3mm gap and it removes cleanly with a small effort. That would be my try for the gap, but your machine could be different.
hushed lotus
Yeah I tried the print, and it turns out that I: a. Made it stupidly large and b. Made the tolerance so small that it fuses horizontally even at full scale.
 elfin charm
Occasionally during prints my 3d printer's nozzle will knock against the already-present plastic and vibrate a little. Is this a big deal? Do I need to relevel?
empty sedge
for PLA that'd typically mean you need more part cooling. If you're not losing steps and you're happy with your print quality don't worry about it
maybe turn on z-hop. prusa uses 0.6mm
elfin charm
Yeah print quality is fine. So it's nothing to worry about? No damage to the printer or anything?
 timber ginkgo
I have ender 3. I ordered a bltouch a while back and in the meantime updated the firmware. I flashed it so that I enabled the BLtouch in the firmware. I stupidly forgot to print the housing for it. Now there is an alarm sound when I start the printer. Will this go away when I finally connect the bltouch?
 umbral cypress
Hi all, I've created a model of the 471 Arcade Button 30mm in Fusion 360 that I'd like to upload to the Adafruit github, but I can't seem to figure out how to do that. Can anyone help me?
frank lichen
Hey guys, I'm new to 3D printing. I'm looking at building a life-sized "Bender" head using some 3D printed parts. I'm starting with the Visor/eyes. The main component is about 200(L) x 100(w) x 80(h) and I'm trying to figure out if it's worth having this part printed somewhere or buying a printer and printing myself. Can anyone recommend where to have this printed? https://www.thingiverse.com/thing:4493402
frank lichen
My model is not yet approved by thingiverse but here is the components for reference.
 stuck inlet
@umbral cypress do you have a github repo in mind? I can help you make a PR
umbral cypress
Hi @stuck inlet I'm hoping to add the model to the https://github.com/adafruit/Adafruit_CAD_Parts repo

GitHub
CAD files for various boards, components and parts - adafruit/Adafruit_CAD_Parts
stuck inlet
awesome! I think first step would be to fork the repo and then clone it locally
this guide is helpful: https://learn.adafruit.com/contribute-to-circuitpython-with-git-and-github

Adafruit Learning System
From fork to merge, this guide covers all the steps necessary for a successful Git and GitHub workflow.
it's for circuitpython but will be similar for the cad repo
umbral cypress
oh ok, thank you. I will try going through that and hopefully get it uploaded. I appreciate the help
stuck inlet
no problem! the git learning curve can be a bit steep so just mention me if you have questions
umbral cypress
Perfect, thanks a lot!
violet needleBOT
Adafruit Industries posted DIY Filti Face Masks #3DPrinting

3D print holders for making a DIY face covering with face mask material from Filti. Magnetic ear savers makes them more comfortable and much easier to take them off. Easy to put together and can be 3d printed fairly quickly without any support material.
Learn Guides
https://l...
empty sedge
what are some good tutorials for sanding 3d prints?
I've spent like 4 hours just on 60 grit for this one moderately sized print
violet needleBOT
Adafruit Industries posted Print in Place Geared Lock Safe #Timelapse #3DPrinting #adafruit
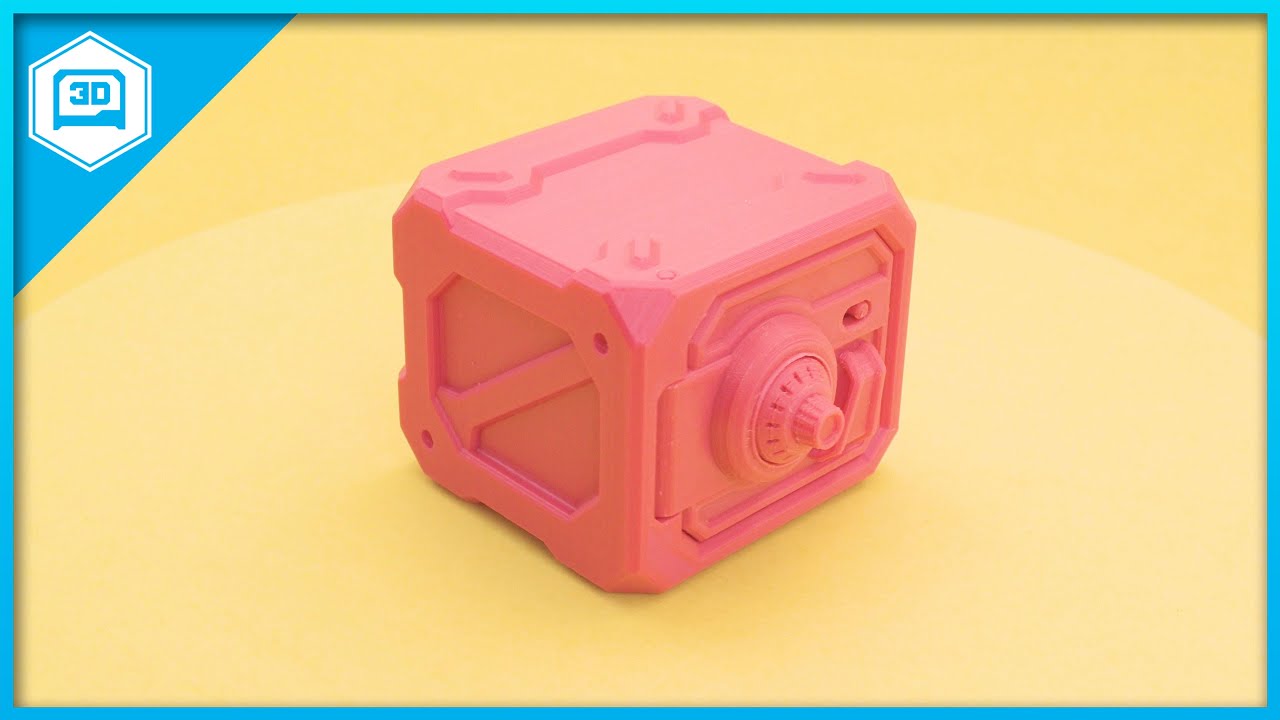
Every week we'll 3D print designs from the community and showcase slicer settings, use cases and of course, Time-lapses!
Print in Place Geared Lock Safe
DNA Designs
https://www.thingiverse.com/thing:4460465
CR10S Pro
Pink PLA
13hrs 50mins
X:187 Y:187 Z:69mm
.2mm layer / .4mm ...
 upper surge
Here is a new https://www.youtube.com/watch?v=kLL-ydbr9DQ

McMasterbating with 3D models. We are living in the future.
(to me)
source of STL files
violet needleBOT
Adafruit Industries posted 3D Hangouts – Magnets and Holders for Face Masks

Learn Guides
https://learn.adafruit.com/filti-face-mask/
YouTube
https://youtu.be/wJfRmqocxyg
Magnetic Ear Savers
https://a360.co/31lUZcD
Mask Fabric Holders
https://a360.co/3fNQdJo
CAD files on Thingiverse
https://www.thingiverse.com/thing:4496809
CAD files on PrusaP...
violet needleBOT
Adafruit Industries posted Fusion 360 Tutorial – PyPortal Guitar Tuner

Taking a look at designing an arcade cabinet style stand for the Adafruit PyPortal. Using a single sketch to drive two components. User parameters setup for quickly adjusting material thickness and width of enclosure.
Fusion 360 Share Link
https://a360.co/31e62nO
PyPortal G...
 tardy zephyr
Hello, I'm new to 3d printing. Just got my Ender3 set up with octoprint and have done a couple of prints so far. I recently bought a "hat" addon board for my raspberry pi zero, and I am worred about the hat putting strain on the header pins on the rpi. Has anyone seen a model for support pegs or something to go into the holes drilled into the corners of the pcb for the rpi and hat respectively so it can remove strain on the header connectors? I can't find anything on thingiverse but I figure it has to be a thing I can print.
karmic brook
That's a good question. The Google AIY kits use these nice little snap-in standoffs, but I don't have a source for them. I think it would be tricky to 3D print them.
tardy zephyr
Exactly! I am actually pillaging the rpi zero from a google aiy kit, and I need something taller because the hat I got has different header height.
Maybe printing material would be too brittle for this eh?
This is pretty much what I need, https://www.adafruit.com/product/2337 I suppose can goto the hardware store and find some M2.5 that will work for this

Finally we get our very own super sweet sixteen... 16 millimeters that is! Our Black Plated M/F Brass 16mm Standoffs are engineered specifically to keep your PiTFT ...
thx
karmic brook
Heh, I just ordered those in my last order!
tardy zephyr
Eyy here we go: https://www.thingiverse.com/thing:2184723 I'll give this a try

Made an expandable Pi Zero cluster rack. This allows me to mount as many as I need together. All the nuts are M2.5 if you want to use metal instead. I am preparing another version that has walls on the side along with fan mounts for 30mm and 40mm fans.
The bottom plate has a c...
 umbral helm
can i get some suggestions as budget 3d printers under $100 dollars\
empty sedge
nope
umbral helm
plzzzz
empty sedge
you're better off saving up for an ender 3 than fighting with a $100 kit
 formal relic
my printer cost me $100 + few rolls of filament, and extra parts.
 karmic brook
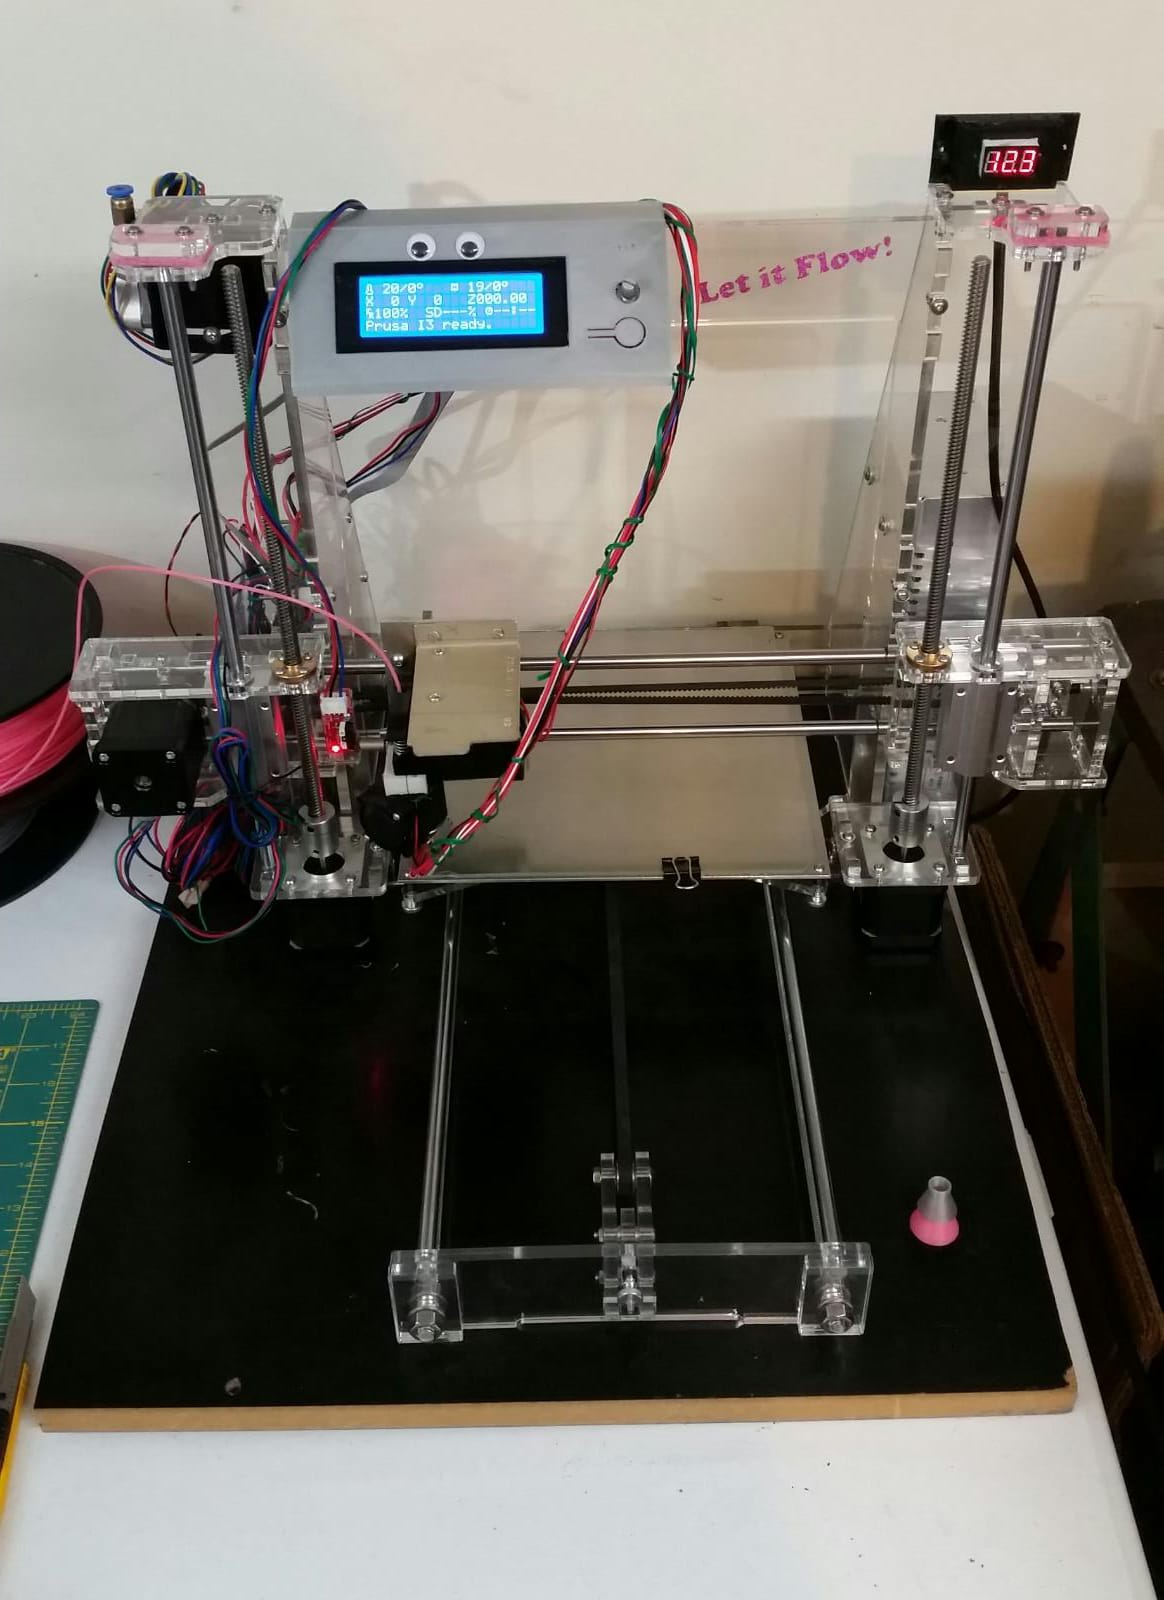
You can get a MonoPrice Mini Delta for $127 or so. I have one, it works okay, but sometimes needs some tweaking to behave. There's also the guy who built a 3D printer himself for €10
Good point: there are some good deals to be had on used printers.
formal relic
Don't get a delta!
karmic brook
They're generally a good value, but will often need some work before they'll operate smoothly.
umbral helm
okk
karmic brook
What do you have against deltas?
umbral helm
yep ??
formal relic
for a beginner that want to just print, delta is unnecessary headache, and the calibration can be very frustrated on the lower end deltas that have close lo ZERO rigidity and vary sloppy frame. also you are limited to bowden extruder = almost impossible to print flexible filament, etc...
For a beginner used printer I will recommended something common that you can find a lot of info online, and Cartesian (XYZ), with common controller board.
My printer did literally hundreds if not thousands (now with the Covid ) of prints over the years, and it is super easy to maintain.
This is my 2 cents
@umbral helm @karmic brook ^
umbral helm
okkk
hushed lotus
Deltas also cost more and are way smaller
karmic brook
Not sure about "cost more" ($127) but yes, the build volume is tiny.
empty sedge
I've known 3 people that buy anet a8 or similar machines to that and none of them have ended up with a good reliable printer when they were done. Some of them after some work print okay, but it really isn't worth the frustration
one of them had oversized holes for the vertical rails so there was almost a millimeter of play
 steep stump
doesn't the anet a8 have some problem with the heater mosfets that makes it catch fire sometimes
empty sedge
I think older versions had a splice to extend the heater wires in the drag chain that would eventually fail and sometimes catch fire
also LOTS of these cheap machines don't have thermal runaway protection in firmware so if the thermistor falls out or wire breaks they will start a fire
bad power connections at the control board are common but I haven't heard of that catching fire. It does burn and melt the connector though
karmic brook
Also the calibration, rigidity, and slop comments above for cheap delta printers probably apply to all the cheap printers, regardless of style.
steep stump
imo unless you're building an entire printer from scratch, it's probably unwise to buy a cheap printer that you're going to have to spend a boatload of money and time just to get it into usable condition
karmic brook
I started with a cheap printer, played with it a bit to get a feel for what I liked and didn't like, then upgraded to a nicer one, which still needed a little tweaking before it worked reliably.
empty sedge
go home marlin. you're drunk.
(lcd says it's printing string~2.gco but I selected pla3bu~1.gco)
weird, it is printing the one I want
 wind prawn
Anyone know where I could get a 3D rendering of the 3.5" TFT FeatherWing? The Adafruit Github has the 2.4" but as of yet not the 3.5"
empty sedge
could it be in another branch @wind prawn ?
kicad has a 3d export but there probably isn't a model for the LCD
GitHub
PCB files for the Adafruit 3.5in TFT Featherwing. Contribute to adafruit/Adafruit-3.5in-TFT-Featherwing-PCB development by creating an account on GitHub.
wind prawn
kicad has a 3d export but there probably isn't a model for the LCD
@empty sedge thanks for the suggestion on kicad... did a quick search and did not find anything but will go back in check a little deeper
empty sedge
PCB only
wind prawn
PCB only
@empty sedge Thanks... unfortunately the STL version does not provide me with the geometry I need to place the part into my 3D model but thanks for the suggestion
empty sedge
or if you're using fusion or something
wind prawn
or if you're using fusion or something
@empty sedge Oh now you're talking... Thank You (where did you find it)?
empty sedge
I imported the brd file into kicad using the eagle import then exported step
wind prawn
I imported the brd file into kicad using the eagle import then exported step
@empty sedge Oh well now that's a neat trick... is Kicad free?
empty sedge
yes
wind prawn
Well then I have a new To-Do item for my list (download/install kicad)... thanks again, this will be a tremendous help
 jovial plaza
I have a Dremel 3D20 printer that has worked great until the after I tried to do a print (I have used it before) but it would not boot and I believe the firmware got corrupted, which meant the USB cable used for updating/resetting firmware will not connect to my laptop and the printer. Does anybody have thoughts on what I can do to fix the printer?
karmic brook
I suppose the first step is to find out what kind of CPU board it has, to see what options there are for resetting/reloading it.
jovial plaza
It is a proprietary board built by flash forge the only info I have is the cpu which is a arm cpu
karmic brook
Realistically, I doubt the firmware is corrupted, and your problem is likely something simpler.
jovial plaza
Your probably right do you think there is some way to hard reset the board?
I also just found it has something called a SWD debugging port I don’t know if that’s helpful for resetting or not
empty sedge
SWD would be one way you could potentially reflash the chip but I doubt dremel would provide the instructions and files to do so
jovial plaza
@empty sedge I agree
,This experience has definitely showed me why I should buy open source
karmic brook
Your first task is to figure out why it doesn't show up on USB. Does it enumerate?
jovial plaza
It does show up during the initial boot sequence but once it boots it no longer shows up
karmic brook
Ah, so the USB interface is working, and the problem is at another level.
Does it show up as the normal device? Does a driver attach?
jovial plaza
I have a profile as a printer set up in windows no driver necessary
jovial plaza
This is not 3D printing btw
empty sedge
they're spamming all the channels
jovial plaza
It’s gone yay
 tight cove
anyone got some beginner 3d printer suggestions? ~£200 (for printing cases and small things, would like some decent quality prints also, willing to play with settings a bit to achieve the quality)
knotty laurel
Not a ton of options at that price point, but Monoprice has some "yes, they basically work" ones that people often start from before knowing what they want to upgrade to.
 dense wraith
Hey all, any suggestions on waterproofing printed parts? I'm making some small prints with internal channels for water flow, about ~5 to ~9cm diameter pipes. The water isn't highly pressurized but there's still leaking through the lines. I've tried higher resolution, thicker walls, but still have some leaks going on. Is there something cheap i can slosh around inside the water channels to (at least temporarily) waterproof them?
tight cove
i guess o-rings or silicone
like a soft rubbery material, so when something is compressed against it, it makes a seal
dense wraith
that'd help for joints between parts, but my prints are literally leaking from between the layers. would there be anything that can seal the layers themselves?
tight cove
@knotty laurel what would you say would be the next step above the monoprice printer
 somber summit
@dense wraith I have not tried this method yet, but i figured brushing a layer of plastic epoxy on the walls would help seal and reinforce the part. That was my plan if i decide to print any parts that hold and carry liquid. FlexSeal may be another alternative as well, though i don't know how well it would hold up.
knotty laurel
@tight cove I'll let someone else answer that, as I don't feel I know the available options all that well. However, Make magazine does publish an annual guide to 3D printers with lots of ratings, so that might be something to look at.
tight cove
alright, ill check that out thank you
somber summit
@tight cove My personal suggestion is the Anet A8 for a starter printer. I have one and it's been a good printer to me. There is a lot of printable upgrades for this printer as well as swapping out upgrade hardware is fairly straight forward. There may be some people who say the printer is a fire hazard and that was true at one point in time for 2 reasons. The terminal block on the mainboard was not up to par for the load being placed on it and the thermal runaway was not enabled in the firmware in earlier versions. The mainboard has undergone revisions to correct this issue and i believe the firmware has been corrected as well. (I did upload new firmware to my board just to be safe.)
dense wraith
@somber summit thanks! will try that
forest wyvern
@tight cove I would also throw in the Prusa Mini coming in at roughly 280 pounds. While more expensive, Prusa has some of the best support and community of any printer brand out there. It uses high quality parts and comes by default with PEI spring steel sheets and auto bed leveling so you waste less time trying to get the first layer to stick or adjust the bed and more time printing. They also develop their own slicer, which competes as one of the best slicers out there. They also support their legacy printers extremely well, so you don't need to worry as much about it becoming obsolete in a few years. I personally own an MK3S and it is the best printer I have dealt with. Also getting high quality prints has a large part to do with filament quality. Speaking from experience, spend the extra few dollars and buy filament from Fillamentum, Push Plastics, Prusa, etc. and you will be much happy with each print. Hope this helps!
 paper scaffold
can some one suggest me some thing more in this file which i can add to it?
jovial plaza
@tight cove I bought a mono price printer once and it was junk buy a prusa
@paper scaffold you might want to add little lines in the windows to show them as windows and if you are up to it a door on hinges
violet needleBOT
Adafruit Industries posted Print in Place Spring PCB Holder #Timelapse #adafruit #3DPrinting

Every week we'll 3D print designs from the community and showcase slicer settings, use cases and of course, Time-lapses!
Print in Place Spring PCB Holder
turbo_sunshine
https://www.thingiverse.com/thing:4445190
CR10S Pro
Green PLA
6hrs 59mins
X:189 Y:194 Z:75mm
.2mm layer / ....
Adafruit Industries posted Print in Place Spring PCB Holder #Timelapse #adafruit #3DPrinting
Every week we'll 3D print designs from the community and showcase slicer settings, use cases and of course, Time-lapses!
Print in Place Spring PCB Holder
turbo_sunshine
https://www.thingiverse.com/thing:4445190
CR10S Pro
Green PLA
6hrs 59mins
X:189 Y:194 Z:75mm
.2mm layer / ....
violet needleBOT
Adafruit Industries posted Automatic Brake Light #3DPrinting #adafruit

Build a bike light with the Circuit Playground. It senses when the bike is braking and lights up NeoPixels when the bike is slowing down.
When the bike is at a full stop, the NeoPixels will fade in and out!
A 3D printed mount allows you to attach the circuit playground case...
tight cove
I am thinking of getting an ender 3d printer, however i would like to ask you guys for your opinions (even if you dont own any of the models, you will have expereince with printing so you might know what to look for in a printer better than me).
I am choosing between:
Ender 3
Ender 3 Pro
Ender 3X
leaning towards the 3X
violet needleBOT
Adafruit Industries posted 3D Hangouts – Brake Lights and Hourglass

Visit the Adafruit shop online - http://www.adafruit.com
LIVE CHAT IS HERE! http://adafru.it/discord
Adafruit on Instagram: https://www.instagram.com/adafruit
Subscribe to Adafruit on YouTube: http://adafru.it/subscribe
New tutoria...
jovial plaza
@tight cove depends on what you need
paper scaffold
hey everyone
is tinkercad a good site for 3d building
?
and can anyone tell me what kind of downloadable 3d designing apps are there which are good
empty sedge
okay, so
@paper scaffold tinkercad is okay, but it limits what you can do to shapes to create new shapes
fusion 360 is similar in workflow to solidworks, but though you download it to your computer it wants to upload all your files to autodesk. It's free for hobbyist use or I think like $500/year
freecad can also use a workflow like solidworks, but it's not as polished as fusion 360
paper scaffold
i want a free one
empty sedge
otherwise, there are art tools like blender that have a completely different workflow that doesn't limit you to creating watertight solid models
wind prawn
i want a free one
@paper scaffold If you register as non-commercial, Fusion is free
paper scaffold
ohk
empty sedge
otherotherwise there is openscad which you type in the parts you want to add and operations to do on them with code. all of the prusa 3d printed parts were originally designed in openscad
the "solidworks-like" workflow is to make a 2d dimensioned and constrained drawing, then select faces and do operations with them like extrude or revolve. Then pick another face or plane, draw another sketch and continue
you end up with parts that are shaped like machined parts
the more smooth cuves-everywhere parts would be done with the "surfaces" tools
I don't think freecad has any surfaces tools
forest wyvern
I second @empty sedge on Fusion360 if you want to do engineering work, as that style of work flow is easily transferred across various engineering CAD software
 vernal panther
@paper scaffold Also check out openscad. You actually code the different shapes as objects which if you're used to programming but not used to CAD is really nice
tight cove
any recommendations for mainboard upgrade for ender 3 pro? (from stock)
 inner lance
SKR 1.4 with TMC2130s or TMC2209 drivers would be my recommendation. I have the 1.4 and the 2130s. Initially I had the 2209s but support for them in Marlin still seems to be a bit iffy so I switched to the 2130s. Getting the 2130s fine tuned with sensorless homing was a little more difficult than the 2209s but it's been working great for the last two weeks.
violet needleBOT
Adafruit Industries posted Playing Card Holder #3DPrinting #Timelapse #adafruit
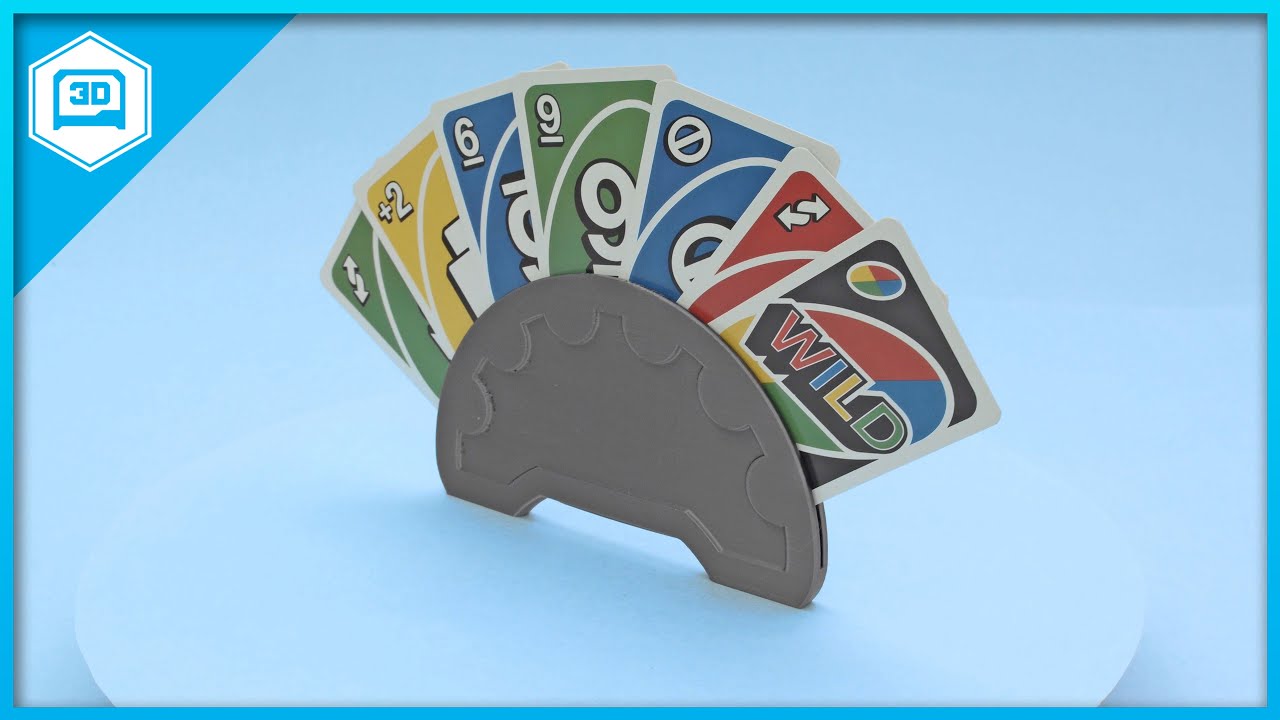
Every week we'll 3D print designs from the community and showcase slicer settings, use cases and of course, Time-lapses!
Playing Card Holder
kwalus
https://www.thingiverse.com/thing:95818
CR10S Pro
Silk Black PLA
5hrs 57mins
X:201 Y:180 Z:82mm
.2mm layer / .4mm nozzle
10% Inf...
violet needleBOT
Adafruit Industries posted LED Matrix Hourglass

Build a beautiful 3d printed hourglass physics toy using LED matrix and Feather Sense. Use CircuitPython to simulate particle collision code on a small microcontroller packed with tons of sensors. With Built-in lipo charging over USB, your projects can be small and portable!
...
violet needleBOT
Adafruit Industries posted 3D Hangouts – Hourglass and Card Holder
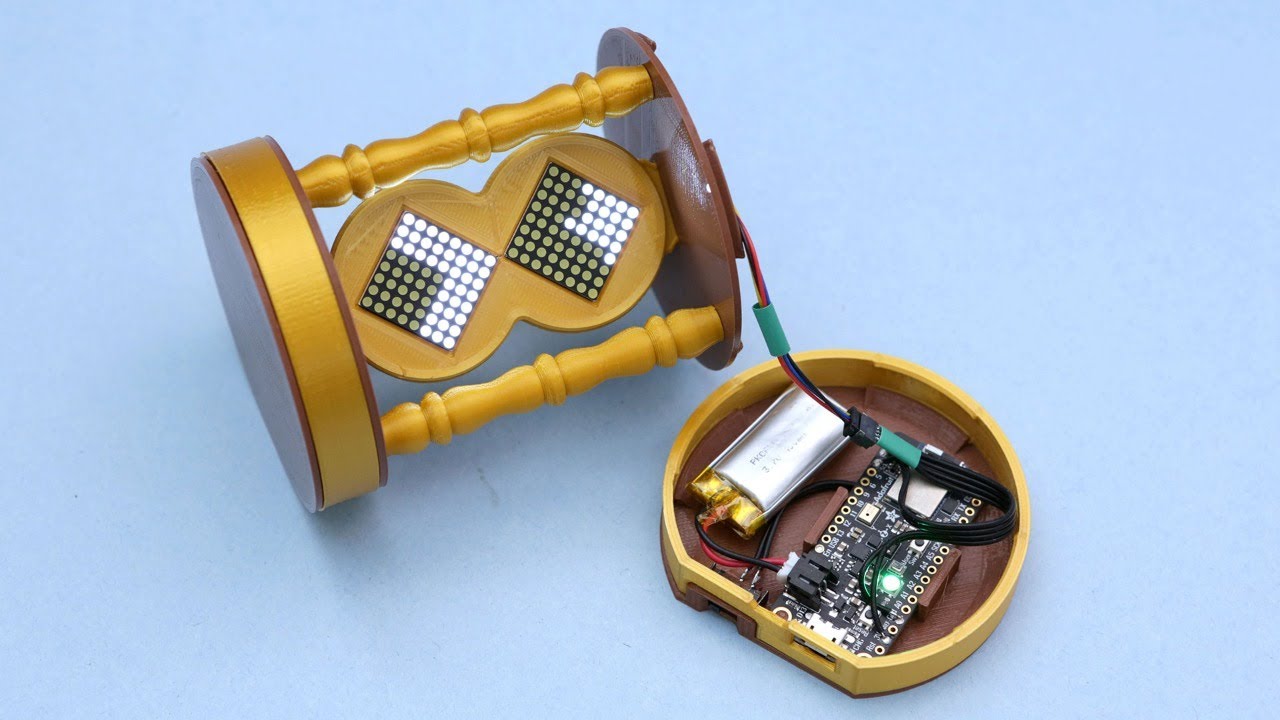
Learn guide
https://learn.adafruit.com/led-matrix-hourglass/
Code on Github
https://github.com/adafruit/Adafruit_Learning_System_Guides/tree/master/CircuitPython_LED_Sand_Hourglass
YouTube Video
https://youtu.be/sO3tqN-1lj8
Feather Sense
https://www.adafruit.com/product/...
formal relic
what 3d pen is recommended? I need it to joint 2 PLA parts and fill some holes in prints.
 whole lichen
Hello, I have a ender3 pro and print PLA. I am currently experiencing some issues more frequently. Some PLA spool are definitely reacting better. I often have bubble in first layers. I also sometime struggle with first layer adhesion (I have the original plastic bed), quite a lot of stringing specifically with this grey PLA. And finally the intra layer adhesion is not always good, ie I can see some very small gap on the sides of the print. I attach some photo and would appreciate some advice. I know this can be caused by many factors. But may be experienced printer can have tips to improve my print quality. Many thanks!
formal relic
dry your filament, and read about oozing and stringing, - most of the times you need more retraction
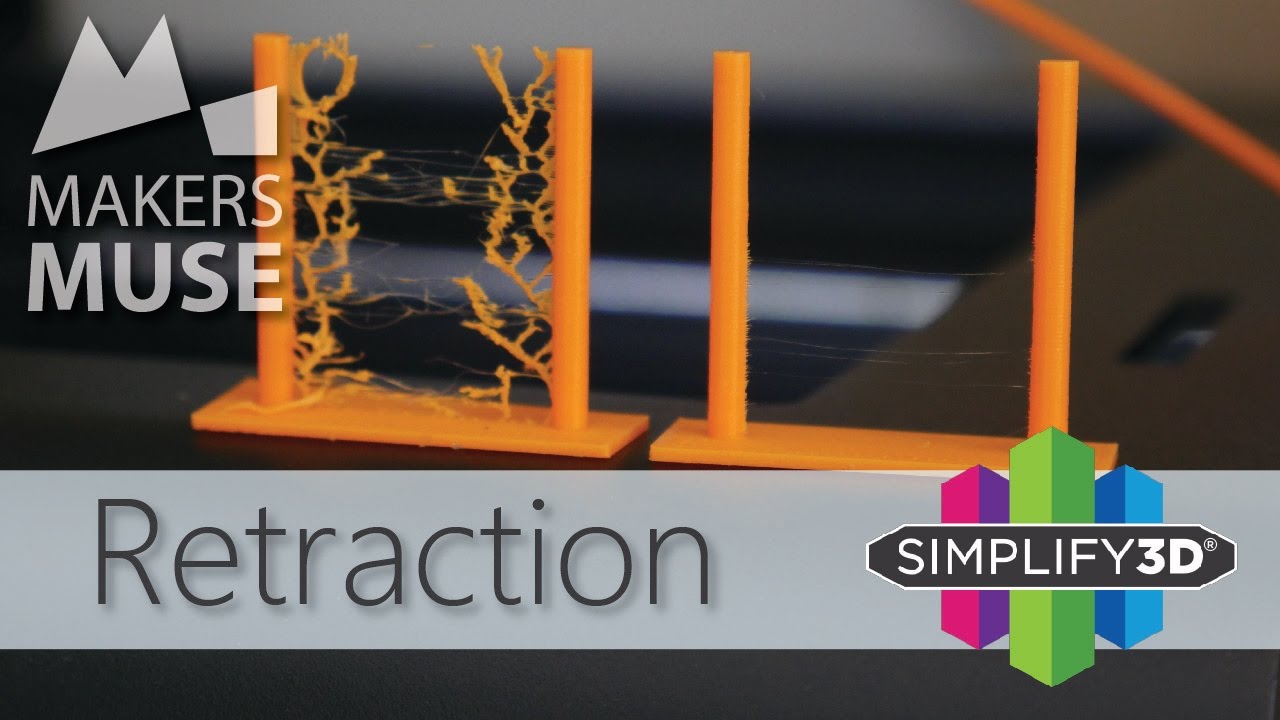
Retraction is a super useful setting you can use within your slicer to greatly improve the quality of your 3D Prints, but it's very misunderstood! In this 3D Printing 101 we'll go through the basics of what retraction settings are and how you can tweak them.
You'll be amazed...
@whole lichen ^
whole lichen
Thanks a lot, I live in Japan and it is not particularly dry so this may be the reason. Do you have link to storage / drying tips? Will look into retraction. thanks!
Found many video on YouTube, thks!
karmic brook
I ended up making my own filament dryer out of a food dehydrator
karmic brook
For storage, I opted for plastic bins with foam gaskets, and packages of silica gel dessicator beads (the metal tins). I chose indicating dessicator that changes color when it's saturated, so I can pop the packages in an oven to dry them out for use again.
tight cove
(ender 3 pro) does anyone know why my extruder stepper keeps skipping backwards? The printer is almost a week old. I have checked the boden tube, I have changed the nozzle, I have checked the tension on the arm that presses the filament against the stepper gear. I have also upgraded to a SKR mini E3 V2, the problem happened on factory board and this board
it makes a knocking noise and jumps back, so its messing up my extrusion settings
if i apply pressure to the arm that pushes it agains the gear it happens constantly, if i dont it rarely does it but the idler bearing stops moving and the filament doesnt move, but the stepper is trying to extrude filament
200C PLA
i print at 215C
empty sedge
@tight cove it's taking too much force to push your filament through your hotend... there's dozens of reasons this could be the case: printing too fast, clogged nozzle, gap in melt zone (between bowden tube and nozzle?), your spool is too hard to pull, bowden tube is distorted, filament too large in diameter or has bulges getting caught, and probably several other ways I didn't lsit
your extruder clicking is it failing to have enough torque to push the filament so it jumps back to the previous "step"
it could also be the current setpoint on the extruder axis but I doubt it if you've had this problem on two different control boards
tight cove
is it possible the extruder gets weaker as it heats up? Ive been doing a print for 1h11m (just cancelled it since this started happening and ruined the print) the extruder is fairly warm. The print has a lot of retractions so its constantly going back and forward, when I started the print it was fine but now its warmed up its skipping like crazy
also in the video, you see the ziptie moving, indicating the boden tube on the extruder end is loose?
i increased the tension on the spring because the bearing would stop moving but the gear would move but not the filament, causing it to just grind at it
tight cove
printing 80mm/s 215c PLA, calibrated E-Steps/mm
empty sedge
at what layer height @tight cove
empty sedge
yes, it will reduce in torque as the motor heats up but if the motor stays under say 150f/60C then the current limit is about right and the motor isn't your problem
is the fan on the cold side of your hotend working?
tight cove
what do you mean?
both fans are working
top of the hotend is cool to the touch, so its getting cooled
formal relic
or the extruder is clogged..
tight cove
already checked, changed nozzle, trimmed tube also
filament roll is also on a bearing holder, so its not the friction from the filament spool
formal relic
if you power the extruder disconnected from the printer?
just the motor without anything
empty sedge
if your motor is getting warm your current limit isn't too low
tight cove
the motor is definitely below 60C
i can touch it and hold it forever without it being uncomfortable
its just warm, id guess around 40C
empty sedge
I think you can change the current setpoint on the SKR mini e3 with M906. Send M906 with no parameters and it should print out what the current setpoints are
I think it uses RMS current not phase current so 1.2A would probably be plenty
empty sedge
eh, I was hoping to compare to the prusa firmware but they don't specify current setpoints but H/S/R values that range from 1..35
@tight cove does the motor have a part number we can look up?
tight cove
says Creality 42-40 on the side
empty sedge
@tight cove try M906 E900 and see if it works better and doesn't get too hot
tight cove
also do i need to run M500 to save it?
empty sedge
if you want it to stick around when you power cycle, yes
tight cove
alright, thanks for the help
tight cove
@empty sedge about 30m into the print I was doing before and it's started skipping again, just as bad as last time
It was skipping constantly for about 30s, now it's stopped
empty sedge
is there a fan moving air over the electronics?
but still, I bet it's a mechanical issue somewhere at the extruder or hotend
tight cove
All fans are active, stepper drivers have the heatsinks that came with the skr mini
empty sedge
[if the stepper drivers were overheating they'd shut off for a longer period than the lost steps you are seeing]
tight cove
PSU fan, main board fan, hotend fan, part fan are all ok
Must be the Bowden tube, strange tho since it's only a week old
empty sedge
weird, maybe the ender 3 extruder just isn't very good
reddit
3 votes and 9 comments so far on Reddit
you're asking for 6.4mm3/sec
tight cove
Interesting, before I got my new main board tho I was printing at 50mm/s and it was still skipping occasionally, not as often as now but the skips were more severe, I increased to 80mm/s since the board could do calculations faster than the 8-bit stock board.
empty sedge
https://www.youtube.com/watch?v=7tCxO17XZtw <- video about fix for jam between ptfe and nozzle

Chuck shows you a simple hotend fix for your Creality Ender 3, CR-10 or just about any Creality Printer. He uses a technique created by Luke Hatfield to create a higher temp insert for the Hotend. But Chuck adds his own twist to the design to give you a higher temperature solu...

3D Printing Stack Exchange
I've already asked this question somewhere else but unfortunately I had little luck.
So... my Ender 3 Pro extruder just started skipping steps, as in the gears (and the gear pinion) will rotate bu...
it's weird we're reinventing solutions to problems that we already solved years ago
the reifsnyder j-head hotend from 2011 has a hollow setscrew to hold the ptfe tube in place against the hot side
tight cove
Well, that's bad, probably also my problem
Gonna untension the spring
How does pla even do that to brass
i have offset the gear so new teeth are touching the filament, loosened the tension spring so it no longer crushes the filament flat but now the gear spins then filament stops moving while the gear it spinning, so its just grinding at it, i tried to give it more tension and its getting to the point where it was at where it crashed it flat
there is too much or too little tension
karmic brook
Seems like something else is binding so it takes too much force to move the filament.
violet needleBOT
Adafruit Industries posted Fusion 360 Tutorial – Circular Snap Fit Case
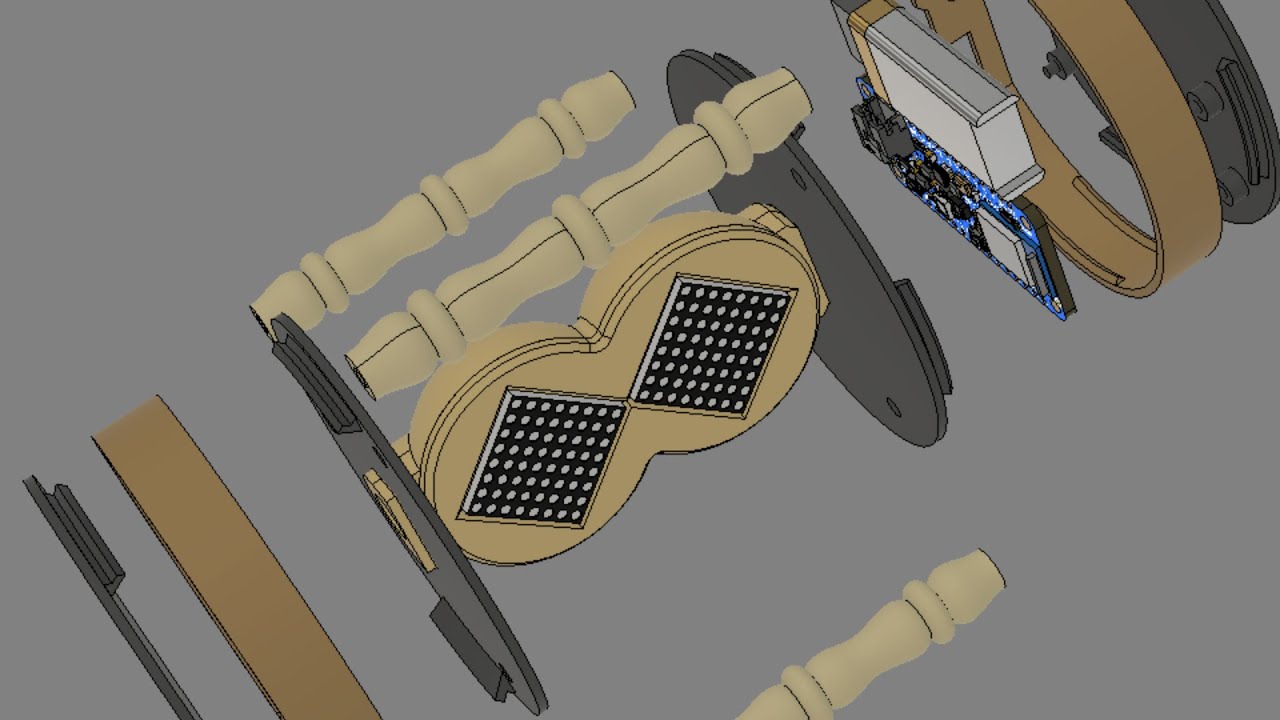
LED hourglass
https://learn.adafruit.com/led-matrix-hourglass/3d-printing
Fusion 360 link
https://a360.co/2Z2Y9jB
3D hangouts livestream
https://youtu.be/HEfwRtWz4IA
project video
https://youtu.be/sO3tqN-1lj8
3D Parts Library on GitHub
https://github.com/adafruit/Adafrui...
 tight flower
Hi, I'm new here. I'm making a 3D printer and on my printers X axis, the motor pulley and the pulley on the other side are of different radius. One is a 16 tooth one and the other is a 20 tooth one. Will this cause any problem?
empty sedge
@tight flower if only one is driven, and the other is free to spin it won't be much of a problem. check to see if the belt length changes as the x axis moves
the lulzbot taz has I think a 20 tooth gt2 pulley (about 13mm diameter) and a 22mm idler... most printers don'd do that any more
it should ideally have the two belt ends anchored to the x carriage at different heights so the tension doesn't change through the travel but it doesn't really
I'm wrong. they do it fine for the parts fixed to the carriage being in-line. the direct pully to idler part is at a diagonal which is fine because as the axis moves these don't change length
it's probably clearer in this photo of Y: https://ohai.lulzbot.com/media/uploads/IMG_2953.JPG
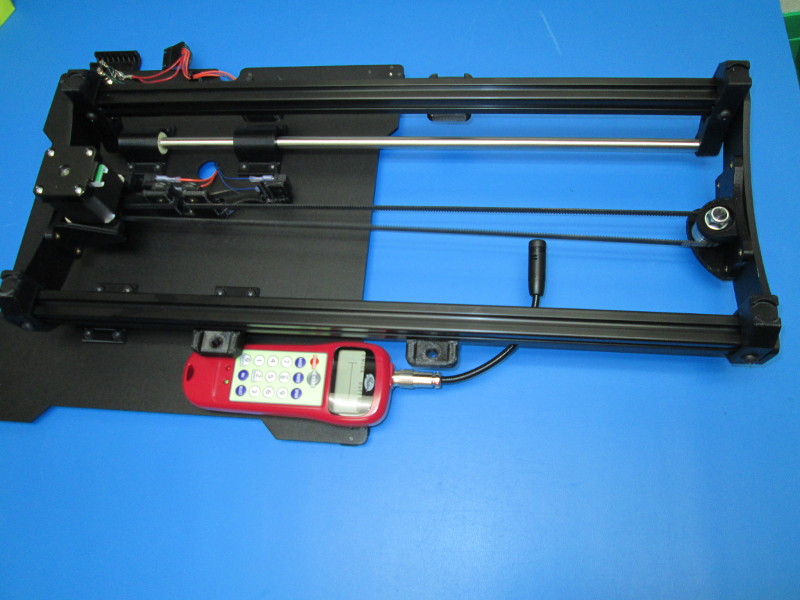 tight flower
The ends of the belts are connected at the same height on my design and the belt gets slightly tighter when the X carriage is on the idler side, since its bigger. It should print almost fine though right?
empty sedge
see how the idler is offset in the photo so the pulley->carriage->idler side is parallel to the rail?
tight flower
Yes they are parallel. But the belt is not parallel, since the idler is bigger
So I guess its fine for first print, I can print same size idler once I get this printer running, this is my first one
empty sedge
yeah
tight flower
so I was wondering, how I can calculate steps per mm with this
The pulley is 16T and idler is 20T. Should I use 16T?
empty sedge
yes
tight flower
Oh and another question, are those idlers without teeth on them bad for the belts? I'm using one of those for my Y axis since I only have one with teeth thats being used on the X axis
empty sedge
it's not a problem
tight cove
why does my nozzle scrape printed parts? i enabled Z Hop on retraction (Retraction distance 4mm, speed 25mm/s, Z Hop Height 0.2mm)
i had z hop off, but then enabled it because it was scraping but its still doing it
karmic brook
If it's only scraping in part of it, it could be a curling/warping issue.
 tawdry forge
It Happens (tm). I hate z lift but with multi small parts it helps 😦 Good slicers optimise the path to avoid overlapping during travel but sometimes small over extrusion or thin walls can have a little edge curl up especially with small layer heights like 0.1
maybe try drop your extrusion multiplier a tiny amount
z lift can make it worse if your z axis has any backlash
tight cove
flow rate is at 95%, turned off z hop again, and it still scrapes the surface of parts
it doesnt do it on every print, only small complex ones with lots of tiny circles
 mild moss
Hey! I am working on my ender 5 and am having some quality issues. This little test cube prints fine but when I try to print anything with curves, I get lots of little nubs. Both of these are printed in PETG with the same settings
Esteps are calibrated and my bed is level.
empty sedge
@mild moss did you print from an Sd card?
empty sedge
try from an SD card but you have probably more than one problem
mild moss
SD card reader has not been working on the ender. I was thinking it may be a belt issue but I really have no idea
empty sedge
it's not just a belt issue
mild moss
My pi did crash part way through the failed print so I have no idea if that would play Into it
empty sedge
it's slowing down for every segment and leaving a bulge but why is it slowing down so much?
what pi?
mild moss
OG
empty sedge
marlin firmware will slow down if the move buffer iesn't full enough which is why I suggested using an SD card
yeah the original 256MB ram pi with copmosite can't keep up with octoprint
mild moss
So I guess that’s my problem. I’ll try a teathered print and see if that fixes it
tight flower
I wonder what wire gauge I should use with my stepper motors as extension. I got them out of old electronics at the dumpster place, so the wire is only 60mm long.
empty sedge
@tight flower what are the motor dimensions?
24awg is fine for nema17 motors because they're rated 2A or less
thicker would be nicer obviously though
shy kelp
Hello. My printer randomly slips when it pulls more filament. I'm not sure if something should be tightend or if its because the room its in is very humid.
What should I do?
empty sedge
do you mean the layers shift, or the filament slips in the extruder?
shy kelp
The stepper motor sort of makes a weird clicking noise and it appears to be making the filament slip. Maybe its normal..? idk
should I upload a video showing it?
empty sedge
I bet it'd look like this one: https://discordapp.com/channels/327254708534116352/330445847382851587/731294682159775745
@shy kelp what printer? what filament? what temperatures, layer height, nozzle size, and print speed?
shy kelp
Thats exactly it!
Ender 3 pro, PLA 1.75 currectly at 200 degrees C and I think I put layer size at .28 which might be causing this since thats the fastest right?
empty sedge
yeah, it sounds like over 5mm^3/sec seems too much for some people
(which at 0.28mm layers and 0.4mm nozzle would be about 45mm/sec)
anyway scroll to that message to see other suggestions
shy kelp
ok thanks for the pointers!
formal relic
what nozzle size you have?
shy kelp
i can't remember but its the default one with the ender 3 pro
formal relic
for 0.4mm nozzle 0.28mm layer is not recommended
also 200C for pla sounds abit low to me
shy kelp
is there like a table of nozzle to layer list on whats recommended?
empty sedge
I disagree. 0.3mm layers on 0.4mm nozzle (75% of nozzle diameter) is fine but going taller would result in weaker layers because of the rounder cross-section. But yeah, for ender 3 you might want higher PLA temps
shy kelp
👍
restarting the print, it already looks so much better lol, i wish its profile on cura had this as default
tight cove
Why does my ender 3 pro main board cooling fan make a grinding noise when starting it up, it only happens when the printer has been off for a few hours. The sound stops after 5s, I have checked if any wires are touching it. Are the bearings in the fan messed up? (surely it would make the sound constantly if it were bearings)
its the stock fan, the printer is about a week old
karmic brook
Could be something stuck in it, bearings, or a lubrication issue.
shy kelp
Ok, I did up-ed the PLA temp and went back to .2mm layer. It still has the same issue and one of the layers was melty with bubbles in spots.
tight cove
I have set my Z offset and set home offsets and stored the settings. When i rehome it, it says its at Z:-0.01
i set the Z offset to +0.01
so its homed to 0, but its not at the offset home
how do i get it to home to +0.01
is this something to worry about? or just ignore it and it will print with my offset?
tight cove
nvm i figured it out
btw, i have offset my Z so it prints nicely at 0.2mm, when i measure with calipers its over 0.2, like 0.25-0.3
but if i offset it so the calipers measure 0.2, then it prints badly, like instead of smooth layers its kinda rough and the sides of each line slightly spread out and up (like its too close)
this would mean its over extruding right? but i calibrated it and its under extruding by 6mm
tight cove
whats happening here?
why are there small scrape marks like that where the layers stop/start
empty sedge
maybe because there's a "wipe" in the gcode
also looks like you're over extruding a lot
violet needleBOT
Adafruit Industries posted Memory Falcon #3DPrinting #Timelpase #adafruit

Every week we'll 3D print designs from the community and showcase slicer settings, use cases and of course, Time-lapses!
Memory Falcon
IdRatherBeMaking
https://www.thingiverse.com/thing:4254975
CR10S Pro
Grey PLA
23hrs 47mins
X:206 Y:180 Z:18mm
.2mm layer / .4mm nozzle
10% In...
tawdry forge
I think they're faster to calculate or something, STL is only triangles
Voxels are making a comeback too at least on some MSLA printers. Which is better because it's fun to say "voxel"
 wide blade
In computer graphics we use triangles because they are always flat. A quad can be bent or twisted. Maybe 3d printers do it for the same reason?
karmic brook
My height map code simply breaks everything into rectangles, then divided them diagonally into triangles. For some reason, the old Silicon Graphics machines chose to render everything as trapezoids instead of triangles.
violet needleBOT
Adafruit Industries posted 3D Hangouts – Matrix Hoops and Camera Cases
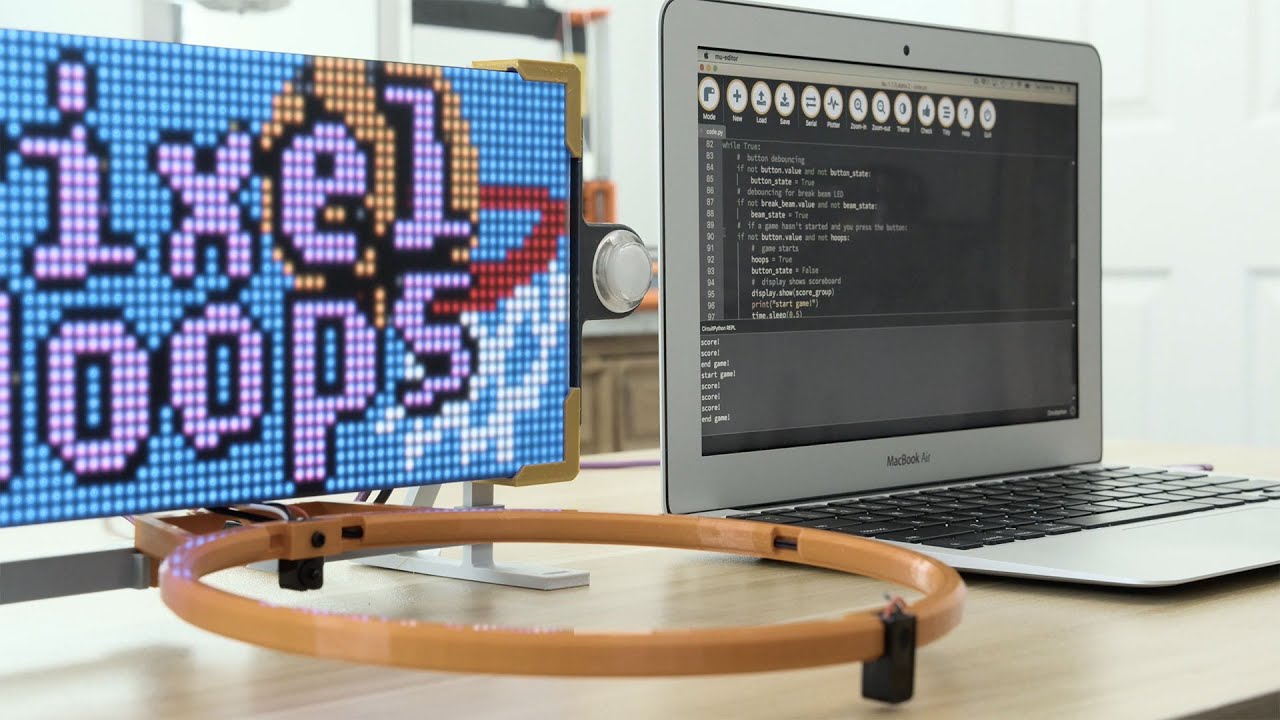
Visit the Adafruit shop online - http://www.adafruit.com
LIVE CHAT IS HERE! http://adafru.it/discord
Adafruit on Instagram: https://www.instagram.com/adafruit
Subscribe to Adafruit on YouTube: http://adafru.it/subscribe
New tutoria...
 scarlet folio
I am thinking about buying a creality resin printer. Any of you guys have experience with it?
violet needleBOT
Adafruit Industries posted LED Matrix Scoreboard

Build an LED scoreboard using an RGB Matrix and CircuitPython! This indoor game lets you shoot hoops and display your score on an LED Matrix.
The 3D printed hoop houses an IR break beam sensor that detects when a ball has gone through it. The 3D printed parts hold everything ...
tight cove
Under extrusion?
empty sedge
yeah, some @tight cove
it could be your e-steps are wrong, temp too low, or print speed too fast, or some combination
also the bulges on the corners are what linear advance was built to fix
tight cove
210C calibrated E-Steps so when 100mm is extruded it is actually 100mm
flow is at 88%, ill increase it a little
I dont see linear advance in cura settings?
tight cove
I have an SKR Mini E3 V2, do I just download the Marlin firmware off github or do I need to get the firmware specific to that board? https://github.com/MarlinFirmware/Marlin

GitHub
Marlin is an optimized firmware for RepRap 3D printers based on the Arduino platform. | Many commercial 3D printers come with Marlin installed. Check with your vendor if you need source code for yo...
empty sedge
I don't know. I'd expect marlinfirmware/marlin would get support for that board but I don't know if it has it now
that said you might already have the feature enabled. check the output of m115 and m900
the prusa profiles for i3 mk3s have m900 in the filament gcode
tight cove
M900 is an unknown command
empty sedge
ok then you don't have linear advance enabled
I've got to go but you can find youtube videos by teachingtech or chris's basement about tuning linear advance
and teachingtech probably has a video about setting up marlin for the skr mini e3. not sure about v2 of it
tight cove
alright ill check it out, thanks for the help
tawdry forge
That looks okay probably just need more outline overlap in the slicer
tight cove
Followed instructions from techingtech for linear advance, been at it for 5 hours keep getting this, it also makes a strange sound after the first line
This is the sound it makes. It gets worse with each line, that tape didn't help adhesion lol
somber summit
@tight cove questions for ya: 1. is that a magnetic bed? 2. do you have autobed level? 3. did it make that noise before enable linear advance?
tight cove
1: Yes
2: No, but i have levelled it manually
3: It didnt make the noise before linear advance
empty sedge
yeah increasing the linear advance factor causes the motor to move forward/reverse more
somber summit
what did you use to set the spacing between the nozzle and bed?
tight cove
printer paper, which i later realised was too thin, then i just kept baby stepping until i got good layers with a bed level test (4 20mmx20mmx0.2mm squares in each corner then 1 in the middle)
empty sedge
@tight cove try a print with the k-factor from about the middle of your picture
I had similar luck where the linear advance tuning thing didn't stick great for the numbers so I used a gcode preview to see what the numbers were at the good results
somber summit
that's odd, i use the same and set it so there is just a little bit of friction while pulling on the paper. if i go above that, bed adhesion really begins to suffer..
empty sedge
^ @tight cove highlighted above one you should use k-factor from
tight cove
the one you highlighted was 1.0, i have set the start value to 0.8 and end to 1.2, and each line increase by 0.05
ill see how it turns out
also lowered the head by 0.01
they are all pretty much the same
but all the ends have a little dot at the end, on the right
isnt lin advance meant to solve that?
somber summit
are you also still using .24mm layer size with a .4mm nozzle? there was an article that i read that stated your layer size shouldn't exceed 50% of your nozzle size.
somber summit
it's suppose to solve that, but i didnt have very much luck with it myself
and i thought bowden tube systems were suppose to have a lot higher K-values.... i will double check that in a bit to know for sure.
scroll down to: LIN_ADVANCE can reduce your print acceleration
i am hoping that will give you some insight into why your printer is behaving the way it is
tight cove
the numbers stuck better, the lines still have the dots, and all lines look basically the same
empty sedge
yeah I'd probably take the lowest one of those
somber summit
@tight cove looking somewhat better... in the Cura settings under Travel... do you have retraction enabled?
and out of curiosity...what are you running for material and at what temps?
tight cove
I do have retraction enabled 6mm, 25mm/s, but the print in the picture wasnt sliced with cura, it was from a website that generated it (https://marlinfw.org/tools/lin_advance/k-factor.html)
PLA 210C extruder 55C bed
currently printing another calibration cube, ill compare it with linear advance and without
somber summit
will this cube be with linear advance then? or without?
somber summit
is that still .2 layer height?
lilac patio
I experimented with adding linear advance to my Bowden setup awhile ago but I didn't really get it to work
tight cove
both are .2
right also had less extrusion rate
88%, left is 95%
other than than all same settings
i dont think linear advance is worth it for me right now
somber summit
that top layer looks really funky, i would try cutting the height down some...like maybe around .15mm. i would also increase your retraction distance up to around 8 or 10mm. that will hopefully get rid of the start blobs.
the recommended retract distance for bowden style printers according to 3dinsider is between 8 to 16mm
https://3dinsider.com/3d-printer-retraction/ section 3 if you want to read it for yourself
3D Insider
As we’ve often mentioned, getting good results out of your 3D printer usually involves things going wrong initially and you adjusting your printer’s settings to solve these problems. The great thing about 3D printers is
@tight cove troubleshooting your printer will be a lot easier without the linear adv enabled for sure...lol
@lilac patio out of curiosity, what 3d Printer do you have and what do you got your retraction distance set at....if you don't mind sharing that is
lilac patio
@somber summit I've got a CR-10 and I have a retraction of 6mms for PLA. I use coasting too
somber summit
@lilac patio thank you for that. after reading about it, using the coasting setting may also prove useful in @tight cove situation as well
lilac patio
No prob
empty sedge
https://discordapp.com/channels/327254708534116352/330445847382851587/733473785617055806
@tight cove I wonder if your top layer infill speed is faster than your extruder can keep up with. But looks better, if consistently under-extruded infill on top. Turn up the flow %
I think your retraction on that print looks fine. 6mm at 25mm/sec should be about right or maybe a bit much on an ender
if you want, you can "disable" linear advance without sending new firmware by setting the k-factor to 0
M900 K0
 rotund pebble
Hello, i want to build the infinity mirror cube. I watched the Video. Where can I find the CAD-Files for the cube?
tight cove
What causes this line in the middle? Is it ghosting? Seems to be caused by the Y where the single line of the Y splits into the two angled lines
shy kelp
I get something similar I think
Is this related to nozzle temp?
I set mine at 215 C
shy kelp
How do I get rid of this layer problem?
shy kelp
Does anyone know how to solve my layer problem above?
shy kelp
Would that be considered layer shifting?
karmic brook
I can't really tell from the picture, but it appears not. Layer shifting is when X or Y is off relative to the other layers, so it sticks out a bit on one side and has a matching depression on the other. If it sticks out on all sides (as that appears to do), it may well be another problem like losing a step on the Z axis so two layers are squished together and push out on the sides.
karmic brook
It depends on what the actual cause is. It could be belt slipping or a motor losing steps (which in turn can be misalignment, stiffness, insufficient drive current, or other causes).
shy kelp
maybe its the belt, it feels somewhat loose, should it be as tight as possible?
karmic brook
There's lots of useful information here https://rigid.ink/pages/ultimate-troubleshooting-guide

rigid.ink
This the web's most comprehensive guide to troubleshooting your FFF (or FDM) 3D Printer. Any problem you could think of having, is explained here with high resolution images and detailed explanations to resolve it - including 3D Printer and Material specific suggestions.
Belt tensioning is a fiddly thing, it should rarely be "as tight as possible", but neither "somewhat loose".
shy kelp
oh cool that guide looks helpful
yeah it could probably be the belt
or maybe the z axis stepper motor since its very easy to move down rather than up
karmic brook
A lot of printers (but not all) use a leadscrew instead of a belt for the Z axis.
shy kelp
oh, yeah thats what i have
 latent coyote
Been learning fusion360. I made this today. Small Case for Trinket M0
The lid slides on.
tawdry forge
Is this related to nozzle temp?
@shy kelp Could be, or poor part cooling or even bad filament. The elephants foot in the middle suggests to me the former but this could just be a matter or slicer settings or plain trying to print too fast.
@latent coyote nice job. Fusion is definitely worth learning, was glad I invested the time
@shy kelp unfortunately without knowing more about your setup Id just say check everything, make sure to do a PID calibration, no backlash and check your slicers quality troubleshooting guide (they all have one...).
latent coyote
@Colin Thank you, and Good Morning. I'm having a lot of fun with it.
tawdry forge
I will never know how to sculpt though, thats some sort of special witchcraft handed down to CGI people
Can only make square things
latent coyote
Is this a good place to post to share 3d printing builds?
tawdry forge
Like this?
I dont see why not!
Or something I actually modeled which took like 100 hours of fusion 360ing
latent coyote
@tawdry forge What is the bottom one for. Looks like a computer tower case, but the size is smaller. Thats awesome!
tawdry forge
Yeah I made it as detailed as I could get in about 1:20 scale
latent coyote
nice!
tawdry forge
Still need to publish the design actually it totally slipped my mind
latent coyote
looks fantastic to me. Do you do anything special for smoothing?
tawdry forge
No I didnt do any smoothing on that
prusa mk3s with the nickel plated E3D just prints like glass
latent coyote
Thats awesome! I have the Creality CR-10S i print with a .2 mm layer height, and its pretty smooth. but there are times where it can be a bit rough.
tawdry forge
Ive found for some reason printing at 0.15 is the best
0.1 doesnt come out as well often
0.2 is like my draft setting for big boxes 😛
latent coyote
i will have to try .15 on my next print. I get artifacting like this from time to time.
tawdry forge
yikes
latent coyote
thats on the build plate. printing on glass.
tawdry forge
how many bottom layers?
latent coyote
id have to check the configuration, 4 i think?
and it's hit or miss, i could print this same print 10 more times, and maybe like 4 of them will have this.
tawdry forge
might up that to 6 top and bottom, bit longer print time but can help. Gotta watch the first layer and make sure if you print at small layer heights to have the first layer be thicker than normal so I always lay down at least .2 or .15 on the first layer
latent coyote
I will look, i think i have .2 on the initial layer height.
tawdry forge
I always watch the first layer, if its not perfect your print is doomed so I throw it away and start again if it doesnt look good
latent coyote
i might get a surround for it to see if that helps?
tawdry forge
bed leveling is the most important part of printing, thats why I love the prusa i3 and mesh leveling. With my old wanhao I used to fine tune the bed while the first layer printed to make sure I got it perfect, lots of burned fingers 😂
latent coyote
🙂
tawdry forge
Yeah enclosure helps. I want to build one but cant find acrylic sheets at all right now, there is a waiting list here with priority going to shops and protective shields
latent coyote
I saw some 3d prints for connectors for acrylic surround.
You've given me some things to think about. I appreciate the information and your time.
 kind coral
pls beg
 shrewd rose
guys im in mids of buying a ender 3 ( costs about 20k INR = 270USD) or building one myself from scratch or just upgrade ender 3
I have worked for like 2 years with handling printers so I know how to do well everything from cad to software side I can manage so that is not issue
What I want from the printer is quality prints and ability to print flexible
size can be small I dont really mind that like 200mm cube works totally
is ender 3 good for this or mod it or make one
Cartesian type is what I kinda prefer to build with direct drive
few questions I have are:
- Is having linear rails on X and Y axis good or just the X is good or for 200mm get simple belt going on with rollers or the classic belt and bearing combo
- which design would u say is kinda the all rounder
what im thinking is go
dual Z motor with lead screw
belt and bearing for X
and have a linear rail for Y
I really like how Zmorph has its design
something like this do be feelin kinda strong and rigid
and also how they have their X axis setup
doing all this will add about 10k INR = 130usd more
so core question is Will this be justified by reliable and high quality smaller prints ( sometimes even flexible )
or just mod an ender 3 with direct drive for good prints just not 3d print flexible for time being
 wild thunder
@shrewd rose I think an ender 3 will do the job quite well for you. I personally own a Tevo Tarantula and after making very minor upgrades, I'm getting really awesome prints from it. Haven't tried any flexible filaments yet, so I can't say anything about that.
empty sedge
@shrewd rose wow those photos are weird looking. It's like someone took the old Mendel design and went overkill building it
the old mendel design wasn't rigid in the X direction because the entire (threaded rod) frame would shear. Also the horizontal rods on the X carriage made it annoying to both have the hot end poking through and the belt
so the prusa i3 was a much more rigid design in the X axis by having Z and X on a single plate
but if you're talking about a printer in the $300 range you're not going to get a prusa i3
I've seen too many people buy a cheap (like $150) prusa i3 clone and a garbage machine. Don't do that
v wheels work well enough if you have the preload set ok. that said I doubt you're going to find a direct drive printer for $300 that can print flexibles
or just mod an ender 3 with direct drive for good prints just not 3d print flexible for time being
@shrewd rose
yeah pretty much
I'd really recommend the prusa i3 mk3 if you want a reliable machine because the automatic bed leveling and removable steel sheet and good print profiles make getting reliable prints over and over MUCH easier than having to tweak the bed leveling and v-wheel tension and stuff from the ender, but the price for the kit is $750 and lead time is like about a month
latent coyote
Is there any recommended places to share 3d prints? Is it even worth trying to sell 3d models?
empty sedge
people do. I don't remember any names at the moment though
[for free stuff there's thingiverse and grabcad]
latent coyote
yeah, i signed up for grabcad mostly to pull a couple of RPi models for building cases around.
I'm considering setting up thingiverse.
empty sedge
this guy built his own site to sell models on: https://www.3dizingof.com/shop/math-art/2-colors-gyroid-by-dizingof/
violet needleBOT
Adafruit Industries posted At-At #3DPrinting #Timelapse #adafruit

Every week we'll 3D print designs from the community and showcase slicer settings, use cases and of course, Time-lapses!
AT-AT
Nancy Gurgiolo
https://www.thingiverse.com/thing:4540953
CR10S Pro
Grey PLA
17hrs 12mins
X:180 Y:120 Z:190mm
.2mm layer / .4mm nozzle
10% Infill / 1...
shy kelp
is there a calibration print that i can use to play around with the retraction distance?
im not really sure what it should be set to since this print had so much stringy ness
empty sedge
@shy kelp yes, and there's more than one way you can get strings like that besides a retraction setting that's not long enough
shy kelp
for my print that covers around 220 mm, what number should i set it too? its at 6.5 right now
empty sedge
@shy kelp it's not simple enough that I can answer that
I use oozebane_test from https://www.thingiverse.com/thing:5573

I've taken all the calibration prints out there and condensed them into one place. I have here:
.5mm thin wall
20mm box
20mm hollow box
50mm tower
perimeter width/t tester
precision block
overhang test
oozebane test
bridge test
and more to come.
All designs are my original wor...
if your retraction is too short, or is too fast (25mm/sec should on the slow side but 100mm/sec is probably too fast) you can get strings like that
if your temp is too high you can get strings like that
if your plastic is wet (seems to be more of a petg or nylon issue) you can get more stringing
if there is a gap on the hot side of your plastic flow between your PTFE tube and your nozzle, or between nozzle and heat break, you can get stringing like that
tawdry forge
I've seen too many people buy a cheap (like $150) prusa i3 clone and a garbage machine. Don't do that
@empty sedge I had a Wanhao i3+ for a while and loved it, it was about a $500 machine at the time, but upgraded to the Prusa i3 and gotta say all the extra features have been a game changer
violet needleBOT
Adafruit Industries posted Perma-Proto Feather Case

3D print a snap fit case for an Adafruit Perma-Proto board. Perfect for using with an Adafruit Feather. Secures a full or half-size PermaProto PCB without any screws. Easy to make with free-support 3D printing.
Learn Guide:
https://learn.adafruit.com/permaproto-feather-case/
...
violet needleBOT
Adafruit Industries posted 3D Hangouts – PermaProto Cases and ATAT Puppy

Learn Guide:
https://learn.adafruit.com/permaproto-feather-case/
YouTube Video:
https://youtu.be/W5ztyDfMIf0
Adafruit Feather M4 Express
https://www.adafruit.com/product/3857
Half-Size Perma-Proto
https://www.adafruit.com/product/1609
Full-Size Perma-Proto
https://www.a...
violet needleBOT
Adafruit Industries posted Fusion 360 – Using Package Generator for PCBs #adafruit
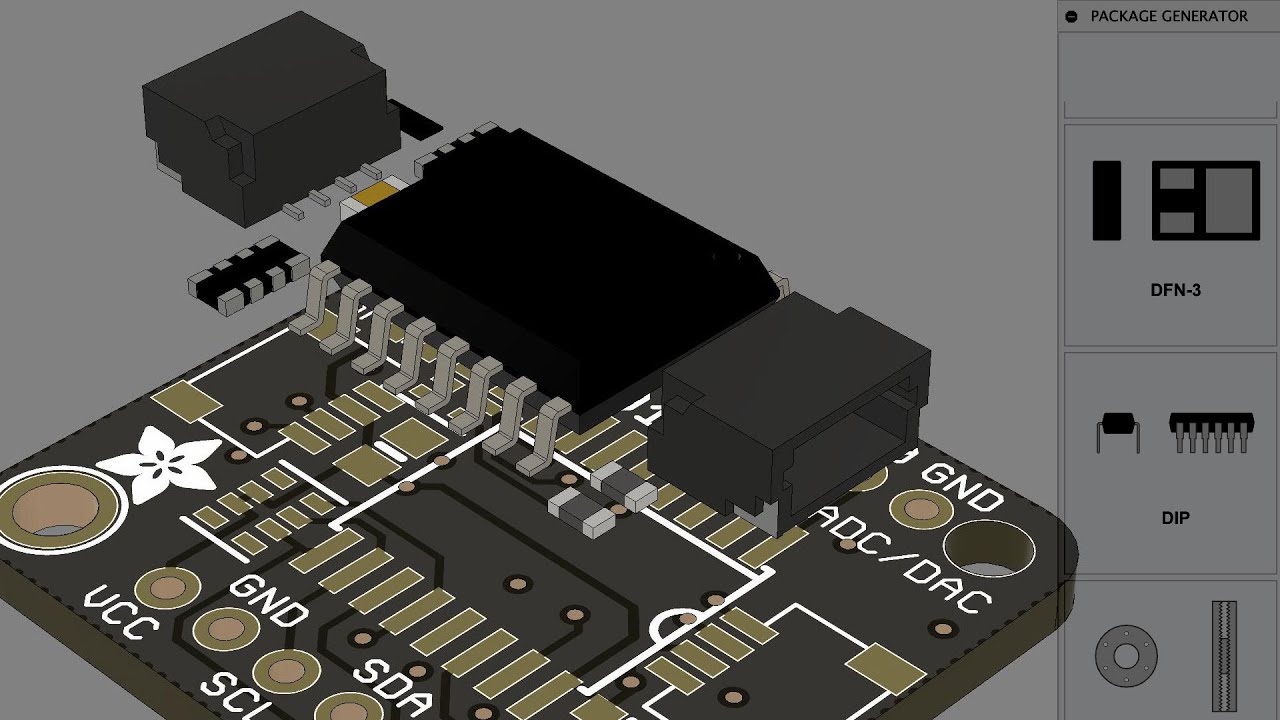
In this video we’re taking a look at the 3D package generator. We’ll walk through the process of exporting a pcb from eagle to fusion 360 and map 3d models to it. We’ll also generator an IC and bring it into the pcb.
Adafruit PCF8591 Breakout
https://learn.adafruit.com/adafr...
 frozen flare
hello y'all, i just want a second opinion on this, but what's the best starter 3d printer for a noob like me?
i have some experience with makergear and prusa and printrbot (rip lol) but i don't own any
karmic brook
Of course, "best" is somewhat subjective. Some of the $25,000 units are really easy to use, but bulky and expensive.
karmic brook
I have a personal fondness for the Prusa i3 Mk3S, under $1000 in kit form, not too hard to put together. There's also the Prusa Mini, which is smaller, easier to assemble, and cheaper.
frozen flare
yeah, i was told to try the prusa mini or the creality cr10
so far i've been leaning towards the prusa mini
karmic brook
I haven't used one of the Minis personally, but I have the larger Prusa, and it's a solid unit. The only real change I've made to it is to replace the heatbreak with a stepless titanium one (the stock one would jam occasionally on cheap filament)
frozen flare
yeah i've tried an upgraded mk2s and it is very solid and easy to use
 junior bloom
I got an Ender 5 as my first one and have had very little issues as a complete newbie when it came to 3d printing. The Ender 3s are a bit cheaper but apparently a bit more of setup/tinkering
karmic brook
I got a Monoprice Mini Delta as my first unit, it does basically work, but needed a lot of upgrades and continuous tweaking.
frozen flare
from what i've heard and seen creality is just a chinese knockoff of prusa bc it's all open source
but thanks for your help :)
karmic brook
I did eye the Creality carefully before splashing out the money for the Prusa, but decided the details in the Prusa were worth the money for me: like I said, "best" is mighty subjective.
junior bloom
Yeah I just went with a friend's recommendation at the time. I know a lot more now
 agile finch
I’m collecting suggestions on how to use these surplus steppers that I was donated by my dad. Main issue is how to interface the shaft to a gear. Left to right: #1 is a lost cause due to how close the gear is to the housing. Only option is to cut off the gear. #2 maybe 3D print something that can latch onto the existing gear? #3 and 4 both have removable press on gears. I’m thinking about a 3D printed collet that clamps down with some m2 screws.
karmic brook
I don't think the only option is to cut off the gear. It's a press fit on the shaft, and could probably be safely pried outward (it puts tension on the bearings, but if it's a lost cause anyway, it's worth a try). Additionally, since this is the 3D printing group, you could print a gear with a collar that fits over the existing gear, heat the existing gear somewhat, and press the new gear on it, the plastic should deform to mesh with it (you could try printing teeth in it to improve the process).
agile finch
These gears are pretty tight and I haven’t been able to get one off by prying with a screwdriver. I wonder if there are some serrations that help this (brass?) gear to grip to the shaft. Anyway I like your melting idea.
Main motivation is that I’ve looked at metal collets and gears for purchase but if I have to buy a part it’s almost the same cost as to buy a new stepper. Gotta find a way to use these perfectly good stepper motors with some judicious 3D printing.
Also will need to make some kind of torque meter to check how strong these are...
karmic brook
The tricky part is that the interfaces with the small diameter shafts and gears will tend to have a lot of torque. However, if loads are light or geared down, it should be possible. I'm the same way, I like to use the parts I have without burning a lot of money in the process.
agile finch
🤛
agile finch
Six minutes on the printer for a test piece. Based on how much work to get it off I think this will hold well. I deformed the edge quite bit when prying it off. And this is without any added heat during the install. This will probably be good enough for most things and can salvage stepper types like #1. Thanks @karmic brook.
🙏
karmic brook
Wow, that looks really nice! How did you model that so fast? ⚙️
tawdry forge
foosion 360 has a plugjn
agile finch
I’ve improved a lot in fusion over the struggle of the last two years! I made one gear divot and then made a circular pattern rotation and Bam! Done.
Ive still a lot to learn to be more efficient with my time and make things “break” less whenever dimensions are changed.
And I got lucky that it fit on the first try.
That’s not typical...
karmic brook
Yeah, Fusion is parametric by nature and the more I embrace that, the easier things become.
tight flower
Hello! I was wondering what is the bed holder plate on a Prusa i3 made out of. Can someone please check their mk3 prusa printer and let me know? I'm talking about this piece:
karmic brook
I have one, but am unsure how to identify the material.
Oddly, the catalog page https://shop.prusa3d.com/en/mk3mk3s/641-y-carriage.html does not specify.
tight flower
@karmic brook I'm guessing it's something light yet heat resistant, cause the heated bed sits right abode it. Can't think of anything other than some type metal. Does it make metal sound when you give it a small hit with something?
karmic brook
It does seem to be metal (possibly powder coated). It sounds like metal when tapped, and conducts heat quite well. I also tested it with a magnet, and it's non ferrous.
empty sedge
yeah it's aluminum
agile finch
@karmic brook just following up on options for attaching gears to stepper motor shafts. This time related to smooth shaft steppers. I made a collet and this seems to work (at least by hand pulling tests but no torque data yet). I failed to find a way to make a single bolt work (see left side) since this relies heavily on the layer adhesion in tension and all of them broke. However with three bolts (right side) I think this keeps the layers in compression so is far superior (but at the cost of two added M2 bolts). Still way cheaper than purchasing a collet and can be customized to the shaft dimensions and the gear type. I call this maybe working.
karmic brook
Oh, that's a good idea! I had been thinking about an ordinary clamp-type arrangement, but that collet idea didn't occur to me, good thinking!
shy kelp
Hello again, I've been playing around with my printers settings (mainly retraction) because I'm trying to reduce the stringy-ness with my print. My problem is it seems to snap the filament in the intake spot where the gear pushes the filament into the extruder. How can I fix this so that it doesn't happen?
(I'm printing with translucent PLA btw)
does it tend to be more brittle?
 fading viper
I have trouble with some types of PLA getting brittle. Especially if they are left out in the air over time.
and when the room temperature fluctuates
Do you have similar issues with other PLA?
latent coyote
@fading viper ive not run into this personally? What brand pla are you using
fading viper
I have a few different kinds. Lots of Inland that I picked up at Microcenter. But a few others from online that were purchased for color above brand or anything else.
Some rolls are worse than others.
fading viper
Ah, no. The prints themselves are typically fine
latent coyote
thats normal from my experience. the rolls need to be in acontainer or bag with some kind of moisture decadent
fading viper
but the roll gets brittle over time ( more than a year I've had many of them) and is more prone to breaking or having issues with the drive gear eating it away instead of pushing it.
Yep
latent coyote
i got mine from microcenter, and i was told they do have a shelf life
tawdry forge
prusa bed plate is steel
and modern PLAs are not that bad in open air, Ive had some rolls out for almost a year and they print just fine
translucent are more brittle though, but is usually fine. Ive never had mine snap while printing
steep stump
what's the best place to buy printer electronics? does it make that much of a difference on a cartesian printer to use high quality stuff like duet vs. whatever cheap stuff I can get on aliexpress/amazon?
tawdry forge
it makes a pretty significant difference yes
“best” place differs highly on where you are on this blue marble
steep stump
more specifically, is there a big difference between power supplies at the various price points?
empty sedge
@steep stump a $30 350W 24V meanwell clone is usually ok but a real meanwell se-450-24 is only $63
[I'm assuming you know you can't mix heaters for different voltages]
@steep stump no. skr 1.4 pro is pretty good. mini might also be but limited memory limits features
shy kelp
I recently want to buy a new 3D printer but I don't know what type or what brand I need to buy, if anyone knows the perfect choice or not the perfect for a beginner like me, just ping me and let me know.
empty sedge
@shy kelp I'm going to continue recommending the prusa i3 mk3s. it's not the cheapest but the extra things it has makes it much more of a predictable workhorse for reliably getting good prints
shy kelp
Thank you.
tawdry forge
My MK3S is quieter now with Stealth Mode turned off 😳
@steep stump The gap is probably smaller these days than it used to be with switching supplies since there are so many reference designs available. Life span is limited by the quality of the components used, the only other factors are efficiency and RF interference which for most people is not a very big concern. You're not going to "see" the difference as a user really, unless you get real unlucky (like I have been twice) and get a supply which has a screaming coil in it, and as someone sensitive to high frequency sound it's a deal breaker
@shy kelp my suggestions for a beginner - don't go too cheap, but also don't get taken in by the XYZ's or Makerbots with their closed mentality. An "i3" cartesian of any sort is a very good start. The MK3S is phenomenal if you can afford it, but Creality is also a good choice apparently, and I personally had a great experience with the Wanhao i3 as my second printer.
 boreal thunder
@shy kelp I dove in with a Creality CR-10S. The Ender 3 is also very popular. You'll spend a lot more time tweaking it to get good quality prints, especially at the beginning, than you would with something like a Prusa, but for the price it's excellent, and it's a good platform for learning and upgrading.
karmic brook
The important other factor is safety: cheap supplies often have poor voltage isolation (sometimes in the transformer where you can't see it), and can without warning connect mains voltage to the output.
 autumn pine
@shy kelp not sure if there is one "good" answer. Probably comes down to cost and function. I purchased my second 3D printer last year - a Prusa MK3. (first was a Wanhao clone of a Prusa Mk2). I've had a few hiccups - but they have been quickly resolved with either talking with Prusa directly or the user community. I've heard great things about the Creality and Ender products as well.
@shy kelp in a perfect world, I'd get an Ultimaker - dual extrusion, easy tool changes, prints just about everything... but the Ultimaker S3 is $3900+
shy kelp
As most of you guys recommended a prusa i3, I'll search more about it, and yeah thank you.
I guess there are no specific ones for begginers, and how about the DIY 3D printers that come in below 200 USD, are they good to start with?
shy kelp
Around 200USD I suggest the Creality Ender3
karmic brook
The Prusa Mini is less expensive than the i3, so can be a good bet for beginners, if the smaller build size is acceptable.
shy kelp
There are many choices in the world so I don't know which one to choose 😅
tawdry forge
I feel like Ultimaker is a bit over rated these days
empty sedge
@shy kelp super cheap i3 clones often don't have thermal runaway protections enabled and are difficult to build into something that gets quality prints. I've had 3 people I know try to build $100-$150 i3 clones and they've all regretted it.
The creality machines are okay: they do have thermal runaway protections configured and usually are fine to get running, but you're going to have more tweaking to do to get them printing reliably and repeatedly as well as the prusa i3 mk3s
shy kelp
🤔
tawdry forge
yeah the super cheap ones after upgrading the useless parts and bits of acrylic they use to hold steppers and such you have spent as much time and money that you could have just gotten a mk3s
empty sedge
a friend of mine bought an ender 3 and the Y rollers were loose because the drilled holes in the Y plate weren't in the correct spots... but it was a $250 printer
shy kelp
And what filaments are the best to use?
latent coyote
i'm really happy with the creality cr-10s. It's not hard to level and when its set it doesn't require alot of maintainence
tawdry forge
on the other hand, throwing piles of money at my Wanhao i3 with a Flexion upgrade and oilite brass bushings and Z braces was worth while fun that I will never regret 😄
empty sedge
@shy kelp you're probably going to be printing PLA mostly. Hatchbox and atomic brands have worked well for me
tawdry forge
that thing could go toe to toe with any printer, except on bed leveling 😦
empty sedge
PLA won't hold up in a hot car though
shy kelp
Okay...
latent coyote
does PETG work better in hot cars?
empty sedge
@latent coyote yes. better but still not perfect
karmic brook
Some vendors offer a "high temperature" PLA that can hold up in hotter environments, but I haven't tried it.
shy kelp
So, the prusa i3 mk3s is good to start with?
tawdry forge
HTPLA is basically just PETG * from what I understand
empty sedge
yeah if you can afford it the i3 mk3s kit is definitely worth it
if you're printing PLA mostly get the smooth sheet, PETG mostly get the textured sheet, or can afford it get both
shy kelp
Okay I'll check my parents if they would agree with that.
latent coyote
i think my next one will be a PRUSA but i need to build the add on workshop to the house for all of them
violet needleBOT
Adafruit Industries posted Finger Copter #3DPrinting #Timelapse #adafruit
Every week we'll 3D print designs from the community and showcase slicer settings, use cases and of course, Time-lapses!
Pull Copter Finger Ring
agepbiz
https://www.prusaprinters.org/prints/35410-pull-copter-finger-ring
CR10S Pro
Purple PLA
1hr 28mins
X:200 Y:180 Z:25mm
.2mm ...
violet needleBOT
Adafruit Industries posted NeoPixel Run – LED Chase Arcade Game

Building an arcade game with NeoPixels and Circuit Python! This project is inspired by the “cyclone” LED chase games often found in arcades. The enclosure is 3D printed and snap fits together. Inside is an Adafruit Feather, an arcade button, a rechargeable battery and a slide ...
violet needleBOT
Adafruit Industries posted 3D Hangouts – Chasing LEDs and Pull Copters

Learn Guide:
https://learn.adafruit.com/pixel-chase-game/
Code on Github
https://github.com/adafruit/Adafruit_Learning_System_Guides/tree/master/Pixel_Chase_Game
YouTube Video:
https://youtu.be/TFzHOti1bYc
Adafruit Feather M4 Express
https://www.adafruit.com/product/3857
...
 silent veldt
I am looking for suggestions and/or advice. I have had 3 3D printers, I'm thinking about which printer to acquire next.
I bought a Monoprice Mini Delta, which was working fine when I gave it away to a middle school robotics team.
I have a Monoprice Select Mini V2, and a Toybox.
And I'm considering whether to go with a Prusa Mini, a full-size Prusa Mk3S, or something else.
latent coyote
@silent veldt I think the general consensus is the Prusa Mk3 or the mini are good.
silent veldt
The Mk3 has a great rep. I haven't really heard much about the Mini, but I presume it won't be BAD.
latent coyote
i'd be careful with monoprice when i was researching them the firmware doesn't support all of the features of the printer
silent veldt
Yeah, I haven't tried to push mine really hard.
For $200 3 years ago, (120mm)^3 build volume and PLA accuracy were fantastic.
But now, I want PETG or Flex as material options, and a larger build volume.
latent coyote
yeah, thats important. I have a Creality CR-10S and it works really good about $400
you'd probably need to get a wrap around for the printer for petg. I printed flex in mine, and worked well.
silent veldt
Naomi reps Creality, and I had the sense their products were pretty good once you got them through shakedown prints.
They Toybox is cool, but I haven't run it in over a year. It's great for making little plastic toys, and ease of use, but that's about it.
latent coyote
once i got my leveled (which wasn't difficult) it prints pretty consistent. The large build plate is susceptible to temperature changes in the room. so a surround is good.
silent veldt
Hmmmmm.
So, I quickly looked at all3dp's buyer's guide.
And they are suggesting Ender 3 V2?
latent coyote
unfortunately, i am not familiar enough with Ender to know. I hear its a good printer, and probably more so with the price point.
silent veldt
hmmmm.
My goblin tendencies are trying to talk me into buying several.
It's just so much easier than deciding on one!
latent coyote
lol do it and make a write up on the pros and cons
silent veldt
I should probably wait until I have an income again.
I don't NEED one.
I just WANT one.
latent coyote
oh yes, the bane of our existence.
silent veldt
But I've already spent too much of my tax return on toys.
I mean, I generally feel pretty good about sending money to Wyrmwood Gaming.
But still.
Of course, even if I order a Prusa now, I won't see it until September....
Whereas if I order one in September I might see it by November.
karmic brook
September is practically next month
silent veldt
It's 6-8 weeks lead time, right now, for Prusa Minis.
Might get shorter or longer, depending on how much PPE Prusa needs to print between then and now. But, AFAIK, the Czech Republic is doing fine on COVID-19 management, so they may not need to run off more face shields.
tight flower
Hello folks, I'm thinking of buying the mks 1.4 board for my printer. I was wondering which driver would be better, TMC2208 or TMC2130? The board supports both
boreal thunder
@tight flower Hmm. I think here “better” depends on your priorities. They’ll both get the job done well, but what’s most important to you in terms of their features?
A bit of quick digging seems to suggest the 2208s are perfect for most folks unless you’re planning on tinkering with sensorless homing. Which can be yet one more challenge when you’re already taking on the job of switching out the board, complications from which always arise. What’s your present machine? Is it stock? If so you’ll see a vast improvement just with the 2208s and the new board. I know I did. I use them and love them. Considered the 2209s, but they were overkill.
tight flower
@boreal thunder it's a diy build and uses Ramps 1.4 with A4988 drivers at the moment. Sensorless homing is something I really would like to try and I already looked at a few tutorials explaining how to set it up on marlin with the mks 1.4 board and 2130. So the 2208s dont have sensorless homing?
lilac patio
you'd probably need to get a wrap around for the printer for petg. I printed flex in mine, and worked well.
@latent coyote I print PETG on my CR-10 with no enclosure. Can you tell me more about printing flexibles? I've wanted to get into it but some people told me it's not easy
latent coyote
@lilac patio Mine turned out well. I will have to find the article i followed. the key there is to print higher temp and slower. So i set mine to around 25mm/s speed and 235C. The material i used was TPU
Flexible filaments, TPE or TPU, possess elasticity, allowing the material to easily stretch and bend. Improve your print quality with advice from our experts.
this highlights some of the points.
lilac patio
Where'd you get the TPU from?
latent coyote
Amazon.
lilac patio
Alright I'll take a look thanks
latent coyote
Yeah, one big thing that happened to me. When a print starts. It will sometimes string a little. Watch to make sure the string doesn't get sucked into the extruder fan. Once the print starts, i didn't have any issue.
my printer does a line down the left side of the print bed before heading to do the print. That string it creates, was pulling into the fan, and i had to take it apart and remove it from the fan.
but the print turned out really well
 blissful marlin
If I want to go into 'high end' printers such as SLA - what would be the best investment? Formlabs Form 3?
boreal thunder
@tight flower The 2208 does not have sensorless homing (Stallguard, as they call it). The 2130 does. So if that’s a key feature for you, it sounds like the 2130 is the way to go.
tight flower
@boreal thunder I think I will go for the 2130 then. by the way, does the interface matters? I can find 2 types of 2130 boards, one controlled using step/dir and the other uses SPI. I guess SPI is better but is it necessary?
boreal thunder
I’m honestly not sure. I think the 2130s can be programmed via SPI the same kind of way as the 2208s can via UART, and that makes life much easier when you’re adjusting VREFs, versus having to physically adjust potentiometers on the board. If that’s the case then my personal preference would be the SPI.
tight flower
Got it, thanks! I think it's worth spending the extra few bucks on the SPI version
tight cove
I have printed a 100mm x 100mm x 4mm L shape to calibrate my x and y axis, i updated the M92 settings with the new calibrated ones from the measurements i took, then i printed a 20mm OD x 15mm ID circle but the OD measures 19.8mm and the ID measures 14.7mm, so i reprinted the L shape i made and the dimensions are accurate (x = 100.05mm, y = 100.15mm), what would cause the circle to be inaccurate?
karmic brook
There are two factors that affect the size of objects, there's the positioning accuracy (which generally doesn't vary) and the bulge of the extrusion (which can). The bulge makes outer diameters (which is both dimensions of your L) larger, but makes inner diameters smaller.
tight cove
what do you mean by bulge? elephants foot?
karmic brook
Normally 3D printers are set up to "squash" the extruded filament somewhat, so it bonds well with the previous layer. This makes it smaller than the nozzle aperture in a vertical dimension but larger in a horizontal one.
tight cove
but surely if you calibrate the x/y axis then it should compensate for that?
karmic brook
No, you're trying to compensate for two effects at once.
That's (part of) what causes the circle to be inaccurate.
tight cove
but my z is accurate, how do i compensate for the bulging?
im fairly confident that my nozzle height is correct because i get good first layers and my extrusion rate is calibrated
karmic brook
Yes, this bulging is a result of the printer operating correctly. However, you have to do a little more testing and math to compensate for it in your models if you require precise inner diameters in openings.
tight cove
so just calibrate x and y more until i get the accuracy i need?
karmic brook
No, this is a separate calibration. As you demonstrated, your X and Y calibrations are correct and accurate. This is a separate correction. It is normally done in the 3D model, not the printer (as the printer has no knowledge of whether a given bit of extrusion is an inside wall or an outside one).
A web search for terms like "hole windage" and "correctly sized 3D printed holes" will return useful information on the subject.
tight cove
so adjust the 3d model? so if i had that circle 20mm OD 15mm ID, and it prints differently then adjust the 3d model so 21mm OD 16mm ID for it to print the desired 20mm x 15mm?
ill have a search
karmic brook
Yes, that's how I do it (aside from the times I just use trial and error, like for openings for servo mounting screws, which need to have enough bite to stay in place, but not fracture my model when installed)
tight cove
id prefer not to do it by changing the dimensions in the model because i plan to print medium sized items and want to limit waste, so if i can get the settings dialled in to print as accurate as possible that would be better
 mellow grove

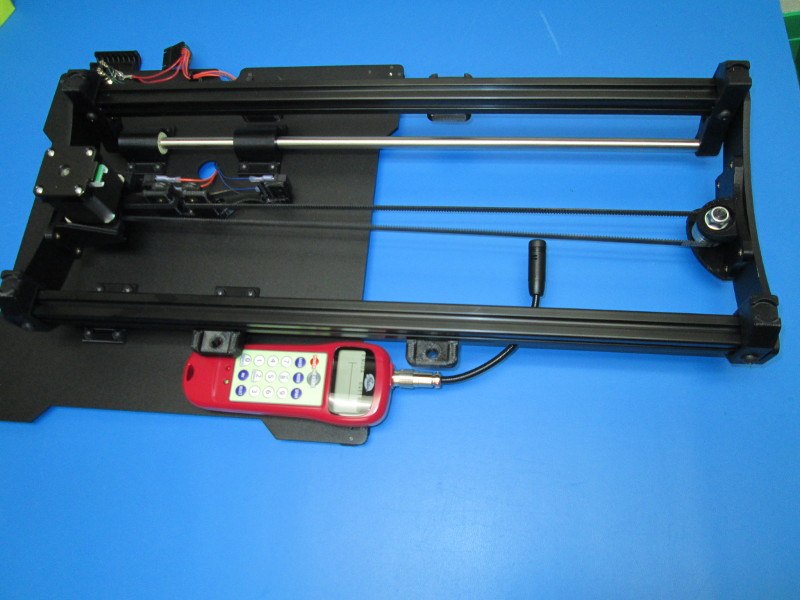 karmic brook
Unfortunately, your printer cannot compensate for it, as it's a non-proportional effect, and it adds (for external dimensions) and subtracts (for internal dimensions). There are several ways to attack it, but none of them are optimal.
tight cove
alright, thanks for the information
 glad shuttle
When I adjust my retract settings in Cura, nothing changes when printing. Anyone have any suggestions?
empty sedge
@glad shuttle what printer? what "nothing changes when printing"?
glad shuttle
It is a custom printer, it is a rebuilt 3d Systems Cube 3 with a SKR 1.3 board, a v6 clone, and TMC2209's.. I think I had my retract feedrate set too low in Marlin 2.0, it is better, now, but still not great
As compared to
Had max feedrate qat 10mms didnt notice, so i changed it to 60 now, and it does actually retract now, but still something not quite right
empty sedge
v6 clone? does the teflon go all the way to the nozzle?
glad shuttle
no it goes down until it connects with a smaller piece inside i think that goes to the nozzle
empty sedge
or alternatively, could you have a gap between the heat break and the nozzle?
the nozzle isn't supposed to be flush against the bottom of the heater block. it's supposed to seal against the heat break inside the heater block. If there's room there it causes the effect you're showing
[same if the teflon goes up to the nozzle, a gap between the two would cause that effect]
glad shuttle
hmmm i will have to tear it apart in a few and check to make sure
thank you good sir at least i have a starting point now!
glad shuttle
This has been a 3month on an off project, but as of now, it is printing, and printing almost.....almost perfectly with sensorless homing/sensorless probing instead of endstops
itty bitty lines
glad shuttle
ok I was wrong looks like retracts still are not working at all, and the only reason there was less stringing is because i had the fans turned way down.
latent coyote
Do they make fairly clear pla?
If so where can I get some?
I want to make some cases good for neopixels.
 elder oxide
I found clear, but because of how it lays, it ends up coming out more opaque
PCB vice I did with “clear pla”
karmic brook
Filamentum makes a clear PLA, but I've been told for real clarity PETG is the way to go. With some postprocessing, it can become fairly transparent.
elder oxide
Yeah, I agree 100%
karmic brook
I print diffusers out of "clear" PLA, they work quite well. I made one of these cases out if it, it worked great. https://learn.adafruit.com/animated-flame-pendant
 elder oxide
Very fun! Giving me some ideas
violet needleBOT
Adafruit Industries posted Fusion 360 Tutorial – NeoPixel Ring Grid Diffuser
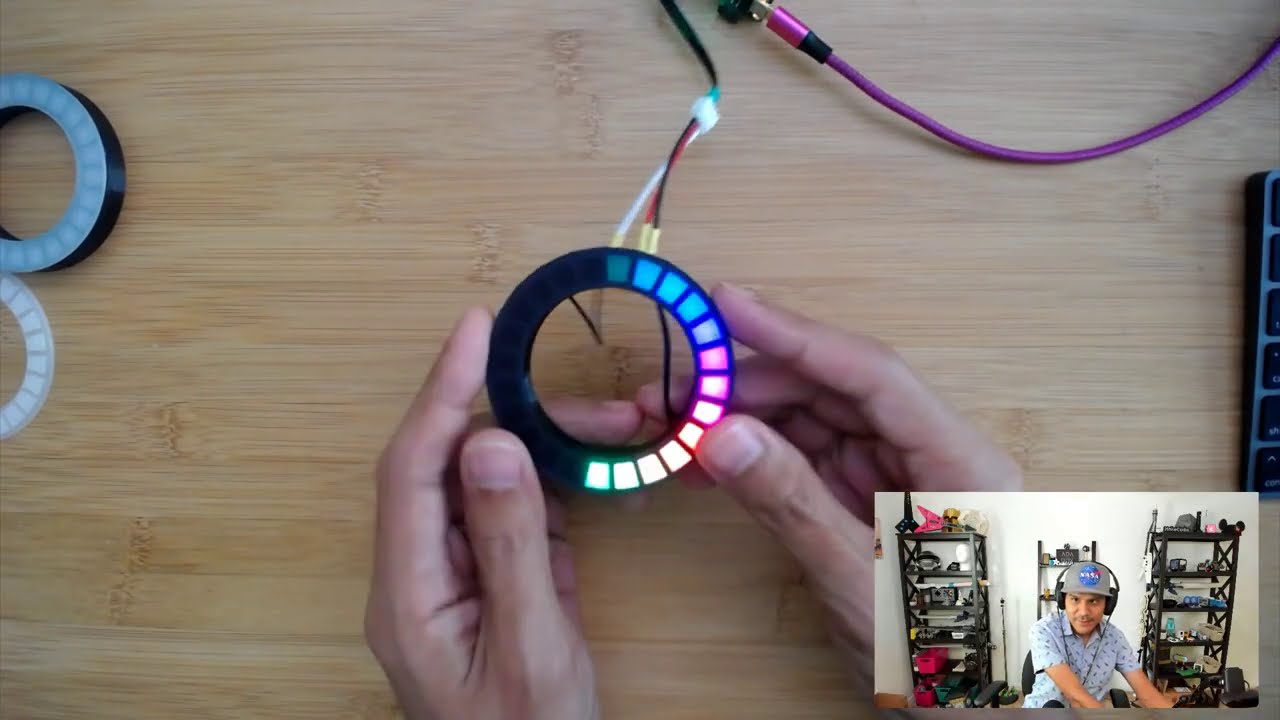
Taking a look at using surface extrude and circular pattern to create a grid diffuser for a 24 x NeoPixel ring from Adafruit.
24 x NeoPixel Ring
https://www.adafruit.com/product/1586
Black LED Acrylic
https://www.adafruit.com/product/4594
Feather M4 Express
https://www.adaf...
shrewd rose
Does it happen with retraction that one side is good and other is bad
and also these retraction tests are cylinder shaped right not cuboidal shaped
karmic brook
Aside from the clickbait looking headline, this video does have some useful advice for stringing (basically print features like that outside to inside as normal, then return to the inside, retract, then move). I've cued the start time to where the actual explanation begins. https://youtu.be/_QRb54zVPfQ?t=307
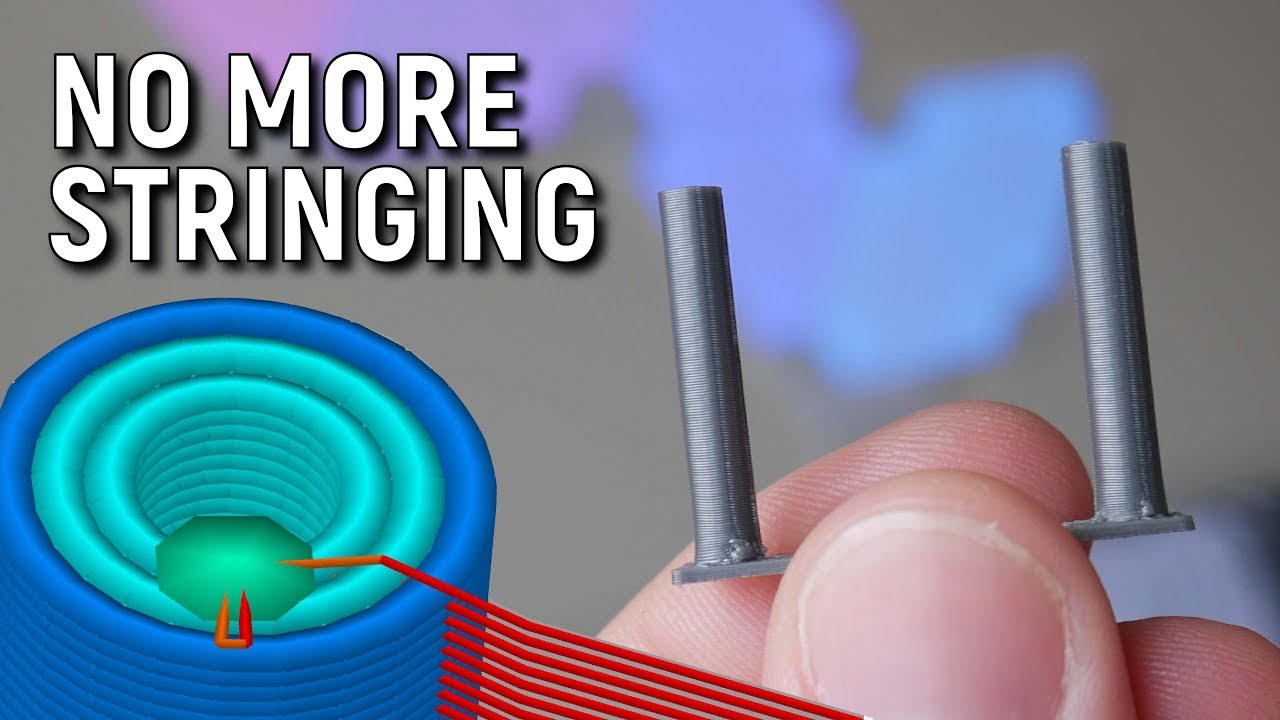
I solved the stringing issues plaguing my Ender 3 Prints with a bit of help from the 3D Printing Community. This video is an important follow up to my Ender 3 and Ender 3 Pro Reviews.
Cura settings for the Ender 3 provided by @ChazMeister2 - https://goo.gl/vnsQWx
My new Simp...
shrewd rose
@karmic brook yea I ended doing this with some more modifications to temp and retraction speeds and it did really help
shy kelp
hello
 quasi scaffold
hello
empty sedge
the automatic lost-step recovery on the prusa i3 mk3 has saved sooo many prints of mine
karmic brook
How would I know if that had occurred?
empty sedge
I'm sitting near my printer so I hear it clack into the limits of travel but otherwise you wouldn't unless something went wrong
I think my z-hop is too low. I'm doing only 0.2mm not the 0.6mm in the default profiles
empty sedge
adds 24V supply to not-quite-i3-mk3s
empty sedge
[I can probably turn up the z max feedrate now]
tawdry forge
How are your prints making it lose steps?
I run in stealth mode so no crash detection but I have no idea why step loss or a crash would happen unless my printer was really poorly built
boreal thunder
Question: do folks usually follow the .8 to .9 safety margin guideline when calculating and adjusting VREFs? I had mine with .9 but I was losing steps. The concern is motor life and overheating, right?
empty sedge
@tawdry forge I'm printing some face shields that go right to the edge of the build plate and there are little protrusions that don't have a lot of area on the plate. Sometimes these parts curl up slightly and catch the nozzle during travel
@boreal thunder if you run at the rated current for the motor it can more than hot enough to distort a PLA motor mount while still being in-spec for the motor
boreal thunder
nods My motor mounts are all aluminum.
shy kelp
This is more of a 3D design question than a 3D printing one, but hopefully not too off-topic. I'm working on a pocket-watch project based around a Circuit Playground Bluefruit that I'm putting together a case for in OpenSCAD, and I was wondering if anyone might have a link to a .scad file for a CP mount or other similar thing that I could get the screw-hole positions from lying around?
agile finch
Maybe you can import one of these file formats: https://github.com/adafruit/Adafruit_CAD_Parts/tree/master/4333 Circuit Playground Bluefruit
GitHub
CAD files for various boards, components and parts - adafruit/Adafruit_CAD_Parts
empty sedge
@shy kelp yeah you can open the step in freecad and use the measure tool there, or open the .brd file in Eagle https://github.com/adafruit/Adafruit-Circuit-Playground-Bluefruit-PCB and look at the coordinates of the holes
GitHub
Contribute to adafruit/Adafruit-Circuit-Playground-Bluefruit-PCB development by creating an account on GitHub.
[kicad's eagle import can also open the brd+sch]
glad shuttle
ok, so I thought it might be something i had just inadvertently changed in the firmware, but I just went from bugfix to 2.0.6 again SKR 1.3 with TMC2209's. My extruder extrudes fine, but retracts do not work at all. Can anyone point me anywhere that might help?
Also...
I just took the 2209's out and replaced it with a4988 and it does the exact same thing 😦 Unplugged cable from E0 (also tried E1 with same result) plugged cable into z and i get extruder spin in both directions.