#help-with-3dprinting
1 messages · Page 34 of 1
 hushed lotus
 formal relic
@hushed lotus I'm Happy I can help
 blissful marlin
Alright regarding my linear rail carriage.
I disassembled two now. Put them in 99% alcohol and reassembled them
I did not yet put the grease on
But I notice a difference between the two carriages
One is moving very freely and the other one only if I push
Is that normal?
 empty sedge
for cheap chinese linear rail parts, that's still a bit odd
typically without grease they'd both move freely
and with grease it should move, but shouldn't bind up during movement
 clever lynx
chinaseium stuff you may have to repack balls and clean out metal chips
empty sedge
but with grease and the correct size bearing balls it shouldn't move along the rail just because of the the weight of carriage alone
clever lynx
maybe even make ball size sorter
or buy your own balls and pack it in, throwing away low quality china balls
blissful marlin
They are japanese I believe
For the one that does not move freely I noticed that when I put the balls into one side they only move when I push them
On the other side they slide around
clever lynx
im not sure actually. no no maybe blocks itseld has preload screw
lets see if mgn has em
or is it sbr?
this is really fancy ball bearing sorter https://youtu.be/2Db3xHGBuXU

www.cdsmanufacturing.com
CDS Ref: 7420
Ball Sorter
clever lynx
what kind of rail system do you have?
mgn, sbr, or plain rods with blocks?
drawer sliders? (yes i saw cnc router using that!)
formal relic
@clever lynx he is using OKI rails + blocks
clever lynx
ok
formal relic
ML12, if i remember correctly.
blissful marlin
I assume the wire on one side is too tight (?)
I put 1 ball on each side
One does not move
The other one moves when I rotate the carriage
formal relic
make sure it is clean, and there is no dust or anything in the block or the ball,
and test other block on the same spot,
you might need to replace the block, or to stone the rail if you got a bump on it.
clever lynx
check out preload section https://motioncontrolsystems.hiwin.com/Asset/MG-Series-Catalog.pdf
its based on balls size apparently
clever lynx
you could build rods style sorter but yeah not easy
you need extremely high precision rods, and a way to adjust so the end of rods is separated fractionally bigger than start
anyway maybe you could mix balls up so its closer to average? no idea if its a good idea
in any case definitely need to be sure its very clean before packing again with some kind of lube
formal relic
measure it with micrometer
clever lynx
ball sizes is too close to be done like that
0.02um something
misread
no preload is -4 to -10um than specified ball size
very loght preload is very close to 0, light preload is 0.02c (c is defined basic dynimatic preload apparently)
blissful marlin
Okay I am pretty sure the wire is causing the issue
on one side the balls move freely
on the others there is friction between the wire and the balls
clever lynx
hm I wonder if wire is indeed what it uses to preload
empty sedge
no, the wire is just to hold the balls in. the wire isn't needed for the operation of the rail at all
clever lynx
o it should have been removed?
empty sedge
no, it's usually still there so when you later take the bearing off the rail without using another rail-shaped piece that the balls all don't rush out onto the floor
clever lynx
interesting. so why is only one freely moving while 3 isnt as muckyu says
empty sedge
see this video and it's follow ups: https://www.youtube.com/watch?v=loBHYcifzRM
Time index below for easy navigation. Product links at the end.
(SORRY ABOUT THE HUM... as you can see, I was a moron and thought I was recording into a different camera and mic, so I had to crank up the audio, hence the hum).
This video became more in-depth than I had hoped...
it could be because the drilled hole you don't see has a misalignment (it's drilled from both ends meeting in the middle) that the balls are catching on
clever lynx
i hav that video favorited already. forgot I guess lol
@blissful marlin check out those videos
blissful marlin
at the moment it is "jumping" when I move it on the rail
empty sedge
sounds like you didn't clean it well enough
 crude kettle
Let it sit in the alcohol
 grave herald
Anyone good with delta printers, kind of need some help.
empty sedge
I melted my delta so I've encountered several of the problems with deltas
[I installed a heated bed on my kossel mini and it was too close to the PLA motor mounts and too hot]
@grave herald what's your question?
grave herald
I picked up a kossel linear plus and it had a 32 bit mks board but it is running smoothie and it's not very smooth
empty sedge
"not very smooth" how?
grave herald
I got it to home but that's about it
I tried to start several prints and I just don't much care for smoothie
I have a board that I can replace the 32 bit board with
empty sedge
I didn't have trouble with smoothie, but that was 5 years ago
you can run marlin 2.0 on that board
grave herald
That's what I was wanti g to run but not sure where to start with the firmware
empty sedge
eh, I don't have time tonight to walk you through all that but pretty much: copy a sample "delta" configuration over configuration.h and then start going through and change everything that's different about your machine
grave herald
I'm not asking for a walk through but thank you
empty sedge
then start figuring out everything: do homing switches work (m119), do the motors move the correct direction, etc
empty sedge
By request: A guide to migrating to Marlin 2.0 from the older Marlin 1.1.9. Marlin 2.0 is required to compile firmware for any 32 bit boards, and still maintains support for 8 bit AVR based boards (like the Ender 3/5 1284P or Mega 2560).
This video compares the two firmware v...
grave herald
And delta
empty sedge
that channel has other 32-bit marlin videos, but not delta stuff
grave herald
I'll poke at this and see how it floats
empty sedge
for delta you mostly just need to start with the delta configuration. The default configuration.h has the delta options removed
my kossel now is skr mini 1.3 / tmc2209 and marlin 2.0 and I haven't worked out all the settings yet like filament change and nozzle park
grave herald
Nice
 coarse thistle
How do I fix an uneven build plate on the Ender 3 Pro? I’ve tried tinkering with the level knobs but nothing works, the only way I can get it to stop is by raising the build plate really high which makes the first layer really thin
empty sedge
in what way is it uneven?
blissful marlin
Okay rrgarding my linear rail issue.
Apparently the X and Y axis are preloaded
At least that is what the 3D printing manufacturer said
What should I do now?
Get one of those bearing measuring thingies and measure every ball?
And put all bigger ones on one side and all smaller ones on the other?
coarse thistle
its almost like it has bubbles under it but they wont flatten
blissful marlin
@formal relic any ideas what I could do in my situation now? Or am I sort of stuck now?
formal relic
preload rails are stiffer and trade speed for accuracy.
all you need to do, is to load the blocks back with grease, of course keep everything nice and clean and lint free.
if you have bind issue (it move smoothly, and then it bind in some point)
Inspect the rails, blocks and the balls for any potential surface damage rust spots, or pitted on the surface. it can cause the block to bind.
I have a feeling that you are over think it and try to over achieve something.
hushed lotus
@coarse thistle i had . the same problem for a while. Use a bubble level to find an even area to put it on. Then take 3 post it notes and put it right over the screw, and put the printhead over it, and tighten so that you can move the post its and they get lightly etched. repeat the process on the opposite corner, and go around a few times until every corner acts this way. Then put some glue-stick on the bed when you print.
blissful marlin
@formal relic ah okay - yes I have the binding issue as you described. I thought that I might have to evenly distribute the "bigger" and "smaller" balls on each side
formal relic
@blissful marlin you probably have some surface damage or dust buildup on the rail. try to clean in with something like scotchbrite and see if it improve the motion.
blissful marlin
@formal relic hm okay will try to clean it again. I just now tried to move the balls with a screwdriver to left & right and noticed that the binding only occurs in one direction somehow.
But when I inspect the parts after taking apart I don't notice any dirt/dust
formal relic
@blissful marlin does it happen if you install the block on the other side?
blissful marlin
I believe so - I will try again in a little bit
formal relic
ok
blissful marlin
How long should I put the parts in the alcohol for cleaning?
Since I used some of the grease already
blissful marlin
Ok
blissful marlin
Okay just done again
It feels a bit more smooth now
but still a bit of binding in one direction
And yes the binding is now on the other side
blissful marlin
I put it back together now - will try to do a testprint tomorrow
 ornate raven
Hmmm, one way of mapping your print bed - print a large thin sheet of something.
blissful marlin
Okay testprint is working so far
Seems to be quieter than before
But still a bit of screeching noise
But I hope if I put it in a box it's mostly quiet
 shy kelp
@coarse thistle hey check to make sure all the bolts underneath the base of the build plate are screwed in. Also relevel your bed if you haven't tried that yet. Maybe invest in a leveling probe like BLtouch or EZABL of that sort. Not sure if you have the magnetic build surface but that tends to warp for me so I replaced it with a glass surface to help keep things straight
 violet needleBOT
Adafruit Industries posted 3D Hangouts – Thermal Camera

Adafruit Industries, Essential service and business: Critical Manufacturing, NYC – Executive Order 202.6
https://adafruit.com/covid
How to place an essential, COVID-19 related order at Adafruit
https://adafruit.com/covidorders
violet needleBOT
Adafruit Industries posted Show and Tell – 3D Hangouts – 4/22/2020

To show and share your project, view the chat or in discord https://adafru.it/discord and look for the JOIN link to join. So be sure to be on our discord server in the #livechannel room for the invite link. For best results be on a wired connection and have a headset and mic!
 karmic brook
I've done that on purpose when I wanted a quiet low speed fan.
coarse thistle
@shy kelp i think the problem is the magnetic build surface warping
shy kelp
Yeah that happened on my ender 3 pro. I took it off
Very annoying. I didn't realize it till after four prints :/
 jovial plaza
just finished replacing my nozzle and this is old one after about a year and 150 hours of printing
crude kettle
It did good
blissful marlin
Is it normal that the wifi connection to octoprint sometimes stops working?
blissful marlin
Or could the problem be that my raspberry pi is inside the enclosure?
ornate raven
@blissful marlin Nope not "Normal". Which Pi, how is it powered. I'm using a Pi 4B+ 1g on a buck converter from the Printer power supply output. I had one loss of connection issue. I did two things: Rerouted the cable between the Pi and the printer, and changed the number of times the Pi polls before it faults. BUT, I'm sure that will work for you. Perhaps, and I repeat Perhaps, you Pi changed it's IP address? If Octopi.local is not finding it, look for the IP address instead.
blissful marlin
Pi 3B+
It had a power cable included which I am using
usually it would show up in my network settings
ornate raven
@blissful marlin have you tried disconnecting the pi from the printer?
empty sedge
@blissful marlin plug in a monitor. maybe you corrupted the SD card
blissful marlin
Yes pi is disconnected from printer
it seems to start right
But the url seems weird?
Okay now it showed up again
after I used advanced Ip scanner 6 times
coarse thistle
My printer keeps making a creaking noise when printing and I’ve tried tightening and loosening the bed wheels but nothing changes, any suggestions?
coarse thistle
Nevermind 🤣 it was just the filament rack rubbing against the filament roll.
empty sedge
@blissful marlin that "seems weird" address is ipv6
 viral steeple
I’ve been printing since 2017, but I am stumped. I was busy printing face shield frames in petg, and switched to print some ear savers in pink PLA for some kids, but it wouldn’t stick to my Prusa smooth PLA sheet. Switched back to petg. Same thing. Run first layer calibration several times. I end up getting it so close the nozzle hits the already down material but it is not sticking. Simone recommended acetone (nail polish remover on the bed) but it didn’t seem to help. I ordered another smooth and a textured bed from Prusa but I don’t think they will ship for weeks. I want to get back to my PPE printing. Any ideas?
empty sedge
@viral steeple try another spool of plastic, and if that doesn't work try replacing your nozzle
viral steeple
Yea, tried both 😿
empty sedge
did you try PETG again?
viral steeple
Yea. Brand new role of same type of material I used before.
empty sedge
so is the nozzle tightened all the way down to the heater block or is there a small gap between the hex and heater block?
also, sometimes there's a plug on the other end at the bottom of the teflon guide tube inside the heatsink
viral steeple
Seems to be tightened all the way. I haven’t taken the hot end apart yet. Not sure about what might be inside.
 jolly light
@viral steeple I had that recently. I had to wipe it with cloth and then used some 96% ethyl alcohol (desinfectant) and that did the trick for me. It is weird because it was from one print to the other that it didn't stick anymore. But weird comes with every 3D printer I guess ...
crude kettle
Well touching the build platform may put oil on it
viral steeple
Update. Another cold pull is clean. I partially took apart the extruder so I could peek in and I see no blockages. There are no plastic bits on the gears.
 silk sable
In order, I usually try - 90+% iso alc, then after it dries some windex or similar. On my prusa sheets that usually handles it.
if you havnt tried it, try the glass cleaner
viral steeple
Ok. I will get it back together and try the winded after ipa.
karmic brook
Prusa recommends regular alcohol cleanings of the (PEI) print bed, and an acetone pass when it starts to have adhesion issues.
viral steeple
I’ve got it back together, the bed thourathly cleaned, and ran ran the self test. Shoot. I have a loose gear pulley now lol
empty sedge
Prusa recommends regular alcohol cleanings of the (PEI) print bed, and an acetone pass when it starts to have adhesion issues.
@karmic brook
But ONLY on the smooth one. No acetone for the textured sheet
karmic brook
That's why I specified the PEI one.
empty sedge
I think the textured one is also PEI
karmic brook
That I did not know.
 unique ravine
I have a spool of glow in the dark PLA which was gifted to me. It's my understanding this stuff is hard on nozzles and that filled filaments in general are more likely to clog. If I'm only using it occasionally, will it be worth picking up a hardened 0.6mm or just write off the regular 0.4mm as a consumable that'll wear out slightly faster than it otherwise would have?
On a tangentially related note - I have a Prusa kit arriving Monday morning. Is it worth ordering a 0.4mm NozzleX from E3D as a once-and-for-all fix from the get-go?
karmic brook
Nozzles are consumables, but they're cheap. Then again, the harder nozzles are also cheap, but have different thermal characteristics. If you're going to do an upgrade in the initial build, I'd recommend a stepless titanium heatbreak, it makes the Prusa hotend less likely to jam (in my experience and at least some others, where is where I cribbed the idea).
The stock Prusa heatbreak has a step in it (to make the MMU work better) but if you're not using an MMU, the step makes it more likely to jam. The titanium heatbreak breaks heat better (titanium has low heat conductivity) and is stronger.
unique ravine
Yeah, MMU is beyond my finances and I'm not totally sold with the big purge blocks/material waste. It's probably more cost effective for me to put a multi-extruder of some stripe on my A10 frankenstein.
Thanks for the tip. I'm basically getting the Prusa so I'll have a reliable printer while I tinker with the tuner/project one.
 vocal flax
Don't they have mmu cad so that you can 3d print it? 🤔
karmic brook
Yes, it's all open source, but there may be a few metal/electrical parts that might have to be made/acquired some other way.
vocal flax
Iirc it's bearings possibly rails(rods) and infinite screw (mX threaded rod)
And 1 extra motor
Which are pretty common for 3d printer diy'ers
unique ravine
I don't have the reliable printer yet so printing parts isn't my go-to yet but it's something I'll keep in mind anyway.
vocal flax
Mmu was my second upgrade planned while building my own printer but on the way there was much more things to make before mmu
😅
hushed lotus
my filament jammed and i need to remove it. however, it snapped off right by the thing that pushes it forward. i cannot remove the ptfe tube from either side. What should i do?
empty sedge
what printer @hushed lotus
hushed lotus
ender 3
empty sedge
so you tried pushing down on the plastic ring to release the bowden tube?
empty sedge
weird it should be sprung unless there's a collar holding it up
hushed lotus
it is sprung tho. i cant push down the ring.
empty sedge
example bowden coupler with plastic clip to prevent pressing release collar
hushed lotus
yeah the fillament broke off right at the antry point
entry
the nozzle got fully clogged too
empty sedge
then you can unthread one of the tube couplers but you'd usually want to remove the tube from the coupler before doing that
hushed lotus
i cant remove the tube tho
empty sedge
the couplers have little teeth that press into the tube so spinning them on the tube could make the tube fit looser. If that becomes a problem you can cut a few mm off the tube with a sharp blade then insert it again
karmic brook
The melted plastic probably bonded with the tube. I've had that happen and just took the whole thing to pieces to rebuild it.
hushed lotus
the max temp i have ever ran it on is 200c, far too low to even touch teflon
empty sedge
yeah but if the heatsink on the cold side doesn't get enough airflow the PLA in your bowden tube can soften at 150f or so
karmic brook
Hot PLA can even stick to teflon (I've seen it happen)
shy kelp
Heat up the hotend. Once hot let it soak. Remove the nozzle. Once removed, use new filament to push against older filament. Worked for me when bad filament with lots of carbon in it plugged up my hot end and messed up my ender 3 pro.
 deft tulip
is my first layer too low
had to take a screenshot because discord refuses to upload anything from my camera roll folder
deft tulip
yeah 0 clue what's going on here
deft tulip
cant have the print with no brim 😂
jokes aside i thought bed adhesion would not be enough
ill increase the z offset, thanks
empty sedge
I think it's easier to tell on the infill than the brim. the adjacent beads on the brim if too low will move the next bead over which isn't as easy to see as on infill
the beads shouldn't lay on top of each other, nor have gaps. so when the first layer infill started at different times meet there shouldn't be a visible overlap like is shown in your 2nd picture
if you peel off your first layer you can usually see if it's too low by looking at the bottom. when too low the even beads will be a different width than the odd beads, or you'll see them mush into a single bead say 3mm from the direction change and not right at the direction change
shy kelp
Anyone here who tried 3D printing a press in hole for 3mm LEDs and can say something about what diameter hole would be good for that?
vocal flax
That highly depends and not just from printer to printer but also filament to filament, nozzle to nozzle (even same nozzle can have different wear and be different)...
Diameter of hole, resolution
Theres just so much variable
What I suggest is print a cube rectangle whatever with warring diameters like 2.8 2.9 3 3.1 3.2 and try which one fits
Or what you could so is make a 3 mm hole and drill it with 3mm bit
 reef sinew
I'm considering getting a Creality Ender 3 to get started with 3d printing, any thoughts? Any upgrades I should get with it from start?
vocal flax
Uhm what you want? A printer that's ready to print and reliable? Or knowing ins and outs of printers? For second ehh ender is not bad, for first probably prusa
Though if you want to learn the code and electronics you should build one yourself from scratch but don't expect to be printing with that sometime soon
blissful marlin
Any ideas where I could find a 65x52x52 cm (or bigger) box somewhere?
Or would I have to make my own
karmic brook
Appliance store?
empty sedge
a hardware store that sells moving boxes? https://www.homedepot.com/p/The-Home-Depot-24-in-L-x-24-in-W-x-34-in-D-Wardrobe-Moving-Box-with-Metal-Hanging-Bar-and-Handles-1001007/202029358?MERCH=REC-_-PLP_Browse-_-NA-_-202029358-_-N

The Home Depot
Pack and store all of your hanging clothes with this The Home Depot Wardrobe Box with Metal Hanging Bar. Features hand access holes for easy carrying.
violet needleBOT
Adafruit Industries posted #3DPrinted Face Mask #Timelapse #adafruit

Every week we'll 3D print designs from the community and showcase slicer settings, use cases and of course, Time-lapses!
3D Printable MASK
Remix by DOMI1L
https://www.thingiverse.com/thing:4303176
CR10S Pro
Grey PLA
08hrs 22mins
X:248 Y:180 Z:60mm
.2mm layer / .4mm nozzle
10...
violet needleBOT
Adafruit Industries posted Slim CLUE Case #3DPrinting #adafruit

In this project we’re making a slim case for the Adafruit Clue!
Guide: https://learn.adafruit.com/clue-slim-case
It features a removable bottom piece so you can access the edge connector were you can connect alligator clips!
Visit the Adafruit shop online - http://www.adafr...
empty sedge
where do people buy aftermarket replicator 2 or clone parts these days?
I'm looking for extruder heatsinks and temperature sensors
karmic brook
I've had good luck with PrintedSolid.com
violet needleBOT
Adafruit Industries posted 3D Hangouts – Slim CLUE

Get Adafruit Parts from DigiKey
https://www.digikey.com/en/supplier-centers/a/adafruit
Learn Guide: Slim Clue Case
https://learn.adafruit.com/clue-slim-case
Adafruit CLUE
https://www.adafruit.com/product/4500
Get Adafruit CLUEfrom Digikey
https://www.digikey.com/product-de...
Adafruit Industries posted SHow and Tell – 4/29/2020 – 3D Hangouts
 violet needleBOT
Adafruit Industries posted 3D Hangouts – Slim CLUE

Get Adafruit Parts from DigiKey
https://www.digikey.com/en/supplier-centers/a/adafruit
Learn Guide: Slim Clue Case
https://learn.adafruit.com/clue-slim-case
Adafruit CLUE
https://www.adafruit.com/product/4500
Get Adafruit CLUEfrom Digikey
https://www.digikey.com/product-de...
unique ravine
I have a working Bowden printer and I'm about to finish building a MK3s. Given that I'm going to have access to both, is there anything you just wouldn't print on one or the other? Or is it all good with enough tuning?
empty sedge
you can't really print super soft flexible filament like ninjaflex on a bowden printer
unique ravine
Anything as far as model features? Bridges, overhangs, vases, etc?
empty sedge
something thin with a lot of retracts is more of a problem on bowden because your retracts tend to be longer (say 5mm instead of 1.5mm) and you'll be going back and forth on the filament more and it can grind all the way through and jam
unique ravine
Thanks! Googling doesn't respond well to this kind of negative ask but it's really the info I needed.
viral steeple
@devout pewter I saw your upgraded prusa the other day on show and tell. What upgrades have you done? Is that the bear frame mod? Or something you designed?
 devout pewter
Hi @viral steeple. I'm actually building it from scratch rather than modding a Prusa. Yes, the design is the Prusa Bear. Some of the main differences are the Bear frame, but it has a taller Z-height, an Ultistik build plate, and the Hemera hot end/extruder. Also, I created a custom filament holder that works with it. I've been covering the build on my YouTube channel at https://www.youtube.com/playlist?list=PLNfVB1UmFL2uA37mAwt8XKF6b01UH3P8P.
Enjoy the videos and music you love, upload original content, and share it all with friends, family, and the world on YouTube.
viral steeple
Oh cool, I will check out your channel. The Hemera looks like a neat extruder - they have been out of stock for some time. I was considering one of those as well.
empty sedge
how do I make prints not stick too agressively to buildtak-like sheet?
clever lynx
wonder if its because walls is too thin?
i think theres a setting minium wall thickness that forces it to put a line as minium?
 vivid current
id assume so but this is scaled up 325%
clever lynx
if its single poly thickness then scale dont really matter. cant get any number besides 0 if its 0 thick 😄
vivid current
def isnt, scaling upto ~700 fixes it
clever lynx
dang
wonder if theres utilities that thicken model thin points only
but check if there IS a thickness minium setting
vivid current
yea cant find anythin
clever lynx
drat lemme ask in reprap
erm looks like one slicer has it
s3d
ah slic3r apparently has it also
karmic brook
PrusaSlicer is a slic3r derivative, so it may too.
formal relic
Someone have an idea for 3d printed single AAA battery holder with cover?
vocal flax
there is none on thingiverse?
oh wow there isn't any (I guess that makes sense. mass production and low cost
formal relic
thingiverse is dead
formal relic
I'm using solidworks
formal relic
I want to just import it, instead of reversing the ugly STL mesh.
vocal flax
Oh well I guess only thing left is redrawing it 🤷
karmic brook
Not much to a battery holder. With a parametric modeler like OpenSCAD or F360, you could probably just change the cell size and be done.
Note, when searching for designs, I usually just look at yeggi.com these days
vocal flax
BTW thingiverse works for me right now unless they deleted their design
formal relic
try to search...
vocal flax
Yeah I searched aaa
vocal flax
I actually get lots of results usually pokemon
formal relic
no idea
karmic brook
yeggi is pretty fast, and it's also an aggregator, it searches multiple sites. For example, when I searched for "AAA battery holder", this is one of the results (note: not thingiverse): https://cults3d.com/en/3d-model/tool/termo-holder-aaa
 formal relic
This is what I came up with https://i.imgur.com/JADSH5T.png
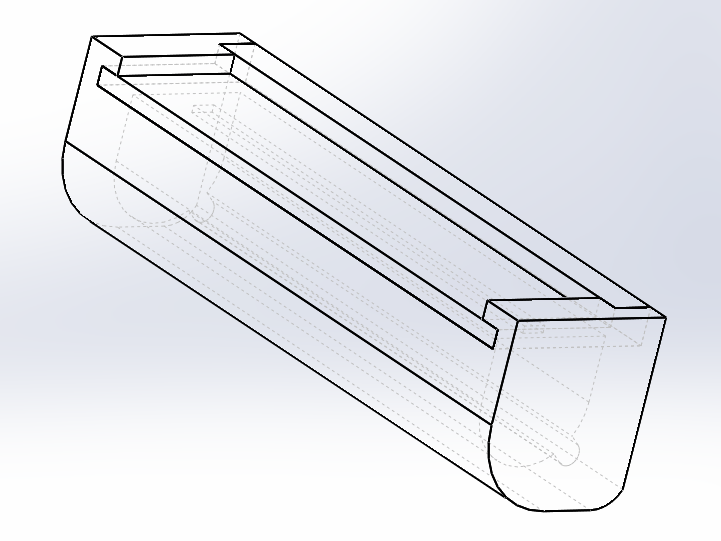 clever lynx
cool
formal relic
Thanks!
vocal flax
which orientation will it be printed?
any orientation seems to produce supports also printing curved surfaces vertically are not ideal
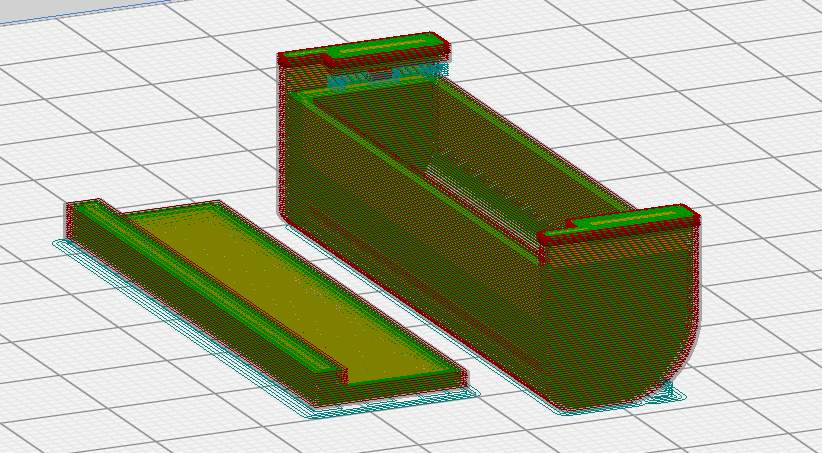 clever lynx
or seperate out sides and make it glue on
so it can be printed in similiar orention as battery cover
formal relic
it is just a test print, if it work, I will embed it in to something
 inland galleon
Question, whats the name of this type of gear? I'm having trouble loading filament on my printer and notice it looks quite worn
(Phone really didn't want to focus on it)
clever lynx
think its hob gear? dunno
and it looks really clogged with plastic
probably need to clean it uop
inland galleon
hmm. it looked just worn to me, but maybe it is is dirty
empty sedge
@molten sandal how so?
 molten sandal
I'm trying to figure out how fast my stepper motor can go actually
empty sedge
it depends how much load is on it
molten sandal
so I'm going to talk out loud and just correct me where I'm wrong
empty sedge

UltiMachine
This stepper motor is a strong choice for any project.5 motors needed for Prusa Mendel.4 needed for OG Mendel.Specifications:Model number: 1124090Holding Torque: 5.5Kg.cmRated Voltage: 4.2VNO.of Phase: 2Step Angle: 1.8° ± 5%Resistance Per Phase: 2.8Ω± 10%Inductance Per P...
molten sandal
ok that rev/min is very helpful
I was looking at the Marlin firmware
and my steps per mm was 1600 for a leadscrew thing I was doing, 100 * 16 microsteps
if it ran at 10 mm/s that would be 16,000 steps/s
empty sedge
0.5mm per motor turn?
molten sandal
its a 2mm pitch leadscrew, 1.8 deg motor
empty sedge
ok, my math was wrong. So is the screw spinning or the nut?
molten sandal
ha I can't tell the difference between that
empty sedge
yeah you can, it's probably the screw spinning
molten sandal
yeah that would be the most common would it
I just know its 200 steps / rev
and its 2mm / rev
so its 100 steps / mm
now comes the kicker
I'm running it at 16 microsteps
empty sedge
100 full steps, 1600 microsteps
molten sandal
1/16
so lets talk about that bit
- Do I actually gain precision with the microsteps?
- What would the new bottleneck be for step rate?
empty sedge
when you build a mechanism with a spinning screw your top speed is also limited by the top speed you can whip the screw around.
yes, microsteps add more precision, but not forever
molten sandal
ok, you are knocking down my doubts very quickly btw
empty sedge
what mcu is your controller using?
molten sandal
I'll come to that in the next bit haha
So I'm guessing torque is involved here yes?
the problem is really each step needs some torque
empty sedge
marlin on 8-bit avr (mega2560 for example) runs the step generator at 10khz, and if you're trying to go faster will send 2x or 4x pulses instead of just one
molten sandal
Ok since we're going to tackle that
I'm using a 32-bit SKR
that's 100Mhz
It actually brings me to a lot of my questions
empty sedge
no, it's 100,000 steps/sec
molten sandal
I mean the SKR has 100Mhz clock frequency
empty sedge
actually, which SKR?
molten sandal
v1.3
empty sedge
yeah what's the full name
molten sandal
ok so 1/16 goes 16x faster yeah?
empty sedge
the mini uses stm32f103 and I don't know if that one uses a slower clock
empty sedge
no, 1/16 microstepping means it subdivides each "full step", the 1.8 or 200 step/revolution of your motor, into 16 microsteps, so marlin needs to output 16 step pulses to move 1.8 degrees on the motor
yeah I don't know the step rate of marlin on stm32f103. I'll try google
molten sandal
hmmm, wait
vocal flax
hmm. it looked just worn to me, but maybe it is is dirty
@inland galleon If its removable leaving it soaked in acetone wouldn't hurt 🙂
molten sandal
wouldn't the controller also need to pulse faster?
vocal flax
https://reprap.org/wiki/Step_rates
@molten sandal https://blog.prusaprinters.org/calculator/ this is more universal 🙂
Prusa Printers
Best tool for calibrating your RepRap based 3D printer. Prusa, Rostock, Mendel, all of them!
empty sedge
yes, marlin has a limited top speed depending on your hardware and your steps/mm
molten sandal
@vocal flax I use that a lot actually
Oh.... a software top speed huh
I can show you a video of what I did today
vocal flax
ohh sorry I thought it gave speed too but it was acceleration
molten sandal
This obviously isn't a 3d printer, but I was just hacking the cartesian to make a 4 axis machine
it started stalling at 16 mm/s
and I was wondering why
1600 steps/mm
empty sedge
ok let's explain why
molten sandal
I actually have a lot more questions if you don't mind about the the step rate...
empty sedge
the way a stepper motor creates torque is that the rotor tries to align with the magnetic field created by the coils in the stator
when not moving, the larger the difference in position the larger the torque trying to push it back into place
vocal flax
After you guys' discussion ends could you give insight on is there any benefit of upgrading to 32 bit micro?
molten sandal
@vocal flax yeah, you get to use Marlin 2.0
@empty sedge I'm listening attentively
empty sedge
@vocal flax not much. you can get higher top speeds but most machines can't use them
this means that when you're using microstepping you don't get as much torque authority to try to align the rotor with the magnetic field because the rotor doesn't need to move as far, so the friction in your leadscrew might not be overcome until you move say 4 or 8 of the 1/16th microsteps
molten sandal
@empty sedge Is this related to inductance
empty sedge
next, as shown in that chart the stepper motor has tremendously reduced torque as speed increases, and that was at 1/2 microstepping
@vocal flax tmc2209 steppers are pretty nice and don't need 32-bit though
so if you need actual precision and speed you end up spending more money on a closed-loop system of some kind where there's an encoder measuring how far was actually moved, then something that tries to correct for the error. There are both closed loop steppers and 3-phase servos that take step+direction input
as you get really fancy you don't just have an encoder watching what the motor does, you get linear encoders on your axes
molten sandal
@empty sedge I'm trying to process that into memory logic
vocal flax
@vocal flax tmc2209 steppers are pretty nice and don't need 32-bit though
@empty sedge ehhh pololu ones are good enough for me. while parting out I went to local dealer and bought motors they didnt know much better than i was at that time so i got sweet deal on pretty high end 0.9 degree motors
molten sandal
this means that when you're using microstepping you don't get as much torque authority to try to align the rotor with the magnetic field because the rotor doesn't need to move as far, so the friction in your leadscrew might not be overcome until you move say 4 or 8 of the 1/16th microsteps
@empty sedge this bit mostly
@vocal flax I like the 2209s become they are quiet and they come with the fancy pansy stuff like sensorless homing
its buggy tho
any dangers at running at high speeds then?
empty sedge
a stepper motor doesn't apply infinite force to move to align the rotor with the magnetic field, it applies a force depending on how far it needs to rotate
molten sandal
ok that explains it a lot
empty sedge
so when you want to move 1/16th the angle you're a lot closer and the torque applied is a lot less
molten sandal
so its not a matter of required torque, but applied torque
empty sedge
this might not overcome the friction in your leadscrew nut
empty sedge
so 1/16 microstepping makes things quieter, but you probably only get 4x the precision
molten sandal
ok I also went a little fancy and reduced the acceleration quite a bit
would that actually affect the precision?
empty sedge
you get the same effective torque for moves though with 1/16 vs 1/4 microstepping
no, reducing the acceleration won't change the precision
if your speed or acceleration are too high you'll lose steps but that should be pretty obvious as things don't move the way you expect and make a buzzing sound
molten sandal
yeah I got 3d printing knowledge
I've seen stuff like ghosting
The thing is I can really only understand things I can picture
empty sedge

The commanded positions are in 0.001 mm units and the observed positions are in mils
vocal flax
@vocal flax I like the 2209s become they are quiet and they come with the fancy pansy stuff like sensorless homing
@molten sandal thanks but stepper drivers are consumable for me (I go through so much that now i keep more than full set extras) and this is not a school or work project which means everything decreases from my lunch money
molten sandal
@vocal flax I mean you get off stock controller so you can play around with these drop-in trinamic drivers, they cost very little compared to other machinery. You don't have to go spend $30 a pop on more expensive stepper drivers that drive like 2A or have external mosfets to deal with all that heat
@empty sedge I've got got another question!
empty sedge
go for it
molten sandal
I'll drop it here while I read the article
So is there more of a likelihood that torque becomes an issue before say the clock frequencies
empty sedge
for a leadscrew, yeah
molten sandal
how about um, timing belt drives
empty sedge
depends what you're driving
molten sandal
I once wrote an interrupt based scheduler to time pulses
empty sedge
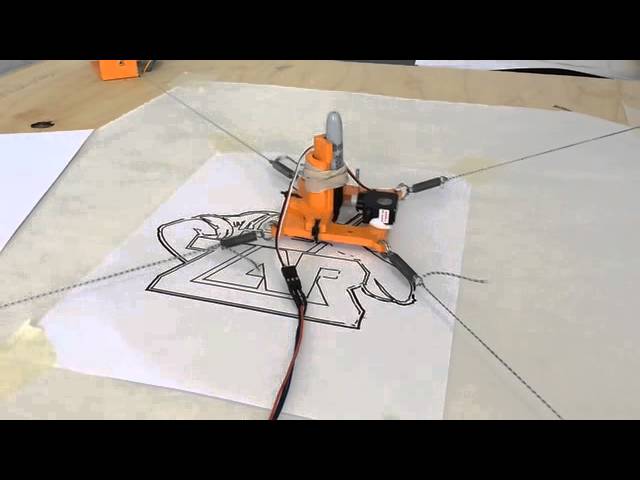 vocal flax
@vocal flax I mean you get off stock controller so you can play around with these drop-in trinamic drivers, they cost very little compared to other machinery. You don't have to go spend $30 a pop on more expensive stepper drivers that drive like 2A or have external mosfets to deal with all that heat
@molten sandal here is the deal other machinery is not consumable, they are already sunken cost, econ 101 taking sunken cost into consideration is common pitfall. and i use a4988 which is 1/6th of price in my local dealer gets the job done and i dont mind listenng some high pitched EDM 😂.
empty sedge
that's 400mm/sec at 1/32 microstepping at 64 steps/mm on smoothieware
the pulleys have 100mm circumfrence
molten sandal
O:
vocal flax
wow thats really fast man
molten sandal
I'm impressed. I'm assuming smoothieware has no software limits
empty sedge
eh, that's 25,000 steps/sec
molten sandal
yeah I Was looking at the math rofl
empty sedge
I think I chose the big pulleys mostly so the diameter didn't change much when the line wrapped on them more than once, not for the speed. That said it did help with the speed
molten sandal
I don't really know any of the motor selection math
but I'm assuming you just got the baddest ones out there
empty sedge
eh, we used those kysan motors I linked to
I don't fully understand how to spec stepper motors but essentially:
- you don't want 12v rated motors if you're using 12v because you're using a current-controlled stepper driver, so you'd want one with a lower voltage than that. You'd only use the same voltage rating if you had an ancient dumb stepper driver
- you can get longer motors with more holding torque, but they probably have higher inductance and will lose more torque at speed
also, apparently some motors are the same size and are quieter than others with the same stepper drivers so those kysans made a printer of mine quieter (not using trinamics on that printer)
there are larger and smaller stepper motor frame sizes too. I mostly work with nema17 steppers, and servos for nema23 and 34
as the diameter of the rotor gets bigger the torque goes up too
molten sandal
so you primarily work with 24V motors?
empty sedge
if you want you can build your own servo: https://www.youtube.com/watch?v=0BoPoWF_FwY&t=3m
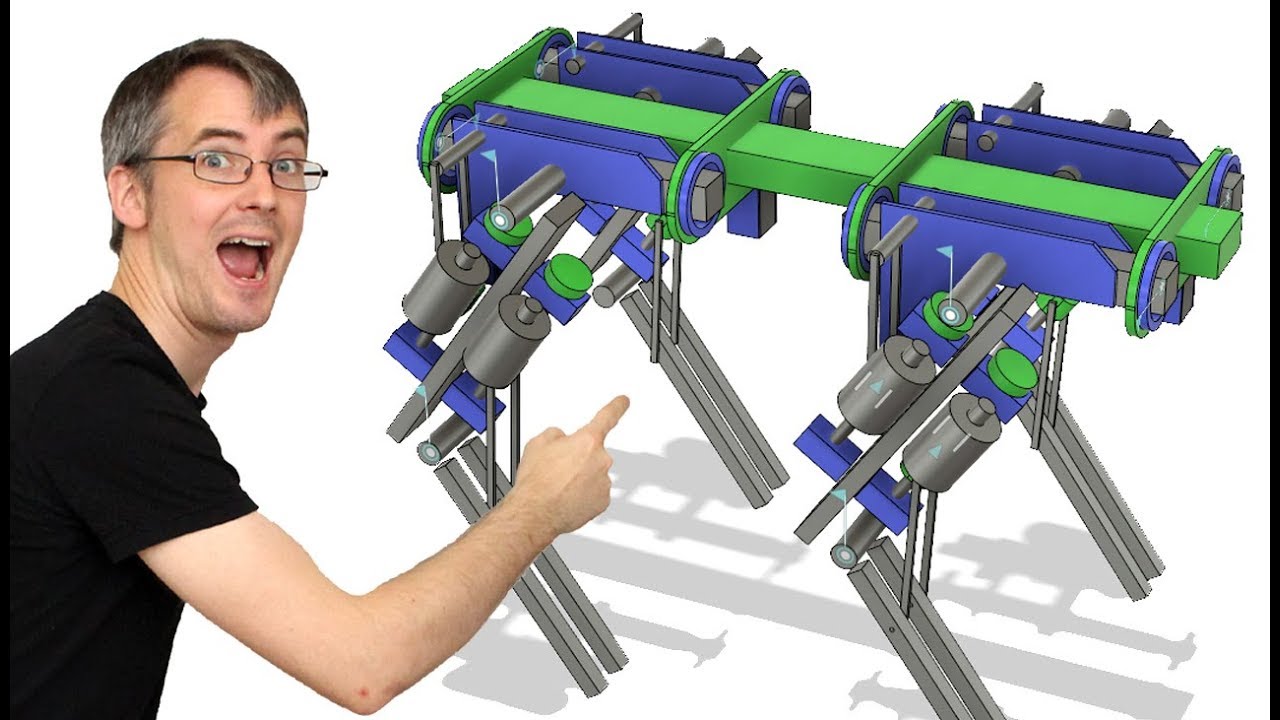
Episode one and already my dogs are barking.
As with any of my projects, it’s important to start with a solid plan. After Boston Dynamics great work with their robot dog, I thought I’d tackle my own robot companion but make it truly open source. In this first week, we’re tal...
or you can buy servos in NEMA form factors like teknic clearpath, or there's dozens of other options that either have the servo driver on the motor or in another box
molten sandal
I haven't actually go the chance to really work with servos
empty sedge
@molten sandal my printers are a mix of 12 and 24v. The servo systems vary, but are at least 24V
teknic clearpath starts at $250 so it's a big price jump
molten sandal
yeah....
empty sedge
but I guess odrive is similar. odrive is $200 for 2 axes, but you need a motor and encoder for each axis.
the turnigy sk3 is the one shown in the opendog videos and is the same one driving the cart in my user icon
https://www.youtube.com/watch?v=0ZtJ0q-ViWM <- sk3 6374 powered crazy cart vs stock
 empty sedge
yeah, when we the lockdown ends the hackerspace is pretty great
molten sandal
what a pass
empty sedge
I've been asked to not cart inside any more though
empty sedge
santa barbara, california
molten sandal
Ok I've digested all the material, man that cleared so many doubt thank you so much
 shy yew
anyone got good tips for no-stringing tpu
 proper shuttle
Lower temp ... faster travel speed ... dry it out first (haven't tried that, but someone suggested)
shy yew
ill try lowering the temp a bit thanks
vocal flax
If you're using bowden maybe not use bowden
hushed lotus
I am printing a goal for an air hockey table. I was wondering how much infill would you recommend
proper shuttle
@hushed lotus A picture of the planned model would be useful. Most things like this would be thin, and not solid in the first place. I print most objects with 2-3 "outline paths", so for something like this, there may not actually even be any infil. The most critical factor is likely the direction you orient it in when printing (for strength) rather than the amount of infil.
hushed lotus
The second is the assembled one
violet needleBOT
Adafruit Industries posted Maker Community in Mexico develops Respirator Mask for Ventilators #3DPrinting #adafruit #Timelapse

Every week we'll 3D print designs from the community and showcase slicer settings, use cases and of course, Time-lapses!
Respirator Mask
By Ariel Rojo
https://www.arielrojo.com/en/printable-3d-system-covid19
CR10S Pro
Rainbow PLA
09hrs 30mins
X:225 Y:225 Z:97mm
.2mm layer / ...
 deft wagon
@hushed lotus Air hockey pucks can hit with considerable force, so the more solif the better... Adjusting the infill is really just a function of print time... So I would say to bump up the infill for as long as you can stand waiting having it print...
hushed lotus
My mom is phobic of fire, and won’t let it run overnight, so the most I can do is 10%. Also, it is a half mini size, and the puck is only around 10g
deft wagon
You should be phobic of fire also 😉 But so then I guess your answer is 10%
vocal flax
even best printer can't %100 guarantee (consumer ones at least) there wont be any fire
violet needleBOT
Adafruit Industries posted Show and Tell on 3D Hangouts

Adafruit Industries posted 3D Hangouts – Display Mount for Gamepads

Learn Guide
https://learn.adafruit.com/ps4-gamepad-display-mount
YouTube Video
https://youtu.be/hanDyDW6dWA
CAD files on Thingiverse
https://www.thingiverse.com/thing:4340030
CAD files on Prusa Printers
https://www.prusaprinters.org/prints/31201-ps4-dualshock-display-moun...
violet needleBOT
Adafruit Industries posted 3D Hangouts – Display Mount for Gamepads

Learn Guide
https://learn.adafruit.com/ps4-gamepad-display-mount
YouTube Video
https://youtu.be/hanDyDW6dWA
CAD files on Thingiverse
https://www.thingiverse.com/thing:4340030
CAD files on Prusa Printers
https://www.prusaprinters.org/prints/31201-ps4-dualshock-display-moun...
Adafruit Industries posted 3D Hangouts – Display Mount for Gamepads

Learn Guide
https://learn.adafruit.com/ps4-gamepad-display-mount
YouTube Video
https://youtu.be/hanDyDW6dWA
CAD files on Thingiverse
https://www.thingiverse.com/thing:4340030
CAD files on Prusa Printers
https://www.prusaprinters.org/prints/31201-ps4-dualshock-display-moun...
 heavy ether
Hey y'all so I want to get into multimaterial printing (printing supports in pva) and I'm wondering what's the cheapest way of doing that. Rn I'm running a monoprice maker select plus if I can somehow adapt that. My DIY skills with printers are meh and I really don't want to modify my printer in any way that might cause permanent damage. Thx for any help!!
karmic brook
You might be able to add a filament splicer external to your printer, but I'm guessing PVA needs different parameters, so you'd need to find a way to change those on the fly, in synchronization with your feedstock changes. https://hackaday.com/2018/03/24/hands-on-with-filament-splicing-robots/
crude kettle
What might help is going Bowden if you're wanting fast prints. Are you still using the stock board?
@heavy ether
heavy ether
The only non stock thing that I have on it is a new nozzle
I don't mind waiting for the prints but I kinda want to not have to deal with supports mostly
@karmic brook I looked up the palette company and it looks like they have a cheaper offering now!
vocal flax
PVA is really hard to multi-material I suppose best way to do is adding secondary direct drive extruder @heavy ether
I don't remember why it needs to be direct drive but as for separate extruder and heater because PVA doesn't mix well with other filaments, and different printing temps. Your pla might clog or make flow harder because it is slushy at PVA temp range
heavy ether
maybe, my printer is direct drive rn tho
vocal flax
BTW if you have direct drive Bowden would be downgrade
heavy ether
oof but that's good to know
like ik having separate extruders is better but I think it's a bit out of my skill range
vocal flax
you use marlin?
heavy ether
I think so but I'm not sure
vocal flax
repetier and marlin had those configurations
heavy ether
yeah I think the firmware is compatible with multiple extruders but I'm more worried that I'll need to really dig into the printer and break something
vocal flax
ohhh in that case IDK
heavy ether
yeahhh lmao
p sure I'll get to the point where I'll be skilled enough to really just hardcore modify my printer
thx for the suggestion tho!!
empty sedge
I keep stripping petg on makergear m2. Anyone have a non-simplify3d profile that works in petg for them?
 balmy tree
I'm looking to get started with 3d printing. Any printer suggestions?
karmic brook
From the Creality line, the CR-6 is looking nice but I haven't checked it out. The Prusa ones are more expensive but need less attention. The Monoprice ones are less expensive but need more attention.
balmy tree
Thanks! I did some searching on my own but these suggestions are more affordable than what I found.
shy kelp
Ender 3 Pro. 45-60 min to assemble and align. Good power supply, nice heated bed system. Works well out of the box and is easy to mod if you're up for it. For peace of mind, I recommend upgrade drive board for quieter operation.
And upgrade to Marlin 2.0.5 for Bed Leveling
I have an Ender 3 Pro and i am happy
vocal flax
do you just want to print it or tinker with the 3d printer itself
Creality cr series are letdown you better off buying ender 3 than cr series
Yeah Cr10 and 20 has bigger plate but it almost never matters
Just brings more headache
 fading jungle
I just bought my first 3d printer about 3 weeks ago. I went with an Ender 3 Pro and I'm quite happy with it so far. Setup was super easy, and so far I've had very little issues with printing.
heavy ether
Prusa I3 MK3S
@shy kelp what about the prusa mini?
Yeah Cr10 and 20 has bigger plate but it almost never matters
@vocal flax personally, 7in^3 is good enough for like 95% of my prints
vocal flax
Whats 7in? 20cm?
Yeah Cr10 and 20 are just headache
The bed warps and you have to flatten it with some tapes
Heating bed usually takes half of my print times
heavy ether
Whats 7in? 20cm?
@vocal flax yeah I think so. Most of my prints are like 5in^3 but it's nice to have a little extra space just in case you need to print that one thing
 tawdry forge
Prusa mk3s mesh leveling changed my life, worth every penny
karmic brook
I agree, the PINDA sensor and mesh levelling is really nice. Once you get the first layer calibration done, it's off to the races.
hushed lotus
Does anyone know of a direct drive mod for ender3? Bowden has been giving me loads of problems
empty sedge
first google result for me: https://www.youtube.com/watch?v=omXgJT5V0D4

Direct drive extruders eliminate the bowden tube from your 3D printer, as found in the Ender 3, CR-10 and many others. I have previously made a guide on fitting an E3D Titan Aero, but that process was long and drawn out.
In this video, I present the DD E3, a direct drive extr...
vocal flax
Which type of sensor prusa use for mesh bed leveling? I want to change my z limit switch to z probe I have bunch of ir sensors but I assume they might not play nice with my random glass
empty sedge
prusa uses an inductive probe which is a bit unusual because it also has a temperature sensor inside. It detects the spring steel sheet that you print on
BLtouch is the typical answer for how to probe that works on glass. I think it's also $35 and it has a little plunger that sticks out on command and is used to probe the bed

Filastruder
In stock, ready to ship. Current version: v3.1 Cable available here if needed: The official BLTouch from ANTCLABS is an auto leveling sensor for 3D Printers that can precisely measure and correct the surface tilt of any kind of material, including glass, wood, metal, tape, Bu...
^ if you're not in the US you might want another distributor for bltouch. The amazon listings are probably all clones
empty sedge
then you can do the hobby servo arm microswitch thing
vocal flax
When it's working season my university pays me like 115$
probably reengineer the whole bltouch assembly thb
it doesn't look that complicated
(I for sure will regret my decision)
empty sedge
here's example of servo arm switch thing: https://www.thingiverse.com/thing:225584

This is auto bed-leveling sytem for Ultimaker. It will also fit derevative printers like Joysmaker or Dreammaker.
The main idea is to mount z-min endstop to the print head. It will probe 4 points of the bed before the print. All moves will be transformed according the bed alig...
eventually the servo gears wear out though
vocal flax
I have metal geared servos 🙂 but I think I still pass on that
empty sedge
you can also build a probe with an allen key and springs that gets deployed&stowed by the motion of the machine (see the kossel mini) or you can just deploy and retract it by hand
karmic brook
The CR-6 claims to use a new design pressure sensor for levelling, but time will tell.
heavy ether
I agree, the PINDA sensor and mesh levelling is really nice. Once you get the first layer calibration done, it's off to the races.
@karmic brook I dream of the day I can have a mesh leveling printer
Wonder if I can mod mine...
karmic brook
I find that 3D printing is all about modification. I've already modified my Prusa, and I haven't had it that long.
vocal flax
I find that 3D printing is all about modification. I've already modified my Prusa, and I haven't had it that long.
@karmic brook What more possibly you can add to prusa? 🤔
karmic brook
My hotend would jam occasionally, which I tracked down to the heatbreak having a "step" in it, and being thermally conductive enough that it could get soft filament too high in it under certain conditions. So I replaced the heatbreak with a stepless titanium one, which seems to have cured the jamming.
This one, if you're curious https://www.printedsolid.com/products/e3d-v6-titanium-heatbreak

Printed Solid
These high-grade Titanium HeatBreaks are an upgrade to the stainless steel HeatBreaks that come as standard with E3D V6 HotEnds. Since V5, the manufacturing processes for all E3D HeatBreaks has been overhauled to achieve a better internal surface finish than ever before. The i...
vocal flax
mine is just chinese noname thing :/
I think its just a bolt turned down and drilled o middle
karmic brook
Apparently Prusa added the step to their heatbreak in order to make it work better with their MMU, but I found it made it more likely to jam and I'm not using an MMU, so I swapped it out.
vocal flax
you probably want to lap that
naah I'm sure it's fine its tad bit oversized in future being oversized gonna be problem but meh i wont fix that until it breaks
now i want to make filament recycler because I have 3 different machines on my demand thanks for school 🙂
clever lynx
cool 🙂 once my chineseium one arrives I want to lap it, but im not sure how. in irc channel guy acciently re-invented lapping by cleaning stuff by first burning off plastic then spinning wood toothpick in it.
using ash as lapping compound, bore was very smooth and shiny
vocal flax
Uhm really 🤔 wood is not harder than steel
Id expect that to not work
(enlighten me please)
clever lynx
you want lapping to be softer than material'
vocal flax
Ahh alright
clever lynx
after all, you want to round it and polish, not actually cut into material
vocal flax
I only see it with high grit sandpapers or some fine grain hard material pastes
clever lynx
i saw one video where they use wood rod with slot in it, use paper with abusives in it

In this 4th video I show how the cylinder is made and lapped for a fine finish.
Castings and plans for sale at http://myfordboy.blogspot.co.uk/p/the-myfordboy-steam-engine.html
vocal flax
but it still uses paste
that paste has tougher materials than brass (I assume that's what he is using)
vocal flax
it does dig into material how does it remove those lines on surface
and carbonized wood is not tougher than steel, I assume IRC guy also used some paste
clever lynx
nah he wasnt lapping, he acciently did it lol
and its carbon from plastic not wood 😉
it does cut into material but very limited extent
and yes softer materials can cut harder.
 vagrant hollow
I need help with the opposite of 3D printing.
empty sedge
subtractive manufacturing?
vagrant hollow
yes. PCB milling specifically.
I am looking at 3018 and 1419 versions from china
I've seen many examples of PCB routing that is acceptable for through hole boards. but i'm interested in SMT and RF boards.
crude kettle
It my help to get on of those and put an rc brushless motor on it for speed.
It would help if you have a 3d printer, but not impossible
ornate raven
@vocal flax I used to work in the plastics extrusion business. Lapping hardened steel with wood was the way to go. ANY abrasives simply remove material to achieve a smooth surface. When you remove material, you impact the profile. We actually used a dry ice blaster for the first level of cleaning. Removes foreign material and leaves no residue. Not great for oils and greases though. Just smears them around.
@clever lynx is right about carbon and steel. Burned plastics, resins, and other materials (including wood) create carbon which, I have seen do irreparable damage to extrusion surfaces. A groove or a pit can cause vortices in the laminar flow of the material. A disruption in the flow will impact the layer being laid down.
 hearty tree
Can anyone find good ABS on Amazon?
empty sedge
@hearty tree Did you buy some problematic ABS from someone?
karmic brook
Any reason you don't want to use a known-good vendor like Atomic Filaments or FilamentOne?
 charred nebula
Odd, I was under the impression that titanium had very poor heat conductivity for being a metal.
Oh wow, necro posting here.
karmic brook
It does, which makes it good for a heatbreak
charred nebula
 clear kindle
What would be the best 3d printer to get for roughly $1000?
 willow sedge
@clear kindle We have a Prusa Mk2.5 which works great - I would suggest the newest version. I don't have experience with others though to give you a comparison or reason the Prusa makes sense over something else. @devout pewter might have better insight though as she uses many different ones.
empty sedge
@clear kindle the prusa i3 mk3s kit is $800 and is a great reliable workhorse of a printer
devout pewter
Yes, I agree with @empty sedge with the Prusa i3 MK3s for that budget.
Additionally, you can get a Prusa Bear Full Kit to make it even more stable and still be within budget.
 glad shuttle
anyone know why the z axis on a custom 3d printer would home one direction and then why i hit print it moves the opposite
charred nebula
The axis is reversed, or the controller is configured wrong.
vocal flax
probably firmware configuration you might have set homing to max than homing to 0
then you have your motor inverted
empty sedge
or your homing switch it thinks it always stuck down. when you home then it would try to back off the homing switch and it wouldn't home in the correct direction. You can check homing switch status by sending M119 from the terminal of pronterface or whatever usb print software you like (cura, simplify3d, etc)
clear kindle
Is there any splicer available for the prusa i3 mk3?
@willow sedge & @empty sedge thank you both for the feedback
empty sedge
filament splicer?
clear kindle
Yeah, for multi-color works. Mainly Black and a transparent color
empty sedge
I haven't tried the prusa MMU but it would be one way to do that
clear kindle
Whats the difference between The kit and the non-kit except price?
empty sedge
the non-kit comes assembled
charred nebula
Fun time at work today explaining the older CNC operators how 3D printers are just whimpy 3 axis CNC mills with a small glue guns that spit plastic.
clear kindle
Is the assembly hard and or does it need lots of extra calibration?
charred nebula
The calibration is easy.
empty sedge
the instructions are very good. it doesn't need a lot of extra calibration
there are a couple steps you can mess up on but the instructions point these out
charred nebula
I've had students with no prior mechanical experience assemble prusa mk3+s within a few hours.
charred nebula
PLA gang, then go from there.
vocal flax
Is the assembly hard and or does it need lots of extra calibration?
@clear kindle usually they send everything you need included basic tools
empty sedge
yeah the kit comes with the allen keys, pliers, tweezers and stuff you'd need
vocal flax
Also, which filament type to get?
@clear kindle since ABS has some slight toxic fumes and its probably home use better to have pla
charred nebula
ABS you need a close box with a filter or be in another room.
vocal flax
(probably there are safer abs es but better safe than sorry)
empty sedge
PLA + the smooth steel sheet are a good combination for a first printer. PLA prints well very well and sticks well to the smooth sheet
unfortunately PLA will soften and warp in a hot car
clear kindle
What about structural properties?
charred nebula
PLA is as if not stronger than ABS, but brittle and stiff.
ABS has more give to it, and is usually "stronger" in real life conditions.
clear kindle
Last question for now, where to get the Bear kit?
vocal flax
for home use don't worry about structural integrity much
charred nebula
The print quality of PLA usually makes it the best option 95% of home printing.
charred nebula
What is the point of the bear kit exactly?
vocal flax
prusa mini presumably a good printer too but Id not buy it over mk3s
charred nebula
I was considering going with the prusa mini, but I ended up going with the cetus mk3 instead.
vocal flax
by bear he probably means without mmu etc
TBH half the price prusa mini doesn't seem bad
but there is also funny things going on with prusa modifications
charred nebula
Considering the parts they use on the prusa the price still irks me a bit.
vocal flax
they dont use the best parts but its not what increases cost of the machine
clear kindle
Ty all for input
charred nebula
I'm probably biased towards linear rails and whatnot since I'm used to CNC machining centers.
The print quality and overall support with the community probably makes prusa worth it.
clear kindle
Well, I ordered one. Too bad the MMU is not available, nor black PLA
 rotund sail
I've been using my new Prusa Mini for two weeks and works really great. My first Prusa so cannot compare to Mk3S
empty sedge
I think the mini is only less in build volume, hotend temperature range, and the filament sensor
I've been going through a ton of plastic printing face shields and the filament sensor has saved me several times
anyone have a solution for makergear m2 grinding filament when there's lots of retracts?
empty sedge
hopefully 10th time is the charm
empty sedge
tons of strings but didn't jam
 stoic yew
karmic brook
stoic yew
karmic brook
I had issues with grinding filament with lots of retracts and decided it might be the heatbreak was allowing the filament up in the hotend to soften, so I replaced the heatbreak with a low thermal conductivity titanium one. Seemed to help.
empty sedge
the makergear has a teflon-lined hotend and no real provision for cooling the cold side. I tried with fans on and that didn't make enough of a difference. I ended up switching slicers twice, ending up in cura, to still have a few retractions but not as many
empty sedge
on the 12th gcode I have it working. it seems about 7mm3/sec is about all that printer can push through the hotend
my i3mk3 has no trouble sustaining 11mm3/sec and can probably go faster
with only 75% of the nozzle area I wasn't expecting that much of a drop
violet needleBOT
Adafruit Industries posted Buzzy Box – BLE Notifications with CircuitPython

Get a buzz! Create some smooth vibrations and light up a neopixel using Feather Sense and a haptic motor. Connect via BLE with Apple Notification Center Service and use CircuitPython to create custom triggers and alarms.
Learn Guide
YouTube
Parts List
Adafruit Feather Sense...
violet needleBOT
Adafruit Industries posted 3D Hangouts – Buzzy BLE #adafruit

Get Adafruit Parts from DigiKey
https://www.digikey.com/en/supplier-centers/a/adafruit
Learn Guide
https://learn.adafruit.com/ble-buzzy-box/
Code on GitHub
https://github.com/adafruit/Adafruit_Learning_System_Guides/tree/master/BLE_Buzzy_Box
3D CAD Files
https://a360.co/3...
Adafruit Industries posted Show and Tell – 3D hangouts – May 13, 2020

 agile finch
I’d like y’all’s suggestions on connecting shafts through bearings.
I am using this 608 skate bearing to connect these two gears. I’m currently using a 3-pronged shaft connector. But I’m not satisfied with how weak these prongs are, they tend to break when connecting and removing the pieces. And there is a bit more backlash than I’d like if I increase the tolerance. I’ve tried a D-shaped connection on a previous project but there was more wobble than I liked.
What best practices and suggestions do y’all have for making shaft connections through bearings, suitable for 3D printing?
proper shuttle
I actually dealt with almost exactly this problem recently. Actually several times. I'd strongly suggest using a short piece of tubing. Brass hobby tubing is really easy to get, but aluminum and steel are also pretty easily available. Then you can have the 3-D printed part interact with the tubing instead of the high stress of going through the bearing.
agile finch
@proper shuttle thats a good idea. How do recommend you connect the part to the tubing, though? I’ve used threaded hex standoffs before. The hex standoffs are good because you can make any length within 5mm increments. But I was never happy with the amount of backlash from attaching them to the 3d printed gear. Any suggestions?
empty sedge
you can do like a wades extruder and use the hex on a hex head bolt
empty sedge
alternatively you could buy bigger bearings. For example a 6006ZZ is about $6.50 and has ID/OD/thickness of 30/55/13
proper shuttle
The key for me has always been interacting with the outside of an object rather than the inside. While there is a printed insert in my picture above, the primary interaction with the tubing is on the outside of the tubing.
agile finch
@empty sedge good idea about a larger bearing. May want to change to something that to make this project more reliable. I enjoy that the 608s are so readily available (cheap). Are there other cost-effective bearings that have large diameter openings? I’ve used some MR128 on a different project since they are much lighter than 608s but unfortunately they only have the same size ID.
proper shuttle
3d printing just doesn't have enough layer strength to insert inside things well particularly if there is any stress
but outside contacts work great
empty sedge
no other bearing is more common or as cheap as the 608
I didn't find any other cheap large bore bearings looking 20mm bore and up besides the 6004 20/42/12 for $5.55
(searching vxb.com for "under $7" and filtering by inner diameter)
agile finch
Those are great ideas. I’m just trying to achieve too much with just too little room for 3D printing. The bolt helps a lot with strength but the shear forces will always be there trying to slice these prongs off.
empty sedge
can you use a hex head bolt? https://reprap.org/mediawiki/images/2/26/UGWG_extruder_Gears_1a.jpg
 agile finch
I’m using a round head M3 bolt to hold it together. But for your idea of using a hex head bolt, how do you keep the two halves from twisting on themselves? Or unscrewing the bolt?
empty sedge
two nuts
agile finch
Got it.
Great ideas folks, y’all gave me some things to chew on now. May stock up on some larger bearings so I’ll have them handy if I decide to go that way. And thanks for the suggested part number. Y’all are awesome.
empty sedge
you tighten the nuts against each other, not against the bolt head
violet needleBOT
Adafruit Industries posted ASK AN ENGINEER 5/13/2020 LIVE! #adafruit #AskAnEngineer
 violet needleBOT
Adafruit Industries posted 3D Hangouts – Buzzy BLE #adafruit

Get Adafruit Parts from DigiKey
https://www.digikey.com/en/supplier-centers/a/adafruit
Learn Guide
https://learn.adafruit.com/ble-buzzy-box/
Code on GitHub
https://github.com/adafruit/Adafruit_Learning_System_Guides/tree/master/BLE_Buzzy_Box
3D CAD Files
https://a360.co/3...
agile finch
@empty sedge @proper shuttle thanks for the suggestions to use a bearing with a larger ID. Looking around I think they can be less than $1.50 a bearing in packs of 10. I’m thinking of trying this 6903 bearing with a 17mm ID x 30mm OD x 7mm thick (vs 8mm ID for the 608s skate bearing). This will give me a lot more room for a stronger shaft. Thanks again for pointing me in this direction!
https://www.fasteddybearings.com/10-units-17x30x7-rubber-sealed-bearing-6903-2rs/

FastEddyBearings.com
17x30x7 Rubber Sealed Bearing 6903-2RS (10 Units)
empty sedge
ugh, why did cura lose my settings
does the "new" cura have a way to load settings from gcode?
ornate raven
@empty sedge if you mean cura configuration, there is an option in the upgrade to save or delete settings and a checkbox for adding the ability of cura to display gcode.
agile finch
@empty sedge @proper shuttle I made a test piece shaft connector in advance of my larger bearing delivery. This will make a world of difference in the strength of this shaft connection. Thanks for getting me over the hurdle of choosing a larger ID bearing.
proper shuttle
Certainly looks alot stronger!
agile finch
After a test-fit I pried them apart with a screwdriver and they didn’t even flinch. This will definitely work.
karmic brook
656 "sprag clutch" 3D Models. Every Day new 3D Models from all over the World. Click to find the best Results for sprag clutch Models for your 3D Printer.
shy kelp
This is good bridge ?
 livid echo
yes, the bridge looks good imo
shy kelp
ok thanks (dzięki)
hushed lotus
I am not sure if my printer is underextruding or not, when I search for how to tell if it is underextruding, all I get is how to fix underextruding.
proper shuttle
@hushed lotus measure some number of mm along the filament from where it enters the extruder (3-5 cm is usually good), then put a mark or lightly attach a piece of tape at that point. Heat up the extruder and extrude that much filament. If it doesn't get to the mark, you can measure how much underextrusion you have. The longer the distance you use, the more accurate the measurement.
hushed lotus
My Bowden tube is opaque
empty sedge
that said, you could be under-extruding because it takes more force than it should to melt your filament and extrude it
On this page you'll be able to visually try to match the problems you are having with your print and hopefully find enough information so that you can eliminate
 brave mica
There's an upcoming Hack Chat with Will Cogley of Nilheim Mechatronics next week:
https://hackaday.io/event/171045-animatronics-hack-chat
If you don't know who he is, he makes complex but accessible 3D printed mechanisms of all sorts
https://www.youtube.com/channel/UCkUD_8b1JoTL2ipOVtxfNKw

Will Cogley

YouTube
Nilheim Mechatronics is all about fusing mechanics, electronics and a little artistic creativity to make top-notch robotics and animatronics. These creations...
violet needleBOT
Adafruit Industries posted Fusion 360 Tutorial – PCB Mounting Plates
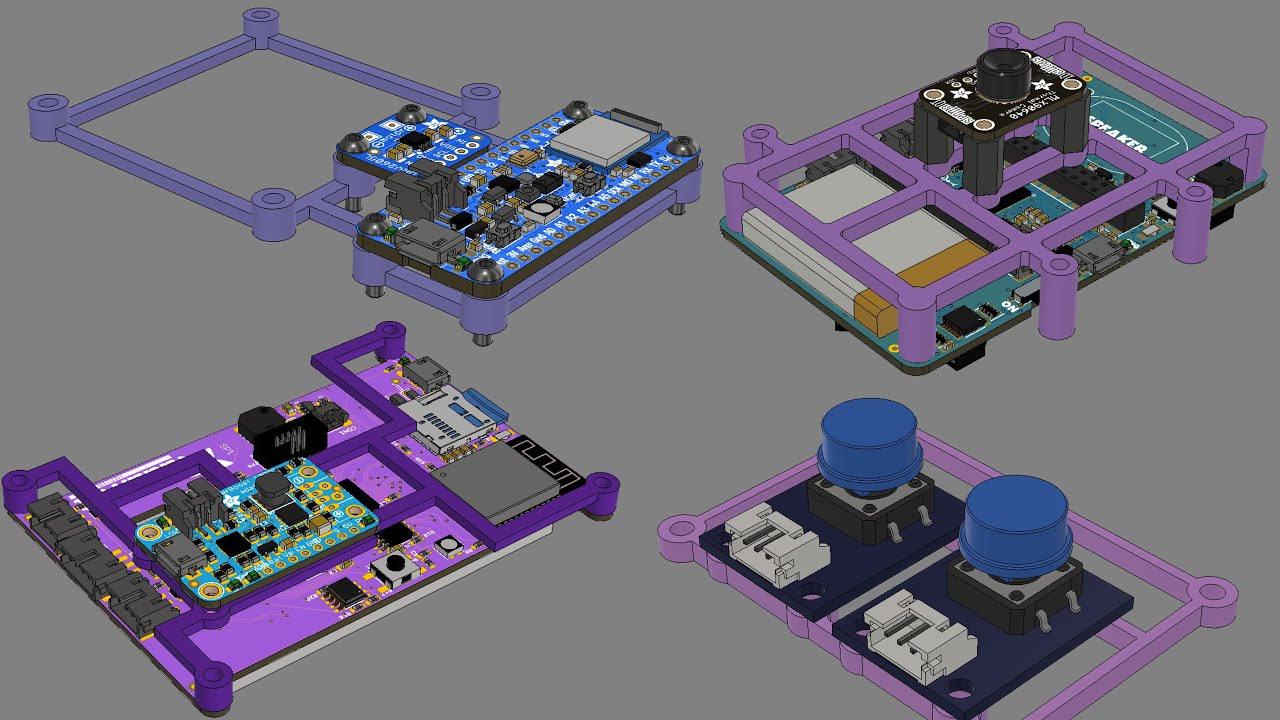
In this tutorial we'll take a look at using PCB mounting plates for enclosure designs. We'll dive into four projects and pull out how to use PCB mounts and why they're helpful. Check out the links to the learn guides of the projects featured in this video. Thanks for watching!...
 storm osprey
i am having a brain-block this AM and cannot find the search terms for what I am looking for... maybe someone can give me a boost?
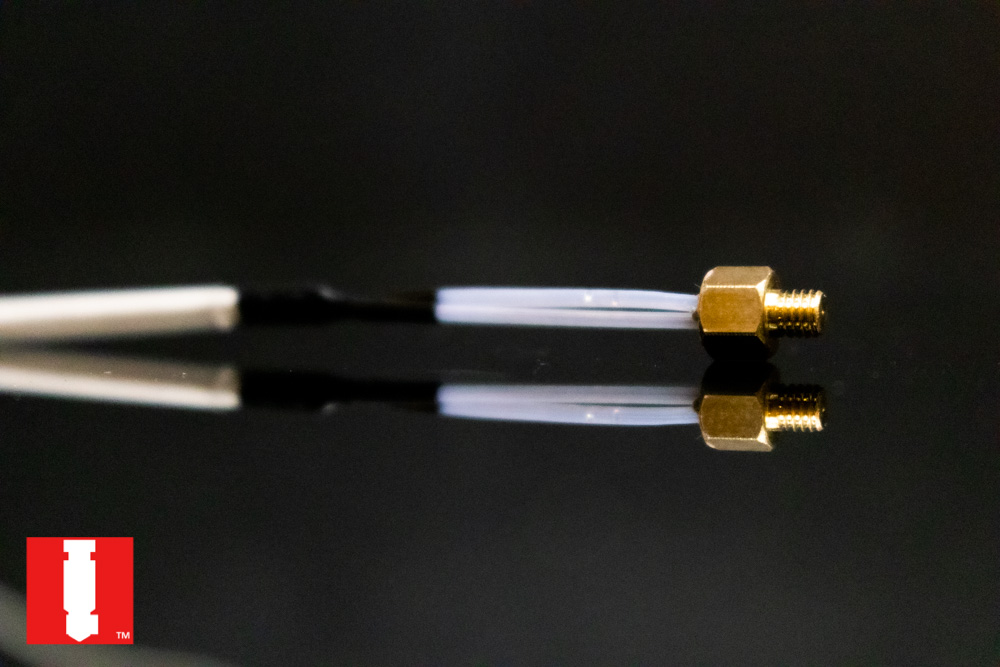
what is the material that is used for insulating thermistor wires? It is a light blue color, very small in diameter and is used in repraps\3d printers a lot...
like heat-shrink, but doesn't shrink, just protects from shorts while being high-temp protective
the bluish tubing on this jhead, https://hotends.com/product/j-head-thermistor/
 storm osprey
teflon or PTFE
empty sedge
the dark blue textured insulation is fiberglass
empty sedge

Filastruder
In stock, ready to ship. 3 inches of high-temperature fiberglass insulation for E3D thermistors. Works with all E3D hotends. Thermistor not included, check spare parts for separate product if needed.
empty sedge
Turns out I didn't think about the weight of the spool when I designed this spool holder: https://youtu.be/Z81Cs376fyU
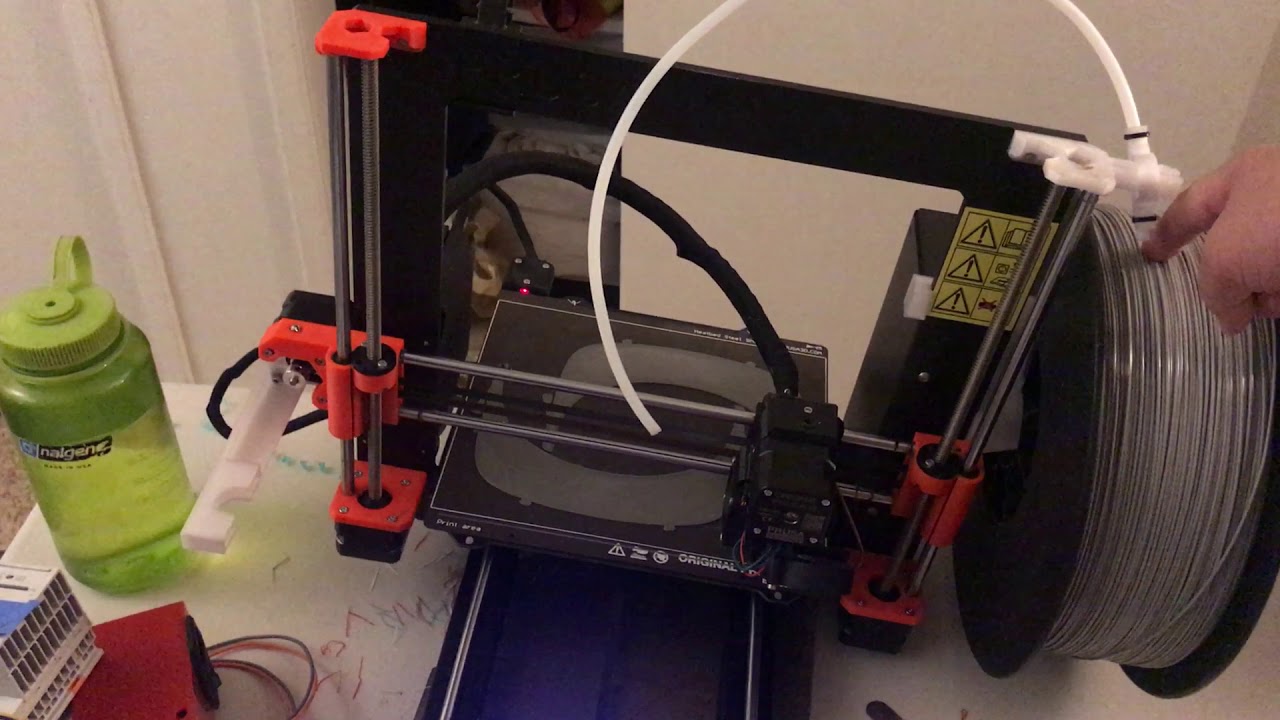
that's a 3.5kg spool. it doesn't fit on the normal spool holder
karmic brook
For something like that, a separate spool holder might be the way to go.
ornate raven
I'm not sure I'd hang something that heavy off my printer frame.
hearty tree
Does anyone here have a Delta printer?
 knotty laurel
I have the Monoprice Mini Delta, since I couldn't resist the price.
hearty tree
@knotty laurel Is it good?
I'm trying to decide between three printers. The He3D K200 it is cheap and, I can get it so it'll have two extruders.
The Monoprice Detla mini.
Or, the Flsun QQ S.
empty sedge
@hearty tree what do you want to print, and how much do you want to tweak your printer?
 wispy cliff
Does anyone know of a 3D model I could import to Fusion 360 for the Pimoroni Pirate Radio Hat (https://www.adafruit.com/product/4453) ? I'd like to design a case for a Raspberry Pi, Pirate Radio Hat, and speakers, and the hat is the only thing I don't have as a model.
hearty tree
@empty sedge I'm wanting to.prnt braces for my seven-year-old sister.
empty sedge
out of PLA?
wispy cliff
I'd be careful with any kind of medical print @hearty tree. You could run the risk of causing more harm than good. Make sure you're talking to her doctors, if you aren't already, about what can be done.
hearty tree
No offense but, I don't see how printing braces would do harm. I would also need to speak with her Physical therapist.
knotty laurel
The Mini Delta probably wouldn't be suitable... it's got a very small print area. It does work okay, though my expectations for an entry-level printer are modest.
wispy cliff
No offense taken @hearty tree and I hope I'm not either. I think it's great you want to help your sister. The community support for 3D printing during COVID-19 response has been awesome. But one of the biggest things is that there can be unintended or unknown effects, and that its important to work closely with medical professionals to make sure its right.
agile finch
@empty sedge @proper shuttle Got my larger bearings today and made a few rounds of test pieces. Way better! I selected a 6903 (17mm ID x 30mm OD x 7mm thick). I was expecting them to be way expensive (>$5 each) but I found them for about $1.10 a piece in packs of 10. Thanks again for suggesting a larger Inside Diameter (ID) bearing.
proper shuttle
Cool. Will keep that in mind myself for the next project.
hearty tree
@wispy cliff Yeah, due to the COVID we aren't able to get her any braces.
I found a 3D printer for $28.99.
Ender 3 pro...
I have many doubts.
empty sedge
I have an old taz pet sheet. what do I need to know about printing PLA and petg on it?
 mild moss
Hey. I have been trying to print these headphone holders, but I get this very textured surface. I'm printing PETG at 267 C and 100 mm/s Any ideas on how I can get this to stop? I'm on an Ender 5 and this only happens on curved prints. All of my flat faces work fine
empty sedge
@mild moss it could be one or more of:
- your gcode sender isn't keeping up. try printing from SD card. (though usually the defects from this are more random)
- you are over extruding
- you don't have linear advance configured properly
267C seems unusually hot for petg, and I don't print anywhere near 100mm/sec but I tend to go for thicker layers to reduce print time instead of faster move speed
hushed lotus
try rotating the model to print it with the screw part flat against the build plate
vocal flax
try rotating the model to print it with the screw part flat against the build plate
looks like he did print it like that you can see extruder movement on the screw plane
livid echo
I think that the problem is caused by ghosting. There might be a loose belt or a loose screw. The v-slot rollers might be too loose. Or the printing speed is too fast.
More imformation: https://3dprinterly.com/3d-printing-ghosting-ringing-echoing-rippling-how-to-solve/
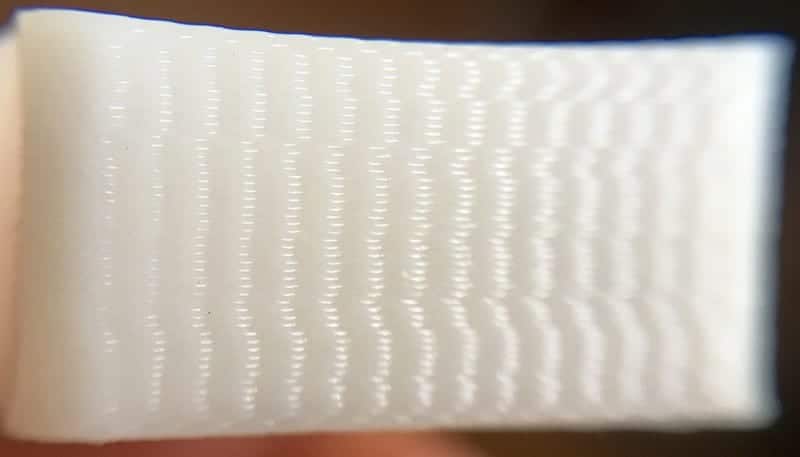
Ghosting is a problem that you've probably experienced if you own a 3D printer. This problem fortunately has some fairly easy solutions which I've described…
ornate raven
Ender3 Pro Folks, how often and how do you recondition the supplied magnetic bed?
Mine has gotten slick as snail snot.
and things just don't stick very well.
Hmm maybe a tip for you E3 guys, 60 grit sandpaper in a cross hatch pattern.
Sticks like a new bed 🙂
hushed lotus
I have a build tak bed that is really grippy, the filament is a good temp, it is extruding at the right speed and the bed is level. However, it might as well be Teflon to the pla. What is going on?
 lilac patio
Maybe your first layer speed is too fast?
karmic brook
Or the first layer height is off, or the bed isn't heated?
hushed lotus
I checked my slicer, it should be good
empty sedge
Cura's default profiles for a bunch of printers doesn't have the set temps in the start gcode so I would check the temperature shown on the LCD or the print sending software more
empty sedge
@hearty tree yeah I have a kossel mini and I've spent a bit with a rostock max
hearty tree
Is it good?
I'm debating between four printers.
The HE3D K200, Flsun QQ s pro, Flsun Kossel or, Anycubic Plus kossel.
empty sedge
I don't think deltas are really worth the effort. You have a lot fewer upgrade options and there's a lot more that can get weird about them
so if you don't have a probe to auto-calibrate you have 3 software or screw adjustments for bed level which aren't too bad, but then you can also have the arm length or machine size wrong and get the bed to seem too high in the center or too low
then once you have everything calibrated you don't have super common option to get better retraction performance by going direct drive. That said, my kossel has been working very well with the new bowden tube and clone BMG extruders so maybe that's not an issue any more
hearty tree
Don't buy a Delta then?
empty sedge
it's a fun project if you have time for that
oh, I don't like the dual nozzles on the HE3D K200
hearty tree
I was gonna get the one nozzle.
empty sedge
I switched to a single nozzle on my kossel after trouble with two nozzles
hearty tree
I also have time.
empty sedge
I melted the printed corners on my kossel mini with a heated bed. Hopefully whatever kit you choose doesn't have those printed in PLA and has spacers to raise the bed above the extrusions
I don't think I can get good prints on my kossel much by turning up the speeds and accelerations either. The 1515 extrusions bend pretty easily
I'd like to add a sheet metal frame wrapped around the printer to make it more rigid by that's a project for the future
empty sedge
I built mine from source and parts
empty sedge
apparently mine started from the 2013 github: https://github.com/jcrocholl/kossel/commit/a396a3c0c17c4221a64570000668ef6df35814a1

mine has:
- clone linear rails
- traxxas ball ends + carbon fiber rods
- 16t pulleys
- 1515 extrusions from misumi
- BTT Y hotend (only tried with one filament so far)
- SKR 1.3 + TMC2209
- clone BMG extruders
- heated bed
- all PETG printed parts (as of this year when I melted PLA ones)
now there are people making custom extrusions for the kossel corner parts for 2020 extrusion which should be more rigid. Also the linear rails are less expensive
I'm on at least my 3rd custom effector design and I think I might've gone overkill on the part cooling
and I regret not including a probe
so anyway, I'd reccomend:
- choose the one with the most off-the shelf parts so when you want to upgrade the hotend, replace the fans, replace the nozzle, etc that's easy
- prefer the ones with with a probe. It will make the calibration and troubleshooting much easier, and should make the software calibration much closer to just a single adjustment until the first layer is the right height
violet needleBOT
Adafruit Industries posted Darth Vader Face Mask #adafruit #3DPrinting #Timelapse

Every week we'll 3D print designs from the community and showcase slicer settings, use cases and of course, Time-lapses!
Darth Vader Face Mask
dumbcomputers
https://www.thingiverse.com/thing:4262205
CR10S Pro
Rainbow PLA
07hrs 56mins
X:192 Y:204 Z:65mm
.2mm layer / .4mm nozzl...
agile finch
Changed from the 608 bearings (8mm ID) to the 6903 bearings (17mm) and made a much stronger shaft and zero backlash. Thanks @empty sedge for the bearing suggestion! The prototype is working well now. @proper shuttle
violet needleBOT
Adafruit Industries posted BLE Mindfulness Bracelet

Build yourself a bracelet that buzzes when you’ve received notifications from an iOS device. Get subtle haptic feedback and a NeoPixel LED to indicate the app. It's also great for reminding yourself to get up and walk away from your desk.
Learn Guide
https://learn.adafruit.c...
violet needleBOT
Adafruit Industries posted 3D Hangouts – Wearable BLE

Learn Guide
https://learn.adafruit.com/ble-vibration-bracelet/
YouTube
https://youtu.be/RcDXAHy06HU
Code on GitHub
https://github.com/adafruit/Adafruit_Learning_System_Guides/tree/master/BLE_Vibration_Bracelet
3D CAD Files
https://a360.co/2ZjEGMp
Adafruit Feather Sense...
 obtuse spoke
hi all: for the cura users out there, the version I have (came with my MP Cadet printer) aggressively polls all /dev/tty.usbserial* ports when it does anything, screwing up other serial devices I have hooked up (e.g. my neotrellis M4). anyone run into this? any workarounds? I shut down cura and replug the usb serial devices and all is well, but it's annoying AF.
(if I have another program attached the serial port it's fine, but for circuitpython devices, for example, that are both USB HID and serial exposing, one doesn't normally connect a program to serial, so when Cura opens it connects to the serial port and the USB HID goes pfft.)
violet needleBOT
Adafruit Industries posted Show and Tell – 3D Hangouts – May 20, 2020
 ornate raven
One more shot at the phone holder. Increased expansion to -0.18 and increased density to 35. Looks great in slicer and first three layers look good. No brim, raft or anything on last attempt made the device look great but somewhere it was still sticking together. Fingers crossed.🤞
obtuse spoke
for anyone with problem in future: https://github.com/Ultimaker/Cura/issues/4039#issuecomment-468327287

GitHub
Application Version 3.3.1 Platform Windows 8.1 64-bit Printer Ultimaker 2 Steps to Reproduce Have Cura running in a window, not doing anything Plug in an Arduino Nano try to use Arduino IDE to uplo...
 grizzled peak
hiya guys I was wondering if anyone would give me a recommendation on a beginner 3d printer for an engineering student that would be under 1k. it can be either a diy kit or a prebuilt I am very new to 3d printing but I have technical knowledge of electronics.
thank you
knotty laurel
I don't have one myself, but I've often heard the Prusa i3 recommended in that price range.
empty sedge
yeah the i3 mk3s kit is $800 and has a well documented manual and is super reliable
livid echo
I also own a Prusa i3 MK3. This printer works very well!
karmic brook
I followed a similar journey: I got the $127 Monoprice Mini Delta, which worked, but needed a lot of tweaking and adjustment, and had a really small build area. Then I bought the Prusa i3 MK3S, which is an excellent printer. It still needs attention from time to time (that's the nature of these printers), but not nearly as often.
 iron remnant
I mean, Wirehead's First Rule of 3D printers is that by being called "Printers" they, like all other printers, are demonspawn from the deep underbasement, and you probably want to sacrifice some poor fool to their evil maintenance.
empty sedge
like paper printers good print material makes them more reliable
 elder lintel
@grizzled peak if you are an engineering student get a kit, it will teach you about how to build and maintain them, make your life easier in the long run. If you can wait a bit get a Prusa- they've been doing amazing COVID-19 work and deserve the support, if you are in a rush an Ender-3 (but check around to verify that recommendation since they sponsor me).
 jaunty canopy
my 3d printing livestream https://www.youtube.com/watch?v=HpVNYttbfkc
 ornate raven
@grizzled peak , I'm not sponsored by anyone and I recommend the Ender 3 Pro. Some construction required, most safety features enabled, easy to upgrade but not required.
shy kelp
I own an Ender 5 Pro, Ender 3 Pro, and an Artillery Sidewinder X1. I'd definitely say that out of the three, the Ender 5 gives my best prints and can print the fastest (no bed inertia), with a slightly bigger print volume than the Ender 3. I'd recommend that one if you can afford the extra, and if you are in need of large print volume, the sidewinder smokes the Enders since it has a titan direct-drive extruder, AC-powered bed, etc. @grizzled peak
 vocal robin
Does anyone have any guidelines for print-in-place models? Offsets? Stuff like that? I've been making 3D stuff for years, but letting Shapeways make them physical, so I'm a total noob in the hardware side. I ordered a printer a week ago and I'm still three weeks out from shipping.
agile finch
@vocal robin check out ClockSpring3D on Twitter for inspiration. He’s doing some great work with print in place. Also he has a YouTube video that shows how to design print-in-place hinges. https://youtu.be/3l8lXlpvcQ0.

I love 3D-print-in-place hinges! In this video I walk through the process of making a hinged heart box in Fusion 360. This was a request from my amazing Patreon supporters! ❤️
Patreon: https://www.patreon.com/clockspring3d
Find lots of my designs on MyMiniFactory: https://w...
I’ve been using a gap of 0.5 for things I have been designing(0.2 mm layer height, 0.4mm nozzle). And orientation you put on the build plate matters a lot to the success you will have of releasing.
vocal robin
@agile finch thanks much.
empty sedge
@karmic brook did you tune the linear advance after changing your heat break?
karmic brook
Linear advance? Like extrusion factor?
empty sedge
no, it's an adjustment so the extrusion amount is consistent as the speed changes. Without it when your printer slows down for corners the corners will bulge out
prusa's default profiles have different numbers set up for different filaments, bowden vs not, and 0.6 vs 0.4 nozzle
karmic brook
Haven't played with that. Maybe I'll look at it for some of my jankier filament.
empty sedge
my almost-but-not-quite-a-prusa apparently needs a lower k-factor than the prusa profiles provide. I'm seeing gaps in the perimiters at corners
karmic brook
I don't remember seeing that, but it's (mostly) a genuine Prusa (so far, anyway)
violet needleBOT
Adafruit Industries posted Virtual Maker Faire - Electronics + 3D Printing for Covid-19 #adafruit #3DPrinting
How Adafruit used Electronics + 3D Printing to make face shields and more for NYC. Making thermal cameras, temperature monitors and face shields more accessible!
Visit the Adafruit shop online - http://www.adafruit.com
LIVE CHAT IS H...
hearty tree
How rare and, expensive is filament that the military uses?
empty sedge
@hearty tree I'm not directly involved with that but here's one fancy filament: https://www.3dxtech.com/thermax-pekk-c/

3DXTech
ThermaX™ PEKK is the pinnacle of the PEAK market - ideal for the most difficult 3d printing applications. Compare to Stratasys Antero PEKK, PEEK, Ultem PEI, PPS.
hearty tree
@empty sedge One of my customers is a contractor for the military. He says when they print stuff they can't use filament for the Air force for the navy.
So, they throw it away.
He said he'd give me some.
empty sedge
yeah makes sense that one budget wouldn't let another group use leftover material
if it's typical stratasys filament the retail price is $250/kg for PLA or ABS
[pla, or something like it, is used for support]
hearty tree
$250/kg.
Jesus.
He'd getting me roughly 20-30 spools.
It's either Nylon, PLA, ABS.
Maybe PC.
 sullen iron
Does anyone else have a PRUSA? if so I'm using the MK3, and every time before a print, when it does a quick mesh bed leveling, some of the filament spews out, does anyone know how to fix that?
 rough ice
Hey. I'm new to 3d printing and creating models. I have used OnShape and Autodesk Fusion 360 to create some models. Unfortunately, those only offer cloud-based saves, and I would prefer to store my models with my own version control (git). Are there any other choices for modeling that allow for local saves?
lilac patio
FreeCAD saves locally. I don't have any experience with it though
lilac patio
no problem
sullen iron
@twilit crystal That seems like a big error
vocal robin
FreeCAD is a rough learning experience. Also, being effectively prerelease software it has some jagged edges. I'm learning as I go.
Bolt holes (pass through): how much offset should I add for small #4-#10 bolts?
empty sedge
@sullen iron @twilit crystal https://www.amazon.com/M2-Materials-Filament-Stratasys-Fortus/dp/B074DMB9LW
yeah but they also call it 40% cheaper than the stratasys spools. I don't have a login to check prices on the stratasys store
it was the 50 cubic inch spools that were about $250 for 1kg
empty sedge
@sullen iron the ooze when the hotend heats up isn't going to go away. the prime wipe at the front edge of the bed in the default prusa slicer start gcode (yes, after probing) is able to take care of this 99% of the time
@rough ice if you can wrap your head around it, there's openscad
but yeah, the "part design" workbench in freecad isn't as nice as onshape or fusion
rough ice
Thanks, @empty sedge I'll try that out too.
 forest wyvern
@rough ice I would also recommend looking at GrabCAD for version control as it is specifically meant for 3D models. It is free and has no limits as to how much you can store on it. It is not as powerful at git but it has some other nice benefits.
rough ice
I'm trying to keep all the bits of my project together in one place. I have a pcb, some 3d prints, and microcontroller code. I would like to version them all together since as soon as I am done, I plan on revising it and doing it again with more features.
I'm building a clock, and eventually I want to stick magnets on the outside to control the time zone. :)
forest wyvern
Ah, then Git would be the way to go, cool concept for the clock, best of luck!
livid echo
@rough ice In Fusion 360 projects can also be saved locally. The option file > export... saves files lon your PC in various file formats preferably .f3d
But other less cloud-based CAD programs are also worth a try!
rough ice
Now if I only knew how to solder. :) My skill in that department is woefully inadaquate.
@livid echo thanks. I'll look at that export. That might be the best option.
hearty tree
@sullen iron @twilit crystal The filament is used by the military I guess.
sullen iron
I'm not sure if I'm looking at it wrong, but it could come it a larger volume as a reason for the cost
empty sedge
nope. here's 10 pounds at $35/kilogram https://www.matterhackers.com/store/l/silver-pro-series-pla-filament-1.75mm-10lb/sk/MLEWEUAN

MatterHackers
10 pounds of PRO Series PLA, aka Polylactic Acid, spooled and ready-to-use for 3D Printing. PRO Series PLA filament is specially formulated for precision 3D printing and manufactured in the USA.
the filament extruders I know of extrude onto giant 20kg or more spools, then respool those onto smaller spools.
violet needleBOT
Adafruit Industries posted NES Switch Cart Case #3DPrinting #Timelapse #adafruit

Every week we'll 3D print designs from the community and showcase slicer settings, use cases and of course, Time-lapses!
NES Switch Cart Case – flyingpurplecow
https://www.thingiverse.com/thing:4378939
dumbcomputers
CR10S Pro
Marble PLA
15hrs 30mins
X:210 Y:180 Z:132mm
.2mm...
violet needleBOT
Adafruit Industries posted USB Mini Fume Extractor 👀#3DPrinting

Build a mini solder fume extractor! Plug into any 5V USB battery. Keep the air clean with a carbon filter. Easily snap fits open for easy filter replacements. Compatible with GoPro style mounts for setting up on tripod or magic arm. Parts can be 3D printed without any support ...
Adafruit Industries posted USB Mini Fume Extractor 👀#3DPrinting
Build a mini solder fume extractor! Plug into any 5V USB battery. Keep the air clean with a carbon filter. Easily snap fits open for easy filter replacements. Compatible with GoPro style mounts for setting up on tripod or magic arm. Parts can be 3D printed without any support ...
violet needleBOT
Adafruit Industries posted 3D Hangouts – Goggly Fumes

Learn Guide:
https://learn.adafruit.com/simple-mini-fume-extractor/
Fusion 360 Source:
https://a360.co/2TwWIXs
Carbon Filter
https://www.adafruit.com/product/3836
5V DC Fan
https://www.digikey.com/product-detail/en/CFM-5010V-052-300/102-4365-ND/7620539/
5V DC Fan on Am...
Adafruit Industries posted Show and Tell – May 27 2020 – 3D Hangouts


 hexed path
Howdy. Is Octoprint Anywhere still a thing or is it The Spaghetti Detective now? I'm looking to not spend any money so I don't need it to alert me if my print goes screwy, I just want to control my Ender 3 from anywhere. YouTube is not being my friend...
ornate raven
@hexed path I use Octoprint from a Win10 desktop and an Android phone but only while at home. I've got the Octoremote App on my phone but never tried it outside my house.
 sonic siren
Astroprint is pretty sweet for remote management. Has an octoprint plugin I think.
violet needleBOT
Adafruit Industries posted Fusion 360 Tutorial – Sketches and Joints
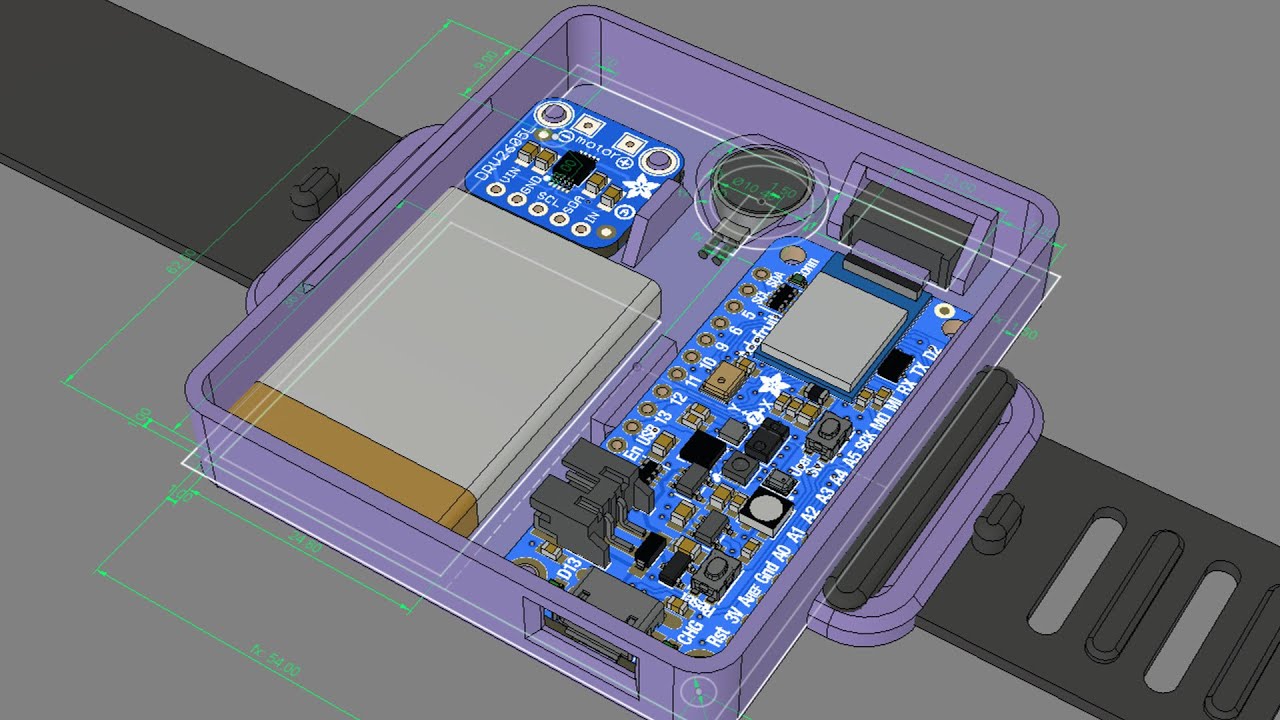
In this tutorial we'll take a look at using sketch profiles to drive joints. This allows the ability to fine tune the position of multiple components by adjusting sketch dimensions.
BLE Vibration Bracelet Guide
https://learn.adafruit.com/ble-vibration-bracelet/
Fusion 360 Sh...
 finite verge
Hi. Anyone know a source for these parts in the US? maybe it's the lack of a good search term but I'm not finding them anywhere. https://www.wanhaouk.com/products/mk9-mk10-extruder-feeder-precision-bearing

wanhaouk.com
These bearings can be found inside the feeder mechanism on Mk9 and Mk10 extruders. These are the v bearings that the filament feed down against. Please note if you need both sides of the feeder mechanism's bearings then please order 2 bearings.
empty sedge
@finite verge do you have one to measure? whats the inner diameter, outer diameter, and thickness?
finite verge
I think it's a U604ZZ now that I've dug a little more - going to grab the calipers now
OD is 12mm, groove is 1mm deep, 4mm thick, 3mm ID
empty sedge
you mean 4MM ID?
finite verge
naw the hole is definitely 3mm ID
M3 screw went through the middle
it's from a wanhao i3 MK10 extruder
err, sorry. M3 screw didn't go through the middle, it has a plastic peg. my bad
but peg is 2.88 ish mm
U604ZZ is close but too big
empty sedge
V623ZZ has the dimensions you listed. 3mm ID, 4mm thick, 12mm OD
V604ZZ or U604ZZ has 4MM ID, 6mm thick, 13mm OD
there are in stock amazon listings for V623ZZ and U623ZZ
finite verge
thank you! that's very helpful. was just digging into bearing catalogs. where'd you look it up?
empty sedge
eh
https://www.robotdigg.com/product/430/V-Type-Ball-Bearing-V623ZZ
https://www.robotdigg.com/product/72/3D-Printer-Extruder-Bearing-V624ZZ-or-U604ZZ
https://www.robotdigg.com/product/1512/MK10-or-CR-10-aluminum-Extruder
V Type Ball BearingModelBearing TypeInside DiameterOutside DiameterThicknessV623ZZMetal Shielded3mm12mm4mmV624ZZMetal &n...
3D Printer Extruder Bearing V624ZZ Ball Bearing 1 piece You can diy your own fishing line pulley for a delta robot 3d pr...

MK10 Extruder Makerbot did start the MK series. The first commercial version was the MK4 on the Cupcake circa 2009. MK4 ...
finite verge
much thanks. my google-fu was weak today
empty sedge
robotdigg is based in china so my last big order there was about 30% shipping on top of listed price, but I was buying about 60 motors and corresponding bearings and stuff
finite verge
Found many sources of V623ZZ bearings on Amazon US, order placed, thanks again for the assist.
unique ravine
Hello.
My PETG prints in particular seem to all be printing smaller than PLA parts of the same model.
Is my Google-Fu that rusty or is this legitimately weird?
Things like a polypanel don't snap together, every connector is super loose.
empty sedge
@unique ravine perhaps the petg you bought is of a slightly smaller diameter? What printer? and what PETG print settings are you using?
and whose petg
unique ravine
Priline PETG on a Prusa MK3S using the Pretty PETG 3.0 profile from PrusaProfiles
They're beautiful prints in all other ways, they're just dimensionally off
unique ravine
My desk is a wreck but this toggle is pretty typical of what I'm seeing. Good finish, extrusion looks good by me, just loose mechanical fit
proper shuttle
As Matsubaa said, filament diameter being off is the usual culprit.
unique ravine
I've taken my customary 3 measurements and I
've got 1.73, 1.74 and 1.78mm
Can I just bump up the extrusion/flow/whatever to compensate or do I just not do dimensionally sensitive parts with this spool?
proper shuttle
@unique ravine I guess I should have said as sphereinabox said 🙂 You can't really get accurate enough measurements by just using a caliper on the filament. You should print a calibration piece, like: https://www.thingiverse.com/thing:2484766

Update 19.01.2020: Excel sheet V2.3 typo corrected at Z axis thanks to the comments from fisero and Miiras.
Update 18.03.2019: New Excel sheet V2! Now the shrinking due to the temperature change can be concidered.
Update 19.05.2019: Corrections on the excel sheet - V2.1. See c...
If you find that all of the distances are too large by a fixed amount, then over-extrusion is the problem. If you find that the errors scale with length, then you have an axis travel calibration problem.
unique ravine
I'm seeing the issue only with the PETG so I'm inclined to blame the filament or the profile over a mechanical issue. I'm printing a pair of cubes sliced with the default PETG profile vs. the "Pretty PETG" profile to try to eliminate at least the profile as a suspect.
I've got that cross downloaded now though because that definitely looks more rigorous than the cube.
It just takes so long to print all the diagnostic prints, I wanted to vet my list of suspects as much as I could.
proper shuttle
Yeah, sounds like it's probably the filament. Unfortunately with a lot of the filament makers you have to calibrate each roll if you really want accuracy. Some have better tolerances than others
unique ravine
I have almost zero PETG experience and my printer before the Prusa is kind of questionable so I'm not sure if my experience with anything really carries over reliably.
Is this just a PETG thing? Is my configuration just crazy screwed? Is it this filament specifically? All options on the table at this point.
empty sedge
the prusa slicer profiles I checked for petg doesn't have a different extrusion multiplier than PLA
proper shuttle
Not a PETG thing in general. None of the thermoplastics change in volume when heated (other than the occasional moisture-induced bubbles, of course). I print with all sorts of filaments all the time. What matters is how much volume is getting pushed through the nozzle, and how the nozzle is moving in space. Filament diameter definitely can vary among manufacturers.
unique ravine
Well, that's fun - my cube is 19.9x19.94x20.13. It's not perfect but it isn't off by a lot much.
unique ravine
After tweaking I'm within +/- 0.01 on each axis of the cube so I'm going to try a pair of polypanels. Crossing my fingers...
unique ravine
Welp, the changes that gave me the near-perfect cube had no bearing on the polypanels so I'm off to print some PLA until I have the patience to tweak more.
vocal flax
Anyone have idea what might be wrong. It's not retraction. And parts are too brittle. It's custom built. Using bowden extruder. And using pla plus filament.
vocal flax
btw 210 degree hotend (which is what filament says) also any lesser clogs (thats what ive been told)
sullen iron
This might not help too much, but I looked at this site: https://www.simplify3d.com/support/print-quality-troubleshooting/stringing-or-oozing/
to see some issues and troubleshooting, it could be possible that maybe it's printing a tiny bit too fast, if you're sure it's not due not enough retraction distance
btw, as for if it's to brittle, what's the infill of your print set to?
empty sedge
@vocal flax why do you think it isn’t retraction ?
It could be wipe should be enabled or disabled (makers muse had a video about this)
It could be that the cold side of your hotend isn’t cold enough. I had similar once and needed to add thermal compound to the threads
vocal flax
@vocal flax why do you think it isn’t retraction ?
It could be wipe should be enabled or disabled (makers muse had a video about this)
It could be that the cold side of your hotend isn’t cold enough. I had similar once and needed to add thermal compound to the threads
@empty sedge because changing retraction changes nothing
neither up netiher down neither big amount neither small amount
empty sedge
Changing it to what? With Bowden you may need 4-8mm retracts
vocal flax
changing to anything else
empty sedge
It could also be that you’re trying to retract faster than the motor can move and you’re not getting enough retracts
vocal flax
visual inspection says it does retract
empty sedge
Or that the Bowden couplers have play that is where your retracts end up not moving filament
vocal flax
It's not retraction we tried lots of values for retraction
even 5 cm retraction changed nothing
empty sedge
Ok what about the other things I suggested?
vocal flax
you may be right about something blocking retraction but everything seems fine motor runs and visually no steps lost
and fillament also moves at the same time
It's not retraction we tried lots of values for retraction
sorry if that seem a bit furious it wasn't 🙂
empty sedge
Sure I’m just trying to find out what I can to help
vocal flax
I will try better cooling for cold side of hot end
empty sedge
https://www.youtube.com/watch?v=_QRb54zVPfQ
Enable wipe differences
I solved the stringing issues plaguing my Ender 3 Prints with a bit of help from the 3D Printing Community. This video is an important follow up to my Ender 3 and Ender 3 Pro Reviews.
Cura settings for the Ender 3 provided by @ChazMeister2 - https://goo.gl/vnsQWx
My new Simp...
That said, wipe isn’t recommended if you use linear advance.
ornate raven
Let the Ninjaflex on an Ender 3 Pro experiment begin
Dual Gear Extruder, All Capricorn Tubing. 10mm/sec print speed. 220 degrees and 75 degrees.
No retraction
ornate raven
Had one loop try to form (was able to pull it back) when moving from first layer to second layer. Lots of strings but, it worked. 🙂
 hidden sable
@ornate raven are you using that modded extruder base for the ninjaflex, or a 3rd party one?
by modded, I meant that 3d printed one...
ornate raven
@hidden sable I'm using an all metal dual gear Bowden tube to the hot end. The dual hear pinches very close to the exit so I didn't add any mod to it. I think on the next one I'll try a little higher temperature.
hidden sable
I upped the extrusion flow as well when printing with tpu and noticed that higher temps gave it a smoother quality
Once I got it smooth I added a very tiny bit of retraction, which made a huge difference to stringing but not sure how that would go on the all metal throat
Ok s3d there’s the feature to not go too far outside the print perimeter, which helped reduce stringing a fair bit too
As was using translucent tpu, I could tell when it was fusing layers better when it became slightly more clearer with higher temps
crude kettle
Any familiar with PT100 Amplifier Board?
 carmine peak
hm?
right
I have a thermistor for my Ender 3 that's genuine creality. Problem is it's a slippery black wire instead of a white or grey "cloth" wire
is it safe to screw in?
empty sedge
@vocal flax did you figure out your extrusion issues?
Another thing it could be is that you're over-extruding. I can't really tell from the picture if that's the case
vocal flax
Yeah it was underextrusion because of loose bearing in extruder @empty sedge
 alpine stag
Hi ! I got my first 3D printer a few days ago.
I am having issues with printing quality.
I sometimes have some gaps on my top layers. At first I thought I was suffering from under extrusion so I set gears of my extruder and tuned it using octoprint (I extruded 10cm of filament and measured to see if the e-steps were correct and they were) I wonder whether I should up the flow in my slicer.
Printer: Anycubic Predator AKA Anycubic D
Filament: Eryone silk PLA
Temperature: 210°C
Speed: 100mm/S
Layer height: 0.25mm
Top/bottom layers: 3
Wall line count: 3
Infill: 20 %
Thanks for helping 😉 🙂
Also the side of the same print
empty sedge
@alpine stag it looks like you have a little bit of backlash or frame wobble. Check all your screws and pulleys to see if any have play. Then try printing at say 40mm/sec
ornate raven
@alpine stag maybe slow down that speed. On an E3 Pro, those kinds of speeds are a near guarantee of failure.
alpine stag
Okay I am going to check that out thanks
What's weird is that I had successful prints at that kind of speed and saw people printing at 120mm/s on some Youtube reviews but that seems a bit to much
empty sedge
your frame needs to be really rigid and your other mechanics need to be set up really well to get outer perimiters that look good at 100mm/sec (or you cheat with low accelerations and only reach that speed in a straight line)
100mm/sec for infill is usually no problem if your hotend can keep up
empty sedge
[and if you print perimiters before infill which unfortunately isn't the cura default]
alpine stag
Thanks I would'nt have thought of checking this
empty sedge
e3dv6 with a direct drive extruder limit is about 12mm3/sec or so. so at 100mm/sec print speed with 0.4 nozzle you'd be limited to layer heights of 0.3 or smaller... well, which you're limited to anyway because layer heights bigger than 0.75*nozzle diameter don't stick well
anyway I'm trying to say that if you want to print 120mm/sec you will need to be printing at 0.2 layers or thinner
printing at slower speeds with thicker layers will always be faster overall though
ornate raven
You have to find that "Happy zone" when printing. It's not always the same. For me, it's a crp shoot.🤠