#help-with-3dprinting
1 messages · Page 33 of 1
 empty sedge
 twin cape
oh beleive me ive twisted the pots every which way, it drops to nothing at the far end of the otation but otherwise the pot does nothing. but it does work when i move the driver to the e1 socket, but as soon as i change the pin assignment to swap e0 with e1, the vref issue comes back but in the e1 socket now
empty sedge
maybe your stepper drivers are defective? or you're setting and measuring vref wrong
twin cape
no because ive swapped the drivers around and measured the others and its fine
it follow the socket, not the drivers
empty sedge
switching the socket shouldn't have a way to change the vref. it's just a voltage divider from the 5v in and that's wired in parallel to all stepper sockets
twin cape
no i mean that when i measure a driver in the e1 socket the vref is adjustable, around 0.6 volts in the center, but the same driver in e0 is 2 volts. and if i change the pin assignment to swap e0 with e1 the issue crops up on e1 and then e0 is 0.6 volts
#define E0_STEP_PIN 26
#define E0_DIR_PIN 28
#define E0_ENABLE_PIN 24
#define E0_CS_PIN 42
is changed to:
#define E0_STEP_PIN 36
#define E0_DIR_PIN 34
#define E0_ENABLE_PIN 30
#define E0_CS_PIN 44
and also change:
#define E1_STEP_PIN 36
#define E1_DIR_PIN 34
#define E1_ENABLE_PIN 30
#define E1_CS_PIN 44
to:
#define E1_STEP_PIN 26
#define E1_DIR_PIN 28
#define E1_ENABLE_PIN 24
#define E1_CS_PIN 42
thats what i did
empty sedge
those should have no effect on vref
empty sedge
no
twin cape
well this is a biqu ramps 1.6, not a legit ramps board
empty sedge
maybe check that the steppers are actually getting 5v and your motor power?
but nothing on RAMPS should have the behavior you're describing
also see if the manual for the stepper driver carriers says anything
I've got to head out. Good luck
twin cape
alright, thanks
what the... alright i guess it is the driver... i guess the spare drivers i have just happened to have the same issue. what in the world. Ive got 0.6v on both now with a4988s, so I guess ill use those
so the 3 drvs on x, y, and z work fine, why would the vref pot be useless on some of them? like i can turn and turn and nothing happens, it just hovers around 1.8 to 2 volts
twin cape
whatever, its been over a month without a printer and now that its printing, imma just put it back together xD
empty sedge
it could be because the potentiometer is broken
if the wiper wasn't connected the voltage would float at the same value
 karmic brook
Those teeny twiddlepots on the drivers are delicate and don't last long. A little too much torque, or turning them more than a few times can wreck them.
twin cape
well thanks for the help :3
twin cape
is it possible i have an extruder motor that's going bad? there was actually an issue prior to the one i mentioned here, one where the extruder would intermittently work and not work, and i was never sure if it was a cable going bad or a motor going bad, is there any reason the motor would be going bad and how do they fail?
empty sedge
if you run too much current the insulation on the phases can burn up and you get shorts in the motor phases
if you run within spec the motor will last forever then you get to worry about mechanical stuff wearing out like the gears in an extruder gear reduction
you can measure the resistance of the phases. between pin 1 and 2 on the 4-pin connector at ramps should be a couple ohms, and that shouldn't connect to frame of the motor or the other phase on pins 2 and 3
I don't feel like grabbing a motor to measure the resistance you should expect
if there's a connector on the motor the pinout there is probably not the same
twin cape
thats what i figured, im almost positive the motor itself is okay, i think the cable itself might have a short that is intermittently problematic because depending how i twist the wire it seems to get through a print
empty sedge
the not-cheapest multimeters have a fake analog "needle" as a gauge on the bottom so you can see quick changes as for example you flex the wires
twin cape
it first showed up in a 13 hour print where it just randomly missed a few layers and then failed printing, but the filament never got stuck, because i tried printing multiple things since then and i was right next to the printer, and it would just intermittently stop extruding and then start again, getting thick layers and thin layers
right now its working but i twisted up the motor lead a bunch
 unique ravine
Hello - Aside from z-offset and bed leveling, any reason a bottom layer would be crap? I'm having issues even on top of a raft where the gaps aren't closed like they ought to be. I can go back to level, offset, etc. again but I want to be sure I'm not overlooking something else.
Sides and top look okay so I'm pretty confident in my stepper calibration. I'm also printing cold on tape pending replacement parts so I might be expecting too much.
 ornate raven
@empty sedge , @twin cape I just measured a NEMA 17 stepper from Adadruit and I get 35 and 36 ohms across the phases and OL between phases and motor body if that helps.
empty sedge
@unique ravine if your first layer extrusion width or layer height are different from normal and your first layer speed isn’t low enough your extruder might not be keeping up
ornate raven
FYI
empty sedge
PLA prints great on 3m blue tape, especially if you clean it with iso
But can you post a photo?
unique ravine
@empty sedge Okay - I'm in PrusaSlicer and my first layer speed is only 35% which seemed super low to me but maybe I just don't know what I'm doing?
empty sedge
Are you printing on a prusa?
ornate raven
35% of what?
unique ravine
I'm on a frankenstein machine. SKR v1.3 driving a Geeetech A10 w/ a BMG clone
empty sedge
10-30mm/sec is about the range for first layers, 0.3mm tall layers with .4mm nozzle
unique ravine
I've set it to auto, zeroes everywhere it'll accept them and set my max speed at 60mm/s. So presumably a max of 21 mm/s
ornate raven
Got caliper to check if the requested output (.3) is the real output?
unique ravine
Here's a first layer on a 0.2 layer height
ornate raven
Hmmm, what kinda bed height you set for? You know, nozzle to bed gap.
unique ravine
I'm set up for UBL but manually adjusted as close to physically level as I could w/ a 0.1 feeler gauge
ornate raven
I sthere an offset for the axis? I manually level my bed with 0.08mm gap. (Ender 3 Pro, heated bed gapped after heatup)
unique ravine
Z offset is currently at -2.35mm using a 3dTouch (GEeetech BLTouch clone)
It's not a fantastic sensor but I've gotten good prints before with the same mount. I had to replace the extruder, hot-end and motherboard and I'm trying to get it dialed back in now.
Like I said though, even on top of a raft which is baffling to me. Shouldn't that have isolated it from the offset/leveling problems?
ornate raven
I have no experience with ABL but -2.35mm seems high. Does that mean the actual gap is -2.35 + 0.1 (-2.25)?
unique ravine
It won't be pretty like printed right on the glass but it still ought not to be an open lattice.
The different between the nozzle and the trigger height of the probe is ~2.35mm
So, when the probe triggers, the nozzle is still 2.35mm off the bed, assuming I've tweaked it right.
empty sedge
Usually the first layer after a raft is printed with the nozzle extra high so the print doesn’t stick to the raft. Your z offset won’t change this
unique ravine
Cura closed the gaps but the bottom layer is also a mess. If it's a setting difference, I don't know which one.
ornate raven
I use Cura, no ABL, and a heated bed so I'm probably not contributing very well to this issue. I don't use rafts but that first layer looks nlike mine used too when I used a thicker gage to gap my hotend.
Can you verify E steps?
When I upgraded to dual gear extruder, I had to bump my E steps way up.
unique ravine
Yeah, I had to screw with that setting quite a bit but got it dialed in to within a fraction of a mm on a 100mm extrusion.
ornate raven
I used Octopi and a piece of filament with 10mm increments
Good. So, we're reasonably confident output is as requested.
unique ravine
Here's the top of the Prusa sliced one. It's really only the bottom that comes out ugly
ornate raven
That DOES look pretty good. 🙂 So, how about Cura top?
In Cura, what are your Initial layer hieght and Width?
ornate raven
Yea I see that.
unique ravine
Try to open my Cura settings now. It's not exactly snappy.
ornate raven
No it isn't. 😦
unique ravine
There's no "width" setting that I could find in PrusaSlicer. Width is 0.4 in Cura
ornate raven
How about Hieght?
unique ravine
Initial layer 0.15 in Cura
ornate raven
I use 0.2 for initial height aa well as all others.
unique ravine
Okay, I'll move my initial layer to 0.2mm/100% and reprint to see what comes out. I guess wish me luck.
ornate raven
Wishin 🙂
unique ravine
Thanks!
 shy kelp
Also, what is a 3d modeling software that doesn't require an active internet connection or a heavy duty computer. There was one that was basically a script based 3d modeling program
@ me when someone replies please.
unique ravine
@shy kelp Are you thinking of OpenSCAD?
shy kelp
Maybe?
unique ravine
Please disregard my un-tuned retractions... Is there a specific setting that would do this weird crap where it doesn't cap off the rails and leaves them as 2 distinct walls?
ornate raven
In Cura I'd say it was Infill setting. But could be Wall thickness.
unique ravine
It looks like there's a "Gap Fill Radius" in PrusaSlicer but in Cura it's just an on/off "fill gaps" so I'm not sure what adjustment to make exactly.
Higher, sure, but how high I still need to figure out.
unique ravine
Okay - I found it and the answer is kinda dumb. The gap filling in PrusaSlicer is governed by a "Speed" setting. Unlike every other setting, if this is set to zero it turns it off entirely instead of setting it to some kind of auto-calc.
I don't know that I changed that, I think it was defaulted to "Off".
It also doesn't take a percentage like the other settings, it wants an absolute value, which is also weird with everything else being at least semi-dynamic.
ornate raven
Wow, I can't believe I just sat through a You Tube Live print of a Benchy with Chris Riley and his new build of a Prusa Bear.
 glad shuttle
Hello everyone, can anyone help with an endstop problem in these trying times?
I am still trying to get this friggin cube3 coverted over to skr 1.3 with tmc2209. My problem is now homing the thing up instead of down, and I have tried a little bit of everything, but currently my z endstop says triggered. There is no endstop currently on the machine, and I cannot change the endstop inverting because of sensorless homing
 hearty tree
What should I 3D print?
glad shuttle
another printer of course
karmic brook
Face shield frame?
empty sedge
@glad shuttle configuration.h has homing directions
it used to be called Z_HOME_DIR
but first try jogging z and make sure that up and down go the correct direction
glad shuttle
when i change it to max it wants me to enable z_max_endstop so i do, and then i get the same issue with a triggered endstop but instead of on zmin its on zmax
empty sedge
do you have the jumper connecting the endstop to the tmc2209 installed?
invert_z_dir is how you change the direction of the motor
glad shuttle
as far as i know there is no endstop jump on the skr 1.3, or at least that i know of
empty sedge
yes there is, see the manual
glad shuttle
can do!
empty sedge

The latest drivers from Trinamic combine great existing new features and offer higher current handling. The TMC2209 is an upgrade from the TMC2208 and the TMC5160 is an improvement on the previous TMC2130.
This video provides a step by step guide to fitting them to the two mo...
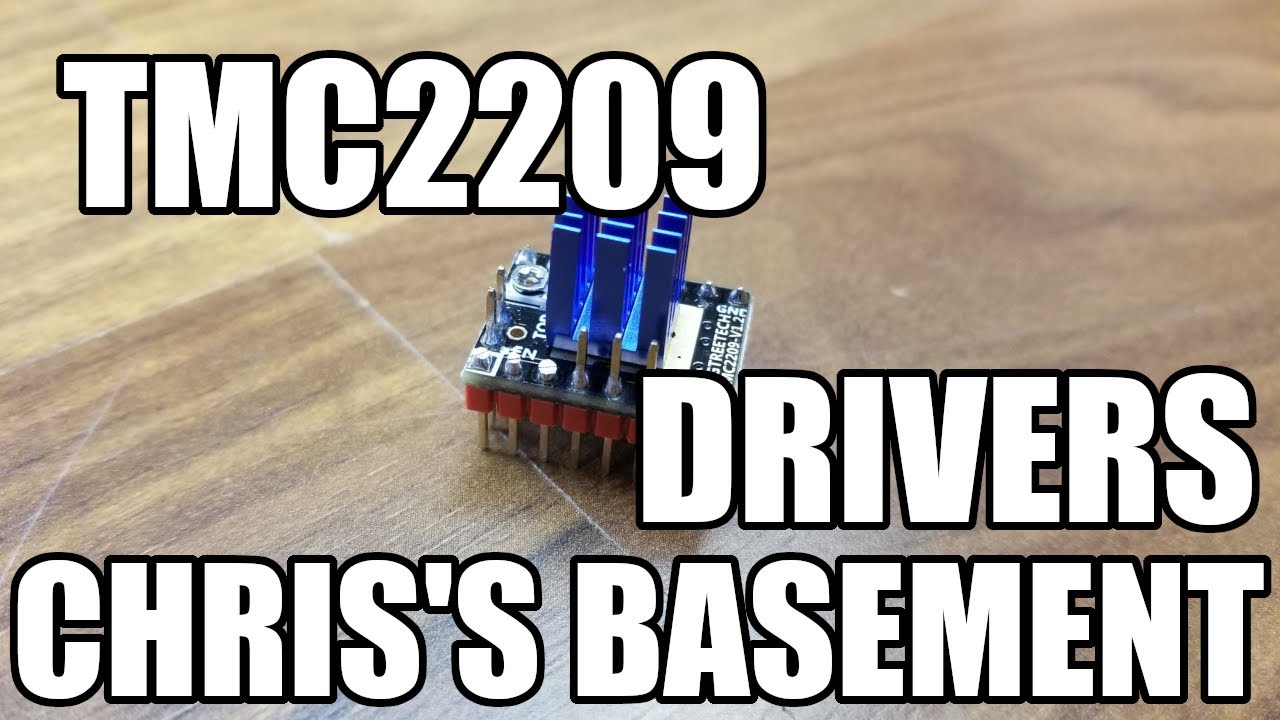
In this one we check out the TMC2209 drivers, these are the Bigtreetech version. We install them on a SKR 1.3 board using the UART connectivity. Another great reason to check out this board.
Link to drivers:
https://www.aliexpress.com/item/33028050145.html?albbt=1&isdl=y&af...
glad shuttle
SON OF AN ANET!
gonna try it now
well i actually had x and y ones connected but not z 😦 waiting on firmware to compile
 glad shuttle
Does anyone know a quick way to make X and Y home first and then Z?
empty sedge
configuration.h
eh, or you can just have your start gcode do that: g28 x y; g28 z
// Use "Z Safe Homing" to avoid homing with a Z probe outside the bed area.
//
// With this feature enabled:
//
// - Allow Z homing only after X and Y homing AND stepper drivers still enabled.
// - If stepper drivers time out, it will need X and Y homing again before Z homing.
// - Move the Z probe (or nozzle) to a defined XY point before Z Homing when homing all axes (G28).
// - Prevent Z homing when the Z probe is outside bed area.
//
//#define Z_SAFE_HOMING
I wouldn't trust trinamic homing the nozzle into a plastic build sheet when hot
 rough marlin
if i am trying to print a screw, how should I orientate the screw so that the sides don't warp?
empty sedge
it depends
screw threads if large enough (maybe 1.5mm pitch) print fine with the thread going vertically
if you have an acme thread then you'll probably want to print the thread in two halves and put them together
it depends on the overhang angle and how far the thread sticks out, so just try it
thingiverse search is garbage or I'd link you to an old makerbot nut and bolt demo print
hearty tree
@karmic brook Why would I print a face shield?
I have no use for anything impractical.
empty sedge
@hearty tree he was probably talking about http://prusaprinters.org/prints/25857-protective-face-shield-rc1
empty sedge
you personally probably don't
but your question was "what should I print" not "what should I print that I need"
empty sedge
try turning the skirt off
rough marlin
the skirt?
empty sedge
I don't have the same version of cura, but yeah
rough marlin
whats that though
empty sedge
the bit where it does a loop around the base of the part to prime the nozzle
rough marlin
oh
empty sedge
in ye olde cura you'd go into expert settings and set skirt line count to 0 from the default of 1
in newer cura you might need to go into printer settings and search for the option and check it to show it in the advanced options on the right
rough marlin
i set it to 0 but it still doesnt work
empty sedge
what if you move the part on the build plate some?
in older cura the part would turn from gray to yellow when it was on the build plate enough to be printed
rough marlin
i think it's just too big
but that doesnt really make sense to me
thats the thing i'm printing
compared to the build plate
empty sedge
that's not a select mini
rough marlin
i tried looking in the manual and it said it;s an I3/Plus but I can't find that in the list of printers
empty sedge
the "monoprice select" is a prusa i3 clone, yes
rough marlin
so which one of these is my printer?
empty sedge
none
rough marlin
but i had it selected to the select mini for other prints and it still worked
so what do i do?
empty sedge
the easiest would be to edit your printer configuration in cura to say the print volume is 200x200x200
rough marlin
how do you know that?
empty sedge
oh looks like 200x200 and 180 tall says https://www.monoprice.com/Product?p_id=15711
Monoprice Maker Select Plus gets Digital Trends Editors’ Choice Award. Read the review here. Built upon the design of the Maker Select 3D Printer, the Mak
 violet needleBOT
Adafruit Industries posted How to Design Face Shield Fusion 360

In this tutorial we're taking a look at modeling a protective face shield. We're using the design from Prusa Research and demonstrating how to design one with user parameters in Fusion 360.
Inspired by:
https://www.prusaprinters.org/prints/25857-prusa-protective-face-shield-r...
unique ravine
Thanks to help on this channel the other day, my tops and bottoms are pretty well fixed now.
New question though - having changed only the gap filling, first later and retraction I've gone from left Benchy to right Benchy.
Which, if any, of those settings might be adjustable to fix the suddenly super prominent layer lines?
Retraction is the only thing I would expect to effect the whole thing from the bottom up but I'm not confident I actually know.
empty sedge
@unique ravine that looks like a mechanical issue. check to make sure nothing is loose, or try your old settings to see if you get the same results as before
also check that your nozzle is tight when hot by grabbing it with pliers and see if it can wiggle or rotate
unique ravine
I've given my Z-rod a good talking to about how that top mount shouldn't loosen itself anymore. Hopefully it listens this time...
Once before I've found it completely detached from the top of the frame. It's not on the "normal" list of regular maintenance but I guess this is a weekly thing for me now.
I keep obsessively looking at printer upgrades and stuff but maybe my next "upgrade" is a couple of drops of Loctite.
ornate raven
@unique ravine I'm not a fan of locktite. More of a fan of finding cause for rod coming loose - vibration, binding, alignment, ... . I was just thinking, mayhaps the rod came loose because of the retraction and z-hop but you didn't mention z-hop. Just a thought.
 vivid current
Didnt think it would pull this off
karmic brook
That is quite a bridge. I had one print like that that the printer managed, but I had enough sag that I had to redesign the part.
ornate raven
I have had long bridges that started with a sagging line or two that in the end looked quite good. But again, I've had some total fails as well. I think filaments all behave differently, PLA from one maker may bridge better than another. Wouldn't it be nice if a filament maker provided some QC tests results that showed effects and results of various temperature, speed, and cooling conditions so we didn't all have to conduct those ourselves?
violet needleBOT
Adafruit Industries posted MIDI Guitar #3DPrinting @Adafruit Industries #adafruit

Build a guitar hero inspired MIDI controller! Features Cherry MX switches, accelerometer and whammy bar! Features a strumming mode so you can power through chords and notes giving you a playing style unlike typical MIDI controllers. The whammy bar lets you pitch bend making it...
vivid current
that was indeed quite a bridge
minor sagging, fixed it with a heat gun afterwards
honestly makers should just 3d print a small test cube with a bit of bridging, overhangs and the likes with the temps used and resolution, would only take a few minutes per cube and would up the value so much
violet needleBOT
Adafruit Industries posted 3D Hangouts – Face Shields and MIDI Guitar

Multistreaming with https://restream.io/?ref=81Mn2
Visit the Adafruit shop online - http://www.adafruit.com
LIVE CHAT IS HERE! http://adafru.it/discord
Adafruit on Instagram: https://www.instagram.com/adafruit
Subscribe to Adafruit...
violet needleBOT
Adafruit Industries posted ASK an ENGINEER 3/25/20 #AskAnEngineer #adafruit #engineering @adafruit

Multistreaming with https://restream.io/?ref=81Mn2
Visit the Adafruit shop online - http://www.adafruit.com
LIVE CHAT IS HERE! http://adafru.it/discord
Adafruit on Instagram: https://www.instagram.com/adafruit
Subscribe to Adafruit...
unique ravine
@ornate raven I don't (knowingly) use Z-hop in any of my profiles. I'm not sure how exactly but the bolts came completely out of the t-slots in the extrusion and the bolts were completely loosened. If there's excessive vibration, I'm not otherwise noticing it.
One of those "bolts" should be "nuts"... oops
 olive narwhal
how bad of an idea would it be to have your first 3d printer be a resin printer like this one? https://www.amazon.com/dp/B07TVW9HGH/ref=as_li_ss_tl?ie=UTF8&linkCode=ll1&tag=insider04-20&linkId=f727bb0cc72a2a40ecf17f5d9e295674&th=1
karmic brook
Nothing wrong with resin printers specifically, but they can be smelly, messy, and toxic. I'm also suspicious of anything from amazon.
olive narwhal
is there some weird reputation with amazon and 3d printers or something?
karmic brook
I just regard amazon as a sketchy vendor due to some of their rules, practices, and vendors.
olive narwhal
worst ive got from amazon was those eeprom chips with the write protection on XD
though i just checked it out on the anycubic website and its a bit cheaper, even free shipping, niice
the main thing is i want a 3d printer that prints pretty good detail in general, one of the reasons i have to convince myself to get one is the printing of d&d minis
karmic brook
The SLA printers like that are great for small detailed objects.
olive narwhal
the whole cleaning process seems like a lil painful though, and im not sure how strong SLA prints are compared to the normal ones
though i guess i could just buy two printers XD
karmic brook
That's the route a lot of people end up taking.
There are printers available that do high strength and a lot of detail, but they're expensive.
olive narwhal
yeah i mean the other thing i was thinking is making nice lil display covers for things like my d20 randomizer and such
but i think the resin can do that
karmic brook
I think either would work for that.
olive narwhal
if the print volume was just 10mm longer, i could make a single cover for a normal breadboard >.<
for the photon that is
karmic brook
My first printer (a Monoprice Mini Delta) had a tiny 109mm print volume, I learned to print things in pieces, but that can be problematic when trying to make nice-looking enclosures.
olive narwhal
ooo, there is the photon S, it has a much larger printing volume
220 x 200 x 400 mm
karmic brook
That's kind of amazing for that price
olive narwhal
yeah, i mean ive been kinda interested in 3d printers for like a decade, its crazy how far they have progressed
i remember watching a maker's muse video on a resin printer, one of the first resin printers that was usable in the home. back then it was like 5 grand or something XD
also this may be the only way to get a mask right now https://i.imgur.com/yRNiVTP.png
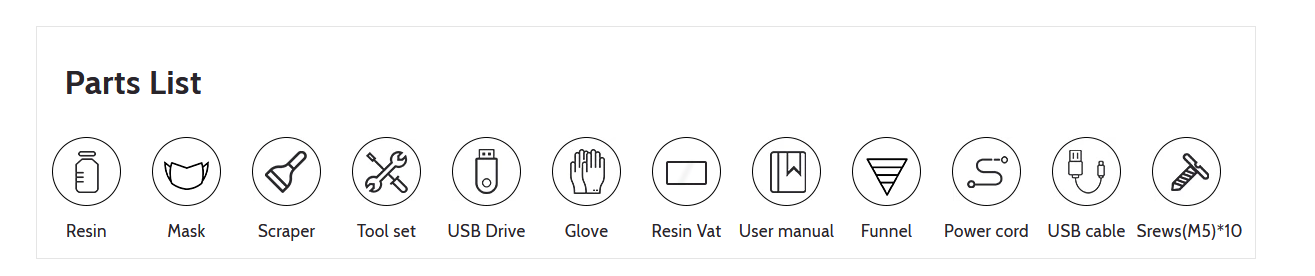
its really a 400 dollar mask with a free 3d printer
karmic brook
You could print more masks with it too
olive narwhal
now were thinking with portals
violet needleBOT
Adafruit Industries posted Face Shield #Timelapse #3DPrinting #adafruit

Every week we'll 3D print designs from the community and showcase slicer settings, use cases and of course, Time-lapses!
Face Shield
Noe Ruiz
https://a360.co/3agcgFK
CR10S Pro
Silver PLA
03hrs 37mins
X:235 Y:201 Z:19mm
.2mm layer / .4mm nozzle
15% Infill / 1mm retract
200C / ...
shy kelp
👍
olive narwhal
so i saw this on ebay https://www.ebay.com/itm/ANYCUBIC-SLA-LCD-Photon-S-3D-Printer-2-8-TFT-Matrix-UV-Light-Resin-Dual-Z-axis/283824838105?ssPageName=STRK%3AMEBIDX%3AIT&_trksid=p2060353.m1438.l2649 the seller claims to be anycubic itself. looking at completed listings this has been on bid several times with the final sale price only being between 300-350 dollars (compared to the 389 on anycubic's store). I just wonder if there is any 'gotcha's in bidding on it vs just paying the 389...

eBay
About ANYCUBIC. ANYCUBIC Photon S supports offline print with built-in operational system, truly hassle-free. System : ANYCUBIC Photon S. “Lu Ouyang, Anycubic’s Founder and CEO, is my childhood friend.
also i had completely misread the print area for the photon S 😦 its 'only' 115x65x165 mm
or just 10mm more than the normal photon :/
karmic brook
I suspect AnyCubic is just using that as an additional sales channel. I suppose you balance the chance of saving a few bucks with a delay and the chance of not winning the auction and/or paying more.
I was wondering about the print volume, given the 47µm resolution and the 2560 pixels of the imager.
olive narwhal
im not sure what makes the photon s worth so much more than the photon
olive narwhal
though also, those dual-material 3d printers would be interesting to look into as well, hoo boy
 cinder stirrup
I have a project with a 3d printer, but I don't know how to do it, will anyone help?
 fading viper
@cinder stirrup what you trying to do?
fading viper
What part you need help with? do you have the STL file?
This page https://www.prusa3d.com/covid19/ contains links to download the files as well as assembly instructions and lots of other info. @cinder stirrup

In reaction to an acute shortage of protective wear for medical personnel in the current pandemic situation, we quickly developed and started to mass-produce protective face shields. And everyone with the 3D printer can help too!
unique ravine
Possible dumb question - is it possible for the PID autotune to have gone totally off the rails?
I'm still tinkering with a misbehaving heated bed. It will heat right up to the setpoint while doing the autotune but otherwise it always stops around 10 degrees short and holds there until the thermal protection kicks in.
It stops around 50 when I set it for 60 but it'll hit 60 if I set it for 70.
karmic brook
It's also worth checking if the connections are solid and the power supply is staying in regulation.
unique ravine
Yeah, taking it all down to check that was next but I wanted to check the easy answer wasn't maybe still in the offing.
karmic brook
It could be possible, PID autotune is a little twitchy, especially if its built-in assumptions don't match your setup.
unique ravine
I did a new autotune and the I on the bed went from like 0.01 to 111 something. I'm not sure where it would have gotten and saved a garbage value but that's a heck of a swing.
I'm not sure it's right now either but I'm just letting it sit at the setpoint now and it seems to be okay.
empty sedge
pid autotune doesn't save any values
the heater does bang bang temperature control unless within the PID window which is +/- 10C by default, so that explains why bad PID settings would get the behavior you saw
 hidden sable
I started printing TPU on my ender 3 today..took a bit of tweaking
 rustic pine
any opinions on this for a face shield material: https://www.amazon.com/Mybecca-54-Inch-Multipurpose-Upholstery-Projects/dp/B015QD7JXQ/ref=sr_1_15?dchild=1&keywords=bendable%2Bplastic%2Bsheets&qid=1585484863&sr=8-15&th=1
RE: https://learn.adafruit.com/open-source-face-shield-designs/vinyl-cutting
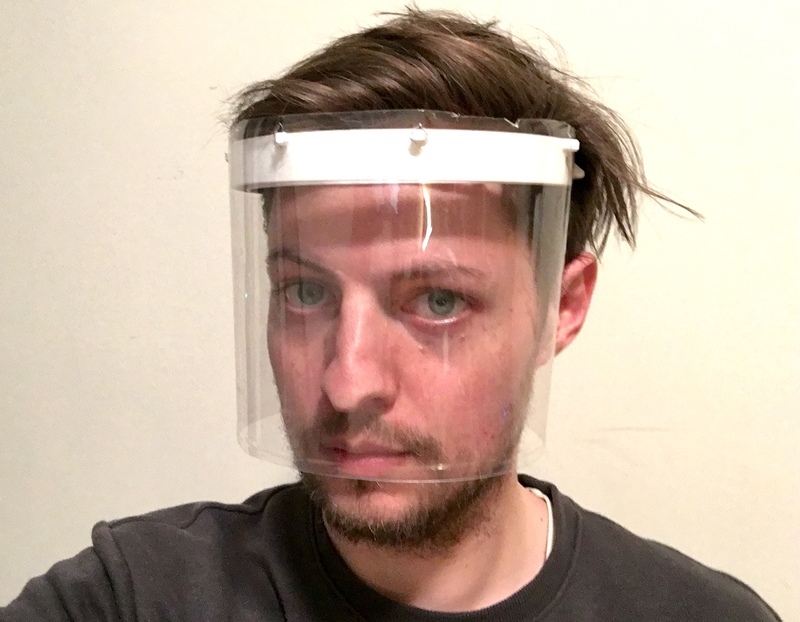
Adafruit Learning System
How to make your own protective face shield
karmic brook
If that's the material I think it is, it may be softer/more flexible than you want, you might want something stiffer (like acetate) than vinyl.
unique ravine
@empty sedge The "U" flag on the autotune command sets the values the autotune discovered and an M500 should save them for the next time. At least, that was how I envisioned using it. I suppose we find out at my next reset.
olive narwhal
anyone got some recommendations for a really high-detail PLA/etc("normal") 3d printer? im not really sure i want to get into resin as my first printer, but i still really want that high detail. pretty much my budget is 1k and id like atleast 200mm on one axis
the Monoprice Maker Ultimate 3D is looking interesting as it claims to have the ability to print at 20micron layers
empty sedge
prusa i3 mk3s.
you'll need a smaller nozzle to get higher detail but that means dramatically longer print time and you're never going to match the surface finish of a resin printer
olive narwhal
hmm
empty sedge
what do you want to make that's really high detail?
olive narwhal
D&D miniatures, lil display cases for possible future projects, mostly just small things in general
olive narwhal
I think ive switched back to wanting a resin printer, this printer is the one im kinda leaning towards, as it has a bit more print volume https://smile.amazon.com/Upgraded-High-Resolution-Parallel-Lighting-Printing/dp/B07YDMFKK9
empty sedge
the screen on those is a consumable
oh, and buying isopropyl alcohol to clean your prints right now might be difficult
empty sedge
you'll also need gloves. the resin isn't stuff you want on your skin
and the smell of the resin is terrible. I can't stand it
I think now isn't a good time to be buying a resin printer because of the safety equipment required for it. If you can wait that would be better
olive narwhal
yeah i been doing a buncha research on them, and there is this new plant-based resin thats apparently way better smelling
empty sedge
that said, for d&d miniatures the detail on an FDM machine isn't where you need it to be unless you switch to an unusually small nozzle. I have sample prints to compare for you but I haven't been to my hackerspace to take photos
olive narwhal
yeah, the more i look into the normal printers the more i want the resin detail instead haha
empty sedge
the CTO from G3d said their resin doesn't smell but I haven't tried it to say
but they're making giant resin printers
olive narwhal
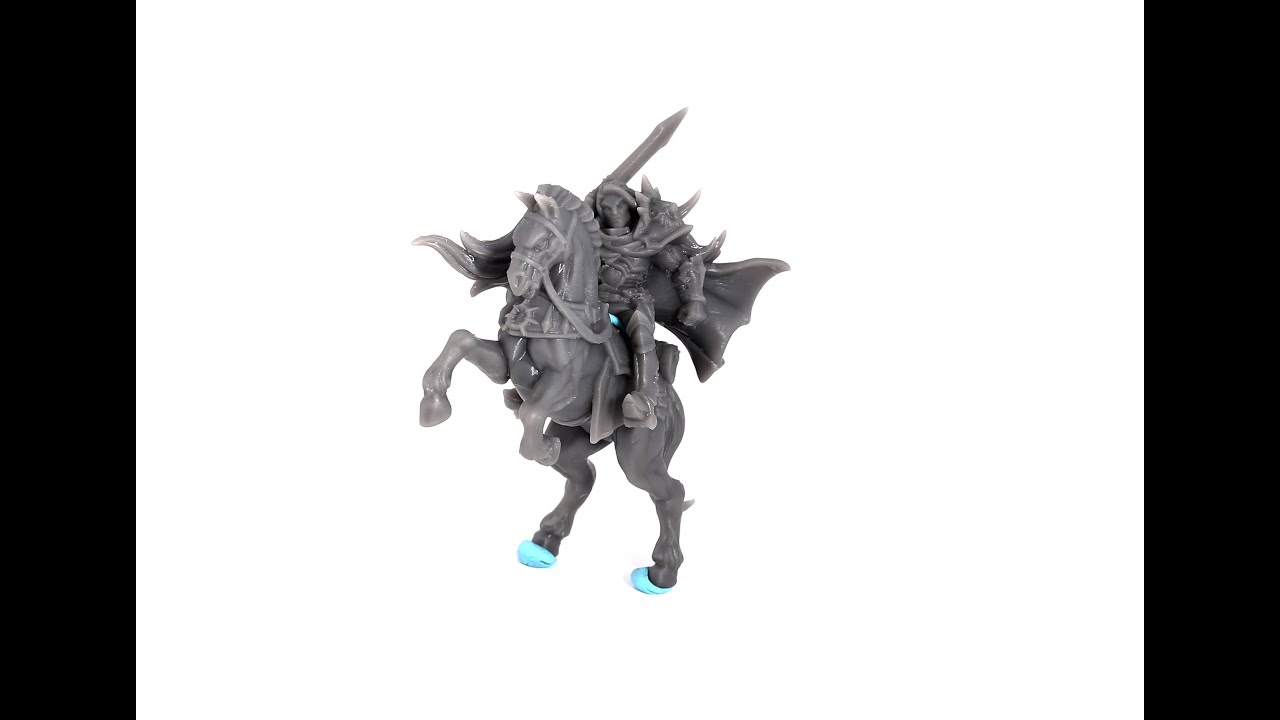
Get rid of IPA or other toxic cleaning agents from your resin printing!! Full (short in time though) review of this resin with 8 kodolds and a mounted human fighter hero printed! And find out what happened in a 12 foot drop test!
if you do opt to buy this resin, please use ...
might not need that alcohol after all
violet needleBOT
Adafruit Industries posted Fusion 360 Tutorial – MX MIDI Guitar

Hey folks, in this video we're taking a look at the MX MIDI Guitar project. In this tutorial we'll go through adding more cherry MX switches and potentiometers. With User Parameters, we can easily change the length of the neck and add more quantities via pattern feature. Thank...
violet needleBOT
Adafruit Industries posted Retractable Door Opener #3DPrinting #adafruit #Timelapse
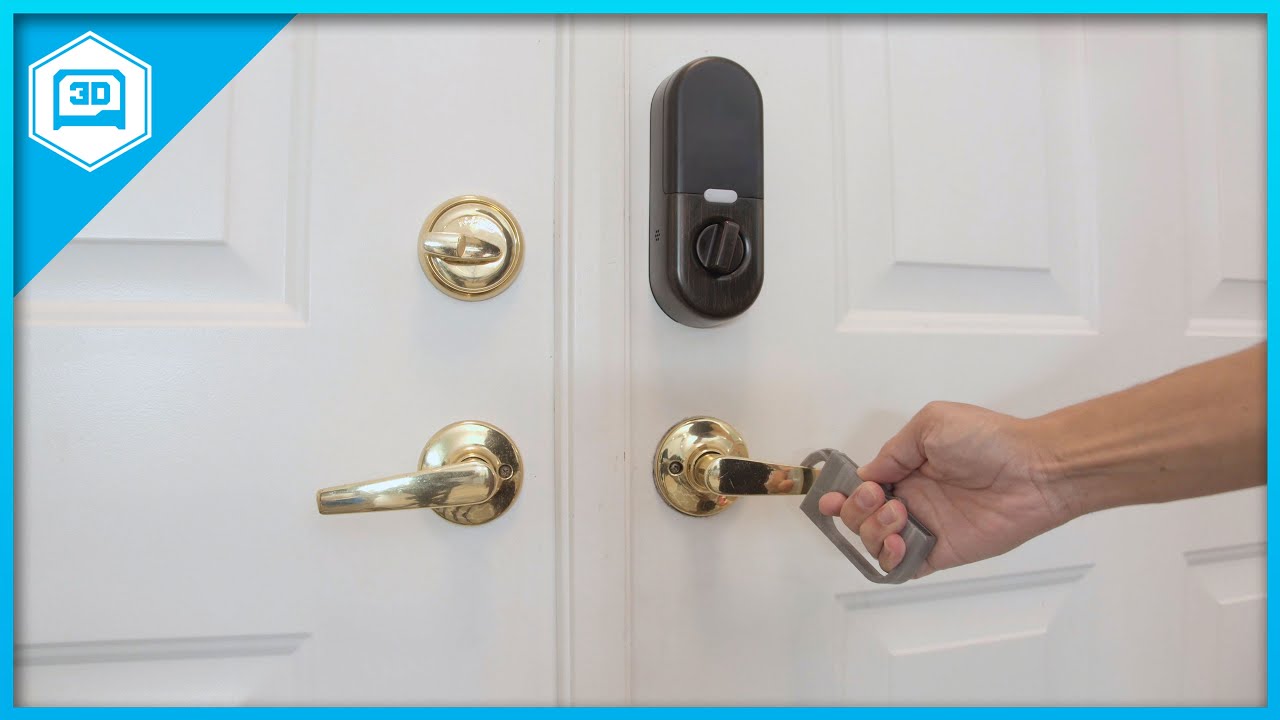
Every week we'll 3D print designs from the community and showcase slicer settings, use cases and of course, Time-lapses!
Retractable Door Opener
Òscar Fri Gola
https://www.thingiverse.com/thing:4248606
CR10S Pro
Silver PLA
05hrs 35mins
X:169 Y:180 Z:90mm
.2mm layer / .4mm no...
violet needleBOT
Adafruit Industries posted 3D Hangouts – Thermal Camera and Temperature Monitor
 violet needleBOT
Adafruit Industries posted ASK an ENGINEER 4/1/20 #AskAnEngineer #adafruit #engineering @adafruit

people working on COVID-19 efforts, they can order, and if it's out of stock email: covid19@adafruit.com
unique ravine
Does anybody actually have a process for calibrating the set screw position in a BLTouch or clones? I found one reference that says it's for cleaning and adjusting the sensitivity but no explanation how to use it.
"Just turn it until something stupid happens" isn't the way I want to go.
karmic brook

if there is an alarm, use scrip 4: M280 P0 S160 to release alarm first.
then use a screw driver to turn the screw in the top of the sensor, when you turn anticlockwise, the pin will be retracted a bit , keep turning the screw untill the LED turns off.
at this time, when you t...
shy kelp
turn it tight as it will go .. and then give it half a turn.
vivid current
anyone know why cura is doing this
unique ravine
@karmic brook Thank you! I've been searching for a while but my Google-Fu has failed me this time.
empty sedge
@vivid current check the "x ray" view mode. maybe there's extra faces or holes inside your model
in older cura in expert settings there's different "combine everything" options for how cura responds to invalid geometry
vivid current
it seems theres a missing face so its filling it all up but even on those ones its just cutting a chunk out
empty sedge
there's a bunch online about repairing models with netfabb or something. I've never had to do that so I don't know which to point you towards
[I typically would manually repair models in blender. There's a function to select non-manifold edges then I'd go through and fill holes or remove extra faces]
 tiny thunder
Does anyone know if the ender 3 pro axis limit switches are sinking or sourcing?
Does the input have a pull up/down resistor? I suspect so, since it's only two wire. Just don't know if it pulls the input up or down. Thx.
I don't seem to have more than 10mV on either pin. So perhaps sinking?
Also, I believe you're supposed to use an npn sensor for autolevel, which would mean sinking as well.
empty sedge
the pull-up is in the cpu
it might be normally closed though depending on how the switch is wired
tiny thunder
Good point about the nc
Yeah it is normally closed. That would make sense why I only got milli volts. It's honestly safer nc.
@empty sedge thanks
I'll have to test it once my print is done
 earnest plover
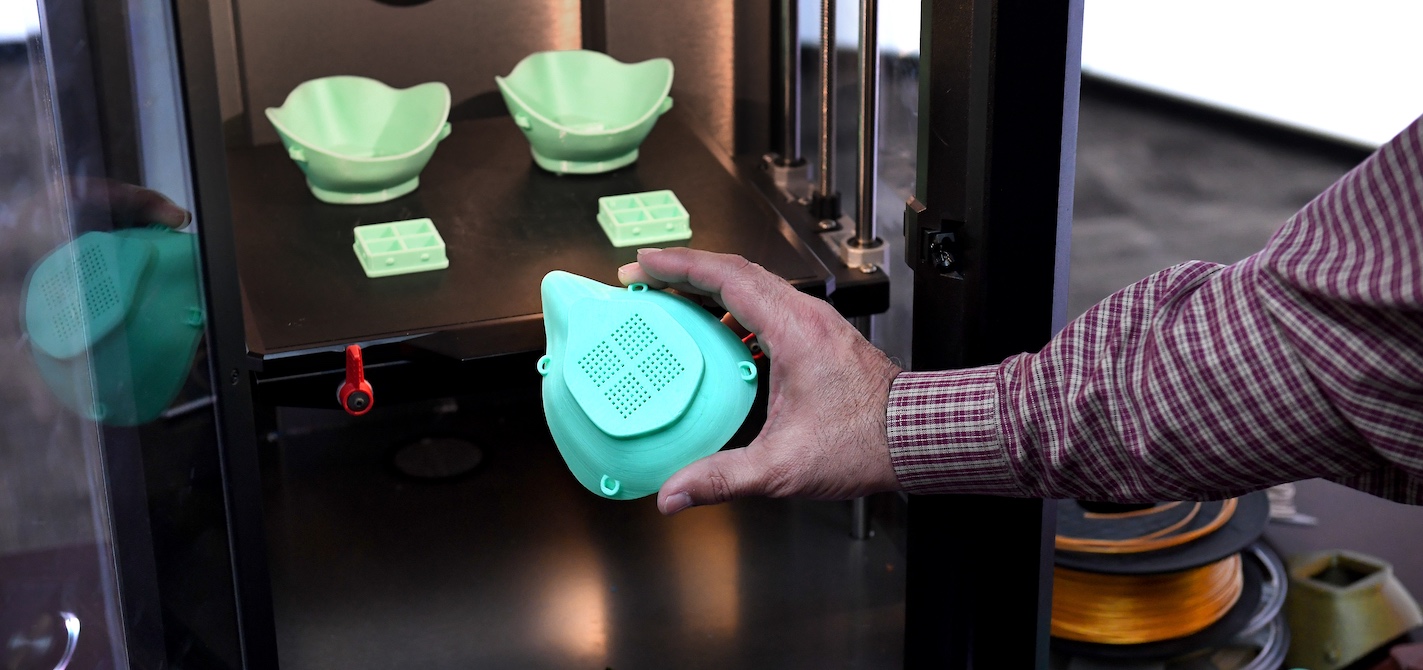
The makerspace has been shut down so I had no access to the printers... so I bought a Wanhao i3 Mini for like $85 (I know, it's a toy compared to a Prusa or Ultimaker, but $85 and not hundreds or thousands). I've already modified the print volume to 125mm x 135mm x 105mm. It's still too small to print the Prusa face shields, but I can print these:
https://www.makethemasks.com/
https://engineering.rowan.edu/research-centers/mask/
Is there anyone from NYC in here that knows hospitals that are accepting things like these masks? I emailed the governor's COVID-19 supplies donation email, but got a generic response with a link to a form for businesses that manufacture actual medical supplies like N95 masks. I personally can make 7-8 masks a day, and I'm sure a lot of other people with small desktop printers would print them as well. And the face shields are great, but they still need masks too.

Make The Masks
COVID-19 has created a PPE crisis. Make The Masks is a 3D-printable, high efficiency filtration mask that can be fitted to the provider’s face and sanitized between uses.
 empty sedge
maybe try the masksfordocs slack? there's an invite link on the pinned tweet on https://twitter.com/masksfordocs

We protect healthcare workers on the front lines of COVID19. 😷 Our 3,000 volunteers put free #PPE directly into doctors’ and nurses’ hands on six continents.
Tweets
1226
Followers
4535
 Twitter
earnest plover
Twitter
earnest plover
awesome, i'll check it out. Thanks!
i didn't notice it
hmm, seems they are just providing 3d printed prusa and verkstan face shields
empty sedge
I don't think printing n95 masks for doctors is going to be helpful. they need real verified tested ones
earnest plover
i think if it came down to a printed mask and no mask the choice is obvious
 blissful marlin
Anyone here have a Cetus 3D printer? I just set mine up again after not using it for a year and notice it's quite noisy (not sure if it was the same before)
I even put it in a plastic box with a lid on but I can still hear it in another room with the door closed. (And I am afraid my neighbour might too)
empty sedge
noisy in what way?
blissful marlin

Here is an example
ignore the clicking sound - I have to increase the temperature
When the bed moves it is very noisy
especially near the end of the video
empty sedge
eh, sounds like a 3d printer to me. Is your extruder jammed and clicking?
blissful marlin
Yeah I fixed that part already
empty sedge
here's what my i3 used to sound like: https://www.youtube.com/watch?v=QQx_3uT6dtQ

The SBHackerspace RepRap we will be building for our 3D printing class in action.
blissful marlin
Just the bed is super noisy
I have a C-10 5 which sounds just fine
But this Cetus one you can hear through 2 walls (+ its in a box)
ornate raven
What are the driver boards for the steppers?
That can have a big impact on noise levels. When I upgraded my main board on my Ender 3Pr, the noise was reduced to just the power supply fan.
blissful marlin
I am not sure - it's all stock cetus MK1
And I have to use this weird software to control it
can't adjust temperature or Z axis while printing which is annoying

Please visit www.cetus3d.com for more details.
Use code AL05 for a 5% discount at https://shop.tiertime.com/
Prints shown
Polypearl Tower https://www.thingiverse.com/thing:2064029
Okay https://www.thingiverse.com/thing:10017/files
Aria the Dragon https://cults3d.com/en/3d-mode...
For comparison
At 3:40 he moves the axis
For him it is smooth
for me it sounds like there is some rattling or so
difficult to describe
ornate raven
Have you lubed the bearings on the rails lately?
blissful marlin
I tried that earlier. I was just not sure how to apply it properly
I just put some oil on a Q tip and applied it onto the rail
and slide it back & forth
Or do I have to disassemble the bearing?
ornate raven
That should have been sufficient. Did the movement feel smooth?
blissful marlin
Nope same as before I think
ornate raven
All I hear seems to me at least to be stepper motor driver noise and maybe a little belt noise. Is the last video of the same model printer or a later model. They might have upgraded the drivers.
blissful marlin
The last video is the second version I believe
ornate raven
Ah, they may have different drivers on the main board. They can make a big difference in noise levels.
earnest plover
I did some searching for a silicone heat mat for this Wanhao i3 Mini i picked up. It looks like I need to order a custom one. Would you guys recommend Keenovo for it or is there a better company?
blissful marlin
Got some other problem on my other printer
CR-10 S5
I am getting some layer shifting
I printed a small testcube earlier no problem
now something bigger but only 10 mm height
it has like 3 layer shifts
Bed axis
But the belt is properly tensioned
karmic brook
The usual culprits are belt slippage (which you've already addressed) and missed steps.
empty sedge
@karmic brook have you seen an i3 mk3s slip filament in the extruder without grinding it? Pushing down on the filament as it's feeding it feeds through fine but when it's just the extruder pulling on the plastic it doesn't push hard enough
I'd rather not dissassemble an i3 extruder again this week but that's the only thing I can think of
karmic brook
After the first few times, I've worked out a much faster method to crack open the extruder to check for stuff like that, but it's still a pain. I assume it could slip without grinding if the extruder stepper misses steps.
blissful marlin
I have now reduced the jerk settings to 7
Seems to do okay so far
gonna have to wait and see I guess
empty sedge
the "S" extruder is definitely an improvement for that, but yeah. It's like remove the blower, 2 screws on the 40mm axial, then 4 more screws, then everything can be pulled apart
blissful marlin
Has anyone here printed face masks? Is 2 hours for a mask okay? Or could that be faster?
empty sedge
I'm printing face shields. 8-10 hours for a stack of 4, with also 4 of the bottom_reinformcement . I'm currently using pretty much the 0.3mm draft setting but with 3 perimiters
blissful marlin
which one exactly?
empty sedge
it's a 4-stack of the r3 of the prusa design with a slight brim on the tab support
without an extruder that can do more than maybe 10mm^3/sec I think about 2 hours each is about the limit.
blissful marlin
https://www.thingiverse.com/thing:4233193 this one looked quite nice- no extra tools needed and the plastic visor snaps into it

Yet another face shield.
Fast and light 3D printed Face shield.
Changelog:
rev0.6: adjusted autolock, more flexible
28/03/2020 added STEP files!
Easy to mount A4 acrylic sheets. Tested with 0,10 to 0,24mm thickness.
Just slide the A4 sheet in and close it.
Assembly: https://ww...
Oh the 4 Stack looks neat
But a bit afraid that mine will jump somewhere along
Gonna stick to 1 for now
empty sedge
that's why I'm only printing one 4-stack at a time, not two at once. I can start prints twice a day and printing only 4 at a time means that when things do go wrong there's less waste then if I'm doing 8 at a time
blissful marlin
It just jumped again
heard a 'tunk' sound
Jumped after an hour of printing
so odd
karmic brook
Maybe you've got some friction/binding?
blissful marlin
Hm how would I check/fix that?
Print speed = 60
Infill speed = 100
Wall speed = 50
Top bottom = 60
support = 60
Travel = 40
initial layer = 20
Cura settings
empty sedge
jerk probably wouldn't cause lost steps
blissful marlin
I had jerk control off before (I think default is 20) - it had a lot of layer shifting at that time
empty sedge
lost steps happen typically when during a rapid move the nozzle clips part of the print. this happened to me yesterday when I had a PLA overhang that curled upwards during the print as it didn't have enough cooling
stepper motors have less torque at faster speeds
so there's a few things you can do:
- enable Z hop. if you have leadscrews 0.6mm is good. This is typically near the retraction settings and will lift the nozzle during travel
- reduce the travel speed. Though 100 should be fine
blissful marlin
Z hop is on.
Travel speed is at 40 mm/s
empty sedge
- check the current setting on the stepper driver. Older boards have a trimpot to adjust this
[if the current is too high you can also lose steps because the stepper driver overheats and shuts down. I doubt this is your problem at the moment]
blissful marlin
To check the stepper driver I have to open the control box, right? Is that safe to do while turned on?
It usually does the shift here
empty sedge
it depends how the control box is wired. The mains power should just go to a power supply and the terminals should all be covered.
if you disconnect mains power and just connect USB does the LCD light up?
do you have a voltmeter?

Step By Step Guides
This guide shows how to adjust the stepper driver current on Creality3D CR-10S
the diagrams point to the extruder motor stepper current adjustment but you can figure out how to find X and Y current knobs
I haven't found the details of what voltage you should see there or what the motors are rated for. I would typically set to about 80% of the phase current limit of the motor, but what voltage that is depends on the resistors creality chose and what stepper driver is on the board
or less current if after an hour of printing your motors are too hot to touch
blissful marlin
Yes the LCD lights up when I only connect USB
Got a voltmeter
Just don't want to end up on darwin awards 😄
empty sedge
then you can probably set the voltage reference with just USB connected and everything in the box would be safe to touch with your fingers
still, be careful with your screwdriver and voltmeter probes
blissful marlin
Set the jerk to 3 but still got some layer shifting
Gonna really have to try the voltmeter option tomorrow
karmic brook
If you move the axes manually, do they move smoothly and easily?
The point you indicate looks like it would be the highest speed on one axis, which may or may not be relevant
blissful marlin
Yes moves quite smooth I would say
I am trying the same print again but moved the face shield to the corner of the bed now
Will see if that helps a bit
violet needleBOT
Adafruit Industries posted 3D Hangouts Show and Tell 4/8/2020

To show and share your project, view the chat or in discord https://adafru.it/discord and look for the JOIN link to join.
For best results be on a wired connection and have a headset and mic!
So be sure to be on our discord server in the #livechannel room for the invite link.
blissful marlin
Okay I just checked the Voltage for my steppers now
X = .719
Y = .821
Z = .901
E0 = .820
E1 = .811
Powersupply voltage set to 13V
To what number should I increase it so that I don't get layer shifting on my bed axis anymore?
violet needleBOT
Adafruit Industries posted Wearable Temperature Monitor #IOT #BLE #3DPrinting
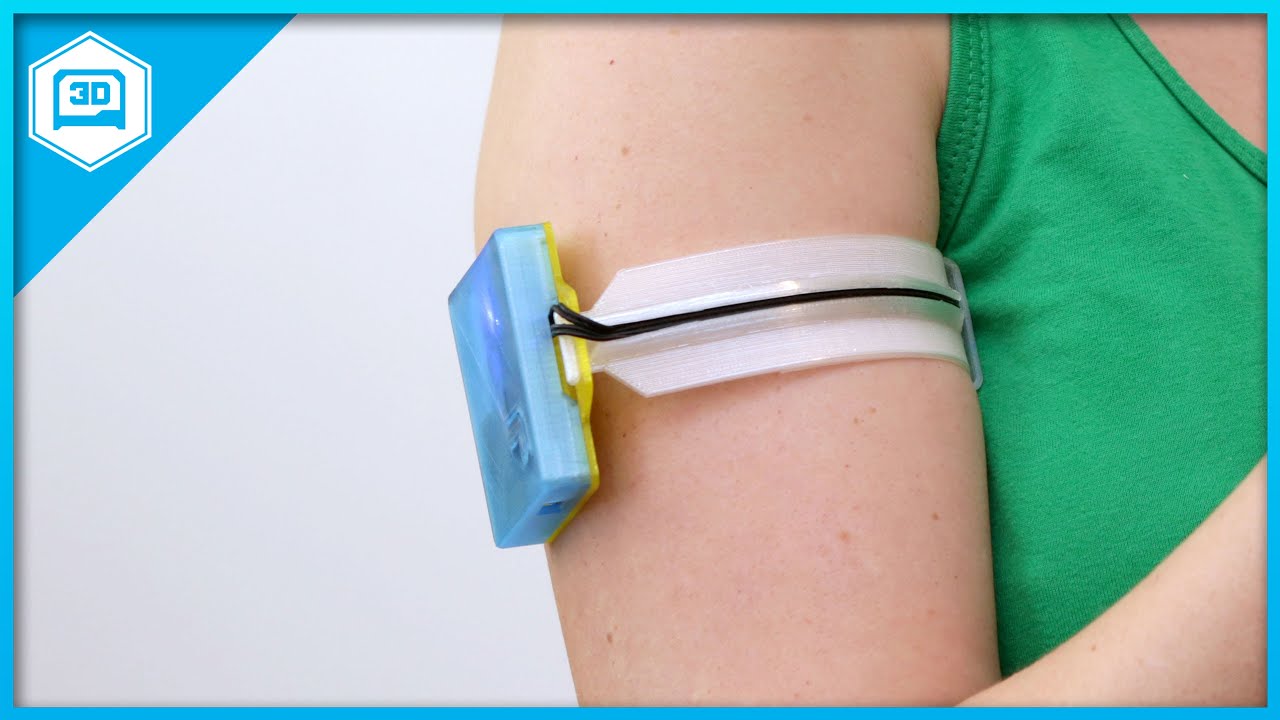
Build a Hands-free temperature monitor that lets you sleep soundly. Track your temperature data using Adafruit IO and get email notifications if it gets too high. 3D printed case and flexible arm band houses the Feather nRF52840 and MCP9808 temperature sensor.
Learn Guide: ht...
karmic brook
@blissful marlin I'd probably try increasing the axis with the issue slightly. For example, if it's the Y axis, maybe increase it to 0.85 or 0.87?
But you'll want to know which axis it is before you start changing things.
karmic brook
That's more than "slightly" but hopefully it will help and not burn anything
karmic brook
Let us know how it goes
 distant kindle
Hey guys, do you know if with fusion 360 is possible to create pare metric objects and then export them and still have the parametric options? I'd like to upload a thing on Thingiverse but apparently only openSCAD parametric are supported. Thank you.
empty sedge
fusion can't export to openscad but you can export the fusion file
then someone would need fusion to change the parameters
violet needleBOT
Adafruit Industries posted 3D Hangouts – Wearable Temperature and Slim Clue Case #adafruit #3Dprinting

Adafruit Industries, Essential service and business: Critical Manufacturing, NYC – Executive Order 202.6
https://adafruit.com/covid
How to place an essential, COVID-19 related order at Adafruit
https://adafruit.com/covidorders
 clever lynx
actual 9 hours 😉
blissful marlin
I have a Cetus 3D printer which uses linear rails.
The bed axis is VERY noisy somehow.
I ended up taking it apart and put the X carriage on the Y axis to see if it makes a difference.
The X carriage moves along fine on the rail. But it has some resistance so that it does not move freely.
The Y carriage on the other hand is completely free
When I don't hold it still it will move around easily
I assume it's too loose which makes the noise
is there a way to make it have more resistance on the rail?
Maybe some kind of oil?
empty sedge
I lubricate linear bearings with "super lube" silicone+ptfe grease
if you'd like to spend an hour watching a guy talk about cheap linear rails and lubricants: https://www.youtube.com/watch?v=loBHYcifzRM
https://www.youtube.com/watch?v=Nh-3J-CcZYI
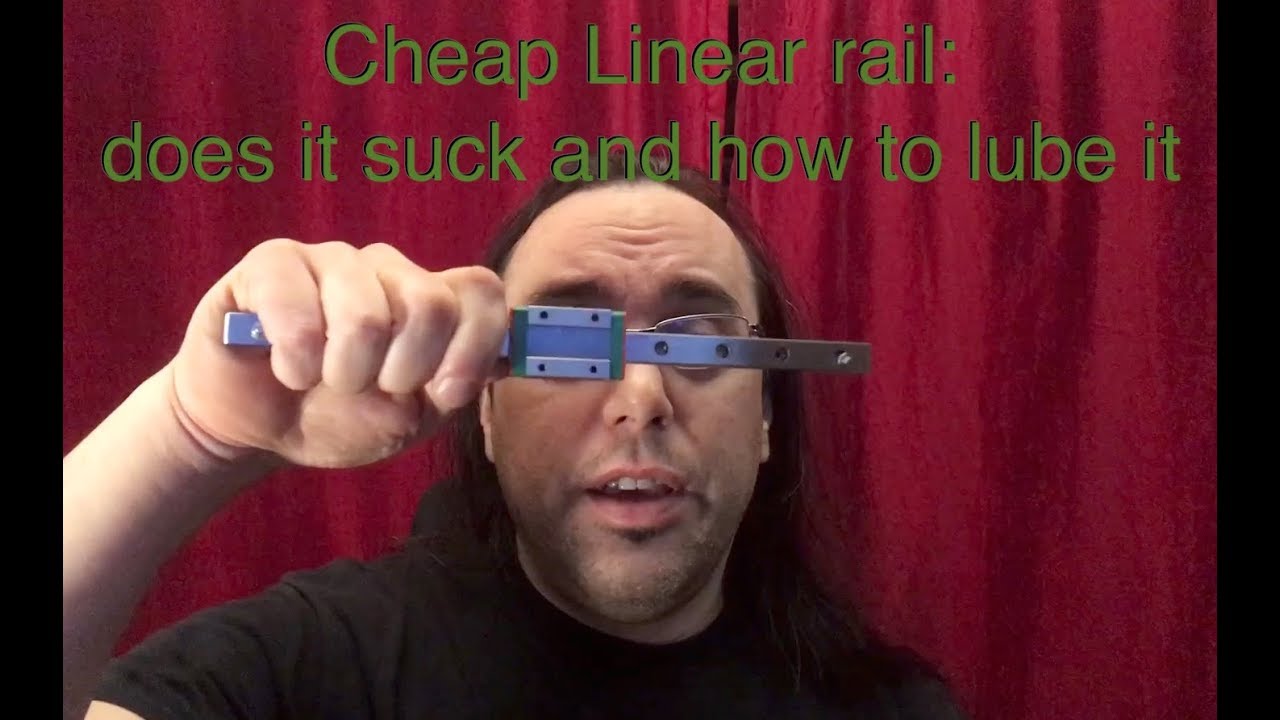
Time index below for easy navigation. Product links at the end.
(SORRY ABOUT THE HUM... as you can see, I was a moron and thought I was recording into a different camera and mic, so I had to crank up the audio, hence the hum).
This video became more in-depth than I had hoped...

Part 2... more budget linear rail info: this time with 100% more bearings and superlube. Long term testing forthcoming, but here is the final installment of my initial thoughts.
Parts affiliate links:
Banggood linear rail that I used
https://www.banggood.com/custlink/v33vyi...
karmic brook
"Liquid Bearings" is a nice lube. It's thick enough to give good dynamic control while avoiding friction and binding. Sewing machine grease is good too.
 crude kettle
I wanted to share this here as if I tried doing it on show and tell today...I don't have a webcam or mic. It's a project I've been working on and off for my college with the intention of student use to print large scale items. Things that may as well be armor props. I brought my smaller printer, in comparison, to show off and I wanted to show students what it would be like to have a small maker space on compass. It's printing like a dream right now but I would like to go bigger if I can enough filament.
All from scratch
empty sedge
Anyone ever seen i3 mk3s dual-drive strip out both sides of the filament? I've cleaned out the drive teeth twice and it keeps happening
Stripped filament on i3 mk3s
empty sedge
I guess I'll try various clog remedies
empty sedge
eh, just going to replace the nozzle
empty sedge
that worked
hidden sable
@empty sedge yeah I just assume clogging first these days
Esp. If I’ve just changed filament types
karmic brook
The stock heatbreak in the mk3s has a stepped bore (to make it easier for the MMU2 to switch filaments) but it makes it more likely to jam like that. I eventually ended up replacing the heatbreak with a smooth bore titanium one which reduces jamming by both breaking heat better (titanium doesn't conduct heat well) as well as not having that step.
hearty tree
I don't think this should be happening.
empty sedge
@hearty tree nope. for an e3d hotend you'd heat to max temp and tighten the nozzle with only 2 foot-pounds (3 Nm) to seal the nozzle against the heat break. I haven't built one of those so I'm not sure how it's supposed to be sealed
hearty tree
Okay.
empty sedge
looks like the same is true on creality: https://www.crealityexperts.com/changing-the-nozzle-on-a-creality-printer
Creality Experts
Change the nozzle on your Creality CR-10, Ender 3, or similar 3D printer with this comprehensive guide. Includes advice on buying a nozzle as well as a step-by-step installation guide.
hearty tree
I broke this glass ball with two wires.
empty sedge
that's the thermistor. it's used to measure temperature
you'll have to buy a new one, but they're not expensive
blissful marlin
What are some good cura settings for easy removable supports? right now I am having a hard time removing some in tight spaces
shy kelp
Change angle of requirements or touches bed only. Sorry short answer experiencing power outage and I don't type well on my phone.
crude kettle
https://www.youtube.com/watch?v=Ey1vk2Hi7Hg
This is a printer I made recently for my college. Just wanted to share here.

I have been working on this printer since mid summer of 2019. It's been a project that I gotten into thanks to my community college and it has been fun working on it. It has been a while since I first started as I been working on and off on it. The idea behind it was to build ...
blissful marlin
Need some suggestion for a 3D printed enclosure for a PCB. I don't want to use screws. What are my options here? I tried to do a sliding cover but with supports and some layers/gaps slightly bigger/smaller it is hard to fit
 proper shuttle
@blissful marlin I'd suggest going to http://thingiverse.com to get inspiration. Lots of cases for raspberry pi and other boards with a range of different closure types. My favorite type is a rectangular enclosure with one open end and a slot for the board to slide into. For a lot of boards you can get away without even putting a cover on the 6th side, and you can make any holes you need for connections, etc. Doesn't work for everything, but works well in a surprising number of cases

Thingiverse is a universe of things. Download our files and build them with your lasercutter, 3D printer, or CNC.
empty sedge
@blissful marlin I copied the snap fit from the pygamer snap fit case https://www.thingiverse.com/thing:3686964 for my hackaday badge case https://www.thingiverse.com/thing:3981754

UPDATE August 6 2019 Version 2 is 2mm thinner and includes an updated bottom half with cutouts for female headers.
Fit Enclosure
This enclosure is designed to secure the PyGamer PCB without any hardware screws. The PCB rests on bottom half with built-in standoffs. The top half...

This is my weekend-designed case for the 2019 hackaday superconference badge.
Features:
Room for cartridge
Room for Add-ons
Room for PMOD
Hole for speaker
Hole for IRDA
I've now printed this and it holds together fine. I chose 0.3mm layers with 0.6mm extrusion width except on ...
my hackaday badge case could've used snaps on the top/bottom also in addition to the sides but there wasn't enough time to do another iteration and still sleep
hidden sable
@blissful marlin you probably want to do some benchmarks so you can tune it to make sure you have adjusted to reasonable tolerances or at least know what they are
 prisma geyser
Hi, I’m a new 3D printer user - just built an MK3S from kit. I ordered the powder coated steel bed, but had a very difficult time getting PLA to stick. Cleaning the sheet with dish soap and warm water helped a bit. Any other hints for getting PLA to stick better? Is the smooth steel sheet better?
Also I’m out of the IPA wipes and it seems very difficult to order any kind of IPA these days - what do you use to clean the bed?
empty sedge
the smooth sheet is better for PLA, but you should still be able to make it stick to the textured sheet if you get the first layer set right
windex or other window cleaner would also work to clean the bed, but you can also use normal soap and water if that's all you have. Probably shouldn't soak it though
prisma geyser
Yes, I had to set the first layer height quite low so it’s really squished to print anything
empty sedge
oh, also maybe try setting the bed temp to 65C instead of 60C
prisma geyser
Will try Windex
empty sedge
you can either use the tune menu to change the bed temp after starting your print, or change it on the filament tab in the slicer
I found that a certain brand of cheap PLA didn't stick well to 60C bed but works well at 65C
it probably won't help to keep getting hotter though. at some point the plastic will be too "gooey" and won't stick any better against the bed
prisma geyser
Thanks, will try setting the temperature higher - is that just for the first layer or all?
empty sedge
all layers. With that plastic the parts would curl off and come loose if the bed went back down to 60
prisma geyser
So far I’m using the Prusa PLA that came with the kit
empty sedge
I had good luck with the default settings with the prusa plastic. Maybe make sure your nozzle is clean on the outside too
when it's hot use pliers to pick off any plastic on it
what color prusa PLA?
prisma geyser
Silver
empty sedge
yeah I had good luck with the silver
prisma geyser
Also ordered some Hatchbox PLA. Any other recommended brands?
empty sedge
atomic, but it's not really cheaper
 inland sage
I am trying to print a face mask that starts as PETG and finishes in flexfil 95A. Is there a slicer that can code multiple print settings for doing this sort of switch? I would like to be able to run it fast for the PETG part and then slow for the flex.
blissful marlin
Is there a terminal command I can use in octoprint to quickly move the printhead around? I notice some vibrating sound sometimes when it moves fast. But it's hard to pin down what it is since it's not coming up for more than 2 seconds or so
blissful marlin
Hm I still have trouble removing support in small areas
I have a model which I have to print vertical
and there are some channels which are like 30x6x6 mm or so
the support in those tight areas I can't get out properly
karmic brook
Yes, many slicers will let you run code at specific layers: do a search on "temperature tower" for examples to change extruder temperature on the fly, you should also be able to change other parameters in a similar fashion.
I had to print some narrow channels with support for some cosplay appliances, and ended up tweaking the support spacing and density (I used a minimum of support with a little spacing), then fished it out with a hook and cleaned up the rough spots with a nail file. Sometimes it's easier to just break the part into two pieces that don't have the same support needs, and then assemble the two pieces after printing.
 formal lark
how could i put my raspberry pi in a 3d printed part
am i supposed to get like a portable charger to connect the pi to and then put it in there?
empty sedge
@formal lark that's sort of what pigrrl does: https://learn.adafruit.com/pigrrl-2

using the adafruit powerboost + lipo to prety much build a portable charger into it
olive narwhal
so the Longer Orange 30 is on amazon right now for only 240 bucks if you use a coupon... pretty tempting https://www.amazon.com/gp/product/B082SL8R1C/ref=ox_sc_act_title_1?smid=A2NQD6UFCM02H2&psc=1
screw it im getting it lol
any recommendations on curing stations and such?
crude kettle
A quick question if anyone knows what are the connecters called on 3d mother boards for stepper motors?
are they JST XH same as lipo battery connector
crude kettle
Not those I'm looking for the once with a little clip to them
@formal relic
Reason being is that the one I am using are dupont and they do not stay plugged
 formal relic
you mean the stepper drivers?
formal relic
X motor, Y motor, .. etc
crude kettle
yeah
formal relic
might be with some type of latch it is hard to see from the picture
I think it might be JST-XH4P
do you have JST to try on?
formal relic
sometimes hot glue can save the day.
crude kettle
They're XH2.54 connecters
formal relic
@crude kettle added to the list of things that we need at home just in case..
violet needleBOT
Adafruit Industries posted Robo Arm #3DPrinting #Timelapse

Every week we'll 3D print designs from the community and showcase slicer settings, use cases and of course, Time-lapses!
Robo Arm
Cisco Czapski
https://www.thingiverse.com/thing:4263075
CR10S Pro
Green PLA
07hrs 40mins
X:237 Y:192 Z:16mm
.2mm layer / .4mm nozzle
10% Infill /...
 winged geyser
howdy all, I'm trying to print the Secret Butterfly Box entirely out of PLA. I was wondering if I should use the PLA drawer spring or it's not going to hold up and should go with the drawer without a spring since getting a spring might not be practical for the time being. thanks
karmic brook
I don't have an answer, but I'm interested too, as I'm eyeing a printed pen holder with an integral spring and don't know how PLA holds up in such service.
 edgy steeple
any recommendations for a US based filament supplier for a dark green or silk jade green.. It's for a Hulk body.
blissful marlin
I need to do some cleaning &lubricating of some linear rails. Do I just disassemble and put them in isopropyl alcohol?
karmic brook
I don't know offhand if alcohol is an effective solvent for lubricants or not (I'm guessing not, as it's miscible with water). Maybe use kerosene, varsol or similar to clean it, or ordinary dish soap and a thorough drying.
I'm fond of the oil and grease made for sewing machine use, as well as Liquid Bearings for lubrication, but there are a whole lot of options.
edgy steeple
is the grease on 3d printer rods (like z axis threaded rod) white lithium grease?
@blissful marlin this might help https://letsprint3d.net/how-to-lubricate-z-axis-lead-screw-3d-printers/

Lubricating a 3D Printer's Z Axis Lead Screw should be done every few months as routine maintenance, ensuring the best performance and great print results.
formal relic
@edgy steeple I'm just use the same grease the I'm using for my mill and my lathe, it is Mobilux NLGI 1 lithium grease .

Grainger
Mobilux EP 1, EP Grease, NLGI 1, 13.7 oz
blissful marlin
I have some grinding sound when I move the carriage on the linear rail
Which is why I am wondering if there is some dirt insidr
formal relic
do you have wiper on it?
formal relic
rubber, felt with oil, etc..
formal relic
the plastic end is the wiper.
did you load the block with lubricant?
@blissful marlin on one side you need to see a hole for that, or even small pressure fitting (mostly on the larger ones)
blissful marlin
There was lubricant already on it from the factory but that was a few years ago
I see a tiny hole
needle size
formal relic
what lubricant the manual say?
if you take the blocks out, you will need to load all the balls, and this his PAIN
@blissful marlin if you need to oil them never put grease in them, and vice versa,
and if you have no idea what was the original lube, it is better to fully de-grease and then to apply new lubricant.
blissful marlin
Yes I think I will do the latter
No idea what it used before
IKO manufactures linear guides, needle roller bearings and positioning stages for semiconductor, packaging, medical, machine tool and automation applications
This is the manufacturer
blissful marlin
formal relic
this is look like the serial number, not the model
maybe on the other side?
@blissful marlin ^
blissful marlin
Hm not sure if I can reach the other side
There is a plate screwed on but the screws are kinda chipped
formal relic
I'm not 100% sure if this is the PDF for your blocks, your might need to measure it and see in the PDF.
or it might be other type from here?
https://www.ikont.com/linear-guides/ball-type-linear-motion-rolling-guides#linear-way
IKO manufactures linear guides, needle roller bearings and positioning stages for semiconductor, packaging, medical, machine tool and automation applications
if you find the correct grease, you can just pump in a bit extra and flush the old one out.
formal relic
NO!!!
blissful marlin
Ok 😆
formal relic
the moly participial can destroy fine surfaces, it is good, if you have stuff like gears, or gaps, but for fine bearings, very rarely you need moly.
@blissful marlin ^
blissful marlin
12 mm
I can see ML12 at an angle. There might be another letter in front but I can't tell
formal relic
ML12 sound like the model
this is the correct PDF
the link that I sent you before, is the correct grease.
blissful marlin
The one on amazon?
formal relic
or any other place, that you like, or any other compatible grease.
the one that I sent you, the the exact one that they claim to factory pack the blocks with.
@blissful marlin
blissful marlin
Okay thanks will have a look. The one you linked is not available in my area I think
formal relic
I might be just lithium-soap based greases NLGI 2, and I think you can find Mobil brand in Grainger.
@blissful marlin ^
formal relic
take in to consideration that Lucas is vary sticky (very good for spinning stuff), and this is not ideal for block that you want them to glide.
formal relic
I had the same story with the restoration of my lathe from 1972, and I had to learn all that stuff,
I did a lot of mistakes.
blissful marlin

Learn how Mobilgrease XHP™ 222 lithium complex grease is an ideal choice for operating conditions including high temperature, water contamination, shock loading and extended relubrication operations.
This one maybe?
But seems to be more for cars?
formal relic
it is a good idea to know what is the original / recommended grease, but if you are anyway going to de-grease it you can use almost whatever, clean grease (with no participial) that you have on hand. because it is very slow speed application.
t
https://www.mobil.com/en/lubricants/for-businesses/heavy-duty-lubricants/products/mobilgrease-xhp-222/
@blissful marlin this is heavy grease
Learn how Mobilgrease XHP™ 222 lithium complex grease is an ideal choice for operating conditions including high temperature, water contamination, shock loading and extended relubrication operations.
blissful marlin
Hm is there a specific term I should look for that is not heavy grease?
formal relic
NLGI 2 lithium soap
the higer the NLGI number the thicker the grease 0 is almost liquid, 1 is about apple souse, 2 is like nutella
blissful marlin
Hm will have to do some more research tomorrow. Right now I only see liqui moly and lucas grease
Thanks for the suggestions
formal relic
I'm using NLGI 1 mobilux , try to see if you can find it in NLGI2, it is cheap and very good grease
Any time!
@blissful marlin
formal relic
no, but it is HUGE amount of grease.
@blissful marlin
This is NLGI2 mobilux https://www.grainger.com/product/MOBIL-Mobilux-EP-2-2RV31

Grainger
Mobilux EP 2, EP Grease, NLGI 2, 13.7 oz.
@blissful marlin I need to get some sleep. I hoped I give you some direction.
let me know how it goes
blissful marlin
Okay found a store and just ordered it
Before I use it I will have to clean the linear rail carriage first, right?
karmic brook
I'd recommend cleaning the rail and bearings, but even if you don't, a little fresh lubrication should help. You only need a tiny amount.
formal relic
@karmic brook It is only a good idea to add grease if you can identify the old grease, otherwise you can cause a reaction between incompatible greases that most of the times cause the grease to hardened.
If the grease hardened in the linear rails you can maybe clean it with no damage. But if you do this mistake in spindles, you can burn the bearings in no time.
https://secureservercdn.net/50.62.174.113/2pf.68b.myftpupload.com/wp-content/uploads/2019/08/Grease-compatibility-chart.gif
 formal relic
Before I use it I will have to clean the linear rail carriage first, right?
@blissful marlin you can, particularly if you feel some grit or debris in the motion. but the original and the one you got are both lithium based, so they are compatible.
blissful marlin
Okay will do
Cleaning I will just do with water & isopropyl alcohol, right?
Or is there a better option
formal relic
Water😬 😬 😬
You scared me!
I'm not sure how skilled you are to unload and reload the blocks, without making all the ball bearings flying all over.
I will say, pump abit of extra grease to the lubrication port, and this way it will flush out the old one.
95% IPA, or wd40 is fine for that.
Make sure to use something that is lint free
 jovial plaza
Question what should I do if my printer does not have thermal runaway
formal relic
If you can't upgrade the firmware, I think octopi have that feature built in
@jovial plaza
jovial plaza
My printer sadly is compatible it’s a Dremel 3D20 which is great as a tool but not as a hobbie
Sorry I mean is not
formal relic
@jovial plaza It seams like the Dremel 3D20 have thermal protection built it. but it might be a better to ask them just to make sure.
jovial plaza
I tested it with a blow dryer and nothing shut of then when I emailed them they basically just said that the Dremel 3D20 is safe with no details
formal relic
@jovial plaza Not sure what to tell you. you might need to replace the board and then you can do whatever you want with it.
jovial plaza
Is that hard?
 hushed lotus
@jovial plaza a hairdryer is not nearly hot enough to trigger thermal runaway protection. Keep in mind that the printerhead can get up to 230 C, and thermal runaway is at higher temperatures than that.
jovial plaza
Sorry let me clarify I saw online that if you use the cool mode on the hairdryer and monster the temp you should see it drop and then shutdown
I mean monitor
Sorry
jovial plaza
Dremel 3D20
hushed lotus
The tip about the hairdryer.
Is that a tip for the Dremel 3d20 specifically?
Is that a tip for the Dremel 3d20 specifically?
jovial plaza
No not specifically for the Dremel 3D20 but i could see the heat drop drastically
From 227c to 198c
formal relic
@jovial plaza And here you have a good reason to play with... Dry ice! and Liquid Nitrogen!
jovial plaza
Should I just put the dry ice on the nozzle that seems like it would crack the brass
formal relic
Or not..
jovial plaza
I might try just flashing marlin firmware with thermal runaway enabled on it
Which will void my warranty but the mods I’ve done to that machine have voided the warranty ten times over
formal relic
@jovial plaza what mods did you do?
jovial plaza
I have added a
Cut aluminum bed
Led controller for the light strip pre installed on it
And will be adding a filter and fan
Along with a plated nozzle
formal relic
what is the base material?
jovial plaza
Of what
formal relic
or the nozzle
formal relic
sounds interasting!
jovial plaza
Heard about them on the 3D printing nerd
formal relic
I'm using e3d https://i.imgur.com/ffRh0nv.mp4
 formal relic
@jovial plaza it is an enclosure with holder for thermometer.
jovial plaza
What type of thermometer
formal relic
the waterproof onewire
jovial plaza
I have been trying to find a project that use one of those
formal relic
no idea
crude kettle
Does anyone know where I can buy a custom sized silicon heat pad for a 3d printer? Bulding one and want to have a 250x400 heat bed. The pad is not going to be that size but I'm wondering where I could order a specified size. Unless there is a better way of going about it.
jovial plaza
On amazon There are a large amount of standardized sizes which you may want to go for if you can
Like 300 by 300
That’s really your only option besides possible making it your self
empty sedge
@crude kettle someone I know asked an aliexpress vendor or something to make them a custom heated bed for I think a 1x1 meter printer. I'm asking now to find out who
crude kettle
Cool thanks
 quartz portal
I'm having issues with my prusa mk3s Where it basically prints the perimeters outside the boundaries of the part. If i slow it way down its better but that's not ideal. It's not the slicing or design as this is proven and works on most of the printers Im using but a few are giving me this problem
Any help or suggestions would be great
I think it might be a belt tension problem since it goes away at lowr speeds
empty sedge
@quartz portal petg? Do you have a way to dry it out?
wet petg will string and ooze like that
quartz portal
It's brand new
quartz portal
The issue follows the printer not the filament. If I swap filaments between printers
But I could try to put them in the oven a bit
It's not stringing. It's the perimeter layer
empty sedge
ok, I also had a stringing issue like that that wasn't due to the filament. I think I fixed it by rebuilding the hotend with thermal compound between the heat break and heatsink
the hotend rebuild fixed my petg stringing during retracts
quartz portal
The outer perimeter isn't attaching to previous layers and it "cuts corners"
empty sedge
so you're only having issues that the loops aren't sticking and are getting pulled straight?
empty sedge
is the infill under-extruded or does it look solid?
quartz portal
The infill seems fine imo
empty sedge
are you just printing too fast?
quartz portal
Normally I'd say yes but it's fine on several other printers and this is optimized gcode direct from prusa for face shields
empty sedge
what temps is it using?
when you extrude into air does the filament come out smooth directly down?
quartz portal
when you extrude into air does the filament come out smooth directly down?
@empty sedge yes
Getting you a vid

Google Photos
This one is better behaved but still has one spot that it's exhibiting the behavior
empty sedge
can you give me a link to the gcode?
empty sedge
13.5mm3/sec seems like a lot to me
that's almost double what the default prusa petg profile limit is (8)
actually I had the wrong extrusion width in my calculations: it's 16.5mm3/sec in that gcode
quartz portal
Yeah it's fast
But it's working on most of my printers
Just 2 or 3 giving me this problem
empty sedge
have you checked the filament drive gears to see if the teeth are clogged?
quartz portal
No. I'll do that
Thank you!
One of them is a brand new printer though lol
Gears are clean
Cleaned the rods with isopropyl and lubbed up
Gonna give it a go
empty sedge

Based on the examination of printers received back from the customers, we compiled a list of the most common problems causing poor print quality. Check them out and improve your 3D prints today!
• Extruder linearity correction calibration:
https://help.prusa3d.com/l/en/artic...
empty sedge

Prusa Knowledgebase
All information you need to know about Original Prusa 3D printers. Assembly manuals, print quality troubleshooting, calibration, PrusaSlicer and much more.
crude kettle
Is the cooling fan in the control box working?
quartz portal
I'll run a self test but there's tachs on all the fans and it would throw an error if the fans weren't working
crude kettle
I mean are that working as they should. See if one is slower than it needs to be
quartz portal
That's what the tachs would reveal right?
After fresh lube it's already better. I'll know in a few more layers
crude kettle
Alright, we'll wait. Post the pic once it's showing results
quartz portal
Thanks everyone!
crude kettle

quartz portal
Decent first layer
Second layer is more angular and not great
See the perimeter
crude kettle
Hmmmm.... Is the bed clean?
quartz portal
Yup. First layer was fine
Second layer just puts perimeter in a straight line
I'll try to fine adjust z lower
Yeah it's still bad... Sigh
crude kettle
See if the coupler is loose for the z
quartz portal
The heat break?
quartz portal
formal relic
are you sure you are slicing to the correct filament diameter? it is look like you set your slicer to 3mm and you are using 1.75mm.
crude kettle
Is the tention on the extruder tight?
quartz portal
I'm not slicing. I'm using the same gcode everyone else in the world producing these face shields is :p
X belt could be tighter
That was my first bet
formal relic
O_O
quartz portal
are you sure you are slicing to the correct filament diameter? it is look like you set your slicer to 3mm and you are using 1.75mm.
@formal relic this file was made available to the public by the manufacturer for this specific printer for this specific job
And the file works great on most of my printers
formal relic
OK, ignore this file. and print something that YOU slice if you want to calibrate this printer.
quartz portal
The problem follows the printer. Not the file nor the filament
crude kettle
Filament?
quartz portal
Petg
Just tested the belt by holding the shat and forcing the carriage
The belt jumps
It's definitely loose in x
Gonna tighten it up
crude kettle
That should help a bit
formal relic
LOL!!!
quartz portal
crude kettle
Man, i wish i had one of these. Ehh...my ender 3 is not dead yet
Oh i see noe
Now*
quartz portal
Yeah I killed it
I'll print a new one tomorrow lol
It'll definitely be tight after a full teardown
crude kettle
Good thing you hsve another printer to fix your printer
formal relic
just machine something out of aluminum
crude kettle
It helps that the files are available for everyone .
Someone has made aluminum parta before
quartz portal
just machine something out of aluminum
@formal relic campus machine shop is closed and this part is a little too complex. For that
Otherwise I might haha
formal relic
lost pla casting?
quartz portal
I could see this part being better with injection molding
But they want you to be able to print new parts haha
formal relic
yeah, this way you need to by 2 printers
crude kettle
I've built a huge one for my college
jovial plaza
How big
crude kettle
formal relic
So it is about.. from here to there
crude kettle
Okay printer is a meter high and 50 cm by 50 cm. Build volume is 300x300x500mm
formal relic
THIS IS NICE!
quartz portal
Wow that's great!
crude kettle
With a Ender 3 to print everything
quartz portal
I'd love to custom build something like that one day
jovial plaza
Amazing
crude kettle
Recommend going with 2040 for the sides. This flex a bit but not while printing.
formal relic
is that conduit?
formal relic
but what is the round things that he is using right now
quartz portal
Looks like emt conduit lol
crude kettle
10mm rods
quartz portal
Nice.
crude kettle
ZYL tech was really good at supplying
quartz portal
Where would one start to custom build a printer?
crude kettle
Thingivers
formal relic
I think my printer use 8mm round shafts
quartz portal
I've built about 15 prusa mk3s but I'm ready for the next step
crude kettle
I recommend looking at thw hyper cube
formal relic
@crude kettle the bed is moving? or you are using something like core xy?
crude kettle
The bed moves down yes
The z uses 10mm rods and a 10mm diameter lead screw
8mm for x and y
quartz portal
I'll check it out thanks
crude kettle
There are kits for it, aluminium extrusion wise, and you pick the electronics
quartz portal
Do you guys know of any comprehensive additive manufacturing courses that can help me flesh out the gaps in my knowledge? I was looking at the one offered by MITx
crude kettle
Whats ths gap?
formal relic
I'm sure there is places that will give you certification as "3d printer special operator"
quartz portal
I can hobble through basic troubleshooting and repair but I don't know a lot of the theory and fundamentals
Like where you were able to see that the extrusion bvolume was high
Volume *
crude kettle
Youtube cnckitchen
Makers Muse
3d printing Nerd
Get a printer that needs to be tuned to learn
formal relic
you just need to do A LOT of mistakes, an do them as quickly as possible, and fix all the issues, and you will be good to go.
quartz portal
Awesome I'll do that. Do you think the MIT course would still be valuable? Employer is willing to pay for it
quartz portal
I've been breaking things for about 2 years. Ready for the next step haha
formal relic
Most makers and machinists, learn with their hands, not in the class.
so instead of braking stuff, you need to build stuff.
crude kettle
Wiring and programming a 3d printer from scratch. Well not complete scratch
quartz portal
And I have for sure. I came into this job with a electronics background and now I machine and 3d print and the full 9. But sometimes researching an issue for 2 days isn't the best use of time
formal relic
so instead of braking stuff, you need to build stuff.
crude kettle
A delta 3d printer may be your alley if you want something more advanced.
formal relic
@crude kettle LOL
How to bang your head on the wall with 3 simple stepper.
quartz portal
Thanks for the great advice both of you
Gonna finish this beer and update you guys in the morning
formal relic
some of the problems with delta printers, OMG..
crude kettle
Delta 3d printer has virtual beds. So Auto Leveling Sensor is a must. A 32-bit motherboard would bring less headache. The SKR 1.4 V is a great choice for that
empty sedge
@crude kettle you could use two 240x200mm heaters
but the answer I got was:
Alibrother worked well for me
I like Keenovo’s off the shelf heaters. I don’t know of anyone that bought custom heaters from Keenovo though. One time I heard they were unresponsive to quote request.
crude kettle
@empty sedge thanks, I'll put these guys on my list of venders. Also going to check to see about heater pcb with aluminium plates on them. I've worked with those and they were great.
Again thanks, cycling though options here.
blissful marlin
@quartz portal how long do you need to print 1 mask in your setup above?
Mine currently takes 2 hours 40 minutes
not sure if that's too slow?
Also are you cleaning them somehow before sending out?
quartz portal
I'm printing 8 headbands in about 12 hours if I don't slow it down
Per printer
I use 2000 grit to get the stringing off and I pull the missed perimeters off with pliers
blissful marlin
wow thats a good speed
quartz portal
I wear a mask, wash my hands, bag them, let them sit for 3 days, then deliver
We have been water jet cutting the polycarbonate shield part
blissful marlin
Does it help to print multiple at once (speed-wise)? At the moment I print 1 by 1
quartz portal
I don't think so but it's a lot less total downtime in between runs
blissful marlin
What print settings do you use for that speed? At the moment I print at 5% infill, 0.3 mm layer height (0.4 nozzle)
2 walls I think
quartz portal
I have one printer dialed back to 60% because the issues I was having got so bad
I'm using the optimized gcode from prusa
blissful marlin
Ah okay
quartz portal
They fine tuned it for their own printers
blissful marlin
don't have a prusa so that won't work for me
quartz portal
I think slicing anything yourself is going to be slower
blissful marlin
Also I noticed for the prusa face shields you have to cut the shield to a specific size, right?
other designs seem to just use A4 sheets
quartz portal
Prusa is bigger. A4 doesn't pro ide enough protection
There's a link for the a4 prusa remix somewhere
Same hole pattern but less protective
jovial plaza
Letting them sit for 3 days may be a little excessive what I have been doing is just wiping them with a Clorox wipe @quartz portal
But the masks are a good idea
quartz portal
The quantity produced doesn't change by holding them for 72 hours. Every maker community is recommending to hold everything sealed for 3 days
It is impossible to sterilize this stuff with clorox. There's gaps between layers. If a maker is an asymptomatic carrier they could cause an outbreak in a hospital
I highly highly suggest you start holding on to the stuff for 3 days. You gain nothing by delivering it 3 days early and lose a lot if you happen to be carrying.
blissful marlin
Weird - I printed 4 faceshields now.
2 times one corner is warped
the other 2 times fine
Any ideas what the issue could be?
Using heated bed 60 degrees + glue stick
and have auto-bed leveling
karmic brook
Air flow?
blissful marlin
I have 2 fans on it
hushed lotus
How does one distribute their masks?
blissful marlin
depend on location. There are some lists online where hospitals requests for mask and give a contact number/drop-off point
quartz portal
Using heated bed 60 degrees + glue stick
@blissful marlin petg?
I wouldn't use a glue stick with petg. Petg is really sticky
crude kettle
Take glass with it off the bed sticky
 obtuse spoke
good morning everybody.
I'm hoping this community can help me navigate the price/performance curve in the FDM space. I have a lot of experience with laser cutting and resin printers, but have avoided FDM printers in lab b/c of their finicky nature (circa 2010 and prior). It seems like the last decade has been great for FDM, and for home use I'd like to get one because of the footprint and relative lack of requirements for cleaning (e.g. no wash required). It seems like the Prusa is the way to go, and that $1000 is a good marker for "just work" printers. Anything substantially cheaper that is worth considering? What's most important to me is reliability. Thanks in advance
karmic brook
I'd agree with the Prusa line: they seem to me to be above the usual price/reliability curve for FDM printers. The new Prusa Mini doesn't have a long track record yet, but looks like it could offer solid reliability at a lower price point (the tradeoff being a smaller build volume, and having to wait for one).


 obtuse spoke
dang. doesnt ship till august. Good things come I guess.
blissful marlin
the noise on my printer sometimes is so annoying
Something is vibrating on the printhead
but I can't pinpoint what it is
empty sedge
a fan?
blissful marlin
Hm no when I touch the fan it still makes the noise
It only appears when the print head is moving fast
Basically when it's printing the outer wall I think
or travel
But the rest of the print pretty much silent
And right now it's kind of traveling in between these 2 spots
Seems like a waste of traveltime?
empty sedge
compared to following your part?
blissful marlin
yeah
blissful marlin
@formal relic received the mobilux EP2 grease now
formal relic
Cool
formal relic
Same here, make sure you keep it in a way it can't leak.
ornate raven
@obtuse spoke I'm in favor of my Ender 3 Pro. Reasonable price, reasonable print area, new one has quiet stepper drivers. Easy asemble. My first printer and one I have l grown to like.
formal relic
What grease fitting you have on the blacks?
blissful marlin
I don't see any fitting
formal relic
can you take a pic from each side of the block?
ornate raven
May be that your grease option is to clean the rail, grease the rail and roll the bearing through the grease.
formal relic
blissful marlin
empty sedge
no, the seals will wipe the grease off the rail
you can wipe it into the balls when the bearing is off the rail though
ornate raven
Ahh, so it doesn't use grease at all. Just something 3 in 1 oil.
blissful marlin
Shall I disassemble it and put it in isopropyl alcohol first?
empty sedge
sure, do it in a plastic bin in case you knock any balls out
I'd recommend super lube grease for linear recirculating ball rails like that, not light oil
formal relic
@ornate raven scroll up, the manual point to use grease
ornate raven
Ok. was looking at the pic where it says oil.
I have little experience with that particular model of bearing. I'm used to sealed precision bearings for heavier industry.
formal relic
@blissful marlin Is you can clean the old lube wit IPA, or WD40.
is there a cover in the black wiper that you can open?
ornate raven
I wouldn;t use wd-40. It will corrode steel.
I know what they say on their website but I also know what I've seen.
We use to use it to clean adhesive off of surfaces. Followed soon by another cleaner and coat of fine oil.
Don't get me wrong, I use the stuff at home for a multitude of things I just don't use it around bearings.
formal relic
95% IPA or denatured alcohol is also fine
ornate raven
https://www.youtube.com/watch?v=c53sa46C1qQ might be helpful.
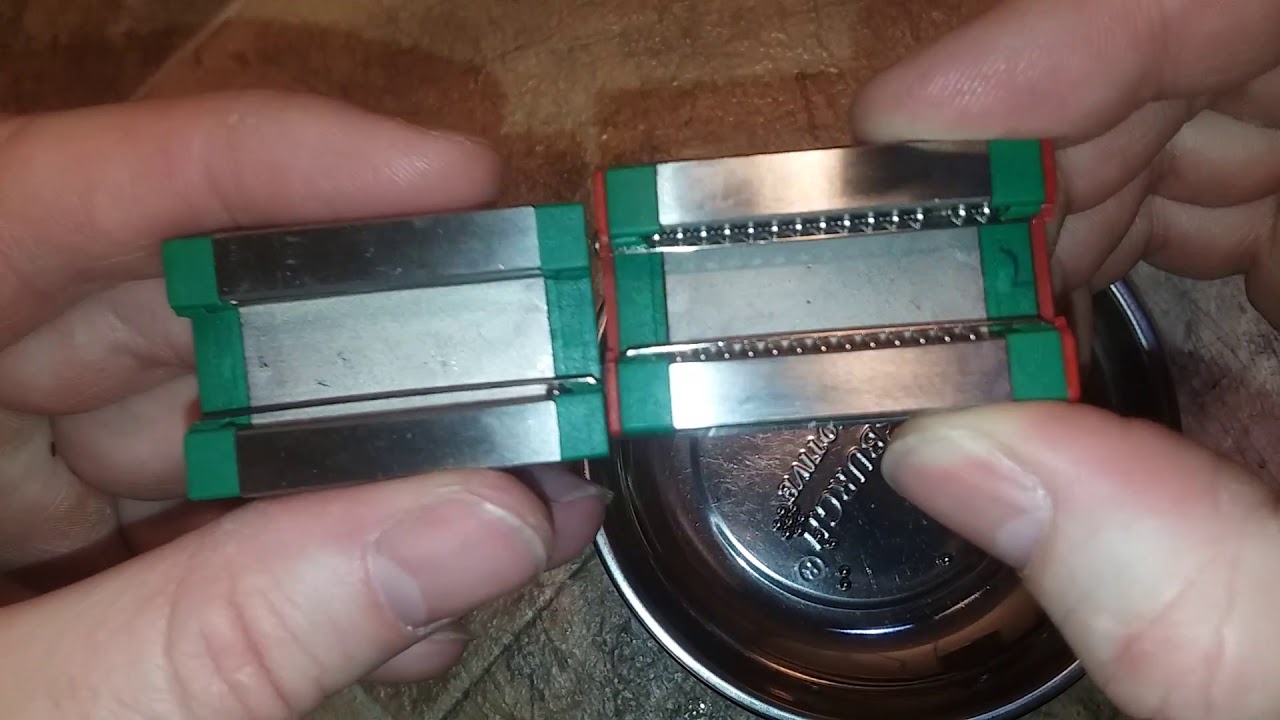
Cheap linear bearings to upgrade my 3D printer to the BLV Mod
AND NO! NO WD40 WAS NOT USED ON THE BEARINGS!!!
Replacement bearings
3/32" Inch Chrome Steel Bearing Balls G25
https://goo.gl/FTEvtH
Linear Guide MGN12H Bearings
https://www.aliexpress.com/item/12mm-Linear-Guide...
Note, no wd40 or grease.
blissful marlin
Yeah I disassembled it all now and pit it in 99% alcohol
Then maybe 5-10 min later I will assemble it again and use a Q-tip to put the grease on the balls
I guess?
formal relic
@ornate raven it is a good idea to clean, but because we already talk about it, and @blissful marlin got compatible grease, it will be fine just to add the new one
blissful marlin
just want to make sure there is no small dirt in there
formal relic
I'm using a syringe for that
ornate raven
Sure. Their bearings. I'm just a fan of using the right tool for the job, not the available tool.
formal relic
Make sure you don't leave any lint
hushed lotus
Recently, i printed a lego piece. i noticed that there was a protrusion that kept it from working. assuming that it was a support, i tried to pop it off, but it wouldn't budge. i went into cura and noticed that although it wasn't present on the stl (when viewed with cura) after slicing it and looking at preview it added another section to the print. even when turning supports off, it is still there. does anyone know what is happening?
formal relic
@hushed lotus it is very tricky to print them reliably
formal relic
@hushed lotus This "thing" on the bottom is the brim.
hushed lotus
no the triangular protrusion within the hole.
formal relic
can you post the original model.
karmic brook
I'm guessing there are errors in the 3D model
karmic brook
That model is full of errors...
hushed lotus
huh
formal relic
If you have dimensions I can make it in few minutes in solidworks and send you the STL file.
karmic brook
The 3D render here looks even worse, with the peg floating in midair
I would totally suggest accepting pink_vampire's offer to build a working model for you.
formal relic
here I'm getting the same issue in cure
hushed lotus
oh nvm
it fully printed and i filed out the hole
lol
i'm not printing this again so I'm not going to put too much effort into this
formal relic
@hushed lotus I'm re drawing it for you.