#help-with-3dprinting
1 messages · Page 32 of 1
 brave mica
brave mica
brave mica
@karmic brook ya, I don't have a big boy microscope yet so mine is one of the thin silver tube endoscope types
ooh, thanks @edgy steeple
 karmic brook
The $17 one I linked to is hardly a "big boy microscope", it's essentially the same one Radio Snack used to sell for $10, with a base added.
What you're describing is a "taper gauge", which is a handy tool you can buy. However, you can make your own out of something like a clarinet reed and some calipers. Just mark lines on it for the distances you care about.
brave mica
ah sorry, I wasn't clear. I meant to say that my microscope I use for board inspection is on the smaller size; planning on getting a trifocal amscope eventually
taper gauge; interesting. I was planing on "borrowing" my dad's feeler gauges
karmic brook
YUCHENGTECH Taper Gauge Gap Gage Welding Wedge Feeler Gauge Gap Feeler Wedge Gauge 0.2-4mm
brave mica
ooh, those are nice
 edgy steeple
@brave mica how is the bed of your CR10 V2? mine is not super flat.. it's not terrible.. but the paper under the nozzle test is very frustrating
brave mica
@edgy steeple not great; what is the thing that holds the bed and has the leveling screws called? Mine came bent so one front corner is nearly maxed out and the other nearly loose
edgy steeple
Have you used Octoprint?
 bright flare
There's an octoprint plugin for probe visualization.
edgy steeple
that has a bed visualizer in it as a add-on/module
brave mica
oh! sweet; yes, I have mine all set up with a 7" touch screen and case/mount
edgy steeple
lol @bright flare , exactly what he said
brave mica
awesome, I'll grab that. Thanks @edgy steeple, @karmic brook , @bright flare and @molten sandal . Gotta get back to work
edgy steeple
I'm running OctoPi on a RPB3.. it's pretty nice
bright flare
I think every printer company calls the 'bed holder" something different, I remember the one on my Anet A8 being called the "H plate"
karmic brook
I tend to think of it as a "carriage"
edgy steeple
seeya @brave mica
bright flare
Y Carriage Plate
edgy steeple
@brave mica I just checked my extruder accuracyand I am off by 18%.. I extruded 100mm and had 18mm left when it stopped. You may want to check yours as well
brave mica
@edgy steeple ya, given the less-than-loved state that mine arrived in, I'm probably going to go through it with a fine tooth comb. I'm going to start with flattening out the probably-called-a-carriage, then check belts, lubrication, squareness of axes, bearing tightness, etc. If you know of a good resource for info on this type of tune up, I'd love to hear it. I'm probably going to start a calibration print. Again if you know of a good one, please share
edgy steeple
thereareabunch of vidson how to change your e step on extruder
brave mica
ok, thanks
brave mica
That quality troubleshooting link you shared is exactly the type of thing I'm looking for. If you have any other similarly amazing links, I'm all ears
edgy steeple
🙂
brave mica
Thank you; enjoy your 🌮
 violet needleBOT
Adafruit Industries posted Fusion 360 Tutorial – Snap Fit Cylinders and Spheres #3DPrinting

Hey folks! In this tutorial we'll take a look creating snap fit features for spherical and cylindrical shapes.
Snap Fit Ornament
https://www.thingiverse.com/thing:4020867
Jumbo Snap Fit Ornament
https://www.thingiverse.com/thing:4065660
I'm on twitter / instagram @ecken
V...
 faint comet
That's what my prints look like
karmic brook
That's a cool effect, but possibly not what you were hoping for.
violet needleBOT
Adafruit Industries posted Tesla CyberQuad ATV @adafruit #adafruit

Every week we'll 3D print designs from the community and showcase slicer settings, use cases and of course, Time-lapses!
TESLA Cyberquad ATV
Iwatobi
https://www.thingiverse.com/thing:4071079
CR10S Pro
Silk Silver PLA
7hrs 55mins
X:193 Y:180 Z:49mm
.2mm layer / .4mm nozzle
8%...
faint comet
Re duse layer height
violet needleBOT
Adafruit Industries posted Retro Case for PyPortals

These cases are designed for the new line of PyPortals. The PyPortal original, PyPortal Titano and PyPortal Pynt. It’s like a mini desktop PC that you can have on your desk and display all sorts of data. The ports are accessible on the side and there’s even a spot to hold...
edgy steeple
@supple stratus @idle crest could you guys start to name the filament you are using for projects and maybe link to them? LOVE that Mac case.. totally doing that project, now to just figure out what pyportal I want 🙂
 ornate raven
Hey folks, been readin back about setting bed to hot end. I got tired of paper and went to a local big box hardware store and picked up a cheap feeler gage set. I already had a dial indicator so I printed a holder for it. I checked my bed hot and cold to determine the terrain. I also looked at it without the magnetic flexi pad. My bed looks like the rolling plains, mostly flat with dips and rises all over. Gets worse when heated (as expected due to expansion) and the flexi bed does not help smooth things out. Just changes where and how bad the hills and valleys are. I use the feeler gages because I try different first layers depending on nozzle diameter. I don't have any form of auto leveling. I feel my first layer has improved significantly since abandoning the paper and going with the gages.
ornate raven
I ought to try a glass bed. But, what I keep seeing is that the ones with coating, don't last long and store bought glass has warping issues.
My biggest issue is simply the uneven bed heating. I don't have a thermal camera but I do have one of those point and shoot deal. It shows that my bed is not even close to evenly heated or close to the setpoint. Well it's kinda close, not like runaway or not heating. Just really variable. I think I'm gonna try some insolation on the bed.
karmic brook
Or perhaps a heat spreader?
 empty sedge
we used plain window glass because hackerspace members kept breaking the good glass
what is your printer with a non-flat bed?
 vagrant drum
anyone try out Prusa Slic3r's alpha color band feature?

PrusaSlicer 2.2.0 alpha 2 - The Color Print newly supports generating color bands at regular intervals with the MMU (¬‿¬)
Try it here ⤵️
https://t.co/zsL6xQciG4
Likes
111

 Twitter
edgy steeple
Twitter
edgy steeple
In Cura if you want to change filaments during a print.. and use "pause at height" post processing->layer.. and select layer 21.. does it pause before or after printing layer 21? 🙂
 sour ivy
I’m using a makerbot replicator mini + and when I try to print an object the filament starts to warp. Anyone know why?
karmic brook
ABS? No enclosure?
ornate raven
@empty sedge Ender 3 Pro.
empty sedge
are the rollers round? do they have the correct tension?
 small heron
@faint comet did you work out your issue?
 formal lark
do you think i could make a chess board with a raspberry pi inside of it that can play chess and move pieces like an engine would
karmic brook
Yeah, a little complicated, but should be doable.
faint comet
No
small heron
how would you want to move them?
@formal lark ^
I think a pi could run a basic chess program
formal lark
Idk maybe magnet?
 stark night
@formal lark
maybe this might give you a few iseas as to how to move the pieces?

Square Off - the app-connected computer chess board that moves its own pieces.
Manufacturers Website https://squareoffnow.com
Affiliated Amazon Links US: https://amzn.to/2NXASKW
Amazon UK: https://amzn.to/2Nbim26
Amazon DE: https://amzn.to/32BlgRg
FAQs
WHAT'S INSIDE THE B...
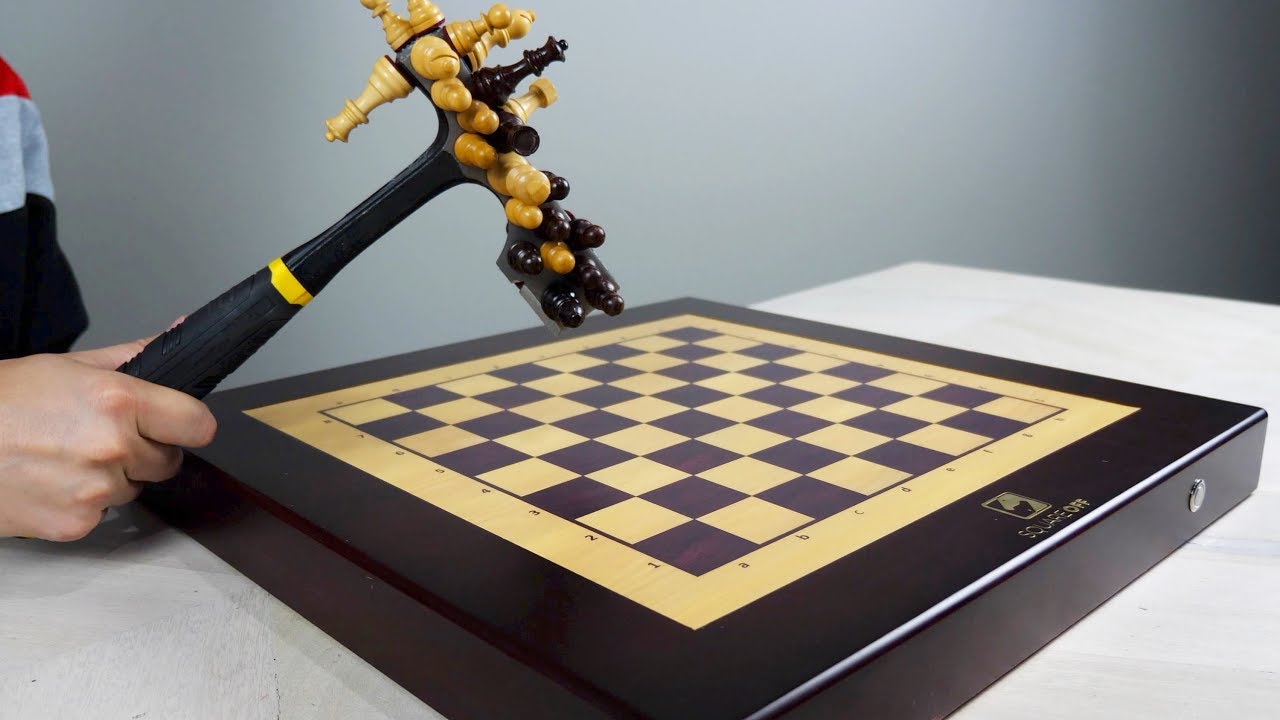
You've never seen a chess board like this - It plays against you! We have to figure out how this thing works!
Thanks to Square Off for the awesome chess board! Get your own and challenge friends across the globe online at: https://squareoffnow.com and use the code: MAGICCHES...
 boreal lava
@formal lark Could you simplify it so that an LED blinks telling you which piece to move where on an opponent's turn?
formal lark
how could I do that?
wouldnt i need some sort of sensor in each piece?
@boreal lava
boreal lava
I would assume you have sensors for location. So, say you have a sort of square ring made of white material with an RGB LED. Now, the square lights up indicating the piece to be moved, and you have a small basic LED that lights up indicating the destination.
I dunno....I'm just sort of sussing it out in my head
So, build it with boxes and acrylic sheets, and it will signal moves. Not auto movement, but as a chess enthusiast, it could work @formal lark
formal lark
can i put sensors in pieces
would that work
like some sort of wireless sensor that would indicate where the piece is on the board
that would be small enough to fit in a piece
boreal lava
Well yeah, you either need to track moves, and know where things are, or have each giving a signal.
karmic brook
Yes, you can use something like RFID tags to identify each piece, or just magnets so it knows "a piece is here", and keeps track of them programmatically.
boreal lava
Using RFID tags, you are at least at a $200 chess board. Tracking moves programmatically is probably a better idea.
use $0.05 hall effect sensors to monitor placement, and set the software to track moves.
karmic brook
Tags are cheap enough, but 64 RFID receivers would get pretty expensive. However, you could probably get away with just using one receiver for the whole board.
 spiral laurel
you aren't going to have multiple pieces "in the air" at any given time, so you should only need to know which was the last piece removed from the board to know which piece was placed back down....assuming nobody cheats
brave mica
heya @edgy steeple @karmic brook either of you have any issues with warping? While I may still have some ahesion issues, I definitely have some warping issues despite having a heated bed. 🤷♀️
karmic brook
I've had a few warping issues, but minor ones. So far, I've only printed with PLA, I suspect I'd have more problems with other materials.
brave mica
same here which is why I'm a bit baffled
It has been a bit cold but it's not like I'm wearing a jacket indoors
empty sedge
is there a breeze blowing across your printer @brave mica ?
brave mica
@empty sedge no, not to my knowledge. It's in a closet next to my desk that I removed the doors from. There is a window on the other side of the room, but I don't often have it open during the winter
I had a good test print of a set of 16 test cubes with excellent adhesion and no warping, but I suspect they're not big enough to be a good comparison to the previous failure.
ornate raven
@brave mica I have Ender 3 Pro. Items in the center of the bed print quite reliably. However, as I range out I get warping issues. I'm confident though that it has to do with uneven bed heating.
karmic brook
It would be quick to check with a thermal camera, but you could do it with an ordinary temperature probe or IR thermometer. However, it might not be uneven heating, it could be that larger prints are more affected by shrinkage.
ornate raven
I have a point and shoot thermometer but I wish I had a camera. But oh well. Do what I can with what I have. I've mapped out the bed and there are 5 degree C differences (low) in a couple of spots mostly along one edge. I made and installed a parts cooling fan nozzle that helped some all around but it didn't affect the bed temperature. I still mess around with different temperature and fan values. Some work, some don't. Mostly I just avoid printing in the cooler side.
karmic brook
That's pretty solid evidence for your "uneven bed heating" hypothesis.
ornate raven
I've seen prints that look great until I get about a centimeter high and then suddenly separation at the bed and then the curling starts.
@karmic brook do YOU think getting the parts (say from Adafruit) to build my own little thermal imager would be a good idea. I'm mostly concerned that the resolution wouldn't be sufficient to nail down a particular area. I'd kinda like to see what's happening during the entire print process.
brave mica
@ornate raven @karmic brook thanks for the tips and ideas; I think I'm going to attach my MLX90640 to my print head and write some g-code to take images of the bed.
You could also use the AMG8833/Grideye ($40)
https://www.adafruit.com/product/3538
but the $20 cost increase to the MLX90640 ($60) is totally worth it for 12 times the pixels and 3+ times the resolution:
https://www.adafruit.com/product/4407
Add heat-vision to your project and with an Adafruit AMG8833 Grid-EYE Breakout! This sensor from Panasonic is an 8x8 array of IR thermal sensors. When connected to your microcontroller (or ...

You can now add affordable heat-vision to your project and with an Adafruit MLX90640 Thermal Camera Breakout. This sensor contains a 24x32 array of IR thermal sensors. When connected to your ...
In the meawhile I'll do some spot tests with my non-contact IR therometer
karmic brook
I suspect even a low resolution imager would be useful for things like printer beds. More resolution comes in handy for tracing stuff like individual circuit components. But that's just guesswork on my part, I haven't played with longwave IR imagers myself (although I'd like to).
brave mica
oh yea, the mlx is complete overkill for this. You could probably map the whole bed with a single temp sensor
 sharp crown
The librarian at our school is looking into a 3d printer. She needs something with a decent sized printing bed, speed, and ability to use a variety of materials. Must be robust. Nothing too expensive. Any ideas?
brave mica
heck, you could probably do it pretty quickly with the right software
i do not need a new project
I wonder what kinda of GPIO is on the CR10's board
NO!
smacks self with list of open projects
empty sedge
@sharp crown so reliability isn't important?
karmic brook
I suppose you could swap out the controller for an EiBot board and use the other GPIO ... NO! Or use the existing controller to just do a grid and pause, and a wireless controller powered by the hotend fan with an accelerometer to detect when it's paused ... NO!
empty sedge
@sharp crown Prusa i3 mk3s has been the most reliable and repeatable printer yet for my hackerspace
karmic brook
The Prusa is in a sweet spot by itself on the cost/capability spectrum, especially if you buy the kit version on sale.
empty sedge
I'm sure there's other people that would say stuff like "get a cr-10" but that's more of a project than a workhorse. if you want to print stuff well, over and over, without having to tweak things the prusa will do you a lot better
on the cr10 or other similar machines you can get good results but you'll have to take your time to level the bed, adjust the wheel tension and maybe tweak your printer profiles. the prusa slicer presets have worked very well for me without tweaking on the prusa
ornate raven
Thanks @brave mica and @karmic brook for the tips. I guess it's time to start another project😊
I have no doubt that the Prusa printers are very good. They are just too pricey for me.
brave mica
@sharp crown I would agree with the Prusa recommendation and the CR10 anti-recommendation. I would recommend making it clear to her that common 3D printers are, despite marketing and enthusiast hype, not a consumer product. They are tools that take training an experience to use, no different than a lathe or tattoo gun. Some will likely disagree but except MAYBE for the top dollar "high end" models they are not plug and play
 green timber
Pyportal Retro cases .. I see in the notes on the learn guide it says the “arm grips” need to be printed in TPU flexible material
I am not familiar with TPU..... I was hoping to send it off to “Thingsverse” —> “Pint A Thing” for a paid print
Will I run into tons of trouble printing all the parts in PLA?
brave mica
@green timber if the creator of the part says something is needed to be printed a certain way, it probably is
green timber
Anyone know a TPU service then?
ornate raven
@green timber I am in the middle of printing the case for the Titano. I'm printing all in PLA. I'll let you know if it works out.
green timber
Ahhhh very nice.. TY!!!
ornate raven
"The Adventures of Duewester and the Inconsistent bed Temperature" Chapter 2 When last we left our hero he was dealing with warping when printing large prints on his Ender 3 Pro. Frustrated, Duewester mapped the bed temperature and found that the bed was not heating evenly at the desired temperature of 80 degrees (C). Temperatures in some area dropped as low as 70 C. Wondering if he was asking too much of the heater controller, Duewester dropped the bed temperature to 65 C and mapped it again. The new map revealed much more consistent temperatures. However, Duewester was dubious of print adhesion to the bed at this temperature but decided to try a few prints in different PLA filaments. Red PLA+ was a success. Duewester was giddy and decided to try some Hatchbox Black PLA. To be continued...
formal lark
Can i get octoprint on a dragonboard 410c?
like just follow same steps as i would if i were using raspberry pi
 shy kelp
Will the Dragonboard run raspbian?
brave mica
@formal lark how familiar with linux are you?
@ornate raven what led you to print PLA at 80? I've seen recommendations in the 60 +/- 5 range
formal lark
Not really familiar @brave mica
 charred acorn
I’m very new to 3D printing, but have been running into an issue that I can’t quite figure out the cause of. Technically two, but they may be related. Printing with ABS and following a recommended config for temps and the like.
When I print objects that tend to be a bit thicker, they are bowing or squishing down on the build. In this case, it's supposed to be round, but it's sagged on the bottom edge of the print.
I’m also seeing some prints that just start to go stringy, but not in a way that would make me think it’s over temp.
I've tried to level and clean multiple times, and have tweaked the temps, but it seems like certain things just keep failing on me.
Would love any help or advice on what to look at for the problems
ornate raven
@brave mica I started on a roll of PLA+ that has higher melt temperature. At 65 it wouldn't stick to the bed under ant circumstance. I found through gradual increase in bed temp, it would stick at 85. The down side became that even then large objects and tall objects would separate (and warp) on one corner and the same side.I think I had two issues. 1 - asking the controller to heat the bed too high. 2 - the PLA+. I finally used up the PLA+ and have switched back to the Hatchbox Black PLA with lower melt temp. So far, I have printed an enclosure for a Pyportal Titano. Everything went very good. The last print of PLA+ even stuck to the bed at 65.
brave mica
ah, ok
any Cura wizards know what setting to tweak to keep this from happening? As far as I can tell it's seeing the 5mm or so deep overhang in the letters as needing support (they don't, it worked fine without it on a previous attempt):
ornate raven
@green timber I finished my Titano case in all PLA. Works very well. The walls of the case are flexible enough to snap and release the face and screen so, if you wanted to print it all in PLA I think it would work well.
@brave mica Maybe change the angle of areas that need support. Or rotate the object to a different plane for printing
brave mica
@charred acorn This isn't answering your question, but have you given PLA a try? I'm struggling to think of situations where ABS would be preferable. I'm probably missing something but I was previously looking at ABS for strength and in my very limited experience, PLA can be very strong
green timber
@ornate raven awesome .. thanks so much for checking and then letting me know
ornate raven
The Titano Case
green timber
Nice 👌
ornate raven
Thanks
charred acorn
@brave mica I haven't tried it yet... I started with ABS because it was what I had the setup for. I do have some PLA, but need to reconfigure my configs to work with it.
I was also under the impression that it needed some more cooling to set and work properly, and my printer doesn't have that currently.
brave mica
My understanding is that ABS is one of the trickier materials to work with and is very sensitive to temperature shifts from small drafts, etc. It might be worth getting a small spool to give a try
karmic brook
I've just used PLA so far, I've looked at other materials, PETG looks attractive. I'm not really eager to fight with ABS.
charred acorn
ABS is supposed to be more heat resistant, and I live in Texas, so that's a consideration for me at some point... but mostly I've just been using it because it's what I had instructions for.
brave mica
@charred acorn I've been using this for most of my prints so far and it's pretty dang strong. They claim super duper thermal stability if heat treated as well (the HT in HTPLA):
https://www.proto-pasta.com/collections/premium-htpla-v3/products/premium-htpla-v3-black

ProtoPlant, makers of Proto-pasta
3D Printing evolved: Stronger & more durable for beautiful, functional prints with engineering-grade performance! Not your everyday PLA, HTPLA v3 offers the ease of PLA printing with such exceptional quality, compatibility, reliability, durability, performance, and finish t...
and you can get a 50g coil for $3.50
 devout pewter
@charred acorn, you may want to look into ASA. It's supposed to be heat resistant as well and not prone to as many of the difficulties as ABS.
edgy steeple
@brave mica No I have not had warping issues. Do you print with a brim? or do you use skirt, or raft, or nothing. Try using a Brim as that may be enough to help with the warping. I printed the "Easy infinity cube" which is my biggest/longest print yet.. like 8-9 inches tall and 14 hours. I used Pure Black PLA from 3d solutech
It's what @supple stratus and @idle crest showed on their last show as being what they are working on for this week. I am so excited I am giddy. 🙂 #IsItWednesdayYet?
I am not happy with the flatness of my bed.. and how leveling changes with temp. I recommend letting the bed get to temp for ten minutes before leveling. I will probably be changing the springs or adding washers to add some more tension to the springs.
what is the bed temp you are using?
@brave mica also what are you using on the bed? I'm using the glass bed that came with it and hairspray on it.
are you using the CHEP magic profiles with Cura?
brave mica
@edgy steeple no, I've ben using a profile Noe gave me. I'm using the stock bed with nothing special on it.
edgy steeple
try some hairspray on the bed.
formal lark
Could I get OctoPi on a Dragonboard (410c)
brave mica
@formal lark it's possible, yes but it won't be easy
@formal lark I take that back; you can get octoprint on a dragonboard, but it won't be easy
octopi is an image specifically meant for the raspberry pi
formal lark
why wont it be easy
is there some tutorial or video I can follow? @brave mica
or do you know of any alternative software I can use with dragonboard to start prints and stuff
brave mica
I think I should rephrase: It will be challenging if you have little experience with linux, but it's certainly doable as the Pi and Dragonboard are both linux machines (or rather they can be). Octopi is a pre-configured OS image with most of the Octoprint setup done for you.
You'll essentially have to setup octoprint on your own.
@formal lark See the "Installing Manually" secction here:
https://octoprint.org/download/

OctoPrint.org
Learn how to setup OctoPrint using the preinstalled OctoPi image for Raspberry Pi, or how to install from source on Windows, Linux and Mac.
and then the Linux section as well
@formal lark looks like we've got a guide as well, but bear in mind it may be out of date in some places
https://learn.adafruit.com/octoprint-open-source-host-software

Adafruit Learning System
Put your printer on the network with open source host software on a Raspberry Pi Model B+
formal lark
Raspbian is only for raspberry pi right?
brave mica
a Debian variant, or plain Debian. You'll want to find dragonboard specific documentation on installing linux. That's your first step, then following the instructions on that download page
formal lark
Ok cool thanks I'll look into it now
brave mica
good luck!
formal lark
thanks
violet needleBOT
Adafruit Industries posted 3D Hangouts – Cubes, Coasters and Spaceships

Learn guide, code and build photos
https://youtu.be/1sDSVTlRim0
https://learn.adafruit.com/neopixel-infinity-cube/
https://github.com/adafruit/Adafruit_Learning_System_Guides/blob/master/ItsyBitsy_Infinity_Cube/code.py
ItsyBitsy nRF52840
https://www.adafruit.com/product/448...
 thin basinBOT
3D Hangouts - 11am ET Wednesdays
Show & Tell - 7:30pm ET Wednesdays
Ask an Engineer - 8pm ET Wednesdays
Desk of Ladyada - Random hacker times
John Park's Workshop - 4pm ET Thursdays
violet needleBOT
Adafruit Industries posted ASK an ENGINEER 1/15/20 LIVE! #AskAnEngineer #electronics #adafruit

 spark crane
I just got a Monoprice Select Mini v2, and while I really like the results, it is too loud for my home office; for one, the case fan doesn't seem to be controlled properly, as it comes on with full speed after a while but won't step down again, even after the print is finished. The second thing is the motors. How much would I benefit from a new board and drivers? I saw a video where frank converted a mini using a MKS GEN-L board with TMC2100 drivers. But why this board and those steppers? what other (budget) boards are available? Would I benefit from different drivers, e.g. the TMC2209, which have features like CoolStep and StallGuard, which sound nice. But would actually benefit from them?
Any hints or pointers to sources where I can read up on that stuff would be appreciated.
karmic brook
You may be able to control the fan speed in GCode (or you may not, depending on how it works)
spark crane
@karmic brook according to the web, the case fan is not controllable. it starts at 55°C but here at least it never to stops. After a power cycle the case fan is quiet again, which leads me to believe that this is a fw bug.
karmic brook
Sounds like it, yes. Maybe there's other firmware out there (or a completely different CPU)
spark crane
the fw is closed, so no alternative FW exists.
Well, but I suppose this could be tackled by replacing the board, which I would have to do for silent steppers anyway 😉
empty sedge
marlin 2.0 could be put on the select mini v1. what's different on the v2?
shy kelp
I'm listening to myself say 'dont use closed firmware' and I just spent 80 bux on a RGB matrix that has .. closed firmware. /donk
karmic brook
My favourite board (Einsy Rambo with Marlin FW) is, alas, not a budget option.
I've heard tell of $12 Ramps clones, but I don't know where to find one or how well it actually works.
empty sedge

GitHub
Optimized firmware for RepRap 3D printers based on the Arduino platform. - MarlinFirmware/Marlin
spark crane
As I want new drivers anyway, I really don't want to spend too much time and energy on the original board and its software.
empty sedge
you won't be able to easily connect the existing LCD to a different control board
@karmic brook I've used cheap ramps and they worked fine at 12V, but for $12 you aren't getting any stepper drivers
karmic brook
All good points.
spark crane
well, I just get another w/ touch, so that's no issue. Controlling the printer with OctoPrint anyway, I really don't care about the printer's screen.
violet needleBOT
Adafruit Industries posted LED Infinity Cube @adafruit #3dprinting

Infinity Cube with NeoPixels. Panels reflect the light inside the cube creating a really cool tunnel effect. Bluetooth allows you to trigger different LED animations! Guide: learn.adafruit.com/neopixel-infinity-cube
Code on GitHub
https://github.com/adafruit/Adafruit_Learni...
sour ivy
I’m using a makerbot replicator mini + and when I try to print an object the print starts to warp. Anyone know why?
shy kelp
Warp is caused by a bed that is not sticky enough (for PLA, PETG) or underheated (for ABS...)
You should try to put some glue on the platform or BuildTack
 molten sandal
@spark crane I did a conversion from a melzi to the mks gen-l, then to an skr v1.1, and finally now a v1.3
The newer boards are fantastic across the board better boards than stock that offer more peripheral support like bltouch and plug and play drivers
Then tmc2209 is the hot favorite now (stallguard is cool but gimmicky), and the 2208 the tried and tested option
The 2130 is trickier to deal with and the 2209 is basically an improved version of 2130+2208
The bigger benefit is still the 32 bit board that would allow you to use marlin 2.0 in all its Glory vs only condensed variants that the 8 bit board manufacturers ship out with
You can control extruder fans in marlin to only turn on when heated (above a preset threshold)
As for case fans.... It's just better you change it to a noctua if within budget
I removed my psu fan and left everything out in the open without a case 😂
But yeah a lot of time and energy went into this, you need to be adequately familiar with how to flash firmware and work around code editors. I meant it to be a learning experience and you'll get a much, much quieter printer and finer control at the end of the build
I spent probably about $80, but probably a lot more time on figuring it all out
Hit me up if you need any learning resources or have any questions
 fluid ridge
Thoughts on best way to glue PLA components together? 6600? CA? Epoxy?
karmic brook
You can use methylene chloride as a fusion solvent.
Ordinary PVC cement or epoxy also works well.
fluid ridge
Sweet! Thank you!
(There's a 3 ft 9 in USS Missouri model. Dog knows how long that print will take. 🙂 )
karmic brook
One hint if you can modify the model is to make filament-sized holes in the individual pieces and then glue bits of filament into the holes to act as both alignment pegs and increased surface area for adhesion. Apparently they're known as "stabbing guides": https://softsolder.com/2015/10/27/stabbing-guides/
He specifies steel plate and welding instructions
fluid ridge
Oh, that's pretty cool! It shouldn't be a problem to modify the files....
Also, I set up a Raspberry Pi with motion so I can work at my desk (in another room entirely) and still watch through the browser to make sure my extruder isn't eating itself again. 😉
karmic brook
Being able to keep an eye on it is useful. I'm tempted to add a webcam (and IR illuminator) to mine so I can watch it while I'm not in the same room.
fluid ridge
After my bad experience (dozed off, extruder packed itself with PLA), I want to be able to watch it. I don't want to just sit there and stare at the printer for hours, though. The camera is a good compromise. You can also configure motion and watch the stream through a web browser, which is super-handy.
As for IR, I just leave the light on. 😉
shy kelp
I use Octopi on a Pi 3A+ and a picam, and octopi.local from any PC, phone or tablet on my guest network to monitor my prints.
 hidden sable
The other thing I like about Octopi with a camera, is that you can timelapse prints, and see exactly where it went wrong (if you doze off)...there seems to be a plugin that improves the timelapse, so that it will only take photos when the extruder is out of the way
boreal lava
octolapse, I think it is called. You can set where you want the hot end to move to so that it is out of the way between layer changes when the pic is taken. It looks really cool, but can also dramatically increase the print time in due to the extra moves.
hidden sable
ah - that was my first thought when I saw that...
maybe it's something that would be worthwhile when I'm doing repetitions of the same print, so I can just do one timelapsed, as a smaller percentage of the overall time
 novel gazelle
Looking at the Brunel hand in Blender. Anyone able to tell me what these are?
karmic brook
Fingers?
 lilac sparrow
Anyone here feel like redesigning the faceplate for this: https://learn.adafruit.com/hallowing-mac/3d-printing to fit this instead? https://www.adafruit.com/product/3625


Easy e-paper finally comes to microcontrollers, with this breakout that's designed to make it a breeze to add a tri-color eInk display. Chances are you've seen one of those ...
boreal lava
shouldn't be hard. Load it into inkscape, and make dxf file, then put it into fusion....should be easy wnough
karmic brook
One approach would be to use some 2D-to-heightmap software if you wanted it as a relief (Cura has this built in, and I have a little Python program that turns an image into an STL). However, perhaps you wanted to print a robotic hand that can perform these gestures? That's possible, but much more involved.
 hearty tree
@karmic brook Robotic hand....
You!
Ugh, now I wanna do it.
I'll still print it though.
shy kelp
@novel gazelle Looks like an edit process where they didn't erase everything (in lowest third of the drawing) but otherwise meant to (the author is filtering that part of the drawing out, in their mind, as they know what it is supposed to look like -- but doesn't, yet. ;)
aka 'fingers' is a good answer (ignoring the geometric figures entirely)
fluid ridge
QQ. What is the correct calculation for translating "desired hole size" to "deisgn hole size"? I wrote an object in SCAD and specified a cylinder radius of 1.25mm, shooting for an M2.5 bolt. Not even close. I finally used a radius of 2.1mm and the bolt is a little loose, so 2.0 is probably right. Is there a way to calculate the correct design hole size so you end up with an M2.5 or M3 hole when you print? (Prusa i3 Mk3, PLA)
shy kelp
@fluid ridge The old paper reference was called 'Machinery's Handbook' iirc.
Probably this one:
https://www.amazon.com/Machinerys-Handbook-29th-Erik-Oberg/dp/083112900X
fluid ridge
Thanks!!!
karmic brook
Ed Nisely's blog softsolder.com has some verbiage on "hole windage" which could be helpful
 knotty laurel
Yep, looks like 2.05mm is standard there. http://www.carbidedepot.com/formulas-tap-metric.htm
Tap Chart Metric Threads
hearty tree
Can anyone help me get thos ready for 3D printing? My laptop broke. ;(
hearty tree
Lemme find one.
I didn't realize the water mark ooof.
Nope..
Sorry for ping....
Can it have a website at the bottom?
empty sedge
up to you
empty sedge
no
karmic brook
Like this?
karmic brook
I wrote a lithophane program a couple of months ago, so I just ran it through that.

GitLab
Generate STL file from an image for printing/engraving lithophanes, reliefs, etc.
hearty tree
Thank you very much.
karmic brook
For reference, this is the command I used: ```
mklithophane.py -s .25 -t 2 -z 2 -i -m ASL-alphabet-small-23v5wom.jpg
The -s (scale) option shrinks it by a factor of 4 so it will fit on my printer. The -t (thickness) of 2 (millimeters) sets the thickness of the background/base. The -z (z-axis) of 2 makes the raised part 2 millimeters high, the -i (invert) option makes darker higher, and -m (mirror) fixed the reversed image.
empty sedge
my results aren't good but I'm not using lithopane program
karmic brook
You are, however, using the same slicer 🙂
Some slicers (like Cura) have it built in.
hearty tree
I use cura even though I have a prusa.
I haven't used my prusa yet.
Thank you everyone.
That have helped me.
How did you two learn to model? And everything else that modeling has to do with?
karmic brook
I learned about OpenSCAD from Ed Nisely's blog at softsolder.com
hearty tree
I see.
karmic brook
I also took technical drawing in high school, which was a help, and learned machining while working as a tech, which has also been useful.
I wrote the lithophane program because all of the existing offerings wouldn't do what I wanted, so I rolled my own.
I used it to make this image of one of the cats here
hearty tree
That's pretty amazing.
karmic brook
I then realized I could (ab)use the same code to make cookie cutters
hearty tree
I hope to have your set of skills one day.
karmic brook
You seem to be on the right track, I just have a head start
hearty tree
Okay, I need to those make cookie cutters. My grandmother would love them.
shy kelp
E
hearty tree
How do I make them. Because I'm gonna be honest idk what I'm doing....
shy kelp
That’s what you have me for 😎
hearty tree
Well you and everyone here on adafruit.
I regret buying my Prusa.
That and my CR-10.
I bought those and have a Ender 3 pro but I don't know what I'm doing.
karmic brook
For the cookie cutter, I used an "edge detect" algorithm in an image program, then selected the line, expanded the selection, then filled it with a medium grey.
Then I ran it through the lithophane program and changed the base thickness to something small like 0.1mm, then told the slicer to omit the bottom couple of layers and violà!
shy kelp
I would have ended up doing it way harder lol
karmic brook
Someone wanted it for a ceramics class (apparently cookie cutters work fine with clay) so I dashed it out quickly with the tools I already had available. Perhaps not an ideal approach, but I got away with it.
hearty tree
Once I'm back home I'll try it.
If you do don't mind me asking, what do you do for a living, Madboger?
karmic brook
I was a programmer for a while, then I got laid off and did freelance hardware design, but I missed having a regular paycheck and eventually went back to programming.
hearty tree
Ah, I see.
I thought'd you would be a designer of some sort. But you seem to code amd program often, so it makes sense.
karmic brook
I'm a wannabee designer (for example, this T-shirt I designed and had printed)
hearty tree
You are good at it.
I like how I spend a lot if time trying to model and engineer stuff also do electrical engineering when I want to be a chemist.
It's all fun and great.
karmic brook
I'm like that too, I find the different areas keep my brain nimble and cross-pollinate ideas in unexpected and useful ways.
 inland sage
I'm new. probably on my 50-75th print. I'm printing with a Prusa Mk3 and I'm having a big issue with prints ending up with tons of strings. It seems like the filament just continuously dribbles out during warmup and almost always leaves a string when the extruder moves between points. Any suggestions on how to deal with this issue?
empty sedge
could your hotend be assembled wrong? such as the heater block is directly against the heatsink or the nozzle is flush with the heater block instead of sealing against the heat break?
or you have something else conducting heat from the heater block to the heatsink
or maybe you don't have thermal grease between the heatsink and the heat break
anyway I had an issue like that where all retraction settings didn't make a difference that were solved by replacing the entire hotend assembly.
ornate raven
I broke down, my will has collapsed. I'm printing a Benchy.
violet needleBOT
Adafruit Industries posted 3D Hangouts – Mirrors, NeoPixels and Starships
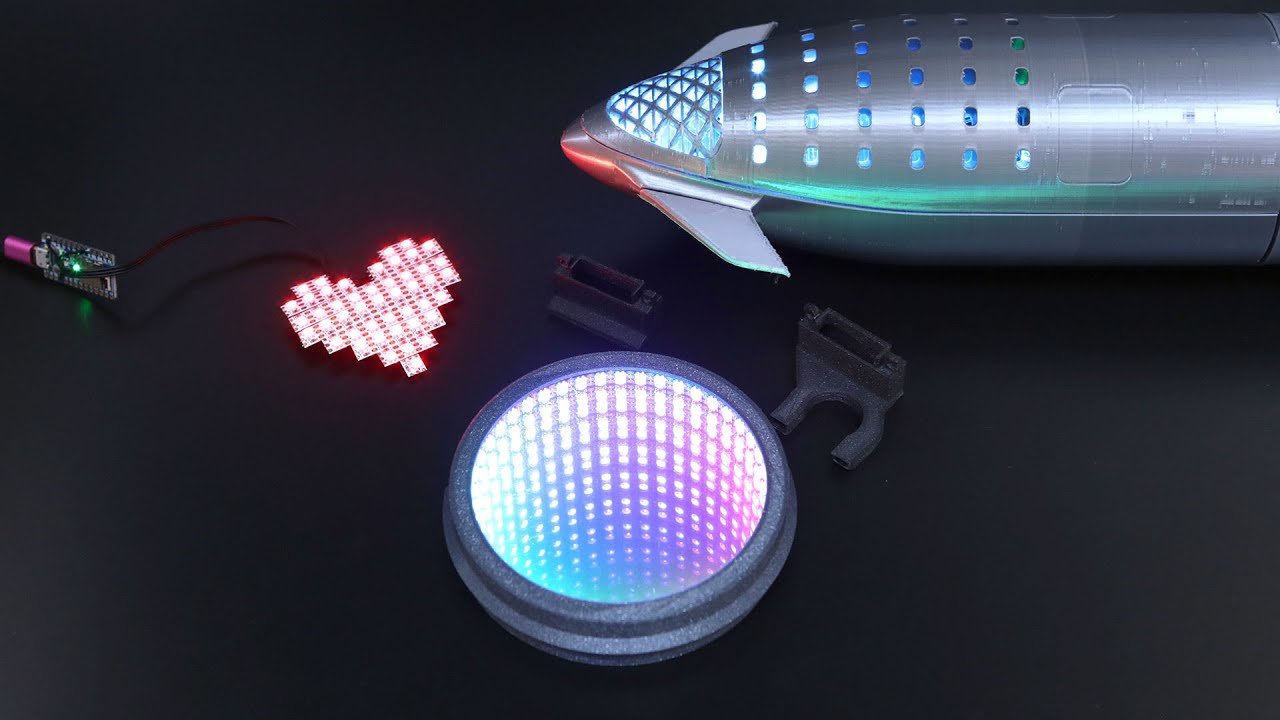
Learn guide, code and build photos and more
https://learn.adafruit.com/infinity-mirror/
https://youtu.be/SFuh2ApT50o
Code on Github
https://github.com/adafruit/Adafruit_Learning_System_Guides/blob/master/ItsyBitsy_Infinity_Mirror/code.py
ItsyBitsy nRF52840
https://www.ad...
shy kelp
Petsfang/petsfang bullseye: Bullseye is for stock fans (needs extra nuts and screws). Both are pretty long standing favourites
Bantamount: Not bad, iirc one or two of the screws should be of increased length than specified for improved stability. Can use a wide variety of fans, for best results I would suggest the 5015 version.
Herome: I'm not a fan of this one, had warping issues, though that may be fixed now. Attachment points for the duct are a bit fragile. Uses stock fans, and stock screws
ornate raven
Benchy done. I suppose I should be able to sleep better now? Two hours and eight minutes from cold start with black PLA that has been hanging on the printer for two weeks. Twenty percent infill with no supports. Very little stringing visible. Bridge on top deck did not sag. Anchor holes are smooth and round. I need to work in Cura about where layers start. Looks like I had a few Centimeters of underextrusion. CT3D. xyz in first layer is good but the text on the stern is only just readable. "Benchy" can be read but the first part is kinda smoothed over but might be 3D. All in all I have to say no worse or better than some of the examples I've seen. At least now, I have a little boat to play with. Toot Toot.
novel gazelle
@shy kelp Just saw you reply from Saturday. I'm still confused as to what you meant.
It's this, print files are at the bottom. https://openbionicslabs.com/shop/brunel-hand

Open Bionics
PLEASE NOTE THE BRUNEL HAND IS BEING DISCONTINUED. PARTS UNAVAILABLE IN THE SHOP WILL NOT BE RESTOCKED. There is a limited amount of Brunel Hands left to purchase. 1 x left hand Files will still remain open source for makers to build themselves. The Brunel Hand 2.0 ...
shy kelp
@novel gazelle I have no idea what we're discussing. I have trouble remembering an hour ago. ;)
novel gazelle
Hahaha. I posted this, wondering what the... things are highlighted.
shy kelp
Right.
My guess was they forgot to erase stuff.
Those geometric 'gems' look like .. embellishment .. establishing a bling claim with no connection with reality. ;)
I would ask them 'just what do you mean by orange gems floating on the fingertips in this graphic?'
Maybe they have a sense of humor and will admit what it is (ad copy, visual, nothing else).
Maybe that's more standard than I know about, and is a symbol that says (to the intiated) 'this thing has n degrees of freedom, and this (gem) represents that, as they both are mathematically <foo> (alike)!'
Maybe it is an orientation marker of some sort. As the thing articulates, so does the 'gem'.
 pallid mirage
reminds me of the MOCAP suits
can it be to align it with real motions capture with a glove, for example ?
shy kelp
.oO( she wore electric boots .. a MOCAP suit .. you know I read it in a magazine ..)
violet needleBOT
Adafruit Industries posted NeoPixel Infinity Mirror
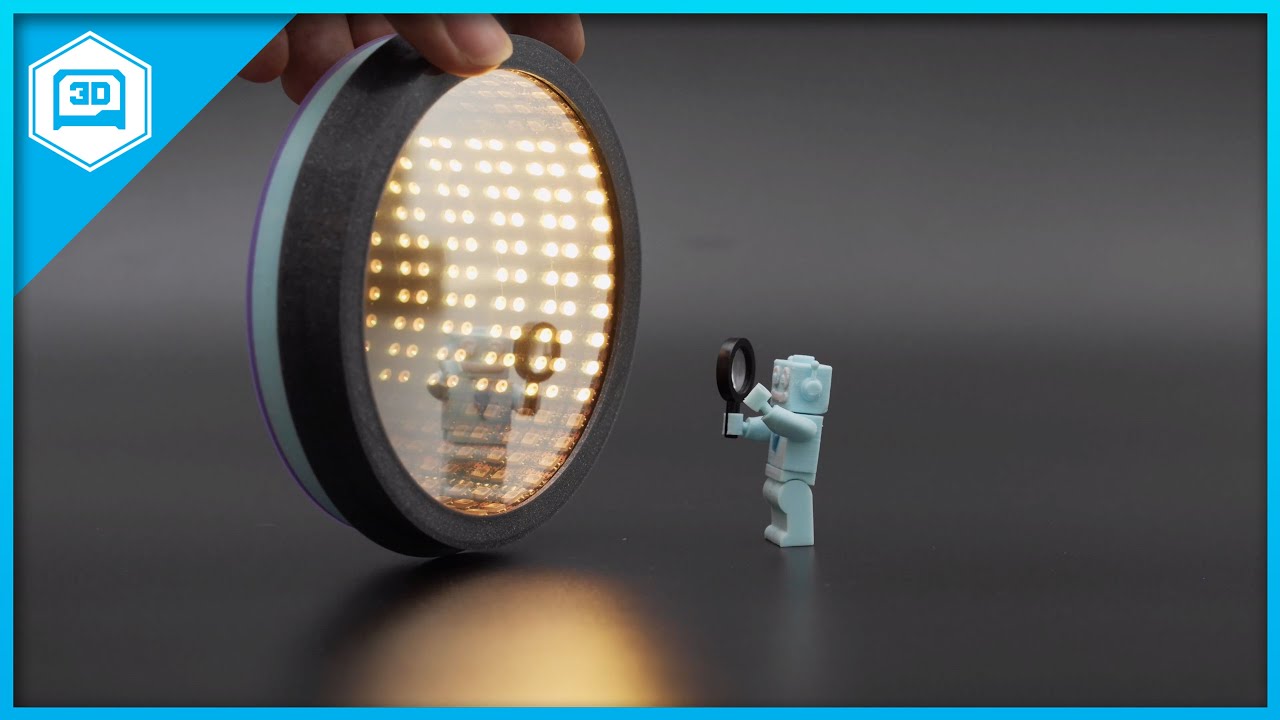
Build a NeoPixel Infinity Mirror with Bluetooth Remote Control! 3D printed parts snap fit together so it's easy to build. Use Circuit Python to code bluetooth hardware and NeoPixel LEDs!
Learn guide, code and build photos and more
https://learn.adafruit.com/infinity-mirror/...
violet needleBOT
Adafruit Industries posted 3D Hangouts – Mirrors, NeoPixels and Starships

Multistreaming with https://restream.io/
Learn guide, code and build photos and more
https://learn.adafruit.com/infinity-mirror/
https://youtu.be/SFuh2ApT50o
Code on Github
https://github.com/adafruit/Adafruit_Learning_System_Guides/blob/master/ItsyBitsy_Infinity_Mirror/...
empty sedge
@novel gazelle They could be custom models to represent the bones or bone handles for the armature
hearty tree
@karmic brook When you did the ASL sign did you make a g code or just put it on your lithopane program?
karmic brook
@hearty tree The lithophane program produced an STL, which I fed to PrusaSlicer to produce GCode.
hearty tree
@karmic brook Okay, thanks I'm going to try to print it since I'm now home from Las Vegas.
karmic brook
What do you want to do with github?
hearty tree
Well, use your Lithophane program.
karmic brook
You can download it straight from the page https://gitlab.com/bodger/lithophane/blob/master/mklithophane.py or ```
git clone git@gitlab.com:bodger/lithophane.git
 glad shuttle
Can someone help with with Marlin 2.0. I have taken the board out of my Davinci Duo and replaced it with a Bigtreetech skr 1.3. I have finally after 3 days seemed to have gotten everything working, now im just trying to get the bed positioning correct. On X, y and Z. I can probably figure out X,Y, but does anyone know a setting inside configuration.h that will allow me to move the Z axis down to the bed when it starts to print?
ok, so nevermind. It would have actually been move the bed up, but because the endstop is there it would not allow it to go up that far, I just took the metal piece that was used for the optical endstops off and it worked. Sorry.
empty sedge
whooo! space's second i3 mk3s
 boreal thunder
Could someone please explain to me the functional differences between the SKR and MKS Gen L controller boards? I'm leaning towards the SKR because it seems to be slightly easier to configure as an upgrade for my CR-10S, but I'm still not wholly clear on the differences. They seem minimal in terms of overall functionality, unless I've missed something. Has anyone else done any controller / stepper upgrades on a Creality machine? How'd it go? Any tips? Thank you. 🙂
For that matter, any practical advantage between the 2208 and 2209 drivers?
Aaaaand I've seen conflicting information about whether it's best to use different drivers on the Z axis and extruder than the X and Y axes, so I'm prepared to take anything said in here as the definitive answer, since y'all have yet to steer me wrong (which I appreciate).
shy kelp
Hi @boreal thunder , I have an Ender 3 Pro. I upgraded my driver board with Creality's new board. There is no noise from the stepper motors at all. Now if I could just get the fans quieted down. I went with OEM equipment because we'll, it's easier.
 clear kindle
Do anyone know of any chinese site that does custom brass and perhaps wood milling?
(Or otherwise cheap shop)
boreal thunder
@shy kelp If it’s anything like the CR-10S, replacement fans (I recommend Noctua) would make a significant noise improvement. I’m upgrading the board more for things like increased microsteps, but the noise reduction from better drivers is a nice ancillary benefit.
edgy steeple
any recommendations on a nice strong/little creep matte black PETG?
It's going to be a display stand holding a 10lb object.
edgy steeple
any that you really like or that you have heard good things about?
 sullen zinc
What makes you conclude you need PETG vs (say) PLA? 10 lbs doesn't seem like much load, unless the stand is quite small in cross section. I have been having a very pleasant experience with a roll of Overure PLA+, no warping, matte finish except on the glass build plate. But I have no structural needs that exceed what PLA can provide...
https://www.3dxtech.com/3dxpro-low-gloss-petg/ https://coexllc.com/product/3d-filaments/petg-filament/petg/matte-black-limited-edition-color-petg/ are a couple I found by googling but no personal experience


COEX LLC: Matte Black (does not contain any matte additives) | 5lbs | 1.75mm | PETG—$62.99

Atomic Filament
Carbon Fiber Ultra Black ABS Available in 1 Kilogram (2.2lb) & 3.5KG Jumbo Rolls - CLICK HERE Our carbon fiber infused abs offers improved dimensional stability during printing (shrink), desirable low luster appearance plus a great feeling textured surface , excellent fo...
edgy steeple
@sullen zinc right now I just have PLA, no PLA+ and I keep reading that under constant load it creeps. I have no experience to go from just what I have read. I'm new to all this. I print in my office so I need something that will not make me regret my life choices :).. so I think that limits me to PLA, PLA+, and PETG.
sullen zinc
this does make me want to perform an experiment. of course, maybe the degree of creep would only call for a new stand once per 5 years... you don't know until you try (or find the relevant material data:)
edgy steeple
not sure my CR10 V2 can do https://www.3dxtech.com/3dxpro-low-gloss-petg/ (Ideal extruder temp is 260 to 280°C) with the boden
some saying you need 290.. but I do run with the capricore PTFE tube
ya.. capricorn ptfe can go to 260 tops.
I suppose if I use a lot of infill that PLA/PLA+ could do it
hearty tree
Can anyone find files on this?
It might just be my phone searching skills but I can't find files for it.
hearty tree
Yeah, that's why I would think there are files on it.
But I've toasted my computer so I cant does any modeling.
karmic brook
I suppose you could use an online modeller, or something quick to install like OpenSCAD
hearty tree
Nah my laptop is dead.
karmic brook
You're running Discord on your phone?
1487 "holster grip" 3D Models. Every Day new 3D Models from all over the World. Click to find the best Results for holster grip Models for your 3D Printer.
edgy steeple
@brave mica if you are having trouble leveling your bed because the thumb screws have no tension.. I did this..
a few washers really helped me.
brave mica
lol yes I forgot washers existed. It's doing well enough for now but I'll keep that in mind.
I've got a new flexi build plate on the way so I'm likely going to go through the whole machine with a caliper and square when it arrives
So far my largest issue has been being too cautious about the probe z-offset. I've got that well enough figured out so I'm playing with initial layer line width now. I think once I get that figured out it'll just be a matter of getting more familiar with what profile adjustments different models will need
edgy steeple
I was noticing that my bed leveling would change after 10 minutes of bed heating.. vs 15 or 20..
so I would level it perfectly.. then wait with heating on.. like 60c.. then check level again.. bzzzzt it would be off again
hearty tree
@karmic brook I am running discord on my phone.
brave mica
@edgy steeple you mean after 10 minutes at 60 its level would change? and that it didn't take 15 or 20?
edgy steeple
I would level it after 10 minutes @ 60c.. then I checked again after it had been 20 minutes @ 60c and it was off by a decent amount.
I think the springs are temp sensitive.. it seems better now that they have more tension on them with the installed washers.. but I should be more scientific and rerun the same test again.
brave mica
@edgy steeple ah, ok. While it's certainly possible that the springs are to blame, I'm inclined to blame the aluminum bed itself 🤷♀️
edgy steeple
the bed warping under heating? ugggg that will keep me up at nights 🙂
Have you played with Octoprint? I'm really liking it. If you have an "old" RaspPi laying around great use for it.
 shadow mica
i have about 50 pi 1's laying about now i want to know if octoprint works on them still
edgy steeple
reddit
1 vote and 6 comments so far on Reddit
the short of the discussion is that it may have issues from being too slow. Octoprint stream the commands to the printer)all that gcode is streamed).. and if you have a camera connected stream those video. The consensus is that it would probably overload it and it would start to stutter.
ornate raven
I always bed level at temperature, including the nozzle.
brave mica
@edgy steeple I have, I'm using it right now! I wouldn't want to use a printer without it. I got a plugin that visualizes the bed level which has been pretty sweet
ornate raven
I love Octoprint. I've run it on several versions of Pi's with no nticable difference in performance. I have not tried a Pi Zero (same chip as original Pi) though. I have to say though that once the Octopi server is up, I run my printer from my desktop pc using the web server (Octopi.local). When I was running a Pi4 and 7" touch screen, I ran the printer from the Pi. I found another use for the Pi4 /touch screen and installed a 3A+ as the Octopi interface. Has a little touch screen on it with a Pi Camera and to date has not caused any issues. I CAN run Octopi from the little screen (with a stylus), I just don't.
@brave mica "plugin that visualizes the bed level", which one is that?
edgy steeple
bed visualizer?
brave mica
@ornate raven
ornate raven
@brave mica Awesome! Thanks
 spare bough
How much friction is the right amount when you level your print bed?
ornate raven
Zero. If you're asking about whatever you use to set the gap, it should be just touching. I use a feeler gage, other use a postit note.
karmic brook
Some people use a taper gauge, which requires less knowledge of "feel"
hearty tree
Sigh, I dont want to do this but I need them, is someone willing to model this for me? If need be I'll pay for it.
karmic brook
Do you have the dimensions?
hearty tree
Hm
Sorry, I was busy and had to leave or else I would have said the dimensions.
Length overall: 2 inches (50mm) Length for belt loop: 1.5 inches (38mm) Width: 1 inches (24mm) Height for belt loop 1 inch (24mm) Thickness: 0.0625 inches (1.5mm)
karmic brook
I had some trouble matching up the dimensions given with the picture, so I ... approximated
karmic brook
I think it ended up 4mm
edgy steeple
So I started off a 24 hour print of a moon using the left over creality starter spool.. I only need like 128g.. and the spool origionally contained 200g.. argh.. I should have weighed it when I first got it.. then I would know how much is left.
I need to get a small scale for such things. Now there is a printermod.. mount the spool holder to the scale and it should be able to tell you how much is left at any moment 🙂
@brave mica will you have that ready for Wednesday's show-n-tell? 🙂
brave mica
@edgy steeple I'm sorry, I lost the context; will I have what ready?
karmic brook
@hearty tree Yeah, what format do you want?
hearty tree
STL preferably.
karmic brook
Okay, I converted it to STL and uploaded it for you. http://www.vitriol.com/ftp/belt-clip-v1.stl
edgy steeple
@brave mica : it was a joke about you building a scale the tells you how much filament you have left. 🙂
hearty tree
@karmic brook Thank you.
hearty tree
I'll send the results once I them printed, boger.
edgy steeple
still going, but I am pretty sure I am not going to make it before I run out.. 😦
violet needleBOT
Adafruit Industries posted 3D Hangouts – Weather, PCBs and Blasters

Learn Guide
https://learn.adafruit.com/pyportal-titano-weather-station/
Code on Github
https://github.com/adafruit/Adafruit_Learning_System_Guides/tree/master/PyPortal_Titano_Weather_Station
PyPortal Titano
https://www.adafruit.com/product/4444
STEMMA Buttons
https://ww...
edgy steeple
81% and the spool of filament is getting small.. oh dear..
3d printers need a button on them for "getting creative with ways to make a small amount of filament go farther" in the middle of a print.
empty sedge
or buy bigger spools: http://atomicfilament.com/collections/3-5kg-jumbo-rolls

Atomic Filament
Products Listed below are available in 3.5KG Jumbo Rolls. Excellent for big print jobs , helps to reduce waste throwing away partial spools that lack enough material for the next print job. Our 3.5 KG spools measure 12" x 3.75" x 2" hole. Other colors not shown below are av...
edgy steeple
95% It is going to be so close...
 rough ice
@edgy steeple don't keep us in suspense!
edgy steeple
I feel bad for spamming ya'll.. but this is why I'm on the edge of my seat.. 🙂
that is just the little test spool they send with a new printer.. and it already printed two of the dogs..
according to Octoprint I will know in 51 minutes 🙂 too funny
97% and 40 minutes to go
edgy steeple
Yea!!!!! it finished. It looks like I have two or three windings left on the small spool. Wow that was lucky. My first 24+ hour print.
hearty tree
@karmic brook I'm loving it but that hole isnt big enough and it might break ;(
karmic brook
I can adjust the hole, just let me know what size you want it.
violet needleBOT
Adafruit Industries posted Mandalorian Blaster #3DPrinting @Adafruit Industries #adafruit

Every week we'll 3D print designs from the community and showcase slicer settings, use cases and of course, Time-lapses!
Mandalorian Blaster
Leonardo Aguirre
https://www.thingiverse.com/thing:3977528
CR10S Pro
Glitter Silver PLA
14hrs 50mins
X:278 Y:274 Z:34mm
.2mm layer / ...
hearty tree
@karmic brook If you can 7/32 and give the bottom of the hole more room so it doesn't break, okay?
I very much appreciate you doing this for me for free! I don't know why you'd even do though, people charge me for doing this stuff for me.
karmic brook
So expand to 7/32" and move it away from the edge?
hearty tree
Pretty much.
Make the bottom of the clip longer so it isn't as weak.
This is for a holster I need to make, and people aren't the smartest and will break it if it's too weak.
karmic brook
I extended that piece a little and expanded the hole to 5.6mm diameter
karmic brook
Should I make it into an STL and upload it, then?
hearty tree
Yes, please.
I can't thank you enough.
Soon I won't need to rely on others to model for me.
karmic brook
Here it is: http://www.vitriol.com/ftp/belt-clip-v2.stl
karmic brook
For additional strength, you can print it with extra perimeters or more infill, I suppose.
hearty tree
Yep. I'm using 100% infill.
violet needleBOT
Adafruit Industries posted 3D Hangouts – Weather, PCBs and Blasters

Multistreaming with https://restream.io/
Learn Guide
https://learn.adafruit.com/pyportal-titano-weather-station/
Code on Github
https://github.com/adafruit/Adafruit_Learning_System_Guides/tree/master/PyPortal_Titano_Weather_Station
PyPortal Titano
https://www.adafruit.co...
ornate raven
Is it just me or is Thingiverse sllllooooooowwwww today?
fluid ridge
@supple stratus Hey, did you use product 4368 for the Starship build? Trying to get the right ones....
@ornate raven It's been glacially slow for me for about a week.
hearty tree
Any tips on printing with PC and TPU?
empty sedge
good luck with plain PC
TPU is pretty easy if your extruder doesn't cause it to buckle: go slow (20mm/sec or maybe even 15mm/sec) and at the recommended temps (220C?)
TPU might stick too well to certain surfaces like PEI
ornate raven
OK wow, that was disgusting. I left a print a lone for an hour that was looking really great and when I came back... most gosh awefull spidersweb of junk I have eve seen on my printer.
karmic brook
I've gotten a couple of epic birdnests that way.
sullen zinc
@ornate raven with a webcam and octoprint, you can monitor and cancel a job from remote. It's pretty cool. Doesn't make a botched job any less maddening though.
also if it's really bad we want to see it
ornate raven
My suspicion, now that I have examined everything is that the spool bound up for a bit. Causewd a gap that subsequently caused no base for material to adhere to when the binding stopped. Oh well. Weather station may take a little longer than anticipated. 😦
@sullen zinc , yea, my bad. I left the house and don't have my Octoprint open to the web. It was when I got home and checked that I saw things had gone bad. It looked SO GOOD though when I left for the grocery that I had no idea...
sullen zinc
I am due a major malfunction, I've had such good printing the last month or two
ornate raven
Sorry, no pics of mess. Too embarrassed and upset to stop and share.
sullen zinc
I understand. My intent wasn't to increase your embarassment.
ornate raven
There was filament all over the place. Never suspected it could get so far out of habd.
ornate raven
No problem @sullen zinc I'm the sloppiest ISTJ with OCD that ever was and know that we all benefitr from the mistakes/failures of others that I SHOULD have stepped back for a minute.
Yep, it's the spool winding. Started the print over and saw that the spool is sticking somewhat.
Some of it is downright welded together.
sullen zinc
that's truly odd. I have had poorly wound filament (or perhaps where I allowed it to improperly re-wind when changing filament) but welded together on the spool is a new one to me!
if there were a problem during manufacturing I guess it could happen. Filament still slightly malleable when it is picked up on the roll because of a cooling/temperature fault
karmic brook
I'll share one of mine
Welded end to end (like, intentionally to splice filament) or just stuck together (like it melted in place)?
sullen zinc
extremely aggressive overhang, a print I did last year.
edgy steeple
how did I not ever hear of adafruit's "layer by layer" video series?!?!
@ionic heath Please have a "Blasts from the past" or something that talks about things that you did before.. for example someone like me is fairly new and has never heard/seen your "Layer by Layer" series.. youtube never recommended it so the only way I found out was when I asked @supple stratus and @crystal ravine to do some tutorials on CAD and they mentioned it.
@ionic heath has made some many things it becomes harder and harder to find stuff or "know all the stuffs".. which is a shame because there is some real gold out there. or maybe make a web page for things that has links to older Adafruit stuff people may not know about. Just brainstorming.. but now I am wondering what else I do not know about 🙂 that you guys have done. if I may be so bold to suggest.. look at things and say "What would a newbie think/ask/want to know more about"
rough ice
Any good recommendations for 3d printing services? I can get simple stuff done at my local library, but I'm looking for more material choices and maybe some pro quality. Unfortunately, the ones I find online were 20x-25x more expensive than my local library.
ornate raven
@sullen zinc @karmic brook , here's some background on the filament. Black Hatchbox PLA, left on the printer for about 10 days after a print that had no issues. Did a cold startup of a Benchy with the filament and it went very well. At end of print, stored away the filament in a bag with desiccant for about a week. Broke it all back out today for printing the Titano case. Looked great with no issues when up to about 3/16 - 1/4 inch. Went to grocery and the rest is history. The spool is VERY tight wound at this stage and I am peeling it off to keep it loose. It is printing well but, If I leave it, the extruder can't pull it loose. MY OPINION is that I should have done a better job of storing the filament and it's not an issue with the filament.
shy kelp
It's the manservant's job to see it before I do, and decide if I need to see it, also. ;) j/k
 jovial quest
Seems like you stored your filament too hot
ornate raven
@jovial quest , good point. I do have a lamp near the filament that illuminates the print bed. It's an LED so I never thought about heat issues for nearby components.
jovial quest
Some leds get hot
Some not
But how you describe your problem seems like you stored it too hot
Maybe it could just have been a hot day
🤷♂️
Or did you tried to put your pla into a driyer?
edgy steeple
@ornate raven that does not sound like a issue with moisture. I agree with others sounds like it somehow got to hot and started fusing together. It could be a manufacturing issue.
An led is doubtful in my mind.. a heatlamp, yes.. but not a reg lamp
but if when manufacturing they started with it too hot it would fuse the inside layers.
ornate raven
No dryer. Just a ziplock with desiccant. Temps haven't been very warm here. Not overly cold either. It's not so much welded as just stuck. Like... tacky and bound too tight.
edgy steeple
so unless you dried it in an oven at too high a temp.. I'm still going with manufacturing.
ornate raven
I'm just trying to give the make (hatchbox) the benefit of doubt.
edgy steeple
did you/someone possibly spill a soda on it or some kind of sticky liquid?
ornate raven
Hah, I also just now found a groove in my filament guide.
edgy steeple
eh?
ornate raven
I,m over in the Live Broadcast currently
edgy steeple
oh that;s right wednesday!!
ornate raven
Oh well, that was a bummer. Got 95% complete when the print missed a layer and went to pieces. New filament arrives today. We'll see what happens.
 thorn pecan
Not sure if this should go here, or if it should go in the pi section- anyone ever tried to set up Octopi and it just not work
I've double-checked everything and watched multiple tutorials.
empty sedge
are you using a pi 4?
last time I tried there was a beta version you needed to use for pi 4 support
thorn pecan
I'm using a pi3B+
It boots up. It just doesn't seem to appear on my wifi network. I've modified the network and password, uncommmented the correct country, etc
hearty tree
Anyone here ever made their Endero 3 or CR-10 DDE?
Wait.
@devout pewter Sorry for the pings, but is it worth making my Ender and CR-10 DDE?
devout pewter
DDE? You mean Direct Drive Extruder?
If so, it depends on what you're printing. If you need to print soft TPU, then yes it's worth it, otherwise it'll probably be fine with bowden.
Also, if you love tinkering, you could always do it for fun. 🙂
hearty tree
I want to try to start making money by making Phone cases so, TPU is a filament I'm wanting to use.
Yes, DDE is Direct Drive Extruder.
I'm homeschooled and I finish all my classes within 4 hours so I have a lot of time amd tinkering is something I enjoy.
I have a Prusa but my uncle is borrowing it. I think he might want to buy it from me.
devout pewter
For the ender 3, since it has only one z-axis lead screw, with the extra weight, I would recommend adding a dual z upgrade kit: https://www.th3dstudio.com/product/ender-3-dual-z-upgrade-kit/

Works with the Ender 3 and Ender 3 Pro
Upgrade your Ender 3 to a dual z setup
Eliminates X gantry sagging
No wiring needed! 100% Mechanical
Works with the Ender 3 and Ender 3 Pro
hearty tree
Yeah, I remember you putting in on in your video.
devout pewter
🙂
hearty tree
I'll build my computer first because I only have $300 left on it.
Then I'll upgrade my printer.
devout pewter
ok
hearty tree
My motherboard for my computer build is very cool. It has 3D printable parts.
It also gives me more time to decide what I want to upgrade.
devout pewter
Yeah
hearty tree
Thank you for your help. I very much appreciate it.
devout pewter
You're welcome
hearty tree
Have you ever printed with PC?
devout pewter
Yes, but it warped on me.
hearty tree
Sounds fun.
I just recently got good with ABS. PC ie hard, correct?
It's also quite pricey to print with.
devout pewter
Yeah, it's very hard. I used PolyMaker PC-Max. Turned out I didn't need the hard version of the part I was making, so I didn't bother re-printing it.
hearty tree
I see.
SAINSMART 1.75mm 250g Flexible TPU 3D Printing Filament, Dimensional Accuracy +/- 0.05 mm (Black) https://www.amazon.com/dp/B072JCXS4G/ref=cm_sw_r_cp_apa_i_S63mEbJQ87QS0
I'm tempted to buy that.
 fallow ermine
Anyone have this file/know where to get it? It's a phone case with moveable gears and the stratasys logo
empty sedge
what about the version without the stratasys logo?
karmic brook
It's a commercial product, I doubt the files are out there.
empty sedge
there are a bunch of similar designs on thingiverse, but not the stratasys logo one https://www.thingiverse.com/thing:65810
fallow ermine
It was at my school and I wanna print one now too 👀
brave mica
anyone know what causes these and how to fix them?
As far as I can tell, there's gaps in the shell when sliced? Is this an aliasing error?
karmic brook
Wow, I haven't seen that before! That's odd. Which slicer?
brave mica
cura
hmm not there with different profiles
aah, it's the z seam alignment set to random
karmic brook
oho that makes sense
faint comet
How can I prevent this artifact
devout pewter
@faint comet Check to make sure you have your filament set to the correct diameter. I had something like that and that ended up being the culprit. Regardless of the setting, it's caused by under-extrusion.
faint comet
How do I stop under extrusion
empty sedge
make sure you're filament diameter is correct, that you're at the correct temperature for the filament you're printing (maybe it's mislabeled), that the nozzle isn't clogged (maybe do a cold pull), that the extruder gears aren't clogged with plastic, that you're not printing too fast with a layer height that's too big (layer height should be under 80% of nozzle diameter), check that your spool undwinds freely and isn't knotted and so-on
On this page you'll be able to visually try to match the problems you are having with your print and hopefully find enough information so that you can eliminate
empty sedge
I'm not sure if this fan is too big or not
 vast girder
"Does this fan make my extruder look big?" 🤣
violet needleBOT
Adafruit Industries posted Retro Weather Station
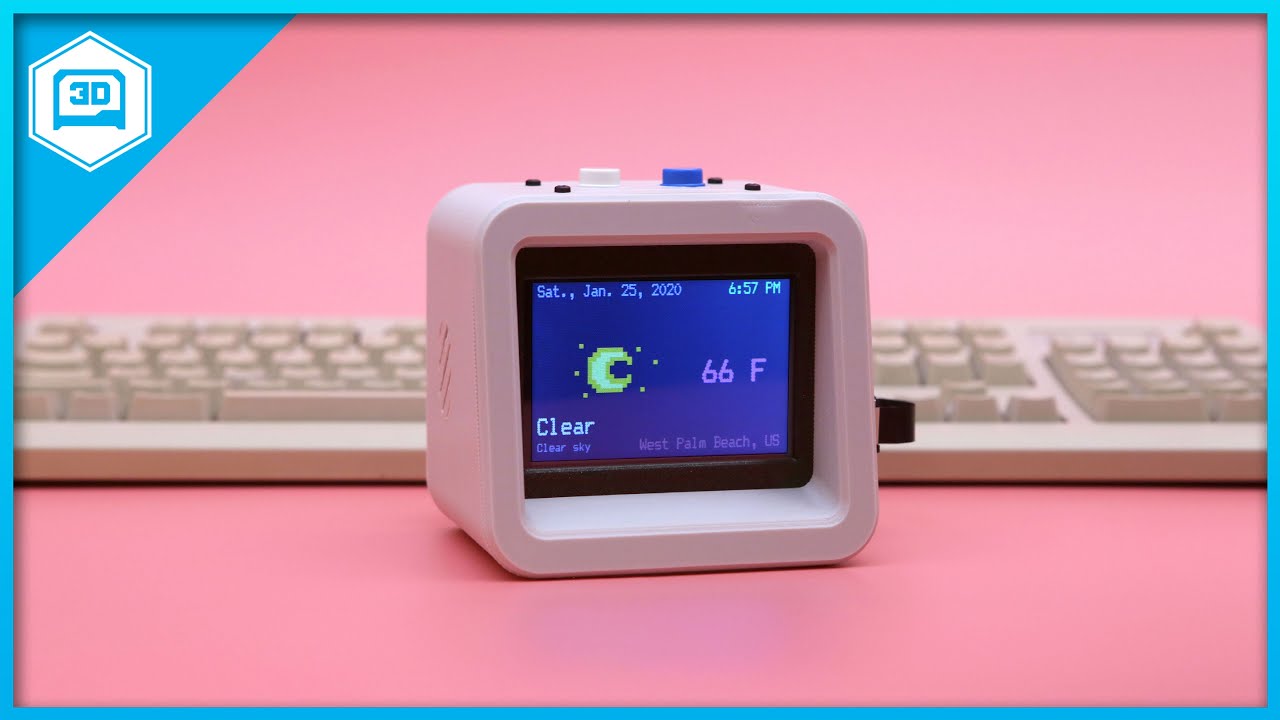
WiFi Weather Station with 8Bit Icons and SFX. Build a weather station with retro inspired 8bit graphics! Use CircuitPython to display data from the Open Weather Maps API. Get temperature, weather conditions, location, time and date! All rendered in chunky fonts and blocky ico...
hearty tree
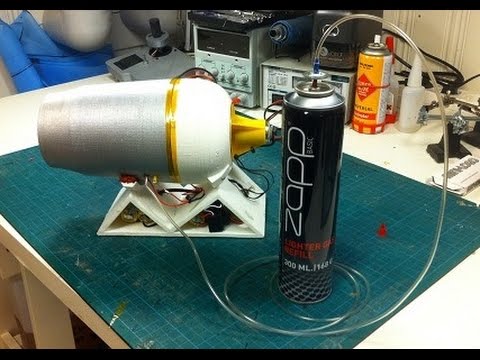
Buy the book and download STL-files for free:
http://amazingdiyprojects.com/3D_jet_engine.html
Should I try it?
jovial quest
Na
karmic brook
Looks like the important bits aren't 3D printed, just part of the housing and base.
hearty tree
Bodger, do you think you could assist me in lightening up a computer mouse body?
Not right now though.
sullen zinc
Any suggestions for a 3d printed case that will fit the clue? I don't know whether general micro:bit ones will fit over the rear protrusions.
karmic brook
@hearty tree I'll admit I don't know what a computer moise body is, or how one would lighten whatever it is.
karmic brook
So you're thinking of 3D printing a replacement housing for a computer mouse, then transplanting the electronics into it?
hearty tree
Yes.
Because gamers for some reason cant handle literally an extra 10 grams in their mouse.
karmic brook
Games? Or gamers? I'm having trouble imagining how games would know the physical characteristics of the mouse. Then again, I like to game with a graphics tablet, which makes some games so much easier
shadow mica
@hearty tree let me guess you have the same problem as me where the mouse is not heavy enough
inland sage
What are some of everyone’s favorite makers of pla filaments for sparkly decorative stuff. I’ve used the Prusament galaxy pla & petg before. Wondering what else people like to use. I’m Looking to make some sparkly props.
shadow mica
mine was printrbot (finishing my last roll 😦 ) now i have overture and i kinda like it
hearty tree
@karmic brook I'm so sorry, I'm not paying attention to what I'm saying. I meant gamers.
@shadow mica It's not my mouse, it is my friends mouse, he wants it lighter.
shadow mica
what kind of mouse does he have
a lot of gaming mice have a way to add wights have they removed them all
hearty tree
Corsair harpoon RGB wireless.
karmic brook
For wireless mice, an easy way to save weight is to replace the power cell with a smaller one.
hearty tree
This one has a quite small battery weights about 2-5 grams.
It's a rechargeable battery.
It's more the body than anything.
karmic brook
It might be easier to carve some plastic off the existing housing than fabricate a whole new one, unless you want to keep the existing housing intact.
shy kelp
@sullen zinc , I'm betting the Ruiz brothers will have something pretty soon.
vagrant drum
hey what's the best slicer for an ender 3?
i've been using prusa slicer for my prusa's, but was thinking Cura? for the ender 3?
shy kelp
@vagrant drum I have used Cura and Slic3r. I prefer Cura. I have Ender 3 Pro.
sullen zinc
@shy kelp yup I imagine so
faint comet
Can any one give me good settings for ultmaker cura
empty sedge
I could if I knew more about what you were trying to do
vagrant drum
@shy kelp thanks much!
shy kelp
@empty sedge is right @faint comet . I have of lately moved away from a "stock" setup to a job specific setup.
empty sedge
even my default PLA for prusa i3 mk3 settings aren't going to be helpful for you if you have a different model of printer
violet needleBOT
Adafruit Industries posted 3D Hangouts – Plants, Pots and Props
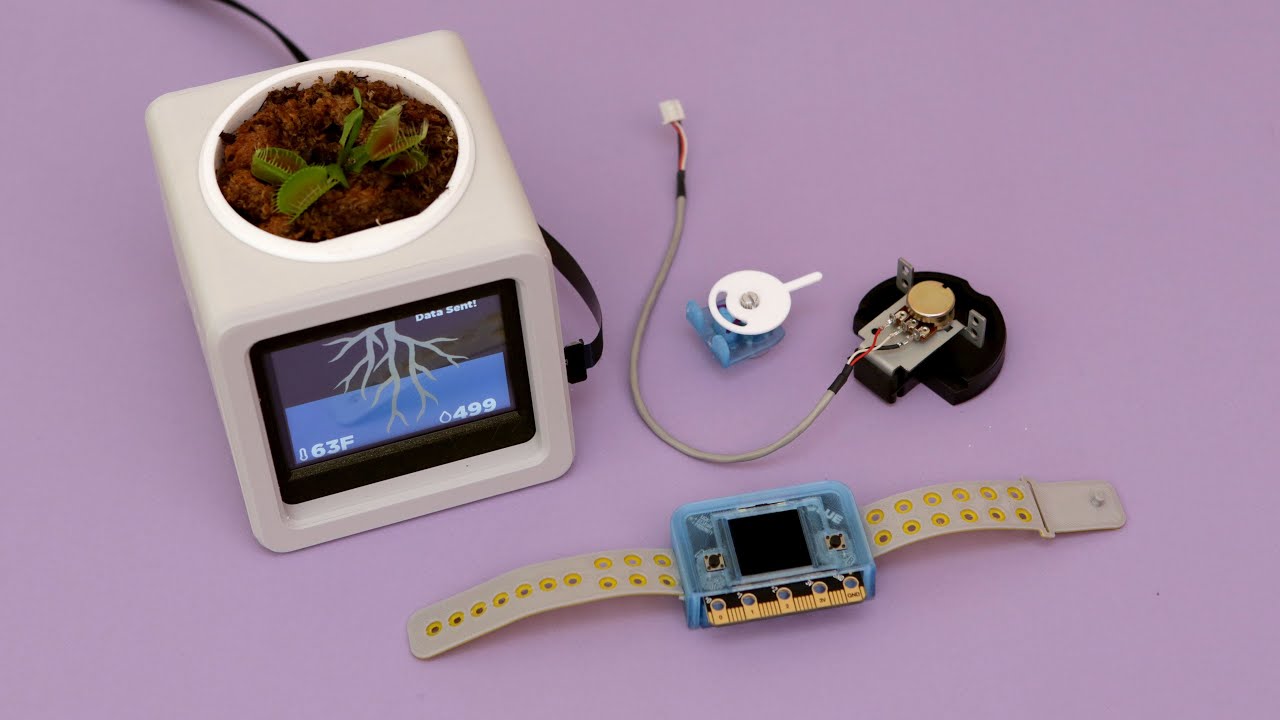
Learn Guide
https://learn.adafruit.com/pyportal-pet-planter-with-adafruit-io/
PyPortal Titano
https://www.adafruit.com/product/4444
STEMMA Soil Sensor
https://www.adafruit.com/product/4026
STEMMA F/F Cable
https://www.adafruit.com/product/3568
Mini Oval Speaker
https:...
jovial quest
Is it over or about too start?
 opaque gust
about to start, 3 minutes or so
violet needleBOT
Adafruit Industries posted 3D Hangouts – Plants, Pots and Props

Multistreaming with https://restream.io/
Learn Guide
https://learn.adafruit.com/pyportal-pet-planter-with-adafruit-io/
PyPortal Titano
https://www.adafruit.com/product/4444
STEMMA Soil Sensor
https://www.adafruit.com/product/4026
STEMMA F/F Cable
https://www.adafruit.c...
edgy steeple
So I have basically given up trying to use wood as an outer shell for my "large" infinity cube.. I am putting my tinkercad skills to the test and my CR10 V2.. The side of my cube is such that a 1m strip of leds makes a perfect circle in a side.. which make the dimentions of the cube with glass like 11 1/8 inches ^ 3 or like 282.575mm
now add to that the outer shell that has to hold it to the stand.. and you get REALLY close to the max of the CR10 V2.. printing a test "holder of the cube" which is 290mm.. and the bed is only 300mm 🙂
This has been one of those on again, off again, projects for the last year.. I'm getting so close.. very exciting times.. and VERY glad I went with the CR10 over the ender series
faint comet
Ender 3 enlargement upgrades
 serene quest
my prints keep lifting near one corner of the bed but my bed is leveled perfectly
ornate raven
@serene quest what is bed temperature? Can you rotate print and get different results? Print speed and cooling fan can also impact warping.
sullen zinc
first successfully modified mesh with blender. I wanted to lower the outlets a little bit, so I used "skew" tool selectively. It's not manifold anymore, but my slicer sliced it anyway.
with glass bed I've found the presence of ANY skin oils makes my prints curl. YMMV but cleaning with soapy water and carefully drying with a disposable paper towel while touching only the edges with my hands fixes it. Until I smudge it removing a print.
(but when a glass bed works it is so amazing)
 river seal
does anyone ever used one of those 3d printing pens?
I often "mod" old devices where I would love to add small details that would make it easier to slide a small pcb or some small parts in, rather to glue then in
do you think this would work?
karmic brook
That's a neat idea. I'll usually use hot glue or sheet metal screws, but using a 3D pen to add locating bumps/ridges on the fly makes sense to me.
river seal
@karmic brook what pen did you get?
karmic brook
I don't have one yet...
violet needleBOT
Adafruit Industries posted 3D Hangout – Hearts, Clues and Pickups
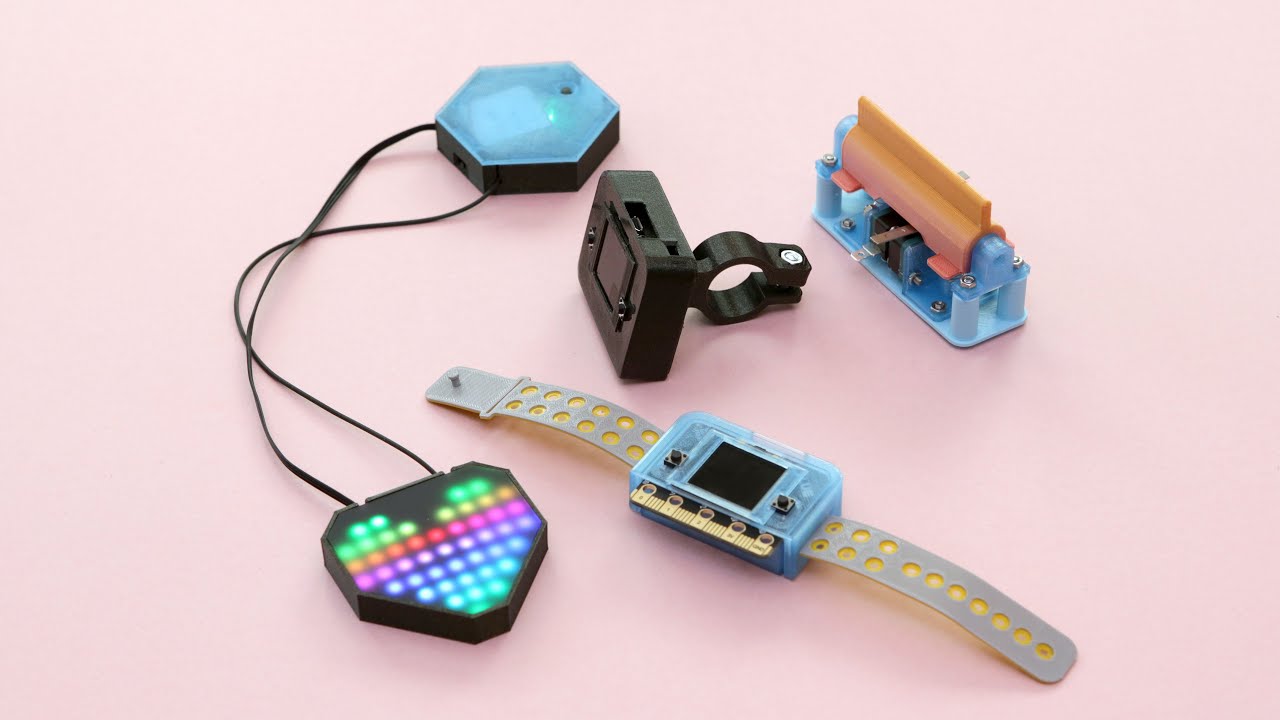
Learn Guide
https://learn.adafruit.com/neopixel-led-heart-necklace/
Project Video
https://youtu.be/PKWkEB1s5Ik
ItsyBitsy nRF52840
https://www.adafruit.com/product/4481
Mini Skinny NeoPixel Strip
https://www.adafruit.com/product/2970
Lipo Backpack
https://www.adafruit.com...
edgy steeple
@serene quest Do you use "brims" on your prints? I also love a light coat of hairspray on my glass bed before a print and after a good cleaning with isopropyl alcohol 90%
violet needleBOT
Adafruit Industries posted 3D Hangouts – Hearts, Clues and Pickups

Multistreaming with https://restream.io/
Learn Guide
https://learn.adafruit.com/neopixel-led-heart-necklace/
Project Video
https://youtu.be/PKWkEB1s5Ik
ItsyBitsy nRF52840
https://www.adafruit.com/product/4481
Mini Skinny NeoPixel Strip
https://www.adafruit.com/product/29...
vagrant drum
when switching from a .4 nozzle to a .6 nozzle has anyone had touble getting models to line up the same specifically with threaded objects like srews and nuts?
if so did you adjust the model in some fashion to fix?
empty sedge
did you adjust the nozzle diameter in your slicer?
[which should also change your default extrusion width]
empty sedge
prusa slicer profiles for the MK3 have extrusion widths specified in mm so they don't change when you set a different nozzle diameter
try setting all the extrusion width options under print settings advanced to 0
vagrant drum
ok i'll give that a shot @empty sedge , thanks
 vocal ginkgo
Could i ask about cura custom support plugin in here?
hidden sable
@river seal I got one of those coocoon 3d pens a while back...I've used it to join things before..but I think to get a good seam you would need to use a heated tool to smooth over e.g. https://all3dp.com/4/modifi3d-pro-heated-tool-finishing-3d-prints/
All3DP
A new tool lets you finish, repair and modify finished 3D prints. The heatable pen tool "Modifi3D Pro" offers 10 exchangeable tips and is now available on Kickstarter.
do many people vent their 3d printers? I'm looking at adding a couple into my laser printer extractor that pulls air outside
or at least the ABS enclosed one for a start
empty sedge
I don't vent my printers, but I don't print ABS much either
 ivory oxide
I've got a teacher at my school to let me use his 3D printer for a robot body, but idk if it can do things that are like roof
roofing*
For instance, is it possible for a 3D printer to make something that looks like this:
ignore the rough model, but basically if it's made from the bottom up can it create that without falling.
knotty laurel
To do that, a printer would usually add a support structure which gets removed after printing.
ivory oxide
Is that automatic in the software
or do I have to do that on my own?
Like I'd bet makerbot and those high end brands have it
knotty laurel
Yes, it's generally automatic, with various config options.
ivory oxide
great
shy kelp
It's a setting. If the object will fit the bed if rotated 90 degrees and layed flat,, that's what I'd do.
shy kelp
Oh, so that's not the whole thing.
shy kelp
Sure,if you don't mind
shy kelp
Dimensions?
ivory oxide
I'm waiting on an electric caliper in the mail
So I haven't made any numbers
if I were to estimate
It would be around...
1 ft long,5 inch wide
See that gray plate? That was the question I had. But I decided to make it so that it could be removable and then just put on top and then clipped or smt to have ti stay
shy kelp
How big is your printer?
ivory oxide
max dim is 14x14 inches
shy kelp
I agree. Make it separately. What slicer are you using.
ivory oxide
uhhhh
I dont know what that means
All I know is that software wise Im going to use something like fusion 360
I'm totally noob with this stuff, back in middle school I used 123DDesign and TinkerCad but the former is no longer available for download and TinkerCad is not precise at all
shy kelp
A 'Slicer' takes the file from fusion or tinkercad and converts it into a language the printer understands. From STL to Gcode. Some printers will do the conversion internally. What's the printer?
ivory oxide
Makerbot I think
shy kelp
MakerBot I believe has it's own slicer.
shy kelp
I don't know if it's internal or if you have to do your own slicing. I'm an Ender3 and Cura guy myself.
ivory oxide
I've used it before in middle school, just plug in an STL and it does basically all of the work
shy kelp
Okay cool.👍
ivory oxide
ty
ornate raven
@ivory oxide is the print working?
ivory oxide
@ornate raven thanks for the concern, we'll find out probably next week because I'm still waiting on my electric calipers in the mail. The image shown was a mere sketch not to scale
 bold totem
anyone know of a good filament to use for the fun little retro styled cases for the pyportal etc
empty sedge
the ziro "marble" PLA is fun, but probably not "retro"
bold totem
yea it's cool and pretty (i have some) but not what i want here
empty sedge
I don't think you're going to get a bakelite result from just a filament choice
ornate raven
@Human Condition oh yea, I forgot.
hearty tree
Has anyone her ever modded a mouse?
ornate raven
Does changing the type of cord from plain rubber to cloth count? I did it to my Raspberry Pi Mouse.
Had one of cheapo power connections you get at the gas station. Found out it had all the wires so I subbed it in on the Pi mouse and works like a charm. Longer too.
hidden sable
@bold totem any Bakelite color would look retro IMO eg black, brown, mustard yellow/green
bold totem
what i had in mind was more amiga 500/commodore than spectrum zx/intellivision
ivory oxide
I've taken all my part measurements, and it's time to do some CAD. One thing I can't determine, however, is how thick my plastic base should be? It's a robot body so I'm thinking at least5mm?
or like 4mm
Idk how strong it is, but it certainly should not wobble
I think i'll be safe and do like 7mm?
violet needleBOT
Adafruit Industries posted BLE Synth by Liz Clark @BlitzCityDIY #adafruit #3DPrinting

Every week we'll 3D print designs from the community and showcase slicer settings, use cases and of course, Time-lapses!
BLE Synth
Liz Clark @BlitzCityDIY
https://www.thingiverse.com/thing:4144262
CR10S Pro
Vertigo Grey PLA
11hrs 44mins
X:239 Y:269 Z:12mm
.2mm layer / .4mm no...
violet needleBOT
Adafruit Industries posted 3D Hangouts – Clues, Synths and Helmets

Learn Guide
https://learn.adafruit.com/adafruit-clue
https://learn.adafruit.com/clue-case
#3DPrinting Live Project Video
https://youtu.be/PKWkEB1s5Ik #3DHangouts
Adafruit Clue
https://www.adafruit.com/product/4500
400mah Battery
https://www.adafruit.com/product/3898
420...
ivory oxide
Bump
violet needleBOT
Adafruit Industries posted 3D Hangouts – Clues, Synths and Helmets

Multistreaming with https://restream.io/?ref=81Mn2
Learn Guide
https://learn.adafruit.com/adafruit-clue
https://learn.adafruit.com/clue-case
#3DPrinting Live Project Video
https://youtu.be/PKWkEB1s5Ik #3DHangouts
Adafruit Clue
https://www.adafruit.com/product/4500
400mah...
ivory oxide
Do you guys think it's a good idea to add 0.5mm to my 3d printing design? Basically I have slots for actual hardware parts, but when I measured them with my electric caliper (0.01 mm accuracy) I someitmes get different results that range from less than 1 mm
I feel like adding 0.5 or maybe 1mm would be safe, but again if its too loose it won't be good
probably 1mm is a safe bet, as it's 10x the error
it'll barely wiggle anyways
I wonder, however, how thick the plastic is going to be as it comes out of the nozzle
So apparently 3d printers are around 100 microns of resolution so i'll add 0.1mm of slack to that
Other than that I'll just take like 6 measurements for each dimension and then choose the largest one
karmic brook
Normally, the plastic comes out close to the nozzle size, but is normally squished onto the baseplate or other plastic afterward, changing its shape/dimensions. However, this does not occur when bridging.
ivory oxide
@karmic brook so would this be okay to do? Basically the holes in the CAD model are the exact same dimensions as the plate that should go on top of it
empty sedge
the holes will probably end up slightly undersize if you want the tabs to fit into them. also you've chosen the weak way to orient the parts
ivory oxide
I'm using glue anyways
so if the wholes are like
3.5mm x 26.55 mm
should i increase the slack by like 0.2 mm?
@empty sedge
Actually, I can just chamfer the tabs a bit?
empty sedge
I'd add maybe 0.1 on each side, yeah
make the hole larger or the tab smaller, not both
ivory oxide
gotcha
thanks'
Im going to reduce the tab side, so should I make it 0.1 less on all 4 sides or just like the outer facing 2 on each tab
wait thats a dumb question lol
just do on each
shy kelp
@ivory oxide It really depends on the material you are using for the body. I have used 3mm delrin.
 weary lichen
This is, without a doubt, the worst successful print I have ever had. It stretches the boundaries of successful a little though.
karmic brook
That's pretty wretched. Almost as if the top was spinning while the printer was trying to print it!
ivory oxide
@shy kelp 3mm is pretty significant, I don't have info on how thick the material is though
Does that have to be accounted for or does the slicer already understand the dimensions you want
shy kelp
3mm is the thickness of the material the decks for my robot were made from.
I have no idea how that affects 3D Printing, sorry.
ivory oxide
Ohhh that's fine thank you
 vivid current
How did u do that
ivory oxide
?
ivory oxide
ah lol
empty sedge
looks like the extruder didn't put out enough plastic. Getting the filament diamenter, flow rate, extrusion width, or nozzle size wrong can all cause that
weary lichen
It was set to a much higher layer height than it really should have been. The whole thing took about 20 minutes to print
vivid current
ah
weary lichen
Adjusting the settings on a slightly updated version had it take about two hours to print or so. Aside from some lifting on one edge, that printed fine.
vivid current
it looks alot better than one of my bad prints tbf
i had a whole side lift off and the extruder melted a channel into the print nicely along the top
weary lichen
I have had those many times
Also balls of spaghetti, and plastic stuck to the tip...
Sometimes both.
karmic brook
My failures are mostly the birdnest and glob of plastic on the extruder types.
empty sedge
any idea what the numbers are here?https://github.com/prusa3d/Prusa-Firmware/blob/c07814bcad3570c5f2b89cabb0e07fe0ab4cea19/Firmware/variants/1_75mm_MK3-EINSy10a-E3Dv6full.h#L267
GitHub
Firmware for Original Prusa i3 3D printer by PrusaResearch - prusa3d/Prusa-Firmware
empty sedge
GitHub
Firmware for Original Prusa i3 3D printer by PrusaResearch - prusa3d/Prusa-Firmware
karmic brook
There are various submodels and options available.
empty sedge
Yes I am trying to figure out what the Trinamic current setting option is because I am using a fork of the prusa firmware on my i3-derivative and unlike the marlin 2.0 where you specify the RMS current in mA the prusa fork uses 0..31
I have a modified Wilson TS with einsy, but running 12V with the i3mk2 bed and mk3s extruder
empty sedge
wilson TS + i3 mk2.5 + i3 mk3s
edgy steeple
@supple stratus @idle crest https://www.reddit.com/r/functionalprint/comments/f89jx7/openastrotracker_releasing_today/

reddit
0 votes and 24 comments so far on Reddit
 silent iron
Im thinking of doing amateur 3d modeling, printing and molding for commissions, what do you guys think?
I think turning towards commissions may be a good way to actually complete projects and allow people to get access to them.
 formal dune
@silent iron Just read that and thought, did someone ever do that comission thing with real time tracking of print jobs and print queue? Like, you could tell job x takes y time, queues at time z and so one... like an open web interface for jobs. could really come in handy for decantralizing prints and also work on big jobs much faster.
opaque gust
well, there are things like Octoprint that let you remotely monitor a printer and I think have a job queue. There's a 3d printer model that has an indexable table for doing multiple prints. The issue with most printers is that usually there's human involvement to remove the print
Shapeways, depending on the process (SLS for example) will fill the work envelope with as many orders as possible and then sorts them after the entire batch is done
https://www.shapeways.com/materials is a pretty impressive list of materials that they can produce

Shapeways.com
Make custom products in plastic, metal, full color and more high quality 3D Printing Materials. Design, Prototype and Sell with Shapeways.
hearty tree
I need tutorials on using Fusion 360, any recommendations?
knotty laurel
If you learn well from books, "Fusion 360 for Makers" is pretty good so far.
karmic brook
That is a useful suggestion: most of the online resources I was able to easily find were videos, and videos don't work well for me. 📚
hidden sable
I fastforward through a lot of them
@karmic brook I think videos definitely have their uses, but if you can explain something in one line of text, and a picture...
shy kelp
They put all that effort into making a video, and then don't bother making a transcript.
Indexing video content rarely or almost never works at all.
I know a back yard mechanic who thinks they're a brilliant source of repair information.
I like instructional videos I've found that I do not need to watch (no agenda on my part, to learn something specific, in order to get something currently plaguing me, done).
If I need to watch it, I need (more) to find it in a book/magazine (web page) format, or just the code, if it's a coding problem I'm working on.
I had a large library of tech books paid for at the regular (walk-in) bookstore.
For years it felt to me like I already had, on-hand, exactly what I needed.
I think knowing that it'd take more hunting for some other book gave me the motive to use what I already had and not even think about where-else, where-else, where-else.
jovial quest
Both video and text has pros and cons
What bothers me most on videos is that they have no script mostly
They try to explain something, goes trough the menu, than notice they made something wrong and change that, but they still included all the wrong steps in the video
hidden sable
when writing tutorials, I've learned not to use a screenshot if I can easily explain something in a sentence, and try to get the message across as quickly and clearly as possible - so I think, in some instances, a video is not always required
but on the topic of 3d printing - I got a dehydrator and was able to rejuvinate a few reels of dead filament!
 viscid ruin
This may be a common question but what 3d printer should I get
It's so many out there
What should I think on when buying a 3d printer
I have a budget of 200€-300€
What options exist
empty sedge
do you want a printer or a project?
empty sedge
the prusa mini should be good though if it doesn't have any major new flaws. I have sort of 3 i3 mk3s and they're great
the removable steel sheet means my buildplate doesn't get torn up when prints stick too well, I just flex it and they come off.
(flexibles would need a glue layer so they don't stick too well, and I don't think the prusa mini would do a great job at super flexible filament like ninjaflex)
shadow mica
i personally have a geeetech a10m and a monoprice select mini v2 at some point i plan on getting a ender 3
empty sedge
and auto bed leveling makes it much easier to consistently get good prints. I have printers I level manually and they're fine but at my hackerspace that doesn't work because inevitably someone is going to find a way to mess it up
shadow mica
my geetech a10m has a auto level probe but i don't use it because for the life of me i can't get it to work right also i would recommend something with a large print area and that can have a bed temp of 110 degrees
empty sedge
eh, printing abs on a bedflinger is a pain even if your bed can do the temperatures
shadow mica
bedflinger?
empty sedge
moving bed in Y like all the machines you and I listed
unlike ultimaker, zortrax, etc
it also helps to not use defective filament
shadow mica
oh i can agree with that but for the price range that rainbow is looking at it's mostly bedflingers
on the note of bed flingers i have always used repider host with slicer but since i got my a10m i have used the cura slicing engine with repider host and i can't get it configure the way i want it to i need to get it to lower the print head on the first layer more to get the right squish but for what ever reason changing the first layer Hight also changes the amount of filament that comes out

empty sedge
I don't think it's worth buying the cheaper machines/kits unless you're happy to have it be a project to get your printer working well. Saving up for the prusa mini or i3 (even as a kit) will end up saving you lots of time on profile tuning and "upgrades" that aren't needed and you'll end up with a much more reliable printer that gets good results every time unless you forget to turn on support material or something obvious
@shadow mica can you "add G92 Z15.1" or something to your start gcode after the move to 15mm z?
shadow mica
This is my review of the new Creality Ender 3 3D printer. It's a $200 pre-assembled kit that arrives with everything you need to get started. The assembly will take 1 hour, but you will be able to start 3d printing right away. My tests showed that the printer was able to print...
empty sedge
I don't know how your firmware is configured to say if m206 or something should be used instead
shadow mica
also @empty sedge i have tryed offsetting it but doing so changes the flow and only with cura through repider host
empty sedge
g92 sets the current position to the number you specify without moving
shadow mica
it is still changing the flow
shadow mica
it's not the firm where i have flashed new firmware on it then back to the original and now (finally made some progress) a community upgrade to marlin 2.0 from 1.8 and 1.9
empty sedge
another way I've hit a similar problem is that the z move feedrate on the cura start gcode might be higher than your machine can do, so if the firmware z feedrate limit isn't high enough you could be losing steps in z between homing and starting your print
on the select mini you could easily have that issue
I think my mendel 90 z feedrate max is 2mm/sec with m8x1.25 allthread
you could also try adding M203 Z2 to start gcode before homing instead of changing firmware limit
shadow mica
your not getting the issue it's my geetech a10m thats having the issue for whatever reason changing the first layer Hight changes the filament feed rate with it so if i print at 2.5mm Hight i i need to set the first layer extrusion with to 300-350% if i set it to 2mm i need 600% and if i set the offset in the gcode tab to be 2mm the required feedrate will still be 600% even tho the head is lowered in gcode and not the first layer settings
empty sedge
I don't understand
shadow mica
my select min is tuned to the point where i can let it run with no problems
empty sedge
why would you set the first layer to 2.5mm tall if you don't have a 3mm nozzle?
[I'm hoping you meant .25mm layers because otherwise you'd have a very custom machine]
shadow mica
whoops i that is what i ment it's kinda 3:54 am here
empty sedge
printed on SeeMeCNC "partdaddy" 14-foot tall delta printer
shadow mica
but yeah i am not getting proper adhesion because the printer is not letting me get the right hieght with the feed rate i need
empty sedge
if your z zero position is correct is correct you shouldn't need to override the flow rate (extrusion multiplayer) for just the first layer. something else is wrong if you do. especially 600% seems like way wrong
shadow mica
but thats it it's all right
empty sedge
some people calibrate by printing single perimiter boxes and measuring the height and width to get the first layer exactly right
anyway I want to sleep also so later
shadow mica
the calibration is right but the slicer is wrong it's changing the feed rate to the first layers hight even with offsets
empty sedge

A revision to my Fundamental Calibration Object
ivory oxide
@shy kelp the print's done
Everything's perfect except the tabs for the lid part are a little too tight so in order to get it on I'd have to either slam it in or file it
I think I'll go with the slamming since I'll barely need to remove the lid once it's ready
shy kelp
@ivory oxide that's great to hear. Got a picture 😁?
ivory oxide
ill take it in a bit, assembling the whole unit rn
ivory oxide
@shy kelp sorry about the mess, im doing hw rn lol
basically the design came out clean, took like 4 days with the makerbot z18
i designed a small venitlation system inside that fits a 12v dc fan as seen
cable management ew
ill take better pics later when i pop the hood again
shy kelp
It's cool
glad shuttle
anyone have experience with the SKR 1.3 and/or TMC2209's?
I have a problem and cannot figure it out. I am sure it something that I have just forgotten to do, or adjust or something, but I have deleted everything and started over like 3 times now, and still I get the same results. Any help would be greatly appreciated. I have taken apart a CUBE 3, and trying to make it work again with boards mentioned above. I cannot get the stepper motors to actually turn correctly, or at least it doesnt seem so, but when I put my hand underneat the z axis and help it (pretty good amount of force) it will move up, but sounds terrible. Videos for reference....
https://youtu.be/I876iiPY-lM
https://youtu.be/crGSZRJdyAk
https://cdn.discordapp.com/attachments/491161257303474176/684465757698261004/20200303_122217.jpg

 empty sedge
did you try a lower feedrate?
your steps/mm or microstepping options are probably wrong
did you verify that marlin is able to talk to your tmc2209?
@glad shuttle what's the output of M122?
glad shuttle
yes I did, output of m122 was good, but it doesnt help at all if you dont have these set right 😦
im dumb lol
empty sedge
there are a lot of steps to follow. if you haven't done them before it's easy to miss some
empty sedge
sure probably
glad shuttle
If I move the z up to the middle and just leave it there, eventually it just stops holding and drops all the way down
sorry took so long, had someone in my office. Im at work currently, just hanging out playing with 3d printers lol
The drop doesnt really bother me, just wondering if that is a normal thing to happen without a screw for z axis, it is belt driven
empty sedge
yeah there's a timeout in marlin where it will disable the z motors
you can turn it off
glad shuttle
ok good, deal, just didnt want to try to make this thing work completely and something else be inccorectly wired or doing it wrong lol
empty sedge
looks like in old marlin you'd set DISABLE_INACTIVE_Z false
or change the timeout by editing DEFAULT_STEPPER_DEACTIVE_TIME
anyway I'm sure you can find what the new setting is
it might be configuration_adv.h
glad shuttle
thanks man
glad shuttle
@empty sedge ok new problem... lol 😦
m122 shows good on all. Had it going up and down, and now having it go side to side and front to back, but now my Z axis will not move 😦
unless i plug it into y
or x
did I somehow kill the axis?
even when I put a new driver on the z axis it does the same thing
empty sedge
I doubt you killed the mcu outputs you probably have something wired or configured wrong still
glad shuttle
its weird though, because it just worked 😦
and now it doesnt lol, but when i plug the Z axis cable into Y it will move up and down, so it isnt the motor
swapped the drivers over to the Y axis and both drivers are still good, so i must have gotten a wired crossed or something. Back to rewiring i guess 😦
M122 says everything is good
glad shuttle
got a little busy at work, will have to play with it again a little later or tomorrow morning, but i will try and let you know if I get it fixed. Thanks for all your help
glad shuttle
@empty sedge ok so i have no idea what the problem was, but apparently it was in the board. I just happened to find a backup SKR 1.3 board that i had a while back, changed everything over so that it would be identical. Plugged in, and it works perfectly.....so im not exactly sure
makes me want to scream real loud though
violet needleBOT
Adafruit Industries posted Golden Snitch #3DPrinting #adafruit

Every week we'll 3D print designs from the community and showcase slicer settings, use cases and of course, Time-lapses!
Golden Snitch
Quentin ROUTHIAU
https://www.thingiverse.com/thing:4153312
CR10S Pro
Silk Gold PLA
1hrs 49mins
X:159 Y:180 Z:37mm
.2mm layer / .4mm nozzle
10...
violet needleBOT
Adafruit Industries posted 3D Hangouts – Pyloton, Props and Guitars

Multistreaming with https://restream.io/?ref=81Mn2
ASK an ENGINEER 2/26/2020
LIVE CHAT IS HERE! http://adafru.it/discord
Adafruit on Instagram: https://www.instagram.com/adafruit
Subscribe to Adafruit on YouTube: http://adafru.it/su...
violet needleBOT
Adafruit Industries posted 3D Hangouts – Pyloton, Props and Guitars

Multistreaming with https://restream.io/?ref=81Mn2
ASK an ENGINEER 2/26/2020
LIVE CHAT IS HERE! http://adafru.it/discord
Adafruit on Instagram: https://www.instagram.com/adafruit
Subscribe to Adafruit on YouTube: http://adafru.it/su...
glad shuttle
Ok new problem, but kinda the same issue i was having yesterday, that I thought i solved with a new board. Apparently not. If anyone has any ideas I would love to hear them, because i am about ready to trash all of these things, and continue on with my life. The video is just of the Z axis. Sometimes it goes, sometimes it doesnt and I just want to scream. https://www.youtube.com/watch?v=iawd3fGkpq8&feature=emb_logo
 karmic brook
It looks like it's turning, what is the problem you're having?
glad shuttle
it isnt always turning the very first couple of times i click it, it just sits there
humming like a @#$%
karmic brook
Sounds like a misconnected phase, insufficient drive voltage, or insufficient drive current.
glad shuttle
hmmmm its weird, I had basically the same thing happen yesterday as well. Tried a different board and it worked perfectly. Came into work today start messing with it, worked great. Uploaded some changes to firmware and poof boned again
karmic brook
A lot of these driver boards have a twiddlepot for adjusting the drive current, others are programmable.
glad shuttle
yea im running 2209s
should be programmable.
but I didnt change the current setting before it stopped working which is what is weird to me
karmic brook
I wonder if the new firmware reset something
glad shuttle
well I went back and unchanged all the things i changed and it still does it 😦
empty sedge
check both ends of your motor wires that the pins are fully inserted into the plug housings
glad shuttle
i will check again, but i used brand new cables. MULTIPLES lol
 small herald
Is anyone here in need of Clear industrial grade tpu pellets?
empty sedge
I doubt anyone here has a filament extrusion line or even a pellet-extruding printer
jovial quest
Not really
But Werbewunder on youtube has a detailed documentation about his professional diy extruder
@empty sedge @small herald
 jovial plaza
Does anyone have a good price point for converting 2D photos to 3D and selling the finished 3D prints.
The photos are from the customer
empty sedge
@jovial plaza Are you asking what you should charge, or looking for someone to do that for you?
if you're asking what you should charge you need to decide how much work you're willing to put in. If you don't have the object itself, or the option to control how the photos are taken then you might never get a good enough scan to print and your only choice might be to sculpt the object yourself using the incomplete scan as reference to get the quality you're looking for
violet needleBOT
Adafruit Industries posted Easter Poké Ball #3DPrinting #adafruit

Every week we'll 3D print designs from the community and showcase slicer settings, use cases and of course, Time-lapses!
Poké Easter Ball
Superbeasti
https://www.thingiverse.com/thing:4202811
CR10S Pro
Red White Black PLA
4hrs 45mins
X:80 Y:80 Z:100mm
.2mm layer / .4mm nozzle...
violet needleBOT
Adafruit Industries posted 3D Hangout – IOT Projects and MIDI Guitar

Multistreaming with https://restream.io/?ref=81Mn2
Learn Guide
https://learn.adafruit.com/welcome-to-adafruit-io/overview
https://learn.adafruit.com/adafruit-io-air-quality-monitor/overview
FeatherWing Doubler / Tripler
https://www.thingiverse.com/thing:3975162
Tripler Feat...
empty sedge

Additive Product Manager Sualp Ozel takes you through the new FFF (fused filament fabrication) functionality in Fusion 360 so you can 3D print straight from Fusion 360.
Note that the Manufacturing Extension is not required to use FFF in Fusion! Happy printing!
►FREE TRIAL...
I guess fusion has its own slicer now? there's configs for prusa i3 (mk2, mk3 for example), ultimaker, and "generic fff"
karmic brook
Probably a copy (or fork) of an existing slicer, preconfigured with some printer models?
spiral laurel
they used to link to a tweaked version of Slic3r, but this looks new and more integrated like their CAM/Subtractive manufacturing tools.
empty sedge
yeah it has a post-processor like every other cam in fusion
ornate raven
Installed a dual gear extruder(https://www.amazon.com/CHPOWER-Extruder-Aluminum-Extrusion-Upgrade/dp/B07RGBD2XJ) on my Ender 3 Pro today. Running a print to test. Realized I had turned off retraction when I saw all the strings everywhere. I'm gonna let this print finish though and the run it again with retraction as a test. Bumped up the E steps to 140 and the first layer and next 12 layers out of 56 look good except for the strings.
No retraction
OBTW Cura 4.5.0
Gray PLA from Hatchbox
Octoprint 1.4.0 on Pi 4B+ 1gb
I had to remove a filament guide on the threaded rod, the filament had been cutting a groove in it anyway and now I also notice less noise from the Z screw area.
New dual gear setup.
Groove in guide.
Source and results of Z drive noise.
 lusty agate
have you got any retraction enabled?
ornate raven
@lusty agate Not on that one. Accidently left it off after calibrating new extruder. Runniong a new one now with retraction and Z-Hop enabled. Already looks better on first 3 layers. 🙂
ornate raven
Thanks. Have a great day and be safe.
lusty agate
you too!
ornate raven
What a difference retraction makes.
karmic brook
No kidding! Wow!
ornate raven
I also found that the part with no retraction was much weaker in construction. As though the no retraction pulled the layers apart somewhat.
Now I've refined my E-Steps (138.37 vs 140) and off to try another print.
edgy steeple
So I have been working on building this holder for my infinity cube for a long time... I went to print it and discovered that I was an idiot and just assumed it would fit my CR10 V2.. LOL.. The cube is 29cm per side.. and my holder holds it at an angle so it would balance on a corner. Just wanted to share my Homer Simpson moment.. "DOH!!!!"
karmic brook
Seems doable if you just print the corner bit and maybe some struts.
violet needleBOT
Adafruit Industries posted Dragon Easter Egg#adafruit

Every week we'll 3D print designs from the community and showcase slicer settings, use cases and of course, Time-lapses!
Dragon Easter Egg
Remix by: TheGranny
https://www.thingiverse.com/thing:4214485
CR10S Pro
Translucent Blue PLA
10hrs 45mins
X:180 Y:180 Z:1400mm
.2mm layer...
violet needleBOT
Adafruit Industries posted 3D Hangouts – MX MIDI Guitar

Multistreaming with https://restream.io/?ref=81Mn2
glad shuttle
Back at it again, still with no luck. Anyone have any suggestions?
This video is me changing the wire from the z axis that is at first plugged into X. The x axis works fine like this, so i unplug it and plug into z where it belongs, and I get brrrrrrrrrrrrrrrrrrrrrrrrrrrrrrrrr and no movement 😦
#if HAS_TRINAMIC
#define HOLD_MULTIPLIER 0.5 // Scales down the holding current from run current
#define INTERPOLATE true // Interpolate X/Y/Z_MICROSTEPS to 256
#if AXIS_IS_TMC(X)
#define X_CURRENT 800 // (mA) RMS current. Multiply by 1.414 for peak current.
#define X_CURRENT_HOME X_CURRENT // (mA) RMS current for sensorless homing
#define X_MICROSTEPS 16 // 0..256
#define X_RSENSE 0.11
#define X_CHAIN_POS -1 // <=0 : Not chained. 1 : MCU MOSI connected. 2 : Next in chain, ...
#endif
#if AXIS_IS_TMC(Y)
#define Y_CURRENT 800
#define Y_CURRENT_HOME Y_CURRENT
#define Y_MICROSTEPS 16
#define Y_RSENSE 0.11
#define Y_CHAIN_POS -1
#endif
#if AXIS_IS_TMC(Z)
#define Z_CURRENT 2000
#define Z_CURRENT_HOME Z_CURRENT
#define Z_MICROSTEPS 16
#define Z_RSENSE 0.11
#define Z_CHAIN_POS -1
#endif
TMc 2209's with SKR 1.3
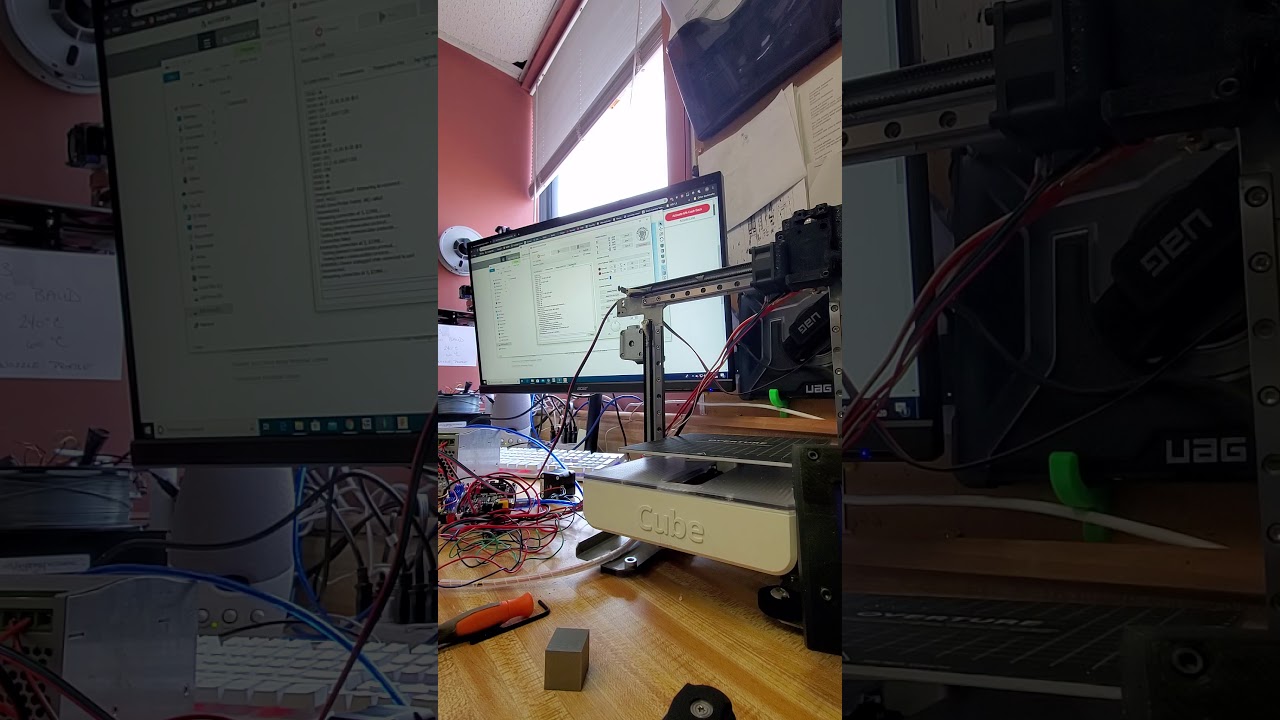
 empty sedge
don't unplug your motors when they are powered
you can destroy the stepper driver that way
what model are the different motors? maybe your z motors have different steps/turn or something
also your typical z speed would be much slower than you demonstrated on x
@glad shuttle does it work when moving slower?
glad shuttle


that is a pic of the motor
so i have just noticed the speed issue on Z before i posted this, I do not really understand why it would be set to move so fast
empty sedge
this thread suggests steps/mm for all axes is the same https://openbuilds.com/threads/tear-down-of-cubify-cube-3-3d-printer-convert-to-reprap.5689/

OpenBuilds
Hi all I am going to pull apart my cube 3 3D printer with the aim of replacing all electronics with RAMPS 1.4 as im fed up with the over priced...
pronterface has a field for the jog speed. Not sure where that is on what you're using
glad shuttle
Im using simplfiy 3d i will check that really fast
empty sedge
your steps/mm are way wrong (or microstepping setting) if the smallest z jog distance is moving 10mm at a time
glad shuttle
ok so it seems turning the speed down might have actually solved it....I have seriously worked on this thing for at least 6-8 hours on an off, and man finding out Im tryin to spin it too fast makes me just wanna die
so what should the steps be set to? 200?
also this * Default Axis Steps Per Unit (steps/mm)
- Override with M92
-
X, Y, Z, E0 [, E1[, E2...]]
*/
#define DEFAULT_AXIS_STEPS_PER_UNIT { 80, 80, 8000, 500 }
?
empty sedge
that openbuilds thread uses
#define DEFAULT_AXIS_STEPS_PER_UNIT {228.57,228.57,228.57,228.57}
but I don't know which microstepping it was with. probably 16x for 2015
the motors are 200steps/rotation, the tmc stepper driver has a configurable microstepping, and I don't know how many teeth or what belt pitch that machine uses to do the calculation for real
so on a prusa i3 it'd typically be 200 full steps/motor turn, 16x microstepping, 20 tooth 2mm pitch pulleys so (200 * 16) / (20 * 2) = 80 steps/mm
the belts are typically labeled with something that will tell you the belt pitch
glad shuttle
Thank you @empty sedge you helped me tremendously. On to the next problem now! Have a great night everyone, stay safe!
vagrant drum
hey all - anyone have any good videos on how to use fusion 360 to make an ergonomic handle specifically from a cylinder?
or how to use a pattern to add finger grooves?
karmic brook
Diyode magazine has this possibly useful tutorial https://diyodemag.com/education/exploring_3d_part_2_beginners_guide_to_fusion_360
vagrant drum
righton thanks
i also found this one - https://www.youtube.com/watch?v=WaBtlb0f4qA
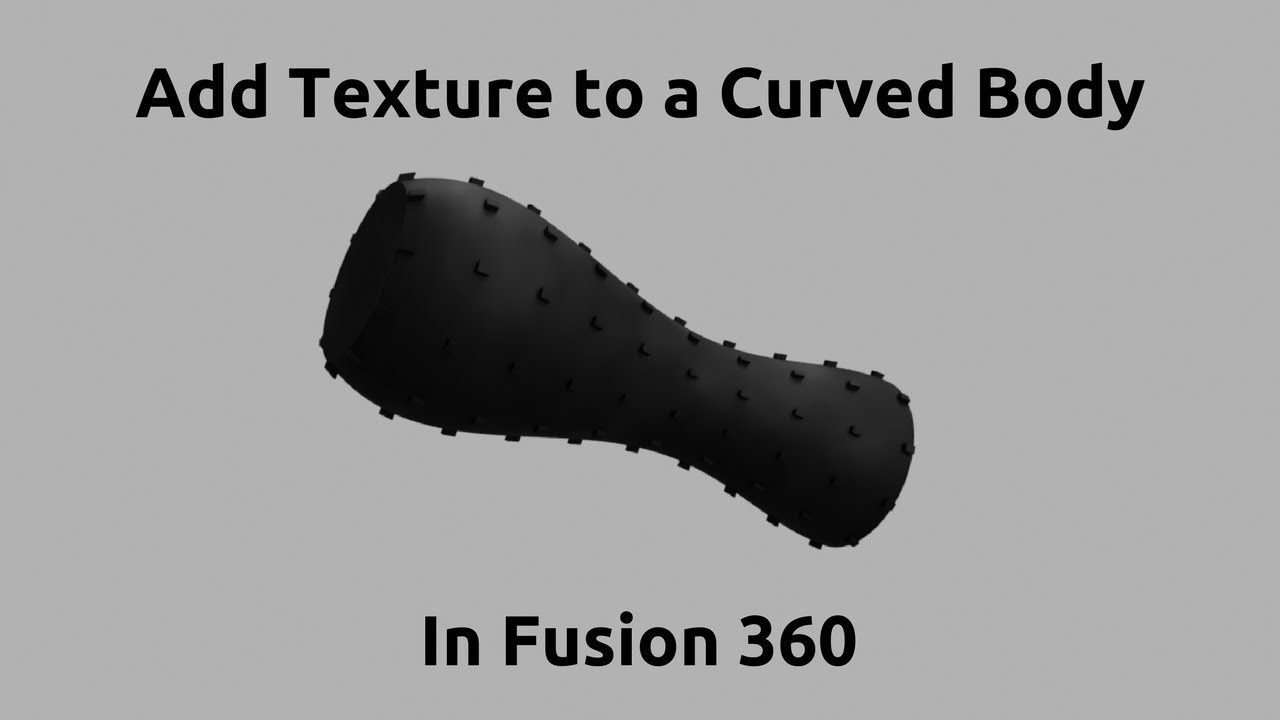
Add texture to your models with Fusion 360.
Stop wasting time jumping from one youtube tutorial to another and get started with Fusion 360 the right way with my Fusion 360 Quick Start Guide. Click on link below.
https://desktopmakes.lpages.co/qsg-youtube
whoa when did https://www.thingiverse.com/ get the new look?

Thingiverse is a universe of things. Download our files and build them with your lasercutter, 3D printer, or CNC.
 twin cape
So, I just replaced my ramps 1.4 board with ramps 1.6, and drv8828 drivers. It works perfectly on all the axis, but the extruder is overheating, I checked the vref and it was 2 volts! And no matter how far I adjust the pot it's still 2 volts! I put a different driver in the e0 socket, same problem, I swapped the pins in the firmware between e0 and e1, the problem followed the pin assignments, because then e0 was 0.6 volts. Any idea what in the world is going on??
empty sedge
maybe the vref adjustment is backwards?
twin cape
how do you mean? when i change the driver its stays 2 volts, and when i move the driver to e1 it goes back to 0.6, is there some software setting for vref?
empty sedge
I mean sometimes the potentiometer has clockwise reduce the current limit