#help-with-3dprinting
1 messages · Page 31 of 1
 karmic brook
I did put thermal compound between the heatbreak and heatsink.
My current guess is that the filament has absorbed some moisture, as it is some I bought before I got the airtight filament storage containers and dessicant. Perhaps it's time to build a filament dryer.
 crude kettle
Is the temp sensor the same as the last one?
karmic brook
Yes, same temperature sensor.
crude kettle
Is the cooling fan okay?
karmic brook
Cooling fan seems fine, it's spinning, not obstructed, and doesn't seem to have anything tangled up in it.
crude kettle
Well what filament is it?
karmic brook
Makergeeks Raptor PLA
crude kettle
Is it an all metal hotend?
karmic brook
The actual hot part is (aside from the silicone sock), but the framework is mostly printed.
crude kettle
Is you retraction distance the same? I'm asking because my printer is doing well with PETG but can't do PLA because the filament gets stick in the heat sink. The heat is not being cooled enough or the fan is not consistently keeping it cool.
karmic brook
I was having that problem previously, which is why I rebuilt the hotend. The retraction distance shouldn't have changed.
crude kettle
Now that I recall I put connecters on my wires. It may be that is my issue.
For you try out an other roll. It may be the roll or a heat sink cooling issue
karmic brook
Yeah, I think the easiest thing to try next is another roll.
crude kettle
Yeah just did the straight solder and the fan sounds like it's spinning faster. Listen to the fan speed as it prints for the heatsink
karmic brook
Before I rebuilt the hotend, I had lowered the print (not heatsink) fan speed to avoid the "thermal runaway" problem. It sounded like a tiny haunted leaf blower as the fan speed varied.
crude kettle
What's your printer again?
karmic brook
Prusa i3 MK3S
crude kettle
Most likely a bad roll
karmic brook
I'm beginning to think so. I'll try some different filament, and if that helps, I'll see if drying the misbehaving roll helps.
crude kettle
Mine is an ender 3 with an all metal hot end mod. The heat sink needs work on my part.
It may be the aluminum alloy transfer too well.
On the e3d clone hotend
karmic brook
I picked up one of the beta heatsinks https://www.printedsolid.com/products/e3d-beta-threaded-heatsink-1-75mm when I was buying hotend parts, I'm seeing if I can integrate it into the Prusa.

Printed Solid
An alternative to Groovemount There are a couple of major flaws with groovemounting (or previous standard HotEnd mounting style): Fit is highly dependent on quality of part machining Fit can become loose from repeated removal and refitting To fight these problems, we're beta-...
 spice estuary
To show how tired I am, I thought that was a dummy load from first glance
crude kettle
There is a screw top there. Interesting to see that put in the Prusa
Been trying to print a nerd gun from Thingivers. Tried pla and that fail at first. A tip I found was to lube the filament with vegi oil
No complaints about the oil yet
karmic brook
The Prusa currently has a groove mount, so I'd have to make a modified hotend to use the screw mount heatsink. It comes with the matching nut, so I wouldn't necessarily have to supply the threaded mount myself.
crude kettle
Sounds like a cool idea. I'm going to experiment with water cooling. The top layer of that cube didn't go well. I like PETG and my printer does very well with it, but I have a lot of PLA and I want to print with that. It may be over kill but it will make my printer look cool.
karmic brook
I have upgraded my filament storage. Instead of a wall rack, they now live in weather-tight boxes with foam gaskets, along with some indicating dessicant.
karmic brook
Hoo boy, THAT did not go well...
 fiery idol
I just started using my 3D Printer again today, (it has been in it's box for a couple months due to me not having room for it and other reasons). The print started out rough but now it seems to be going well. My 3D Printer sure is jumpy! 😆
fiery idol
What would cause ripples in a print?
crude kettle
Check flow rate
fiery idol
It was an old model, it actually printed pretty well. I updated Cura recently, testing out another print. Seems to be going a lot slower than before. But I am using different settings because the settings I had before would make the print take too long.
 empty sedge
So it's likely the extra pressure in the nozzle putting out extra plastic when you slow down to change directions
prusa uses "linear advance" to tune this out https://help.prusa3d.com/article/t5w9VsdVai-linear-advanced

Article describing our brand new Linear advanced.
fiery idol
Huh, cool.
I use Cura with my Creality CR-10. Just finished another test print. The quality is great, I had it set to the Standard Quality - 0.2mm. Time to see if the hex nuts fit in the cutouts I made.
I think my printer bed was not properly leveled, thank you all for the input.
 shy kelp
i want to print this wall mount: https://www.thingiverse.com/thing:216329 but i'm not sure if is better pla or abs. may someone help me?
is it safe to use this project?

Wall mounting for TV / Monitor duel arms for additional strength
UPDATE: Added modified beams after seeing Trais McAllister's great idea of using coach bolts in his build
UPDATE Added alibre 12.1 source files.. v2 is directory with this model
crude kettle
How heavy is the monitor
 spiral laurel
if your printer is performing well and you take care to print in the right orientation I think that would work ok for a 24" monitor. I wouldn't try it with a 50" TV
crude kettle
@karmic brook
BTW what happened to the EXTRUDER
karmic brook
I'm not entirely clear what happened. It seemed to be printing fine, so I went away for a while to do other things. When I came back, it had knocked the print off the bed and the extruder was encased in this glob of plastic.
crude kettle
Nozzle may have been loose
karmic brook
Hmm, are there any specs for how tight it should be? I just reassembled it, so it's entirely conceivable I didn't do so correctly.
crude kettle
I normally tighten my when I install it and a little more after heating it. The heat expansions can ruin a tighten nozzle
That my also explain the bad prints form earlier
karmic brook
I'll try tightening it. The test print looked better but (of course) the real print failed.
crude kettle
Yeah, in my experiments be for hand a loose nozzle can do small print be ends in horrible mess with bigger jobs. Right now I was trying to do a print that was going to be like 15 hours but, 5 hours in, it looks like the all metal hotend hates every PLA roll I give it. May need to switch to a hotend with the PTFE tube inside all the way through set aside just for PLA filament. The all metal love the PETG though.
karmic brook
I haven't worked with PETG yet. I'm tempted to redesign the part to be several smaller prints. I don't have the original design (just the STL), so I'd have to draft the whole thing again, and figure out how to partition it.
crude kettle
File for the Prusa? https://www.thingiverse.com/thing:2699771/files

UPDATE: 12/22/2017 - Fixed the Frame Thickness to 6.25 mm, which was originally incorrect.UPDATE: 1/14/2018 - Added new Heatbed Cover. Found in V3.UPDATE: 2/14/2018 - Added the STEP files for the R2 parts.UPDATE: 2/17/2018 - Added the SolidWorks Assembly with the R2 parts. Ad...
There are step file here for it including the hotend
karmic brook
No, the object I'm trying to print.
empty sedge
@karmic brook yes there are specs for how tight the nozzle should be. I doubt you had it too loose
you probably didn't heat it up to max temp, then tighten the nozzle again. Probably should take out the PLA before you do this
 karmic brook
Hmm, 3Nm at 285°C, yeah PLA would burn at that temperature. Happily, I have a miniature torque wrench with a 7mm socket, thanks!
crude kettle
hope it prints well
 ornate raven
@fiery idol Your print looks like the layer starts in the same place each layer. I've seen that on many of my prints. There's supposed to be a place in Cura to change that bot I haven't looked into it. Can you adjust in your slicer where each layer starts?
fiery idol
@ornate raven maybe, I'll have to check. My last print came out well, (had a slight bed leveling issue), but overally it looked nice. I am using the latest version of Cura. Well, unless they updated it within the last two weeks.
I can't test anything right now. I took apart the control box for my printer. I am try to hack the control board to get more I/O pins. Figured out I can do it through the SPI bus.
ornate raven
My Cura is about two weeks old as well. Look for the YT from some in Canada, does a Friday night show. CHEP, I think is his moniker.
I'm too scared to delve into my control board. I replaced it once (Ender 3 Pro) to get the one with quite stepper motor drive. Cut out 95% of my noise whiule printing.
fiery idol
I need to replace my Creality CR-10 control board, the USB Port is damaged and I have tried repairing it, but I think the circuit board is also danaged.. I was thinking about getting the one from TH3D, but I have not really looked into it.
ornate raven
https://www.youtube.com/watch?v=NU1kYEE3qrQ It's all about the seams.

The seam on a 3D print is often visible. Its where the layer height changes while 3D printing. Chuck shows you how to control seams in Cura Slicer. There are...
fiery idol
@ornate raven thank you, I will have to take a look into that.
ornate raven
You are welcome. @fiery idol
karmic brook
Violà! A filament dryer!
ornate raven
@karmic brook can filament be TOO dry?
karmic brook
I suspect not, but I'm not an expert. Apparently absorbed water can boil when it's heated and cause random pressure changes.
 devout pewter
@karmic brook the nozzle should be tightened while the printer is on and heated to around 230-240C. As for filament being too dry, not really. It will probably start absorbing moisture through the air before it gets too dry.
ornate raven
Thank you @devout pewter. I'm thinking of putting in a big nozzle and trying to print with some filament that has a lot of carbon in it and keeps plugging up my regular use nozzle. The torquing tip will help.
devout pewter
You're welcome. I just changed a hot end (along with nozzle) recently, so I was pretty up to date on the procedures.
ornate raven
I used to work in the plastics industry. I've had to learn new nomenclature for the home 3D printing world. Actually not new, just used differently. An "Extruder" for me was a big heated screw chamber that mixed and melted plastic. The "Hot End" was a "Die". But, I'm getting there.
 molten sandal
@karmic brook Sorry I didn't catch this discussion going on
What @devout pewter said was right, you need to hand tighten the nozzle, reverse turn a quarter turn
heat the nozzle and then tighten the nozzle up (but don't wear out the threads)
The block is usually made of alu and might wear the threads out
karmic brook
I think you folks were right, thanks. I heated up the hotend and then tightened the nozzle to 3Nm with a miniature torque wrench. Took almost 3/4 turn, so it was a lot looser at operating temperature than I realized. Then I redid the first layer calibration (I had wondered why it seemed to be varying, this would explain it), and now I'm doing a test print to see if it's behaving better.
crude kettle
I learned this lesson several times before. One time at my college I was helping with getting their 3d printer maintained and we have issues with accuracy for months. turns out it was a loss nozzle that was our issue. An issue I over looked
karmic brook
Test print went fine for the first couple of hours, just a couple of nits, when I went to check on it again, the nozzle was again encased in a giant blob of plastic and it had knocked the print off the bed. 😦
crude kettle
Check to see if the lead screws are loose
karmic brook
Which lead screws? The Z axis?
crude kettle
Yeah
karmic brook
They seem solidly joined to the steppers. Not sure how that would blob up the hotend, but I'm still learning about these beasts.
crude kettle
I may have jumped a tangent there. Are you sure the print is being knock off VS the print not sticking
karmic brook
It looks like the print and/or head gets blobbed up, then it crashes and yanks the print off the bed.
There are a few big blobs of plastic on the print and of course the large one on the hotend.
crude kettle
Hmmmm....what temp is the roll rated?
karmic brook
220/240
crude kettle
Brand?
karmic brook
colorFabb
crude kettle
I would think that would be fine filament. The wires to the extruder I guess at this point
karmic brook
Hmm, there are a bunch of wires to the extruder (stepper, heater, thermister, heatsink fan, print fan, filament sensor)
crude kettle
The stepper
karmic brook
Hmm, I can see how that could cause it to miss steps, but I don't see how missing steps would make a filament blob (unless retraction totally failed?)
crude kettle
What is the job of the filament sensor again? Does it adjust the speed of the filament?
karmic brook
No, it just notes whether the filament is present (designed to detect running out or breakage), it has no notion of speed.
There was talk of a fancy laser based filament speed sensor but apparently it was impractical, because it was quietly dropped.
crude kettle
With the stepper there could be a chance that it is pushing too much filament at one time
karmic brook
Hmm, could be. I wonder how to figure out what the extrusion ratio should be.
Or perhaps the new nozzle isn't quite the right size, which would give similar problems.
crude kettle
Did you update your slicer
karmic brook
No, last update was about 3 weeks ago.
molten sandal
@karmic brook sorry to hear about the blobs, these are by far the most frustrating problems do you have a picture of the mess this time?
empty sedge
@karmic brook Is the shoulder on the nozzle bottoming out on bottom of your heater block? There should be a gap between that shoulder and the heater block so the nozzle seals against the bottom of the heat break
 karmic brook
I suspect what happened is that I got a blob on the print, which then caught on the silicone sock and pulled it out of position, at which point, the nozzle was extruding into the sock.
crude kettle
Ah, just an unfortunate series of events while printing
devout pewter
Perhaps the Silicon sock just wasn't on well enough. Also, maybe try printing without if on to see if that helps.
karmic brook
I didn't get a picture of the second mess, here are the pieces after I carefully hacked it off the hotend while trying to avoid destroying the thermistor and heater wires.
It's a little hard to tell whether the nozzle has a gap or not, but the information that it (more or less) seals to the heatbreak, not the heat block, is good to know.
You can see that there's still hardened plastic on top of the heat block, that's going to be annoying to remove. I may have to completely disassemble the hotend again, in which case I'm tempted to just go whole hog with a titanium heatbreak and vanadium nozzle, but I'm also wary of changing too many things at a time.
I am planning on giving it a go without the sock for a while, at least until I tame the blobbing problem. I'll have to remember to reduce the fan speed so I don't get the thermal runaway issue without the sock.
 cunning oyster
Hi All - in last Thursday's 3D Hangouts episode, they reviewed a new Creality printer. IIRC, it was the Creality3D CR-10 V2. Is this the one?
https://creality3d.shop/collections/cr-series/products/creality3d-cr-10-v2-3d-printer

Creality 3D
Creality CR-10 V2 will come in mid-September! 7 Disruptive Upgrades enable smart and premium user experience. Enjoy your DIY Fun!
fiery idol
Huh, it does not like they did much to it. I am adding in some extra features to my CR-10 right now (RGB LED Support, modified the Firmware, built my own LED Driver Circuit, now Assembling everything). Back to the Creality CR-10 V2, it looks like there was a problem that made them add in those front supports. I wonder why they need those.
cunning oyster
I'm new to 3D printers. Looking to buy my first one. This looks like way more than I need to get started, honestly, but they did such a nice job talking about it that it made me start looking at them. I don't plan to make anything nearly that tall out of the gate.
I'm open to recommendations in the "My First 3D Printer" category.
fiery idol
A fairly popular 3D Printer is the Creality Ender 3. I am not a 3D Printer expert, but they do seem to do a decent job for their price. You can find information on hack and mods people have done to the Ender 3. Prusa makes good 3D Printers for a reasonable price. They can also be upgraded.
cunning oyster
Great. Thanks! I'll check them out. I have heard the Prusa name before.
fiery idol
I know someone who has one, and they love it. Some parts on the Prusas are 3D Printed, so if there is a issue with a part or there is a better version, you can just print a new one.
cunning oyster
Well, that's handy.
fiery idol
I have the Creality CR-10, it's a big printer, too big. It's hard to find a spot where I can put it in my room. It's so tall and the control box is separate. It's nice to know though that if I need to print something tall I can do it.
cunning oyster
Yeah, that's where I get hung-up. I can't think of a good rationale for a tall printer other than, "...well, what if I want to print something TALL some day? Then I'll be READY!" But the pragmatist in me kicks in and starts questioning the $$ outlay.
fiery idol
Yeah, true. I got my printer for Christmas back in 2017. I think we paid $517.00 for it off of Amazon, the nice thing was that is was mostly assembled.
crude kettle
It is pretty big, not good for those who lives in small place.
fiery idol
Yeah, it's hard to find a good place for it.
karmic brook
The Prusa Mini is smaller, more affordable, and easier to assemble (3 pieces) than the Prusa i3, but it's not available quite yet.
cunning oyster
I had the idea that the Prusa printers were fairly spendy. Let me rephrase, the Prusa printers are more expensive than I was thinking for an initial printer. Is it worth the investment?
 vast girder
Related question: Experienced users, how does the initial price of a printer compare to the ongoing costs of operating it? Considering consumables, upgrades, repairs, whatever else, is there a case for one or another being "cheaper in the long run"?
shy kelp
I'm just waiting to meet someone in a bar or a coffee shop who tells me about their ten year affair with 3D printing. ;)
fiery idol
@vast girder it just depends on the quality of the parts the printer is made with. I have already had to change extruder nozzle once, I have not really done much printing. There is not really a whole lot that can break on a 3D Printer. Replacement parts can be expensive at times and it could eventually cost more than half of what the printer originally cost.
Maintenance also plays a large role in how long a printer will last, if you keep everything greased up, don't leave filament in the extruder, etc., then the printer should last for a quite a bit of time.
 violet needleBOT
Adafruit Industries posted Deadly Rose #3DPrinting #Timelapse @adafruit #adafruit
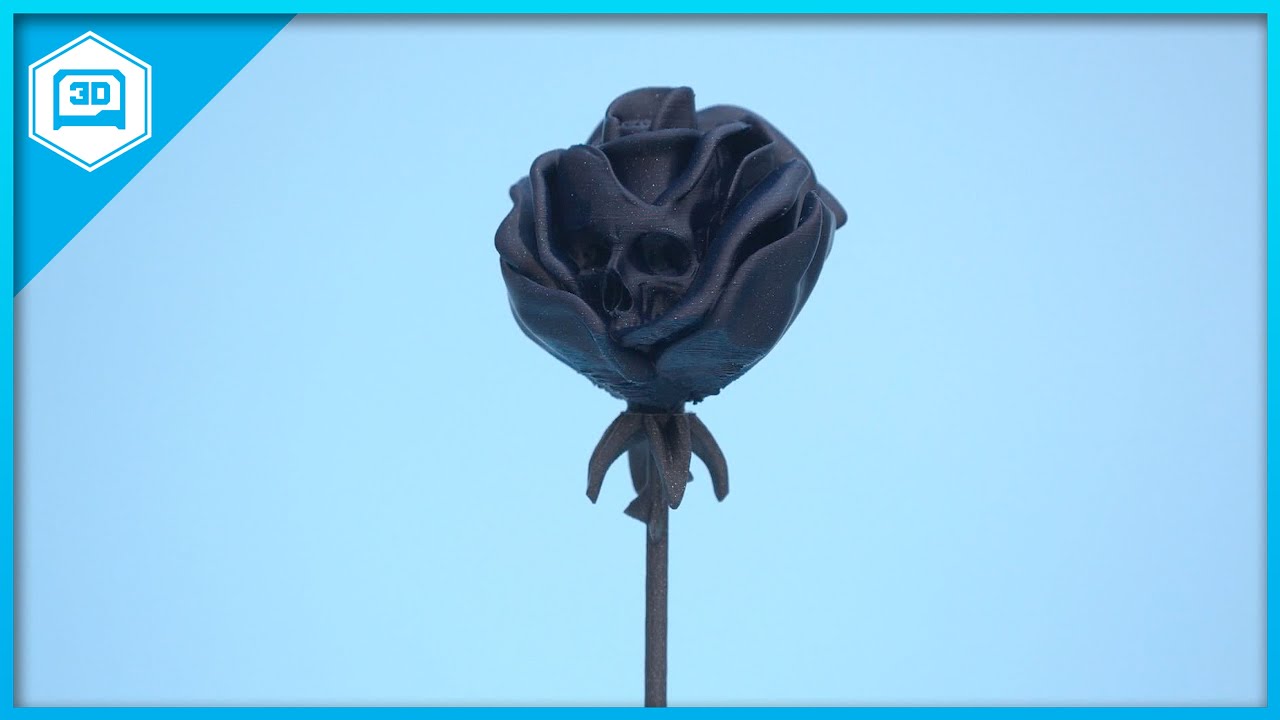
Every week we'll 3D print designs from the community and showcase slicer settings, use cases and of course, Time-lapses! Deadly Rose Tanya Wiesner https://ww...
devout pewter
@cunning oyster I have the Prusa MK3S and it's my go-to printer. I definitely think it's worth the extra money, especially if you just want to print and not have to worry about tinkering with it all the time.
karmic brook
Agree on the Prusa
vast girder
So you're saying that tinkering with it all the time isn't the whole point? 😉
crude kettle
I got the Ender 3, but that's because I'm cheap. If you have the cash go prusa
karmic brook
I have a MPMD for that and the Prusa for when I actually want to print something
crude kettle
My current printer set up does petg flawlessly. However tuning setting was a pain. Not to mention the upgrades i did. It was fun though.
crude kettle
What printer do you have?
vast girder
@crude kettle Actually I don't mind tinkering. I don't see any way I'll be turning a profit using one. The main thing I'd want out of it is some experience and understanding of how it works and what can go wrong, and how to get decent results I guess. I'm actually leaning towards the Ender-3 because it seems to be a semi-kit.
crude kettle
It is fun to work with. I don't regret buying it.
 small heron
they are fun, good way to get creative
violet needleBOT
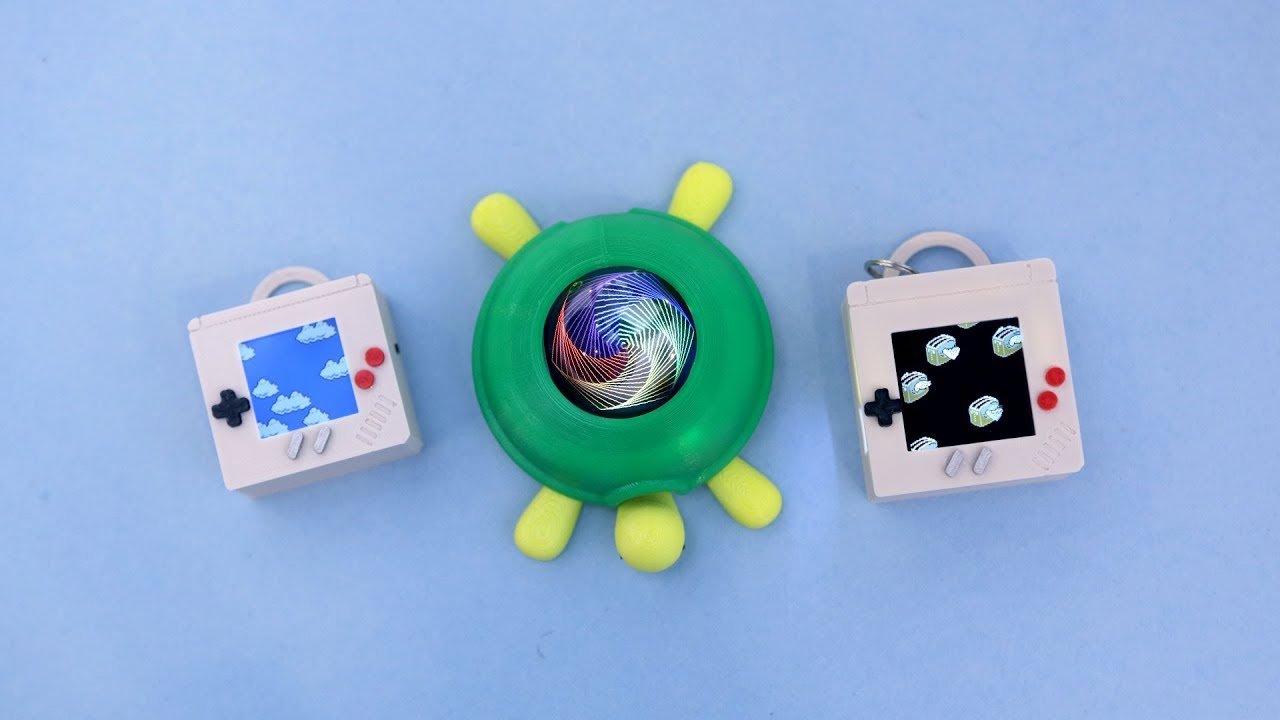
Adafruit Industries posted 3D Hangouts – Flying Toasters and Clouds
 fiery idol
There is a sale on the Creality CR-10 right now. https://www.creality3d.shop/products/creality-cr-10-3d-printer-prusa-i3-diy-kit-aluminum-large-print-size-300x300x400mm

Creality 3D
Only $379, Buy official service Creality3D CR-10 3D Printer, free shipping.
violet needleBOT
Adafruit Industries posted 3D Hangouts – Flying Toasters and Clouds
 fallow ermine
What's everyone's preferred PLA filament brand? I normally use matterhackers and was gonna buy a roll since it's like $20 for 1 kg right now but I wanted to ask what everyone else uses/recommends
fiery idol
I use 3D Solutech. I also have a spool of Hatchbox, it's more expensive and I don't really like it. Only have Three Spools of filament, but the 3D Solutech stuff has not been too bad.
fallow ermine
I found like 1/3 of a 1 kg spool of ABS in the trash today 👀
karmic brook
I'm fond of Prusament, but shipping from the Czech republic is expensive. I'm experimenting with colorFabb and eyeing Atomic Filaments.
cunning oyster
What about design software? Is there a generally-accepted "best" option?
karmic brook
That varies a lot by user. Blender, Fusion 360, and OpenSCAD seem to be popular, they're all good at different things. However, there are dozens of choices out there.
If you do a Discord search for a particular package (those I just mentioned, FreeCAD, TinkerCAD, SketchUp, etc.) you can find peoples' comments about them.
cunning oyster
Thanks!
Any chance you have an opinion on snow tires, because I am reviewing those, also! 😉
karmic brook
My Canadian friends love Nokian Hakkapeliitta snow tires.
I'm fond of Goodyear Assurance TripleTred, aside from the goofy spelling and CamelCaps.
cunning oyster
Been looking at Bridgestone Blizzak and General Altimax Arctic. Really any snow tire will improve on an all-season. But we digress...
karmic brook
Yeah, the TripleTred are all-season, which suits where I live, as we get mostly mud and slush.
karmic brook
It's DOS-only, so I wouldn't use it anyway.
fallow ermine
What's that
karmic brook
Creo only runs on DOS/windoze.
violet needleBOT
Adafruit Industries posted Mario Clouds and Flying Toasters #3DPrinting #CircuitPython

Learn Guide: https://learn.adafruit.com/circuitpython-sprite-animation-pendant-mario-clouds-flying-toasters/ In this project we’re making retro inspired wear...
 forest wyvern
@fallow ermine Out of curiosity, did you learn Solidworks before Inventor? I am learning Solidworks right now after being an Inventor Professional and have the same opinion on the CAD softwares you mentioned, just with Solidworks and Inventor switched.
fallow ermine
@forest wyvern yeah, I've used solidworks for like 3 years now and I've minimally used inventor (my friend however uses inventor a ton) and even with the minimal experience I have with inventor I still prefer it over the piece of crap they call creo
forest wyvern
Neat, I haven't used Creo but I'll take your word on it. It's very humbling going even from Inventor to Solidworks, it is similar enough to make you feel like you should know what is going on but at the same time different enough to make you feel entirely new to CAD 😆
fallow ermine
The biggest complaint I have for creo is that if you want to make a cut you can't just make a shape on a plane and select it then click cut. You have to like negatively extrude it 🙄
devout pewter
I used to do all my stuff in openSCAD, but moved over to Fusion360 a couple months ago. I can design way faster with Fusion 360.
fallow ermine
When your class requires you to use creo so you just design the whole part in solidworks then import to creo 😂
karmic brook
I also started with OpenSCAD, now I'm dabbling with Fusion.
 turbid hill
Don't recall Creo being that much of a pain compared to Solidworks. It's been a few years, though.
forest wyvern
@fallow ermine When you say negatively extrude, do you mean use the extrude tool and switch it from extrude mode to cut mode?
karmic brook
I assume it's like OpenSCAD, where you "subtract" the extrusion from the original piece.
fallow ermine
I honestly don't know man, I try to figure out what tool does what and it takes like 2 minutes of hovering over it with my mouse before a label pops up
turbid hill
Creo’s built-in documentation was pretty sparse last time I used it. But with a decent book, it was fine. I got burnt in my previous job by students (and a few faculty) always running down Creo in favor of SolidWorks (which we had no license for aside from donated licenses to vehicle design teams).
One thing I appreciated about Creo was that once you made a sketch, it threw all the dimensions required to lock down the sketch right in your face. If the dimensioning scheme looked like crap, you were supposed to fix it. Inventor at least tells you how many are left. Solidworks just color-codes the lines that are unconstrained.
small heron
has anyone printed any sorta case/backing for a neopixel jewel ? I need something to keep me from breaking wires
this is more of has someone already done this to save me work sorta thing
empty sedge
@small heron like this? https://www.thingiverse.com/thing:3209885

Updated
After watching a video by Becky Stern on using snaps to attach components to garments I decided to try updating my model to include garment snaps and channels for running wires to them.
It worked :) so I thought I'd put the updated model up here too.
It's a little b...
empty sedge
that's about the closest I found searching thingiverse
there were a few others, you should search yourself
 wary violet
small heron
wary violet
small heron
what material?
forest wyvern
@wary violet If you have access to a sand blaster, that is the fastest way I have found.
small heron
PETG is a good ABS replacement
crude kettle
And can be done on an open frame 3d printer
small heron
Acetone will not work on PLA
heat and filling compound would work depending on the size of it, but you will loose detail
 deft raven
I just got a 3D printer with a heated bed. This is the first one I have used that has a heated bed. I cannot get the ABS to stick to the bed. Do I need to add something to the bed?
empty sedge
what is on the bed? can it get to 110C?
deft raven
I don't have anything on the bed. It is set to go to 115C
 boreal thunder
So, I’m definitely upgrading my CR-10S’s board, but I’m undecided on drivers. Recommendations would be appreciated. TMC2208s, 2209s, or something else? Is there accuracy to the widespread reporting that the Z axis and/or extruder are better served by a different model of driver than the X and Y due to skipping problems?
For that matter, MKS Gen L, or SKR?
empty sedge
I've been able to print ABS on: Kapton tape, PET tape, glue stick on glass, white glue (pva) on glass, and PEI
I've had trouble printing ABS on clean glass
if you have a taz, the adhesive holding the PEI down doesn't last very long at ABS temperatures and the PEI will bubble up
deft raven
@empty sedge Sorry, I got pulled away for a minute. I am not sure what the be is made of. It is a Airwolf3D HD. The software is saying the bed is getting the 115C
empty sedge
that's a few years old. It looks like a PCB heater with glass on top, and maybe a pet sheet on the glass (green)
deft raven
No pet sheet. I just have the glass
empty sedge
if the glass is bare you'll want to spread something on it to stick to. I've diluted white glue with 8 parts water 1 part glue and spread it on so it's a bit cloudy instead of clear
you could also use a glue stick when the glass is cold
airwolf3d also sells stuff you can spread on
deft raven
Got it. I thought the point of a heated bed was you didn't need an adhesive?
empty sedge
ABS shrinks too much when it cools to stay stuck to anything that isn't heated

This is a demonstration of how I apply PVA glue to my glass print surface on my Reprap MendelMax 3D printer for printing with PLA filament. I can print PLA o...
deft raven
Got it! I have always used PLA on a normal piece of glass that I spray hairspray on.
empty sedge
it's possible to print ABS on clean glass if you get the temps and print speeds just right but you'll have MUCH better luck with some stickier layer to bond to
deft raven
Cool. Thanks for your help!
empty sedge
at this point, I'd recommend just printing PETG and ignoring abs: there is no smell, it doesn't shrink as much as ABS, and you can use similar prep to PLA
don't print PETG or PLA directly on glass. It can stick well enough to pull chips out of the glass
also, with wolfbite or dilute elmers glue or glue stick you won't have to re-apply every print
deft raven
Ok. I have PLA from our other printers and this printer was donated to us with a bunch of ABS. I will order some PETG and try that.
empty sedge
that old airwolf might not be able to print pla with the original buddaschnozzle-clone hotend.
deft raven
OK. Thanks. It was donated to us so i'm not out anything if I can't get it to work. It wouldn't even power on when I got it so the fact that I have gotten this far baffles me. I have experience using 3D printers but haven't build one so I was pretty happy when I got it to turn on and move
empty sedge
buh how do I delete sketch constraints in fusion 360?
turbid hill
Click the constraint symbol on the sketch, hit the delete key?
empty sedge
it selects the edge, not the constraint when i do that
spiral laurel
long-click, or maybe just right-click will give you a drop down menu to select other things under the cursor besides the default
 edgy steeple
for the price areyou guys fans of the Creality CR-10 V2?
boreal thunder
... No strong driver feelings, then?
empty sedge
Ugh inserting a component from another document doesn’t bring along the joint origins
So I can’t use another document to define the weird shape of a hole I want to cut in several places because I can’t joint the hole by a feature on the hole
karmic brook
Thanks for your help with my printing issues. Ended up rebuilding the hotend twice. Now it has the stepless titanium heatbreak and is working reliably again. The base of this giant LED was a 16-hour print and ran just fine (the previous 8 tries all failed within the first 3 hours).
shy kelp
I thought maybe you had an LED sized cat, there. 
crude kettle
Glade to hear that your printer is working fine.
I too was having printer issues, but I found out my blower fans for part cooling was blowing on the brass nozzle and not the part itself. Works much better now that I printed a new fan mount that angles the air to where is needs to be.
fiery idol
Now make the Giant LED light up!
karmic brook
Oh, that's in the cards. I'm thinking of having a fairly bright LED underneath a chunk of acrylic to emulate the LED die, and a gold wire coming from the post to the anvil to emulate the bond wire.
The pieces are hollow so I can thread wiring through them. I'm also planning on printing another piece for the leads outside the body, and a chunk of solderless breadboard for it to plug in to (I'll hide the power supply there).
fallow ermine
@karmic brook I like your void kitty
molten sandal
@karmic brook Glad to hear your printing troubles are finally over
For anyone interested in adding textures to a surface in Fusion 360
check out this library plugin! https://github.com/hanskellner/Fusion360Image2Surface

GitHub
Image2Surface Script for Autodesk Fusion 360. Contribute to hanskellner/Fusion360Image2Surface development by creating an account on GitHub.
I've been using it to make custom jewelry for my partner
could be useful for making light deflectors, transparent pla light diffusers as long as you have a grayscale image
edgy steeple
@supple stratus @idle crest How are you guys likeing the CR10 V2?
I see they are running around $499.. anything else in that range you would recommend?
 summer marsh
has anyone made their own sla printer with nanodlp? Z axis works manually but it doesn't move when printing
karmic brook
The Prusa Mini is in that price range and should be a solid performer.
empty sedge
the removable steel sheet and leveling probe on my i3 mk3 is a large improvement over my previous machines
karmic brook
That's true for me too.
violet needleBOT
Adafruit Industries posted Dice Tumbler #3DPrinting #Timelapse @adafruit #adafruit

Every week we'll 3D print designs from the community and showcase slicer settings, use cases and of course, Time-lapses! Dice Tumbler Davis Fay https://www.t...
karmic brook
How do you do the smooth timelapse zooms? Or is that done after the fact?
violet needleBOT
Adafruit Industries posted 3D Hangouts – Python Clocks and Watches

Learn guide, code and build photos https://learn.adafruit.com/circuitpython-oled-watch/ Feather M4 Express https://www.adafruit.com/product/3857 RTC FeatherW...
 blazing python
Okay, so, I need some advice if somebody has experience.
I have an ender 3, and the nozzle got clogged because of the fairly common disk-shape-clog issue. After a lot of work I managed to clean out the hot end completely and bought new bowden tube. Now when I'm trying to install it, it turns out the outer diameter of the tube is smaller than stock - and the coupler thing on top of the hot end doesn't grip to it at all. The coupler seems really janky in the first place but I have no idea where to look for more sturdy replacements. I've seen some identical couplers on banggood, but they come with tube anyway. Ideas? Just buy a set of replacement tube from china?
An idea I had was to thicken the outside of the tube with some electrical tape - it shouldn't get too hot since it's at the cold end of the hotend. But it seems... too hacky.
karmic brook
I get parts like that from printedsolid.com, they have a few choices for the Bowden tube coupling (they also have both standard PTFE tubing and the Capricorn TL kind). https://www.printedsolid.com/apps/omega-search/?q=bowden#q=bowden

Printed Solid
blazing python
They look like a really nice supplier, but unfortunately I'm in the EU.
karmic brook
Hmm, how about Oozenest? https://ooznest.co.uk/product-category/parts/extruders-hotends/extruder-hotend-parts/bowden-systems/
Ooznest | 3D Printers & CNC Machines | Parts, Kits & More
blazing python
That seems nice, I will go with them. Thank you for your help :)
 blissful marlin
Got some trouble with bigger prints. Small prints work fine but when I try to print something bigger the brim starts warping
I am using PLA on a heated bed - bed is level (auto bed leveling)
Any ideas how I can fix that?
Printing on a mirror
violet needleBOT
Adafruit Industries posted 3D Hangouts – Python Clocks and Watches

Multistreaming with https://restream.io/ Learn guide, code and build photos https://learn.adafruit.com/circuitpython-oled-watch/ Feather M4 Express https://w...
empty sedge
@blissful marlin can you upload a photo?
empty sedge
On this page you'll be able to visually try to match the problems you are having with your print and hopefully find enough information so that you can eliminate
violet needleBOT
Adafruit Industries posted CircuitPython Watch / Desktop Clock @adafruit #adafruit

It's CircuitPython Time! Guide: https://learn.adafruit.com/circuitpython-oled-watch In this project we’ll show you how to make a watch using an Adafruit Feat...
 sour ivy
any one have a file for a a 3D printed trophy?
karmic brook
Take your pick https://www.yeggi.com/q/trophy/
1919 "trophy" 3D Models. Every Day new 3D Models from all over the World. Click to find the best Results for trophy Models for your 3D Printer.
blissful marlin
Is there a slicer that has easy to remove supports?
Cura seems to be to impossible to remove at times
karmic brook
Have you tried the "tree" supports? I usually used the rectilinear ones but they took a little tweaking for alignment/spacing to make them easier to remove.
empty sedge
I use the "lines" supports in cura 15.04
 turbid dawn
HI all, does anyone know if this version of the Benchy is available anywhere? Thingiverse search is being...less than helpful this morning.
 empty sedge

#3DBenchy is a 3D model designed by us at CreativeTools specifically for testing and benchmarking 3D printers. It is a small recognisable object that you can download for free, make and share.
It is designed to 3D-print quickly and be a fun tool for calibrating your 3D prin...

download.3DBenchy.com You can download the official #3DBenchy high-resolution STL file for free by clicking on any of the 3D print file-sharing sites below. To download the multi-part #3DBenchy STL…
^ that page has links to other places to download
turbid dawn
@empty sedge Oh I never realized the original was all split up. Whoops! Thanks for the link
empty sedge
it wasn't originally but they added the additional files to thingiverse
 vernal panther
Does anyone have a reccomendation for a good first 3d printer to buy or make? I was looking at making a reprap but wasn't sure which model to get and whether I should get a kit or buy individual parts.
empty sedge
the prusa mini or prusa i3 mk3s
the creality machines are popular and cheaper but you'll waste more time tweaking them than a prusa
vernal panther
Ok. Thanks for the info
@empty sedge How important is it to buy one from prusa? I see clones on aliexpress for about half the cost, but I'd gladly pay the extra money for the real prusa if it was significantly better
empty sedge
get the mini from prusa if cost is a huge concern
the ones I've seen on aliexpress are missing very important parts like the control board and printed parts, and then once you get it you'll have to deal with every way they cut corners that isn't obvious like not doing a great job on the filament drive gears, linear bearings, screws, or hotend wiring and polishing
I could probably get an aliexpress one working, but I don't think it's worth the trouble for a first printer
[I've built several prusa i3 from scratch but still bought the official prusa bed, steel sheet and filament gears for upgrading one of my machines because it's so much nicer than the "glass on pcb heater" I had before]
[my current home printer is kind of a 12v i3 mk3s, built using an ultimachine einsy (same as mk3s) but 12V (using prusa i3 mk2s bed)]
the hackerspace printer is an i3 mk3s and it's been much more reliable than any other printer we had previously. before that we had an ultimaker 2
karmic brook
I started with a cheap printer (Monoprice Mini Delta). It does basically work, but it needed a lot of modifications before it would print reliably, and it still has quirks and limitations. After using it for a while, I waited for a sale and picked up the kit version of the Prusa with free shipping, and it's a great printer.
cunning oyster
@karmic brook - did you get the Prusa Mini?
karmic brook
I got the i3 Mk3S, which was the only one available at the time. It's more of a kit (took me a couple of days to put it together). The Mini looks like a good buy and is apparently just 3 parts to put together, so assembly should go quickly.
cunning oyster
Agreed, though their website says they aren't shipping new orders for MINIs until February
karmic brook
They also offer a SLA printer, but I don't know as much about those.
Yeah, the early Minis got snapped up in a hurry, and I'm guessing they're still ramping up production.
cunning oyster
The price point is interesting.
karmic brook
I noticed the same thing: there aren't many printers at that price point, there are a lot in the <$450 range, and plenty in the $2000 and up, but not a lot in-between.
cunning oyster
Have you seen the Railcore printers? More expensive, but look nice.
karmic brook
I haven't looked at those. I'd looked at Flashforge, Creality, Lulzbot, and Taz lines principally.
cunning oyster
Sheesh... Way more expensive.
Yeah, I have been eyeing the Creality options
Then I bought snow tires...
Those aren't as much fun
karmic brook
A lot of people like them, but they do seem to generally need some tweaking and mods before they work reliably. That's not necessarily a downside, just something to be aware of. I wanted to treat mine as more of an appliance, so a more ready-to-go unit appealed to me (this is also why I was eyeing the even more expensive ones as well).
cunning oyster
Understood. Have you ever tinkered around with a SCARA printer?
karmic brook
I'd had years of frustration with inkjet printers that always had clogged heads and finally sprung for a dye sublimation printer that's ready to go anytime and doesn't waste massive amounts of ink every time I turn it on. It was such a relief that when I hit frustration with a cheaper 3D printer, I was motivated to get one that wouldn't need too much ongoing effort (and fortunately, I had the means to afford one).
The Scara is the one that basically works like an Axidraw?
cunning oyster
Nice. That's great. That Prusa you bought comes highly recommended.
Yes, I guess so. But I confess I had to look up Axidraw
Looks like it though.
Just adding Z
karmic brook
Right. It's an interesting approach.
cunning oyster
Interesting idea - especially as the robotics industry continues to mature and evolve and get less expensive.
karmic brook
I'm keeping an eye on the Duet printer as well, they seem to have some clever leading edge design going on.
cunning oyster
I had never heard of them until I watched a Hackaday video this week about CoreXY, and he did a brief mention.
Duet makes the boards, yes?
Are they making their own printer?
karmic brook
It looks like they're headed that way. I found them from a mention on this page for an improved E3D heatsink https://www.printedsolid.com/products/e3d-beta-threaded-heatsink-1-75mm
Printed Solid
An alternative to Groovemount There are a couple of major flaws with groovemounting (or previous standard HotEnd mounting style): Fit is highly dependent on quality of part machining Fit can become loose from repeated removal and refitting To fight these problems, we're beta-...
cunning oyster
Well, then.... That's a good catch.
empty sedge
the threaded e3d heatsink is used with a fancy delta printer effector that has a force sensor built into the effector by building the effector out of a PCB

Filastruder
In stock, ready to ship. Available in 1.75 mm only. 6 Spare Magballs 12 Magballs + 6 360mm Arms The Smart Effector for delta printers allows the hotend to be used as a Z probe giving fantastic accuracy across the whole delta build area by eliminating the effect of tilt. It u...
karmic brook
Oh, neat! I had wondered how it was used (while considering printing a mount that would accommodate the heatsink nut for my current hotend).
 sullen zinc
I have been using "abs juice" for first layer adhesion on a glass bed, but after awhile I end up with a buildup of the stuff and that makes for ugly first layers. Any tips on removing it?
removing it mechanically (fingertip or plastic spudger) takes a long time and risks scratching the glass, and pouring a bunch of acetone over it and into the environment doesn't seem great either.
shy kelp
single-edged razor blade?
sullen zinc
I hate bleeding on things but it might be worth a try
crude kettle
Marlin 2 is giving me issues. Trying to use the Bltouch with auto mesh bed leveling.
Any idea what I'm going wrong or a resource I can see
molten sandal
try the marlin forums?
You'll get a much quicker reply there
I'm doing my ABL right now too actually

This group is hosted by a core developer of Marlin Firmware, and is specifically for announcements, questions, and discussion about Marlin. Promotional posts will be removed.
 clear kindle
How to prevent Resin from leaking out of tiny openings? Can you wait till like jelly like before pouring?
spice estuary
Most I know that do resin use foam instead of 3D prints to not havectiny openings
karmic brook
People will often plug tiny openings with clay, wax, or the like.
blissful marlin
I have some loud noise when my printer is moving quickly on the x axis (CR10S5).
I assume something is causing vibrations on the printhead but I can't determine what it is exactly
Any ideas what it could be or some settings I can try to change that might help?
 boreal wyvern
I asked the duckduck and from the reddits it seems common, for some it sounds like people added a variety of x-axis belt tensioners and it reduced resonance. https://www.reddit.com/r/CR10/comments/8nzh7m/x_axis_vibration_ratteling_please_help/

reddit
Hello, when X axis on my printer moves above 50 mm/s it gives this vibration sound...
small heron
has anyone here worked with the lulzbot dualstruder?
I am working to get the one in the library up, wile I have gotten it to work more then anyone else I seem to be haveing some issues, it would be nice to have someone to talk through it with.
I am useing https://www.thingiverse.com/thing:3193522 as my test print, i seem to be haveing some allignment issues on the tail and the head, print failed at about 50%.

Check out my Amazon Page to see what kind of gear I use to make these models!
This is a two-color version of the Cali Cat designed for dual extruder (or dual extrusion) printers. Just load the two files into your favorite slicer and print them both out!
Printed on a Lulzbot T...
small heron
karmic brook
Looks like multiple things need adjusting, aside from any dual extrusion issues.
small heron
yeah, i got it to print the 2nd time @karmic brook i am messing with the offset right now
it looks like the blue did not adhear well to the orange
I switched to a 2x2 block to work stuff faster, as im here outside of lab hours
karmic brook
Maybe lower the fan speed or increase the extrusion temperature?
small heron
I can try that in about 17min
I don't have the time sadly to do test with the abs to see what happens
karmic brook
Sounds like you have the right idea of experimenting to narrow down the settings you need to use, but each test takes a while.
small heron
but this is better then the nothing at all it was before
yeah, it helps to have another person to work it through sometimes
karmic brook
Quite true. Some folks here have helped me the same way.
small heron
fine tooning this x offset will suck
karmic brook
There ought to be some test print that would try a few options in quick succession to help you narrow it down more quickly.
small heron
the calipers led me to think -1mm
karmic brook
Calipers seem like a very good idea.
small heron
I am so glad that the lab got them
I have a feeling over a larger piece that that will get worse
karmic brook
I'm guessing it's the fixed offset between the dual nozzles, so won't increase on larger prints, but I could well be wrong!
small heron
heem, it may have been what caused the first cat to fail
thats a guess, sorta
heem -1.0mm might have been closer then I thought
karmic brook
Cool!
violet needleBOT
Adafruit Industries posted Skull Ornament #3DPrinting #Timelapse @adafruit #adafruit

Every week we'll 3D print designs from the community and showcase slicer settings, use cases and of course, Time-lapses! Santa Skull Ornament spooner2011 htt...
fallow ermine
Anyone have experience/thoughts/reviews on this printer? https://www.gearbest.com/3d-printers-3d-printer-kits/pp_1845899.html?wid=1433363&lkid=14716855
I'm trying to get a good low budget one for home
 wide otter
It's a good entry-level printer, but you can get it cheaper. I got the Pro model for $201 shipped.
fallow ermine
Ooh
wide otter
This is Creality's website if you want to order directly from them: https://www.creality3dofficial.com/
Explore the world of 3D printing through Creality3D official store. Ender-3, Ender-3 Pro, Ender-5,Ender 5 Plus , and CR-10 Max etc. Visit the Creality3D official online store to learn, buy, and get support.
They have sales every once in a while.
fallow ermine
That would be smart to do
vs a site where like half the reviews are in Russian or something lol
vast girder
@fallow ermine You could use the search function for "ender 3" and you'll find a lot of comments. I'm shopping too but what I can say: They're very popular, apparently not horrible, $199 is a good but not amazing price (and the cost of filament when/if you actually use it makes the purchase price matter less), and they didn't get it down to that price without cutting some corners.
small heron
I use lulzbots at the library , i love them
@fallow ermine
but I am not sure if they are cheap
fallow ermine
I use those most often but they're pretty expensive
Like 1k for one with a decent print bed size
karmic brook
The Lulzbot Mini is on sale for $1300 https://www.sparkfun.com/products/14717

The LulzBot Mini 2 is a versatile, high performance desktop 3D printer engineered to deliver premium results print after print.
Taz is $2950 https://www.sparkfun.com/products/15375

The new Lulzbot TAZ Workhorse Edition is the latest in the TAZ Lineup. Featuring strengthened design, improved motion system, premium hot end, and new auto
 novel lark
@fallow ermine I'm a big fan of the Monoprice MP Select Mini 3D Printer V2. I got mine last year on Black Friday, as an open box item for $99. I was fine with having to repair a broken cable for that price, and learned a lot in the process. You can get one brand new for $190:
The World's #1 Selling 3D Printer*Too often, getting a low-cost 3D printer means getting a box of ill-fitted parts with poorly written and incomplete documentation. You end up spending hour
It has an community, both on an official site, and on Reddit.
https://www.mpselectmini.com
karmic brook
I started with the Monoprice Mini Delta, but it needed some tweaking before it would print reliably, and has a pretty small print volume.
fallow ermine
If I get the internship I applied for for this summer I'll probably buy myself a nice lulzbot lol
 violet needleBOT
Adafruit Industries posted 3D Hangouts – Turtles, Ornaments and Goggles
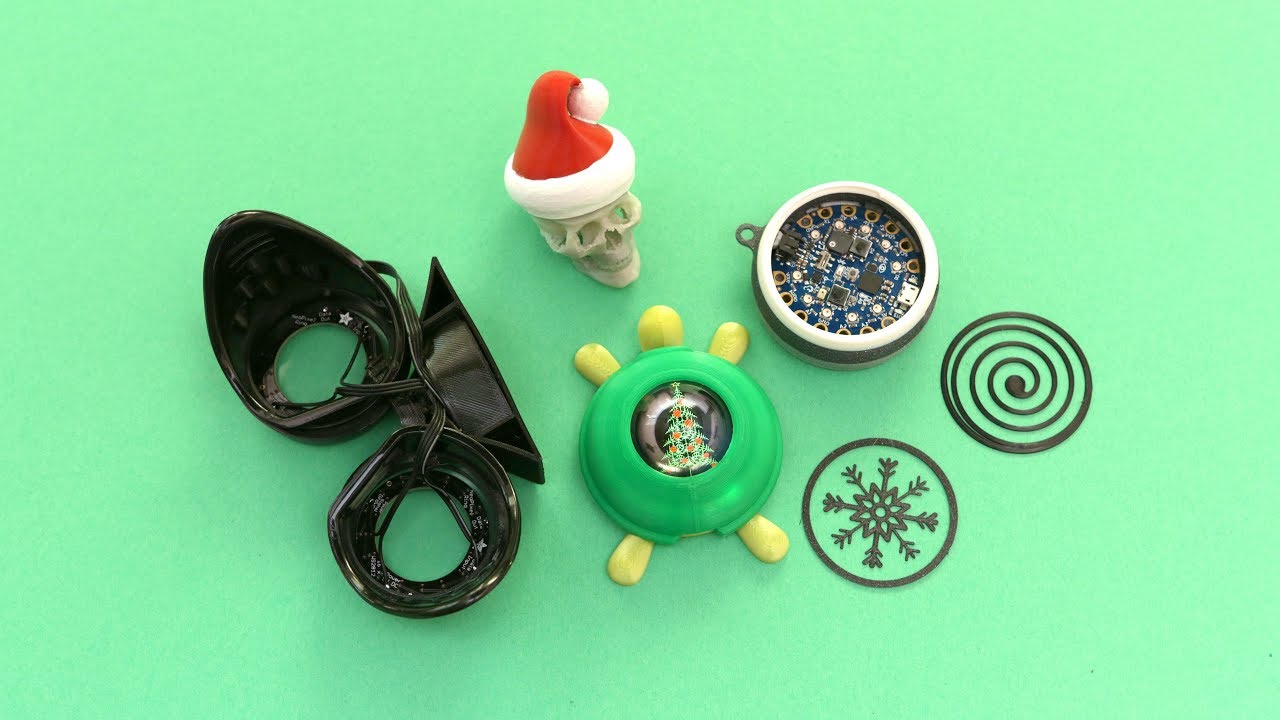
Learn guide, code and build photos https://learn.adafruit.com/tft-gizmo-turtle/ https://youtu.be/z6kF2RAEP3Y Circuit Playground Bluefruit https://www.adafrui...
violet needleBOT
Adafruit Industries posted 3D Hangouts – Turtles, Ornaments and Goggles
Enjoy the videos and music you love, upload original content, and share it all with friends, family, and the world on YouTube.
 spring barn
All my larger prints exhibit this issue where the left side of the outer wall facing the back of the bed looks kind of crap. Everything else is mostly fine
Printer is an Ender 3 with a PETG spool
empty sedge
looks like it's under extruding in those cases. Does the filament get bound up in some way?
spring barn
Filament is being extruded nice and smooth. What puzzles me is why it always happens in this spot
The rest of the print is good
empty sedge
because the bend of the bowden tube when the extruder is near those locations adds a restriction?
shy kelp
Is anyone here good at making models?
shy kelp
Dms.
molten sandal
@spring barn What hotend are you using?
Looks like extruder cooling problems
I had this when I had retraction issues
My guess is it starts after a layer change (which typically does a retract)
shy kelp
Help, I am having problems printing with ABS.
karmic brook
What sort of problems? Adhesion? Warping? Clogging? Something else?
 karmic brook
Hard to tell (the camera isn't focussing on the area of interest), but it looks like a bed adhesion issue. Could be a first layer height issue, a levelling issue, a bed temperature issue, an extrusion temperature issue, or bed prep or simple cold air. ABS often behaves better when printed in an enclosure.
shy kelp
Ahh.
My bed is at 80C
The recommended temp for ABS from the manufacturer is 210C.
I tried 230C still the same.
@karmic brook
karmic brook
80°C is a little cold for ABS, especially in a non-enclosed printer.
You can also improve adhesion by making an ABS slurry by dissolving ABS chips in acetone and applying a thin layer of it to the bed.
You could also try a brim or raft. This is all assuming the main problem is adhesion, which is just a guess on my part based on squinting at the video and trying to figure out what went wrong first.
shy kelp

@karmic brook So....I've has this since Saturday it's the ender 3 pro it was a gift, I suck and didn't get it close enough to the surface.
karmic brook
It takes some fiddling to get it dialed in.
shy kelp
Yeah....
 elder lintel
ABS does not make much sense as a printing material anymore, stick with PETG or one of the other high performance filaments...
Creality does have a low cost tent-like enclosure for the Ender # now though...
3
boreal wyvern
We print our abs at around 270C (probly 10C too high) with a bed temp at 110C. Wu is spot-on with the tent enclosure suggestion. It looks like the abs is cooling too quickly and you have to watch for AC vents blowing on your printer. Abs is pretty nasty and she is right, although you may print petg at 0.5 the speed of abs, it is more durable and probly has less health hazards longterm.
elder lintel
It's a bit silly (but cheap-ish): https://www.creality3dofficial.com/products/3d-printer-enclosure-safe-quick-and-easy-installation

3D Printer Enclosure: Safe, Quick and Easy Installation Applicable: Ender3/PRO/Ender5Storage Size: 445X565x685Land Size: 495x615x735Iron pipes Diameter: 16MMPackage Included:440 Iron pipesx4 / 560 Iron pipesx4 / 645 Iron pipesx4 / fixed-angle bracketx8 / folding shed x1Functi...
Prusa has some really elegant ones that might be adaptable.
karmic brook
I thought Prusa recommended buying a particular small table (Lack?) from Ikea, then printing some joining bits, attaching acrylic, and building an enclosure that way.
elder lintel
Yeah but they have all the part STL and it goes together really cleanly: https://blog.prusaprinters.org/mmu2s-printer-enclosure/

Prusa Printers
Our first 3D printer enclosure became incredibly popular – and naturally, once we released our new Multi Material Upgrade 2.0 and 2S, people started asking us for an updated enclosure that would accomodate the Original Prusa i3 MK3S (and 2.5S) 3D printer along with the MMU...
karmic brook
That's the one! It's a clever design.
elder lintel
Yeah prusa is so far ahead with stuff like that
shy kelp
After hours of messing with my printer, the extruder plate was wobbly, my room was -15 C, it's snowing, the surface wasn't level, didn't have right temps.
I suck.
Either way anyone here good with making models?
karmic brook
What kind of models?
I'm amused that my guess of "simple cold air" might have been right.
shy kelp
@karmic brook dms.
devout pewter
@shy kelp, if you're interested in building the Lack table enclosure, I did a video series on this at: https://www.youtube.com/watch?v=bhaIgfg71Ho&list=PLNfVB1UmFL2tBJXyr_P9QzpkdfsfX1Y2i
I also have the Creality Enclosure that @elder lintel linked to, but I haven't had a chance to use it yet.

In this video, which is part one of three, we build out most of the Prusa Printer MMU2S Lack Table Enclosure V2. Part two will be assembling the actual MMU2S...
devout pewter
Awesome. Also, I have a few printers, but the Prusa is nice.
karmic brook
I did see another one (and a classic Mac) in the background.
devout pewter
Thanks!
devout pewter
My channel is all about teaching. 🙂
shy kelp
Yeah.
So, I was thinking of doing something kinda dumb.
Making an enclosure out of Cardboard.
The business my family owns uses a lot of boxes so it's cheap and convenient.
I'd use it more to cover it more than anything because a lot of people will see my ender and want to mess with it, which I hate so it's to hide it.
Hello sir
Hello friend.
I used coroplast and a sheet of acrylic for my enclosure
I'd like to weld a frame and just use aluminum sheeting.
With some foam to keep the heat in.
Yea
I don’t really need one here
It would scorch the printer
Florida ☀️
Here it's -12
I don't keep the heater on either.
shy kelp
When I don't with ABS the model starts to now after time Lettuce told me to use glue I assume he's right.
Is he right?
karmic brook
I think cardboard would work fine. Amusingly, AdaFruit sells cardboard construction tools like https://www.adafruit.com/product/3285, https://www.adafruit.com/product/3929, and https://www.adafruit.com/product/3822. I build things out of cardboard a lot, and it has some insulating value and will block airflow, so it should make a decent printer enclosure.
shy kelp
Yeah.
Its just temporary.
Permanent is either wood or steel frame with aluminium sheeting and a Plexiglas door.
karmic brook
Cardboard should be fine for a proof of concept, and as you point out, you already have the raw material.
shy kelp
Yeah, I'll use the cardboard until I go to home depot.
shy kelp

want to see more? https://www.instagram.com/sparetimeshop My 3D printer was making too much noise, so I built an enclosure to solve that problem. It also hel...
That's pretty nice.
 shadow mica
now i feel bad for having my 3d printer on a server rack
karmic brook
Mine's currently on a piece of countertop that's just sitting on (not attached) to a broken table frame.
shy kelp
@karmic brook What printer do you have?
shadow mica
i have a monoprice select and a broken printerbot lc
karmic brook
I have a Monoprice Mini Delta and a Průša i3 Mk3S
karmic brook
We all start out as beginners. I've gotten a lot of help here
elder lintel
@devout pewter subbed!
ornate raven
Hey @shy kelp I'm goin onna year with my Ender3 Pro and every print is learning experience. Today I printed a duct for the hot end parts cooler. I've installed it and now I'm printing a different style of vortex cooler to see if one works better than the other.
ornate raven
I'm strictly PLA. Were I to do ABS, I think I'd use an enclosed printer. That's what we had at work and it was very good, expensive but very good. For me (so far at least) the PLA has been a great way to break into 3D printing.
shy kelp
@ornate raven I need to build an enclosure.
devout pewter
Thanks @elder lintel! I'm honored.
@shy kelp and @ornate raven, you may want to look into ASA. It's supposed to have a lot of the good properties of ABS without as many bad things like warping. Some people consider it to be ABS 2.0.
ornate raven
@devout pewter does it need a enclosure?
devout pewter
@ornate raven, I'm not sure. I have a roll of it, but haven't tried printing with it yet.
I would think no, since I've printed plenty in ABS without an enclosure.
ornate raven
I was just watching Thomas Sanladerers' video ab out it. Looks like an enclose isn't required but can improve build strength (if I read him correctly).
devout pewter
That sounds about right.
ornate raven
I need to do a heat map of my heated bed. One side seems to always curl up no matter what I do to clean and control temperature.
I think I have a cold section
devout pewter
You could move your print in your slicer so it's on a different section.
ornate raven
I've slowed printing to half of what I normally do (50 -25), raised bed temp and kept it hot throughout print, first layer at .4.
devout pewter
Have you tried a raft?
ornate raven
@devout pewter , yea, I thought of that. I'm gonna try that after this print finishes. I have several silver dollars on hand that I put on the brim to hold it down :-).
works sometimes
others, not
devout pewter
If bed adhesion is your issue, have you tried putting things on your bed to help? If it's ABS, you could try hairspray (the cheap kind).
ornate raven
I did a raft on a fairly larg print and it still warped. Lot of wasted plastic on that one 😦
I clean it with alcohol and run fine sandpaper over it. I've got some of the purple glue some have recommended. No benefit to that.
devout pewter
Are you running a 12v or 24v system?
I used to do lots of ABS printing on a 12v printer and it was just an exercise in frustration.
Nowadays, my printers are 24v and I usually stick with PETG or PLA.
crude kettle
Finally was able to put header pins on this.
I know I could use a touch screen that has USB but this is more fun
Marlin 2 has code to use an Arduino USB host shield or this with the same chip to read G code over USB
Also to ALL, Amazon is having a sell on PETG for 10 or so a roll when I check last today
 pale moth
Hi, I know this is a long shot but I'm having a hard time assembling my Y carriage for my Prusa i3 MK3S. I'm not finding it possible to get the nuts retaining the U bolts both flush & at an even tension, and I've not found advice about it in the assembly manual, the comments on that manual, or several assembly videos.
crude kettle
Got any pics?
pale moth
I think my U bolts might be slightly bowed out. One of them was straight up non-functional & I had to use a spare.
Not really? I can't take a picture of the tension on a nut, and the tension on the U bolt is too subtle for my camera to capture without a macro lens. Which I don't have to hand.
So I can take pictures but I'm not sure if they'd help
pale moth
Yes
crude kettle
Not sure if evening tensioning would make a difference never built one of these before
pale moth
Well, they stress it multiple times in the manual.
But in assembly videos on YT people don't seem to worry about it.
pale moth
I think it's less if a motion than a longevity issue, seems like they're saying that unbalanced tension will gradually warp the bearings
crude kettle
Don't go crazy with tensioning and it should be good
pale moth
Mmkay.
Thanks
Final question, do you know how many cycles a nylon nut can take? I've done & undone them at least a dozen times fiddling with this
crude kettle
It can be undone several time given that the screw is in good condition. Nylon is very tough.
pale moth
Mmkay. Hey thanks so much for your help
crude kettle
You're welcome
devout pewter
@crude kettle, you may want to verify that your bearings are still round. Squishing them through overtightening is the main thing to watch out for in that step. Otherwise, you should be fine.
crude kettle
Make sense
vast girder
Fwiw, I just opened a Tomtom Tomtop Black Friday email that's advertising Ender 3 Pros for $190 and Ender 3s for $155. (Haven't followed either link so that's all I know about it.)
karmic brook
I thought Tomtom was a GPS company.
vast girder
Oh jeez... Tomtop, not Tomtom!
Thinking about too many things at once. Thanks for catching that.
shadow mica
@pale moth the bolts just need to be tight as far as i remember because the carriage has a grove i was going to make a Prusa i3 at one point but i just got finished repairing my printrbot lc v1
blissful marlin
Can I print something like this without supports?
karmic brook
Probably. You might want a brim so it has good attachment to the platform
blissful marlin
Yes got that
Do you think it will also work with flexible filament?
Or would it collapse
karmic brook
Depends on a lot of factors 🙂
blissful marlin
only printed flexible filament flat before :S
boreal wyvern
I tend to get some wiggle for taller/thinner ninjaflex prints- at the top we get something that looks like underextrusion. When i printed untitled goose the neck and head were rough but didn't fall down.
shy kelp
@blissful marlin only one way to find out
blissful marlin
blissful marlin
unfortunately it shakes quite a bit at the top
Can I avoid stringing with flex filament?
shadow mica
yes you can
shadow mica
@blissful marlin i think you just need to go slower
karmic brook
Agreed, I'd try going slower first, then maybe tweak retraction settings.
blissful marlin
hmm okay
at the moment I am printing at 20mm/s
uhm small problem
why is it printing the inside too
okay seems to be the infill
Not sure why it got enabled
blissful marlin
is it normal that the flexible filament is oozing out all the time
shy kelp
So I had to strip the end of a 3D printer heating element
It has like strands of stuff, is there a chance of the insulation being Asbestos?
It might also be fiberglass but I am a bit scared
I mean that red cable btw
empty sedge
The heater cartridge wires are fiberglass insulated
blissful marlin
help
it seems to print the brim fine
and then it goes crazy and drags everything around
karmic brook
Goes crazy how? The printhead zooms around, or the brim pops off or what?
blissful marlin
I am not quite sure - there are strings appearing and they get dragged around by the nozzle
here again in the middle
And why does it even print the brim in the center
Center should be free, no?
and weird is that it worked earlier
wide otter
If you're using Cura, there is an option to only print the brim on the outside or print it on both inside and outside.
 mighty gull
even still, at least from that gcode preview, it should be able to print that inside brim quite easily.
What is your first layer speed? Could be going a little too fast?
wide otter
Wait, that's not a brim inside. It's doing lines instead of concentric. Looks like it's printing a floor for some reason.
mighty gull
hmmm. might be easier to see what's going on with the color coded Gcode preview. There should be an option to set the preview colors to be by line type? brim should be light blue, walls red/green, infill/top/bottom yellow, at least going from memory.
blissful marlin
Yes cura
This is the STL file
Maybe it has the problem - can someone try?
It even prints it at the top
mighty gull
I'll give it a shot after work
karmic brook
It slices okay with PrusaSlicer (a Slic3r derivative), but there's a hollow cylinder of material inside the mesh. It's also really tiny (perhaps inches vs millimeters?)
karmic brook
Then it appears to have sliced properly, there's no top nor bottom lid. I could add a brim.
blissful marlin
Weird then maybe it's one of my cura settings?
Okay I think it's the model
This one I printed earlier
same settings
karmic brook
Wait, no, it is trying to do infill. Hmm, object shows 3 shells.
wide otter
Did you make this design yourself or download it from somewhere?
blissful marlin
Made it myself
I just exported it again and put into cura
now it has no top and bottom
but still seems difficult to print
violet needleBOT
Adafruit Industries posted Baby Yoda #3DPrinting #Timelapse @adafruit #adafruit

Every week we'll 3D print designs from the community and showcase slicer settings, use cases and of course, Time-lapses! Baby Yoda Dave Magginnis https://www...
blissful marlin
Someone here good with meshmixer?
I need a grid pattern like this
But in meshmixer I can only get this
mighty gull
that's a voronoi pattern. They're typically randomly generated. Not too familiar with meshmixer though.
karmic brook
Tried to load filament to test my 2d-to-3d code and it utterly refused to load. Apparently the last time I unloaded filament, instead of coming out, it broke off inside and got wedged inside the PTFE tube. grump
empty sedge
I try to pull up on the filament while it's backing out to avoid that or the molten plug getting left behind
thankfully the mk3s extruder is slightly easier to disassemble than the non-s
karmic brook
The first time I disassembled it, I used the online instructions. By the sixth time, I had come up with my own, much faster approach.
shadow mica
lol my monoprice select did the same thing
sullen zinc
I just am NOT having luck printing these keycaps for the SICK-68 keyboard. They look OK but don't actually go on the keyswitch. If I break the bottommost part of the stem off, it will, but that usually breaks so much the key is unusable (won't stay on anymore).
it seems like a good geometry , the bevel on the foot part should make it go right on, but .. no. I wonder if my cherry-copycat stems are the wrong geometry...?
negative horizontal expansion seems like the next thing to try
dimensions of the stems do seem comparable to this unattributed image from the internet
karmic brook
I had some issues like that modelling servo horns so I could subtract them from objects so I could make things that engaged solidly with them. Even with quality digital calipers, it took a few iterations to get dimensions that would work well.
sullen zinc
yeah, in this case what I'm starting with presumably worked for someone else, whose 3d printer may be tuned quite differently than mine...
well that print was a fail, stem detached during the print
and the support didn't want to remove either
karmic brook
Get out the calipers, measure the mount and print, make corrections as necessary? Looks like a tricky print.
sullen zinc
Glitter filament 🎊
"be systematic" is good overall advice isn't it 🙂
I disassembled a spare switch and .. the parts I have "fit", I can insert the stem into the printed part. But it's just snug enough that when I try to do it on an assembled switch, it presses the key instead..
karmic brook
Erf, that's annoying.
sullen zinc
I don't think that measuring anything is going to help, but adjusting it (probably negative HZE in cura) until it works seems viable
oh hmmmm that big rectangle at the bottom of the keycap's too big for my keyswitches
I wonder if the designer intends it to be broken off (like a brim, except it's really thick) or just has keyswitches with quite different geometry
sullen zinc
@karmic brook that's a nice surface finish on your part btw
karmic brook
I was pretty pleased with it, especially as it's some weird old filament I was using.
sullen zinc
getting closer to my goal. goodnight!
shy kelp
@sullen zinc anthony001 or such on Twitch
sullen zinc
@shy kelp I think I'm missing some context, or you meant to mention someone besides me
shy kelp
I was on a handheld (and am having basic troubles today) so it was missing 'boocoo' context. ;)@sullen zinc
anthony builds keyboards, on camera, during live Twitch feeds.
001anthony iirc.
sullen zinc
aha neat
shy kelp
https://www.twitch.tv/001anthony I think that's him. Twitch UI is a bit daft.
This looks more representative:
https://www.twitch.tv/001anthony/clip/SneakyAliveDragonflyCoolStoryBro
(not really previewing these haha)
I don't spend time there so it's hard to find a good one. That last one seems to suffer video quality; he's usually good for an HD feed with decent camera work.
fallow ermine
Anyone know which is the real creality website? https://creality3d.shop/products/creality3d-ender-3-pro-high-precision-3d-printer or https://www.creality3dofficial.com/collections/thankful-black-friday/products/creality-ender-3-pro-3d-printer

Creality 3D
$229 Free shipping.Creality3D Online Store. Tax Exemption & Duty-Free Ender-3 Pro 3D Printer Economic Ender DIY KITS.

Creality3D official store to buy ender series Ender 3 Pro 3D Printer, Creality3D official store free shipping and 1-year warranty + return within 30 days!
wide otter
@fallow ermine creality3dofficial.com is the real one. I've seen some reports on Reddit of people not getting printers shipped from creality3d.shop
And if you go to creality3d.cn it links to creality3dofficial.com
fallow ermine
Okay thanks
pale moth
Hi, does anyone know of something I can use as a resist for dying SLS printed Nylon parts ("Versatile Plastic" from shapeways)?
I have two areas close together I'd like to dye different colors
I'm hoping I can cover it in Elmer's glue or something but I'm not sure I can get it off without damaging the part
 full verge
Any experience with that Creality Ender 3 Pro? The price seems a bit too good to be true. Related question: What does Adafruit like for quality 3D printing? I'm looking for a possible upgrade to the FlashForge Finder 3D. It would be nice to have a 3D printer that is more reliable. Often we spend too much time tinkering to get it to work.
vast girder
@full verge You can use the search widget here to find recent comments on it. Being in the shopping phase myself, my take is that there aren't any real horror stories, but in some ways it's a kit rather than a product and definitely built to a price. People who bought one with reasonable expectations are mostly happy about it.
karmic brook
According to the folks at SparkFun, the Taz Pro is very reliable.
boreal wyvern
@pale moth I have yet to dye printed nylon, but according to Matterhackers even hairspray might be enough to resist the dye, in which case you could tape mask and then spray it. (https://www.matterhackers.com/articles/how-to-dye-nylon-3d-prints). You might be able to borrow from watercolor painters where they use wax (not removable), "sizing liquid" / "masking fluid" (which might be removable), or potentially rubber cement.

MatterHackers
MatterHackers is dedicated to enabling 3D Printing. Check us out at www.matterhackers.com or our Retail Store in Foothill Ranch, CA.
pale moth
@boreal wyvern Hey thanks, I'll check that out. I'm guessing that rubber cement has solvents which will hurt the part, but I'm not sure,
boreal wyvern
No problem! Good point about the solvent, not sure. chemical resistance is probably dependent on the type of nylon it is (Nylon-6,66,or 12, or PLC). I have heard it is generally pretty resistant. Definitely an instance where sacrificial samples would be important.
pale moth
Good thing I remembered to add a couple extras onto the sprue, especially since this was a tiny part & adding more would still have left me under the minimum price.
I definitely didn't forget and am now trying to use a tiny sprue as my sacrifical sample.
whistles
shy kelp
Hey all, I thought you might find this interesting- I built a couple 3D printer enclosures and shared all of the designs and code. It uses Prusa printers but also relies on Adafruit temp/humidity sensors: https://back7.co/home/learning-to-scale-small-manufacturing-with-enclosures-amp-big-blue-saw

BACK7.CO
There is still a case to be made for high-volume manufacturing, but this article is about my goal for a different kind of scale- the ability for a very small business to manufacture at scale. This project has been sponsored by Big Blue Saw , who offers waterjet and laser ...
small heron
Someone linked me a 3f printable case for the newpixel jewel, but I can't seem to find it in a search of thingiverse
If someone knows it could they post it?
small heron
NVM found it
violet needleBOT
Adafruit Industries posted Tesla Cyber Truck #3DPrinting #Timelapse @adafruit #adafruit

Every week we'll 3D print designs from the community and showcase slicer settings, use cases and of course, Time-lapses! Tesla Cyber Truck aaskedall https://...
violet needleBOT
Adafruit Industries posted Ornaments with Circuit Playground Gizmos
Enjoy the videos and music you love, upload original content, and share it all with friends, family, and the world on YouTube.
shy kelp
@full verge I have the ender 3 pro and I am very pleased.
cunning oyster
Hi All - banggood.com has the Creality CR-10 Mini for $239 which seems like a decent price. However, they have the following note:
Notes:
- Do not include T-bracket(right side)
- The US/AU warehouse do not have the adapter
So...it seems like a part that may be important to putting this thing together? I'm not familiar with this printer - any thoughts?
karmic brook
I assume the "adapter" referred to is plug adapter to allow connecting to US/AU mains outlets. Presumably it has an ordinary ISO power connector on the power supply, so most of us probably already have suitable power cords.
cunning oyster
Ah... How about the T-Bracket? That's the one that stuck out to me.
cunning oyster
Managed to hunt this Q/A down on their site. Figured I'd post it in case anyone else looked at it:
karmic brook
Ah, good find. I had no idea about the T-bracket, just had a guess on the US/AU "adapter".
cunning oyster
The Ender 3 is only $162 right now.
At that price, you could buy one and keep it in the glovebox of your car as an emergency back-up printer.
 wet falcon
is the ender 3 an OK option for getting started with 3d printing?
karmic brook
It's an ok option if you're comfortable with a little tweaking and tuning before it works repeatably.
wet falcon
i mean as long as its not too insane i dont mind doing some things myself?
ive been hesitant to get into it all, but $162 seems like a really good entry point
shadow mica
get one with a large print area....trust me
@wet falcon ender 3 is good just like the a10m there pretty much the same design
shadow mica
anyone know where i can find a proper 3d printable joystick for flight sims
 faint comet
Any good filament company's
shadow mica
the overture filaments i got of amazon seem to be pretty good @faint comet
karmic brook
I've heard good things about Atomic Filaments and FilamentOne (both US), DASFilament (Germany), and Prusa (Czech Republic).
devout pewter
Most of my filament is either Proto Pasta and Prusament, but I have some FilamentOne and some FilaCube. All of those have printed quite well.
 vagrant drum
MatterHackers has worked for me
I have printed their PLA, PETG, and ABS - all worked well
 silent iron
I wonder if there is a way to take the pins for a second extruder to make a spindle cutter to remove excess off of a 3d print with a end mill or something
karmic brook
There are some convertible machines were you can swap an extruder head for a carving or laser one.
silent iron
What im thinking about is using a regular printing extruder to create the original stock layer by layer as usual but then have a secondary "extruder" that functions as a small end mill to carve the perimeters of the layer for extreme precision as well as removing the need for sanding. The cuts would have to be layer by layer as well in order to reduce the resistance so that the print doesn't disconnect from the print bed.
alas there must be some way to do this with marlin
empty sedge
why does marlin need to be updated?
empty sedge
you'd have to modify your slicer to generate the subtractive toolpath but I don't think you'd need to modify marlin unless you needed something like a special tool-change gcode or marlin to control the spindle RPM
fallow ermine
I personally like matterhackers filament, great price for the amount
violet needleBOT
Adafruit Industries posted Watchmen's Sister Night NeoPixel Goggles

Build the Nite Owl tech from Watchmen to complete your Sister Night costume. In this project, we're building NeoPixel goggles inspired by HBO's television se...
 boreal lava
I posted this in a couple of servers, but no one seems to be able to figure this out Maybe someone here will have an idea. Whenever I print something like a cup that has some regular infill, and then a transition to where the walled portion of the cup begins. I get a weird irregularity in the print where the outer wall is slightly wider in the cup portion than the section below where there is infill. This does not show up in the model or gcode. It has happened consistently across all filaments and temps.
Any Ideas?
boreal wyvern
@boreal lava We get a less pronounced version of this with ABS at lower temps (230-245C, bed 110C) on our Polyprinters. We were able to reduce it a bit by moving our extruder temp up (270C), but our cooling fan may still need to be fiddled with because it tends to still appear slightly in square corner containers. If your belts are tight, rods greased, steppers centered, and printer is enclosed; you might try printing a sample print that came with your printer (where the optimal settings are dialed in) and see if it is a physical rather than a slicing setting issue. ? What kind of printer do you have?
boreal lava
Thanks Sean. I'm using a pretty heavily modified Ender 5. The weird thing about the irregularity is that it just started a couple of months ago. I have printed some of the same files that worked fine before, but now they have that weird line. I think it may be something in Marlin 2.0, but not entirely sure about that.
boreal wyvern
Quite the mystery. Can you try using older gcodes or comparing the old and new gcodes for the same files? My first thought is over extrusion or temperature differences, the bottom shrinking at a different rate perhaps. It looks like you have 3+ shells, have to varied infill and shell count? prusa mentions something called "Z-hop distance", it might be something to look at https://www.prusa3d.com/layer-shifting/ Hopefully you won't have to move back to 1.1.9.

Some 3D printing issues, such as layer shifting, may appear because of many different causes....
boreal lava
I've done identical gcode. That print does have three layers. I've tried it with 2 and 4. It's a very weird issue. That "ledge" shows up at the point where the insides change. I have other files with a thicker base, and sure enough there it is at the exact spot where infill ends. I'm up for trying anything at this point.
boreal wyvern
Even with the identical gcode! That's intense. at 10:00 he prints a benchy and finds "salmon skin " and some sort of z chatter. the z chatter might be good to rule out too, in addition to playing with the Vz jerk. https://www.youtube.com/watch?v=u0uxK_uRyjQ

Creality Ender 5 3d printer full review in 4k. Video contains, Unboxing, assembly, close up look on internal components, Overview, specs, fixes, upgrades, tips, TL smoother installation, Stepper damper installation, test prints in PLA, PETG, and TPU with close up shoots, Sou...
empty sedge
@boreal lava what if you're just over-extruding?
ornate raven
@boreal lava what's your parts cooling fan doing at that stage? Does the gcode have a change in speeds and wall thickness? What slicer are you using?
boreal lava
@empty sedge I can't imagine that would be it. My layers look great, and the top layer is generally pretty awesome. If there were extrusion issues, I would expect them to show there as well.
@ornate raven I'm using ProsaSlicer now. I've tried cura as well with similar results. The fan runs between 80% to 100% after the second layer. Generally closer to the 80% unless it is bridging. The gcode looks fine. The previews in Slicer don't have the irregularity. And using the same stl files a few months ago didn't include it when printed.
ornate raven
@boreal lava , hmmm... I was wondering if maybe cooling effects might be impacting the different density of the layers. When I upgraded Cura to version 4.3 (I think it was 4.3) the print speed of the inner walls was different than the exterior walls by default and I had some issues with warping and shrinking. So I thought maybe...
boreal lava
That's entirely possible. I have other prints with 3mm walls, and approximately 70mm diameter that it does the same thing on at a similar transition point higher in the model.
ornate raven
OBTW, I use an Ender 3 Pro and PLA
boreal lava
I would think at that scale, and with dual fans, it should pretty well mitigate cooling issues, but I am at a loss
There's probably some setting in Marlin that got flipped somewhere that is just laughing at me right now.
It wouldn't be something in octoprint would it?
boreal lava
Update....tried sending the gcode through pronterface to eliminate octoprint as the culprit. Getting the same effect.
boreal lava
update #2....sliced it in Cura again, and while the irregularity is still there. It is much less pronounced.
Cura printed more slowly, and with concentric infill on the top and bottom layers, so that may be a factor as well
ornate raven
@boreal lava in cura (4.4.0) what are your Quality and Shell settings looking like?
You might also want to fiddle with the Infill density and pattern.
DISCLAIMER, I am by no means an expert or anything like it in Cura, I'm just sharing what I know has helped me.
boreal lava
@ornate raven just to update, someone on another server found the problem. Turns out, it was the infill. Switching from rectilinear to either gyroid or honeycomb mostly fixes it. There's still a small line, but much less noticeable.
ornate raven
@obtuse galleon , cool. Glad to hear you have a solution.
empty sedge
@boreal lava you might also try printing perimeters before infill
edgy steeple
@idle crest & @supple stratus have you guys done any mods or additions to your CR10 V2?
faint comet
shoud i buy the ender 3 whale its on sale
boreal lava
What's the sale price?
shy kelp
@faint comet IMHO, see if the Pro version is in your price range. Either way. The E3 is a good starter printer.
And beware. There are some " to good to be true" sales out there that I would be very suspicious of.
boreal lava
Just looked up the sale. It is about $40-$50 off on the creality site based on amazon prices. That's a good price, but given my experience with Creality customer support...I don't know if I would buy from them directly again. They are super quick to respond, and fix things. but lead time is about 3 weeks for a replacement. My first replacement was the wrong fan. The second arrived as an empty envelope. The third finally arrived with the correct item, but I had to sign for it. The delivery guy looked at me weird when I opened the package before I signed.
They're good printers, don't get me wrong, but it's information worth having.
TLDR; It took me over two months to get a replacement for a bad fan from Creality.
 rustic pine
I upgraded my ender 5 from stock extruder to dual gear because the stock one cracked.
SO I'm over here doing esteps calibration
started at 92.6 (factory). I measured it, extruded 100mm. It was 17.4 short. So maths == new esteps == 111.97 aka 112.0
so i extruded another 100mm
it extruded 80.00mm
-_-
I did a whoopsie?
maybe the ender only decided to push 80.000000?
it was upsetting how accurately it was off by 20mm
i'm printing a test print now it looks... honestly, it looks perfect.
boreal lava
so, you expected 100 mm, and got 80. So, (100/80) * steps = new steps
I would start by looking up the recommended settings of the extruder. It should get you very close. Then apply the formula of (expected mm/actual mm) * steps
rustic pine
@boreal lava I didn't even consider they'd have recommended settings. derp.
HA cheps video shows him landing at 135
with the same extruder
CHEP, what a guy.
violet needleBOT
Adafruit Industries posted CircuitPython Camera Slider

Build a motorized camera slider with Adafruit Feather and CircuitPython! Create HyperSmooth motion timelapse video with this build!
Learn Guide: https://learn.adafruit.com/circuitpython-motorized-camera-slider/
This project uses the Adafruit Feather platform and CircuitPyth...
edgy steeple
I like this idea.. anyone done anything like this?https://www.thingiverse.com/thing:2148191

Have you ever worried about leaving your printer running for those long 20 hour prints? With a heated bed, hot extruder, and cheap power supply, there's a lot that could go wrong. I have worried about leaving my printer unattended and wanted an automatic smoke detection and s...
edgy steeple
anyone know what is used for the whitish translucent parts like swords, etc that @supple stratus and @idle crest use in their projects.. the ones that need to let leds to show thru?
 willow sedge
@edgy steeple I assume translucent filament. We printed a star for the tree using translucent filament. We had two, one more clear than the other (the clearer one is more expensive). The less clear one looks a little yellower on the spool, but comes out whiteish looking, and LEDs show through quite well.
karmic brook
I've used white and clear filament for the flame pendant, they both print as reasonably translucent. I also used white for a lithophane and it came out pretty well.
empty sedge

Comparison of 10 different filaments, all the swatches are 2mm thick, 100% infill, slightly overextruded. They were all printed at 30mm/sec, 0.15mm layer height, 100% infill, and 240°C, except for the Zen Toolworks Flexible which was printed at 215°C. Getting the right e...
edgy steeple
that is really cool @empty sedge . Great idea to actually show how they would look
edgy steeple
I like the difuse feel of the eSun PLA ...but now to figure out which one it is
boreal lava
@edgy steeple i suppose it depends on the design. If it can be printed in vase mode, then really any single wall print will work.
edgy steeple
I'm a total newb.. I'd like to make https://www.thingiverse.com/thing:3938695
boreal lava
that looks awesome! The hardest part of that will be setting up the LEDs
 warm palm
Woah cool!
boreal lava
but as far as filament goes, white or transparent will work
I would probably go with white just because it will diffuse the light a bit more
I think that photo may be an acrylic box.....but not sure
edgy steeple
you could use something like this https://www.amazon.com/CHINLY-Programmed-Flexible-Individually-Addressable/dp/B07418JSWD
would have to buy 5 of them.. so I am back to how to getting the perfect pla to difuse but to not overly strangle the light
idealy I would also be able to use the same PLA for @supple stratus and @idle crest projects that need some.. like their glowing swords, etc
boreal lava
You can't. Using those will be enormously expensive, but also give serious layer lines as the levels go up
karmic brook
It might be worth just using purpose-made diffusion material
boreal lava
That would be nice as a base....and could work, but if you want variations in the vertical layers, it would not be optimal
edgy steeple
I'm not understanding the "variations in the vertical layers"
boreal lava
@edgy steeple You could set that as a base, and it would work....but going up, it would not have the same pixelation I think you would want. So you would have to stack them...that becomes expensive, but also gives some very distinct shadows
@karmic brook velum is super under rated as a diffuse material.
it's pretty cheap, and works well
edgy steeple
I feel like a small kid that wants to be an astranaught but no clue what that even means 🙂
luckily my infinity cube is close to completion. and my first led project will be done
boreal lava
Pay me no mind. I think we all speak from our own experience. You need your experience. Build your thing. Then refine it. The best part of making things is finding out "holy crap, that worked". The second best is when it doesn't work, but you see why
btw....I need my experience too. We all do. I meant no offense there
edgy steeple
lol no offense taken
I am here to learn.. so I value hearing what others think
I'm an odd person.. I have a 3d printer(creality CR-10 V2) still in the box unopened.. worried will I use it enought.. will I have enought worth printing out.. will I even figure out how to make it work ok.. they are so much more complicated than people make them seem.. the people on youtube have been using them for years.
boreal lava
If you put that much thought into it, and you are making things....yes; put it together and use it.
edgy steeple
lol.. I always thought I was a little batty
boreal lava
For example...with your cube. Let's assume you want to use acrylic for the walls. You could print the corner brackets that attaches them
CR-10 is a good printer
edgy steeple
got a great Cyber Monday deal.. $415 for the CR-10 V2
boreal lava
nice...may I offer a bit of advice?
edgy steeple
PLEASE do
boreal lava
Go through several assembly youtube videos. More importantly, take your time and make sure things are square
It will add an hour or so to the assembly, but it is well worth it
edgy steeple
measure twice and cut once kind of thing
boreal lava
lol yes
edgy steeple
good advice
boreal lava
just be sure you are square and true
edgy steeple
then after you get past that.. so many setting in cura
boreal lava
honeatly, I don't use cura, but it sounds like the creawesome profile should work
boreal lava
I use prusaSlicer.
Only because it is just what I have used for 12 years. Cura is super solid, and simplify is great if you wnt to pay for it
boreal lava
A heavily modded ender 5.
edgy steeple
ah cool so prusiaslicer will work with creality stuff
boreal lava
sure....The thing I like about PrusaSlicer above Cura is that I can set temperature profiles for each filament I use
edgy steeple
that does sound handy
edgy steeple
I will have to try both slicers
warm palm
Heyyo, I have an extremely noobish 3D printing question 😅
It's like... 35-40° here (100°F ish I think) and I don't have aircon, are printers okay to operate in that environment? I read something about moving power supplies outside of enclosed chambers but not sure if heat is the reason 😅
spiral laurel
think of it as a REALLY BIG heated build chamber 🙂 The power supply and stepper driver chips might start getting cranky at those temperatures
warm palm
Yeah I might hold off then, little brother being cranky about waiting a day for prints might be better than harming the printer ^°^
Thanks!
spiral laurel
if you can get a fan blowing over the PSU & driver board without blowing over the print area you'll probably be fine.
warm palm
Ahh yeah I might look into getting a little fan for that
Weather this time of year is WILD and it'd kinda suck to not be able to print for a few months at a time because of ambient temperature haha
molten sandal
I don't think it would be an issue
I live in the tropics and we have ambient 24-35-ish temperatures. As @spiral laurel mentioned, the main problem would be getting cooling to your driver boards and extruder assembly
It would be a problem if it gets humid or you are printing weather sensitive materials like ABS
wide otter
I missed the transparent printing discussion earlier, but I've researched it a lot recently and it looks like Polyclear is the easiest way to get a clear print: https://www.youtube.com/watch?v=92C10-n21Po

In this video, I test out a way to make your 3D prints completely clear. Not translucent - but actually transparent.
Watch part 2! https://www.youtube.com/watch?v=XALChxPG2SY
Mattias Lundberg Instagram: http://bit.ly/2StYfdN
Polymaker Facebook Group: http://bit.ly/2Nu25CM
...
There is also the "polish the crap out of it" approach: http://fenneclabs.net/index.php/2018/12/09/3d-printing-transparent-parts-using-fdm-fff-printer/

Ever since I got my 3D printer, I have been wondering whether it was possible to produce transparent parts. While there are plenty of transparent filaments sold on the market, they typically do not produce transparent prints, but rather translucent ones. The difference betwee...
edgy steeple
@wide otter : Any finds for translucent ? I'm trying to diffuse neopixels.. so enough opaqueness to hide the led, but translucent enough to not restrict the light too much. Like @supple stratus and @crystal ravine do on a lot of their projects. They seem to use some kind of white.
wide otter
You could just print it fairly thin in white. Or maybe use clear and scuff it up evenly with fine sandpaper?
edgy steeple
interesting idea on the scuffing
karmic brook
If you need a flat diffuser, I find commercially available plastic diffuser material works well. For other shapes, something 3D printable is probably a good bet. I've had good luck with thin layers of transparent filament (like the flame pendant)
boreal thunder
Can anyone recommend a decent site for Creality-specific parts and upgrades that isn't Tiny Machines (which I know and like) or TH3D (which I know and... less said there the better).
 half yarrow
https://www.thingiverse.com/thing:4019946 anyone print this for the tft gizmo?
https://youtu.be/QrGf29aSIVc
3D print your own ornaments with a display! Use the TFT Gizmo or E-ink Gizmo to display custom images with the Circuit Playground Bluefruit. The 3D printed ornament is designed to snap fit together for an easy assembly!
Learn Guidehttps://learn.ad...
It's not exactly a 3d printing question because they came out great, but the bluefruit and tft don't really fit right
There's a screw in the way of one of the posts to fit into the board from the tft gizmo and I couldn't find any clear instructions for putting it in the case so figured I'd ask here. Any suggestions or advice is appreciated
violet needleBOT
Adafruit Industries posted Ornament Bowl @adafruit #adafruit

Ornament Candy Dish
Mark Rouleau
https://www.thingiverse.com/thing:3249918
CR10S Pro
Rainbow PLA
17hrs 15mins
X:218 Y:201 Z:144mm
.2mm layer / .4mm nozzle
20% Infill / 6.5mm retract
200C / 60C
185g
60mm/s
Visit the Adafruit shop online - http://www.adafruit.com
------------...
sullen zinc
@half yarrow hey did you notice there's a guide? https://learn.adafruit.com/display-ornaments-with-circuit-playground/eink-gizmo-ornament

it looks like the parts differ depending on whether you have e-ink or TFT, and also you omit 4 of the screws when assembling the gizmo to the circuit playground
Place the Circuit Playground Express over the standoffs with the USB port lined up with the USB label. The PCBs are secured with M3 x 6mm machine screws (included with the E-Ink Gizmo). In order for the Gizmo and CPX to fit the 3D printed ornament, use only 10 screws. Reference the photo for the correct placement of screws.
emphasis on "use only 10 screws"
half yarrow
Oh wow, I didn't see that. I had tried removing just the two screws that interfered and then the tft wouldn't come on. Ended up printing two of the backs and just clipping off the posts. I'll give this a shot next, thanks so much!
sullen zinc
make sure you have the right parts for your screen, too -- it looks like each one is specific to the display, I guess they interact with the bluefruit using different pins or something
half yarrow
Mine are the ones from the December adabox. Probably why I missed this guide. I was using the ones that were listed in the adabox page, but that comes with the clear plastic globe for it
I didn't like the plastic globe because of how much it'd move around in it
Yeah I don't think it would work for mine
half yarrow
I just have to keep the Vout screw in since the code I'm using is the "snow globe" ornament
so on my backup I only snipped one post and now it's perfect
 worn holly
Is there any global shortage of PLA?
 onyx nova
getting the raw pellets of PLA is running into a shortage issue, yes, someone correct me if im wrong, it was because many companies realized PLA is a better bio friendly substance, so now many more things are being made from that, and pulling away from PET. since so few PLA pellet masking companies exist, 3D filament making is getting less to make their product, some companies have actually closed up shop apparently because they only made PLA, and had no diverse setup for other materials. thats the short version.
if anyone has any info or hands on with the "super cheap" EZT3D-T1 delta printer, and would like to have input on a better replacement controller board, please let me know. im shooting for the MKS Gen L 1.4, putting in a BLtouch or an inductive sensor. and the knob screen compatible with the MKS.
shy kelp
I don't...
Sorry.
Does anyone here have experience with Printing PC (Polycarbonate)?
I'm going to start making phone cases and selling them..
Ping me.
worn holly
Thank you @onyx nova
empty sedge
I had lots of trouble printing polycarbonate but I don't have a fancy printer with a heated chamber, my bed only goes up to 120 and I was using relatively-pure PC not a PC blend
turbid hill
Aleph got bought by another company in November. No mention of a shutdown, but maybe they’re moving?
faint comet
Maby but I saw that thay wer planning on shuting down in oct
But if thay were moving wouldn't you think I woud ceep the address intell thay fully move in?
turbid hill
https://forum.lulzbot.com/t/rumors-of-lulzbot-closing-by-end-of-october-2019/6968/37 says "moving to North Dakota".
Lulzbot
Anyone Have the stl for dual v3 exturder body (green piece that the filament flows through)? I have stuck filament, Also appears they were bought out…
 rough marlin
I got the Monoprice Maker Select Plus 3D Printer for christmas this year and it is my first 3d printer. The issue is with the nozzle not heating up when i preheat it. The base plate heats up fine but the nozzle doesn't. I tried heating it up with a blow drier to see if it was the thermostat that told me it was 0 Celsius even if it was heating up and it still stayed at 0.

Google Photos
and i have this problem
spiral laurel
sounds like the thermistor cable came unplugged, or maybe the thermistor itself broke in shipping
rough marlin
where is the thermistor cable so i can try to attach
spiral laurel
since you're X-stop doesn't appear to be registering that thin-wide ribbon seems like a likely culprit. It looks like they have all of their connections running over that
spiral laurel
yeah. I was looking in the manual to try and see where the other end plugs in but haven't found it yet
rough marlin
ill see what i can do on my own while you look in the manual
I think I found the problem
thanks so much! everything works now
spiral laurel
if that end was unplugged I think it would account for your issues
yay! Let the molten plastic flow!
 glad loom
Does anyone have a go to site for reliable phone STLs
empty sedge
I doubt there's a good answer for you @glad loom
shy kelp
@faint comet you in Colorado? if you don't mind me asking.
I'm wanting to use PC and PC carbon fiber.
I have an ender 3 pro.
I might get a Prusa.
 grave herald
hello all
 buoyant temple
yo anyone know if this works well, and if it matters where you live? like if i lived at north pole compared to if i lived at equator
its a sundial but like a digital clock

The episode in [ENGLISH]: http://www.mojoptix.com/?p=108
L'épisode en [FRANCAIS]: http://www.mojoptix.com/?p=75Note: To see more inventions and contraptions (like this one ), suscribe to Mojoptix on Youtube !
+++++++++++++++++++++++++++++++++++
Update
For those who have tro...
faint comet
No @shy kelp
wide otter
I'm trying to print this in vase mode and the printer keeps doing weird moves on some but not all layers. It'll either skip extruding for a little bit or pause, move back, and then continue. I sliced it in Cura 4.4.1. Anyone have any ideas?
violet needleBOT
Adafruit Industries posted 3D Printed Mandalorian Helmet @adafruit #adafruit #Timelapse

Every week we'll 3D print designs from the community and showcase slicer settings, use cases and of course, Time-lapses!
The Mandalorian Helmet
DamaskProps
https://www.thingiverse.com/thing:3835069
CR10S Pro
Silk Silver PLA
68hrs 21mins
X:250 Y:266 Z:232mm
.2mm layer / .4mm ...
karmic brook
Those clip leads look like they were about to pull free!
ornate raven
Printing a "Stretched" Pyportal stand for my Pyportal Titano. Hope it works. Titano is only 3mm wider than Pyportal.
boreal thunder
Any tips on places to get parts and upgrades for Creality machines? I’m familiar with Tiny Machines and TH3D.
I realize I’ve asked that before, but I’m never sure whether to read a lack of responses as folks not having an answer or as folks just not happening to see the question.
ornate raven
@boreal thunder Thingiverse and Tinkercad have been my go to's for my Ender 3 Pro to make my own. Creality and Amazon for other hardware.
violet needleBOT
Adafruit Industries posted 2019 3D Projects @adafruit #adafruit

3D Printing in 2019!
Here are just some of the 3d printing projects for 2019!
Astrolite NeoPixel Upgrade
https://learn.adafruit.com/astrolite-neopixel-upgrade
Prop-Maker Keyblade
https://learn.adafruit.com/propmaker-keyblade
Robotic Creatures
https://learn.adafruit.com/ro...
ornate raven
"stretched" pyportal came out pretty good. Used 3.0 standoffs verses 2.5 (don't have any) so 1 screw is tight to the frame
shy kelp
What brand of filament do y'all use?
empty sedge
atomic and hatchbox PLA. I've had bad luck with super cheap stuff
esun petg has been ok but I've had to dry it out first
 weary lichen
I've used hatchbox pla for all of my printing
 tropic dragon
I use PrimaValue pla
karmic brook
Note: there are good filament producers in various parts of the world, and shipping can be a significant fraction of the cost, so people in Europe will tend to use different providers from people in North America, for instance. I love Prusament, but shipping from the Czech Republic is pretty expensive.
shy kelp
Mostly Hatchbox here.
faint comet
I found out why Google says that lulzbot is closed is because thare employee number is 8
 vivid vessel
I use eSun for just about everything I want printed but does not need to look nice. I swap up to polyalchemy elixir for gifts and prints I want to look good.
boreal wyvern
We mostly use Polyprinter and Matterhackers pro abs.
empty sedge
huh, there's a banner on https://www.polyalchemy.com
that says "DUE TO A GLOBAL SUPPLY SHORTAGE OF RAW MATERIALS (PLA) WE ARE NOT ABLE TO MAKE ANYMORE FILAMENT UNTIL FURTHER NOTICE."
karmic brook
@onyx nova posted an explanation here a couple of weeks back explaining that PLA is getting used by industry more, competing with 3D printing for raw materials.
onyx nova
ok, here is the fun question.
friend got me and EZT3D-T1 delta for sport after upgrading his ender3. the mainboard is trash and ZERO support or datasheets, and the steppers stutter once the old board drivers warm up, so i am upgrading the board to a BTT 1.4 with tft24-v1.1 screen, and TMC2209-v1.2. has anyone ever done something like this, or have exp with those boards, so i can double-check my new setup.
onyx nova
😭 made detailed edits to marlin config, didint save it right. have to do it all again.
ornate raven
@onyx nova Have you looked at the Teaching Tech Youtube channel? Michael does a lot of Marlin stuff and has reviewed quite a few printers.
faint comet
Which is better flashforge or dremel 3d printer flash forge dreamer admthe one from dremal that looks like the dreamer ithink the 3d5867
shy kelp
I have used btts Skr 1.3, and their TFT 24 before, I have never touched a delta though, or 2209s...
I'd recommend you flash btts new firmware to the TFT, its much better than the one they give stock and allows you to switch modes easily. Also, the display to enable in marlin configs for it is "rep rap discount full graphics smart controller" iirc
 molten creek
I got fusion 360 for students but cant get out the trial mode 🤔 anyone ever faced that?
 hidden sable
D'OH - ran out of BuildTak recently...lots of stores closed over the holiday period, then happened to be near one and realised they're closed due to bushfires
violet needleBOT
Adafruit Industries posted 3D Hangouts – New Year, Glasses and PyPortals
 violet needleBOT
Adafruit Industries posted 3D Hangouts – New Year, Glasses and PyPortals

 faint comet
What well your prints look like when you need to replace your nosle
ornate raven
@faint comet I think that varies depending on what happened to the nozzle. I had one that got clogged with carbon. It wouldn't come out without marking up the inside of the nozzle. The prints started getting an unfilled and stringy look. Whole lines were missing and the walls got very thin. I actually thought it was my extruder at first. Then I saw a piece of black something go into the Borden tube a few minutes later the print started missing a layer. That's when I stopped and investigated the nozzle and found I couldn't put my cleaning needle into the nozzle anymore.
edgy steeple
in the today's "Adafruit Daily - 3D Printing" they show a collapsing wand.. very cool. It would probably be trivial to add a single rbg led to the end of the wand like https://www.adafruit.com/product/159

Diffused 5mm tri-color LED with separate red, green and blue LED chips inside! Nice indicator, and fun to color-swirl. 60 degree viewing angle. We like diffused RGB LEDs because they color ...
wire it back to the prop feather.. and change color based on accelerometer.. and some sounds.. any harry potter fans would go nuts 🙂

LOLwut? NeoPixels in 5mm through-hole variety? Oh yes, we haz them! If you like NeoPixel strips you'll luv these 5mm diffused through-hole NeoPixels. All the ...
use some silicone covered stranded wire.. that should move easily as the wand is extended or retracted.
 brave mica
@edgy steeple nice idea
Hello fellow 3D printing enthusiasts! I got a CR10 V2 for x-mars so I will doubtless be hanging here more often! I'm currently playing first layer whodunnit, trying to find a fix for some adhesion issues. Turns out BL Touch isn't a panacea.
My money is on me still not having the z-height offset/ first layer height quite perfect but who knows? This is the current torture test:
This is all new to me, so for all I know that's like trying to hit a 2 meter exhaust port in a T-16
karmic brook
Yes, could be bed heat, bed material, first layer height, extrusion temperature, or some combination. I've found hair spray is a hacky but effective approach to adhesion issues. For first layer height, I use filament with a contrasting color to my bed and a cheap pocket microscope like https://www.homesciencetools.com/product/pocket-microscope-100x/ to judge whether the profile is the correct sort of flattened oval, while jogging Z in increments of .02mm or so.
molten sandal
I use 3mm borosilicate glass sandwiched by a thermal transfer media
Don't use any binder clips as they will warp even 4mm glass
I know some folks have success with hairspray, but I found that you could print on bare borosilicate glass with the right bed temps and z-layer height calibration (always)
If you are going the hairspray route, you'd need a certain hairspray as well, like aquanet, I used a sticky one and it formed a gucky layer after a week.
edgy steeple
@brave mica I also got a CR10 V2 for Christmas
brave mica
@edgy steeple nice! we should start a club 😆
edgy steeple
I did a 20mm calibration cube.. and my z height is 20.07mm ! but my first layer did a Elephant foot and is 20.45.. then it goes to 20.25mm
I found some articles to help with accurate dimensionality so I am going to give them a try and see if I can get a little more out of it.
@idle crest also got a CR10 V2 🙂
brave mica
can you link those articles here?
edgy steeple
sure thing
brave mica
Pedro and Noe are to blame for me getting mine. Pretty sure they said "the first fix is free" though I'm pretty sure I paid for it myself
edgy steeple

reddit
CR10 V2, slicing using Cura 4.4.1 with CHEP's PLA profiles.. Magic 0.20 selected. The 20mm calibration cube is 20.07mm tall.. wow! 20.25mm to...
I snagged a great CyberMonday sale.. couldn;t pass it up
brave mica
@karmic brook that filament /microscope tip is a great idea! I'll have to buy some decent white filament; got the microscope already for board inspection
@edgy steeple oh yea? nice! I hemmed and hawed past all the sales as far as I can tell. Got mine from amazon for ~$520 though I unintentionally bought it from a non-Creality seller; Had some issues; scratches on the screen, missing z limit switch screws, and an apparently bent thing-that-attaches-the-bed-to-the-x-carriage. Nothing that a hammer can't fix and they gave me $50 back 🤷♀️
karmic brook
I have some fairly crappy white filament I use for bed levelling, as it's just a throwaway and I'm just looking at the head height, not extrusion quality.
brave mica
hm. I suppose I could use the stuff I'd shelved that came with the printer
edgy steeple
Can you tell which is my first print? 🙂
karmic brook
Should be fine. I think mine came with another printer (Monoprice Mini Delta)
brave mica
I suppose I was thinking garbage in , garbage out
karmic brook
I couldn't find any good photos out there of proper first level extrusion, maybe I should attempt to make some.
brave mica
that would be a useful resource