#help-with-3dprinting
1 messages · Page 30 of 1
 karmic brook
 west bolt
What is the actual difference between ABS and PLA? (and what is best for just starting out 3D modelling/printing)
karmic brook
Nice short writeup on ABS, PLA, and nylon here https://markforged.com/blog/pla-abs-nylon/
More thorough writeup here https://www.allthat3d.com/pla-vs-abs/
west bolt
great, thanks!
 shy kelp
Go with PLA Its easier
Easy to come by, easy to work with, makes fine parts. I use tons of it.. Well, grams of it.
 lofty sigil
PLA is a lot more forgiving and doesn't have the same need for good ventilation to avoid the fumes
ABS has more strength for certain applications
 formal relic
 empty sedge
the x motor isn't part of the moving mass, but you depend on your rails a lot to prevent racking
like hbot, corexy doesn't move the motors around, but always pulls the effector from both sides eliminating racking
 brittle oxide
@supple stratus and @idle crest where can I find the printer profile for the Printrbot Play?
 frozen drift
I need help figuring out how to combine the 4 pieces of this. It doesnt need to come apart and I want it to stay together. do any of you have ideas as to how I could do that?

GitHub
Contribute to Twingemios/SpeechRecognitionWand development by creating an account on GitHub.
All 4 pieces will be printed separately and then put together using some method
 ocean orbit
Glue?
 boreal lava
@frozen drift two part epoxy. Just please, if you use it, wear gloves. That stuff is nasty to get off of skin, but it will hold nearly anything if you sand the surface first.
karmic brook
One useful trick is to put in alignment holes of filament diameter, then you can cut out filament pegs to use as dowels. Not only holds the parts in alignment, but gives the glue more to grab.
boreal lava
I often put small crosses and slots on pieces that need to mate up, but you really need to know the tolerance of your printer to design those
 boreal wyvern
@frozen drift If you print in ABS you could use superglue or acetone, great bond, but short on working time. If I use a 2part epoxy I use 5min version so I have time to make mistakes.
 violet needleBOT
Adafruit Industries posted Star Wars Galaxys Edge Bottle Cap

Every week we'll 3D print designs from the community and showcase slicer settings, use cases and of course, Time-lapses! Galaxys Edge Bottle Cap Pedro Ruiz h...
violet needleBOT
Adafruit Industries posted 3D Hangouts – CPX Lamps and Halloween Props

Multistreaming with https://restream.io/ This week’s #3DPrinting project on Adafruit Learning System https://learn.adafruit.com/lego-head-lamp-with-audio/ ht...
violet needleBOT
Adafruit Industries posted 3D Hangouts – CPX Lamps and Halloween Props

This week’s #3DPrinting project on Adafruit Learning System https://learn.adafruit.com/lego-head-lamp-with-audio/ https://learn.adafruit.com/snap-fit-mount-f...
Adafruit Industries posted 3D Hangouts – CPX Lamps and Halloween Props

This week’s #3DPrinting project on Adafruit Learning System https://learn.adafruit.com/lego-head-lamp-with-audio/ https://learn.adafruit.com/snap-fit-mount-f...
 molten sandal
I just completed an upgrade to an inexpensive 32-bit board SKR V1.3 running Marlin 2.0. Anyone looking to do the "ramps" upgrade can ask away while the upgrade is still fresh in my mind.
The main benefits is that its running ultra quiet on the xyz axis for less than $50
karmic brook
Nice!
 boreal thunder
Could you please break down the MKS / SKR / “ramps” business? I know they’re replacement main boards, and generally why they’re improvements over the stock board, but I don’t fully understand what makes them different from each other. Architectures? Expandability? And what drivers are you now using? TMC2208? 2209? 22-there-are-so-many-I-cannot-comprehend? Did you have to fiddle with voltages?
I’d definitely like to know what you thought of the whole process and any issues you encountered, please and thank you.
violet needleBOT
Adafruit Industries posted LEGO Head Lamp with Audio

Build a light up LEGO head with Adafruit's Circuit Playround Express! 3D print the parts and make an interactive lamp that plays sound clips from the LEGO mo...
molten sandal
@boreal thunder The stock boards typically have integrated drivers like the 4988s that are impossible to replace when something breaks. So if an integrated driver breaks down, your entire board has to be binned. This is exactly what happened to my stock melzi board. The newer boards offer header pins that allow you to plug driver boards in easily.
The new tmc22xx (trinamic) drivers are value-for-money driver boards that offer features like stealthchop (quieter printing) or microstepping to 256(via software interpolation, something 8-bit boards are not able to handle). But arguably nothing above 1/16 msteps is needed. But I did notice a huge print quality improvement from my stock boards with a 32-bit microcontroller and new driver boards.
Some new driver boards offer features like dynamic UART (software setting of vref currents), lower Rsense (less heat on the drivers) which to me are quality of life improvements for people that tinker with their boards a lot. The SKR v1.3 even has headers that allow you to activate these features easily without having to jumper cables between your driver boards and your diag pins - but these would only make sense to you once you're waist deep into this territory.
ocean orbit
Right, I need a bit of a sanity check on what im doing right now
I have a 12v 200w silicone bed heater, that should pull a little over 16 amps
Im likely to need a mosfet for this
also, what gauge wire should i be using to wire the mosfet etc
karmic brook
You'll need a fairly serious MOSFET for that, and probably 12 gauge wire.
ocean orbit
I ended up just buying a different cheap printer with a heated bed allready
the stuff to add a heated bed to this one was getting up towards £40-50, so i thought "oh well" and grabbed a cheap cartesian
karmic brook
Probably a good idea. When you have more amps than volts, everything has to be really low impedance or it just gets hot in the wrong place and doesn't work.
ocean orbit
that and the cheap silicone bed heater i have, i measured the wires, and if they are 16 gauge id be lucky
I know silicone covered wires can handle higher amperage but that seemed potentially hazardous
karmic brook
They'll still get warm and waste power and voltage.
ocean orbit
I actuyally had a google and if they are 16, when they are probably closer to 18, they would hit >80c if it draws the full 16.7 amps
Plus my printer is a cheap delta and frankly ive been after a cartesian with a slightly bigger build plate sooo
and my partner was also asking so it just made sense haha
ocean orbit
yeha i was looking at a mosfet that could take a decent amount of amperage but i wasnt sure
karmic brook
Right, it's not that silicone insulated wires don't get as hot, they still get hot, but the insulation can withstand higher temperatures.
molten sandal
yeah precisely, and most of the power that it takes to run a 3d printer actually goes to the heater bed anyways
karmic brook
Yup. Heat issues aside, for those low voltage high current heaters, the losses can add up. If you get just a couple of volts of drop in the MOSFET and wiring, the heater gets 10V instead of 12V, so your 200 watt heater is now only 139 watts.
ocean orbit
Makes sense
it only cost like £6
so im not too worried
maybe i will find a use for a 12v 200 watt heat bed for something, who knows
karmic brook
Seed starter? Food warmer? Special effects for holidays? Lots of possible uses for something like that.
ocean orbit
exactly
ocean orbit
gigantic coffee warmer
molten sandal
Does anyone know of a way to accurately measure a 3d printer's hotend temperature?
I've lost trust in a thermistor that I've been using since forever after taking some resistance readings at "220" degs
ocean orbit
another thermistor?
one of those infrared thermometer things would probably work too
molten sandal
those are not very good unfortunately
much of my nozzle is hiding behind a silicon sleeve as well
they can be off by as much as 20 degs
I'll still try it nonetheless
I've got a unit-t one sitting about somewhere
anyone uses a PT1000 thermocouple for their hotend?
karmic brook
Hint for infrared thermometers - metallic surfaces can throw off the readings due to their lower emissivity but a little polyimide tape gives good readings
 ornate raven
@molten sandal , speaking from an industrial maintenance point of view. Have a second device not related to the first device to measure temperature. Series them in logic to the heater control scr (or whatever is controlling your heater) so that if either fails, the relay dies, thus the heater loses power. I'm a fan of 3 wire RTD's but two wire devices might be simpler to implement.
Man, I really gotta get out of my old frame of mind and realize we're talking devices used at home.
karmic brook
Even if they are used at home (and perhaps especially so), you don't want to lose control of a heater capable of high temperatures: there are stories of 3D printers catching fire.
I like the idea of redundant sensors and having the control code shut off the heater if it doesn't get reasonable (and consistent and expected) readings from both (or all) the sensors.
molten sandal
@karmic brook Oh this is precisely what is happening in my Marlin code atm, I'm getting heater errors and marlin catches thermistor / heater problems very aggressively (or perhaps too much)
I'm smelling a little burnt plastic (could be leftover wood pla residue) when heating at 240 so I'm wondering how can I measure these high temps with some reasonable accuracy
There is a facility to add dummy thermistors into the circuitry but I'll need some time to wrap my head around the series logic
Let me do some reading up
@ornate raven that was definitely keen insight
karmic brook
I don't know much about measuring temperatures like that accurately, I know people use thermistors and thermocouples, but I don't know much about their accuracy, calibration, what other options might be available, or how to integrate different kinds of sensors into something like Marlin.
ornate raven
25 years ago it was all thermocouples but these days (in industry at least) it's RTD's. 3 wire in particular.
karmic brook
3 wire like a bridge configuration?
ornate raven
One wire is reference. The controller uses it to reference wire resistance of the run the other two wires have the rtd across them
Increase accuracy
Big factor in hot environments
I always hated troubleshooting a temperature control problem involving thermocouples. The mor junctions in the wire, the worse the accuracy. Heated and then cooled caused the metals to separate etc...just not fun to hunt down. where the stray resistance was at.
molten sandal
So apparently there's even a 4th wire for RTDs https://www.omega.com/en-us/resources/rtd-2-3-4-wire-connections
So very little I know
molten sandal
I fixed the thermistor by cracking out some math on how the ADC values really works
the marlin firmware uses 10-bit reso values, so 0-1023 (https://reprap.org/wiki/Thermistor). The math for the ADC values are ADC_count = 1024*Vout/Vref = 1024* Rth /(R2+Rth) # for 100K thermistors without R1.
It uses the board pullup resistor as the reference resistor
so in my case ADC 72 would translate to ~355 ohms
for a 100k, beta 3950 thermistor. After digging into thermistor tables in the marlin code, I found the 104GT-2 thermistor defined there as having a beta of 4267 which should be the manufacturer's default but with clones and all that its never the same across the board
That difference in beta resulted in a temperature difference at a target temperature of 37 degrees (247 vs 210). Yikes!
I think the big takeaway from this exercise is that whenever you should never blindly follow model numbers and always read what is on the tin. You should always know your parts and work accordingly with them.
For measuring against real temperatures, I blue tape the said thermistor to a prusa hotend at work and set the hotend to a target temperature. Its a trusty method but I've been considering building a little test jig that would do the same and output real the beta values of the thermistor you're testing against
Would anyone else find a use for something like that?
karmic brook
An automatic calibration/beta measuring rig sounds useful for a lot of things.
Especially if it can handle a variety of temperature ranges (I'd probably want a different calibration for an air conditioning temperature sensor than for a hot end temperature sensor).
molten sandal
hmmm I haven't thought it out carefully, but its generally to simulate an insulated heated environment to determine the real beta values of NTC thermistors
I guess I could add a small peltier to cool things
I even put my meat thermometer to the hotend!
karmic brook
Don't necessarily have to cool things, but perhaps have one range from (say) 20-40°C and another from 50-300°C or somesuch.
molten sandal
hmm that wouldn't be too difficult
I'm going to let the idea float in my mind a little for sure
I've seen a fair number of 3d printers with incorrectly configured thermistors to realise that this is an actual problem
karmic brook
I like it. For once in a while, I can just cobble something together, but for something I do more frequently, it's nice to have some automation.
molten sandal
Its like, "Why do I have so much stringing on my printer! I've set it the temps to 190!!", "Why do I smell burnt PLA at 200?"
I wouldn't mind making something if it benefits everyone. I'll sleep tonight thinking about it
Probably no fancy steinhart & hart calculation though
karmic brook
Maybe offer a choice of a linear or quadratic approximation, that ought to be sufficient for the sort of uses most people would put them to.
 heady python
Is there a way to use a lipoly battery to power servo feather wings and/or stepper motors? I love my servo wing but it requires separate 5v power. For portable projects it’d be great to be able to power the Servos off the lipoly battery....can I? Maybe using a powerboost?
karmic brook
Yeah, a powerboost will give you 5V from a single-cell LiPo source. Some steppers will run from LiPo voltage (generally small ones). Bigger steppers generally work better with more voltage (12 to 24 volts is popular).
heady python
But you can only draw 1amp correct?
heady python
Do you have an example kea?
karmic brook
This one can provide up to 5A at 5V https://www.pololu.com/product/2565
ocean orbit
im pretty partial to https://shop.pimoroni.com/products/mp2636-power-booster-charger-module

Power boost and LiPo battery charging on one board!
but i power my projects from USB a lot
heady python
Hey that’s awesome! Hopefully i can source it in the US 🙂
@karmic brook you’re says maximum input current is 5A. Sorry for the dumb Q but I don’t like explosions.....is max current in the same as out?
karmic brook
Input current for a boost regulator is more than output current, so if you can only have 5A in, you'll get less than 5A out.
heady python
So why wouldn’t they tell you have the max output current is at 5v. Seems kind of important if you’re trying to size motors 🙂
karmic brook
Because the output current depends on the input current and the input voltage.
ocean orbit
CHeapo chinese printer arrived
with a german plug ofc
a GROUNDED plug though
which is frankly more than i expected
karmic brook
Heh, I got a laser cutter like that with a standard Japanese (100V) plug marked "240V 50Hz". Fortunately, my expectations were also low.
ocean orbit
well this is an anet a8
so
im well aware that a lot of them, as stock, are deathtraps
mostly because a) they disable thermal runaway protection (why)
and b) the hotbed connector flexes and shorts
So i will be using a fixed version of marlin with protection enabled
and I will ALSO be soldering the wires directly to the heated bed
which will fix the two most glaring of safety issues
plus, it will never be printing unattended
AND
there is a smoke detector 😛
which definately works
anything else you could recommend @karmic brook
 alpine walrus
Always have a fire extinguisher to hand? 😛
ocean orbit
generally good advice lol
 serene laurel
I upgraded from a wanhao duplicator I3 plus to a Prusa Mk3S about a month ago. Best upgrade ever!!!! The prusa is soooooo nice to print with because it just works!!! And I have an MMU2S kit arriving tomorrow! cant wait for that
ocean orbit
Nice
serene laurel
definitely worth the money so far!
ocean orbit
Im sure!
karmic brook
I upgraded from a Monoprice Mini Delta to the Prusa Mk3S recently too, and it's a huge improvement, I really like it. I'll be curious how you like the MMU2S, as I've been eyeing it as well.
ocean orbit
someone informed me adding a mosfet wont help
because the main board will still be sourcing 10 amps
i dont think they know how a mosfet works
violet needleBOT
Adafruit Industries posted Cubone #3DPrinting #Timelapse @adafruit #adafruit

Every week we'll 3D print designs from the community and showcase slicer settings, use cases and of course, Time-lapses! CuBone CYN https://www.thingiverse.c...
ocean orbit
huh
the connectors on this board are 20A rated
or look to be
its almost like this printer ISNT trying to burn my house down
karmic brook
I assume the main board has a MOSFET on it already to control the heater.
ocean orbit
Certainly does, but apparently the heater can draw a solid 10-12 amps depending
The old revision or whatever only had connectors rated for max 10 amps
karmic brook
I got curious what the Prusa uses to switch the bed heater. That printer uses an Einsy Rambo board for most of its smarts, and that board in turn uses a PSMN1R8-40YLC MOSFET, rated at 1.8mΩ and capable of switching 100A. I was looking for a big TO-220 part, but it's a little LFPAK (power SO-8) without a heatsink. Impressive.
karmic brook
Yeah, sort of like the AdaFruit partfinder, I have my own collection of useful parts.
serene laurel
@karmic brook my MMU2S will be delivered later today! and im off tomorrow so i can stay up all night building it and getting it to work. I will let you know when I get it working how it is!!
violet needleBOT
Adafruit Industries posted 3D Hangouts – Cappy Eyes and Cauldrons

Learn guide, code and build photos https://learn.adafruit.com/cappy-monster-m4sk https://youtu.be/sneETf_BeM8 Adafruit Monster M4SK https://www.adafruit.com/...
 forest wyvern
@serene laurel I got my MMU2S about a month ago and so far it is pretty reliable however, if you're anything like me, when you first try to print something you will get jam after jam after jam with the default Prusa settings. It won't hurt for you to give it a go with the default settings, you will just get fed up with it very quickly. I HIGHLY recommend tuning to the settings listed in this video https://www.youtube.com/watch?v=U3v_FSRmHss as it will hopefully save you some time, filament, and prints. With the settings in the video I have been able to pull off filament changes with ease and no more frustrating jams. Also as a warning, if you get any of your filament from venders like eSun or Hatchbox or any other 'Amazon' sort of filament supplier (you know the $20-$23 per kilo), don't use it for multi material prints. It is far too stringy and overall just not worth the time to save a couple bucks over higher grade materials. I recommend Push Plastics (https://www.pushplastic.com/), Fillamentum (https://fillamentum.com/), or any other high quality filaments (Colorfabb, Prusa, etc). If you have any questions, let me know and I'll try to answer them.
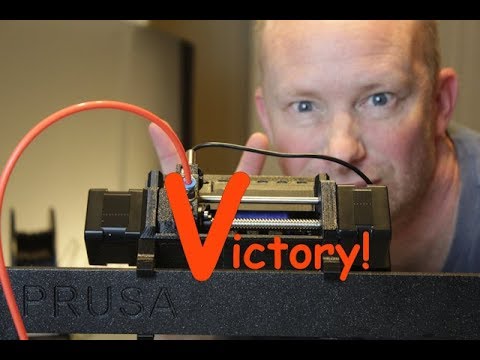
As a followup to my in-depth look at the Prusa Multi Material Upgrade 2.0, in this video I share how I finally got the damn thing to work. Here is a link to ...
serene laurel
Sweet!!! I will check that out a little late!!
violet needleBOT
Adafruit Industries posted 3D Hangouts – Cappy Eyes and Cauldrons

Multistreaming with https://restream.io/ Learn guide, code and build photos https://learn.adafruit.com/cappy-monster-m4sk https://youtu.be/sneETf_BeM8 Adafru...
serene laurel
Aside from a couple colors, most of my PLA filament is from Atomic Filaments.
forest wyvern
Looks like pretty good stuff, out of curiosity, how do you like it?
serene laurel
oh I LOVE all the PLA ive gotten from ATOMIC. they have yet to disappoint me!!! I have to tweak my temps usually to get them to stick properly but they definitely print nicely. I have several of their UV reactive PLAs and their aqua glow in the dark PLA as well. and that gitd is super nice!
Ive got 9 different colors of their PLA. and i also have their translucent PETG as well.
forest wyvern
I might have to give some of their filament a go then. I primarily use Push Plastics right now but it's always good to have a second filament source just in case.
karmic brook
I'd buy filament from Prusa if I could, but shipping to the US makes it noncompetitive. I wish there were a (non Amazon) US reseller.
Thanks for the recommendations, I'll look at Atomic and Push Plastics.
serene laurel
I will have to give Push Plastics a go as well!! I recently got a roll of Black Amethyst PLA+ from SnoLabs as well. and that stuff is BEAUTIFUL!!!!!
oh yeah, and I really like Tianse wood filament!! its pretty.
Any recommendations for nice metallic petg filaments? I have a sample of metallic blue from DAS filament and it looks beautiful. but i need a metallic green or purple to go with the blue.
karmic brook
I'm curious about the "Ultrafuse" stainless steel filament which can be sintered into a metal part (presumably like PMC).
serene laurel
ohhhhh that sounds fancy!!!
 crude kettle
Really fancy
forest wyvern
I feel like there needs to be a solid list of US filament suppliers because it seems like all "Top Filament" sort of lists are just European filament suppliers, which is great, make no mistake they have really good filament, until you see that Fillamentum charges 50 euros to ship something and you want it in less than two weeks.
karmic brook

MatterHackers
Accessible metal additive manufacturing on desktop 3D printers is here thanks to BASF 3D Printing Solutions' Ultrafuse 316L Metal 3D Printing Filament. Cost-effectively produce functional prototypes and end-use products made out of stainless steel metal, right from your offic...
serene laurel
i think i just died a little bit
forest wyvern
My thoughts too
karmic brook
The ability to 3D print stainless steel parts might be worth the expense.
forest wyvern
It's like when you look into PEEK and the price tag for half a kilo is $600
serene laurel
da fudge??? $600 for half a roll of PEEK?
crude kettle
Well, I'm getting a CNC mill that I could make Aluminum parts form. It cost me 400. Spindle is only 300w what I can upgrade that.
serene laurel
whats so special about PEEK?
forest wyvern
My bad, a full roll is that price, I was looking at the fiberglass reinforced PEEK
It's really, really strong
serene laurel
ahhhhhhh
forest wyvern
What CNC @crude kettle?
forest wyvern
Nice, looks like a solid machine
crude kettle
eBay had the best price. Amazon charges an extra 30-40 bucks
And within the US
I like that it's full metal body for 400 bucks
forest wyvern
Yeah, I recently overhauled a CNC 3018 to do PCB work and I'm curious if it will do aluminum
serene laurel
im too impatient. Why cant DHL have the gps tracking for when your package is close to being delivered. Kinda like Amazon has.
forest wyvern
I know exactly how you feel!
serene laurel
The ADHD doesnt help with being patient
karmic brook
I went with the Sherline
crude kettle
Owo
Where did you get that?
karmic brook
Bought it directly from Sherline.
forest wyvern
I've worked with their mills and lathes, they
karmic brook
Added some stepper motors from eBay and a QuadStepper from SparkFun
forest wyvern
are great for small precise stuff
karmic brook
Nice stuff and solid support, but yes, not cheap.
The one I bought cost about half that.
crude kettle
Hmm...If it's solid that would justify the price
serene laurel
Printed a cute business card holder the other day! Love how it came out!!
crude kettle
That is nice
empty sedge
Is that the "Starry night" PLA?
serene laurel
Its Black Amethyst PLA+ from SnoLabs!
Its a lot blacker in person. but its sooooooo much nicer in person than in my photo
empty sedge
Atomic filament "starry night" PLA loubie dragon
serene laurel
ohhhhh very nice!!
forest wyvern
It's great when prints are so nice that you can see the polygons that make them up (not that you want to see the polygons, it's just good that the printer is only limited by model resolution)
serene laurel
the business card holder was designed to look like that.
forest wyvern
Ah, none the less, an amazing job.
ornate raven
I bought some red PLA from microcenter while I was there. First third printed very well. Then the carbon started showing up. Sometimes big enough to spot and cut out, others were mixed in well enough to make it the nozzle and plug it up. So, I'm back on the Amazon stuff "Hatchbox".
 tribal egret
@solar zinc did you report to the store/refund?
ornate raven
Nah, Chalkin it up to experience. Gonna try it again with a larger nozzle and less refined make some day.
violet needleBOT
Adafruit Industries posted Mario Cappy with Animated Eyes

Learn Guide: https://learn.adafruit.com/cappy-monster-m4sk In this video we’ll show you how to use Adafruit’s Monster M4sk and attach it to your hat with our...
 polar wharf
I'm thinking about getting into 3d printing. but i'm unsure which 3d software to learn
It it pretty universal? or is it very strict in what formats you can use.
karmic brook
There are a lot of packages out there, most of them produce files that pretty much any slicer can use (the slicer converts the model into GCode, which is what the 3D printers understand).
I'm going to quote @boreal wyvern 's reply to a similar question in this channel from August:
FreeCAD is super intense but free. TinkerCAD is easy and free, but cloud-based and can be limited. Blender is great for organic shapes and free. Fusion360 is cool freeware for engineering-style parts and the LayerByLayer tutorials are excellent. I have heard Meshmixer, SketchUp and Ayam can be good, but I have yet to really explore them.
If you do searches for those terms ("FreeCAD", "TinkerCAD", etc.), you can find other peoples' comments about those and other offerings.
serene laurel
Update on my MMU2: I got it all assembled and went to flash the firmware update for it. My computer could not detect it and neither could my prusa mk3s. after some research im guessing the bootloader on it was either not present or corrupted. I contacted Prusa and they are going to send me a new board. If i had the tool and the total understanding of the build process I probably would have just tried to flash the bootloader myself
karmic brook
I suspect you're right: most of those boards are recognizable derivatives of existing hardware and support the usual loading methods.
ocean orbit
For mechanical parts I love fusion360, feels very easy to get something from a rough drawing to a part
serene laurel
If only I had an AVR flasher. and the skills to understand how to build the bootloader, all their stuff is on their github
 bright olive
What's the best way to enlarge a hole in a printed part? I'm a bit less than half a millimeter off on a hole for a USB type C jack and I'd prefer not to reprint the part just for that. Off the top of my head, I have some needle files and a sacrificial soldering iron tip, but something less messy would be great if possible.
serene laurel
id just sand it down
karmic brook
Tapered reamer?
heady python
You can get a cheap 140 bit drill set from harbor freight for like $40. The increments are close enough you can widen to whatever you want. I use it for press fits on locating pins and for drilling out holes for taps or heat inserts

Harbor Freight Tools
High Speed Steel Drill Bit Set with Index, Piece
shy kelp
@bright olive soldering iron.
bright olive
I'll give the iron a try first, I think. It has nothing to do with it being closest to me >_>
ocean orbit
i use a soldering iron sometimes, the heat seals the edges and you can get a good strong hole
ocean orbit
Stupid anet board has no bootloader
luckily i have arduino stuff just generally lying around
so I can flash one on
karmic brook
It's handy to have access to tools like that when you start getting into things.
bright olive
Well the soldering-iron-expanded hole is ugly as sin but it works
ocean orbit
haha, the trick is to flatten the extra plastic around the hole to the print, makes it strong
ornate raven
@ocean orbit is correct. I also put my tip to the plastic as it is heating and as soon as it gets hot enough to do the trick, I get it away.
ocean orbit
yup, practice etc
ornate raven
But, ugly as sin has been my results on the road to getting better at it.
karmic brook
That sounds like many processes (coloring, soldering, cooking) during the learning process.
tribal egret
I haven't tried this out but Adam Savage recommended using these for reinforcing threads in plastic parts:
https://www.aliexpress.com/item/32918154876.html
Anyone else try these? vs. the heat-set inserts

aliexpress.com
Smarter Shopping, Better Living! Aliexpress.com
 devout pewter
I've used them in a car for repairing stripped threads in an aluminum engine block and they worked well.
tribal egret
@devout pewter cool! I don't have a jig to heat press the heat inserts so was looking for alternatives. These seem to be more $$ tho..
devout pewter
Yeah, they're pretty expensive. It might be more cost effective in the long run to build a jig yourself, though it isn't strictly necessary if you have a caeful hand.
ocean orbit
I just jam the suckers in with a soldering iron
tribal egret
I use a resin based mSLA printer, I actually haven't tried 'melting' or seeing how it responds to heat
tribal egret
The plastic used in SLA printing is what is known as a thermoset plastic, as opposed to the thermoplastic plastics used in FDM printing. What this means, is that it can not be melted. The reaction that hardens SLA materials is irreversible. If you heat up the plastic it won't melt, it will just burn (if it gets hot enough). What you're planning is a bad idea, and it won't work.
https://3dprinting.stackexchange.com/questions/7194/using-heat-set-inserts-with-sla-printed-part

3D Printing Stack Exchange
I have an SLA printed part I want to put a brass threaded insert in using a soldering iron. The insert is slightly larger than the hole so I would assume the edge will melt and re-freeze around the...
ocean orbit
Oh hey I was right :p
tribal egret
I was ready to try it out too haha
polar wharf
FreeCAD seems nice. cause it's cross platform.
ocean orbit
fusion360 is my preferred tool but you know
karmic brook
Different folks have different preferences and priorities. I ended up using OpenSCAD, but it's certainly not for everyone.
forest wyvern
I used Autodesk Inventor Professional as my go to but am in the process of learning Solidworks for fun (both are pretty much identical)
 turbid sand
has anyone taken the featherwing enclosure and stretched that for the featherwing tripler? I’m trying to figure out an enclosure for my x3 featherwing setup using the OLED featherwing. Was hoping maybe someone’s done this before so I don’t have to reinvent the wheel 🤔😬
ocean orbit
Not that i can see, but they have the fusion360 file available for the standard feather case so you might be able to adapt it fairly easily
 raw sluice
I've got a good amount of PLA filament on my current spool, but I know it's not going to be enough for the print I want to run overnight. I've got another roll of the same, is there a way to join them before I start the job?
ocean orbit
not easily or cheaply
raw sluice
better to save the partial spool for a smaller future job then?
ocean orbit
thats what i would do
raw sluice
cool, I can live with that. It's the 1 or 2 meter leftovers that really bug me
ocean orbit
haha same
my partner sometimes uses them with a 3d print
..3d pen
wish I knew why my printer is binding on one side
guess ill have to strip out the rods tommorow and check if one is uneven or something
karmic brook
There are filament splicers like this fancy one https://theawesomer.com/mosaic-palette-2/529405/

A slick upgrade for 3D printers, the Palette 2 and Palette 2 Pro let you print models with up to 4 colors from a single print head. It works with special...
There are also more cost effective approaches https://rigid.ink/blogs/news/how-to-join-or-fuse-filament-together

rigid.ink
In this article we'll cover why you may want to fuse filaments together, why you perhaps shouldn't do it - and we'll cover our top 3 methods if you really still want to do it anyway.
How many times have you finished a 3d print, and the leftover filament on the spool isn’t...
boreal thunder
What do folks here do for ventilation / fume extraction / filtering when printing?
molten sandal
just dont print ABS and go for PETG instead
and print at the right temperatures
there are some designs out there for a HEPA filter to be added to an IKEA STUVA cupboard
but in general if you are printing PLA its not needed
ocean orbit
I did some research on the subject a whileback
3d printers all release VoCs to some degree, from my research in a couple of scientific papers I found that generally speaking a PLA printing printer releases similar VoCs to a laserjet printer
So not REALLY a big deal, probably
BAS etc though, definately wanna filter that
 jovial quest
Is the anet a8 still a good printer for its price?
karmic brook
Makes sense to me, and I'm guessing it works fine.
ocean orbit
fixed the issue i was having with the axis being squished
ordered a 12v 80mm fan, gonna print out a bracket and hook it up
karmic brook
Good idea: once I have a working fix, then I go about making it more stable/permanent/nice looking
ocean orbit
yep, aside from the cable holder on my elta which has been an elastic band for about a year, because nothing else works as well
delta*
karmic brook
Reminds me of when 3M found out the Nascar teams were using their roofing adhesive to glue bolts flexibly to the wheels so they could just bang them on and tighten the nuts. 3M came up with a bunch of "optimized" formulations, but none of them worked as well as plain old roof adhesive, so the teams just stuck* with that. * pun intended
jovial quest
@ocean orbit Hey thanks for the reply, yeah cant afford more
ocean orbit
WELL, the ender3 isnt THAT much more and its a nicer printer for sure
I would really recommend saving the extra
also I know whatim talking about I bought an anet a8 like 5 days ago
and I should have bought an ender 3
jovial quest
Where to order?
I thought just buying from amazon. And the Ender 3 would extra 100€ on amazon
ocean orbit
Should check aliexpress if you dont mind longer delivery times
crude kettle
Depends on where you are too
jovial quest
EU
ocean orbit
for sure
ocean orbit

aliexpress.com
Smarter Shopping, Better Living! Aliexpress.com
this one ships from germany
dont know what the price would be like for you
crude kettle
Ah, the EU. Normally alixpress or eBay depends if there is a vender.
jovial quest
I found an offer on gearbest
crude kettle
That is were I got mine
ocean orbit
I've ordered from gearbest before
crude kettle
Once I had a faulty board 6 months in and they replace it for free
ocean orbit
Btw the reason I recommend against the anet a8 is it's cheaper but I spent an extra 30-40 euros making it less likely to burn my house down
And once you've done that why not go for the alu frame etc of the ender
crude kettle
If the ender 3 is your choice I would change the hotend for a all metal one.
Also isn't there a new revision for the Ante 3d printer?
That is made of V slot
crude kettle
But that one has issues base on what I heard
using 8mm rods for a LARGE print size tends to sag
ocean orbit
But basically if I had known the ender could be had for the price I would have bought that
Bit of the old buyers remorse you know
jovial quest
Yeah I think I will go with the Ender 3
crude kettle
Yeah, I like my ender 3.
jovial quest
Anything to buy also when starting with 3d printers?
ocean orbit
Patience
jovial quest
Cant afford that 😄
crude kettle
A all metal hotend for creality
jovial quest
Only sometimes
ocean orbit
You will likely end up wanting to throw it through the wall
crude kettle
Only if you can't read words
crude kettle
OOOOOOOOOOOOOOOOOOOOOOOOOOOOOOOOOOH
That happened before and that made me buy a new hotend. Still waiting for it in the mail. Had it happened to be on a 10 hour print.
Failed 8 1/2 in
crude kettle
Luckily for me that has not happened to me.
YET
ocean orbit
But basically aside from the printer and filament you will probably be allright
There's a ton of "maybe" items that might help, glue stick, clippers, one of those sharp scraper things etc
crude kettle
Seriously though all metal hotend will save you panic if you want to do PETG for long periods of time
ocean orbit
For sure , maybe not a buy immediately, but at some point
jovial quest
some has a coupon for gearbest?
crude kettle
Uhhh you mean someone*
jovial quest
Yes
crude kettle
I would use the Honey browser exention
jovial quest
No
crude kettle
If there is a coupon it will find it at check out
ocean orbit
Might have some luck with googling for one but who knows
ocean orbit
Just checked, I don't have one
Congratulations on buying a 3d printer, look forward to having completely random 3d printed crap lying around
crude kettle
I have some random prints on my desk
ocean orbit
Oh I've got them all over the place, but it's come in very useful for my quadruped robot, brackets, battery box etc
jovial quest
First thing Im going to print is boaty 😄
ocean orbit
Benchy? I have literally never printed that hahah
jovial quest
Yes benchy my bad
ocean orbit
I printed a pretty sick at-st
ocean orbit
Which my cat broke, but it cost like £2 in filament so who cares
jovial quest
Thanks for the input
ocean orbit
Np! I have a wide variety of useful, useless and kind of useful prints
Great for making little cases for projects and stuff too
crude kettle
A whistle was fun for me
crude kettle
There is a CNC I bought that came in this past Thursday. The thing won't turn on and no software recognizes it.
Dead on arrival. Seller is taking his marry time responding
crude kettle
The machine is good, but I would like to be refunded an amount so I can buy a cnc board from Adafruit. Adafruit on for few American companies I really trust. That is not to say I don't trust any other company.
ocean orbit
Ahhh
crude kettle
Yeah, I got the machine so I can mill parts to build a 3D printer
ocean orbit
Hahaha oh what kind ?
crude kettle
got mine for $403 USD
Full metal and I was happy.
But the Board is NOT recognized my the recommend software
PlanetCNC Software saw it but refused to connect
And now it won't power on
ocean orbit
guess how i just tested to see if the heat block was hot
karmic brook
Was the answer "Ouch"?
crude kettle
Hehe
 elder lintel
Just FYI I got Anet into GPL compliance so the firmware/fire issue is fixed. But you should still buy an Ender 3 anyway😊
crude kettle
The Ender 3 really blow the Monoprice 3d printers OUT of the water at lunch
launch*
elder lintel
Monoprice Select Mini is still a great size though for smaller setups.
crude kettle
The price was higher at launch
molten sandal
Yeah I own a wanhao and I would agree with that point on the ender 3
ocean orbit
@elder lintel I vaguely remember your tweet about that, good job!
But yeah if I had done my homework properly I would have gone for the ender 3 but live and learn
Also in all fairness the anet still produces some nice prints
Also as my partner points out, gives me an excuse to tinker with it, which I love
elder lintel
@ocean orbit😉
ocean orbit
Maybe I should print a Naomi on it haha
Though I would have to explain to my partner why I'm printing a person, hmm
karmic brook
I also thought about printing a Naomi, but while it would look nice, it wouldn't do teardowns, custom designs, explain Chinese culture, or discuss technical issues with me.
karmic brook
And it takes years to flash the bootloader so you can talk to them
ocean orbit
hard pass from me
karmic brook
Yeah, I think I'll follow LadyAda's advice and build robot friends instead. 🤖
ocean orbit

smallest pocket 3D pirnter in the world.Adopt low lead 15mm step screw, 0.2mm nozzle, print size 45mm45mm40mm, the debugging accuracy should be able to kill a thousand yuan machine in a second.
You are welcome to put forward better Suggestions.
firmwarehttps://github.com/moss...
ocean orbit
Just utterly destroyed a print getting it off the bed
REALLY didnt want to let go
think i need to tweak that first layer a bit 😄
karmic brook
I like the flexible removable beds for safely removing stubborn prints
ocean orbit
i should get one
also i realised my build surface is just masking tape
i could have just peeled the tape off
crude kettle
Flex bed would have saved a good amount of hair for me.
elder lintel
@karmic brook😅
 tacit sandal
Hey, super newbie here. Just got my first print complete last night.
What PLA filaments do you guys recommend actually? Has anyone used cheap filaments, are they worth it at all/what are they like?
empty sedge
I've had good luck with hatchbox PLA off amazon. I probably wouldn't buy stuff that's cheaper than that
ocean orbit
I just use whatever is cheapest, it depends on what you want it for really
random parts? cheap
something that you want to be really nice? go for something a bit more pricy
its a lot easier than it used to be, so many more maniufacturers making filament at dirt cheap prices, used to be no name or branded, maybe 4 options
ornate raven
Hatchbox has served me well but I've only used two spools so far.
crude kettle
I can say Hatchbox is good too. The Cheap filament from eBay has served me well, but I tune the settings before each print
elder lintel
Big issue with cheap Chinese filament is they change the blend batch to batch depending on what's raw material they get cheapest. You can dial almost anything in, and diameter control is a lot better than it used to be, but it's a huge waste have to tweak each roll.
ocean orbit
For sure, Its why i reccomend it only if you dont particularly need the absolute best results
In other news this anet a8 is printing really really well, which kind of surprises me
ocean orbit
Just fitted an 80mm fan because had issues with the board getting a bit warm though
karmic brook
In place of the desk fan?
karmic brook
That's a bonus, so you can get whatever amount of cooling you want (within the capabilities of the fan, anyway)
karmic brook
Manual control still beats no control!
ocean orbit
for sure, no idea if any pins on the anet board are free
from what ive heard the memory on th eboard is super small so you know
karmic brook
I think the Einsy Rambo just runs the fans from a constant 5V (no PWM) although I think it does have a tachometer input to see how they're spinning.
ocean orbit
atm its a 12v fan wired from the PSU (piggybacking the power connector on the board) with one of those manual speed control knob things
I could probably add a temperature sensor etc but eh
over engineering you know?
karmic brook
Oh, I end up doing a lot of unnecessary overengineering.
ocean orbit
it becomes very tempting
If i was going for as quiet a build as possible I probably would
got a temp probe against the board/heatsinks and its at 26 degrees
maybe 3 degrees above ambient
karmic brook
I would't expect the fan to be the dominant noise source.
ocean orbit
not really, you can get stepper motor drivers that make them extremely quiet in which case the fan MAY be
but the anet is allready quieter than my delta
karmic brook
You can always put it in an enclosure (which has other advantages besides noise reduction)
ocean orbit
also true
especially when we find out the VoCs released by printers are killing us all
karmic brook
Too late for me, I've been breathing leaded solder fumes for decades.
ocean orbit
haha yeah
leaded solder is just better
cute little curiosity
mostly printed because i needed something long to test the fan, worked a charm
karmic brook
Are the bogies articulated?
ocean orbit
solid, the model si from nasa and its just supposed to be a cute model.
i dont doubt it could be edited though
I have this vague plan of printing up a scale working model
karmic brook
Oh, I like that idea!
ocean orbit

GitHub
A build-it-yourself, 6-wheel rover based on the rovers on Mars! - nasa-jpl/open-source-rover
there is this buttt
its quite a bit bigger than i envisioned, also more function than form
karmic brook
Yeah, I like it, but it's solving a different set of problems.
ocean orbit
exactly
its an idea in the back of my mind so I havent put much thought into it really
thought about maybe using the scale of a standard 9g servo as a size guide
karmic brook
Found this one, but it's unpowered https://www.thingiverse.com/thing:27908

Curiosity is the biggest, baddest, laser-wielding, plutonium-powered, robot-rover ever sent to Mars. On Sunday, August 5, 2012 it survived a dangerous landing that secured Mars exploration hopes for a decade. It will help answer the question of whether or not we are alone in...
violet needleBOT
Adafruit Industries posted D&D Smokey Dragon Skull @adafruit #3DPrinting #timelapse #adafruit
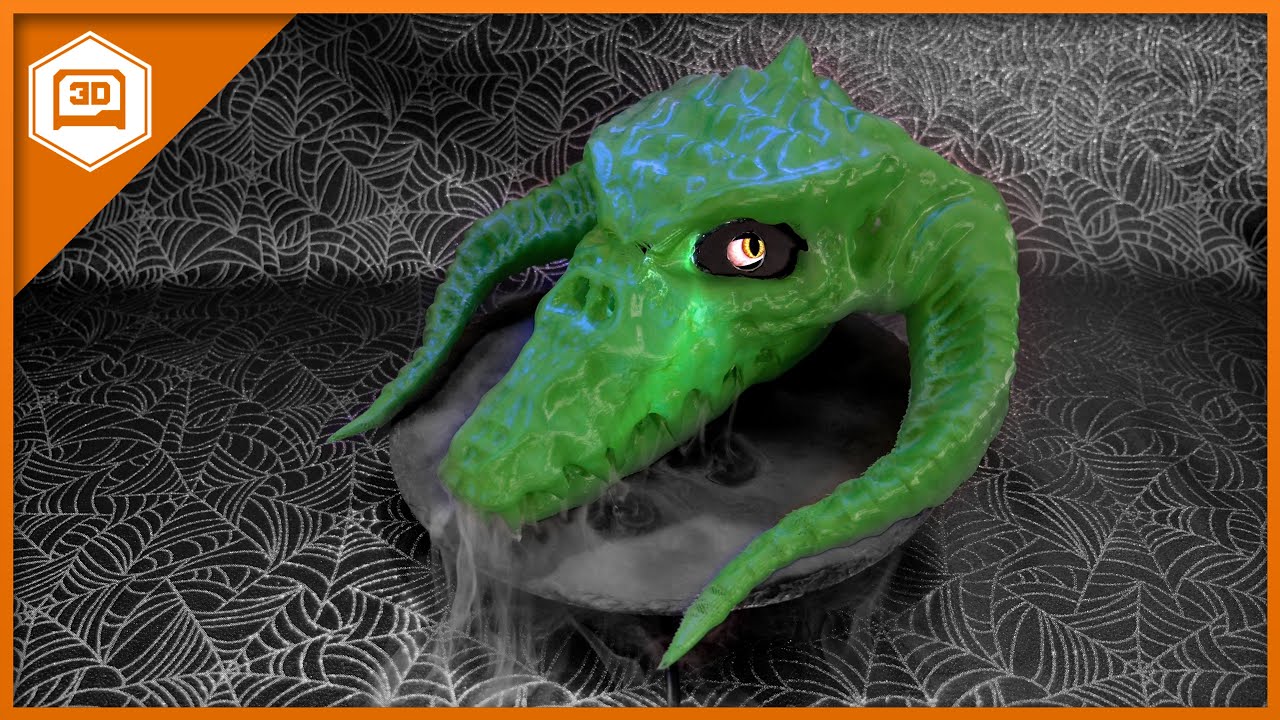
Every week we'll 3D print designs from the community and showcase slicer settings, use cases and of course, Time-lapses! Black Dragon Skull Gunther Beatty ht...
ornate raven
Take it out, roll it on a mirror.
ocean orbit
I would, but im going to trust the calipers on this one
also they are a pain in the backside to get out
ornate raven
Pain verses performance, the ultimate dilemma.
ocean orbit
going to print a few things and check results
worst case scenario i buy a couple of new rods
ocean orbit
I wish I knew why my printer is clicking
vaguely sounds like a spark noise but cant see any
hmm
karmic brook
That's usually a stepper bottoming out/skipping somewhere or sometimes a feed issue in the extruder.
ocean orbit
nah its super quiet, ive had steppers skip before and its usually a more audible noise
this is like a spark noise
karmic brook
Hmmm. Sometimes ceramic capacitors can make tiny tick sounds when voltages across them change suddenly. Can you try changing the temperature of the heated bed and extruder and seeing if it speeds up or slows down? I'm not sure which other loads might do that. Fans?
One useful thing to do is take a screwdriver and hold the handle against your ear, and probe with it: it works like a stethoscope and can help narrow down where a sound is coming from. A mechanic's stethoscope (basically a thin tube with earpieces) works too, if you happen to have access to one.
ocean orbit
its printing right now so im not sure if that would help
karmic brook
Yeah, a tiny sound would likely get buried in the noise of an active printer.
ocean orbit
i can tell you one of the bearings needs oil
but still cant narrow down the ticking noise
hmmm, tommorow ill double check for shorts
if it IS sparking there would be signs
Really annoying me because it really sounds like a spark
empty sedge
are any of the high-power connectors for the heated bed too hot to touch?
ocean orbit
I don't want to touch them because it's turned on rn :p
empty sedge
do you have a mains heated bed?
ocean orbit
Nope
boreal lava
Weird question, but what's your cable management situation? Sometimes a zip tie can click against something on the printer and make annoying sounds like that.
empty sedge
sticking your hand on stuff that's 24V or 12V won't shock you unless your hand is really wet. But you could also try wiggling the wires and see if the sound changes
ocean orbit
Cable management is questionable at best, but I've poked everything and haven't managed to stop it or encourage it
Also I don't want to touch it cos the bed is hot rn
empty sedge
I was asking about the control board side
what happens with loose bed heater wires is the resistance increases which causes them to get hotter which causes the resistance to increase more
ocean orbit
Cant get my hand in, hang on
empty sedge
it can happen on the power input to the control board or the wires going to your bed
ocean orbit
Beds attached via midget so I'll check those
Er
Mosfet
Mosfet is barely warm, 30c ish across the terminals etc
Poked my finger into the electronics, doesn't feel warm
empty sedge
is the ticking the sound of the spool inching forward?
ocean orbit
Nope
Can't quite narrow it down, guess I'll have to pop it apart, heat everything up and poke it until it makes a noise
I'm sure I'll work it out
empty sedge
I regret buying an Arduino 101
ocean orbit
Might have to poke the power supply which scares me because 230v
empty sedge
[I'd rather have two more leonardos than two more 101s]
karmic brook
I always looked askance at the X86s in Arduinos. Seemed like a bad fit to me. What I thought Intel should have done is strip off the X86 wrapper and offer the RISC core: in the Arduino ecosystem, there isn't legacy X86 software compatibility issues, they could have made a fresh start, but they tried to shoehorn in the old backwards compatible one.
violet needleBOT
Adafruit Industries posted 3D Hangouts – Foggy Cauldrons

Make a Meat Skull Centerpiece for your next weird party! Multistreaming with https://restream.io/ ----------------------------------------- LIVE CHAT IS HERE...
violet needleBOT
Adafruit Industries posted 3D Hangouts – Foggy Cauldrons

Make a Meat Skull Centerpiece for your next weird party! Multistreaming with https://restream.io/ ----------------------------------------- LIVE CHAT IS HERE...
boreal wyvern
@ocean orbit If the printer is clicking while it is extruding, sometimes a partial clog in the nozzle can cause the feed stepper to skip and make an odd clicking noise. We have lots of spare nozzles, so we change out the clogged nozzle even when it is still partially extruding (extruding sideways, or has reduced flow and makes a skipping clicking noise). There are various ways to try to unclog the nozzle. We raised the temperature of our extruders so it doesn't happen nearly as often, unless we get a bad batch of filament with schmutz in it.
ocean orbit
Thanks but its definately not the extruder
boreal wyvern
quite the conundrum
violet needleBOT
Adafruit Industries posted Circuit Playground Bluefruit Cauldron #3DPrinting

In this project we’re making a bluetooth controlled light up cauldron. This 3d printed cauldron is designed to house Adafruit Circuit Playground Bluefruit. Y...
 blissful marlin
question: I made some 3D prints where I want to put screws in. For example for an M4 screw I just made a hole of 4 mm and forgot to add some tolerance so now the hole is a bit loose
Is there a quick fix I can do to still use the model?
Maybe add putty into the hole and let it dry?
empty sedge
you could do helicoils, but that's probably more expensive than printing again
you could try 8-32 screws instead
no, 8-32 will probably also be too lose. #10-24 screws should work
blissful marlin
Ah cant use bigger screws because the holes are for securing a PCB
ocean orbit
If its for securing a pcb I wouldnt worry too much, tighten the bolts properly and it will hold it stiff even if there is a little play
for the future i generally make SMALLER holes and use them as guides for a quick drill out
if your slicer and stuff are all set up very well you can print more or less exactly the size hole you need, but I generally dont worry about it
karmic brook
For larger screws, the traditional approach was to take up some room with something like a toothpick. That might work here, or you could use some filament. If that's too thick, you might be able to use some extruded filament.
karmic brook
Right, that's why I suggested wedging something thin in the hole to give the threads something to push against. You can also use glue, rubber, or melt a little of the hole with a soldering iron (not a tip you care about for soldering) to bulge out the material.
ornate raven
@blissful marlin Fill it with hot glue
shy kelp
I use glue or brass hot inserts
Some thing like: Brass Heat-Set Inserts for Plastic - M3 x 4mm - 50 pack

Wanna improve the connection strength between your project's 3D-printed parts, and also have nice clean surfaces? Instead of gluing bits together, or screwing plastic screws directly ...
 mental nacelle
I’ve 3D printed this gray PLA box for a 1.5” OLED & want to attach the silver lens holder. I did not design holes in the gray box so that I could insert screws through the silver tabs to hold it to the box. Can I drill small holes thru tab holes and use metal screws? Any other advice on screw sizes, things to watch out for, or if there is a better approach? Thx! https://twitter.com/i/status/1182741722406817793


Maker advice: I’ve 3D printed this gray PLA box for a 1.5” OLED & want to attach the silver lens holder. I did not design holes in the gray box to screw in the through the silver tabs. Can I drill small holes thru tab holes and use metal screws? Any other advice? Thx! ...
 Twitter
ornate raven
Twitter
ornate raven
That looks like some tiny screws ya be dealin with. Could you design into you box some kind of tabs that these twist lock into?
karmic brook
You could try self-tapping screws into the tabs, but they may not give a lot of strength. If they pull out, use machine screws and nuts.
boreal lava
@mental nacelle If you do try to drill it, use a slow speed. Using a high speed can generate enough friction to heat up and melt the filament. It's probably not a big deal on small tabs, but on larger prints the bit can get stuck in there if it cools while still inserted.
empty sedge
anyone here know the burnout schedule for ESUN castable resin for jewelry?
also what kiln do you use?
ocean orbit
No clue for the esun stuff, but formlabs has a little tutorial thing and i would assume the resins are fairly similar
mental nacelle
@boreal lava @karmic brook @ornate raven thanks for the advice. I did a slow speed drink, first with 5/64", then 7/64" and was able to then sink in some M3 screws & it seems to be holding snugly. I might push down the one pushed-up tab. Not a perfect "Mad Eye" replica, but close enough. @reef yarrow's code is just wonderful.
karmic brook
Anyone have a favorite method for cleaning gunk off a nozzle? I usually just scrub it off with a paper towel, but might try a brass brush.
ocean orbit
scrucnhed up aluminium foil, because i usual;ly have it on hand
empty sedge
I use tweezers to get the big stuff then just paper towell
devout pewter
The Prusa Mini was announced today for $349: https://twitter.com/josefprusa/status/1183021309774782466
Also https://blog.prusaprinters.org/original-prusa-mini-is-here-smart-and-compact-3d-printer/

Original Prusa MINI is here! 🥳 Our new smart and affordable 3D printer. Perfect starter printer, secondary printer to your MK3S, reliable print farm workhorse and simple enough for classrooms. And it’s just $349 or 379€ inc. VAT. 😍
https://t.co/ZwHoGg7cCt
Retweets
127
Likes
530
Twitter
karmic brook
Redesigned the extruder to be lightweight enough to make it work, apparently.
crude kettle
Definitely for those who likes Bowden extruders
karmic brook
I prefer direct drive, but I'm hoping a retrofit becomes available to put the new 32-bit controller in the i3. Then again, I could get most of that functionality by lashing a Pi to it.
ocean orbit
mydelta has bowden, gigantic pita
crude kettle
32 bit 3d printer boards has been becoming more affordable in the DIY community as of late. Going to add the Bigtree SKR board that's made for my ender 3 once I have time.
ocean orbit
might be throwing the skr into my anet at some point
karmic brook
My MPMD has both a 32-bit controller and a Bowden cable.
ocean orbit
im replacing darn near everthing else
crude kettle
Going to add a direct dive on my ender once the 32 bit board is on there
Bigtree has done quit I good job with the board. The components are good and for the price a ramps or a RADDS is pointless
ocean orbit
its pretty much a drop in for a lot of printers too
crude kettle
Yeah, 8 bit boards death call is coming a lot closer now
crude kettle
Even the ramps is better than that
ocean orbit
less likely to catch fire
crude kettle
Yeah, cheap 8 bit standers should be dropping soon or at least be the absolute first upgrade out of the box of a 3d printer.
boreal lava
32 bit is becoming the standard. Most of what we have been doing is easy on 8 bit, but it's going to be interesting to see what new functionality 32 bit affords as things move forward.
Bonus....once you upgrade a to a 32 bit board, now your old board is a pretty solid robot controller for tinkering.
karmic brook
Yeah, might let the old board run my laser cutter.
elder lintel
@crude kettle bigtree is good people, they really do their best to keep things open and collaborate across the language barrier.
ocean orbit
Good to have a endorsement from someone i trust on them, since a bigtree board is likely to replace the kind of crappy anet board
more a product of the advancement in controllers than anything i feel
crude kettle
Bigtree really were cheeky where they made a board especially designed for the ender 3. A straight swap
crude kettle
Is this grounds for reporting for false advertising?
empty sedge
when you select the color does it switch to the 0.5kg spool photo?
crude kettle
No, the photo stays at the larger spool
 cobalt quarry
I just got a different brand of filament from the usual: ERYONE (from amazon)> It jams in the nozzle repeatedly (with that thunk-thunk-thunk noisefrom the feeder)... I haven't gotten a working print with it yet. I'm slicing with "generic PLA" settings (Prusa Slicer). When I unload after a jam, the end of the filmanet is thicker that the rest. My inclination is to toss it in the trash and order some Prusa filament. I had been using PrintinZ from Adafruit with almost perfect success rates, but they seems to be not restocking it. I'm wondering if there's something in the slicer settings I can tweak to make it work.
ocean orbit
make sure you arent tooclose to thebed first
karmic brook
I have some cheap filament that does that too. Using it up while converging on a prototype.
Ended up reshaping the screw holes so the forces don't wedge the layers apart.
cobalt quarry
@ocean orbit No, this happens suddenly an hour or so into the print.
ocean orbit
what temperature?
cobalt quarry
The printer defaul of 210C
ocean orbit
must just suck then i guess
cobalt quarry
Never had this happen before. The odd issue when first changing filament from a bad load, but one it's loaded and flowing, it always worked.
OK.. I see complaints that their diameter tolerances and sloppy, leading to exactly what I'm seeing. In to the trash with it and I'll get some Prusament.
ocean orbit
i usually buy whatebver is cheapest on amazon, worked thus far
cobalt quarry
Yeah... that approach didn't work so well.
karmic brook
I never buy anything from amazon, which is annoying as they seem to be the sole US supplier for Prusament.
cobalt quarry
Yeah. Alas Amazon.ca doesn't carry it.
I buy a lot from Amazon. Prime for free next/2nd day shipping plus their selection can't be beat.
crude kettle
In my case Amazon tend to have the same thing as eBay and I can get the some thing shipping at the same time as Amazon. That's just filament though.
I got my SKR board on Amazon, but only because at the time it was 10 buck cheaper then eBay and there was a 99 cent for prime promotion.
karmic brook
I don't like their policy of shipping (possibly counterfeit) "equivalent" items from the closest warehouse, the way they'll claim they have something in stock when they don't, and of course their corporate bullying, so I take my business elsewhere. As for their selection being unbeatable, I made a bet with myself many years ago that I could find anything elsewhere cheaper. I've only failed to do so twice in thousands of purchases.
crude kettle
I tied ordering bearings from them once and they "claimed" they ran out of stock and had to order more from their vender. TWO months later I had them.
And they were bad .
I tend to find things cheaper else were than amazon a lot too. It takes a little searching and I can find it.
forest wyvern
Does anyone here have experience with the E3D Nozzle X? I've been trying to find honest reviews as to whether it's worth twice the price of the nickel plated copper nozzles I normally use. Thanks in advance.
crude kettle
Sorry, not really. I guess it depends on what filament you want to print.
empty sedge
@forest wyvern what materials are you printing?
If you're not printing carbon fiber filled or fiberglass filled or other abrasive materials it won't help you
crude kettle
If it's carbon fiber go for it, but it's just for PETG or ABS go with a cheaper one
ocean orbit
even if you were hardened steel is likely to give you enough durability
forest wyvern
PLA and PETG, I was looking at it mostly for the “polyphobic” coating as I run an MMU2S and I’ve heard it might help with retractions and such
ocean orbit
dammit
crude kettle
Go with the cheaper steal nozzle or have a pack of 20 of brass nozzles.
ocean orbit
bloody bot, i was going to say its not insanely expensive, while you probably dont need it its not an insane amount to try out
crude kettle
Well, it is 30 bucks. Though it does mean cleaning it to save money is a must
ocean orbit
i would mostly be worried it wouldnt stand up to a torch
forest wyvern
I would be willing to throw that at a nozzle to see if it is better but I don’t know if all my profiles would change because of the hardened steel
ocean orbit
shouldnt really matter
forest wyvern
I also (knock on wood) almost never get nozzle jams for some lucky reason
crude kettle
A torch is over kill. A lighter is the most I'll go
ocean orbit
i just use brass nozzles and toss them when they get jammed because im far too lazy to clean them
forest wyvern
Do you mean cleaning the exterior or interior of the nozzle?
crude kettle
Interior can get hard to clean over time
ocean orbit
which is why i dont bother
forest wyvern
Yeah, I’ve done cold pulls and cleaning filament which do a decent job, usually a little easier for me than a nozzle change, but sometimes you just need a new nozzle
crude kettle
A more expensive nozzle won't prevent a jam. I like cheaper nozzles b/c it doesn't hurt me when I change it out
 glad shuttle
Has anyone ever seen a corner bracket for the inside of an alumnium case. Like these https://www.harborfreight.com/18-in-x-6-in-x-13-in-black-aluminum-case-69318.html.
I am trying to mount a monitor in the top part for use with a raspberry pi.
Harbor Freight buys their top quality tools from the same factories that supply our competitors. We cut out the middleman and pass the savings to you!
ocean orbit
not really, should be fairly trivial to model one though
glad shuttle
yea if I were a fairly trivial moddeler I would give it a shot 🙂
ocean orbit
Haha, well it all depends what kind of bracket you are looking for, 3d printed obviously, but then its a case of how do you want it to attatch to the case, how do you want to attatch the monitor to the bracket, where the mounting holes are etc etc
They key to making a bracket like that really easily is measurements, lots of them.
glad shuttle
those are mirror mounting brackets that I edited to be thick enough for a monitor. Not actually that monitor because the do not fit.
most of the editing that I have done is punching holes in things, and copying part of a model, and making it shorter or longer
I mean, I will eventually just sit down and spend 3 hours copy, pasting, and cutting holes in something until it fits in there. I was really just trying to save some time, thinking someone might have already done this, and I just havent found the correct way to word my search yet.
ocean orbit
what 3d modelling software do you use
glad shuttle
at the moment, I use netfab standard to do everything
ocean orbit
yeah cant help with that 😦 i only use fusion 360
glad shuttle
One of these days good sir, I will learn to 3d model. At least enough to help me, but I have always been too busy with other projects, 3d printing, R/C wheelchairs, PLC's and things
ocean orbit
Hah i feel that
though you could probably learn enough to model a bracket in fusion 360 in like, 5 minutes
ok maybe 15
crude kettle
Fusion is easy to get
ocean orbit
yup
basically all you do is draw out a 2d design of your bracket, and then extrude it into a 3d model
as long as you know the measurements of the things you have, you are golden
glad shuttle
I will watch some youtubes rl quick, then try my hand. Will def post a picture if I get it done 🙂
glad shuttle
well, im impressed!, and also kinda sad lol
ocean orbit
dont be, its really simple stuff when you get the idea
as you can see, i drew a flat sketch
firsti made a 60mm square, decided that was a good size for a bracket maybe?
then the corner of the case is a weird 45 degree angle, i dont know the measurements for that so i just draw a 20mm square in the corner, then used a line to make a 45 degree diagonal line between the square point
glad shuttle
like....you made what pretty much what i needed, before i could get logged into autodesk and even click the button to download.
🙂
ocean orbit
its all to do with getting the sketch right, you know what shape you need, so you make that shape in your sketch
glad shuttle
I can see that, and then work on getting the measurements
or getting them correct anyway
ocean orbit
if oyu have the measurements allready you just put them in as you go, you know you need the bracket to be so long on each side, then work out the distance between your screen and the case etc
glad shuttle
10-4. thanks man. I am 22% into setup, gonna just bite the bullet and spend the rest of the day on this if i have to 🙂
I will still send you a pic of my attempts 🙂
ocean orbit
I highly doubt you will need the entire day, just get the hang off making a sketch, drawing some shapes in it, then extruding the shape out into a solid object
the hardest thing is working where all the buttons are 😛
glad shuttle
yea, there is always that button learning curve
photoshop, premiere, really any good program ever
ocean orbit
the most important buttons for you are "create sketch" , the shapes in the sketch, finish sketch
and then press/pull
and theres fillet and all sorts if you want to make FANCY things with smooth corners and whatnot
iim actually just a beginner wiht fusion360, but 90% of what i need to do with is simple brackets and boxes and such
glad shuttle
yea, you have inspired me! I need to know, I have all these printers, and sometimes you just need a custom part.
ocean orbit
exactly! thats why i worked out how to do it because i wanted to make my robot without glueing if could help it
glad shuttle
.....robot you say...?
ocean orbit
one of my projects is a quadruped robot, im using an existing open source frame but i needed brackets and battery boxes and all that other stuff
karmic brook
Heh, that's why I was printing the custom parts to mate solidly with servo horns: I'm also building a quadruped robot.
ocean orbit
I need to do what you have done because my quad is getting an extra servo per leg soon
glad shuttle
how do you know what he has done? Are you a secret quadruped robot spy?
karmic brook
Right now, mine just has two servos per leg, so it can't do straight-line motion.
ocean orbit
mine has a hip and a lift motor, im swapping it to a hip, thigh and knee
karmic brook
So we're at about the same place.
ocean orbit
except i cheated and used an open source kit that im now heavily modifying because why not
glad shuttle
why quadruped? and not wheels?
ocean orbit
because wheels are easy
karmic brook
I'm interested in quadrupeds both because the mechanics interest me, and to see if I can climb obstacles that a similar-sized wheeled/tracked robot would have trouble with. Also, they're cool/creepy looking. May go for 6-8 legs at some point too.
ocean orbit
the issue with walking robots is servos arent cheap, so i started with 4 legs
glad shuttle
I am assuming you saw the ones that EU is wanting to send to the moon. Suupppper creepy looking.
karmic brook
Same here: 4 legs, 2 servos per leg, that's 8 already. Unfortunately, the latest servos I bought have different horns than the existing ones, so I had to redesign my parts to fit them (the new horns are asymmetrical too, which makes it trickier)
I should look those up, I love creepy things.
ocean orbit
i like the climbing robot
karmic brook
I also wrote some software that uses Bresenham's algorithm to coördinate the motion of multiple servos. Sure, I could have just lifted the code from a G-code interpreter, but it was an interesting exercise to adapt my CRT line drawing code to move servos in N-space.
ocean orbit
(i did not do anything that complicated)
karmic brook
This is a research project for me, so I'm leaning toward learning by doing things the hard way.
ocean orbit
for me the locomotion is simply a means to an end, the ofcus for me was additional systems
but ive got onto this z80 idea since i have to wait for parts for the robot soo
karmic brook
Totally understand. I'm also building a Halloween costume and breadboarding an 1802.
ocean orbit
hows the 1802 coming
karmic brook
I put it aside to play with robotics 🙂
ocean orbit
excellent!
make an 1802 brain for your orbot
in a 3d printing theme today i printed a guitar pic ontop of a stripped cd
and it looked awesome
ocean orbit
awesome, thats what i do, draw a physical plan first and then use it to make the digital sketch
 sullen zinc
anybody know of a 3d printable (FDM) version of https://www.adafruit.com/product/4228 ? failed to find the right search terms so far.

These Reese's Piece's lookin' bits fit perfectly on top of tactile buttons with 2.4mm square tops and give a satisfying 8mm diameter surface area for your fingers to press.You ...
empty sedge

UPDATE August 6 2019 Version 2 is 2mm thinner and includes an updated bottom half with cutouts for female headers.
Fit Enclosure
This enclosure is designed to secure the PyGamer PCB without any hardware screws. The PCB rests on bottom half with built-in standoffs. The top hal...
violet needleBOT
Adafruit Industries posted 3D Hangouts – Eye Bowls and Holograms

Learn guide, code and build photos https://learn.adafruit.com/hallowing-m4-candy-bowl/ https://youtu.be/gmaii6LJLwc Adafruit HalloWing M4 https://www.adafrui...
ocean orbit
that goose 3d print is everywhere 😄
violet needleBOT
Adafruit Industries posted Entitled Goose from Untitled Goose Game #3DPrinting @adafruit #Timelapse #adafruit

Every week we'll 3D print designs from the community and showcase slicer settings, use cases and of course, Time-lapses! Goose günther hanssen https://www.th...
violet needleBOT
Adafruit Industries posted Entitled Goose from Untitled Goose Game #3DPrinting @adafruit #Timelapse #adafruit
Every week we'll 3D print designs from the community and showcase slicer settings, use cases and of course, Time-lapses! Goose günther hanssen https://www.th...
violet needleBOT
Adafruit Industries posted 3D Hangouts – Eyes Bowls and Holograms

Multistreaming with https://restream.io/ Learn guide, code and build photos https://learn.adafruit.com/hallowing-m4-candy-bowl/ https://youtu.be/gmaii6LJLwc ...
sullen zinc
@empty sedge those buttons worked well, I did some in silver and some in gold and they fit right over the laser cut case
ocean orbit
Friend of mine interestedin a 3d printed settlers of catan board
think they may balk at the cost 😛
 pale moth
Is there an OpenSCAD specific Discord server? I don't have a question (other than this one), I just like talking shop about OpenSCAD.
(I do know there's a mailing list)
 cloud halo
What is the opinion of a test print from Autodesk such as this one? I imagine it's better than the traditional cube or benchy....what are some alternatives to the Autodesk offering I should consider?

GitHub
Kickstarter Autodesk 3D Printer Evaluation. Contribute to kickstarter/kickstarter-autodesk-3d development by creating an account on GitHub.
empty sedge
make magazine had a bunch of 3d printer test objects that essentially had each part of the autodesk object as its own STL
makers muse on youtube has a couple prints for seeing how small of a tolerance between adjacent parts you can print without fusing together
but what are you trying to do with a test print?
ocean orbit
Benchy is a rubbish test print, the model isn't that well optimized for it
Specific models are generally far better
karmic brook
Don't know of a specific OpenSCAD group (although it seems likely that there is one somewhere) but I'm happy to talk OpenSCAD here.
I found some really nice 3D printer test objects on Thingiverse.
This one is the "MICRO_All_In_One_3D_printer_test_micro"
There's also a "mini" version (this is the result from my printer)
 green pine
how'd I do mates ?
ocean orbit
looks good!
hope that braid isnt flammable
(i say having a printer that is 90% flammable)
green pine
nah, just goes black and tarry at about 300c
running a duet with a cr10-mini frame 😄
looks like this otherwise 🙂
ocean orbit
looks real clean
green pine
thanks, what I was going for too 🙂 just need to make a PSU shroud + hide the power cables xD
ocean orbit
mine are a mess, i pretty much focused on making sure everything was out of the way mechanically
karmic brook
I like the look of the purple wheels, what are they? Pulleys, sprockets, fans, or something else?
ocean orbit
They are for levelling the bed at a guess
my printer can have something similar so you dont have to faff on with a screwdriver haha
ornate raven
I'm with @ocean orbit , bed leveling. Look the black ones on my Ender 3 Prto
karmic brook
I'm a beginner with Fusion 3D, and when I tried to round off an opening with a fillet, it did ... this. I figured it did it backwards because I selected the vertices in the wrong order, but it does it with either order.
boreal wyvern
That's wild. Maybe the constraint on that sketch object got turned off? Did you go back to redraw that shape in your sketch and try to fillet it again?
I have to qualify that i am more of a rhino guy than a f360 guy.
karmic brook
So far, F360 isn't impressing me. I may go back to OpenSCAD.
boreal wyvern
that reminds me of playing with microcontrollers, where the shift from assembly to c was rough for me. the python move makes me even more nervous lol. sometimes the granular control is easier 🤓
 spiral laurel
that's some bizarre geometry glitching. I'm not seeing the opening you're trying to round though
karmic brook
This is the "before" view: I'm trying to round off the pointy end.
boreal wyvern
it did something similar for me when i tried that operation on a similar shape. What does it do when you start to drag that blue fillet arrow?
similar, but mine didn't change in the z direction
karmic brook
I had closed the program. When I opened it again and tried to reopen the project, I got this. So much for the advantages of storing my precious data in the cloud.
boreal wyvern
when it rains it pours?
karmic brook
It is, in fact, raining where I am.
boreal wyvern
Dragging that arrow moved it back to a reasonable place. not sure what the deal is, but it might be usable when you get it up and running again.
karmic brook
Rebuilt the sketch (for the sixth time...) and when it did that, I scrolled 'way down past the bottom of my model and found the little arrow and dragged it. Yup, that worked.
boreal wyvern
they misspelled plane
ocean orbit
I like fusion360 a lot but it has a lot of quirks still, ones that likely have a perfectly good explanation but finding that explanation can be a pain,
pale moth
Re: going back to OpenSCAD, To be fair fillets with OpenSCAD can be a pita
minkowski() is a great way to take a reasonable model and make it take forever to render.
Though it looks like for what you're doing, you could use minkowski in 2D, which is much safer, of course.
empty sedge
Hull is faster for fillets on convex shapes
pale moth
So in wood joinery there's all these riddles like the impossible dovetail, and other weird, unintuitive joints. Has anyone come up with 3D printing-specific riddles?
 covert ridge
any opinions about the Zortrax M300? i am looking for a 3D printer for our company, something that we can use for some years and that has a big volume. Any suggestions?
empty sedge
I've used an older zortrax and it did pretty well but wouldn't work with filaments made by other companies
large volume printers mean really long prints. Would a week long print be ok for you?
covert ridge
large in the sence of around 250x250x250, i've just looked at the Flashforge creator 3, looks like a really cool machine
violet needleBOT
Adafruit Industries posted 3D Hangouts – Holograms and Talking Pumpkins

Multistreaming with https://restream.io/ JOHN PARK'S WORKSHOP LIVE 10/17/19 Circuit Playground BLE Color Remote @adafruit @johnedgarpark #adafruit Visit the ...
 turbid hill
@karmic brook depending on how similar Fusion is to Inventor, and depending on whether or not you've done parametric solid modeling before, I've got some introductory notes up at https://www.cae.tntech.edu/~renfro/gset/01 - holder-block/ -- subsections "Rules" and the "The basic procedure for sketched features" show what I'd stress to everyone getting started. Way too easy for people to draw something close to what they want, then have it blow up on what should be miniscule changes.
Super-basic rough sketch of a closed profile with the right topology and right arrangement of straight lines and big arcs ➡ geometric constraints (tangency, parallel, perpendicular, horizontal, vertical, equal length, etc.) ➡ dimensioning scheme with default values ➡ dimension values, ordered from smallest to largest (if the sketch is way too big) or largest to smallest (if the sketch is way too small), both of which help keep the sketch from twisting over itself.
violet needleBOT
Adafruit Industries posted 3D Hangouts – Holograms and Talking Pumpkins

Multistreaming with https://restream.io/ Learn guide, code and build photos https://learn.adafruit.com/how-to-make-animated-graphics-for-hologram-displays/ h...
karmic brook
I'm slowly getting the hang of it.
violet needleBOT
Adafruit Industries posted Skull Mask Horns @adafruit #3DPrinting #Timelapse #adafruit

Every week we'll 3D print designs from the community and showcase slicer settings, use cases and of course, Time-lapses! Skull Mask with Horns Paul Long http...
violet needleBOT
Adafruit Industries posted Making Holograms with PyPortal

Learn Guide: https://learn.adafruit.com/how-to-make-animated-graphics-for-hologram-displays/ Make custom "holograms" with Adafruit’s PyPortal. This uses an i...
 manic grotto
Hey guys, I'm new to this part of the server. Anyways, I just got my Ender 3 Pro and I'm running into some issues
my printer is beginning the print way too high. No matter where the print head is fitted, even though I've tried manually putting it down to the lowest possible position, the print head always raises about a centimeter over the bed so my prints aren't sticking at all.
Has anyone else run into this issue and knows how to fix it?
Oh and another thing
when I auto home
instead of going to the bottom corner, my z axis goes up a few mm and stops
empty sedge
sounds like your z endstop always reports that it's triggered
use m119 from pronterface or something to see the endstop status
so run m119 with the switch triggered and not and see if the status changes
manic grotto
okay thanks ill try that
ornate raven
@manic grotto Mechanically, I'd verify that the set screws are tight against FLAT spots and not curves and doublecheck that you have the right connections to the machine. I upgraded my motherboard on the printer a few months ago and created some similar issues by getting two axis crossed. I doubt you did that though (unless you played around in the main board). The E3Pro is my only machine but it has been a great one and most of my problems have been induced by me. Except curling on the edges of large prints. Haven't figured that one out yet.
 potent sentinel
Help! I have tried to adjust almost every single thing I can on my machine and I’m still having this issue. I’ve releveled my bed, replaced the nozzle and tubes, adjusted heat timing and temp settings, tried different forms of support. I’m at a loss 😦 . I’ve also adjusted all my settings in cura to go with the nozzle size I’m using. Anyone have any ideas?
 wild gate
Has anyone found better Fusion 360 API resources more geared towards beginners? The API reference material and examples are difficult for a non-programmer to follow.
shy kelp
@potent sentinel have you looked at the gear on the extruder? Looks like maybe it's slipping.
potent sentinel
there isnt anything on the filament that would indicate there was a problem, but ill have to check again tommorrow. i took a closer look today and it appeared that some filament was actually seeping from places it shouldnt have been in the nozzle. i think the teflon tube wasnt pushed in far enough in and was causing filament to fill up in the chamber, therefore causing extrusion problems. a new tube and nozzle set come in monday, so ill see if changing the nozzle again helps
karmic brook
@wild gate I ran into the same problem. Most of the documentation seems to be videos (although there are some useful PDFs). I'm toying with making a "how to really get started with Fusion 360" writeup, but I'm a programmer, and Fusion 360 turns out to be geared to parametric modelling while it sort-of pretends not to be.
ornate raven
@karmic brook I was in adult education and the problem I see in todays generation of "Educators" is that it is assumed you already know something. I can't count the number of times I've read a book or YT description that claimed to be for "Absolute Beginners", that lost me within a page or the first 60 seconds.
The meme is something like "If you can't explain it simply, you don't know it very well". The problem is that people don't know they aren't explaining it simply. To them it is simple and clear as glass.
For ME, the way I have been getting into 3d drawing is to start with the most basic and simplest "A fifth grader can do it" software and build from there. To me (even with Autocad experience) Fusion 360 is like throwing someone into a hard ware store in the dark and saying "We're going to cut a piece of wood". Sure, all the tools are there. If you already know where they are and how to use them.
molten sandal
It certainly doesn't help as well that they keep changing the UI
wild gate
Most of the good info I’ve used consistently in fusion360, I’ve learned from the Ruiz Brothers and Adafruit. They do a great job modeling in the software but I’d like some resources with the API. Parametrics are great but I’d like info on the step above that. The Fusion API team has simple examples that I can kind of follow but applying the info to my projects doesn’t work well. After working a script out it makes little sense and saves no time.
crude kettle
Hey I'm wondering if anyone has an opinion on water-cooled hot-ends. I have a idea to make one and I wonder if its a something that is worth the effort. I guess if I want to really high temp martials would make it work better than a ton of fans.
empty sedge
I know a guy that built one because he has his printer in a custom-built heated chamber. Without a heated chamber I don't see why you'd need a water cooled cold side
crude kettle
Well, the one I'm building is going to be enclosed and heated.
empty sedge
how hot will the chamber be?
crude kettle
Aiming to do carbon-fiber in the future
empty sedge
carbon fiber filled nylon?
crude kettle
Yeah
empty sedge
Eh, you'll want a 80-100C bed but I'm not sure you'll need a heated or very heated chamber for that
crude kettle
Hmm...may just to water cooling for over kill. Seems like a fun thing to do. What filament needs a heated chamber other than abs?
empty sedge
polycarbonate. probably also peek and pekk would benefit
nylon filament that isn't carbon-filled would also do well with a heated chamber
do you have a machine already or are you building a new one?
crude kettle
I have an ender 3 at the moment I want to build a printer that is enclosed so I can print ABS. The price of it has gone down recently and cheaper than PETG.
empty sedge
how large of ABS parts?
crude kettle
On a 300x200 bed and 280 height
empty sedge
I can't find the posts I'm looking for and the results don't show all comments and show posts that aren't the ones in the search results after the ones I click on. I'm probably just complaining about new reddit
air cooled, printing peek. custom hotend + cold side: https://imgur.com/a/cIgWRbt
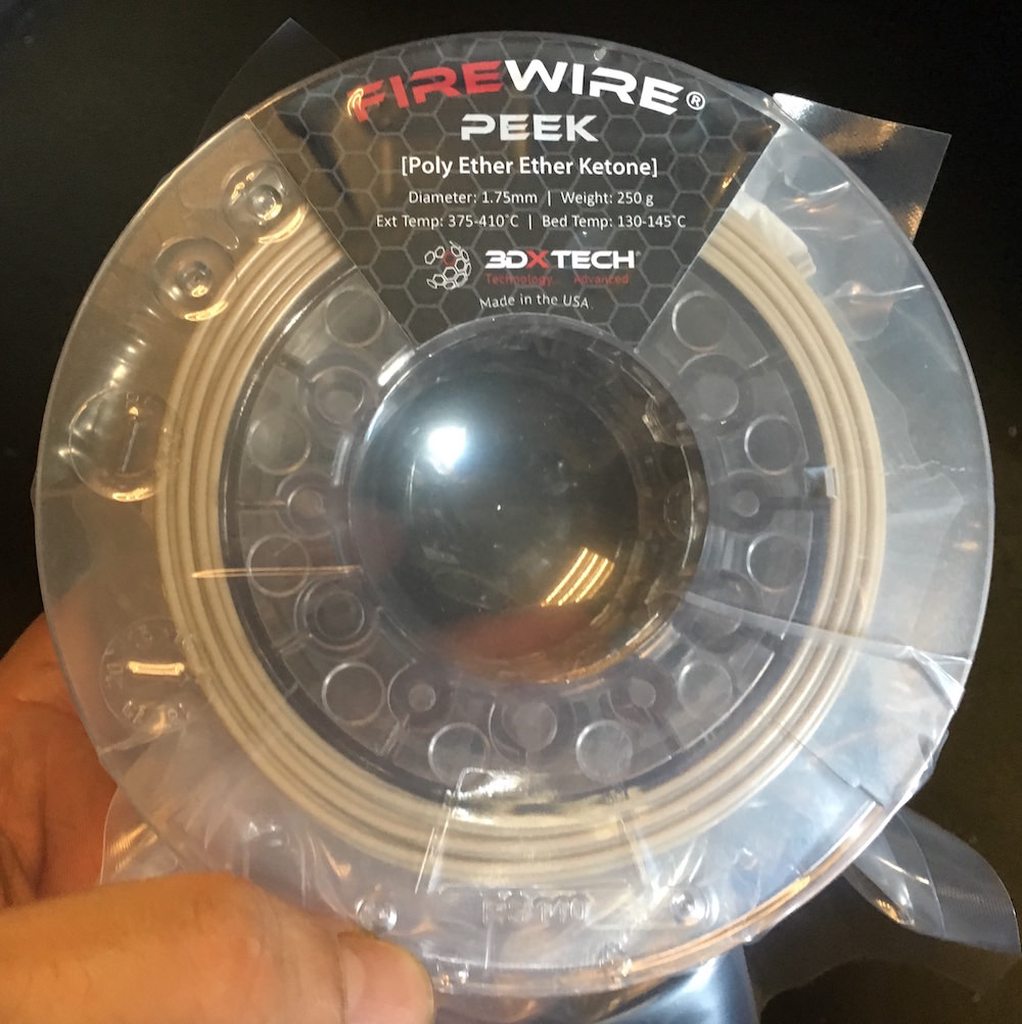 crude kettle
Interesting
karmic brook
Blarg, my Prusa keeps getting filament jams. I've played a little with the feed tensioner, but the documentation is fairly vague on setting it correctly. Reading about the issue shows that the proper tension is different for different filaments, but gives little guidance on finding the correct setting. I've also seen suggestions for lubricating the filament (with avocado oil, even), modifying the nozzle to remove an internal step, upgrading the heatbreak, and finding a way to print without retraction (seems unworkable to me, but I'm still new at this).
karmic brook
Ordinary PLA
molten sandal
this an MKII?
karmic brook
MK3S
molten sandal
is it jamming on retractions?
karmic brook
I don't know how to find out. It prints fine for a few hours but when I go to check on it, it's cheerfully moving the nozzle around in midair but nothing is coming out.
molten sandal
If it prints the initial layers fine
because they have just single retractions from layer-to-layer
but jams on retract-on-moves, e.g. printing layers for different columns
karmic brook
It's generally doing infill at the time, as far as I can tell, which I assume does a lot of short moves and retractions.
molten sandal
yaeh in that case its most likely related to your heatbreak
Let me pull up a video on that

Print WAY easier with your Prusa! Thanks to Squarespace for sponsoring - use https://www.squarespace.com/3dprintingnerd for 10% off first purchase! The heat ...
I'm not sure if the mk3s has that annoying lip (MKII here) but if it forms a plug during retractions it can cause a filament jam
I never had to oil anything, partly because the PLA I'm using comes rather oily
karmic brook
Heh, you said "oh please none of the oil methods" and linked to a video on using oil?
ornate raven
Anyone tried OctoScreen by Z-Bolt?
forest wyvern
Have you ever tried putting filament filters on your spools @karmic brook
karmic brook
I don't even know what that is.
forest wyvern
They’re little cylinders with a piece of sponge in it that the filament passes through. It helps remove all dust and other debris before entering the “clean” parts of the printer (tubing, hotend, extrude gears, etc)
You’d be shocked how much dust and other junk is on the outside of your filament (as in after running a spool through one you can pull usually a little fluff ball out that would’ve gone into your extruded without it)
Here’s the ones I use before the tubes leading into my MMU2S
empty sedge
@karmic brook did you assemble your hotend?
eh, my mk3s and clone are using the "until the screw head is flush for the tensioner with no filament" as shown in the build manual https://manual.prusa3d.com/Guide/5.+E-axis+assembly/1055?lang=en#s18574

Prusa3D
molten sandal
@karmic brook they tend to clog the nozzle as stated in the video
forest wyvern
Filament filters?
molten sandal
no the oils...
I haven't tried filament filters before, I mean they could be very useful for filament that's been sitting out there for a long time
forest wyvern
Oh yeah I completely agree, I run my filters dry
Yep, unless you plan on running an entire roll the minute you open it, it’ll collect some dust
molten sandal
well there's always the good ol cold pull method for dust clogs
but I don't think @karmic brook is facing that particular issue
karmic brook
My hotend came partly assembled, I did the final assembly.
molten sandal
its common to think filament jams = dust
but most of the time its caused by retractions on the cold end that isn't cool enough
forest wyvern
Those are the only ones I’ve faced in the past but that could also be because I try to stay away from lower end more jam prone plastics
karmic brook
I wonder how to address the cold end not cold enough issue.
molten sandal
I really, ramped up my extruder fan cooling ability
just picture this, when the filament is too hot going up the cold end
it becomes skinny during that quick retraction very much like how you pull at a taffy
when its extruded again it forms a cold plug that can't fit into your bore anymore
this is what causes a filament jam
oil might help, reducing retractions can help (not a real fix imo), a straight bore will really help, a much cooler cold end where heat doesn't creep up will very much help
forest wyvern
I agree with @molten sandal, are you running a default profile?
empty sedge
@karmic brook I was getting a ton of strings and bad retractions when printing petg with all retraction settings on my clone mk3s until I put thermal compound between the heat break and cold side heatsink
molten sandal
I think what @empty sedge suggested is a great fix, I've always had thermal compound between the heat break and heatsink
empty sedge
petg retraction tests before/after thermal grease between heatsink+heatbreak
forest wyvern
Same here, I got my hotend in and immediate replaced the factory stuff with E3D ceramic thermal compound and never had an issue
(I think it was ceramic can’t remember exactly)
karmic brook
I ordered the straight heatbreak, I'll make sure there's thermal compound when I reassemble it. I actually got a "thermal runaway" error once when printing a large flat object, but that's the hot end too cold, not the cold end too cold.
forest wyvern
I feel obligated to raise the question then, could you possibly have a flakey thermistor that would be sending too low of a value making both thermal runaway occur and having too hot of an extruder causing bad retractions?
molten sandal
I think they are separate issues
I get phantom thermal runaway errors all the time on my marlin 2.0 printer, it can range from fiddly connectors to your thermistor on your board
forest wyvern
I whole heartedly agree, but I feel obligated to raise the question when two issues like that come up
molten sandal
Well, I can't say for sure because it depends on your setup
If you're using octoprint like I am with a prusa
the thermal runaway errors are very hard to nail, its a could be software/hardware issue
I see where you're coming at, but the heat break is really a mechanical issue
I had problems with thermal runaway / heating failed because of serial buffers that I've set wrongly in Marlin
karmic brook
I tried reducing the nozzle cooling fan and the thermal runaway error vanished, so I'm guessing that the slicer's default 100% fan is too much for that hotend in some situations. While the issues might be related, I'm guessing they're not.
molten sandal
I love that prusa silent blower fan
I only turn on cooling on the 2nd layer and slowly ramp it up to 50% at layer 30
karmic brook
In the sort term, I think I'll try printing at a slightly higher temperature and see what happens.
forest wyvern
Yes 100% is sometimes too much, in fact, (I don't know if they still do) Prusa made it so that if there is thermal errors both hot end fans blow at 100% power and that is enough to combat the heater and start cooling it down
karmic brook
Right, I adjusted the slicer to not run the nozzle fan at 100%, but I'm still running the cold end fan at 100%.
forest wyvern
Great, I hope one of the solutions one of us threw out will help your jam issues, best of luck to you.
violet needleBOT
Adafruit Industries posted Circuit Playground Bluefruit Talking Pumpkin

Visit the Learn Guide - https://learn.adafruit.com/pumpkin-with-circuit-playground-bluefruit Add NeoPixel LEDs and sound effects to your Halloween Props with...
violet needleBOT
Adafruit Industries posted 3D Hangouts – Pumpkins and Clouds

Learn guide, code and build photos https://learn.adafruit.com/pumpkin-with-circuit-playground-bluefruit https://youtu.be/WiVC0r4WW6s Circuit Playground Bluef...
 unkempt hare
Guys can you please help me choose a 3d printer under 200$ please
 vast girder
Hi again. I've been looking myself and what I've found so far is that the two most popular inexpensive printers seem to be the Monoprice MP Select Mini V2 and the Creality Ender-3. The Monoprice is less expensive and comes assembled and ready to print. The Creality is faster and can print bigger things and has more features all around but it takes a few hours to put it together and get it calibrated. It's also a little bit over your price limit at full price, but I've always been able to find one for less than $200 on sale or open box or something.
It's pretty slow here at this time of night so maybe some folks with more experience can chime in later on. Just my two cents...
empty sedge
@unkempt hare no
I don't think anything sold under $200 is worth your time or the potential fire hazard
I've seen a couple of anet a8 or clones be built and while they do end up moving and extruding plastic it isn't worth the hassle compared to even the creality ender 3
I expect the new prusa mini to also very much be worth its $350.
On the i3 mk3s I have the removable sheet and bed probing are so much more hassle free than any other printer I've used
the sub $200 anet-like machines print directly on aluminum so getting your bed leveled, and prints sticking well, and then removed later are each things you'll have to tweak for repeatedly
violet needleBOT
Adafruit Industries posted 3D Hangouts – Pumpkins and Clouds

Multistreaming with https://restream.io/ Learn guide, code and build photos https://learn.adafruit.com/pumpkin-with-circuit-playground-bluefruit https://yout...
ornate raven
@unkempt hare , I have the E3 Pro. Love it. More than $200 though ($259.00 these days). Heated bed, quiet drives, reasonable print size (220,220,250), open source, lots of help on YT and internet. Took me about an hour to assemble (it was my first one). Easy access for mods (well, relatively easy) of which most are just for looks. Functions well right out of the box. I was looking sub 200 myself but decided to splurge. My only issue is with trying to print a thin flat frame that fills the print bed. The edges keep curling. Otherwise, use good filament. I got some filament that has chunks of carbon in it and they plug up the Bowden tube and nozzle.
unkempt hare
Ok thanks
violet needleBOT
Adafruit Industries posted Cheshire Cat #3DPrinting #Timelapse @adafruit #adafruit

Every week we'll 3D print designs from the community and showcase slicer settings, use cases and of course, Time-lapses! Cheshire Pumpkin Poly Forge https://...
 clear kindle
What would be an affordable desk 3d printer solution? Max 40x40 [cm] in bottom area size. I'm mostly going to print smaller cases with it. Preferably with support for 2 work filaments (ex. Black+Red+Support).
karmic brook
If you scroll back, there's a bunch of discussion. The gist of it is there's a price/effort tradeoff. At the low end are the Monoprice printers, which take a fair amount of tweaking but are cheap. Midrange is the Ender 3, which is not too expensive, and needs less tweaking. The upcoming Prusa Mini is a little more expensive but looks pretty solid.
All that said, those are all single-extruder printers. The larger Prusa has a multiple filament option but is more expensive. Unfortunately, I'm less familiar with the Creality/Ender options for multiple extrusion, but perhaps someone else has some useful info.
As always, each person's definitions of "too much effort" and "affordable" can vary widely.
clear kindle
Initially I was thinking maybe around $500, but that probably wont get me very far
Prusa i3 MK3S + MMU2S-MK3S seems like a viable option, tho double what I set out for
Another thought was a Delta Go
ornate raven
@clear kindle , dual extrusion is what's gonna cost ya.
https://www.amazon.com/FlashForge-Structure-Optimized-Platform-Extruder/dp/B00I8NM6JO gets bteer than four stars
$800 b ucks (american) though
AND not an overly large build area
empty sedge
under 40x40cm desk space is also hard to fit into. the flashforge is too wide and the prusa i3 is probably too deep and too wide
an ultimaker would fit but cost quite a lot more
my i3 printers have 400mm long rails in x,y so are at least 450x450 on the desk when the bed isn't sticking out of the front or back
ornate raven
I thought the 40x40 was referencing the print area.
However, my E3Pro is in the ballpark of 40 x 40 footprint but needs more for cable movement.
clear kindle
Seems the Delta Go is the only I've found with decent print space and small footprint
Unfortunately not heated environment
empty sedge
I don't think that patent expires until the end of this year
no, march 2021 is when that patent expires
clear kindle
There be a patent for Heated Enclosures?
empty sedge
yeah, it's owned by stratasys and back when reprap was younger they sued trying to say that a heated bed infringed that patent
karmic brook
@molten sandal @forest wyvern @empty sedge I took your advice, and am rebuilding my hotend.
empty sedge
I wish prusa made that easier. I get to do that this weekend
karmic brook
New heatbreak to avoid the stuck filament issue and silicone sock to avoid the thermal runaway issue. Took me 2-3 hours to remove the hotend, rebuild it, and reassemble the printer.
empty sedge
nice
karmic brook
I lurve my miniature torque wrench, so I made sure it was in the picture.
forest wyvern
Silicone socks are amazing, looks like you have everything you'll need
karmic brook
The sock should also help with getting filament stuck to the hotend in general. If this doesn't work, I'll go whole hog and try a titanium heatbreak.
empty sedge
maybe I'll put a sock on the 'space printer
karmic brook
I've got two spares now 🙂
forest wyvern
It's good too, they don't last forever and having a few on hand once they get worn out is always nice.
molten sandal
the silicon sock really does help with blowback from the cooling fan issues
karmic brook
I'm looking forward to that. Slowing down the fan seems to work, but seems a little hacky (also the varying fan speed makes a slightly distracting moaning sound from the printer, like a tiny haunted leaf blower).
molten sandal
I finally found the phantom heating problems my printer suffered from for a couple of months
For the longest time I would have very erratic thermal runaway issues, or heating failed errors during the print startup sequence
It turns out I had unknowingly used 24AWG stranded gauge wires for the connection between the PSU and the mosfet
They were initially ok, just warm to touch so I thought it would be fine but it took a couple of months for carbon to build up at the +ve terminals and finally started a little smoking today
I switched it back to single core 12AWG (I must have changed these because they were very difficult to bend)
karmic brook
Stranded 12AWG might suit the task, at least it's easier to bend and doesn't tend to cause stress at the joints if it's subjected to motion or vibration.
crude kettle
Hey I'm wondering if any one know the pins on the Full graphics lcd under the SD card. I was looking at marlin 2 and there is a why to have G-code read off of a flash drive using the pins for the SD card.
Proof
empty sedge
@crude kettle the schematic is on https://reprap.org/wiki/RepRapDiscount_Full_Graphic_Smart_Controller
often the ribbon connectors are installed upside down
crude kettle
I'm Looking into it now. I was able to look behind the lcd to see the labeling. Why they put it behind the LCD away from view is beyond me.
From right to left is this.
SD_1
SD_2
3v3
SD_54
MISO
DET
GND
I saw that there was a label for pin 5, but looking at the schematic that is to the encoder. I think it was meant for pin 4 of the plug.
With is in mind I can theoretical print over USB flash drive for my 3d printer now instead of SD.
Dual socket would be nice, but a USB flash drive is more convenient to me.
@empty sedge Thanks
karmic brook
I rebuilt my hotend with a new heatbreak without a step and a silicone sock and redid the printer calibration, but now my prints are a blobby mess!
shy kelp
Looks like surge's in the extrusion. How consistent are your temperatures?
empty sedge
@karmic brook did you put thermal compound between heat break and heatsink?