#help-with-3dprinting
1 messages · Page 29 of 1
 hollow ember
 ornate raven
Hey y'll. I have an Ender 3Pro that I got for Christmas. Very fine printer. Most problems are operator induced. I tinkered with it and installed an all metal extruder and a Capricorn Bowden Tube. Everything goes well except very tall thin objects (I have learned to lay them flat via Cura and they print and work very well). I bought the updated main board from Creality and installed it yesterday. Prior to first power up, I moved the bed and hot end away from each other. Powered on, the home screen and other screens look like the old ones. So far so good. I selected Auto Home and the hot end and bed began to move to the home position. They actually are very quiet so the update is going well. Then the stuff hits the fan. They get to each home switch and just keep grinding away. I killed the power to prevent damage. I suspect the firmware is looking for switch positions to be true(or false) and are getting False(or true). I briefly thought I got a connector backwards but the realized that A - two switches aren't working and B- polarity doesn't matter. So, long story short, how can I look at the program in the printer main board.
 coarse ruin
ender3 is a variant of marlin?
ornate raven
I believe so
coarse ruin
source at the marlin github... get out a shovel and dig.
sounds more like mis-configured mis-positioned end switches.
i.e. eprom values that got wiped in an upgrade
ornate raven
Ok. I was hoping someone had dug this hole before and might be able to tell me what kind of shovel.
coarse ruin
i.e. it's going "home"... which is not the same physical place as you want it to go.
verify the limit switches and hardware and then do the calibrations
you don't need firmware source of any of that.
ornate raven
Switches didn't get moved. I too suspect a value isn't what it should be. Steppers are at least moving correct direction for home, they just don't stop and back off a bit like they used to. Caliobrations? are the software? This is an updated original Creality board. No place to adjust anything. 😦
coarse ruin
wait... "installed... updated main board" You do know that it will have to adjusted for your machine? It should come with no valid config.
ornate raven
So, I need to install a "Bootloader" and Firmware?
coarse ruin
config = EEPROM values. hook up your old PCB to the display and power and pull the values out of it.
ornate raven
Ahhhh.... Ok. I see where we're headed now.
coarse ruin
i can't give you details because each new machine has some similar process... never the same.
coarse ruin
the most likely values to be of issue in your case are the endstop locations / offsets.
ornate raven
Endstops and Off sets ! Exactley what I was looking for. Thanks again.
Time to get the soldering iron out and build a jumper.
 boreal lava
the new silent creality mainboard should have a bootloader installed iirc
@ornate raven If you set the hot end toward the center and move it and manually engage the endstop with your finger, does it stop the travel?
ornate raven
Hi Brad. Gimme a minure. Printer is on other room.
ornate raven
X Axis is first to move and nope. doesn't stop if I push the switch. Nor does it make a difference when I start with the switch closed. I measured the voltage to the switch - 5v dc. And Darth Paul, my apologies. There are indeed very tiny little pots by the drivers. I thought they were caps or tiny transistors. At 63 my eyes aren't what they used to be.
I never noticed before but there is a menu to move the axis. They all work.
boreal lava
if a continuity test on the switch shows it opening and closing, then I would imagine there is something either in the connections, or config, but being a creality mainboard, it should come set up from the factory. Probably a silly question, but are you sure you have the switches connected in the correct ports?
ornate raven
Pretty sure. I did connection for connection swap and all are labeled. But, I will check. Hold on.
Ok, Brad. That might be it. I moved all to a safe distance and set auto home. Pushing different switches made different steppers stop. But, oddly ALL three are wrong. The wires are all in such a tight bundle that it is hard to imagine getting them all three mixed up but, I must have. Unless as you suggest, the config is somehow buggered. Well at any rate, time to take the bottom off again. I'll get back when I get it open. Thanks for the heads up.
 karmic brook
I think the config describes which switch is connected where, so it might be easier to update that than rewire it.
ornate raven
What is best way to check config? Can I hook up to usb and check with Arduino IDE?
karmic brook
I think you can do it through the built-in UI, like Ion_Ewe described.
coarse ruin
the little pots would adjust the current for the motors. if the motors are moving well i would leave those alone for the moment.
best way to document things for wire swap out is to use wire labels (tape) and pictures. but it's a bit late for that now.
pressing the limit switchs manually while homing could be a good way to test them.
ornate raven
Hi madbodger and IonEwe2, I haven't gotten back to the printer yet. I got caught up in doin stuff like pay bills, do laundry, dishes... I'll try to get back into it tomorrow. You've both been big help. I think I'll peruse Youtube for some Teachingtechs' vids and see what he has too. Kinda hope to get this resolved by Wednesday show during lunch. I made two cranks like they showed last week. One with less fill and no adhesion actually worked right off the mat. The other, with default settings, took some effort to get working.
karmic brook
3D printers are generally not completely automatic and turnkey, each printer needs to be dialed in, and some prints will also require some customized tweaking of their own. It's the nature of the beast, unless you care to outsource your prints to a bureau.
 opal marsh
T ;[[TCCXCCCCCCCCCCCVCWZXSRV CJHYN BESJKIM98 U776YC C FVRX CGXXXXXCXC DT5RG4FE6D3VCXS D44JHGVFXCDFVCSAZYE4FVWDCRGS5XT6axcsdVWBNhec5rddc m,vbh4
 molten sandal
@opal marsh Thanks for posting your API key!
karmic brook
Catlike typing detected! https://www.bitboost.com/pawsense/
opal marsh
😬I think I forgot to log out of Windows before work yesterday. Curious 2yo child deleted files, somehow filled my hard drive, and apparently clicked and typed randomly 😬
karmic brook
Whoops. Probably easiest to just reinstall.
coarse ruin
cmd -uninstall Curious_2yo_child -i /y
karmic brook
I wonder if Pawsense would protect against 2yos as well as cats.
 novel wadi
Hello. I've a new Prusa i3 MK3S. This is my first printer. I'll assemble it this weekend. Are there some recommended first prints to test it out? I've seen some 3D models that test stringing, support structure, print speed, overhang angle etc. Any suggestions other than a teapot and tug boat?
 crude kettle
I would go for the torcher test prints on thingivers. It help gets you a feel on printer setting for you filament
karmic brook
Simple calibration cubes are quick and show whether things are basically adjusted well (especially first layer adhesion). "MINI_All_In_One_3D_printer_test" (on Thingiverse) is a good all-around shakedown test.
novel wadi
Would be great if Thingiverse let me filter by printer settings so I can find tests that have been attempted on my printer. But those initial tests look very good. Thanks!
molten sandal
I second @karmic brook suggestion for calibration cubes (or even better, calibration dices). They help you determine (with a pair of calipers) if your x,y,z axis are properly sized in addition to what he suggested
Everything else just consumes a lot of filament, and a prusa that comes pre-tuned would have passed QC anyways
But if you are ok with waste and want to print something cooler than a benchy (that tug boat)....

Into the jungle with "JUN" the Jungle Queen
There is nothing more beautiful than an adventure. With Jun you can let your imaginative adventures run free. She swims in shallow waters, but the deep sea is not for Jun. Have fun exploring your own limits.
Even if my boats are not...
If you want to get one of these to float I think you need to print with higher infill (nephew problems)
novel wadi
Oh golly that is beautiful!
The Prusa is not preassembled so there is every chance that my assembly introduces alignment issues so I'll want to calibrate anyway. But I'm quite excited to begin building things.
Is it dangerous to leave a printer running over night or away from home?
I'm told some prints can take a day. That's a lot of baby sitting
 spiral laurel
a Prusa should be fine once you're sure nothing really bizarre has happened in shipping & setup. Some of the really cheap chinese knock offs have had issues with unsafe power handling or even turning off safety feature in the firmware for some reason. The worse you should have to worry about is wasting filament on a failed print
novel wadi
Smoke detector, a C02 canister, a dump valve, and I'm good to go? Haha
spiral laurel
I'd be comfortable going to sleep after 2-3 hours of printing on a new Prusa.
novel wadi
That's really reassuring to hear
spiral laurel
if it doesn't start smoking pretty quickly it probably isn't going to.
novel wadi
Not even from peer pressure of other 3d printers? :D
spiral laurel
overnight prints seem to be the norm. I think the reports of fires are mostly limited to bad wiring on cheap printers and safety features disabled
novel wadi
What safety features ? It detects issues ? Or do you mean safety in hardware like current limit etc
spiral laurel
I think it was the one that turns off the extruder heater when the temperature sensor isn't reporting temperature increases that would be expected by what the controller is doing. So it would keep cranking up the power to the heater until something melts
novel wadi
I see. Yes. One may not initially consider that when doing a temperature controlled heating element. Sensor says ambient or something but the heater is 200C
karmic brook
There have also been some bed heater issues where a bad connection would overheat: bed heaters are a larger area, so tend to be higher wattage, so the wiring and connections need to be solid to avoid problems. The Průša printers have well-design bed wiring, and may well have firmware that avoids blasting power to the bed heater if the heating feedback looks unreasonable.
 potent sentinel
Hey all!! I’m looking for some insight as to what might be up with my printer. This is my first large print and I’m having issues with the first layer. I haven’t had problems with anything else before so I’m wondering what may be the problem. I’m getting weird ridges on my print. So far I have releveled the bed twice, adjusted the heat slightly higher, tried different slicing software, and cleaning my printer bed.
This is attempt two
After releveling the bed
So the first layer is going on evenly for the most part except for the weird uniform ridges
 novel lark
The unevenness of the skirt is suspicious. That makes me think the bed is still not level.
 devout pewter
You may want to look at the filament diameter in your slicer settings. It's possible that it's overextruding.
 shy kelp
@potent sentinel either too close to the bed or unflat surface
Mk3's and stuff have a similar issue
 wet palm
suggestions for a first 3d printer and go
ornate raven
Ender 3 or Ender 3 Pro. I have a pro and it has been a good first printer and learning tool.
karmic brook
Průša i3 Mk3S is a great printer, but fairly expensive, and you do have to do some setup. The Matterhacker printers don't need much setup at all, but they're really expensive. Some of the Monoprice printers are pretty cheap, but need a fair amount of tuning before they'll work well. In other words, to recommend a printer, we'd need to know your parameters as to cost, effort, print quality, space available, cost of supplies, etc.
If you wanted low effort and money wasn't a big deal, maybe a Lulzbot. If you don't mind a lot of hands-on experimenting, don't need to print anything large, and space and money are critical, maybe one of the $100 or so Monoprice printers. Like everything in engineering, it's a tradeoff.
devout pewter
I have 3 3D printers. An Ended 3, a custom one based on the MendelMax, and a Prusa MK3S. It really depends on your budget, but if you can, I would highly recommend the Prusa MK3S. It's so nice not having to struggle with just getting a basic print out. Plus with it's direct drive, it can even print in flex filament. It has a 24v heated bed and that heats up nicely. Oh, and the autobed leveling is awesome. There's so many small things that make this printer great. Ender 3 is ok, but was really only designed to print PLA, though some people have had luck with PETG. ABS just doesn't stick to the surface because it's too rough, though you could use glass and recalibrate the Z axis. Since my custom one wasn't a kit, I can't really recommend it. 😉
wet palm
I am looking for one that has a high accuracy on prints, print bed does not need to be large. other than that, i am not picky
i am looking to prototype some knife shapes and maybe print my mando costume (not the helmet)
devout pewter
Most 3D printers have high accuracy once calibrated properly. However, the MK3S was a breeze to calibrate compared to the other 2.
karmic brook
So the little 110mm circular bed of a Monoprice Mini Delta might not be sufficient
It's great for things like D&D miniatures, but for larger things like knife blades and bigger cosplay pieces, you'd have to print things in pieces and assemble them afterward.
 tropic dragon
Hey,I am building a tablet.The case will be 3D printed but I am not sure if I should go with PLA or ABS(or other materials)
karmic brook
I suspect ABS would be more durable, which might be relevant. You can also do other things (internal struts, epoxy filling, etc.) for even more strength.
tropic dragon
I have seen pepole embed wire into thei prints for stranght.But I think ABS would work and I will increase the peramanters to add strenght(I think I have seen a video fron cnc kitchen talking about 3d printed parts strenght and he said that it is better to increase the periameters insted of the infill)
thanks
karmic brook
Thicker perimeter helps resist indentation, infill helps resist crushing/bending.
 deft raven
I have a Polar3D printer that has a circular moving build plate with the extruder only moving in the z direction. I am having issues with anything being printed in the middle of the plate printing badly. There is a spot for me to do an X calibration but when I follow the directions, it only makes the issue worse and I end up setting back to factory default which is better, but still not good. Is there a video anywhere that shows how to properly calibrate the x axis on a printer like this?
https://www.google.com/url?sa=i&rct=j&q=&esrc=s&source=images&cd=&ved=2ahUKEwil5M-67friAhUNSN8KHYBuAd0QjRx6BAgBEAU&url=http%3A%2F%2Fwww.academicsuperstore.com%2Fproducts%2FPolar3D%2F3D%2BPrinters%2F1682521&psig=AOvVaw1pv98BSToZePalu7kBA-oV&ust=1561216134225416
deft raven
@novel lark I cannot find a model number. The make is Polar3D. Try this link maybe?
https://www.genesis-technologies.com/polar-3d-printer-with-polar-cloud-connectivity.html?utm_medium=shp&utm_source=feeds&gclid=Cj0KCQjwgLLoBRDyARIsACRAZe4tqRyMxDs97xAVHaWhCJEIEDM2LBdPlKBCfs6j-rcHafcFwzr-_loaAksAEALw_wcB

That might be part of my trouble. I can’t find a model number to try to figure this out from google
novel lark
Manufacturer's model number appears to be 394208
Contact: info@polar3D.com
Did you purchase from Genesis Technologies?
tropic dragon
Hello,I have a Tevo Tarantula.I have a problem.The prints are not straight
the walls in the Z direction are not at 90 degrees(even if they should).Any ideas on how to fix this?
ornate raven
Hey Y'll, a few days back I had asked for help about a problem with a Ender 3 Pro that I had just put a new main board in. Several of you were very helpful, and I thank you. It turned out that it was operator error. I had put the cables back on the board where they seemed to align best. As it turned out, two of them (X and Z) were switched. Now all are in the proper location and I have printed several items as tests. I must say, the updated board from Creality is super quiet. The only thing I can hear anymore are the fans. No stepper noise at all. Once again, thank you all for the help.
shy kelp
@tropic dragon check that your frame is square
coarse ruin
@ornate raven i did s similar thing with the PRUSA i3 M3 extruder and z-axis2
shy kelp
Guys I have a question
Anyone have any idea what would cause this curling at the stern of the benchy?
Printing in ABS
ornate raven
@coarse ruin It's kinda encouraging to know others have made the same kind of mistake. Thanks for helping me figure it out.
@shy kelp , I don't do ABS but it is pretty sensitive to temperature variations as I recall. Have you tried the print from a different angle? Does it do it on other objects?
 hidden sable
@shy kelp you could be slightly over extruding as it looks to be bubbly on the corners, so it could be worth adjusting the flow
 ionic kraken
So I have worked with prusa printers at a farm for over a year. I now want to own a 3d printer with a large bed. I was wondering if anybody has a recommendations for printers that I may not know about.
 wanton monolith
I'm poor, what are good freecad tutorials, or alternatives
This program is user hostile and I miss my student license to anything else
devout pewter
You could take a look at Fusion 360. It's free for hobbyists and there's many tutorials on it. If you do go with Fusion 360, you might take want to take a look at the Layer by Layer tutorials to see if those work for you. https://www.youtube.com/playlist?list=PLjF7R1fz_OOVsMp6nKnpjsXSQ45nxfORb

YouTube
Learn how to use CAD for 3D printing and DIY electronics! In this series, we'll walk through some projects and learn how to use features in CAD software to b...
wanton monolith
I'm actually trying to make an electronic case so this looks very good
Can I export into 3d print friendly formats with the free trial?
devout pewter
They advertise as being Free to Hobbyists and makers, so as far as I understand, it's the full version.
So yes, you should be able to export
wanton monolith
Good, will try it
spiral laurel
Fusion 360 is pretty awesome. I actually use it the opposite way, using the built-in CAM tools to make gcode for a CNC router (subtractive manufacturing) instead of exporting STL to feed into a slicer. There is some slicer integration in there too, but it looked kinda janky to me.
wanton monolith
I've got the rest of the procedure down, just needing to cad for the first time since losing student licenses
this is exactly what the doctor ordered
ornate raven
Tinkercad (Autodesk) is free and on-line. There are tutorials on YouTube. Nothing to download and pretty good even for more advanced users.
 pastel flume
I use DesignSpark mechanical, which is free to use, it has some tutorials online on youtube and in additon there are more SpaceClaim tutorials, which is basically the same software
 iron remnant
Yeah, I went through the FreeCAD learning spiral a few years ago to prove Naomi Wu right that you should just use Tinkercad or Fusion.
 tulip sun
i prever also Fusion 360
 turbid hill
Inventor Professional is zero-cost to students and educators for personal devices. Not as loose a license as Fusion 360, and I don't know the feature comparison off the top of my head. https://www.autodesk.com/education/free-software/inventor-professional
Autodesk provides students, educators, and institutions free access to Inventor Professional, in addition to learning tools. Get a free 3-year education license now.
Should grab a Fusion 360 to really compare. Ok, impressed so far. They have a script to do spur gears, and that script creates real involute profiles, the way the gear gods intended.
pastel flume
Hello,
on my Creality CR10s pro the print head on the X-axis rail is very loose, so if it reaches the maximum right position of the axis, the cable belt forces the head to tilt. I do not remember correctly whether the printhead was that loose in the beginning or not. I guess that it has to properly stick to the axis rail or am I wrong?
In addition I do not see any possibilty to fix this issue because there are no long holes to justify the rail roles
pastel flume
Okay, I found a youtube with the title "Creality Wobbly Mount Plate FIX" - exactly what I was looking for
 violet needleBOT
Adafruit Industries posted 3D Hangout – Thumbsticks, Cranks and Hilts

PyGamer Crank - https://learn.adafruit.com/gaming-handheld-crank/ USB Crank Project - https://learn.adafruit.com/usb-hid-crank-controller Snapfit Case for Py...
boreal lava
@wanton monolith I'm with @devout pewter Fusion 360 has a bit of a learning curve, but is a very solid piece of software. Once you get past that curve, it becomes pretty intuitive. Of the software that is free for makers, it is probably the best option in my opinion.
novel lark
Here's a link to getting Fusion 360 for free.
Hobbyists who are using Fusion 360 for wholly non-commercial use qualify for free use of Fusion 360.
Also, @supple stratus & @idle crest have some great videos on YouTube showing how to create or modify projects in Fusion 360:
https://www.youtube.com/user/adafruit/search?query="fusion+360"

YouTube
Adafruit was founded in 2005 by MIT engineer, Limor "Ladyada" Fried. Her goal was to create the best place online for learning electronics and making the bes...
 atomic meteor
question about one of your makes on the website and trying to understand the mod that was made to it you site pics shows the base but the 3d stl that I recived from thingaverse has 3 holes that are extra in the print and I am trying to figure out what the three holes are for. your website of it is this https://learn.adafruit.com/marble-run/3d-printing the thingaverse is this https://www.thingiverse.com/thing:3083972


https://youtu.be/_wwuXqjfS5E
Motorized remix of the Marble Machine! The Adafruit Crickit drives a gearbox DC motor to turn the elevator, while the LED strips illuminate the tracks and animate different effects. Original design by Tulio Laanen.
You can also use the on-board se...
violet needleBOT
Adafruit Industries posted 3D Hangouts – Iridescent Printing

Multistreaming with https://restream.io/ Iridescent 3D Prints Learn Guide https://learn.adafruit.com/3d-printing-on-diffraction-grating-sheets Diffraction Gr...
violet needleBOT
Adafruit Industries posted ADABOX 012 UNBOXING LIVE 7/3/19 @adafruit @digikey #MAKEWITHDIGIKEY @johnedgarpark

Multistreaming with https://restream.io/ Iridescent 3D Prints Learn Guide https://learn.adafruit.com/3d-printing-on-diffraction-grating-sheets Diffraction Gr...
violet needleBOT
Adafruit Industries posted 3D Printing on Diffraction Grating Sheets @adafruit #adafruit

Guide: https://learn.adafruit.com/3d-printing-on-diffraction-grating-sheets - You can get shiny Iridescent effects on 3D printed parts! Double Axis Diffracti...
pastel flume
Hi!
We got a problem with our CR-10s PRO Printer. We jammed the nozzle so we unmounted the whole hot end and cleaned it. Then we reassembled the hot end and tried to heaten up the printer. Unfortunately it cannot reach the setpoint temperature - unless we disable the colling vent. Any Ideas what we can do?
spiral laurel
I'd suspect that either the heater cartridge or thermistor isn't fully seated.
pastel flume
OK, I will have a look at it again. Thank you.
karmic brook
Could also be the PID coefficients need to be adjusted for the new environment but I agree that the mechanical/coupling (and wiring connections) issues are more likely.
 small heron
as anyone used the amazon basics PETG ? and if so what settings are you useing
My local Lab just got some and I got to experiment, but I think I need to tweak a few settings
pastel flume
We use this tower to test new filament: https://www.thingiverse.com/thing:3477606

I use this small combination temp and stringing test to determine the best settings for each roll of PLA that I use. The temperature range used is 180 to 225 degrees C. After printing you are able to determine what the best temperature setting is for stringing, bridging, fi...
small heron
I use calli cat, but my isseue is heat settings and what I found on google verried abit
pastel flume
We do not have the amazon filament, we got ours from a German supplier. We Print at 215 °C hotend and 70°C bed at the beginning which we drop to 60 later
small heron
the cat came out real well, but i think the heat was to high
i think I can set that in cura
They wont be open again till Saturday, so I wont be able to try anything till then unless I send a message to them with any notes i make
pastel flume
In cura you can add a script to midufy the gcode (e.g. change temperature at layer height of x):
*modify
karmic brook
"midufy" seems like a great term for "modify in mid-print", however.
small heron
thats good to know
I mostly use the old ver because it hasent whitelisted 3.6 yet
but I am allowed to bring my tablet in...
now to work out if the g/cm³ is about the same
small heron
icr3d is listed as 1.20, i'll leave it for now
Im working off of what is in cura, and tweeking
I can say so far I like the stuff
small heron
So te setting seem to work rather well, I forgot to set infill so the top of my print was a bit odd but it looked good thank you for the info @pastel flume
violet needleBOT
Adafruit Industries posted 3D Hangouts – 241 PyBadgers, Bumpers and Cases

PyBadge Snap Fit Case https://learn.adafruit.com/pybadger-event-badge https://www.thingiverse.com/thing:3730923 PyBadger Event Badge https://learn.adafruit.c...
violet needleBOT
Adafruit Industries posted 3D Hangouts – 241 – PyBadgers, Bumpers and Cases

Multistreaming with https://restream.io/ PyBadger Event Badge https://learn.adafruit.com/pybadger-event-badge/ PyBadge Snap Fit Case https://www.thingiverse....
 vagrant drum
anyone have experience with 3d print management and tracking user filament usage? i am quite familiar with octoprint, but there doesn't seem to be any plugins that quite fit.
 fluid ridge
@vagrant drum I don't know of any, but that would sure be handy! If you find anything could you share it here?
vagrant drum
you bet!
pastel flume

OctoPrint Plugin Repository
This OctoPrint plugin helps to manage your filament spools.
Ain't this kinda that what you're searching for?
@vagrant drum @fluid ridge
vagrant drum
@pastel flume on the surface it looks like it could be. I'll see what it can do in relation to separate user accounts
thanks for the link!
pastel flume
ouch, did not recognize you searched for a 'per user' usage / gauge tool.
dunno if filamentmanager supports this
pastel flume
due it is open source you could expand it to that functionality
 severe wadi
yeah.. shouldn't be too bad
pastel flume
there is an alternative printer management software available which also can handle multiple printers. Maybe this has some other advantages.... I struggle with finding the name of the software
Found AstroPrint and Repetier but did not find the per user filament usage feature by googleing it - sorry
severe wadi
yeah, haven't seen that feature anywhere
vagrant drum
i also looked into 3dprinter os, that seemed close but a bit bloated for my needs
perhaps its time to dive into their plugin world
karmic brook
My new 3D printer shipped today 😃
vagrant drum
what did you get @karmic brook
karmic brook
Průša i3 Mk3S kit 😃
vagrant drum
oh nice
i am kicking myself that i didnt order the MMU back in Jan. the lead times just stayed at two months over and over
hold the phone - now only 2-3 day lead time!
i have one of the mk3s. the new filament detection mechanism works very well since its mechanical
i had problems before with their sensor not recognizing some of the lighter filament colors
ornate raven
Jealous. I don't have the budget for a Prusa. 🙁
Just ploddin along on my E3 Pro, makin mods as I need them or can afford them.
karmic brook
I've been saving up for over a year, learning on my original printer, a Monoprice Mini Delta.
As it happens, they had a free shipping sale so I pounced on that (overseas shipping can get expensive).
vagrant drum
i've been quite impressed with mine - the only issue i have had is with ASA fusing (?) to the sheet. if i throw down glue stick it's fine, but i think ASA shouldn't over adhere like it has
my nozzle may be too low
violet needleBOT
Adafruit Industries posted PyBadger - Interactive Badge for Conferences @adafruit #adafruit

Guide: https://learn.adafruit.com/pybadger-event-badge PyBadger makes it easy to create interactive badges for conferences and events! You can easily display...
shy kelp
whats a really good stepper motor controller that can pump around 1.7Amps
severe wadi
drv8825 is simple, reliable and will do 2.2A with a heatsink. not sure what you consider 'really good' .. there are some that detect stalls, missed steps, etc., which are nice-to-haves
crude kettle
Hey, I'm wondering if someone here knows there way around using visual studio code for up loading marlin 2.0 to the Arduino Due.
novel lark
@crude kettle This looks like it would be helpful:
http://marlinfw.org/docs/basics/install_arm.html
crude kettle
Yeah, I figured it out after some trouble shooting and I was able to upload the code.
Thanks though @novel lark
novel lark
Yay!
crude kettle
Yeah, needed to let the drives finish loading in Linux for it to get recognized
PATIENCE -100
karmic brook
Just received my Průša. Super impressed so far with the packaging and presentation. Looking forward to getting it assembled.
 tired forge
Has anyone created a design that implemented a tactile button on ? How did you design the print so that you could place the button? Did you have a printed cap on top of it? Looking to use something like this: https://www.adafruit.com/product/1489

Slim clicky momentary switches are standard input "buttons" on electronic projects. These are half the width of classic 6mm tactile switches so they line up better on a breadboard, ...
severe wadi
@karmic brook cool.. let us know how it goes. have heard a lot of good about them.
vagrant drum
anyone using PrusaSlicer2.0 over the slic3r that comes with the drivers?
any glaring issues?
devout pewter
I use the latest PrusaSlicer and it's worked great so far.
vagrant drum
any pluses over the slic3r they used to include?
devout pewter
I never used the old one, but maybe this video will help: https://www.youtube.com/watch?v=bzf20FxsN2Q

Read more: https://blog.prusaprinters.org/prusaslicer-2-release/ Download Drivers & Apps package: https://www.prusa3d.com/drivers/ Music: And So It Begins - ...
I suppose I should clarify, I never used the original Slic3r with the Prusa plugin. I had used the Original Slic3r with other printers and it worked ok for those, but the new version has been great. I think the Undo function hadn't been implemented yet though.
vagrant drum
cool - thanks!
violet needleBOT
Adafruit Industries posted We Made A Meme Sound Board? #CircuitPython #3DPrinting

learn guide - https://learn.adafruit.com/neotrellis-soundboard/ This is a sound board using Adafruit’s NeoTrellis. This lets you trigger audio files so you c...
violet needleBOT
Adafruit Industries posted 3D Hangouts – NeoTrellis, Master Sword and Halloween Countdown

Multistreaming with https://restream.io/ Visit the Adafruit shop online - http://www.adafruit.com ----------------------------------------- LIVE CHAT IS HERE...
violet needleBOT
Adafruit Industries posted 3D Hangouts – NeoTrellis, Master Sword and Halloween Countdown

Multistreaming with https://restream.io/ This week’s #3DPrinting project on Adafruit Learning System - NeoTrellis Sound Board https://learn.adafruit.com/neot...
 onyx stratus
Question: if I'm painting a white PLA printed part with no surface details (it's basically just a rectangular prism) with a dark paint, do I need to worry about using a primer or would sanding be enough?
novel lark
@onyx stratus Here's the painting part of a project that @supple stratus & @idle crest published:
https://learn.adafruit.com/3d-print-links-hylian-shield/assembly

Adafruit Learning System
Take this shield, it's dangerous to go alone!
In that project, they use gray PLA, and say,
“Chrome and blue metallic spray paint gives these parts a car paint job finish. The gray pigment in the PLA acts as a primer, so you can apply chrome spray paint without any primer.”
pastel flume
In addition to this: Search on youtube for KamuiCosplay - a really lovely but totally crazy girl (in a positiv way). She has some very nice tutorials about cosplay costume and prop making, including paint jobs
coarse ruin
primer or not primer - depends on what level 1) paint adhesion... primer will help problem areas 2) durablity... it will last longer with primer, and 3) shiney, primer will fill gaps and you can sand smooth.
i however rarely use primer.
crude kettle
Hey all all I got a question. I was working on a 3d print for some brackets for 2020 and printed them and well they messed put, constantly. tried printing them again and again four times and they messed put in the same place. THE SAME PLACE.
Then I uninstalled and reinstalled cura and it was fixed. Any idea why cura would do that by any chance. I'm using 4.1
 hoary sleet
Could be a corruption in the gcode that it was creating? When you tried to re-print were you generating new gcode each time or just printing the same?
crude kettle
Yes, deleted everything in the SD card and loaded it in. Only after the reinstall of Cura did it stop happening.
crude kettle
Yeah, then again windows did updated
violet needleBOT
Adafruit Industries posted 3D Hangout – Flipping Mics and Blaster Swords

This week’s #3DPrinting project on Adafruit Learning System - PyBadge Case with Flip Out Mic Learn guide https://learn.adafruit.com/pybadge-case-with-flip-ou...
violet needleBOT
Adafruit Industries posted PyBadge Case with Flip Out Mic #TensorFlow #3DPrinting

3D print a case with a flip out mic! This case is designed for the TensorFlow Lite Kit. Use the Adafruit PyBadge, battery and microphone to build a machine l...
ornate raven
Anybody working on Octopi/print on a Raspberry Pi 4B?
spiral laurel
I wouldn't expect it to need any work. It should work out of the box
severe wadi
The Octoprint SD card image (OctoPi) doesn't yet work on the 4 (though there are test images), but if you install it manually on the latest Raspbian it should absolutely work.
 lofty sigil
I may have finally figured out what my trouble has been with my friend's printer
I did not realize you needed to keep PLA dehumidified
I've just been keeping the roll out on the printer when not using it
just ordered a watertight storage box and a portable no-power dehumidifier so I can store my filament and keep it from sucking up moisture
karmic brook
I'm thinking of using 5 gallon buckets like spackle comes in and silica dessicant
lofty sigil
That would work
I went with an outdoor box (like you'd use in a raft or kayak) and one of the reusable dehumidifiers (Eva-Dry E-333 -- when the crystals change color, plug it in for a few hours and it dries them back out).
I only have a couple of spools of filament right now
and space is already limited
but my friend took a picture at the builds last night and was like, "could it be moisture" and I was all "lol WUT" and then did some reading
and my prints looked exactly like the prints they were showing
in other news he also showed me where to find all the presets in Cura for my printer. So last night was a "time to feel dumb" day for me on the 3-D printing front.
 rustic adder
I'm a newB when it comes to 3D printers. I've been using a Lulzbbot 6 at my local library to get fimilar and now would like to buy a printer, any suggestion? On the Ruiz bothers channel I see a lot of projects printed with Prusa. How does it compair to the Lulzbot?
severe wadi
Though I'd prefer a dry box, I often use 3.5kg spools and don't have a whole lot of room near my printer so I use "ziploc" vacuum bags (the kind you'd put clothes in you can vacuum or force the air out of to save space) that are sealed except for the little bit of ptfe tube that I put through the zipper as a filament guide. The density of the bag plastic is high enough that it keeps out air, moisture, etc., unlike normal Ziploc, PE, etc. bags, which I eventually realized are actually semi-permeable. And I include a little canister (3d printed) of reusable desiccant. I keep any filament that's not being used in the bags (sealed, of course) with desiccant and then store them in sealed 13 gallon square buckets. Seems to be doing the job pretty well. Would really like to have a large dry box and 'manifold' so I can switch filament more easily, but no room right now.
shy kelp
Thanks @spiral laurel and @severe wadi
severe wadi
You're welcome
shy kelp
I'm wanting to get a 3D printer but I don't know where to start. Can someone assist me on goof 3D printers?
 forest wyvern
@shy kelp Do you have a price range in mind?
shy kelp
@forest wyvern $500 - $1500
forest wyvern
I've owned a Kossel XL and Prusa i3 MK3S, and worked with a Robo R2 and a couple other lesser known printers. I would have to say, my favorite is my Prusa. It prints amazing, has an excellent user base, and comes with all the features most other companies require you to buy as an add on. From the silent mode (great if it is near people) to the magnetic heated bed (which they also offer a powder coated one which gives a very nice finish), to the all metal E3D hotend with Noctua fans, and even a Raspberry Pi Zero port built in if OctoPrint is your fancy. I would take my Prusa over any printer I've interacted with, plus the company is focused on upgrade-ability so you won't feel left in the dust in one year because they came out with a new one. They also have their own slicer program that they are constantly updating with cool things like variable layer height and their MMU2S upgrade and such. Their kit printer comes in at $750 so they don't break the bank, but that's just my opinion, I'm sure some other people will throw their ideas in as well.
karmic brook
Just bought a Prusa kit. Beautifully packaged and it works very well now that I've assembled it.
It pretty much instantly supplanted my previous printer
shy kelp
Do they sell it on Amazon or would I have to buy it off their website?
forest wyvern
You need to buy it from their site
shy kelp
Okay thanks
karmic brook
The free shipping promotion may still be running which is nice for overseas shipping
violet needleBOT
Adafruit Industries posted Snap Fit Case with Flip Out Mic
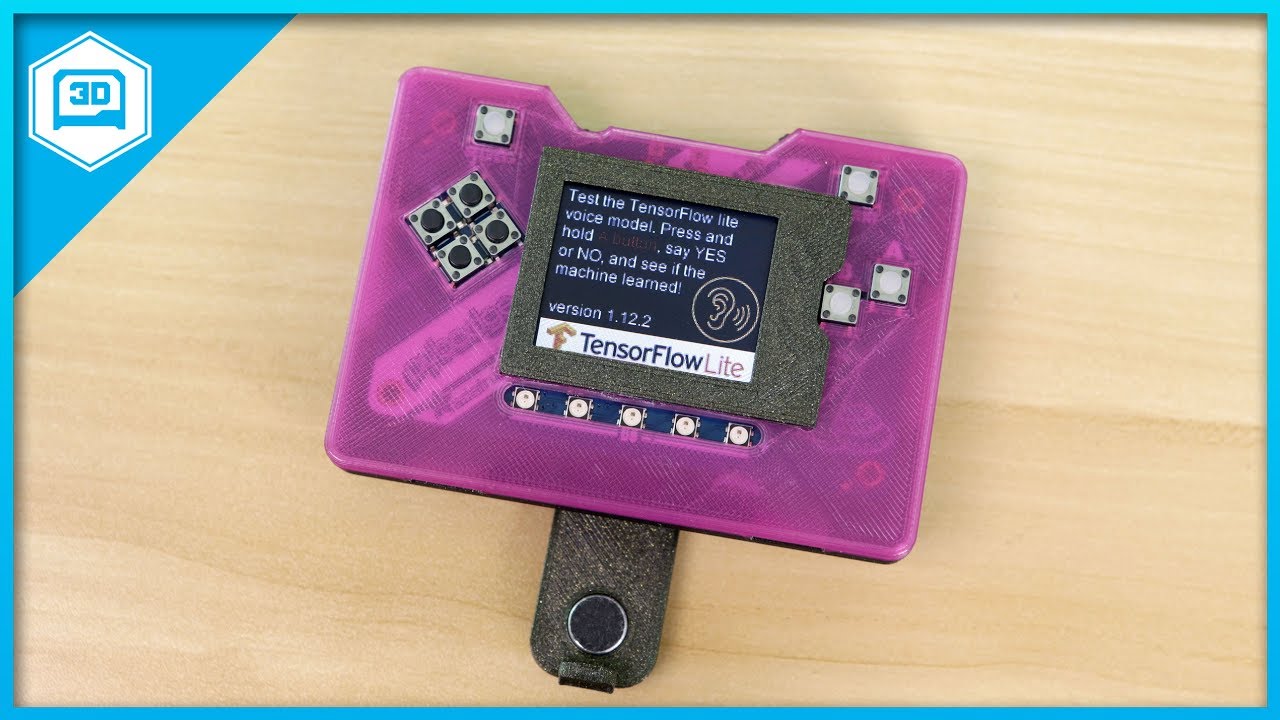
3D print a case with a flip out mic! This case is designed for the TensorFlow Lite Kit. Use the Adafruit PyBadge, battery and microphone to build a machine l...
shy kelp
which prusa should I get?
forest wyvern
I bought the MK3S kit, which I think is the only full printer (besides the MK3S assembled) which is available for sale

Prusa Research
The Original Prusa I3 MK3 is the successor of the award-winning Original Prusa i3 MK2 3D printer. ef Průša
(For the kit one)
Also if you use the cheapest shipping method, they make sure it comes in just under $800 total (which is good because there is a charge of $32 (I think) added onto anything shipped into the US over 800).
 merry phoenix
anyone have reccomendations for a 3d printer? (budget is about $300)
forest wyvern
@shy kelp Thanks for the heads up, and to answer your question, not unless you want to pay extra for import tax. (although in the future I would recommend the powder coated sheet) and as far as @merry phoenix question, I have heard some good things about the Creality Ender 3, which is a little under the $300 budget. I personally haven't worked with one but it's apparently one of, if not the best budget 3D printer. Hope this helps or guides you in a direction to look.
shy kelp
Thank you very much
merry phoenix
thanks @forest wyvern
ornate raven
@merry phoenix I have an Ender 3 Pro. Only printer I own. I like it. Had since first of year and only issues are usually operator induced. I put in an updated driver board (direct from Creality) that significantly quieted the stepper motors. Didn't affect print quality, just cohabitation quality. Love the magnetic removable heated bed. Just always make sure the bed is aligned and clean when starting new print. I let mine slip off to side a little and it rubbed against the power supply and caused it to buckle up a little which threw off the print. Like I said, most issues are operator induced. 😃
shy kelp
@ornate raven thank you
shy kelp
Would you recommend using Carbon Fiber filament?
I just need a strong filament
any recommendations?
turbid hill
I’d verify that carbon fiber filament has higher tensile strength than other options. If the fibers aren’t continuous, I suspect they’re not going to be that strong. Assuming you’re really wanting strength, and not stiffness or toughness (and just calling one of those strength).
 bronze epoch
@shy kelp what are you making?
shy kelp
@bronze epoch I am making prototypes of headphones
turbid hill
What kind of forces are going to be so high on the over the ear part (relative to the amount of material you have there) that would require so much strength?
forest wyvern
@shy kelp Unfortunately what I’ve found from extensive research is that carbon fiber filament is really good if you need extra stiffness but, when actually looking at strength, it pretty much performs as well as the base material. If you look at https://www.rcgroups.com/forums/showthread.php?2924886-carbon-fiber-filament-bend-testing he did a comparison of carbon fiber filled vs standard pla (attached image as well) and it really didn’t do too much in the strength category. I would recommend PETG, it is very tough but also more impact resistant and doesn’t shatter as easily as others and doesn’t wear out the nozzle. I print with PETG from Push Plastics which is a great American company with a lot of different filaments, and even carbon fiber if you choose that route. (I am not sponsored by them but man I wish I was)
Data carbon fiber filament bend testing R/C Blogs
karmic brook
You could try embedding a wire in it for additional strength. You probably want a wire channel in any case for the signal
shy kelp
How strong is ABS?
forest wyvern
Stronger than PLA, but it warps much more than PLA or PETG
rustic adder
Anyone try to order a 3D printer from Prusa recently? I've made three attempts but keep getting tranaction cancelled from their web page. I've contacted customer service and their only recommendation is to use a different payment method. This doesn't work for me as the other options on their site are not avaliale for me. Just wondering if others had issues when ordering and how osticale was resolved.
forest wyvern
@rustic adder I had that issue, mine was resolved by calling the credit card company as they were blocking a purchase to Czech Republic (which makes sense unless you constantly order from said place) and telling them to put the payment through. If the payment goes through but no order is attached to it, which happened to me, just email their support (or use the live support) and they'
ll attach the order to the payment^*
rustic adder
@forest wyvern Thanks for the info I'll call my anks again and get more specific as to what and where I'm trying to purchase.
forest wyvern
Hope it works out for you
 cloud halo
What’s the reputation of Reprapguru’s version of the Prusa i3 v2? I had an opportunity to buy an open box kit of it today for $70, but passed.
rustic adder
@forest wyvern Thanks, it didn't work. Bank pre-cleared purchase but for some reason Prusa web site can' t process. I was on live chat with their rep and he was at a loss as to what the issue might be. Oh well, no new toy this week. 😦
@forest wyvern Mystery just solved!! I don't have a PayPal account but I can select use CC via PayPal, purchase went through. New toy after all coming my way. Again thanks for your input.
forest wyvern
Great! Sorry it wasn’t what I thought but I’m glad you got it cleared. Hope you enjoy the printer, and if you have any question or need recommendations on stuff for it, let me know.
shy kelp
I wanna buy a 3D printer I'm looking at the Creality Ender 3 pro it's $239 and I don't have enough and the sales ends tomorrow I only have $190 rest is at another location
karmic brook
Anyone have a pointer for the assembly instructions for the Prusa multi-extruder? I'm thinking of buying one and want to know what the process is like, but haven't been able to find them on the site.
 karmic brook
Cool, thanks! Let me know how you like it when you've used it a little.
vagrant drum
while i am still getting used to it, I can say right out of the box that it is not nearly as easy to use as the MK3/S
each print has had jams which while easy enough to fix or timeconsuming and annoying
but like you can see, when it works it works : )
karmic brook
Awesome! I'm looking forward to getting one, as manually changing filament during a print is a pain.
vagrant drum
i hear ya
violet needleBOT
Adafruit Industries posted LED Zelda Master Sword

Guide: https://learn.adafruit.com/zelda-master-sword In this project we'll build the legendary Zelda Master Sword! This light up sword is motion activated, s...
violet needleBOT
Adafruit Industries posted 3D Hangouts – Master Swords and CircuitPython BLE Hats
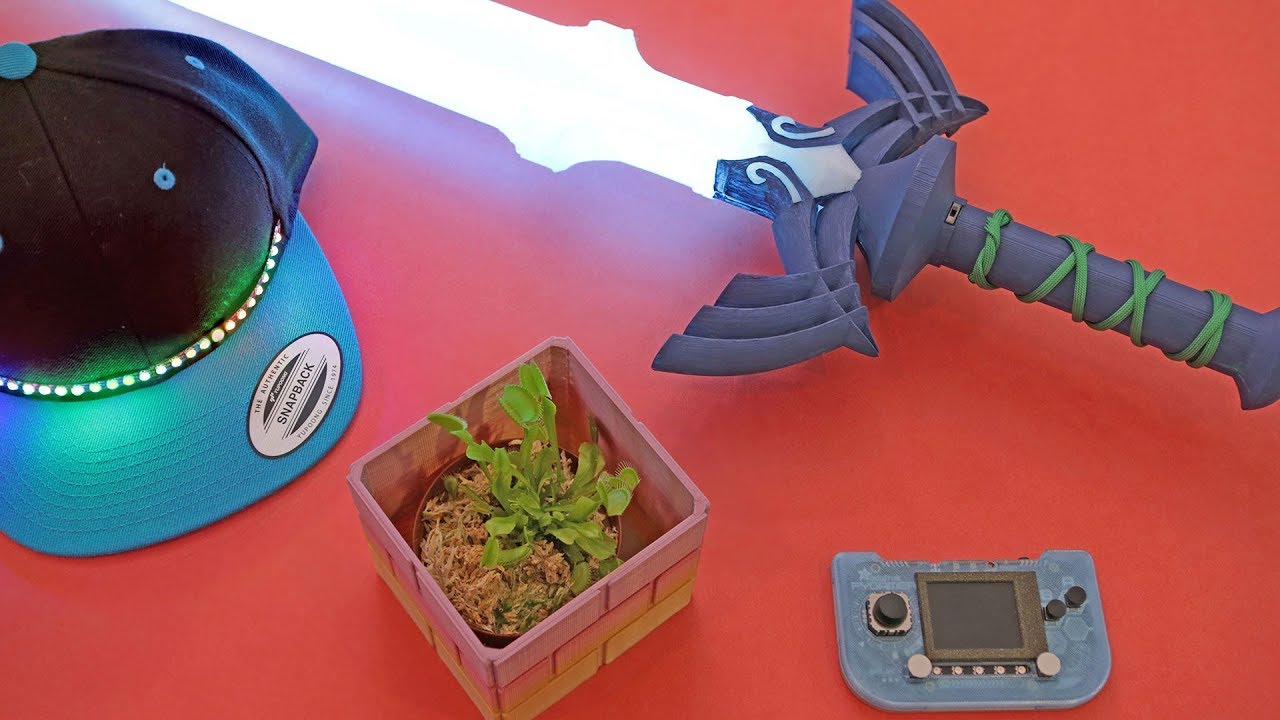
Multistreaming with https://restream.io/ ASK an ENGINEER 7/24/19 LIVE! Visit the Adafruit shop online - http://www.adafruit.com -----------------------------...
violet needleBOT
Adafruit Industries posted 3D Hangouts – Master Swords and CircuitPython BLE Hats

Multistreaming with https://restream.io/ Learn guide https://learn.adafruit.com/zelda-master-sword/ Zelda Master Sword https://learn.adafruit.com/zelda-maste...
 mighty gull
@merry phoenix Like @forest wyvern has already brought up, the Creality Ender 3 is great, and can be found for very cheap abroad. A little more expensive on Amazon, but you get the peace of mind.
I love mine, I've had it since last October. It requires a bit of TLC to get it assembled and calibrated just right though. But once you get it going, it will produce great quality parts. It's also really hackable and upgradeable if you're into that ( I find that part of the fun 😃 )
lofty sigil
How do I know if my attempts to dehumidify my filament have worked? Or is there any saving PLA filament once it has absorbed moisture?
 shrewd haven
Anyone experience with the Flsun 3D Printer I3 ?
 wise estuary
@lofty sigil WA7DLG if you have a scale you can weigh the PLA filament before and after drying it. I have seen mine change weight by 2 or 3% (100 grams before, 97 after). I dry at 175F for 3 hours (in the oven, don't tell my wife). The filament is slightly soft at that temperature, and will stick to tiself and be slightly wavy when it cools. The adhesion between coils is only very minor, and the waviness is not enough to interfere with printing, though I do have a direct drive, not a bowden extruder.
vagrant drum
@karmic brook if you are interested I just published a review of our MMU2S on our blog
 violet needleBOT
Adafruit Industries posted Mario Brick Planter #3DPrinting #Timelapse @adafruit #adafruit
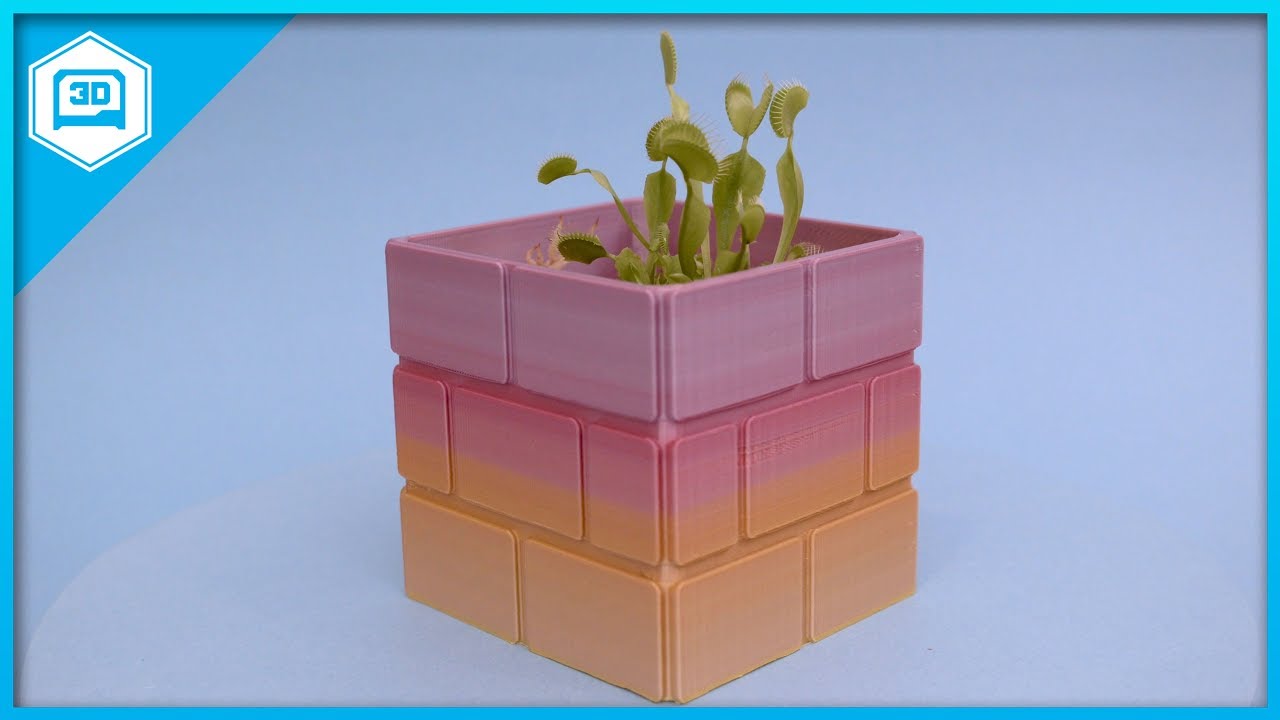
Every week we'll 3D print designs from the community and showcase slicer settings, use cases and of course, Time-lapses! Mario Brick Planter Pedro Ruiz https...
shrewd haven
What is a good beginner program to design 3D parts?
 tribal berry
Blender with youtube tutorials. My first steps in 3D printing were a steep learning curve, but paid off
It's opensource, capable of opening/importing almost every format you can encounter in the wild, and there are LOTS of tutorials available for almost every challenge you encounter
shrewd haven
Ok great! Does blender have native support for units like meters and centimeters?
turbid hill
I'm gonna say Autodesk Fusion 360 (freeware, not open source) or Autodesk Inventor (not freeware, not open source, should be free to students). I'd always considered Blender to be for rendering, with modeling as a necessary requirement for that. The other two are primarily for modeling.
tribal berry
I guess @turbid hill has a point; a significant part of the UI for Blender deals with rendering and animation options.
But yes, Blender has proper units 😄
 boreal wyvern
@shrewd haven FreeCAD is super intense but free. TinkerCAD is easy and free, but cloud-based and can be limited. Blender is great for organic shapes and free. Fusion360 is cool freeware for engineering-style parts and the LayerByLayer tutorials are excellent. I have heard Meshmixer, SketchUp and Ayam can be good, but I have yet to really explore them.
shrewd haven
I see that sketchup is no longer owned by google
I think I'll try blender, I have used it in the past for simple stuff
But thanks for the suggestions!
severe wadi
I'm with @turbid hill, for whatever it's worth. Fusion360 is a good tool, is free, and is at least worth trying (it does CAM, as well, so if you plan to go beyond just designing 3d parts to be printed, you'll be learning something that can be used for other things - CNC, etc.). Personally I prefer Solidworks or Inventor, but neither are free.
violet needleBOT
Adafruit Industries posted Fusion 360 Tutorial – Snap Fit Circular PCBs

Thought I'd make a tutorial on how to create snap fits for circular PCBs. This method uses the sweep feature to create snaps that follow a path. Tabs with 45...
violet needleBOT
Adafruit Industries posted 3D Hangouts – SpaceX Helmets, BLE Hats and PyGamer Buttons

This week’s #3DPrinting project on Adafruit Learning System - PyGamer Braille Buttons Learn guide https://learn.adafruit.com/pygamer-snapfit-case/overview Py...
violet needleBOT
Adafruit Industries posted 3D Hangouts – SpaceX Helmets, BLE Hats and PyGamer Buttons

Multistreaming with https://restream.io/ This week’s #3DPrinting project on Adafruit Learning System - PyGamer Braille Buttons Learn guide https://learn.adaf...
shrewd haven
@severe wadi I'll take a look at it, I don't think I'll ever use CNC
Is fusion really free? It states 30 day trial
Well now got it free
severe wadi
Yeah - you have to indicate it's non-commercial use or something like that. Has been a while for me, so don't remember exactly what I had to do, but it was pretty easy.
shrewd haven
There is like small line below the buying option inside the program: "click here to find out if you qualify for free usage" or something like that
violet needleBOT
Adafruit Industries posted Braille Buttons for PyGamer

Hey folks, this week we’re making accessibility buttons for the Adafruit PyGamer. These buttons are 3d printed with the braille alphabet so folks can touch a...
 ancient iron
@shrewd haven as you may have found out there are two free options for Fusion 360. A non-expiring student edition that may include free cloud computing and a 1year startup license that is valid as long as your "company" makes less than a certain dollar value per year. The 1year license is renewable for free also.
severe wadi
Ah, yeah, that sounds familiar.
ornate raven
Well, I started MY most complicated print to date. Six pices at the same time. Looked easy. turned out bad. Short pieces curled up and came off bed 😦 . Oh well, back to the drawing board.
karmic brook
May have to adjust speed, pause, or cooling?
 solemn parrot
Depending on your print surface, using purple elmers glue could be helpful
What filament are you printing with?
 wraith oyster
If you have surface problems, clean your bed, and then use glue, and yeah what filament, PLA needs 0-60 Celsius for the bed but if its something like PETG or ABS you need a lot of heat
ornate raven
I'm using PLA. Bed temp 85 first layer then drop down to 70. Ender 3 Pro with heated magnetic bed. The bed was leveled and then lightly scrubbed with denatured alc prior to each print. Running the filament at 200, 50% infill, 0.16 layer, stock nozzle. (.4 I think). I clean the bed prior to any print and usually have no issues. BUT, I have only printed ONE object at a time. Now I have 6 pieces 50mm to 150mm long. The first 3/16 to 1/8 inch print fine and then the smaller pieces start curling up, a couple of layers later they get pushed off the bed by the nozzle. I printed two smaller circular objects and that went perfect (I broke one trying to clean off the support layer 😦 ). Today I'll try just printing the shorter pieces and see how that goes. @solemn parrot , I've tried the purple glue before but it didn't work. I think due to heated bed, it made things worse. But, it was back in me beginning days. @wraith oyster , when I print at lower temps for the bed, I get adhesion issues at random locations just trying to get the first layer. I might try just dropping back to a constant 70. I've had such great luck with my first layer at 85 that I'm reluctant to back it off. @karmic brook , I usually go with the default speed setting for the Ender 3, I use Cura. I have noticed that since moving up to Cura 4.2, things seem slower. I will look into the speed.
ornate raven
I'm building a 55mm arm (go-pro type) and using supports. I think the curvature without them contributed to the curling and eventuall un-sticking. All other factors are staying the same. Don't want to change too many things at once.
ornate raven
The 55mm arm went very well all by its lonesome.
boreal wyvern
@ornate raven You might watch out for AC draft blowing on your printer, especially with those open-style printers. If you can add a raft/grid that can help even out temps as an object prints. Occasionally I have to add a brim or "mickey mouse ears" for objects with a flat bottom and sharp corners.
ornate raven
Good point @boreal wyvern . I recently moved my printer because I suspected the AC was blowing on it. I'll try the "Brim" trick on next print. Thank you for the assist and your time.
Now that I think about it, before I update Cura to 4.2, my prints all had brims and now they have a skirt. Time to check some settings. Thanks again
Would you say "Raft" or "Brim". Raft looks pretty intense.
Yep, sure enough. Cura Settings. I created a new profile with several other changes and will test on the next print.
Moral of the story "Recommended isn't always the best thing."
 gusty mortar
Can anyone recommend a good 3D printing service online? Looking to possibly get some 3D prints done, but don't want to invest in my own printer at the moment.
wraith oyster
It hast to depend on your country
molten sandal
@gusty mortar check out shapeways
gusty mortar
@molten sandal
ok cool thanks
wraith oyster
So my Prusa i3 Mk3S's Y axis has been making a kind of grinding sound when it does big movements, i have tracked the noise down to the bearings, so question, what new bearings should i get? Ive seen some mention of IGUS Polymer bushings but i don know if i should
molten sandal
Oh the igus bearings are brutally sensitive to alignment
They have to fit like Cinderella shoes or just go with longer lmu bearings
coarse ruin
very likely they are overly compressed by exceeding the tightening spec
frankly that clamp design is poor at best.
karmic brook
Apparently greasing the existing bearings can help, but I've heard tell of people upgrading the bearings and even the rods. There's a good writeup on relubricating bearings here https://prusacommunity.com/set-your-bearing-straight/
shrewd haven
Greasing bearings is not exactly rocket science, just use WD40.
Usually these bearings don't cost that much so if WD40 doesn't work, just get new ones
You can find prices as low as 5$ for a pack of 10
I don't know if there are ceramic or hybrid LM8UU bearings.
molten sandal
WD40? Shouldn't you be using something like dry teflon
Anyways I got a question
Am I right to say that most 3d printers use NTC thermistors?
I've been wondering why when most of these operate up to a maximum of 150 deg C (~300 F)
shrewd haven
They don't use those of course
But the ones that have a higher range
They use the ones that go to about 300 degrees celcius
molten sandal
have you done a search for ntc thermistors that actually go up to 300?
it basically narrows down the entire catalog to 2 thermistors
I've read multiple sources online that mentions that thermistors don't typically go above 150, and I would assume that you would want to catch thermistors midway in their operating range to get best results (even for the best beta value ones)
shrewd haven
They use that 100k ohm one
molten sandal
when filtered to 100k ohm there's only thermistor left in the entire catalog of mouser
shrewd haven
Some also use the EPCOS 100K Thermistor (B57540G0104F000)
I think they are running them a bit above their official spec
molten sandal
Operating Temperature -55°C ~ 200°C
Yeah so I was wondering about this bit
what's the hackery behind using cheap thermistors for 3d printing out of their operating requirements
shrewd haven
No they don't, the websites just list the wrong value
According to digikey this one goes up to 200, while the datasheet says 300
molten sandal
I don't know if I can trust mouser/digikey anymore rofl
shrewd haven
Mouser is all right https://nl.mouser.com/ProductDetail/EPCOS-TDK/B57560G1104H000
But weird that it didnt show up in your search results
You made a pretty dumb mistake xD
You should remove the minimum temperature than you get way more results
228 options instead of 2
molten sandal
oh yeah i forgot mouser's page
has this == logic as well, as opposed to a >=
to get all the thermistors above 250 you have to select all the fields above 250
shrewd haven
or <= in this case
karmic brook
WD40 is a water displacer, not a lubricant. I'd recommend something like Superlube or better yet, Liquid Bearings http://liquidbearings.com/
shrewd haven
WD40 cleans and lubricates and is cheaply available.
It is basically is some combination of different petroleum fractions
ancient iron
So I'm pretty familiar with bearing in general. Assuming you are talking about ball bearings, use general purpose grease (WD40 is a penetrating oil) usually available at an auto parts store. Penetrating oil should not be used for this purpose. There are some types of bushings where a thicker oil may be appropriate. In general penetrating oil does not continue to lubricate long-term. It is made for short term use. You can also use it as a cleaning agent.
 idle crest
#3DPrinting Live in 10mins! Episode #246 – BLE NeoPixel Hats and Mickey Ears https://www.youtube.com/adafruit/live #3DHangouts

YouTube
This week’s #3DPrinting project on Adafruit Learning System - BLE NeoPixel Hat Learn guide, code and build photos https://learn.adafruit.com/circuitpython-f...
violet needleBOT
Adafruit Industries posted 3D Hangouts – BLE NeoPixel Hats and Mickey Ears
This week’s #3DPrinting project on Adafruit Learning System - BLE NeoPixel Hat Learn guide, code and build photos https://learn.adafruit.com/circuitpython-fe...
violet needleBOT
Adafruit Industries posted 3D Hangouts – BLE NeoPixel Hats and Mickey Ears

Multistreaming with https://restream.io/ This week’s #3DPrinting project on Adafruit Learning System - BLE NeoPixel Hat Learn guide, code and build photos ht...
shy kelp
@shrewd haven wd40 basically leaves napatha behind doesn't it
shrewd haven
Naphtha really isn't well defined. It can mean multiple different oil fractions. It does leave some mineral oil behind
lofty sigil

"I am being asked by others in my company to start using WD40 as a bearing lubricant. I know that this is not best practice, but I need to explain to them why. Any advice?"
To understand how...
Is oxidation a huge problem when using ball bearings inside?
Ball bearings in a 3D printer don't need that much protection against dirt, water, heat, shrapnel, etc. So if I read the article correctly it should be good enough
turbid hill
Main things I get from that article is "Second, you will hear it said that 'viscosity is the single most important property when selecting a lubricant.'"and "So unless this application is particularly high speed, operating at low to moderate temperatures, it is unlikely that WD40 contains an oil of sufficiently high viscosity to provide adequate lubrication for the rolling element/bearing raceway interface." --I assume that their scale of machinery is factory production stuff, and the bearings on the XY axes of a 3D printer aren't high speed by comparison.
severe wadi
fwiw, i mostly use superlube synthetic on my motion components (and a good number of other things): https://www.amazon.com/Super-Lube-21030-Synthetic-Grease/dp/B000XBH9HI
have never had a problem
forest wyvern
I
I'm with @severe wadi on this one, I use the Super Lube he included a link for on my lead screws and I use a lighter oil amazon.com/dp/B00175VGUA on my linear bearing
severe wadi
Thanks for mentioning the lightweight version. I'll give it a try too.
I've been using the one I linked to on everything - screws, rails, rods, etc.
But it's pretty goopy/thick, and I get buildup that attracts dirt and has to be cleaned up
forest wyvern
Yeah that's the main thing I wanted to avoid on the rods is buildup, also (for anyone wondering why you use 2 different lubricants) you want to make sure the oil in the linear bearing is not too viscous to where it would stop the balls inside from rolling properly, where with the lead screws its more of getting something that will stay on and hold itself onto the screw.
shrewd haven
I was mostly talking about a quick-fix that probably works just fine for a while.
It is pretty hard to find really good research most sources are more using guesswork than real data
ornate raven
@lofty sigil WD40 is more of a solvent than lubricant. It does its "magic" by thinning out the grease or oil already present. It does leave a super lite film behind but it will do more harm than good in the long run. Show them some videos of mechanics using wd40 to break down rusted in bolts for easier removal and maybe they'll get the idea.. Just curious, are they sealed bearing?
shrewd haven
Yeah but do you actually have evidence that it is bad?
 serene quest
I am having very odd issues on my ender 3, there is a bump in the y axis at a certain point and it shows up in prints, on the left side the bump lowers the bed in a small area and on the right side it raises it in a small area. The bump lasts for about a centimeter and the only place the bed doesn't lower/raise is in the center, the other issue is that in the center of the print bed on the edge closest to you when looking at the printer head on, the bed is raised, to counter act this I am forced to level the bed very low in the edge closest to you. When the alluminium heatbed is removed and set face down on the floor it seems to be flat, same thing for the print surface. Any fixes or solutions for this?
Also, the bump is not in the bed, I raised the nozzle and moved the bed around and I still felt that bump in the same place
severe wadi
@serene quest is this something you can take a picture of so we can see what you mean? perhaps a print with the 'bump' ?
serene quest
I cannot as I am not at home right now, but the bump is only visible in the first layer, sorry to be vague
After the printer printed the first layer, I paused it and that was how it looked
severe wadi
how high is the bump?
serene quest
High enough to discolor the filament as it is very thin
it looks as if it didn't even print there
the filament is transparent
in that area
serene quest
can't find what material it is anywhere https://www.amazon.com/Creality-Original-Replacement-3D-235X235MM/dp/B07FCBCS9K
it is a rough and grainy surface
severe wadi
do you think the 'bump' is 10s of microns, or 100s of microns, or?
don't really have much perspective yet
serene quest
100s
severe wadi
have you tried another aluminum bed or print surface? things usually aren't really very flat unless you buy them that way.
serene quest
No, I haven't
ornate raven
@shrewd haven if they have to keep adding the lubricant because the wear gets worse, that should tell them something. I am a retired Maintenance Instructor and never heard from any of the professionals I worked with that WD-40 is a good long term lubricant. They only ever used it to degrease and break down rusty areas for easy work. Then the WD-40 is washed off and proper lubricant added.
serene quest
My main issue is the bed lowering significantly on that edge
severe wadi
i ended up having an aluminum bed ground to 0.001" (~25um) and then put pei on it because i couldn't tolerate the wavy crap that came with my printer
it came with a piece of aluminum and then a piece of glass on top of that.. the glass had 300um 'waves' in it
severe wadi
i tried to buy ultraflat glass, but it's very expensive
serene quest
Yeah I can't afford it
shrewd haven
The yoyo community talks more about wd40, this is about linear bearings that slide over a rod. @ornate raven
ornate raven
I have Ender 3pro. Heated Magnetic bed. Has a slight dip in center when cold but levels out when heated.
severe wadi
it took me like a month to get 'flatness' sorted out.. ended up buying a 1um dial indicator, trying half a dozen different materials and suppliers, etc., until i finally gave in and just had a piece of k100s (tooling aluminum) cut to size and ground.
and on top of that, i use UBL in marlin, because the heating distorts the bed significantly.. like 50-60-70um, which is enough to cause first layer adherence issues
ornate raven
Linear, circular, they all have rollers on a smooth surface. some are spheres and some are balls.
severe wadi
i'm thinking ubl would mostly solve your problem if it's in the bed/surface
serene quest
hmm
ornate raven
@severe wadi I printed up a dial indicator mount for my DI and rand it over my bed at zero, 5,10, and 15 just to see if my shape maintained along all axis. Stayed the same.
serene quest
I'm gonna buy a leveling probe
severe wadi
sounds like a good idea
@ornate raven I have a video of mine changing shape with the dial indicator. I'll see if i can find it in a bit.
ornate raven
@severe wadi , I suspect that the way the heater is fixed to the bed (has big glob in center) mmay be the dip in the bed, At any rate, it levels out when heated so I'm pretty happy with it.
severe wadi
I use the bltouch, but its repeatability isn't as good as i would like.. I tried 3 of them (I was a marlin developer for a while - I bought two and they sent me one to try out) and they all were issue-y.. avg repeatability of 5-10um, but sometimes 25-30, so I pretty much always check it with a feeler gauge and then just leave it when I have it where I want.
@ornate raven cool.. sounds good
I'm super-anal about things like this. I'm sure i could have made do with just UBL, but it drove me nuts.
serene quest
Same with me, mesh bed leveling is a bodged fix, I wish it would be proper and perfect like it should be
severe wadi
one of the things i wanted to work on before i left marlin was integration of a laser distance sensor for bed profiling.. i was looking at the microepsilon optoncdt ilr 1320, but they're so expensive.
ornate raven
I'm thinking that I could somehow create or modify a Gcode that runs the level check for me. I use one I got from Youtuber every couple of prints just to verify my level. I'm pretty new to the 3d printer world and every day I learn something new about my printer.
severe wadi
UBL is pretty good. I'm still using the 8 bit Marlin and have a 14x14 grid of points on my bed.
It corrects for any meaningful deviations in shape in realtime.
And I use the same grid, generally, as long as the bed doesn't get disturbed. It's probing and tuning one-time, save the mesh, and you're good from then on.
ornate raven
I love that laser idea. I used to work in maintenance and the some of the best leveling and measuring I ever saw was via laser.
severe wadi
Yeah.. the ilr 1320 has 1um repeatability
that'd be overkill for this application
but it would result in a perfect bed profile that wouldn't take long.
serene quest
@severe wadi Is there a way to set it up to probe every print?
ornate raven
Overkill is better than wide tolerance.
severe wadi
that's how i feel about it, too.. lol
serene quest
Same with me
ornate raven
Checking at different levels could also tell you if you're have issues with the screw or it's stepper.
severe wadi
@serene quest yes, but (assuming you're talking about building the mesh) unless you're taking your bed off/apart regularly, there's no need to do that. better to probe once, fine-tune the mesh, save it, and then simply reprobe (home z) once to set the current height with the mesh active.
i do that when i power on the machine, verify/adjust with a feeler gauge, reset zero manually if i need to make any changes, and then i'm good until i turn the printer back off
severe wadi
do you use octoprint, or?
serene quest
My workflow is a bit archaic, I use a SD Card
I have two raspberry pi 1's which are very weak and cause the print time to double with the same gcode
How about using a anycubic ultrabase?
severe wadi
@ornate raven what firmware are you running? and what slicer? and what sender? you can integrate probing/leveling in the startup gcode in your slicer, and it'll always be included when you save or send gcode to the printer. if you're using octoprint, you can add homing/leveling gcode to its 'gcode scripts' configuration and it'll run it when it's supposed to.
ornate raven
I have a new Pi4 1gb that I'm trying to set up for Octoprint. So Far I just use it to watch what my printer is doing. Next step is using it for control
severe wadi
fyi, here's the settings in octoprint
ornate raven
I upgrade my main board two months ago to the new Creality board.REALLY made things quieter, like if the fan wasn't running, you would know it was printing
severe wadi
@ornate raven cool..i'm sure the 4 will be more than adequate.
ornate raven
I was trying a Pi0 (I knew it was under powered for control but I just wanted to watch)
serene quest
Supposedly flat
ornate raven
I use latest Cura for now. Might change if Octoprint works out.
severe wadi
i don't know anycubic ultrabase, really.. i've heard of it, but have no idea if it's actually decent, flat, etc.
do they give flatness specs?
ornate raven
Ultrabase?
severe wadi
@ornate raven cool. i used cura for a while, but eventually gave in and bought simplify3d
cura is pretty good. i didn't have any major problems with it.. just wanted more configurability/control.
s3d has some issues, though they seem to be fixing them slowly
ornate raven
Yea, I hear ya. I'm new at this and just have the one printer for personal dabbleing so ...
I tried Slic3r from a RPi 3B+ for a while but it took too much mental prowess for me to get it right
serene quest
Any idea how I can fix the bump
ornate raven
@serene quest , are you adverse to just buying a sheet of tempered glass and cutting it to size?
serene quest
No the issue is it is not in the bed
serene quest
I'll explain, when the nozzle is 100mm away from the bed and I move the bed back and forth in the same place there is a bump, every time. As I said earlier the bump affects prints
ornate raven
That's right, I remember now. You said it was happening a particular spot in the print.
severe wadi
Sounds like a problem with your rails or other motion components, then.
I missed that earlier.
serene quest
Yeah, should I order new rails and rollers?
ornate raven
Have you looked at your belt and track?
severe wadi
Well, I had a similar issue on my printer. I ended up replacing all of the rails and blocks.
That they 'caught' and 'jerked' in certain spots upset me, though the manufacturer kept arguing it wasn't a real problem.
serene quest
Yup, the belt isn't the issue
severe wadi
That it lasts only a cm seems odd.
is it an abrupt shift higher/lower, or is it a smooth transition?
ornate raven
What about drive coupling to shaft? And what @severe wadi said
severe wadi
(more like a square wave, or sine wave?)
if more like a sinewave.. have you checked the torque in the screws holding the rails down to whatever (assuming they're linear rails that screw down)?
ornate raven
Ahh @severe wadi , If I read you correctly, shape would tell if one axix over another or more than one axis
severe wadi
you can distort the shape of the rails if the torque on the screws isn't uniform
i assumed the problem was in one axis
i was thinking that if the bump is a sinewave-like shape, it could be that he has some extra tight or extra loose screws holding the rails down
ornate raven
On big gantry cranes I've seen oddities at certain spots due to bad data cable. Gets bent too much at one location and then causes issues.
serene quest
but when its loosened to remove the bump its too lose and the bed wobbles
severe wadi
can you adjust the torque in the surrounding screws to take out the wave/bump?
severe wadi
gotcha.. our messages crossed
ornate raven
I don't suppose you have a Megger and could check your cables
severe wadi
well, if you can sortof 'fix' the problem by adjusting the screw(s) in the rail(s), it seems likely it's to do with the rail
i would probably do what i could to confirm that, and then replace if i was reasonably sure that was the problem
if you remove the rail entirely, is there any bowing or warping?
serene quest
Not sure, should I replace rails and rollers?
severe wadi
i can't tell you that.. no way for me to know if that's the problem without actually looking at it.
but based on what you're saying and what i understand, it seems likely they're the problem, or at least involved.
ornate raven
Only one spot, probably rail but bad rail might be due to bad nearing. From my experience I'd replace them both if I couldn't confirm one over the other.
severe wadi
same.. i would probably replace both as a matter of course, since it's going to be apart anyway, unless they're really expensive
serene quest
Okay
 hard turret
what do you guys think about the Creality Ender 3 for beginners?
karmic brook
Seems like the low end of something not too frustrating
hard turret
i'm looking to 3D print a thrust vector control mount for a rocket
still trying to decide which printer and filament I should use.
karmic brook
You might want to figure out how strong it will need to be, which could affect your choice of material and possibly which printers are appropriate. Build volume might also be a factor.
hard turret
The highest force motor I can get my hands on is 108.5 Newtons
turbid hill
The control mount will be holding the rocket and directing it, or exposed to the exhaust and directing just the exhaust?
hard turret
The control mount will be holding this:
The exhaust won't be touching the mount
I might go with ABS since it is more durable than PLA
turbid hill
Strength versus toughness, basically. Depending on what parts at what sizes need to withstand that 110 Newtons, may not be that big of an issue.
karmic brook
Correct: size, and configuration details like leverage and thickness strongly affect what you can manage. Happily, a lot of intro printers can manage things like ABS and PETG. It's often also possible to use PLA directly (it does offer better controlled details), if you design parts to have strength where you need it. You also need to avoid parts getting hot enough to soften, which (again) is addressed by part design and other techniques (shielding, directing airflow, etc.). Obviously if something is going to fly, you don't want it to be too heavy, so all these things are tradeoffs (you may find that the strength to weight ratio of one material is better for your use case, so you'd want a printer that can handle that material).
coarse ruin
use PTEG.... ABS if you can't do PETG
molten sandal
i second PETG
 boreal thunder
If you’re working with anything but PLA you should consider environmental controls, both to ensure stable temperatures around the printer and to avoid exposure to any carcinogens and nasty smells.
Also, hi, I’m Foaly. Lovely to meet you all. @weary lichen suggested I swing by and see how this community is, since the current 3D printing Discord of which I’m a member is hateful and toxic and vile. Not unlike ABS fumes.
 weary lichen
Hey there @boreal thunder! Good to see you here.
boreal thunder
Thank you. Nice to be here. I appreciate the suggestion. I’ll try not to British up the place too much.
weary lichen
Oh, don't worry. You can't British it up too much.
As far as hate and toxicity go, we don't tolerate that here. If you see anything, let any of us know and we'll take care of it.
boreal thunder
Much appreciated. And it’s kind of appropriate that once again you’re bringing me into something, since mucking about with your digibadge is what first got me into the hardware side of things. But anyway, to the topic: 3D printing! Huzzah! The hobby where you can make anything, absolutely anything, as long as it’s a calibration cube or a miniature boat.
weary lichen
Speaking of miniature boats, there's the East Coast Rep Rap Festival coming up in October and they're having a Benchy contest. Best quality in lowest time or something like that.
A web site is useful: http://eastcoastreprapfestival.com/
boreal thunder
Oh wow. I wonder if I can make it to that.
Not to compete, since I’d get my backside handed to me.
weary lichen
If you want to compete in something there's a 3D printed Derby
I'll be going there since it's absurdly close to me. About 10 minutes away from where I work
boreal thunder
I’d just enjoy going round to all the vendors. And telling one in particular what a foul Discord community they have, and how they’ve lost my business until the heat death of the universe.
The talks sound interesting too though.
weary lichen
Yeah, last year I was really only able to go wander around everyone's table and didn't really have much of a chance to listen to any of the talks. I also wasn't particularly familiar with the event at all since I had found out about it literally that day
boreal thunder
My hotend and fan assembly did not spark joy.
 night kraken
oof
hey guys, i got a small issue...
When i 'home' my printer, it keeps sitting on the Z axis end stop
it usually goes to the end stop, touches it and moves away from it a bit, but now it just stops and sits on it
its an Anet A8 with Omni running on it
this means i cant print with it, as it collides into my bed
(Yes i did press the RESET button on the side)
shy kelp
Is the switch plugged in. On both ends, main board and at the switch?
weary lichen
I'd similarly suspect the switch. Check the wiring, both ends, and I'd check to make sure the switch itself is working too
boreal lava
if you raise the hot end to say 50mm, then send the command to lower it by 10mm, but manually hit the endstop with your finger, does it stop?
night kraken
Yes, but I basicly fixed it,
8 had an issue that my hotend crashed into my bed making one of my stepper motors go up, and the other stay stil, so there was a slight ramp, now it works perfectly again 😊
karmic brook
I'm trying to print a tardigrade head on my Průša i3 MK3S, but as you can see it only has a small ring contacting the build surface, and it came loose at some point while it was printing overnight.
It made the usual mess before I woke up and caught it. I'm guessing I want a raft or more supports or something to give it more surface to hang on to the build plate. Suggestions?
 smoky marlin
3d egg noodles
boreal thunder
More supports and a brim.
And make sure your z offset and retraction are as dialed in as possible.
A question of my own: say you’re an adventurous sort and replaced the PSU on your CR-10S. Say you also fiddled with the VREF pots for each motor, keeping them within recommended limits but still fiddling. And now say you’re getting phantom power such that despite the machine being off, your LCD still brightens for a moment when you shift the build plate along the y axis. In other words I’m getting power feeding back from that motor, in the same way I catch stray power to the control box from the USB connection from my RPi even when the control box is shut off. I’m assuming back off the VREFs again and check to make sure all my wiring is properly shielded and connected?
karmic brook
I doubt that's a VREF problem: stepper motors (like many motors) act as generators when they are rotated, and will create a voltage across their leads. Presumably this flows back to the driver board, through the protection diodes, and into the power rails.
Brim or raft? I'll admit I'm a little unclear on the difference.
boreal thunder
nod Not something I’ve noticed before since I fiddled with the settings, though. I’m also now getting hella layer shifting, which is definitely a VREF problem since it’s the only thing I’ve changed. I’ll dial it back and see what happens. Experimentation.
As to the difference:
Brim prints extra lines around the model, like a skirt, but connected up to the actual rim. A raft prints a whole surface of several layers beneath the object, effectively giving it a new floor. Both can be removed after the print, and both lend it better adhesion, but general attitudes seem to be that if you have to use a raft you’re compensating for other settings not being correct rather than trying to fix them, which doesn’t serve you in the long run. It’s a judgement call; if you need to get the piece printed and haven’t time to mess around, I’d consider a raft a perfectly viable option. But everything else being correct, a brim will do the job of keeping the model on the bed if it has too little contacting surface area without one. Of course the filament material and the build surface material come into play as well.
Disclaimer: I’m still relatively new to the 3D printing world (~4 months), so this is just what I’ve gathered. If I’m mistaken I hope others will correct me.
 warped hemlock
@karmic brook For your issue, you will want to be sure the bed is clean, that there is a brim, and you might consider slowing down the print speed. Your overhangs are also most of the mass, so you want to avoid moving the bed too fast.
karmic brook
I had just cleaned the bed (although I think I'll give the PEI an acetone pass next time for even better adhesion). Reducing the print speed makes sense. Since the attachment is hollow, I'm wondering if a raft (versus a brim) might be more effective.
weary lichen
@boreal thunder The Monoprice Mini v2 will light up the LCD if you move the print bed back and forth too quickly. It's not the best thing to happen, but in general if you avoid doing it (often) the printer will be fine.
As far as raft vs brim - Raft is useful when there isn't a large contact point, or many contact points.
boreal wyvern
Definitely time for a raft and lots of support. If you can chop the piece and assemble it afterwards it can save a lot of sweat and tears. 🙂
violet needleBOT
Adafruit Industries posted 3D Hangouts – Space Helmets and Monster Masks

This week’s #3DPrinting project on Adafruit Learning System https://learn.adafruit.com/spacex-helmet/ https://youtu.be/32eCaIho6Bw This week’s #3DPrinting pr...
karmic brook
Thanks for your suggestions. I added a brim and reduced speed and acceleration, so far, so good.
boreal thunder
Looking good!
rustic adder
To all Prusa MK3S users, I just received my printer kit and I'm at the point to attach the heatbed and connect the power supply. Before making any connections I made some measurments with my multimeter so I can identify any mistakes I may have made after assembly. I found that the VCC and Gnd teminals on the heatbed read zero ohms between them. Durning my online chat with Prusa I was told that when the bed heats up 24 volts will be at VCC. I don't think that person understood what I was trying to convey. Those of you with a Pruse MK3 could you please verify the continuity between these terminals? Thank you.
ornate raven
@rustic adder I'm not sure I'd panic about that reading just yet but, zero ohms is low (indicates a shorted resister). What scale were you on? A heater is just a big resister with usually high resistance. I'd do a close visual inspection and check for continuity to the bed. Might indicate a crushed element.
karmic brook
I'd expect the bed heater to be a low resistance. I'd go measure mine, but it's currently printing.
It's basically a printed circuit board with a long winding copper trace, I'd expect it to be a few ohms or so.
This page says a heated bed for a MK3 should be 3.5Ω - 4.0Ω https://help.prusa3d.com/article/mvzxcjkvtx-troubleshooting-multimeter-usage
That would make sense, too. The MK3 has a 24V power supply, so 24V across 4Ω yields 6 amps. That's 144 watts, which is reasonable for a heated bed that size.
ornate raven
Good catch @karmic brook I meant low not high, (got my E , R, and I all goofed up.
violet needleBOT
Adafruit Industries posted 3D Hangouts – Space Helmets and Monster Masks

Multistreaming with https://restream.io/ This week’s #3DPrinting project on Adafruit Learning System https://learn.adafruit.com/spacex-helmet/ https://youtu....
rustic adder
@karmic brook @ornate raven Thanks for the info, without the schematic I not sure what I was actually measuring. Lo and behold when I lowered the range I got 3Ω, so I guess it safe to continue with the assemble. Hopefully I'll be 3D printing this afternoon. 🙃
ornate raven
Outstanding news. Glad to have been of any asiistance.
 raw sluice
I've been printing parts for that Master Sword build from a few weeks back, but now I've gotten to the Pommel, which Cura can't seem to slice correctly and says it's going to take 0 minutes to print. Has anyone had success with that one stl?
karmic brook
Looks like something's wrong with it. It renders, but PrusaSlicer can't slice it either.
raw sluice
Yeah, Simplify3d too
boreal thunder
I cannot for the life of me get my CR-10S’s x axis belt tightened to the point where it isn’t prone to sliding on the bearings when the gantry moves. I guess it doesn’t matter as long as it’s tight enough to move the gantry and not slip off the pulley or miss steps on the way, but it’s a pain in the butt all the same.
 raven carbon
Anyone using Octopi here?
severe wadi
Not anymore, but I used to. I still use octoprint, but just have it installed on a typical linux box.
what's up?
ornate raven
I'm setting up a Pi4B+ with 1gb to be my Octopi/print. Printing up my mounting system now. Tested all the SW and it works well. Will know more once I get it all mounted and do a run through of the whole shootin match.
boreal thunder
Huh. Last I checked Octopi wasn’t working on the Pi4B+ out of the box; quite a lot of software tweaks were needed. Glad they’ve fixed them.
I have it running on a 3 and have been wanting to upgrade. So, yay. Thanks for the info. 😃
 cursive mortar
Hey i was wondering if anyone knew of any good 3d design software.
Thanks.
karmic brook
Are you looking for beginner friendly or more advanced? Do you want more mechanical/CAD or more sculptural/organic? Do you want browser based or installed?
cursive mortar
Beginner freindly, sculptural and either browser or installed would be fine
ornate raven
Try Tinkercad. Good icebreaker.
cursive mortar
Ok will do thanks.
 opaque gust
I've been out of touch for a while. But I saw the awesome 3D printed heat-set insert rig, wondered if they had any tutorials on designing projects to use them
devout pewter
Actually, yes. I just published a learn guide that uses it yesterday: https://learn.adafruit.com/stream-deck-controlled-rgb-message-panel-using-adafruit-io

Adafruit Learning System
Easily display status messages with Stream Deck and an RGB Matrix Panel
Or if you mean a guide on designing projects with heat-set inserts, I might be able to help since I designed one for it.
opaque gust
yeah, that's a pretty cool project, but I meant more a guide for designing parts to use them
I noticed in the model of the rig itself the walls around the inserts seemed extra thick
most of my prints seem to turn to infill
devout pewter
There's no guide on that specifically. I just set the hole inner diameter to about halfway between the larger and smaller diameters of the heat-set insert. I read to use 3-4 perimeters and it should use a minimum of 2mm of plastic on all sides of the insert.
Some people recommend a slope on the hole, but I didn't find it necessary for the short inserts.
devout pewter
yw
severe wadi
I use them all the time in everything.. 3-4 perimeters and ~2mm is good advice, but you can get by with less surrounding material in a pinch.
At minimum, I make the hole 0.2mm smaller than the large end of the taper, but halfway between the diameters works. You also want the hole to be a 1mm or so deeper than the heatset is long, especially if the hole is tight, as hot plastic can come up into the threaded center if there's nowhere for it to be displaced to, if that makes sense.
have had that happen a few times
whether you need extra room depends on the size of the heatset, too - tiny heatsets, like m2, don't require much extra room, but larger like m4, m5, m6 easily could if the hole is tight.
opaque gust
👍
rustic adder
Help! I've completed my Prusa MK3S and the calibrations seem OK but I can not get a desent print. They are off center and stringy. I have no clue as to what parameter on the slicer software that may affect this. I've used Cura and Prusa slicer. The photo is my print from a post on Prusa site, it's an SD mini and micro card storage.
Here's another example of the poor prints my MK3 is producing. This is part of the Iron Man reator assemble that holds a Gemma MO. The one on the left I used Cura slicer and the right one was produced from Prusa slice. I got the file from Github and used the printer at my local library (Luzbot) and it printed perfect.
 rustic pine
do ya'll have a favorite clear or white PLA? The sample that came with my ender 5 was great. I want to print some lamps and grey doesn't let enough light through. 😦
mighty gull
my fav white PLA is esun white pla+
i've used it to make a lampshade and several lithophanes

@rustic pine ^
rustic pine
I mean, that's a pretty solid recommendation on account of you literally printing exactly what I intend to print! 😄
mighty gull
hahahaha
yeah, I've also used it to print the moon lamp that got really popular on thingiverse
the lampshade was just a cylinder in vase mode, so 1 continuous wall.
rustic pine
I've heard a lot about vase mode but I don't know how to make that happen -_-
I've been using cura
mighty gull
in Cura its under 'special modes' -> 'spiralize outer countour'
rustic pine
So I made and printed a few vases in fusion 360
but i just did normal cura slicing and they turned out great
Does the vase mode make it, uh, smoother?
or I suppose it's good for just printing the outer shell of an otherwise solid print
Woah! This vase goes from 11.5 hours to 2.5 hours! Double thank you for this information! 😄
rustic pine
Ok, amazon says it'll be here tomorrow. I'll report back on quality. Thanks again @mighty gull !
mighty gull
oh yeah, so vase mode is MUCH faster because its only 1 wall thick. Not great if you need any sort of strength of rigidity, but its great for lampshades since it would allow maximum light to pass through.
you also won't have a vertical seem
remember that it only works for certain geometries. can't do anything with gaps or holes, has to be able to do each perimeter in one continuous motion.
ornate raven
I have a 1gb Pi 4B+ Running Octoprint. Using a Pi camera. Using Octoprint version developed for Pi4. So far, I can monitor temps and monitor/control position and view the print via PC . But, I can't see the gcode in the viewer and I can't load from the PC although I can see all the files on the sd card. So, I'm about half way there.
OBTW Ender 3 Pro.
shy kelp
@rustic pine vase mode also makes it to where there's no seams
It just never stops extruding
karmic brook
Just a helical extrusion?
rustic pine
That's pretty exciting. I'm gonna try it tonight
rustic pine
looking at my vase in cura, I'm not sure how it's going to turn out. I just started the print, I'll report in when it finishes. 😄
mighty gull
woo! let us know!
rustic pine
So it turned out pretty good. I'm gonna tweak a bunch of things and try some more. this is pretty awesome.
 spice raptor
Anyone tried/bought a Sovol SV01 printer. It's been out a few months but not alot of info out there. It has direct drive and is closely related to Creality. Any thoughts?
ornate raven
Update on my Octoprint setup. Well it appears that the Gcode viewer works fine as long as you're dragging a file from the PC to the server. Not if you're printing from the SD card.
The viewer is a more accurate representation of actual events when the object is larger. Time lapse?
boreal wyvern
@rustic adder What temperature settings are you using? It looks like either a loose belt (which can cause chattering and off-kilter layers) or extruding at too low a temp. We get that kind of stringing from mild errors in the file. So we repair the file with either 3D Builder or Netfabb Pro (free for educational purposes). The layer skipping looks like partial clogging from plastic that isn't hot enough to flow, but I'm not sure. Did you turn on support material? It looks like there are areas that have an overhang.
rustic pine
The white pla+ arrived today. I'm excited to print some lampshades 😁
rustic adder
@boreal wyvern Spot on, The gear on the x-axis was sliping as I did not have the set screw on the flat spot, and the tension on the y-axis was not tight enough. Thanks for taking the time to help.
@boreal wyvern Also seems very...very important to clean the bed after VERY print.......no matter how clean it looks wipe it with alcohol ;~)
bronze epoch
https://www.reddit.com/r/3Dprinting/comments/cvmnfv/every_day_i_help_people_fix_problems_with_their
Wonderful guide to all metal hot ends

reddit
0 votes and 0 comments so far on Reddit
boreal wyvern
@rustic adder That's great! You're very welcome! It took me two weeks of weird and wiggly printing until I discovered the same issue on our Polyprinter 😅
raw sluice
Hi! I’ve been working on that master sword from a few weeks back. I printed these with an 8mm brim and everything was still attached to the print bed when the prints finished, but when I put the two halves together, you can see the corners curl. These were sliced with Cura and printed on a Taz6 with the SE toolhead. Anyone have an idea what could be going on here?
boreal wyvern
@raw sluice I have had issues with long flat prints curling, especially with ABS. That sounds like a good sized brim. What some folks do is add "mickeymouse ears" to their file to hold those corners down and reduce the pulling (https://www.thingiverse.com/thing:839635). We had a large issue with pulling with ABS and between increasing the infill and increasing the extruder temp from 240C to 270C seemed to solve the problem most of the time. That is still a pretty nice fit especially if you hit it with a heat gun. I wonder if chopping the file into 2 shorter pieces would help.
I guess it is just called "mouse ears" https://ultimaker.com/en/resources/37095-how-to-improve-build-plate-adhesion-with-design-orientation

Ultimaker.com
Designing a good 3D print in a CAD program can be difficult. A design that looks beautiful in your CAD program and can be extremely difficult or messy to print. That’s because of the limitat...
 placid cipher
I think we should still them mickeymouse ears, until we get a C&D from disney, hehehe
ornate raven
Print with a brim. Seems to work best for me.
ornate raven
I find myself intoxicated watching the Gcode viewer in Octopi.😯
violet needleBOT
Adafruit Industries posted 3D Hangouts – Mini Cranks and Neon Ears

This week’s #3DPrinting project on Adafruit Learning System - Adabot Crank Solder Dispenser Learn guide, code and build photos https://learn.adafruit.com/cra...
violet needleBOT
Adafruit Industries posted LIVE Stream

Multistreaming with https://restream.io/ This week’s #3DPrinting project on Adafruit Learning System - Adabot Crank Solder Dispenser Learn guide, code and bu...
violet needleBOT
Adafruit Industries posted Hand Crank Solder Dispenser

Make solder time fun with Adabot and a hand cranked solder caddy! Keep your workspace tidy with this cute 3D printed solder dispenser. The crank is a print-i...
shrewd haven
Are UV laser printers good for beginners?
 crude prawn
@shrewd haven SLA printing isn't something I would start with.
Look for a cheap FDM printer.
https://www.google.com/amp/s/www.digitaltrends.com/cool-tech/fdm-vs-sla/%3Famp

Digital Trends
For common types of 3D printers, it's often a case of FDM vs. SLA: Let's go over how these two different 3D printing processes work, why they are both popular, what drawbacks they have - and which may work best for you!
shrewd haven
The anycubic photon is also reasonably priced and the printed parts look really good
shrewd haven
PLA does have many filament options
shrewd haven
I decided to go with SLA, I think I'll use it a lot more because the results aren't ugly
novel lark
IMHO, FDM is easier and less messy. SLA is pretty awesome for resolution, but requires good hygiene with the resin, and care of the build platform and resin tank.
Sanding and painting can compensate for the surface texture of FDM prints.
rustic adder
I've had my Prusa MK3S for about 3 weeks, took 2 days to assemble. I'm still struggling to get it to print what I want. It will print the Prusa files of the SD card just fine but blows a gasket when I attempt to print one of my files. Prusa live chat has not been helpful, emails sent to Pruse are not answered. I'm about to throw this thing out the window. Just saying :~(
shrewd haven
Sorry I got a DLP not a SLA printer.
Taking good care of the printer doesn't seem much of a problem. A lot of people really seem to think that the resin is highly toxic but they clearly didn't read the safetysheet
karmic brook
@rustic adder Where are you getting your 3D model files? Which slicer are you using? After using one of the sample files from the SD card, I sliced and printed a quick simple calibration cube as a test to make sure I had a working toolchain.
rustic adder
@karmic brook The model I'm trying to print is from Thingiverse: http://www.thingiverse.com/thing:1848497 I'm using the PrusaSlicer. My first print of this model resulted in skewed layers. After some advise from others I found that the a-axis belt drive gear was not set correctly, the set screw was not seated on the flat spot. After that correction I printed Buddy from Prusa file, it was perfect. I then tried to print the thingiverse file but I would not stick to the bed after a few layers. After about 2 hours with Prusa live chat they recommended using configuration assistant to import the slicer original settings with the model. That resulted in the non-stick print.
Prusa Slice with model I wish to print. I have printed this model at my local library. They have a Luzbot and I used Cura, the model printed perfect and considering this printer is used by many and I have never seen the print bed cleaned after each print it's amazing how will it works. No were as temperamental as MK3S seems to be.
This is what I now get after Prusa's recommendations.
This is just to show that the printer does work properly when using Prusa models from SD card.
karmic brook
Yeah, sure does look like a bed adhesion problem. This looks like the PLA that comes with the printer, which shouldn't be a problem. Are you using the PEI bed or the powder coated one? What's the bed temperature?
Hmm, looks like PrusaSlicer is set up with the "generic FFF printer" settings. Did you configure the MK3S when you set up PrusaSlicer? If not, go to Configuration -> Configuration Assistant, click "Next" to get from the welcome screen, and choose at least one of the nozzles for your printer (probably the default 0.4mm one).
Once you've set that up, you should be able to select "Original Prusa i3 MK3S" as your printer on the plater page.
rustic adder
Go catch, I make that adjustment, fingers crossed. At the moment I'm getting a Bed Calibration point was not found. I get various error messages when running calibration and then seems to settle out after the forth of fifth run without me doing anything but looking at it.💩
@karmic brook Forgot to mention that I'm using the plate that is NOT powder coated. 🙃
karmic brook
May need to adjust your PINDA probe height if it's having issues with bed calibration.
Note: I've also had bed calibration issues when I forget to put the build plate back onto the bed.
That's for the best (I'd rather not print directly on the heated bed) but it makes me feel dumb.
rustic adder
Today could not get passed the bed level calib. If I lower the PINDA any lower it will be touching the bed. 😩
The PINDA seems to be working, I see it flicker as the extruder moves. And I can see the the bit changes from 0 to 1 on the LCD when I place a metal ruler under it.
forest wyvern
@rustic adder Having your PINDA that low might be the problem, I have mine set to 1.25mm higher than my nozzle. There is not a huge range on the PINDA to try to keep it precise (~1 mm if I remember correctly) so having this height set properly is so incredibly necessary. I would recommend starting with getting bed levelling passing before you keep going with anything else.
karmic brook
Did you get the "congratulations, your axes are perpendicular" message in the initial configuration check? If not, you might want to fine-tune the assembly somewhat.
rustic adder
@karmic brook @forest wyvern Well after 4 live chat rounds with Prusa it turns out I have a somewhat bad PINDA. Sometimes it would work and then it would not. That explains why I could get through the calibrations and then failures durning prints. The PINDA could not find the reference points so the extruder no longer had position feedback and then it all went wonky. So new probe on its way. Thanks for you help.
karmic brook
That's a situation I did not expect, I'm glad they were able to work with you to figure it out.
 serene laurel
happy cat noises I only placed my order last night and it shipped a little bit ago.
shrewd haven
Anyone experience with PVA as support material?
 empty sedge
All I can say is "don't let it ever sit in ambient and absorb water". Our PVA was always too soft/wet to even consider loading into the printer
the last time I had a working dual-extruder printer I did a nice ABS + HIPS print and the HIPS support I was able to remove cleanly from the ABS
rustic pine
Heyo! Y'all ever printed PETG? I just started on a roll tonight and the first layer looks a hot mess when it goes down and the brim almost never looks "good" but if I let it print the part looks good and the first layer looks clean. No problems with bed adhesion... it just doesn't look like a clean layer. :/
Maybe my magnetic bed is sucking in filament or something. It also might have been some left over white in the hotend from the PLA+ I just swapped out.
shrewd haven
Some people use 3DLAC spray or something like that but I personally have not used it @rustic pine
Do you mean 'not clean' as in contaminated or as that the shape isn't proper?
coarse ruin
there is another material that can be used for support PVB. It only desolves in alcohol not water.
rustic pine
@shrewd haven it looked like it was getting smeared. In additional research I read that I need a bigger initial gap for petg
Also what the heck
shrewd haven
Lol thats weird
karmic brook
Looks like it came loose from the build platform. I had a similar problem (scroll back to 8/20 for pictures), people suggested a brim for better anchoring, and reducing speed/acceleration so the mass away from the platform wouldn't lever the print loose. I did both, and was able to print successfully.
rustic pine
@karmic brook I had a brim but it printed wack. I'm gonna relevel the bed tonight and try what you said about reducing speed. I'll report back! 😄
 formal relic
What do you do with the support material after you remove it from the part? it is go in to the recycle bin or the trash bin?
forest wyvern
@formal relic Most 3D printer filament is not recyclable (as in PLA and PETG) unless taken to specific recycler who will take them. I don’t know of any that will take PLA as it isn’t a petroleum product. ABS is more likely to be taken if you throw it in a recycling bin, but the 3D printing industry has tried to move away from ABS recently due to environmental impact. Hope this helps.
karmic brook
It is possible (but not particularly practical, yet) to recycle PLA yourself. Might be worthwhile for a makerspace or similar group that uses a lot of PLA and isn't extremely particular about filament consistency.
 inner scroll
Recycle = ship plastic trash other countries and hope they dont refuse it.
formal relic
I'm in NY, so if you know about someone who want it for recycling or a maker space that will do something with it I will be happy to give it, I have about 1 lbs of scrap PLA
boreal wyvern
ABS will melt in acetone. So some people store it in different consistencies as a filler, a glue or paint a thin layer on their print bed for better adhesion. We save larger failed prints for patrons to test out different finishing methods, and save random strands of unused filament for plastic rivets.
shy kelp
Hi All! I've got a print with PETG and the part has a tab that's about 11mmx15xmm attached at one side to a wall, but the tab is 20mm above the build plate. My supports are not doing a great job, is there a hack or trick to improve the underside to the tabs?
karmic brook
Sometimes it's possible to re-orient the part so the tab is pointing up (instead of horizontally), or the tab is along the build plate. Other times, breaking the model into two parts that are printed separately and then assembled can help. It ought to be possible with supports, but you may have to fiddle with the support settings to get it to work well.
I've seen other approaches, like a snap-off beam at the end of the tab, so it's bridging instead of trying to extrude out into empty space. As with most engineering, creativity can pay off.
shy kelp
I can't reorient or split it up- I am trying some sacrificial parts with .2mm spacing underneath, hoping it will just break off... it's a 23 hour print so I'll follow up tomorrow 🙂
small heron
anyone her with a sewing machine that would be intrested in testing a remix I am working on?
and a 3d rinter...
karmic brook
I do have those things and I'm curious.
I've seen some clever projects 3D printing directly onto fabric.
small heron
give me a sec to re export the file @karmic brook
it's a bobbin holder, I made changes to fit the needs of the library maker lab but it's not open again for a few days and i sorta want to know it it looks good
karmic brook
Slices okay.
small heron
what did you use to slice btw ?
karmic brook
PrusaSlicer
small heron
good to know, thanks, the Library lab has cura
karmic brook
PrusaSlicer is a bit picky and will complain about various things, so the fact that it's happy implies your model is a good one.
small heron
it is a remix, sa that may help
we have an issue in the lab with haveing multiple sewing machines needing more then just the class 15 bobbin, so keeping bobins with the spools has become a thing...
karmic brook
Oh, I think I see what you're getting at. I usually have several bobbins at the ready, and keeping them with the spools is an issue for me too.
small heron
if you have a home lab it's not a big deal, but in this environment ... I am working on ting and a coded clip system
karmic brook
Trying to visualize how it works. The slots at the end look like thread could go through them, perhaps a bobbin could fit in the small loop, but I'm unsure how it holds onto a spool.
small heron
hold on a sec ill take a pic of an older one
karmic brook
Ah, thanks. I figure I'll put it on an SD card and take it to the 3D printer in a little while.
small heron
I ame hopeing that this will hold 3 bobbins
but 2 will be good as well
btw as a heads up this one is also ment for some bigger spools then the one shown
karmic brook
Is the purple printed piece a separate one?
karmic brook
Looks like it would work without it, but I wasn't sure
small heron
handy thing that keeps things tidy.
yeah, I should have taken it off for the pic, sorry.
karmic brook
It's all good: the picture shows the intended use clearly, I was just curious.
formal relic
@small heron Yes I have sewing machine! But I'm not next to the printer, I love your idea!
small heron
it's a remix on another, depending on your needs you may want to look at the smaller ones first.
violet needleBOT
Adafruit Industries posted 3D Hangout – Monster Goggles and Ghosts

This week’s #3DPrinting project on Adafruit Learning System - Monster Mask Wearable Case https://learn.adafruit.com/monster-mask-case/ https://www.youtube.co...
formal relic
@small heron what material to use? and how much infill?
small heron
I have access to ABS, PLa, PETG and Ngen, so any of those will work, as for infill I have been useing 10-15 for the old ver so that should be fine
formal relic
COOL!
small heron
as so as I have some confirmations, I'll add the remix to thingiverse, @formal relic iyf you only have one machine and only use the spool in the pic I would reomend the original
I can link you if you like
formal relic
how you did the quot??
small heron
?
formal relic
your reply here was with a quot of my message
formal relic
 small heron
that's a mention
not a quote
any time someone says your name in discord it will be highlighted so you can see it.
formal relic
I'm more of a Whatsapp user then discord
small heron
anyway, if you want the links to the originals let me know, I am about to head out.
formal relic
@small heron. Yes it is soo cool
small heron
https://www.thingiverse.com/thing:2797743
https://www.thingiverse.com/thing:1066342
I use both and have been modding both for use in the local makerspace

The original bobbin holder by pitracer did not hold very well the larger spools of thread which had a larger hole. This design is thinner and has a larger separation at the ends. Printing in PETG works very well. PLA works but it has some memory and will deform to a smaller...
This gadget holds a threaded bobbin to the matching spools of thread.
if the tips curl up try the model with the dots on the ends. Happy Making!!
Both are good, we just have some oddly specific needs that most people don't have
karmic brook
Alas, I had forgotten that the bobbins for my usual machine (a Touch and Sew) has bobbins without through holes, so I'd need a different sort of keeper to keep them with the spools.
ornate raven
I just experienced my first (I'm nine months into 3D printing) "Spaghetti" during a print. I suspect a bad spot in the filament. I was 2/3 way through the Mask Glasses Top when things went sour. I was watching the Hackchat and heard something behind me screeching. It was filament sucking into my fan. 😦
karmic brook
Yow! I had a print fail 3/4 of the way through when the filament stopped feeding. The nozzle was still moving around, but it wasn't doing anything productive.
formal relic
@small heron sorry I didn't reply, I was driving.
I will try to print it when I will be home.
I have an embroidery machining, so it must become useful 
ornate raven
Replaced Nozzle, replaced Bowden Tube. Win10 updated and wouldn't recognize my mouse and keyboard (Logitech Unifying)...Prints won't level and stick... Yep, it's 9-11.
small heron
It is, chose the right holder for your needs @formal relic
ornate raven
YeeHaa, Brim goin down and looking great.😂
ornate raven
Went south at the same location. Gcode has it just suddenly start printing out in thin air....
One more try tonight, gonna use my settings and see what happens.
hidden sable
@ornate raven you may want to try a different reel of filament - I've had that suddenly start happening and messed around for ages until realising that the filament had gone bad
shy kelp
I did indeed change filament after another bad segment went through. Unfortunately, it appears that my nozzle is clogged again.
ornate raven
Not nozzle. Worn gear on extruder. The bad filament may have had some carbon in it. Looks like some big chunks of blab embedded in the red. I know one got caught at the extruder for a few seconds. Anyway, changed gears, leveled and cleaned bed. Ran a test code. Beds a little tight but, I'm taking another shot at it.
😦
That didn't go well. First layer was so tight I can see through the black filament.
Bed musta been cooling while I was leveling. I have layer height set at .16 so I usually set level at .13. Been working for months that way.
karmic brook
This sort of engineering is just part of 3D printing. Seems like you're on top of it, however, just working the problem.
karmic brook
Time for acetone and a brush?
ornate raven
Acetone is a solvent. Bad for my bed (and other plastics that aren't filament) so I use Isopropyl Alcohol. And a brush.
I worked in polymers for 27 years and I'm no expert but, I learned a few things. One being that solvents aren't just bad for our health, they'er bad for plastics.
and so is carbon. which is what burnt plastics turn into and clog very fine pours, like nozzles.
karmic brook
I didn't mean for the bed, I meant for the brass gear, which shouldn't be harmed by acetone.
ornate raven
I understood. I guess what I was saying is that I don't keep acetone or Nail Polish remover around the house. And, the gear doesn't reflect it in the pic very well but it has flat spots on several adjacent teeth.
and the rest are rounded off in a groove.
formal relic
what kind of UPS do I need for 3d printer?
karmic brook
Nothing special, really. Just enough capacity to support the max power draw of the printer (probably 200 watts or so, max, but you can look on the nameplate of the printer or its power supply to check), and enough battery+runtime for as long as you want the UPS to keep it running.
formal relic
we have here almost once a month a few seconds of power outage
I'm using arduino with integrated rams board
so.. I don't think it is possible to stop and resume the print
karmic brook
Ah, just short dropouts: even the little UPS units built into a power strip should work for that.
formal relic
it is need to be a pure sine wave?
ornate raven
Well the Mask Top is printed. Worst first layer I have ever seen that I actually let finish printing. But, It's done and I'm on to next piece.
karmic brook
Most 3D printers aren't picky at all about their input power, so the modified sine or even square wave UPS units should be fine.
spiral laurel
I don't think a "Pure Sine Wave" unit will gain you anything for a 3d Printer, because you're just immediately converting it back to DC through all sorts of filtering capacitors and regulators in the power supply
vagrant drum
anyone been saving there filament waste and find something artistic/useful to do with it?
i have a small trash can's worth and am trying to come up with ideas
i saw a guide online where someone shredded their left overs, added some resin, and turned it into a tile
formal relic
I have alot of waste filament
ornate raven
I save all mine. Different colors to different bags. No idea what to do with it yet.
formal relic
And there is some filament recycling machines, but you need to shred it first
Maybe we need buy a machine like that and make cheap filament for test prints
karmic brook
A shredder would be easy enough to home build. An filament extruder seems like a more difficult proposition.
formal relic
@karmic brook "easy enough"??
karmic brook
The sort of thing I could imagine one or two people to be able to design and build in a week or two, assuming at least one of them has some experience doing that kind of thing.
I'm imagining something like a rotary cheese grater chucked into a drill, or something like that.
formal relic
in my case the problem is with prototyping, that I have V1 V2 V3 V...N until I'm at the point that I have functional assembly
so all those test a pure waste
karmic brook
When I'm building something, I assume it's not going to work the first try. However, I usually manage to recycle most of the build into the next version. Even when I have to discard a build entirely, I don't consider it a waste, as I learned something and I probably used recycled parts to build it in the first place.
However, it's a rare thing when I have to discard a build entirely: usually I'll just take it apart and keep whatever parts look like something I can re-use.
formal relic
how can you recycle complete 3d print assembly?
the moving parts are locked in the 3d print
karmic brook
Oh, I misunderstood: I thought you were thinking of multiple versions of a home-built plastic shredder!
formal relic
no no
karmic brook
Yeah, failed prints would go into the shredder (if I had one). Yeah, I understand the annoyance of having to discard failed prints.
formal relic
some time I'm print something just to test it for 10 sec, and it is a fail
karmic brook
Since I don't have a shredder, I have the same problem as everybody else: what to do with unused plastic. At least PLA is biodegradable, but I've been known to hack chunks off failed prints to use for various other purposes.
ornate raven
I spent27 years in the plastic business. Shredding, extruding, stretching, recycling, transporting... I was in Plant Engineering for a Box Sealing Tape manufacturer. I can't see it being very economical to one person to recycle. You could do it. No doubt about it. Need more horsepower than a cheese grater and a drill. Extruding the filament involves tension control and winding assy. I've thought it over a few times. Might be better if we al coopted a system whereby someone builds and operates and we supply material and a fee for recycled filament.
 vast girder

A contest to design a machine to produce low-cost filament for 3D printing has been won -- by a Washington State retiree.

The LYMAN FILAMENT EXTRUDER II is a redesign or the original LYMAN FILAMENT EXTRUDER. It features less wood parts and more steel parts, as well as other material changes. The BOM includes quotations of custom parts from emachineshop.com. It is designed for resubmittion to DFC...
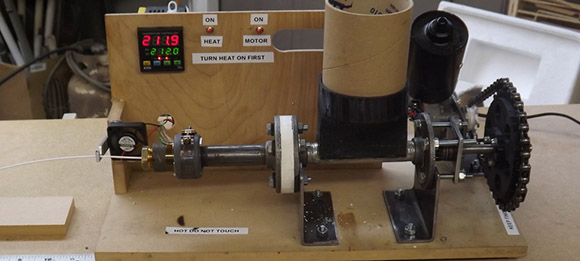
If there’s one problem with the RepRap, it’s the cost of filament. Sure, there’s also the computationally difficult problem of slicing 3D models, but a 5 to 10 times markup on tur…
formal relic
I need ice 3d printer
 unique ravine
Hopefully an easy question - I just upgraded/replaced my Bowden tube. What do I need to recalibrate? Retraction is a no-brainer but should I need to do the extruder too?
ornate raven
@vast girder , any idea how much it cost to make and operate that system. I saw the article some time back when I first thought about 3d printing. The author is making some assumptions that are based on now 6-7 year old information.
25kg is a LOT of film (25 spools) /pellets.
vast girder
@ornate raven All I know is what's in those articles. I was surprised that they were from 2013, amazed that I was even able to find them 6 years later.
He won a $40,000 prize for the machine and had to re-engineer some of it to get under the $250 limit on parts cost that was part of the competition, so that tells you something. You might be able to cheapen the control eletronics some now.
ornate raven
And that's just the extrusion unit.
We're talking recycled material so we also need a grinder.
and a winding system
they're out there but... how cheap. There's also cost of electricity.
That extruder needs a coolant system too. Grinding plastic creates heat. It may need a heater for some times and a cooler at other times.
vast girder
@ornate raven Your area of expertise... I just pass along helpful links. 😉
ornate raven
@vast girder , yes you do. I'm just pointing out the other obsticles. (sp)
I gotta break off for a bit but, I'd love to continue this exploratory effort.
vast girder
@ornate raven Yeah, it'd be interesting to pick up later. Seems like the kind of thing that might happen, if it happens, because some people just want to do it. I don't expect that it would ever be economical for someone who uses a pound of filament a year, but there must be a break-even point somewhere, and some adventurous folks to get it started who are about the challenge more than the cost/benefit.
formal relic
I can sell you all my fail prints
it is about 2kg
I must go ( to get a UPS for my printer) and also other cool stuff.
vast girder
@formal relic 😁 This came up during the biodiesel boom about 10 years ago. Should restaurants sell their waste vegetable oil as a valuable raw material, or should they be paying you to take away their waste? It isn't obvious and it totally depends on supply and demand.
ornate raven
Hey Noe and Pedro, Finally finished this.
Had to wait two weeks for 3 screws for T nuts. Uses a roll of nickles.
Using a soldering Iron I've had for 30+ years. Thanks for the inspiration and plans.
formal relic
@ornate raven why did you hang the poor soldering iron like that?
ornate raven
It's a heat press for setting brass nuts in plastic.
vagrant drum
any prusa mmu power users out there?
i am wondering if there is a setting to improve perimeter adhesion
notice the gap between the yellow and pink
the whole mask is only 1mm thick and while i could probably perform some extrusion techniques to have the layers overlap i am wondering if anyone has encountered a setting in prusa slicer that would do the trick
formal relic
@ornate raven cool idea!
ornate raven
@formal relic , thanks but not my idea. Just my implementation of one in the Adafruit Learn Guides that the Ruiz brothers put together.
If you haven't already, you need to check out their Wednesday 11 am (EST) showson Youtube.
They are absolutely awesome and my inspiration for 3D printing.
formal relic
I know about ultrasonic press, but to do it with a soldering iron.. my iron is too expensive for that
ornate raven
@formal relic , I have several very old ones (50 years of accumulated stuff) and this one heats the hottest and fastest.
formal relic
do a restoration to it
ornate raven
I had been doing the nuts by hand but, after a beer or ten it gets kinda hit n miss. So, I decided to build the press. I had to wait weeks for three screws for the T nuts and I had to mod the clamp to fit my narrowing handle but I'm pretty proud of the way it came out.
Restore the iron? Wouldn't be much of video. Four screws (three to hold element to handle and one to hold tip in element. Actually everything is in pretty good shape.
Besides, I don't do vids well. I was a trainer for engineering and did a lot of presentations but how-to vids just weren't my sweet spot as a trainer.
I'm more of a Powerpoint animator type.
violet needleBOT
Adafruit Industries posted Fusion 360 Tutorial – Glasses Frame
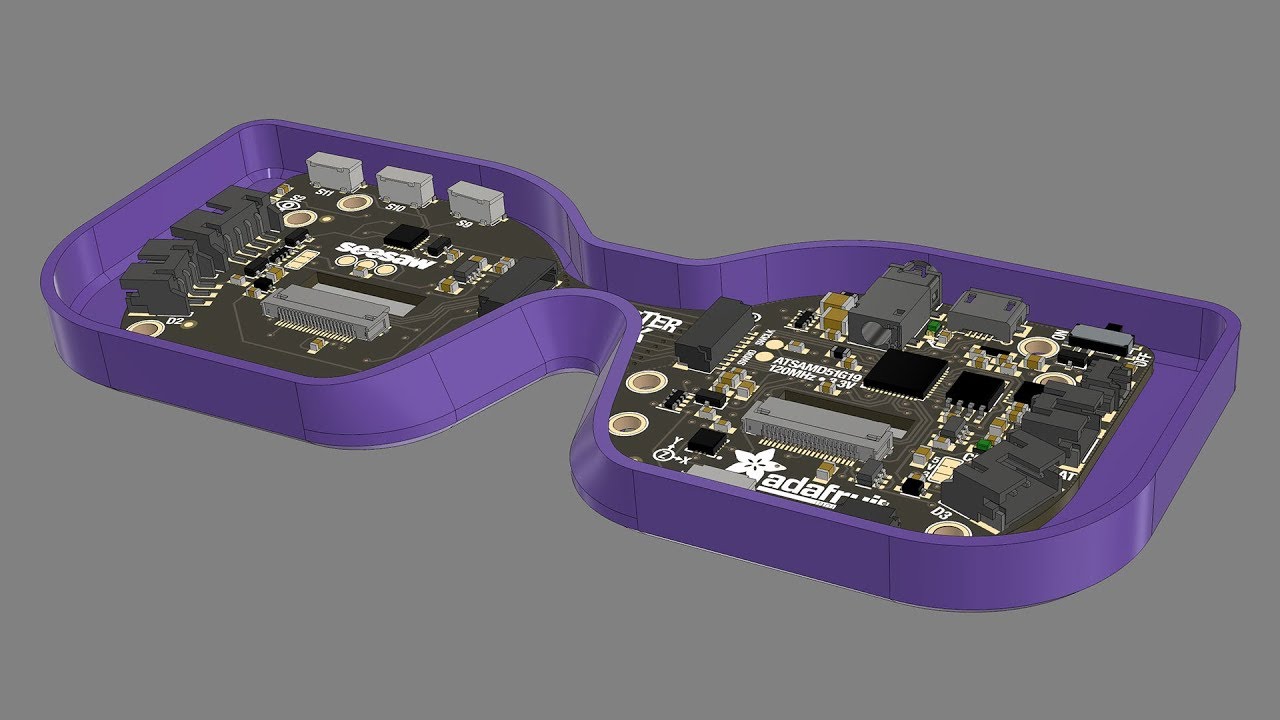
In this tutorial we'll take a look at creating a frame for glasses or the Adafruit Monster M4SK. I use the loft featuring to seamlessly blend two surfaces to...
violet needleBOT
Adafruit Industries posted adafruit live

Live from John Park's workshop: GIF Candy Bucket with MONSTER M4SK MakeCode Minute Game of the Week much more! Multistreaming with https://restream.io/ -----...
devout pewter
@vagrant drum I'm an MMU2S user (not sure if you're using the original MMU), but I haven't seen a setting like you describe unless you are talking about scaling, nor have I had any issues like that. How are you adding the model parts together? Are you loading the base model, right clicking and choosing add part? Is it possible the gap is in the model?
vagrant drum
@devout pewter the parts are all the same height and I'm wondering if that is part of the issue - there is no true 'base'.
but i am loading the face first and then right-clicking it and selecting add part-load. the issu only becomes apparent when i try to heat the mask and add a curve.
devout pewter
@vagrant drum, Ok, that makes more sense. It sounds like it’s a layer adhesion issue between different filaments. Are the the same material and brand? If so, maybe change your part cooling fan setting.
vagrant drum
@devout pewter they are the same material and brand - matterhackers build pla. i'll take another look and see if i can make some changes
it almost looks like it has something to do with both parts having a perimeter, but nothing connects the perimeter. on a single part the infill on the first layer wil overlap, just slightly, the perimeter. but with the mmu and multiple parts it there is no overlap between the two perimeter parts. so they just abut each other but dont overlap.
 hazy vine
I am making a smart watch from a gameduino and esp32. I was wondering if anyone here could help me design a 3d printer case
ornate raven
@hazy vine , Tinkercad is free and online. There are YT tutorials and Tinkercad tutorials. Good luck with your project.
karmic brook
While I'd consider collaborating on a 3D printed case project, it might be a lot of effort to work with me, since my tool of choice is OpenScad, which is the opposite of user friendly.
hazy vine
I want to steal away fron tinkercard as I am a student and have Autodesk inventor
And @karmic brook I don’t mind, we can make it work, as long as it can somehow export to gcode 😛
karmic brook
OpenScad exports STL, which I then feed to a slicer to get GCode.
empty sedge
Has anyone here familiar with the calibration routines of "Original Prusa i3" firmware? I have a half i3 MK2.5S half wilson running on Einsy that isn't making it through the XYZ calibration
karmic brook
Where is it getting hung up? I had an issue with mine with a message I wasn't sure about for a while, but it turned out I needed to manually crank up the Z axis beforehand.
empty sedge
the XYZ calibration drives Z to the top of travel and crashes there, then goes back down and tries to spiral down around the first of four calibration points on the bed. It eventually finds it, then rasters across it, and says it didn't find it successfully
it looks like it expects to find 66 points where the probe is triggered out of a 32x32 grid but only finds 16-24
my printer has 0.8mm/turn screws for Z so maybe it just doesn't step down in large enough increments to get enough probe trigger points?
karmic brook
Which probe are you using?
empty sedge
the pidna probe from the i3 mk2.5s upgrade kit
karmic brook
Do you have a build surface installed?
empty sedge
no, for the XYZ calibration you remove the steel sheet. I do have the 12V version of the fancy heated bed which seems to have the same calibration points, but 6 mounting points to Y carriage instead of the MK3 bed 9 mounting studs
karmic brook
Weird, I thought the Pinda probe depended on the steel sheet (it's looking for something ferrous)
empty sedge

Do not use acetone on powder-coated sheets! (10:16 is just for the smooth PEI sheet) A new video guide for our printer Prusa i3 MK3 on our YouTube channel! A...
empty sedge
Eh, skipped the XYZ calibration and I'm printing now.
violet needleBOT
Adafruit Industries posted Fusion 360 Tutorial – Twisty Unicorn Horns!

Howdy folks! I finally came up with a nice workflow for creating twisty unicorn horns in Fusion 360. It's smooth, shelled and fully parametric so it's easy t...
formal relic
Is there any alternative to MPCNC?
https://www.youtube.com/watch?v=68ohaPYyiDA

My MPCNC build is coming to an end over a copyright dispute. Twitter thread: https://twitter.com/toms3dp/status/1170306400716804099 💙 Enjoying the videos? Su...
violet needleBOT
Adafruit Industries posted 3D Hangouts – Antenna Eyes and Glowy Cauldrons

Multistreaming with https://restream.io/ This week’s #3DPrinting project on Adafruit Learning System - Antenna Eyes https://learn.adafruit.com/antenna-eyes h...
unique ravine
I'm (hopefully) printing the CircuitPlayground Express case and realized late that it was listed as being designed by Adafruit. Any chance there's a central repo for their models I'm overlooking?
ornate raven
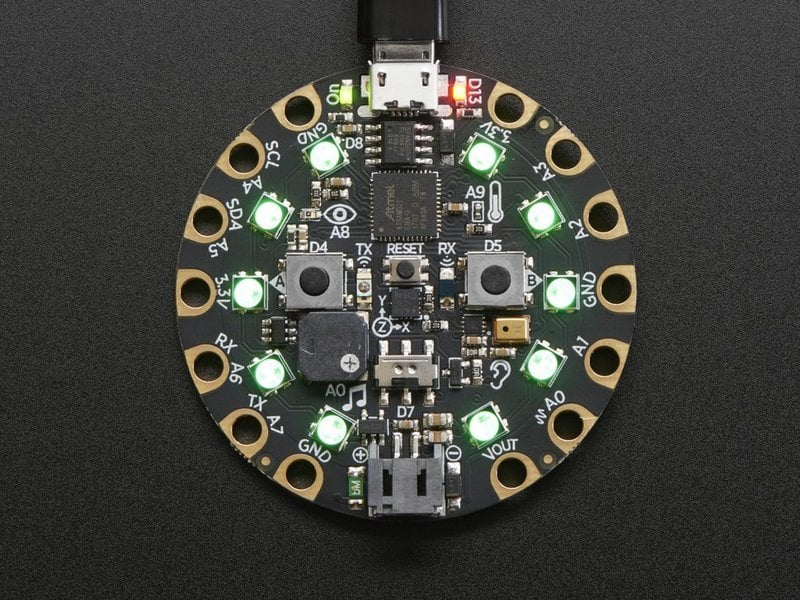
Adafruit Learning System
Make faster and easier than ever with MakeCode, code.org CSD, CircuitPython or Arduino!
unique ravine
I don't see 3d printing files at that link, am I overlooking something?
 wild gate
I am trying to make a light diffuser for a Neopixel matrix I made. I created in Fusion360 a single pixel diffuser. It’s an open square 33mm x 33mm x 20mm tall. One end has a circle cut out. My thought was to 3D print and glue each box together into a 12x20 grid. Then the grid could be laid on the matrix either side squares or circles. Then end goal is for the matrix to be used with Multi-Disabled students. So, 240 boxes is an unreasonable amount of printing/cost/time. So, my question is what other options could I pursue? It was suggested that I try silicone mold making, but with this part not being solid I’m not sure that would be the best option. Any thoughts from the community would be appreciated.
karmic brook
At that quantity, it might make sense to get them injection molded. It used to be you needed hundreds of thousands of units to amortize having the molds built, but for simple pieces like that, it might be worth looking in to (especially if you ended up needing larger quantities).
I've been looking around for a different but similar sort of project and found places like https://midwestmold.com/low-volume-prototype-plastic-parts-2/

Midwest Mold is a low volume plastic part supplier & 3D rapid prototyping. Custom aluminum injection molds provide low cost value added short run manufacturing.
wild gate
@karmic brook Thanks, I’ll check them out.
shy kelp
@unique ravine , my bad. I saw the question about CAD files and assumed the Eaglecad was what you were looking for. I my self can't do it but some people use the EC drawings as parameters for 3d drawings.
unique ravine
@shy kelp All good, I'm not against making my own, it just wasn't where I'm at right now. Thanks!
 west bolt
Sorry if this question is asked many times a day, but I am looking for a 3D printer up to £250ish that is ideal for getting into 3D printing. Doesn't need to be too large, and I don't care if it needs a lot of hands-on when it comes to building it. I am not too worried about how good the quality is, I guess enough detail to print a Space Shuttle stack the size of a glass with minimal details
karmic brook
The Monoprice Mini Delta takes some tweaking and has a 110mm diameter cylindrical build volume, and it's inexpensive.
west bolt
that looks perfect actually.
Thank you very much 😄 will probably get it in a few months once i have settled into my new place.
boreal wyvern
@wild gate Another option (since they are so small) might be to talk to a local jeweler who does vulcanized rubber molds and hand-injecting/casting the rubber molds yourself with something like Alumilite. The vulcanized molds will hold up a lot better than RTV silicone molds.
wild gate
@boreal wyvern Thanks for the suggestion. I’ll look into it.
empty sedge
huh, the https://github.com/prusa3d/Prusa-Firmware doesn't have build instructions for pi
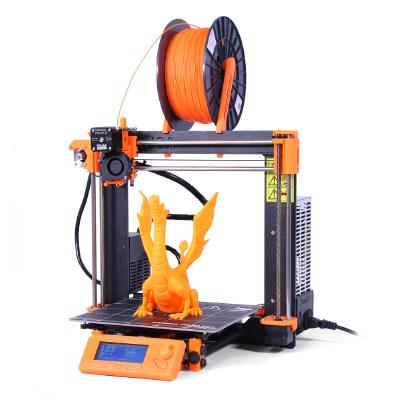
GitHub
Firmware for Original Prusa i3 3D printer by PrusaResearch - prusa3d/Prusa-Firmware
spiral laurel
Linux, right there at the top. You generally don't want to be compiling stuff on a Pi if you can help it. On a 3 or 4 with a good SD card it's probably ok, but on a zero? That's an exercise in patience
empty sedge
the linux instructions are for x86-64 only
I'm on a pi 3B and thought it might be easier to have octoprint and the ability to compile new firmware on the same pi
I've run into a couple issues with the MK3 firmware on my not-quite-MK3 machine
spiral laurel
that's lame that it downloads a random giant tarball from github to do all the work building.
Arduino provides arm64 builds though, so you should be able to use that with the Windows directions
empty sedge
yeah, I'm currently starting arduino 1.8.5 over x forwarding. it's not ideal
spiral laurel
once you get it setup you can probably steal the actual compile file from the build.sh for future rebuilds
empty sedge
the arduino approach works. I'm waiting for a print to finish to try uploading the firmware
empty sedge
how do I tell which direction to adjust my bed temp when PLA isn't staying down during prints? parts are lifting at the corners and popping off
empty sedge
tried lower by 3C, worse. trying warmer by 3C: better so far