#help-with-3dprinting
1 messages · Page 28 of 1
 sonic hollow
a 3.3mm hole turns out to be a snug but smooth fit on an M3 shaft, and I did some 20mm slip fit rings that were happy about there too.
...for my machine, that day.
 modest elk
It really depends on the tolerance of the machine, how tight you want the fit, and the geometry of the parts
sonic hollow
if they're small features, print a test coupon
 glossy knoll
it also depends on the type of filament that you're using
modest elk
true
 boreal lava
There's loads of variables. I'm curious @sonic hollow and @glossy knoll , what layer height are you printing at?
glossy knoll
0.19mm
boreal lava
Oh wow.
modest elk
What do you use @boreal lava
sonic hollow
I'm traveling, can't say today 😦
modest elk
I like faster prints and actually enjoy the look of the layer lines so I use .28 on a .4 nozzle
boreal lava
@modest elk at larger layer heights you have wider layers, and therefore a larger margin for error given extrusion abnormalities (blobbing, speed, overextrusion, etc)
At the moment I am using about .3 mm. I have gone down to .1ish, but am curous what other people see as acceptable
modest elk
My printers are dialed in fairly well so I don't see that many errors, you would be surprised how well good drivers help
What size nozzle do you use
boreal lava
I have several sizes. At the moment I have a .5mm nozzle on because I am printing structural parts. I also have .3, .1, and.4 nozzles I use for different things. I was just looking to get a general idea of tolerances people epect
*expect
modest elk
To be clear you are talking about tolerances or clearances
boreal lava
Thank you @sonic hollow and @glossy knoll . For the record, I am more towards the .3 side of things, but am looking at setting up a customizable part on thingiverse, so it's nice to know what people experience.
glossy knoll
nice to know you, too
boreal lava
Knowing what other people experience is good for setting up a good part
@modest elk I dunno. Maybe I used the wrong words. I'm just curious what sort of adjustments people add to their prints when creating slotted parts.
modest elk
idk, in from my experience there are just way to many variables. I am a firm believer in just starting with .5mm (or any value +-.2mm from that) and reprinting based on how it works out
 brittle glacier
I just rebuilt the hot-end on a MP Delta Mini and I'm still not sure how it's actually put together. The coupling is held in with a set screw. I think I'm missing a short bit of teflon tube in the heater block. I'm pretty sure I'm going to end up using it for parts. It's kind of a shame because when the crappy firmware works the light print head and small volume produce some really clean prints.
 karmic brook
The Monoprice Mini Delta is a rebranded Malyan, which might help, but if you can stomach using Facebook, there's a very active MPMD group there with knowledgable people who are willing to answer questions and help out. https://www.facebook.com/groups/mpminideltaowners
 coarse ruin
i'm using cura because 1) i produces reasonably good results, 2) it works with all my printers (6+ different types), 3) i can teach it for the makerspace, 4) reasonable GUI that can be customized.
Last time i checked slic3r failed at 1), 2) and 4)
 south kernel
Has anyone in the adafruit community used the palette multi material attachment (maybe with a prusa mk2ish)? I just learned about it and would love to head a personal opinion.
 crude kettle
Based on what i hear is to stick with martirals that has simular temperature values.
Also what to share my sweet success. Drv8825 are a bit tricky on repitier
 shy kelp
@crude kettle are you going to solder a jumper to get rod of the salmon skin effect drv’s produce?
crude kettle
A jumper? Hmm I many need to check on some forms or documentations for that soon. I've just gotten them moving right without issues. There was a delay time that needed to be adjusted.
@shy kelp
shy kelp
usually DRV drivers have their decay phase set to slow or auto
My prints seem to be getting squashed the taller they get. Ender 3 Pro, Cura.
this produces salmon skin
or vertical lines
crude kettle
@shy kelp any documentation you know of I could reference from? I don't want to screw it up.
shy kelp
also... repitier? thats quite old
look at the datasheet
one of the pins should be to set the decay phase
crude kettle
The repitier 1.0.3 is what I've using. Is there another firmware that I could use?
shy kelp
pin 19
klipper has recently become popular in diy, but most still stick with marlin
about the drv8825 jumper thing, you can just solder a jumper. the pin is open (auto mode)
shy kelp
yeah
crude kettle
I've heard online that this varies due to different versions of drv8825. Then again seller would say anything to liquidate.
shy kelp
i dont see how other than chip orientation
crude kettle
I mean the need for the jumper
either it does need it or doesn't
alsp Klipper does not seem to have support for radds
red mean does not exist
support wise
shy kelp
klipper can support nearly any board
crude kettle
hmm
shy kelp
radds uses a due, right
crude kettle
right
shy kelp
so youll need to build your own config
the due is supported
therefore the radds is, you just need to build your config
which is just specifying the pins youre using
crude kettle
maybe no one made a page for RADDS yet.
shy kelp
yeah no example config by the looks of it
crude kettle
I'll give it a try if Repitier fails me. It's not too old compared to the last marlin32.
shy kelp

GitHub
Klipper is a 3d-printer firmware. Contribute to KevinOConnor/klipper development by creating an account on GitHub.
crude kettle
ohh, bookmarked
shy kelp
Arduino Due (SAM3X8E) fastest: 438K with 3 steppers active: 438K
these are the step rates
yeh marlin2 is the newest project
crude kettle
looks like it's still under development
shy kelp
it is
crude kettle
Going to give it a try once it is out for sure.
shy kelp
in the general 3dp discord, theres a literal marlin dev there
crude kettle
Sounds good, thanks for the suggestion and topic to look over.
shy kelp
Alright, guys, so I'm trying to print something on my new Sindoh
And I want to preserve as much material as I can
So I'm thinking there are advanced options for controlling the infill of the parts I print
Does anything ring a bell?
karmic brook
I'd guess "Infill density", but I use a different tool.
karmic brook
Going fairly well out here. I finally got the last parts I needed to upgrade the bed on my 3D printer and I'm looking forward to trying it.
shy kelp
Sounds nice
So, I watched my printer making something in a test, and it had a checker-looking pattern that was pretty tightly packed...it was mesmerizing to watch
Like, inside of the part
I imagine the "Infill" menu edits that, but what should I care about?
boreal lava
I would guess infill density as well, but really have no idea with that software. Did it come with a manual?
sweet @karmic brook What's your plan? I have some 2020 extrusion coming tomorrow to build out a second 3d printer frame.
karmic brook
Cool! I'm modifying binder clip handles into hold-down arms.
 valid crow
I kind of want to get the ender 3 but idk what I'd do with it.
Like is it worth the money and if so what are some good uses for it?
If you have any ideas dm/ping me.
boreal lava
@valid crow I hear good things about that printer. I would say it depends on your finances, interests, and goals as to whether or not it would be worth it. You'll be able to print a lot of neat things with it, and if you are willing to put in some time to learn to design your own parts, you can make things that solve numerous problems around the house.
It's always fun to see a need, sit down and design a part to meet that need, and print it out.
I assume since you are on this discord, you are at least a bit curious about electronics. A 3d printer can really come in handy when you need a part for a specific project that may not be available anywhere else.
 deft cave
this needs supports right?
 proven musk
Possibly not, it is pretty upright turn on support, slice it and check the preview to see what support is generated
All those thin bits might be tricky though but you never know till you try
brittle glacier
It's good to know what overhang angle your printer can handle. Then you can set that in your slicer and add supports only where needed. 50 degrees is the default in Cura I think and a good place to start.
shy kelp
Or do a torture test
Despite what some may say, it's ok to have your duct blow on the nozzle a bit
You just need to minimize the amount of large angles
 violet needleBOT
Adafruit Industries posted 3D Hangouts – PyPortal Wall

This week’s #3DPrinting project on Adafruit Learning System https://learn.adafruit.com/pyportal-wall-mount/ CircuitPython Downloads: https://circuitpython.or...
 bold geyser
New monoprice mini printer MP10 - $300.
Heated bed, 200x200x180 build area

Monoprice.com
The MP10 Mini is a feature rich 3D printer with a 200x200 heated, flexible, and removable steel spring build plate, and an all metal extruder. It has an assisted level sensor on its magnetic extruder assembly, allowing easy changes to the Z offset in the menu for easy and per...
violet needleBOT
Adafruit Industries posted 3D Hangouts – PyPortal Wall

Multistreaming with https://restream.io/ This week’s #3DPrinting project on Adafruit Learning System https://learn.adafruit.com/pyportal-wall-mount/ CircuitP...
shy kelp
@bold geyser how does it compare to an ender 3 or a maker ultimate?
bold geyser
Ender 3 on sale now for $195 Wow.
Maker ultimate is $480 and has 20 micron prints. MP10 goes to 50 micron only.
Ender 3 is 100 micron ?
proven musk
Hear hear. It’s way overrated. I rarely print below 150
Below 100 other things will mess it up for almost all sanely priced printers and the print will take forever
The magnetic attached extruder is an off feature
Odd
proven musk
I need someone to talk me down from buying a Prusa SL1
karmic brook
I'm eyeing a Prusa, but talked myself down by opening up my existing printer and making a few mods.
valid crow
Should I buy an ender 3? I kind if want one I just have no idea what I would print with it
karmic brook
It's an attractive price. My thinking was I'd start with an inexpensive printer to see what I liked and didn't like and then consider upgrading if I found I liked it and was using it (and had a better idea as to what features I want). I ended up starting with a MonoPrice Mini Delta ($127 on sale).
valid crow
Is that a good printer?
proven musk
the biggest advantage, IMO, of the ender 3 is the large community using it. I've not used one but the amount of users using, modding and tuning it is amazing
but be warned (or be excited!) 3d printers in the this class are a project 😃
valid crow
Like how just modifying it with 3d parts?
proven musk
tweaks, new parts, improvements. Most not 3d-printed. But it seems to do a decent job out of the box.
but most printers like this are not turnkey, you'll need to do lots of learning and work
which is good fun IMO
valid crow
Hm should u buy a mini pre build printer as my first printer or the ender 3?
karmic brook
I'm not sure which one you're asking about. The Mini Delta is like most inexpensive printers, it needs some knowledge and tweaking before it will work reliably, but there's a good community with hints, files, and dialog to help. After some basic tweaking, mine works reasonably well (I just upgraded the bed clips, which I'm expecting will help with first layer thickness issues).
I don't have an opinion on the Ender 3, but comparing what Paul said with my experiences with the Mini Delta, it seems like a good bet for a low-end printer.
shy kelp
@proven musk it's overpriced and gets the same quality as an anycubic photon
@valid crow cheap deltas are often not a good idea
valid crow
So ender 3 it is.
proven musk
@shy kelp Interesting machine. Might be a good machine to experiment in SLA
bold geyser
I started with a lulz mini someone let me borrow. Even that took lots of tweaking with cura settings. Seems like dual rails on bed is good for MP10
proven musk
Though, I'm in the getting prints stage more then the adjusting machine stage, the SL1 looks pretty turnkey with all its autocalibration stuff. Hmm, still, the price difference is not insignificant.
valid crow
Yeah but it wont ship for atleast a month on gearbest.
boreal lava
A buddy of mine just got an ender 3 and has had no problems. He's getting some nice prints.
He just took his time assembling it to make sure everything was nice and square at each step
valid crow
Okay.
shy kelp
I have Ender 3 Pro. Good printer. Never done flexible stuff. I could do some modifications to it but, I'd rather just get another printer for flexible stuff. Every time you make adjustments to accommodate a different material I believe you are compromising. I am tinkering with my E3P but they are mostly cosmetic tinkering. I did replace the plastic extruder with an all metal one and replace the stock Bowden tube. I think both made improvement to my print quality.
bold geyser
@valid crow where are you getting yours from then?
valid crow
Amazon
 molten shoal
What's the best beginner 3D printer that's cheap?
 pastel flume
Today I received my Creality CR-10s pro, shich will be to expensive for you. I own a smaller one, which is very good:
bold geyser
i cant seem to figure out if the ender works with flexible filament. does cr-10s pro work with more filament types?
shy kelp
My understanding is that a direct drive hot end is better for the flexible stuff. Not impossible on Bowden feeds but they need modification to the hot end
proven musk
It is a Bowden drive. It should work with some mucking around with moderately flexible ones like TPU 95 (like Cheetah) Very flexible filaments with hardness in the 40 range will be very difficult I think. In between you mileage will vary. Note most highly flexible filaments give kind of messy results even on a direct drive. 95 hardness will be enough flex for many gaskets or basic shock absorbing but if your primary use case is flexible filaments you should probably buy direct drive with an extruder with a very constrained path.
Highly flexible here is like rubber
bold geyser
thanks - that is very helpful
shy kelp
@shy kelp to an extent. In general, DD has an easier time with flexibles, but it has more to do with your extruder assembly than anything else
A decent geared dual drive bowden with a good filament path can print flex just fine. Flexion can do flexibles best, but it's more meant for dedicating an entire machine to flex due to its poor ability to print other filaments
bold geyser
Yea I found a YouTube video where they got good results on the ender 3 with flexible using a thingiverse filament adapter on the extruder
proven musk
I'll just point out "flexible" covers a lot of ground. The most common flexible is TPU 95, which prints just fine on most bowdens if the extruder and hotend are setup well.
Mind you, a roll of hytrel shore hardness 40 is almost 1/2 the cost of an ender 3 ($85/kg, but it seems very dense so that isn't a lot of filament), so might be worth customizing for (I can't imagine what a PITA that is to print ... NinjaFlex can be a bit of a PITA, and it is 85)
boreal lava
Hey folks. Not sure if this goes better here or in help with projects, but I am drawing up the plans for my 3d printer now. I have a pretty good idea of what I want to do. It will be a box frame with a sliding bed basically. I have all the parts to finish it (except two bearings), but can't decide on a size.
I have a 220x220 heated bed to install, so that would be the minimum. I would like to eventually go up to about 300x300 though. At the moment I have everything designed to build at 400x400mm inside diameter. It looks like I can fit everything in, but I could also go 500x500 to leave more clearance. I keep waffling back and forth I like the idea of 400, but would the extra 50mm around the bed on the 500 make that much difference? Anyone have experience or opinions on this?
proven musk
Everything is aggravated by size. The bed is heavier and less flat. The rods flex more and sag more. Belts stretch more. Etc. printers tend to be smaller because they work better. Also print times go stratospheric on big sizes. All that said, make it the size you want to. OTOH it doesn’t have to be your last printer.....
boreal lava
Thanks. It will be my second, so it's really just for the experience. I'll be printing parts from that one. I have 12mm rods for the bed, and 1m t slot (x10) to cut down for the build. Hopefully that shpuld reduce sag a bit. The size is the sticky part lol.
proven musk
If I was to build a ... 3rd or 4th printer, I'd say go for something different. like a core-xy printer. They are interesting because in a bowden type set-up they can hit high speeds, with very little moving mass. Though the ultimaker style can do that too. I think these are better designs (though core-xy has really long belts) for big printers since they avoid massive moving mass of of a big bed.
boreal lava
I was thinking about corexy. I may convert this second one to that eventually. Thay's why I am starting with the box frame. They are interesting printers.
proven musk
I'm looking at my next build being a corexy cnc ....
https://www.youtube.com/watch?v=dmm16oOhpKM
Reallly love this design, if the makers can loosen up and publish everything. They are trying to hard to "finish" it right now, hopefully they do an get it all out there so we can go build it! Not 3d printing though, so I'll say no more!
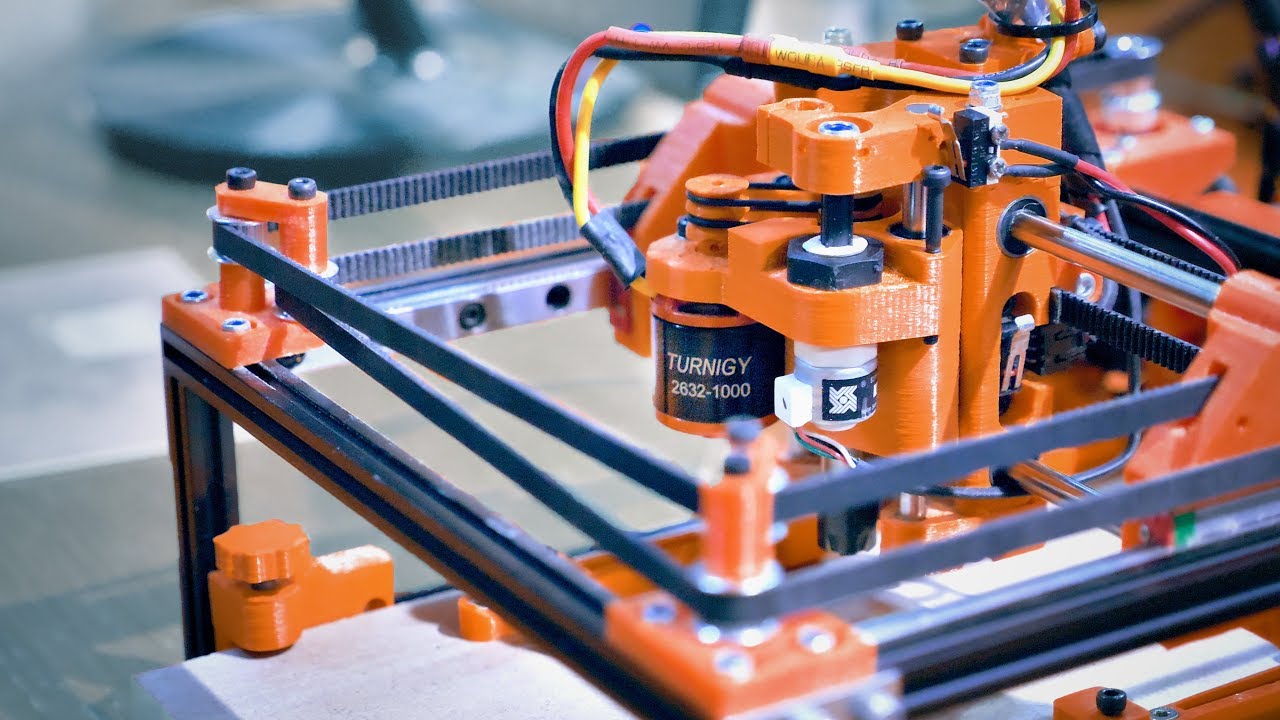
At this year's Make Munich, I found the ANT CNC - a custom, minuscule CNC made just to mill PCBs with the best precision possible! It's completely open sourc...
shy kelp
@proven musk the belt runs at 500 on a CoreXY would be huge. Ringing for years
I'd recommend ultimaker/zortrax style
proven musk
Yah the Ultimaker style would be better still very low mass head
shy kelp
The only downside is you need really precise components
If I ever get around to a diy ultimaker style printer myself, I'm considering making it double as a PNP
 loud silo
Re printing flex: we have a guide on that: https://learn.adafruit.com/3d-printing-with-ninjaflex

Print your next creation in flexible material with ninja flex.
bold geyser
awesome
shy kelp
Don't you want no retraction when printing extreme flexibles, and just use combing?
boreal lava
Question....I have been mucking with my end stop every time I change layer height (e.g .1mm for fine prints to .3mm for structural parts). Granted I will need to recalibrate between nozzle changes, but should I just set my end stop to a super low point and use the Z offset to adjust for it?
proven musk
@boreal lava yes. Set the stop just to stop bad bed crash
proven musk
Or dead on bed height
Definitely don’t want to adjust it for later height a z offset will handle that fine
Or at least have it the lowest you would ever like to go
I’ve been using auto zero too long 😃
boreal lava
Thanks @proven musk . That is super helpful. Given that I change nozzles pretty often, setting it above bed height makes sense as I don't know precisely where that nozzle offset will lie. I assume I can offset for that.
Would I need to move to optical sensors vs switches to compensate for staring points lower than the trigger?
proven musk
You usually can’t set the limit higher then the lowest you will go.
boreal lava
Hmmmm....is that a firmware limitaton/
proven musk
Most firmware will get grumpy about going lower
boreal lava
I can add that exception into the firmware for my use. So optical would be the way to go?
proven musk
Actual sensors also won’t like being squished
Yah optical won’t get damaged at least
boreal lava
Would there be a better option you can think of?
proven musk
On my printer where this applies, I use a BL Touch which lets me change beds and auto-zero. HOWEVER, the bl touch depends on a fixed nozzle/bl touch distance; if you changed nozzles you would still have to, at minimum, alter a parameter (M851 for marlin)
nozzle changes are particularly PITA
on the upside, the correct value for M851 isn't that hard to fine, you go G0Z0 and then twiddle it until it is the right height
boreal lava
Yeah. Right now I am using a .5 nozzle flr syructural parts, but when I want better resolution it changes. A real pain.
proven musk
Another printer is the best solution 😃 I also have an ultimaker, which allows completely seamless nozzle changes, but you have to change the whole "core" (heater + nozzle)
If you have the space and patience, "regular" printers are awfully cheap now
one for 0.4, one for 0.25 one for 0.8 ....
lol
on my pegasus printer (ender 3 style, though direct drive), i just don't change nozzles it is too much PITA
boreal lava
"awfully cheap" is a bit relative when you're talking about a few minutes of calibration
proven musk
well yah, that is true. But at some point I really ran out of patience with the printer, and just want prints. A BL touch (without nozzle changes) made that printer way more turn-key. Of course, everyone is in it for their one satisfaction. I hate calibrating the printer.
well, now I do
when I first built it, it was fun
and rebuilt it, and rebuilt it some more 😃
 orchid imp
hello 3d printing people ! i have no experience with that, but is it possible using 3d printing to build such a device in smaller scale? https://www.freeenergyplanet.biz/free-energy-from-nature/application-for-patent-no.html
Viktor Schauberger at Wien-Hadersdorf, Austria, 4th March 1940. Processes and Equipment for the Atomic Transformation of Droppable Liquids or Gaseous
(probably using some metalish material)
boreal lava
Yeah. My first printer, and the one I use now, is one of the much maligned 2 up printers. They are a PAIN, but after many hours, and many mods, it is pretty good now. Just looking to make me better in how I use it, and how I design my new build.
proven musk
Rough start!
boreal lava
yeah, but it taught me a lot
proven musk
yah, an odd first printer, if you stick with it, can be very instructive. For example, my first one printed ABS really well but was crap on PLA, against all common modern wisdom (it had no print cooling fan). Unfortunately these finicky printers turn lots of people off the whole idea
Friend of mine started with a monoprice mini; it combines heat break fan with print cooling fan, so struggles with ABS (or gets clogs). It has to be seriously f-ed with to get it to take a differnet bed
So he could print PLA but not anything else, and had to really screw with it to add a glass bed
and its heated bed is kinda random...
karmic brook
For printing in metal-like materials, you can use an SLS printer (which isn't generally a home variety), or you can print something, make a sand mold out of it, and cast the result in metal (lost PLA casting).
orchid imp
ah
proven musk
I'll point out that glass-filled nylon is shockingly strong
karmic brook
I started with a Monoprice, trying to decide what my upgrade path is.
proven musk
metal is overrated 😃
orchid imp
carbon rocks
boreal lava
This is a recent test print from the 2 up
lost pla casting. Interesting. We did lost wax casting in school, but I never thought to apply it to 3d prints
proven musk
There is wax filament too which works very nicely for cleaning up before casting
My print just off the printer tonight is envelope holder for the desk
Wood PLA 0.6 mm nozzle 0.15 layer height I think. Was going to stain it be it’s hard to get staying in between
boreal lava
@thorny juniper what would you use for the mold with lost pla casting?
proven musk
its normally done pretty tradionally, just uses PLA model instead of wax model, everything else remains the same. Some PLA's burn out better then others
boreal lava
meant that to be at @karmic brook
karmic brook
Molding sand, basically, but you can also use other materials, such as plaster for some metals.
boreal lava
sorry @proven musk just noticed I atted the wrong name. Wasn't meant at you
boreal lava
@karmic brook we used a sort of slippy clay. I have to look this up. This could be fun
*for wax
boreal lava
I was thinking of milling some parts with a CNC machine, but now that I've looked up the lost PLA stuff I'm a bit torn. Casting seems to have far less loss.
karmic brook
Different tradeoffs, but pretty efficient. You generally don't get a finished part by casting, but the cleanup is pretty easy compared to milling it from a billet.
violet needleBOT
Adafruit Industries posted Fusion 360 Tutorial – Wall Plate for PyPortal

Designing a parametrically driven mounting plate for the Adafruit PyPortal. Download Design Files: https://learn.adafruit.com/pyportal-wall-mount Get Adafrui...
pastel flume
Yesterday I installed ultimaker cura on a new system and suddenly the setup installed some adafruit drivers .... why?
violet needleBOT
Adafruit Industries posted Flip Flop Toy #3DPrinting #Timelapse @adafruit #adafruit
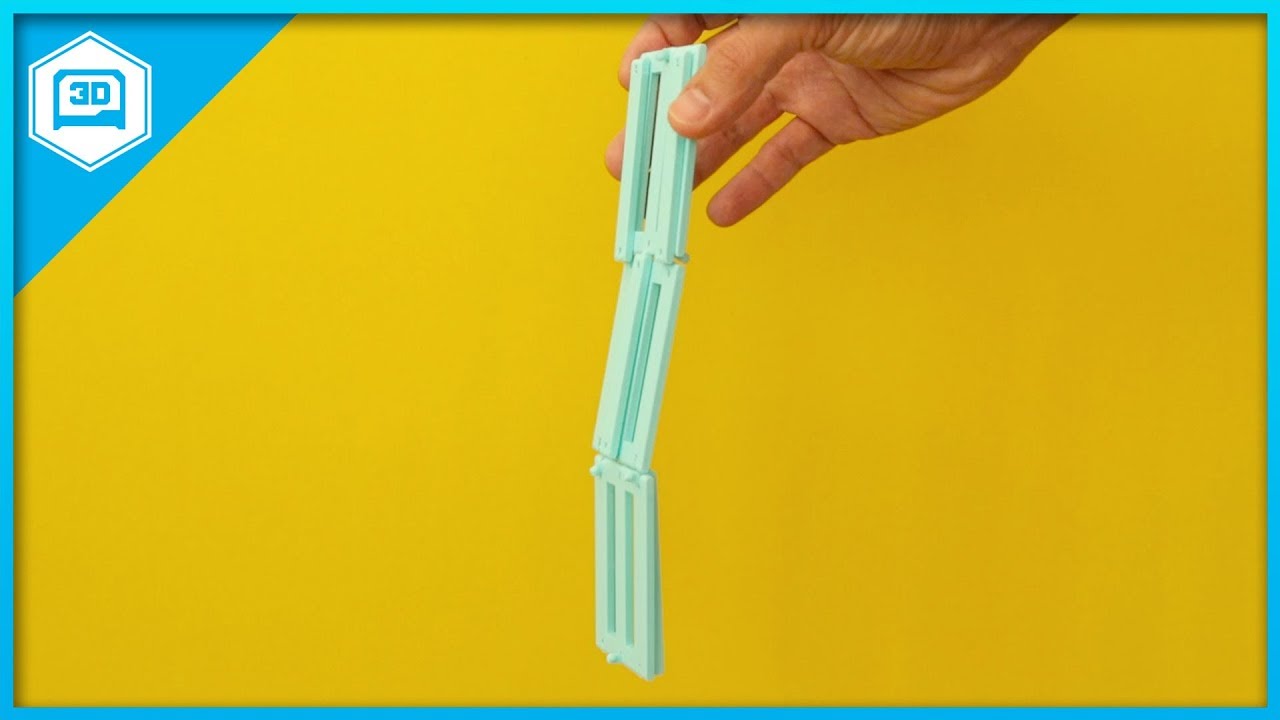
Every week we'll 3D print designs from the community and showcase slicer settings, use cases and of course, Time-lapses! FLIP FLOP TOY by: franciscoczapski h...
proven musk
I have a wooden version of that toy purchased like 40 years ago at a Mennonite market when I was a kid. My daughter now plays with it. It is a very cool toy! She likes printing things with me, maybe we'll do one in pink 😃
 raw spruce
i started an 11 hour print today i hope it hasn’t messed up by the time i check on it tomorrow lol
bold geyser
now you've jinxed it
raw spruce
oh no
raw spruce
yay it failed 🙃
i think it clogged but im on 2 hours of sleep and i just took the whole thing off
it was multiple piece so next time im gonna print the pieces separately
violet needleBOT
Adafruit Industries posted 3D Hangouts – Star Trek Clock and Flip Flop

Files, code, learn guide: https://learn.adafruit.com/pyportal-alarm-clock/ Project Video: https://youtu.be/i-coZnJzuD4 Get Adafruit PyPortal https://adafru.i...
karmic brook
@cobalt quarry A more specific suggestion for PLA glue: https://www.eplastics.com/plexiglass/acrylic-accessories/ips4-4oz
We stock, sell, and ship glue, cement, and adhesives for plexiglass/acrylic plastic.
 cobalt quarry
Thx.. I was just looking at find a source today 😃
karmic brook
Synchronicity!
violet needleBOT
Adafruit Industries posted 3D Hangouts – Star Trek Clock and Flip Flop

Multistreaming with https://restream.io/ Files, code, learn guide: https://learn.adafruit.com/pyportal-alarm-clock/ Project Video: https://youtu.be/i-coZnJzu...
raw spruce
What’s the best way to take off rafts lol
karmic brook
When things go well, I can just peel them off. When they don't, I break out a spudger and putty knife. Sometimes I have to remove the last bits with a sharp knife and/or emery board.
coarse ruin
i find the best way is to not use a raft... there are almost always better ways.
bold geyser
when i was using hips i could never get rafts off cleanly. but im a total noob
boreal lava
Any tips for printing parts that hold linear bearings without biding?
I am designing/reprinting my x gantry. The parts will support the gantry and move up and down the Z rods. The print I have uses two LM8UU bearings mounted to either end with about a bearing's distance in between. It is sturdy and everything fits, but seems to have some small resistance when moving along the rod. Individually the bearings move fine when tested so I am assuming there is some binding happening between the two.
I'm in the process of tearing down the model in F360 to double check parts individually for fitment. Any other tips?
This is the part so far
violet needleBOT
Adafruit Industries posted Star Trek Alarm Clock – PyPortal #3DPrinting #CircuitPython

Make an IoT Alarm Clock with Adafruit's PyPortal! 3D print a Star Trek TNG inspired enclosure. Use the touchscreen to set the alarm with a LCARS inspired UI....
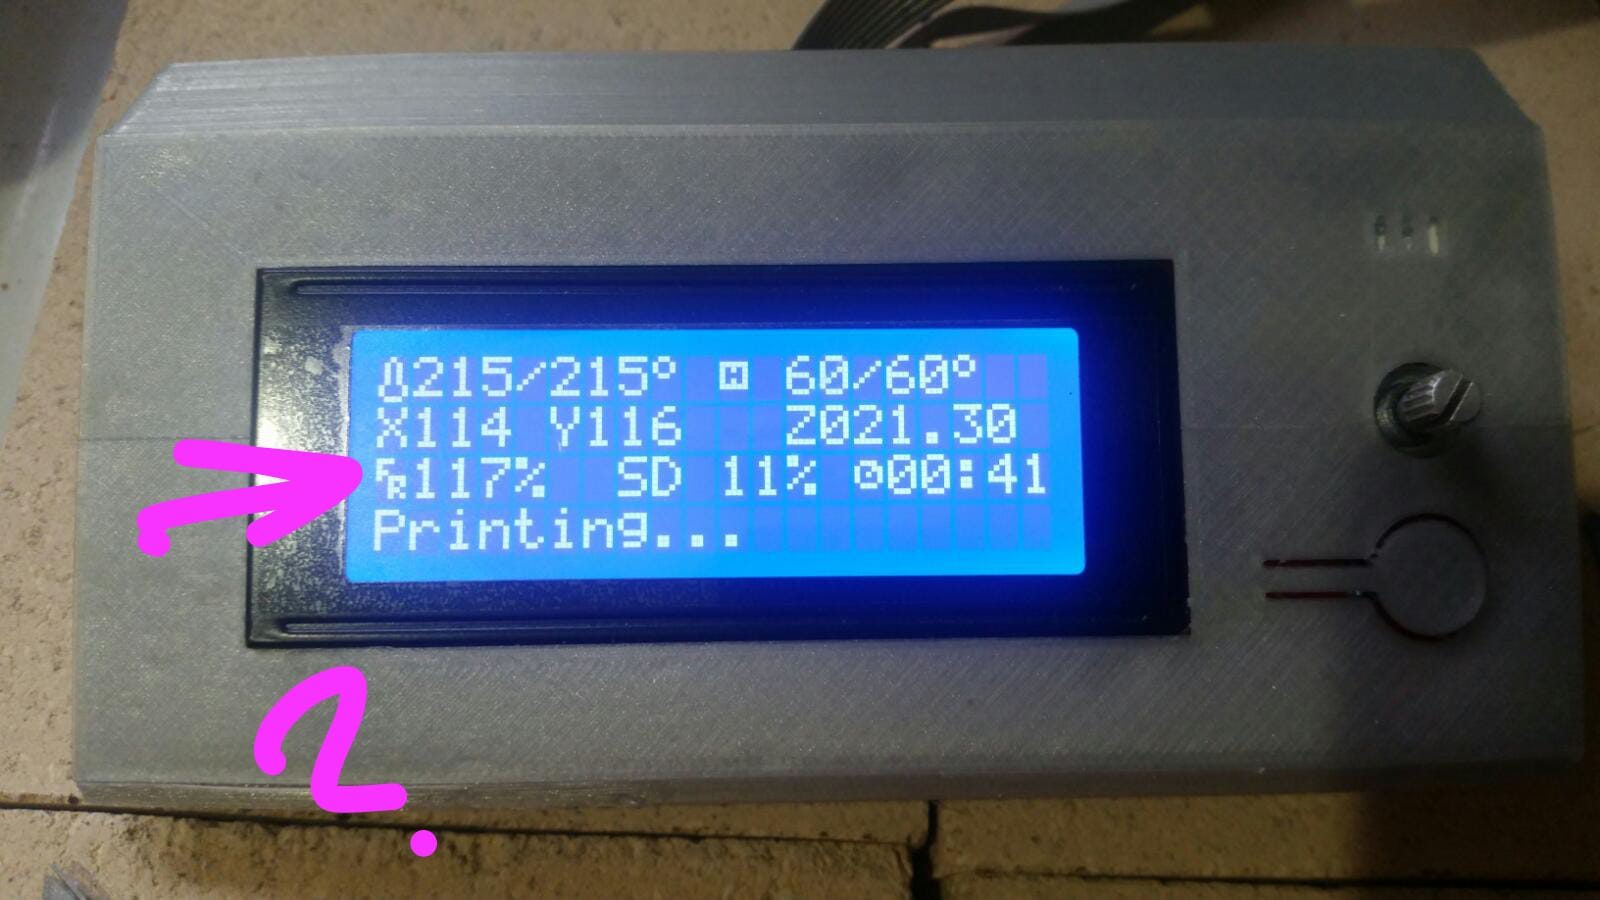
 formal relic
https://i.imgur.com/0tW9yMB.png
what this thing mean??
 shy kelp
@raw spruce a good raft should be easy to pull off. Personally, I don't use them that often, I just replace my PEI sheet
@formal relic feed rate. In Marlin, it means increasing speed to make prints go faster
@boreal lava if you have a bedslinger (i3 style), secure it at 3 points, and use zip ties. Use press fit mounts if using igus bushings
raw spruce
it’s a bad raft then lol
karmic brook
@cobalt quarry I got curious and contacted the folks at ePlastics to see if they had any more specific recommendations for gluing PLA. They replied that their IPS 16 is suitable. https://www.eplastics.com/accessories/plastic-adhesives/acrylic-glue/ips16-1-5oz
cobalt quarry
@karmic brook Sweet. Thanks!
formal relic
@shy kelp thanks!!
coarse ruin
that glue contains Methylene Chloride. wear gloves. It's a weld on product and should be availiible from more than one vendor.
cobalt quarry
I ended up getting something from amazon.ca... next day free shipping. Beats ordering from San Diego.
valid crow
If anyone wants to help out. I want to get the ender 3 but I am $20 short. https://www.gofundme.com/72h66k8

gofundme.com
I am a freshmen in college attempting to get the ender 3 as my first 3d printer. I came up $20 short so if anyone wants to help that would be awesome.
 earnest plover
Does anyone have recommendations for the hole sizes to print for tapping M2 and M2.5 screw holes in PLA? Should I just print holes the tap drill size?
karmic brook
Perhaps a wee bit smaller, since small holes are often approximated by polygons, also plastic is softer than metal so greater thread engagement is sometimes useful.
earnest plover
An M2.5 screw calls for a tap drill of 2.05mm, and an M2 calls for 1.60mm. So maybe a couple tenths of an inch? I'll be printing on a new Ultimaker 3, if that matters
proven musk
The best way is to print a small block with your prospective size and try tapping it. That way you can zero in on a whole size that works for your printer. Make sure you use the profile and filament (or same type at least) as your final part. This way it'll be set for you printer, slicer/profile and material, all of which affect the actual hole size you'll get and will let you check how well tapping works in that. You can of course do a few different sized holes in the block to help minimize the reprinting.
Printing test bits (just portions of the final) is an under-utilized way to get stuff that fits without 12 hour reprints 😃
earnest plover
Thanks for the tip. I probably wouldn't have done that and would have had just that, a 12 hour reprint. going to draw up a test block. I was going to print one to get my printed dimensions as exact as possible before the final print job, but didnt think to do the same for the screw holes
proven musk
You'll want to print something like this eventually if you do a lot of designing too. There are lots of variations out there.
https://www.thingiverse.com/thing:3522476
But for tapping, I'd run up a custom job to get it to tap the way you want to.
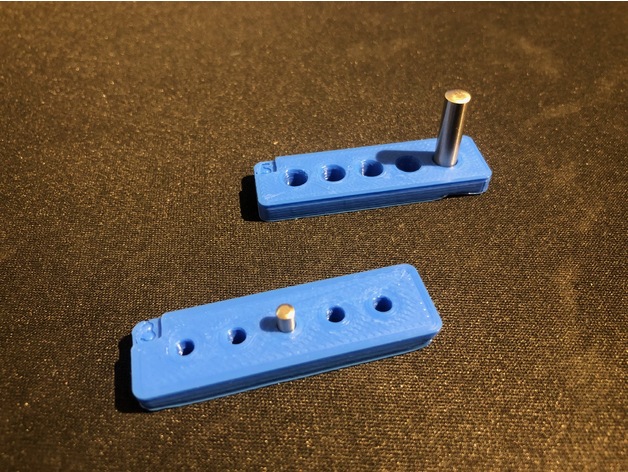
A simple part for testing the fit of various shafts / dowel pins on printed holes. Ideal for getting the perfect clearance / interference fit every time.
Each tester takes about 15 mins to print and has a hole at the nominal size on the far left (next to the number) and each ...
earnest plover
and now i'm going to be looking at test prints on thingiverse all weekend before going to the new makerspace and seeing if the ultimakers have been tweaked by anyone yet.
proven musk
If you are ambitions you can print threads and just chase them with a tap
earnest plover
those are pretty awesome
proven musk
I've done that fairly often and it worked out. Depends on your design app and thread size
earnest plover
for M2 and M2.5? i figured it would be too small
also, first print ever for me. i think traditional tapping may be enough. i'm already modifying the pigrrl 2.0 design to accommodate 2 analog joysticks, a trigger button, and a stereo headphone jack within the original dimensions
proven musk
Ah, first print, that is very exciting! Good luck. It is really great when it comes out!
Ultimakers tend to be very accurate on outside dimensions but a little tight on inside dimensions. You can file or drill out things. It is common to need to do that kind of adjustment for perfect if it you don't want to reprint all the time.
earnest plover
I was figuring that as well. Still, I've been checking the dimensions of everything with digital calipers. And I'm thrilled about the three brand new UM3's. Very interested in the dual extruders.
bold geyser
ender 3 was on amazon flash sale yesterday for $180. nearly bought it. Now I think im going to spend the extra and get an ender 5. Seems like the square design will yield better long term results. anyone have insights into the ender 3 vs ender 5? Is it worth the 1.5x price tag?
karmic brook
My point of view isn't completely thought out yet, but I tend to lump SLA 3D printers into three categories: inexpensive, entry-level printers ($100-$200); serious hobby printers ($600-1000); and industrial printers ($2000 and up). I tend to overlook the in-between ones, as they seem to me to not offer solid value for the money.
As for the Ender 5 specifically, I tend to regard it as basically a bigger Ender 3, so if you want something like an Ender 3 with a bigger build volume, it might make sense.
bold geyser
My thought process is that with the square frame it will be more rigid, and seemingly would offer more stability with the fact that it has rollers on both ends of the rails.
karmic brook
The square frame is a Very Good Idea. Scaling these things up isn't as easy as it might seem: the rigidity requirements go up exponentially with the size.
bold geyser
ender 5 is same X,Y as ender 3, only Z is bigger. 220x220x250 for ender 3 vs 220x220x300 for ender 5

The Ender 3 is the king of budget 3d printers, so what is different about the Ender 5 and how does it compare? In this review, I examine all of Creality's FD...
great comparison of enders
only 50mm taller
boreal lava
ender 5 is also a very mechanically different printer. It looks like there should be room to swap out for a larger bed. If I were looking at an ender 3 pro, I would be strongly considering the Ender 5. It's one of the designs I've been looking at to build. Just waiting to settle on a design before cutting my extrusions.
The ender 5 seems like it would have more failure points than the ender three. I can't imagine that the cantilevered bed design, though popular, is as fool proof as the sliding bed.
bold geyser
At least the cantilevered bed is only moving 1 direction. And the hot end which moves the most is supported fully from both sides. One review mentioned the hanging bed is not super well supported. Some folks say the ender 5 is designed like the ender 4, but it’s not at all. The ender 4 is an H belt routing design.
cobalt quarry
Anyone know approximately how many meters on a 1kg spool of 1.75mm PLA filament?
shy kelp
@boreal lava ender 5 has a very flimsy frame, and it's cantilevered with unsuitable brackets. This means you get artifacts if you use the full build space of the printer @bold geyser
@cobalt quarry 250m
Also, apperently the ender 3 came after the 5. Odd. Also, I'm just going to say this rn, they're both Cartesians
bold geyser
mkay I caved and bought the ender 5. If an ender 5 has a flimsy frame then the ender 3 must be even flimsier
shy kelp
The ender 3 uses blind joints
bold geyser
What does that mean? What style is ender 5?
shy kelp
Cartesian @bold geyser
you ask the x motor to move, the gantry moves in the x direction
you ask the y motors to move, it moves in the y direction
vs a corexy where if you ask one motor to move the gantry moves diagonally
bold geyser
@shy kelp sorry I was actually refering to the join style. I'm wondering about stability, as it would be impacted by various joint styles. Yeah I think the ender 4 was corexy style.
coarse ruin
@earnest plover Most slicers over fill holes by the width of the FDM extruder (0.4mm) so in your case 2.0mm 2.6mm. But that is only if you are going to use a cut tap. For most small threads i tend to use a ROLL tap method with heat. That is heat up a screw and thread it into the hole. The screw may need to be heated several times depending on the depth of the hole. I usually size the hole the average of the though hole and the tap hole size (2.2 and 2.7 ). The roll "tap" can be the screw itself (but there are roll taps that can be purchased).
The advantages of a roll tap is 1) near 100% engagement, 2) less stress on the plastic threads, 3) the screw can be the tap
This method works best with 10-32 (M6?) and smaller. For 1/4-20 and larger i use inserts or build the thread into the model and clean up with a tap.
shy kelp
Consider brass inserts or nut traps, plastic isn't exactly an ideal material for threads
Cnc kitchen just released this vid on the topic
earnest plover
@coarse ruin @shy kelp thanks for the tips
coarse ruin
@shy kelp good vid. and i can agree with the results from my exp also.
earnest plover
just finished the vid. very informative
coarse ruin
however, the limited scope covered ( the ratio of metal to plastic makes a difference) also limits the application. In most cases small objects are assembled with more than one connection system.
e.g. PCBs are usually trapped / supported with the edge and pinned with fasteners. It's really the edge support that does most of the work.
earnest plover
it's for securing the internal components for a pigrrl 2.0 inspired mod, so it's M2 and M2.5 for all the little bits. i found a kit of brass inserts with the right sizes on amazon. i'll print some test holes, and if i'm not happy with my results i'll pick them up
coarse ruin
just as a tip use a clean soldering iron on a setting below the temp of solder.... otherwise there can be some solder slag that gets into the threads.
i use a SMT reflow tool because of the level of control of heat and airflow.
 austere estuary
If a part has a 2mm mounting hole, are you supposed to use a 2M screw for it? (Also, why does the Powerboost 1000C have a 2mm hole but the description says #4-40 screws will fit?)
proven musk
2mm is really small. #4 is not going to fit AFAIK
austere estuary
Well the holes on the powerboost are only 2mm, possibly 2.5 (my calipers are a little iffy in holes this small.
proven musk
looking at the eagle pcb file, its 2.5. #4 looks to be spec'd for 3mm
austere estuary
Gotcha. I just got my PCB CAD package up and running again and I hadn't thought to check yet.
So how would I pick to appropriate size screw?
boreal lava
I usually just grab whatever fits and has a head big enough to hold it. With something that size I don't think it really matters as long as it holds securely.
austere estuary
Gotcha, thanks.
proven musk
I didn't use CAD, I just read the file on github 😃
bold geyser
got ender 5, assembled in 30 minutes, printed dog gcode from included sd card. wow. great results for first print
shy kelp
pics?
bold geyser
There’s definitely some minor issues, and I’m a noob, but this came out better than on my lulz mini after screwing around with the lulz mini settings for hours. This is immediately after assembly and bed leveling.
violet needleBOT
Adafruit Industries posted 3D Hangouts – ePaper Stand

Multistreaming with https://restream.io/ ----------------------------------------- LIVE CHAT IS HERE! http://adafru.it/discord Adafruit on Instagram: https:/...
violet needleBOT
Adafruit Industries posted 3D Hangouts – ePaper Stand

Files, code, learn guide: https://learn.adafruit.com/eink-display-stand/ Project Video: https://youtu.be/fWEJ6m8zb0c Get Adafruit 2.13in eink FeatherWing htt...
violet needleBOT
Adafruit Industries posted e-ink FeatherWing Stand #3DPrinting #CircuitPython
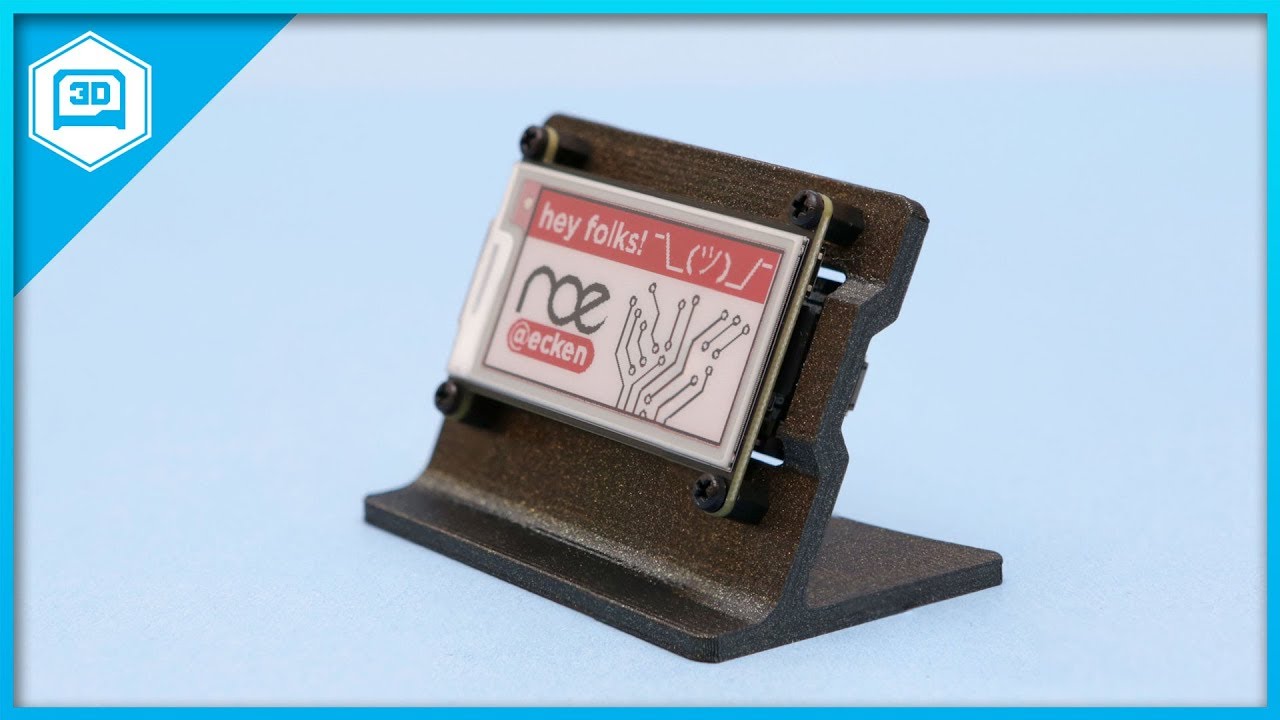
Make a custom name tag with Adafruit e-Ink FeatherWing! The 2.13in e-paper display features red, black and white. 3D print a stand and display text and image...
 spark crane
Hi, I am looking for a linux-compatible alternative to sekcthup for modelling. Maybe something with not quite a steeep learning curve as blender. Any suggestions?
karmic brook
I've found it kind of depends on your mindset. Personally, I'm fond of OpenScad, but it's more of a programming/mathematical approach where you describe how to build your object out of combinations of geometrical solids (for example, to make a hole, I subtract a cylinder from an object).
spark crane
@karmic brook i have used openscad for a speaker grille, and while it works, i find it a bit involved to quickly throw something together. Also, its rendering times are, well, long. very long.
Maybe Tinkercad can fill in there.
karmic brook
Agreed.
spark crane
There is also K-3D and Wings 3D beeing thrown around in all those "X best alternatives to ..", maybe I'll hava a look at those. Just thought there might be a more obvious solution.
karmic brook
May well be, maybe someone else will have some ideas too.
loud silo
I like TInkerCad as a good free choice. I got pretty frustrated with SketchUp after a while.
boreal lava
Speaking of software, what printing software do you all use? I've been using repetier since I started a few years ago, but as I am setting up a new system it has me wondering if there is something else out there that I should try. Any suggestions?
karmic brook
Do you mean slicer, or what?
boreal lava
Slicer, or like repetier host where you can use different slicing software, but the "host" coordinates the placement, visualization, and gcode sending.
Repetier lets you use Curs, Slic3r, and I think a few others. It just runs the show so to speak.
*Cura
shy kelp
Marlin, been playing with Marlin2 on my mk2s. Been looking into klipper tho
@boreal lava
boreal lava
klipper, thst runs on Raspberry Pi, right? Or is there a full install for other systems?
shy kelp
Fw swap on the 3dp main board, runs as a plugin for octoprint on the rpi side of things
People have been using dwc2 (duet web control 2) with octoprint
boreal lava
Ah, ok. Yeah, I've been using Marlin FW too.
Man, I never realized how much software is involved
shy kelp
Motion plotter on klipper is supposedly incredible
There's a support web site made by a non-official discord as well :P klipper.info iirc
boreal lava
ooooh....just saw there is a patch for the Samd51 with klipper. Wonder if that will run on a Grand Central
shy kelp
That's the point of it
Grand central +RADDS or similar
Feature-wise, if you use a Samd51, you can't expect to have all the features of like an skr 1.3
karmic brook
A Grand Central seems like overkill, even an ItsyBitsy should be sufficient: you need CPU horsepower, not a bunch of I/O if I understand it right.
shy kelp
Yeah
It's more about spec if anything else. Clock rate helps a little bit, but stuff like memory helps more. Hence why the beaglebone PRU is outperformed as far as step rates goes in comparison to a Samd51
Edit: the reason Samd51 gets higher isn't becuase of memory, just used it as an example
boreal lava
My thinking was, and I could be wrong, a ramps board fits the GC and 3.3v should be well capable of signaling the 5v controllers on the board. It just creates a lot more room for modifications and addons than the Mega can handle
shy kelp
Ramps is a dead standard imo, 5v only
boreal lava
hmmm. What would be a good inexpensive replacement?
I've looked at some, but they are a bit more than I want to spend for something that I will probably destroy in the tinkering process. 😋
shy kelp
Skr1.3 is a good one
If you want trinamic drivers, get them soldered in like an einsy
Ofc, duet on rrf is the best
 edgy steeple
I can see where a 3d printer is almost a necessity now days in DIY.. Can I get some recommendations for what to look for that is reasonably priced and that will not leave me wanting a different one in 6 months?
or pointed to a spot-on article where this has been asked and answered
karmic brook
I was looking for the same thing about a year ago, but then decided to rethink my options. I ended up buying a Monoprice Mini Delta on the cheap, knowing it would need some tinkering to get working well and has a small build volume, fully planning on upgrading at some point once I knew more about what features were important to me.
So I was planning on wanting a different one in 6 months, but armed with much more knowledge about how I really use a 3D printer and what I liked and didn't like.
Since the MPMD can be had for <$150, I figured I wouldn't be out much money, and then when I upgraded, I'd have two printers.
edgy steeple
Your idea makes a lot of sense but I am trying to save money in the long run.. this thinking will probably bite me in the butt
karmic brook
So, when you say "reasonably priced", what do you mean? I've found prices to be somewhat stratified, so there are a bunch of sub-$200 printers, a bunch of $600-1000 ones, and then the multi-thousand dollar ones, with not much in-between.
karmic brook
The only one of those I'm familiar with personally is the aforementioned MPMD. People seem to like the Ender 3 and Anet printers in that price range, and you might consider the used market as well.
edgy steeple
The Ender 3 looks like it can build decent sized items
karmic brook
This looks like a reasonably well thought out and evenhanded writeup https://all3dp.com/1/best-3d-printer-reviews-top-3d-printers-home-3-d-printer-3d/
bold geyser
get an ender 3 and dont look back. great reasources available for it. i just got the ender 5 a week ago and im happy with it so far.
ender 3, ender 3 pro, and ender 5 are current price scale from creality
ender 3 can be purchased from banggood shipped from US warehouse for $170 + $11 Shipping. Not sure if you are in USA
US Warehouse | Creality 3D® Ender-3 V-slot Prusa I3 DIY 3D Printer Kit 220x220x250mm Printing Size With Power Resume Function/MK10 Extruder 1.75mm 0.4mm Nozzle
spark crane
I nearly bought an Anycubic Mega-S for ~230€ last week. Already had it in the basket, bailed out at the last second ;). Anyway, I was considering the Ender 3, but from what I read, the Mega-S offers a bit better build-quality and a couple of additional features.
And you probably don't have to have a fire extinuisher right beside the printer 😉
loud silo
There is a local guy (Boston area) that sells FlashForge returns from Amazon (no guarantee) on eBay and craigslist, but many are unused (tie wraps still on). Another local guy buys new and used ones from the first guy, tests, and fixes them. So I got a FlashForge Finder from the second guy for $150 that had been vetted and set up, plus a free external spool holder. It's not highly featured (no heated bed, etc.), but seems fine for a first printer, and is well built.
shy kelp
@edgy steeple depends on your price point. You're probably going to want another one anyways, but an ender 3 is a good option. Wouldn't recommend the mp mini delta
Finder is a good option, but it's pretty limiting AFAIK. Deffo could get better results with a wider range of filaments on the ender 3
The ender 3s fire issues can easily be fixed by just soldering the heated bed wires together, or not using the bed (PLA w/o a heated bed is possible)
If you want something a bit better and don't mind the price tag, prusa i3 mk3s is an amazing option
@bold geyser BTW your ender 3 print looks pretty ok, where was the print placed on the build area?
Like, towards the leadscrew or near the front
karmic brook
I'm certainly eyeing that Prusa as my next printer.
shy kelp
builds white knight
bold geyser
In the center
edgy steeple
I have just started looking at people's suggestions and there are a crazy amount of mods for ender 3
boreal lava
@edgy steeple One thing to think about with hobby level printers is how large or small the userbase is. Printers with a wide adoption are much more likely to have more mods available, and if you do run into issues the odds are very good that someone else has already answered that question somewhere online.
 cedar saffron
@edgy steeple I know I'm a little late to the conversation here, but I've had an Ender 3 for almost a year now, and I recently picked up a Geeetech A10
they're very, very similar
Now, that being said, the first thing I did was rip the guts out and shove in my own electronics
but from construction/equipment/performance perspectives, they are very much alike
bold geyser
MKS gen L board perhaps?
shy kelp
Skr 1.3?
karmic brook
Duet 2 Maestro?
 lofty sigil
Hey all. New to 3d printing. Borrowing my friend's Monoprice Maker Ultimate, which seems like a decent printer overall. Downloaded Cura 4 and set it up according to a couple of YouTube videos I found. Did the little test tugboat print and overall it looks good, but it seems to have a problem with "stringing" in some places (first layer, I watched one of the passes not adhere to the pad and get dragged along diagonally. Couple other places on the print where material didn't stay where it was put.
Any ideas on what parameters I need to tweak? And are there any smaller test prints that focus on those parameters so I can more quickly check the results?
Thanks in advance for any guidance you can manage...I'm working my way up to printing out the components for a SatNogs rotator v3 in ABS, but starting small and gaining experience in PLA.
Also, SatNogs seems to use the .fcstd file type for its FDM parts...how do I get that converted to STL?
shy kelp
@lofty sigil clean your bed, raise first layer height a little bit
Never heard of fcstd files
lofty sigil
They are FreeCAD files, and I had to download FreeCAD, open each file, select the mesh, and export them to STL.
In case anyone else ever runs into that...not that hard.
@shy kelp The bed was cleaned, most of the first layer was fine, and I saw the same kind of dragging on upper layers (mostly in the infill portions)
loud silo
what temp and what filament?
earnest plover
Hey guys. I worked up this case for a 2.13" e-ink featherwing and an M4 express feather to be like a name badge or something. It's the first thing i've drawn up from scratch. Any comments? I'm going to print it tomorrow if I can. https://a360.co/2G3yv3P
Share 2D and 3D design files and project files with anyone.
shy kelp
make sure you have accounted for your tolerances :P
earnest plover
Yeah, I also figure I can sand it a bit for a better fit
crude kettle
good plan
lofty sigil
@loud silo 200C PLC. Here’s a picture of the output.
PLA even.
The filament feed was also clicking gently at several points doing the infill like it wasn’t keeping up with how fast the head was moving
karmic brook
May need to play with print speed, extruder temperature, and perhaps extrusion multiplier. I'd suggest printing some small test objects to evaluate parameters more quickly.
shy kelp
@lofty sigil tune esteps, use more walls/perimeters, etc
Discord can you stop sending messages twice? Kthx
bold geyser
I find it’s helpful to switch to the layer view after you slice something and step through it to see how it’s going to stack the lines. Sometimes the slicer does really wacky things.
coarse ruin
the picture shows 2 major issues 1) underextrude, 2) retraction issues.
both can have several sources that cause them.
for under extrude first make sure the nozzle is clean (inside). One easy way to do this is to insert (carefully) a ~0.4 drill or tool when the nozzle is pre heated. This should remove most blockages.
one common cause possiblity would be using to high of a temp.
There are test prints for temp, retraction, and extrude multiplier. Run them.
200C isn't on the high side for most printer, but it is very dependent on 1) the printer temp accuracy, 2) the type of extuder, 3) the material. 4) head speed
as an example i run my modified Rep2 at 90mm/sec head speed up to 230C and 120mm/sec at 240C.
but that is only on infill and inner shell the outer shell runs at 50 - 60mm/s
karmic brook
That's some really good information.
earnest plover
Thank you guys for your advice 😊
violet needleBOT
Adafruit Industries posted 3D Hangouts – KeyBlades and Animatronics

Multistreaming with https://restream.io/ Files, code, learn guide: https://learn.adafruit.com/eink-display-stand/ Project Video: https://youtu.be/fWEJ6m8zb0c...
violet needleBOT
Adafruit Industries posted 3D Hangouts – KeyBlades and Animatronics
Multistreaming with https://restream.io/ Files, code, learn guide: https://learn.adafruit.com/propmaker-keyblade/ Project Video: https://youtu.be/Ae5X_SgtCOQ...
 cloud halo
The Monoprice Inventor II printer -- is that a rebranded Flashforge Inventor II? I wasn't able to find it on the Monoprice site, but other searches popped up Flashforge which looks extremely similar...
loud silo
@cloud halo somehow we stocked it as Monoprice, but yes, it's a Flashforge. Maybe there was some Monoprice deal with FlashForge that quickly disappeared or never actually materialized
@cloud halo aha: https://www.monoprice.com/product?p_id=30525

Monoprice.com
The Monoprice Fully Enclosed 150 is an easy to use, ultra quiet, beginner friendly 3D printer that is ideal for both educational and home environments. It features a 3.5" LCD touch screen interface and an assisted leveling system, which makes it easy to get perfect prints wit...
so it's naming issue
lofty sigil
@coarse ruin That's a bunch of information packed densely! I'm pretty new to 3-d printing, any chance you can upack that a little bit more and give me some references to where I can read up more and learn?
coarse ruin
i would suggest you start with the test prints. They should let you know the issues. If the test prints are good... then either your model or the settings are the issue.
if not then you know hardware is the issue somewhere. Most of the things i listed where hardware. But at this time you have ALL options and you need to start by isolating likely v.s. unlikely.
i haven't looked at the monoprice maker... so i don't have specific links or info for you.
boreal lava
@lofty sigil What printer are you using? What stepper drivers and mode are you using? Do you know if your stepper drivers are tuned properly?
If it were my prints, one of the first things I would do is to check the VREF on the extruder stepper driver (takes all of a few seconds to do). Adjust if needed. Then I would print a test print of some sort (doesn't really matter what) at about 40mm/s, and starting at your current temp, raise it a few degrees manually through the print interface/software to see if the clicking eventually goes away. If it doesn't start going down any once you hit about 215-220, then I'd suspect deeper issues.
cloud halo
@loud silo Thanks! That's why I wasn't able to find it, was just the name. I wanted to dig into the details a little bit more before making a decision --- my unassembled Prusa isn't going to build itself, and seems like an uphill battle for a beginner.
loud silo
@cloud halo I think I'd have confidence in your assembly ability, and you might feel more confident when it needs maintenance (and I think "when", rather than "if" is true for most 3d printers).
cloud halo
@loud silo I'm sure if I just sat down and did it, I'd be allright. It's just one of those.....well, momentum things.
karmic brook
Heh, I'll buy you a Monoprice in trade for your unassembled Průša. 😃
cloud halo
Haha....I'll pass on that kind offer @karmic brook 😛
loud silo
@cloud halo When I was 13 I mysteriously got sick for a day (a genuine 99F fever) after my Heathkit SW radio arrived, and managed to finish it by the next morning. I'm not suggesting you skip work :), just approach it with fun in mind
karmic brook
I had a Lectron learning set when I was a kid (I credit it with my really understanding and internalizing the basic concepts), and my mom had bought the advanced version, but kept it in reserve to play with when I was ill. I never really understood that.
boreal lava
anyone know which mainboard the ender 3 pro/ender 5 are shipping with now?
bold geyser
@boreal lava - watch this

The MKS Gen L has been a mainboard upgrade I've been happy with. It is daunting for some people, however, so in this video I test the new Creality 1.1.4 main...
boreal lava
Thanks, I saw that, but I'm still unclear if that is an addon board right now or in production on the printers.
earnest plover
Do you guys have any tips on finishing TPU buttons to smooth them out?
earnest plover
That was what I was thinking, but wanted to ask just in case. Thanks!
crude kettle
Yeah, just be carefull. Do it in a way to warms the plastic and it should be easy to mold
boreal lava
would passing a heated soldering iron close to it be hot enough? May be easier to control and use than an open flame
earnest plover
The Makerspace has some heat guns for solder reflowing at the soldering stations
crude kettle
If the tip is clean I guess
boreal lava
not touching it, just pass by close
crude kettle
It depends on the melting temps of the plastic
earnest plover
I'll test it out with some scrap when I get home tonight.
The soldering iron, that is. I've got a few new tips
violet needleBOT
Adafruit Industries posted Keyblade Prop-Maker #3DPrinting #KingdomHearts #Cosplay
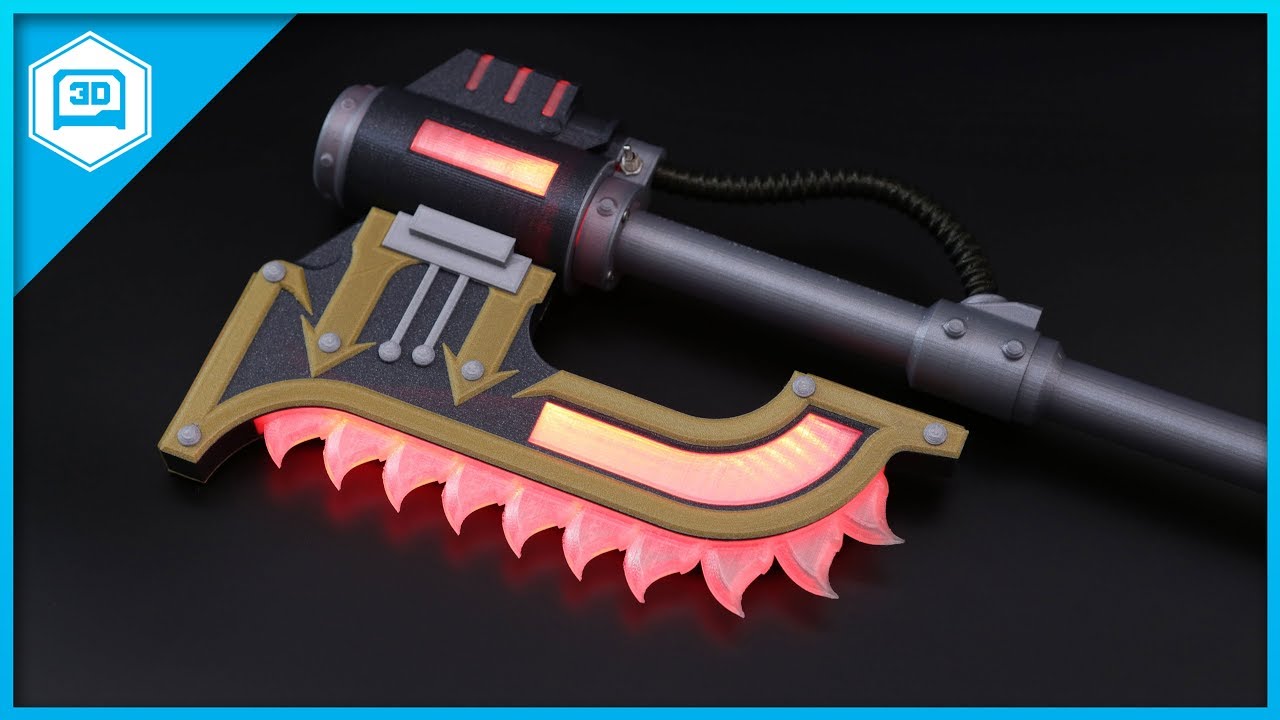
Build a Keyblade inspired prop with lights and sound effects using Prop-Maker FeatherWing! 3D print the parts and use circuit python to program the Feather M...
bold geyser
@boreal lava just bought an ender 5 on amazon about 2 weeks ago and it includes this new 1.1.4 board. It doesn’t have a meanwell psu tho which was on of my concerns. It has a landy psu
shy kelp
@boreal lava @bold geyser replacing a4988's with 2208's isn't a good idea. Just buy an skr 1.3 and genuine watterotts off digikey...
They do share similar pinouts, but the 2208s have issues with torque apperently
But I'm pretty sure you can just set vref higher and set them to spreadcycle, which I'm sure is the exact opposite reasons you want 2208s
lofty sigil
@boreal lava Monoprice Maker Ultimate (Wanhao Duplicator 6), no clue on the steppers.
@boreal lava How do I find that out?
boreal lava
@bold geyser good to know. I was wondering if it had the 2208 (1.1.4 board should). I have a meanwell sitting Idle that I may swap in then. Thanks.
@shy kelp That is the exact board I ordered for my custom build, but was curious if it was worth swapping into an ender. If they are both using the 2208 drivers it may not be.
shy kelp
BTW only the brand new 1.1.5 has the 2208's
boreal lava
on the video you shared he pulls the heat sink off, and it has 2208 iirc
@lofty sigil I don't know. That looks to be a pretty standard printer so I would guess a4988 drivers . That's pretty standard. Good drivers.
Given your printer, I think I would look at temperature. It looks like you are not getting good adhesion, and the extruder is struggling (it's hard to push unmelted plastic). The only thing giving me pause in that is what looks like very melted spots in the print. Weird things happen though, and sometimes two issues will combine to make a strange new third one.
Look up on thingiverse for the gcode for a temperature test. If you can't find one for your printer, post back and I can help you make one.
@shy kelp just double checked and that video shows the 1.1.4 board with 2208
shy kelp
interesting
boreal lava
@shy kelp Just finished setting up the ender 5. It did ship with the 1.1.4 board as @bold geyser mentioned. I didn't pull the heat sink, but from the sound of it, I would surmise it has 2208 drivers. The fan is the loudest part.
shy kelp
Cool
boreal lava
Printing a test piece now, and there is loads of stringing. I probably should have started with a known filament instead of the sample roll, but even then how do you know that the temp on your hot end is consistent among other thermistors? Moving to a new printing platform is such an interesting beast.
shy kelp
I don't remember if the 1.3 or the gen L had this issue, but you need a larger decoupling cap on the thermistor input to get a nice looking temp graph
Er yeah it was the gen L
Piss poor decoupling cap in the 5v regulator (honestly thermistors should just have their own linear 5v regulator)
Wot
It had a weak decoupling cap on the output of the 5v reg
violet needleBOT
Adafruit Industries posted Fusion 360 Tutorial – Knurling #3DPrinting

Working on a keyblade cosplay prop and wanted some knurling effects on the handle. Using 2-coils and circuit pattern, we can make some sweet knurling that ca...
coarse ruin
just got some PVB in from polymaker (polysmooth) clear. Anyone use this? settings? suggestions?
boreal lava
After playing with the ender 5 for a few days, I've come to the realization that the reviews are correct. The bed is super easy to move if power is removed from the Z stepper. It often just drops an inch or more on its own if it is near the top. I am thinking of replacing the 8mm lead screw with one with a 2mm lead. Would this help? My thinking is that it will increase the amount of linear force needed to initiate rotation of the screw, and increase the powered down holding ability of the bed. Would also think it wuld increase Z precision. Is that sound thinking?
bold geyser
isnt that was the small spring on the lead screw is supposed to do? I've noticed the bed vibrates a ton when things move around quickly
thinking of adding bed supports like this: https://www.youtube.com/watch?v=CJbbCoSZW6w

Third iteration with easy assembly requiring only one M4 nut and bolt with clip on design. You can find it on Thingiverse: https://www.thingiverse.com/thing:...
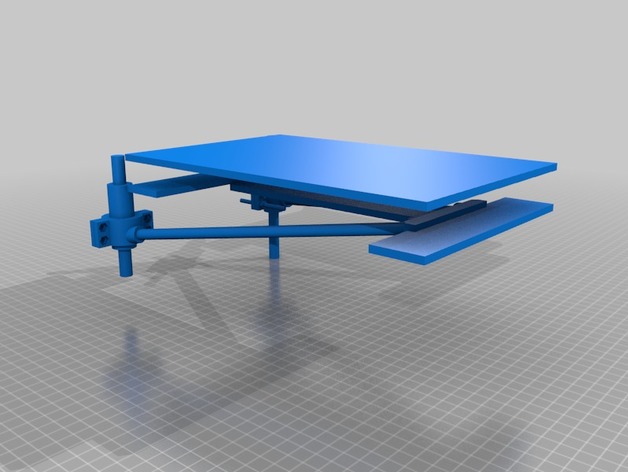
Ender 5 Bed Support.
Fully built tested and ready to download if you fancy it.
I had massive bed wobble could'nt work out what was wrong as suffered it before on my Ultimaker 2+ so I looked on the post for inspiration thankyou to whoever it was and credits to your idea.
I sim...
boreal lava
I think that was the idea with the anti backlash nut, but it doesn't seem to be doing much at all on mine. Closer to the bottom (max print height) of travel, things are pretty ok. At the or near the top of travel it will not hold at all without power on the motor.
I was looking at that mod too. If you do it, please post back with your results. I have some 2020 extrusion I was considering using to rebuild the bed a bit, but if that works...
bold geyser
So if you put your bed to the top - it moves down on it's own? Mine does not at all.
That's the purpose of this piece, correct?
boreal lava
Yes, when power is turned off. I can touch it pretty lightly and it will move. On my last print it dropped about an inch when it finished
I think that was the intended purpose,
I just put a roll of painters tape on the bed with probably 1/2-2/3 left on it, and the bed traveled all the way down on its own.
after testing, it seems that around 225 grams is the sweet spot for initiating movement on the Z. Closer to 150g is enough when the bed is near the nozzle.
bold geyser
yes, i have 125g painters tape - stays up but increasing the weight yes it sure does drop
shy kelp
No it's not that you're worried about @bold geyser
You should be worried about deflection from the rods
You need to double up on bearings and use thicket rods
boreal lava
How would that stop the bed traveling on its own at power down?
shy kelp
As for additional supports, if you want more, use some extrusions from misumi in a hevo style setup
He/she's using an anti backlash nut, isn't he/she?
boreal lava
yes, but even with that, mine travels on its own. I think that was why @bold geyser was testing with the tape. To provide a comparison beteween two printers
shy kelp
Then go for a dual/triple lead screw setup
boreal lava
I was thinking of just swapping one in with a 2mm lead
shy kelp
That bracket won't help either as far as preventing from z dropping upon a blackout
Wdym 2mm lead?
boreal lava
The lower travel (2mm vs 8mm) should require more linear force to get the screw to turn
shy kelp
So you want a screw with a higher turns/mm?
Normally it's the other way around to reduce whip
boreal lava
yes. That would lower the angle of the threads, and make it harder to move on its own. It should alos make it easier to turn at the motor
shy kelp
When you press down on your bed, where do you press it?
shy kelp
OK ok
boreal lava
It drops a bit under its own weight when a print finishes
that was with a negligible (15g) print on it
shy kelp
Then maybe swap the anti backlash nut for something better

OpenBuilds Part Store
SHOP NOW - Anti-Backlash Nut Block for 8mm Metric Acme Lead Screw! Fast Shipping from U.S. - Genuine OpenBuilds Parts - #1 Open Source Hardware
boreal lava
I have one of those somewhere I think, but wouldn't increasing the friction on that make the screw harder to turn?
I was thinking something like this would make it harder to go down on its own, but easier to go up and down under power. https://www.amazon.com/Screw-Length-Copper-THSL-400-8D-Printer/dp/B07K195BCH/
Amazon.com: T8 Lead Screw Dia 8MM Pitch 2mm Lead 2mm Length 400mm with Copper Nut THSL-400-8D 3D Printer Part: Computers & Accessories
bold geyser
yeah i think that's the point. looks like the tension on there is adjustable with the nut
if you change that rod does it require more turns for the same movement?
boreal lava
about 4x more
bold geyser
does that require messing with firmware?
boreal lava
Unless there is a setting somewhere on the ender 5 yes. I haven't gone through the menus completely yet
just checked, it can be changed it in the menus on the LCD
I think my old printer was around 1600 steps/mm on z
shy kelp
Maybe use like a TR8x8 lead screw
boreal lava
that's what it has afaik
shy kelp
Xx is the amount of starts, right?
boreal lava
4 start I think
boreal lava
it's hard to get to to look at, but it looks liek 4 start
that's what I am thinking. Like the one in the link I posted
just curious if my logic is sound that it should be harder to rotate through linear force, but easier to create linear movement with radial force (e.g. motor)
shy kelp
So how long does the ender 5 lead screw have to be?
boreal lava
it looks like 400 mm, but since it is open at the top, I'm thinking that or 450. I'll havr to measure it more full later
lol
shy kelp
Wot
Misumi wants $45 for a lead screw with a 2mm pitch
Ofc, you don't need to order from misumi, it's just guaranteed to be straight and of a high quality
boreal lava
they're like 8 bucks on Amazon. probably not top quality, but cheap enough to be used as a trial run before shelling out $45. I can always swap back in the original
shy kelp
You'd also need a new nut
boreal lava
yeah. I have a delrin nut from my old printer
shy kelp
(the one I listed from misumi didn't come with a nut for 45)
boreal lava
yikes
shy kelp
Misumi is one of the best, not one of the cheapest
boreal lava
Yeah, I got some extrrusion from them a while back. Prices were pretty reasonable on that.
Hate to cut this short, but I need to run to a meeting. Thanks for the help. You too @bold geyser
bold geyser
im interested to hear your findings - i don't care much about perfect prints at this point as it works well enough, but I may do a few tweaks here and there if they are cheap
bold geyser
cool
boreal lava
well, just finished connecting the skr 1.1.3 in my printer. When I was first testing it I used some spare steppers I had lying around. I thought it wasn't working at first it was so quiet with the 2208s lol
had to edit the firmware some to adjust the directions on the steppers, but mostly the Marlin 2.0 fork on the Bigtreetech github works pretty well. The regular Marlin build wouldn't work for some reason. Probably something I was goofing up.
boreal lava
Anyone know anything about this error?
12:47:11.247 : X:178.17 Y:13.67 Z:0.40 E:0.00 Count X:4802 Y:1229 Z:160
It happens every time the hot end executes a travel. I am assuming it has something to do with lifting the Z axis, but am at a loss as to finding where to fix that in the firmware.
 mellow marten
can anyone help with a mainboard issue I'm having with my prusa i3? it may be a firmware problem, I'm not sure. I'm very lost.
karmic brook
What's it doing? Or not doing, as the case may be.
crude kettle
Is there like a weird noise
cloud halo
What's the general attitude regarding Monoprice-branded filament? I haven't tried it, but I'm considering giving it a shot.
crude kettle
never tried it
karmic brook
I bought some with my Monoprice printer, it seems fine. I bought a bunch of stuff from FilamentGeeks/MakerGeeks (it always seemed to be on sale), and it's fine too, but they appear to be off the air now.
crude kettle
I use some reagualr pla from eBay. 12 to 13 bucks and, depending where you live, free shipping. They work fine.
boreal lava
I haven't tried that one, but on the cheaper side of things I like the novamaker filament a lot, and 3d solutech I got seems pretty good, but I haven't printed a whole lot with it yet
mellow marten
I had to replace the mainvoard with an anet a8 board and when i try to turn the printer on, the extruder fan spins for a second and the mobo light turns on for a sec and then it goes dead
Heres a reddit link to a more detailed explanation of my problem: https://www.reddit.com/r/3Dprinting/comments/bdbanf/please_help_me_with_my_prusa_i3_mainboard/?utm_medium=android_app&utm_source=share
reddit
3 votes and 3 comments so far on Reddit
karmic brook
Sounds like your mainboard isn't booting. I'd try disconnecting everything but the logic supply and see if it boots up that way.
crude kettle
It may be they sent a fualty board. I hear that happens time to time. It would be good to check to see if that's case.
 unique juniper
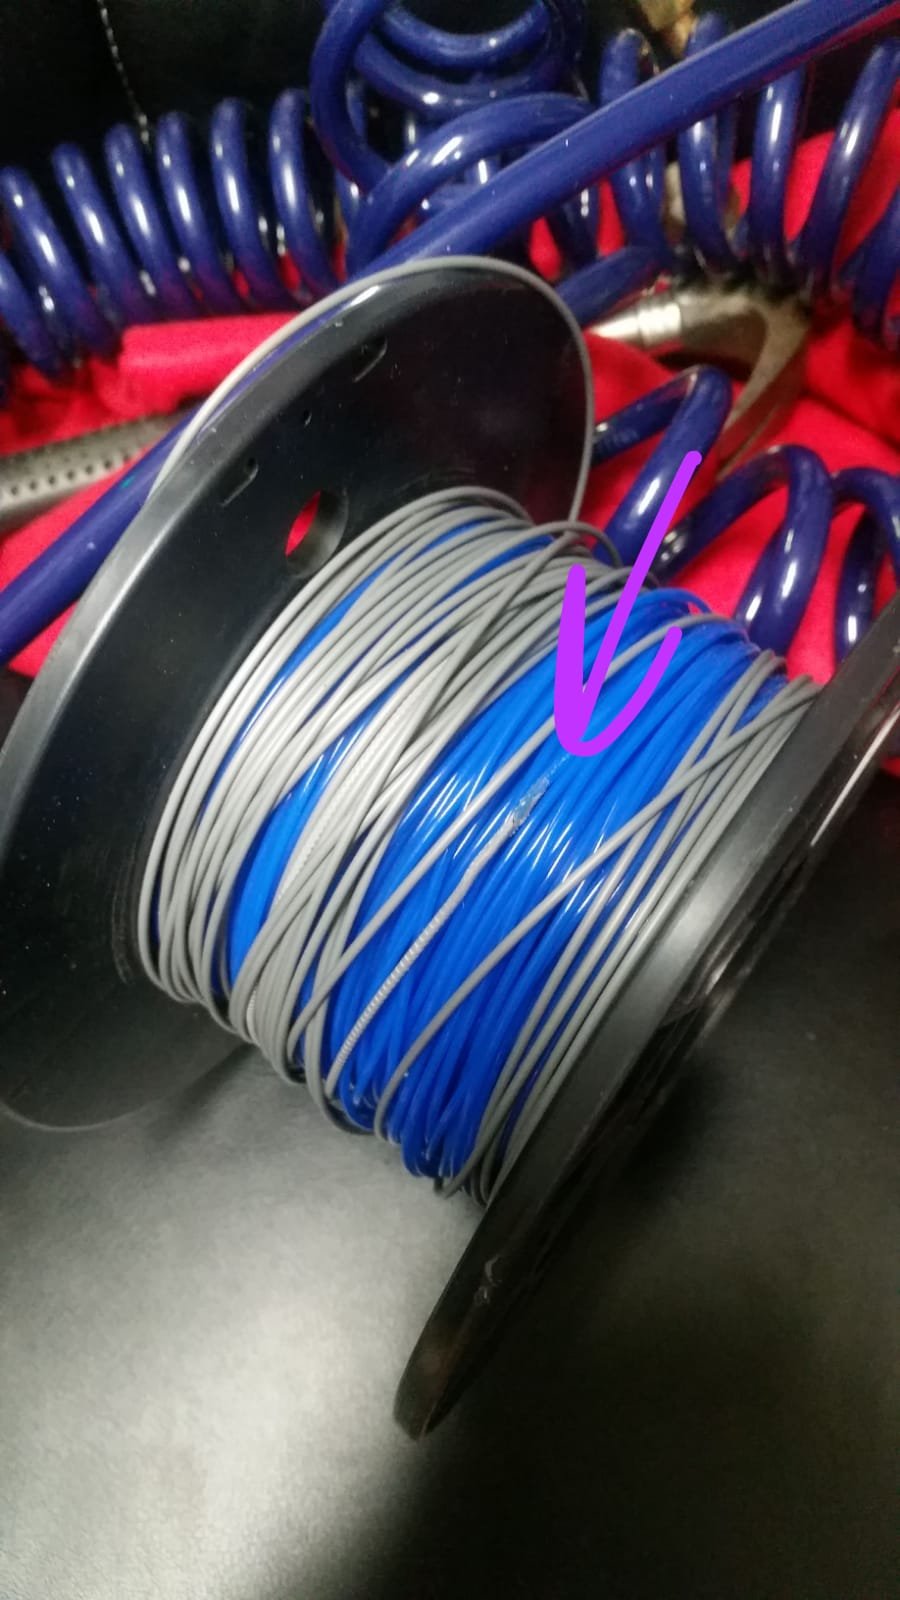
I bought some sample spools of 3d filament from amazon that do not have a spool. They are about 50grams each. Is there an easy way to use these without a spool?
formal relic
50g is just very short, just rolled it over other spool
unique juniper
We tried that and it keeps coming off. Is there a trick to it?
formal relic
tape the end of it
unique juniper
Ok. I will try that. Thanks
formal relic
let me take a pic for you
@unique juniper https://i.imgur.com/ePfuNub.png
I just weld it , but you can use a tape as well, just make sure it is not go in to the hot-end
boreal lava
Hey folks. I've been setting up a new printer, and am doing the calibration tests ATM. Everything looks great (save for some zits), but I have one thing bugging me, maybe someone could help.
Printing a test for ghosting shows little to no ripples, but there is a slight deflection along the X and Y long extrusions between features. So, for example, if I print a 20/20 cube it comes out pretty well, but the sides are ever so slightly concave. Any thoughts?
mellow marten
@boreal lava When the printer is running, does the hot end move linearly or is it moving with the concave shape?
formal relic
parallel to the bed
boreal lava
seems to be moving linearly. I haven't noticed any deviations in the path
mellow marten
@karmic brook should the board boot with just the powersupply connected? Is that what you're saying? becasue if so, i can confirm that it does not. in fact, it only attemppts to boot if the lcd is plugged in
@boreal lava if the hot end is moving linearly but the walls seem concave, it could be a layering issue. What layer heigh and nozzle diameter are you using?
boreal lava
.4 nozzle and .2 height
formal relic
can you upload a photo?
boreal lava
yeah, gime a sec and let me see if I can get one
formal relic
cool
mellow marten
was gonna ask the same thing @formal relic
boreal lava
It may be tough to see, but between the letters and corners it goes in slightly
lol also ignore the top layer. Still haven't got to getting that section sorted yet 😃
formal relic
what slicer?
boreal lava
Slic3r PE
formal relic
what material?
mellow marten
its possible it could be a very slight over extrusion...
boreal lava
PLA
formal relic
are you using heated bed?
formal relic
try to print with a brim
mellow marten
what have you tried to solve it so far?
formal relic
just for test
boreal lava
it had a brim. That notch on the bottom is in the model
Calibrated e-steps. Vhecked dimensional accuracy for all axes. Ummm...adjusting the speed some. Could it have anything to do with the jerk/acceleration settings?
boreal lava
on that one, about 210. I did run a heat tower prior to this step
to set the temp right
mellow marten
how did the heat tower look? concaved sides?
boreal lava
looked fine
mellow marten
hmmm
that make it more questionable of if its the printer or the model. Anything change between now and then? did you model on and not the other? did you use a different slicer?
*one
boreal lava
Haven't tried any other slicers yet. In the model everything is straight, and the preview from my print software, the layer runs are all straight.
mellow marten
i would maybe try adjusting extruder steps/mm and print speed. I'm not sure. however, that either of those will fix it, that is just where I'd start.
boreal lava
That was my thoughts too. I did the esteps already, but I can double check it. I'm hoping to find a fix that doesn't involve reducing print speed. My thought was that maybe as it passes the corner, the slower feed rate allows more filament to settle on the print, then during acceleration it is slightly less creating the concavity. I don't know though, and wouldn't know where to start with fixing it if I did
sonic hollow
retract speed mismatched with acceleration maybe?
boreal lava
hmmmm...hadn't thought about that
sonic hollow
or something like? the head slows down going into the corner, the extrude better slow down too...
boreal lava
could be. I haven't really adjusted retraction speed yet
mellow marten
i'd be surprised if retraction speed has anything to do with it. For some reason, the filament being extruded isn't following the pathway of the nozzle or is warping / falling. do you have a fan for the nozzle such that the filament cools quickly?
boreal lava
yes
It's really a pretty minor issue, so not a huge deal. It's just the puzzle of it all that nags at me lol
mellow marten
likewise
im am very confusion
i would like to say that my ultimate guess it it related to the speed or temps. Just for clarification, how large is the cube?
boreal lava
20x20x20...within 0.05 mm of that anyway
mellow marten
20 mm ^3 is pretty small for it to be printing at 90 mm / s. my printer, a prusa i3, never runs faster than 70-75 mm/sec
boreal lava
yeah, it probably never reached that speed. That is just where the settings are
mellow marten
that is just from personal experience though.
I'm not sure on the solution to this, perhaps someone else could help and likely knows more than I.
I wish you good luck on your 3d printing journeys though!
try the r/3dprinitng subreddit
There's a lot of great people on there who are really helpful.
boreal lava
Nah, you've been a big help. Once this next print finishes I'm going to take your suggestion on double checking the esteps. Looking at a thin wall on some supports now, and it may be a little low like you said
mellow marten
oh yeah, how thick are the walls of the print? I know that thin walls can lead to concavity
boreal lava
not sure of the measurements, but there are 4 perimeters
 deft raven
I need help with using sketchup with my 3d printer. Whenever I export something as an stl out of sketchup and import it into polar3d, my 3d printing program, the size always gets messed up. Sometimes it is too small, other times it is too big. Does nayone have any suggestions on what I could be doing wrong?
crude kettle
Check to out put units of your program when you export
crude kettle
I think it should be under preferences. If not that look it up.
Design and export units can be differnt at times.
shy kelp
@deft raven check your dimensions in both your slicer (polar3d) and sketch up are set to mm
deft raven
I think polar3d is where I am having the issue. The export settings for polar3d are in mm. I cannot find a place in polar3d to set import units.
shy kelp
Try a different program?
deft raven
It appears that polar 3D is linked with tinkerCAD somehow. Everything ports over very well from there, the problem is I was having issues designing what I wanted in tinkerCAD but I think I have it now.
crude kettle
Okay, let us know if the issue still follows
deft raven
It appears to be fixed when I use TinkerCAD. Thanks for the help!
crude kettle
Okay
deft raven
It just stinks being stuck to TinkerCAD for modeling
deft raven
I will try that. I used maya in college but lost access to it when I graduated 😞
crude kettle
I know the feeling.....well I will know eventually. I use inventor.
I heard that Designspark Mechanical works for some people
deft raven
I will check that out also. I just downloaded fusion 360
deft raven
@crude kettle Fusion 360 is also working with Polar3D. I must be something with Sketchup that Polar3D doesn't like.
crude kettle
I hear that Sketchup is kind of gittery at times/most of the time in the commuinty. Or atleast what I heard on youtube.
@deft raven
Also scratch the DesignSpark. They ask for info like a telemarketer even if it's for hobbyist. Account info with business info ya da ya da.
To annoying @deft raven
shy kelp
@crude kettle fusion doesn't need internet
@deft raven one benefit of using fusion 360 is its free to hobbyists
shy kelp
You can download your files, and fusion will automatically upload the files back to the cloud once you have internet again
boreal lava
@crude kettle lol nm @shy kelp beat me to it. Fusion does have offline mode
crude kettle
The main compilate I have is sometimes it requires me to login a lot....or maybe that when me.
with me
shy kelp
Yeah you have to log back in after every update
 idle aspen
Yeah, that's annoying too
shy kelp
But it's freeee
idle aspen
That's trueee
boreal lava
Has anyone tried silicone bed mounts in place of springs?
crude kettle
What do you have in mind
boreal lava
I was offered a set of silicone mounts for my bed, and was just curious if anyone had experience using them vs traditional springs.
crude kettle
I hear they are less effected by bed vibrations.
boreal lava
You think they're worth giving a shot? My main hesitation is that if something fails the springs offer a lot more give.
crude kettle
What is your print set up?
boreal lava
ender 5
 vagrant drum
anyone go through the process of replacing a PEI sheet for a Prusa MK3?
forgot to use gluestick before printing colorFabb XT and the print ripped off some of the PEI sheet...womps
coarse ruin
gluestick should not be necessary.... did you try to remove the part while it was still warm?
removing the 3M sheet... is difficult, acetone, heat, and careful use of plane blade.
the alternative is... fill the existing hole with "stuff" and layer a new sheet over top + adjust the Z offset.
this may be one of the better vids on this topic https://www.youtube.com/watch?v=DzaPFlEKP10

Ever had the problem of print just not sticking to a PEI 3D printer bed? I sure have... Thankfully, taking care of the printbed or even fully restoring one i...
vagrant drum
The Prusa instructions for removing the PEI sheet do see pretty involved. The glue stick makes a big difference for XT - other prints I have done with the glue separate without issue.
Thanks for the link @coarse ruin
coarse ruin
sure... i have yet to try polyimide or other copolymers. I've heard PETG is an issue. But when asked... generally the issue was they tried to rip the print off just after done (still warm). In nearly all cases... if you wait.... the part just sides off of PEI when below 30C (don't believe the bed temp because that is not the temp UNDER your part).
Tom recommends cleaning with acetone... i can say that will work but is not optimal. For PEI i use ethyl acetate when normal window cleaner / alcohol doesn't work.
shy kelp
@vagrant drum goof off works the same as d limonene. You can buy ultem off their website
@coarse ruin you need glue stick when using prusa PEI cuz it's thin
Likes to crack
coarse ruin
which one prusa? my MK3 i3 is not thin
coarse ruin
also probably depends on if you have the smooth or textured... mine is the textured which likely helps with over adhesion.
violet needleBOT
Adafruit Industries posted Robot Fish #3DPrinting #MakeCode #Adafruit

Watch as these seemingly lifeless creatures spring to life in this mysterious glowing jar. The enclosure houses the electronics and the models are printed in...
Adafruit Industries posted 3D Hangout – Robotic Critters and Keyblades

Multistreaming with https://restream.io/ This week’s #3DPrinting project on Adafruit Learning System https://learn.adafruit.com/robotic-creatures/ https://ma...
boreal lava
Hey @bold geyser just swapped in a lead screw with a 2mm lead on the Z. This completely eliminates the bed dropping on the Ender-5. Haven't tested much with it yet, but it seems to be working well so far.
I didn't want to push down on the bed too hard, but I did push down pretty firmly with no movement.
violet needleBOT
Adafruit Industries posted Fusion 360 Tutorial – Screw Threaded Parts

Taking a look at making tubing with screw-threaded ends. Working on the Keyblade prop and wanted to make the parts screw together. Using cylinders, coils and...
bold geyser
@boreal lava - so there was a corresponding setting to change?
boreal lava
Yeah, just needed to set the resolution to 1600 vs 400 to account for the thread angle.
It may be steps/mm if you are using an older firmware version. Not sure which comes flashed on the ender
bold geyser
Did you upgrade the firmware and flash a boot loader?
boreal lava
I've swapped in an SKR 1.3. But yeah, different firmware. The resolution (steps/mm) can be set through the advanced settings on the LCD though
On the stock board
bold geyser
Any other reasons for SKR? Maybe adding bltouch? Bltouch seems to be the most bang for your buck upgrade IMO
boreal lava
SKR is designed with BLTouch support in mind. has a servo header that can work with it, and it has all the wiring to run my TMC2208 drivers in UART mode.
I just got the BLTouch installed yesterday
bold geyser
Can you help me with one thing I’m unclear on? Previously I used a bot that you run from cura via USB, but it seems the ender 5 doesn’t work over USB with the version of Cura I have. Do I just need different software to run ender 5 in USB mode? I don’t prefer using an SD card.
boreal lava
I couldn't get that working through repetier host or cura either, but it did work with octoprint oddly enough.
be back in about 10 min
I think that has to do with the modified Marlin they use. It's basically marlin, but their own fork
bold geyser
Yeah doesn’t make sense. The one you tuber shows adding bltouch support by starting with stock marlin. I may pursue that but it seems the upgraded board may be the best plan long term. Adding the motor drivers makes the initial $30 cost jump pretty quick tho. So much for an affordable printer after all these upgrades
boreal lava
lol I feel ya. luckily I had a lot of stuff already on hand. If you have a raspberry Pi, octoprint works well with the stock board via USB
well, wifi from your computer, but USB to the printer
bold geyser
yeesh that sounds even crazier
boreal lava
It's actually pretty convenient. You control everything via a wifi interface instead of having to be tethered.
So far my most bang for the buck upgrade is the lead screw. Now I can fit a piece of mirror glass on there without it falling down, so that also solves the bed issue of that mat being super uneven
shy kelp
@boreal lava what screw did you settle on?
Also don't run tmc2208's in standalone
@bold geyser look into using a wifi SD card
boreal lava
@shy kelp I just got a cheap one from Amazon. Figured if it didn't work no real loss. Seems to be working ok
Why not run them in standalone?
shy kelp
@boreal lava They randomly stop working until they are reset. Theoretically, it's because of overtemp protection (theres a pre-warning and an interrupt pin for when this occurs, but no fw uses this).
boreal lava
Ah, ok. I'll look into which pad I need to solder then, and set the firmware to use UART
 tired forge
Making a case for an epaper and want to add a micro usb port to the case and extend that inside to plug into the esp8266, has anyone done something similar?
karmic brook
I usually do that by mounting the board so its USB connector is next to an outside wall and just make an opening large enough for the connector to fit. However, if this isn't practical, AdaFruit offers this handy panel mount micro USB extension cable https://www.adafruit.com/product/3258
tired forge
Ya, I'd normally got that route, but I need the case to be a bit bigger: https://www.aliexpress.com/store/product/AZSMZ-EPAPER-2-9-Mini-display-Esp8266-WiFi-EINK-YahooApi-open-source-github-espaper-weatherstation/2179173_32846657080.html

aliexpress.com
Smarter Shopping, Better Living! Aliexpress.com
Thanks for the suggestion though!
lofty sigil
I need to design and print an enclosure for an Ultimate GPS breakout board. The enclosure will sit on the underside of a length of PVC pipe. This allows it to track the direction that an antenna is pointing.
Are there any good tutorials/walkthroughs for how to design custom enclosures?
boreal lava
@lofty sigil not necessarily for that board, but this one covers the concepts https://www.youtube.com/watch?v=YxBamwc6s7U

Hey folks! In this weeks layer by layer, we’re taking a look at creating a 3d printed enclosure for the Raspberry Pi Zero. In this tutorial, we’ll use our Au...
They have a few more on other cases, but really the fundamentals don't change much
lofty sigil
That's pretty much what I was looking for @boreal lava thanks much
bold geyser
@boreal lava which new lead screw did you get? Seems like a decent upgrade for $9. Was it this one? https://www.amazon.com/Screw-Length-Copper-THSL-400-8D-Printer/dp/B07K195BCH/
did you get the corresponding anti backlash nut also?
boreal lava
@bold geyser That one looks to be the same as what I got. quality is hit or miss on these sometimes, so just be ready to check it out pretty well when you get it. I just got the cheap one to keep from spending $50 without testing first. I'll probably get one from misumi later, but this one seems straight and to be working fine for now.
On these printers, you really don't need an anti backlash nut on the Z. The weight of the bed/print will keep the nut engaged on the screw, so backlash shouldn't be an issue.
This is the one I got https://www.amazon.com/gp/product/B06ZZ59KPZ It is working for me, but I have no idea what sort of quality contro or overall reliability of these.
Oh....if you do decide to buy a screw from somewhere, make sure to measure before buying. I got a 500mm because I'm lazy and didn't feel like actually measuring closely. I can measure when I get home, but I think the original screw is 450mm
karmic brook
Due to amazon's "commingled inventory" situation, you may not even get the same item you ordered.
 potent ice
Being in Australia I barely use Amazon as one item on the US store is 13 and the exact same item on the Aus store was like 105 well in this situation
boreal lava
@bold geyser just got home and measured the screw I took off. It's 370mm.
anything over that should be fine. Like was said though, Amazon quality can be spotty on these things so if you get one from there be sure to check it over pretty well while it's in the return window.
violet needleBOT
Adafruit Industries posted 3D Hangouts – Keyblades and Solder Jigs

Multistreaming with https://restream.io/ Files, code, learn guide: https://learn.adafruit.com/kingdom-key-keyblade/ Project Video: https://youtu.be/aASsWYpQr...
 brazen sundial
i'm trying to make a "3d printer" form cd-rom stepper motors using an arduino mega and a ramps 1.4 i have a4988 drivers(with the pot facing away from psu connector and all jumper connectors under the drivers in place) but the motors dont give any response at all. i flashed grbl 1.1 on the arduino and am using UGS and bcnc on my pc but neither of them is giving me an error
violet needleBOT
Adafruit Industries posted 3D Printed Keyblade Kit

3D print and build your own Kingdom Key! This Keyblade is designed to be an easy-to-build kit with parts that screw fit together. No support material is requ...
Adafruit Industries posted ASK AN ENGINEER 4/24/19 LIVE! @adafruit #adafruit #AskAnEngineer #electronics

ASK AN ENGINEER! ----------------------------------------- LIVE CHAT IS HERE! http://adafru.it/discord Adafruit on Instagram: https://www.instagram.com/adafr...
boreal lava
What infill overlap settings are you all using?
 hollow ember
Hello, think I'll be a regular here. Sorry now for silly questions.
Recently got an Anet A6 off of a friend. Enjoying tinkering with it, but need to start printing stuff soon.
 fleet stratus
Careful now, make sure you look up safety modifications to minimise fire risk
shy kelp
Swap all the electronics
karmic brook
And keep the old electronics for a Frankenprinter
boreal lava
or a drawbot
shy kelp
Cnc foam board cutter?
crude kettle
Robo pancake maker
hollow ember
@fleet stratus yep,added mosfet to hotend, added one to hotbed, but wasn't working, so will try again sometime.
fleet stratus
generally speaking it is worth updating the main board, as you can add auto levelling etc. as to what you upgrade to depends on budget.
hollow ember
Would be nice to have that, but for now just want to get it working. Have down the calibration cube test, but still needs a few tweaks.
shy kelp
@hollow ember what kind of mosfets?
The baggood ones aren't really good
Here I'll dm u one of the good ones
violet needleBOT
Adafruit Industries posted Layer by Layer – SpaceMouse First Look
I just got a SpaceMouse compact by 3DConnexion and thought I'd do a quick demo using it to pan through an assembly while recording with wirecast. Thanks for ...
fleet stratus
Aw man is that really the first time you two have used the spacemouse? I really struggle in fusion without it
coarse ruin
pigs in space announcer voice miceeeee.... innnnn spppppaaaaacccceeee... 😃
 hardy jungle
I made an big mistake
when i was replacing de heatsink fan ,I accidentally cut off the thermistor cable
Gosh it hurts so much
hollow ember
@shy kelp https://www.amazon.co.uk/gp/aw/d/B07BJZRSCP these ones I ordered.
 young dirge
Hey guys does anyone know how to change an ascii geometry database into an STL file?
I am not spending $500 dollars for autodesk so I got BRL-CAD which can export into ASCII file but I need to change that into STL file for printing
young dirge
BRL cad isn’t going to work easily
crude kettle
Well, are you a student by any chance
young dirge
Yea but I don’t think it’s in my school shop
young dirge
Ok I will check blender out blender is like maya right
crude kettle

Import ASCII FBX. Get FBX Converter 2013: https://www.autodesk.com/developer-network/platform-technologies/fbx-converter-archives
@young dirge
this should help
crude kettle
Well, yeah I think so. Just not as easy. Fusion 360 works and it's free
crude kettle
like
violet needleBOT
Adafruit Industries posted Belt Pocket #3DPrinting #Timelapse @adafruit #adafruit

Every week we'll 3D print designs from the community and showcase slicer settings, use cases and of course, Time-lapses! Fanny Pocket Cisco Czapski https://w...
violet needleBOT
Adafruit Industries posted 3D Hangouts – Dragons and Heat Inserts

This week’s #3DPrinting project on Adafruit Learning System https://learn.adafruit.com/dragon-lamp CircuitPython Downloads: https://circuitpython.org/board/p...
violet needleBOT
Adafruit Industries posted 3D Hangouts – Dragons and Heat Inserts

Multistreaming with https://restream.io/ This week’s #3DPrinting project on Adafruit Learning System https://learn.adafruit.com/dragon-lamp CircuitPython Dow...
vagrant drum
anyone have suggestions for filling a large gap in a bronzefill print? i don't think the gap will affect the overall structural integrity just the asthetics
violet needleBOT
Adafruit Industries posted Dragon Lamp #3DPrinting @adafruit #adafruit

In this project we’re 3D printing a Dragon Lamp! Guide: https://learn.adafruit.com/dragon-lamp This dragon was inspired by Game of Thrones and actually has t...
 merry hill
Anyone have experience electroplating prints?
 weary lichen
@merry hill I haven't actually done it, but I've looked into it. What's your goal? Electroplate the whole thing, only parts?
merry hill
I imagine the whole thing. I hadn't thought about doing only parts. I feel like it wouldn't work too well.
weary lichen
Depends on what you're going for and how you do it.
If you want to use a normal filament, there are conductive inks and paints that you can use to cover the print, but you'll probably lose some detail
On the other hand, if you print with a conductive filament, it should be straightforward to electroplate directly, but I've never tried it.
merry hill
Oh wow, I didn't realize you could get conductive filament. That should have some interesting applications.
The detail was indeed what I was worried about but I will likely have to go with paints since it seems conductive is expensive
merry hill
This isn't quite 3d printing but it's dang close. If there's a better channel to ask please redirect me. Anyone have experience with mini cnc machines like these?
karmic brook
They're not high precision, the supplied software is DOS-only, and you can get them much cheaper on Aliexpress.
weary lichen
Wait, DOS-only?
karmic brook
" Supported system
Windows XP/ Win 7/ Win 8/ Win10 Home "
weary lichen
Oh, I thought you mean it was a command-line only sort of thing.
karmic brook
No, just no non-microsoft operating systems.
weary lichen
I'm sure someone has made firmware for them
karmic brook
That's why I qualified my statement with "supplied software".
weary lichen
Of course
boreal lava
I thought the firmware on those was grbl. Don't they just respond to G Code?
 spiral laurel
I looked at those last year and ended up building an MPCNC instead. jscut and cncjs have served me well, along with Fusion 360's CAM functionality
coarse ruin
there are some systems out for electroplating plastics. @merry hill but it depends on what you want as a result.
smooth surface is needed if you want a shiny metal surface (mirror like) for chrome or others.
but if you just want it for EMI shielding you can use a spray on conductive coating / paint
kits for electroplating, copper, silver, gold are on the market.
most plating involves several layers depending on the desired result and use.
merry hill
@karmic brook yeah that just happened to be the screenshot I took, I went straight to aliexpress to see the cheaper ones.
I want something that mills soft metals a little better so may end up going with the Millright M3 or building an MPCNC. @spiral laurel how much did you end up spending to build yours?
karmic brook
I spent a fair amount of money, as I started with a Sherline mill and added steppers, a stepper driver and an Arduino to run GRBL.
merry hill
How much was your Sherline?
karmic brook
It's been a few years, I think it was about $900 with the options I chose.
spiral laurel
I think it was $500-600 for the initial 2x2' setup. Probably more in wood, sanding stuff, finishes, etc over the last year
oh, and bits. Big, and small, and round, and pointy, undercut
pastel flume
Hello everyone!
I have a question about PCB and 3d printing. My idea is the creation of very simple eletronic boards is building a press / stamp / stencil (dunno exactly what to call it). In this machine I am able to insert aluminium foil and do some kind of die cutting to get a simple aluminium foil circuit path, which I am able to e.g. glue to a cardboard box.
Therefore I am searching for a program which converts my gerber / eagle file to g code. There are some applications around that solve this problem, but they to the conversion for milling machines, so that they produce an outline g code file. I need to get the other way around.
Someone understand what I am talking about?
karmic brook
I think @errant lodge did something like that with copper foil, but I don't think Gcode was involved (may have all been done in Illustrator). However, an outline is probably what you need. I'm envisioning cutting it out with something like a vinyl cutter that moves a knife in the programmed path. If you want the traces, you then remove the material outside. If you want a stencil, it's the same cuts, but you remove the material in the traces instead (in vinyl cutting, the process is known as "weeding", and tweezers are often used).
pastel flume
Thank you @karmic brook - at the moment I am experimenting with inkscape which seems to be pretty much the same as the Illustrator way. So I hope that there's a middleware to do this conversions on the fly
karmic brook
Yeah, Inkscape is a vector editing program too. There are extensions available to generate Gcode like Gcodetools and Eggbot.
pastel flume
that is really cool. Thank you again.
pastel flume
I found a very promising tool: https://github.com/Nikolay-Kha/PCBConverter

GitHub
Tool for generating gcode for CNC machines from PCB gerber files. - Nikolay-Kha/PCBConverter
this one has the possibility to release to 3d printer file ☺
 errant lodge
@pastel flume
@pastel flume
I just wrote a quite big message but the bot advised me to watch out for my language & deleted it :/ ..
anyway, in short:
- I'm using Adobe Illustrator > .dfx > Silhouette Studio to cut copper traces from copper tape
-> if you need any more hint, feel free to ask ( sorry but the message deleted by the bot was more detailed .. )
pastel flume
@errant lodge maybe the bot is to afraid of to technical or detailed messages. I printed the Eagle board file to an PDF printer, opened it in Inkscape, then I imported it to Design Spark and now I am working on the 3D. Thank you for your kind help
errant lodge
@pastel flume
^^
-> we gotta teach this bot how to behave ( ex: telling the user about which 'offending' stuff is present instead of deleting all at once 'd be a great start .. unfortunately, 'got few things to mess with before doing so ;p )
-> I currently don't know much about InkScape ( too bad, I know :/ .. ), but if your workflow is as you desired, I'm glad it is so ( even if my contribution is somewhat more than lightweight .. ;p )
pastel flume
the eyes of the law are everywhere and fulfil the code of conduct with strength and wisdom (caugh)
Inkscape is really a help as it can import and export lots of formats and once you know how to control the programm, it is a big advantage. It's basically the same with AI unless Inkscape is open source software.
Yes, you helped me a lot 😄
violet needleBOT
Adafruit Industries posted 3D Hangouts – Heat Set Press, PyBadge and Engines

Learn guide: https://learn.adafruit.com/heat-set-rig/ YouTube video https://youtu.be/bbsD-3_AP_0 Soldering Iron 60W https://www.adafruit.com/product/3685 202...
violet needleBOT
Adafruit Industries posted 3D Hangouts – Heat Set Press, PyBadge and Engines

Multistreaming with https://restream.io/ Learn guide: https://learn.adafruit.com/heat-set-rig/ YouTube video https://youtu.be/bbsD-3_AP_0 Soldering Iron 60W ...
violet needleBOT
Adafruit Industries posted Heat Set Insert Press

In this project we're building a rig for installing heat set inserts. Use 3D printed parts and hardware to build a solder rig with smooth linear roller actio...
shy kelp
butwhy.jpeg
proven musk
Getting them dead perpendicular can be a little PITA, so I do see some point in it. If it took zero space in my shop, I'd probably make it 😃
earnest plover
Does anyone here have any experience with a Dimension SST 768? Someone wants to give my Makerspace one that needs to be repaired and we're wondering if it's worth having. We already have 3 Ultimaker 3's, 2 Prusa i3 mk2's, and a Formlabs Form 2. The Dimensions broken part is apparently $3800, but we have the equipment and machinists to make anything we need.
violet needleBOT
Adafruit Industries posted Layer By Layer – Heat Set Press Assembly

Taking a look at the heat set press assembly to swap out the roller carriage for a different design. I walkthrough the process of exporting and importing com...
 grim juniper
@merry hill I have a CNC 3018, but not the upgrade version. I paid half that price on Aliexpress. It does use GRBL. I use it for making PCB's. You can make it do the equivalent of a bed-leveling by making it probe a height map
Is the something else you wanna know about it?
edgy steeple
$2 for 10 PCBs (100*100mm) https://jlcpcb.com Circuit, Code, 3D Model and more details here ► https://howtomechatronics.com/projects/arduino-3d-wire-bending-...
 supple stratus
@shy kelp well because I actually needed it in a project and ruined a few parts doing them by hand. Pretty cool I got to build a tool that helps me and learned more about assemblies and hardware. Bill of ATMakers built a similar version to help build switches for folks who are in need.
edgy steeple
a very cool tool @supple stratus
violet needleBOT
Adafruit Industries posted Retractable Lightsaber #3DPrinting #Timelapse @adafruit #adafruit

Every week we'll 3D print designs from the community and showcase slicer settings, use cases and of course, Time-lapses! Collapsing Lightsaber John Mulac htt...
 novel lark
@supple stratus Is your PyBadge case available for download yet?
edgy steeple
nice!
shy kelp
@supple stratus what were you doing that requires that? The only benefit I could see to it is you can go a bit quicker/hotter
supple stratus
@novel lark Yep, its on github and thingiverse https://learn.adafruit.com/pybadge-case/3d-printing

3D Print a wearable case for your next con!
violet needleBOT
Adafruit Industries posted 3D Hangouts – PyBadges and Lightsabers

Multistreaming with https://restream.io/ Learn Guide: https://learn.adafruit.com/pybadge-case/ YouTube Video: https://youtu.be/rTxf4x6bQPc PyBadge https://ww...
violet needleBOT
Adafruit Industries posted 3D Hangouts – PyBadges and Lightsabers

Multistreaming with https://restream.io/ Learn Guide: https://learn.adafruit.com/pybadge-case/ YouTube Video: https://youtu.be/rTxf4x6bQPc PyBadge https://ww...
novel lark
Printing out @supple stratus 's PyBadge case on my Monoprice Select Mini V2. (Which I got for $99 on Black Friday sale. It was an open-box item, and needed a little love.)
violet needleBOT
Adafruit Industries posted PyBadge Case #3DPrinting #Adafruit

In this project we’re making a case for the Adafruit PyBadge. This 3d printed case is designed for a lanyard so you can use it as a conference badge. Learn G...
sonic hollow

GovDeals is the place to bid on government surplus and unclaimed property including heavy equipment, cars, trucks, buses, airplanes, and so much more.
karmic brook
That's a serious printer for $450. You'd need 30A 3Ø power for it, but it's worth it. I wonder what kind of laser it uses.
Looks like a CO2 laser, melting nylon powder. Looks like it can do some precision parts.
 potent ice
what is he holding in the picture
karmic brook
I'm not sure, it looks like some sort of adjustable filter, but a good demonstration of the kind of detail that printer is capable of producing.
shy kelp
hes not even holding it LMAO
might me sls, havent really held many sls parts tho
@potent ice @karmic brook just look at the image for a sec
and btw the material for an sls cost more than that
and it can kill you
karmic brook
It's nylon powder, not too horrible.
I'm not sure why I'm looking at the image, are you referring to something in particular?
shy kelp
@karmic brook i want you to hold something in front of you, note the orientation of the hands
boreal lava
It looks fine to me. I can see how it may look like he is looking the other way. Given the direction of the lighting his left eye probably has some reflection. His right eye (our left) on the other hand, seems to be looking straight at it
Why would anyone spend time photoshoping an image that would be so easy just to take?
shy kelp
it looks actually impossible to hold it like that
violet needleBOT
Adafruit Industries posted Layer by Layer – PyBadge Snapfit Case Pt 1

Taking a look at the Adafruit PyBadge. In this three part mini series, we'll deep dive into the process of modeling a parametric enclosure with snap fit feat...
Adafruit Industries posted Layer by Layer – PyBadge Snapfit Case Pt 2

Picking up right where we left off, in this episode we're going to create the proper cut outs for the buttons, display, neopixels, sensors, switch and USB po...
Adafruit Industries posted Layer by Layer – PyBadge Snapfit Case Pt 3

In the last installment of this mini series, we're creating snap fit features. Instead of drawing them within the document, we'll import it as an external co...
violet needleBOT
Adafruit Industries posted 3D Hangouts – PyBadge and 3D Scanning

Learn Guide: https://learn.adafruit.com/adafruit-pybadge/ YouTube Video: https://youtu.be/K2zu00C6lho PyBadge https://www.adafruit.com/product/4200 PyBadge L...
violet needleBOT
Adafruit Industries posted 3D Hangouts – PyBadge and 3D Scanning

Multistreaming with https://restream.io/ Learn Guide: https://learn.adafruit.com/adafruit-pybadge/ YouTube Video: https://youtu.be/K2zu00C6lho PyBadge https:...
boreal lava
Hey, I'm designing a few prints in Fusion that I may end up sharing, and I am using some of the adafruit models that are on github in them (mostly for sizing, hole placement, etc). Will it be ok to include these models in the shared files? What sort of attributions/links should I add if so?
 turbid hill
Adafruit models on Github should have a license attached to them. https://github.com/adafruit/Adafruit_CAD_Parts/blob/master/LICENSE is an MIT license.

GitHub
CAD files for various boards, components and parts - adafruit/Adafruit_CAD_Parts
boreal lava
Thanks. I haven't yet decided how the final print will be shared, I may just build in parts and import what I need for the final model, but good to know the option is there.
 low shore
I completed this display piece 3D printed in plastic and finished off with some electronics from Adafruit for a little magical sprinkle https://youtu.be/WIt1f6YSCQQ
This is my Avengers inspired display 3D printed then coated in @Barnes Iron B coat. And running off an @Adafruit Gemma using a capacitive touch pin to cycle ...
violet needleBOT
Adafruit Industries posted 3D Hangouts – PyGamers, Cranks and Scanners
 violet needleBOT
Adafruit Industries posted 3D Hangouts – PyGamers, Cranks and Scanners

Multistreaming with https://restream.io/ Learn Guide: https://learn.adafruit.com/adafruit-pygamer PyGamer https://www.adafruit.com/product/4242 Button Caps h...
boreal lava
anyone else entering the Fusion 360 challenge on thingiverse?
 wary bane
hi, i have a question to my print settings

Every week we'll 3D print designs from the community and showcase slicer settings, use cases and of course, Time-lapses! Collapsing Katana John Mulac https:/...
I want to print this Katana and I am using Cura as a Slicing Software
after infill, the Viedeo says 0.8mm retract but i don't know how to apply that in Cura
karmic brook
The search menu is your friend
weary lichen
So. I am having issues. Using Slicer prusa edition. From what I can tell, it's either overlap issues or extrusion issues. Walls are pretty much completely detached.
Increasing overlap doesn't seem to do much. Increasing extrusion seems to help but causes it's own problems. The difference between these two prints is one has 1.01 extrusion amount. It became super lumpy on the edges.
I have been fiddling with these settings all day, and I only seem to get these two results. Detached walls, or bubbly nasty walls.
weary lichen
It appears that it's not either of them. Examining another print shows that the interior/fill is connecting to the inner wall itself, but each individual wall isn't connecting.
weary lichen
Bingo. Increased interior perimeter extrusion width and problem solved.
violet needleBOT
Adafruit Industries posted Layer by Layer – Weekly Ep 1
Update on projects this week. We're taking a look at the Adafruit Crickit HAT for Raspberry Pi. Library IO website for generating custom headers. new 3D scan...
violet needleBOT
Adafruit Industries posted Layer by Layer Weekly Ep 2

This week I'm using the Manage Lost Projections feature in fusion 360 to update the enclosure for PyGamer. Rule of thumb is to use as little projected geomet...
 buoyant temple
anyone ever tried a first layer for a finger print scanner? i just got a DIY 3d printer
noticed when printing brims they look kind of like a finger print
 hidden sable
@buoyant temple on mine they don't look fine enough to pass for a fingerprint
Anyone using simplify 3d find that fff profiles seem to not persist through reboots on mac?
buoyant temple
im super new to 3d printing, has anyone tried cooking PLA to make outside smooth??? like heat up some oil and dunk them for a second? at like 165c??????
 hexed umbra
Can someone help me in marlin i havent been able to use my printer for days @here
spiral laurel
super hot oil, sounds like a great way to maim yourself. Less drastic heating causes warping before getting good smoothing.
that's an interesting idea, but 165c is probably too hot to try that.
karmic brook
I've seen people using heat guns, IR radiators, solvents, and fillers to get a smooth surface.
coarse ruin
i have used a SMD reflow (hot air nozzle) to selectivily modify prints... In most cases I don't need a smoother surface.
violet needleBOT
Adafruit Industries posted 3D Hangouts – Games, Hinges and Cranks

Multistreaming with https://restream.io/ Learn Guide: https://learn.adafruit.com/adafruit-pygamer PyGamer https://www.adafruit.com/product/4242 Mini Oval Spe...
violet needleBOT
Adafruit Industries posted 3D Hangouts – Games, Hinges and Cranks

Multistreaming with https://restream.io/ Learn Guide: https://learn.adafruit.com/adafruit-pygamer PyGamer https://www.adafruit.com/product/4242 Mini Oval Spe...
 fair scarab
This is my issue: https://i.imgur.com/Akb7FhW.png
can anyone recommend a easy way to connect parts? I am using cura, I dont really like brim and all the bed support options as they are hard to remove but i would appriciate a way to just have a little line between parts that I could remove later on. Something like this:
https://cdn.thingiverse.com/renders/59/12/83/3a/35/1bb82f1505fcde0c37264d1ab78e3084_preview_featured.jpg


 karmic brook
Ah, like snip-off sprues.
fair scarab
yeah exactly
I dont think there is any support for it, looking into posting on the cura repo and asking for help to develop a plugin
karmic brook
I suspect you're right, but perhaps something like a 2D variant of tree-style supports and/or Voronai tesselation might yield the sort of result you're looking for.
I suppose a simple grid would basically work and be a lot easier to code.
karmic brook
I don't either, it might be something to implement at an earlier stage so it's part of the 3D model before slicing.
fair scarab
ah I see
then this might be a candidate

The lack of "custom supports" feature is something that that many users often brought up as an argument against Cura. Not anymore - I created the Cura custom supports plugin, and it works similar to the custom supports function you see in other slicers like CraftWare or Simpl...
its a done plugin that could be rewriten
karmic brook
I really prefer to start with working code and modify it than start from scratch.
fair scarab

GitHub
Custom Supports plugin for Cura. Contribute to lokster/cura-custom-supports development by creating an account on GitHub.
yeah exactly
but as said this is a part you have to add yourself to the build plate
its not really a dropdown option like brim
and that would be the best but this is probably a good start
karmic brook
Yeah, an automatic process would be lovely (hence my Voronai comment) but more work.
fair scarab
but the voronai is not a plugin afaik
or am I having a brainfart
ah nevermind
I wish there would be examples for automatic process scripts, but I doubt that they are even possible
but I will post on their repo
karmic brook
It's a mathematical technique to divide up a plane.
spiral laurel
sprues won't accomplish anything on a 3d printer. Tape, glue, magigoo, different beds etc are ways to improve adhesion/release
fair scarab
@spiral laurel sure it helps. I tried printing without 4-5 times and it always failed. I remodelled the part and it worked every print afterwards.
coarse ruin
Tape = fail, glue = only for special materials, magigoo = only for certian platforms, DIFFERENT BEDS = with correct surface covering are the most reliable.
lofty sigil
@karmic brook Not just a plane -- I use Voronoi diagrams with star data to procedurally generate FTL jump routes for the sf world I'm writing
karmic brook
Cool, I learned something new!
Of course, when I think FTL, I tend to think four (or more) dimensions.
lofty sigil
yeah, but all I really need is to know which volumes of space "belong" to certain stars
so I can figure out which star systems are neighbors
and build the potential jump network out from there
karmic brook
Mathy! I like it.
lofty sigil
rather than just make stuff up, I wanted to use the https://github.com/astronexus combined real star data as a source
 karmic brook
I had to solve a vaguely similar problem once to optimize routes for Frito delivery trucks.
lofty sigil
but this has nothing to do with 3d-printing so I will go back to lurking...you just caught my eye talking about Voronoi diagrams. 😃
 urban harness
my net a8 has a tronxy xy-08n Z sender on it but it has just stoped seeing the build plate it will see my metal steppers fine has anyone come across this ?
even more odd if i lower it down it docent see it but if i put metal stweezers under it it then will see the build plate till it next moves then stops seeing it
karmic brook
Magnet stuck to it, maybe?
urban harness
nope its been very odd with help i found someone say its due o the control cable being next to the others for fans and nozzle i removed it with no look then lower the sender witch seems to have worked for what ever reason the sender can't be at the top of its screw holes like it was yesterday ?
karmic brook
Odd. Interference doesn't seem likely to me based on your experiments so I was guessing something shifted it's hysteresis curve
urban harness
no idea what it would be i used it till 1 am last night (uk time ) and come to it at 10 am tday and it just went nope not going to work
karmic brook
Maybe something near it switched off at the wrong moment and induced a magnetic field? All I have is guesswork
urban harness
hopefully not don't fancy trying to fix it again the sad thing is i had just sorted the z off set after fixing the bed and then this happened so im how re doing the z off set again
karmic brook
If you have a demagnetier/degausser available, maybe give it a try
urban harness
i do but its for a real to real 2 track with exstrender arm no way to really get it in there :/
karmic brook
That's frustrating
urban harness
yep
hollow ember
Maybe a odd question, but I'm after a sample pack of colours. Is the PLA for 3D print Pens same or similar for Printers?
urban harness
sos iv never used the pens so im no help 😦
karmic brook
As long as the filament diameter is the same, I'm guessing it would be fine. You may need to tweak the temperature
boreal lava
I think most pens use 1.75 PLA. It should be mostly the same stuff you'd get on a spool. I give my buddy the leftovers from my rolls, and they seem to work ok. I think the pens are slightly cooler, but extrude more slowly, so get good enough melting for most of them.