#help-with-3dprinting
1 messages · Page 21 of 1
 shy kelp
Thanks
 weary lichen
Just make sure if you go with BuildTak that you get the real stuff. The more generic ones have adhesive that's super difficult to remove, while the real BuildTak is designed to be removed at the end of its lifespan and replaced with new stuff
shy kelp
Thanks the help
 violet needleBOT
Adafruit Industries posted Fusion 360 Tutorial – Modifying Sketches (For Beginners)

Here's how to make simple edits to features in fusion 360. This was inspired by recent comments in the thingiverse page of the Adabot Google AIY voice kit fo...
shy kelp
Hey @weary lichen yiu have experience with octoprint?
shy kelp
I have a problem setting it up with my rpi3
I loaded the image to a micro SD but can't SSH connect to i5
It
weary lichen
Do you have a monitor/tv/etc + keyboard so you can take a peek at the Pi?
To get the IP address
shy kelp
Yes
weary lichen
When you get logged into the Pi, you'll want to type "sudo ifconfig" into the command line (If it's opening into a desktop, you'll have to open a terminal)
https://learn.adafruit.com/adafruits-raspberry-pi-lesson-3-network-setup/finding-your-pis-ip-address

Learn how to connect to the Internet wirelessly or with Ethernet
shy kelp
Also says I can go to octopi.local on a web browser. But when I go there nothing happens
It just says server not found
weary lichen
Yeah, you'll need to get to the IP address, becasue for some reason your network isn't recognizing it.
type "pi" and hit enter
Then type "raspberry" and hit enter when it prompts for password. It won't show any change when typing the password - this is normal
weary lichen
sudo ifconfig
the "sudo" is important as that runs it with the appropriate permissions
weary lichen
Can you get me a picture?
shy kelp
shy kelp
Destination hist unreachable
weary lichen
OK. The reason you can't SSH into it, is because it isn't cooperating with your network.
shy kelp
I have 2 networks, should I try my secondary one?
weary lichen
PRobably
shy kelp
Should the quation marks around ssid and password be single or double
weary lichen
Don't think it matters as long as thay're both the same. I use double.
shy kelp
I used double, rebooting the Pi now
Alright
Here's what it shows
octopi.local still doesn't work
weary lichen
what's your /etc/network/interfaces look like?
weary lichen
Personally, I'd remove wlan1 in its entirety. It might be getting hung up on the wrong one.
It also looks different than my standard setup
iface wlan0 inet static
address 192.168.1.200
netmask 255.255.255.0
gateway 192.168.1.1
wpa-conf /etc/wpa_supplicant/wpa_supplicant.conf
iface default inet dhcp```That gives my Pi a static IP of 192.168.1.200 - super useful for SSHing in
shy kelp
I'll try that
shy kelp
Above the allow-hotplug wlan0?
weary lichen
Yep
weary lichen
Yeah
weary lichen
sudo ifconfig shows what?
(I don't expect octopi.local to work. Those type of masks have never worked for me for my Pis)
shy kelp
weary lichen
Aha, here's a try:
edit or create /etc/sysctl.conf
And add "net.ipv6.conf.all.disable_ipv6=1" on a new line
SAve it, and reboot
shy kelp
Is there a way to do it on the Pi without having to remove the SD card and out it into my. Laptop?
Will sudo nano work?
weary lichen
Yep
Reboot can be done by "sudo reboot"
Nano is what I use for editing local files
shy kelp
Sorry I'll have to check tomorrow. Thanks for the help
weary lichen
No worries!
shy kelp
@weary lichen is there a way to make yiur own web interface for the MP mini?
It's web interface is really bad lol
shy kelp
Does the printer use an ESP chip set for wifi?
weary lichen
I doubt it, but it's possible
Down on that page, it shows how to upload a custom web UI
weary lichen
@cobalt quarry https://www.thingiverse.com/thing:2737211

A very basic Pi Zero case. The Zero should snap in to the bottom part fairly easily - although some quick cleanup with a hobby knife or sandpaper may be required. Has slots for USB, SD card, power, HDMI, and camera, along with the header. Top piece is connected to the bottom piece with M2 or #2 screws. As with all screw holes, they may vary depending on your printer. Screws should slide easily through the top holes as they're slightly wider, and then catch and self-thread in the bottom holes.
Those are the files to the Pi Zero case.
shy kelp
So I'm not sure why
But the web interface works great all of a sudden
Takes 5sec average to upload a 1 Mb file
5mb file took like 7 sec
weary lichen
I'm guessing some form of intereference somewhere.
shy kelp
It makes me mad that I have to go to a website to see the estimated print time lol
weary lichen
If you're anyway decent with web coding, you can put it on the web interface
 cobalt quarry
@weary lichen Thanks. Now I just need to wait for my printer to arrive.
weary lichen
That's awesome.
shy kelp
Didn't think it was going to turn out that good
Accidently bought the wrong type of tape and everything sticks to it too well
So then I have to raise the bed temp to 60 so the sticky part will melt away
 spice estuary
Little bit of detail work on smooth part of it, fantastic
 simple fable
3d printed rollercoaster that works: https://www.open-electronics.org/3d-printed-fully-functional-mini-roller-coaster/

While many enjoy roller coasters, few can claim the same dedication of engineer Matt Schmotzer, who 3D-printed a 1/25th scale replica of Invertigo, a boomerang coaster at Kings Island in Ohio. Since I was little I had this dream of becoming a roller coaster designer, like many others. I had made a few static models but was never satisfied because they were not working. When I was younger I did not have the money or tools available to create a coaster that worked so it wasn’t until recently that I had the opportunity to pursue the dream of creating a working model. The CAD model took only a week to complete, but 3D printing this 4’ x 8’ creation took an incredible 450 hours. This doesn’t include the countless hours spent assembling and debugging it. The coaster runs on an Arduino Mega, using 42 of the 54 available IO pins. This allows it to not only lift and drop the coaster, but also feature details like actuated gates and restraints to keep the tiny [...]
shy kelp
This benchy has been underwater for 2 days
It doesn't appear to get weaker or anything like everyone says
weary lichen
@shy kelp From what I've seen, it's about what's in the water
Also, i think Benchy Boat is the wrong side up
shy kelp
Lol
It won't stay up for some reason
Also, @weary lichen how can I fix/prevent stringing on prints?
weary lichen
Stringing! A number of ways.
Retraction is first
Z-lift is another
And there's an option fir keeping moves within the solid part of a print
You'll never be able to completely get rid of it, but retraction is good to work in
Z-lift had the biggest effect for me
shy kelp
1.what is retraction? 2. How can I stop it in slic3r?
 tribal egret
shy kelp
tribal egret
shy kelp
Thanks
weary lichen
Retraction is sometimes good, sometimes bad.
Too much is bad. But too little can lead to oozing
 timber niche
Try weighing a freshly printed part then leaving it in water for a few days and them weighing it again. I'm guessing it will get at least a little heavier from absorbing water. You could also take measurements before and after soaking to see if it swells.
tribal egret
how would leaving that same part out to dry out in the sun (or something) affect the material? will it shrink down ? @timber niche
shy kelp
Has anyone used ASTRO print before?
Octoprint won't work for me so Im gonna a give a shot at astro print
weary lichen
@shy kelp What issues are you having wtih OctoPrint?
weary lichen
Wasn't sure if you had figured that out and ran into other problems or not
shy kelp
I was thinking of trying astro print. Good idea?
weary lichen
Never heard of it
shy kelp
Ok
 uncut ledge
Stick with octopi
Astroprint is the newb friendly version of octopi, also less features
weary lichen
@shy kelp To answer a question from earlier: It looks like the driver board does, in fact, have an ESP8266 on it. Looks like it handles the screen, and probably wifi too
shy kelp
Oh
Then you could easily y change the OS
Well no
The wifi interface
Just flash a new wifi OS on that bad Johnson
Like the cloud NodeMCU
weary lichen
The primary driver is an M3 chip
timber niche
I downloaded astroprint but haven't played with it yet.
I looked at the Simplify3D site yesterday and noticed they now say they support Fedora Linux. They used to only support Ubuntu.
cobalt quarry
2018 will be the year I start doing 3d printing. Very excited!
timber niche
I had one of the 3d printed parts on my printer (cheap Chinese Prusa i3 knockoff) break on me. I was able to print a replacement at my local maker space (where I built the printer in the first place), but Cura put the supports right down the middle of where screw holes go, filling up the holes. So I had to drill out the holes and in the process the bit took a bite out of the side of one of the holes. If it weren't for the fact that it is sandwiched between two other parts, it wouldn't sit straight.
So first I have to figure out if there is anything that can be done in Cura to modify support placement. If I can't do that, I think I'll invest in Simplify3D.
 spring pine
🎆
tribal egret
what are the speed limits of an 8bit vs 32bit controller board (eg. RAMPS vs. Smoothieboard) for a cartesian printer. What are the speed bottlenecks, etc..
@weary lichen im planning on swapping the controller board on the mpsm mini to one with tmc2130 steppers
weary lichen
@tribal egret I think you'll run into issues with extrusion/other printing issues before you get to the theoretical limits of the hardware.
@tribal egret I'm planning on modifying mine, eventually, to have dual extruders for two-material printing.
tribal egret
@weary lichen nice 😄 i did a few mods over the holidays and feel more comfy with doing some more.. eg. speed, im currently running it at 40mm/s for a minimal worry print
would like to speed it up, get better octoprint controls working (currently have to manually do reconnects for example), better initial print/thermal run off
weary lichen
Apparently connect/reconnect is an issue for the MPSM
tribal egret
yeah, its not a big deal but also have to turn off the machine from power after each print
I replaced the hotend with one that has a silicon cover and the extruder arm etc for flexible filament support
weary lichen
Sounds like you could put in a relay
tribal egret
have you seen the reviews on the tmc2130?
weary lichen
Heh, flex printing is cool, but I also plan on building a printer of my own design... eventually.
Nope.
I only juuuust got in to 3D printing recently.
Saw someone post about the MPSM being on sale for Cyber Monday and grabbed it then.
tribal egret
@weary lichen yeah prolly wont print flexible for a while but had the parts printed a while back so xD
tribal egret
@weary lichen yep, the results for my query didnt result in reliable pros/cons specifically with the new drivers, might be too new still
 south elbow
@weary lichen you said my printer broke because of heat creep. I think your right. I got an entire new hot end assembly and compared the two pipes. somehow i missed the fack that the plasticy lining in the tube had melted
and it probably happened because the stock heating block never had a screw that secured the thermometer thingo in, so it sometimes fell out.
well, better say thanks man i guess
weary lichen
That sounds a little different than heat creep, but at least you solved the issue
Having the thermistor fall out could give you some problems though
The plastic tube on the inside is PTFE, if I remember correctly - Which melts at heat not too far above what the print head operates at
uncut ledge
@tribal egret the 2130s are a dream
Tuning current on the fly without fiddling with pots is so nice
Hybrid stepping mode is slick too, you can control the speed threshold to switch to spreadcycle on a whim
The only caveat is hybrid mode has some anomalies
Moving at, say, 75mms with the threshold at 90mms will behave differently than if it were set to 150mms
tribal egret
@uncut ledge how fast do you print?
uncut ledge
uh
on my machine with tmc's no more than 70mms
the issues i have with hybrid mode are with the extruder, im more of a fringe case
for most people its probably fine
just an anomaly i noticed
timber niche
By the way, for anyone wanting to experiment with flexible filaments without spending too much on filament, http://3dprintny.com/ sells samples and small spools. You can get a 15 foot sample for $1.99.
timber niche
Also by the way, I created a mini spool for use with those samples: https://www.thingiverse.com/thing:2342235

I bought some 15 foot flexible filament samples from 3DPrintNY.com which are sold as loose filament coils in a bag. I wanted to be able to put them on a spool but didn't find anything that seemed right for my application so I created something inspired by jimustanguitar's mini spool for 50g samples.
I created this to be customizable to different sizes and for different hub diameters.
shy kelp
That's awesome, make a 3d pen mount for that lol
spring pine
😃
violet needleBOT
Adafruit Industries posted Motion Timelapse for Maker Projects

Here's how we capture motion timelapse videos of our projects. Learn how to build a motorized camera slider at https://learn.adafruit.com/motorized-camera-sl...
 crude kettle
hey everone, I could use some ponters. I'm working on a low cost 3d printer linear system that I want to be accessible for a wide rang of people. An Idea I want to use is using hdpe and sliding martrial. Of couse there are self lubercating plastic, but hdpe is already made to be non-sticky. Current I have done some testing with a mode from melting some in scrap 1/2 conduet. Now I want to find a small squre tube of some kind. Any suggestions?
 dawn ridge
Hello, I have recently designed and printed out some Rubik's cube pieces. But I have noticed that when I take out all of the support filament, the build plate adhesion is still stuck on the bottom of the piece, making it protrude. Is there any way to get rid of this, or do I just need to modify my slicer settings? I will add the other side for comparison.
crude kettle
What adhesion is one your bed?
dawn ridge
It is the brim adhesion
 idle crest
@normal dirge oh try fusion360 http://autode.sk/1Ro3wkb Noe has made a couple of tutorials here: https://www.youtube.com/playlist?list=PLjF7R1fz_OOVsMp6nKnpjsXSQ45nxfORb
Fusion 360 CAD/CAM software connects your entire product design & development process in a single tool. Starting at $25/month, get a free trial today.

YouTube
Learn how to use CAD for 3D printing and DIY electronics! In this series, we'll walk through some projects and learn how to use features in CAD software to b...
 normal dirge
awesome, thanks!
crude kettle
I nornally go around this by using a raft. Not the ones in the slicer programs. Usally I make a simple raft in some kind of cad software and make it a layer thick so 1 mm. After a print I take the print off and rip the thin raft and smooth the edges with a knife
spice estuary
Unfortunately, I can’t use that
spice estuary
Fusion360 doesn’t work on Linux
idle crest
oh maybe blender? https://www.blender.org/download/

Home of the Blender project - Free and Open 3D Creation Software
dawn ridge
@crude kettle Thanks!
crude kettle
hey
spice estuary
I got Blender & toying with it a little
crude kettle
It's a great programe. Tried to make a charater with it. Success!
But only then head due to low ram (laggy as all heck)
@dawn ridge No problem
spice estuary
Yea, I don’t have high end editing computer, so lag will be expected, but I got decent amount of ram
crude kettle
As long as you are not redering a ton or high details like for faces yo should be fine.
spice estuary
Cool, there are a few face I may be doing
But that is local group decided to use a mini bust to compare filament
The high end rendering I may end up pushing is making multiple shapes together
crude kettle
should be fine then form there @spice estuary
spice estuary
Cool
 cloud halo
@slim escarp I think I got the same 3D printer as you (Prusia i3 Mk 2s)...and mine is a kit as well. I've been meaning to build it for a while. Would you have any tips or thoughts you could pass along, since you just got done building yours? Any lessons you learned you wish you knew before you began?
 slim escarp
that is the printer i got! definitely have some tips. not sure if you've ever done a printer build before but this was my 1st and the 1st thing is that it took way longer than i thought it would. probably about 8 hours so i'd definitely leave a day to do it. for the assembly definitely go slower than you may feel inclined to. i found myself inferring some instructions from the pictures rather than reading carefully & sometimes i made mistakes because of that and had to go back a step or two. there are also some steps that mention the meassurements of parts like the rod positions and pinda probe from the bed leveling. i did get a tape measurer and measure these things & it definitely saved a lot of hassle when it came time for leveling. for the electronics the included manual does not have good pictures of the connector positions so definitely refer to the online manual for that step which has really nice photos for that. i also knolled all of the screws and nuts for each step and that definitely helped me to stay organized. overall though it's a good build, i never felt lost during it and it's been printing beautifully. in fact it's running right now 😃
cloud halo
@slim escarp Thank you 😃 I was under the impression it'd take closer to 20 hours to build it (not really sure why?). I've never built a 3D printer before, and this is my first experience with the hobby itself. My current gameplan is to read the instructions online, along with the comments people posted.
Thank you for the tips -- one of the things I just broke out was my set of digital calipers. I'm glad it went smoothly, that knowledge by itself is comforting. It's a very expensive first attempt, and I didn't want to feel like I got in over my head.
(getting in over one's head is a great feeling, seriously. you can learn so much from it. but it's anxiety inducing when there's that much money on the table)
slim escarp
@cloud halo no problem! & probably best to overestimate in that case haha. I wish you luck with the build. I haven't been printing for very long at all (around 2ish months) and started out w/ a monoprice mini delta which is a really fun & very affordable machine but the prusa has that extra control & ability to tweak things that really makes it an amazing machine. the instructions for bed leveling & flashing the updated firmware are very clear too. Prusa has their own firmware flasher that's super simple & there's a built in wizard for the first time you calibrate everything so no worries there either
shy kelp
@weary lichen
Question for octopi
Do you need a usb connection from printer to pi? Or just eifi
weary lichen
They live in an aquarium.
shy kelp
LOL
weary lichen
USB
shy kelp
Oh well that's the end of that idea
weary lichen
All OctoPi setups I've seen have required USB
shy kelp
Mine doesn't have usb port lol
shy kelp
I meant my print
I bought it without usb port
Figured I never needed it
I guess I could solder in a new one
weary lichen
Oh, the USB is broken.
You can get a replacement board, but for that cost you may as well upgrade to a RAMPS board
shy kelp
How easy to upgrade to RAMPS?
weary lichen
As far as I can tell? Fairly easy.
The problem is, you lose the nice shiny screen
But RAMPS kits are about $30-40
weary lichen
This one has a nice image on how everything is connected
@shy kelp The V2 mainboard is $50, so RAMPS would definitely be the better thing.
weary lichen
I'm not 100% certain
It LOOKS like you can get the RAMPS board and then drop the Marlin firmware on it
shy kelp
So it's LCD text screen now?
weary lichen
It's largely designed to be used over USB
Upgrading to Ramps would probably be a subject better suited to the folks on the Mini discord chat. They'd know more than I
tribal egret
How is it broken @shy kelp ?
shy kelp
There is no port @tribal egret
tribal egret
@shy kelp there is no usb port on the pcb either? was it taken out or just nonexistant. you said it was broken?
shy kelp
The seller said it was broken
Haven't really looked if it broke off
Might be an easy solder job
weary lichen
@tribal egret The Mini has, by default, a USB port built in.
If it's been forcibly physically removed, I'm not sure it can be soldered back on. It probably would have taken the traces with it
tribal egret

@weary lichen ah yeah. the data lines you could prolly hack into if you are careful
shy kelp
How much does a replacement board cost?
tribal egret
@shy kelp which model do you have v1 or v2?
@shy kelp if you can wait a while I may sell my board . I think they're $60
going to try and play around with a ramps board and trinamic 2130's X)
slim escarp
I really like this guy's content but I especially liked this video because the art he's making with the 3D printing pens is really impressive. Hadn't really seen a use for them beyond a scribble toy before https://www.youtube.com/watch?v=atOZigPE818&t=0s

I'm back with more little 3D pen artworks requested by my dedicated supporters on Patreon! You can join at https://patreon.com/makeanything. Learn about the ...
weary lichen
@slim escarp THAT IS COOL
slim escarp
@weary lichen isn't it!? My favorite was the Kirby but they're all really awesome. I hope more artists start experimenting with the 3d pens because seems like in the right hands they can do some really cool stuff
weary lichen
They really can
I hadn't really considered them for much of anything before, but this guy's taking things to a whole new level.
Literally!
weary lichen
Well, 5 hour print set up. Time to sleep.
south elbow
every day a new problem arises
today, i think ive finally got the filament grinding problem
a while ago i noticed a couple shards dotted around the block that the throat tube is in
today i checked my print and found a massive coil of thin filament all through the cog area where it pushes filament through
so its like grinding just enough that its cutting its own strip of filament off
and i realised that the hole the filament goes through doesnt actually line up with the guide thing on the extruder
god this is frustrating
south elbow
Pic for reference
timber niche
@south elbow I suppose you could try using a needle file to flare out the input end throat tube a little. Is there a ptfe tube inside the metal one?
@slim escarp @weary lichen I've also seen people use the 3D pens for attaching 3D printed parts together as a sort of filament glue.
@slim escarp @cloud halo I built my printer, too. It's a Chinese knock-off of a Prusa i3. I hope to get a genuine Prusa in the future. I think there is value in building your own printer as it gets you familar with its construction which is useful when you need to fix or adjust something.
@cloud halo BTW, you mentioned being in northern NJ. I'm in Bergen County myself and there is a maker space here: ttps://www.meetup.com/Bergen-Makerspace/
slim escarp
@timber niche yeah it’s definitely come in handy so far for making adjustments. Also takes a bit of the fear or hesitation away to take it apart to check on something
 jovial wedge
Has anyone tried the Kipper firmware?
It's an add-on to a Raspberry already running Octoprint. You flash your printer with their firmware, and you get quiet motors with printing speeds of 100mm/s, with stock printers.
Here's a calibration cube at 150mm/s. (wait for the first layer...)
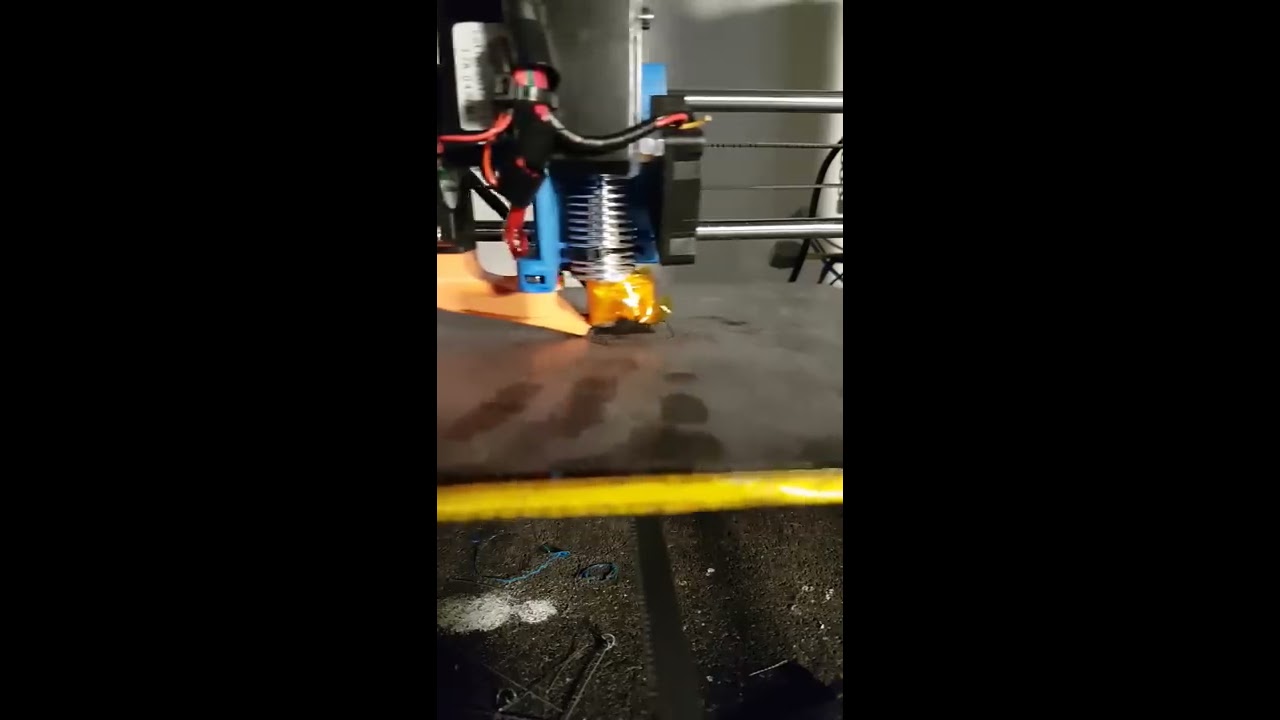
https://github.com/KevinOConnor/klipper Second print after flashing with pressure advance enabled. Ramps, tmc2100 @ x+y / 12v / stealth chop No tweaking done...
And here the github repo. https://github.com/KevinOConnor/klipper
 slim escarp
@jovial wedge ohh that sounds intriguing
jovial wedge
@slim escarp Yeap, speacially since it's a big gain without replacing hardware, it's only a Pi/firmware change.
I'm in some circle of hell with a small CNC I got for x-mas, but as soon as I get out, I plan on testing it on my 2 printrbots.
slim escarp
oh nice and i wish you luck with the cnc. i have a monoprice mini delta that may be a good candidate
jovial wedge
Thanks.
cloud halo
@timber niche Oh very cool! I've actually visited that school (had a job for work there installing some equipment many years ago). I was so impressed at the technology they had for their students (and a little bit jealous to be honest, I wish I had that growing up).
I'm not surprised there's a makerspace at that facility, it's certainly one of the best places to have one.
We went to White Manna for lunch, I remember that day pretty well.
timber niche
@cloud halo There's a Boston Market next to the school now. I built my printer in a class they had there. The first day of the class was an all day Saturday session so it was handy to be able to walk next door for lunch.
cloud halo
I've never quite had...good experiences...from a Boston Market. I mean, I love Boston. Markets? Totally a fan. Put the two together? um. no thanks 😛
But it is a good location, lots of stuff nearby
weary lichen
@cloud halo After the first few "experiences" did you just... Market off your list?
south elbow
@timber niche yeah theres a ptfe tube inside it
timber niche
@south elbow I wonder if the ptfe tube is not sticking up far enough (close enough to the top). Maybe it could be moved up or maybe you need a slightly longer tube.
south elbow
When you insert filament it gets hooked on the top of the ptfe tube and you have to try to get it past it. Only happened with this new one tho.
Does that mean i mightve pushed out the ptfe tube inserting filament? @timber niche
timber niche
@south elbow It's possible. I'm just making semi-educated guesses as to what's wrong.
Is there any where to re-align the parts to get a straight shot?
It is usualy a good idea to cut your filament at a sharp angle to make a point on the end you're inserting. That would make it less likely to catch on anything.
south elbow
ah ok
timber niche
I doubt the ptfe would shave bits off the filament as the metal tube appears to be doing.
timber niche
Also, if you're having trouble inserting the filament, you can try twisting it around.
That is what it looks like to me. You could try watching as it prints to see where the filament is geting shaved.
My guess is that there is a sharp edge on the opening of the throat tube which the filament is rubbing against as it is pushed down at a slight offset.
The best solution is probably to adjust so everything is lined up properly.
The next best is probably adjusting the ptfe upward so the filemant only rubs on the ptfe.
south elbow
alright, im gonna pull it appart and put a washer between the stepper and the tube block so that it hopefully alligns.
i thought i could just move the guide bearing but apparently i cant
timber niche
I'd strongly suggest watching it as it prints first to verify the hypothesis of what is going wrong before taking it apart.
south elbow
o
i just finished realigning it
i looked at the filament and it didnt look like the gear was taking it off
timber niche
Yeah, I doubt you'd see those long strips being shaved off if it was the grub screw chewwing it up.
south elbow
but then again i couldnt actually see where abouts the ground off parts had come off of
nah it wasnt the grub screw
when i first saw it, it was legit a 15cm long flake that was just constantly coming out
timber niche
In your picture it looks like the filament was being pushed against the right edge of the troat tube.
south elbow
i think your right
timber niche
What printer is that, btw?
south elbow
i realigned it with washers and have been printing for about 5 mins and nothing so far
Anet A8
the really cheap one
timber niche
I think that is very similar to mine.
south elbow
thanks man, i never wouldve guessed it was the throat tube
south elbow
yeah
timber niche
Mine is no longer bein made.
south elbow
oh
timber niche
I REALLY want a genuine Prusa next.
south elbow
same actually, but its like $900 or something
 simple palm
Hey
timber niche
IS the part holding the idler metal or 3d printed.
I'd buy the kit and build it. The i3 mk3 is $749.
simple palm
Hum I need to know how to make something but ...
I don't know where to post my question ..
timber niche
I mean the assembly that moves the idler. It is a 3d printed part on mine, but in your photo it looks like metal.
jovial wedge
@simple palm ask away. If here is not the place, we'll tell you where 😃
south elbow
OH i know what your talkin bout now
its just acrylic like the rest of the machine
you can 3d print another one if you want and nothing would change
timber niche
Ah, ok. It didn't look 3d printed.
south elbow
nah but it works
OH
i couldve printed another one with a different offset bit where the pulley attaches to to realign it
but washers work just as good
timber niche
I don't know if this would fit your machine, but this was a nice addition to mine: https://www.thingiverse.com/thing:871223

Being tired of the "bystanding" spool holder of the Migbot i3 I thought I could put the three bolts holding the two top rod guides in place to good use.
This spool holder attaches to the existing holes and allows to mount a spool with up to 24cm in diameter over the printer.
This removes stress on the x-Axis where the print head has to "pull" the filament to the side, and instead allows the printhead to pull the filament downwards.
Make sure your spool is spinning easily to avoid excess force on the direct drive.
south elbow
i already printed one but need to get a longer rod to span the gap
timber niche
Some have said that an overhead spool holder can contribute to vibration/shaking, but it's been ok for me.
I got a threaded rod at Home Depot. I thinkit's a foot long.
south elbow
yeah i can get one, i just havent yet lol
timber niche
I found that little spring clamps like these were the easiest thing to hold the rod in place: https://www.homedepot.com/p/HDX-3-4-in-Mini-Spring-Clamp-80001/100656782
The Home Depot
Enjoy the HDX 3/4 in. Mini Spring Clamp 80001, steel constructed of heavy-duty steel for durability and features vinyl tips to protect projects from The Home Depot
south elbow
you used them instead of the nuts that come with everything
timber niche
Just on the overhead spool holder. It makes it much easier to change spools. Also, they won't get unscrewed by the spinning of the spool.
I had that happen on the little free-standing spool hiolder.
cobalt quarry
@slim escarp Just watched yesterdays video on your 3d printing experiences. Thanks, it is useful. (My 1st printer is due to arrive later this month)
weary lichen
@cobalt quarry You got a Prusia, right?
timber niche
 vast salmon
the 3D printer what Naomi Wu unboxed it was using slimmer one
weary lichen
Did a bit of pricing today. Looks like the dual extruder upgrade for my Mini V2 will be about $90
Which, while expensive, isn't bad considering I'm replacing a significant portion of the hardware
Controller board, extruder stepper, power supply, adding an extruder, replacing the hot end.
I'm going to store the stuff I take out. I intend on building a fully custom printer eventually, and it'll let me restore the Mini V1 and re-use the other parts.
south elbow
oh i see, thats pretty neat
cloud halo
@slim escarp You do videos on 3D printing?
weary lichen
@cloud halo https://www.youtube.com/watch?v=a1_5HX9Wx38

I wanted to make a video talking about some things that I've learned in the past two months 3D printing. These aren't necessarily fun, unique or even enterta...
uncut ledge
🤔 oh i've seen this person in the other discord
slim escarp
@cobalt quarry oh awesome, thanks! glad it was helpful 🙂 and looking forward to seeing what you print!
@cloud halo i make videos on a little bit of everything and i'm just starting to do some stuff on 3d printing. that video that @weary lichen was kind enough to link goes over some issues i've had that are a bit boring but no one really talks about too much
weary lichen
Your video was certainly not boring.
slim escarp
that sounds awesome @weary lichen about the duel extrusion!
weary lichen
Duel extrusion: I'll make them fight!
@slim escarp I do believe there is an easy upgrade kit for multiple materials on the Prusa you have.
slim escarp
oh yes been seeing a lot of videos on that kit. looks pretty cool. honestly one of the reasons i went for it was the upgrade options for further down the road. today i was experimenting with color changing in the middle of the print and it went pretty well
weary lichen
I don't like the single-extruder multi-material method because it wastes a lot. Dual extrusion also allows for soluble supports
slim escarp
true, definitely a downside to it. one thing i've seen though is that the prusa upgrade is more for when you're doing large prints or multiple small ones. the waste block is actually a bit smaller for multiple prints of the same model than if you print just one
weary lichen
Yep. I saw a video about it the other day - The purge amount is going to be the same, regardless of how much of that color you use. And there's also the fact that the purge block needs to be maintained for higher layers.
Even if you only use one color for ten layers, you still need to be able to purge for color changes on the next layers.
slim escarp
yeah it will be interesting to see if they can streamline it with software or a hardware mod
weary lichen
Some of it is just physics, so there's no getting around it. But what you print can really help, too
slim escarp
darn physics, always getting in the way
weary lichen
We don't need no stinkin' physics! It's just holding us back!
cobalt quarry
@weary lichen Yes, the new one
@slim escarp Me too, I have little idea what I’ll do with it. Likely mainly cases for projects.
slim escarp
@cobalt quarry yeah that's going to be my main focus. currently printing the enclosure for the OKAY synth kit and it's so amazing to see the case construction come to life. so many possibilities
cobalt quarry
@slim escarp I’ll spend a while just printing random stuff to get the feel of the printer.
slim escarp
@cobalt quarry definitely yeah that's half the fun. i'm still in that mode a bit. definitely recommend the joelbot model for a stress test once you get it mostly dialed in
violet needleBOT
Adafruit Industries posted Cat in a Box (Multi Color) - Time-lapse
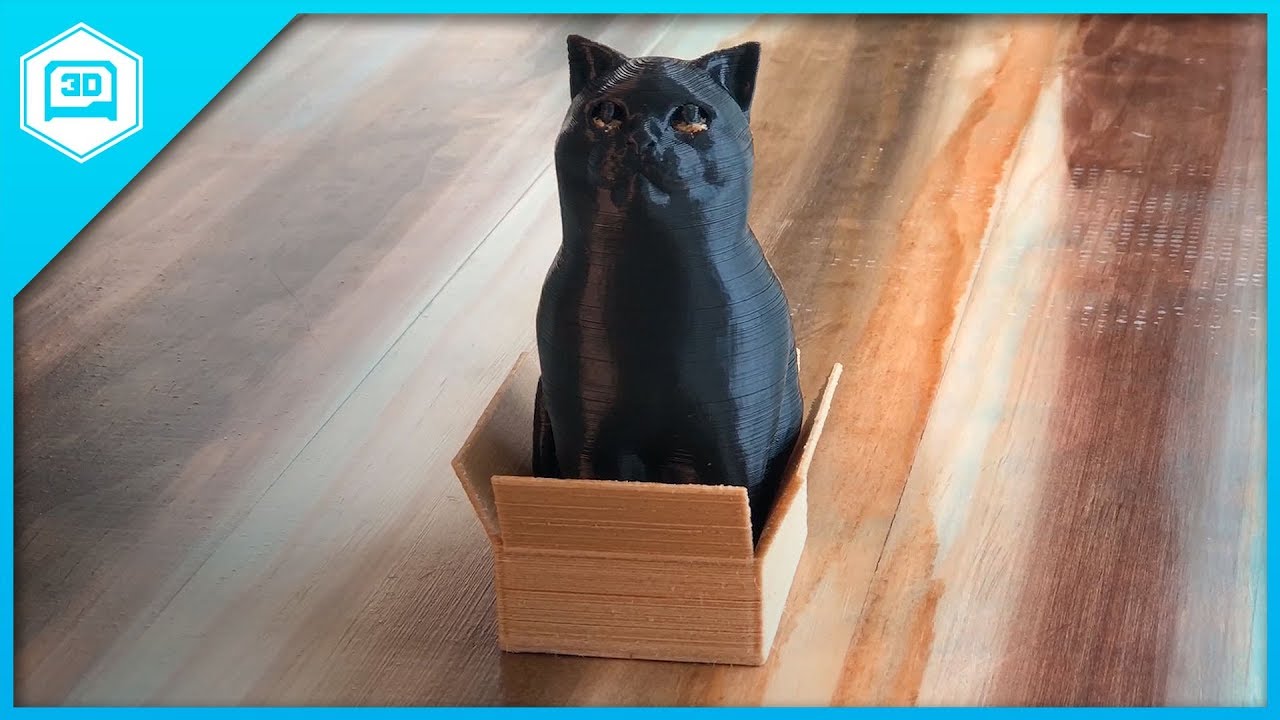
Every week we'll 3D print designs from the community and showcase slicer settings, use cases and of course, Time-lapses! Cat in a Box https://www.thingiverse...
tribal egret
@weary lichen dual extrusion for soluable supports really opens up the creativity more I think as well. No need to worry so much about the angles of corners and such.
weary lichen
Yep. It's the thing I'm most eager for with this mod.
Two colors is "Neat"
If you could solder to conductive filaments, printing a PCB would be super cool, but sadly you can't.
But soluble supports? Now THAT has options!
tribal egret
@weary lichen you could mod a 3d printer as a mini-cnc for pcb stuff if you want
weary lichen
Eh, the cost for that is a bit and has limitations on what it can do. Easier and cheaper to get a PCB house to make them.
tribal egret
yeah wouldnt bother with it myself other than for the learning/building part
normal dirge
Hey. Any chance someone can help me make a case for a 2.4” nextion display?
I’ve been trying and failing in tinkercad so far
spring pine
I made a tv-b gone case, if you might want to use it for your base... https://www.tinkercad.com/things/a5TCGZBK2Nm

Tinkercad
3D design 'TV-B-GONE Case' created by Codingpro Industries with Tinkercad.
shy kelp
@weary lichen do you use the fault web interface on your MP?
weary lichen
Not anymore!
shy kelp
I just changed mine
weary lichen
I uploaded the one linked in the other Discord
shy kelp
Same
I love it, there's so many controls, and fast uploading speed
I'm just now trying out my first movie parts print
normal dirge
what's the general approach to making lids that are secure to a 3d printed project case?
i always assume screw holes
if that's a solid approach, what's the general technique for creating them? i'm trying out fusion360 now, but it's a bit confusing
tribal egret
@normal dirge depends on your use case, I use Fusion 360 and @supple stratus 's tutorials is my Go-To https://www.youtube.com/watch?v=pjtiWuGUnlI&t=693s

Today we'll take a look at designing features in Autodesk Fusion 360 for making snap fit cases, optimized for 3D Printing! Shop for parts for your own DIY pr...
normal dirge
Cool I’ll check this out now. Thanks!
Fusion360 seems very cool and easy to use with lots of options. Just wish it were a bit cheaper for the occasional 3D designer 😞
tribal egret
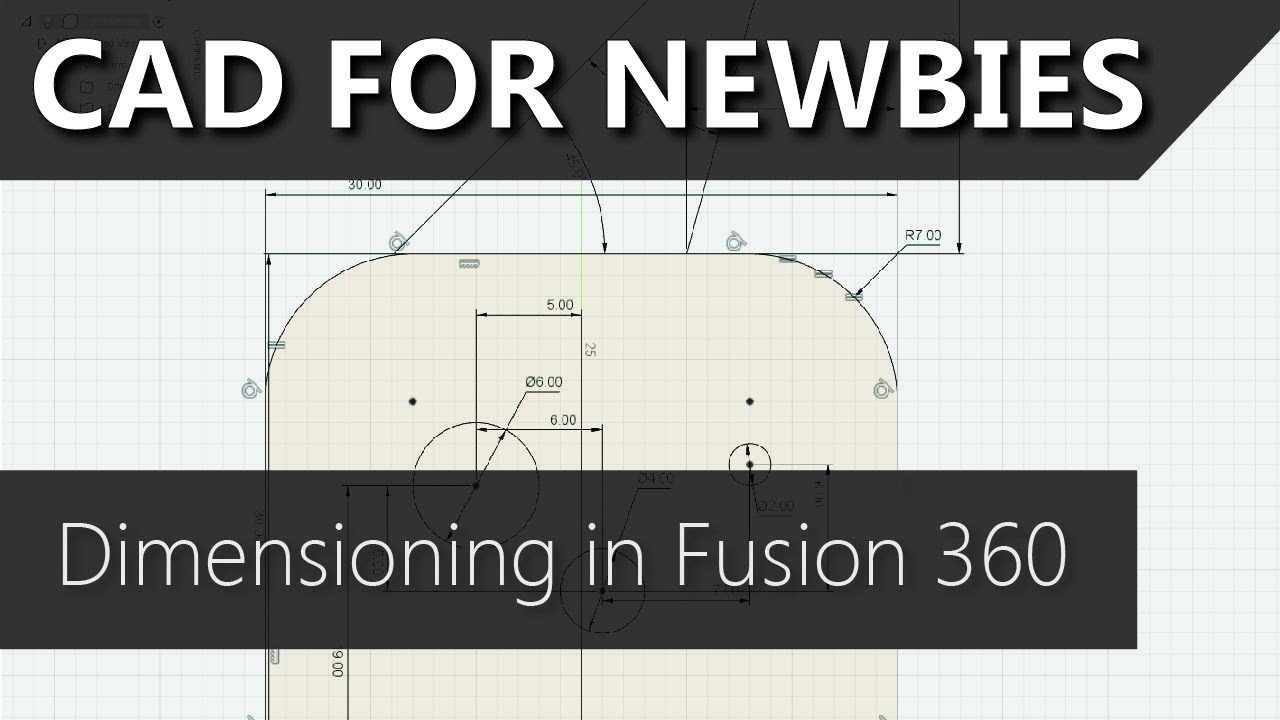
Correct sketch dimensions are crucial for creating models that are easy to alter in future! This is something that can be difficult to grasp, so hopefully th...
using the "Startup" entitlement, "(b) an individual using the service for personal non-commercial projects, hobbies, or personal learning."
tribal egret

When you start Fusion 360, a countdown clock is displayed for a trial. You want to know how to select the free Start-up/Enthusiast or free Educational licensing option. Important License Information: All trials are for Fusion 360 Ultimate. To activate Start-Up or Educational licensing, you must download install Fusion 360 from the Autodesk website or the Autodesk Education Website
here ya go!
normal dirge
@tribal egret thanks!!!
tribal egret
@normal dirge np! never used tinkercad myself, just went straight to fusion360 x)
shy kelp
So this meshmixer program, it can split a big part into smaller chunks to be able to print a big part on a small printer?
 trim sail
@weary lichen is there someplace I can find a "how-to" to change the web ui in my V2?
weary lichen
It's somewhere on the wiki. I'm at work so it'll take a few mins
trim sail
No hurry... I'm retired, so what;s a few [ minutes | hours | ? ]
tribal egret
@normal dirge have you seen:
https://www.thingiverse.com/thing:2259101 https://www.thingiverse.com/thing:2103346 https://www.thingiverse.com/thing:1183191 https://www.thingiverse.com/thing:2245148 https://www.itead.cc/wiki/Nextion_HMI_Solution#3D_printing_bezel
all of these are for the nextion 2.4"
normal dirge
@tribal egret yea, unfortunately none of them suit my needs 😦
i tried printing the second one without success
i want something like the first one, but with room for a wifi feather behind it, and only a slot for the usb, along with holes for mounting on the wall
don't know how to adapt existing designs
so thought i'd need to start from scratch
uncut ledge
you guys like the nextion?
i had a project that used the 5" one
aside from it using very few pins, it wasn't an enjoyable thing to work with
violet needleBOT
Adafruit Industries posted Bob Omb (Multi-Color) – Timelapse

Bob Omb (Multi-Color) https://www.thingiverse.com/ChaosCoreTech https://www.thingiverse.com/thing:2720626 Ultimaker 3 Black PLA/WoodFill 8hrs 40min X:137 Y:1...
trim sail
@shy kelp @weary lichen Did you folks use the MYLAN demo UI code, or something creative and original. I used it, but made a few simple mods. I kinda like the temp graphs... not too sure what I'll use them for other than bewilderment and awe. And the "movement" is not something I thought I needed in a GUI.
 rapid steppe
I love that Bob-omb.
 brittle oxide
Hi folks. Sorry @idle crest and @supple stratus I’m in the airport about to board. I’ll catch up later
I’d still love for you to join us Feb3 in Kissimmee for the ATIA Maker Day
violet needleBOT
Adafruit Industries posted 3D Hangouts – Physics, Thermal Cams and Timelapses

This week's project: LED Sand – Physics Toy https://learn.adafruit.com/animated-led-sand/overview LED Matrix Physics Inspiration https://twitter.com/calebkra...
 glass cairn
Hay gang. does anyone know why all my prints have been turning out like this?
The pot is supposed to be nice & smooth.
crude kettle
What filament is that and how many shells and infill'
glass cairn
Maker select PLA, 2 shells, & 20% infill. I've varied the infill, tried it with 3 shells, thickening each shell, varied the print temp & bed temp. It's being printed on a Maker Select V2 slicing with Cura 3.1.0. Right before I started having this problem I printed a Baby Groot with the same role of PLA & it turned out perfectly, right down to the fine details. Only dif that I can figure is that baby groot was sliced using an old ver of Cura, that I deleted when I installed this new ver of Cura. I did make sure that it has all of the same setting that the old ver of Cura had. Could Cura be the issue?
@crude kettle
crude kettle
Sounds like it alright. Try a small print like a flate key chain(to save filament) to test it. If it's the case try the old cura agian and compare.
glass cairn
ok, I haven't been able to find ver 2.5 that I got when I got the printer but I just finished reinstalling ver 3.0.3 and will try it with that. Thanks
glass cairn
Go figure @crude kettle , it's only one percent in (went with a dancing groot cause if it failed it has a small foot print, but if it worked, lol well it's a dancing groot. 😃 But so far so good no signs of issue. "knock on Groot" He he.
crude kettle
post a pic when it's done @glass cairn
glass cairn
I will @tepid wing , still going good. We're at 37% & he's growing nicely. 😃 I'm not sure what the hobb gear is @timber niche , but would it be effected be just a change in software? Cause it seams to have just been my trying to use the Cura 3.1.0 that was messing me up. Which I guess it would make sense, the software would make a difference wouldn't it? I do remember that I did have the extrusion set at 100%. I wonder if the software just wasn't configured well enough to allow the printer to extrude at a full 100% even though it was set "saying" 100%. Has anyone else had similar issues with using Cura ver 3.1.0?
weary lichen
Well, I'll be receiving my RAMPS board kit tomorrow, and also the stuff I need for the bed re-wire for the Mini V2. Not sure if I'll be tackling that right away, but I've got the rest of the stuff I need for putting the Chimera dual extruder on it on order. But those will take a while to get here.
weary lichen
You're saying it'll be a headache?
uncut ledge
most likely
weary lichen
Sounds about right.
I know I'll have to design and print a mount for it.
Figure out how I'll be mounting the second extruder stepper motor. Replacing the default extruder stepper, as well. I picked up two, so that they would match.
And beyond that, I'll have to design and build a filament holder that hopefully won't tip the whole thing over.
tribal egret
!!!exciting 😃
@weary lichen keep me updated! would like to do the same eventually..
will you stream it?
weary lichen
@tribal egret Hah! I don't have the equipment even if I wanted to.
timber niche
@glass cairn It could be just an software issue. Actually I'm not sure if hobb gear is the most correct term, but I've heard it used. I mean the gear in the extruder that advances the filament. I had an issue once where the set screw got loose and the gear was slipping,causing under extrusion.
glass cairn
Good morning, Good morning,,, Gooooddd morning! All of you wonderful makers! (And no I don't wake up THAT cheerful, but life is what we illustrate to be right?) @timber niche I haven't checked the set screw, I'll check it after I'm more functional, tho I don't think it is the culprit here. I tried printing another Groot last night n it seamed to extrude well with using Cura ver 3.0.3.
Lol, that is until it didn't go so well.
I'm guessing the center piece broke loose & it moved around in the out pot, which was still stuck to the bed. Making for an interesting happening. That center section in between the good print & the mass chaos. It actually printed a solid appearingly translucent section that looks like it could actually function as a proper light pipe.
@Techmorfic#9428 That's how it turned out. @supple stratus @idle crest I'm not sure on how exactly my machine managed to print that accidental light pipe but it is 7.72mm thick and was printed with 1.75mm clean filament. Have you guys ever come across printing a solid section of plastic like that? Could be able to print custom designed light pipes, that is if you can figure out how purposely duplicate this mistake.
@crude kettle
And then again maybe not. I just cut my failed Groot apart & tried putting that section on a light and it didn't carry the light through much at all. Certainly no were near as well as what I expected that it would.
 gray raven
That feeling when your large print first layer goes down without a hitch... 🤑
tribal egret
@gray raven https://i.imgur.com/ZK9vQtt.png

 night kraken
Anyone here have a Anet A8 printer?
spring pine
nope
weary lichen
@night kraken I haven't heard of anyone here having that printer. Are you having an issue with it? We might be able to help anyway.
 latent smelt
What is a good starter 3d printer that wont break the bank? I probably just need to print small enclosures and other parts. Also, is there like a mr fusion 3d printer where I just dump old plastic bottles into it and it magically uses that as print material? TIA
night kraken
@weary lichen Well, my issue is, whenever im calibrating it, i make it to go home (works) but when i let it go up on the Z axis, the left motor tends to hang, and the right motor just turns, which means its getting an really odd angle and cant move back anymore because of that angle....
What happens when the Z endstop gets touched, the Z axis goes up a bit, then down again, makes somes some noise that he cant move further but the motor keeps spinning for like 1 second, while the endstop is pushed in....
I already tracked the wiring and everything looks fine to me...
night kraken
i found out the problem with the Z axis, now just the printing has a problem, when i tell it to print a file, it just stays still and starts spitting out PLA lol
weary lichen
@night kraken Are you printing from an SD card or directly from the computer?
night kraken
SD Card
 supple stratus
@glass cairn interesting, is that regular PLA filament? That reminds me of the t-glase filament http://taulman3d.com/t-glase-features.html haven't gotten around to actually using it in practice (other than using a piece of the bare filament in this switch grip https://www.youtube.com/watch?v=5hxBi2F-7d4 )


Check out the Guardian Robot: https://www.youtube.com/watch?v=ULqynriVAa0 Check out the Guardian Sword: https://www.youtube.com/watch?v=BNUuwJpeilM Check out...
vast salmon
@idle crest now that if you do the controller for tesla via that PSmodule control and  there is Powerchell Core
@supple stratus naomi wu tested strong pla filament with glue but as it was smaller nozzle it proke with 3 times 2 with one glue and 1 with other glue
 low shore
Hey guys. I have a project I'm working on that I can use a hand with. It's a 3D model of a modern take on the Assassins Creed blade. I'm struggling to print where I have a curved bottom sitting on top of a support generated by the out of the box Prusa software. http://bit.ly/2qYrZGZ. I'm thinking of just making it a flat bottom to print straight off the printer bed. I'd appreciate your help.

Here's my take on the Assassins Creed Modern blade. I'd appreciate if you guys can share some feedback before I do any further work on this. Don't forget to note work by the 3D designer from "Make It Real"
weary lichen
@low shore I've never had a "good" bottom surface when printing from supports. I'd recommend splitting it into pieces so that there's always some flat bottom to print
low shore
Cut off the curve and glue it back later. Thanks Andon. Feels good that I'm not alone either 😉
tribal egret
@weary lichen are you doing two extruder heads for your conversion?
 oak pewter
@low shore It kinda looks like a Drone knife, so I'd say you got the "modern" vibe down
weary lichen
@tribal egret Yep. I'll be putting the Chimera (or a clone, at least) on
night kraken
Hey guys, that happens alot when i print
people say its because of the temps, im printing at 200/50 (extruder/heatbed)
are my cura settings maybe wrong?
Look how ugly my prints are lol
night kraken
I put my Hotbed at 40 degrees for PLA now
and its still warping, might this because the tape on the bottom is like, overlapping each other?
night kraken
I put the extruder on 200 and the bed at 40
the room temp is 22 celsius
i adjusted the height of the hotbed
i printed it with a brim of 8mm and the brim started to warp
but the inner didnt warp
night kraken
well rip... my printer doesnt heat the extruder anymore
 untold urchin
@night kraken are you sure you using PLA... And not ABS and what kind of filament are you using? Like brand
uncut ledge
For PLA I print with the bed at 60 lol
 silent veldt
@night kraken you should be able to replace the hot end
silent veldt
What do you usually use to do the CAD work?
night kraken
Well i use Cura
my hotend works again, so i had to improvise on the hotend cables... Because the connector wasnt on there when i got it, anyway, im using 200/70>60 now and recalibrated my bed, its going awesome now! :D
weary lichen
@silent veldt I use FreeCad. It works well for the mechanical end of things, which is what I do.
silent veldt
The problem I'm trying to solve is cut down a test tube model to fit into my build volume.
I've downloaded a design I like from thingiverse, but it's too big.
weary lichen
Most slicers can scale it down
silent veldt
@weary lichen I don't want it scaled. The slots for the test tubes have to stay the same dimensions. I just want to reduce the model from 7 slots to 4 slots. That should bring the log axis under the 90mm that I have to work with.
silent veldt
Monoprice select mini v2
silent veldt
I'm willing to believe you are correct.
weary lichen
Still probably too small for your object
silent veldt
However 134mm still is too long.
weary lichen
I know some people overstate their bed size just fine, but I'm not sure it's that much
silent veldt
I took the dimensions on the test tubes, I know I need 13mm circles, and I want to fit 4 of them.
So I guess I could start learning to use SketchUp or something.
silent veldt
12.8mm outer diameter with a little bit of extra thickness where they are printed on.
weary lichen
Link to the rack you want to print?
silent veldt
it was 12.91m or something.
So, 13 mm holes should give it a little play. Maybe I should scale them to 14mm, actually, given that my printer can't quite manage 0.2mm lateral tolerance with the filiment I have.
85.1mm long, 84.3mm depth, flat bottom cylindrical, inner diameter of 11.3mm
According to my digital calipers.
weary lichen
@silent veldt I might be able to make something for you. Are you looking for single-piece print or is multi-piece OK?
silent veldt

A rack for my aquarium test tubes that would double as both display (when testing aquarium water quality), storage, and drainage/drying. Small feet and holes at the bottom of each tube slot allow for drainage/drying. A line indicates 5ml, when using API test tubes or similar, which is usually the volume needed for testing. If printed on white, the semi-circular slot means the test tube has an even background colour, ideal for comparing to test colour charts.
Honestly, I'm just trying to learn about design.
Well, no.
What I'm trying to do is print a testtube holder because my GF wants one for all the aquarium testing.
Because I needed to print off something demonstrably useful.
And I don't have the M2.5 and M3 screws to screw together any of the board cases.
weary lichen
It's entirely possible to make a multi-piece design that wouldn't need any hardware.
silent veldt
I printed off the Maker's Muse tolerance tester that doubles as a bearing-free fidget spinner.
weary lichen
Hah! Me too
silent veldt
But I cut my bed surface in trying to use a utility knife to remove the PLA.
So, eventually I'm going to have to replace that.
silent veldt
anyway, the critical dimension is the length of that test tube rack.
Or, width, rather.
Somewhere I'm sure there's an STL editor that would let me chop 3 tubes out of the middle, and I expect I would be golden.
According to Cura, it won't fit into my build volume.
uncut ledge
print it at an angle
weary lichen
@uncut ledge There's no way that thing is being printed at an angle.
It's just too long.
Was just fiddling with it myself.
uncut ledge
its only 14cm on a 120mm bed right?
weary lichen
It's also really wide, too
weary lichen
But there's no horses on it
silent veldt
Hay!
uncut ledge
you can probably shorten the height a bit and it would work the same?
weary lichen
Not a matter of height.
uncut ledge
may help with finagling it onto the bed
silent veldt
oh FFS.
I updated my Cura.
Which means it probably forgot my machine settings.
No, that seems OK.
@weary lichen Have you formatted another MicroSD card for this machine?
silent veldt
I've tried to get it to read FAT-16 on an 8GB card, but it was not a happy camper.
Mine didn't read FAT-32
The 128MB card is FAT-16
So, yeah, I have enjoyed printing things off, but this is definitely making me think about saving up for a Prussa i3 MK3.
And if I had many dollars, cheap power, and a large well-ventilated workspace, I'd probably want to get an Ultimaker 3, a Form 2, etc.
Though, I guess there's a $300 machine that's pretty good?
Because I want to build a RepRap so I don't feel completely failed at open source.
weary lichen
I'm upgrading the V2, then going to build a RepRap for larger prints.
uncut ledge
i cloned a part for someone printed on a fortus using my v2
they're practically identical
silent veldt
There's a lot to be said for them.
uncut ledge
(my seams look better though)
select v2 though, not the mini
don't know much about those
silent veldt
@uncut ledge They won an award from Make Magazine for being very good for a $220 printer.
Ah, right, the Creality CR-10.
Not that I have a cubic meter to give over to a printer.
Maybe 90mm is the print speed? Though I thought it was 50mm
Ah, well, bedtime. @weary lichen thanks for looking into it!
weary lichen
@silent veldt I'll have it done in about 10 minutes...
silent veldt
oh! Well, then thank you!
silent veldt
Can you put it up on Thingiverse?
weary lichen
Just re-doing the feet
Yep
I just got distracted because someone on Twitter decided to call me a nerd, as though it were an insult.
silent veldt
Because the problem I'm trying to solve is holding the aquarium test tubes for a common aquarium testing kit.
While we're doing the testing.
It's probably going to come out in purple PLA.
And at some point I want to get the WiFi turned on and get a bigger SD card in there.
weary lichen
@silent veldt https://www.thingiverse.com/thing:2757727

I re-built the Test Tube Rack in FreeCAD, and trimmed it down to 4 tubes for smaller printers.
weary lichen
They're 14mm diameter sleeves, slightly increased from the base file's 13mm
Just because I know my printer tends to print slightly small
silent veldt
yeah. I work only in PLA so far, and at least shrinkage hasn't been a problem.
At 0.2m layer height, and 10% infill, it should only take 4-5 hours.
weary lichen
@silent veldt Have you seen the "Magic Numbers" for the V2?
shy kelp
Fun fact, if you don't mind me interrupting: you can actually get layers down to 0.04375/3 on the Mini V2, but rounding sometimes causes errors.
uncut ledge
i print at 0.4 layers on my other machine 😂
weary lichen
@shy kelp So, roughly layer height of 0.014583? Tiny!
silent veldt
of course they are on stack exchange.
shy kelp
Yep! It's absurd. Unfortunately, because of the rounding issue, there's a chance you might end up with the stepper skipping.
weary lichen
How low can it print without rounding issues?
shy kelp
0.04375mm, as you stated before
Provided, of course, your slicing software allows it to get that small.
silent veldt
I don't need it that small for this purpose.
weary lichen
@shy kelp What sort of issues arise from stepper skipping?
shy kelp
Most obviously it can cause a little bump in the flow rate
Can also cause the coordinates to become ever so slightly off, depending on how much it skips.
weary lichen
I doubt I'd need to print anything with that fine details.
shy kelp
I doubt anyone would on a mpsm
silent veldt
Maybe some of the RepRap parts
uncut ledge
there's no way you'd get a decent looking print out of that layer height lol
weary lichen
I'm thinking something like HeroForge minis might benefit from super-low layer height, but the X/Y accuracy makes it a bit much.
uncut ledge
well, I should say extremely unlikely
shy kelp
There's no real reason to print at that small of a layer height, especially with .4mm nozzle. It's just an interesting technical limitation.
weary lichen
No need to be like Jurrasic Park. Just because you CAN doesn't mean you SHOULD
silent veldt
Shouldn't there also be a step size for the x and y axies then?
shy kelp
The issue with that is the size of the nozzle
silent veldt
I guess I could mount a 0.3 or a 0.25
shy kelp
Then again, so is the layer height issue, but it's not as obvious
weary lichen
Or a 0.1 if you're crazy
silent veldt
I mean, I guess.
I'm just getting into this, got the printer around Thanksgiving in the USA.
so, late november.
shy kelp
nice, dude
weary lichen
@silent veldt Did you get it on Cyber Monday from Amazon too?
silent veldt
Nah, ordered directly from Monoprice. With a 1kg spool of filament, it was $208 shipped.
$30 off coupon on getting the white one instead of the black one.
Then I bought another $80 in filament and spare nozzle from Monoprice, so they have made out on me.
weary lichen
I bought from Amazon, was $165, then another $22 for a thing of Hatchbox PLA
My parents got me two more spools of PLA for Christmas, too.
shy kelp
@silent veldt you were asking about x/y axis limits?
silent veldt
yeah
shy kelp
Got bored and calculated it, 0.010795mm
silent veldt
Wow, so you did well.
shy kelp
I'd hope so. Still an absurd number.
There's still no way you'd get a nozzle that would make that useful.
silent veldt
fair enough.
south elbow
Hey all, im nearly out of filament again so need to order some more. I just wanna ask, whats a good filament to use? Ive only used PLA so far and am looking for something different to try. Something thats strong and not as flexible, and can be used in the Anet A8
silent veldt
@weary lichen I'm running off a calibration cube in the new filament, then I'm going to run off the test tube rack. 😃
tribal egret
thanks @supple stratus for that awesome new 3d printing video tutorial! I really like how it complements the learn guide + electronics how to videos. 👏🏻 👏🏻 🙇🏻
weary lichen
@silent veldt Let me know how it turns out
uncut ledge
@south elbow PETG
And what do you mean not as flexible? PLA is very rigid but not very durable or strong
silent veldt
print in progress!
silent veldt
print still in progress.
I tried to get some video but I clearly don't do that for a living. 😃
weary lichen
My printer's in a spot where video from my phone ends up super dark
Doesn't help that the printer is black
uncut ledge
I have a large black frame and gantry with a mirror bed
there's no hope for any camera on mine
weary lichen
@silent veldt Does it fit the tubes well?
weary lichen
Cleanup is always useful. How'd the drain holes print?
silent veldt
They are a little stringy but I ran a needle through them.
I might need to push a rod through there.
What did you dimension them to?
And, I'm running off the default cat in purple filiment.
weary lichen
I think it's 1.5mm diameter for the little holes.
silent veldt
OK. Maybe I can drill it if I wanted to.
I have some pictures on my phone.
I need to get them into thingiverse
normal dirge
hi all....so i got this awesome epaper weather kit, and there's a case for it on thingiverse

Enclosure for hte Squix ESP8266 2.9" ESPaper e-paper weather station.
See http://mcuoneclipse.com/2017/10/22/squix-esp8266-based-e-paper-weather-station
i tried printing it on my makergear m2, but it came out very flimsy
gray raven
Dang, pretty large screen.
normal dirge
the front of the case was so thin it warped when i took it off the bed (maybe i didn't let it cool long enough?) and the "pins" inside that connect the front to the back broke off almost immediately
is there something like, really firm and solid objects need 100% infill?
what other settings determine "strength" of a print?
gray raven
@normal dirge I'd say you're probably looking for more top and bottom layers with that print to make it stronger
gray raven
Are you printing in PLA, ABS, other?
gray raven
Oh nice, let me get a screenshot of the exact screen. One sec

So the 3, 3, 2 I have there for "Top Solid Layers" bottom and outline would be bumped higher if I were printing that
So right now with 3 solid top layers at .2 layer height, I'm looking at .6 mm of solid layers... I'd double that to 1.2mm for something I wanted to be strong that was thin.
normal dirge
so 3,3,2 and the 1.2?
gray raven
I'd do 6, 6, 3 personally
normal dirge
im so naive, beyond speed, raft, and supports, i have no clue what the other settings are for 😦
any good online classes?
ok, so 6, 6, 3 and the 1.2?
(just want to make sure im getting it correctly)
gray raven
I found this dude named Thomas on Youtube that had killer vids
The 1.2? For layer height? No, I'd keep that between 0.1 and 0.3 but changing that means you change you layer count
So what you are seeing is that "Primary Layer Height" is how tall (or I guess wide) each individual layer line is.
normal dirge
ok gotcha, so .2, and 6, 6, 3
silent veldt
Maybe PLA isn't the best material for this purpose?
gray raven
So if your goal is to get 1.2 mm, you multiply your layer height by the number of layers til you get 1.2
So at 0.2 it's 6, 6, 3. At 0.1 it's 12, 12, 6
gray raven
Def
silent veldt
I'm really new at this too.
gray raven
ABS has much higher material strength in general
But it's prone to warping and requires much better controlled temp situations. Some regions that are really cold could even use enclosures.
silent veldt
PLA is brittle. Which is fine for what I've been doing, where material strength isn't a big requirement.
Like the test-tube holder I just printed out.
5 hours and 40 minutes on my printer.
Even at 10% infill.
gray raven
I have a couple of Raspberry Pi cases in PLA. Hatchbox PLA and they are tough enough. I mean, you won't be able to throw that in a bag of crap and expect it not to crack but if it's mostly just a house accessory, I'd say it's fine
normal dirge
and how do u know what infill % to use?
and how does speed affect it? like on a makergear m2 that can go very fast, is slower always better?
gray raven
On infill, for me it's a balance between how long do I want to spend printing vs end strength.
normal dirge
so is 100% the strongest?
gray raven
100% is basically a solid block of plastic. You could look at it as having all solid layers for your print.
normal dirge
so for a thin case like this wouldn't 100% be best?
or are there diminishing returns on strength?
gray raven
There are. Also, the infill patterns provide some engineered strength.
So I personally would never print anything at 100%
weary lichen
@normal dirge For a thin case like that, infill might not even come into effect depending on number of shell layers you have
gray raven
The different infill patterns have different characteristics for strength too.
normal dirge
ok...so tomorrow morning (printer is at work...i built a maker space at my office for everyone!), i'll try 20% infill, 80mm/s, and 6, 6, 3 for the layer counts
gray raven
I kinda agree with Andon for the top but I think more than 20% would be my suggestion
gray raven
Personally, I'd go with 50% honeycomb for the base enclosure and 75% honeycomb for the faceplate.
But don't just take my word for it. Each printer is diff
And 50/75 is very strength focused so it will take time to print
😄
normal dirge
i forgot that the guy who designed the case wrote back to me on twitter
No special settings needed, I have printed it with an Ultimaker 2:
- Layer height: 0.1mm
- shell thickness: 0.4 mm
- Bottom/top thickness: 0.6 mm
- Fill density: 15%
gray raven
Going from 0.2mm to 0.1mm basically doubles your time. For an enclosure, seems a bit excessive unless it's in a high traffic area or something.
weary lichen
@gray raven I have to say, honeycomb infill also looks cool.
gray raven
Lol, it's def my favorite except for that lattice one some splicers have.
silent veldt
@weary lichen the test tubes fit
weary lichen
Awesome!
normal dirge
k...still looking for someone to help me design a case for something else 😃
how do i find a freelancer to do a design?
weary lichen
@normal dirge What do you need a case for?
normal dirge
that nextion display....i don't like any of the options out there
i want something that fits it perfectly (as small as possible), with just enough depth to put a feather huzzah behind it
weary lichen
Do you have a link to exactly which display it is?
normal dirge
my "vision" is to hang this (in a case) on a wall, with a wire cover tube thing going down the wall, for a nice wall mounted home automation controller
weary lichen
I'm assuming you need room for the cables at the base as well
Does the feather huzzah have headers or no?
normal dirge
@weary lichen (sorry, putting 2y/o to sleep)....yes...i was thinking a cutout at the button for the usb plug, and to make it "sturdier", maybe it'd be best to do a small cutout area and place one of those micro usb breakouts (i've seen noe and pedro do that once or twice), so that gets fixed into place, and then the feather (no headers) can be "floating" inside, the screen fixed in place by the screw holes
weary lichen
No promises, especially about time, but I might be able to make something.
normal dirge
awesome, i'd be appreciative for anything! thanks!
vast salmon
@supple stratus @idle crest should that eg2-d2 be more e2-g2
violet needleBOT
Adafruit Industries posted Fusion 360 Tutorial – Easy Snap Fit Cases!

Visit the Adafruit shop online - http://www.adafruit.com ----------------------------------------- LIVE CHAT IS HERE! http://adafru.it/discord Subscribe to A...
night kraken
Anyone know why this layer is so thin?
got it, my bed was wrong... randomly didnt know that would happen lol
night kraken
Wth is happening ?! https://cdn.discordapp.com/attachments/319864049527422976/402879431896596491/IMG_20180116_183827.jpg

it worked all fine and it just starts acting up coming out on top of the extruder
weary lichen
@night kraken Looks like heat creep, and things not being on quite right.
You'll have to take a look at Google for fixes - I've never personally dealt with it
night kraken
Yeah and my Y motor is broken
it makes horrible noise now when it moves
i cant even find somewhere to buy a new Y axis motor
like, google is empty with it
im getting so frustrated after only been able to use it for 2 days
weary lichen
What printer? Probably a NEMA 17 motor
night kraken
Anet A8
i bought an Nema 17 motor 😄
Btw, is it normal that my extruder holes dont line up?

Thats how it actually looks like for me inreal
shy kelp
That is a beautiful image
night kraken
thanks 😄
I tried my best :3
i have to deassemble my extruder everytime when i want to put in a new Filament
weary lichen
@night kraken Can tou get a picture of your extruder?
I'm really not sure what you mean by that picture.
night kraken
the filament is missing the hole
its going right next to the hole when pushing it in
i have to deassemble the extruder, push it in manually, and put it all back together
not really rewarding when its 200 degrees hot...
weary lichen
More accurately, I'm not sure what sort of extruder setup you have
night kraken
Let me see if i can get a pic
one sec
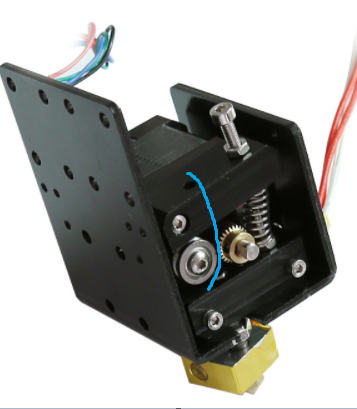
https://i.gyazo.com/54f721472e6384d58b31a8d6b33cd444.png
This one, from the side
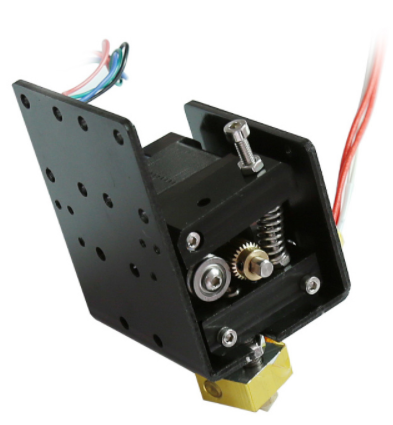
because the filament is on a reel, i cant push it in right into the hole
because its 'bend'
weary lichen
Dumb question, but: You're pressing down on the lever, right? That should move the silver wheel on the left up and over some. Put the filament through both holes, then release the lever.
weary lichen
As said, dumb question, but just wanted to be sure.
 silent veldt
that's really obnoxious.
night kraken
it is 😦
have to take it apart everytime while its still hot
burned myself twice now haha
weary lichen
@night kraken Before I run off to D&D night, might I suggest looking into one of the modifications that are recommended for using flex filament? They usually extend the bottom tube to where it goes practically right up into the two wheels, allowing no movement of the filament.
 compact meadow
@supple stratus @crystal ravine When you all do time-lapse, are you using GoPro? is so, which model? and does it save the time-lapse in one video file? or is there an additional process?
violet needleBOT
Adafruit Industries posted 3D Hangouts – Heatmaps, Cookies and Stories

This week's project: Thermal Camera https://learn.adafruit.com/thermal-camera-with-display/ AMG8833 Thermal Camera https://learn.adafruit.com/adafruit-amg883...
night kraken
Does anyone know if its much of a difference on what stepper motor i use? I mean, i bought the Nema 17 42BYGH47-401A
But the Anet A8 uses the NEMA 17 SL42STH40-1684A
will this be an issue?
weary lichen
You'll have to calibrate it
night kraken
mhm?
weary lichen
Different motors have different numbers of steps. I'm not 100% sure on the methodology of how you're supposed to calibrate it, but you run a gcode to tell it what the steps per mm for the motor is (I think), and then it's best to print a test item, measure it, and then figure out how far off it is from what it's supposed to be. Then you can figure out how many steps that motor actually is and send another gcode command to adjust it accordingly
weary lichen
You'd still ahve to do the same even if it's an "identical" motor to what's on the A8, to get good prints
night kraken
really...
pfft
but will it be wrong when i plug it in the first time, and look if it works?
like if it actually does it right
weary lichen
Not sure. Let me check
The two steppers look quite similar
So it should be a matter of install, print, make sure everything is working right, and then do calibration.
night kraken
im searching on calibrating a stepper motor
but there isnt that much of tutorials about it haha
weary lichen
Search for "Calibrating 3D printer" and you'll find plenty
silent veldt
So here's my question:
Is there a RepRap design that I could print in PLA on my Select Mini V2, to bootstrap myself to a larger build volume?
weary lichen
@silent veldt The answer is, of course, "Yes" but I have no idea what it'd be.
There's always going to be additional hardware to purchase, though
How much larger of a build volume are you going for?
silent veldt
I've been poking around, and there's a highly printed design.
But it needs 150mm in a couple dimensions.
weary lichen
Yeah, that's the annoying problem.
 jolly silo
I just got a 3d printer and there already is something on the print bed, is that ok?
weary lichen
Honestly, if you're not aiming for a super-huge volume, there's $200-250-ish printers with a moderately larger build volume you can get. Or you can do some mods to the V2 to increase build volume.
weary lichen
Thin scraper will get under the edge and pull the whole thing up
jolly silo
Ok
Nice little gift for buying the printer, I guess
Oh good, it comes with a scraper
silent veldt
@weary lichen The thing for me is that I could keep bootstrapping the frame up.
Go from PLA frame components from the MPSM v2
to a bigger build volume and a V6 hot end.
weary lichen
You'd have to continually replace things like z-axis rods and x/y axis belts and rods, if you change build size
And they're often the more expensive parts
silent veldt
The most heavily printed model doesn't need belts.
weary lichen
What does it use?
silent veldt

GitHub
snappy-reprap - The world's most 3D printable 3D printer. (Guinness Book of World Records 2017 & 2018)
The teeth are printed into the bed carrier.
this is maybe a little clearer.
GitHub
snappy-reprap - The world's most 3D printable 3D printer. (Guinness Book of World Records 2017 & 2018)
violet needleBOT
Adafruit Industries posted Egg2-D2 – 3D Printing Timelapse
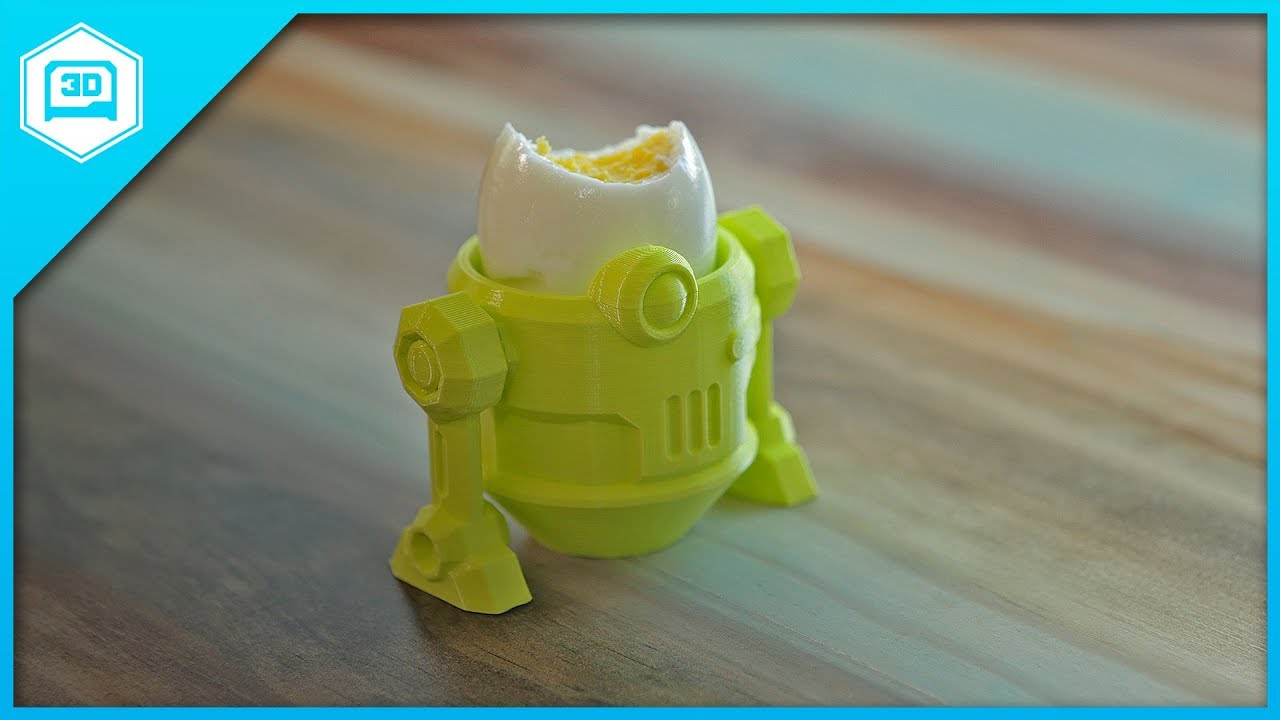
Every week we'll 3D print designs from the community and showcase slicer settings, use cases and of course, Time-lapses! EG2-D2 By: MAGELI https://cults3d.co...
south elbow
K im gonna get a roll of Nylon because my main printer use is for functional mechanical parts for projects. But i need to know wether the hot end assembly can actually print it. It says i can print ABS (210-250) but Nylon is a lil bit hotter than that (240-260). I had to buy a replacement hot end and the seller (ebay purchase) says it has a throat pipe with teflon lining and a PTFE lined barrel, other than that its the same as out of the box.
Its an Anet A8 btw
And if i cant, what do i need to be able to?
and if i do need an E3D v6, will this cheap one from ebay work? https://www.ebay.com.au/itm/E3D-V6-Extruder-For-Makerbot-Reprap-3D-printer-1-75mm-Metal-J-head-Hotend/192405727761?hash=item2ccc466a11:g:WIIAAOSwE0JY-Vmv

eBay
Upgrade your Anet A8, TronXY or practically any modern 3D printer to this more advanced hotend for superior prints. All Aluminium Heater Block. Cooling fan and bracket with cable and connector. Bowden adapter included. | eBay!
jolly silo
my 3d printer manual says you need to download cura from their website, but it isn't on there
Can I just download from ultimaker?
The one in the book says it's version 15.04.2
I just got the newer one
But the 3d printer I need to slect isn't there
It says I need to select Prusa Mendel i3
Is just prusa i3 ok?
weary lichen
@jolly silo I THINK so.
Also, for everyone: https://twitter.com/AndonRT/status/954105636643594240


 jolly silo
Well I know what I'm printing first
And if it helps solve my question, I'm using a Monoprice Maker Select V2





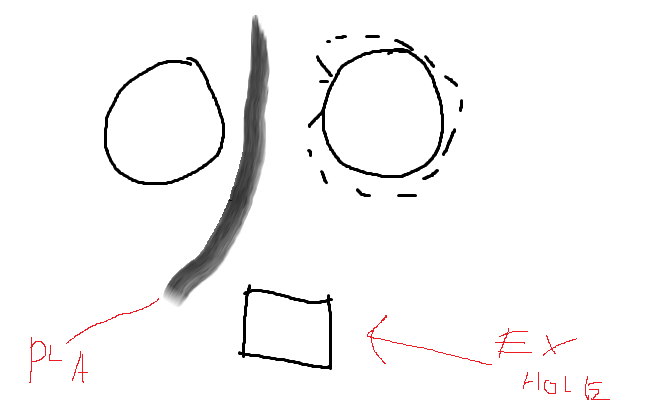
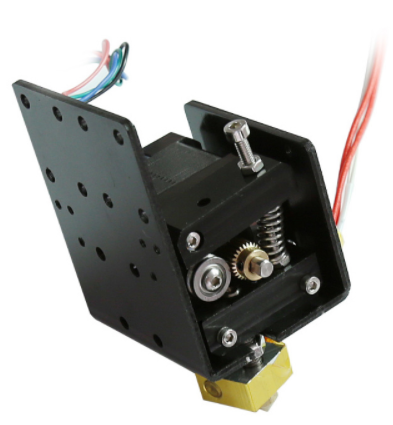
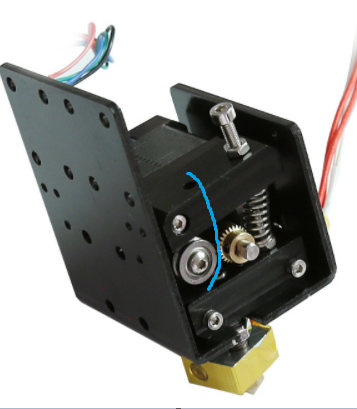 night kraken
@weary lichen Received my stepper motor, found out it was the wrong one because it was too big, (too long)
just send it back, now waiting for mine coming from China haha
weary lichen
One from China an exact replacement?
Also, man does waiting for stuff from China suck. So slow!
night kraken
Yeah it does haha, well they specify it as an Anet axis stepper motor haha
looked like the same 😛
night kraken

GearBest
Just US$9.87 + free shipping, buy Anet Linear Screw 2 Phase 42 Stepper 1.8 Degree Motor online shopping at GearBest.com.
shy kelp
Lol I want to print a gear box with a weird reduction
But I'm afraid things won't fit and it'll be a huge waste of plastic
shy kelp
@jolly silo does your computer read it?
jolly silo
Yes, it does
It's the SD card that came with the printer and has a bunch of samples on it
shy kelp
I heard the SD card that comes with it is trash and corrupts easily
have you tried formating it?
shy kelp
if you want to keep them
Try loading one of the gcode files into gcode.ws
Thats a goos way to test if the contents are corrupted
your computer using Win10?
jolly silo
Thanks!
shy kelp
lol do you mind helping me with something @jolly silo ?
jolly silo
Sure
shy kelp
My Win10 laptop isnt reading SD cards
It detectects is, even makes a sound when plugged in
troubleshooter finds nothing, Ive tried 4 different sd cards so it's not that
Any idea what the problem may be?
shy kelp
It works fine with Linux as an OS
I think it's an OS problem
when I load linux on it it works flawlessly
Welp My printer just became unusable lol rip
shy kelp
It even makes a sound when inserted
no it does not show up
Under drives theres nothing
jolly silo
Maybe post a quesion on tom's hardware or something
shy kelp
umm
jolly silo
I'm not very good with windows 10