
#3D Print Gulag
1 messages · Page 3 of 1
Next up, the receiver. The metal bits should be in the mail.

It says 00:08 for print time, but clearly marlin is smoking something.
SuperSlicer wasof the opinion that it would take somewhere between a very long time and at least a year.
Isnt 95% infill just as strong and takes a lot less time?
Basically. Though for the most part walls add strength rather than infill
Yup, if i need strength, i add a wall
I just realized something. The 00:08 print time was probably for the first layer. Apparently, it was showing that separately for some reason.
Maybe because all the temp settings change after that is done?
I'm not sure why, but I had terrible adhesion issues after a while of using the printer, and changing to printing the first layer much hotter than "normal" fixed it. So now I print at 210/65 and then drop to 200/55 for the second layer on so as not to cook the print.
Most of the print is pretty thin walled already, and any heft I can get to that point will help balance as well as strength
Also, the source for the model I used specified 100% infill, so I just went "Sure, sounds like a good idea" and rolled with it 😛
The main body I went with 5 walls and like 15-20%? I don't remember.
An AR style grip would probably be legal for you. If for airsoft if nothing else. The part that is printing now... Less so 😛
Yeah the grip would be fine, stock too (i hope as i have done that already) just lower and upper are off limits
did you at least increase wall thickness?
@tight river
acting your age in months eh?
Absolutely
👍
This thing is pretty cool. Once I have matte spray it should improve a fair bit. That's on the "normal" setting, though there's a fine setting as well
As long as I get within a millimeter of what I'm scanning it'll serve most of my purposes
I don't understand why it refused to pick up my facial hair though.
cause it thinks you need to shave!
betting than a fat 70 year old 😝
Give me a few years
Just gotta figure out how to get this into fusion 360 and blammo. I'll be in business. Not this scan itself but, you know.
You gonna spray yourself?
Might could
You apparantly too shiny
Yeah idk what the issue is with the beard man.
That's odd
I think it just has issues with dark surfaces
Or it can't reflect well between the hairs
It had as much issue with the inside of the box where there wasn't much light
My plan with that box is to design and 3d print the mounts necessary to shove a diesel heater, fuel tank and battery inside it
Sounds like you need to order big lights and diffusers
I got spray chalk coming and already have lights for photography
What kind of 3D-Scanner is it? IR based? Camera based? "Lidar" based? First two are pretty dependant on uniform lighting (the second one being IR lighting)
Also: you know there is scanning spray, that just disappears after some time. Maybe better than chalk?
The evaporating stuff costs 260 dollars for 6 cans. And I've already ordered some, but I won't be using it for anything that I can just wash off after lol
As for the type I'm guessing it's a camera based one, but it has its own flash and projector. Getting good lighting won't be an issue for me
Just started printing the second receiver. First one was okish, but poorly placed supports kinda mangled a few bits and I decided it was easier to print another one with better supports than spend a bunch of time cleaning it up.
We will see how it turned out in 16 hours or so.
Supports stay fuckin up my prints. I'm terrible with them
Also I've been awake pretty much all night so that's super cool
Does it like prject a pattern to the surface?
It does
It's the cr1 scan from creality. I only paid like 350 bucks for it so, so far the results are better than I hoped for

the squidge is about to scan a box?
Chalk spray was a bust.
trying to make shiny surfaces scannable?
greenfluro pimple ftw! 🤣
What now
Next attempt is talcum powder and alcohol to make a spray talc that rapidly dries. But that'll be for Friday.
Sounds like "MOAR LIGHTS" might be a smarter first try
Like a 1kw halogen shop light, whatever you've got on hand
Just gotta scan fast before you're totally blind and the part melts
@viscid violet I went down the spray rabbit hole too a while back. Best to get the right stuff, but from a less expensive vendor: https://us-attblime.com/product/attblime-abp-scanning-spray-semi-permanent/
Who summons me and then deleted the comment
Ah now I see it.
I'll try it. The washable stuff is good for washable things but the evaporating stuff is necessary for like car interiors and stuff that the cracks might be impossible to clean
Yeah, I bought both from there, pretty reasonable. Use them and cheap Amazon retrorefltctive dots and have scanned a bunch of my Camaro lemons car
Nice
Yeah the dots make a huge difference. I need to get this car back on the road so I can start working on that project.
Downloaded Fusion360 today, struggling with it a lot but i managed to make a box with screwholes to fit my geiger counter
It's gonna melt down
Maybe
Ready to print

Dude I know that does custom sheet metal work offered to repair the bit of rust on the car
As well as weld my diff
I just got his 3d printer running too so he can start making custom dies for forming his sheet metal
That's pretty cool
Aaannnd he's not all that great with fusion either so I'll start showing him that shit
I could use some pointers too
Sadly not today, maybe some evening next week, otherwise im preoccupied 🥲
Yeah that's fine
Rope in a Fleet Ops Officer (the weird orange people) and make in an ARMCO event! 😛
Can't sleep, went to check on it (insomnia is not related to this print)


Is that some special photon emitter or a photon sensor :P?
Ohhhhh hehe should've known by the silkscreen I overlooked xD
ah, a fellow fan of uranium glass and glazes? wish I could afford to collect some. but what I really want to do is make some pottery with uranium glaze, the colors you can get from it are amazing. I have never seen those shades of orange in a high temp glaze done any other way.
of course getting your hands on the stuff to make some is not easy
They sell them at antique stores here, sometimes thrift stores too
I think i paid like 7 bucks each
Ohh you're gonna have fun if one of those bad boys explodes in the oven for some reason ☢️
Don't know if theres no-burn uranium glaze tho
no burn?
I mean if you dont fire it, its not a glaze. and pottery exploding tends to mostly be a problem for beginners, once you get good at working the air out of it the worst you will get is a crack or broken pot. even if one with uranium glaze did explode, its all getting turned into a glass anyway that you will just have to chip off your kiln walls but that is rare, more likely it just gets stuck to the shelf. worst case you have to get rid of the shelf.
uranium is only slightly more horrible then some of the other metals that go into glazes. all kinds of nasty stuff
vanadium pentoxide is fun stuff. nasty inhalation hazard. cobalt is just horrible in every way. there is of course the classic hazard of lead
and the ever present danger of silicosis. the bane of all potters
I think explosions cause microscopic dust and I heard chipped uranium glass already is really dangerous because microscopic dust could get inside your body
I'm my bout of insanity, I have made the Holy Hand Grenade

CONSULT THE BOOK OF ARMAMENTS!

One, two, FIVE!
Three, sir!
THREE
so I was just looking into GFPP again. price has come way down. its probably one of the most affordable fiber reenforced filaments out there now. I think I will have to get some. https://www.3dxtech.com/product/fibrex-pp-gf30-polypropylene/

3DXTECH
FibreX™ PP+GF30 is made using a specialty formulated 30% glass fiber reinforced polypropylene copolymer that we created specifically for 3D printing. Our PP+GF30 is ideal when you need improved strength, stiffness, impact, dimensional stability, chemical resistance and high thermal properties.
anyone know if this brand is any good?
oh FFS... the filament might be cheap but the glue stick you need is 50 bucks!
thats the stuff I get, 2kg at a crack
but if you dont use the PP adhesive juice life is bad. It prints really well though
lots of layer adhesion
yeah but 50 bucks for the fancy glue stick? thats kinda painful. how long do they last?
its lighter then PLA, so is the 500g spool close to a standard 1k of PLA in length?
I was thinking it might be nice for direct pour molds. I have heard from a few sources including you that PP has amazing layer adhesion and next to nothing sticks to PP so it might be really nice for mold making.
I am going to be casting some epoxy into PLA molds in the next few days and I expect disaster. either it will get to hot and deform the mold or its going to leak or its going to stick to the mold and I will never get the part out.
It's not that much lighter
No idea where you got 50 bucks from
Magigoo MPP2018 3D Printer Adhesive Glue, Reduces Warping for Polypropylene Filament on Glass, PEI, Buildtak, Kapton 50ml 1.69 fl. oz, White https://a.co/d/6u1wvuc

Magigoo polypropylene is designed for professional use, to work exclusively with polypropylene filaments to adhere to build plate of a 3D printer. The part should be relatively easy to remove once it cools.
That's what I use
I am having a problem with printing in vase mode. I get a strange spiral pattern all over the print. anyone know what would cause this? sorry I cant provide a picture.
this pattern?

if so, then its likely being caused by powerloss recovery
the printer pauses for a moment as it writes the current position to the SD card. you can disable it (marlin) with M413 S0. do note that this turns off powerloss recovery (which doesnt always let you recover anyway because of bed cooling or motors losing position anyway)
its similar to that but I have powerloss recovery turned off. its a much finner more freqent pattern.
its a very fine pattern that looks almost like ringing, it might even be ringing but I am not printing fast so I dont get it
not a clogged nozzle pattern?

the lines can be traced from the top to the bottom of the print, they get more slanted over the smaller the radius gets forming a tighter spiral
hmm. there is an effect I am thinking of, but it is nowhere near that pronounced (and I cant remember how to find the stuff I saw on it.)
I cant find anything on this because spiral mode is what vase mode is fucking called in prusaslicer so there is no way to sift out the nonsense
I bet there is something screwy with my z axis. but no idea what it could be. belt to tight or to loose, bump in a wheel, wheels to tight?
I think I found it. I am printing at 0.8mm line width with a 0.4mm nozzle. https://youtu.be/tJHnx89Fmi0?t=458

In this video I do exactly what the title suggests, and try progressively larger settings for line width in vase mode, until I break something.
Vase mode, also known as "spiralize outer contour" for some reason in Cura, is a 3d printing mode that allows you to print one single wall, technically one single layer all the way up a piece. It's inc...
nevermind, slowing things down and reducing line width didnt help, switching to cura didnt help. this might be hardware
it only shows up about an inch up, always starts at exactly the same height.
Does it also happen with square vases or only round ones?
Maybe this is overfill because it thinks there are corners there
The spirality of it would be caused by maths, it's common for "corners" to turn into spirals in maths.
Also what does the model topology look like?
What about the g-code?
I tested it in normal mod and it still did the same thing. it hates something about the model its self. I am testing if it might be to high a poly count right now, it was only 200k but its not very big so maybe it was to much for the size
nope, exact same fucking thing. it cant be the geo, the geo was totally changed when I decimated it.
I have been printing all week, this is the only damn model having problems. I dont get it
I wouldnt know what to look for in the g code. and seeing as it does the same thing weather sliced with cura or prusa I cant see it being that
you mention the geo... however there was an issue in cura for a while where it would generate faaaar more points/moves than was necessary for a curve, and this would bog down the printer mainboard (they can only handle so many moves in a short period of time)
its not that, I just cute the poly count in half and it made no difference and yesterday I printed a model with 3x the poly count. its actually worse in prusa then in cura and I have the latest cura beta well after that bug was fixed
polycount doesnt really affect the sliced output. unless it actually has more detail
it looks kinda like a dwell problem, like its getting to many instructions to keep up. esspecially if I turn off spiralize but that just dosnt make sense
an organic model like this will always have more detail then the output.
does it look like your printer is halting when it does that.?
no
I dont see any stuttering. I had a dwell problem before from a failing SD card so I know what to look for on that. it really dosnt seem like the same thing
but it sure as hell looks similar.
this is so fucking annoying, I need this print done tonight. I still have a mountain of other much larger prints to get done for this project and I needed it done now because this one has to be fully finished and smoothed by tuesday
its too small for filling or sanding. I cant sand details this small and filling will just wash all the detail away.
that is why I was trying to print it in vase mode, avoid seams that way.
and best of all I cant even show anyone the fucking model to see if they can see anything wrong with it!
I meant some g-code visualizer so you might be able to see the spiral already there
You could also try to replicate the model more or less step by step to see what causes the problem.
Approach the step by step via divide-and-concour
I figured it out. it was my filament. never buying overture PLA again. shit had so much veriation in the diameter that it was showing up on this super detailed print as a spiral patter. luckly I was at the end of the spool.
The fun of disassembling the entire hotend to clean up carbonized black gunk that oozed out everywhere
Basically rebuild the entire thing, now test printing to see if it was enough
So far so good
Glad we're moving soon, I'll get so much more workshop space
Enclosure time
And/or bigger printer
Probably both

I have a theory on what happened. With the heating and cooling of the hotend the screws, that hold the hotend pressed against the heatsink on top, came slightly loose and caused enough of a gap for melted filament to escape in between the two parts, this carbonized and caused a clog (again )
)
I tightened them and with a new nozzle I'm back in business
I'll get some locktide soon
A friend of mine is currently building a printer that can do an enclosure temp of 250°C, why don't you go with that if you do an enclosure? :D
Well, I didn't say, the enclosure would include the electronics xD
I'll have a look into how I have to make one
pretty sure it is but not sure why it is useful tho
Well my new work 'shop' will be a garage, the air temp and humidity will fluctuate quite a lot
I'm sure there's plenty of guides online, when i got the time I'll look into it
Anyway, it's back up and running for now

think you only need to go to those temps for the really crazy engineering plastics. that stuff that is like 500 bucks a kg
I am trying to workout a design for a spray booth for airbrushing. going to build the walls out of hardboard I guess because I have a bit of it left over from another project. going to need to design and print a number of 4inch ducting adaptors.
and save a good bit of money, those ducting adaptors and mounts add up in price real fast when building any kind of system like that. often like 10-15 bucks each and you end up needing 5 or 6 of them, what looked like a cheap project ends up costs allot more then you expected. or you just print them for $1-$2 in filament each
Exactly, doesn't always save money (also don't look at hours spend on it), but most of the time it does
and I can print exactly the window adaptor I need instead of having to try to change everything about how my window AC is mounted to accomidate what I can buy
Relevant: https://youtu.be/uJxv5qARXV4

In this video I'll show you how I used 3D Printing to create a custom mounting solution for my synthesizer setup and how you can use the same process to attach anything to anything else!
The Ultimate Book of 3D Printing Tips and Tricks (FDM/FFF) - https://www.makersmuse.com/3dprintingtips
Join the Maker's Muse Community - https://www.makersmu...
I needed some tiny boxes a while back, i could buy them for 15 bucks each... Or i could print some for about 1/2 bucks in filament and about 8 hours
Do i really need it? Not necessarily, but it cleans up my desk

AA battery dispenser was one of my earliest prints. Very useful.
So I want to be able to print ASA/ABS and a few other filaments that need or at least benifit from an enclosure. would something like this work and are they safe for your pinter? like I worry about the heat and the electronics https://www.amazon.com/Enclosure-V2-Fireproof-Dustproof-Temperature-Protective/dp/B0B67WLTBF/ref=pd_rhf_d_gw_s_trq_dl_sccl_1_8/147-4920872-1400211?pd_rd_w=RuIkG&content-id=amzn1.sym.3529a7b4-8919-4007-ab94-788638d675ba&pf_rd_p=3529a7b4-8919-4007-ab94-788638d675ba&pf_rd_r=WDZ432MNVRV6JW4WPWSF&pd_rd_wg=Yryqf&pd_rd_r=1ca96ec4-619b-4ffd-b4e8-af7cd86a0095&pd_rd_i=B0B67WLTBF&th=1

[Constant Temprature] Keep a constant temperature Printing Enviroment. Reducing the Bad impact to 3D prints. improve the prints stability at warm status. Help Regulate the temperature and reduce drafts for improved print quality and keep curious fingers (or paws) off your print. [Flame Retardant]...
at the very least I think it would be helpful for me to keep dust off the printer. something I have a hard time with as I end up doing allot of sanding in the same space
Those are fine for the printer. It doesn't let it get hot enough for the electronics to care, and it helps for abs/asa since it allows to both warm up slightly and keeps drafts off the print
anyone thing is its a bit to big for my desk. really its to big for my printer. so it would be hanging off the desk and look fairly stupid. cant seem to find one that would fit my printer better either.
Hence i didnt buy/make one already, just don't have the space atm
I have had it with sanding PLA, I want asa/abs damn it
afaik the footprint isnt much bigger than the printer anyway. if the front of the enclosure would hang off the desk then the printer would be doing that anyway
yeah but I want something a little better then that. the main problem is its to deep, I guess I could just shorten the depth rods on it and have it baggy at the back
huh. just opened up the listing and it is waaaay bigger than I thought
they are made to fit most printers. meaning if your pinter is a bit smaller in one direction then its going to be to big in that direction.. I messured my desk and printer and it will overhange by a good 4 inches
about 50% deeper than it needs to be for an ender3 (~200mm bed, needs about 500mm depth for travel)
and it dosnt seem I can get a smaller one because the smaller ones are also shorter and I do need the height do to top mounted filament
lol, I think that thing could fit the big printers like the Neptune plus, maybe even a max
run a reverse bowden setup out the zipper and have the filament outside. or even just have it sitting on a roller on the "floor" inside the enclosure if there is space
I think best option is just shorten the tubes where needed and have it baggy. if I had a sewing machine I could alter the case as well but no big deal.
some of the review photos show it being a snug fit for a ender3 s1 🤔
sure I can fold the extra up in a way that will look neat
isnt the S1 kinda chunky?
Yeah i didnt have the height, so i printed an adapter so the filament is on the side
I know one of the enders had a bigger build volume
the s1 has the same build volume, so it should be the same size
S1 pro?
The s5 plus iirc
thinking I need the all metal hotend upgrade as well for ASA. its technically still in the safe range but only just
the v2, s1, and s1 pro are all roughly the same size (470*470*620). but slightly bigger than the pro (440*420*465)
I think I have had my bed (stock e3 pro bed) up that high, just to see if it could (I know I pushed it over 100c). but I know that not all want to go that high
mine only go's to 100
anone know how I go about finding the right hotend kit for my printer?
I have heard I will probably need to replace the heater block because the chances of getting the old one appart without breaking it are very slim
why is google giving me mostly results in german...
so I can by a single bimetal heatbreak for 17 bucks or a 4 pack of the same ones for 12... WHY?@!
looks like it uses the same parts as the CR10
Also does anyone know what the best type of thermal paste to use for this is? I see boron nitride recommended but is that the best option? I DONT want heat creep
I will be very sad if going all metal makes it so I cant print PLA reliable
boron nitride is the standard one afaik
all-metal can be slightly worse for PLA than a lined hotend. but from what I can remember a bimetal heatbreak is the same if not better
I fucking hate searching for products anymore. I search Boron Nitride Thermal paste, it gives me one result for that and then the rest are just the most popular CPU thermal paste options
and search modifiers dont work on amazon at all, they dont work anywhere anymore including on youtube.
I got some with the mosquito I still havent installed yet... though the hotend was pre-assembled so its not actually necessary unless I want to get messy with the nozzle
so I dont actually know where you are supposed to get it 🤔
you would be fine wityh CPU/pc thermal paste between heatbreak and heatsink. not sure I would trust the cheaper stuff at 250c on the heater side though
oh wait. will need it for the heater/thermister (which arent installed yet)
I searched for "boron nitride paste" on google and got a bunch of results
only one option on scamazon, 16 bucks for a tiny tiny tube
fucking funny, pay more for the thermal paste then the block and tube combined
10 bucks for the slice one on bondtech: https://www.bondtech.se/product/mosquito-boron-nitride-paste/
7 bucks for whatever this one is: https://www.partsbuilt.com/boron-nitride-thermal-paste/
10 € for this one: https://filament2print.com/gb/maintenance/1133-thermal-boron-nitride-paste.html
12 quid for the slice on at 3djake: https://www.3djake.com/slice-engineering/mosquito-boron-nitride-paste
all from the first page of google search results for the search I mentioned above

Thermal paste improves conduction and act as a release agent. Use the included applicator to coat the cartridge heater hole in your 3D printer heat block.

Partsbuilt 3D
Boron Nitride Thermal Paste for 3D Printers | Shop Partsbuilt 3D for high quality 3D printing supplies
High-performance thermal paste for hotends, stable up to 1000 ºC and with a conductivity of 31.44 W/mK.

3DJake International
Thermal compound to improve the conductivity. Price: $13.08. 29 Customer Reviews.
was also thinking of picking up one of these nock off CHT nozzles. but looking at this image I am not sure I like the size of the flat spot on it. looks small. https://m.media-amazon.com/images/I/618Ut24l7JL._SL1500_.jpg

I like to print with 0.6mm lines
you mean the tip of the nozzle?
yes
print with a 0.6 nozzle then. will give you higher flow than trying to print 0.6 on a 0.4
no... printing with a 0.6 will reduce the quality to much. its totally fine to print 0.6mm lines with a 0.4mm nozzle and you get better quality then you would with a 0.6 while printing way faster then the standard 0.4 line width.
I would only buy a 0.6 if I was planning to print at 0.8mm
well I do sometimes go up to 0.8 even with my 0.4. it works fine as well
modern slicers (aka anything running arachne) dont really care. plus you only really want to go slightly wider than the nozzle aperture anyway (due to die swell). fine detail quality is based on extrusion width not nozzle size
vase mode is really the only time you want to go excessively wider than the nozzle
arachne is what lets you do this without loosing hardly any quality and saving tones of time. there is no reason to print with 0.4mm lines in most cases. crank it up!
there is a very good reason too. you save allot of time on the bottom and top surfaces with the thicker lines and best of all you can drop to 2 walls instead of 3 without getting the infil bleeding threw or loosing any str of your parts. together it saves you a ton of print time.
yes, and you could do it even better by using an appropriately sized nozzle
I printed my latest giant... um thing I am printing, and it only took me 8 hours. and thing thing was HUGE.
no, I cant do it better, the quality is WORSE. there have been lots and lots of videos comparing this stuff. the best nozzle size for printing 0.6mm lines is not a 0.6mm nozzle, its a 0.4
from what I recall observed quality differences were barely noticeable in the first place. and you could cut that 8 hours down even smaller by printing with a less restrictive nozzle. a 0.6 will flow even more than a 0.4 even before CHT type modifications
its a small difference in quality for people printing only functional parts. its more then big enough to cause me problems. increasing my sanding work is not something I want to deal with. so I will stick to 0.4, hell I have been tempted to drop down to 0.3 and print at 0.4mm lines with that. if I could afford that fancy quick swap nozzle system I would do just that and use the smaller nozzles for the high detail prints
I think the best option is to buy another printer, one for pla and one for other stuff😜
well I want high flow for both, because SPEED
1800mm/s!
What is more speed than having multiple printers
lol, that is true. but I also dont have desk space
Shelves
got as many shelves as will fit. still no room. I just bought a tiny desk to put in my kitchen that will be where my spray booth lives and a resin printer when I eventually get one of those. maybe a laser... dont know yet
fdm is perfectly happy printing in any orientation
let me just go and bolt them to the ceiling then
there are people who have their farm printers bolted to the wall, such that when the bed cools the part slides off in to a bin underneat
I just got finished setting up this backing board and shelf on my desk to give me self some more , this little corner is all the space I have. https://cdn.discordapp.com/attachments/445610544162930699/1110693328292425890/wallthing.jpg

need to print up a bunch of hooks to screw onto the board and tool holders for the hexwall thingy
oh, that was taken before I reinstalled the monitor there as well so its even more crouded now
I will also probably add some heavy mounting bolds to it that I can stick the parts shelf on as well. it has slots for that on the back
double checks there is nothing in that photo that will give away what I actually make
mine's crammed into some shelving, only space i could fit it where it wouldn't take up any of my workbench

that is a tight fit
But it fits
trying out some smooth-on XTC epoxy for print smoothing right now.
stuff is stinky as hell. go's on smooth and despite being very thin it dosnt run like you would expect so it coats really well. have to work fast as it only has a 10min pot life and you have to be very careful not to have any of it in a large volume for very long (like the mixing cup or a filled brush) because this shit cooks off FAST and will get hot enough to catch fire very easy. tricky stuff but you can put down very thin layers as to not wipe out your details.
need to use in a well ventalated area and ideally with a resporator... I have neither so will probably die
its way better then the table top epoxy I tried before, at least so far. will have to see what its like when its cured in a few hours (few hours instead of few days! that right there is a big improvement)
3d print an addition the the house/apartment!
now why didnt I think of that
If only, right?
na, just mod your printer to print concrete and print one brick at a time.
Overextruding slightly does wonders for quality and layer adhesion as the tip of the nozzle acts like an iron. Takes some fine tuning though, by the slicers are set up for it.
My friend bought a Bambu labs printer. Sent me this. This is out of the box.
Yeah lol
Which one is it?
Acceleration? YES.
X1C with AMS
or just upgrade a normal printer. core xy is nice and all, easier to get good speeds out of, but with input shaping and a high flow nozzle of some kind, you should be able to get damn good speeds out of a bed slinger.
yup. people have gotten 10-15minute benchies on an (modified) ender3. plus the prusa mk4 did a silly fast one too

buy 2 cheap printers instead 😛
also I managed a 30min benchy without any modifications, just imporved slicer settings. (without quality loss over default 0.2mm line profiles)
I upped the speed by 15mm/s from default, that's about all I did so far
He's at 13 minutes for his so far lol
Without messing with it much.
I mean I know you can go way faster with input shaper and all that fun tuning stuff. why I want to get it setup on my machine. point was just that you can get a fair bit more speed out of your printer without doing anything more then using smarter slicer settings then the horrible defaults
so I made one of those honeycome walls, and I installed it rotated 90 degress without realizing. they are next to impossible to take apart onces put together.
I should have jsut bought some pegboard
i just screwed a large piece of plywood to the wall
screw anything i need striaght to it
a lot of stl's for holders you can find online have screwholes already, and if not, it's a quick fix with fusion
well I have a board I can screw things into. but I wanted easy to switch out holders like pegboard or the honeycomb wall offer.

it comes pre installed with klipper and its 300 bucks
and there filament is onsale again, 10kg fors 100 bucks D:
thats insanely cheap
oh nice, they also added a full USB port that you can use to print from a thumb drive, no more stupid micro SD card that go's flying across the room when you try to take it out
its insanely cheap both for the printer and the filament.
it basically has all the upgrades I wanted to do to my neptune 3 built in... anyone one want to buy a neptune 3 pro, slightly used?
damn it, that hurts
wish they would sell the board as an upgrade kit for the 3 pro.
yep... holly shit, that bar on the back of the gantry, that is the part cooling fan!
it has 4 blowers
in addition to what is on the head
they are not kidding about 500mm/s printing speed https://www.youtube.com/watch?v=JkMZgq3iaCs

Thank You To @ElegooOfficial for sponsoring this video. Preorders start today for these machines and you can find that here: bit.ly/3oKdmpq (affiliate link)
#elegoo #3dprinting
you sure its not the 3? because the 4 is only just today started exsepting preorders
it wont arrive till august
I really want it...
but I cant justify upgrading when I have had mine for only a few months
oh and these as well...

9k
which was cheaper than the 6k, even before they knocked the price down 🤔
oh wait, the 6k is the max. aka bigger
If I ever upgrade from my current printer, I want a large coreXY printer.
Nothing I want to do benefits from resin.
Basically just the subpixels from a normal hidpi screen, but monochrome
going to be some smooth prints
3d printer market is getting shaken up daily it seems. after years of nothing new
wonder what Solvo is going to do, they have basically a prusa 3 clone right now but for cheap. if they pull what elegoo just did they will basically be offering the prusa 4 but at 1/3 the price
that would be some funny shit
I need a unit that's under $2000, can operate at 400c hot end, and has the electronics all outside of a temperature controlled chamber that can be heated up to at least 50c.
But I am not sure if the patent is expired yet on having steppers outside of the enclosure
50c enclosure is okay for having steppers inside, but you cant really go much higher
the winding insulation is usually good up to... 90c afaik
you can get ones that are rated higher, but you are paying for it
Elegoo seems to really have their shit together
anyone looking to stock up on PLA, I would get that shit while you can. last time they sold out very fast. I use that filament is its good
lol, maybe to late. the 10kg pack of black is now saying dilivery in 60 days
I can wait 3 months on filament a third of the price
Not like I'm running out any time soon

god damn it. I had to reload my filament because I kinked the filament when moving the spool, had to cut it or it might have broke while printing. now my extruder is clicking like a motherfucker.
no idea why either. it looks like its printing fine
Fuck sakes! its the SD card again. it started doing that shit where it says "update firmware" when I try and boot with the SD card installed. booted with the card out then tried a print and got blobbing like I had the last time my SD card went bad. I have only been using this SD card for 2 months and have maybe printed 15 things off it or so. I didnt get a cheap card either, its a scandisk industrial!
do you have to reformat these things ever few months or something?
I did a disk error check on it and my computer says its fine
Is it an older card?
I just said its new unless 2 months is old for an SD card
Oh i didnt read it correctly, still early here😝
I eject my card from the PC propperly, right clicking and selecting eject. I dont remove or install the card on the printer unless it is off. as far as I know I dont have to many radiation sources in my room so I dont think its being corrupted from that.
maybe I should get a fucking geiger counter
hahaha. one of my local suppliers managed to reopen and then close again without me noticing 😆
(not filament, but screws and other odds and ends I need for projects)
Radioactive radiation barely affects sd cards, it's more likely electromagnetism
Is the power supply properly shielded?

Have you ever wondered if radioactivity affects the data on flash memory like the SD cards in your camera? In this video I will test an SD card against some naturally radioactive minerals. They are thousands of times stronger than natural background radiation, but will they erase data on the card? Time to find out!
You could be one of ESA's nex...
Sandisk cards should last multiple write fills (tho just having it installed and not using it does seem to shorten lifespan)
I could not imagine why the card should've failed except bad from the factory
card didnt fail, reformating fixed it but why did it need reformating?
Not easy to say, given that we don't know anything about the filesystem being used, the partition table, nor how the printer interacts with it ^^'
it seems to be a common problem on this printer. I probably need to update my firmware. didnt want to because I wanted to do the newer marline with input shaping. guess I might as well go ahead and try to do that upgrade. if I brick the printer I guess I get to buy a neptune 4 and use the parts from this to build something else
Heh :D
Imo nowadays it's almost impossible to actually brick devices.
ROMs are often built in such a way, that the updater portion either doesn't change, or their changes complete fast enough, that the risks of something happening right then are really small
it even warns you, if you turn the printer off or loose power while updating the firmware your fucked
flashing does a check after its done, but it cant magically recover something that has already been overwritten if it fails
if flashing goes sufficiently wrong you would need to connect an icsp programmer to the debug pins on the board
While back i saw a vid about a guy who printed a custom psu case, and then a lot of his devices started acting weird😝
might have been a grounding issue rather than a shielding issue there

hahaha. oh god
Huh, didn't know a caliper could function as a EMI detector aswell :D
TIL
tbh I wasnt actually sure how the digital calipers worked. I know the scales used on lathes/mills are magnetic, but hadnt put 3 and 4 together
My theory till now was that they worked with magic
like I said, magnets 😛
Fair
https://cdn.discordapp.com/attachments/716401392021012571/1114220340416102520/image.png file handles for my cheap harbor freight file/rasp set. only came with 2 handles so going to print these for the rest.

printed handles work great

I went with flat sides so I can print them laying down for better str. was afraid they might snap at the layer lines if printed vertically
one of the rare cases where I would use PETG if I had any. something that is a little more impact resistant would be nice.
I was looking for excuses to print petg, and then i broke a rasp handle
over engineered window too 4inch duct adaptor for my airbrush booth https://cdn.discordapp.com/attachments/417308639770968064/1114503780474572881/image.png


has an aux vent for equalizing pressure on the bottom, will add some kind of door to it to close it when using this for fume extraction but if using it just for a bit of fresh air ventilation then it will keep from making the room positive pressure
needed to be sized to live next to my window AC in the same window so had to do something custom
fuck, I was going to print this out of PLA. its going to be in a window and get direct sun light for a few hours a day. will this even survive?
ASA for sunlight afaik
I cant print ASA and PETG is shit, its only very slightly better about heat then PLA
not worried about UV degridation, I can just paint it if that is the problem. its just heat and the possiblity that it will melt/warp a bunch in the window (not behind glass, out in the open)
well I guess I will paint it and hope for the best.
Out in the open is usually better than behind a window when it comes to heat from sunlight. The window can act like a greenhouse and get even hotter
OMG, the inline blower I bought for this porject is SO overkill its not even funny. I figured at $28 it was going to be fairly meh. 183CFM isnt much for a fan... but its not a fan, its a blow with crazy high pressure, its also kinda huge and very heavy with a fairly heavy impeller. it moves a shit tun of air threw this 4 inch flexible ducting like there is no restriction at all.
Pla will only start to warp at like 60°C
sure but air temp is not surface temp.
sidewalk baking under the sun all day gets allot hotter then the air temp for example.
I guess I could foil tape it
Make it all shiny
shit... this is why I need a nozzle upgrade

I have never tested it but assuming its similar to the E3 its based on then I will max out around 10 or 11 from what I have read. means I will be in trouble for this print
everything I do that will get this under 10 cubic mm/s will increase the printing time by about 4 hour
Good excuse to buy the upgrade 😜
I worry about that upgrade. not sure how much I trust those nozzles
going to boost the temp and see if i can get away with this print or not.
Make your own CHT.
You take a normal nozzle, drill a hole through the side the same size as some copper wire. Then heat up the nozzle while cooling down the wire (oven and freezer), then insert the wire through the hole.
Repeat once more at 90 degrees if you really want.
Clip off the excess wire then chase with an M6 tap (for v6 or mk8 nozzles)
Et voila, homemade CHT nozzle
yeah no
Actually the one i saw might have had them soldered in 🤔
It does work, not as well as a machined one, but it gives significant improvements to flow
or I could just spend 10 bucks on a 4 pack of the clone nozzles and not do something so janky and probably prone to causing clogs
clogging is my biggest worry with the CHT clones
wires, yeah fuck that
Afaik the issue with something like the wires DIY cht is more leaking than clogging
https://cdn.discordapp.com/attachments/716401392021012571/1114902611569692672/under01.jpg yep, its under extruding in the points where it hits 14 cubic mm/s

ordered the CHT clone nozzles, hope they work. find it funny that I can hit flow limits at stock speed
Paint it white and send it
going to cover it in aluminum tape. should be more then enough protection
Well, I guess we are going to find out how good my first layer is 

This is a 2mm to 0mm ramp intended to be used to help smooth the edges of my powerplay pad so the desk pad that goes over it doesn't have a noticeable bump.
It has a small single layer lip (left side) that goes under the powerplay pad to help hold it in place. I may or may not end up taping it as well. We will see.
I dont think 2mm is that tap-able, probably just puncture right through it
oh taping, not tapping
words
lol, I happen to be printing something similar right now. just a bit thicker and smaller. pair of plates to fix a dumb mistake on my window vent idea.

why glorified dryer vent so far.

the extendible part on the top is now 8x taller then it used to be because I fucked up messuring my window that badly.
I am really impressed with how badly I failed on that.
friend of mine wants to get into resin 3d printing. they are in Australia where the prices for everything are always stupid. any advice on the subject, what is a good one to get, are the washing and curing stations worth having or just an over priced UV lamp and tupperware as they seem. stuff like that.
3M discontinued Bondo spray filler primer!
the best filler primer around, easiest to work with, super fast drying, can sand it in less then half an hour. and they killed it
that is what I used to finish all of my prints. was so good at hiding layer lines
so now all that is left really is water based trash primers that react badly to half the paints you will try and stick ontop of them and take 4-6hrs to dry enough to sand
what about the rustolium filler primer?
After the dickosaurus, I got my first fidget toy from @tight river
Still learning to one-hand it
rustolium filler primer is garbage and it causes cure inhibition in silicone, the biggest factor in my selection of primer is if it causes cure inhibition.
actually every rustolium paint I have used has pissed me off in some way, they just suck
Sounds like they arent made for plastic but metals...
lol, they suck for that as well, they are just bad paints
the problem is solvent based solvent-based acrylic lacquer are being replaced with water based ones because people are to stupid to wear PPE when spraying paint. the problem is its worse in every way.
would a home desk top CNC Mill count for this chanel?
that is dumb I am sorry but we should not get more stop saws not duller saw blades
I mean it is 3D🤷♂️😜
the one I know about is 2A related but it is a very neat piece of kit that can mill Al and steel
isnt a CNC mill like literally the opposite of a 3d printer? 😛
they should take us out of the tech-lab tab hell and just make a makers channel.
If they pull this and car gang out, it's half the posts in tech-lab
I mean CNC fits in under manufacturing and home maker equip
the issue is all the vids I have seen on it are from gun tubers
I have seen allot of CNC vids that are not from gun tubers.
Can't see why cnc wouldn't belong here, yeah it's not a printer but it's still close enough imo
a desk top CNC is mostly the same thing as a 3d printer just in reverse. removing instead of adding. if your looking for youtubers that do a bit of desktop CNC stuff you should check out Ivan Miranda, he does both and has built a few small CNCs, even offers the plans for them for free (or maybe its a patron perk, dont know for sure) fun channel, guy is a bit nuts.
key difference between a 3d printer and a small CNC besides the tool head is how sturdy and rigid it needs to be. lots of tool pressure in milling even softer materals let alone metal.
youtube tends towards self-reinforcing suggestions. you watch a video on something, so it suggests you similar stuff, and in no time thats a significant portion of what you see
and its really bad about gun channels. you watch one thing even remotly releated to weapons and your recommendations will be flooded until you remove it from your watch history.
youtube/google is pro money and nothing else matters
if it gets views and dosnt get them sued its all good
Sometimes I have good ideas
Heh not quite literally half but actually significant

Now add the car gang which Squidge also made
Ohh wait where tf did that go I thought I pinned it for me 
It unpins them after you don't use it for a certain period i think
As soon as we moved im gonna (pre) order the neptune printer
Car gang is almost 4000
My two threads are about 65% the size of the main thread, but I think that 10k is just that thread, not the total in the tech lab of all threads.
We can overthrow it
So I want to design and print a simple diffuser for LED strip lights. I have white PLA so that should be fairly good for the job. any ideas how this might work?
this is for the airbrush booth I am building.
my current idea is to print a bar that the LED strip will sit in and it would have 2 slots in it along the top/bottom, then print a flat 2 layer thick sheet about 2cm wide that would bend into a curve when placed in those slots.
I could also just print a D shaped vase mode print but it would be rather small and very tall so the print speed would have to be turned way down.
goal of the diffuser is keep me from directly seeing the LEDs and getting blinded and to of course diffuse the light
I used white pla for that exact purpose. Depending on how close you are to the led(s) it may not diffuse as much as you like.
But you'll lose a lot of output.
Your design sounds viable enough to avoid that.
The diffusion issue, not the output. You'll still lose output like crazy
how thick were the walls for the diffuser you tried?
I know simple white paper can work well as a diffuser but I dont have any. probably be a similar amount of lost light. but I do have 13ft of LED strip in this kit for a fairly small spray booth, might be fine
I could also try an open diffuser, little box type structers around each LED to reflex the light from the sides but still leaving the top open for direct light shinning down.
Why white when translucent and/or transparent filament exists?
And for that matter, if you're just printing a flat sheet, maybe just buy a flat sheet?
because I am not going to pay 25 bucks for a spool of PETG just to print a diffuser and why would I wait for a diffuser to be shipped to me when I can print one? as I said if I had paper I would look at just using that but I dont.
anyway transparent diffusers let more light threw but they also dont diffuse as much. even diffuse lighting seems more important then intensity for painting
Just buy a sheet of diffuser film. Way better results.
I have already spent to much money on this project, I am not spending more. just forget it, I will figure something out.
White filament seems about right for this kind of thing. as you have already said, print thin (only a few layers). just be aware that filament comes in different whites and yours might colour the light slightly
0.8mm
You'd almost be better off just buying a thin sheet of plastic and cutting it out.
Like a milk jug

just have to install the LED strips. dont mind the ugly interior paintjob, I had very little white paint left and needed to at least make sure the light would bounce around in there somewhat.
its made of hardboard mostly because I had allot of extra lying around from another project. its only 1/8inch so no way to screw or nail that together so I 3d printed little triangle brackets to hold it all together and printed a 4inch dryer duct attachment to hook it up to the exhaust fan. takes a 20/14inch furnace filter.
when I get a resin printer I am going to set it up along with this so it can duct the fumes from that outside, my vacuum pump for degassing resin and silicone will also live in the box when its running so that the oil mist gets sucked outside.
damn it. I didnt think about attaching the LEDs to the hardboard. I have the ruff surface on the inside for most of it and getting any kind of tape to stick to that like the double sided tape on the LED strips is basically impossible. what little paint I was able to get in there isnt enough either.
only thing I can think of with the stuff I have on hand is to mix up a batch of epoxy to paint on the surfaces that will get the LED strips and that means another day before I can install the lights
what about a white RTV to glue them in?
VHB tape is basically the superglue of tape.
already gave it the epoxy treatment. it will be cured enough tomorrow to attach the LEDs.
the delay isnt a big deal anymore because I just had a rather huge setback on my current project that I needed this for. forcing me to redesign my molds and reprint anyway.
OOF
a good 14hrs of printing and half a roll of filament for the new molds. waste of close to the same for the old. also about 10 bucks worth of silicone wasted on the failed attempt and the new one will need 2x as much to cast. exspensive fail for me
got the lights installed in the spray box. for sure need some kind of defuser but that is going to be hard because of how they ended up mounted. tempted to just throw some masking tape over them, everything else I do is janky as fuck so why not
well my spray box dosnt fit very well where I wanted it. I made it small enough to fit on the kitchen counter instead just incase that happened. but that does mean I need to make it water proof because it will be next to the sink and it also means I will need to make some kind of quick connect system for the vent hose. not sure how to go about doing that
so now starts the slow process of epoxy coating it. I can only do one side a day because it takes a day to cure.
oh well, with an epoxy coating over the whole thing its going to last a long time at least
anyone have ideas for a quick connect 4 inch dryer hose setup? or know of a good design already made that I can just print
would rather not have to buy magnets, I have some magnets but they are just not strong enough for that kind of thing
something like an RV sewer line connection may be sufficiently quick / secure
I looked at those, they are too small
what about dryer vent stuff
no one makes quick connect setups for dryer vents oddly enough, this is the kind of thing you need to make... hense 3d printing
Look at workshop dust collection stuff. There's a ton of options for 3 and 4 inch hose
I was figuring that style of connection. You could probably find a model and scale it up
forgot about work shop scale dust management equipment lot of options there
Progress

Oh you fancy with your render

Yeah it didn't fit
Rip
something went wrong when we added the rim around the screen cutout, it added a 'rim' on the inside too and we didnt notice so it was 2+2mm too small
V2 is almost done printing
This one fits

messure twice, print once, find out your off by a semingly insane 4 inches, messure and print again, this time off by 1 inch, start to wonder if your ruler is magically changing length on you.
at least that is how it go's for me
This time it was software doing things we didn't expect and didn't measure afterwards 😝
inside brims are annoying, they are hard to clean up.
Tolerance on the buttons was also a bit tight so we changed that too
I had to go threw and remove that stupid setting on all my profiles not to long ago
tolerance is an area my printer really struggles with. I know there are calibrations I should do to try and fix that but havent been bothered to do it yet.
Noctua has recently launched official 24 to 12 volt converters for their fans specifically to make them easier to use with 3d printers and the like.
Probably overpriced, but still pretty cool of them.
NA-VC1
Knowing Noctua, it is probably A) Expensive B) Easy to use C) Built AF
googles
Overheat, overcurrent, short circuit, and reverse polarity protections built in. Good to 60c. Certified by nearly everyone who is willing to certify something. Only about three times as large as a female 4 pin fan plug. MSRP $24 Check, check, and check lol
Actually, that isn't that much more expensive than a cheap buck converter off amazon, depending on how cheap you are willing to get. Only like double the price.
That sounds pretty good
sounds about right. I love my noctua fans but god damn the price.
Noctua is one of the platonic examples of "you get what you pay for" turning out well for you
Yea
what filaments are best for mechanical components that would be submerged in oil?
I don't know the answer, but I bet the person who does is going to ask "what kind of oil?"
I want to print a gear box but I hate noisy gears so I want it to be in an oil bath. also dusty enviroment so rather not use grease.
what ever oil I can use that dosnt stink (fuck gear lube!) and is least likely to ruin the parts.
or other options for making nice and quiet gear reduction that can handle moderatly high torque
basically I have a motor that is about 2x as fast as I want it and about half as strong as I want it so I want to stick a simple and quiet 2-1 reduction on it.
anyway, knowing what filaments are safe to use in oily enviroments is useful information anyway. I am guessing PETG is probably fine with it, most PE plastics are good with oil but PETG is annoying
Why is it annoying? I've had very little trouble printing it
Non-straight cut gears are more quiet in cars, maybe look into that.
Herringbone is awful popular for printed gears
"Nylon, PETG and polycarbonate are oil resistant" https://www.cdc.gov/niosh/docs/2020-115/default.html
Answer by yer trusty bing chat
There are several ways to reduce gear noise. Here are some tips that might help you make your plastic gearbox more quiet:
- Use high-precision gears to reduce pitch error, tooth profile error, runout error and lead error.
- Use a better surface finish on gears.
- Ensure a correct tooth contact.
- Have a proper amount of backlash.
- Increase the transverse contact ratio.
- Increase the overlap ratio.
- Eliminate interference on the tooth profile.
- Use gears that have smaller teeth.
- Replace pitted or damaged bearings.
- Replace chipped or worn teeth on any gear¹.
3D Printing with Filaments: Health and Safety Questions to Ask, Publication No., 2020-115
Well, it prevents slip and is resistant to high torque but I'm sure it's pretty loud
The whole idea behind herringbone gears is getting the noise reduction of avoiding straight gears, AND avoiding the need for thrust bearings because the axial loads cancel out.
Ahh okay didnt know that!
Though apparently I learned something as well, just "double helical" gears are what I'd go for here, not necessarily herringbone, as apparently they're a specific case of double helical gears where the teeth meet in the middle: I don't know if that part is essential here or not
So a double helix differentieates from a herringbone through the middle, where in the helix there is a gap for air to escape?
herringbone is a special case of double helical, I think.
Though there may be some fuzziness in actual usage of the terminology
yeah, I know what is required for gears to run really good and as such be quiet, those are all things that are really hard to manage in a 3d print, 3d printed gears that a hobbiest can make without fancy tooling and mats are always going to be on the noisy side, why I just wanted to minimize it by running them in oil.
from what I understand for most practical applications double helical and herringbone gears perform almost the same. the biggest difference between them is ease of manufacturing. I think double helical gears are easier to machine then herringbone but herringbone are easier to print. (I might have that backwards, cant remember for sure)
I dont like PETG, I think its a very ugly plastic, the most plastic looking of plastics. as such I would only ever use it for functional parts where I dont care about the looks but I dont print those enough to use it up quickly and the stuff absorbs humidity like crazy and I dont have a setup for fillament drying.
I actually really like PLA because it looks and feels a bit like bakelite
now thats not a comparison I had ever heard 🤔
bakelite is very rigid for a plastic and has a slightly odd sound to it, its almost a bit like wood I guess... probably because most of it has wood pulp in it. PLA feels a bit like that. its not the same for sure, far from it but when sanded up nicely its allot closer to that style of plastic then most others
lol, and like bakelite it shatters into horrible glass like shards that will ruin your feet. fucking supports! worse then legos
Technically almost everything you print with absorbs moisture like crazy and has serious mechanical defects as a result. The problem is the typical home user can't tell when they've hydrolytically degraded the material and just over designs everything anyways.
As for pla feeling like bakelite... not sure I'd agree there, but alright. I can see it somewhat.
i get it, but my experience with bakelite is it's very brittle and shatters, pla still gives a little before breaking
PLA gives a lot though, isn't that one of its things, very high toughness AKA absorbs a lot of energy in deformation before ultimate failure?
well I said it was kinda like, its closer to that feel then most printable plastics. I mean bakelite is a resin. I cant really think of any other plastic PLA is like, its a bit of an odd one.
I am sure moisture has allot of hard to see effects on the plastics we print but in the case of PETG its very easy to see and turns it into a gross bubble stringy mess. dont want to deal with that
might be more willing to play with it in winter but in summer its so fucking humid here I wont stand a chance
for a bunch of plastics, them absorbing water after printing is actually a good. thing. iirc it helps to stabilise some of them. before printing however it screws them over
I did wonder for a moment of bakelite might be printable, but alas its a thermoset rather than a thermoplastic 😦
it needs a lot of pressure or it's gonna be a mess of bubbles
and its made with HORRIBLE chemicals, if it could be printed you wouldnt want to. if you have ever smelled hot bakelite you will know
reminds me of this https://www.youtube.com/watch?v=phNLecfyWS8&ab_channel=NileRed
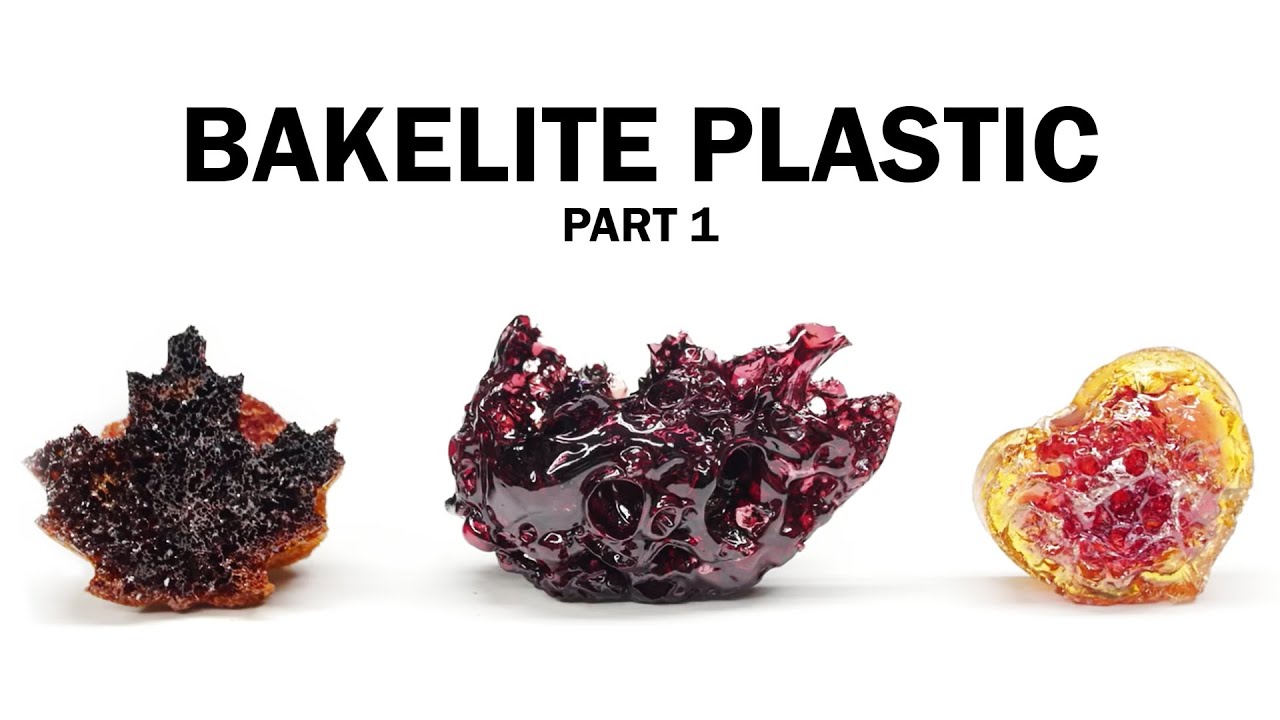
In part 1, I will be doing the classic Bakelite demonstration and making resole.
Nile talks about lab safety: https://youtu.be/ftACSEJ6DZA
• NileRed Store: https://nilered.tv/store
• Patreon: https://www.patreon.com/nilered
• NileRed Newsletter: https://nile.red/home#newsletter
------------------...
never seen anyone try to make it from scratch. that could be a fun watch
I doubt many people want to mess about with formaldehyde
yeah
there is another similar plastic, stuff pipe stems were made out of (in addition to bakelite) but I cant remember the name of it. really nice looking and feeling
The Bakelite Company produced "transparent" cast resin (which did not include filler) for a small market during the 1910s and 1920s.[12]: 172–174 Blocks or rods of cast resin, also known as "artificial amber", were machined and carved to create items such as pipe stems,
from the bakelite wiki page
yeah but those are rare, another amber plastic replaced it but I cant remember what the name of it was
oh it wasnt the amber ones, those are just Lucite, its the black ones. made of Ebonite, actually not a plastic at all its a hardened rubber.
That's true for basically everything except pla, except the non-hygroscopic stuff that is.
Pla is the oddball here, not petg.
all the more reason to like PLA then. I cant afford a filament dryer setup right now and as I said I dont print enough functional parts to use up a spool quickly enough that it wouldnt matter. its not like I am going to print my molds and masters out of PETG, if PLA is hell to sand I dont even want to think about what a tougher more flexible plastic like PETG is like to sand.
tbh that actually has little to do with sandability
it has a huge amount to do with sandability... weather or not the abrasive cuts the materal or just deforms it depends a good bit on how hard it is and how much it deforms. its not the only factors but its an important one. PETG is a strong, tough and flexible plastic. all things combined that scream "hard to sand" it sounds like its one step above trying to sand rubber.
well silicone rubber. some natural rubber is fairly easy to sand because its a bit crumbly and just not held together all that tightly.
Matter Hackers says ABS is easiest and PLA is hardest with PETG in the middle. maybe it is a little easier but that seems odd to me.
from memory PLA has issues with sanding. and dont even think about trying to use sanding power tools, they melt instead of cut
PLA is a bitch
I fucking hate sanding it
these is another reason I really cant use PETG for molds/masters. I have to paint them
my understanding is painting PETG like most Polyethylene plastics is not easy
Hardness
seeing allot of conflicting information on weather its easier or harder to sand. makes me think they both just suck for sanding
why I need to get setup for ABS/ASA because on that everyone seems to agree, its easy to sand
That's it.
Steel sands incredibly easily with the right sandpaper, because it's a matter of hardness and effort applied.
Petg sands just fine. Nylon too. Until you put carbon fiber in it then fuck off lmao
well anytime you have to sand something with carbon fiber in it, it will ruin your day
And your lungs
I would have thought nylon would be very hard to sand.
that is the thing I find really funny. its easier to sand steel then PLA
but then its also easier to sand steel then aluminum in most cases...
gums everything up, might as well be a plastic
maybe I am not being clear on what I mean by it sands badly. I dont mean you get a bad finish I mean it just takes ALLOT of work to actually remove materal. hand sanding taking ages and seemingly nothing being removed.
and i am not using cheap paper. I got that fancy 3M purple shit.
Nylon is relatively soft stuff.
Wet sanding and using the correct type of paper alleviates clogging but as for straight up "how hard to sand" pla is still "easier" than steel by definition. If it's debated in a somewhat anecdotal manner than steel, by the same exact method, is much harder to sand with the same paper in hand.
Generally with steel you're only lookin for surface finish on largely smooth surfaces whereas printed pla has ridges and thus substantial mass that needs to be removed.
In terms of mass per effort removed with the same paper pla sands way easier than steel.
In terms of how much effort is needed from a "finished" piece to secondary operations producing a smooth surface then steel is easier as you aren't removing layer ridges.
Very anecdotal stuff here.
that and you tend to not hand sand but power sand steel. not a good option with PLA as it will just melt
Water once again helps that tremendously.
I wet sand my cf nylon and I can go to town on it.
Anyone need a new printer?
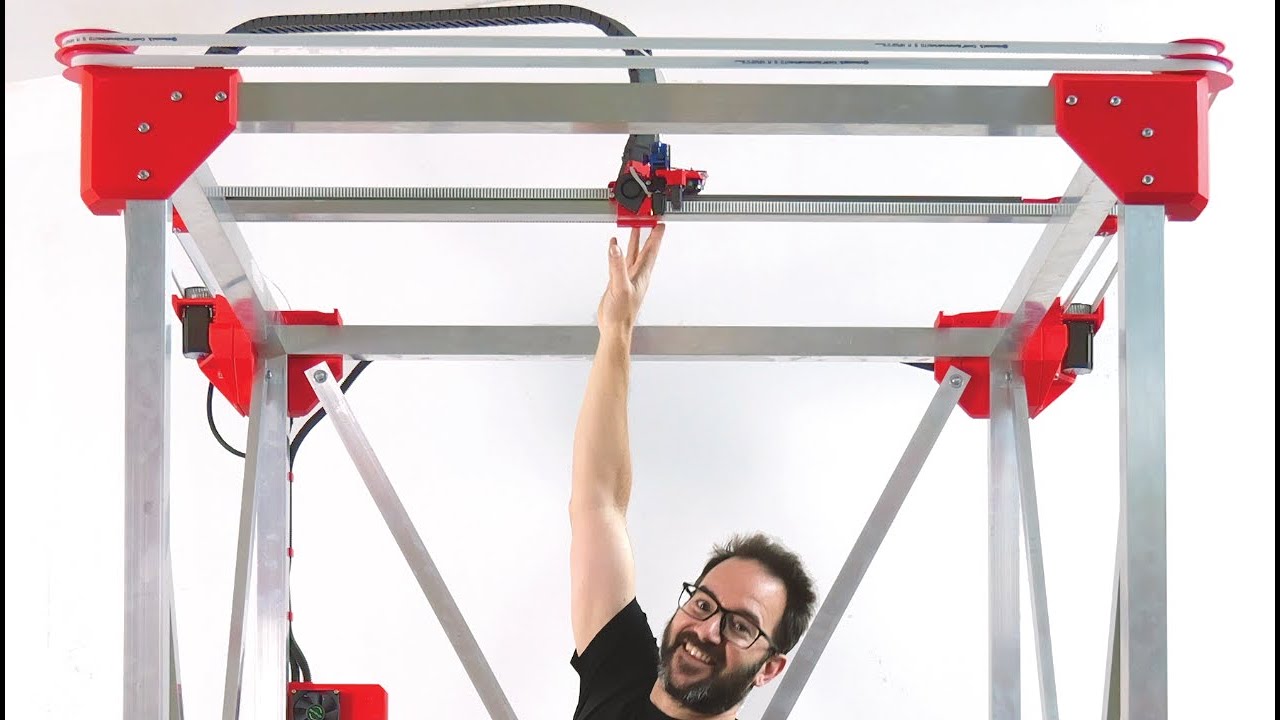
Create a FREE Onshape account here: https://Onshape.pro/IvanMiranda
The early version of the files are here:
https://ivanmiranda.com/products/big-3d-printer-mkv
I will keep adding stuff to the files until they're complete and then I'll send updates as I keep improving the machine.
I've built a giant 3D printer with a build volume of 1110mmx...
That's not big enough
Well, good news!
It is modular!
Just make the frame any size you need.
Probably need stronger materials if you make it much larger though.
It has a 1.0mm nozzle
I wondered about that. It wouldn't make any sense to use even a .6 on a monster that size.
always love his videos. I wonder if it would be a good idea to cast those none moving frame parts full of concrete to make the machine heavier and more rigid. allot of the larger home made CNCs have something like that done to them.
Depends - if you can make sure that the concrete is under compression and not tension it would definitely help
sand is a pretty good one. great at damping vibrations
Fill everything with lead shot
lol, someone did a video about that and it did not work at all
you have a link handy?

3D printer ringing is a tricky problem to hunt down and fix - can your wacky suggestions after my last attempts improve them?
Thanks to Slice Engineering for sponsoring this video! Check out the LGX Ace and LGX Shortcut here http://go.toms3d.org/LGXSlice
Watch part I here: https://www.youtube.com/watch?v=EWxpN_Sw5Pg
Read the article to this vi...
oh yeah. 2020/4020 doesnt really have enough space inside the extrusions for fun stuff like that
maybe it just dosnt scale to the small printers but I still dont think it would help that much. its not about damping, what is really needed is good rigidity.
also its hard to beat good old mass when it comes to damping anyway
mass helps, but damping is a complex subject (as most are 😆)
its an insanely complex subject. I dont know how well my background with it applies to 3d printers (car audio and sub box design) but I do have a fair bit of exp in that area.
hexibase (youtuber who likes 3d printing speaker boxes) found an interesting plaster of paris mix (with an extra additive I cant remember) worked pretty well for his speakers
concrete seems like the easiest way to make a printer like that just work better all around even if it does murder any chance of it being portable. added damping of vibration, improved rigidity, it wont walk across the floor when running at higher speeds. all around a good improvement.
I mean if it works for CNC machines it will probably work for a 3d printer
assuming it dosnt do something stupid to the aluminum. all the CNC machines I have seen that done on were steel
all the big stuff is cast iron, which is absolutely lovely for damping
yeah, that is what the concrete trick is done for, to try and get that kind of performance without having giant iron castings
there is some fun stuff you can do with epoxy too. that video had some interesting discussions (including a few links to research) in the comments. dont ask which video though 😆
though anything epoxy tends to get expensive. it used a filler of some kind though
I would think if you loaded up epoxy with iron dust or similar it would work just as well. you can cram all kinds of fun stuff into epoxy. I have been getting into it quite allot lately and its fun stuff.
I got some iron powder I am going to mix with some for a rusting paint I can put on 3d prints to make them look like rusty old iron
got it for my steampunk/industrial lamp project. I need to get back to that but I hit some mental roadblocks on the design and needed to step away
my current headache is trying to figure out how to smooth the inside of a 3d printed mold. its too tight a space for sanding or spraying filler.
epoxy smoothing is an option but I have been having allot of problems with that. the epoxy likes to pull away from patches on the print and kind of bead up. it does this less if i can prime it but again how do I prime something I cant spray?
if you are printing ABS there is alway acetone smoothing
its PLA
and even then vapor smoothing wouldnt work. I need a better surface then that can give
I hear there are ways to chemical smooth PLA. but I cant remember what it was, and some of the options might have been nicely toxic
it dosnt even need to be a permanent coating, infact one that can be removed would be better.
I just tried Mod-podge and I also tried liquifying monster clay with mineral spirits to make something I could slush cast into an inner shell. neither worked, they just dont wet out smoothly enough
to top it off I am very limited on what I can use because its a mold for silicone parts and so cure inhibition is a constant consern. otherwise I would probably just use a normal liquid acrylic paint like craft paint. but those always have latex in them
totally stumped. I can try the epoxy but if that fails it destroys a 14hr print
3d printing experts. I seak information about vibration and tumbling based smoothing/finishing for 3d printed parts.
ffs, epoxy ran and I didnt notice the run in it. tiny thing, only found it after inspecting the mold after it had cured. 14hr print ruined, 5 bucks worth a filament down the drain.
Whats an epoxy run?
a run, like paint run. droplet flowing down the side
Ahhh ugghh
tried to find a way to get in there with a razer or file to fix it but just cant, its to tight and area. this whole thing has been such a nightmare.
Nice... I sense Mazda parts being made
I think mazda parta have already been made
mazda parts?
I mean. I have.
you guys remember me asking about a source of 20 micron microspheres a while back? well Nighthawk came out with a video the other day on how to make your own microspheres with fairly simple ingredients. I gathered all the stuff for that and my 2nd batch is now settling out. going to have a paint with microspheres for my molds finally!
well if this all works...
first attempt didnt work too well. the reaction is more temp sensitive then he let on. got the mixture colder this time and it gelled like it should this time.
I think I did it... they look half the size of the iron particles I have and those should be around 40 microns.
I want a mini cnc so bad
It wasn't too outrageously expensive as a kit, but the z axis is a serious limit
I'm thinking about getting a laser cnc myself
I would totally build one I am just totally out of space.
I'm planning on getting the laser addon for my ender 3s

update
it was the lift height
Upped it by 2mm, checked the print "50% in" (literally everything else is printed it's just the spear that's taking a long time) and it's perfect
Did you have half printed gunk floating on the vat the first time?
Or stuck to the fep?
I did not.
I clean and filter my vat after every print
Testprint after the move, it didn't fuck up the leveling too bad

3d scanning is so damn cool
so I keep hearing contradictory information on weather I need to get the fancy thermal past when doing an upgrade to an all metal hotend. some people say you dont need it other say if you dont get it then you will get heat creep and never be able to print low temp mats again. can anyone shed some light on this?
upgrade of what exactly?
heatbreak->heatsink generally wants thermal paste (to help pull away as much heat as possible from the heatbreak to keep the transition sharp
heatblock->heatbreak doesnt really care. the paste would increase the meltzone slightly, but require more heat to be transferred to the heatsink
nozzle->heatblock... eh, who cares
a heatbreak with a tapered interface in to the heatsink shouldnt need thermal paste though, a good taper is great for good contact
Only if it's cranked down super tight and is a high precision fit that's even more precise than a cpu and heat sink. Which it wont be. Use thermal paste.
Neptune elegoo 4 pro is preordered
after much trial and error I finally managed to get a clean batch of microspheres. they are 10 microns so a little smaller then I wanted but I finally know what was going wrong with my old batches. its very hard getting a good photo with my phone threw my hand held microscope but here they are. the scale on the slide is 10 micron divisionshttps://cdn.discordapp.com/attachments/559410920229568548/1129966267713998888/IMG_20230715_213930308.jpg

dosnt look like much but in person without the stupid phone camera those are all perfect tiny spheres of calcium carbonate!
I know this isnt really 3d printing but its for making a custom paint to finish my 3d prints and I dont see any other place to really stick this.
once its dry I am going to mix up a batch of epoxy with this and the super fine version I made to see if I can get the ultimate matte mold paint for my printed molds
he finished it. https://www.youtube.com/watch?v=PxcP74W-PgE

You and your company can try Onshape for Free at https://onshape.pro/ivanmiranda
The files for this 3D printer are here:
https://ivanmiranda.com/products/big-3d-printer-mkv
These files are mostly finished and I'll keep updating them with whatever improvements or changes I make to the machine.
The part 1 of the build where I complete the frame ...
but now I am wondering why he is using a filament extruder at this size. wouldnt a pellet extruder make way more sense at that scale?

is that a foaming filament or are you using fuzzy skin?
Carbon fiber plus somewhat low layer height.
I knew carbon fiber filaments had a more matte look to them, didnt know they were that bumpy
Glass does the same thing. It's the fibers.
I can get it a bit smoother with higher layers but this is going on a black carpeted subwoofer enclosure so... it matches a bit more now lol
oh, sub box. fun stuff. I used to design and make those.
oh, its going on one, miss read
thought it might be some of that new light weight foaming filament. kinda want to play with that. its to bad its so much more exspensive as I bet it sands way easier.


Trying to get my trunk space back. Need the depth of the well that's currently filled with a flat square box, which then doesn't let me put anything on top of it. So it's a lot of wasted space.
lol, by the time neptune 4s are in stock my printer might actually be old enough that it could be worth considering the upgrade, but by then the neptune 5 will be coming out.
Oh the 4 is on time, it's the 4 pro that's delayed
well he gets his filament for free from his sponsor so😅
also quite a bit of weight that comes with a pellet extruder
Here's one that's a much more appropriate layer height.

Delay has been revoked, delivery now 10th of August
so lower layer heights gives fiber filled prints a rougher texture? how does that work?
More squish, more chance the fibers align with the layer
I wouldn't be surprised if lower layer heights reduced strength as well (someone has probably tested that)
I think CNC Kitchen did that test but not with fiber filled. lower layer height with normal filament did indead lower layer adhesion
thicker layers were stronger up until you got to silly layer heights
Clogs up while it's extruding. The fibers don't melt.
The larger gap let's em out more gooder.
So you get little plugged up moments that then just get forced out and it happens fairly rapidly. Ends up looking rough. I like it personally
I have seen people do cool grips and stuff with fuzzy skin. made me wonder if there might be a way to take advantage of that effect for something similar. but dont know how nice that stuff is to hold, if it actually has exposed fibers then not so good
so my bottle of 99% IPA and my bottle of mineral oil I use for a light mold release are exactly the same style and size of bottle and have almost the same color of label... I just know one of these days I am going to grab the wrong one for cleaning my printer bed and things are going to go really bad
"Fuzzy skin" is a slicer effect you can apply to any model or region of a model.
how flexible is PTFE tubing? specifically I need to know if a 2mm ID by 3mm OD PTFE tube like might be used for a boden tube is stiff enough to hold its shape unsupported. I have never had a printer with one so I dont know how stiff it is.
it would be under slight compression between to fixed points
I need it to maintain a good curve without collapsing
It's pretty rigid, like, you can bend it, but it'll return to it's shape
even at that size? I am assuming this size is a bit smaller then a standard boden tube
well it seems like the ideal stuff so I will give it a try and hope for the best. what is the standard sized used by most printers by the way?
Honestly no idea, I've been using the one the printer came with for years
Bowden tube is typically 2mm id/4mm od
Some reverse Bowden setups use 3mm/4mm I think
ok so the ID is the same this stuff just has thinner walls. but for my project the OD is key so cant be helped. guess I wont be able to use the left overs if I need a new heat break. oh well
Hey guys, I was replacing my nozzle and the entire threaded part broke off inside the heat block, you have any tips on how I could get it out
It’s on an old flashforge finder btw
Heat it up, and then try to turn it out with a broken screw remover or similar?
You want the hotend to be somewhere around "hot as hell", and then proceed with care.
Hopefully you know this already, but just in case: You always want to do nozzle changes when the hotend is hot, preferably hotter than your normal printing temp.
"screw extractor" or "bolt extractor" are the magic search terms.
Though, honestly, look up the prices of a new heat block before you waste too much time.
If you trust in your Bubba skills and god looking out for fools, you can use a flat screw driver and risk damage, but I am not recommending that course of action. (but TBH, it is probably what i would do since I want an excuse to get a new, better, hotend anyway )
Ah ok thanks for the help, yeah i saw only video of it on youtube and it said to take out the whole hot end first lol so I’ll keep that in mind
And yeah ima wait to get the screw extractor lol

Amp rack coming along. Got some cleanup to do but at least the damn holes line up and the two expensive pieces printed...usable at least.
Sup guys, anyone know a reliable source for 3D commissions that are one off prints from stl? Most of the places I've seen online are sketchy or insanely expensive
You've described basically every online print service
What do you consider "expensive"?
I've heard generally good things about the online pcb fabs that also do milling and 3d printing
Depending on the size why not buy your own printer and do it yourself?
Because that would turn a 25 buck print in to a 250 buck purchase?
(dunno how much the print was, just needed a nice number :p)
Sounds like a perfect excuse
with how cheap printers have gotten I question the logic of paying for them unless your really really dont want to get into it... or want it in metal. all the youtubers tell me PCBWay is the way to go, of course they are payed to tell me this but if you cant trust a random person on the internet who can you trust?
TBH, online part fabrication only kinda makes sense for things like PCBs, laser cutting (send cut send is surprisingly cheap) and maybe milling.
3d printing is too easy and cheap to do at home unless you want an exotic material.
Nothing exotic, a couple of pieces, some of which need to be rather precise. Nothing crazy on material required. And yeah, if the print cost is $75+shipping, I'd rather pay that than $250+time to get a printer tuned in. Also don't really have the space for one lol
or you dont care about any of that and just want to yeet money at someone and get a part back
That’s fair. Figured it was worth at least tossing the option out there
Another option might be finding a makerspace or someone local to you?
Yeah, I've used a local guy for a 1 off before. He was quick, and cheap, but the parts needed a little cleaning up. This next potential project will require a little more precision I think
If it were me I’d rather work directly with someone local to have faster turn around towards the quality I was looking for.
If i have to clean up a part somewhat but it's faster and cheaper, I'd happily do that
2kg roll is what I buy, but it's two prints around 900g
Fills pretty much the entire build volume of the cr5 pro I have
2 matching pieces that'll get bolted together to make a dump chute for reject parts.

How thick?
3mm


what is it? tweak the model in cad, and the object with dremel. just like everyone else 😆 not that I have a dremel, would be much faster than using knives and files
Amplifier rack. I thought I had it all straight but I must have missed a check when resizing a few parameters.
The filament is so expensive I'd rather try to salvage it lol
tweaking the model is for "next time"
Won't be a next time
and if its only slightly off, then making what you have already printed work is pretty normal
how much is putting the amps infront of the sub going to hurt the sound output?
Zero
is it ported?
if its a sealed box I would think it will have at least some effect.
It's common practice to place subwoofers face down on standoffs and the like. All you need to do is ensure a minimum gap over the top of it, and this doesn't even cover the whole face. I won't even be able to measure a difference.
If you put a subwoofer face down 1.5 inches above the surface it's on and it's open all the way around it'll do virtually nothing to affect the output.
I'm more worried about the amp rack flexing
I would like to try printing a small home sub box but I cant really use one do to appartment living.
would be fun to be able to do the complex folded horn designs that were just to hard for my crappy wood working skills and tools.
would have to make spaced walls that could be filled with something like concrete, that would be a bit messy but fairly sure it would be fine
or maybe a fiber filled epoxy would be better if a bit more exspensive
Stiffness is more important than density. Concrete and such is a huge waste of effort.
Look up hexibase on youtube. He has a lot of 3d printed stuff that pushes the limits of physics.
well you need stiffness and low ressonance. the easiest way to get that is just with concrete, its cheap and easy to mix up
just messy
epoxy would be really good if you filled it with something to help deaden it a bit. but epoxy is exspensive
maybe fill it with that horrible silica shit.
or sawdust
Worst way possible. Braced plywood does the same thing.
You're still confusing density and mass with the matter.
Adding a bunch of concrete or epoxy doesn't gain you anything unless the thing you're pouring it into is badly designed.
Back in the day guys in stereo competitions used to believe the same thing and nobody does that anymore.
you mean back in my day?
was literally one of the people building those boxes.
anyway the point isnt making a super high density or stiff box its taking a 3d printed box and making it actually work because thin layers of plastic sure as hell wont sound good on there own.
just thinking the cheapest and easiest thing to cast fill the cavity with so that I dont have to try and make as complex a shape as a folded horn out of plywood or MDF.
I mean maybe fully printed would be ok if you used something like gyroid infill at a high percentage but then it will take a week to print and use a fuck tone of filament
you know that the same guy you referenced (hexibase) did exactly that right?
Not for the majority of his stuff.
You're still assuming you can't achieve the necessary stiffness with plastic which is simply incorrect.
looks like he prints them just like I said, stupid high infill only he is using the triangular one instead of gyroid. I would much rather leave the top open and just fill
Anything over about 30% gyroid is a waste of effort
yes, and the one he did it for was one he was taking more seriously
I never said you couldnt. I am just not willing to spend 100 bucks in filament to print something like that or the week of constant printing that he does
Then you're wasting your time considering 3d printing anyways. A sheet of plywood will achieve far superior results with simple bracing.
when I could print a box like that in 14hrs then spend a half hour mixing up some concrete and filling it
You could build a vastly better box in much less than 14 hours lmao
sure... if I had a CNC to cut out the plywood I would LOVE to make one that way
printing a double walled box lets you do more interesting shapes than "box"
Cnc lmao
you dont need a cnc. a circular saw is more than enough
Yeah because I didn't make every box I ever built with just a circular saw
Including doing dados
I am not talking about a simple box, I am talking about one of those crazy folded 7 level jobbies like he does
Still just need a circular saw
fair, those would be a pain to do without more than just a circular or table saw. like a router with a template
all the boxes I ever built were with a jig saw and a circular saw. made some really cool boxes but its allot of work and I dont even own a good circular saw anymore so why not 3d print it?
lol, I was thinking more like 4in
Wasting your time with epoxy and concrete for that
I am thinking of printing some boxes (not yet designed) for 2-3" drivers (not yet specd out) for PC speakers myself.
You need about 3/4" plywood for a 400rms 10" subwoofer. Anything stiffer is a waste of materials and time. A 4 inch is handled with 1/4" of PLA
if I ever get a working car I would need a box for my 12 inch but I would just make a sealed box for that, its designed to work best with sealed anyway.
Sealed gang.
I like sealed boxes more honestly, snappy
Ports add too much complexity in tuning the car
yep
I use a DSP and still prefer not to mess with ports
This is a sealed 10

Imagine trying to deal with a peak at whatever the box is tuned at
lol, I once built a quad 12 inch isoberic cannon... but I fucked up the math. couldnt hear anything with in 20ft of the box. but it rattled the windows of houses a block away
sealed gets you flatter, ported gets you more efficient (and a boost at small range)
Though the dip at 200 hurt my feelings
back in the days of "lets destroy our hearing for ever just for SPL!"
I also accidently wired that box wrong and toasted my amp when I first tried to use it. was like 0.5omh the way I wired it or some shit, amp was rated at 4
Rip
all the smoke escaped
wired parallel rather than series?
anyway dosnt matter. as I said even if I made one I cant use it in my appartment 😦
cant remember. I forgot all this stuff its been so long.
was 20 years ago
You can get new smoke
I thought there was no way to put the magic smoke back

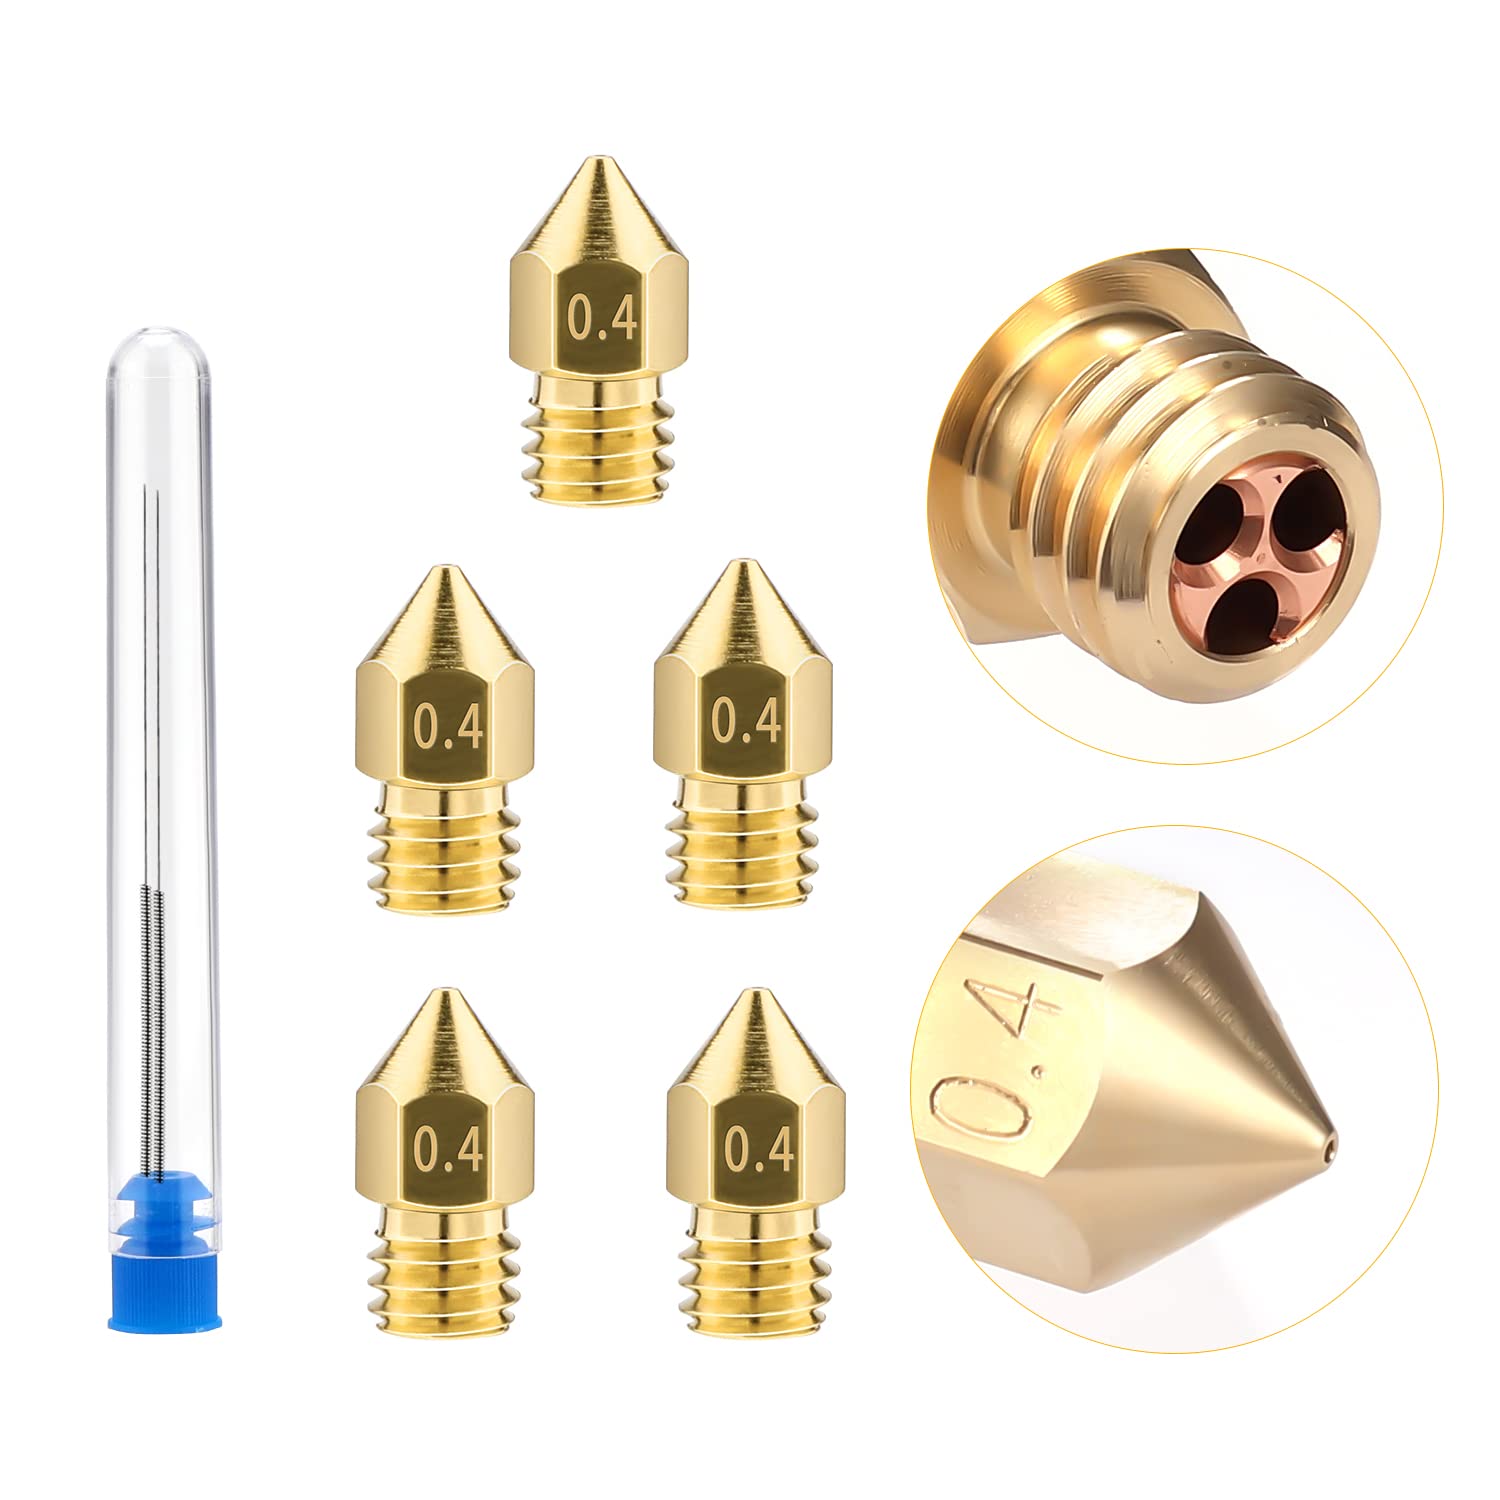
Lmao. Modification was way easier than expected


Eyeballing this geometry also worked out shockingly well.

I didn't think it would match that well


ALSO used a new bed adhesive specially for nylon and holy shit did it work well.
is there a way to reduce warping with PLA? i know its already a low warp material but there is still some and for 2 part molds or large surfaces that have to be joined together it gets annoying. I sometimes have to sand back so much on the mating surfaces that it changes the part
more bed adhesion
its not comming unstuck from the bed
actually it seems to warp after I remove it. its a little better if I let it fully cool before removing it from the bed but its still there on larger prints
that's a design issue.
inconsistent wall thicknesses will greatly encourage warp
among other things
Its easy for me to just say that like its obvious though because I work in plastic injection molding and the various things necessary to avoid warp are baked into my brain
but there's a lot to it and its difficult to get a full understanding on it without experience
panel stiffening help?
I could treat it like sheet metal and add in stiffening on the outside walls that wont be mating surfaces.
it probably dosnt help that I mostly use lightning infil
sometimes that creates more warp. Remember that warp is caused by material shrinking, not necessarily be stress that needs to be braced. adding bracing is itself more material to shrink and pull on things
then what can help? I can make the outside of the shell any shape I want really. I would assume that rounded shapes are better
thinner walls that can be printed solid, bracing should be the same thickness or thinner, rounded corners and fillets inside and out
take a look at injection molded enclosures and study how they are designed
consistency in wall thickness is yuge
well the outer wall thickness is always the same, its either a box or a cylinder for most of the molds I make. the inside surface of the mold cant be consistent really. its going to be what ever the shape of the object I am casting is and often times that means it gets a little funky. esspecially with high detail parts
prusia slicer has a setting that I think is ment to help with that but I have not tried it sense they fixed it (used to be bugged as shit)
not the print thickness, the geometry thickness
I will draw a picture real quick... maybe

The scribble areas are just empty space rather than filled with infill
You don't even really need the box around the outside unless you have a fixture you use to hold the mold that needs a certain shape.
But the cavity walls, exterior walls, and ribs are all the same thickness.
When you do this, you end up with wildly different wall thicknesses across the print.

The infill will shrink more in the wider areas than otherwise
If you could print the cavity such that the outside is exactly the same shape as the outside, plus wall thickness, it would warp less.
Abs that's done by having the geometry of the cavity then literally just hitting "thicken"
so I need connections from the outside walls to the inside cavity walls? not actually sure how to model that so the slicer will understand it. its kinda like adding my own infill
but it makes sense that tying the 2 surfaces together would help quite a bit
well that gives me some ideas. should be able to figure something out. thanks
well... if you dont need the outside box in the first place, you can just eliminate it entirely

look at this fiberglass mold for example. there's no outer box shape around it
the wall thickness of the mold is the same all the way around
just keep in mind when I say wall thickness, I mean the geometry, not the wall thickness setting in the slicer
the outside dimensions are nothing more than the inner cavity + the thickness necessary to form the structure
Just reread this. This isn't the goal. The goal is to remove the plastic where you don't need it. So there's no infill or anything between the outside box shape and the cavity.
anyone ever worked with PVB much? I want to try vapor/chemical smoothing but not ready to invest in ABS/ASA setup yet. main question is can the stuff be painted or coated with something to protect it after smoothing.
ayo 3D gang
You guys think that I could turn the CNC head of a Snapmaker 2 sideways so that I can machine into the walls of (for simplicity) poly-ethylene cube thats bigger than the linear rail structure?
like with a 3D-printed adapter I make beforehand?
friend of mine says the biggest problem is the proprietary software...
I have seen laser engraver/cutters that are like that. where you can jsut set them on any surface you want
Well is the Snapmaker one of them..?
I need to win an internet argument about why nylon dosnt suck for 3d printing. give me what I need to win!
also would getting a sheet of this work as a printing surface for PP? rather then having to do packing tap https://www.amazon.com/Polypropylene-Plastic-Sheet-Thick-Wide/dp/B084H1FLQW/ref=sr_1_3?keywords=polypropylene+sheet&qid=1690735535&sr=8-3

Polypropylene is an economical material with moderate resistance to water and chemicals. This Product is Manufactured in China. Thickness: 1/8"; Thickness Tolerance: (-0.007" - +0"); Width: 16"; Width Tolerance: (-0.25" - +0.25"); Length: 16"; Length Tolerance: (-1" - +1"). Color: White; Clarity:...
if there is a way around it I would like to avoid depending on a magic glue stick to print the stuff.
Just use the magigoo stuff for pp
If you end up bonding your print to that sheet you're gonna have a bad time
I have a really hard time justifying spending 40 bucks on a glue stick
hell its probably literally just pva with powdered pp mixed in
really need a better option for what to call it short hand... taken out of context
ok so I have a problem and I am wondering if I can 3d print my way out of it.
my landlord/slumlord has decided that paying for water softener salt for the building is to exspensive for him (at the same time he raised the rent) the water where I live is literally the hardest water you can get and taking a shower in this shit is fucking horrible. does anyone know if it would be possible to make an inline water softener to install in my shower? I cant find much information on this. I know the basics of how they work, they are just a can filled with ion exchange resin that is charged with sodium salts, they exchange the sodium for the calsium and magnesium that is making the water hard. if I printed something like a 1.5l container with hose fittings for my shower nozzle and put that inline would it work?
I am frankly getting desperate. to the point I am almost willing to shell out the 200 bucks for an RV water softener. hoping maybe I can make one my self

What if i told you that you already have everything you need to assemble one of the best filament dryers available? Don't believe me? In this video i'll show you how, with a combination of very simple principles, we can all dry filament without an oven for free.
....................................................................................
is it a cardboard box on the printer bed? if so I have been suggesting that to people for ages 😆
It is lol
though I never actually used a cardboard box myself, I used a plastic food container (one of the same ones I store filament in), and cover the bundle in towels for insulation
I'm thinking about getting a voron 2 kit, and suddenly I'm realizing that is a single exhaust fan from also being a janky dehydrator.
(I want a Voron 2 because large nylon parts sound fun)
Only problem is, I'm looking at having to spend $1k minimum to get something nice. Cheaper than that and the feature set starts to fall off hard.
And $1k more on printers is $1k less on guns
Well, I guess a better printer is money towards future guns?
TBH, I bought the ender without any real idea of what I wanted to do with a 3d printer, just vague ideas that it would be cool. Now I know what I want to print, and they make loud noises.
Print new guns on your better printer
That is the plan. I want something that:
A) Can print a whole monolithic AR-style lower without seams, so a largeish build plate.
B) Can print high temp polymers, particularly CF Nylon just as well as PLA (so enclosure and all metal hotend)
C) Is direct drive so I can play with TPU and shit if I want.
D) Is fast, since I would rather avoid multi-day prints. (CoreXY baby!)
And a Voron 2 just goes right down that list and checks them all.
Also, since it only comes as a kit (from various third parties) or as a pure BOM, customizing it during the build process is pretty easy without the stress of a pure custom design.
so what are the chance the hotend or even entire extruder from the neptune 4, will fit on the neptune 3 pro? from the outside it looks almost the same... if I can upgrade my entire hotend to the 300 degree one from that for close to the same price as getting all the stuff to do the custom version and without having to do all the nonsense involved in that it would be really nice.
the printer its self comes out in like a week or so. I know you can buy the hotend for the 3 pro so I am hoping I can do the same for the 4
I mean, i could send you pics/measurements next week😜
But it wouldn't surprise me if at least some of the holes will line up
that would actually be really helpful
I'll let you know when it arrives
v2 of the case has usb-c ports (and yeah i slipped with the pliers and scratched it)


hm. neptune 4 uses a custom nozzle. that is annoying
so you will have to wait for them or some other company to offer hadened or higher flowing nozzles.
Oh i didnt know that
I take it, it comes with one and a spare like the ender did
Also it hasn't arrived yet, got an email it's delayed another week
well the neptune 3 pro came with spares so I am guessing the 4 will as well. but it didnt come with different sizes. that is going to be annoying
it looks like the threads might be standard, its just a halfway size between a normal ender style nozzle and the volcano version it looks like. maybe volcano nozzles can be used or cut down or something
guess i'll find out when it arrives
has any one seen the bench top water jet cutters?
no?
I saw an ad for one. Checked it out and... Yeah, not for $10k I'm not
A good laser is cheaper and in some ways more versatile.
If I really need something cut on a water jet I can go talk to my friend in PA and see if he can do it on the industrial machine in their shop.
But, they do look really cool.