#3d-modeling
1 messages · Page 134 of 1
 cobalt adder
 pallid apex
They are unwrapped
 young vault
pallid apex
They are unwrapped
young vault
pallid apex
They are unwrapped
Wrong UVmap? And in what way were they unwrapped?
Automatic or manual, etc.
And where are seams placed
 echo palm
Having a problem applying a material to this basic 6 sided object. The material does apply correctly to other objects.
 echo palm
Having a problem applying a material to this basic 6 sided object. The material ...
echo palm
echo palm
Having a problem applying a material to this basic 6 sided object. The material ...
I click "clear" under UV in edit mode with all selected in blender then reexported to unity and that fixed my problem
 astral gyro
am I allowed to post renders in here of something I have 3D Modelled?
pallid apex
young vault
Wrong UVmap? And in what way were they unwrapped?
i used smart uv project
young vault
Did you check in the UVmap if that area had more than like 1% allocated?
Cause it's really dumb if you don't do apply transforms in object mode
It can make the biggest piece of geometry the smallest in the UV even if it's supposed to do the opposite when properly setup
pallid apex
young vault
Did you check in the UVmap if that area had more than like 1% allocated?
these are my uvs as of right now

i made a new floor that im testing out
young vault
I assume those long bars are the part that's messed up?
pallid apex
pallid apex
i made a new floor that im testing out
^
young vault
Ah, lul
But, ya, smart uv project is dumb uv project unless you make sure all scales are a 1 before you do it
 onyx berry
I think I must be doing something wrong baking my textures, the colors in unity seem complete off compared to the procedural material in Blender. How can I fix this?

It's seems to be an issue with how unity and blender handle colors when it gets to the display, but there's gotta be some way to correct for this.
Here's it again, but with baked textures on the blender version :/

 supple garnet
onyx berry
Here's it again, but with baked textures on the blender version :/
supple garnet
onyx berry
Here's it again, but with baked textures on the blender version :/
Are you sure it isn't just the difference in lighting between blender and unity?
Also, the bright white avatar might be making the unity version look artificially darker than the blender one, even tho it is not in actuality.
 spiral sigil
just working on a random knight im just confused on if anyones got some techniques to make fluff like that seen on the wickerbeast model
 onyx berry
supple garnet
Are you sure it isn't just the difference in lighting between blender and unity?...
onyx berry
supple garnet
Are you sure it isn't just the difference in lighting between blender and unity?...
Sampling the colors in gimp and comparing side by side, both of these are having an effect, but from the shader and the color grading, unity seems to have way more contrast. The Unity version is a lot brighter in some areas compared to the same spot on the Blender version
I think also the way normal maps catch light in Blender is really different from Unity
 onyx wind
Does anyone know if there is a way I can use the knife tool on an imported Vroid Studio model's transparent parts without completely breaking the existing shape keys?

So I can make it work without transparency
Like, some sort of "inherit shape keys from nearest vertex"? sort of thing???
supple garnet
onyx berry
Sampling the colors in gimp and comparing side by side, both of these are having...
Might try using a different shader or tweaking the one you are using then to try and get it to react closer to how you want as that sounds like what is causing the color discrepancies, not a failed bake
onyx berry
supple garnet
Might try using a different shader or tweaking the one you are using then to try...
I fiddled with SSS shader I'm using and bumped up the ambient light strength on it and that seemed to help with the contrast. The over-saturation in Unity seems to be from the Default and ACES tonemapping, but also my monitor warping colors at different angles, and from dust on my glasses ;-;. I'm starting to regret buying this giant VA panel...
 supple garnet
onyx berry
I fiddled with SSS shader I'm using and bumped up the ambient light strength on ...
supple garnet
onyx berry
I fiddled with SSS shader I'm using and bumped up the ambient light strength on ...
lmao, I have a similar monitor and I feel that.
It does look a lot closer now, but just keep in mind you will never get the same lighting quality in unity as blender.
onyx berry
supple garnet
lmao, I have a similar monitor and I feel that.
It does look a lot closer now, b...
Yeah, not without the HDRP, plus we have to contend with world makers not testing things with PBR materials. There's so many worlds without reflection probes...
 faint gulch
???
Okay I guess reposting the question without the image:
I have a low poly model, and I was wondering if it was possible to instead of having a modeled mouth, to have my talking animations replaced with swapping out the textures with an open mouth, or a closed eye for blinking, etc. etc.
Posting the image of the model separately so the bot doesn't yell at me
 onyx berry
faint gulch
Okay I guess reposting the question without the image:
I have a low poly model,...
onyx berry
faint gulch
Okay I guess reposting the question without the image:
I have a low poly model,...
I have something similar for the eyes on the avatars in the screenshots I posted. I haven't figured out how to do it without a custom shader, but basically I have a grid of images in a texture, with the eyes UV unwrapped to the first one, then I offset the UVs with parameter and snap the parameter to whole numbers. No clue why I didn't just use integers..
fixed4 c = tex2D(_MainTex, IN.uv_MainTex + half2(floor(ImageX), floor(ImageY)) / 10) * _Color;
I-- Don't understand any of that.
onyx berry
faint gulch
I-- Don't understand any of that.
There's probably some better way to animate UVs, than the awful shader method, so I'd ask around.
faint gulch
Okay, thank you.
I should also say that this is a commissioned model that I got permission to edit from the person I bought it from, so I'm a bit uhhhh
clueless to say the least when it comes to this.
 tough plover
@onyx wind make your changes on a new shape key, then apply the shape key to basis at the end
also, cut along the existing edges
don't create new vertices in the middle of a face
onyx wind
tough plover
<@292789193678127107> make your changes on a new shape key, then apply the shape...
Thank you!
faint gulch
Yeah no I've been trying to figure this out, what the hell is the code for? Can anyone please help me out here?
 devout scroll
Are you doing this for quest
Because there a few ways to handle 2d face and lipsync stuff
faint gulch
devout scroll
Are you doing this for quest
PC. If I can also somehow use this for some vtuber stuff that'd be poggers as hell
devout scroll
well
you can use the ancient method of faceplates, where you copy the mesh for the mouth and put a different texture on it, then using a blendshape scale it to your mouth. There's old videos about it or you do with in unity with a shader
if you want to do vtuber stuff you'll have to set that up separately in unity from vrchat because vrchat uses it's own way to tell your avatar what mouth shape you're doing
faint gulch
Damn. Understandable tho. For the method you mentioned of Faceplates, does that translate over to Unity as well as VRChat?
devout scroll
yes, it could look janky if you don't set it up correctly
because they're not instant and can clip into each other
faint gulch
:thonk:
devout scroll
shader based stuff would look a lot better but has it's own limitations as well
there's more setup to do and if someone disables your animations they won't see it
faint gulch
devout scroll
there's more setup to do and if someone disables your animations they won't see ...
Hell. Thank you for pointing me in a great direction though, it means the world to me.
devout scroll
if going for shader based you can have a texture with all mouths on it then just pan the texture in an unity animation. if using a custom shader like poiyomi you can use a flipbook which will let create a flipbook out of different images of your mouth shapes where you can select the frame manually
you'll still need to setup an animator that decides when to show which mouth shape
it's not hard stuff per se, but there are a few different things you need to know
spiral sigil
any tips on how i should do the chest here

 manic spade
i hate anatomy

 swift halo
you do it well though
 thorn gulch

 fallow osprey
What methods do you guys use to make hair for your characters?
I tried using curves in blender but they add soooo many polys that I've resorted to doing simple meshes :/
 tough plover
fallow osprey
I tried using curves in blender but they add soooo many polys that I've resorted...
tough plover
fallow osprey
I tried using curves in blender but they add soooo many polys that I've resorted...
there are a lot of options when do you use curves
fallow osprey
tough plover
there are a lot of options when do you use curves
But when I try using them, each spline adds like 3000 polys, cutting into my performance budget. I tried lowering the resolution but then each "row" of vertices contained like 50 verts?
tough plover
that's because you're not reducing the resolution of each curve
fallow osprey
Ideally I'd have like 30 different splines to cover the head
tough plover
and the amount of verts
fallow osprey
I see
Ok I think the issue was that my hair controller resolution was set as default, so even though I reduced the resolution of each curve, they had a lot of verts on each point

Versus
 cobalt adder
im working on my first avatar:D

does anyone have any tips on how to model the eyes/mouth?
devout scroll
best is to probably find creators who stream and look at how they do it
 quaint jasper
Or find a downloadable base you can study
manic spade
fallow osprey
Ok I think the issue was that my hair controller resolution was set as default, ...
keep in mind you have resolution on the curve itself and on the bevel itself
fallow osprey
manic spade
keep in mind you have resolution on the curve itself and on the bevel itself
Yes, that's exactly what went wrong for me, but thanks for the advice
manic spade
fallow osprey
Yes, that's exactly what went wrong for me, but thanks for the advice
you might also manually add loops or bevel loops later if you need to adjust it
fallow osprey
manic spade
you might also manually add loops or bevel loops later if you need to adjust it
Thanks, I'll take this in mind. I haven't worked with curves for biological stuff much, so it may take me some time to work things out :^)
manic spade
fallow osprey
Thanks, I'll take this in mind. I haven't worked with curves for biological stuf...
theres a few decent videos on youtube
 vague junco
Help lol

 winter palm
Is my bounding box suppose to be tilted? If not, how do I fix it?
 quaint jasper
vague junco
Help lol
quaint jasper
vague junco
Help lol
Join your meshes
quaint jasper
winter palm
Is my bounding box suppose to be tilted? If not, how do I fix it?
Apply your transforms in blender
winter palm
I applied my transforms, still tilted
manic spade
any foot experts got criticism for me
 devout scroll
winter palm
I applied my transforms, still tilted
devout scroll
winter palm
I applied my transforms, still tilted
Your root bone is tilted then
Should be hips
 dim saddle
manic spade
any foot experts got criticism for me
dim saddle
manic spade
any foot experts got criticism for me
Looks good but nails?
 waxen lake
any1 know how i could fix this?

 nimble glade
Does anyone know anything about Blendshape Drivers?
tough plover
nimble glade
Does anyone know anything about Blendshape Drivers?
can you elaborate on what you mean by that exactly? I think I know but just making sure
nimble glade
tough plover
can you elaborate on what you mean by that exactly? I think I know but just maki...
Mainly when I move the thigh bones on my model, some of the topology flattens out and looses it's shape and I want to correct that using blend shapes drivers. Been working with tutorials and nothing is working. I want to make it so the Drivers active the blendshape in increments depending on how much the bone is rotated on a specific access. Full 90° will have the blendshape to 1 and 0° it'll be at 0. Hope that makes sense 💦
nimble glade
nimble glade
Mainly when I move the thigh bones on my model, some of the topology flattens ou...
 tough plover
can't do that
well
not simply at least
you could technically use a pair of contact senders/receivers and drive a float using that to then drive a blendshape
but the simpler solution here is control bones
using extra bones to preserve the volume of part of a mesh
nimble glade
tough plover
but the simpler solution here is control bones
Uh okay, I'll look that up and probably give that a go but thank you ⭐️
tough plover
if you know how to rig models, it's pretty straightforward
if your example was referring to the butt, then add extra bones for the butt and either have them parented to the hips or to the legs (depending on what looks better), or have them parented to the hips but with rotation constraints at a lowered weight
so that the can basically follow the legs 50%
or whatever value you pick
nimble glade
tough plover
or whatever value you pick
I'll have to play with it, I don't know how this'll bode in VRChat and hopefully it won't go over bone Count. I was hoping to use blendshapes as it seemed a bit easier at first. That and it might help me out a great deal with the eyes as I usually have trouble keeping them in place or moving correctly. Usually the eyes don't move on my models as I'm still figuring out how to correctly do eye tracking too
 raw glade
Unity is saying my model "has an invalid Avatar Rig Configuration. Missing or invalid transform:
Required human bone 'LeftFoot' not found", but left foot is there. I don't understand this...
 tough plover
raw glade
Unity is saying my model "has an invalid Avatar Rig Configuration. Missing or in...
tough plover
raw glade
Unity is saying my model "has an invalid Avatar Rig Configuration. Missing or in...
first off, you should probably switch your bone display mode to Octahedral or Stick so we can see them better. secondly, you don't need any IK bones for VRChat rigs
raw glade
tough plover
first off, you should probably switch your bone display mode to Octahedral or St...
Hold on, I need to figure out how to do that...
As for LK bones, the model came like this, as the artist who did the ENA short models released them to the public.
raw glade
tough plover
first off, you should probably switch your bone display mode to Octahedral or St...
Okay, here it is:
 tough plover
okay, those knee target bones and the root bone can go
check if those foot IK bones do anything via pose mode. if they do, leave em, if they don't, remove em
raw glade
tough plover
check if those foot IK bones do anything via pose mode. if they do, leave em, if...
I think the root bone is the parent to all the other bones though...it won't delete the others, will it?
tough plover
raw glade
I think the root bone is the parent to all the other bones though...it won't del...
no
raw glade
tough plover
check if those foot IK bones do anything via pose mode. if they do, leave em, if...
Um, moving either foot lK bone makes the right leg move outward...
 tough plover
okay, there are most likely still a bunch of constrains set up
the CATS plugin can easily remove all of that for you. you'll need a more stable blender version though, like 2.93.9 (latest LTS release)
grab that blender version, and install the CATS plugin. make a copy of your blend file, and try opening it in that version
raw glade
tough plover
grab that blender version, and install the CATS plugin. make a copy of your blen...
Do I delete this version of Blender first?
tough plover
up to you. you probably don't need most of the features that version has over 2.93.9
raw glade
tough plover
up to you. you probably don't need most of the features that version has over 2....
Okay. One other thing though... how do I fix this error?
 tough plover
click the Configure button
make sure all of the bone mappings are correct, and go Pose > Reset pose
then Done, then Apply
raw glade
tough plover
click the Configure button
Where is Configure?
tough plover
 raw glade
tough plover
raw glade
tough plover
I did the reset, but it didn't clear that error... and apparently the feet aren't there, according to it. XD

 prime zenith
Hi. I am saving a .png image using GIMP, it should look like the Alpha on the right, but the RGB looks like on the left.
Why is this and how do I fix this ?

 unborn acorn
waxen lake
any1 know how i could fix this?
unborn acorn
waxen lake
any1 know how i could fix this?
Its a weight paint issue just go look up weight painting and youll br gud
raw glade
tough plover
grab that blender version, and install the CATS plugin. make a copy of your blen...
CATS fix model button stole most of the bones... b

 crude trail
What's the right way to export from Blender into Unity as FBX? I've got some whack rotation going on and I've tried a bunch of settings in the FBX export but to no avail. Some tutorials suggest rotating my avatar in Blender before exporting it but that's stupid.
 cinder cradle
crude trail
What's the right way to export from Blender into Unity as FBX? I've got some wha...
cinder cradle
crude trail
What's the right way to export from Blender into Unity as FBX? I've got some wha...
this
 crude trail
cinder cradle
this
crude trail
cinder cradle
this
Seems to lead to my avatar being upside down and in the ground 😕 it looks fine in Unity so not sure what has happened
Also all of the menus/HUD go missing too which seems very odd
cinder cradle
maybe u pressed ctrl+space
crude trail
What does that do?
cinder cradle
hides menus in blender
crude trail
How would hiding the menus in blender make the menus/HUD go missing in VRChat 😁
Sorry I guess I wasn't clear
cinder cradle
then say it's in vrchat
crude trail
I assume my armature shouldn't have this rotation on it in Unity - it's something coming through with the export and resetting it to zero makes my avatar face down in Unity.
 crude trail
Changing it to -Y as up doesn't seem to do anything, but when I mean facing down I mean they're lying down, not upside down
So I don't think flipping the Y axis is the fix?
cinder cradle
try other axis then
no idea which since haven't seen ur project u need to figure it out
crude trail
Z is up in my Blender project (with -Y being forwards) and Y is up in my Unity project (with Z being forwards)


So Y as up seems to be the right export option
cinder cradle
then try exporting z as up and -y as forward
as for your avatar being underground maybe origin point is on center not below avatar
crude trail
Yeah turns out the idle pose exported from Blender was a bit mashed, I also had to reset the pose for the humanoid rig and that seems to have sorted it.
Now to save these export settings as a preset 😁 cheers @cinder cradle
spiral sigil
just working on my first humanoid just wondering if theres any tips anyone would like for me to know when modelling basic characters.
 unborn acorn
spiral sigil
just working on my first humanoid just wondering if theres any tips anyone would...
unborn acorn
spiral sigil
just working on my first humanoid just wondering if theres any tips anyone would...
Use references that are similar to ehat youre making it helps a ton
 strange sorrel
Does VRChat clamp blendshape values to [0,100] or [-100,100]? I was trying to set up something with values > 100 in unity but not seeing that change in world.
quaint jasper
strange sorrel
Does VRChat clamp blendshape values to [0,100] or [-100,100]? I was trying to se...
They're clamped yes
0,100 specifically
strange sorrel
quaint jasper
0,100 specifically
Does this map to the full shapekey range as exported from blender?
quaint jasper
It does, but if you're talking about blendshapes specifically, then those are much harder to get to 100
strange sorrel
@quaint jasper Basically just wondering if I wanted 50% more range on a blendshape, I can change blender shapekey range to 0-1.5, re-export the FBX, then set that blendshape to 100 in Unity and call it good.
quaint jasper
Ah, in that case you'd want to make a shapekey mix to get that 150% become the 100% on a new one and export that instead
Afaik, fbx export also clamps it to that 0-1 value range
strange sorrel
quaint jasper
Ah, in that case you'd want to make a shapekey mix to get that 150% become the 1...
Ok cool. I'll give that a shot, thanks!
 sinful mesa
I cant figure out how to fix this issue
when i view my model in viewport shader it displays all messed up
resetting vectors didnt work and neither did recalculating outside

it also looks like this when I try to import my model into marvelous designer

all of my normals seem to be facing the right direction

it even looks fine in the original project file, it just gets messed up when i export as FXB

 low crypt
Wondering if anyone could make me an avatar
 azure rain
nobody's going to make you an avatar for free
low crypt
Just asking
 trail python
for money, sure


 devout scroll
spiral sigil
i have no idea on how to make the lower legs look more natural
devout scroll
spiral sigil
i have no idea on how to make the lower legs look more natural
they might be too straight
and also if you think about how feet bend up and down the sharp bit at the bottom would dig into the foot if it moved up
so you might want to put the sharp bits on the sides instead of the front
tough plover
nice, glad that did it
the SDK should have warned you about that though
in the build panel
unborn acorn
spiral sigil
i have no idea on how to make the lower legs look more natural
Make the calf area more round cuz it looks too straight
 exotic obsidian
Luke Skywalker's self-made Lightsaber

Here's the Hilt

Obviously I used a reference, but I'm still proud of myself
devout scroll
nice!
 worldly pulsar
so im trying to get into using unity for vr chat avatars how long do I need to wait for me to be able to use this?

 pallid cradle
You need to play the game more
 pallid cradle
No
worldly pulsar
I think it might be because I am logged in through steam not through vr chat
pallid cradle
18 hours isn’t enough
cinder cradle
worldly pulsar
I think it might be because I am logged in through steam not through vr chat
huh but u need vrchat account if u haven't merged steam account to vrchat one then ur wasting time
steam account lv ups slower
merge steam account to vrchat account
worldly pulsar
cinder cradle
huh but u need vrchat account if u haven't merged steam account to vrchat one th...
yea I just signed my vrchat account to vr chat
pallid cradle
You can’t upload without a vrchat account regardless
worldly pulsar
how
worldly pulsar
cinder cradle
merge steam account to vrchat account
how
pallid cradle
Website
worldly pulsar
ill take a look
cinder cradle
go to steam account in game find in settings "upgrade account" and copy token and in website u paste this
in merge tab
worldly pulsar
cinder cradle
go to steam account in game find in settings "upgrade account" and copy token a...
thanks let me try
worldly pulsar
cinder cradle
in merge tab
once I merge my accounts which account do I use steam or VRchat?
cinder cradle
when u login u gonna always be on vrchat one even if u login through steam
after merge
worldly pulsar
ah okay thanks
 surreal lance
pallid cradle
18 hours isn’t enough
surreal lance
pallid cradle
18 hours isn’t enough
10 hours is more than enough
pallid cradle
no
surreal lance
Yes?
pallid cradle
you likely wont get new user until at least 50 hours if you're lucky
azure rain
?upload
 split graniteBOT
You must obtain at least "New User" Trust Rank in our Trust and Safety system in order to upload content. You can get this by just spending a few hours in VRChat, hop some worlds, and make some friends. Give it some time and you'll be able to upload content in no time.
As an aside, you must have a VRChat account to upload content. That means you can't use a Steam account, Oculus account, or Viveport account to upload content like worlds or avatars.
Source: https://docs.vrchat.com/docs/frequently-asked-questions
 obsidian nova
exotic obsidian
Here's the Hilt
obsidian nova
exotic obsidian
Here's the Hilt
Scrolling back up through the thread, I thought you made a vape pen, then I saw the rest. lol
 tardy dome
dunno if this is the right place to ask, but why in the world are the textures completely broken and why is he semi transparent?
 fallow osprey
What are some typical methods of modelling eyes? ._.

 foggy granite
fallow osprey
What are some typical methods of modelling eyes? ._.
foggy granite
fallow osprey
What are some typical methods of modelling eyes? ._.
typically it just a slightly edit sphere it mostly the texture work for the eyes then the modeling
 pine raft
Sculpting a kobold
 fallow osprey
foggy granite
typically it just a slightly edit sphere it mostly the texture work for the eyes...
fallow osprey
foggy granite
typically it just a slightly edit sphere it mostly the texture work for the eyes...
Ty for the tip ^_^ I find setting the verts to simple black doesn't really do the eye justice lol
foggy granite
np
 queen hill
Hey yall so I'm trying my hand at weight painting. I can't see how to populate the list of vertex data on a jacket to bones that I added my self after I started the editing of the avi. Like adding bones for a strap on a jacket for example. In blender btw
trail python
just make new vertex groups and name them exactly the same name as the bone you're weight painting
 cerulean shoal
stopped procrastinating im nearly done

 spare kiln
 spare kiln

 sterile bluff
tardy dome
dunno if this is the right place to ask, but why in the world are the textures c...
sterile bluff
tardy dome
dunno if this is the right place to ask, but why in the world are the textures c...
because you dont have light on scene and material is transparent or faces is upside down
spare kiln


 quaint jasper
spare kiln
quaint jasper
spare kiln
Are you exporting out with ID masks ? Wondering if you're packing that way for convenience or if there's another reason
quaint jasper
So you make your own masks manually in substance ?
ID maps is just vertex color, vertex color is shader based, although not supported on quest iirc
quaint jasper
Yeah SP can be very fun
azure rain
yeah substance painter is very helpful
 white dock
Alright, i just got unity, what else do i need to upload avatars to vrc?
cinder cradle
vrchat sdk from website
cinder cradle
white dock
why 2019?
u need exactly 2019.4.31f1
cinder cradle
that's why u do research before starting
white dock
i will admit i got ahead of myself
cinder cradle
at least u admitted unlike some people
white dock
i just wanted to edit the avatar that i brought off of booth, ive been waiting forever for this lmao
I can only find 2019.4.39f1
alright, i have the correct version installing now aswell as the sdk is downloaded
oh my bad i thought i was in user support
ill make sure to ask in the correct channel next time
spare kiln
quaint jasper
Are you exporting out with ID masks ? Wondering if you're packing that way for c...
Just looks nice, and generators only work when I have them baked out
onyx berry
I'm working on my first public avatar and I'm not really feeling the design for some reason, could I get some critique?
https://youtu.be/yLwNyArrRvs

I'm going to have a non-robot version and optional fluff and simpler material too, but I wanted something more in line with my other work (and honestly a bit gimmicky) to get it to stand out more.
 prisma berry
would anyone be willing to help me on blender?
actually sorry forget it
how do i fuse the parts of a an object

how do i fuse em
onyx berry
prisma berry
how do i fuse em
Do you mean fuse as in make them the same object?
prisma berry
yes
onyx berry
Go to OBJECT mode and do Ctrl+j
Blender calls it "Join"
prisma berry
but in object mode they dont apear
onyx berry
Are you in "Local" view or have them hidden in the Inspector?
prisma berry
im preaty new so i dont get what that means
onyx berry
To get in and out of local view, just hit / on your numpad, and it'll say local in the top left corner of the viewport https://docs.blender.org/manual/en/latest/editors/3dview/navigate/local_view.html
 onyx berry
And you can do h to hide and Alt+h to unhide everything
prisma berry
its now what im serching for
prisma berry
prisma berry
im trying to make this flat
onyx berry
prisma berry
im trying to make this flat
Like, perfectly flat as if it were paper?
prisma berry
texture i think
i mean sub divide creates more divisions but unsubdivide does nothing
onyx berry
Also unsubdivision is slightly messy and often not perfect
onyx berry
prisma berry
you see the lines?
It's been triangulated, but not subd'd
prisma berry
and how do fuze em
onyx berry
Alt+j iirc
Or hit X and do "limited dissolve"
They might both fail (silently) if they can't figure out a way to get the shapes you have without triangles
prisma berry
wierd still separated but better
onyx berry
Are you trying to change the beard or the skin?
prisma berry
no
tough plover
prisma berry
wierd still separated but better
if you want to remove an edge going through a face, dissolve it using ctrl + X
prisma berry
i wanna model it to be rounder but for that i want to make my own splits
onyx berry
Ah
tough plover
rounder? doesn't that defeat the purpose of pixel art
onyx berry
You could use vertex bevel for that
 pallid apex
anyone know a way to convert a maya mb file into an fbx or obj?
i have this asset i want to import but afaik its incompatible with blender
onyx berry
prisma berry
cos im new and thats how i know to do it
The vertex bevel method might be easier, it's just a modifier. It might not be the best option if you have shape keys though. (But everything we just did probably broke them anyway) I can't send a screenshot, so here's a photo

(I'm out of town and my carrier does some anti-consumer shenanigans with hotspot connections so no internet on the computer)
fallow osprey
L e a t h e r - j a c k e t


 grave aurora

 quaint jasper
Epic
grave aurora
Model has been done for a few weeks but wanted to get around to making some portfolio work to show potential employers :)
cerulean shoal
LOOKS SO SILLY!! love it 😭
spare kiln
 spiral sigil
oh no bro
 surreal ibex
Has anyone ever had the issue where when exporting an FBX from Blender, all of the rotations are off by 90 degrees in Unity? I've gotten some advice on how to fix this when exporting, but I must be messing up some exact step.. I need a REALLY dumbed down set of instructions or for someone to hop in a call and see what it is I am doing wrong. I'm feeling really dumb that I can't fix this. I feel like 5 mins of someone's time would help me move on from this...
cinder cradle
surreal ibex
Has anyone ever had the issue where when exporting an FBX from Blender, all of t...
check this convo it might help i think u have same problem #3d-modeling message
surreal ibex
cinder cradle
check this convo it might help i think u have same problem https://discord.com/c...
This is really close to the issue I was having, but this is one of my issues: Avatar appears normally in Unity but 1) the eye rotation is off by 90 degrees. I have to offset the eyes by 90 degrees to get the eyes to alight forward. This avatar is a decimated version of a PC avatar and is being used to convert to quest, so it breaks many of the animations as well because of these off rotations. I was told I had to rotate the model -90 on the x, then apply transforms.. but its the steps after that where I'm messing up I think...
I'd also like to make it work with Better Exporter instead of Blenders default exporter.. I have lots of glitches when using the native Blender FBX exporter.
cinder cradle
i never had issue with default exporter
no idea why u would need rotate it in any way after making it quest version
i never had such issue
surreal ibex
I'm assuming the import settings were messed up (I'm not the only person working on this model) and that was a big reason this started.
cinder cradle
do you use fbx exporter?
in unity
i always use this one
to be sure i doesn't mess up
surreal ibex
no, we imported the FBX from the original project in Unity.
cinder cradle
hmm it can easly backfire
surreal ibex
Yeah, I'm seeing orientation settings for the importer.. I'm guessing they weren't set to Unity orientation. :/
 calm sandal
The model is almost done just need to figure out the hands

Very simple for learning purposes
calm sandal
the modeling I got down for the most part
tough plover
surreal ibex
This is really close to the issue I was having, but this is one of my issues: A...
your eye and head bones should be facing perfectly upwards
surreal ibex
tough plover
your eye and head bones should be facing perfectly upwards
they were not like this on the original model.
pallid cradle
spiral sigil
oh no bro
OH NO BRO! You know who else likes peepo? MY MOM! ReEeEeEeE
spiral sigil
pallid cradle
*OH NO BRO! You know who else likes peepo? MY MOM! ReEeEeEeE*
Kids on vrchat in a nutshell
spiral sigil
OH NO BRO
fallow osprey
How do you get the outline effect in blender? Does it port over into unity? :o
tough plover
fallow osprey
How do you get the outline effect in blender? Does it port over into unity? :o
that is in Unity
doing the same thing in blender would require some more wacky stuff
and it wouldn't port over
 minor palm
fallow osprey
How do you get the outline effect in blender? Does it port over into unity? :o
minor palm
fallow osprey
How do you get the outline effect in blender? Does it port over into unity? :o
Outlines are something best done by shaders, which are not compatible between Unity and Blender. I'd check out Poiyomi's shader for Unity, as they have an outline varient that would do what you're looking for. Otherwise I'm personally not as familiar with achieving outlines in Blender, but tmk the are some tutorials and documentation on the topic that are only a Google search away.
fallow osprey
tough plover
that *is* in Unity
Ahh thanks, didn't recognise it ^_^
fallow osprey
minor palm
Outlines are something best done by shaders, which are not compatible between Un...
Coolio, I was curious if it was in blender but I suppose not. Will definitely check out Poiyomi tho
prisma berry
anyone know a place where i can get a free sample of a guy fawkes mask?
even a shitty one
spiral sigil
pepe?
the frog?
im assuming vrchat doesnt recognize it as a hate symbol anymore since it used to be a rule in this discord server againt it but its been removed for a year or so
u can blame me if you get your avatar removed but im nearly completely certain its allowed
worse case it gets taken down
U could email vrchat
for an official answer
email is at bottom of #faq
if they do say its not allowed I will vehemoneldtttt protest !
yeah that was probably when they were airing on the side of it being a hate symbol
olden days
dunno I wasnt on this game before 2019
well I mean its kinda like if enough people use it as one then it becomes one
I dont think anyone does anymore afaik so
hmm what should I try to model for my first project in months
months of failure and terrible discipline
no
they are currently the bane of my existence
hmm I haven't done any furniture yet
yeah same
I also plan to slowly go through the entire documentation and note down what I havent realised was a thing yet or feel is important to write down
which to be honest is something I should of done from the very start
aa what do you call this thing specifically that you can push up and down to adjust the height

reverse google img searching isnt getting me it
cinder cradle
spiral sigil
aa what do you call this thing specifically that you can push up and down to adj...
looks kinda like director's stool
spiral sigil
yeah
that actually would be cool to make too
I might just go for that since I can find plenty of reference w that
 quick thunder
I was outright blocked by VRPill for using a Pepe model at some point
🗿
never banned tho
spiral sigil
spicyyyy
fallow osprey
Hey, does anyone know of a way to convert a mesh into a png texture? Cuz I like this but it's naturally a bit too heavy on performance 😄

 azure rain

In this tutorial I show how to bake the high poly details of a sculpted model onto a low poly object with Blender, I use Blender 2.9 but 2.8 would work as well.
The process works but in my opinion it is quite tedious and difficult:
- Selecting high and low poly both (in this order)
- Create the nodes for baking in the PBR setup of the material...
fallow osprey
azure rain
https://www.youtube.com/watch?v=DQPjIGncXcM
I assume I could apply this to a "flat" version of the undersuit that still catches the light the same way?
Cuz I also want to make fishnet with the same method, but that requires some kind of transparency in the texture
azure rain
yes you would bake it to a low poly version of it
spiral sigil
oo I wonder if its viable to make cloth textures in a similar manner
spiral sigil
i gave up on it
i dont well procedural textures know enough and i dont have motivation
the style i really like anyway is always the handpainted stuff and i cant draw for the life of me but ill try again tonight
tough plover
spiral sigil
oo I wonder if its viable to make cloth textures in a similar manner
yes, that's basically what I do
you can either sculpt the cloth details in a mesh and bake it, or do it in Substance
manic spade
its not awful i dont think? have to blur cuz stupid bot

didnt bother with patch topology on abs or anything because i cant imagine those will ever need to deform any way but laterally
dunno if there are any topology experts around but im not sure if i should insert tris at the elbow joints for better bends
tough plover
could probably reduce poly count and bake detail into a normal map
tough plover
apart from that the topology looks quite good
manic spade
i have a high poly sculpt already
manic spade
the vertical edge loops on the torso connect to the fingers
unless you mean just get rid of some of the horizontal ones
tough plover

still WIP but you can see how low you can actually go
horizontal ones are the main ones ye
manic spade
i know you can go lower
tough plover
and around the arms for example
manic spade
yeah i cant decide how long to make the polys on the arms
i guess they dont need to deform much apart from at the joints
manic spade
the joints you have will bend weirdly though

 manic spade
A is a better deform than B
 tough plover
 manic spade
maybe it doesnt matter as much at higher polycounts
tough plover
you can see that extra face here too
manic spade
A is a tri in that case
collapsible

i've gone kind of high on the limbs and torso only because im not sure how much you need for twists in fbt
to avoid ugly artifacts
like if they are disproportionately long i think they wont twist nicely
tough plover
I can safely say that you can definitely get away with reducing the amount of loops and it will still deform fine
manic spade
tough plover
almost feels like you're trying to make it look good for movies lol
most of the ones on gumroad are like 40-50k tris from what ive seen
manic spade
bodies
tough plover
too much lol
manic spade
same with the nipnip one or whatever the dudes name is
that ones even higher i think
tough plover
the entire base model that I use including the head is 28k

and that works really well
so I definitely think that 40k for just the body is too much
manic spade
tough plover
the entire base model that I use including the head is 28k
my big pet peeve is that fingers never look quite right
they always deform weirdly
i feel like i've only ever used a few models where they looked really nice
tough plover
yea, it's fine if you add extra loops in key places on the fingers to make them bend better, that's fine
but what's not fine is taking that same density of geometry and having that across the entire model
not that I'm saying that's what you're doing, but I've seen shit very close to that lol
manic spade
tough plover
not that I'm saying that's what you're doing, but I've seen shit very close to t...
its a shame most of the ones on gumroad dont provide wireframes
prisma berry
anyone get a shitty v mask object for blender they can give?
 bright steppe
Am I spending way too long to make a boring arcade game that I'm too nostalgic for? maybe

but it's an excuse to learn Substance Painter and get better with Udon
bright steppe
Hehe yus I'll update progress ~ I plan to make it fully functional
 tight quartz
Hi! How do I cut this part out so I just move this part? I forgot how to do it. '_>'

I accidentally ctrl + d the left part and I dont want them to be linked.
tight quartz
 cinder cradle
u need to be in edit mode
spiral sigil
tough plover
you can either sculpt the cloth details in a mesh and bake it, or do it in Subst...
o thats cool do u only bake the normals and then texture paint the color or u also bake the colors
 midnight valve
thoughts on this hair?


im a bit unhappy with the front personally but dont really know how to improve it
midnight valve
hmmm
 prisma berry
would anyone be willing to help me with my avatar? im trying to assign something as the head but im really new and dont understand how
prisma berry
would anyone help me with a vertex group problem?
devout scroll
select the mesh in edit mode, select thr head vertex group and press assign
fallow osprey
Ok so I'm UV unwrapping atm and I'm wondering if the higher resolution at the seam on top of the chest could cause problems. I'm not sure how to even it out for the breasts

So far I've noticed UV stretching is most prominent in the armpit, the breasts and the heels of the feet
Palms too
quaint jasper
if you want consistent texture quality, yeah texel density is important
fallow osprey
quaint jasper
if you want consistent texture quality, yeah texel density is important
I'm thinking the problem areas will mostly be smooth textured so it wouldn't be too much of an issue
quaint jasper
if there's no detail, then UVs won't matter at all 
calm sandal
Done. Now to figure out texture painting


 manic spade
fallow osprey
Ok so I'm UV unwrapping atm and I'm wondering if the higher resolution at the se...
manic spade
fallow osprey
Ok so I'm UV unwrapping atm and I'm wondering if the higher resolution at the se...
it isnt usually necessary to make a seam for breasts in the first place
manic spade
spare kiln
lookin good
tyy
thorn gulch
 manic spade
thorn gulch
manic spade
thorn gulch
that ur sculpt? sick
spiral sigil
itslike king cobra dinosoar
quaint jasper
manic spade
decent bake?
knee area looks a bit odd, but bake is great !
manic spade
quaint jasper
knee area looks a bit odd, but bake is great !
aaaaaaaa
i stared at bodybuilder knees
quaint jasper
Fair enough, that might be the norm for them !
manic spade
quaint jasper
Fair enough, that might be the norm for them !
because i had people telling me the knees were too soft looking compared to the torso
 spiral sigil
too much muscle imo
around the knees of that guy it looks like normal leg but the thigh muscles above are like geez wow extra
idk just doesnt feel rlly proportionate
quaint jasper
In that case your sculpt is closer to that image than of a normal person
spiral sigil
consider that GOOD
manic spade
im gonna die
thorn gulch
manic spade
that ur sculpt? sick
yea i sculpted it from a sphere
manic spade
thorn gulch
yea i sculpted it from a sphere
zbrush?
thorn gulch
manic spade
zbrush?
indeed
 mortal zodiac
wip of my oc
 manic spade
no
its my own
what does panda's look like
?

no its my own sculpt
thanks
maybee
exotic obsidian
IDK if I'll ever rig this, but here's a little axolotl boi
 spiral sigil
exotic obsidian
IDK if I'll ever rig this, but here's a little axolotl boi
spiral sigil
exotic obsidian
IDK if I'll ever rig this, but here's a little axolotl boi
it can def be just a plushie for a world
 lone blaze


 nova roost
i was working on this months ago and i never finishde it
 spare kiln
nova roost
i was working on this months ago and i never finishde it
spare kiln
nova roost
i was working on this months ago and i never finishde it
i love it! please finish it!
the hair is awesome
spiral sigil
kinda reminds me of raiden shogun
spiral sigil
oh perfect then
 safe schooner
so im just learning blender, and ummmm.... i kinda fricked up and how to made donut grey again instead of transparent (idk if its the right channel to ask)

 glad steeple
safe schooner
so im just learning blender, and ummmm.... i kinda fricked up and how to made do...
glad steeple
safe schooner
so im just learning blender, and ummmm.... i kinda fricked up and how to made do...

or press z and select from the four options
safe schooner
tysm!!!!
spiral sigil
or alt+z if ur cool
wait so yknow how there are raster images and vector images
and in 3d your models are polygons
what if you could have like mathmatical equations perfectly representing 3d objects without polygons
im probably misunderstanding something integeral on why thats not already a thing
tough plover
spiral sigil
what if you could have like mathmatical equations perfectly representing 3d obje...
...that's what CAD is all about
it's called Nurbs modeling
spiral sigil
tough plover
...that's what CAD is all about
in like fusion 360 or inventor?
tough plover
yes
spiral sigil
I think im learning both in my future drafting classes for school
lookin
forward

Let's discuss NURBS modeling and how it compares to poly-based modeling.
➤ Learn more hard surface with our SciFi Terminal Design mini-course
https://www.blenderbros.com/scifi-terminal-design-mini-course
Website - https://www.blenderbros.com
Patreon - https://patreon.com/theblenderbros
Hard Ops/Boxcutter (affiliate): https://gumroad.com/a/81...
fallow osprey
How can I convert a 3D fishnet mesh into a texture?
 spiral sigil
.
spiral sigil
fallow osprey
How can I convert a 3D fishnet mesh into a texture?
maybe if you bake a texture between the fishnet and the body, put that into photoshop and only keep the fishnet part of the image and erase the rest, and THEN put that edited image on top of your regular body texture and that should do it
my messGes might be sending multiple times there is lightning making my wifi go off and on
quaint jasper
100% a transparency texture thing, no one uses a mesh
fallow osprey
That's what I was thinking because I have the additional mesh above the legs which I can bake the fishnet onto, but I'm not sure how you would do it or whether it could even have alpha values attached to it in a PNG file
Alternatively I have a square crisscross texture but I was worried about it stretching awkwardly when I already have something that fits decently around the legs
@spiral sigil
fallow osprey
quaint jasper
100% a transparency texture thing, no one uses a mesh
Yeah, that's why I ask how to convert it into something more performant ^_^
Although I think I have seen some avatars use 3D fishnets >_>
 lapis smelt
theres a bumpy line in the center of the face, mirror modif btw, any ways to fix it?
 spiral sigil
fallow osprey
That's what I was thinking because I have the additional mesh above the legs whi...
spiral sigil
fallow osprey
That's what I was thinking because I have the additional mesh above the legs whi...
idk just try to experiment with baking
If ur okay with giving me the assets I could try messing around with baking but I def can't guarantee anything lol
 harsh saddle
lapis smelt
theres a bumpy line in the center of the face, mirror modif btw, any ways to fix...
harsh saddle
lapis smelt
theres a bumpy line in the center of the face, mirror modif btw, any ways to fix...
Try changing the merge distance on the modifier.
 feral sable
lapis smelt
theres a bumpy line in the center of the face, mirror modif btw, any ways to fix...
feral sable
lapis smelt
theres a bumpy line in the center of the face, mirror modif btw, any ways to fix...
i've never had this issue but from what i do know i think i'd try just blowing it up a bit to uneven everything, and then smooth it out using the smooth brush and see if that does the trick
and when you smooth it, try to be light on the sides so that it dosen't point upwards again
if that dosen't work i'd honestly just turn mirror off, smooth it, and then get back to work
spiral sigil
I am trying to do weight painting for the first time however I am having an issue

when i go into weight painting mode I can't see my mesh at all
spiral sigil
it just appears as orange lines
 restive mirage
nova roost
i was working on this months ago and i never finishde it
restive mirage
nova roost
i was working on this months ago and i never finishde it
damn that looks nice asf
 turbid vale
ok here we are
can't say it helped

yes
oh yeah you're right
maybe using realistic lightings in poiyomi wasn't the best idea
thanks a lot though
yep, it's definitely not a problem anymore, just need to make it look good now
thanks

 toxic knoll
Do you think this is enough topology to try sculpting eyes and other features?
 quaint jasper
You'll move the topology around a lot, more likely will create what you need over time
toxic knoll
cool cool. I always get nervous about sculpting because it usually comes out really messy and disproportionate.
But it's not bad right now, especially without a reference.
 harsh saddle
Looks good. You can handle a fair amount of the finer detail with a normal map.
devout scroll
nothing wrong with bad topology at the beginning since you can just remesh
get the big shapes done first then sculpt the detail later
toxic knoll
I'll try it out. Just trying to figure out what large shapes I wanna use
harsh saddle
Yeah, I do all my initial work of building out the form using the sculpt mode and dynotopo and then just retopologize on top of that, much easier way to experiment with the form but you basically have to make the model twice.
thorn gulch


 toxic knoll
very cool
toxic knoll
update. Hasn't fallen apart yet.

 sharp flare
aye I came looking for a hero
I'm making a self-project (meaning im not gonna post it anywhere)
and for it I need a 3D Model of Thomas The Engine
anywhere I can find one? since I have no clue how to use blender
Thanks in advance! :>
 heady apex
sharp flare
aye I came looking for a hero
I'm making a self-project (meaning im not gonna p...
heady apex
sharp flare
aye I came looking for a hero
I'm making a self-project (meaning im not gonna p...
Cgt,turbo squid etc
harsh saddle

Thomas The Tank Engine from Thomas And Freinds - Thomas The Tank Engine - Download Free 3D model by HarrisonHag1
sharp flare
hey, trying to work on my personal project and as a part of it I'm making a cave that looks about that :
https://youtu.be/cccqm4o3vXU?t=665
I have a prefab of the flowers with a point light and I started scattering them across the room which ended up causing HUGE fps drop (from like 200 to ~14)
I have disabled shadows for the point light and the performance did improve but apparently the big amount of meshes causes performance issues as well, I know this because I've tried baking the meshes and it improved the performance back to normal, but the issue with that is that the baked mashes don't have the point lights I created.
Any thoughts?
thanks a bunch !~
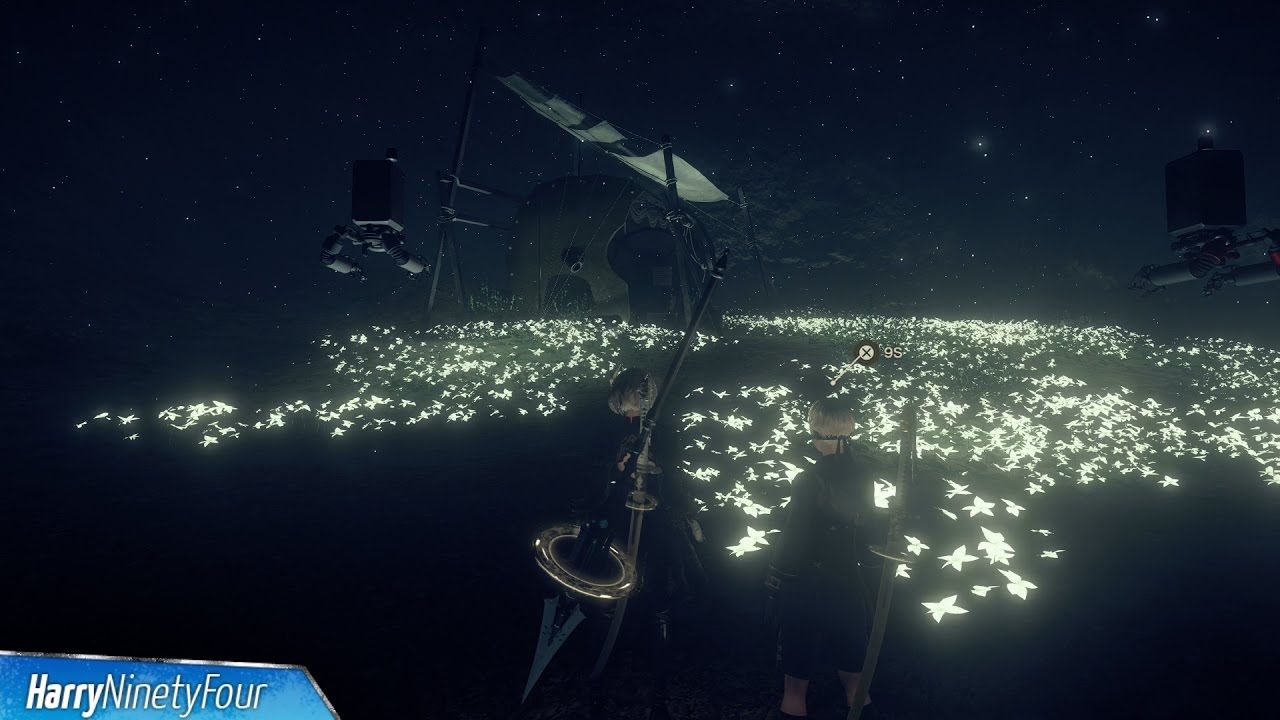
Nier Automata - Lunar Tear Trophy Guide (Emil's Memories Side Quest Walkthrough)
To get the "Lunar Tear" trophy, you need to first complete the main story mission in the forest, which ends in the fight with A2 in the Castle. Once that's done, talk to Pascal and complete the Forest Quest. Now, Emil will spawn. He can be found driving around near...
harsh saddle
Can't you add the point light back in? Do they not receive light anymore?
fallow osprey
spiral sigil
If ur okay with giving me the assets I could try messing around with baking but ...
Btw how can I send you assets? Still learning blender ^_^
pallid cradle
ok i know edge loops are optimal... but no one said anything about edge roller coasters...


 pale grail
i have 9 tails from 1 model and i have the model i want to parent it to, when i try to parent the tails to the hip bone they have a greyed out text when i click parent. why is that
 quaint jasper
pale grail
i have 9 tails from 1 model and i have the model i want to parent it to, when i ...
quaint jasper
pale grail
i have 9 tails from 1 model and i have the model i want to parent it to, when i ...
I don't know if you can do that operation on multiple bones at once, does it work with a single bone ?
pale grail
yeee i thing i figured somethin out ikll try it later
devout scroll
quaint jasper
I don't know if you can do that operation on multiple bones at once, does it wor...
You can if you hold alt when parenting
So ctrl+p with hips selected last, hold alt and click keep offset
Holding alt let's you apply whatever setting change to all selected in more than this case
I would make a root bone for the tails tho if you want them to be dynamic. You shouldn't put physbone scripts onto humanoid bones
@pale grail
spiral sigil
wait how do i add a collision to a thing in blender so it has one when igo to unity
trail python
spiral sigil
wait how do i add a collision to a thing in blender so it has one when igo to ...
you do that in unity
spiral sigil
trail python
you do that in unity
yes but like the Torus thing in Blender doesn't have a Collider in Unity that only goes roundthe ring
trail python
uh mesh collider?
spiral sigil
thanks pum pum
 thin shadow
spiral sigil
wait how do i add a collision to a thing in blender so it has one when igo to ...
thin shadow
spiral sigil
wait how do i add a collision to a thing in blender so it has one when igo to ...
In the unity fbx import settings > generate colliders
pale grail
@devout scroll thx
spiral sigil
Could someone make me a Johnny sins(Face) 3D model
 north ocean
not sure if this is the right place for asking for help but some of my vertexs arent showing dots on them and i have a hard time trying to select them
 fallow osprey
Is the face a separate object from the rest of the head?
north ocean
nope not that i know
 obtuse snow
does anyone know how to dissolve vertices without removing the face as well, because im trying to model a hand, but when i dissolve the vertices, it leaves a hole where a face once was.
north ocean
the face is part of the body but i dunno why its causing this
 spare kiln
north ocean
the face is part of the body but i dunno why its causing this
spare kiln
north ocean
the face is part of the body but i dunno why its causing this
go to object mode
click the head, shift-click the body,
ctrl-J
then press tab to see if its fixed
 spare kiln
north ocean
spare kiln
north ocean
can i get a ss of the viewport when u have the mesh selected in object mode>
north ocean
ss?
spare kiln
screenshot
north ocean
 spare kiln
can u try object mode
 north ocean
that seemed to have fixed it
spare kiln
awesome!!
north ocean
thenk ^^
 gray geyser

 spare kiln
gray geyser
spare kiln
gray geyser
i love this
gray geyser
Thanks! I’m just adding some finishing touches to him
gray geyser
spare kiln
i love this
 cinder cradle
gray geyser
cinder cradle
gray geyser
move your origin to 3d cursor
spare kiln
gray geyser
awesome! well done with the texture
gray geyser
Thanks!
 bitter crest
is there anyone here who would be open to texture and rig a model for me
harsh saddle
There are lots of avatar creators out there but you can easily spend a few hundred dollars or more to commission them. I don't know of any automatic texture options but Mixamo does a decent job with rigging if we're talking a basic humanoid.
bitter crest
idk if you could call it humanoid
plus its just simple colours anyway
for this guy


 harsh saddle
If you've already got UVs, you could probably just get away with assigning basic colors and baking them in Cycles https://www.youtube.com/watch?v=eYvgFWEiNp8
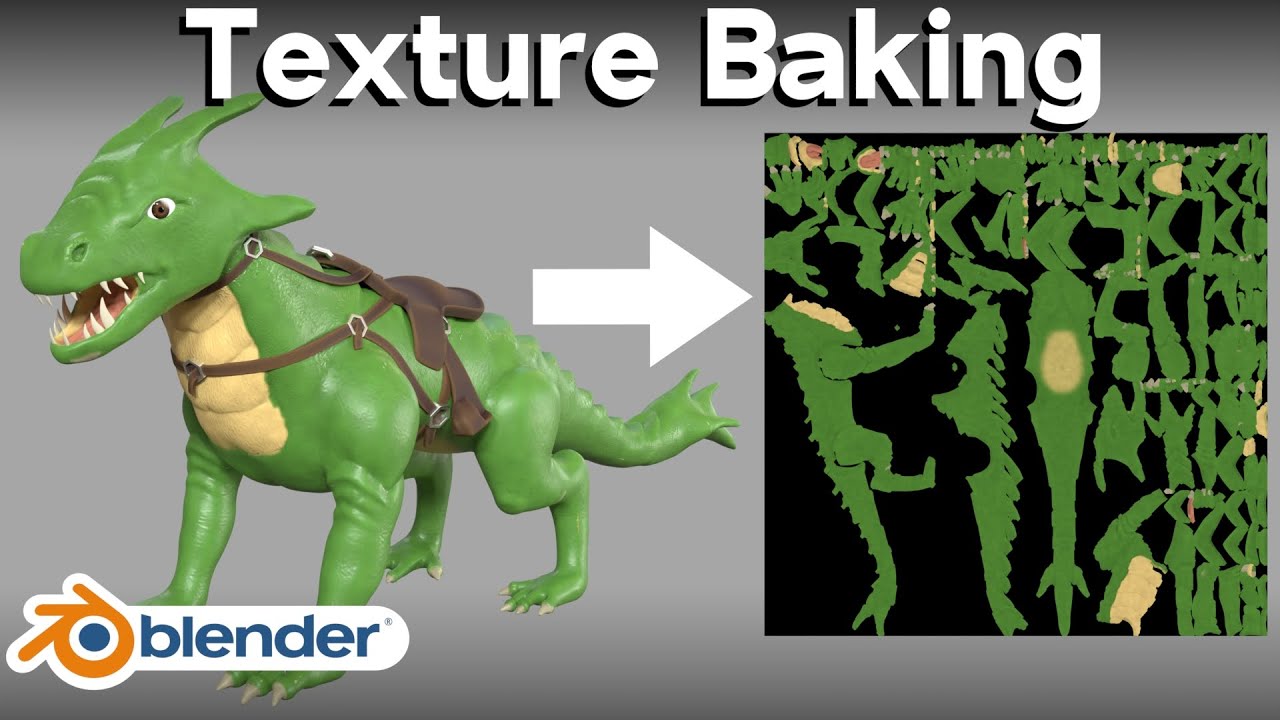
Check out Sketchfab 3D models: https://shrsl.com/3b1vs (Affiliated Link)
Apply to become a seller: https://bit.ly/skfbstore-apply
Forgot to mention in the tutorial: The sample count will effect the bake. So if you turn the sample count down, then it will bake faster.
In This Blender Tutorial, I will show you how to do Texture Baking.
Procedur...
quaint jasper
Looks like a fun model !


 devout scroll
obtuse snow
does anyone know how to dissolve vertices without removing the face as well, bec...
devout scroll
obtuse snow
does anyone know how to dissolve vertices without removing the face as well, bec...
depends, if you don't have enough verts for a face after you dissolve the face just gets deleted
so either slide them across the edge (press g twice) to another vert then merge by distance, or use the knife tool (K) or join different verts (J) to create the edges you want to have in the end and then dissolve the verts that you don't need
 potent comet
How does my topology look so far? This is my first 3d modeling project and I'm not sure how the limbs are supposed to stretch so im just doing what feels right. Anyone have any critiques?


 quaint jasper
potent comet
How does my topology look so far? This is my first 3d modeling project and I'm n...
quaint jasper
potent comet
How does my topology look so far? This is my first 3d modeling project and I'm n...
Are you using any visual reference in blender at all ?
That topology needs to be smoothed and spaced evenly in most places
potent comet
quaint jasper
Are you using any visual reference in blender at all ?
yeah i am
quaint jasper
front and side view ?
potent comet
yeah
quaint jasper
What does it look like ?
potent comet
 quaint jasper
Ah so no topology reference, I'd highly suggest you find one for a woman body, that way you'll get a clearer idea as to what you need to aim for
potent comet
like something like this?
 quaint jasper
Sure, you can also find tons of reference by looking at the images of bases being sold on Artstation to get an idea https://www.artstation.com/marketplace/game-dev/resources?section=trending&q=base female topology
ArtStation
Explore a wide collection of Resources for Game Development. Find 3D Models, Animation Resources, Environment Assets and much more. Elements are ready to use in ZBrush, Blender, Photoshop and other Art Tools.
potent comet
sweet, thanks!

 fallow rain
moment when you spend a huge amount of time on a model only for every attempt at rigging it to not work and you're stuck with a t-posing cat
 harsh saddle
Have you tried Mixamo? It's usually pretty good but it does sometimes struggle if you stray too far from humanoid.
 winged kiln
first time using blender and making an avi from scratch. Quick question, am i able to change the Levels Viewport to 2? Or do vrc models require it to stay at 1? i just dont want to screw it up and have it get all funky on me in game
prisma berry
this a good hand?
 harsh saddle
winged kiln
first time using blender and making an avi from scratch. Quick question, am i ab...
harsh saddle
winged kiln
first time using blender and making an avi from scratch. Quick question, am i ab...
In your subdivision modifier? I think it depends on your export settings whether modifiers get applied or not but you can see what your polygon count is in the statistics window. Quest avatars need to be below 15k polygons, I believe, to not be very poor and thus blocked from display by default. You can get away with a lot more on PC but it's still good to be conscious of other players' performance so I'd shoot for south of 50k at most.
 potent comet
prisma berry
this a good hand?
potent comet
prisma berry
this a good hand?
I'm not a professional by any means but I would try to add more vertices around the joints for a better skeleton. If you plan on adding any gestures, the knuckles (and maybe the wrists?) might create some weird stretching in the polys.
Once again though I don't really know my way around modeling/blender enough to give a definite reply, I'm kind of curious though if anyone more experienced knows.
I personally would try to add a skeleton and use weight painting to test out how it would bend at the joints and adjust as needed.
prisma berry
what im working on

 sage moat
Hii, can anyone help me to convert my PC Avatar into a Quest Avatar?
I'm new to it and I don't understand much about Unity yet D:!
 upper canyon
Sippbox has a very good tutorial
upper canyon
sage moat
Hii, can anyone help me to convert my PC Avatar into a Quest Avatar?

Did this video help you? Consider sending me a tip on Ko-fi! https://ko-fi.com/sippbox
Making optimized Quest models is hard. But it doesn't have to be! With recently updated polygon limits and fallback avatars, it's a better time than ever to create something that represents you to Quest users! Hopefully this tutorial will help you out!
0:00 ...
Got it!
Though if you don't understand blender all that well, I'd recommend you to get comfortable with the tools it has before trying to convert an avatar, it can be anything from a nice stroll to a marathon in flames.
sage moat
thank you so much mate
 thin lily
ok, so when i weight paint in edit mode, when I'm working on, say, a lower arm bone, do I highlight and assign the hand and fingers too, or will they follow along naturally?
like, highlight and assign the hand and fingers with the arm to that lower arm bone
same with highlighting fingers when weight painting the hand
harsh saddle
No, you want to weight the polygons of the area you want the bone to effect to the bone you want to do the effecting. The hand bone will follow the arm bone if it's connected in the rig but if the hand is weighted to the arm bone, then those polygons are going to move when you're doing arm motions that have nothing to do with the hand. I recommend downloading a ready player me avatar and using its weight as reference.
prisma berry
can someone help me rig the bones on my avatar?
harsh saddle
Have you tried Mixamo?
prisma berry
i mean i have an anvatar of many parts and i dont know how do add the bones to each part
 honest scroll
Is there any way to scale each UV island while keeping the location of the center of each island where it is?

I need to make each island infinitely small for a shader gimmick i am working on but google isnt helping me
trail python
honest scroll
Is there any way to scale each UV island while keeping the location of the cente...
i think individual origins miiight be what you're looking for?
 honest scroll
trail python
i think individual origins miiight be what you're looking for?
honest scroll
trail python
i think individual origins miiight be what you're looking for?
Going to give this a try!
❤️
That worked!
Thank you so much!!
😄
honest scroll
I'm making a pin art prefab and it needed to be scaled like that for it to work :3
❤️

😄
bitter crest
Hey is there anyone here who would be free to texture and rig a really simple model
Like
Three colours simple
And the model is allready made
 spiral sigil
Dm me if you can show me how to use blender for from scratch avatar making
honest scroll
trail python
thatll be cool in vr
 trail python
ayo lets gooo, thats awesome as hell man
 red glade


First time doing sculpting and this style of texturing, still needs a good bit finesse but we gettin there
Im not too happy bout the hair just yet tho, it feels a bit off. might redo them
thin lily
harsh saddle
No, you want to weight the polygons of the area you want the bone to effect to t...
ok, i thought so. thank you!
heady apex
Some modeling logo types I did today :)

 quaint jasper
heady apex
Some modeling logo types I did today :)
quaint jasper
heady apex
Some modeling logo types I did today :)
Raw SVG or another workflow ?
heady apex
quaint jasper
Raw SVG or another workflow ?
Top yes, bottom no
honest scroll
Quick little promotional render I did 😄
 quaint jasper
Never put your face on this, you don't know what you friends did with it 
heady apex
quaint jasper
Never put your face on this, you don't know what you friends did with it <:nervo...
Fr 💀
 pseudo storm
This is a personal project, for now is only a sculpt.
 quaint jasper
Copying my comment over: Raise the back of the jaw up until we can't see it from the front
pseudo storm
Maybe I actually need to lower the front of the jaw.
 true solstice

Dont know what to do next
I making some thing off google but different like it was blue but now green
And the crown was teal blue
And now red
quaint jasper
pseudo storm
Maybe I actually need to lower the front of the jaw.
I think the front jaw is good
fallow osprey
Quick question... is it possible to apply different alpha, specular and roughness values to different parts of a texture map?
pseudo storm
fallow osprey
Quick question... is it possible to apply different alpha, specular and roughnes...
I am always wondering the same, one of those things I hate from Unity.
spiral sigil
:0
 prisma berry
hey im having a problem why is the ub using the other side of the object

any idea why?
 cerulean wigeon
Can any1 tell me how to re-topo a model with a skeletal structure inside?
harsh saddle
cerulean wigeon
Can any1 tell me how to re-topo a model with a skeletal structure inside?
You can decimate a rigged model without too much issue depending on how heavily you're decimating but a full retopology is generally going to require re-rigging. You could do a nearest vertex transfer of the weight paint from the original to the retopologized model but it will likely require some manual clean up
cerulean wigeon
i tried decimating it, but (i dont know why) blender just kind of stops at a certain value
harsh saddle
prisma berry
hey im having a problem why is the ub using the other side of the object
Do you perhaps have any flipped normals?
cerulean wigeon
also if i have to re-rig it, then i wont do the retopology, thanks for the info
prisma berry
i just made a new material
cerulean wigeon
i ported this model from SFM
prisma berry
it fixed
cerulean wigeon
harsh saddle
You can decimate a rigged model without too much issue depending on how heavily ...
could you show me how to do that?
harsh saddle
It won't let you decimate below a certain point? That's weird. But yeah, weighting is all based on vertex order so if you're completely changing the structure of the mesh, the rig won't know what to do with it. https://www.youtube.com/watch?v=bR_Vke__voU
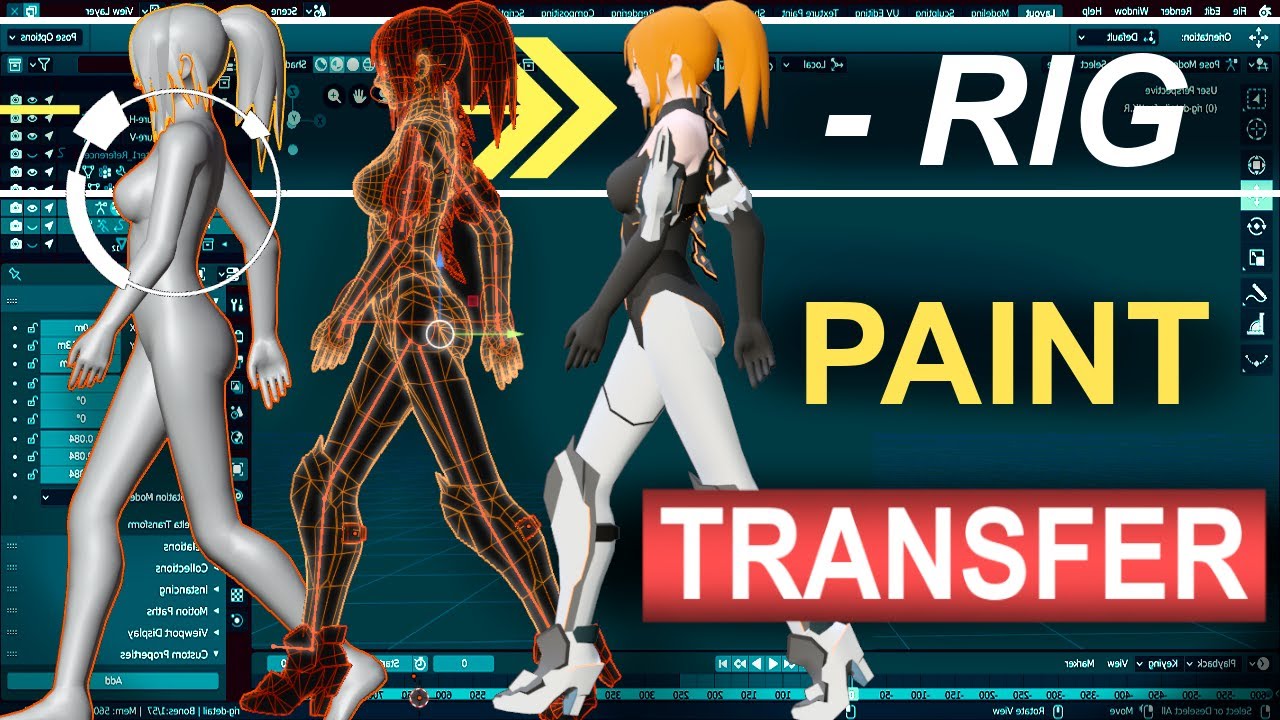
Never waste your time re-painting a new character ever again. In the next 60 seconds, you'll learn everything you need to transfer your Rig's weight painting from one character to another under a minute!!! Hope it helps :)
Free Female Base Rig Download:
https://www.youtube.com/watch?v=_XfvLpLyulI
Sayuri Artsy Weight Paint Transfer Video:
http...
prisma berry
can someone help me rig the bones? i dont understand how to do it, ive seen some videos
i made an avatar of multiple layers
lapis smelt
harsh saddle
Try changing the merge distance on the modifier.
Late reply, I used the merge distance, smoothed it and it's still the same.
harsh saddle
prisma berry
i made an avatar of multiple layers
Is that really necessary? There isn't much reason to keep your model as a bunch of separate objects unless you intend to hide certain parts with animations. You can still select and export a bunch of separate models as one FBX, it's just going to lower your performance rating if you don't actually need them to be separate.
prisma berry
i mean i made multiple parts and some have mirror
like the head
its a mirror
or the pants
but the jacket is not
or the arms
harsh saddle
Can't you just apply the modifier?
Mirrored objects aren't really new objects if you're using a modifier. Depending on the export, it's either going to apply it as one object or ignore it and you're just going to have one side of the model.
prisma berry
im really new to blender i just made the model and wanted to put the bones so i can port it to unity
the thing is
when i join the objects
the mirror is taken off
harsh saddle
Because you need to apply the modifier before joining.
 prisma berry
oh let me see that
i dont see thoes opetions
im using the latest version of unity
sorry blender
harsh saddle
Did you click the arrow?
harsh saddle
Yeah
You can automatically rig a humanoid model with Mixamo. It will generally have some issues but then you need to correct them with weight painting. https://www.youtube.com/watch?v=4fICQmBEt4Y

I've been meaning to update this video for a very VERY long time. But, we're finally here. Everything you need to know in order to start painting weight layers onto your character!!! Hope it helps :)
Female Body Model Link:
https://www.youtube.com/watch?v=_XfvLpLyulI
If you enjoyed this video, please don't forget to like and subscribe!
You ca...
prisma berry
i dont have bones so i was making em
and i was trying to see how to rig em to the model
and i see that when i join some the uv edit breakes
harsh saddle
You can make your own rig but you're going to need to learn a lot to do it better than Mixamo. Weights are what binds a model to a rig and Mixamo will create those for you so you just need to correct any issues.
 harsh saddle
If your textures are getting messed up when joining, it means your UVs have different names, make sure they all have the same name.

 harsh saddle
Mixmo will make the bones, make the vertex group, and assign the model to the rig, basically everything. Then you just have to fix anything it gets wrong with the weight paints, see the video above for that.
Check the UV Map names, I'll bet they're different.
prisma berry
maximo is an addon? i have an addon called cats
harsh saddle

LetMeGoogleThat.com
For all those people that find it more convenient to bother you with their question than to google it for themselves.
 harsh saddle
I wonder if it would have something to do with having the wrong tab selected? 🤔
 uncut imp
There are also some example setup vrchat avatar armatures, which you can just line up with your model and then apply the armature to it with automatic weights and fix up any issues the weights have after that
prisma berry
thats what someone told me to do once when i asked how they did the bones rig
harsh saddle
I think you're going to have to do more clean up with automatic weights that with Mixamo's rigging tools but it's an option.
prisma berry
i still dont get if its an addon
harsh saddle
You're going to have to make some effort to understand things for yourself if you want to make any progress. I have faith in you.
uncut imp

Today we are looking at a tool called Character Combiner, an open source project for combining multiple Miximo animations into a single project, which can then me exported as GLB/GLTF and ready to use in your game engine of choice.
Links
https://gamefromscratch.com/creating-3d-animations-with-mixamo-and-character-animation-combiner/
---------...
prisma berry
oh so i upload my avatar in there and it rigs it
do the arms need to be higher?

is this good?

its magic this is black magic man this is amazing
now i put it in blender?
oh nop that aint good
 steady zealot
honest scroll
https://gyazo.com/0dba101e0466522730b0b9e0cf01e8a8 :3
steady zealot
honest scroll
https://gyazo.com/0dba101e0466522730b0b9e0cf01e8a8 :3
Oh neat! I made one of these using vertex offset with a height map from a depth camera once!
 sleek osprey
Hello!
I'm currently trying to add clothing onto a base.
My question is do the bones for the clothing and base need to match up 100% ?
I provided two screen shots to show what i mean ^w^
I'm extremely new to Blender and would love some help.
This dress will be used as a toggle btw
If anyone has tutorials for setting up clothing in Blender to fit a base to then be used as a toggle over in Unity pleaseee slide them my way.

 harsh saddle
You have to weight the clothes separately from the rest of the body, see the link a bit above this for how to weight paint . You want it to be as close as possible to the bones that are going to be controlling it but what you have looks fine. Usually, you'll want to delete the mesh below the clothing to reduce the polygon count and eliminate clipping but that might not be an option if the body underneath will be visible sometimes.
devout scroll
The bones don't have to match exactly because it's the weights (vertex groups) that decide what a bone can move what. So if the head bone were to move the feet mesh for example you'd have the bone move a little but the mesh move a lot because they're far away
So you want to match it closely but it doesn't have to be perfect
But bone names need to match
upper canyon
Anyone ever had export issues? have a couple and I may need some help, It's a pretty big issue so I'd like to get into contact with someone, my blender skills are lacking today lol
bitter crest
bro can someone dm me abt texturing this model i need someone to do it for me
 harsh saddle
At this point, you probably could have taught yourself how to do it rather tham get someone to do it for you but you can keep trying
quaint jasper
bitter crest
bro can someone dm me abt texturing this model i need someone to do it for me
Look up any video on UV mapping
Also smooth shade your model
quaint jasper
Hours of watching tutorials ? Damn 
bitter crest
ive watched literally every tutorial
quaint jasper
And you retained no information ?

VRChat Ask
Post about commissions for avatars in this category. Requests are not permitted, we only permit posts from those providing services.
bitter crest
quaint jasper
And you retained no information ?
nope
quaint jasper
Sounds like you need to learn how to do that first, or find another type of tutorial that suits you, otherwise I'm unsure how you'll ever get better at blender
prisma berry
hows this hand?
 nova roost


 proven zodiac
nova roost
proven zodiac
nova roost
Looks good 👍
 tough plover
prisma berry
tough plover
prisma berry
if you're doing subdiv with that, you're going to end up with a lot of polys
I strongly recommend getting rid of some loops, mainly the ones around the wrist
 granite rock
Ive been working on this avatar for a few hours and ive lost all my progress , if its okay can I have some advice / on a call on how to fix it , im missing some of the Script for some of the things . but if you can add me or drop a Dm would be greatful
 silent cargo
hi! im having problems with bakes in 3.2 is there a way to fix this?
 silent cargo
it was the denoiser y makes that error
devout scroll
oh, good to know 👍
 spare apex
image from this video tutorial: || https://www.youtube.com/watch?v=JURLsyBLgbU ||
hey!! so, i joined to ask a question. i keep seeing avatars with these gorgeous 2d eyes, but i have no idea how they're made! does anybody have a tutorial or some tips on how these eyes work/how to make them?
i've used eyes are that are just spheres before and i don't like the look. i draw a lot myself and would much prefer to make some bangin' 2d eyes.
they're somewhat set inside the head so they follow you around, and i assume that the pupil itself is just a flat texture. but how do they work with the bones? how do you get it to move just the pupil and not the entire eye? i have so many questions, but i figured this would be the best place to ask!

 raven cloud
anyone got any tutorials on makin vrc avatars from scratch?
harsh saddle
There are many but this is the one that VRChat officially recommends so it's probably a good place to start. https://www.youtube.com/playlist?list=PLRUlfYGZBxVeEAVXkaG1uydyzFZAMOuMd

YouTube
Another good option is downloading a ReadyPlayerMe avatar and just uploading that so you can understand the Unity/VRChat side of things before jumping down the rabbit hole of creating your own models and rigs https://readyplayer.me/

Create a full-body 3D avatar with a selfie and use it in the metaverse. Developer? Integrate our avatar platform into your app or game.


 molten zephyr
spare apex
**image from this video tutorial: || https://www.youtube.com/watch?v=JURLsyBLgbU...
molten zephyr
spare apex
**image from this video tutorial: || https://www.youtube.com/watch?v=JURLsyBLgbU...
idk if anyone's DMed you with an answer or you were able to dig it up, but the entire white area is just a concave hole inside the head, while the pupil is the only thing rigged to the eye bone!
i know rainhet's tutorial series does the concave eye, but it's buried in making the rest of the model haha
granite rock
im trying to get my avatar that is chibi , Im trying the set the eye level for it and trying to upload to To VC chat but It seems to be have a problem
harsh saddle
What problem? You should be able to set the eye height to whatever you want.
prisma berry
would someone be willing to help me weight paint a model?
im following videos but i cant seem to understand the weight paint part
harsh saddle
It's pretty simple in theory, you select the vertex group that corresponds to the bone and you paint on your model what area you want that bone to effect with red being maximum power and blue being none. I recommend downloading a ReadyPlayerMe avatar to see how they do their weights. Rigging with Mixamo will give you weights that should be mostly correct, you'll likely just need to clean up the head and fingers.
spare apex
molten zephyr
idk if anyone's DMed you with an answer or you were able to dig it up, but the e...
Someone did dm me! But this does help a lot- thank you!!!
spiral sigil
does anyone know why MMD textures doesn't give me the option to add anything?

 solar fossil
mmd texture , ikes
spiral sigil
what do you mean
solar fossil
why not use the normal diffuse
spiral sigil
im following a tutorial, are u going to answer my question or just be condescending
solar fossil
i was just asking if you have a reason to use over the normal blender material, but ok
spiral sigil
bc the tutorial told me to and im still learning blender, i dont want to deviate from what theyre telling me to do
until i understand why im doing it
solar fossil
well, if you cant get it to work than check out the surface tab, there should be base color, click on the yellow dot and set it to image texture from the drop down, should be able to put the texture in there
spiral sigil
thank you, sorry im just frustrated because there's so many god damn options in this program and it's confusing as hell when something doesn't work as intended lol. sorry i called u condescending
devout scroll
you're probably watching a really old tutorial
back when people didn't really know
solar fossil
dont know why cats still adds the mmd tabs, they seem pretty useless
devout scroll
they get hidden from the side bar now at least
and yeah, it's annoying when it keeps creating mmd materials
have to manually setup emissive or principled shader
spiral sigil
actually it's from january lol
This tutorial covers how to make models using already premade assets from the VRChat creator community. It covers how to put these assets together to create your own model.
Please note: I do not claim to be an expert. Everything in this tutorial has been shared to help newer members of the community who have no experience in 3D and wish to lear...
spiral sigil
any idea how to get the texture from her face to wrap around to the back of her head?
 red glade
 spiral sigil
how do i move this bitches eyes around so she's not crosseyed lmao


this one is even worse lol
spiral sigil
I know this is probably a stupid question but whats the diffrence between textures and materials?
harsh saddle
A texture is a 2D image that corresponds to points on the UV map and allows for things like colors, normals, roughness, etc. A material is a combination of textures (or maps) along with a shader which tells the game engines how all of those elements should be rendered. So textures + shader = material.
spiral sigil
ah so materials are just shaded textures? thank you
harsh saddle
Pretty much, shaders can do all sorts of stuff that is beyond me but in a very general sense.
tough plover
spiral sigil
ah so materials are just shaded textures? thank you
materials are essentially presets for how an object should be rendered. it contains info about its physical properties like color, roughness, metallic, and other stuff. you specify a shader on a material, which is the actual code that runs on the GPU that draws the object on the screen
 oak hatch
MFW making VR parts in CAD.
I'm tired of Blendo, perfect booleans LETS GOOO.

(this is an eye. Yes it's weird. Trust me, it only gets more cursed from here.)
quaint jasper
What makes blender booleans unreliable ?
quaint jasper

oak hatch
I'm used to solid modelling, in CAD. Might as well use my strengths
quaint jasper
Ever looked into HardOps ?
oak hatch
No? Wozzat
quaint jasper
addon specifically for hard surface modelling
makes the process of handling modifiers and booleans much more intuitive and easy
I think it's by far the most popular blender addon
 oak hatch
Ideally, I want my main body to eventually be mostly mechanically correct.
So using a combination of tools would be legit.
quaint jasper

oak hatch
Hopefully OielBot 2.0 will be able to get resin printed as an articulated figurine. That would be...hella cool
quaint jasper
Yeah I'm envious of people 3D printing their models, looks cool as fuck !
oak hatch
Same, tbh.
spiral sigil
how do I seperate my shoe texture map from my face texture map?
 rustic pier
Does anyone know when I merged the head and the body together the head suddently like flys up?

 ashen stag
rustic pier
Does anyone know when I merged the head and the body together the head suddently...
ashen stag
rustic pier
Does anyone know when I merged the head and the body together the head suddently...
Make sure to apply transforms (ctrl+a) before joining stuff
rustic pier
ashen stag
Make sure to apply transforms (ctrl+a) before joining stuff
Oo okay! Thanks <3
It still won't work lol </3
harsh saddle
Can you just select the head in edit mode and move it down?
quaint jasper
You shouldn't have to if the transforms are applied
harsh saddle
Yeah, it is weird that happens as applying transforms should treat the location/scale/rotation as being 0,0,0, or 1,1,1 in the case of scale but if that isn't working for whatever reason, then maybe moving the points in edit mode. will work better.
exotic obsidian
Be careful who you call ugly in middle school 😳
 quaint jasper
What a glow-up
 acoustic parrot
hey guys im trying to bring a model into vrchat but im having an issue, whenever i move the bones in edit mode, the mesh is rotated/moved in object mode
any ideas how to just rotate/move bones without affecting the mesh?
harsh saddle
Unrig the mesh? Generally you don't want to be editing the rig after it's bound to the mesh.
acoustic parrot
in my projects, moving bones doesnt move the mesh
but in this random blender project i found, it does
no idea why or what you mean by unrig, unless you mean delete weights
or, idk
unless theres a way to bind a mesh to a bone outside of weights like a constraint
harsh saddle
I would just delete the rig component entirely and start over if the rig isn't built properly.
acoustic parrot
its just the eyes not being vertical
harsh saddle
You might be able to get away with deleting the eye bones, deleting those vertex groups and adding in your own bones and weights.
acoustic parrot
that would probably work
the bones are attached to the eyes in some way other than weights
and i have no idea how
Black magic and sorcery
harsh saddle
I don't know what it could be other than weights or constraints. In either case, it should show up in the modifiers.
 dusk glade
i forgot to mark seems and sharps.... kill me.
 granite rock
I’m having abit of trouble , the character is clipping in to the floor , I’m using uniting but what is causing this , and how can I fix it ? Kinda stuck


 thin shadow
in blender 3.0, i can't find the option to turn the bones viewport display to wireframe octahedral while in object mode

this is after using the auto fix function in cats
harsh saddle
 thin shadow
harsh saddle
thin shadow
harsh saddle
doesn't work. feels like the setting could be somewhere else.


oh ok found it, it's in object properties, not armature properties

ok now i need to find out how to set it default to always view as wire, not texture
harsh saddle
You mean the model? I don't know if there's a way to change the default on that, you just have to go in and change it.
Object viewport display is in the object tab, armature display is in the armature tab
thin shadow
The purpose of defaulting it is to not have me change it on every avatar I import. So it will just to automate some repetitive steps.
So in conclusion:
-viewing bone on object mode-
i want it to be wire view -> object properties > viewport display display as wire
-viewing bone on bone edit and pose mode-
i want it to be solid view -> already in blender default setting
however, there's another problem though. The mat combiner is non functional. I guess i have to stay on 2.93.x for a little longer. I just want to experiment on 3.1.x
harsh saddle
The object properties viewport display doesn't affect bones, at least not in my version of Blender, maybe you've got something I don't. Solid and textured views are for models, not armatures.
 gritty veldt
Anyone know what could cause these strange shadows in the mesh? This is also visible in blender but I dunno how to fix it
 quaint jasper
gritty veldt
Anyone know what could cause these strange shadows in the mesh? This is also vis...
quaint jasper
gritty veldt
Anyone know what could cause these strange shadows in the mesh? This is also vis...
These are your normals, select the faces in edit mode and do Alt + N > Set normals from faces
gritty veldt
Oh cool! Thanks alot!
thorn gulch


 thin shadow
harsh saddle
The object properties viewport display doesn't affect bones, at least not in my ...
thin shadow
harsh saddle
The object properties viewport display doesn't affect bones, at least not in my ...
because the object properties changes depending on which object I select
harsh saddle
thin shadow
because the object properties changes depending on which object I select
Ah, I guess that is how it functions when they're octahedrons. I thought you wanted an actual wire, not a wireframe of an octahedron.
This

vs this

If you're using an actual wire in the armature visibility settings, it doesn't look any different so I was confused.
thin shadow
Terminology can be confusing
 ashen forge
Working on a buddy

 worldly pewter
can someone help put a avatar in vrchat? please i just want to put this one avatar and thats it
 surreal yoke
 spiral sigil
can anyone recommend some good making original objects tutorials on blender and some tips on textures? I have been mostly messing around with the sculpt tool but I want to try and make an original accessories for one of my avatars.
 sterile oracle
OK, got a pc now where should I start with making an avatar from scratch?