#3d-modeling
1 messages · Page 129 of 1
 calm goblet
that'd bring back the foreahead and make the hair look better
and you're usually better off making the mouth in a relaxed position so you can make the shapes around it more natural as well
with difficulty
gomme a bit to think of a good way to do it in that style
one way would be to use spiralled hair cards, but that'd eat up a shitload of polys
calm goblet
yeah bringing up the forehead does make it look a lot better
for the cheeks can you make them a little more red than brown? just a little more on the res side
and add a bit on the chin as well
this is what i was thinking for spiral cards, that you could then scatter over a central cone shape

 untold schooner
screw modifier 🤤
optimized way would be normal map, considering the thickness of the hair it wouldn’t even look that wrong if done right
calm goblet
untold schooner
optimized way would be normal map, considering the thickness of the hair it woul...
normal map would be the cheap way to do it, but then you'd have to manually paint in the hairiness
or it'd look like a lumpy turd
main reason i said cards scattered on a cone was cause the cone cuts out a lot of the polys and the cards would give you a good look without spending a week painting the hair
untold schooner
calm goblet
or it'd look like a lumpy turd
so give it some personality with modeled strands ontop
enough to complete the look but not too many to make it i optimized
unoptimized
calm goblet
polygons aren't the real performance issue anyway though
untold schooner
isn’t it the transparency on the hair cards
calm goblet
for hair that spiralled you wouldn't need transparency
you could just go for a really dense strand texture
having that and ending up at like 120k polys would probably use up less resources than someone's 30k polygon model using 5 materials
untold schooner
i mean technically it can be millions of polys as long as it’s not skinned
or animated idk how unity does it
calm goblet
well, the point is that polygons aren't the killer anymore
draw calls are the killer these days
untold schooner
so yeah just wait till you can use this tessellation and make the hair a height map https://youtu.be/DTqcPEhSHB8
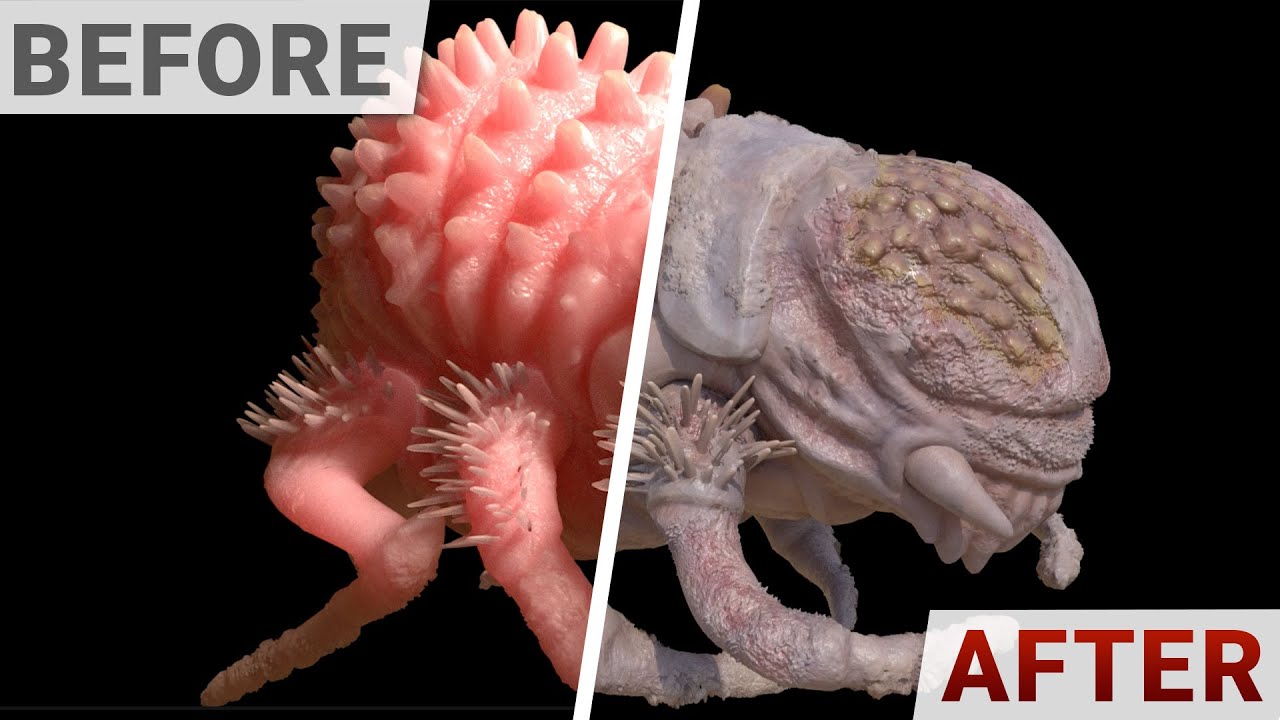
❤️ Check out Cohere and sign up for free today: https://cohere.ai/papers
📝 The paper "Tessellation-Free Displacement Mapping for Ray Tracing" is available here:
https://research.adobe.com/publication/tessellation-free-displacement-mapping-for-ray-tracing/
https://perso.telecom-paristech.fr/boubek/papers/TFDM/
📝 Our previous paper with the plan...
calm goblet
untold schooner
so yeah just wait till you can use this tessellation and make the hair a height ...
won't work on characters
just like nanite doesn't work on characters
what it'll mean is the same as nanite already means
 mossy harness
am working on a beowolf model so i can make a beowolf vrchat avatar. I dont even watch rwby, I just think skulldogs are neat


 calm goblet
saving a load of performance on environments, even massively detailed ones, means characters and creatures can be much more complex, mechanics and physics also have more room for complexity
mossy harness
oof didnt realize real conversation was happening XD sorry
untold schooner
calm goblet
saving a load of performance on environments, even massively detailed ones, mean...
yeah i saw the ue5 demo
 night trout
oof ouch
didnt realise this happened with my hand

 snow spoke
not even close to done but i envy anyone who makes realistic muscles well. things like abs are super hard to noobies like me lol, but im trying ! any tips or suggestions ill happily take, shown in subdivision for reference,
edit: i just looked back in this thread quite far and wth is up with everyone using sculpt lol does topology not matter to anyone 😛

 untold schooner
snow spoke
not even close to done but i envy anyone who makes realistic muscles well. thing...
untold schooner
snow spoke
not even close to done but i envy anyone who makes realistic muscles well. thing...
you can use the multi res modifier to sculpt in high detail while retaining the topology
or sculpt and retook 🥴
retop
snow spoke
untold schooner
you can use the multi res modifier to sculpt in high detail while retaining the ...
that tool that allows me to change the resolution on the fly? not too common with alot of terms i havent used 🥺
untold schooner
snow spoke
that tool that allows me to change the resolution on the fly? not too common wit...
yes. i usually block out a mesh and use the multires modifier to get a high poly to bake onto a low poly
all within the same modifier
snow spoke
so your just looking for like the sweet spot after your sculpt that it still retains your shape but it retops it for you
 snow spoke
no thats great, am i gonna have problems with this because my models only 1 mesh
or will it matter more later with clothes or hair ie seperate meshes
untold schooner
just separate the part you’re gonna sculpt on
 azure rain
you can always separate out the pieces for modeling convenience and then put them back together at the end
snow spoke
untold schooner
https://media.discordapp.net/attachments/566879420753641482/717007024998580265/h...
should i apply my subdivider before i do this
untold schooner
no
snow spoke
ok
untold schooner
because the modifier itself is subdivision+
azure rain
it's easier to control your modeling if your subdivide isn't burned onto the model
 sterile mantle
One message removed from a suspended account.
One message removed from a suspended account.
snow spoke
untold schooner
because the modifier itself is subdivision+
sorry i guess one more question, so if i use this method ill essentially never have to apply my subdivide like this will replace it but on a per mesh level ( the meshes i sepereate to reres, im just asking wont this make it super hard to reattach the meshes
i guess 2 questions
untold schooner
what i do is just duplicate it when i’m done and apply one at low level one at high level
how do you mean reattach? like join verts?
snow spoke
yes
 quaint jasper
sterile mantle
One message removed from a suspended account.
quaint jasper
sterile mantle
One message removed from a suspended account.
You got a portfolio anywhere ?
untold schooner
if you apply the low subdivision one to be the same level as the non sculpted on mesh then no
assuming they were initially connected
snow spoke
ah i see
snow spoke
untold schooner
assuming they were initially connected
thanks 🙂
snow spoke
untold schooner
if you apply the low subdivision one to be the same level as the non sculpted on...
i can already see part of this art is deciding where to seperate lol
untold schooner
well technically if you’re just gonna connect them again at the same subdivision there’s no need to separate
snow spoke
untold schooner
well technically if you’re just gonna connect them again at the same subdivision...
ok i def missed something then, can i just reres selected pieces ?
untold schooner
multires doesn’t take a vertex group when you multires it’s the entire mesh. if you intend to subdivide the separated non sculpted on part of the mesh to the same level as the low level sculpt of the other mesh you might as well not separate them and just not sculpt the second half
snow spoke
untold schooner
multires doesn’t take a vertex group when you multires it’s the entire mesh. if ...
my mirror mod line seems very sus, should i be worried
 snow spoke
untold schooner
multires doesn’t take a vertex group when you multires it’s the entire mesh. if ...
snow spoke
untold schooner
multires doesn’t take a vertex group when you multires it’s the entire mesh. if ...
sorry fopr bombarding you im just tryna figure this multires thing out ive watched a couple tutorials cause im more of a visual learner, but theres def something im missing
untold schooner
multires doesn’t support mirror
snow spoke
untold schooner
multires doesn’t support mirror
ah so i need to apply that first
?
but then how the frik do i get symmetry... confused noises
untold schooner
you use the sculpt symmetry
 craggy lintel
Ugh
:|
I’m beginning to hate 3D modeling community
people are such assholes
tbh that’s all communities though
quaint jasper

 desert crown
Is there a way to make shape keys with eye textures like this? i did a google search and end up with uv mapping, but that doesn't work with shape keys. Is there an alternative?
 quaint jasper
desert crown
Is there a way to make shape keys with eye textures like this? i did a google se...
quaint jasper
desert crown
Is there a way to make shape keys with eye textures like this? i did a google se...
If it's a super low poly model, I assume that it would require a shapekey to bring a flat mesh in front of the face with that texture
desert crown
yeah its super low, below 5k poly. That suggestion was some other alternative but i want to avoid using multi eye mesh cuz then when doing that, both mesh overlaps.
quaint jasper
Well they shouldn't overlap perfectly, there should be a super tiny offset to avoid zfighting
desert crown
well kinda. Does blender have instant texture swap? making it seems like the mesh doesn't leave any where, but rather swap places instantly?
quaint jasper
You either have to have a specific material for the eyes that is animated with an offset, to change the texture, or do that with a shapekey, I'm not aware of any method
desert crown
hm....
i might end up with animating offset, but i guess i'll explore the other ones first
craggy lintel
they probably have dinner alone
 devout scroll
desert crown
i might end up with animating offset, but i guess i'll explore the other ones fi...
devout scroll
desert crown
i might end up with animating offset, but i guess i'll explore the other ones fi...
If you want to animate offset you'll need people to enable your animations in vrchat
But in that case you can use a decal and animate the offset of the decal
That way you won't need any extra polygons in front and will ensure no zfighting
desert crown
well damn that sucks, i want it to be on by default since this model is going to be quest compatible and i want it as a fallback
devout scroll
I guess if you don't need transparency
Then you probably won't have any issues using blendshapes
desert crown
i want to avoid transparency since its gonna be a quest avatar
if it was just pc focus, i would've done it any other way to be honest
calm goblet
craggy lintel
they probably have dinner alone
you make solo dinner sound like a bad thing lol
 sinful mesa
hey uh what does this mean and how do i fix it

neither did anythin
or at least did what I hoped
 tough plover
alt + N > reset vectors
sinful mesa
thank you
 plain garden
does anybody know why this would be happening to this model on the other arm and wrist it dosent have this problem

 quaint jasper
plain garden
does anybody know why this would be happening to this model on the other arm and...
quaint jasper
plain garden
does anybody know why this would be happening to this model on the other arm and...
Probably had a twist bone that didn't get dissolved correctly
plain garden
quaint jasper
Probably had a twist bone that didn't get dissolved correctly
Thank you so much that was exactly that
quaint jasper

plain garden
I also have a model that has two essentially lightsabers attached to his hands i cant find the meshes for them in blender how would I go about getting rid of them I cant seem them in the layout but once i put the character in unity they show up
 spiral sigil
any tips for the hair particles on the legs im new to blender
 spiral sigil
im wondering if this is the right channel for my problem but i need some help im not sure if its a simple fix but can i get someone to take off the image that is on the back of this avatar?

ill pay -_-
or direct me to some type of help
quaint jasper
spiral sigil
or direct me to some type of help
Edit the texture in paint
spiral sigil
quaint jasper
Edit the texture in paint
im a total newbie, is there a video i could watch?
 cinder cradle
spiral sigil
im a total newbie, is there a video i could watch?
cinder cradle
spiral sigil
im a total newbie, is there a video i could watch?
if you have texture file you can edit it in photoshop or something
untold schooner
spiral sigil
im wondering if this is the right channel for my problem but i need some help im...
yeah no problem

 prime zenith
Does anybody have any good solution to the Unity bug, when you material swap Material Slot 2 it material swaps something else ?
I cannot seem to be able to rearrange material slots manually at all
devout scroll
Not sure, search there, it comes up once in a while but i'm not sure if there's an easy solution
spiral sigil
untold schooner
yeah no problem
that took you hours to think about that joke lol
found a way to do it now anyway
untold schooner
how do you know that that simple image edit didn't simply take hours
devout scroll
spiral sigil
any tips for the hair particles on the legs im new to blender
look up hair cards
 proud sundial
new to modeling and using a quad sphere, it has artifacts in smooth shading. does it look better flat shaded, and if not, how would oi go about fixing the artifacts?

 night trout
ngl
the more i look at my model
the more proud of it i am
 cinder cradle
night trout
ngl
the more i look at my model
the more proud of it i am
cinder cradle
night trout
ngl
the more i look at my model
the more proud of it i am
that's what 3d is about
night trout
just gotta figure out how to get started with my boi's clothing
cinder cradle
remember when making clothing to already have idea on your mind
night trout
oh trust me i do
its more just me not knowing how to start clothing lmao
quaint jasper
proud sundial
new to modeling and using a quad sphere, it has artifacts in smooth shading. doe...
In the side menu, where your shapekeys are, there is a submenu for normals, you need to enable that andplqy with the value slider
Or you can mark those edges as sharp with Ctrl + E
Can also be done automatically with "select sharp edges" in edit mode
proud sundial
ill give that a look thanks. im learnin as i go haha
quaint jasper
 midnight valley
does anyone know how to create good shape keys from xps rigs? the model has a bunch of bone groups but i cant make them look good no matter how hard i try
this is what im talking about. there is enough bone groups to make any facial animation but i guess im moving them wrong because they all turn out terrible

 thin shadow
midnight valley
does anyone know how to create good shape keys from xps rigs? the model has a bu...
thin shadow
midnight valley
does anyone know how to create good shape keys from xps rigs? the model has a bu...
enter pose mode, pose the bone, then click pose to shape key
midnight valley
All the bones move in a group. I figure since it’s already like that there is a way to create easy shape keys but no. For example when I try to make a blink shape key it extends far too forward
midnight valley
thin shadow
enter pose mode, pose the bone, then click pose to shape key
I know how to create shape keys, thank you though. I was just wondering if anyone here who has more experience knows how to work bone groups in pose mode well. My attempts at creating shape keys look abysmal so far lol
thin shadow
midnight valley
I know how to create shape keys, thank you though. I was just wondering if anyon...
Last time when i was working on that kind of model, I use the method of hiding and unhiding the bones for better visual
 languid fog
Any tips of how can i make this blood look better?

 storm pike
 burnt lake


 solar fossil
ey, that looks great
craggy lintel
Anyone have good tips on texturing jeans
I have been using procedurals but not a fan of how they’re looking rn
I’m thinking there’s a specific UV style I need to do
Rn my pants are UV’d not in a single piece (ofc)
so directions on procedural are in diff
quaint jasper
Either make your islands face the same direction, or use triplanar ?
craggy lintel
I’m going to try both one at a time
night trout
decided to add some very basic tongue shapekeys

and of course i had to use the new shapekeys to make a blep

 clear geyser
I love him
 winter palm
Hello. Any idea on whats going on with the middle line? its not marked sharp and cant smooth it out
 snow spoke
winter palm
Hello. Any idea on whats going on with the middle line? its not marked sharp and...
snow spoke
winter palm
Hello. Any idea on whats going on with the middle line? its not marked sharp and...
Make sure clipping is turned on on your mirror and apply it before you apply your subdivision
 potent glade
So what's a reliable method for consistent scale referencing? Does everyone use default Blender cubes or is there a better method?
azure rain
potent glade
So what's a reliable method for consistent scale referencing? Does everyone use ...
the blender cube is 2 meters tall
potent glade
ok
 glacial perch
azure rain
the blender cube is 2 meters tall
glacial perch
azure rain
the blender cube is 2 meters tall
Thx
Thats actualy really helpful
Means im now 1.4m tall as i measured in cubes
 viral umbra
Question on UV unwrapping I posted here https://blender.stackexchange.com/questions/254378/unwrap-pack-uv-to-bounded-area-of-texture-space that you guys might have an idea on
The end goal is to have textures which can be symmetrically edited in an image editor in case the user does not own substance painter

Blender Stack Exchange
I have a mesh which I am going to mirror but I do not want the UVs to be stacked after. I need the UV to be symetrical around the x axis of the texture space so it can be textured asymetrically if
calm goblet
potent glade
So what's a reliable method for consistent scale referencing? Does everyone use ...
for an environment/scene? i use a human
calm goblet
viral umbra
Question on UV unwrapping I posted here https://blender.stackexchange.com/questi...
you might be able to do it with uv packmaster
you can definitely do it with rizom, but if someone can't/won't buy a proper texturing program they're unlikely to buy a proper UVing program either
i'm guessing topological symmetry is one of the many things blender texturing can't handle?
viral umbra
Thanks, I'll look that up
Yeah blender handles UV symmetry by stacking the mirrored islands. For 90% of use cases that is probably fine, but makes it super annoying for this where you don't want to force end users to make the texture symmetrical
Ah looks like uv packmaster has exactly what I need

+1 to Tieguaili
calm goblet
viral umbra
Thanks, I'll look that up
Yeah blender handles UV symmetry by stacking the mirro...
i meant topological symmetry for painting without needing mirrored or stacked UVs, 3d coat does it that way
viral umbra
Substance painter also does that, but since it is paid a lot of people don't have it
calm goblet
yeah i know a lot of people are either kids, or they're under the impression that paying for hobbies isn't a thing lol
viral umbra
Wouldn't say that necessarily, if you are just looking to once off retexture an avatar base you like, its a relatively large investment. So making symmetrical UVs so they can use the likes of gimp for basic recolours and decals is the way to go
calm goblet
true, or getting someone to do it for them
if it's a basic recolour that doesn't take much time i'm sure plenty of people would do it free in a few mins lol
viral umbra
Either way, the more accessible assets are, the better imo 🙂 Thanks for the tip on uvpackmaster again, will save me a bunch of time in the future
calm goblet
for my own assets i'm more interested in maximizing the UV space than make it easy for people to butcher them lol
people that want to mess with things are gonna find a way to do it anyway lol
quaint jasper
If you're planning to sell then definitely have to make it easy to edit rather than optimized
calm goblet
quaint jasper
If you're planning to sell then definitely have to make it easy to edit rather t...
unless you're going for a style that's inherantly not easy to just attack with a fill bucket in gimp
quaint jasper
That probably covers the majority of edits yeah
calm goblet
it covers the edits that people are gonna try without knowing enough about 3d to work with a more optimized model
prime zenith
Guys, how do I shade smooth these extruded faces so it looks the same as the rest of the mesh ?
 calm goblet
is it something that came with textures, that you now modified without altering the UVs and fixing the textures?
calm goblet
try recalculating normals
prime zenith
No change
calm goblet
mark sharps on the edges and use autosmooth?
cinder cradle
prime zenith
No change
in edit mode ctr+v and smooth vertices
prime zenith
autosmooth you made "Shade Smooth" ?
prime zenith
cinder cradle
in edit mode ctr+v and smooth vertices
That does not help
cinder cradle
prime zenith
That does not help
try doing f3 and merge by distance
prime zenith
not much change

 unborn acorn
prime zenith
not much change
unborn acorn
prime zenith
not much change
Probably something to do with custom vertex data, try deleting it but make a copy first to test it
prime zenith
If I apply subdivision modifier it fixes it, but I don't want to double the amount of vertexes
unborn acorn
Strange, no idea then
prime zenith
unborn acorn
Probably something to do with custom vertex data, try deleting it but make a cop...
I am not deleting my weight painted weights if you mean this
unborn acorn
prime zenith
I am not deleting my weight painted weights if you mean this
Nah, vertex data is whats used to make custom shading like you see in guilty gear
calm goblet
prime zenith
If I apply subdivision modifier it fixes it, but I don't want to double the amou...
how about applying a subdiv then removing the extra verts?
prime zenith
calm goblet
how about applying a subdiv then removing the extra verts?
By hand ?
calm goblet
yup
calm goblet
well you've been asking about this problem for at least a couple days, you could've already tested the manual cleanup method by now
prime zenith
I did not spend time on this for days, I just came back to this because I have time
And I like to learn more time efficient methods when possible
calm goblet
have you tried a weighted normals modifier?
cinder cradle
prime zenith
And I like to learn more time efficient methods when possible
what about mesh-weights-smooth
prime zenith
Weighted normals modifier works
calm goblet
there you go, use weighted normals
prime zenith
Cheers
calm goblet
if that hadn't worked though, you'd be down to manual cleanup 😛
prime zenith
Yeah fair, we did try like 6 things
cinder cradle
one option would work for sure manual clean up is like last thing
calm goblet
for me i only try 2 things before manually fixing
recalculate normals, merge by distance, and weighted normals modifier
3 things
calm goblet
if i have an obvious normals issue and one of those 3 things doesn't fix it then manually cleaning is gonna be the fastest fix
prime zenith
I mean I can imagine Whire is like speedruning all those 10 options in like 45 seconds
cinder cradle
if you like your methods than you are fine i won't force anything on you
calm goblet
you could tell me what the other 7 things are 😛
cinder cradle
i have them inside text file i'm not on pc right now
i have more like muscle memory now
calm goblet
fair enough
prime zenith
Yeah bro this is not a competition
calm goblet
who said anything about competition? i wanna know what 7 things i don't know about
prime zenith
Chill, your messages sometimes come a bit smug
 exotic obsidian
Work in Progress of a Mini Warden (Minecraft)

 tight quartz
👀
 fallen bluff
as im working on the textures for this model im seeing and thinking of ways i could have like modeled it a bit better here and there, and im like fighting the urge to like go back and redo big chunks of the model, lol
like, for the most part they're parts i haven't textured yet, so its not like i'd lose texturing progress, but it would add time on the project from making new models and organizing the UVs again 
 blazing belfry
does anyone do custom avater for people
untold schooner
yeah im sure some people do it..
tough plover
prime zenith
Guys, how do I shade smooth these extruded faces so it looks the same as the res...
alt + N > Reset vectors
 ruby thunder
Someone knows who I can ask for an avatar to do it to me is that I don't know how to make avatars for vr chat


 quaint jasper
They look amazing !
 steady zealot
Thanks!
 spice pewter

 somber garden
Does someone know if a Blender v 3.0.01 model work in unity 2019.4.31?
spiral sigil
somber garden
Does someone know if a Blender v 3.0.01 model work in unity 2019.4.31?
Doesn't matter what the blender version is
Doesn't even have to be from blender
Just has to be one of them model formats Unity is okay with for the most part
somber garden
thx
calm goblet
prime zenith
Chill, your messages sometimes come a bit smug
well that's the thing about just words on a screen, you say something that should be taken completely at face value and cause it's much harder to actually detect the tone people go projecting whatever shit they want onto it
 fallow fable
spiral sigil
fallow fable
spiral sigil
Oh wow Crit your still going at it I se
Must have a real collection by now
An army
 kindred plover
Halp. Halp me. Someone. Anyone. Before I destroy my laptop?
cinder cradle
kindred plover
Halp. Halp me. Someone. Anyone. Before I destroy my laptop?
you need to say with what ..
just saying help me is not the way here.
kindred plover
That was just my way of saying "hello I'm having issues, is anyone available to assist me?" but you know, with style.
I marked all my delicious seems and when I went to unwrap them there is a spot that refuses to seperate. I tried a bunch of stuff, last of which was to completely deleting the section and rebuilding it out of frustration but it still is this
Oh oop
One sec

It's a shoulder seam, the one that circles the arm and seperates it from the torso. I merged vertices, I deleted faces /vertices /edges looking for the problem. I removed the whole seam and re-marked it
(And it looks all poopy now because I literally deleted the whole chunk and reconnected it then remarked it before giving up and seeking help)
quaint jasper
kindred plover
I marked all my delicious seems and when I went to unwrap them there is a spot t...
Make sure there's no hidden geometry (Alt + H), and that everything is actually marked as a seam, I can't think of anything else that would result in that
You can also Press U to reset the UVMap, save, and restart blender to attempt another unwrap
kindred plover
I definitely did not save this mess lol. I did look for hidden stuff with all my maximum effort, but I'll try to reset the UV map next, thank you!
I even tried remarking the seam at a lower place. I am going to take an ice cream break instead of throwing this laptop first, but if I figure it out I'll share the mystery
 uncut imp
Definitly sounds like theirs some weird geo in there that's making that. if you select points and go merge by distance does it merge anything? you might have multiple overlapping points on the same place there.
kindred plover
I did try, and nothing merged. This is what it looked like originally, a tangled mess

(Oop. My phone can't send its actual pictures for some reason and I'm not about to make anyone download anything) so I untangled it, right? And find these prime suspects


But merging didn't do anything, and neither did completely destroying it and reconnecting (the first picture I sent. It actually looks like it made it worse maybe lol)
untold schooner
steady zealot
substance smart material going hard
looks great
especially the bow flex 🥴
kindred plover
What about my shoulder? Does it look great?
 untold schooner
an interesting way of showcasing it but apart from those meaningless tris in the center yeah
 sterile creek
 devout scroll
Wrong channel, ask in#user-support-old
 molten zephyr
makin a dude
 spiral sigil
that is actually kida epic lookin
molten zephyr
thanks haha
 unborn ingot
Does anyone know to make a rexonium avatar, like where can I get a free base for rexonium avatar, pls I need help
I do have blender and unity
calm goblet
try google
unborn ingot
I did I couldn't find
tough plover
unborn ingot
Does anyone know to make a rexonium avatar, like where can I get a free base for...
the Rex model is not free, you can find it on Gumroad
kindred plover
Lol I just made those so I could identify what was happening to them in the unwrapping. Which I'm about to put my brain back on figuring out. Pray for my sanity.
Also that's a super cool looking dude.
craggy lintel
Rex = most common avatar you see.. LOL
 minor acorn
Very true lol
Got some questions though, I know it's most likely a no, but is there anything you can use without a pc to make avatars? Like something html or something? I know of a few web 3d modelers, but I know you need unity for making avatars, any suggestions? I have a chromebook but I can't install on it and well..its a chromebook lol
azure rain
uploading with unity is the only option for the avatars
azure rain
doing some Googling it appears folks have got blender and Unity running on a Chromebook but that requires doing some playing around with developer settings
minor acorn
Yeah, I wouldn't be able to do that with mine sadly
I feel like maybe I could figure some janky stuff out with using a cloud computer service lol
night trout
fuck me
my brain legit doesnt know how to do clothing for my model
minor acorn
Lol I felt that
somber garden
Does someone know how do you wrap around the face with a mesh? It's a disaster for me 💀

 foggy granite
somber garden
Does someone know how do you wrap around the face with a mesh? It's a disaster f...
foggy granite
somber garden
Does someone know how do you wrap around the face with a mesh? It's a disaster f...
The shrink wrap modifier and face snap should do the job
Then just work from there
foggy granite
Give me a second I take a screenshot for the face snap
But for shrink wrap it just in the modifier tab
 somber garden
Do i have to be in layout mode?
I'm in modeling mode
@foggy granite
sorry for ping
foggy granite
the ping find you have to be in edit mode for it work thats the mode i was in when i took the screenshot

 foggy granite
odd
foggy granite
3.0.1

 somber garden
weird
maybe because we're on different operating systems
i'm on mac and u on windows
foggy granite
probably
somber garden
ohhhh
how am i so stupid
i have 2 screens
well
sides
the toolbar can't fit all in one side
so it cut off
foggy granite
well that funny
foggy granite
well i hope the face snap helps
somber garden
It's going through the head
uncut imp
somber garden
It's going through the head
You dont need to click the magnet to use face snap, you just hold shift while you move the thing to enable snapping while your holding shift, if you dont want it always enabled.
devout scroll
It's control yeah, shift makes movements more precise (lower sensitivity basically)
holding ctrl basically just swaps whatever your snapping is set to. if it's on holding ctrl will keep it off while you keep holding, and if it's off it will be on
fallen bluff
blender is this close to being my villain origin story, why did an object in my scene just seemingly randomly revert an earlier state from before i cleaned up the geometry on it, i managed to get that work back by going back to an earlier save but what the hell???
spiral sigil
U can always make duplicates of objects ur working on and periodically send them to collections as save points
Make sure to colorcode
devout scroll
and also blender autosaves every two minutes to backup
uncut imp
spiral sigil
It's control key for me I don't remember shift working too
maybe im just misremebering the key, its kinda muscle memory at this point XD
 wise mirage
The arms will not join the mesh for some reason. I am new to blender, so go easy on me. 😅

 lunar steeple
Are you able to create avatars for quest 2? I really want to start creating avatars. I do have a PC if that's required
devout scroll
Yeah it's the same process as for pc just that the requirements are more strict
Because the quest is less performant
lunar steeple
Ah alrighty thx
thin shadow
There are many ways of creation but only 1 way of uploading it
lunar steeple
Good to know
spiral sigil
uncut imp
maybe im just misremebering the key, its kinda muscle memory at this point XD
i get you I dont remember some keys
so many it seems impossible to remember
spiral sigil
i dont see why youd want to export your project in multiple files seems like a hassle unless there is some select special reason
calm goblet
i can't think of why to export as multiple files either, FBX lets you keep all the information you'd need including separate objects, mateirals, armatures, all that


 upper canyon
Noice
fallen bluff
re doing this room may have added more stress and time on this project, but im so happy with how its looking now
upper canyon
If it looks good, it was worth it.
 compact halo
hey uh can someone help me optimise my model for quest?
ive been trying for the past few days and im getting nowhere
I still want to keep my clothing toggles though
also for some reson my shape keys arent porting over
spiral sigil
compact halo
hey uh can someone help me optimise my model for quest?
What Quest Performance Rating are you aiming to get your model to?
spiral sigil
lmao yea i dont imagine it being any less if they want to keep all their clothing toggles since that adds polygons/triangles
upper canyon
My avatar is, but I'm working on an empty fallback version
I've excused myself to so many quest users. Most of them don't care when they unhide my avatar (Mainly because most mesh renderers are disabled 90% of the time, and the poly count is 19 947)
it's not super optimised, but at least I'm not the one making there quests turn into spaceships
spiral sigil
Id reccomend u choose like one clothing or costume and retopo it
upper canyon
nah I have other plans, thinking of splitting all my things up
spiral sigil
sounds like you decimated which is far quicker to do but also far shittier than Retopo
cinder cradle
spiral sigil
sounds like you decimated which is far quicker to do but also far shittier than ...
yeah retopo is good but takes time
compact halo
spiral sigil
What Quest Performance Rating are you aiming to get your model to?
Atleast good like just 8000 polygons
upper canyon
The evolution of my avatar in performance rank:
PC: 


Quest: 
It's funny because when you think about it, this just shows the contrast between pc and quest
spiral sigil
compact halo
Atleast good like just 8000 polygons
yea you are gonna have to manual retopo unless your model is already low geometry
decimating to that will get your medel bending like a broken straw
compact halo
It was somewhere around 12000
compact halo
The original model after I did some manual decimation
spiral sigil
edge loop dissolving? thats fine yea
calm goblet
compact halo
The original model after I did some manual decimation
you shouldn't call manual cleanup decimation, decimation is never a good option for a character model
 ashen stag
upper canyon
The evolution of my avatar in performance rank:
PC: <:vrcPerfGood:60844662...
ashen stag
upper canyon
The evolution of my avatar in performance rank:
PC: <:vrcPerfGood:60844662...
Why are you going in the wrong direction 😭
spice pewter

 rain fjord
can texture seems be painted out in Zbrush and Mudbox like they can in Substance Painter? i've been looking for tutorials but i can only find one for Substance
 gloomy pawn
More of a general question but I could use a hand
Provided all these textures for a project. Any idea what "OM" is an acronym for?

Not sure what it's meant to be
 gloomy pawn
That's what I was thinking? It doesn't fit anywhere on a bsdf though
ah wait i see now. it's not meant to be part of the material it's an external render pass. essentially unused for this scenario
uncut imp
gloomy pawn
That's what I was thinking? It doesn't fit anywhere on a bsdf though
That's intended, blender doesnt really have an ambient light to occlude and when rendering in cycles it effectivly calculates it
but would be for putting into your material into vrc to simulate it n make stuff look nicer 😄
uncut imp
Indeed it does
gloomy pawn
Considering though it's gonna end up on a vrc model, i'll just ignore it
spiral sigil
Is it bad to have a bunch of maps on your materials
Does that stack up in vram quick
Yknow having all those textures
uncut imp
spiral sigil
Does that stack up in vram quick
yea it can, but you can lower the resoltion on all the less important textures in your materials to save on that
calm goblet
rain fjord
can texture seems be painted out in Zbrush and Mudbox like they can in Substance...
only if you convert to polypaint i think
at least for zbrush
why not just texture in substance though?
spiral sigil
where is the video to make your own avatar from scratch
mention me when you see this
rain fjord
calm goblet
why not just texture in substance though?
can't afford it
rain fjord
@calm goblet quixel has that feature too? is it just as good?
calm goblet
it's not bad, the painting isn't as fluid as something like 3d coat but it isn't terrible
rain fjord
calm goblet
it's not bad, the painting isn't as fluid as something like 3d coat but it isn't...
fluid?
calm goblet
quick and responsive to your pen
like 3d coat is just like painting a miniature
quixel's brush engine isn't that good
rain fjord
k
calm goblet
it works though
and the materials and generators are solid
kinda hilarious that you can afford zbrush/mudbox but not substance though 😛
rain fjord
calm goblet
kinda hilarious that you can afford zbrush/mudbox but not substance though 😛
i was using the free trial but it ran out, thought about using zbrush's free trial
calm goblet
ahh
untold schooner
student trial 😈
devout scroll
yeah just get a perpetual student license
spiral sigil
idk might aswell post this

 brisk maple
@upper canyon https://thecum.zone/ZW0O.webp I see
 upper canyon
Yep, that's what it does constantly
brisk maple
fix model fixed it up though
upper canyon
I really need to get it working in blender so I can modify that damned plug on the back for quest
i've heard enough dick jokes
brisk maple
aight so merging mesh was easy, I've lost the textures but thats probably because they're external and linux is odd
hardest part would be weightpainting the eyes again, but that's fairly simple since they're all not attached to the main mesh
upper canyon
Alright, seems easy enough for me
my issue was just getting it imported and exported, the rest could easily be fixed by asking advice or tutorials
brisk maple

just gotta set that in export settings and the bones/model will be orientated right
and oh boy opening unity editor drunk was a bad idea, cleaning this mess up is gonna be fun
rain fjord
devout scroll
yeah just get a perpetual student license
how?, they'll just accept anything you enter in?
devout scroll
rain fjord
how?, they'll just accept anything you enter in?
pretty much
rain fjord
devout scroll
pretty much
ok well what small amount of effort should i still put in?
devout scroll
I'd still put in correct details, it's the student id picture that doesn't matter much
 frosty sedge
Yo i search someone ! I have a 3D modèle but i want to have im on my quest 2 but i dont know how to make this avatar for quest 2 and i can't post im... Someone can help me?
rain fjord
devout scroll
I'd still put in correct details, it's the student id picture that doesn't matte...
correct details? i'm not in school anymore
snow spoke
if I want a model that uses the emote menu to change clothes, do I make the clothes in blender, separate them ( like make a shirt for my avi, separate it to its own blend file ) and upload them as thier own file to unity
spiral sigil
snow spoke
if I want a model that uses the emote menu to change clothes, do I make the clot...
why would you need to seperate the blend files
when you export your blender project (fbx) into unity all the meshs are seperate gameobjects so why bother the trouble
untold schooner
devout scroll
I doubt it's checked anyway
i put in school of uganda and a picture of a gnome as the id
its automated
and now that they’re owned by adobe it’s morally correct to do this
devout scroll
true
 dry rose
Hello, out of curiosity it seems my button for cloth physics dosen't do anything, and no way to constraint it via the pop up.
Help?
snow spoke
cinder cradle
having all in one blender project is better
So if I wanted multiple styles of shirts would I just hide the last shirt I made and make the new one right over it
cinder cradle
snow spoke
So if I wanted multiple styles of shirts would I just hide the last shirt I made...
make it as toggle
snow spoke
spiral sigil
when you export your blender project (fbx) into unity all the meshs are seperate...
You may also be able to answer this ^
cinder cradle
where you hide one and show another
snow spoke
cinder cradle
make it as toggle
In blender ?
cinder cradle
no unity
snow spoke
But thats what I'm asking how do I get them all in there, where should they be placed with my model if they are in the same file? All right on the skin and you toggle them individually in unity ?
Like should the shirts be " stacked" in blender
spiral sigil
They would be stacked yes but that's why you only have one active at a time
cinder cradle
yeah
snow spoke
Okay thanks yall so much
spiral sigil
The toggle would work that out
cinder cradle
you will have default animation
that shows one shirt
played on beggining of avatar
in every instance
i'm bad at explaining sdk3 sorry hehe
snow spoke
spiral sigil
The toggle would work that out
That's kinda what I figured I just didn't wanna waste a bunch of time building stuff I didn't need. And yes, default set to one then the toggles turn that off and apply another
snow spoke
cinder cradle
i'm bad at explaining sdk3 sorry hehe
You did great :) ty so much !
spiral sigil
snow spoke
That's kinda what I figured I just didn't wanna waste a bunch of time building s...
I'd make an INT var and then your toggles can set the values to 1 2 3 and 4
One number for each shirt
Or u could do a Bool var for each shirt
 pearl goblet
so ive been trying to flatten this hoodie but it seems everything i do makes it end up distorted, is there a better way to do this that idk abt?

and i mean completely flatten so its up against the body
cinder cradle
try sculpting it
pearl goblet
i have
cinder cradle
there is no really better way
you could try moving edges etc but that will take more time
 jovial turret
shrinkwrap modifier. assign vertices that you want to move to a vertex group and use that vertex group in the modifier so it only moves those
pearl goblet
you got a video i can watch ?
jovial turret
I do not sadly.
pearl goblet
damn
hmmm
maybe if your able to you could show what you mean and send it
like step by step or smth
cinder cradle
pearl goblet
like step by step or smth
dk if that will be better for you but it's good tutorial on it https://www.youtube.com/watch?v=QDM3UiNm7GM&t=524s&ab_channel=GENVFX

I love Blender...
Yes, I know, broken record, but I do. And some of the things that have been part of it for ages have most recently been adopted by major production software. Shrinkwrap in Maya is relatively new, but where did it get the idea from? I wonder...
Anyway, here is a short tutorial about using Shrinkwrap in Blender 2.93 to create...
pearl goblet
alright thanks
 dusky trout
Are there services out there that can make custom avatars for you?
(I don't have the time or patience to learn but if there are people out there that can do it even if it's at a price, I'd be interested in that)
 willow timber
fiver i guess could be your solution but i personally make my own avatars but with fiver you would just pay a person
spiral sigil
dusky trout
(I don't have the time or patience to learn but if there are people out there th...
NO NO don't do fiver there is a discord server that generally has more reputable people in it
#community-servers-old it's called VRC Traders

 neat viper
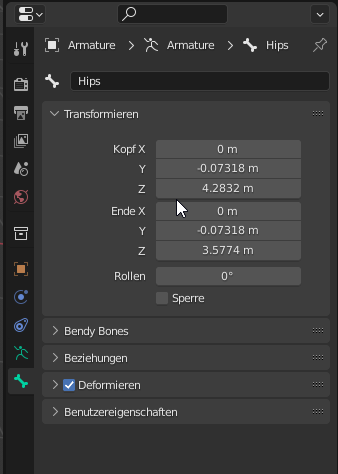
ah, you're in the object panel (edit for the future - I smoothbrained, there isn't a bone rotation menu in edit mode, skip down to the non-strikethrough text)
Switch to the bone panel lower down, it'll have a green bone icon

 neat viper
that's..odd
there should be rotation options there lol
welp alternatively, grab the hip bone and hold ctrl to snap turn, then rotate it 180 degrees to be facing up. If it's connected, you'll have to disconnect it first in the Relations tab, in the bone menu
 crisp barn
uh
neat viper
Select the bone above it and go to the Bone tab, go down to Relations, and click the X next to the hip's name:

Grab the hip bone and flip it as noted above, then select the bone above it, and set it's parent back to the hip
You can search at the top of that list, or scroll through it to find the hip bone c:
neat viper
I mean the bone physically above it, i.e in the spine
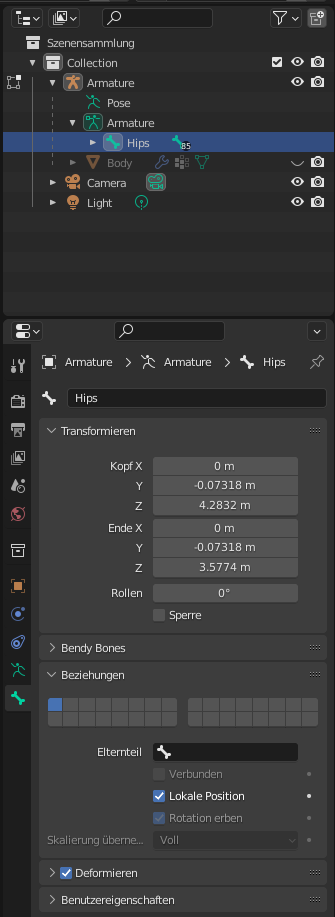 neat viper
Click the bone, and switch to the rotation tool at the top-left

alternatively, press r
crisp barn
i think i got it now
neat viper
cool! Make sure to set the spine's parent to be the hip again
When you're ready to export the avatar, go back to Object mode, select both your avatar's mesh(es) and it's armature, go to File > Export and click FBX
Limit it to the selected objects as well, otherwise you'll have the light and camera in the export too
crisp barn
@neat viperthere are now way more bones
like i have 70 on old version and 106 on new
but it actually worked
neat viper
not sure what'd cause that, make sure your old armature isn't still in the project maybe?
glad to hear it worked though! o:
crisp barn
neat viper
not sure what'd cause that, make sure your old armature isn't still in the proje...
there was only one armature
oh nvm
its objects
snow spoke
some how disconnected all my meshes from my armature, i heard there was a way to easily fix this, some apply to empty groups thing i just cant figure it out though, everything is still named properly
 sour sorrel
anyone know any good plugins for avatar optimization in blender
neat viper
CATS mainly, though I'd recommend looking into edge loop dissolving, and atlassing. CATS can do automatic atlassing, but manual atlassing gives you a lot more control over the process, and can produce better-looking results. Edge loop dissolving is a way to reduce polygon counts, and I'd highly recommend it over decimating. Decimation destroys your topology, and it's shotgun-blasted to the entire avatar - edge loop dissolving gives you a lot more control, doesn't destroy your topology, and if you do it well you might not notice that polygons have been removed
Here's some guides on atlassing and baking, respectively:
https://web.archive.org/web/20211102075907/https://vrcat.club/threads/kattsunes-guide-to-a-manual-texture-atlas-in-blender-2-8.3359/
https://www.youtube.com/watch?v=9airvjDaVh4
(helpful if the above guide doesn't produce good results, or if it doesn't bake all materials. Specifying the UVMap to use is vv important)
snow spoke
i wanna punch topology in the face. that is all
 gusty shard
ty for vids on atlasing, I'll have to see if I can do that in maya or if I gotta pick up blender just for that cx
spiral sigil
gusty shard
ty for vids on atlasing, I'll have to see if I can do that in maya or if I gotta...
you should be able to do it in maya as long as it can manipulate UVs and you can use photoshop to combine textures into single images
cuz its just basically putting a bunch of textures on big image and then adjusting the UVs to the new image
so the UVs line up wit the textures they used to be alligned with, but now on that one single atlas
cinder cradle
yeah cats can do that for you but it doesn't consider if you want one texture to have more details or not.
so manually doing it is better way
calm goblet
sour sorrel
anyone know any good plugins for avatar optimization in blender
do it manually, you'll get better results
cats just decimates your model to reduce polycount, which gives you shit results, you have no control over how it re-does your textures and UVs so your texel density is all fucked, there's no good reason to not either learn how to do the stuff yourself or find someone to do it for you
 young vault
When you do material combine in cats and suddenly your white eye texture is 10x bigger than before
calm goblet
young vault
When you do material combine in cats and suddenly your *white* eye texture is 10...
eyes have 60% of your used texture space, everything else has 40%, perfect
young vault
calm goblet
eyes have 60% of your used texture space, everything else has 40%, perfect
It is truly the ideal texture layout.
calm goblet
although i do think it's unwise for people to try always putting everything on a single UV map
absolutely nothing wrong with using up to 3 if you have enough detail in your model to warrant it
"if you have enough detail to warrant it" being very important lol
actrually, i guess that's kinda balancing draw calls against vram usage
what's more of a performance hit, 3 draw calls for 1k textures or a single draw call on a 4k texture?
calm goblet
exactly, what's actually more of a performance hit, the 2 extra draw calls or the extra vram used?
tough plover
i would say it depends
in a non crowded instance? draw calls would be worse
in a more crowded instance? probably VRAM
young vault
If you got a multiple of 2 in drawcall I feel like dividing it is always good.
But, otherwise, it's circumstantial
azure rain
no not really. that's texture resolution that's better to be powers of 2
spiral sigil
Oh ok I see
young vault
What I mean is
If I have 2 1024x1024 textures that contribute 2 drawcalls
Why do I not make them 1 2048x1024 texture that contribute 1 drawcall?
If it's power of two in drawcalls, might as well make it not
If you can make the texture a pot and decrease drawcalls, do it.
3 drawcalls can be two with two pot textures.
Without losing visual clairty
clarity
azure rain
2048x1024 is a acceptable a powers of 2 texture
 brave storm
dont tell me that you need neck, arms n shit n blender
in blender**
im trying to make a character that is like the default one
no arms, no legs and feet, no neck
 pastel condor
You may need those in your armature, but you dont have to have anything weighted to them.
 regal hemlock
Hi I would like to know if anyone with rigging knowledge could look at my test rig and give me any tips and generally tell me how stupid I am. I will send the file. I am using blender
spiral sigil

Why am I dumb I don't understand blender
Apply All Transforms for the meshs you are trying to merge
Individually apply transforms per mesh
control+A
That's my guess
It might be something else
Oh wait are you doing a CATS feature
The problem is actually a piece of clothing with bones and it won't merge with the avatar.
OHH
Ok wait one second
I got to do this more... like it's not hard but these little errors drive me nuts
Yea they are funky
Almost got the video
I have to compress it under 8MB because no nitro
Hold Shift and drag on multiple boxes if you want to input the same value into multiple fields
you could also press n while your cursor is somewhere in the viewport to popout the Properties menu
im applying 0 location, 0 rotation, and 1 scale to the Parent armature and then joining the Child to Parent
make sure you select the Child first, and then the Parent so the Child ---Merges onto---> Parent; not Parent---Merges Onto----> Child
Thanks I am pretty new with blender it's so much more simple when someone just tells you how 😅
👍 👍
 quiet moss
so i got a vroid model made but i don't feel like relearning blender or unity and i was wondering if someone could do it for me?
spiral sigil
Go relearn it and be proud of your work
Both of those programs are much better and easier to use than they used to be years ago so you will be fineeee
 tranquil fable
snow spoke
tranquil fable
snow spoke
looks great
cinder cradle
tbh those who make models without sculpting won't use it but i use zbrush so it's gonna be must have for me
so yeah hope it will be fun
calm goblet
cinder cradle
tbh those who make models without sculpting won't use it but i use zbrush so it'...
or you could be smart and get topogun
cinder cradle
calm goblet
or you could be smart and get topogun
first time i hear about it gonna check it out
calm goblet
cinder cradle
first time i hear about it gonna check it out
it's insanely good, makes retopo much less painful and much much faster
snow spoke
but this will change how i think ab my work
because the way my work flow is right now, i still use refrence pictures and this will allow me to use reference models
cinder cradle
using reference and doing topology of model is best way
snow spoke
i agree
cinder cradle
but yeah topogun i will use it when i feel like sculpting
wow 100$ is good price
for license
snow spoke
meh i kinda like the trials of learning ab getting the perfect topo
its actually challenging lol
spiral sigil
Use brain
cinder cradle
there is always room for improvment
spiral sigil
Always room for bigger brain
cinder cradle
i watch now videos about it and it looks pretty promising
cinder cradle
well you can always read about it probably on their site.
calm goblet
i'll link you to some vids

http://topogun.com/store/buytopogunnimlot
Buying topogun 2 now and then upgrading to topogun 3 when the official release will come will be cheaper than buying 3 directly.
Also you get full access to topogun 3 beta with the ability to save and export ;)
Don't forget to follow me on twitch: https://www.twitch.tv/nimlot26
Cheers!
this is pretty old but shows most of it
gusty shard
I do sculpt in zbrush then make the lowpoly in maya by using live surface and quad draw
calm goblet
quad draw doesn't look too bad from what i've seen, not as well rounded as topogun tohugh
but then topogun is a program made specifically for that one job, makes sense that it has more tools for retopo than a generalist program
 wanton helm
I want to Improve my UVs so i can Properly Texture it, can someone give me some advice on doing it, FYI this avatar is supposed to hit Quest Med performance so no Cheats of more Material Slots or extra skinned meshes.
 neat viper
like 90% of your UV space is wasted lol, if that hair is just one solid color, you could shrink it down to just a couple pixels at the bottom of the atlas
neat viper
neat viper
CATS mainly, though I'd recommend looking into edge loop dissolving, and atlassi...
See this: ^
a lot of your avatar's texture consists of solid colors, which could be made tiny in the texture - that'd also leave you with a lot of space in the UV dedicated for actual textures
wanton helm
I want to change the texture to be actual details instead of solid colors, and the hair normal is always blurry if the uv is small
calm goblet
wanton helm
I want to Improve my UVs so i can Properly Texture it, can someone give me some ...
learn about texel density and how to scale your UV islands
you could square up those hair islands and either stack some or just pack them close together, and like zuvali said you're literally just not even using most of your texture space there
huge wasted areas
all this is stuff you could be using to increase the effective resolution of your texture
 tough plover
UV > Average island scale is a very useful tool
sterile mantle
quaint jasper
You got a portfolio anywhere ?
One message removed from a suspended account.
One message removed from a suspended account.
One message removed from a suspended account.
quaint jasper
A place where you host all your models, like sketchfab/artstation
sterile mantle
One message removed from a suspended account.
One message removed from a suspended account.
cinder cradle
sterile mantle
One message removed from a suspended account.
wow cool
sterile mantle
One message removed from a suspended account.
sterile mantle
cinder cradle
do you have render with lights on ?
One message removed from a suspended account.
cinder cradle
ok anyways cool
sterile mantle
cinder cradle
or you haven't made them
One message removed from a suspended account.
sterile mantle
quaint jasper
A place where you host all your models, like sketchfab/artstation
One message removed from a suspended account.
quaint jasper
Any official response you'd want from vrchat should be coming from the support
cinder cradle
quaint jasper
Any official response you'd want from vrchat should be coming from the support <...
i doubt it's about vrchat
trakso want to ask you about hosting models
i think
neat viper
sterile mantle
One message removed from a suspended account.
9 day necro :monkas:
sterile mantle
quaint jasper
Any official response you'd want from vrchat should be coming from the support <...
One message removed from a suspended account.
cinder cradle
sterile mantle
One message removed from a suspended account.
you mean your 3d models?
sterile mantle
One message removed from a suspended account.
cinder cradle
in vrchat it isn't possible, you can make world where you link your booth or gumroad page
to them
that is what most people do
sterile mantle
cinder cradle
in vrchat it isn't possible, you can make world where you link your booth or gum...
One message removed from a suspended account.
cinder cradle
it is allowed
sterile mantle
One message removed from a suspended account.
cinder cradle
make gumroad or booth page with them
untold schooner
buy real cars through a vrchat map finally
sterile mantle
untold schooner
buy real cars through a vrchat map finally
One message removed from a suspended account.
cinder cradle
sterile mantle
One message removed from a suspended account.
what you suggested there is kinda not allowed
sterile mantle
One message removed from a suspended account.
cinder cradle
like i said make your store on one of these websites and u good to go
sterile mantle
One message removed from a suspended account.
sterile mantle
cinder cradle
like i said make your store on one of these websites and u good to go
One message removed from a suspended account.
uncut imp
sterile mantle
One message removed from a suspended account.
I believe the virtual market get some sort of special stuff going on that lets you have the links taht work. That's not something you can do with the normal SDK. 😦
I understand why but it'd be nice if i could make my discord link clickable in my world
sterile mantle
One message removed from a suspended account.
One message removed from a suspended account.
One message removed from a suspended account.
uncut imp
imo the whole scanning qr codes in vr is weird. How am i supposed to do that? take a photo of it and scan the screenshot later I guess?
untold schooner
you could setup a showcase world and have your discord just about everywhere
sterile mantle
uncut imp
imo the whole scanning qr codes in vr is weird. How am i supposed to do that? ta...
One message removed from a suspended account.
sterile mantle
untold schooner
you could setup a showcase world and have your discord just about everywhere
One message removed from a suspended account.
uncut imp
sterile mantle
One message removed from a suspended account.
True. Up until today my pc was in a different room to my VR so i couldnt just scan my screen while in VR.
But i guess i can look at the thing and scan my screen now (since i moved where my pc setup is)
sterile mantle
One message removed from a suspended account.
night trout
man
looking back on my model
i feel like i should have done more to improve it
cause the head (when no subdiv modifier is on), specifically the back
still looks too low poly
devout scroll
add more loops and smooth it out where it's noticeable
compact halo
hey how can I get both my eyes


I just did object mirror mirror X global
and then changed the shape group names to the associated bone

also all the vertex faces are right
 supple glen
So I'm using blender 8.80+, and (since I haven't used it in such a long time) I forgot how to display textures/import them properly. I asked my friend, and he also forgot.
 cinder cradle
supple glen
So I'm using blender 8.80+, and (since I haven't used it in such a long time) I ...
cinder cradle
supple glen
So I'm using blender 8.80+, and (since I haven't used it in such a long time) I ...
blender 2.8 probably and also you need to open armature hierarchy
alt+h to unhide
supple glen
cinder cradle
blender 2.8 probably and also you need to open armature hierarchy
Wait I just realised I said mesh instead of texture
crap sorry
cinder cradle
hold z and material preview
supple glen
cinder cradle
hold z and material preview
thanks!
 heady stirrup
how would i go about making a cd case in blender
i would like it to be open with the cd poking out a bit
then putting in the scans for the slipknot self title cd for textures
heady stirrup
also i would like it to play the songs from the album from the expressions menu if possible
devout scroll
it's possible but you'll need to learn a bunch of different things for that
heady stirrup
i already have the model now but the textures are a bitch


its hard to tell but the album cover is there

just broken as hell
jesus christ its purple now
Yes i need to yell bot
why is it purple this isnt source
got the front cover to work finally

back still broken tho
cinder cradle
check uv's.
heady stirrup
where do i find that
im about to give up on the back all together because im impressed i made it this far
cinder cradle
open new area in blender and from 3d viewpoint go to uv editor.
heady stirrup
why wont vr descripter show up in unity? ive installed sdk
cinder cradle
you have right unity version?
cinder cradle
new sdk works with 2019.4.31f1
 misty valley
@neat viper how do i see if any bone needs the 180° rotation?

i dont know anything about blender, i dont know how to get those weird lines displayed

cinder cradle
misty valley
i dont know anything about blender, i dont know how to get those weird lines dis...
what weird lines you mean? the parenting ones or something else?
misty valley
cinder cradle
what weird lines you mean? the parenting ones or something else?
outlines like in those msgs #3d-modeling message
how do i find out if i need to rotate a bone, which side is supposed to be up? i'm completely new to armature setups
apparently some avatards need to be fixed bc they have rigging hacks or something
cinder cradle
the rig you screenshooted is like that by default?
misty valley
it's a modified version of the base with 5 fingers, but i didnt really have any issues with any of the 3 lockmodes
but i read you need to adjust those as Octofloofy also had to edit his hobkin
cinder cradle
ahh i see the hips
misty valley
this here is a Rantichi which had a broken spine when head lock was enabled
 cinder cradle
you need to rotate hips by 180
cinder cradle
so it looks like this

just in edit mode click on hips and r and click y and hold ctr when moving bone
if you gonna miss it you can always fix it in window that will pop up
 misty valley
oh didnt know you could actually select singular bones, thx
cinder cradle
misty valley
oh didnt know you could actually select singular bones, thx
well now you know
misty valley
still cant find the angle window
cinder cradle
it should pop right after you rotated it by hand
misty valley
for me the affected field in the item popup was "roll"
 cinder cradle
what blender ver you use?
cinder cradle
weird that you bone moved up when rotated
it should have stayed in it's place
you can lower it by clicking g + z
misty valley
i swapped the z offset and base position, would that work?
 misty valley
cinder cradle
weird that you bone moved up when rotated
misty valley
cinder cradle
weird that you bone moved up when rotated
well it was rotated from that one ball as a base
the upper ball stayed in position and became the lower one
misty valley
:c
cinder cradle
yeah it's too low now
tough plover
grab the ball at the bottom of the hip bone and move it up
 misty valley
is it supposed to overlap the spine tho
misty valley
cinder cradle
the lower ball needs to be higher than upper ball of upper leg
alright thx
tough plover
not really
you should set all bones in the spine to Connected
so that it forms one continuous chain
cinder cradle
yeah i disconnected spine and hips bcs i was testing something
misty valley
tough plover
so that it forms one continuous chain
ah
so this is borderline ok?

cant put it higher without resizing it
tough plover
resizing it is perfectly fine
tough plover
also, spine seems crooked now
select all bones from hips to neck, and do S > X > 0 > enter
misty valley
🤨
misty valley
it did straighten the hip bone or sth
 cinder cradle
yeah ur good now
cinder cradle
misty valley
thx for the support <@!497827696676569088> i had like zero experience with blend...
np ur good
misty valley
now i have a bit
cinder cradle
this change will improve your avatar
misty valley
yeah i bet, i never messed with armature stuff before other than renaming or re-parenting a group. i wouldnt want to mess too much with this tho as most models i got seem to work well. is there anything else related to the new ik i must keep in mind regarding the avatar skeletons?
cinder cradle
misty valley
yeah i bet, i never messed with armature stuff before other than renaming or re-...
hmm right now i think there isn't something i noticed anymore that need to be fixed on armatures
tried testing armatures with added upperchest and it's still kinda useless.
misty valley
cinder cradle
hmm right now i think there isn't something i noticed anymore that need to be fi...

 bold urchin
My nose (and lip) shading is being odd here, I haven't been able to diagnose it
 bold urchin
Face orientation is consistent, nose UV's are with nose UV's.
Unsmoothed vertices hm
 cinder cradle
can you try doing f3 and finding merge by distance ?
if that won't fix it check uv
bold urchin
0 merged.
Nose UV's are with nose
 bold urchin
I know right, I've been stumped too.
Blender is fine, Unity is fucked.
Even removing any source of shading on material.
bold urchin
Good point to check vertex colors.
Wish Blender didn't keep fighting me.
I feel as if I've reset vectors a lot now but I'll try it again
My nose is better.
A little crusty though
 bold urchin
Though now I'm getting this warning again that I tried to fix originally. a x12

It was split normals, apparently I wasn't exporting with split normals because it was giving me some trouble.
I'd like to clear those split normals but then things fight me more trying to make it look good again
bold urchin
It's one mesh but kitbashed together pretty hard
cinder cradle
hmm weird that unity now have problem with blinking, other blendshapes work?
spiral sigil
if blendshape keys dont work in unity, I remake the key as a mix and then use that new one i made adn it usually works
bold urchin
It's complaining about all my shapekeys lol
cinder cradle
oofers
maybe you are able to fix it manually with little bit of messing with vertices
bold urchin
Messing with vertices?
 spiral sigil
languid fog
spiral sigil
languid fog
u will get better at texturing over time dont worrry
its the real struggle brother
languid fog

 vocal anvil
have to do textures now
 devout scroll
Unity doesn't really have a notion of bones
You're just renaming game objects
The mesh object that goes into the skinned mesh renderer just knows which objects affect what verticies
So weights are just assigned to objects


 quaint jasper
You can edit the .anim in a text editing app like notepad++
quaint jasper
steady zealot
Latest Commish
Looks amazing 🤩
steady zealot
Thank you!
 visual vigil
https://cdn.discordapp.com/attachments/857676254412275774/948166897675960370/VRCoutfitcollage.png https://cdn.discordapp.com/attachments/857676254412275774/948166863152635924/Bikinioutfitcollage.png https://cdn.discordapp.com/attachments/857676254412275774/948166832043475004/Catoutfitcollage.png
making shit for sites


 thin shadow
text editor
thin shadow
it's possible to edit it with text editor, but why not use the duplicate and temporary controller routine
solar fossil
more prop modelling, lets go
visual vigil
 devout scroll
cute tiddy tupper
 plush bone
...
calm thyself
did you build your armature in unity?
cool work with me here buddy
where did you rename the armature?
ok so you renamed it in unity
so can you just reimport the armature from blender then?
how's that
calm downn
you can fix this
if you say so ¯_(ツ)_/¯
I'll bet you can fix it though
calm the fuck down
no
you don't get to blame the people here
we are trying to help you
you can make backups
and we can help you fix it
plain garden
how much should i weight paint this shoulder bone
 plush bone
then leave
plush bone
plain garden
how much should i weight paint this shoulder bone
you're probably gonna want to blur that a bit
plain garden
How do I do that im still new to blender and this is the first model Ive had to do this much weight painting for as i put clothes from one model on another
plush bone
how do y'all do finger topology so that they bend nicely?
I've seen things like the below gif, but I've had mixed results applying it
 spiral sigil
There is some weird ass frickin oval ring of topo around some knuckes that some models have
plush bone
got any pictures?
spiral sigil
Not that I have no but I have looked at human models from uhhh whats it calledd
Daz3dStudio
I was told the topo on their models is pretty good to model off of
I'm very certain those models do the thing I was saying
plush bone
are those game ready models?
plush bone
gotcha thanks
azure rain
They might not necessarily be game-ready as Daz Studio primary use case is offline image and video rendering
spiral sigil
True I'm not sure what extent they are rigged
OH wait one thing uh their material count is insane usually but it's definitely because of the whole super easy customization thing
azure rain
oh they're definitely rigged I just note they might be a bit too high poly
spiral sigil
That too
 visual vigil
quaint jasper
Exporting with modifiers ?
visual vigil
quaint jasper
Exporting with modifiers ?
nope
visual vigil
quaint jasper
Did your shapekeys work before export ?
yes
quaint jasper
Same issue if exported as an obj ?
visual vigil
will try
languid fog
That happen to me one time, i applied all transformers and some way fixed it
solar fossil
quaint jasper
Unpack the prefab and rename it
It's not worth it man

Now I'm wondering, been modelling a bunch of props for worlds, if I were to make them into a pack would anyone be interested in it 
spiral sigil
solar fossil
Now I'm wondering, been modelling a bunch of props for worlds, if I were to make...
are they all of similar theme or
just like random stuff u made for a bunch of projects
if its all to a collective theme then its alot better


