#3d-modeling
1 messages · Page 91 of 1
 spiral sigil
 devout scroll
ngons usually cause issues for subdivs and shading
 median pike
for me
the rule is
N gons are fine as long as they are flat
because than they wont cause issues with shading, subdivs, or triangulation
spiral sigil
Also here, i recommend watching this reguardless, it uses quite a bit of terminology and theory https://www.youtube.com/watch?v=jBqYTgaFDxU
Blender 2.8 3D Modeling tutorial for complete beginners.
You can download Blender from here▼
https://www.blender.org/
▼ My Gumroad Store (Sculpting and Texturing Course, Recordings, and More Cool Character Stuff!):
https://gumroad.com/yansculpts
▼ Help Support Me On Patreon...
median pike
hardsurface modeling I have down for the most part
making character is hard though lol
median pike
anything organic is just a nightmare consisting of uncanny valley faces and crying
spiral sigil
I mean i made this character in one day
median pike
depends on the person
spiral sigil
but he's also p simple
And that was solely off reference images and such
apparently he's a rapper's avatar or sommin
devout scroll
looks kinda sketchy
spiral sigil
Sketchy how?
devout scroll
i guess it doesn't have red lips
median pike
yeah lol he looks like the stereotypical racist caricature of black people
spiral sigil
I mean, the rapper is native american, so im not gonna judge
devout scroll
also, you don't have to be good at drawing to make a reference
a sketch can be enough
spiral sigil
Yea that works too
devout scroll
and some base colors
you can also just get a base body sketch and use that as a reference for your reference
median pike
personally
2D is just harder than 3D
so at that point
it would be easier to just make it in 3D
spiral sigil
urrr
median pike
than make that in to a flat image
spiral sigil
i mean
Just draw a stick figure
make them look cool
then make a 3d model
ezpz
median pike
that might be what youre looking to make
but not what I am
I mean of course I can model a stick figure
spiral sigil
i mean that's how i made my goggles
median pike
but thats not really hard
spiral sigil
i guess i dont really understand the double standard then
median pike
double standard? how?
spiral sigil
im bad at modeling
but i dont want to learn to get better
but i wont model that cause it's too easy
which suggests i want something harder to model
median pike
when did I say I dont want to learn to get better?
how is a tutorial that explains to me how to move the camera in blender gonna help me?
spiral sigil
Well it actually shows you how to make the sword from start to finish
if you actually like
watched it
including uv unwrapping
 vivid crater
he wants to push himself to harder projects, so you can assume he did basics already and such
somethings up with me mm key
median pike
I know how to unwrap
spiral sigil
Well if you modelled that, then where's the issue
im just having a hard time understanding what exactly is difficult here?
median pike
what I am trying to say
is that I dont consider myself good if I can make stuff like this https://cdn.discordapp.com/attachments/390924397726138370/751846296574492822/blender_2020-08-30_21-38-52.png

I am not saying its bad
is really nice
but not what I am trying to achieve
spiral sigil
well what are you trying to achieve, hyper realism?
median pike
and doing something like this, is significantly harder than that
spiral sigil
so you want to make studio quality stuff
so then you might want to try learning sculpting
median pike
I just want to make something I am proud of and would at least give ma a chance at making it in the industry
spiral sigil
i mean
vivid crater
gud luck have fun
spiral sigil
but why would you want to do that in a game that you literally need to optimize stuff
spiral sigil
I mean maybe
i personally am a game dev, so i focus on optimization before detail
i personally hate hyper realism, but that's just me
if i wanted a game that looked as depressing as real life, i'd just go outside lmfao
median pike
you can make a character like this with like 30k polys and 1 or two materials
spiral sigil
I mean
median pike
imperfection is beauty in my eyes
spiral sigil
Idk
and your point is you appear to be limiting yourself to other people's standards possibly, i dunno
Some people literally model rocks for a living
median pike
Some people literally model rocks for a living
@spiral sigil I get your point here
but also thats not true really
the days of modeling rocks is long gone
median pike
right
I dont limit myself
I just dont think I have achieved what I want to
therefor I will not call myself good at what I am doing
spiral sigil
you said you find imperfection enticing, so draw, and fail
median pike
my man
spiral sigil
and keep failing till you have something to show for it
median pike
its not only a mental issue
but also a mental issue
I mean look at it this way
everyone can kick a football
not everyone can become a professional football player
spiral sigil
yeah, cause not everyone tries to be one
spiral sigil
There was a man who was a field kicker who had one foot, and kicked with his bad foot, if that man can be a professional football player, p sure anybody can be if they make the right connections
it's just a mentallity that's turned into self doubt
median pike
again, thats a pretty nonsensical comparison
youre saying it like every one legged person can be a field kicker
one out of 100K means nothing
everyone is different
spiral sigil
Then why do you bother trying to model
if 1 / 100k means nothing, then you'll clearly never get where you want to be and somebody will do it for you
median pike
I know I wont
I do it because i just like doing it
I know I am bad at it and probably will never be where I want to be
I have come to terms with that ages ago
devout scroll
I mean, I've just come to terms with the fact that being "good" is kinda pointless lol
Just keep learning and looking to improve until you get where you want to be
Mental blocks and limits are a thing, and it is indeed because of a bad mindset or fragile ego
Just don't worry about these things because the line between good and bad is entirely in your head
Just make what you want and look at how people who are better do things when you get stuck
 vernal wigeon
Im dying trying to figure this shit out. In short. The models supposed to have solid blue jeans
But when i bake it, there are random splotches of incorrect color.
 gray hornet
About fixing normals, if you enable backface culling and notice some polys dissappearing, that means inverted normals
vernal wigeon
I have no idea what you just said
gray hornet
Easy fix would be selecting all of this and pressing Shift-N ( i think that’s recalculate normals or something like this)
So a face/polygon has two sides
Front and back
gray hornet
Might be that
vernal wigeon
Ill try it and see what happens i suppose
gray hornet
I see
vernal wigeon
It actually got worse
gray hornet
If you press on the distortion dropbox there should be direction or something like that
I don’t have blender in an iPad xD
vernal wigeon
this comes up
gray hornet
Can you do a screenshot of fhat options it has?
vernal wigeon
gray hornet
Below the mesh analysis checkbox you have type and on the right there’s distortion, change that to... face orientation?
I don’r emember what’s inside it exactly xD
gray hornet
Duh, I recall there being face direction or something...
It showed front faces as blue and backfaces as red
But if recalculating normals made it worse, then it means you gotta flip their directions
Wait, 2.9 is now live version?
 timber lantern
is there a way to scale this 'outwards' trivially?
i thought changing the thing from global to Normal might do it, but nope
i don't wanna delete the verts underneath - i could use an alpha map on the skin but surely there's a way to just scale it outwards a tiny bit
(the glove)
 raw marlin
anyone wants this prop?
i dont know what to do with it
i made it for my avatar but idk how to use unity
 fringe rock
@timber lantern alt S
will scale on the normal
but be sure all the vertex a connected
 mellow narwhal
how could you make a roblox character into a avatar?
timber lantern
thank you again franada
super useful, could have done with knowing it over a year ago wew
 humble smelt
how to save my unity project model in vrm format?
 patent lava
which way is forwards in VRChat? Exporting from blender with +Z forwards seems to make things backwards, and exporting with -Z forwards also seems to make things backwards.
spiral sigil
workin on a mokuri avatar now
vernal wigeon
Nice
 dry locust
Does anyone know of any video tutorials that show you how to take certain aspects from one model and put them on another? Like say theres one model that I wanna use for an avatar, and theres another model that has a hat I wanna use, but I only wanna take just the hat and put it on the model I wanna use as an avatar.
spiral sigil
Ah
Do you know what it is?
@dry locust
If it's just attaching something to say, a hand
you can use a parent constraint
spiral sigil
Hair c:
Hey I'm trying to merge these two model pieces into one but one of the meshes always moves away from the bones no matter which order I do it in, not sure what I'm doing wrong here
hrm, im not sure
this isnt something i personally do, sorry
spiral sigil
thx
vernal wigeon
Need a bit of help here, Im tryna make that grey surface metalic and reflective, but it just looks like clay. What am i doing wrong?
 dry locust
@spiral sigil Well I stated that I have two models, and one of them I want to use just the hat and put it on the other model that I'll use as an avatar
spiral sigil
yeah but you didnt say if it was in blender, or in unity
raw marlin
just oprm roblox studio and get your character using character exporter addon
then using rbxanimations addon change it into .blend file
then open it and using blender rbx animations addon genereate automatic rig for it
and when ifs working correctly then just get it into unity

Blender Roblox Addon: https://gist.githubusercontent.com/anonymous/08965641f2fe3825c480eb7faacf9fb6/raw/429fed6ff0670e2612feca8e9d537c1b9dfe4b62/rbxblender.py
Roblox Studio Plugin: https://www.roblox.com/library/716953901/Blender-rig-exporter-animation-importer
2.8 plugin (u...
mellow narwhal
@raw marlin on the tutorial it shows a dummy as the rig model? how do i make it my own?
dry locust
@spiral sigil Blender I guess? I didnt know you could edit models like that in Unity.
mellow narwhal
i have my character and the dummy right next to eachother
raw marlin
@raw marlin on the tutorial it shows a dummy as the rig model? how do i make it my own?
@mellow narwhal use roblox studio addon
gimme second i will find the link

ROBLOX
Use Load Character and thousands of other assets to build an immersive game or experience. Select from a wide range of models, decals, meshes, plugins, or audio that help bring your imagination into reality.
here you go
you need to set it as r15
@mellow narwhal
mellow narwhal
okay, thank you i have it all downloaded and ready, now i'll try it.
@raw marlin i've made it to blender but now this is here
idk why there's just a chunk of ground below him
mellow narwhal
ah ok i'll try and get rid of it
 pseudo hawk
I need a bit of help - To explain, i got this model and the UV map is very, hmm, not symmetrical, so i tried to follow how another model did their UV map which his is very symmetrical. So i re-did the seams, to where i wanted them, so that when unwrapped it will become nice and symmertical. But, when i click unwrap in blender, it just does some cooky stuff. I've done some googling watched many video's and none seem to run into the same problem as me. Not that i could find anyways. So there it is unwrapped without the new seams.
here it is unwrapped with the new seams. I even tried like cleared the UV map, and such, and then tried unwrapping. But all the videos i watched if they used the smart unwrap, then did the seams, without changing the smart UV map, and just click unwrapped it changed instantly.
with no issues
I've even tried doing it with the original seams. Did the smart UV unwrap and then did a normal unwrap with the original seams, and it still did something similar.
Whats that 👀
Uhh, nono
I am trying to split it down the back
Thats not a double, thats technically the back of the model
the left is the front
All at once
Im just using the unwrap shortcut
here's what im trying to get it to look like- something along these lines
Mind dming me on how to do that in detail? Im not super familiar with blender so im not sure how to do some of that stuff. If not im sure i can google it, its just always easier to have someone who knows exactly what youre trying to do help out ^^
spiral sigil
why even unwrap it like that 🤔 you can just enable mirroring with the paintbrush
and paint in blender
oof
spiral sigil
I mean, i'd shell out money for like
pseudo hawk
Just, earier
pseudo hawk
Don't like the bleeding feature
spiral sigil
uhhh
pseudo hawk
Makes it really frustrating
spiral sigil
dunno what program you're using then :T cause you need to have bleed for it to not have edge issues
spiral sigil
ew
why not use like, gimp or something
i just draw in blender lmao
's pretty fun
pseudo hawk
and i can color just the claws, unlike with substance painter if i colored on the claws on the UV map it bleeds onto the fingers
pixelss
pseudo hawk
Yeah, its unique
heres mine tho, colored with sai
no bleeding on the toes <3
Ah the symmetry is so off
cuga, the claws are kinda gross cause i didnt get perfect symmetry cause of stuff but yeah- nice clean colored models
Ill just, deal with how the UV map is-
spiral sigil
Does anyone have tutorials on creating mouths and animating them with blendshapes?
I'd like a good blendahape tutorial in general
 solar fossil
https://youtu.be/uqNBFZD1AbU
here you go hibiscus

Blender shape keys / morph targets / blend shapes allow you to set different positions of vertices that you can morph between in animation!
Twitter: https://twitter.com/MrTriPie
spiral sigil
ty
good tutorials are hard to find
I know some ppl here make there own tutorials so I like to ask so I can see those first
vernal wigeon
Need a but of help here, Im tryna make that grey surface metalic and reflective, but it just looks like clay. What am i doing wrong?
spiral sigil
another question, I found this old program called hexagreat and I'm virtualizing it. It's practically impossible to find tutorials for it though. Does anyone know about it?
It seems really cool
solar fossil
never heard of it, and pretty much everybody here uses blender since its free and well, can do everything
spiral sigil
it just seemed pretty neat for automating/making low poly models
but it was popular in japan a billion years ago for making games
but yeah I also use blender for everything
 crude parcel
https://gyazo.com/291aa8ec1f5478597a698ab0c63bea41 anyone knows why is this happening in unity? when i recalculate normals in blender it fixes it but importing to unity breaks it again, and i applied normals calculate on fbx in unity and didnt fix it..
 spiral sigil
it looks almost like you have faces flipped the wrong ways
should try going to the solid view mode (which it looks like you're in) and setting "backface culling" on, and then seeing if your faces are the wrong way around
spiral sigil
Could anyone help me real quick?
The faces are present but completely transparent both inside and out.
It's only these faces though as the connecting faces are being shown properly.
Uhhh
flip normals
maybe?
Nevermind, I didn't have the proper material applied to it.
Big Dumb ™️ moment.
oof
timber lantern
does anyone know how to get blender 2.8 to allow you to click a bone in pose mode, then click the mesh to select it (and then Shift + Tab to go into weight paint mode for the selected bone)?
i unchecked Lock Object Modes but it still doesn't work like it did in 2.79 where you can select the mesh when you have a bone selected in pose mode
when i try to select the mesh, it just de-selects the bone but remains in pose mode on the armature
like i get the feeling that the file itself is broken but i don't know how to fix it unless i exported an FBX and imported into a fresh blend file, but i worry about bad things happening if i do that
spiral sigil
uhh
Basically
You click the skeleton
then shift click the mesh
then go into weight paint mode
then right click any bone
i dont think the pose to mesh thing works
timber lantern
nah shift click doesn't work
and it's not the file
oh sorry it is
lock object mode was enabled in the new file wew
i guess it is just a broken file
 quaint jasper
spooky eyes
 light maple
Very spook. Going to be halloween themed.
 atomic hamlet
Looking good.
light maple
Thanks! 💕
 clear geyser
Modeled a washed out jacket yesterday. First time texture painting with a stencil. Far from perfect but overall I think it turned out good
clear geyser
That's the lighting messing with the seams and such >:L Here's without all of that
The light parts could be smoothed in more but I wasn't going for perfection
 calm sandal
Manually rigged and weight painted this model in blender however it appears the face is rendering really incorrectly when opened in unity, as if the inside of the model is rendering instead of the outside.
Wondering if anyone by sight can diagnose what might be the issue here, as within blender I can't really see an issue
 lament pond
Check the faces direction in blender.
lament pond
You could try selecting it all and clicking recalculate normals.
calm sandal
ah, I flipped the normals
lament pond
If any remain still facing the wrong way you can manually flip them.
calm sandal
yeah, it seems to look good in blender now
thank you!
and it looks normal in unity now 👍
 wild iris
does anyone know how to fix the purpleish hue behind the eyes to make it white?
(here are the texture files if you need some reference to fixing this issue)
this is blender 2.8 im working with
using MMD tools and CAT tools
pseudo hawk
Does anyone have stockings for the nanachi
quaint jasper
@wild iris get any image editing software and change the hue
wild iris
but do you know which texture is making that hue?
quaint jasper
oh you mean behind the eyes, i didn't notice on the image, maybe it's something on the Hand texture
spiral sigil
Does anyone have stockings for the nanachi
@pseudo hawk they're p easy to make
pseudo hawk
My friend has been trying for 2 days
@spiral sigil he literally cant figure it out, it'd just be easier to get one with them already added that he can edit
spiral sigil
have you asked in one of the many nanachi servers? There's like 3-4 different model bases
all they all have slightly different legs
I think this chat is more for modeling than pre made assets
I asked in one of the discords on your behalf, I'll dm you if someone responds
pseudo hawk
thank you so much @spiral sigil
 elder mirage
should an adams apple be more of just a lil bump to round out that area/spot, or more of a noticeable lump that actually effects the general 'neck'?
quaint jasper
small bump
 quaint jasper
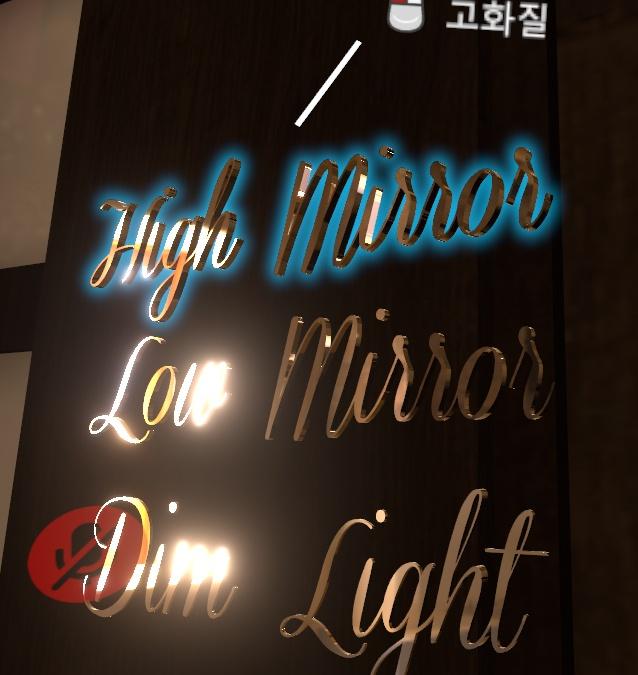
SVG text into blender, and extrude
 swift sinew
I'm having some issues with vertex paint atm in blender. When I actually try and paint on my selected vertices my frames seems to drop like it's working, but nothings actually happening. If I delete my currently vertex color group and then try and color then it creates a new one, but it doesn't actually show me what I have drawn
 ashen forge
Just finished this model, based off a character from the game Lobotomy Corp, currently rigging it for VRC!
 wise fern
How do you model a simple toonish hand?
humble smelt
how to save a model in vrm format?
 twin flare

■モデル紹介 もちもちした体のねこです 動きや表情等 https://twitter.com/mofuaki_/status/1257006388758245376 ------------------------------------ 本モデルはVRCでの利用を想定したunityのHumanoid形式に対応したデータです。 利用規約を読んでいただき、ご了承の上での購入をお願いいたします。 ■導入について VRCSDKをあらかじめインポートしておいてください。 本モデルはArktoon-Shadersを使用しています。
I found this model
 supple shore
how do you turn a basic object into a grabbable game item?
 wispy cairn
sorry if this is a stupid question but i was looking at some tutorials and i found that a lot of people have these extra vertices around the edges to make curves and stuff, where do they come from? https://cdn.discordapp.com/attachments/645373818168147998/752951679506186390/image0.png
 spiral sigil
subdivison surface modifier
wispy cairn
thought so, i had tried that but still couldnt see them
 tulip condor
hi everyone
someone knows how to change hotkey of mesh select mode in blender 2.79 ?
cause i want to change hotkey from CTRL+TAB to CTRL+D
i want that to change that because that is closer to my finger structure
here is an video:
https://streamable.com/lup1ou
thanks in advance
 spiral sigil
 gaunt abyss
Making my first character model from scratch and I was just curious, for those of you with experience making characters from scratch, how would you make the mouth cavity? Its a cartoony styled character with a relatively large mouth that takes up a fairly large portion of the bottom half of the head when it's open or smiling if that matters.
The way I added one in the past to an existing (mouthless) character was just to cut a line across the front for the lips, then add an inverted sphere with the front section cut off for the interior of the mouth. It worked but definitely isn't ideal.
tulip condor
@spiral sigil
I'm sorry but in my version of blender there is no keybinding option
and in the search: ctrl tab not finding anything
spiral sigil
don't search by name
tulip condor
ah... i tought that with the name the blender will find everything what i type
oof i don't like blender search algorithm at all
@spiral sigil
it working now thanks
quaint jasper
damn that's one ugly layout skin 
 torpid crag
I made this in blender and im proud so it goes here now
devout scroll
i think they mentioned at some point that their eyes are fucked, thats why their layout is weird colors
spiral sigil
uhhh
The only thing i can think of is either
A. The texture is transparent
B. There's a transparency shader on it
or C. It's all facing the wrong direction
 coarse citrus
Blender is doing a weird thing where at a distance it starts "hiding" pollies (as seen in pic), any idea how to stop this?
note: it also changes any time the camera moves (so when moving it makes the entire thing almost "spaz")
also it does not do this in wireframe mode
 stable edge
Idk that looks a bit like you've just got a ton of overlapping faces
quaint jasper
@coarse citrus How tall is your model
coarse citrus
Aprox 10 ft rn, however this issue persists on models of just about any size (granted the issue is lessened on smaller ones, but is still present) @quaint jasper
though i've found its not present when in "Modeling" as appose to the "Layout" tab
quaint jasper
Try importing something else in the scene to compare
i feel like it's kilometers tall and that's why it's having a hard time rendering it
coarse citrus
if you mean by something like in a fresh default scene, that didn't work either
the issue actually started yesterday, but this is a completely new project and the issue has persisted
quaint jasper
tried making a new project ? That has to be something you did at some point
 quaint bronze
Have you tried messing with the clipping planes settings for the camera?
quaint jasper
0.001 does that
the further away you go
and since your model is tall, that makes it worse
0.01 is the best of both worlds
coarse citrus
odd, i've always done that and its never taken issue; or rather ig ive just been using small models
well thanks that actually seems to have fixed it, cant believe i didnt think to just increase that value haha
quaint jasper
yeah it's less of an issue the smaller you go
0.001 is when you work zoomed in on vertices
spiral sigil
does anyone else have this issue
where's there's something you want to model that's slightly more complex than what you're comfortable with, and you can't just start it?
even though it's something you really want to make
yes, every time
it really sucks. I want to try to make a cute sweater but it seems like I can do everything
how do you trick yourself into do stuff
I don't.
devout scroll
you research some more
look at how other people do it
maybe watch a few tutorials
if you can't get over yourself, you need to look for something else to push you to do it
either a commission or a competition
devout scroll
blender youtubers often have discords that also run competitions once in a while
spiral sigil
can you suggest a good blender community ?
devout scroll
no idea as i haven't really been looking at any
but the blender youtubers I like and would consider looking into would be curtis holt and grant abbitt
but i very much doubt they do anime and/or furry stuff
other than that, finding a study buddy around your level would be nice
and sharing what you're working on with one another, and the new stuff you figure out
it's been really useful for me with scripting
devout scroll
bevel the sharp edges
 tight quartz
??
tight quartz
True
spiral sigil
I can also suggest grant abbitt
he makes some great tutorials
good beginner guides for sculpting too and also got a small series to train your polymodeling skills
tyy
devout scroll
ye but I can imagine he's a bit of a boomer in terms of art styles
spiral sigil
SirPinkBeard is also super great for sculpting
devout scroll
there's a bunch of good youtubers
Can also just post in vrc related discords modelling channels
spiral sigil
This is probably a stretch but has anyone attempted using Bodyslide from Skyrim/Fallout 4 to tweak body meshes?
Or clothing?
I've compiled several assets from different models but the proportions are noticably different to the point where custom-fitting them would be a task unto itself.
median pike
not sure how body slide works, I have used it before and I am assuming it uses shape keys
so why not just do it in blender than? the mesh needs to have them to be body slide compatible
though correct me if I am wrong
spiral sigil
Ease of use, honestly. I haven't done much in regards to custom-fitting clothes and Blender isn't wanting to recognize "rings" of vertices.
So doing it that way would require me to manually select all of the desired vertices one-by-one.
 pseudo epoch
Is it posible to get the pro builder unity package for unity 2018?
 pale sedge
I needs help on me model
I have been trying to make my pf as my avatar
But I can’t find out how to model the hair right
devout scroll
sculpt it
then remesh it
i find sculpting easier if i can't understand the shape
devout scroll
teeth are usually just a bent plane with 1 vertex sticking out on either side
1 plane for top and 1 for bottom
quaint jasper
Take a rectangle, subdivide it a bunch, bend it with proportional editing, move vertices up and down for the teeth
 gaunt aurora
spiral sigil
gaunt aurora
spiral sigil
Well, here's my first iteration of the sharp teeth
Modified from regular teeth.
Ideally, the teeth would interlock more cleanly but not sure how to really do that for the time being.
Aiming for semi-realism, helps the teeth stand out vs "lone snaggletooth" and "sharp teeth" syndrome a lot of anime-esque avatars have.
Any tips for improving them?
quaint jasper
boolean modifier
median pike
Working on hoodie.
quaint jasper
Marvelous
 azure rain
is that a hole for a tail to stick out
median pike
Ye
azure rain
I figured I just guessed the lack of tail is because of Marvelous Designer
median pike
I made the pants a while ago. I figured using the model with the tail weould just mess up arangement points so I didnt use them for the hoodie
spiral sigil
looks good
median pike
Thank
azure rain
pants with proper tailhole impressive
devout scroll
Been thinking of trying marvelous
But I'm a stubborn blender boy
Does it offer a student license
quaint jasper
GitHub
New modeling Cloth tools. Contribute to the3dadvantage/Modeling-Cloth-2_8 development by creating an account on GitHub.
Works like marvelous

Using modeling cloth addon to make a simple women's top. discord: https://discord.gg/h98XtJv
Support on Patreon: https://www.patreon.com/The_3D_Advantage
Download: https://github.com/the3dadvantage/Modeling-Cloth-2_8/archive/master.zip
Gumroad: https://gumroad.com/l/HJos
Full ...
Been using it for the past two days, it's great
median pike
Can you pull the cloth while its simming?
quaint jasper
ye
median pike
Nice. I might give it a shot as marvelous can be annoying at time
quaint jasper
Took me 10 seconds to make the pattern
collision and everything can be adjusted ofc
but the basic setup is sooo fast it's actually a fun process
median pike
Yeah marvelous works exactly like that. You just dont get the familiar interface
quaint jasper
Although making pants is still elusive to me
What does the pattern look like but the crotch area ?
median pike
Best way i found to learn is to google sewing patterns
Since they are pritty similar to how its done irl
quaint jasper
i forgot the real world existed, whoops, i'll look into those
mmh, that may be where the blender addon falls short, not sure if i can make sewing for that kind of pattern
median pike
Oh? Cant you just amke an ngon and remesh it or something?
Like whats the problem of the patern?
quaint jasper
I'd need four parts total right ?
 median pike
Yea so 4 in total
median pike
A bit too thight id say but yeeeee
Ikr
Its a lot of fun
Until wacky physics kick in
quaint jasper
how would you suggest less tight, increase pattern scale ?
median pike
Make a "belt" or something thighter on the top first so when you increase this pattern it doesnt just fall off the hip.
And sew those together ofc
You know. Like real pants
I guess you dont wear those offten
Same
quaint jasper
i just walk and pull my pants up every 7 seconds so i can't relate
how tf do i make a belt though ? As in modelling it first so that the top can rest on top of it when it sews ?
median pike
Nah just make it like the pants
Make a long rectangle
And se it on the back
Like a ring

This is a Fearless Makers Quickie video for Olga Jeanne Rose on YouTube. She was having issues getting a belt done in Marvelous Designer.
Please subscribe for more videos about Marvelous Designer and other fun projects.
Visit FearlessMakers.com for more great projects!
quaint jasper
mmh alright
 visual vigil
https://cdn.discordapp.com/attachments/669760923321499678/753537527142547487/unknown.png https://cdn.discordapp.com/attachments/669760923321499678/753537591940218930/unknown.png

 atomic hamlet
Looking gud.
quaint jasper
I can see the space marine inspiration, that's dope
spiral sigil
Gumroad
A dynamic HDRI background shader to use in Blender scenes, baking and beyondDirect download link: https://drive.google.com/open?id=1WOP7eyyp4Q3ZhchcfctWcEGUzo5TQW3YThe Product is under CC0 License, with attribution appreciatedBuying this product is considered to be a donation ...
spiral sigil
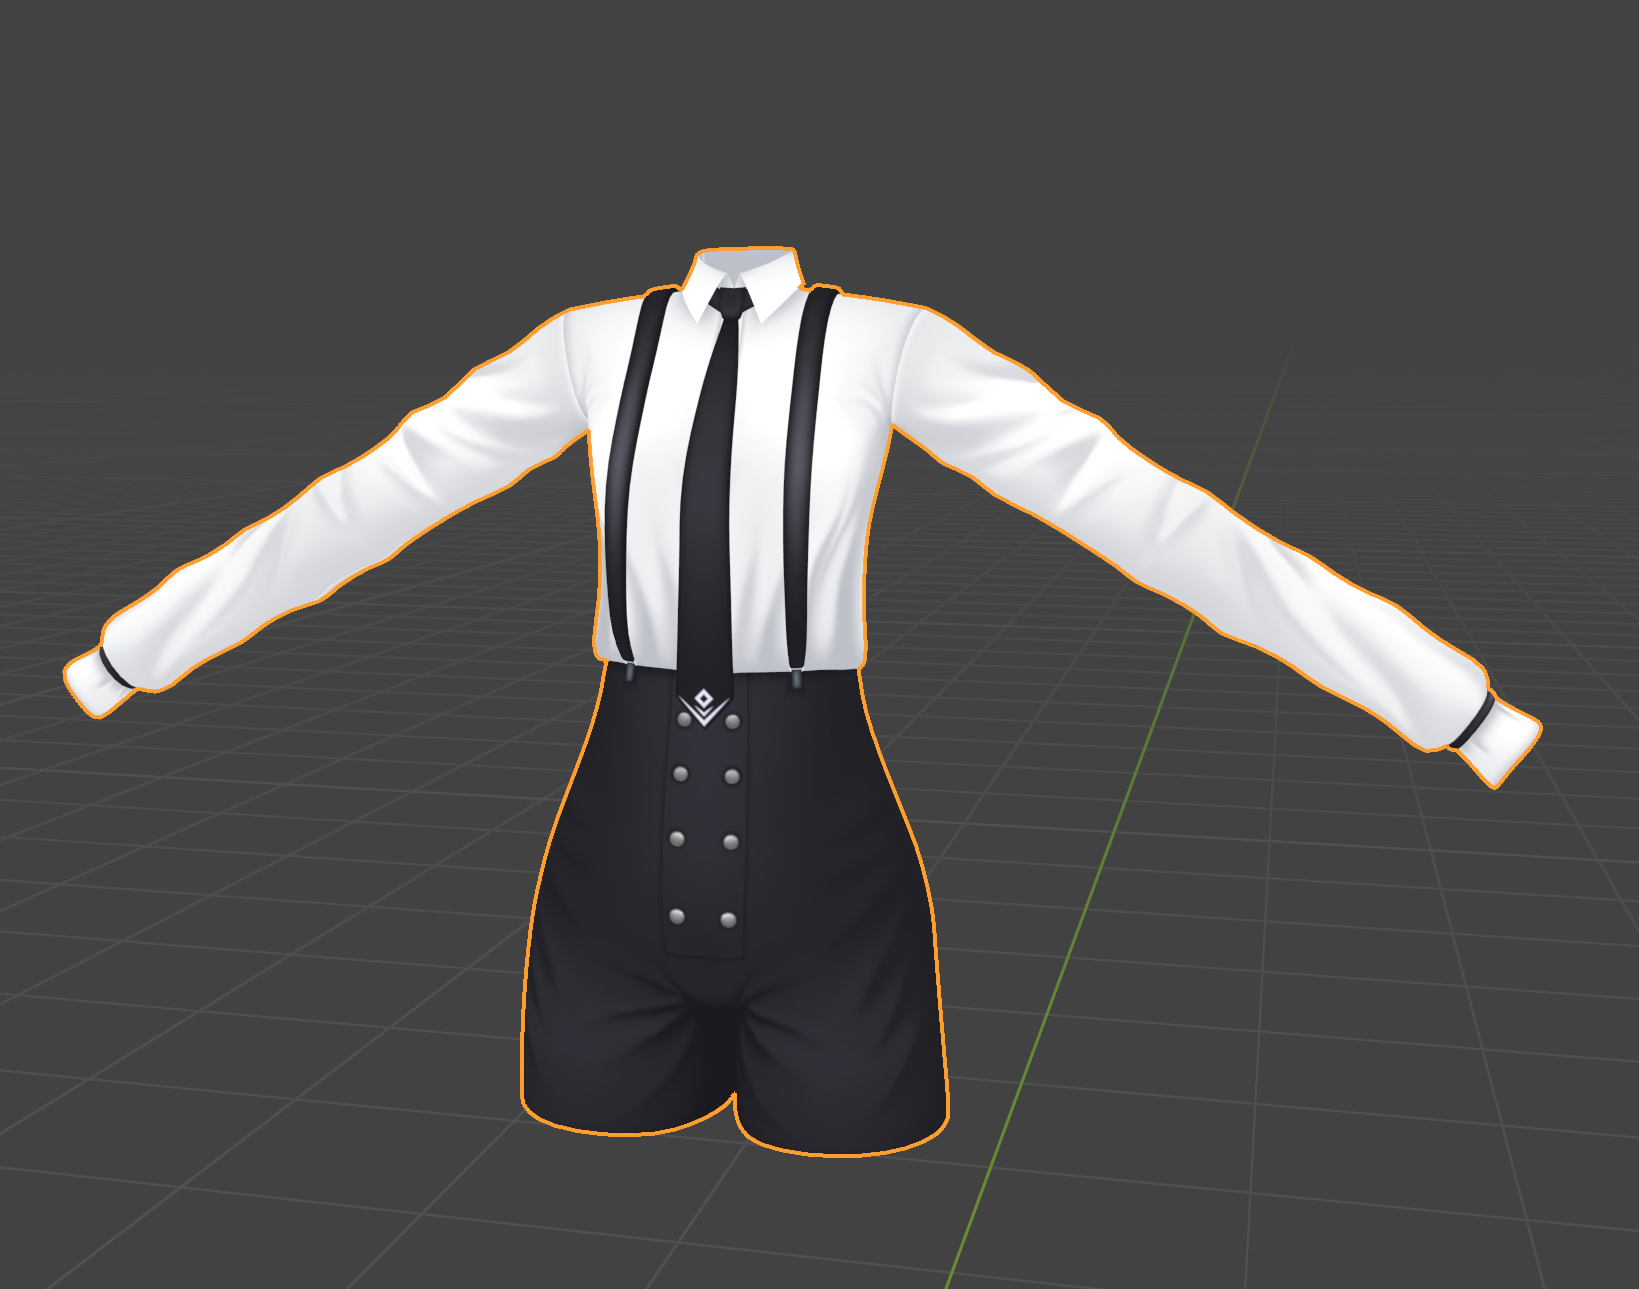
@quaint jasper Is it possible to use Modeling Cloth on pre-existing pieces to custom-fit them?
I'd imagine so but not quite sure how one would set that up.
 keen delta
Is it possible to duplicate a tail in Blender in a way where it follows the original tail, keeping its weight painting and following the original bone? Say I turn a one tailed model into a nine tailed one, I duplicate 8 more tails that all follow the original tail?
Without editing the armature that is
 ashen stag
Each tail would have to have its own rigging and then rotation constraint to the original tail, you cant just not have bones in the extra tails
keen delta
Okay, then is it possible to just have duplicates of the same tail? Like, copy the entire thing, including bones? And shape keys too?
ashen stag
Yeah, split the tail off the main so its its own mesh and armature and duplicate that
keen delta
Okay, I know how to do that, how do you do the rotation constraint thing?
ashen stag
Go to a bone on the tail you want to be a follower, add a rotation constraint, link it to the respective bone on the leader tail
It'll then copy all rotations
keen delta
Alright, I'll try that. Thanks!
quaint jasper
@spiral sigil Yes that's the point of the brush
spiral sigil
Brush?
tight quartz
I used a very similar outfit from BnS
@spiral sigil
You know where to find the outfit=?
spiral sigil
Ah, gotcha.
I'm inexperienced with 2.8 and been primarily using 2.79.
Should probably make the indefinite move sooner then latter though.
tight quartz
Anyone know a good video for learning to make VRC models?
In Blender of course.
(Please ping me)
keen delta

I managed to duplicate the tails. How exactly do I add rotation constraints again? (Edit: The duplicated tails are not weighted)
spiral sigil
 tight quartz
Thx. 😄
spiral sigil
I legit dont think ive ever gotten so mad at a program
my college wants me to use maya
and it's keybinds and workflow are so old and outdated
 heavy raven
Does anyone now the best tutorial video for a person with low IQ to be able to understand in creating models and clothing?
quaint jasper
That's going to be a tough one, if you have a hard time with basic tutorials i'm not sure if going through the entire process is doable
Which ones have your looked at so far ?
heavy raven
well only thing i can do so far is use vroids but i want to make a it from scratch since i need custom clothing for my Vstream avatar and vrchat avatar
and only tutorial videos i have watch was the sculpture tutorial of how to create a body
 still wadi
i see this a lot here and i feel like lying to ppl that they can do theyr own models just watching tutorials
won't rly help anyone
but that's just me 🤷♂️
heavy raven
well maybe its also since some process are not always show like me who has no idea how blender works in generall
still wadi
modeling a proper model is more than just watching a tutorial and it's not a one time quick thing
heavy raven
yea ive try to learn from watching your stream but it goes so fast that i cant keep up
quaint jasper
@heavy raven https://youtu.be/WlaMfIgS2ns

In this tutorial I'm going to show you my workflow in order to model a character base mesh in Blender. It could be used later on as a starting point for a sculpt. We are going to see how to arrange a good topology and how to make optimal decisions when needed during this proce...
quaint jasper
If you've got better ones, what are you waiting for 
still wadi
look not gonna like i might have a small crush on you just cuz my favorite dota hero was rubick
actually
you're right
quaint jasper
There isn't that many videos of people going through the whole process realtime explaining things 
quaint jasper
No reason you should, since you know your workflow
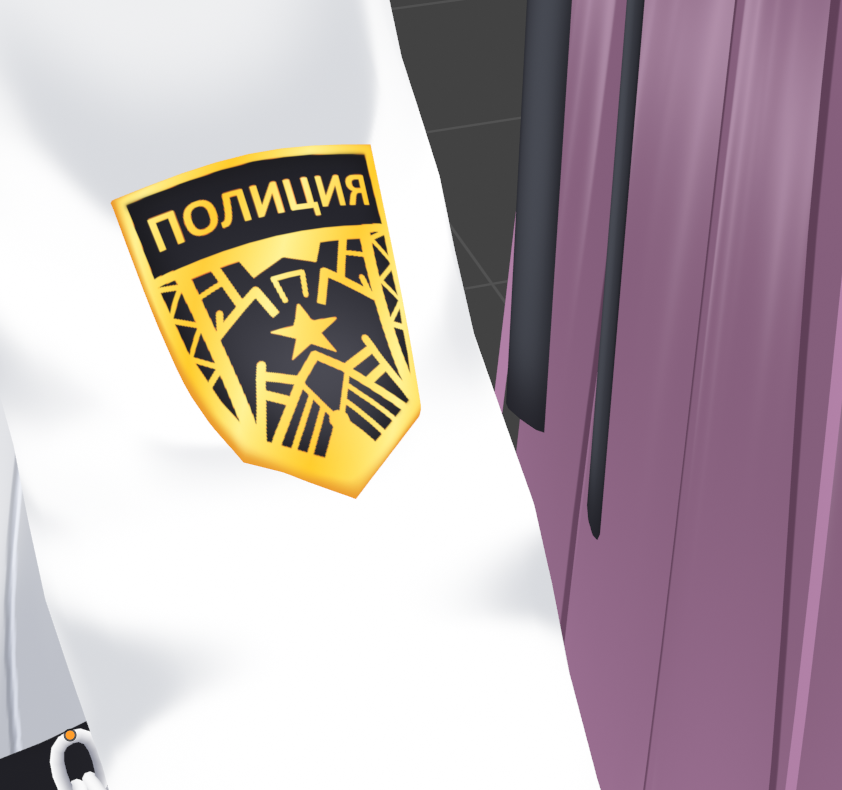 quaint jasper
Why is your badge bent
still wadi
Its like one pf those shoulder badges
spiral sigil
so i just got commissioned to do a model for someone for the first time, and since this is a first i'm not that experienced with pricing, what would be a reasonable price to set for a first time commission? i don't want to overprice it but i also don't want to sell my work under-value
quaint jasper
Depends what you're making
if it's a frankenstein/kitbash then 30-50$ is what we usually see
If it's full scratch then could be 200-1000$
@spiral sigil
spiral sigil
it's a full scratch custom model which should be compatible with vtuber software and vrchat
im currently waiting to get the full character sheets so i have some time to come up with a price offer
@quaint jasper
quaint jasper
Then yeah, pricing should start at at least 200-300$, depending on the complexity
spiral sigil
i think i can set it off of that once i have the sheets, thanks!
 patent pollen
heya!
not sure if this is more of a unity/sdk thing
but rn I need to make a 2d mouth and I remember hearing somewhere you could do actual animated visemes and if i cant should I use a shader or just finesse it when i model it
quaint jasper

EDIT: If you are using an MMD model please read below!
In this video I will show you how to make your 2D eyes/mouth type avatar have a blinking animation and mouth movements for VRChat!
The process is different for MMD model...
vivid crater
you can use actual animations as visemes now too, that ones a bit dated, same idea tho
 elfin saddle
Ohhh, whats the new method for 2D visemes? I've been looking for that~
I've been using cards to pop in and out on blendshapes. :B
Looks proper janky. XP
"The Viseme animator parameter is updated in all viseme modes."
Ohhhh~ 8O
That's big~
 frosty plinth
 radiant moon
Why is Leeloo an anime girl and why is she wearing a mickey mouse hat
 onyx juniper
Nah she looks more like a pixar girl. You can see she actually has a nose and lips
And the iris only takes up about 40% of the eye instead of 90% of the eye
And the eyes are shaped like eyes instead of rectangles in disguise
Also I think it's not Leeloo but Wishes' original character, donut steel
Anyway, I like it
keen delta
How do I assign a vertex group with weights onto a bone again? 🤔
quaint jasper
change its name
devout scroll
to match the name of the bone
keen delta
Thanks
 calm anchor
is there any way to apply UV coordinate moving to a shape key?
etcetera
found out you can store multiple UV's. All i need to do is make them switch out as shape keys.
calm anchor
wild guess, but see if there are any NGons around that area in blender?
 tight socket
there was a sneaky lil ngon that ruined my day. cheers lol
still wadi
@calm anchor you'll have to do that in unity make the textur itself relocate in an animation under uvmap
calm anchor
i'm wanting to use this for the talking anims. is that possible?
still wadi
should be
calm anchor
ok thanks a bunch!
calm anchor
ok
still wadi
i help 🙂
quaint jasper
Proud of you
still wadi
do u like feet ?
quaint jasper
0 to 100 real quick
spiral sigil
👀
 spring kiln
everytime i split a body in half and put it back together you can clearly see a line
recalculate, flip normals or remove doubles doesnt help
https://i.imgur.com/RMhPedw.png
quaint jasper
set normals from faces ?
spring kiln
@quaint jasper thanks a lot that helped
still wadi
yea who ?
 tame pelican
@clear geyser <----- this one
 muted raven
Sooo i really like skull girls
so i made this
I think im gonna make a head hunter variant
shes op
 halcyon citrus
As a person who also enjoys Skullgirls, I approve. 👍
ashen forge
hey kids wanna know how to make 3D modelers cry
I'm currently fixing up the greaves on a really old model of mine.
Left(old) is 3,964 tris Right(new) is 920
 inner thicket
I cried when I first tried to weight paint the left and right half of each side of a dress to a leg to save on dynamic bones and cloth physics.
 sudden laurel
Hey, I have a really specific question. Can we put fur on things yet? Because I want to make a really specific model that's only going to work if there is a way to do it.

Aka this demon
median pike
You can use a fur shader or haircards
It will never look as good as the movies and drawings though
sudden laurel
Thank you for the answer! And actually that's a render right there if you are wondering. I'll need to recreate it as I don't know if anyone has even tried to fan create the character.
spiral sigil
is anyone here using the modeling cloth ad on?
I'm having a lot of trouble where the pattern will only sew if I turn off collisions
which isn't particularly useful
spiral sigil
@quaint jasper are you having any luck with it
quaint jasper
yeah it's great and works well
make sure you add and remove the collider option on the mesh collider, sometimes that fixes it
@spiral sigil is it working ?
quaint jasper
yes
spiral sigil
Alright
tight quartz
Hello!!! So is there any good video on how to make a base model for vrchat?
Or a VRChat model in general.
quaint jasper
a vrchat model is just a 3d model with specific bones requirements
radiant moon
Any advice on how to fix this?
spiral sigil
oh lord
spiral sigil
@quaint jasper have you run into anything like this
I feel like there's some settings I should be playing with to get it to work
or should I break the mesh up
spiral sigil
ty
spiral sigil
can you post screen shot of your settings
because bend spring 0.03 makes my pattern dissapear
 white moth
This is a pretty basic blender question, but when I'm currently repositioning something (G), is it possible to pan the camera?
I feel like there should be but I've always just moved stuff in parts and then moved the camera
quaint jasper
@spiral sigil disappear ? can you record your screen when you start the sewing
@white moth What's the use case ?
white moth
I'm trying to slide some UV's to another part of a texture but it's so far away I can't do it without either moving the camera or zooming out too much to see what i'm doing
since while repositining i can't seem to move the cam
quaint jasper
@white moth Use the snapping feature ?
you can snap to 2D cursor or anything
and then use . on numpad to recenter on selection
white moth
The issue is things like . don't work while repositining - they just start typing a move value (decimal)
quaint jasper
can you show an example ?
spiral sigil
OK so
setting the value to that didn't really help
for some reason my fabric just crawls up the model
spiral sigil
yeah I wasn't
this is a bit more satisfying than the shell modifier
I wonder how hard it to is to make more advanced stuff though
like flaps and cuffs
 deep dirge
why not just model it
tight socket
why model it
deep dirge
seems easier to just shift D and alt s the torso
quaint jasper
@spiral sigil that's also at the end of the video tutorial afaik
but honestly you can do the more advanced stuff through blender cloth itself
If you have a flat torso yes, otherwise no
radiant moon
Oh my god, I just realized what was causing my issue
tight quartz
a vrchat model is just a 3d model with specific bones requirements
Bruh. But is there any video that guides into making a base model then?
radiant moon
It was my dumbass forgettiing to set the texture node of the normal map to non color
quaint jasper
@tight quartz yeah a ton on youtube, what have you watched that wasn't good enough ?
tight quartz
I haven't really watched any since I just started getting into Blender. I just thought someone would recommend me a good one.
quaint jasper

In this episode we model a low poly character in Blender, to be used in the RPG series.
See Brackeys' channel for the programming half of this series: https://www.youtube.com/user/Brackeys
Download reference images here:
https://www.dropbox.com/s/q12ji6k6bf3fa8a/Player ref...
tight quartz
Ok nice! Thank you!
spiral sigil
Im stupid bad at video comprehension
I'll have to rewatch it a few times before it sticks
tight quartz
Same. .-.
white moth
These two islands have the same topology, but one is morphed. Is there an easy way to snap one to the other, because you'll save me a half hour of copying and pasting UV coordinates one vert at a time.
I thought about data transfer, but they are part of the same object and vert order is very different
quaint jasper
you mean automatically morphing the bottom island to match the top one ?
sounds like a job for UV squares tbh
median pike
hows my topology?
spiral sigil
looks alright
you going to use it for something or is it just for learning and renders ?
median pike
I wanna use it on an avatar
its around 7k polys
I know thats a lot for a single piece of clothing but I cant do better
spiral sigil
some poles are not on a flat surface, won't that cause issues like n-gons ?
quaint jasper
Does the render have AO and baked normals ?
 subtle crest
which program do u use for 3d modelling?
 shy trellis
If I want to add clothing to my avatar, is the best way to just make it an object that I toggle on, and KEEP the underlying geometry? rather than making a second version of my avatar and switching to it, with the benefit that it removes the underlying geometry
 subtle jackal
A person I know was experimenting with using shapekeys to scale in the parts of geometry that were covered to help prevent clipping, but aside from that yea pretty much. If you're the more savvy sort you could also create multiple sections of your avatar that you toggle with each outfit and just match the vertex normals at the seams.
 iron agate
Got a question
I have an fbx I exported from Blender
when I import that FBX into substance painter, the body is incredibly tiny and the clothes and eyes (separate meshes) are normal size. Do you know why this is?
and how I can fix it?
quaint jasper
apply your transforms in blender before exporting
median pike
@quaint jasper here. To answer your question, yes the normals were baked. But today I worked on it more and I finally got a much better normal and AO bake done. Tell me how it is.
quaint jasper
Looks dope
shy trellis
@subtle jackal Thanks. I ended up doing a combination, like I have plate carrier over a shirt that I disable with an animation, but I also have a tie underneath that I have as a shape key, which I set to 100 when the "plate carrier off" animation plays
I can't think of a good way yet to take the shirt off entirely yet. I had removed the mesh underneath. What I should probably do is make a "chest hide" shapekey on the nude mesh, and have that 100 whenever shirts are on
 silver plank
6th attempt at creating an avatar from scratch. I think im getting the hang of it
spring kiln
can't edit bounds on skinned mesh renderer, the white cubes to drag dont appear 2018 unity and in gizmo everything is enabled https://i.imgur.com/HOGell7.png
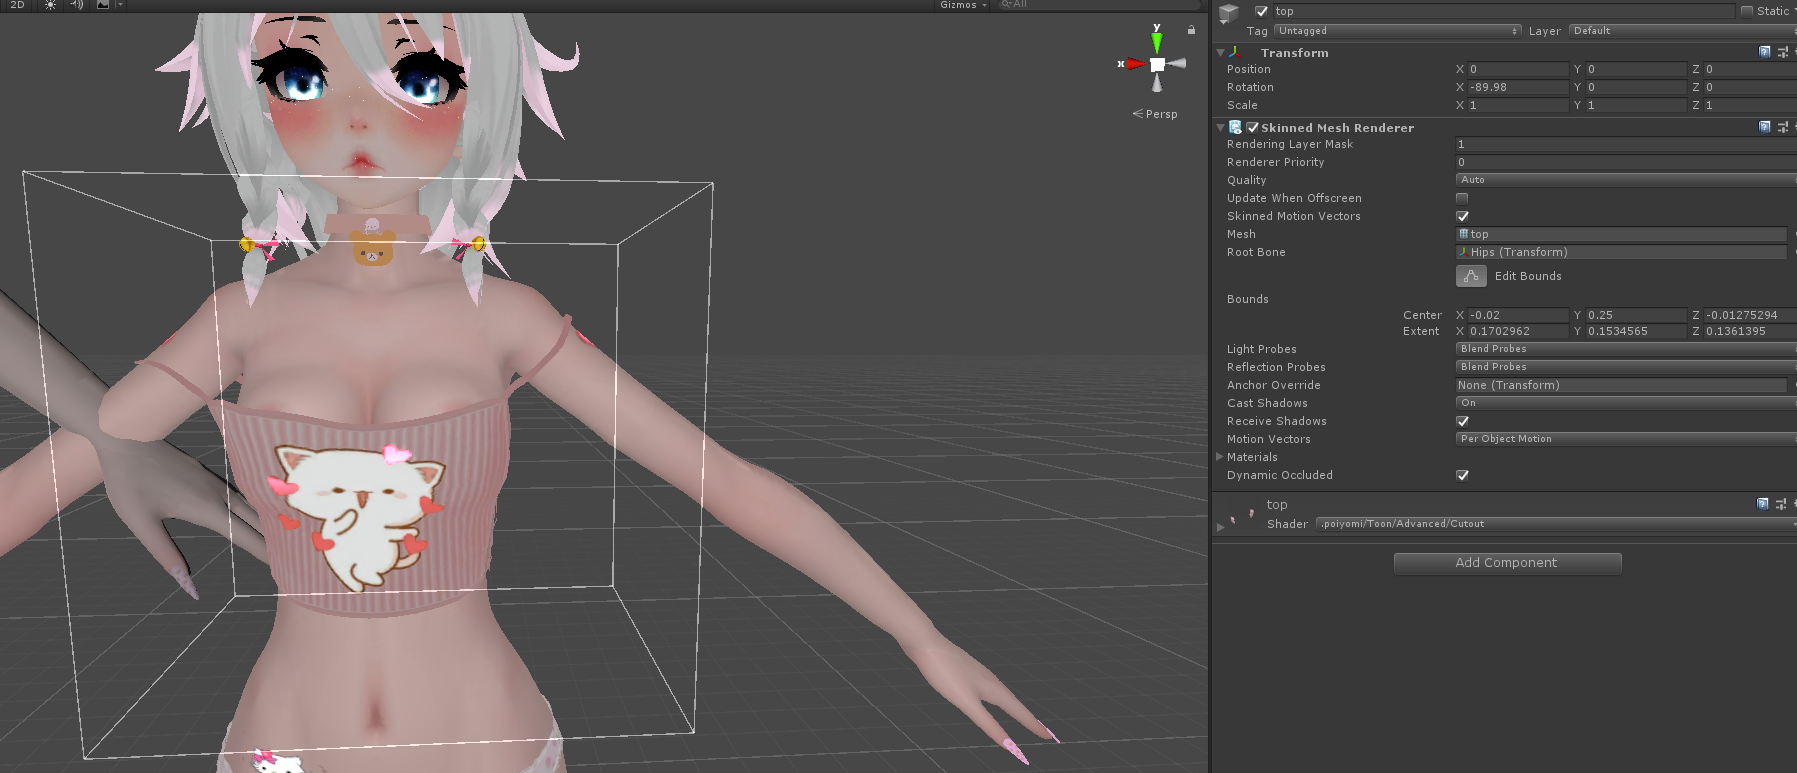 quaint jasper
I don't know if you can, but what's the purpose ?
Have you tried settings the bounds and then moving the center ? @spring kiln
spring kiln
when the bounding box is too small sometimes people cant see the object when too close or they look from a weird angle
quaint jasper
i mean, this is larger than the mesh as every bounds generally are
spring kiln
i could do it just manually yea but was wondering why the buttons are missing
quaint jasper
joining meshes and doing it through a blendshape would ensure it's always visible
make sure there's nothing in the console about it too
spring kiln
oh yea blendshapes, thats even easier now with 3.0
quaint jasper
yep
I don't have any model with multiple skinned meshes, so i can't test this behavior myself
i actually i do, but i'm not seeing your issue
spring kiln
it works normally on my project with sdk2 but doubt its the sdk doing it, but its not a big problem
quaint jasper
make sure the gizmo isn't disabled too i guess ?
spring kiln
well thank you for your time and reminding me about blendshapes again
its all checked
quaint jasper
and all the parent objects are enabled ?
spring kiln
yes they are
quaint jasper
i'm out of guesses
spring kiln
its ok thanks anyways 
radiant moon
Oh yeah, it's super easy
Just mess with the setting, go into play mode and wiggle your model around to see if you like it
Don't forget that if you edit the settings while in play mode they won't save
 coarse light
ik that part
im having an issue
when i add the spikes to my tails hierarchy
the tail twists n becomes flat
even tho i have them listed in my exclusions
 still rain
hi can i ask question for particle here ?
 vestal spire
May I get help here on Blender? So I want to sculpt the cloth on my avatar. But I want to make it easier. I dont want to make the cloth go through the mesh that I dont sculpt but I wanna sculpt the cloth into the same geometry and touching the body mesh. Is there a way to set the body mesh as mesh that makes the cloth mesh not to go through the body mesh while I'm sculpting?
devout scroll
look into masks and face sets
actually wait, that doesn't sound like what you want
you mean your cloth is a separate object and you want the cloth to stick to your body?
vivid crater
if you actually mean using the cloth sculpt brush, then cloth collision for sculpting is in 2.91 alpha right now, not on the stable release
 abstract hazel
Drawing over my model to get an idea, it's kinda tricky trying to get the shape just right
based on this character i created
devout scroll
The horn thing looks a bit too straight
Other than that it's mostly just messing with it until it looks right
abstract hazel
Like the halo horn you mean?
radiant moon
that part looks fine to me
abstract hazel
Thanks
median pike
slowly coming together, the bakes went alright and the topology is "fine"
52k tris
could be much better, but I cant do better
quaint jasper
Looks great !
median pike
thank you
 wheat swallow
Anyone know how to fix this type of issue?
This is just a pair of glasses im making. This spefic piece has its fron faces transparent but in blender there perfectly fine. I have made props before but non do this
median pike
flip normals on that part
abstract hazel
well just hit a -> alt+n -> recalculate outside
wheat swallow
@abstract hazel @median pike ty
 trail shuttle
Hey I was wondering does anyone know a good series to learn blender for 3D modeling up to rigging? I’m a beginner. And I’m making a sick dohnut right now learning the ropes.
 raw basalt
Hey...I was wondering if anyone knows what's going on with this model, porting from Gmod to Unity here and this model is missing...it's torso, upper legs, entirety of their arms, part of their face and the entirety of their ears...I honestly don't know what is going on and I could use a hand as to how to fix this.


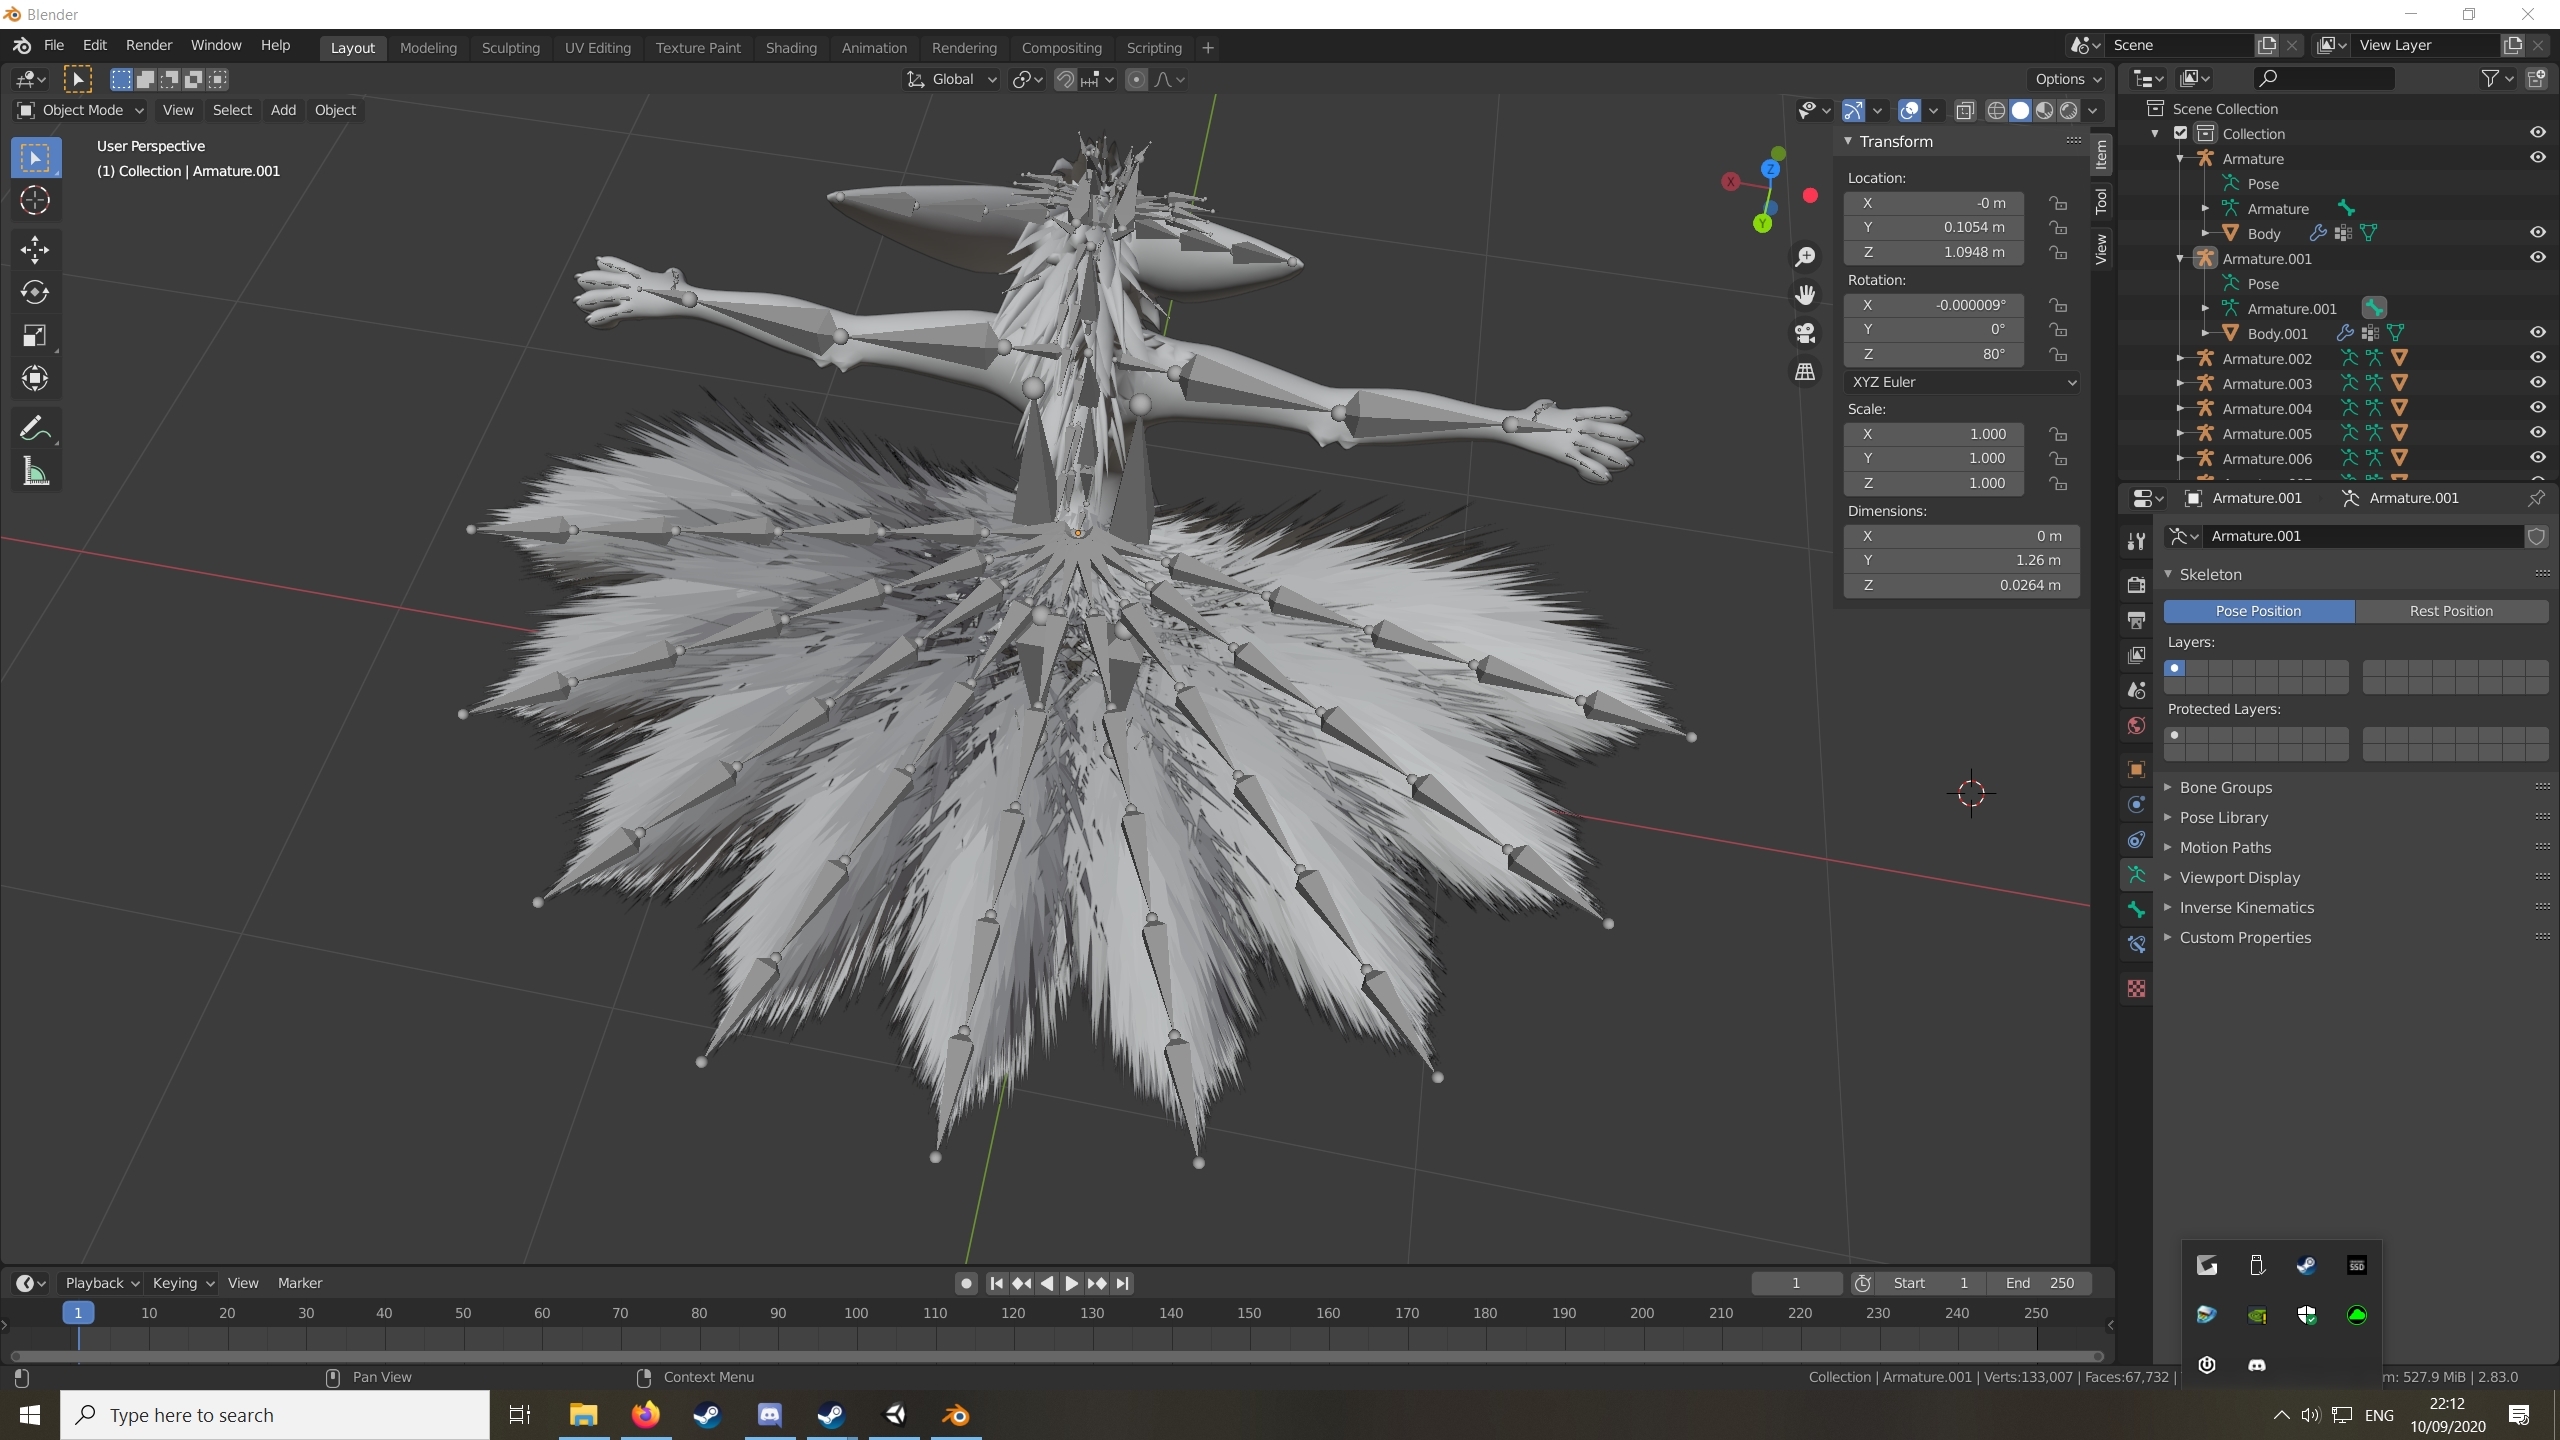


 raw basalt
It's the fox player model from gmod.
I'm just hoping someone would know what is causing this...because I don't know, other people I ask don't know.
quaint jasper
yeah i've never seen that before
 river tulip
GitHub
Rewritten from scratch mdl importer, should now import any V49-V48 models with lods and etc
raw basalt
It's not a redxeye model but thank you.
quaint jasper
river tulip
It's a blender importer script
quaint jasper
redxeye made the tool
quaint jasper
it just allows for more file type to be imported
raw basalt
Right...but how do I use it? I'm new to blender..
quaint jasper
import >
raw basalt
I'm an idiot...I mean how do I get it into blender?
Not the file...the MDL
Do I install it?
quaint jasper
??
raw basalt
Do I install the sourceio file into blender....I don't know what in the world I am talking about am I?
river tulip
you already have it installed
raw basalt
That's the old source tool...not RedxEye's
quaint jasper
then do the same with red's tool
raw basalt
Thank you, and sorry for the large amount of confusion...I'm an idiot as I said before but I am learning
 daring isle
So im tryna put a coat on my avatar but it keeps clipping into the body and im not sure why or how to fix it.


 coarse light
Anyone know where to get dragon wings
 valid dirge
anyone know why my avatar is appearing pink in solid view and all black in render preview
 unborn pike
@daring isle I found if I can transfer weights over from the main body, it will stay a fixed distance from my body. Or delete the part of the mesh covered by the jacket.
quaint jasper
@valid dirge Incorrect texture ?
valid dirge
but i mean its the texture that came with the base
@quaint jasper can i dm you a pic?
quaint jasper
yeah but you need to apply it in the material
valid dirge
how do i do that
sorry i am very very new to this
i tried sending but it keeps saying upload failed
quaint jasper
highly suggest you google all the questions you have related to blender, very likely someone had it before you and that there is a tutorial for it
valid dirge
i tried following a guide but i still had the same problem
i used this guide https://all3dp.com/2/blender-how-to-add-a-texture/

All3DP
Textures show us an object's appearance independently of its shape. Keep reading to learn about Blender's add texture features!
quaint jasper
then the shader is incorrect
valid dirge
oh i think i know the problem
quaint jasper
ok so you're missing one blink and the two lowerlids
quaint jasper
Sure, lowerlid is an almost empty shapekey though
 mild nexus
I will try that, thanks
mild nexus
it worked, i just had to configure the eye tracking like this, and the lowerlids got fixed with that
Just in case that someone else has the same problem
elfin saddle
I never understood why there's a left and right blink slot. Is there anything that uses a wink animation? 🤔
abstract hazel
well in avatar 3.0 it seems they merged it together into one blink
 gray grotto
Anyone know why my blendshapes are showing up like this and are unusable? They work fine in blender
 young vault
Just change the number to the right, the slider should pop up after that @gray grotto
young vault
Weird, usually works for me when this happens. But, glad it fixed itself for you
 vital drift
Yandere dev chalice 😱😱
 bronze walrus
I suck with proportions, does this look right?
namely the size of the head to the body
abstract hazel
top of the head is extremely flat
it needs to be rounder
unless you want him to look like frankenstein's monster
bronze walrus
It looks that way, but I'm in ortho view
ashen stag
That should be covered by hair anyways, all TDA like models have that head structure
bronze walrus
right
I just want to make sure that the head doesn't look to big before combining the meshes
ashen stag
Only thing that is bothering me is your tpose is pointed upwards, head honestly looks fine but its harder to tell without hair
bronze walrus
pointing upward?
ashen stag
From the side tho the neck seems too thick/short but that depends on the build you're going for
yeah the arms should be parallel with the axis but they seem to be pointing upwards
bronze walrus
oh yeah, they do have a tiny upward tilt to them
I must of missed that when I was setting the base in tpose
and tbh, I have no idea how to fix the neck
it came like that with the base and I'm not skilled enough to make it look better
abstract hazel
still planning everything out slowly slowly
bronze walrus
for what it is, I don't think that's all that bad
ashen stag
Yeah hair does make it look better