#3d-modeling
1 messages · Page 90 of 1
 devout scroll
 quaint jasper
If you start with no knowledge of blender it'll take a while
 stuck sequoia
:/
 tulip condor
@devout scroll
ok i press CTRL+M and do some x,y,z combinations
but it doesn't do anything useful to me
 wintry vector
How do I make the armature transparent in pose mode? I don't want it invisible, just not so opaque
 velvet aurora
<--- Is still here. ^^
devout scroll
no, ctrl + +/- grows/shrinks selection
M to join by distance
@velvet aurora you're missing a neck and head, as the error clearly says, if they're there, rename them
velvet aurora
Hrm, I'll see if I can find the head and neck on a metarig.
devout scroll
@wintry vector you can set the display type to stick in either object properties or armature settings somewhere
velvet aurora
Thank you btw ^^
@devout scroll It worked, thank you. =D
Time to add the weights!
nvm, didnt work, lol
Wonder if it's the hair.
tulip condor
@devout scroll
i will do that tomorrow
thanks for help
 acoustic lichen
I'm trying to get a fan blade to line up with a cylindrical hole. It's centered, but it's not angled right. Is there a way to constrain two particular faces of two objects to always be parallel?
acoustic lichen
Like I know how to do it in inventor but I can't figure how to do it in blender
 spiral sigil
Alright, so I wanna reflect the changes done to one side of the mesh while preserving the original UV layout. Using the mirror tool flips the UV.
Is there a way to simply reflect the vertices' new positions to the other side without changing the UV in the process?
spiral sigil
The effects are too strong to make out any real details. What're you wanting exactly?
 north mesa
basically a mask with only eye holes its a wooden brown in color (sorry if that didnt help)
 wanton cape
So I was wondering on how I could start modeling
I wanna make Dio Brando from late Part 3 JoJos Bizarre Adventure
during the Road Roller Scene
 stark ore
Finished Texture work on the model unless i come back to it. just got Rigging and visemes left
quaint jasper
@acoustic lichen That's a rigging issue, you'd need a child bone to maintain its rotation
acoustic lichen
gracias
 lament pond
 velvet shell
hey guys, not sure if this is where this would go, but I'm having a weird issue where after exporting my finished model as an fbx file, when i try to import it to unity, unity crashes. I tried another avatar and it imported fine so something must be wrong with my model in blender but I'm clearly too dumb to find it myself. I think it might have something to do with either my terrible attempt at texturing my avatar's shirt or maybe something when i removed his old torso/bones/etc to import the new chest/shirt with its own bones and stuff. I have tried fixing model using CATS to no avail. Any help would be appreciated, apologies for the long post just trying to give as much info as possible.
velvet shell
i just had the torso separated for the picture so i could bring up the uv map in case that was the problem, but im not sure what you mean by fixing my shapekeys
quaint jasper
Try any of your face shapekey in blender
 ashen gazelle
Are you sure unity 2018 supports UDIMs ?
velvet shell
here is a ss of some of my shapekeys, how would i test to see if they are working properly?
velvet shell
im really sorry but Im not sure which slider to test or where it would be at
quaint jasper
below that list
velvet shell
is there any easy way to fix that or is this going to be a start over kind of thing
quaint jasper
super easy, select everything but the face (anything that is affected by your facial shapekeys) and do "Shape propagate"
velvet shell
i already combined my meshes, would i need to like separate the head somehow? im ultra mega new to this
quaint jasper
Try doing this on the shirt and other parts of the mode first
you can press L with your cursor on those pieces in edit mode
shape propagate and try the shapekeys again
velvet shell
so i may or may not be able to find the shape propogate button but i have the shirt selected
nvm found it
alright! he makes it into unity now! thank you for helping me out idk if I would have figured that out on my own. Now i get to try and figure out why he has no face lol
quaint jasper
no face ?
velvet shell
no face and no loading textures
i know i have to apply them myself but even still i thought they were supposed to show up with the fbx
quaint jasper
I think your normals are inverted
check your mesh in blender, "Recalculate normals"
you can open the model from your unity project in blender btw
saves a bit of time
works as long as you're not editing bones
velvet shell
that fixed almost everything but face
which i can see a very faint transparent face like its supposed to be there
devout scroll
normals don't recalculate properly it faces are separate
remove doubles (or merge by distance in 2.8) would close those gaps but it could also potentially connect your lips as well
so cat's one probably ignores the face
you can try manually doing it but be careful with the mouth
velvet shell
the face is definitely there bc I just put a texture on it and it showed up
not transparent or anything
devout scroll
just select all the face and press M, merge by distance
then check the talking visemes if everything is ok
velvet shell
i did that and he came in pre-textured but his face is still kinda messed up
his neck is missing chunks and his eyes are just pupils
everything else looks good though
devout scroll
eye whites are flipped, same issue as before
Turn on face orientation and flip normals on all the red ones if recalculate doesn't do it right
devout scroll
i think so
but really, you can just select the parts that you see are missing in unity instead
velvet shell
the neck included?
velvet shell
yeah that fixed it
thank you guys a lot for all your help with this
got alot of tweaking to do now but should hopefully work from here
 valid moat
How do you color a model?
 hallow bough
An unwrap+textures. You should look up a tutorial for beginners on texturing Lucky 😄
valid moat
I already have it unwrapped. I don't know how textures work though. And all the tutorials I've seem are very boring to me. I prefer a more hands on approach
I have everything (desides from eyes) on my model so far. (And i don't understand any of the shortcut commands thus all the eye tutorials are very confusing)
 rapid jasper
on Blender 2.79, how can I get textured, solid bones? I don't really like this transparent look
 reef mantle
You Blender users are masochists
reef mantle
Ohh, VRchat supports normal maps?
lament pond
You just need a shader that has a normal map slot.
If you're going for toon style I recommend poiyomi.
reef mantle
Thanks. I'll remember that.
 white moth
Blender makes more sense than unity to be honest
At least current blender anyway. 2.79 blender users are masochists.
 normal rune
 carmine knoll
can someone make meh a avatar dm if u wanna help
 loud junco
Hey I am looking for someone to make me a avatar for free if you can it doesn't have to be nice just represent me.
quaint jasper
No one will do that
loud junco
hey its worth a try
lament pond
Comparing and prefering blender vs unity is a bit of an odd thing to say considering blender is a 3D suite and unity is a game development software. . .
reef mantle
No I mean like using the shift and control key to move and rotate instead of in maya where you use Alt + mouse buttons
white moth
Comparing and prefering blender vs unity is a bit of an odd thing to say considering blender is a 3D suite and unity is a game development software. . .
@lament pond I’m fairly versed in both they seem perfectly comparable to me.
lament pond
But you can't really 3D model in Unity and from what I remember didn't Blender phase out the Game Design portion of it? xD
white moth
I don’t see how that means you can’t compare the two. The interface for both are pretty much the same.
I can say solving a crossword puzzle is easier than operating helicopter. They don’t need anything to do with each other.
Both blender and unity are great at what they do and outstanding when you consider that they are free. That said, unity, at least the “make games without coding” part of unity, is a pretty tedious.
Much easier if you know a little bit of C#
reef mantle
The thing I dislike about Blender is that the button layout makes me sick
In Maya and unity at least the rotation, move and scale buttons are next to each other
 onyx juniper
Clicking icons for translation operations instead of using hotkeys? What is this, The Flintstones?
 frosty plinth
another cheap build
cause i dont have time to make high quality for my world in october
 still wadi
@quaint jasper amount of special ppl you gotta deal with, kudos to u sir
quaint jasper
We like you even if you're special 
 muted atlas
working on a protogen o3o
going to add more plumming to his legs and also to his torso
o3o
frosty plinth
so far
might sell it or give it away for free when finished idk
gonna be fun when merging all the verts
quaint jasper

still wadi
i see
 stable mountain
i tried creating a model from this avatar but I'm very bad at modelling it, any tips
quaint jasper
Looks good to me !
stable mountain
nah, these are the reference photos, i want to make a model from these photos
my bad
quaint jasper
Oh, well, did you try sculpting or moving vertices/edges/faces around ?
stable mountain
yeah, i accidently deleted everything, so I'm trying again
stable mountain
in blender is there any way to merge two objects without having to merge each vertice by hand
 molten flume
use "boolean" modifier
 subtle jackal
Been spending way way too long on this, but man, seeing it all textured finally is really quite nice. Aside from my hand. My hand hurts.
(All painted in blender btw)
devout scroll
that's rough (the painting in blender thing)
last i tried it leaves really bad seams when you paint over an edge and it wraps the brush around
but looks really good!
subtle jackal
Nah painting in Blender is pretty decent. Way nicer than, say, Substance Painter, which I've found to be awful for this style of work (great for clothes tho with the baked light node)
I suspect something like 3D coat may be better but I don't have it so eh
rapid jasper
https://cdn.discordapp.com/attachments/390924397726138370/747817635030499378/unknown.png
Can somebody actually answer my question? How do you turn the bones' appearance to solid instead of transparent? I know there's a way, but I can't find it

 latent charm
@rapid jasper Assuming blender 2.8x:
Object tab in properties, Viewport Display section, Display as: solid
In 2.7x It's the object tab, Display section, Maximum Draw Type: solid
rapid jasper
oh finally, thank you for the quick answer
spiral sigil
Belly button tuft.
frosty plinth
muted atlas
i got that on my avatar
as animation xD
i've been doing it for 7 years
and the more you do it
the easier ti gets
but like
dont expect to make a master piece on your first try
i've had friend that stopped due to that
devout scroll
It's like learning any skill
It's not inherently hard* but takes a long time to master
*depends on what you're trying to make
spiral sigil
Ah I see then
tulip condor
hi
in blender 2.79...
i have some small annoying problem
which cause my avatars edges to be highlighted
i probably turn' d on something
here is the video:
any idea how to fix this ?
devout scroll
kinda hard to tell what you mean when your colors are so weird
 merry plume
i need helo with a problem with mirroring the x axes
devout scroll
well what is the problem
merry plume
i fixed it
still wadi

spiral sigil

stark ore
 devout scroll
soon™️
lament pond
Make it
 leaden sigil
can i get some help with a blender exporting issue?
 latent temple
@leaden sigil if you drop the issue in here, someone might have an answer
leaden sigil
i have a question, what makes my model break whenever i export it? The one on the right is the one before exporting and the left one is after i exported and brought back into blender
https://cdn.discordapp.com/attachments/185590907947581440/748283421653991555/unknown.png
 quaint jasper
Why do you have 7 bone leafs
leaden sigil
?
quaint jasper
Do you have the cats plugin ?
leaden sigil
not that i know of
quaint jasper
Get that first, use the auto fix
leaden sigil
ill try it, thx
spiral sigil
Anyone know of any decent skeletal references? Like 3d bone scans you can rotate around or something similar.
 ember prairie
There's a way to stop bone leafs from happening when you import to blender as well.
 solar trench
You can use an XboxOne kinect for windows using styrofoamballs on the node points as a frame of reference and a program called ReconstructMe.
I now use Daz3D and export the models as an .fbx and then run through with the cats plug-in.
 stable edge
Interesting workflow tbh
onyx juniper
I'd love to see daz models in VRChat

 vivid crater
Nice pp
devout scroll
uwu
 tidal wharf
Aight I like.
I'm gonna have to probably pay someone to make me an avatar ._.
Cause I think I am gonna drive myself nutty if I try to learn 3D modeling.
still wadi
but making models is easy just follow a guide 🙂
tidal wharf
Seriously..?
I'd probably have to do it at school since my internet is bad
Nope my brain feels like it's gonna explode trying to handle this right now.
 clever seal
anybody mind helping me make an avatar. already have an idea just need one part modeled. should be fairly simple too. no idea how to make my own models.
seriously no idea what im doing

even got a blend file ready to roll if it helps...
quaint jasper
helping ? yes. Doing it for you ? nope.
clever seal
understandable
quaint jasper
Too many tutorials and help out there to not be able to do something by oneself
same with addons
clever seal
true
quaint jasper
it'll get easier super quickly
clever seal
im trying by the looks of it
quaint jasper
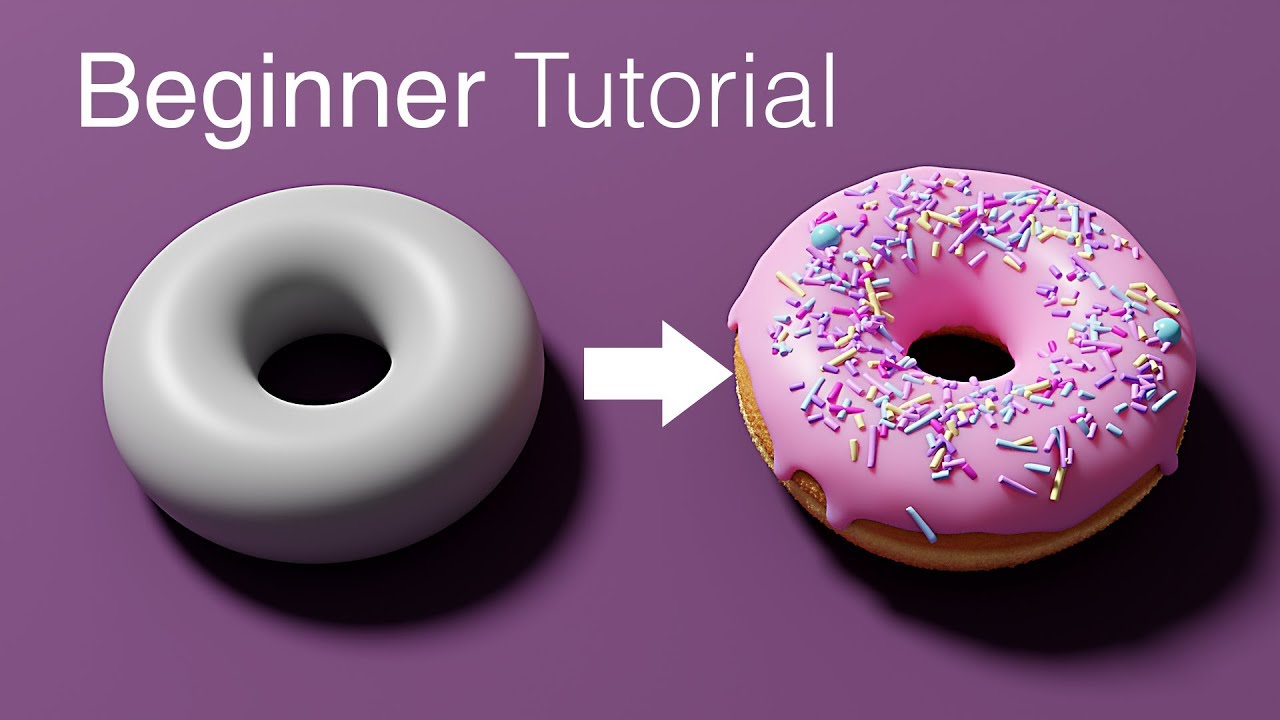
Blender tutorial for beginners! The long awaited reboot of the popular donut tutorial, completely remade for Blender 2.8x. New videos will be uploaded every other day to this channel.
Get the shortcut pdf: https://mailchi.mp/ef5b15a32043/subscribe-to-the-newsletter
--------...
Do this first
clever seal
yeah iight
quaint jasper
it will help a ton getting accustomed to the process
clever seal
no jumping straight in huh?
quaint jasper
Who would have thought 
clever seal
damn its like skills take practice or something
quaint jasper
yeah hard to believe !
clever seal
better boot blender* back up
 plain spruce

I'm making a beams for a hut
but I'm trying to rotate each beam individually so that the square side is on it's face and not the vertex like shown above
how do I individually rotate all faces so that the faces are flat instead of on the vertex?
quaint jasper
Rotation local instead of global ?
plain spruce
it's set to local with individual origins but it's not rotating each beam individually
quaint jasper
Try separating each object ? Also you should be using an array modifier for this kind of stuff no ?
plain spruce
This one specifically points to a mid section that converges into the hut, but i think the overall shape is okay now, Seperating probably would do it
thanks
muted atlas
ok this might be a record
in less then 2.5 hours
editing the full body and having hte model in VR
i only have to do the setup things for VR
o wait
nevermind
forgot i have to do dynamic bones xD
 pseudo hawk

does anyone know what kind of modeling this is called
or like the technique
take 2d images and like
make textures with em
 quaint jasper
hair cards
pseudo hawk
how do them
quaint jasper
i thought you'd google that
 plucky jolt
Finished the legs. Hopefully once it is all done I can maybe do a lowpoly version
 median pike
are you using freestyle for the outlines?
tulip condor
hi all
any idea how to resolve this ?
devout scroll
select them all and merge to center
or mergy by distance and increase the size of it until it looks like you want
M for merge menu
alt+m in old blender i think
tulip condor
i merge them all to the center but everything get screwed connected to a random whatever angle
but i will try the rest of your suggestion
tulip condor
@devout scroll
alright i forgot to mention that i using blender 2.79
because it was quite on the world scene that blender 2.80 and up wont support cat plugin that is wary crucial for unity and vrchat 2D/3D models so i ask in #user-support-old channel
is blender 2.80 and up still wornt let cat plugin to be compatible to it's version but noone respond to my q
anyway here is what i did so far...
devout scroll
if you want to do more at a time without merging them into 1
you need to use remove doubles
in 2.7 it's not in the merge menu
make sure everything is deselected before selecting
you can press space or f3 and type remove doubles if you can't find it
if they don't merge, increase the distance in the bottom left popup menu
hold shift to increase slower
tulip condor
@devout scroll
well removing doubles wont help me at all
you see...when i do remove doubles it only removes (1) and when i check os there a any double edge,vertice and face behind origin one
there is no any at all
so it's pretty confusing for me why is that happening anyway.
but i will continue to go on your guiding
devout scroll
increase the distance of it
it should give you the result you want if i understand correctly
tulip condor
ok just a sec i need to take my eyes a break every 5 or 10 min
but thank you so much for the help
devout scroll
@tulip condor https://puu.sh/GmGQO/53cac7e2f6.mp4 (used F6 to bring up the tool settings menu after I did it)
 night ember
basically want to get it back looking like one peice (meshes are already combine
devout scroll
click remove doubles in cats
night ember
o heck
i just realized i couldve done that
lol
ty so much
im using 2.79 so for me itll be alt m
devout scroll
cats does it in a different way I think
night ember
ah yeh
devout scroll
so it doesn't destroy your face visemes if your lips are too close together for example, it shouldn't weld them shut
night ember
for them you combine the verts
but in 2.79...its a lil tedious
im ok with that though
tulip condor
@devout scroll
devout scroll
i'm still kinda confused what your problem is then
if it says removed 0 it doesn't matter because you press f6 and change the distance
but can you try to explain again what you're trying to do
tulip condor
ps the discord will not show you the full screen of the video
(well i think it's only case for me)
anyway if that is same for you
then most likely that you must download an video in order to see it in full screen so you will see what's on the bottom
in short i want to connect multiple + edges to their centers
and i think that you understand me correctly
@devout scroll
you mention this before
"increase the distance in the bottom left popup menu
hold shift to increase slower"
excuse me how i can do that in my blender
because there is no any left popup menu and to hold shift to increase it
devout scroll
oh yeah it's not a popup in old blender
press F6 or use the menu on the bottom left
after you do it
tulip condor
@devout scroll
oof i migrate my project to a deferent location
and from there i load-up my scene
but this time i have some of more disconnected edges
so it will take some times to fix them
but when i fix it i will try what you told me
and i will let you know my final result
devout scroll
alright
ashen gazelle
When I export a model to FBX from blender, the first shape key is fully activated for no reason
devout scroll
if by first you mean basis, then it's the default, it's always full
if not then is it activated in the sense that it's set to 100 in unity or it look like it's activated
ashen gazelle
I mean my A viseme is like baked into the mesh, even when opening the FBX with windows 3D viewer it shows the mesh with an open mouth
Ok, I resolved my issue, I had to put all shape keys to 0, create shape key from mix, and then apply the newly created shape key to basis
night ember
for full body stuff, my shoulders are sagging is there a bone i need to lengthen to fix this? Either arm bone or elbow?
makes my whole upper body swing
or is it the view point in unity that needs to be shortened
tulip condor
@devout scroll
yes...it partially works
but on the end i must connect some of lose vertices manually
which is not so big deal for me
here is an video:
but yeah this technique will cut my work in half
thanks again
✌️😌👍 👑
devout scroll
👍
 north rapids
quaint jasper
north rapids
quaint jasper
Congrats
 halcyon citrus

 tawdry goblet
does anyone know why blender wont let me adjust a primitive when I add one into my scene?
quaint jasper
same without selecting objects ?
tawdry goblet
what do you mean without selecting objects? you mean when nothing is selected?
when i add the mesh, blender will automatically select what is added
quaint jasper
yeah, but you had already selected the other objects in your collection
tawdry goblet
oh i see what youre saying. Let me try that
nope same issue
i'd like to also point out im getting the same issue on new blend files which is really puzzling
quaint jasper
Try resetting the layout ?
tawdry goblet
yeah no dice either
quaint jasper
try removing your Blender preferences file
tawdry goblet
are you refering to this?
well, i did what i thought was the equivalent and loaded the factory settings and it fixed it
thank you!
absolutely no clue why it occured tho
 shut cairn
umm
vrchat server is in problem right now
but i can't open SDK Control Panel in Unity
is that server issue ?
 fathom dew
I have a friend whose unity is deleting avatars and work and undo's progress when they hit play or go to upload, even deleted a whole scene, does it even in new projects. Anyone have any idea on what the cause is and how to fix it?
 ornate harbor
One of the links in pinned doesnt work anymore
quaint jasper
indeed
fathom dew
I'll get them to check when I can but yea scary stuff
 queen elbow
 surreal trout
if i have faces that are seemingly "connected" but it is actually just 2 sharp edges that use separate vertices. how can i connect those vertices without messing with the UV map?
quaint jasper
merge by distance
 gusty bloom
Not sure if this is the right place to ask, but is anyone else using the newest version of Blender and can't find the options for symmetry while texture painting? I'm pretty sure it existed before, just not sure what version.
The Viewport Overlay seems to also have disappeared, so I can't see the Normal directions as easy.
 timber lantern
i'm trying to remove the breasts from this model (to make a male version) - i removed the breasts and filled the hole, but I'm not sure exactly how to progress here and split up this new face into many faces
what's the best approach?
 fringe rock
no
timber lantern
excuse me
fringe rock
use sculpting to flat it
 dark geyser

Goblin girl for VRChat WIP. Completely from scratch. She'll be on my patreon soon.

 Twitter
fringe rock
Twitter
fringe rock
@timber lantern something like that by using smooth brush https://gyazo.com/28f397176829d6aac2e69a299c91c998
 gusty bloom
You can use the knife tool to split it up, try to make sure it's all in squares or triangles. You can also merge some vertices to lower the poly count, since it doesn't need more polys, since it won't need to deform as much as, for example the boobs on the female model.
fringe rock
you can clean the mesh after if you want but dont really matter. you wont save that mush tris anyway
dark geyser
@timber lantern F3 -> grid fill
fringe rock
boy can have well define pectorals too
 onyx crane
Does anyone here use Marvelous Designer? I have clothes made but am not sure what the next step in the worflow is. Do I need to export as .OBJ and weight paint / rig from scratch in Blender, or can M.D. do any of that work for me?
frosty plinth
 quaint bronze
@onyx crane The next step would indeed be exporting then weight painting in whatever software you choose to do your weights in. First though I would suggest checking the box for ‘remeshing’ in the settings for each pattern - it gives cleaner topology and if you change your patterns particle distance you can (sortof) control the polycount. A higher particle distance (20+) will give you a lower overall polycount but your cloth and simulation will be less accurate. Also be mindful of the UV setting on the export! MD will give you UVs that are exactly the same as your pattern pieces and it makes texturing the clothing really easy.
onyx crane
@quaint bronze Ah, thank you so much! For the UV setting-- do you keep it at the defaults, or do you check anything in particular on the export screen?
quaint bronze
Checking Unified UV Coordinates will make MD fit all the parts of the UV into a square. Which may or may not be what you want depending on how you plan to set up your materials
Weld/Unweld lets you control if the seams on the cloth get connected on export
timber lantern
what's the best way to add more verts to the ass to make it smooth? I've always just selected the area and hit subdivide but that results in shitty topology with half-way verts on the edge of the selection
timber lantern
though i guess the topology is already a bit off
timber lantern
hard dejavu
i noticed there's a checkbox on the subdivide menu to avoid n-gons and such
 deep dirge
Why do you need it smoother
It's already at a perfect amount of faces
Hell, it could even be lower
timber lantern
sharp edges
i can't upload images wtf
well anyway it's still p obv
you want a smooth silhouette
i actually used sculpt tool as franada suggested, succesfully
thanks tho
devout scroll
also just use grid fill instead of cutting out quads
 dim vapor
frosty plinth
dim vapor
frosty plinth
correct btw when I'm done the outfit, its not going to be for sale sorry...
frosty plinth
Finished, btw hope you like!
timber lantern
bit late but smooth shade doesn't fix the sharp edges
upload failed
nvm
no preview huh
lament pond
@frosty plinth considering the outfit is meant to be skin tight it may be best to cut it out of the body so you don't have to worry about clipping
timber lantern
if the topology doesn't work with the outfit you're trying to make, is it best to do like a 'best fit' and then sculpt it?
for instance, i wanted to put panties on a model by duplicating some of the skin mesh, but the topology didn't work for it at all
frosty plinth
im using my wishes body to make the outfit, plus i know your way of doing it, i might of did that if i was giving more thought were to start... i woke up and got right on and was like grid build lol
most of the time im building half asleep early in the morning as a head start before i do other stuff anyways gtg thx
 boreal escarp
Can anyone tell me why this model I made gets split down the middle when you get further away from it?
up close:
Far away
When I made the model in Blender, I made sure to have the mesh merge in the center. It was a mirrored mesh
fringe rock
You dont have enought margin on your texture. So the uv picm up the red beside it
When you go further the uv expend slowly
The more far you are
Sort of
devout scroll
You can also use a shrink wrap modifier to make it skin tight then transfer weights from the body mesh underneath
boreal escarp
Shrink wrap modifier?
Also, that helped a little
But there's still a line at the bottom
I cleaned up the texture
This is roughly what it was before and after
devout scroll
sorry, was referring to @frosty plinth 's stuff
boreal escarp
understandable
fringe rock
Like not having red
molten flume
Deactivate mipmap
On the texture in unity
That whats create wierd cuts in a model over distance
 ornate talon
Hey I was wondering if someone could help me recognize which Nanachi base is used. I'm looking for an avatar base which looks really similar to the Zoichi base, but with the fingers not connected to the hand.
Example of what I mean with this. The 2 pictures above are example of what I'm looking for. Lower is what the fingers on Zoichi base look like
 next agate
Can someone tell me where an avatar like this can be found or who could make such thing?
 marble summit
yo,i wanna ask,how much do yall think a custom avatar of my sona would be?
fringe rock
Yall?
boreal escarp
Google is your friend, franda. It's a contraction of "You all."
@molten flume How would I go about deactivating the mipmap? I've looked for the option and I can't seem to find it.
spiral sigil
Google is your friend Hath
https://answers.unity.com/questions/22491/how-do-i-turn-off-mip-mapping.html

Unity is the ultimate game development platform. Use Unity to build high-quality 3D and 2D games, deploy them across mobile, desktop, VR/AR, consoles or the Web, and connect with loyal and enthusiastic players and customers.
boreal escarp
Yeah
Saw that, but it's a whole ass page of info and finding what I'm looking for isn't really working out
"Locate the 'Generate Mip Maps' option and disable it,"
Like, gee Billy
I haven't tried that yet
Shit, nvm. Found it lmfao
I looked at this page like 7 times
fringe rock
Sound bad, who's speaking like that. Anyway. The issue if you disable mipmap, you will get a pixelited texture when you stand far away.
boreal escarp
Yeah. I got it already.
I used to play a ton of TF2 and knew what mipmaps were through that.
fringe rock
It can be agressive on the eyes
boreal escarp
Just was just struggling to find the option for it when searching just now
fringe rock
The only issue is the red in your texture. Re bake it but with a bigger margin
boreal escarp
No?
As stated, I already changed it earlier.
Besides, the mipmap was the fix. Since I found it, it's working now.
devout scroll
lack of mip maps should make it turn into a flickery mess at a distance
timber lantern
I'm trying to make clothing for my avatar - I selected verts, duplicated, then separated. I then created somefaces along the top edge (as the topology of the mesh didn't go along where i would want clothing to be) and moved the verts around a bit to make it nice and smooth
i then did a little sculpting and then Solidified it
however, even after setting normals from faces, it still looks scuffed
how do i un-scuff it?
(or create it such that it doesn't scuff)
timber lantern
looks like it's how i did the extra bits at the top
not following the flow of the direction or whatever
 glad steeple
pull up ur pants

 old jetty
i dont even know how to make one >.< but i want my own avatar in VRChat UwU
quaint jasper
Look at tutorials, and try to replicate what they do
 vagrant wave
Anyone know how I can hide the names of objects in Blender? I loaded a file I downloaded and there's names all over the place of the bones in the armature and I have no idea how to turn them off and the only page I found which describes how to do so tells me to open stuff that I can't even find because they don't describe where in the interface they might be.
Nevermind I found it. With the armature selected, it's under the icon of a running man (object data properties), on the right side menu, under Viewport Display.
muted atlas
i think i am the only one in this discord
that models with metasequoia xD
i just port the models from MMD format to FBX and vice versa
i noticed some rigging mistakes to late xD
 deft shore
Hi, I'm new to the 3d community and I was wondering how to switch between the skins for these on blender
https://www.deviantart.com/vlthar/art/Norn-848799007?comment=1%3A848799007%3A4861283061

The person who posted these said something about object layers but not quite sure what that means
quaint jasper
Check in the hierarchy
deft shore
Sorry, but how can I do that
quaint jasper
by looking
deft shore
i just downloaded blender not to long ago
quaint jasper
deft shore
omg thank you so much
 river wasp
quaint jasper
river wasp
quaint jasper
It means you need to remove the paint from other bones on the part that's not moving correctly
 uncut laurel
uhhhh guise how do i merge this?
uncut laurel
Not working ): @onyx juniper
onyx juniper
Oops, I mean ctrl + j
spiral sigil
thankye
spiral sigil
Dude be lookin like a fricken anime protagonist now
median pike
@terse lava its very relevant lmao
@timber lantern late reply but
make sure to clear custom split normals if you have any and after that check autosmooth and adjust the angle until it looks right
uncut laurel
how to i make this more clear? it was perfect in blender but in unity it looks like asscheeks
 fathom ridge
anyne know how to make Spartans from Halo
quaint jasper
@uncut laurel Clear in what way ?
if it's resolution then the only solution is to increase the amount of place it takes on the texture
ornate talon
Or it might be that the texture used in unity is more compressed
uncut laurel
@ornate talon you were right, i lowered compression and now its better
 crude parcel
any idea why blendshapes dont work or reset when i stop making one? https://gyazo.com/2328df14475881eb5ed40e57ad29846e
they were fine before, i dont know what happened, the vertices just no longer move after i stop editing a blendshape
devout scroll
dunno if it would make a difference but try editing it when it's at 0
crude parcel
nope, no difference still
spiral sigil
this goes out to everyone creating avatars: so a friend that plays the PC version of VRC (i play on quest) just showed me how many polygons the avatars generally have, can we get a hard limit on polygon count allowed per avatar please???? it's absolutely insane how people don't know how to optimize avatars, and is probably what is causing so many issues relating to lag and crashes in VRC for many users. so please clean up your models before exporting them.
no
You can hide the avatar of people like that
or use the perf system to auto hide
but that sucks for a game experience
it's not players responsibility to make sure avatar creators stay within reason with their avatar size
it's not too hard as a creator either, just some extra steps in the creation process for cleanup
 young vault
TBH, I'd say 200000 polys max should be a thing on PC.
Just to allow some leniency
But, that's just me.
spiral sigil

timber lantern
do you need more
 still cobalt
can anyone tell me why this is happening and how i can fix it? i have the same issues with the eye tracking
white moth
It used to be 20000 on pc, it got upped to 70000 and people were like that was way more than enough
If you up it to 200000, every single avatar will be 199999
Just like everything is 69999 right now
spiral sigil
Should I make my custom avatar based on Hazuki?
young vault
Eeeh, I meant it as a hardlimit. Like, no avatars above it period all the other restrictions still apply.
And considering most people I see run around with avatars around 120k-150k. With the odd 80000-90000 here and there. I rarely see an avatar that isn't above 69999 tbh.
white moth
That count isn’t real, it’s counting all their props as if they were all active at once
young vault
Though, I guess that wouldn't work with the current system of the prop counting, ya.
white moth
Inactive props do not add to lag at all, they aren’t rendered
Their unique textures, if they have them, sit in memory but that’s it
young vault
I know. But, 800k poly accessories are.
dark geyser
The textures are coming along nicely. #vrchat #avatars #Blender3d
 Twitter
 young vault
And I mean, those that are on by default.
And the people I talk about with 120k-150k polys don't have props most of the time.
white moth
I wish props didn’t count against you, unless they were active like if it puts you over the limit then you get hidden momentarily. I guess it’s expensive to check constantly. Maybe check every x minutes or something
I have a lot of stuff that is rated very poor even though if hidden props didn’t count it would be rated “Good”
I try to be excellent before props
Since deactivating props dosn’t help, I minimize materials by hiding them with bone scaling which is technically more laggy since the triangles are always rendered ... but the system likes it better lol
young vault
If I were to ever fully make my own avatar from scratch I'd probably try to get it to excellent and quest compatible, seems the most fair to do. But, I've yet to actually come up with what I want to do... For now I'll just continue trying to push at least down to medium or poor.
white moth
It’s way easier when you’re making it from scratch, optimizing other people stuff, especially if it’s already been triangulated, is slow work to do properly and ugly work to do fast
Learning to make stuff on your own is very freeing, and you realize how much harder it was optimizing other people’s stuff compared to just doing it yourself
But it is good practice for learning the tools
onyx juniper
I have to agree with this.
I've gathered from my time here that if anything, it's everything else that needs hard limits
young vault
Eh, true.
 zealous pond
oh god
blender crashed
I opened it back up
it updated to 2.9
I mean, I like it, but now cats doesn't work :c
vivid crater
this is why you turn auto update for blender off if you use the steam version
 rugged hill
I have been living a fool's life for the past four years
but now I've seen the light
white moth
It cleaned itself up recently and had a nice shave and a new haircut. It was a hobo before that
zealous pond
This is the best update to ever happen
quaint jasper
That's always been there 
onyx juniper
Blender got cosmetic surgery and is now horrifying to look at. It learned some good new skills, though
timber lantern
Does anyone have any particular tips in their overall approach to doing leaf-base-hair?
i've followed a video to get set up and i have a couple of reference images on each side in blender
just wondering if there's any approach like, lay down big hair pieces first, then smaller pieces on top, or something? i've never done this before
i'm also curious about how the texture side of it works
wondering if i should be doing that bit first
before creating all the leaves
young vault
Hair first. Do it like painting. Big strokes first, then smaller correction strokes and edits. UVmap the hair. And then start off with a base color and refine it. That's what I'd do at least.
quaint jasper
Yeah it's easier to make one fully and then duplicate imo
timber lantern
you guys give opposite opinions wew
i'm unfamiliar with the more pure side of blender
in terms of doing uvmaps for many similar meshes
young vault
As long as it's a valid option that doesn't end up with bad results and in a good amount of time it works
timber lantern
i'm kinda thinking it would be nice to have like, 3 'maps', with 3 different textures
where like, one is lighter at the start, one is normal, and one is darker at the end
and then somehow mapping all the hair leaves to one of the 3 textures
i guess you could do that manually
maybe set it up like that for one leaf, and then do the modelling, and then go through and pick out all 'type a' leaves, move their UV to one of the thirds of the image, and then do the same for the other 2
like this amazing drawing
i think that would work?
and then special snowflake ones i could move elsewhere on the image and paint onto them in ps/ blender
young vault
If you want monocolored ones, I recommend leaving as little space for them as possible. For the snowflake ones give as much space.
timber lantern
none of them will be mono color
timber lantern
like the rest of this model, i'm ripping off shokk
and i like his hair
all textured
nicely
young vault
Ah, okay. Well, ya. I think you'll figure it out nicely.
timber lantern
ty 👍
 radiant moon
Can someone help me with my Normal Maps? What am I doing wrong?
And yes, I have my color space set to non-color
radiant moon
Nvm it suddenly decided it wants to work?
 odd spade
I've been working on this off and on and finally finished her today!
I plan to start rigging soon I just gotta figure out what to do with her eyes, cant wait to port her for VRC 👉👈
This is the second model I've ever made and first I've ever finished so I'm kinda proud of her eee
radiant moon
Looks good! What's it supposed to be? Looks like a lemur to me.
odd spade
Shes actually a red panda!! I think that's pretty close O:
 steady zealot
 next jungle
Oh damn I need to get on that
radiant moon
My workspace is very hectic lol
 elder mirage
lots of waynes
radiant moon
Glad someone recognized him lol
 whole zinc
i see blender broke cats now.
 empty narwhal
Anyone ever try using sculptvr to make a model?
I'm having fun with it
Could always try blender too though.. i guess
elder mirage
So when it comes to eyelids for something semi-low-poly, anyone recommend which way to do em; part of the mesh or a pair of 'floating textures'?
 vital drift
If anyone can help me in #avatars-2-general that would be great :))
 regal quest
need help with Blender fbx to Unity
how to retain texture?
my Blender don't have that options
zealous pond
@regal quest you have to add the texture in manually in unity
white moth
Blender starting to be as intuitive as sketchup, nice
north rapids
who can help me make avatar
 wicked schooner
@north rapids there are a lot of tutorials on youtube!
 iron agate
I have a question about editing UV
I opened a project in blender and moved some vertices around to give something a different shape
Exported the new fbx, and opened it in substance
unfortunately, the UV matches the old model, before the changes, so the texture stretching is really bad.
I kinda know what I need to do; in essence, unwrap the model again. But I don't really know how to do that, and how to properly update the fbx in substance painter
Anyone want to help me?
For reference, it's the protogen model, and all I did was change the shape on some of the verticies in "Parts"
is there a way to select only the "parts" of the model and create a new UV
quaint jasper
Did you rebake all the maps ?
 solar fossil
RTX on
 fringe thicket
Idk what that is but its cute as hek lmao
solar fossil
Yo, yall like my node setup btw?
 primal narwhal
Does anyone happen to know why I'm getting these edge artifacts on my model specifically only in VRChat? And how to get rid of them? They appear over the whole model. I'm pretty sure that it's not the shader as the safety system disabling shaders showed the same result, and I'm pretty sure it isn't the texture as I've messed with about every import setting on it without any apparent changes.
I'm also pretty sure that it doesn't have to do with the UV's, as these edge artifacts are appearing right in the middle of UV islands, not just on edges that would cause color bleed for instance
I've already run this through several cleanup's in Blender to optimize it as well as clean up any potential double verts and etc... and I'm about halfway sure that it isn't a problem with the model as it's appearing in random places all over the model not just the parts I've specifically gone over.
I'll give it a shot tomorrow morning in the hope to fix it but I'm still partially sure that isn't it.
elder mirage
anyone have a tip for how to break out of the perpetual 'how do I know when my model is good enough' mindset?
quaint jasper
Let me know if you ever figure that one out
 uncut moss
anyone have a tip for how to break out of the perpetual 'how do I know when my model is good enough' mindset?
@elder mirage
Start a new project!
You just need to decide when its ready Or ready enough. Its not stupid idea to make different versions of your model so you can pickup the best one! You learn always something new !
Its easy to spend too much time for tweaking all the details 😄
Give your self a time limit so Its ready when the deadline comes!
quaint jasper
I agree with hard limits. Deadlines really help you make quick decisions instead of never going for what you think may be a good idea
uncut moss
So I tried sewing with blender 😄 and I had some problems, I'm still trouble shooting what went wrong!
quaint jasper
Sewing what ?
uncut moss
Sewing what ?
@quaint jasper
Shirt for my avatar, Maybe I missed something, I will continue learning how those cloth physics work!
quaint jasper
@uncut moss If you can show me how you set it up i can help out, i've done a bit of cloth sim in blender before
lament pond
Can't pick which socks I prefer for this design
spiral sigil
right
 wise fern
Agreed
devout scroll
I like striped socks, but they don't fit a red skirt as much so I'll to with right as well
uncut moss
@uncut moss If you can show me how you set it up i can help out, i've done a bit of cloth sim in blender before
@quaint jasper
I can share some screens when I get home, it just feels like that cloth goes too tight /sews too tight and it looks just grumbled when it’s done. I might have something missing, because This is still new for me 😄
 barren quiver
Those stripes are uneven which looks kind of ugly
tulip condor
hi
anyone knows how to resolve face pixelization ?
molten flume
That ur shading , some of ur face arent in "shade smooth"
tulip condor
@molten flume
excuse me how i can shade smooth those faces ?
molten flume
Just open the quick shearch menu and look for shade
white moth
Hard edges could be a few things it could be shaded sharp instead of smooth it could also be duplicated edges/verts that should be merged together, it can also be split normals
It could also just be edges that are marked sharp on the object even if it’s shaded smooth
And if all of that fails it could have auto smoothing enabled and it’s just sharp enough to be auto sharpened
Lots of things to check
next agate
Help
devout scroll
@tulip condor https://puu.sh/GoAPM/c3b5560dd0.png
 iron agate
could someone help me with my UV problem?
devout scroll
post it again
iron agate
Ok. This is a normal Protogen. The headband is one bar across the forehead

I popped this bad boi into blender to reshape the headband into a sort of crown, like this.

I must moved vertices and added polys to the existing model
However, it appears I need to correct the UV map. Here's what it looks like in substance painter; the UV map does not match the shape of the new mesh

Which distorts the texture and stretches it.
I need to remake the UV map. The model has existing seams and an existing UV, I don't need to start from scratch. I just need to know how to update the current UV so it doesn't stretch the textures into ass.
I'm pretty new to blender, so try to dumb things down for me. I started with what I thought would be an easy project to learn how to use it. So if you're telling me "Just do X and then Y" please tell me where those are located and how to use them!
 atomic hamlet
You can literally just go into the UV editing tab and edit them.
Make sure you select everything on the mesh in edit mode tho, or the UV's won't appear in the window.
atomic hamlet
Oh, if the UV seams are still in the editor you should just be able to UV unwrap it again to update them.
iron agate
yeah that does nothing.
elder mirage
I know everyone is probably used to the 20K~50K poly models and such, but what is the minimum you would consider to be 'medium poly' and no longer low poly?
quaint jasper
above 5k
atomic hamlet
yeah that does nothing.
@iron agate You'll have to manually edit the UV's then, go to the UV editing tab in Blender, select all the verts/faces in edit mode, then you can move the verts/faces in the UV editing panel to not stretch the texture as badly.
Just note that you'll have to redo the part of the texture that used the old UV's.
You can also select individual faces instead of everything if you only want certain parts of the mesh to show up in the UV editing panel.
iron agate
Project from view has been really helpful here!
Ah yeah
I'm learning more about the UV process with all this. I think this problem is a combination of me learning UV mapping and the absolute haphazard disaster mangle of polys I added/stretched into shape for this crown
That's good advice tho, Sub, thanks!
atomic hamlet
Yeah, UV's are far from easy. It'll take a LOT of time to learn.
iron agate
Man, learning 3d modeling is such a weird minefield of time sinks. Like, I'll be trudging along, and think, "ok, I want to try to do this thing, or edit this part, and usually it's easy. But every now and then I stumble into a subsection of 3d modeling like UVs that's a whole goddamn world of its own.
devout scroll
That said this particular thing is pretty simple so uv mapping it shouldn't be too difficult
the mesh i mean
iron agate
It shouldn't be, Pumkin, but look at what I get when I unwrap
oh
I fixed it
this whole time I've been merging and dissolving uneeded and mismatched vertices and edges
and now
it looks somewhat normal!
still some weird crossing going on, but I'm slowly untangling it
muted atlas
no one:
me:
protogen taur
elder mirage
the upper waist looks a lil thin compared to the lower waist imo
devout scroll
you gotta place some seams so it doesn't overlap
seams is where it gets cut and unfolded
iron agate
Yes! I was able to come to the same conclusion
muted atlas
thanks
i am still working on it :P
this is my most updated wip
o and @iron agate i am stealing that name o3o
iron agate
I already bought the url, you wanna fight me for it?
iron agate
hahaha
iron agate
bro, lets fight. Swords at dawn, choose your weapon.
muted atlas
nuke
atomic hamlet
WIDE
 cosmic owl
does anybody know how to use maya? it keeps making this extra face when i try to extrude and recreating the curve-- twice!-- and trying again with this shape doesnt fix it
it always happens on the side i make the curve on :(
iron agate
I've another question about UVs
why is this happening
Looks fine in Blender, UVs and texture look fine in Substance, but when I export from substance to use the texture in Unity, it does this
cosmic owl
i've got no idea, i haven't learned that yet,,,
i swear my issue is simple but i have no idea how to fix it 😭
ive done it either 3 or 4 times now and i get the same issue :(
tulip condor
@devout scroll
unfortunately for some reason in my blender 2.79>left panel>tools>
i couldn't find related option,
but when i press space and enter what i need
i indeed fix my problem by choosing "mesh-shade_smooth"
thanks for letting me know what i need to do 👍
atomic hamlet
Whenever I (ctrl+j) join my meshes together, my textures/materials vanish. The other day, I found I can just use CATS to join the meshes, and that plugin's join meshes button didn't produce such a problem
@torpid cairn Conflicting UV map names will cause that. You need to make sure the UV map has the same name.
That makes it a little more tricky, just make sure whatever your "primary" UV map is has the same name as the one on the mesh your merging with.
And if both meshes had 2 maps, they would both need to share the same names as the merge target, you get where I'm going with this?
o7
devout scroll
@tulip condor gotta be in object mode
tulip condor
@devout scroll
alright...i will look at that forward in the future
thanks
 lilac cypress
https://twitter.com/oja_bitterlife/status/1301177270422265856 thought this might be useful for those making anime styled heads


今日も30分。
今日は顔の作り方を変えてみました。
平面から作ってたのを一回消して、鼻から顎までのオレンジ色じゃないところを四角形から、残りのオレンジ色のところを球で作ってみた。
うーん、逆に時間がかかってる気がする…
慣れてないだけか、そもそも作りにくいのか。
 Twitter


 heavy compass
using blender 2.79 trying to edit the mesh and i cant see it cause of these pink and blue lines...any way to remove them?
 jovial radish
try to look for a 'vertex normals visibility' checkbox?
 small cloud
@heavy compass in N menu toggle your normals
devout scroll
If it's blender 2.8+ you need to look in viewport overlays top right of yohr viewport
 slender osprey
@iron agate might be a giant n-gon that corrupts the uv's when imported (unity triangulation or whatever)
i've gotten that issue with n-gons before
iron agate
what's an n-gon?
white moth
A polygon with more than 4 sides
3 is triangle, 4 is quad, 5 and up is ngon
Avoid them
They aren’t real
Technically some quads aren’t real either
tawdry goblet
Does anyone else have this weird issue where you can't edit the properties of a mesh you add if global undo is checked off?
i finally figured out why it has been doing it, but now I can't figure out how to fix it
tawdry goblet
i believe that was me
tawdry goblet
do you know why it keeps doing that?
quaint jasper
no clue
tawdry goblet
before i didnt know global undo did that, but now i do and I am trying to not have to keep reseting my preferences
and i can't have global undo, because it crashes my blender
which is a apparently an issue that is known but not fixed lol
i guess i have to do what you just told me, but if anyone knows why lmk
no that dosent work either
having global undo off after deleting your preferences will just result you unable to adjust a mesh you add
 waxen pewter
nothing wrong with ngons if you use them correctly -
median pike
ehh
I wouldnt say that
nothing wrong with them as long as they are perfectly flat
otherwise they will cause inconsistencies between render engines
also never use ngons on skinned meshes That will cause a lot of issues
spiral sigil
you can't have ngons in unity anyway
everything is triangulated
median pike
thats what creates the inconsistencies
spiral sigil
Quad topology is where its at 
young vault
Even quads get triangulated in Unity tho. Better to do triangulation in blender after you're finished. And probably keep a quad version stored.
slender osprey
most of the time you don't have to worry about the uv's in unity if it's untriangulated
n-gons just have the tendency to distort the uv's when triangulated by unity
means you can just triangulate the ngons without the whole mesh (for hard surface mainly)
tawdry goblet
it's also my understanding that quads are only okay with static object, and that triangulation is good on avatars or moving objects specfically because unity interprets lighting on the mesh better
slender osprey
well i'm not sure if that's necessary since all meshes get triangulated when rendering
tawdry goblet
True. Does every engine do that?
also wouldnt it be good form to trinaglate it in blender to ensure cleaner topology?
white moth
Quads are just another n-gon to unity, they all get triangulated
If you don’t say how to split them up it will decide for you so it’s better to do it yourself
But in blender it’s better to keep things as quads most of the actually good blender tools don’t work on triangulated meshes
spiral sigil
Workin on a lil darkie avatar for my friend
It's only 1078 tris so far
which i think is pretty boppin so far
devout scroll
You should be able to triangulate and convert to quads quite easily
Also there's probably a triangulate modifier you can use
spiral sigil
it's entirely quads @half smelt
it just counts quads as tris
unless you're talkin to the other people
idk
 half smelt
(Pinged wrong person) xD
 forest mantle
im getting a problem when i add meshes onto my avatar...all my shape keys basically move them to random spots on the bottom and idk how to fix it
stable edge
Blender renders them as tris, even if they're counted as quads
It's triangles all the way down
forest mantle
so how can i fix it?
quaint jasper
shape propagate the meshes in edit mode
spiral sigil
Man this has gone splendedly so far
final triangle count is ehhh
about 2500 tris
gonna have to find an outline shader for unity for some of the stuff tho
radiant moon
Finally got the rigging done, had an unfortunate 3-day long delay
spiral sigil
@terse lava the guy's name is lil darkie, he's a rapper or somethin
tulip condor
hi all
is there a way to separate body parts
and make them both selectable in edit mod
for example:
when pressing L on legs the legs are selected
and if pressing L on torso the torso gets selected (highlighted)
any idea ?
devout scroll
there's a few ways
either you split them into different objects, then select them all and go into edit mode with them all selected at the same time
Or you mark an edge loop as a seam or as sharp, then when pressing L you have the option to select using that
or you create a vertex group with weight set to 0 for each thing and use that to select
I'll show examples later
tulip condor
i will try some of those ways
thanks
devout scroll
but if you mark a seam or sharp, remove them when you're done
honestly vertex groups with 0 weights is easiest, it's like saving a selection
tulip condor
alright here is what i did...
in edit mode:
i marked wanted body parts for separation (one by one)
then pressing P i chose "separate by selection"
after i done all of that i go to...
object mode:
and press 2x (A) to select all separated objects
then i press J to join all
after i did that i go to edit mode and try to press L on wanted body parts
and it worked here is an video:
thanks @devout scroll 👍
devout scroll
good enough
don't forget to join them back after you're done by removing doubles with both edge sides selected, like i mentioned last time
 ocean mesa
theres literally no reason to triangulate anything, it just makes editing harder to edit and unity/vrc does it automatically...
spiral sigil
Well
that's not entirely true
For example, occasionally if you want a very nice rounded surface, triangulating helps with that
Or if you need to adjust faces on a quad that is bending entirely wrong, deleting the face and making it only triangles helps with fixing that issue
It has it's uses, though generally yes, sticking to quads helps more often than not
for example, if you want to sculpt something, triangles are superior usually, just due to their flexibility over quads
but if you want like, hard surface modeling, then yea, just stick to quads, usually is easier for manual editing later
median pike
@ocean mesa there are reasons to triangulate yourself, not for most things but the triangulation can happen on a different spot than you want it to
and it that case you would need to triangulate in blender
pseudo hawk
Does anyone know how to get UV maps from models?
like this-
i have a model that is seperated already, i can use it in substance painter, but it doesnt have a UV map, and i wanna touch up some things in my art program but its hard
https://cdn.discordapp.com/attachments/715785422009270272/751769436771450950/Hobkin_-_Body_UV.png

 median pike
and also as mentioned for certain geometry, triangulating is better
@pseudo hawk what do you mean by " doesnt have a uv map" every much has a uv map
it must have one
if you want a template so you can edit the textures easier in 2D editors
median pike
well there you go
median pike
thats how I just showed you
median pike
oh lol, you must have deleted the UVs
pseudo hawk
I didnt, i havent edited it
this isn't my model, i opened the blender file they provided
and i havent touched anything
median pike
send a picture of the whole blender window
median pike
median pike
oh you have more than one material
well
deselect everything and select them by material
you can export that
median pike
pseudo hawk
that window isnt open for me
median pike
than open it?
median pike
drag out an edge of another window, from a corner, when your cursor changes to a + sign
and than change it to the properties window
also, you should probably watch some basics of blender before asking about questions
median pike
this channel is meant for helping with specific issues, its hard and tedious to hand hold someone trough the entire process
pseudo hawk
😬 Thanks anyways
devout scroll
going back to the modelling tab or layout tab to select a different material is easier at this point
This is pretty nice for clothes https://www.youtube.com/watch?v=f0aJ6wjPizw

Hello guys! Welcome to my channel. In this devlog video, I talk about the process of how I model the clothes for the main character of my current game project on Blender 2.8. I am also adding a temporary texture to the model to make this model looks appealing while keeping the...
Using project from view to make a temporary texture out of the concept art to get a feel for the final result is a really good idea
Really helps motivation when your model looks nice, which textures really help with
median pike
imagine having a concept art
spiral sigil
Imagine being original
median pike
all I know is that commissioning a ref sheet is too expensive
spiral sigil
then learn to draw
median pike
and you cant do something like this with just reference images
spiral sigil
Yeah you can?
median pike
ah yes let me just spend 7 years to learn how to draw
spiral sigil
I did it literally yesterday
just learn to draw 4head
it's that easy
that's why there are art school
median pike
no thank you, I have already wasted 8 years of my life trying to learn 2D art
spiral sigil
If anything, the ability to work off solely off reference is more powerful than working like this dude
because learnig to draw is so easy you can learn it in a few weeks
median pike
I know, but this is way easier
median pike
having a refsheet to just box model from is so much simpler than using a bunch of images off google
at least for me
spiral sigil
I learned how to model based off references
so i dont really do the way he does
It just really takes alot of understanding spatial conception
median pike
lol I dont even know how to model
spiral sigil
that's about it
median pike
yeah, one of the reasons why I suck at drawing, perspective and spatial conception are things my brain will never understand
spiral sigil
Well, i dont really understand perspective
spatial conception is just something im pretty good at
but that's because i used to be in a few 2D animation groups
so learning spatial conception in a 2D space helps alot
Think of it like uhh
If you think of a gun, how you can take it apart in a 3D space, and how you'd move it in 2D basically
median pike
no idea lol
spiral sigil
if you give me a sec i have a tutorial i generally recommend noobies who follow me around to watch to learn the basics and make something in the process
spiral sigil
But you said you dont know how to model :P
spiral sigil
I mean
median pike
but I am just not good at doing the thing lol
spiral sigil
Not many rules tbh
biggest rule is mostly just like "dont connect everything to one point"
if people tell you "Ngons are bad" just tell them to suck it, cause ngons have their place
devout scroll
i wish someone told me earlier to not connect everything
that caused lots of unnecessary loops to be all over the place
median pike
lol
spiral sigil
I mean, loops are great if you want a bendy character
but Ngons can be an issue cause of deforming occasionally, they arent entirely bad, but it's best to attempt to avoid them
median pike
yeah dont worry, I know all that
devout scroll
Sometimes you get loops going around the whole model just because you need one somewhere
spiral sigil
the place i mostly use Ngons is in like
fingers
just cause like, the top and the bottom of the hand, make it almost unavoidable
median pike
ngons are just inconsistent