#3d-modeling
1 messages · Page 87 of 1
 green ember
 burnt root
Who can make me a kon avatar HMU @burnt root
 stark ore
https://booth.pm/en/items/1415037 @burnt root

VRchatでの利用を想定したunityのHumanoid形式に対応した3Dモデルです。 This is a 3D data model that is compatible with Unity's Humanoid file type and intended for use with VRChat. 利用規約が記載されていますので、ご了承の上での購入をお願いします。 The terms of use for the model are in writing below the explanation. We ask that you purc...
its a paid model from booth
 marble ermine
Does anyone here create avatars in 3ds max?
 lament pond

 hardy agate
damn that looks good, was thinking about trying to make some gorillaz awhile back but i had figured someone with your talent would come along eventually.
 solar fossil
holy dem viseme
 spiral sigil
what's the easiest way to weightpaint the area close to the chest? I want to expand the weight painting of the breast towards the chest
spiral sigil
I see a backpain
hardy agate
lol
 quaint jasper
@spiral sigil You have smoothing/levels, the values in level for gain can go above 1
spiral sigil
oo ty
spiral sigil
Can someone idk recommend me a not to complicated 3D modeling program I'm sure that they are all almost the same but I am interested in learning how to 3D model and I'm not to sure how well I will do as my current laptop is a chrome book (not sure on the specs but I know it's not a fancy high tech chrome book) and I play on a quest which as we all know there are quest avatars and there are pc avatars and I'm going to guess quest avatars might be a bit "easier" idk anything helps I guess
 fervent light
hey blender is pretty cool try using blender
spiral sigil
Ok
 white moth
Blender. Free and the latest version is easy for beginners
Recommend getting steam version for the auto-updates
 dire sable
I got his error on substance painter and don't know exactly what i means, does anyone know?
[GPUIssuesCheck] The current TDR (GPU hang recovery) delay is low: 2s.
Substance Painter can be interrupted by the OS when doing a long computation.
See https://docs.substance3d.com/spdoc/gpu-drivers-crash-with-long-computations-128745489.html

GPU drivers crash with long computations (TDR crash)
quaint jasper
Did you do what it says in the link ?
dire sable
Idk wat any of it means in the link
The problem i have is that it won't le me change the base color of the model im using. I followed the substance painter guide on youtube exactly and it still won't ley me chang the color
I was thinking it had to do with my graphics card because it is not that powerful
I have the right amount of ram and a good cpu as well
just a poopy gpu
quaint jasper
They explain all of it in the link and how to fix it with screenshots
 empty wing
anyone know how to make it not look like like plastic in 3ds max
spiral sigil
Today I made some Vroid models that maybe function on mmd
 median pike
Imagine using 3dsmax
green ember
honestly
 jovial radish
@empty wing The plastic look comes from your material. It's roughness value is probably too low.
Though as others already commented, you'd be probably be better off using Blender instead of 3dsMax
empty wing
i would buti have to use 3ds max to import the thing from gta 5
jovial radish
what format is it?
empty wing
.odd
jovial radish
well you could also just export the model in .fbx and then open it in blender
 arctic pagoda
Does anyone know why my mesh collider data gets distorted and it turns into a stick?
empty wing
that what i do but it f up the skeleton
jovial radish
@arctic pagoda go in object mode
F3
Apply transforms
(though I'm not sure if this version of blender has an F3 menu 🤔 )
empty wing
i can import it but it has no skeleton no more
jovial radish
There probably is an option to export it with the skeleton
empty wing
not from what i can tell
empty wing
so i think i have it working just need help to make it not look like plastic in blender
 devout scroll
shouldn't matter how it looks like in blender as you'll have to redo all/most of the shader work in unity after exporting
empty wing
oh ok
empty wing
whats a good format to export in
jovial radish
.fbx
 ashen stag
There is a default sized avatar in the VRCSDK, you should scale in reference to it
spiral sigil
what is vrchat unity version
unity 2018.4.20f1
or
unity 2018.4.21f1
?
empty wing
it links it on there website
VRChat
This page lists the current Unity version you should use when creating content for VRChat, as well as links to the correct version for both Unity Hub and direct downloads. Current Unity Version The current Unity version in use is Unity 2018.4.20f1. Unity Hub To install the cu...
ashen stag
@empty wing The scale of your model is based on export settings. The numbers dont really mean anything. You should scale your model up or down to match the relative size of the blue guy
spiral sigil
oh thanx its 20f1
fervent light
Volleyball is not ok
jovial radish
Volleyball is never ok
solar fossil
Volleyballing is a big no no in vrc
empty wing
it's not a volleyball it's the avatar ball thing in the avatar descriptor
jovial radish
That's what someone trying to hide a volleyball would say
empty wing
is it meant to be that big
empty wing
when my character is the same size as the default character
empty wing
as I can't decrease the size of the ball I wonder why it's so large
 fair patrol
instead of dropping the objects onto the render view
drop them onto the list to the left
they will have their origin at 0 0 0 and proper scale, then do the same with your model and see if its the same size as vrcexample
empty wing
will give that a try
empty wing
nope did not help
spiral sigil
https://gyazo.com/58d9c9c21cba1bfdf42d803a00140021 i think im making a mailman
 quaint jasper
Cute !
 oak cairn
hey anyone know how i can texture and put a model into VRChat
i have the model i'm not sure how to do any of the fancy stuff haha
 fervent folio
Any 3d modellers for vtubing got open commissions rn?
 gaunt aurora
try the vrctraders discord
fervent folio
@gaunt aurora got a link to that?
 vivid crater
its at the top of #community-servers-old
 vestal marsh
If I use the mirror modifier in blender will applying the modifier also apply the weight painting of the armature, provided that all the bones are named in the proper way?
Or will I have to transfer those over manually
 dry relic
I think you'll have to weight paint the other side again
the mirror modifier just duplicates and flips vertices
unless I'm wrong which is possible too
quaint jasper
It duplicates vertex groups so yes weight paint will be mirrored automatically
white moth
In my experience the mirror modifier only mirrors vert groups if
1.) The bone names to be mirrored are formatted like BoneName.R and BoneName.L
2.) The vert groups for both the left and right sides already exist when the Mirror is applied
vestal marsh
Ahh ok, fantastic, thanks guys! ^^
spiral sigil
https://gyazo.com/34a90b9c390e44c6eda3ac298f2a7e8b aaaa why is unwrapping soo boring...
 quaint jasper
You should get UV packmaster pro 2
spiral sigil
What does it do?
quaint jasper
Tons of stuff, check it out https://gumroad.com/l/uvpackmaster2

Gumroad
Quick links: demo version download (no login needed), the standard edition. UVPackmaster 2 is an efficient UV packing engine available as a command line tool. Its robustness comes not only from the fact that it was written in C++ and runs as a multi-threaded application - it a...
white moth
^Own that thing, totally worth it
 fringe rock
but you need space or the mipmap will start to bleed all over the place
fringe rock
yes
the similar uv pretty cool
vrchat streaming mipmap is really extreme. uv island need to have a lots of space. have to be careful when atlasing. set to 64 pixel boy
white moth
Depends on the overall texture size. Smaller textures don't need as much padding.
so absolutes like 64px aren't good
because the amount of bleed in pixels scales up and down with the texture resolution
4px padding seems to be plenty on 1024x1024
 hard jolt
I know I'm going to be asking a bit to much, but is there anyone who isn't busy in the mornings 8am (Pacific Standard Time) to guide me on how to use Blender? I tried going the youtube route but just became even more confused. I have a model I want to remove its bracelets and collar, but it always leaves holes and I don't know how to fix it...
vestal marsh
I mean, once you select the vertices you can press F to fill the faces one by one, no?
I can't be a guide but I can try to help with the smaller stuff O:
hard jolt
I don't know. I'm trying to follow Greyhound to add clothes to my hopkin but the bracelets and collar are in the way of it.
vestal marsh
.. It's cause idk what these bracelets and collar look like that I'm saying go with filing it in by hand, how big are these?
hard jolt
mind if I call to screen share it??
green ember
havent made anything in a hot minute so i decided to do benson from regular show real quick
hard jolt
that look really good.
I hit F after I removed the bracelet on 1 arm and it filled in that spot, thanks but now it looks awkward with what looks like it should be a 2x2 square mesh(?). It looks like 1 big piece with 8 squares attached to it...
vestal marsh
Ah yeah you prolly selected all of them, see if you can select them in groups of four, can you send an image? qwq
green ember
try gridfill instead
hard jolt
vestal marsh
That too
hard jolt
gridfill?
vestal marsh
Ahh yeah try gridfill for this
hard jolt
thank you. thank you thank you.
Youtube guides don't work for me most of the time (they either go to fast or have their stuff set up with shortcut buttons that I don't know about) and I find talking with people to work easier to learn.
again, Thank you both for the help.
green ember
i personally only manage to learn new things from straight to the point 1 minute blender videos
ian hubert or cgmatter
hard jolt
everyone learns differently. the only thing we can all do is try to help each other and be patient. Right? 😁
hard jolt
but anyway. thank you both
white moth
Shapekey logic still confusing the heck out of me. How can I reverse a shape key? So that the model at 0.0 and 1.0 on a given shape key swaps? Without breaking all the other shape keys.
@hard jolt I think you just accidentally deleted a vert that wasn't part of the bracelet. I have that Hobbert avatar and can confirm
spiral sigil
not sure what you ask
you can set a shapekey to 1 and then set that shapekey as the basis one
white moth
That breaks every other shape key though
spiral sigil
it will then create a copy of that shapekey that will basically reverse to the initial state
does it ? i did it some week ago for a model and it was fine
 exotic matrix
i have this but i can't import
hard jolt
@white moth how am I suppose to get rid of those with out breaking anything then?
both sets of them are removed already and fixed up the meshes.
white moth
@spiral sigil let me be clear. I have a shape key that hides a “anger” emote when activates. I want to reverse it so it’s shrink by default and activating the shape key makes it appear instead. But when I do what you explained, it works, but every other shape key also makes it move until it becomes huge.
green ember
are you trying to change the base pose of the model?
like what it will blend into the shapekey from
white moth
I'm just trying to reverse a single shape key so that on is off and off is on
I have many shape keys, and only want to reverse one of them
hard jolt
@white moth How do I get the blush to work right? it didn't become a seperate thing like the original model.
white moth
It's just a shape key
It doesn't need to be a separate object, the shape key is on the base model if it's joined
hard jolt
shapekey? like these? if so which one?
 onyx juniper
@green ember Cool idea. Benson has way longer arms and legs than that though
Okay, a bit longer and usually
green ember
its really inconsistent
i only spent 40 minutes on the whole thing so if i do end up actually wanting to texture and rig it i might change it
and if i do make them that long vrchat wont like them in vr
green ember
I just put a camera and an hdri in the scene to quickly render it in cycles
this addon gives you like 300 hdris
pretty useful if anyone wants it
spiral sigil
https://gyazo.com/4ebffb9995351566c49ebdcc2f873221 you've got mail
 arctic pagoda
Using blender 2.79, after I did apply scale/rotation, my mesh collider is this small puny thing. Have no idea what to do now lol....
quaint jasper
you can duplicate that object outside the prefab and scale it in your scene
devout scroll
Might want to look at your units and your export settings maybe
 vapid egret
Can I take a blender model and model it in Zbrush or Maya while still keeping everything intact? Blend shapes ect.
My friend is a modeler and they offered to fix up an avatar's body, but they dont work in blender and I dont want the model to be messed up
quaint jasper
if you change vertices count, no
If they are only fixing the body, you can detatch the head though
green ember
progress
jovial radish
nice robot
hardy agate
hello there
 hallow bough
Getting Galactica vibes from that robot, cool!
 jagged crest
Oh hey a magnaguard
green ember
yeah its a magnaguard from star wars
white moth
RIP torso
 azure rain
also that's going to leave a bunch of gross triangles compared to just go in the edge Loop method
 tawdry oyster
Ok this is gonna drive me nuts eventually but I have this idea for a world but I cant find the model I'm looking for so does anyone know of someone who has or can make a full scale model replica of Atlantis from the stargate franchise as well as a couple of things like jet packs that look like the puddle jumpers and Atlantis's version of the stargate itself?
I'd make it myself but since I'm still learning blender it would take significantly longer to make myself versus a professional at model making
quaint jasper
I'm sure you can commission someone to do that on the vrchat ask forums
tawdry oyster
Posted there so I'll just have to wait and see
 rare plinth
Is it a normal issue for chairs to be correct with small / big characters? It seems when using the vrc3 chair that smaller characters kind of sink into it instead of sitting on it like other characters.
I used the vr chat chair prefab in conjunction with this that I modeled but only standard sized characters / larger characters seem to sit in it properly. Smaller characters seem to just sink.
I tested like this also just to see where different characters would end up being positioned.
Im starting to feel like I will need to create my own chair script that goes off the character hip bone but honestly thats probably going to have issues too
quaint jasper
Can't do custom scripts
You can have adjustable heights for that like most people do since avatar height varies a lot
rare plinth
hmmm.. Guess I am going to have to look into this more then.
Can't do custom scripts
@quaint jasper Even though its not a script do you think its not possible to accomplish that with udon? I havent dabbled with it yet but I have a feeling its similar to Play maker and or unreal blueprint system.
quaint jasper
You can do pretty much anything with Udon yeah
and they're very similar to those other systems
rare plinth
I think im going to give this a try

VRCat: Community-Run VRChat Forums
VRChat Chairs with proper height fixes for small and tall avatars that also allows you to customize the sitting pose, emotes, and right/ left-hand...
quaint jasper
Yeah, Splink's prefab is great
white moth
I wish the root of the chair sit was the back of their knee, that way you could place it in the edge of the chair and scale would be irrelevant
onyx juniper
That sounds like a valid feature request
 pseudo palm
how easy would that be to implement? If it's no trouble it probably would have been done already
onyx juniper
I don't think that's true.
There are plans or priorities that might make them hesitate
Or maybe they just plain didn't think of that
 bold jewel
scale would be irrelevant if you could guarantee their model's legs aren't longer than the chair's seat
with root of chair sit as the spine then you don't have to worry about players clipping into the seat back
spiral sigil
i need some ideas for this donut, around his core and chest area (Ingore arms and legs, there placeholders until I redesign them as well)
 stable acorn

Im having a bit of trouble mirroring only this handle part downwards without mirroring the entire sword
Figured it out nvm lol
 real isle
Any tips to make this look a bit better?
 sharp fox
Does anyone have any good tutorials on how to get started on custom modeling
 tall jacinth
I've seen Blender tutorials on making a donut
 subtle jackal
https://steamuserimages-a.akamaihd.net/ugc/1326823800165632089/CFE24D58332DCD03CCE70BE6BBE795B2064641C9/ https://steamuserimages-a.akamaihd.net/ugc/1326823800165636667/48A92C1D89A329F077CFEEE28A18C767B6A2EDE8/ https://steamuserimages-a.akamaihd.net/ugc/1326823800165639163/2F5DAD22010B2B58E723EC6C8CF0489630B9D4E1/ https://steamuserimages-a.akamaihd.net/ugc/1326823800165640224/85B1EF39FE8F4F0812EE0906AC7B772C4A379477/ Decent progress this weekend (sorry for link dump)


 spiral sigil
@real isle Your topology is a bit all over the place. There is no method to the madness. Search for face topology groups and see how it is build up.
 latent charm
http://wiki.polycount.com/wiki/FaceTopology
@real isle Loads of good ones on this page.
In general the polycount wiki is super-helpful.
real isle
Well, that's because it is my first avatar. But thank you for the link.
sharp fox
what is that process called? like when you model a drawing like that
im having a hard time finding tutorials on it
quaint jasper
Sculpting with a reference sheet
 wispy orbit
Could this work? https://cadmonster.org/
3D-modeling from sketch, Quality conversion models (STEP, STL, OBJ), recovering 3D files, CAD-files
 carmine geyser
Probably
Ugh I gotta give my email
Why they gotta use email
Why not just... Give it to me
And I gotta heckin wait
@wispy orbit How long will this take?
carmine geyser
It's like
1301 kb
wait no
12450 kb
I'm impatient
This button doesn't even work
 sullen blaze
can someone possibly help me edit a model?
carmine geyser
Of?
sullen blaze
just a typical eboy
i wanna edit the hair
and im pretty small brain at the 3d stuff
i can texture just fine
sullen blaze
ill have a look if it will be too big brain for my dumbass
can i import an fbx and edit im assuming?
carmine geyser
Maybe?
sullen blaze
hopfully
carmine geyser
Lemme check
sullen blaze
ty
sullen blaze
i c
carmine geyser
Lemme see if I can snag hair
Hmmm....
Beautiful.
Yep
@sullen blaze you can make hair and export it
I got it into blender
 wind zinc
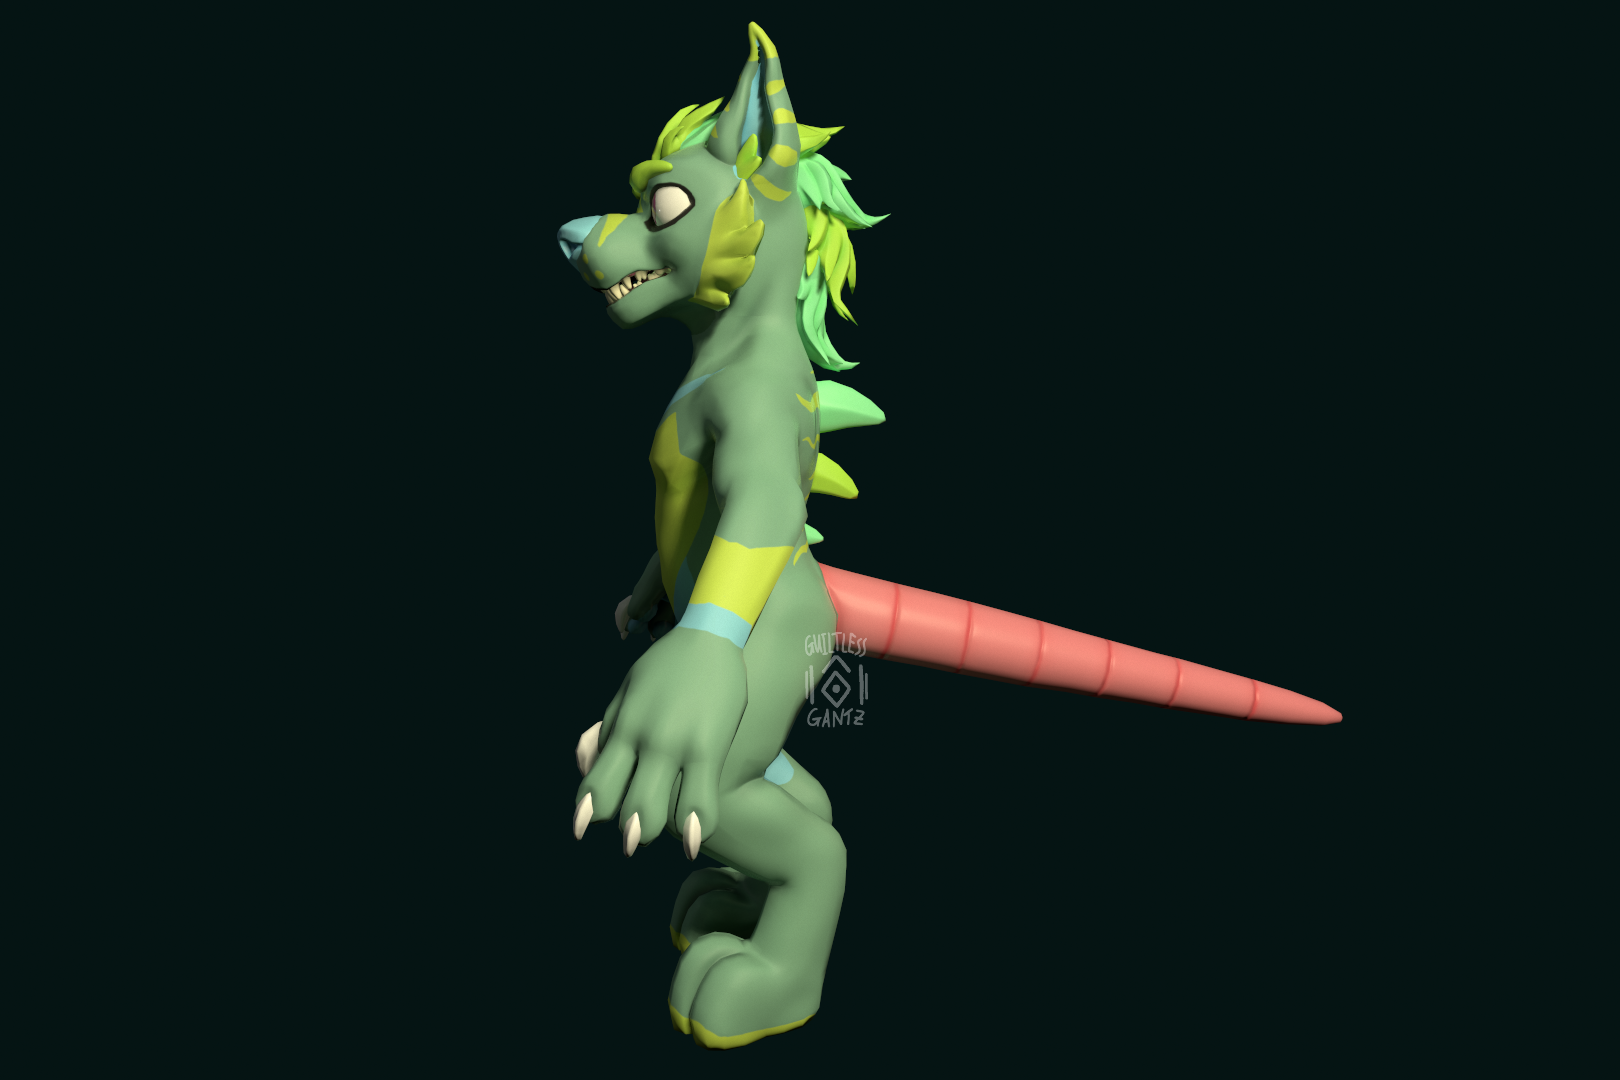
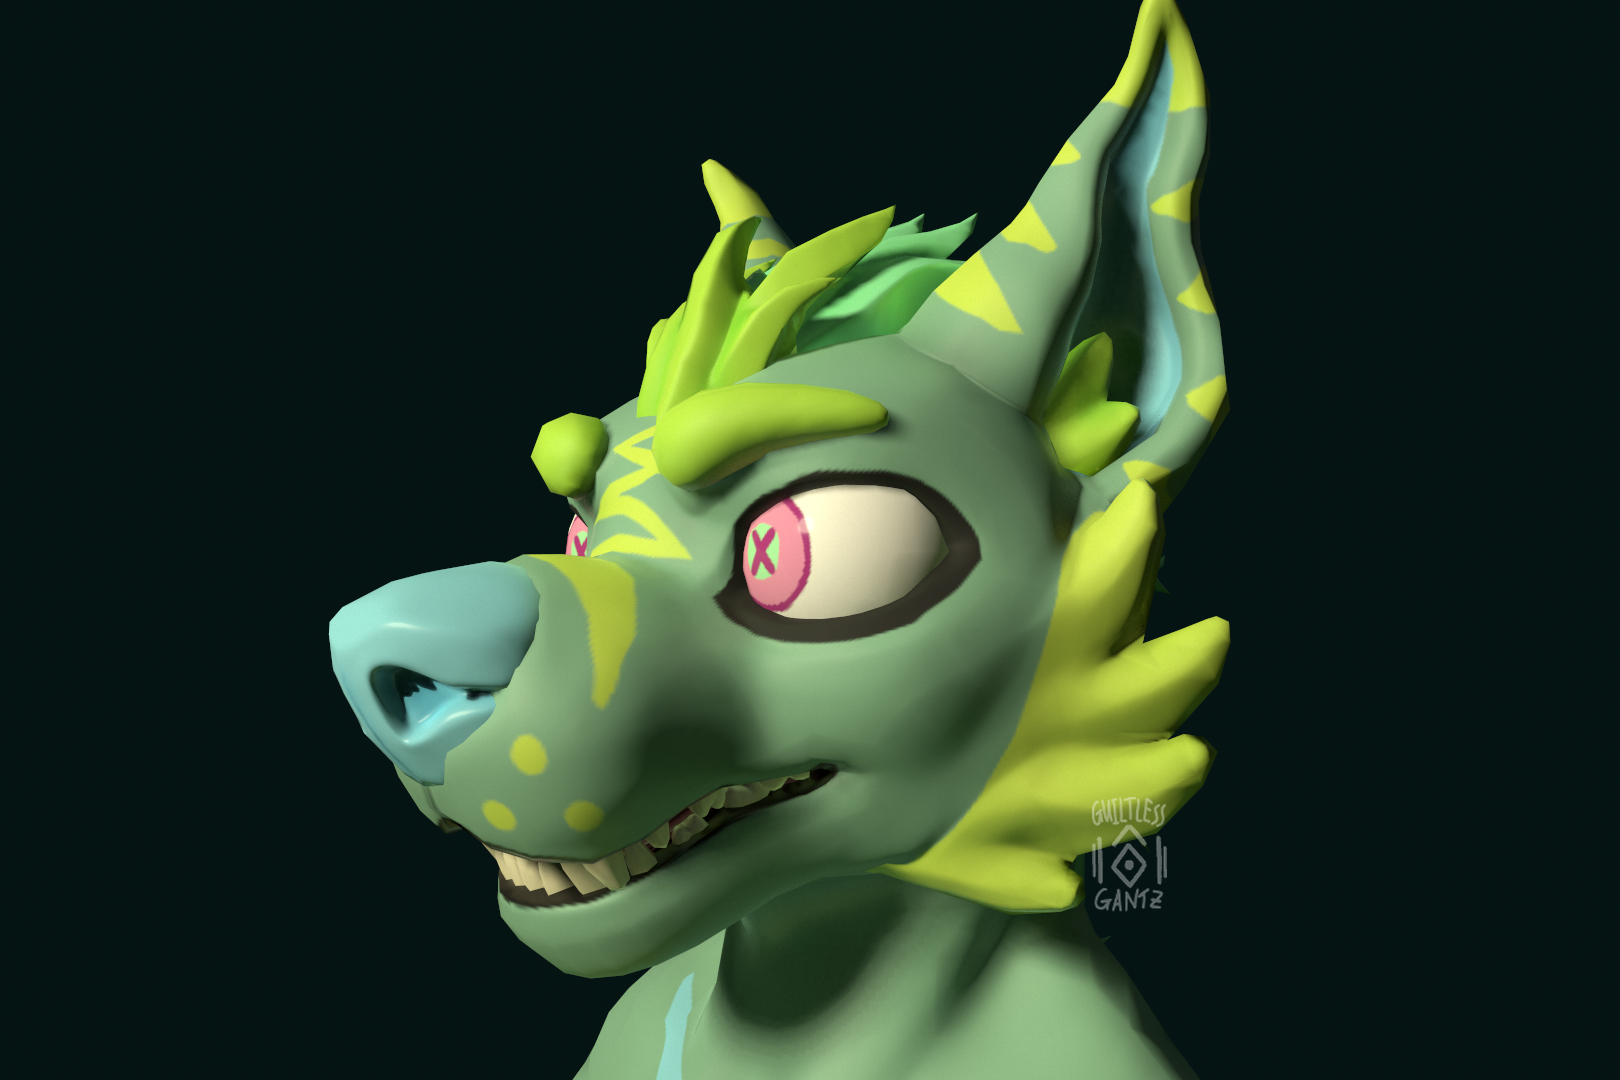
https://twitter.com/guiltlessgantz/status/1282671161793368065?s=21 first pass on textures

Finally got the first texture pass on Goblin for my Friend @Goose_Maroos. sooon he will be in VRchat 👀

 Twitter

 calm saddle
When making new models, do you guys prefer to work it all on one mesh, or multiple then combine? Not sure which process is better. Trying to make a robot of some sort.
azure rain
I think you'd be fine doing multiple and then combining considering it's hard surface as that gives you more control over the modifiers stack
calm saddle
I've seen a few different vids and there's different processes. It seems possibly a bit smoother and better for hard surface stuff to make them separately then combine, such as arms and legs and what not? A lot different working on blender than zbrush, but pretty fun in it's own way.
azure rain
yeah basically each part that would be mechanically separate get a mesh to start
calm saddle
Is it best to combine them into a single mesh at the end? Or could Arm1 be it's own mesh, and Arm2 be a separate one?
azure rain
yeah they need to be all one mesh at the end before they go to Unity
calm saddle
Gotcha, thank you
azure rain
and depending on how you do the texturing before the texturing so that the UV layout is on one or two textures
calm saddle
I haven't thought that far yet. Gotta git gud at making a base model how I want it first I think 😄
azure rain
yes definitely focus on the modeling first
calm saddle
I might have bitten off a lil more than I should going for a robot first xD
azure rain
robots are easier to work with because they're not organic shapes so you probably be okay just box modeling everything to start
calm saddle
That's what I'm doing so far. My biggest problem atm is like extra bits I suppose. Stuff to make it more robotic I suppose, like these kinda hydralics. I saw them on the the black/blue starting option avatar. https://gyazo.com/96cb1fe7793074fdc04ec7920b2ec251

I made a fugly robot that worked in vrc already, but I need to look up weight maps and rigging more, the chest moved and stretched when I lifted my arms up
azure rain
yes definitely important to work on the weight painting
calm saddle
If I leave the chest area on low strength, it'll still follow the rig right? Just wouldn't stretch as much with movement?
azure rain
not sure off the top of my head as most of my experience has been kitbashing feel free to try and see if it works
calm saddle
What kinda stuff do you kitbash?
azure rain
modifying furry Avatars
calm saddle
Ah, that's nice. Would it be dynamic bones that's used for stuff like flowing tails and fluffy ears?
azure rain
yes
calm saddle
Noice
Jiggle physics on robot antenna is a must.
I take it they could be used for a few dangling cables as well?
azure rain
the Avatar 3.0 stuff looks like would be good for some of that tails and ears I might suggest seeing if you can find some other methods for your cables as Dynamic bones are a bit expensive and are completely disabled on the Oculus Quest
calm saddle
Ah, might just dumpt that idea or just have em in a way they can be static.
Would that mean that flowing hair and such is draining on the game?
calm saddle
That might explain some of the stutters in some of the rooms I've been in xD
I'll make sure to turn off dynamic bones
azure rain
yes that probably helped a bunch people put way too many Dynamic bones on their skirts like most folks do it we're basically it looks like an octopus draping a whole bunch of bone chains around the skirt even though you could probably just have one chain down the middle of the models to handle the skirt
calm saddle
So if I'm making models as a hobby, it's best to assume modeling things without the physics. Like making sure skirts and such are weighted properly so the rig does the work and legs don't clip through?
azure rain
yes if you don't want to murder everyone's performance
calm saddle
I stumbled upon an avatar yesterday that killed the game for me within seconds.
I'm just glad I could reset via website
azure rain
not to say you couldn't ever use Dynamics bones just be aware how to model an avatar with a skirt so they're not needed not to break the skirt
calm saddle
Do you know if the drain depends on how much mesh they affect? Like would say, the backside of hair drain more than a simple cable or antenna?
azure rain
that has more to do with how many bones and how many collider's they have to consider
calm saddle
Gotcha, gonna look it up but leave it low priority
azure rain
yeah you don't want the avatar looking terrible to somebody who has Dynamic bones turned off for performance reasons
calm saddle
Mhm, I'm assuming that's the general masses, so better to look good for everyone than extra good for a few is how I see it.
quaint jasper
there's a lot of fucked up, what specific thing are you pointing to ?
What does the wireframe look like
and the UVs
Ouch
Yeah I'm not surprised it looks jank
You have an overlapping uv, so it can't look correct
jovial radish
Looks jank cause it is x)
quaint jasper
Turn on the flat texturing mode and it'll look jank there too
 lunar hull
Is there a way for me to have a bone affect only one mesh and not the others
Because I'm making a minecraft character model and the bone weights are affecting other meshes
 lusty void
hey uh
any of y'all know of any good tutorials for 3d modeling
I'm kinda tired of using mmd models lol
devout scroll

In this video, I share what I think is the best way to learn Blender 2.8.
Blender 2.8 Launch Pad Course: https://academy.cgboost.com/p/blender-2-8-launch-pad?affcode=206256_je5wtd2f
Get free resources here: https://gumroad.com/curtisjamesholt
Blender 2.8 First Steps Playlist...
There's many options
Some mentioned here
If you don't want to look for too long you can look at grant abbitt's channel
But keep in mind that making models for renders is a bit different from making them to be used in game engines, so you might want to look for that as well
lusty void
ah alright, thank you so much!
arctic pagoda
In blender 2.79, is there any way to hide meshes in weight painting mode? So that automatic weights doesn't weight-paint parts that I don't want it to be on.
Please @arctic pagoda when replying! Thanks!
green ember
@arctic pagoda You should be able to go into edit mode and hide the vertices and then when you go back to weight paint mode they wont appear
I remember it being in 2.79 but I'm not completely certain
arctic pagoda
@green ember I've tried that but then in weight paint mode they all appear again, yet hidden in edit mode
green ember
I guess you could separate the parts you don't want to weight paint into another mesh and hide it. I don't know a way to properly hide it without doing it in 2.79
@arctic pagoda
arctic pagoda
@green ember Hmm I'll try, it's just that it's on an avatar model, so separating something on the main model's body might mess with the shape keys but I'll see how it goes
jovial radish
Pretty sure there's an option to only weight-paint faces selected in edit mode
subtle jackal
Not enough progress today but at least it's something I guess.
getting the zigzag part for the hair was blah
median pike
How did you do it? Did you use paths that you retopoed or something else?
subtle jackal
Started with two spheres and started to refine it, then split them into strips, added a couple modifiers and merged them again. It was a really convoluted process because I didn't have a solid idea how to approach it first.
calm saddle
Anyone got experience with robot/hard surface avatars?
jovial radish
I made a robot avatar, why?
median pike
Same. Whats up?
calm saddle
Any idea how to get a solid corner like this with Shade Smooth on in Blender without adding a bunch of loops near the edges?
spiral sigil
bevel i would say
jovial radish
shade smooth
then in vertex group check auto smooth
turn the angle way up
and then select the edges that need to be sharp and right-click > mark sharp
calm saddle
Imma test that, you might be a superhero 😮
median pike
Or just manually mark the sharp endges
jovial radish
yeah that's what I said
calm saddle
The mark sharp and the normals auto smooth helped a lot. It still looks kinda poopy, but can't expect too much going without proper concept and learning a new software
jovial radish
why would you need a new software? 🤔
calm saddle
I used to sculpt on zbrush, so learning blender now
Dum question, how do you unmark sharp?
jovial radish
right click > clear sharp
jovial radish
np!
calm saddle
What kinda robots do you make by the way?
white moth
I don’t use auto smoothing, shade everything smooth and mark sharp where I want to an edge exagerated
Auto smoothing always shows up unexpectedly
calm saddle
Dang, that's pretty nice. Do you get any distortions with the hinge type joints on robots?
So far, auto smoothing is giving me better results. Base:
Without auto:
with auto:
green ember
id mark the corners too personally
calm saddle
I did that too now
Looks like this without Auto:
Would it be more optimal to make the 'port' and cable as a separate part then have it hover over where I need it?
I'm making eveything out of a single cube and adding loops where needed, extruding etc
green ember
if you make it like that it'll save you a lot of headache with the topology imo
but it depends what you're going for
calm saddle
Just practicing to get comfortable with making stuff, I picked up blender like a week ago?
green ember
everybody gotta start somewhere
calm saddle
Did you mean that keeping it all one object is better btw?
Or could I make a port and cable and just have them as part of same mesh but not same topology I guess?
I dunno what's the correct term
green ember
having everything be connected is technically better but more difficult to make look good topologically
@calm saddle i assume the one on the right is what you meant when you said everything separate
calm saddle
yeah basically. At least for "extra" stuff on robot type characters, like ports and armor type pieces?
Like one example, I kinda wanna make the hip part look a bit like a piston sorta thing, but when I extrude the edge it looks hella ugly, but a cylinder is pretty dang smooth.
gaunt aurora
learn auto smoothing and sharp edges
calm saddle
@jovial radish btw, how did you make those hinge type joints on knees and elbows? My topology kinda sucks so it's hard to extrude precise shapes like cylinders.
jovial radish
You can just add a new cylinder and place it in the correct spot
green ember
stuff thats actually supposed to be separate parts should be separate parts
calm saddle
So something like this could actually be a joint technically?
calm saddle
That helps a lot. I got it in my head to try keeping it all one single "block" so to speak, as in everything was connected
That cylinder is part of the avatar mesh, do you have any tricks for mirroring it without the modifier?
green ember
mirror the cap from one side to another?
calm saddle
Yeah, but since it's part of avatar mesh, any modifier would mirror the whole avatar.
Or would you just make it three separate cylinders. Inner, and two outer?
green ember
id personally do both sides at the same time
calm saddle
I tried that, but when I was extruding the cap, it kinda went along a single axis, all faces of it
green ember
id just build each part individually with mirror mode and them combine it with the main then
calm saddle
If I extrude along faces this happens to caps
 summer bluff
my journey begins
calm saddle
Donut tut?
summer bluff
yeah
calm saddle
It's pretty gud
summer bluff
nice
 keen island
Dose anyone have a base for a protogen avata that I could use?
summer bluff
This is a really confidence boosting tutorial
summer bluff
my lighting is weird
 young vault
DONUT
calm saddle
The true endgame is making an ahego donut
spiral sigil

 vivid crater
i just wanna see a yummy donut
calm saddle
summer bluff
Not having the same version of blender as Blender Guru really messes with the tutorial
I'm going to do his newer chair tutorial instead
hardy agate
man you guys are gonna make me hungry
vivid crater
he should have one for both 2.79 and 2.8
summer bluff
I was mostly fine for Level 1, but level 2 got weird because the donut didn't appear in the shading tab automatically and stuff
calm saddle
Oh yeah, I had that issue too.
Dun remember how I fixed it, check comments I think, people were helpful in there
The rest should be fine though, I didn't have much issues after that
young vault
He does have a 2.79 and 2.8 donut guide
summer bluff
I'll have to look around and see about resuming or maybe just restarting for more practice then
this donut was me wanting to get through the series. It might be neat to see the result of taking my time on each step.
white moth
I feel bad I don’t have my donut anymore
I should have kept my tutorial donut
It’s ok to use blender 1.79, but if you are learning blender from no prior experience use the latest blender lest you be stuck in the same update limbo as your predecessors
People only avoid updating to avoid relearning everything
It will put you ahead of a lot of old hats. You can teach them 2.8 later.
calm saddle
Is it really horrible to have triangles in the mesh?
quaint jasper
you don't have a choice, unity triangulate your mesh
calm saddle
Ah, so if I end up with a triangle here or there it's not the end?
quaint jasper
not, it's better to chose where the triangle will be for better shading sometimes
calm saddle
Nicu, thanks. I got it in my head from somewhere that triangles were the worst thing ever
vivid crater
It's a common trap
calm saddle
This thing gonna be so fugly, but it's my first vrc babu
fringe rock
Wait, it's all triangles. Always has been.
azure rain
quads are just a modeling convenience
fringe rock
The problem with unity it will sometime tris the wrong way. When we use low poly. That problematic
azure rain
yes which is why it might be a good idea to do the triangulation yourself before it goes to Unity so that the results are consistent
subtle jackal
a good quad mesh won't have many quads that it matters what way they are triangulated (since they should be planar or damn close to it), so you can usually just get away with manually cutting any problem ones. Also your exporter should usually triangulate your mesh on export, and thus SHOULD do it the way you see in Blender anywho.
jovial radish
Quads are convenient mostly because you ac subdivide, edge loop and overall manipulate them easily
arctic pagoda
So.... I want to make miniature Avatars as anime figures.
I know shrinking them in Unity/blender won't decrease its polygon count for optimization. What would you recommend?
spiral sigil
you can either decimate or retopology
 mossy robin
@calm saddle looks good I’m making a 🍩 but currently at stage putting the sprinkles on it for some reason tho they are above the donut and not on it :/ I don’t know why
calm saddle
Are they still forming in the shape of the frosting?
mossy robin
Yes
calm saddle
Can you screengrab the particles menu?
mossy robin
I’m not currently on the comp atm but once I’m on later happy to
arctic pagoda
retopology? I haven't heard of that, but thank you! I'll look into it
calm saddle
Do you remember if you changed the function to Hair? A lot of strands should have come out of the frosting
mossy robin
Yes it looked like that
I did exactly like guru said too just came out above the donut lol
calm saddle
That's odd. Not sure what could be wrong, I'll poke arounda bit. I picked up blender like a week ago myself so not experienced enough to know what might be the issue
mossy robin
Ah well thank you so much 🙂 I’m new at blender too hence doing the tutorials 🙂
mossy robin
Lol 😂
calm saddle
Think I found it
mossy robin
Awesome
calm saddle
imma ping you in case, so you can find it easier later.
mossy robin
K
calm saddle
@mossy robin ```The emitted particles (sprinkles) are attached to the emitter (donut) in their origin points. If the origin point is far from the object, the emitted particle will be far from its emitter. Check the origin point of the emitted object, Perhaps it's not adjusted to geometry.
Select the emitted object (the sprinkle) > Right click > Set origin > Origin to geometry.```
mossy robin
Oo that could be it thank you
calm saddle
did it look like this?
calm saddle
I'm helpful. Now I can nap
mossy robin
Haha thank you so much
calm saddle
You gonna work on an avatar eventually?
mossy robin
so I tried setting it to geometry and it hasnt work @calm saddle
calm saddle
Hmm
Can you send screenshot again?
Just to make sure from what I glanced at the screenshot, you had Geometry to origin I believe, can you test with Set Origin to Geo?
EDIT: Select the first sprinkle, right click, Set Origin, Origin to geometry
(solution by @blenderGuru)```@calm saddle thank you wyvernjack it worked 😄
calm saddle
Noice
median pike
efficient island packing be like -
quaint jasper
packmaster ?
subtle jackal
Certainly looks like it, and not set to allow for much mip-mapping either
 zenith fable
 sharp bolt
Basic Stuff. But how can I fix the clipping edges? Is it like a problem because the faces aren't flat or something like that?
Do I just need to redo Uv?
sharp bolt
Found it nevermind, just needed to merge vertices
summer bluff
why is blender looking like this and not showing my donut?
lunar hull
how do I connect two edge loops?
white moth
I was stupid and I set impossibly stupid iterations on the "Smooth Vertex" command, and it crashed blender. Now I can never use Smooth Vertex or blender crashes because it saved the really stupid settings. How can I revert the default parameters for my Smooth Vertex command?
 tight quartz
Anyone that has something easy to model for beginners?
I really wanna start making avatars but need to try to model stuff first.
quaint jasper
@white moth Use the smoothing tool instead ?
@tight quartz Do the donut/chair tutorial from blender guru first
tight quartz
Alright! Thx.
devout scroll
If it saves for some reason, you could try calling the command directly in the python console with different numbers @white moth
That might overwrite it
Doesn't seem to work rip
white moth
Thanks. Oof, I don't know python at all
tight quartz
While attempting to do the chair from Blender guru, I can say that it looks decent for being new.
tight quartz
How do I remove a vertice that is in another vertice?
white moth
Could you rephrase
tight quartz
Like, this.

Blender chair tutorial series continues! In this part we tighten edges, add bevels and finish the wood base.
Join the free newsletter to get a Blender Keyboard Shortcut PDF: https://mailchi.mp/ef5b15a32043/subscribe-to-the-newsletter
-----------------------------------------...
By pressing ALT + M I don't get that menu.
quaint jasper
M on 2.83
tight quartz
just m?
 pallid sable
You highlight both verts and press M and click center
tight quartz
ah ok
I got problems 🤔 Loading into blender and this project again and this happend.
Nvm figured it out.
 unborn coyote
Hello! Can I ask a noob question?
Is it preferable to use triangle-meshed models over triangle-and-square meshes? I remember it affecting perfomance in other games.
I am referring to avatars btw
spiral sigil
it's easier to model with quads
you can get a better flow than triangles
for the performance thing, i'm not sure
i only know that unity convert everything to triangles anyway
white moth
Just run the command Shade Smooth
boom, nice models
Things always look bad when flat lit
quaint jasper
yeah, very specific art style but it can work
median pike
a lovely style to be fair. I absolutely adore it
azure rain

The original Motor Toon GP looks pretty decent as far as early PS1 games go, but the Plastic Lake track looks incredible
So beautifully weird and abstract, I can't think of many other games on the console with these kinds of visuals!
Likes
266
 Twitter


These reflections are just the same model turned upside down and colored differently but it's convincing enough
Plus it looks so COOL
 Twitter
white moth
Twitter
white moth
I revoke my "flat lit can't look good" comment - typically organics don't look good. If you intentionally design around it it can be great
green ember
flat is mostly for stylized stuff, you cant just stick it on something
you either do it for artistic reasons or system limitations for older stuff
which both at the end are considered artistic choices
 wintry pulsar
does anyone here know how to get rid of hair that's on my avatar through blender? btw im using the latest version of blender
young vault
Separate by material if hair has its own material
If not, try selecting each piece of hair and doing Ctrl + L to select all linked vertices
white moth
So there’s “Propagate to Shapes” which sets the selected verts positions on all shape keys. But Is there a “propagate to all shapes except one of my choosing”? because man if you don’t want it on all of them you need to blend them all one at a time.
unborn coyote
@white moth thanks! I'll remember to do that
summer bluff
I'm basically an expert now. So, feel free to send those thousand dollar commissions my way.
spiral sigil
where is the anvil ?
young vault
With bump maps?!
 short steppe
wouh
young vault
And then the low-poly pirate. Gotta have one of those in your portfolio. And don't forget the 20 raptors that all look identical with slightly different colors.
short steppe
I didnt know that ppl went to vrchat and wanting to make 3D stuff to just put in the VRChat
Very nice.
summer bluff
I'll look into those lol. I want to get good at this so I can make worlds without needing to search and credit different assets.
young vault
I never made the donut. I'm not gonna lie.
spiral sigil

white moth
Congrats on your donut!
 urban bramble
 atomic patrol
Anyone willing to help me out?
I'm Trying to smooth out some of the vertices, is there a way to do that a bit easier than just making a fuckton of them?
Trynna make the back look more like the lowest image
also trying to make the back of the head, like the cylindrical bit to go inwards veeeeery slightly
obv smoothly
quaint jasper
Bevels !
atomic patrol
What are those? I just downloaded blender today so idk what i'm doing rlly haha
atomic patrol
I love him
jovial radish
Might want to bevel the rest of the body a bit
the head is very smooth but the body is very sharp
 storm stirrup
I am very angry that you just downloaded blender yesterday and did that
but also very proud
well done
subtle jackal
https://cdn.discordapp.com/attachments/721965082459766814/733778734145863800/unknown.png Pigtails almost done. Also friend helped me improve the face a bit, mostly in cheeks and mouth
 spiral sigil
elf ears 👀
subtle jackal
Mhm
white moth
I'm having one heck of a time reversing all these shape keys to make them "Add Thing" instead of "Remove Thing" - they start messing up all the others and expand with every additional slider that gets turned on
calm saddle
Anyone got experience with Zbrush and Blender usage for VRC? Was curious bout something
white moth
Only Blender
 coarse light
what unity version do we need
calm saddle
2018.4.20f1
calm saddle
I only got like 2 weeks in this stuff, but the newest blender works just fine. I believe the newest version is 2.83.2 and it works just fine for me
white moth
@coarse light I always use the most recent version. Recommend just installing the Steam version since it will auto-update
calm saddle
There's a steam ver?
spiral sigil
and i recommend not using the steam version
white moth

Blender is a free and open source 3D creation suite. It supports the entirety of the 3D pipeline—modeling, rigging, animation, simulation, rendering, compositing and motion tracking, and video editing. Advanced users employ Blender’s API for Python scripting to customize the a...
Recommendations
148
spiral sigil
the auto update will fuck you up if you use 3nd party addons
white moth
Well you can disable the auto update
coarse light
before i get into making avatars
calm saddle
Svel, any chance you use zbrush and blender? 😮
coarse light
should i just wait for 3.0 avatars to release?
white moth
calm saddle
They should be backwards compatible, and you can always just take the 2.0 avatar into separate file and update it?
white moth
The only time it broke plugins
calm saddle
Plus it's good practice to do 2.0 while we wait for 3.0, get in a workflow that works for you
white moth
was the big 2.8 update
I wouldn't worry about holding out for Avatar 3.0. There are a few things you can do in advance (like making a closed_eyes and mood_angry etc shapekeys) that will let the avatar get a few 3.0 features for free when it drops
spiral sigil
no wyvern, i only use blender
white moth
I don't like scultping just because you have to retopologize anyway to get it game ready, it's so much extra work.. I'd rather just make it with quads in the first place
coarse light
so can u get any 3d model, add bones in blender, then just touch up in unity and upload to vrchat.net?
spiral sigil
i just know that the work flow Zbrush > blender was made super easy now
with the remade multires modifier
white moth
If I do learn to sculpt, I'd probably just learn the blender sculpts tools instead and keep it all free. 👀
spiral sigil

The one and only Pablo Dobarro has implemented an absolute game-changing new feature for the multires modifier, one that will make all kinds of new things possible for sculpting in blender. This new feature is much like Zbrush's subdivision level system. It lets you rebuild su...
white moth
jinx.
calm saddle
I already got zbrush, got it before it was cool and they been just giving out free udpates for years
coarse light
so does that work?
calm saddle
Kinda shame to let it waste, and I like their projection texture tool a bit better. I was hoping to use zbrush for a base form sculpt and UV seams, then do some stuff in blender like rigging and animations.
white moth
if "add bones in blender" also includes weight painting the geometry to those bones, yes
That's sort of a "draw the rest of the owl" situation
calm saddle
The difficulty lies in proper weight paints right?
spiral sigil
yes
white moth
Yes it's a very trail and error task, at least for me'
coarse light
Weight paints?
white moth
Yeaaaah.
coarse light
What is that
spiral sigil
which got disgusting topology
white moth
if you come from sculpting programs you probably don't have a concept of how actual 3D models are animated in videogames
spiral sigil
if you have a proper topology, weight painting is fairly easy
white moth
I just mean when you work and pose clay you probably aren't familiar with weights and armatures
clay modeling lets you take a lot for granted
calm saddle
Luckily I started out with max and maya before getting zbrush xD
white moth
but yes models are made of verts, and those verts follow bones. you need to tell every vert which bones they should follow and in what amounts. that's called weight painting
calm saddle
Feels like he might be shooting himself a bit in the leg by jumping into the middle of the process without knowing the basics tbh
spiral sigil
yup
white moth
Weight painting is certainly one of the most advanced 3d modeling steps in the game asset creation process.
You can understand it, but it will take much longer to master it
Most other things are just technical knowledge
weight painting needs technical knowledge AND an eye for aesthetics AND lots of tedious trail and error checking
spiral sigil
accurate
calm saddle
I feel it
coarse light
Ive seen so many people with variants of these models but i cant find it anywhere
calm saddle
Hmm, do you guys use any addons for UV stuff like seams? Or manual?
green ember
isnt the multires 2.9?
not 2.8
also the easiest cheesiest way of weight painting ive found is add a bunch of "holding" bones to like limit how far you want automatic weights to go and then just do that
and 9 out of 10 times it comes out perfect without needing to edit it once you setup all the holding bones
calm saddle
After the "not 2.8" comment, you started speaking elvish to me
green ember
yeah i dont know if there's a proper term for what i was talking about but ill show an example
normal humanoid rig
holding bones
i dont know i just put those bones there to actually set up borders for automatic weights and then merge it with the parent
friend of mine who goes to game design school said he did this and everyone was so surprised with how quick he was done
calm saddle
And the weight isn't mesed up when you get rid of the extra bones?
green ember
i merge them to parent
so it ends up being exactly the same just that the additional bones arent there
calm saddle
Huh, sounds handy. I'll have to look into making own bones. I've been using a premade one I found in a tutorial
green ember
i use rigify and have my own premade rigs to use on characters
calm saddle
I got into blender maybe 2 weeks ago, so all that stuff is still new to me
green ember
gotta start somewhere
calm saddle
Yepsi pepsi
For now, I got a bionicle looking avatar up and running
Had some weird issue with feet being in the ground lately tho, wonder if it's rig related.
It looks fine in unity and blender, but then vrc is like nah, feet in ground and viewpoint isn't where it was on unity
green ember
that means the bones are under 0
calm saddle
Which is odd cuz I always reset position.
And the same rig worked fine on an earlier model
it's just suddenly the two recent ones get messed up
green ember
idk i just hit fix model in cats and if it doesnt find anything to break then it fixes everything thats wrong with it
white moth
Blender 2.9 does not exist. What.
white moth
Gotcha
green ember
to me honestly 2.9 is such a significant change from 2.83
calm saddle
How so?
green ember
personally i dont use shortcuts for everything and in every 2.8 build there are things missing from the search menu
white moth
I avoid blender beta, not trusting experimental builds with my projects
green ember
and in 2.9 everything is in the search menu
white moth
Nice!
green ember
and also the multires modifier
calm saddle
Think I wanna fully grasp 2.8 befor going 2.9 maybe
that way I don't confuse myself on ui and stuff
white moth
Everything after 2.8 is the same.
green ember
its just quality of life features
calm saddle
so most 2.8 tutorials would still work fine?
green ember
yeah
white moth
The UI update going from 1.79 to 2.8 is the only major blender change
green ember
yeah they're not going to be redoing the UI anytime soon
white moth
Once you are used to a post 2.79 blender you should just always use the latest stable release tbh
calm saddle
hmm
green ember
2.79*
white moth
Yes
calm saddle
I need to sit down and do a concept doodle and make a proper avatar
green ember
there are still some weirdos out there that use 2.79
white moth
I consider 2.79 so old I think of it as blender 1 lol
calm saddle
Do you guys do UV unwraps with default blender or some addon?
green ember
default blender and if i cant be bothered i let substance painter figure it out on import
spiral sigil

A viewer helped me figure out how to get files off the Mame virtual machine, so I was able to try to open the donut scene from Blender 1.0 on Irix on a modern version of Blender!
white moth
I do unwraps with default blender then I use third party plugins to pack it
green ember
yeah wasnt blender 1 released in like 1990 or something
calm saddle
I need to figure out how to do seams and shtuff, cuz when I tried to texture project last time, the uv's overlapped and I painted multiple areas at once 😦
spiral sigil
2001 i think
green ember
1998
close enough
https://twitter.com/JanvandenHemel i'd check this guy out if you're just starting out with blender

Writer of the Blender Secrets e-book https://www.blendersecrets.org/book
Tweets
2056
Followers
13616
Twitter
or even if youre already comfortable with it
he posts so much useful stuff
also if you have a short attention span its also perfect
calm saddle
Any chance you got a good tut for UV workflow?
spiral sigil
take some tissues with you, you'll need them when you start to meltdown
green ember
i dont think i ever watched a tutorial for UV unwrapping
it's usually "yep this cuts here and should open up like that on the UVs oh shit it didnt do anything"
its just trial and error till you get comfortable with it
spiral sigil
kinda hard to do a tutorial on it
green ember
its different per project
spiral sigil
you basically need to imagine your model IRL as a paper model
green ember
i mean i guess you could waste time watching blender guru unwrap an anvil....
spiral sigil
where would you cut it out
to make it perfectly flat
without tearing anything up or stretching anything
vivid crater
yea tutorials dont really help too much, you just need to understand the whys of it
calm saddle
That part I kinda get, but I saw someone somewhere have stuff neatly fold out and stuff like that. Last model I tried, it had like 6 parts overlapping in the center while everything else was on islands of their own.
calm saddle
Wanted to add some variety with texture projection, but that just painted them all at once and any island that appeared on top of them with the basic Unwrap button, was hoping there was a better way to split things up than manually moving every piece one by one
green ember
at the end it might look like a mess but as long as there's no terrible stretching or anything overlapping you're good
calm saddle
Yeah, I messed up mine big time. All the yellow marked pieces are one single object.
green ember
that doesnt look right
calm saddle
green ember
did you click smart uv or just normal unwrap
white moth
Default blender unwrap + Shotpacker to maximize used texture space
calm saddle
Just UV > Unwrap
vivid crater
margins probably set too high
calm saddle
It's possible yeah, this was just exprimenting without a tutorial
Gonna make a more organic character this time around, this one is fine enough with some really basic materials. I kinda like the bionicle vibe anyway. Gonna practice UV's on a bit more substantial model, which also allows me to work on Normal Maps at the same time
Btw @white moth on that fox, where did you go with the seams?
white moth
green ember
just like svel said, you'd seam it where you think it'd unfold into a flat plane in real life
white moth
yeah think of it like you want to lay it flat, where should you make cuts
it also represents where you will have potentional texture decontinuities and need to make sure you color match both sides of seams, so i also try to pick locations that aren't seen often
spiral sigil
you made that adeon ?
calm saddle
Gotcha, gonna keep practicing on the new model.
Is that normal maps on the tail btw?
white moth
or where color discontinuities are expected
green ember
on the fox do you use that same texture thats in blender in unity as well?
white moth
This model was a z-brush comission, I only did blender work to weight it and quest optimize. yes it's normalmapped
spiral sigil
how is the bend doing around the knee pit ? you only have one line of edges there
calm saddle
So in theory, I could make a model in zbrush, bake the details into a normal map, then do some tweaking in blender like rigging and the normal maps would work fine in vrc?
green ember
in theory you can do all of that in blender lol
white moth
yes, that's a very common workflow
calm saddle
I tried blender sculpting, I'm more used to zbrush atm.
and I got some custom brushes here and there
green ember
do you get any mipmapping mishaps with that texture on the fox?
white moth
None
spiral sigil
you can also just sculpt in zbrush
green ember
damn thats crazy
spiral sigil
then bring it in blender
retopoligze it
bake normals
and do the rest of the work there
white moth
Oh, this picture was before I added margins LOL
spiral sigil
especially with the better multires modifier, that's way easier now
green ember
yeah i was gonna say
calm saddle
Any idea if unwrapped UV in zbrush would move over to blender as well?
white moth
UV's are the same, i just took the image in gimp and liquified the black
green ember
i just use content aware fill in photoshop on the blank if and when i need to
idk if you guys know about this cool addon for blender called quad remesher but its pretty cool
spiral sigil
yup
i recommend it too
green ember
i only know about it because one of the first builds of blender had it built in
its basically magic
white moth
Export the UV's as an image, open in gimp and remove the alpha channel, now you have a UV mask. then I use that as a guide for the solidify filter to do this kind of thing to the texture:
it entirely removes UV bleed
green ember
substance just does it on export by default so im good most the time
calm saddle
is quad remesher an addon you need to install?
green ember
yeah
Quad Remesher: a new automatic quad remeshing (auto retopology) plugin for 3dsMax, Maya, modo. (and more to come : Blender, Cinema4D, Houdini)
i guess it's technically paid but they give you a trial which for me has been lasting infinity
white moth
The topology flow on that penguin is insane
didn't you have to like, guide it? with flow lines?
green ember
nope
spiral sigil
it even create poles, it's crazy good
calm saddle
I kinda wanna make a prinny now
white moth
Just make Roland from Animal Crossing. Same thing
calm saddle
Prinny are way cooler
They esplode
Maybe when I'm learning to make animated stuff like explosion
green ember
@white moth
in some cases you would wanna guide it but for quick stuff like this its super handy
white moth
Holy
spiral sigil
the code for this must be crazy
white moth
Well, I don't have much of an excuse to not learn sculpting now
green ember
it kind of figures out proper loops for most things
white moth
Yeah I can only imagine the code
vivid crater
its by the same guy who made the zbrush remesh right?
calm saddle
Do you use any addon to clean up normals as well?
green ember
everything normals related i use default blender
white moth
Auto-smoothing has never done me wrong
green ember
autosmoothing and sometimes weighted normals modifier
when im working with multiple modifiers
calm saddle
That's what I've been using so far. Perhaps I just need to bevel a bit more. Do modifiers need to be applied before we export them out into unity btw?
green ember
they apply on export
also for sculpting ive been enjoying the multires modifier for the most part
green ember
it lets you non destructivly sculpt at multiple levels of subdivision
calm saddle
Huh, sounds like zbrush mechanic
green ember
it most likely is
spiral sigil
it is now
it works the same
you had levels of details basically
you can stack them i think too ?
green ember
in blender?
spiral sigil
ye
calm saddle
Speaking of details, I kinda figured out why vrc sometimes feels slow or laggy by accident. I in the performance settings, if you set minimum requirmenents to poor, a ton of avatars get turned off xD
green ember
if we're thinking about the same definition of stacking no you cant
its usually the wolfboy with 40+ materials with 8k solid color textures in the lobby lagging you
calm saddle
I was in a room and once I filtered out the verypoor performance avatars, there was like 3 out of 20 who were visible
spiral sigil
you can bypass the filter
green ember
the vrchat performance ranking isn't perfect but the info it gives you about other people is handy for when you wanna talk shit about someones avatar
white moth
how is the bend doing around the knee pit ? you only have one line of edges there
@spiral sigil https://i.imgur.com/LDPyzUt.png
three on front of kneecap, only one on back. could be better, but I'm on a quest budget
white moth
They get triangulated
spiral sigil
looks good enough
calm saddle
Btw, anyone got an avatar without feet/toes? Like those cartoony stubby toes?
white moth
Like... socks?
 green ember
retopoflow is nice but its not as nice as quad remesher afaik im pretty sure
vivid crater
quadremesh is an automatic solution still
calm saddle
Can't find a good example of the feet I meant, but basically some avatars have feet like cylinders I suppose?
green ember
mistook retopoflow for something else
i just generally avoid having bad topology because i usually model and not sculpt
coarse light
how do u apply textures to a model made for it
onyx juniper
Oh, hey. You could use this for making lower poly models, I bet
coarse light
on blender
Okay i applied the texture to the model
Is there a way u can turn the green to red in blender?
Its basically a png
The texture
calm saddle
You could take the texture map and do a Hue & saturation ediit
kinda like this but just on scales
coarse light
Wow that looks fantastic! @calm saddle
Thanks!
from in blender or with another program?
calm saddle
basically photoshop, but browser based
if you put your texture map here I can do the same thing
 wintry raptor


 runic nymph
techically anything works as a world as long as you attach a scene descriptor to it 
 undone valley
hi i think this is the right chanel but it wont sculpt this tshirt ? how do i fix that ?
coarse light
after exporting a model from blender, how do we get it into blender (then what do we do in blender), then into vrchat
quaint jasper

VERY IMPORTANT - PLEASE READ:
This tutorial may still be mostly useful, but there's a few major changes that you need to pay attention to. First off, VRChat now uses Unity 2017.4.15f1, not Unity 5.6. Additionally, there's some new tools for helping with atlasing that you shoul...
 turbid flax
I literally just figured out how to make armatures and bind them to models by accident
Im very Happy
Now I just need to figure out how to merge armatures
summer bluff
Anyone know some good anime character blender tutorials? Or even just things that talk about how to do eyes and mouths.
 abstract pond
I’m not a 3D modeler, but wouldn’t it be possible (and way fast) to use the LiDAR module on the iPad Pro to depth scan a whole room or like a whole house, then using that scan to model it in blender for bringing IRL locations into VRC? Has it been done before? I’m trying to learn more about it...
 ashen gazelle
@abstract pond I think it's doable, but quite slow and after scanning you need to bring the model into a 3D software to correct artefacts and small details.
abstract pond
@ashen gazelle I was just planning on using the scan for reference for building the world, not using the scan as part of the actual modeling
ashen gazelle
Ok, cause the scan would have way too much polygons for vrchat.
But in my opinion, it will be faster to take good reference photos then 3D model than lidar scan + retopology. But my method will not get the exact dimensions of your room, cm wise.
Hope you understood me
unborn coyote
Hello! I'm trying to model this cat and I want the eyes and mouth to be "painted on". I've seen people do this with meshes only, can you direct me to any resources/give any advise on doing that?
quaint jasper

EDIT: If you are using an MMD model please read below!
In this video I will show you how to make your 2D eyes/mouth type avatar have a blinking animation and mouth movements for VRChat!
The process is different for MMD model...
unborn coyote
Thanks!
tight quartz
Anyone think this is to hard to model for a beginner just the model not like every detail?
wind zinc
i think just go for it, you will learn a lot even if you might not get to where you hoped to at the start
tight quartz
I already like forgot most of the buttons ;-;
wind zinc
XD rip
tight quartz
Mhm
Is there a website that can like cut up this image so I can have front view and stuff?
wind zinc
i mean what i would do is duplicate it 4 times
then just crop each one to the part you want
 lavish night
heyya, really dumb beginner question but when in blender modelling parts for a vrchat world, is there a difference between combining objects into one by using boolean and just joining them?
i know boolean merges the meshes but practically speaking is it a big deal for vrchat in terms of optimization and such?
tight quartz
How do I select both at once?
Without going outside side view
Wait nvm I am stoopido
lavish night
bump on my join objects vs boolean modifier question cause im still an idiot
 stable edge
Boolean will remove geometry, join won't
lavish night
sure but
would there be any consequence to using objects made with join
other than the hardly significant increase in polys
stable edge
Idk if you can reduce material count that's always a plus
stable edge
Np
young vault
Certain times boolean will also increase the amount of geometry if you're aiming for a low-res style.
 wild hedge
I'm working on a low-poly model and am looking at some PS1 models for reference... and there's an odd design choice I don't understand
With this model of Leon from RE2, the arms look normal and attached to the shoulders, despite being segmented..
but with the model of Claire, I don't understand why Capcom would let the arm clip through the shoulder like this
latent charm

polycount
I've been interested in learning to how rig/pose characters/objects and so I started looking at some PS1 games (because I want to get the simplest idea of how it works).
 fervent rose
anyone have any good techniques for sculpting fur tufts in blender? ive been using the grab tool to extrude a mass and then carving it out from there but it just seems off, or maybe its just me
 onyx crane
Is anyone very comfortable with baking diffuse from procedural material setups? I would like to bake textures from materials that have degrees of 'randomness', in particular the famous Blender Guru donut sprinkles. I am very comfortable baking diffuse, normals, etc but am hitting a wall when it comes to textures that are randomly generated (using an Object Info 'Random' node hooked to a ColorRamp node hooked to a Principled BSDF Base Color)
When I bake on these sorts of textures, my bake appears empty in the areas that should have the random material. How can I fix this?
white moth
In blender is there an easy way to get a simple yes or no that two objects currently have identical topology?
 deep dirge
look at them in edit mode
white moth
that's not easy
a single flipped diagonal on some microscopic quad means they don't match
I don't need to know where the differences are... just that there's a difference somewhere
basically i want to know in advance if join as shapes will work perfectly
fringe rock
if you want to transfer shapekey they need to be exactly the same or it give you an error
white moth
Join as shapes works as long as the topology and vert order matches
i can easily make the vert order match if the topology matches, so getting the toplogy to match is the only tricky part, that's why i want a easy check to see if there's somewhere i still missed so i don't have to keep joining as shapes to see it fail then play more spot the differences
my usual process for weight transfer is
make topology match -> run macro to make vert order match -> join as shapes -> make shaped the same -> overlay them -> weight transfer using nearest vert
deep dirge
white moth
lol what video
deep dirge
white moth
ah yeah
deep dirge
It randomly popped up in my recommended
spiral sigil
same
deep dirge
then I saw you
white moth
I am old :D
deep dirge
I always come back to this video. You seem to be the only person who truly created some non-euclidean space, everyone else just fakes it with render to texture portals and teleporting.
white moth
9 years later, someone is doing non-flat space and I'm hype https://www.youtube.com/watch?v=EMKLeS-Uq_8
 clever steeple
can someone help me with this problem?
i'm working on something in blender
but the background of the object is transparent
how can i see it?
azure rain
quaint jasper
disable backface culling
