#3d-modeling
1 messages · Page 84 of 1
 fair swift
 quaint jasper
yeah i know the meme
 spiral sigil
Just get their VRC name and add them and meet up in game
 main kettle
@quaint jasper before, there were a lot of them, but now they seem to have disappeared
@spiral sigil where can i find vcr name?
spiral sigil
Send it to each other
main kettle
@spiral sigil also, what’s is vcr
spiral sigil
VRChat.
main kettle
@spiral sigil I’m idiot
 proper narwhal
any one know why when i try to asign a material to an object in blender it isnt doing anything?
spiral sigil
Is the object UV unwrapped?
 thin bison
Getting back to modeling after not doing it seriously for a couple months is a bit daunting
proper narwhal
wow that is amazing
quaint jasper
Proportions look great !
thin bison
The topology for anyone that cares
Might do a second pass on the topology as I'm not entirely convinced about the nose and bridge
proper narwhal
still looks great
 runic nymph
nut
spiral sigil
is there a way to save just a selected collection in blender
spiral sigil
Wheres a good place to upload assets for people to use. I've made a few simple things I'd like to share
 devout scroll
https://booth.pm I guess

BOOTH(ブース)とは、pixivと連携した、創作物の総合マーケットです。無料で簡単にショップを作成でき、商品の保管・発送代行サービスも提供しています!
you can make it free
thin bison
Sketchfab is pretty good for that
devout scroll
o that too
thin bison
Artstation has a marketplace as well
But if you just want a place to upload things you want to give away for free you could use a cloud storage solution which you can link to
spiral sigil
I mean if I ever got good I'd like to sell things but right now I'm working hard to just absorb as much information I can.
I'd like something where I can link to and say hey friend can you help me with this or hey I made something interesting you can have it
BOOTH looks nice but is very japanese. How much japanese do I need to know to be able to use it lol
thin bison
Sketchfab prices can be set as free and it allows live preview
devout scroll
Booth has lesser quality stuff on it too so eh
You can set it to english too, but I'd put stuff on sketchfab I guess
spiral sigil
ty
 frosty plinth
Madonna Update
frosty plinth
frosty plinth
giving Madonna Her Makeup now
frosty plinth
 brittle notch

 glad steeple
pedant, but the fabric going in here doesnt make alot of sense
also the abs kind of just became a crevice, tone those down abit
 kind gull
 hallow bough
Have you tried looking up some tutorials on weight painting?
 shell sentinel
On my 3rd model and learned about curves for hair
This is life changing
Thabkfully my pal who's getting the avatar doesn't really care about dynamic bones so I won't have to stick bones in all the hair strands
 next fractal
A warning with the curves. They're extremely high poly.
spiral sigil
@shell sentinel did you do a tutorial for the hair
shell sentinel
@next fractal I FIGURED I’m wondering if there’s a way to knock it down
And I did!
hallow bough
Could always dissolve the edge loops you dont need if each hair piece doesnt have defined strands anyway
shell sentinel
Also yeah thankfully this guy only has 20 strands but I saw the 4 hair tufts that a commissioned model I got had and lORD
next fractal
Yeah, you can either retopologise it or manually decimate it, good luck man!
looks good though
shell sentinel
Good to know! Thanks so much
My models are really stylized so I alway try to keep it as low-poly as I can
This dude tho needed
Way too many loop cuts
spiral sigil
Can you post the tutorial pls
hallow bough
Around the joints im assuming xD?
shell sentinel
Yeah it was just this one!
@Mari not -too- many around the joints, mostly where the coattails met the waist

A tutorial on how to make hair in Blender 2.8 with curves, a method that is very simple and effective that I have been using for my character sculpts.
▼ Sculpting Uraraka Ochako:
Re-Sculpting My Old Art | Uraraka Ochako in 3D [My Hero Academia] | Can You Improve In Only 1 Yea...
Here ya go! It's just this one
I edited the dhape a ton though to where it was practically a cylinder with tapered ends
hallow bough
Gotcha XD Well you learn everytime luckily!
Hair curves saved my life i didn't know how to make hair with volume before it tbh
shell sentinel
Yeah for real lol its so funny that every new tutorial I find I learn like 10 other unrelated shortcuts that could have saved me HOURS
I went from 3 hours to 10 minutes on the simple base mesh for sculpting tutorial
To make a simple body structure to start from
Rather than me modeling one body part off of a basic shape mesh and deleting/connecting the faces every time to merge them
hallow bough
The time it takes to make stuff improves so much the more you start actively watching 3d modeling videos and making things it feels good XD
shell sentinel
The 3d learning curve is really sharpe I’ve found
spiral sigil
I've found most of the things I'd want to make aren't super complex but I dont have enough program literacy to do it. So I'm constantly looking for better ways to do something
I keep a list of questions that if Google fails me I ask here
shell sentinel
Same omg I’ve started writing stuff down too
 onyx crane
Does anyone have Maya and would be willing to try opening an .FBX and converting it to .OBJ for me? I am trying to open it in Blender but it's just not budging, and throwing out errors. (It's an .FBX of a ceiling light).
onyx crane
Nah, it's not that -- "Version 6100 unsupported! Must be 7100 or later." have tried opening in both new blender and old blender
quaint jasper
i think it's the maya version that's the problem then
quaint jasper
i never want maya on my pc again
 mild nimbus
I only used it for uving
Cause there tools amazing
And rigging animation
But blender is starting to evolve in those aspects
More the reason not to use it
onyx crane
I got it, used the autodesk converter to do .dae and then took that .dae into blender
and yeah, i am really happy with the new Blender's abilities
also much more beginner friendly (than old blender)
mild nimbus
Maya student license gonna be poof for me in 1 more year
F
Once it's gone I'm out
Cause that new system is a yikes
 pulsar cobalt
Question: I have a glove on the right hand of my model. I copied, mirrored, and moved it over to the left hand. However, it still moves with the right hand. I've clicked everything and done about an hour of youtubing and can't figure out how to fix. Can anyone help?
quaint jasper
that's called weight paint
pulsar cobalt
I already tried subtracting and repainting
quaint jasper
probably done incorrectly then, you can select all vertices affected by specific vertex groups, try to find which groups affect the wrong hand
 green ember
 median pike
getting a bit better with sculpting. I am still far away from being good enough for avatars but I am slowly getting there
 autumn badger
That's super cute!
median pike
thank you!. I already got a few suggestions to improve it like pushing the forehead a bit forwards so the eyes sit more in the face. It still looks a bit uncanny but Its much better from my yesterdays attempt
 hard ember
@median pike this is peak sculpting
 weak berry
i need to 3d model a helltaker character in the future but idk which one
 onyx juniper
From Blender Discord's Add-Ons channel:
[Optiloops](https://github.com/vilemduha/optiloops)
TAGS: tagFree, tagOptimization
Allows you to quickly delete edge loops that don't contribute much to the shape's curvature. This is the proper fast way to optimize mesh, instead of the dreadful decimate```Mostly for @shell sentinel Looking for a way to trim the hair curves
That cat/devil guy is really doing for me by the way
shell sentinel
Omg thank you ! He's Spring-heeled jack :V
Also i ended up using a "decimate" modifier that worked!
And then joined everything
Here's how to turened out! Ignore the junky automatic weights lol
Hes gonna have a ton shader on so the head ans hair will essentially blend in
onyx juniper
I gathered from the picture that this guy is supposed to have hair over one eye, or where he's supposed to have another eye, like Jessica Rabbit
shell sentinel
YEAH lol pretty much, it doesn't technically cover the area on the model but he's gonna be in shilouettw so
Also im losing my mind in trying to wright paint the hair to the head and one. Single. Strand
Does not work
 vivid crater
you werent gonna have bones for the hair anyway right?
shell sentinel
OH its hooked to the neck
Yeah but I had to merge the hair onto the body
If you do that after weighting it, it turns off all your weights
Automatic wrights stuck this onto the neck. I'm laughing so hard
pulsar cobalt
Is there a tutorial for getting a pose right with high heels? Mine keeps resetting back even though I set it as rest pose
green ember
@shell sentinel It was a bit challenging to make him 3D because of his inconsistent design in the pilot. but I think it turned out pretty good at the end
shell sentinel
Yeah haha pilot episodes tend to have very off-model designs
green ember
I mean this mostly
shell sentinel
FAIR LOL
green ember
it wouldve looked hella off if it was front facing in 3d
shell sentinel
Curse of the phineas/mung Daal
green ember
pretty much
but I'm happy with how it turned out. had a friend of mine draw me tpose reference for it
 hardy agate
whats that from?
green ember
Smiling Friends
spiral sigil
not sure if i should ask here or #avatars-2-general , how do i go about making clothes from scratch?
spiral sigil
Sign Langue Teaching world (in progress)
9564 tris as of right now
Divided into different meshed for each pillar, walls, floor and ceiling for a baked occlusion map ect.
quaint jasper
Planning on Quest compatible ?
spiral sigil
It will be Quest compatible. The render view will always be below 10.000 tris
quaint jasper
That's great !
spiral sigil
I don't know about the texture maps though. Should each be 2K?
I only use texture maps for the globe and pillars
Example the globe
Will it run smooth with high resolution texture maps?
quaint jasper
2K isn't considered high resolution, but i'd suggest trying 1K to see if the difference is that big
in terms of visual quality
spiral sigil
Thanks. I'll bump it down to 1K if quest users are lagging.
quaint jasper
Very unlikely though
spiral sigil
It is the first time I am making a map for VrChat, so I put all effort into making it as optimized as possible.
quaint jasper
You have some leeway though, no need to take down everything to make it run on an N64 😄
spiral sigil
In some cases there are about 40 players if not more (in the lesson)
So I have no idea how this map will work in practice.
Semi big lesson
And ALLL those avatars will just burn up any computer
quaint jasper
Quest by itself can't handle that many people, hardly half
Regardless of avatars, 20 people will already suffer from microphone stutter
spiral sigil
Oh, it is sign. Nobody speak, lol
quaint jasper
Of course, but some sign users may try to use speech in some cases like I've seen MrDummy before, it makes it even more difficult
That's why the Hub has such a low limit of users per instance
Performance can and should be great in an optimized world, but players bring in voice, IK and their avatars
So it all adds up very quickly if the avatars are bad
A single awful quest avatar could be worse than your world many times over
spiral sigil
Would there even be a solution to optimize an almost MMO like world for quest users?
quaint jasper
Agressive optimization
Lots of culling, lots of baking, lots of atlasing, low res, barely any audio, etc
spiral sigil
quaint jasper
Your world should be absolutely fine
I'd suggest maybe merging the pillars though, lowering drawcalls as they probably cannot be batched easily
And won'tt get culled anyway
At least not occlusion culled
spiral sigil
That is interesting. Maybe I should divide them into four sections? I wanted to have pillars behind the player not take up performance.
quaint jasper
Ultimately it's alright, there's a few good ways to do it, it's such a low number of drawcalls that it's not really a giant issue
I'm off for now, but feel free to ping me with any question and I'll do my best to answer them tomorrow
spiral sigil
Thanks for everything. Will do 🙂
hallow bough
Is it better to model a tail (Cat,wolf etc) In a natural position or straight/horizontal for rigging and such? I don't have experience working with animal tails XD
spiral sigil
I would guess it's easier to make a straight tail
and then bend it how you need after weight paint
 stable edge
Yeah, they usually leave it straight out when weighting because that's easier
 versed glacier
i need helps does anyone know how to import stl models into blender
when i try that they appear invisivle
but the origin is still there
 safe tapir
Pretty decent, but are the arms supposed to be so short?
Or are you still working on it?
green ember
oh yeah WIP
safe tapir
Aha
green ember
no forearms shoulders or feet yet
safe tapir
I see, well looks pretty good otherwise then so far, can't think of much to add aside from that. Maybe a few intends or something on the ball joints perhaps?
green ember
its solid colors in blender right now i plan to make it pbr in substance painter
that'll add definition to the metal and all the joints
hallow bough
Getting Doctor Who vibes from the design!
 gaunt aurora
@green ember needs pistons
spiral sigil
so I'm learning some hair using curves. But I'm running into trouble. When I alt-s to taper off the end it moves the whole object down. Is there some way I can position the path in the object that it's generating?
very annoying
screen shot of tutorial I'm following
 gray hornet
Where is the origin point of the circle?
the second curve that has the shape of hair
spiral sigil
bruh
the origin
I set the origin to object and it fixed it
thx
making hair this way seems pretty easy but this seems like a lot faces, etc. Is there a way to bring it down?
Also this doesn't seem like a thing I can uv unwrap and texture?
Is my only choice to assign a material to it and color it that way?
Thru some experimenting I converted the curve to a mesh. To optimize would I just dissolve faces and edges?
gray hornet
You can check in curve settings to lower resolution
but dissolving edges would work I think
also - best UVmap ever xD
spiral sigil
it was a cube at one point. Now it's hell
spiral sigil
what is he
gray hornet
close up on modified head
 rare cedar
Anyone want to help (and by help I mean do this avatar that I have) with this Zoro avatar that I am working on? I have to do some renaming of bones and placement changes.
https://media.discordapp.net/attachments/361742235525709825/714667737900646430/unknown.png?width=1204&height=677 want to get it vrchat ready but I have no idea about this stuff on blender
 quaint jasper
You can commission someone in VRCTraders #community-servers-old @rare cedar
rare cedar
where tf that at
 manic dove
Anyone know how to open VRM files in blender without messing it up? I was trying to use https://github.com/pixiv/three-vrm/blob/dev/examples/models/three-vrm-girl.vrm but I just can't open it without getting something wrong.
GitHub
Use VRM on Three.js. Contribute to pixiv/three-vrm development by creating an account on GitHub.
autumn badger
Are most of the anime avatars made using VRoid?
stable edge
Vroid is relatively new, so no
 fierce tundra
yeeeeeeeeeeeeeee
green ember
really making a use of that multires modifier for the a lot on this model
spiral sigil
looks good !
green ember
now to texture it 😈
 waxen pewter
thinking of purchasing Retopoflow - anyone have experience with it ?
spiral sigil
I'm making this rabbit tail using curves. Is there a way to make the end less sharp? Or is using curves for this a dummy idea.
I just want that end to curve more at the top and make it look soft
 stark ore
had to redo uv's because i forgot mipmaps exist, mood rn
green ember
just turn off mipmapping lol
spiral sigil
wtf is mipmapping
green ember
texture scaling by distance
thin bison
Basically, it's your renderer creating downscaled version of your texture to use at distance
spiral sigil
oooh
thin bison
And turning it off is inadvisable as it leads to very jaggy looking textures at a distance when off
 ashen stag
Talking about creating UV maps with mip maps in mind. What is a good practice? I've created UVs that are fine in every aspect except mip mapping.
thin bison
Having a good pixel margin between uv islands, it will help with seams. Also planning, such as having uv islands with similar colours and tones close to each other. Some artists even have certain sections where the background colour will be similar to the uv islands
ashen stag
Yeah warframe does it where instead of blank space or solid color the islands bleed outwards until they hit another island. Was just curious as I had some jarring mip mapping on a simple texture so I just turned it off. Thanks for the advice
thin bison
http://wiki.polycount.com/wiki/Edge_padding This page shows examples of what's happening without proper padding, it also give general tips on minimum padding distance @ashen stag
ashen stag
Alright thanks a bunch, looking back at the texture that I was having an issue with it makes a lot of sense that mip mapping would struggle with it. Do you think it would be best to try to separate the white and black into different islands instead of having it the way I do?
thin bison
I'm guessing that's for one whole piece of a mesh?
ashen stag
Yeah its knee high socks, the UV is the leg as it goes down
The main reason I didnt split it into different islands was because the white and black are not cut on vertex edges
thin bison
Is it the stripes which are causing trouble with the mip maps?
Or the seams on the leg?
ashen stag
I can open unity and send you an image, but the main problem is that the black blurs into the white all across the leg
thin bison
Yeah, show me
ashen stag
thin bison
ooof, what's the original texture size?
thin bison
You might be better off without mip mapping then, is it a texture atlas for multiple parts of the model?
ashen stag
Yeah the entire model is atlased into 1 texture
However, the legs are the only issue with mip mapping
thin bison
Yeah, you might be able to fix some of it by redoing the uv map for the legs, giving the stripes more breathing room and softening the transition between black and white
As the biggest issue seems to occur in areas were the stripes are really close on the texture
You could also do the arc system method as you seem to just use solid colours with gradients and create a white and black block and placing faces in them
ashen stag
Alright well thats a couple things to try when I head back to this model at some point. Just wanted to chime in since its a problem that I found quite a while ago. Thanks a ton for the advice though
thin bison
Always happy to help
green ember
i was hoping to have it be all shiny and cool ingame but there goes that because unity is shit
spiral sigil
that's standard shader ?
green ember
rero standard with custom reflection fallback
i guess its not that bad as long as it never uses the normal reflection probe
spiral sigil
don't know much about rero's shader
but for a very shiny metallic look with standard
green ember
it's basically standard but with extra stuff
green ember
i know. just that unity doesnt have very good metallic roughness
spiral sigil
😔
waxen pewter
not sure if anyone have interest but - Retopoflow is free (V2.03) for blender 2.79 - some ppl have working with 2.8 / i can not get it working for that version - hers the git for DL

GitHub
A suite of retopology tools for Blender. Contribute to CGCookie/retopoflow development by creating an account on GitHub.
spiral sigil
How is this free?
you download it from their repo
for free
Just downloading the repo doesn't mean it'll be setup to work in blender though
spiral sigil
Just downloading a clone of the repo works?
waxen pewter
this is the free release for blender users
spiral sigil
Where do you get it though.
The releases page only has a 3.0 beta.
waxen pewter
thats the paid version
spiral sigil
Then where do you download it because the only other download I see is cloning/downloading the entire repo
waxen pewter
it's 4mb / python code for blender / i dont see your argument here
spiral sigil
I don't see where I'm supposed to look to download it is the problem.
waxen pewter
just clone and download the 4mb file - install the zip as an add-on - thats it
@green ember is that for 2.8x - not 2.79
green ember
id assume theres a version for 2.79
spiral sigil
What file specifically.
I tried to clone the whole repo and install it and it didn't work.
vivid crater
the one on github is for 2.79 only
spiral sigil
I did it on 2.79.
onyx juniper
Old but Gold?
https://www.youtube.com/watch?v=Z_gClPouYqg

This video will guide you through the process of Total character Unwrapping in Roadkill, No Audio, only Video Reference. Base model in Maya & UV Mapping in Roadkill
spiral sigil
roadkill any better than belder at unwrapping?
Seems pretty basic, nothing particularly special about it. It'd just do it in blender with marking seams and manually moving UV islands
onyx juniper
I was just posting this for the unwrap approach
waxen pewter
@spiral sigil i managed to just select the .zip file "cloned DL" in the add on section of 2.79 - set it active with checkbox and then save prefs - nothing different from any other plugin rly
then it's here -
green ember
waxen pewter
nice model - substance painter eh?
 swift dock
ok so, I have a unity package that contains a model and what not fully set up and ready to go, uploading works fine and all.
However lets say I edit the .fbx file in blender, and just delete a piece of the clothing. Once I load back into unity to see how the model was updated there, it's entirely messed up (almost looks like a very thin stick figure). There any way to get around this? Or am I going to have to just not use that custom scene and have to re-do all the animations/dynamic bone colliders/etc?
 open scarab
Wouldnt recommend you save over a fbx in unity when its set up, usually mess stuff up, create a new one instead
spiral sigil
I usually version control my fbx then let unity reload it so I don't have to redo all my bones and what ever
sounds like you did something wrong in blender like accidently edit outside of the basis shape key which happens to me a lot
devout scroll
If you change the number of bones it will likely break
 old robin
someone dm me if they can make me an avatar bacause i dont know hoe
spiral sigil
Can I get some guidance / critique on how I unwrapped this nanachi. I'm still fairly new and have a lot of anxiety with uv unwrapping for some reason so I'd appreciate any comments.
quaint jasper
You should have maybe have seems to cut the legs in their own parts
The fingers have seams ? And what are those very tiny islands ?
 balmy oriole
yeah i feel like i would separate the legs and the fingers into separate pieces
 desert crown
separate all materials via cats plugin and then you can fix uv's separately on each of them
 young vault
🤔
spiral sigil
I want to do it without cats.
The fingers seem to be their own mesh and account for the bigger circle islands
The really small islands are nails and paw pads
I'm going to propperly seam the fingers and legs then
inside the arm-- the fingers are basically cylinders jammed into the arm and I guess get unwrapped separately. I can't imagine making them a different color from the rest of the fur so I guess I'll keep them as is in terms of wrapping
quaint jasper
Any reason you're making seams for all the tiny parts on the hand then ? i can't imagine you wouldn't be able to paint them as whole
spiral sigil
I'm incredibly dumb and think the only way I'd be able to find, and paint them correctly is if they are their own island
balmy oriole
honestly i feel like it would be easier for me to just take the model file and do it myself than it would be to explain
just pretend you're making a stuffed animal and split the seams like that
like the way you've done the fingers instead of separating the pawpads it would be better to split each finger in half (one for inside, one for outside) and then paint the pawpads on the correct side
spiral sigil
i feel like it would be easier for me to just take the model file and do it myself than it would be to explain
Then I wouldn't learn anything
balmy oriole
the way you're doing it now is fine for really tiny texture maps (like if you're just doing solid colors)
spiral sigil
I was planning on doing mostly solid colors. I debated doing it how you mentioned for each finger, but I'm very inexperience with retexturing
balmy oriole
ah i see. of course it's best if you do it how you feel comfortable
spiral sigil
Thanks I'll re do some of it and come back later
balmy oriole
i probably tend to over-mark seams anyway, if i'm being honest
spiral sigil
it's best if you do it how you feel comfortable
I mostly want to step out of my comfort zone and get better
quaint jasper
If you're doing solid colors then those can overlap, no need to take space for nothing
also your arms aren't fully seamed
spiral sigil
yeah I see that, but kinda unsure where to put them. Can it be arbitrary?
maybe put seams here?
I ended up going with something like this
nvm this looks better
 tepid wagon
@spiral sigil Not sure do you use it (it doesn't seem like from your screenshots) but you can enable Streching in UV view options to have easier time deciding does certain parts can be connected or should you separate them https://gyazo.com/f678b3e58f1cd90f797d839da3a42e12. Most likely you going to need seem around each finger (possibly on their sides and not top to bottom). You should also consider removing half of your mesh and using mirror modifier for any parts that will have mirrored texture, that way you can save up a lot of space on the UV as both sides of the mesh will overlap on the texture. You mentioned you gonna have many parts in single color - you can create a small plane for each color you gonna use, name them with different colors you want and unwrap them with every part of your model that will NOT be single colored. Single colored parts can then be sorted according to what color you want them in, scale them down to a single pixel on the UV and place them where your little planes are on the UV so they take least amount of space (you can use different shapes like triangle or hexagon to have easier time in finding them on the UV)
spiral sigil
@tepid wagon I can't seem to find the place in your screenshot to enable it
I found it
I thought blue was good?
quaint jasper
Do you have giant UV padding values ?
tepid wagon
Yes, none of the islands seem streched to much
spiral sigil
I turned the padding down a little
tepid wagon
Top to bottom is how I described cuts you just made, I thought cuts will be less visible if they are on the sides of fingers @spiral sigil
quaint jasper
If these pieces are symmetrical then you should cut them in half and overlap all UVs islands
The more space you have for the things that matter, the better it'll look
glad steeple
avoid all the empty space too, your materials can make the most of the texture res if they take up more room!
tepid wagon
I cut my avatars fingers only on one side so if I had my hands in natural position seams would be visible only behind me but I compromised on streching which is pretty high in this case https://gyazo.com/79ef5de403be420256b40638f71d78e5. At the end it didn't even matter cos I decided to use single color for the fingers. Try switching from Streching to Area in the options and if streching is low and area of faces uniform it should be good enough
spiral sigil
Oh I think I understand now
If these pieces are symmetrical then you should cut them in half and overlap all UVs islands
[6:02 PM]
I have to learn how to do this
I'm not entirely sure how
 modest wadi
Im trying to merge the meshes of a model together so I can get it to just two, but it messes up the textures. Any way I can get around that or remap the textures?
spiral sigil
when im in obj mode and click on armature and want to go to pose mode, i cant actually click on any of the bones and pose them. anyone know why?
alright one more thing before I loose my mind. How would I unwrap something like this. I've tried a few things but the uv keeps coming out weird
spiral sigil
not sure where to put the seams on this one
spiral sigil
i tried straight down mix results
spiral sigil
NO DICE
quaint jasper
enable correct aspect
spiral sigil
I don't see that in the UI and google isn't helping
spiral sigil
😠 crap im dumb
stable edge
dw im worse
spiral sigil
ok so that didnt help
quaint jasper
unless you have an addon to make those UVs, i don't understand how you can get a rectangle as a result
spiral sigil
yeah im perplexed
no addons
at this point im really stuck
made this with curves then converted to mesh
quaint jasper
Did you not merge the vertices at the end ?
spiral sigil
im not sure what you mean so likely not
quaint jasper
Well if it's a curve then it becomes a tube, if it's a tube it makes sense you end up with rectangle UVs
stable edge
Editmode > select all verts > Mesh > clean up > merge by distance if you missed it
spiral sigil
No I see what you're saying it does make sense because it's literally a tube. But is there any way I can maintain some of the shape so I can paint on it later?
and i dont get why i need to do the clean up
quaint jasper
can you send us this piece as its own fbx ?
well that's the whole model
You didn't apply transforms to your model @spiral sigil
quaint jasper
In object mode, select everything and do ctrl + a
It gives you a warning at the bottom of you screen when you tried to uv unwrap
stable edge
o
makes sense that you were trying to unwrap a tube and it was unwrapping that way
because it was still shaped like a tube
quaint jasper
It's also mostly because they didn't have scale applied
devout scroll
Yeah, if you scale stuff in oblect move and your scale isn't uniform you'll have issues with a lot of things not working right. Gotta apply it
 stark torrent
what do you do if your model commits mitosis?
 fringe rock
scary
spiral sigil

spiral sigil
@quaint jasper I spent a stupid amount of time thinking it was the way I was doing seams and I was so confused thanks for the help. I'll remember to apply transformations before unwrapping
What are you working on that requires so much geometry?
hallow bough
I'm wondering that too.
balmy oriole
anyone here have any tips for modelling and rigging suspenders? should i use bones for the whole thing or just have it move with the chest? i don't want it to clip if possible, but it's going to hand off the body in parts
spiral sigil
that's kind of interesting I'd also like to know how that would work
devout scroll
i'd think it's mostly weighted to the body and has separate bones where it hangs off if you want it to jiggle around
balmy oriole
yeah that's what i was thinking too
frosty plinth
frosty plinth
devout scroll
Disney would like to know your location
frosty plinth
@quaint jasper what You think to shinny lol... I'm trying the new blender like you said got really use to it this past week!! 
its way better
than 7 thanks
balmy oriole
i forget how long it takes me to model things, sheesh...i'm so tired
at least it's uv mapped so i can paint it later
unfinished models always look kinda scary lol
 hardy lake
how can this kinda hair be created in blender? this looks somehow generated in some other software like maya or 3ds max....
gaunt aurora
that's a complexe one, make a plane, add an array modifier, add a curve, and then on the plane, add a curve modifier. By doing this, and modifing the curve and the modifier settings, you'll get 1 strand, just repeat it quite a few times. don't worry about the shape of the strands, you should do that through texturing
@hardy lake
hardy lake
Well in this example the coiling isn't done through texture... It's all a mesh
I have experience making straight hair with curves and even have Hair tool addon, but these coiling hair won't stop bothering me
gaunt aurora
if you modify the starting shape, like instead of using a plane like i suggested, you can make it all mesh, but your poly count is probably gonna tripple at best
glad steeple
also "generated in maya or 3ds max" those programs dont have special tools for anything like that, blender/maya/max do it the same
This is how its done: https://www.youtube.com/watch?v=BqWYgrXw7Jk
A tutorial on how to make hair in Blender 2.8 with curves, a method that is very simple and effective that I have been using for my character sculpts.
▼ Sculpting Uraraka Ochako:
Re-Sculpting My Old Art | Uraraka Ochako in 3D [My Hero Academia] | Can You Improve In Only 1 Yea...
just modify the shape youre using to be a curl
@hardy lake ^
hardy lake
In fact there are tools in maya and 3ds max, they're called xgen and ornatrix... As for blender, i wasn't able to make the profile of the curve perpendicular to its direction, unless i was using a z-up twisting method, but using that messes up the flat part of the curve, which is laying on top of the head
stable edge
Why not just have textured cylinders?
hardy lake
cylinders would make sense if the hair is kinda like an afro (curly from root to tip) but what about hairstyle like this? it starts with very flat hair card and then goes down curling around itself
better resolution so the roots are more visible
spiral sigil
https://youtu.be/i2KXwzzkZX0
My boy Daniel Kreuter is back with a new series about 3d anime character modeling in blender 2.83, new videos every week, already two videos in

This is the first part of my 2020 edition, Anime Character 3D Modeling Tutorial, in which we will look at how to create a 3D character from scratch by using ZBrush and Blender 2.83.
In this first part, we will collect existing reference, draw some additional material and look...
devout scroll

green ember
think they both turned out pretty well
spiral sigil
What was your inspiration?
waxen pewter
@green ember check out Kuroyu on DA - you might like his work
green ember
it's pretty cool but im that's really not my type, im not biggest fan of anime style art and models
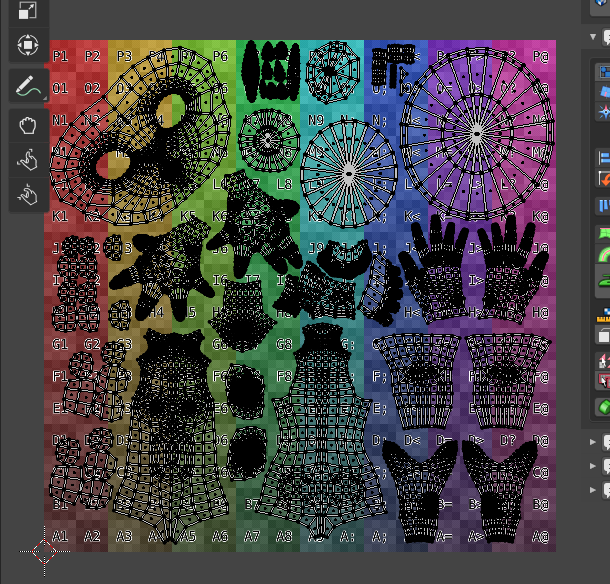
 dire sable
I know its the normals messed up but idk where in blender
 dire sable
Ooooooo
devout scroll
@dire sable turn off auto smooth, under normals, in the mesh tab
quaint jasper
@small valve Looks nice but face seems very small
vivid crater
slightly concerned about it being at an angle too, still fine
devout scroll
i'd split stuff like face and eyes from the body and have 2 textures
unless you want same resolution on everything and a huge atlas
green ember
ambient occlusion moment 😈
 mental plover
How do I attach these to the model? I've tried looking up tutorials to learn how, but the closest thing I can find is clothing
mental plover
Yes, it is from roughly 6 different models
is there anything else I'll need to add, so textures or anything before I expoort it, or is it fine to throw back in unity and retexture there?
 small valve
My topology is
Its alright
It used to be a lot worse
First attempt at a scratch made model is going really well
This is the second retopo mesh ive made
 ember prairie
what does it matter what angle the face is in on the UV map?
I think it looks good, Solar
quaint jasper
because stretching
 lament pond
green ember
lament pond
green ember
temp paintjob
ember prairie
https://gyazo.com/ba72714b4e24a1f2482bcc0ffa963a20
isn't stretching just determined by the orientation between the verts that make up a face on the UVmap and not where they are placed on the UVmap (rotation and location)?

does the stretch display not tell everything o.o?
ember prairie
I feel like it might make it easier to do texture work not having it at an angle, but that's not true for all programs
runic nymph
@small valve is it me or your mouth is super small
runic nymph
eeh
small valve
I want to properly make the second one i work on
runic nymph
i see
small valve
And not be scared of modeling lips
The workflow for this one was mostly experimental and me learning so i modeled myself into a corner where having no lips was better than any
So its kinda shoite
runic nymph
what i saw shonzo do is make the lips first and then the chin/cheeks, and then connect them together slowly
allows you to defermine the shape of the mouth in advance
 green socket
Does anyone have pool toy assets, handle and intake valve.
 nova oyster
eeee
how do i access the Cats Plugin and fix the bones
stable edge
I think it's in right menu you can open in 3d view?
If you have it installed and active it's probably called cats or smthn
 light perch
i learned the hard way it only works on humanoids
onyx juniper
How does this smile look?
https://cdn.discordapp.com/attachments/266188290703491092/717118057025241169/unknown.png
 quaint jasper
Do you have another shot with the eyes looking forward ?
A bit terrifying right now 😄
onyx juniper
onyx juniper
Yessir
Wait, Subsurface scattering Subdivision surface?
Doesn't matter, yes to both
Also thanks
quaint jasper
subsurface scattering, it looked really good so i was wondering
onyx juniper
Now if Only I can get it to look nearly that good in VRChat
runic nymph
skin coloured matcap could probably help
onyx juniper
That sounds like a pro tip
 fervent light
What kind of tools would you guys use to edit mouth shape keys? I'm thinking of sculpting, but I'm not sure if there's a better way
spiral sigil
Good rigging, pose mode, pose to shape key as a start, then edit the shape keys with proportional editing to make life easier.
fervent light
pose to shape key as a start, then edit the shape keys with proportional editing to make life easier
Not sure what you mean here. Shape keys are attached to mesh, not the armature, right? And what do you mean by proportional editing?
spiral sigil
devout scroll
Shape keys are all verts yeah
fervent light
Ahhh that makes sense. Also, I edited stuff about the eyes in basis, but the rest of the shape keys seem to deform them. Do I have to go through all of them and blend for shape?
devout scroll

proportional editing is this guy up here
as far as I know shape keys are vertices and the amount they should move and where
so if you edit basis they're still gonna move the same amount
tho if they don't match basis i think they remember their position or something, i'm not sure
you could try to propagate shape key on basis with the eyes selected
that's gonna make the eyes just match basis in all shape keys
spiral sigil
Shape propagate can help you apply a shape/basis to all other shape keys
fervent light
Both tools worked wonders. Blender is literally loaded with shit I will never use 😂
I figured out the major reason why these visemes looked so bad anyways. Ah, Oh, and Ch were toothy. Like Chip Skylark himself made them
onyx juniper
@fervent light Just making sure you know to only make permanent changes in the Basis shape key
fervent light
Yeah, that much I'm aware of. Editing with a selected shape key edits the end position of the shape key
I'm making sure to check them afterward too
 wise zealot
I'm really new to making avatars in blender, is there a course/video/videos (preferably free) that anybody would recommend?
green ember
the actual reason why viseme look bad ingame is that two of them are switched out and one never gets used
the devs could actually fix that in an update and take credit for something oculus lipsync devs shouldve done
spiral sigil
wdym?
onyx juniper
What do you mean, "wdym"?
quaint jasper
@green ember Which are switched ?
quaint jasper
That's apparently incorrect:
"the ih viseme is the ee sound like in beam. E (shouldn't be written as EE) is more like get. We should probably link the docs to the viseme standards that Oculus uses. ou most definitely gets used. I usually test my visemes by making both the ou and oh sounds to make sure the blendshapes work.
https://developer.oculus.com/documentation/unity/audio-ovrlipsync-viseme-reference
its easy to get confused because they use the word tip as an example for ih. If you know anything about linguistics, the sound for 'tip' and 'beam' are closer than the sound for 'get' (Oculus uses 'bed' as the example for E). As a French guy you probably realize it, as the French accent turns 'tip' into 'teep' not 'tep'"
@green ember
A complete table of visemes detected by Oculus Lipsync, with reference images.
green ember
so what youre saying is that theyre just switched out on text and people have been misinterpreting them this entire time
that makes more sense than them being switched actually switched out, but still doesnt explain why OU doesnt get used
quaint jasper
it's pretty easy to test
green ember
i just always assumed that e as an EE sound and ih was eh
i tested it with the lipsync demo in unity
fervent light
Yeah that's a valid assumption
onyx juniper
Same here
green ember
thats odd, OU works fine on the viseme demo mesh there but if i put a custom one it doesnt
i dont know man this shit wacky. thanks tho for that i never actually read into it and that explains it
onyx juniper
Maybe OU for some reason is the only one that expects an exact morph name?
runic nymph
the lil diamond is to animate i believe
you trying to assign a texture to a material?
 wooden cipher
Yes
runic nymph
go into shading, where the nodes are
press shift A , and add an image texture(you can search that) ,then connect it to the colour input of the shader
wooden cipher
image texture is greyed out
wooden cipher
Seems that was the issue
This is a different type than what I'm used to. Thank you.
runic nymph
o7
 supple lichen

VRoid Hub
VRoid Hubは、3Dキャラクターのための投稿・共有プラットフォームです。モデルデータをアップロードするだけでキャラクターが活き活きとアニメーションするプロフィールページを作成でき、利用条件と共にモデルデータを配布することもできます。登録した3Dモデルは、VRoid Hubと連携した各種VR/ARプラットフォームや3Dコンテンツ上で利用可能です
 subtle glen
anyone here use 3DS Max and is familiar with texture baking? I'm trying to bake a normal map and it's just giving me massive moire patterns no matter what I do
all the other texture maps bake fine (diffuse/emissive/AO)
 potent otter
For make our avatar
Can we use blender to create one?
stable edge
yes
potent otter
k
stable edge
merge the separate meshes and remove doubles
 willow stump
I've ran in to a peculiar issue in blender, it looks like there's a mask applied to my wireframe and solid viewports only, texture and rendered views do not have it
I found someone else with a similar issue but nothing really helped https://blender.stackexchange.com/questions/149392/how-to-remove-weird-viewport-mask

Blender Stack Exchange
I was messing about with keyboard combos in 2.80 alpha trying to remember how to add a render preview rectangle, however I seem to have done something that has masked my model in 3D space, which I ...
nvm just loaded default settings, then loaded the blend file without loading the UI and that fixed it for me, weird though
quaint jasper
Solidify ? Or other new ones ?
hardy agate
that looks nice
runic nymph
robodifiers
waxen pewter
only on the body i have a small list
runic nymph
man, non destructive really is crazy
quaint jasper
What is the mesh originally supposed to be ?
devout scroll
try disabling auto smooth under normals, in the mesh menu
runic nymph
or recalculate normals
green ember
whenever my normals look bad i hit the reset vectors button
gaunt aurora
are you using substance painter?
because it has saved me years of learning how to texture
green ember
yeah
runic nymph
is it that good?
quaint jasper
@runic nymph https://youtu.be/L6f87psKYyk
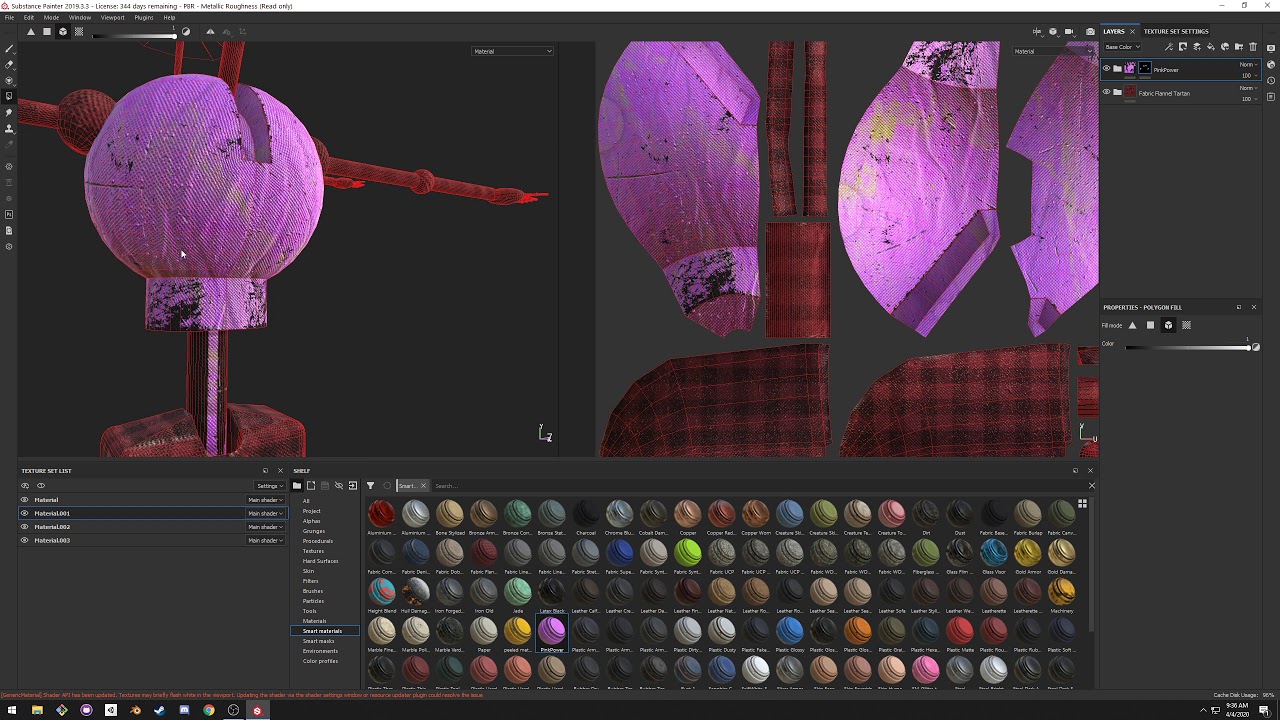
This mediocre tutorial goes over the basics of substance painter for the VRChat avatar/model creation workflow.
green ember
student license
 timber bear
looks at lack of
green ember
they give you a free year if you sign up as a student
devout scroll
You can still buy substance on steam
timber bear
But you'd need a ID
devout scroll
It's a bit expensive but you get to keep it
And yeah I think you can still get a student license, that they don't really check anyway
devout scroll
The second you press upload student id you get the email with a key
By it's now owned by adobe I think? So, buy it on steam or look for alternatives!
runic nymph
quite pricey, innit
devout scroll
Well, 70 dollaridoos is pretty reasonable when you compare it to photoshop
That you can't even get anymore without the damn subscription
At least 70 in my steam store
green ember
I mean unless youre using it professionally youll be fine with the student version of substance
legally
timber bear
Like I'm looking into learning how to do basically everything to do with avatars because I want to customise a hobkin but I ain't exactly made of the money to get a commission
devout scroll
But really, people either get a student license or pirate it
runic nymph
its 118.99 £ for me
150 $
devout scroll
Rip
green ember
region based pricing
runic nymph
give me your steam now 👁️
devout scroll
Third world countries 
runic nymph
wow
runic nymph
ok vpn time
devout scroll
You need a bank card from the country you're buying from
green ember
unless you wanna buy giftcards from shady 3rd party sites
devout scroll
I lived in the uk for 8 years and still used my home bank account to buy cheap games all this time
ashen stag
If you want to try substance you can always try quixel instead
green ember
^
runic nymph
Kapp
 white moth
I’d totally buy expensive 3D software if it meant free updates for life, but I don’t do subscriptions
I know why they do it, it’s for businesses, but I’m never going to make a dime off their program. I’d still buy it if it was one time purchase
devout scroll
It's a one on steam in this case but i don't think you get updates and there's gonna be a yearly version
tepid wagon
If you buy Substance Painter on Steam you get free updates for a year since the time of purchase, or at least it used to be like this before Adobe took it
devout scroll
Well, they took off substance 2019 off steam when they put 2020 on
green ember
yeah you own that years version
runic nymph
they changed the merge from Alt M to just M in blender 2.83
habit ruined
green ember
its infinitely better on M
runic nymph
reee
runic nymph
it probably will, once im used to it
devout scroll
yeah it was kinda annoying but it makes sense
m for merge, alt+m for split, which is basically the inverse
alt is usually used for inverse of stuff
 crisp trellis
Just don't update
runic nymph
i always though of Alt as Alternative
also, anyone happen to know if its possible to snap an array of objects to a mesh?
in my instance its snapping buttons to a shirt, and im curious if it can be done in a more automated way
devout scroll
well, alt+g resets position, alt+r resets rotation, alt+s resets scale, alt+h unhides
they've got a pattern going
spiral sigil
https://youtu.be/3nKXOZvc-Gk
The new cloth brush seems OP as hell. I'd love to mess around with it.
Grease pencil stuff is interesting too, might actually try to take a crack at animation because of it.

Release notes: https://www.blender.org/download/releases/2-83/
Support core Blender development - https://fund.blender.org
Video by Remington Markham (SouthernShotty):
runic nymph
ive, uh, tried the cloth brush today
it worked on a plane just fine, but, uh, not what i actually needed it for
spiral sigil
Nooooo, my dreams
runic nymph
dont give up just yet
spiral sigil
The internet has hyped it up so much
runic nymph
who do you trust
a guy with a whopping 5 minutes of experience with cloth brush
or
the rest of the internet
spiral sigil
runic nymph
im not getting the reference 
quaint jasper
that's cloth
spiral sigil
It's a picture of the movie Aibou
For my fellow nihonjin that's partner
runic nymph
great observation, rubick
and thats what i tried doing today, getting them wrinkles on my sleeves and it just kinda pushed the verts around or inflated blobs and thats about it
ill have to take a deep dive into tutorials
 pseudo kestrel
What's that blue line creased edge effect called? I want to learn how to do/undo that tool but cant find what it is.
Got rid of it easy with knifing and zipping but if anyone knows the tool thanks in advance
hardy agate
select the blue lines (which are called sharps and are there to mark where a model is supposed to have a sharp edge) and press ctrl+e and select clear sharp
depending on where it is you may want to keep it for a better look
 proven pebble
Hello I´m fascinated about 3d modeling but i don´t know an good app to do it, could someone recommend me some app to do it?
 craggy frigate
blender is a good start as it is free and there are many tutorials. https://www.blender.org/download/
Home of the Blender project - Free and Open 3D Creation Software
proven pebble
thank you
craggy frigate
no problem
light perch
Anyone know how to fix that oval shape? I hate it and want the normal circle
craggy frigate
there should be a ratio setting in the brush
ok that actually doesnt seem to work
ah ok so
@light perch apply the object scale, do you know how?
craggy frigate
np
green ember
idk where i was even going with this render
but i think overall it turned out pretty nice, all things considered
craggy frigate
very pretty
runic nymph
Cunt
runic nymph
lul
my cloth brush struggles continue today
yt was of no use, they all make it look so easy
green ember
yeah they should really have it on that by default
runic nymph
it does have to be quite high poly, i didnt have to retopo anything up until now
green ember
you dont need to
 runic nymph
ooooh, shit, thats right, thats a thing now
runic nymph
yep yep, got it in 83
green ember
I use it when i sculpt so i can have a high poly and low poly with same topology that i can bake normals on
yes
i mean theres quadroflow eitherway for retop that gives you pretty decent topology with the press of a button
but this is cleaner in some ways
They also added another thing that simulates cloth on the entire thing with the ability to mask stuff out.
i'd say it could be used for applying clothes with gravity but since it doesnt have collision ill stick to marvelous design probably
devout scroll
that's cool
craggy frigate
god your pc must be a beast
crisp trellis
Omg so dope
green ember
since it doesnt actually have any collision anyone can run it
i mean as long as you dont have too many polys
crisp trellis
And how about the thing moving?
runic nymph
bruv, blender needs to stop crashing on me
green ember
since i switched to 2.8/9 i only had crashes when i was doing stupid shit
runic nymph
it just crashed 2 times in a quick succession for no reason at all for me
okay, make that 3 times
green ember
at least it autosaves everytime you switch modes
stable edge
check your indents
runic nymph
whats that
stable edge
idk i just assumed you made some while loops and forgot like i do asafasdsaf
runic nymph
bleh
green ember
i mean even if it crashes
it autosaves so often you lose only a little bit of progress
i once made something completely in an unsaved project and it crashed but it autosaved so i kept it
runic nymph
i did so little before it crashed its faster to recreate than recover
crisp trellis
Lmao
green ember
yeah youre doing something youre not supposed to do
 potent thunder

A good understanding of topology is a vital skill that every VFX artist should have in their arsenal. In this video, I'll break down a quick and simple method to change the edge count of any topology. Once you know how to connect an odd and an even number of faces, you can cre...
Why is that ^ better than this: ??
quaint jasper
If you don't care about topology then it doesn't matter
potent thunder
He just mumbles in the end and says "as this is bad topology mbmbm" No explanation why.
I have only done Udon stuff, so I don't understand topology (yet?).
quaint jasper
Topology is just edge flow and the information that goes with it. It helps with normals, sharps, and and everything else Substance might use to bake the texture
runic nymph
topology, the way i see it, is only important in places where your model is going to be moving (stuff like joints)
quaint jasper
If the topology is bad, you miss out on correct detailing and you'll have innacurate information to provide other softwares about your mesh
Ngons are poor because it's up to other softwares to decide where to cut it in triangles
And that can create bad normals =innacurate shading
In the case of hard surface, it doesn't really matter as long as it's flat afaik
potent thunder
🤔
Oh I see. I really had trouble finding a reason for what just felt as over-engineering, but it is starting to make a bit of sense now. Will look up more tutorials on it, now when I can visualize what it is used for. Thank you ! 
green ember
made in like an hour for a game jam im participating in
thing it actually didnt turn out too bad
considering how long it took
 brazen quail
how do yall even make these amazing things-
hardy agate
^ i swear these people went to art school for like a decade or something, even on the model that i spent weeks on, it still came out like hot garbage
quaint jasper
know the software, then practice a lot
devout scroll
also reference helps a lot
just like with drawing, trying to do something from memory doesn't work that well
hardy agate
i always try to get as many as i can but my results def show i need to practice a crap ton more
devout scroll
unless you have a lot of experience
green ember
i mean ive been using blender for like 2 years but only started making stuff from scratch basically a month and a half ago
before that i only used it for blendshapes, some animations and merging models
i guess somewhere along the way i picked up on how to make stuff
stable edge
good shit
quaint jasper
How many polygons for that croc ?
 cold plank
You could probably easilly go down from there, but it looks great
spiral sigil
Hello. I'm korean. If you have VRchat One Fun Man character here, can you copy it? I really want to set up a One Fun Man character
 dense crest
spiral sigil
dense crest
spiral sigil
Which crocodiles make you cool? I didn't understand the words well
stable edge
its the brand of shoes
 sleek bone
make them green
dark green
it's the only way
ok i think ill download blender, surely someone's made Kirito and a crocs model
then i can combine them
and i'd be the ultimate boss
 mild linden
howdy i need help
 void seal
How do you tell how tall your models will be in game? For example when you edit your models Z axis scale translate that into inches
( X pixels = Y inches)
 somber crescent
On that topic, how tall would you make a female character in m?
I read 1.45 but that seems like loli height and I just want an average height model ;-;
spiral sigil
1.62 seems about right yeah. That's around 5'4"
white moth
How can I join two meshes together and merge their seams, if one of them has shape keys that will screw up?
runic nymph
join them and remove doubles if the seams are on top of each other
and i think the shape keys should be fine
devout scroll
if you use cats remove doubles it should be fine
blender's will probably screw it up
runic nymph
whats the difference between cats and blenders'
devout scroll
shape keys generally don't like vertices changing
but i don't remember what exactly happens
 near crown


 glad steeple
beautiful
runic nymph
must. not. make. thicc. joke.
glad steeple
he cant hear it anyway
quaint jasper
very cool
spiral sigil
https://cdn.discordapp.com/attachments/521112661841149952/719390551107043419/unknown.png idk why theres some spots not shaded smooth here. anyone know why?

 hardy agate
when you go into edit mode do you see any blue lines?
hardy agate
hmm, im not really sure then
quaint jasper
@spiral sigil Isn't that edge doubles ?
spiral sigil
maybe? idk how to check or fix that
devout scroll
select the whole thing then press alt+M if you're on blender 2.7, 2,8 and M if you're on 2.83, then merge by distance
or remove doubles if you're in 2.7
supple lichen
Just finished up the base for a character named Jin from Elsword. Clothes will be next
 sand valley
NICE!
green ember
skeleton sculpt to low poly i made with a friend
i did the ribcage and hands and he did the rest of it
 solar fossil
The mouth might need some more tweaking, but looks good otherwise 👍
runic nymph
looks like it was made out of clay, so the mouth can be non realistic, since it wasnt taken out of a real hooman

solar fossil
Clay goes: Splish splash, that theory is wack
runic nymph
its hardened, it cant go splish splash
green ember
the head is like very stylized
he only started using 2.8 and modeling as a whole like last week
white moth
If you are using current blender there are five sources of edge sharpness: edge doubles, object set to shade sharp, edges marked as sharp, custom normal split data on the object , and auto smoothness enabled on the object. Remove the doubles (via “merge by distance”) and make sure all four of the others are smooth if you want a fully smooth model
white moth
I’m continually amazed and depressed when people pick up Blender for two weeks and are way better than anything I can do :)
spiral sigil
blender closes itself when i open it
white moth
When you open a blend file or just open blender without a project?
spiral sigil
blender without a project
subtle glen
meanwhile every time I've tried to learn Blender I just get excessively frustrated and go back to Max
Blender's UI/UX was written by someone with a master's degree in how not to write UI/UX
stark ore
https://media.discordapp.net/attachments/601162166527197195/719651887481356338/unknown.png working on a new outfit, started doing texture work

 white moth
@subtle glen 2.79 or current? 2.79 is Cthulhu and I hate every time someone recommends it. Current blender is very straight forward and I don’t understand complaints
2.79 is Cthulhu, If Cthulhu in addition to emanating a feeling of existential emptiness also emanates obscure python errors.
young vault
This version is way less messy than most software I've seen in the recent years.
hardy agate
1.79?
onyx juniper
Yeah you mean 2.79
subtle glen
Idk, it's been probably a year since I tried blender
onyx juniper
Spy I know you were also correcting him, I wasn't correcting you
subtle glen
Even after changing the keyboard shortcuts to Max shortcuts it's just impossible to be productive in it to me
hardy agate
yeah and i understand some of that, to people who have used 2.79 since they started its confusing to try and learn 2.8, i can see the appeal of the 2.8 ui to new people.
subtle glen
I'm comfortable in Max and have a seemingly indefinite "educational license" for it, so I'm sticking with it
onyx juniper
I hate to admit that people have an easier time learning the new Blender version, or at least this one modder I know that used to hate Blender until now
UI is fucking hideous to look at though
Less subjectively I also hate the new Blender icons, because I have to quint to tell them apart
white moth
Ya I meant 2.79 edited messages
vivid crater
You can drag the icons out so words appear
its just a little hard to grab the edge since its slightly to the right of the icons
 cedar urchin
how many triangles is to many again
spiral sigil
There is no limit at the moment for PC avatars. But aim for less than 70000
hardy agate
32,000 is for an excellent ranking, and 70,000 is the limit before you get a very poor ranking
vivid crater
you can scroll down and check the chart under pc limits
https://docs.vrchat.com/docs/avatar-performance-ranking-system
cedar urchin
i forgot about triangle and im at 577K
hardy agate
oh my
vivid crater

spiral sigil
From scratch model I assume?
cedar urchin
yeah
spiral sigil
Guess you'll have to do some retopology my friend
vivid crater
that doesnt look like half a million to me
cedar urchin
ikr
hardy agate
oh you would be surprised
vivid crater
do you have a subdiv modifier on?
vivid crater
perfect
spiral sigil
Subdivision and multiresolution are a helluva drug
cedar urchin
vivid crater
maybe separate the eyes so you can just use it on them
cedar urchin
lol
we good nod
this is my first type using blender for heavy topoly meshes
as in humanoids
cedar urchin
thanks
i bench watched so many topology videos before starting
so that kinda helped
how do I edit weights again?
sorry im new to alot of the riging process
uve been modeling ffor 2 years and never done stuff like this
 stray notch
What software do i use for 3d modeling avatars
cedar urchin
im using blender currently
cedar urchin
Im coming from Maya
stray notch
oh
 plush berry
A
stray notch
is maya free?
cedar urchin
not anymore
stray notch
oh ;-;
cedar urchin
you use to untill they fixed there education virson
 frail lodge
Yo @cedar urchin check dms
cedar urchin
i still need help btw
runic nymph
still trying to figure out how to weight paint?
 plucky jolt
Holy Jeebus that a lot of verts
 plush token
apply the subdivision then do an decimate unsubdivision level 2
cedar urchin
i found it out
dont worry
now its time for the fun part
texturing
i have yet to texture map with blender
i did with Maya
cedar urchin
i need help again!
how do I texture paint
im trying to but every time i add color it turns blackk
wait I found it out
sorry
ive really been the only one typing in here wow
i wonder if anyone will turn up
how do I see what I select in the UV preview
on the mesh
as in faces
 fleet ice
spiral sigil
fleet ice
spiral sigil
Thought I'd share something I've been working on myself. It's not as impressive as a scratch-built avatar but I'm using pre-existing assets as a basis for my own version.
Blue gauntlet is 100% custom mesh, the green one is the original w/ basis textures. The straps and bolts use textures from parts of the original model. Gonna be slapping on the same texture for the new gauntlet as a placeholder until I can make a suitable replacement.
green ember
burnt my shoe
spiral sigil
Lava Boots
green ember
couldnt find any fire/burnt materials for substance painter so i just eyeballed it with charcoal and lava