#3d-modeling
1 messages · Page 82 of 1
 azure rain
 vapid widget
say uh
I load a thing in and uh
I can't get into object mode
mainly because this is practically my first time opening blender
ok nevermind I broke something before
 stable edge
Blender
 pale dome
the what
vapid widget
ok so
now I dont have the option to move anything with my mouse via the little tool things on the bottom bar that are usually there
 still wadi
Ppl say if u got anime pfp ur weird, yea...
vapid widget
these
stable edge
Blender is the program to use
stable edge
 fading pine
if you can't google and download blender I have doubts you'll be able to learn and use it
 surreal isle
can agree, did 8 hours of tutorials and still find it somewhat challenging
on another note, can someone rate how my first character is coming along?
 spiral sigil
looks ok so far. cant really say for that tho. normally i start with a basic block geometery and scupt it down but as long as ur getting the general shape it should be good
fading pine
I want to make some clothes, and I'm watching a tutorial. Is there something like maya's shrink wrap deformer?
A want a mesh (the clothes) to shrink and conform with the underlying mesh (the person)
for blender that is
 thin bison
Yup, it's called the shrinkwrap modifier
fading pine
aaye I didn't see it. I'll look again. Is this a good way to go about making clothing, or is there a better method you know of?
thin bison
I just tend to to sculpt so I use a different workflow
Mostly I just mask out the area in sculpt mode on the base and extract a copy if I want to work on pants or shirts
fading pine
Ah yeah I want to learn how to sculpt things but modeling seemed more approachable and more familiar coming from cad
I'm super not used to doing soft body
thanks anyways. Gonna play with this modifier
thin bison
Use it in combination with vertex snapping to volume for easier use
You won't have to fret about placing the vertex inside or it hovering over the mesh
spiral sigil
if anyone knows how to show the standard UV grid on a mesh pls let me know its been driving me crazy for a while.
something like this. ive tried looking it up but dont know how to on 2.8
im working on UVs on my mesh from scratch so i want to see where it stretches ya know what i mean
 quaint jasper
Apply a UV texture on it ?
spiral sigil
i dont know how
quaint jasper
You don't know how to add a texture to your mesh ? You can look that up easily
spiral sigil
Choose UV Grid
When you click to make a new image
Or color whatever grid you pref
surreal isle
after some more work
i have a small issue
i cant seem to smooth the model out without creating points and edges on my mesh
quaint jasper
Use more geometry and smooth shading
spiral sigil
I plan on modifying this mesh into a ponytail, anyone have any tips or recommendations? (This'll be my first time messing with modifications of meshes so I'll need the tips)
quaint jasper
Use proportional editing
spiral sigil
I’m not experienced with blender too well, what does that do?
stable edge
Means you don't have to move it vert by vert
spiral sigil
Gotcha
 quaint bronze
Proportional editing lets you select a single face/vert/edge and move the nearby ones within a range that you set ^
stable edge
I'd probably have it as only move connected or whatever it's called
surreal isle
@quaint jasper does smooth shading work in the game itself?
 vivid crater
whered you get that reference sheet?
vivid crater
sure
 hollow radish
if you want a better look at how its done. https://youtu.be/haLo8T9tZas

Since the character to the show doesn't have any good illustration to make a 3D model. I made my own. Maybe I'll make a video progress on drawing soon.
Here's the modeling progress on the Head. It's always trial and error until you get it right. I'm gonna skip making a video...
in maya but some thing of moving vertices
cut tool is k, join tool is j, or whatever 2.8 version it is
also face toplogy is important, use loop tool to check the flow
surreal isle
thanks, by the look of it i might have to start from scratch
hollow radish
tris are fine, but you should avoid them if you can
yeah that's the process 👍 my first few faces were terrible
another way


AREA JAPAN
みなさんいかがお過ごしでしょうか?エスエフ・グラフィックス株式会社のCGデザイナー林です。第一回コラムの公開後には多くのお声を頂き本当に感謝しております!少しでも多くの方にお役にたてるよう、今後も頑張っていきますのでよろしくお願いいたします。
🙃 even I have problems since I don't box model a lot but sculpt more
surreal isle
i have experience with modelling in blender, so i dont think i should have too many difficulties
the issue is i model objects not humans
hollow radish
well your better than most people already 👀
you should probably look up human anatomy, and how anime stylizes it
so you can get a sense of what's wrong
and have a ref model at hand
surreal isle
alright, thanks
hollow radish
Also most models I've seen for anime are pretty flat
do to shading
you can fix normals
or just make your head "round"
but for anime you would need to figure out which is the most accurate of your picture,
since 2d doesn't translate to 3d for these types of sketches
surreal isle
i used side and front references
hollow radish
well side and front don't necessarily match up
surreal isle
hollow radish
I think its most evident when you start doing the eyes
 latent charm
If you haven't, read up on how Arc System Works made Guilty Gear XRD, they talk about a lot of their graphical development.
hollow radish
^
those rely on custom normals though
so you would have weird normals around your mouth if you just let blender recalculate normals
surreal isle
unless i did it manually
hollow radish
yeah I fix my normals as well
data transfer or edit normals modifier
or whatever you find useful
surreal isle
hmm, guess i have more to learn than i thought
all this so i can have a unique model ingame lmao
hollow radish
🙃 ah yeah, i've been doing this for two years and only recently I think I got my damn workflow down
but it takes me an entire month nonstop to finish an actual model
surreal isle
oh boy
hollow radish
so 100hrs+ but its my high bar and stupid workflow
if I just box modelled and painted
I could make a model in 25hrs
well with base models even less
surreal isle
i spent 4-5 hours yesterday and only got half of what i sent done
surreal isle
wow
hollow radish
well... that's minimum
I probably do weird things
but yeah, learn properly first or the hours add up
hollow radish
🙃 i just do it
and wonder halfway why I'm even doing this
though sometimes I need to pause projects cause they are too high level for me
cause I don't know zbrush too well
or my proportions are terrible
yeah, for vrchat you need to worry about hands
surreal isle
its all a bit overwhelming tbh
hollow radish
pretty much
which is why I just head swap in the beginning for my models
initially
surreal isle
not like i have anything better to do
hollow radish
then I started making my own base
surreal isle
mmm
surreal isle
yeah
although, i've never really liked the idea of using someone elses work
dont know why
hollow radish
just saying this is free and a good place to start
and get things quickly
unless you want to make your own base from the start
but yeah, take it in steps
surreal isle
yeah
hollow radish
for me, really only using it as a starting point for a new base
since I've had weird proportional problems
and possible leaning issues
tldr, every upgrade to my base I make, i make more mistakes but don't fix enough to be satisfied
and my workflow makes everything take longer
surreal isle
im sort of a perfectionist with these sort of things, paired with my lack of patience i rarely actually finish anything
hollow radish
just do it and move on
overtime you'll feel less afraid to do so
cause I'm a perfectionist as well
its really never done, just only released
hollow radish
👌 I'll be on my way
surreal isle
creating depth
 clever pebble
Yo can someone help me with blender? For some reason I cannot select bones in weight mode, it just simply doens't work... :/
latent charm
@clever pebble Edit menu > uncheck Lock Object Modes
It's a really fucking dumb default that is inconsistent with previous behaviour.
clever pebble
Well, I turned it off but now when i try to select any bone it gets be back to Object mode ;o
I click on the bones, shift+click the mesh, go to weight paint mode, I ctrl+click select a bone and it turns me to object mode
To be more specific
Why does blender need to be so dumb, jesus.
It literally worked 20 minutes ago, and now it doesn't.
 silver crow
if it helps, you can select different bones from the vertex group tab
i can get screenshots in a second o:
clever pebble
Please do, cause i need to get this avatar to work... :c
silver crow
its in the properties tab, but clicking on the bone you want to paint will highlight the desired area :3
if its not showing up, you can add a vertex group and name it after the bone and it'll auto assign!
it will also automatically make a mirror group if applicable
you might just want to double check with some bone groups because ive painted the tongue bones backwards a few times hahaha
clever pebble
I still don't get it yet i feel like its very simple
could I call u and possibly share my screen so u can guide me like this?
silver crow
i can try!
hollow radish
@surreal isle fix your topology a bit
its supposed to be smooth or your shading will be off
also don't make quads unless you can hide them
should try to be evenly spaced
you can smooth vertices to fix it
and then manually move it again
 frigid robin

Today I remade the water bus sign (og 13k, now 8k), had to perspective warp and completely redo the sign texture from scratch. Nodes are super messy too.
I'm hoping I can bake the procedural material stuff into pbr maps for Unity, still new to making things.
#Blender3D #b3d...

 Twitter

I wanted to show the couple hours worth of material FUCKERY that I've done for a single object for the world im tryna make
Hope to god I can bake all those nodes into some pbr maps, if I cant im actually gonna cry bro
latent charm
@frigid robin From what I can see of your nodes in the screenshot you should be fine for baking them to pbr for unity standard 👍
frigid robin
My problem is, that I've never baked anything before lmao
I dont even know where to start
latent charm
https://www.google.co.uk/search?hl=en&q=blender cycles baking
Is a good place to start 😉
frigid robin
Yeah I've been looking, it's all gibberish right now to my lizard brain, although once I sleep I'd probably be able to decipher the process
 opaque cradle
trying my hand at 3d modeling for an avatar i've been meaning to make. two test projects later and this is my current progress! It's mainly been me clicking around and watching a few small starter tutorials so far, so if yall got any tips, ill take em 👀
(seams are just there for my poor eyes to know where things are adkvnkj)
clever pebble
https://gyazo.com/7882cfecb3aaf58dc929018183cd158e my avatar missess "body" in the hierarchy for some reason yet I can use animations correctly, by that when i export it into the VRchat it becomes invisible, how do i fix that?
 signal helm
Flat face
surreal isle
@hollow radish thanks, time to start from scratch again lol
 dull path
I don't understand obj file (its poorly made), how can I get all the triangel in it (I don't want f and all of this sh.. only the coordinat of the point that compos all the triangel)?
 thorny ivy
You want the coordinates of each vertex exported?
dull path
the 3 points of everry triangel
thorny ivy
Eh you can delete all the faces and edges leaving only the vertices
But for what do you need to do this if I may ask? :>
spiral sigil
if you don't need a face or an edge somewhere
dull path
to aply a aply ray tracing
 timber mesa
azure rain
timber mesa
azure rain
cool
thorny ivy
Is there a post saying what avatar 3.0 is bringing?
 frigid robin
There's a lot of information, I dont think anyone has compiled it all into a text document
thorny ivy
hopefully its nothing too crazy to pick up
frigid robin
One of the major things I was excited for is basically a full whitelist of final IK
They're splitting the base character animator up into 5 different layer animators
We're getting a built in inventory system that is split between actions, moods, and emojis
Moods is shown as just different facial animations
Visemes can now be created in unity using a blend animations, so you can use bone roll and posistion
Visemes with that can also activate subgestures, like moving eyebrows up or squint, etc.
This includes objects, I was talking a ruuubick, and asked him wether or not I could bind a gigantic fuckoff mouth laser to a viseme for me screaming - he said yes
frigid robin
So there is no need to have seperate animators for specific actions, or rigid bodies since the constraints
If you've made visemes before using blend shapes, you can still do that
It's just the option is there to also either augment that with bone rotation and position, or you can just use blendshapes
thorny ivy
no havent done visemes
was looking those up today lol
the modeling part im 3/4 there
texturing etc
just the things vrchat has and uses is something i still have to learn
 hardy agate
that video might as well be speaking german, i cant understand the slightest thing either of them said
spiral sigil
Anyone interested in contributing to a murder map me and a buddy are working on? will either use unityhub or azure devops for version control. We both know a good bit about unity and arent new at all. Ive also been coding for over 4 years and can teach you/work on the udon side of the map. Please DM me if interested~
 stark ore
Contributing what though?@spiral sigil
 fallow fable
Hi guys : )
Any idea why my weight maps aren't functioning as intended? when I go to pose mode and move bones with said weight values attached, it just ignores it and accepts any value as 100%
stark ore
How are you weighting it?
fallow fable
weight painting in blender
naming a bone and a vertex group the same name to link them
fading pine
That's how you link vertex groups to bones?
fallow fable
mhm
that's how I was told to do it, but now it's not accepting the range in value of the weight paint
it's accepting any paint as 100%
and my object has no bendyness to it
is there another way to link vertex groups to bones? lol
stark ore
If a vert has no weight to any other bone than just 1, then it automatically is 100%
Cuz there is nothing else pulling it
Im assuming you only did this to 1 group
stark ore
Np, glad that made sense
fallow fable
wow what a great resource this discord has been, I'll have to be sure to come back and answer a few quesitons later when I understand most things.
I would have been stuck there quite awhile, youtube wasn't doin it for me
 nova cave
spiral sigil
nova cave
spiral sigil
Can you import textures onto a .obj model on Microsoft 3D Builder
I don't know how to
thorny ivy
Use blender 
spiral sigil
Is stupid I know
Xbox has the windows app called Microsoft 3D Builder
It works the same as the pc version
thorny ivy
Seems to be mostly focused on 3D printing
spiral sigil
Ok
thorny ivy
Doesn't seem like you can apply textures etc
Blender is very light to run tho
You can use anything you find
spiral sigil
is there an easy way to get my uv layout similar to this one. for example having the arm UVs flipped over the center axis? or do i just gotta line it up manually?
rn im just trying to line it up but cant really copy paste the x coord and flip the sign cause all the coords are in positives
https://cdn.discordapp.com/attachments/521112661841149952/702976265728032845/unknown.png
https://cdn.discordapp.com/attachments/521112661841149952/702976512600834178/unknown.png

 quaint jasper
that's all done manually
But right is Maya, and has tools for that
blender maybe has an addon
thorny ivy
Textools I think is the name of the addon
But there should be a uv layout addon
Those won't give you this kind of layout tho
They puzzle the islands to gain as much coverage possible of the UV space
spiral sigil
ill try that out and see what happens. ill try looking for a uv layout addon too. if not then ill just line them up as close as symmetrical as possible using maths
quaint jasper

Blender Stack Exchange
Is there a way to unwrap a symmetrical model so that the UVs for each side overlap? I'm working on a model which will have the same patterns on each side, and I'd like to avoid having to create hal...
apparently it's possible this way

#b3d #blender #secrets #tutorial
Visit my website: https://www.blendersecrets.org/book
e-Book bundle (20% Discount) : https://gumroad.com/l/IxofeY
stable edge
Does anyone know what type of texture blenders studiolight is
I can't remember ittttt
Usually it's an image of the environment around the model
That's what the image usually looks like anyway
 fringe rock
oh thanks for that mirror thing. will use that If my face isn't symmetrical so I can squeeze more rez for other stuff if needed
spiral sigil
yeah i would do that but i dont want the texuture to be symmetrical, want to but different stuff on each side, and i dont really wanna put a seem down the middle
or cut it in half and mirror it
fringe rock
you will only have issue in the distance with symmetrical if you don't have enough texture bleed.
for that one it might have a line at the back of the head. but you can fix that by using clamp instead of repeat.
stark ore
Also i got a new model i been workin at from scratch new base n all, ill post the full pic when home
Not done yet, needs a suit jacket. Its like 13.5k tris
thorny ivy
@stable edge HDRI
stable edge
It was reflective
 native field
this is a guy i've been wanting to do for a long wile. at this moment i'm trying to get their bones/rig to work before i contune to fully work on the hands
native field
this became a bit outdated because they guy above has been scraped and i'm working on something new that i'm confident will better
native field
this is my new guy i'm working on
spiral sigil
Try to make sure you're working with quads and not creating polys or tris in parts that should be moving. It'll save you a lot of headache later on.
native field
could you elaborate?
thorny ivy
Quads deform easier
Allot easier to control aswell
Also
It's a bit blocky for deformation
Can vrc rigs use proxy geo?
native field
by quads you mean cubes right?
spiral sigil
No
native field
idk what quads are then
quaint jasper
The difference between a square and a triangle shape ?
spiral sigil
Quads are shapes with 4 vertices or 4 sides depending on how you're looking at it. They're easy to work with and easy to subdivide.
You can run loop cuts through them easily and their geometry is nice to work with.
Tris are not as nice to work with and they don't deform and shade well. They also don't allow you to run loop cuts through them.
Ngons/polys are the same just with 5 or more points
native field
so it would be easier if i work with cubes or anything that has 4 faces?
spiral sigil
Not cubes. That's not what quads means.
Just shapes with 4 vertices, that's it.
thorny ivy
Like a square sheet of paper
Tris is just like a sheet of paper with 3 sides instead of 4
native field
so just work with flat faces?
thorny ivy
Hmm
spiral sigil
No
thorny ivy
Alright just add a cube to the scene and apply a subdivision surface modifier to it
quaint jasper
You're making it worse lol
thorny ivy
Wot
thorny ivy
Lol I just wanted to show him the quads on a mesh
quaint jasper
If you use a cube, that gives you 6 quads
native field
ok so from what i'm understanding is that i should have started with 4 quads and then went form there?
spiral sigil
What
native field
i made the head and part of the body with 3d shapes and you said it be easier if i used quads instead
thorny ivy
Alright so what's your final design that you have in mind?
Do you have a drawing?
Or any reference?
spiral sigil
That's not what I said, I said that you should be working in quads.
native field
ok so should i start over and use qauds instead? if so i have no problem starting over
spiral sigil
Not what I said either.
All I wanted was for you to be mindful about your model's topology so you didn't have a mess to deal with later.
I wasn't saying to change anything or start over.
spiral sigil
Here's an example of a model with good topology. See how it has edge flow and loops that can deform easily. It's also easy to subdivide this mesh for more detail
thorny ivy
@native field https://youtu.be/O9yXCsRcMqk

In this episode I talk about why it helps to model in quads and when using tris and ngons can be useful. I also talk a bit about topology and give examples of when the different methods can be used in both modelling and animation
My website www.gabbitt.co.uk
discord server h...

native field
thank you
thorny ivy
If you know most basics of modeling there's a modeling exercise series
Teaches you some tricks and techniques
native field
thanks again
 stark ore
here some pics of a model i did from scratch. incomplete but i feel far enough to post it now
with tris shown
quaint jasper
Looks great ! Is it rigged ?
hollow radish
shoulders seem a bit too large
 green moon
I want to start modelling some cool avatars but I dont know where to get started and what is the easiest way to do it
hollow radish
easiest way is still the hard way
spiral sigil
Have you gotten experience with working with basic 3d models and stuff yet? I think it's better to start with making edits and such before going into modeling from scratch. That way you learn what works and why and what best practices are
hollow radish
examples?
spiral sigil
Mostly everyone here uses Blender as their main program. Occasionally other people in other programs come in but not often
green moon
Okay
hollow radish
it doesnt matter what software you use, blender can match other software in a lot of areas. just have to have equivalences
you have to be experienced with one program to realize the benefits of the others
stark ore
its rigged @quaint jasper
quaint jasper
Super cool, are the legs alright ? They look a bit forward in blender
 delicate shoal
Is the head static or does it float around a bit with a dynamic bone or something? Glad to see a not-anime avatar for once 😛
native field
i got question. i want to show a doodle of a idea of a model i want to do but idk if i'd put it hear or else were?
 sharp oriole
Holy crap @stark ore it looks great! I can't believe that's literally only the second model you've ever made from scratch. You're improving too damn fast!
@native field Yep, here would be fine
 brisk bobcat
can i ask on this channel about questions of blender?
 high crag
how do I fix the weird texture/lightening on her face?
 earnest quiver
stark ore
earnest quiver
stark ore
I did spend like 15-20 days just watching speed modeling n tutorials while looking at mobile games inbetween @sharp oriole
I have alot to learn to improve my poly count
Goal is to make convincing models under 10k like the ps3 era and even lower like the mobile scene. That way quest is simple to allow
If anyone has stuff related to mobile game model creation please share it with me
sharp oriole
Hmm, never thought about watching speed modelling vids to learn
stark ore
Gives you an idea of how other people model
Workflows
I watched to find simularities in them. Then incorporated those
I mainly used a sculpting/retopo video series of blender 2.79 as reference of a sao character for anatomy/topology advice as i box model
thorny ivy
What in wondering is
Aside from edge loop reduction
How about decimation on non deforming parts
stable edge
Kota are your materials ok
suarva if theyre not deforming just get rid of the verts you dont need
that dont add anything to the model
thorny ivy
If they have some surface details then local decimation brings it down to do minimum what's needed to support those shapes lol
spiral sigil
using the components that are mentioned
also wrong channel
spiral sigil
normal #avatars-2-general channel
brisk bobcat
ty
 visual python
Hey, is anyone here good at 3D modeling classic muscle cars? Specifically of the Corvette variety?
fading pine
How do I get rid of this crease with mirroring?
 copper pine
Is there some Good 3d modeling Tutorial on YouTube That maybe fit with vrchat?
stark ore
literally just look at everything related to topology and sculpting aswell as human anatomy @copper pine
can't tell you whats good because everyone learns differently
native field
not sure if this is the best place to show this but this is a concept doodle for a model i want to do. i'm not the best artist but it's a start and i will continue to refine them to be able to use them as a proper reference
visual python
Hey, is anyone here good at 3D modeling classic muscle cars? Specifically of the Corvette variety?
stark ore
depends on your fancy really @copper pine
blender is a fine start
different programs give different needs and ways of doing something, some more or less productive than others in area's
copper pine
@stark ore okay i think learning in blender First. It‘s easier i think and should do what i want.
 cedar gazelle
For anyone that uses Blender 2.8, how do I weight paint through a mesh, like you could with the x-ray feature in 2.79?
spiral sigil
did you google that question?
 native barn
Hey guys im having an issue while exporting a model into unity.
It insta crashes unity 2018 when i export it and i have absolutely no idea why.
 muted laurel
what should I use for 3d modoeling cuz I'm new to 3d modoeling
 pure pond
ey how is the hair? ive been workin on it for a while now and I think it just looks kinda weird. Ik the hair is not all the way down, still gotta do that part
spiral sigil
Might want to check your topology, got some artifacts in the shading.
Hair is looking alright but notice that hair is layered and stacks on top of each other, it's not just one layer of strands each.
I feel like your model is too close to the actual skull line
Video game models like to block out hair first and then put hair cards on top of them to add a more hairlike feel to it.
Maybe finding some examples online of short anime/cartoon hair styles might help, or looking at other similar 3d models and reverse engineering how they built their hair
pure pond
I used this as reference. To me it looked like the user just had a bunch of hairlock-meshes and ctrl+j. I'm doing the same now
is it a bad thing if its layerd on top of eachother?
 somber sinew
dose anyone know how to put vroid models into vrcaht? idk how to make vrchat avatars and my brothers busy
spiral sigil
Layering is the way you want to go with hair usually
somber sinew
qwq
pure pond
oke thanks
 quiet summit
I'm super new, just downloaded a wood material for blender: http://www.blenderinsight.com/material-for-blender-2-8x-cycles/
and I was wondering how I could put it into my blender project
it downloads as a zip and opens into a project but I have no idea how to apply the texture to anything.
thanks for the help
 hidden flower
Does anyone know how to join the hair? I'm new to this xd
quaint jasper
join the hair to ?
hidden flower
If the bone moves and the back hair stays there is
pure pond
Wow that's so cool
I see you have triangles and quads in you model, I'm still new to all of this but aren't you supposed to have only triangles or only quads.
quaint jasper
That's because i'm bad
pure pond
What
quaint jasper
I should only have quads, i have triangles because my 3D modeling skills are low
pure pond
Low?!
quaint jasper
Yeah, don't be fooled by this, "give a million monkey a timewriter and you'll eventually get a novel" type of deal
except i'm a single monkey and it took me many months to make a single model
 muted raven
Everyone’s gotta start somewhere
But you really get out what you put in , spend 3 months on a model and you get something so perfect that you barely ever switch out of it
quaint jasper
that's what you think, but then you spend another year making edits and fixes, it never ends, at least for me
If you make it correctly to begin with, you won't have that problem i guess
muted raven
Well yeah your always going to add to it and yes if you make it correctly from the start you won’t be fixing it exactly rather improving upon your successful design !
Nothing better then trying to get that most realistic thigh waist and *** weight paint
Even in the most extreme of angles
quaint jasper
i still don't know what the fuck i'm doing with weight paint to be honest
muted raven
Why’s that lmao 😆
quaint jasper
it can only get as good as the topology is, and my topology is not good 
muted raven
That’s very correct hehehe
Well I mean as long as it’s somewhat human based you should be able to make everything bend naturally
You just kinda wing it for 8 hours a day for a few weeks and eventually you get what you want
You might hate yourself during the process and give up at every impass but you surely continue the pain
For the luxury
Of course
Nothin better than the compliments on your hard work
stable edge
Ruuubick triangles are inevitable
You can have them, as long as they don't get it the way
Noses usually have tris iirc
Your stuff looks good, so don't be so harsh on yourself
azure rain


Here's a little visual guide I made back in '16 on how I approach certain topology in anticipation of animation/deformation.
(I've come to call them "crumple-zones") https://t.co/z699Dex63k
Retweets
5699
Likes
21387
Twitter
an example of where triangles can actually be helpful
spiral sigil
you don't need triangles for that


 fading pine
Is it possible to unwrap something by material or vertex groups and have separate uv maps you can bake and us in unity?
Trying to unwrap a complex models seems outrageous all in one go
 marsh moth
I've made a point on AltSpaceVR and feel as if it may be applicable here also
When people create worlds, objects or use CC:BY material it is important to share references when possible
Apologies if this is not the right place, I hope it is, CC:BY is a great tool people can use to share their work with other community members
Stay safe all and look forward to getting a little more in to VRChat
stark ore
all right! im down to just texturing at this point, the model is just under 15k, i could of saved some more poly on the head i notice now, but im happy with how it turned out overall
this was my reference btw https://www.youtube.com/watch?v=T-IACZZgke4

Salava.
on Twitter → https://twitter.com/casablancalanca
off vocal : https://24.gigafile.nu/0505-c7ffa8c48a6e203540511994e8161c5a4
just realized middle orb is the wrong colour lol
quaint bronze
@fading pine You can definitely do this! You would assign the meshes/faces to the materials you create then treat each material set (or objects assigned to that material) as a completely separate UV from the other materials. After UVing everything by material selecting all the objects will make the UVs look stacked, but that should be fine if you’ve set up the materials correctly. After that you can texture each material separately and it should only affect the meshes/surfaced you assigned to the material. The import into unity will just be you assigning the files to the correct material and everything should work out
spiral sigil
im trying to move some vertices of an object in edit mode but i want it to mirror at the same time on the other side, when i try mirror modifier it mirrors both sides of it so it just clips through the other mirrored part of the mesh if i try to move them. does anyone know how to do this without showing both sides mirrored?
I don't understand what you're asking
its clipping cause the mirror modifier is mirroring both sides of the mesh
so im wondering how to just mirror the actions of one side onto the other so it wont clip and i can see where im moving the vertices
If it's unweighted and symmetrical you can use the symmeterize option to copy one side to the other, and in the bottom left you can specify the axis you want to mirror by
Otherwise you can delete half the face and mirror it and enable clipping and clip the center vertices together and work that way.
fading pine
@quaint bronze so say I have a vertex group. I can select that group, then assign it to a material, then do I go into uv unwrap and unwrap for that selection?
then repeat for each material?
 verbal karma
anyone knows a discord server or site where i can look up for people who need 3D objects made/request? i want to work on more objects
spiral sigil
https://cdn.discordapp.com/attachments/402349592244649996/704100135755579452/unknown.png
https://community.adobe.com/legacyfs/online/1239587_uvs.gif
so would it be better to set up my UV islands organized like the first one or fill up the space and have the islands be different sizes like the second picture? Ive been following this video and the way they explain how to organize the UV layout to make texturing simpler makes sense to me but also if I make the more important islands bigger and fill up some of the empty space then i can get more resolution out of it right? not sure what the best route is but ill probably play around with both and see how it turns out. https://www.youtube.com/watch?v=roNFY8G8KUM&list=PLmvWjPz-r9TRE45AVpAuRj963VLYSXqXI&index=2&t=1291s


This is a free chapter from our newly released UV Mapping Characters.
https://flippednormals.com/downloads/uv-mapping-characters-
In this full series, you'll learn how to UV map a character from scratch, both for games and for VFX with full on UDIMS.
Make sure to follow us...
 clever prawn
Really depends. Personally I go for maximizing texture space, but I also own a Substance Painter license so keeping UV layouts "nice" isn't nearly as much of a concern for me since I can just paint right on the model. With "traditional" texture painting keeping the layout nice is probably a much bigger issue. 🤷♂️
spiral sigil
i also use substance painter so i figured it wouldnt matter to much about the organization as well
its just easier if you do it traditionally and makes it a little easier to visualize for me personally
clever prawn
Yeah, plus it helps if you gotta go in and paint something in "2D" space manually (which I do find myself doing here and there, particularly since I can't hide faces to get them out of the way in Substance grrr)
spiral sigil
but also if lets say the face is bigger than the other islands doesnt it end up looking wierd cause the face will have more resolution than the rest of the body?
clever prawn
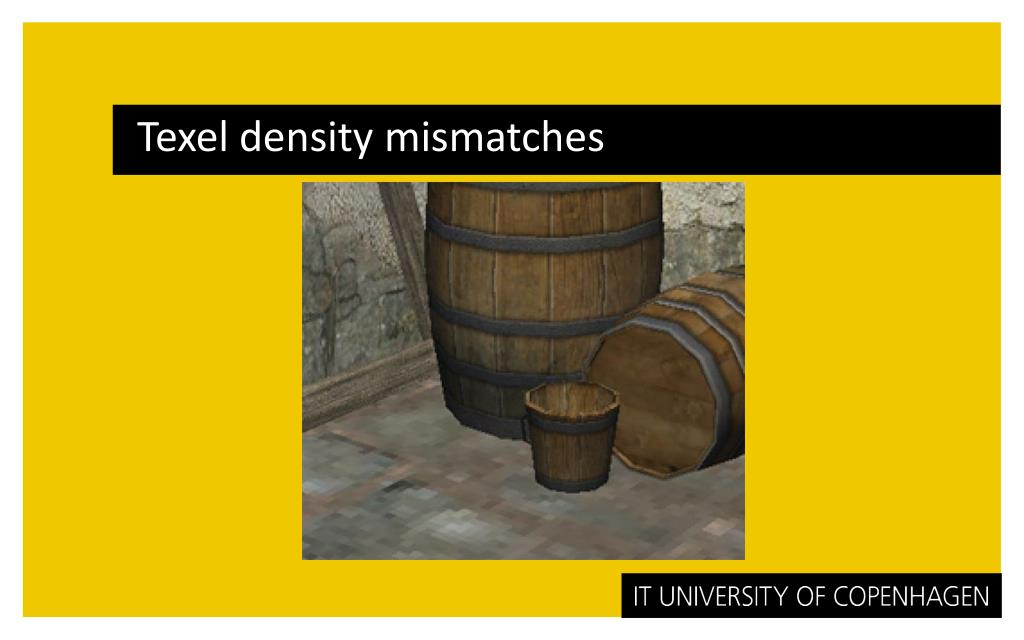
I would try and keep texel density largely the same between each of the UV islands so you don't end up with weird situations like that tbh.
spiral sigil
ok. ill try scaling them up equally and filling up as much empty space as i can then
spiral sigil
It's best practice to have well packed uv islands, it's what professional game designers do.
thorny ivy
texel density and max UV space usage > nice looking layout
fringe rock
You place it like they show for painthing but after project/bake to a more condenced version with a lower rez
 subtle jackal
the reason you maximize UV space isn't to make painting easier, but to not waste texture memory, really. As for whether to keep all islands normalized or scale more important islands for more detail, that depends. Ideally you want consistent texture resolution throughout your mesh, but if the item allows you to scale some things to get a bit extra resolution and save either bumping to a higher res texture or you simply can't tell what bits are lower res due to the nature of the model go for it. Especially if you're putting what would otherwise be empty UV space to work due to irreconcilable UV arrangement when islands are normalized.
for example most of my model is even but my fingernail/toenail UVs are scaled up to better fit in a gap, and due to toon shading and so forth, you can't tell at all, and it gives me a bit more room to have say, fancy nail art if I wanted.
stable edge
You want things that are more important to have larger islands, yeah
subtle jackal
well no, if you can fit everything in at an even texel density and have enough resolution to do that and efficiently use UV space, then that's ideal
stable edge
Also it's to reduce draw cells (less textures = less materials = less cells), and reduce memory usage
:/ not too sure I agree with you, considering how older games lay out uvs
azure rain
yeah but a lot of older games were also like diffuse only so that visually looks a bit better the unconsistent Texel density
subtle jackal
indeed, modern games are all about presenting a consistent level of detail across the mesh/environment

CG3DANKFUN
Spread the love75SharesEverthing You Need to Know about Texel Density_Leonardo Iezzi In this tutorial Leonardo lezzi is guiding you about
Stylistic choice can just give you a bit more freedom/wiggle room in specific cases
azure rain
and also that's going to kind of look silly if say the specular highlights are different sizes because of inconsistent Texel density
but if you're trying to make a toon shaded Avatar a lot more wiggle room for inconsistent Texel density
subtle jackal
well, to the best of my knowledge specular highlights generally don't get calculated based on texel density, so those should remain consistent regardless, but it just looks bad to have say, something super sharp and clear and superbly detailed next to something that is obviously more muddy and lower resolution
 subtle jackal
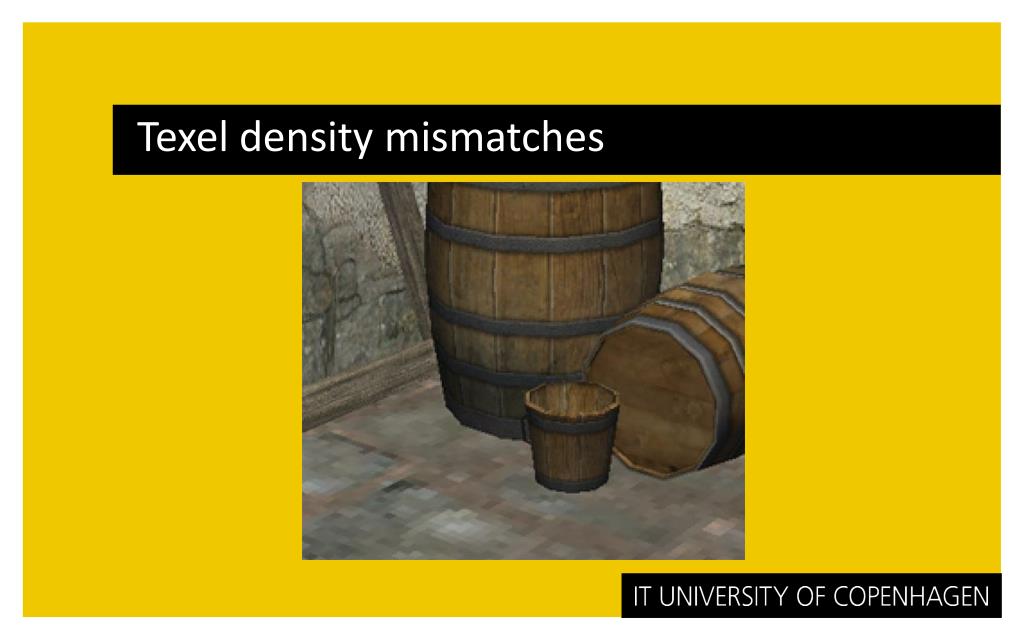
yeah that's a pretty good example, though I'm guessing (hoping?) that's a texture streaming/mipmap issue and not an actual art flub
azure rain
 subtle jackal
yikes
azure rain
it's reminding me of second life before all the textures loading in
subtle jackal
hehe
azure rain
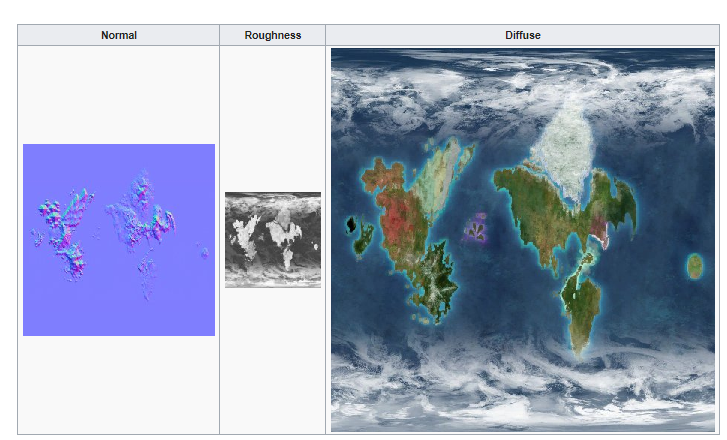
something I found interesting not saying you should necessarily but with Nintendo for their pbr materials they make the other Maps besides for the diffuse smaller https://i.gyazo.com/e9dcf5bf2c991873a667e9789bd66096.png

they probably do that to reduce file sizes considering the cartridges
and how much RAM the switch has
thorny ivy
Curious but why are avatars with only albedo so common?
No normal map,roughness etc etc at all
azure rain
because a good chunk of the vrchat avatars are Japanese MMD models which don't really have an art style that would benefit heavily from normal maps and roughness & it takes a lot longer to make a model that has a normal map as you need to do the High poly sculpting
azure rain
yeah but that also cost like a hundred and fifty bucks
thorny ivy
just get for a month
azure rain

ArmorPaint is a software designed for physically-based texture painting.
this software is only like 17 bucks
azure rain
oh yeah good point
thorny ivy
Armorpaint is free if you compile it yourself
azure rain
and I suppose if you're talkin about why you folks aren't doing pbr's if you have any intent of making Quest avatars PBR pretty much doesn't work as as there's no lighting
thorny ivy
Ah yeah it's pretty much like a mobile game right? The way you have to optimize for quest
azure rain
yep exactly
thorny ivy
512x512 only albedo lol
azure rain
actually the max texture size is 1024
thorny ivy
Ah well I mean you can certainly push it down if possible
azure rain
and no transparencies so hair cards don't work cards don't work
azure rain
transparencies are expensive on mobile
thorny ivy
One thing I'm wondering tho
I saw someone on twitch make nice model with all the texture maps and hair cards
It looked really great in blender
And then it goes into unity and oh my
azure rain
yeah you need to have good transparencies for that to work
thorny ivy
The SSS made the skin look really burnt lol
And I think the metalness looked a bit odd aswell
azure rain

something showing office similar hairdo in Alpha versus one big clay blob
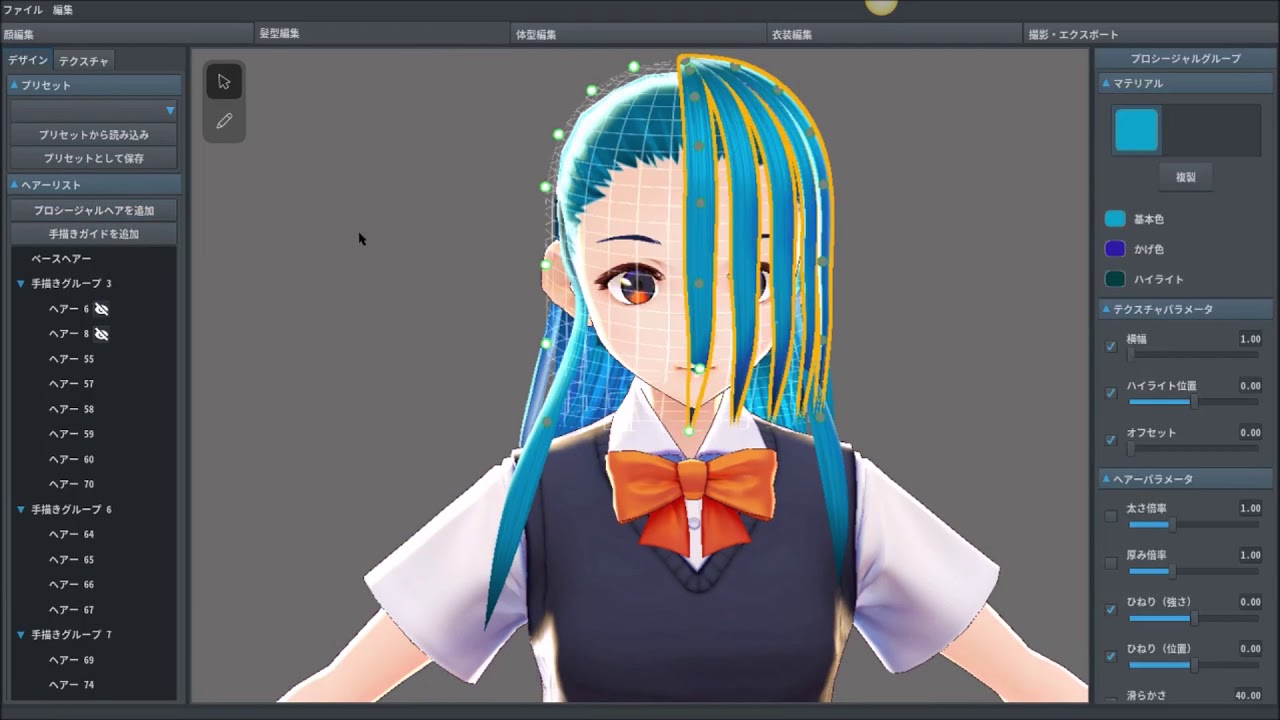
& mmd VRoid approach big chunky splines with tiling hair textures https://i.ytimg.com/vi/R9obMJrd7LA/maxresdefault.jpg
 thorny ivy
Hmm
Oh and since there's a limit to how many meshes can be unconnected
Clothes are fused with the body?
Eh atleast most of the time?
azure rain
yeah definitely a good idea if you can manage it fused the parts
but not the end of the world if you just have the part of the arm that's not covered by a shirt just stuck into the shirt with some geometry to hide the holes as long as you make sure the weight paint is correct
spiral sigil
when i move a mesh the location coords dont change and this move window comes up, not sure what i did to cause that. anyone know how to fix or just make it normal? https://cdn.discordapp.com/attachments/521112661841149952/704378967158948010/unknown.png
 stable edge
Bottom left menu is normal
spiral sigil
how do i make it so when i move the mesh it moves the location coords?
clever prawn
Are you talking about the "Location" displayed at the top right underneath "3D Cursor"?
spiral sigil
yes
clever prawn
You can re-center the 3D cursor on an object's center by pressing Shift+S and selecting "Cursor to Selected"
spiral sigil
that didnt work
spiral sigil
Move in not edit mode
 north portal
hey guys im just getting into 3D modeling
i have a little experience from my animation classes but pretty much new to this
thorny ivy
Time to start with the donut
spiral sigil
Hope you have a good time
 white moth
I want to use "Join as Shapes" to make one mesh a shape key of the other, but at some point my modified mesh must have gotten the vert order scrambled. vert count is the same and the UV layout is identical... is there any way to un-scramble it?
I was thinking I could use the UV data as a lookup to match up the verts in the correct order, but no idea how to script that in blender code
 vapid hatch

Gumroad
Addon will be located in right 3d View Sidebar(N) -> Tools panel. Manual for Blender 2.8 (it is same for blender 2.8, except panel is located now in right 3d View Sidebar). See video tutorial about addon made by Danny Mac 3D here. This blender addon makes it possible to transf...
 frail pumice
Before
After texture fix
Now I need the shoes and nose and spikey quills and gloves and sonic hedgehog hair
white moth
@vapid hatch Mocha oh my god thank you you just saved me manually positioning 222 verts by hand
 latent remnant
if i want to make a 3d model from scratch in blender what should i first start with?
and um im trying to make a chibi but i dont know what i should use as a base for the body
spiral sigil
Probably Blender Guru's donut
spiral sigil
No. I mean the tutorial about making donuts
https://youtu.be/TPrnSACiTJ4
Blender tutorial for beginners! The long awaited reboot of the popular donut tutorial, completely remade for Blender 2.8. New videos will be uploaded every other day to this channel.
Get the shortcut pdf: https://mailchi.mp/ef5b15a32043/subscribe-to-the-newsletter
---------...
spiral sigil
Although if you want to get started immediately modeling characters related to anime, Daniel Kreuter's tutorial I have always found very enlightening. https://youtu.be/5Xuf6ODN_xY?list=PLvgIVNDU-Dxjb3eukDF5W0l0-6ShO9OiM
If you want something with a more cartoony aspect then Darrin Life's tutorial is pretty good too https://youtu.be/0QT1GNMevfc

Download the references here:
http://goo.gl/al2UHh (GoogleDrive)
This video is part 0 of 40 in this very detailed tutorial series about modeling. I'll take you through all the steps of anime style character creation in the 3d software called 'Blender' and without any time lap...
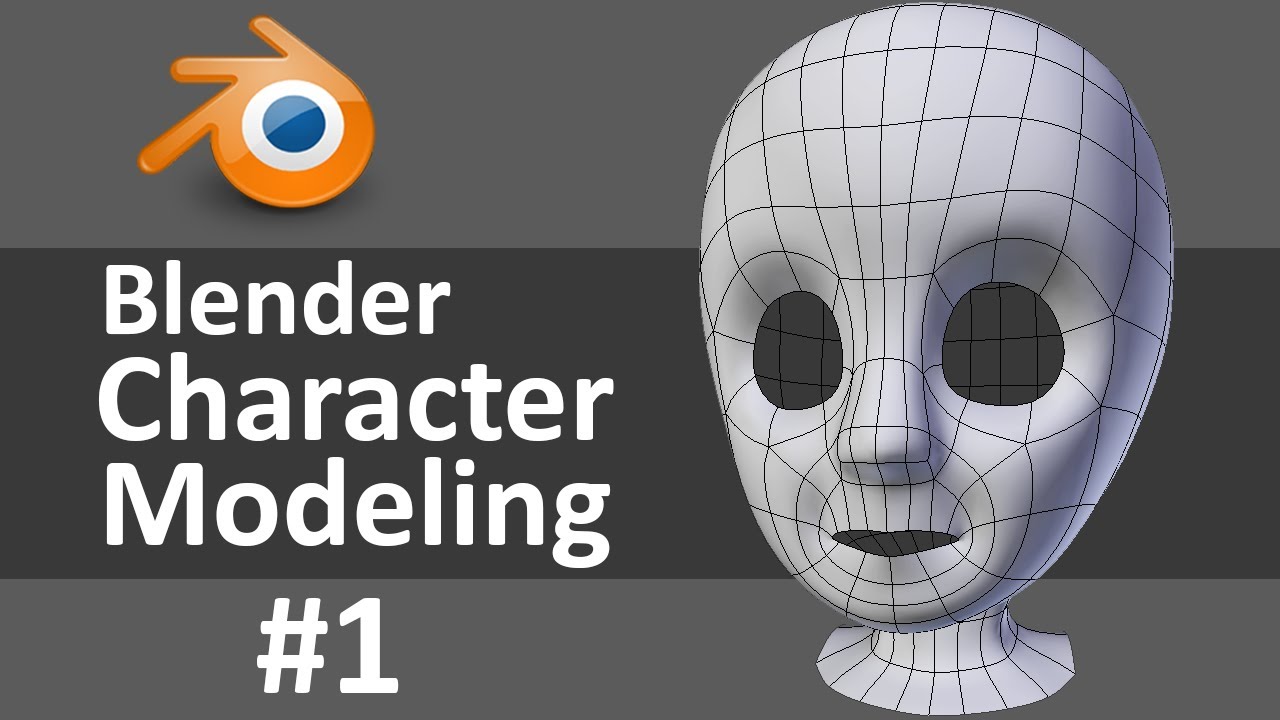
Create Your Own Game Character at http://www.darrinlile.com
If you're new to Blender, watch this Blender Quick Start Guide first: https://youtu.be/lZe3tGWSy6s
Starting a new character today! I go over bringing reference images into Blender, the mirror modifier, and establis...
thorny ivy
Honestly I would advice sculpting and retopology as a better start
Freedom of designing the character and the technical aspect of retopology are separate there
fallow fable
If I used a 4444 x 4444 image for my Characters Texture
would that fly?
lol
would that be ok in the game?
clever prawn
I mean, personally I'd scale it down to like 4096 because hardware usually likes power-of-two textures better (AFAIK going over results in padding to the next power of two size which wastes way more VRAM than you really need to)
Basically, for performance reasons hardware will always allocate space in VRAM equivalent to padding your texture up to the next power-of-two size. So in that case it'd be almost like having an 8k texture in memory of which you're only using a 4k corner of, which is pretty wasteful. Scaling down to 4096 (rounding down to the previous power-of-two size) would avoid that, and the difference in size is probably small enough that you won't notice.
 plain spruce
https://gyazo.com/8e6fb1240937a6a689d78f089f27d1a0 how would I get rid of these kinds of seams within blender?


ahh you can barely see it but the top photo towards the middle
there's a slight light leak seam
also visible within the game
spiral sigil
Probably due to not have enough bleed textures in the texture.
You can fix that by adding more to the texture or you can try using the alpha is transparency option in the texture import settings in unity
That topology looks very rough though, might want to consider editing that
 rose olive

 coral plover
so i attempted to make a 3d model for vrchat how did i do? any advice will be helpful (im normally a 2d artist so this was a new thing and i mostly have a cartoony style i really tried qwq)
ik... its bad qwq
goal:creepy yet simple (sorry for forgot to add)
spiral sigil
Not bad, might want to consider a little bit more layering in the hair cause one layer anime hair tends to look a little flat
But for a first effort it's very good
coral plover
thank you ^^ @spiral sigil and okay ill try to see what i can do about that
spiral sigil
Was this scratch or VRoid?
spiral sigil
I see
coral plover
@spiral sigil when you ment layering you mean something like this right?
spiral sigil
Kinda?
coral plover
oh what did i do wrong?
spiral sigil
I'm not sure how VRoid works so I wouldn't knwo
coral plover
i swear to god the hair is gonna be the death of me in 3d modling qwq and okay do you know anyone that does if they can help?
stable edge
I don't use vroid but I'm pretty sure you could have multiple hair layers
coral plover
thats what i done i made another layer @stable edge
not sure what im doing wrong tho..
stable edge
Don't you have to adjust the shape of the new laywer first?
Change that so they're layered with each other, not colliding
thorny ivy
@coral plover think he means actual parts of the hair being stacked on top of eachother
To give the hair style more depth
coral plover
oh okay like shading in 2d?
thorny ivy
Hmm no more like just taking the strips of hair and placing them on top of eachother
A bit randomly aswell

A tutorial on how to make hair in Blender 2.8 with curves, a method that is very simple and effective that I have been using for my character sculpts.
▼ Sculpting Uraraka Ochako:
Re-Sculpting My Old Art | Uraraka Ochako in 3D [My Hero Academia] | Can You Improve In Only 1 Yea...
Kind of like this a bit
coral plover
okay i see it tho i dont use blender tho i get it
thorny ivy
Vroid is pretty limited
Idk maybe there's an option to layer hair
stable edge
Yeah you can have multiple hair groups iirc
so on the second one if you deform the base shape you can have in layered on top of the first one
coral plover
okay
i know its limited tho this is how i get into new things when i first learned how to draw i used bases so i think of this as a base until i can push myself once im ready @thorny ivy
thorny ivy
Oh you can already start
Once you learn the basics of blender allot of options are there for you
stable edge
Yeah but topo is hard etc etc
thorny ivy
Not polygonal modeling
stable edge
Do what you're doing right now, it's a good stepping stone
You have to do retop after sculpting
coral plover
okay imma sleep now tho cya and have fun and okay
thorny ivy
Sculpting and retopology is the best one now
thorny ivy
Hmm
Well if it can teach editing the mesh etc
thorny ivy
Ah yeah I see it has quite something
 neat ocean
Do these proportions look ok? Something keeps bugging me but I've stared at this for too long to really see what
thorny ivy
Head size compared to ribcage but then again that's the style
neat ocean
Reference pic
stable edge
I feel like the elbow is too close to the body also
neat ocean
Did some minor adjustments
fading pine
Ok good luck
spiral sigil
Really want an avatar but cant make one because my computer is too sucky.
thorny ivy
As long as blender works you can go ahead lol
stable edge
If you can't run blender because your computer is too sucky can you run vrc then
 mint furnace
https://gyazo.com/a1189d48313e68ff929bc2e8bc71c6bf
trying to setup eye track with Cats, it works but the eyes dont move very much what could be wrong?
 steady zealot
3d modelling software (if you're not using insane amounts of tris/polygons) are typically a whole lot more performant than games, because they don't have to render a whole lot of stuff at the same time, or do as many simulations for particles, lights, etc.
So you shouldn't have to worry too much about being able to use blender. If your computer can run VRChat, it can run Blender to atleast some degree
just don't make your models surpass like 300k tris (this number pertains to blender performance only, and you should not be making avatars with nearly that many polygons. Max recommended polycount for each avatar in-game is 70k)
 stark torrent
Making a Bo peep avatar rn. Her head is fully rigged, but I still need to retopologize her body, and add more detail to her clothes
eevee real time render btw
thorny ivy
And then it goes into unity and it looks totally different
@stark torrent wrinkles with cloth brush?
stark torrent
nah, marvelous designer
I'm going to sculpt details in Zbrush later on
actually, besides the lighting, this is pretty much how she will look in Unity
at least based on the other avatars I've made
thorny ivy
Ah the lighting which will decide most of the looks
Seen some great models in eevee
Then they go into unity and eh
fading pine
is there a way to create vertexes where these edges intersect ?
stable edge
Not 100% sure but you might be able to use Boolean to help?
quaint jasper
@stark torrent So pretty !!
thorny ivy
@fading pine redraw those edges using knife tool
stark torrent
Thanks rubick 🙂
fading pine
I might try redrawing with knife tool
stark torrent
@thorny ivy Uh oh, that's concerning haha. Everytime I make stuff, it look great at the beginning, but just degrades in quality as the pipline goes 😢
thorny ivy
Ah atleast you can make characters
I'm still busy finishing anatomy
Not that it's really needed for these kinds of chars but a good basis always helps
 ripe escarp
I just made a simple crt monitor in blender and when i import it into unity, it's all combined and not seperate, how do i fix this? sorry if my wording is terrible i'm pretty tired
 small valve
mm? why do you need it to be separate meshes in unity? animations?
regardless, i think it's because exports from blender bundle everything together in one .fbx or .[model] file
so you would have to export each component one-by-one
ripe escarp
wh
i typed oooh
anyway
i realise what i done wrong
i need it to be seperate as i want to put different shaders on different sections
but i think its cause i exported it as obj
yeah it was
 steel flare
Do all of you guys use blender or is there another program that is commonly used?
spiral sigil
Most people use blender
steel flare
Is that because it is free or another reason? Just wondering if there is some paid option that might be better in the long run
ripe escarp
in the mmd community some people use metasequoia
spiral sigil
Free and a lot of documentation and a plugin that standardizes the process
ripe escarp
there is a paid option for 3d modelling programs called 3ds max
but yeah blender is great
steel flare
are there plugins on blender that help with modeling? I've rigged avatars with various plugins but nothing else
any technical advantage to those other programs?
spiral sigil
There's tons of plugins for anything out there.
ripe escarp
not that I know of
steel flare
apologies for 21 questions
spiral sigil
what type of modeling ?
steel flare
what types are there? or is that like asking for what application? Sorry very newb
spiral sigil
what applications ? what do you need help with
steel flare
oh I would like to start learning to model assets to be used in games primarily
spiral sigil
you can either sculpt or poly model
steel flare
what's the difference
spiral sigil
Blender 2.8 released with a lot better sculpting tools.
But the standard in the industry for sculpting is ZBrush.

In this video tutorial, we're talking about the differences between traditional polymodeling and sculpting.
Support us by checking out our merch!
https://teespring.com/stores/flippednormals
Subscribe now!
https://www.youtube.com/c/FlippedNormals?sub_confirmation=1
Website -...
spiral sigil
Generally the workflow in the industry goes
Blocking out -> Sculpting -> Retopology and so on
steel flare
is retopology like reducing the poly count more or less?
spiral sigil
Yeah, it's basically a form of poly modeling on top of the sculpted mesh to make better topology and edge flow. Usually it reduces the poly count as well
you can also bake all the details when you are done with sculpting
so you apply all the details with the help of textures (like normal maps) to the "low poly" version
steel flare
is there a program specifically for creating textures or can you do that in z brush?
spiral sigil
substance painter
The industry standard for texturing usually happens in substance painter
quaint jasper
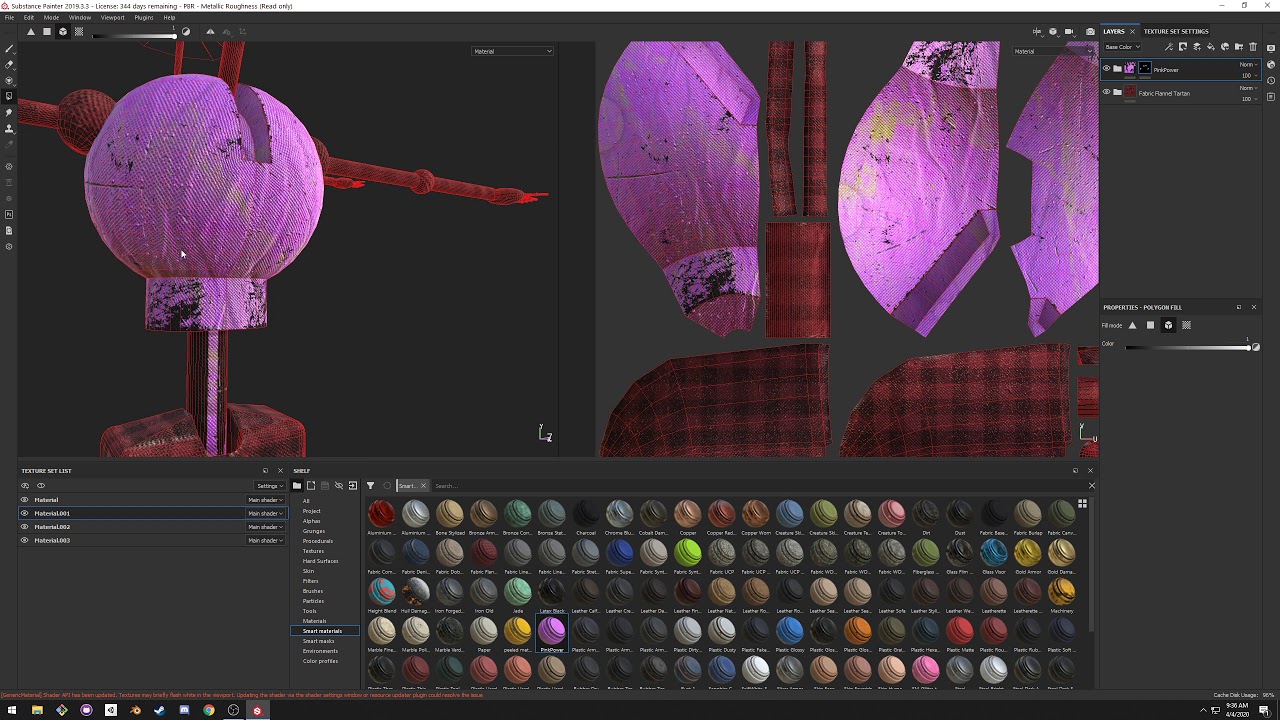
This tutorial goes over the basics of substance painter for the VRChat avatar/model creation workflow.
steel flare
thank you for the link
is there a specific program for Retopology as well? Seems like you could do that part in blender
spiral sigil
you do in the 3d modeling software you are using yes
blender got a pretty good add-on for it
you can either pay (like 90 bucks) or use the free version https://blendermarket.com/products/retopoflow

Blender Market
A Unique Market for Creators that love Blender

GitHub
A suite of retopology tools for Blender. Contribute to CGCookie/retopoflow development by creating an account on GitHub.
steel flare
ok excellent, thank you for those links as well
spiral sigil
blender guru made a pretty nice beginner tutorial for Blender
it's VERY basic but the main point of the tutorial is to show you all the main tools to start
steel flare
great I googled blender guru and see the series, I will start that later today
when you said "Blocking out -> Sculpting -> Retopology" are the general steps, by blocking out you just mean creating a rough shape to start sculpting right?
spiral sigil
Yeah pretty much, some people skip it to a degree and just sculpt blocked out shapes
steel flare
ok great, just making sure I understood
spiral sigil
probably easier to make a rough shape if you want to start sculpting
starting to sculpt a head from just a sphere might be a bit hard in the beginning
steel flare
yes that makes sense
spiral sigil
some more stuff if you wanna go deeper https://www.youtube.com/watch?v=cjZt0ICfutQ (using zbrush but the same method apply to blender or any sculpting software)
https://www.youtube.com/watch?v=98FkRIbihyQ for building up a bit of knowledge
steel flare
thank you, I'll check those out
is sculpting in VR a gimmick or is that something to check out seriously?
spiral sigil
more of a gimmick
steel flare
ok
ripe escarp
ive heard its fun but idk considering i aint got vr plus i dont do sculpting
steel flare
I tried it with Medium (comes free with Occulus) just for fun way back. Was like cutting foam with a chainsaw, but with an undo button and many convenient tools compared to real physical sculpting.
I assume some extremely skilled people can make it work
spiral sigil
not really a model question but if there are any substance painters here im trying to add some height to the skin but when you zoom in close on the seams for the UV its still barely visable. its hardly noticable at distance so i think i can work with it if i have to but was just wondering if there was a way to clean it up and make sure the seams are not showing at all
https://cdn.discordapp.com/attachments/478941902276788224/705516307495387186/unknown.png
 quaint jasper
I don't think you can hide seams like that, unless you change to triplanar mapping maybe ?
spiral sigil
its already on triplanar
i mean its hardly noticeable unless your looking for it at close up'
so i think i can just work with it but its triggering my OCD 😣
spiral sigil
I've tried baking AO onto my model but I have two issues - one is a black neck and the other is some scuff around some of the faces that I created to fill a hole after removing the tail of the model.
the way i've been told to fix the black part is to recalculate normals, but this results in them being flipped the wrong way (so i see the texture on the backside of the far side of the neck) and then flipping them back and rebaking results in no change in the bake - same kind of problem for the scuffed faces in the second image
could someone help?
thorny ivy
@spiral sigil is the part in the image part of a single mesh?
thorny ivy
@spiral sigil got an image of your high poly?
spiral sigil
masterful topology i know
Here's one of my favorite images to step down polys while maintaining quad structure
thorny ivy
Huh
So why do you want to bake AO? You don't have fine detail since your low poly is exactly like your high poly
Or I'm not seeing everything lol
spiral sigil
i don't know what you're asking
this is my model
i want to bake AO
i have problem baking AO (in the area that i have created faces/ unwrapped)
i've fixed it up in photoshop anyway, but it would be nice to know how to fix it properly anyway
fading pine
is there a modifier to bend an object
spiral sigil
Bend an object? How so?
I mean, there's the deform modifier that has a bend function inside it. https://youtu.be/bMYccraiLQU
What exactly are you trying to accomplish?

In this tutorial video, I want to show you how to use the new “BEND” modifier feature that exists in Blender 2.8x which is part of the “SIMPLE DEFORM” modifier. One of the most important things to know when using the bend feature is the correlation between the ROTATIONAL AXIS ...
quaint jasper
topology goes grid fill
small valve
I still have no idea how the fuck #1 happened lol
I think i was stressing out over how to cap the head
So first i looped the face over the top and capped it and tried filling in the...quarter sphere?
That was shit so then i shaved it off and then started a straight up cap to the top
When all was said and done i sent it to a friend and then was like
"hm. something is wrong. hm"
quaint jasper
yeah it stands out lmao
stark torrent

Bonus Content - https://gum.co/TAQM
Instagram: https://www.instagram.com/danny_mac3d/
Tumblr: http://danny-mac.tumblr.com/
Twitch: https://www.twitch.tv/danny__mac
Artstation: https://www.artstation.com/artist/mccabe86
Facebook: https://www.facebook.com/danny.mac.design/
Twit...
@small valve
that topology might hurt
usually standard head topology looks something like this
minus the neck part 😅
you might already know that though, but just incase
small valve
Yeah i was trying to go for that initially!
Ill keep this in mind :3
Since its anime im not stressing too much over deformations
Especially since basically the whole ass forehead is going to be covered up by bangs
 timber drum
wow
dull path
can someone help me (I can send my blender file if neede) , I don't know how to properly link the back and the frount face of my model
fading pine
what I wanted to do is, I have this flat belt buckle. I wanted to give it a slight curvature
like so it would fit flush to a body
@spiral sigil
I can't seem to do this with the deform modifier
spiral sigil
Did you try changing the axis of the deform? You could also try a shrink wrap modifier
fading pine
yeah. Here's what it looks like deformed "bend" on z
fading pine
Yeah that looks like what I want yiggs
 devout scroll
You can also use a lattice to bend stuff
You create a lattice object and add a latice modifier to your object that you want to deform, then pick the lattice in the modifier then edit the lattice to deform your object based on the lattice's vertices
Gives you more control over the bend, though you might not need it in this case
fading pine
I managed to do it with the curve modifier
delicate shoal
I've seen lattices referenced a couple times. I should look into them. I gotta get a better handle on the fundamentals of a lot of those modifiers. I'm winging it too much
 raw bane
hi guys, how long does it take to release your account for upload?
I'm playing for about 3 days and I still can't: /
spiral sigil
The general number people see are about 20-40 hours but there can be major expections to this case. It's different for everybody
raw bane
got it, thanks bro
 dire sable
Probably really simple to do but how do I only merge the meshes that are selected?
spiral sigil
Ctrl+J
dire sable
Don't work
spiral sigil
Worked for me. Is your mouse in the scene, it has to be for the shortcut to work
raw bane
select in the 3D view, don't know if it works in the outliner
dire sable
This is what it looks like, for some reason the meshes don't show up in blender but they do in unity, Im trying to merge only certain meshes but it won't for some reason
Ok i'll try that
nope
spiral sigil
Where is your mouse when you are doing it? If all else fails you can just do F3, search join and hit join
dire sable
My mouse is in scene collection
spiral sigil
Scene collection?
dire sable
spiral sigil
Your mouse should be in the space where the mesh is, the active scene not the hierarchy section to use shortcuts there.
The F3 menu should work anywhere though
dire sable
The problem i have it that some meshes won't show up making it where I can't select them
the ones darker don't show up
spiral sigil
You can still select them from the hierarchy.
But if you want to use the join shortcut you need to be outside of that menu.
spiral sigil
Is it possible this .blend file was made for 2.79?
spiral sigil
Go into this menu and enable this option and see if anything is set as to be disabled in viewport. If so just re-enable it
spiral sigil
how do I put already made textures onto a model in substance painter? So I can edit it there
spiral sigil
Related to a custom avatar I'm about to rig up, I actually feel proud of this remake. The original model was super jank but I did my best to incorporate both the psuedo-3D dimensions of the texture + combine it with the original mesh's general look.
I plan to turn the little circle-indent into a strap anchor to help keep the gauntlet in place when moving (from a realistic perspective).
coral plover
nvm about what i said before im too nervous owo
 severe walrus
Where do you guys learn how to do this stuff? Just Youtube tutorials?
spiral sigil
Tutorials and experience
fading pine
I'm trying to subtrack the inner piece from the outer piece to create like a tunnel
I tried using the bool modifier but it doesn't seem to work out
any suggestions?
Difference just removes the middle of the inner rod
 ashen stag
fading pine
ashen stag
fading pine
I put the boolean on the other object but no change
the puck is the middle piece
the buckle is the large piece I'm trying to drill a tunnel through
never mind I figured it out, thanks
the modifiers where misleading and the puck wasn't actually where it needed to be
spiral sigil
Huh, that seems more than just messed up normals. Odd. Would you mind shooting me the model to take a look at?
 median pike
that looks like messed up normals though
for some reason normals can get corrupted and destroy the model on export
 olive roost
The spikey parts make me lean more towards messed up shapekeys! Because those can appear in unity sometimes.
 near crown
 mighty fossil
Hi I need someone to take a look at a model for me if anyone can please DM me
spiral sigil
hey may someone help me make my avatar less..shit?
 river maple
I dont know if someone could help me /explain this to me: in edit mode in blender my model has 2k faces, in object mode it has 8k and in unity somehow 16k (sometimes even 2000000000 polygons). How can i fix this?
spiral sigil
hidden meshes?
river maple
no everythin is unhidden
 junior cloud
I am kind of confused about a little something that keeps happening my shape keys keep disapearing at random anybody know what might be the culprit?
quaint jasper
disappearing where ?
junior cloud
I made shape keys for the visemes, after I exported the model they just disappeared.
quaint jasper
Is your mesh with the visemes called Body ?
junior cloud
ya that is what I thought was the issue.
stark ore
made this shirt for fun today after laughing at a shirt simular i saw on google looking up "mens fashion"
 arctic pagoda
Sooo I ran into a bit of a problem. I was changing the hair of an avatar in blender (made sure to separate the hair first and remove shape keys), then I add the hair back to the head.
I also added new clothes and did weight painting.
All shape keys and visemes works fine in blender. But when export it to unity as FBX, the basis shapekey is gone and it went to default to the next shapekey in the list. I have no idea what happened.
devout scroll
Basis shape key doesn't exist in unity
 tepid wagon
@arctic pagoda If you generated your visemes using CATS you should have "sil" viseme, use it as your base face expression
 balmy orchid
anyone mind helping me with a roblox model? i cannot figure out how i can make it rig it as i just exported it straight out of roblox
basically meaning i got a obj file and i dont know how i can make this an actual model for vrchat
quaint jasper
Create/use a default rig, weight paint the mesh to the bones, done !
quaint jasper
The sample avatar is in the SDK
balmy orchid
oh didnt know that sdk also works in blender
quaint jasper
It doesn't, you need to import the avatar in blender
balmy orchid
well i do have the "avatar" in blender but like i said its more or likely just an object with no real bones or anything
and idk what im suppose to do with the sdk
quaint jasper
import the avatar from your unity project into blender
quaint jasper
Did you make a unity project and import the sdk in it ?
balmy orchid
im in blender now not unity
quaint jasper
That's how you get the sample avatar you'll need for your armature
quaint jasper
Try that for now https://youtu.be/f2pTkW-1JkE
Blender is Free and Open Source Software
The character Rig will be freely available next week on https://cloud.blender.org
Download: https://blender.org/download
Support core Blender development - https://fund.blender.org
--
This tutorial is part of the Blender Fundamentals ...
balmy orchid
alright guess imma try doing that
well i got the example avatar, should i just export it?
quaint jasper
either method is fine
balmy orchid
ok then the problem is how
i think im becoming blind with all these things stacked on top
well i just screwed up the model textures and now have to restart it
neat
well guess there goes my idea for my roblox model
 gaunt abyss
Take it slow man. I just read back this conversation, and it seems like all the confusion and mistakes are just from rushing.
I was the same way back when I started doing this stuff
 green ember
small valve
green ember
small valve
awesome
median pike
ohh they shape keys on that lol
gaunt abyss
lol I love it
hardy agate
that was fast
 silent cargo
Hi im doing this avatar any suggestions? or ideas?
stable edge
Maybe a different colour for the legs/cape? Contrast isn't high enough
silent cargo
Thank you!! I hope to finish her this week to upload for vrchat
 hallow bough
@silent cargo I'd try and add some more yellow detail to the boots or change up the cape color. I agree that her legs sort of disappear because of the cape. Make the cape yellow perhaps?
spiral sigil
Yellow cape with black trim perhaps?
green ember
WIP
 visual vigil
https://cdn.discordapp.com/attachments/640366454432202772/707542365753049168/unknown.png https://cdn.discordapp.com/attachments/640366454432202772/707542660902158366/unknown.png https://cdn.discordapp.com/attachments/640366454432202772/707542742863183872/unknown.png https://cdn.discordapp.com/attachments/640366454432202772/707542962070093874/unknown.png


 delicate shoal
@green ember Figured it was a matter of time before avatars for MG started getting made. Whole time I was watching that show I was thinking "that's an easy avatar, that's an easy avatar." I've only made Clancy so far, but I've only run into one other Clancy avatar so far.
delicate shoal
green ember
that looks pretty good. i literally only started doing characters in blender 2 weeks ago starting with that clancy model
delicate shoal
well some teenager out there thinks mine's trash and yours is better if that help 🙂
I haven't touched mouth visemes outside of just having a static plane squash and stretch so you're ahead of me there.
green ember
mine isnt as true to the show
the other two i did are way closer to how they look in the show
delicate shoal
What method are you using for shaping? Clancy was done with subdivision modeling but I'm waiting for my tablet to arrive so I can start sculpting
green ember
it was all by hand
subdivision for the feet maybe but rest of it was raw extruding and merging
used looptools and the smooth sculpt brush a lot though to make it more well, smooth
delicate shoal
if you don't have optiloops enabled, I'd recommend that plugin
can decimate edge loops cleanly and by angle. I find it way easier with curvy things to model it super high poly and then decimate the loops until I have the minimum I'd like for a given shape. Way better than that godforsaken limited dissolve as it keeps the quads
quaint jasper
@visual vigil Looks incredible !





 quaint jasper
I remember that, looks super clean !