#3d-modeling
1 messages · Page 81 of 1
 dusty heron
 fringe rock
If cats is on it yes sure
 brittle crane
preciselly i will learn 2.8x for CATS use
 tight dragon
I know jevil being in vr chat
 eternal scroll
i starteed to color the shirt was about to make the symbol on the shirt but the white mixing with the purple, any idea on how to sort it? also why is the white so dark?
 olive roost
I think the white being so dark is just due to it being in shadow? But it could also be the normals being reversed. In the circle i kinda badly drew, there are options to turn your view shadeless, and also to turn on backface culling. I’d recommend turning on backface culling to check that the shirt does not disappear! If it does, the normals need to be reversed/calculated. If they stay, then check shadeless! Cuz it coild just be the shadows making it darker. @eternal scroll
eternal scroll
thanks 😄
olive roost
Welcome!
 hallow bough
Is the orange color on her midsection skin?
 glad steeple
id say drop the peach color all together
hallow bough
Yeah I was about to say it's feeling out of place. It's hard to imagine what material that would be.
 vagrant wave
How do I create a segmented cylinder in Blender, like the one pictured here? https://docs.blender.org/manual/en/latest/modeling/meshes/editing/transform/bend.html
If I make a cylinder it has an input field for vertices to specify how smooth it is, but no option for segments along the length.
 quaint jasper
You make a cylinder, then ctrl + r + scrollwheen
vagrant wave
ctrl + r + scrollwheel does nothing. What is that key combo supposed to do? Like what's its name? I'm not using the default blender keybinds I'm using the compatible ones.
hallow bough
It's supposed to give you the ability to add as many edge loops/segments as you need. Have you done the ctrl+R while hovering your mouse over your object?
vagrant wave
A quick google seems to indicate it's related to "loop cut" but in both object and edit mode, with the cylinder selected, that key combo does nothing. I see a loop cut tool in edit mode though.
Am I supposed to have all the faces selected? All the edges selected?
hallow bough
Well what key is that loop cut for you it should show you wich one it is.
vagrant wave
What tool needs to be selected when doing this.
I'm pointing at the object when doing it too.
hallow bough
No you just have to be in edit mode with your mouse on the object. Then CTRL+R to add your loop cuts, you can use the scroll wheel for how many or simply type in a number.
vagrant wave
Okay, that's ALT-C, and I had to click the cylinder after selecting the tool to activate it...
hallow bough
Never heard of someone using alt-c for loop cuts but if it works it works 👍
vagrant wave
I chose the compatibility interface they introduced in 2.8. They're designed to match as many 3d applications as possible. So rotating things is the same as Unity for example. That way I don't get confused going back and forth between tools.
And alt-c makes a lot more sense and is easier to remember than ctrl-r. What's R supposed to stand for here? 🙂
 vivid crater
Roop cut
 summer tundra
 clever narwhal
i saw that model yesterday and couldn’t stop laughing
 serene onyx
So, I've tried looking stuff up to help myself with modelling.
I've seen this one series on how to get set with the base model--but when it comes to making clothing for avatars or hair, anything beyond the body, I have no clue how to do that. Are there any tips or help I could get with this? Tutorials or links, any help would truly be appreciated.
Also, for VRC models, this is the process, right?
Box Scultping -> Weight Paint -> Rigging -> Textures -> Unity-ready? Or am I missing something. Sorry for the large amount of questions, I just wanna try making something from scratch cx
quaint jasper
Extruding body mesh for clothes are usually a simple way
but yeah that's pretty much the whole process you put at the bottom
serene onyx
Ahh, alright, I'll try that out and look more into it, thank you ^-^
Regarding the hair, any tips on that? I tried doing it by hand and that uh... went poorly o.o
quaint jasper
curves ! Or hair cards ! or actually modeling and copy pasting hair meshes
serene onyx
Thank you, much appreciated! :D
brittle crane
Continuing creating a new avatar slowly 🤔
quaint jasper
wow, cute axolotl !
brittle crane
ty Ruuubick 
quaint jasper
Will it be quest compatible ?
 tough rune
i havent seen any recent avatar items for download recently so i decided not to be lazy and make me some new items......
 vagrant onyx
I run in to a problem with a bone wight and I can't find the area that is wrong and I don't know what bone is messing with it
olive roost
Can you circle the problem?
Usually easiest way is to start with like the bones with the most bones parented to them (so like left thigh, right thigh, spine) and see which of those move the offending part. (Because if the offending part is parented under these bones, itll move) then go down the parented bones from there, checking if they affect it (and maybe making sure with a zero weight full strength brush) all the way down the chain!
vagrant onyx
olive roost
Ok! Yeah id just check ur bones in pose mode and sniff it out with the list from above.
Sometimes u can kinda tell whst its weighted incorrectly to by what it follows ingame!
vagrant onyx
@olive roost thankyou
serene onyx
What type of T-Pose do I want to use when modelling?
sort of down-wards arms like this,
Or straight out?
quaint jasper
straight out
serene onyx
Alrighty, thank you! ^-^
brittle crane
@quaint jasper probably ill make it quest compatible if particles are allowed (ill giving this avatar a pair of flaming gloves)
 spiral sigil
I've got a question for ya'll: I'm making a "weave" that has distinct segments and was wondering what would be the best method for doing so since there'll be a dozen or so strands with several segments each.
Would it be better to have bones for the segment connectors or have cloth physics instead?
The original mesh was mainly just 2D with some 3D segments tossed in here and there. For my version, I want the whole thing to be 3D and have physics so the individual strands and segments move about.
quaint jasper
cramped ?
brittle crane
can we see the entire model?
 mild nimbus
A or T pose depends on the modeler btw.
@serene onyx
Either or is fine lul but it is easier to rig in T pose and add objects to the arm
And T pose not good for shoulder deformation
A pose is
and A pose can give general example of proper arm proportion to the body
they have there pros and cons lol
spiral sigil
Could anyone help me with some weight-painting? I'm trying to have a tube that's anchored to different halves and move with them while the middle is also flexible.
Top-most is what the upper tube should swing from while the bottom section is what swings from the lower tube.
Does the large, bottom section need a bone as well or...?
The ultimate goal is to have several segments connected, kinda like bones in Blender, so they can swing around and be influenced by objects/gravity.
 latent charm
@mild nimbus Is right, while it's up to you really, A-Pose is better for shoulders.
Best way to do it is model & rig in A-Pose, then place it in a T-Pose when you export it but don't apply the pose. That way you get the benefits of A-Pose and works best with unity's T-Pose requirements.
@serene onyx
serene onyx
Ahh, okay, thank you, I'll do that then! ^-^
mild nimbus
Not using it for VR Chat im using it for a short animation I got in mind
But doing the Arcs System work method for believable 2D characters but its 3D
hallow bough
Not a big fan of the peach color midsection but otherwise the design comes together very well! I like her feet design alot 👍
mild nimbus
Yes it's skin
I can change the skin color at the end
Proper lighting is not in play yet either
 fierce dirge
 stable edge
Mood
spiral sigil
Ok
 stark ore
Wonder why he is so heated
hallow bough
3d modeling is frustrating sometimes I suppose
 dull canyon
sure is
brittle crane
At the end is so satisfying
mild nimbus
 serene onyx
How do you add images to blender? I knew how to do it in the old version... but can't find it in this one 😅
glad steeple
make sure you have nothing selected and just drag it in
ideally in orthographic mode so its flat :-)
serene onyx
Okay! Thank you ^-^
serene onyx
When it comes to image size for reference, does 5 m mean legit 5 meters? If so, should I set it to 1.8m, the character's height, or leave it as the bigger 5 m?
I'm not sure what size would be best for that
 tepid wagon
@serene onyx Add a cube, scale it to 1.8m, scale the reference image so it is the size of the cube (ignore image size), delete the cube
serene onyx
Okay! Many thanks ^-^
fringe rock
You can put yhe tutorial avatar as a reference
 covert moth
Finished the base rigging. (sorry for the bad gif)
 frosty plinth
making this
gonna be a while though
Hope Disney Hires Me!!! My Dream Job!!!
ill update another progress in about a week or so depending how far i am by then
 weary olive
Wow, nearly 10k tris already?
frosty plinth
oh quit it!!!
weary olive
:p
frosty plinth
i hate using the one from deviantart, if i want something from the actual disney show... then it has to be just that to fit my needs lol
frosty plinth
lol going simple with the eyebrows
and eyelashes
ok i need to focus im thats enough on screenshots
frosty plinth
 static raptor
Anyone have anime female hoodie i can use for:
static raptor

glad steeple
a hoodie is way more than 10 tris
static raptor
Gibe it pwease
frosty plinth
i lol my bad
follow what i draw
or if you want i can do it maybe ill teach someone something for once lol
static raptor
But it is free?
frosty plinth
sure
static raptor
Yay
frosty plinth
kinda at the end of my worlds for now
static raptor
Nani?
 frosty plinth
 slim turtle
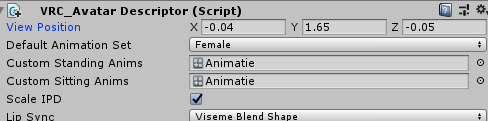
My viewpoint is way to bugged i have to use negative 0 to center
frosty plinth
quaint jasper
For x no, for z I think it's fine, but you might have odd results
slim turtle
That explains why in game does not work ..
quaint jasper
Can you space out the screenshots of your progress Wishes ? It's a bit spammy
slim turtle
So if i can't move it anymore with x there is no other way to center it with my model ? , do i have to go back in blender ?
serene onyx
So, quick thing... regarding eyes.
I'm curious, how do you add the eyelash extra stuff?
https://i.gyazo.com/1a3d6c2b287c50e02f707e5381dedba9.png
I have this, but you know the blackish brown stuff surrounding the eyes, I have no clue how to do it.
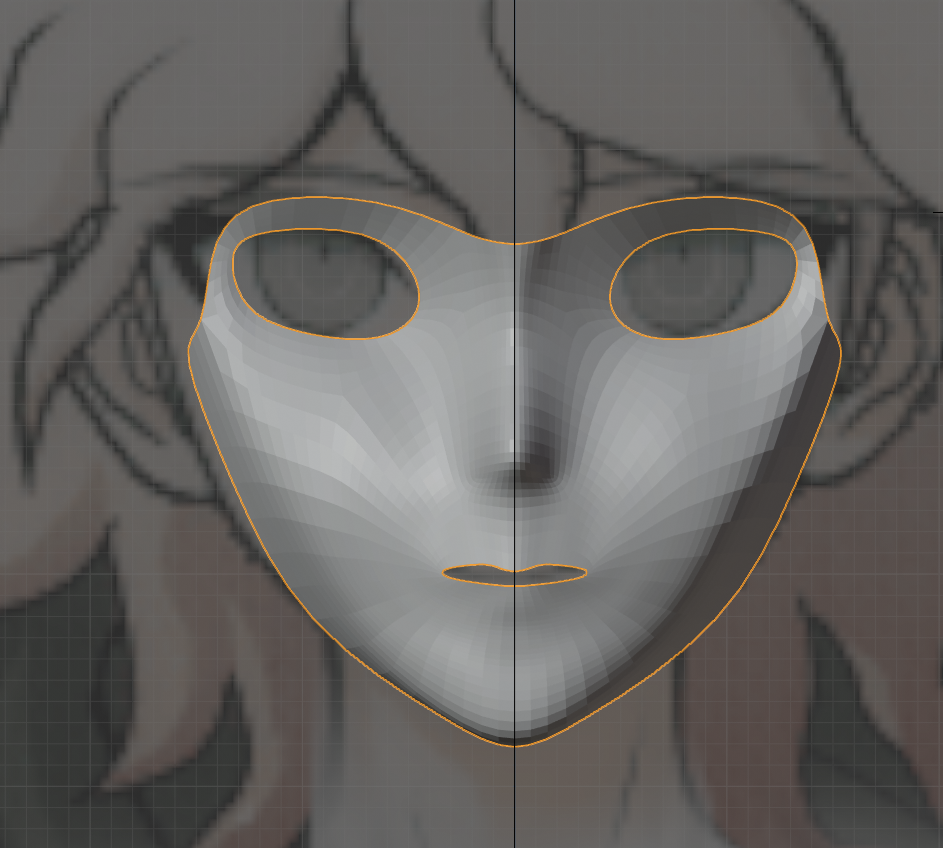
Since I'm making Ko from DR, he be havin some lashes
frosty plinth
Yes lol sorry Ruuubick
quaint jasper
@serene onyx You can try extruding the edge outside the edge, and scaling it
good to look at how other anime models do it
serene onyx
Alrighty, thank you ^-^
 molten knoll
https://gyazo.com/5004a2c4148c4d44d2dcb3e512ce5e87 why does the origin keep getting offset in unity when i import models into my scene?

its centered in blender
this happens with all sorts of models i import btw
oh wait
 warm swift
Yo who gets paid to make avatars here?
 plain tinsel
Please contact me if you make custom avatars. Thank you 🙂
spiral sigil
That is a big IF
stable edge
There's a server for that
frosty plinth
I'm sorry i don't do avatars for people...
quaint jasper
Made this last night, hopefully can be helpful to some https://twitter.com/Ruuubick_/status/1246477707623399425

Hey #VRChat avatar creators, i made a "short" Substance Painter tutorial that goes over the basics so that you can get something looking cooler easily ! I hope it'll help ! https://t.co/O7JxeNBMbt
 Twitter
dull canyon
Twitter
dull canyon
for the next video you might wanna increase your mic volume a bit
I'm at max volume and I can barely hear you
quaint jasper

dull canyon
but nice tut
frosty plinth
Nice Ruuubick 
 plain pumice
Emission
spiral sigil
Hi everyone! I'm new to Unity but an experienced modeler in Blender!
Does anyone here knows how to export Blender objects to Unity without losing the shader and texture?
Because somehow when I export using fbx, the shader information is just screwed up
mild nimbus
@spiral sigil Blender shaders do not transfer over at all.
It needs to be translated within the game engine
Only thing that carries over are Diffuse BSDF and Principled BSDF nodes with its appropiate image textures with proper hook ups
Anything snazzy like a cel shade wont work.
spiral sigil
Oh , I see. So far all of my shaders are Principled BDSF, some had image texture on it. But it doesn't translate well as image textures are unloadable.
This is like my every shaders that I had
The look in Blender
The look in Unity
dull canyon
standard shader and plug the base color texture into the appropriate slot?
spiral sigil
you mean diffuse BDSF?
dull canyon
no I mean in unity
use the standard shader on the model
looks to me like the texture isn't mapped correctly
spiral sigil
maybe... In the meantime, I'll try using Unity's shader preferences
spiral sigil
Those teal hexagons are tables. So yeah, there's shadow under it
latent charm
@upbeat bluff Does the image filename have non-latin characters in it? Looks like a utf-8 decoding failure.
If it's what I think it is, the easiest workaround is to rename it to something simple like image.png or whatever filetype it is
 pastel slate
Okay, so, I want to give my character pointed teeth that line up with each other, and I also want to give them a long tongue as a running joke in our friend group but I have absolutely no idea how to do this stuff- I need to model both of them.
 upbeat bluff
@latent charm it doesn't work💔
latent charm
@upbeat bluff does it successfully import other images?
upbeat bluff
Nupp 💔 @latent charm
mild nimbus
@upbeat bluff Rename it something basic like image.png
Go into Object Mode.
and drag and drop it into the scene.

Make sure you have this add on ticked on
in your preferences
then try again if does not work
You need to drag it INTO the viewport.
upbeat bluff
Thank u so much ✨💃 @mild nimbus
mild nimbus
👌
brittle crane
Finishing cooking textures on my WIP avatar 😋
 cosmic marsh
Hi all, a little bit more basic here, however I have this lamp I have partially modelled. When I import it into Unity, the inside mesh is invisible, can you help?
This is the FBX being viewed using Windows 3D viewer
 sonic quarry
Have you got 2 sides to that outer ring?
Faces only have 1 side, so unless you duplicate it and invert the normals on the duplicant, the inside will be see-through
if you turn on backface culling in blender you'll be able to see that
cosmic marsh
If I do back face culling it'll be see through from the front right?
So I have to go the duplicant route?
sonic quarry
Backface culling just shows which are see-through by displaying them as see-through
You'll have to duplicate that outer ring and invert the normals on it, to make a second inward-facing ring
sonic quarry
No clue, sorry
cosmic marsh
No problem, thanks for your help! 🙂
sonic quarry
Basically it's the reason why you can almost always see out of objects if you clip inside them in games
Only the outside of the mesh is actually visual
cosmic marsh
Okay, that's fair enough 🙂
I think I have done it (Normals: Tab into Edit mode > Shift + N and then check the box if you want inside)
 quaint jasper
boolean
 late bloom
where can i find it? 😮
quaint jasper
modifier in blender
sonic quarry
By the way, it is often graphically cheaper to have things clip through each other, depending on the situation
 halcyon hare
Booleans are super useful for lots of situations
although it is definitely destructive
brittle crane
@late bloom what is the use of the boolean circles?
 old spoke
@cosmic marsh If you havent figured it out already, select the faces you want to invert in edit mode, in the top left go to mesh > normals, then recalculate inside or outside. I think for that specific model it'd be inside but you could try both
late bloom
@brittle crane it's not the circles, i say that for example
i need to delete this "parts" of head structure: http://puu.sh/Fu7Ie/2e382267bc.jpg

this one: http://puu.sh/Fu7Ky/e1373f7b97.jpg

it's 2 rings from the head model
i want to cut them off with boolean, i think
weary olive
Awesome.
 still wadi
https://i.imgur.com/QYREsRu.png a very wholesome loli wip still

 cobalt prism
dusty heron
cobalt prism
dusty heron
vegetales theme resonates
 soft prairie
i need help
spiral sigil
Do you?
stable edge
Don't we all
vagrant onyx
anyone know how i can get an old blender file in a new version of blender
like a way to update the old file
spiral sigil
Open it in the new blender version? Should be enough
latent charm
@vagrant onyx Look up autodesk's FBX converter tool, should be able to convert it to a newer version blender can read.
vagrant onyx
thx you
vagrant onyx
also how do i move this to the top i hate when its one the bottom
vagrant onyx
also i cant put my camera inside mesh how do i set it were i can
 mossy thicket
hi, i'm new to 3d modeling and am struggling to make my characters hair. Does anyone have tips/resources/tutorials on how to make anime styled hair?
quaint jasper

A full walkthrough of my mesh hair creation process for anime or cartoon hair using Blender 2.8. Model it flat while wrapping it onto the head with modifiers. This method breaks things down into small, simple steps and gives clean topology and UVs.
In this tutorial:
- Overvie...
 meager inlet
Hey, I'm looking for a 3d modeller that is professional and can do an outstanding work for my avatar
quaint jasper
@meager inlet You can find people who accept paid work in https://discord.gg/6xnKyf5
 pearl bear
Hello, im currently working on my first humanoid model and im finally onto the hands. Im having trouble with the fingers though and have went through 2-3 attempts, scrapping all of them. Any advice?
serene onyx
I have a video that shows someone doing a pretty good way to go about doing hands.
Not sure if that's what you want, but that much of a resource I know of.

Create a Game Character Now at http://www.darrinlile.com
Modeling the fingers and hands today, and connecting them up to the wrist. If you'd like to follow along, you can download the reference images at http://www.darrinlile.com/tutorial-files
Next Video: https://youtu.be/...
pearl bear
It could be helpful, thanks
serene onyx
Yup, np ^-^
pearl bear
Im taking a break currently cause i got frustrated
pearl bear
Is it fine to post the main part of the model here for opinions? Its a base female model is why im asking, i dont 100% remember the rules tbh, its been awhile since i joined
I've never done a humanoid model so i want as many opinions as possible so i know it doesnt look scuffed
serene onyx
I'm not necessarily sure, but I'd believe so.
pearl bear
Alright, im just gonna post it then and hope i dont get yelled at xD
What do you think?
mild nimbus
Use the snip tool @pearl bear So I can see a more clear look of the model
and take Profile view shot
3 quarter view shot
side shot back shot
dusty heron
You can flood the chat.
pearl bear
alright then 😛
i havent done any sculpting or anything this is just the barebones model. im not done with it yet obviously
@mild nimbus here ya go
mild nimbus
The arms look extremely flimsy add some fat to the arms
Ankle area is way to thin also
I see you blocked out the rib cage area which is good
The arm may be a big to long to because remember when you add the hands to this arm its going to look even longer.
I reccomand you cut the forearm a bit shorter so the hand can fit in proportionaly
Hands reach up to the middle of the thighs.
You way beyond that point with just the wrist alone
In my personal opinion regarding to the shoulders it looks kinda uh...
Sharp?
Makes it look masculine smooth out the shoulder a bit
since I assume this is not a masculine female character
mild nimbus
👍
pearl bear
does this look better?
i feel like i should make the ankles a tiny bit bigger still
mild nimbus
Its starting to come together now
the arms dont look like noodles xD
Let is starting to take its form
Put like a indent on that line to define the Tibia
 quaint bronze
@pearl bear Are you using a reference when building out the model? I think you have a great start but just need to brush up on the proportions a bit. having a reference would help pinpoint where you should direct your efforts 🙂
mild nimbus
Tons of reference out there
I reccomand you use PureRef
its a application that puts all your references into 1 window
and it overlays all your applications
pearl bear
i do have a reference but its from a 2014 tutorial
i just have it hidden for the pics
quaint bronze
Dont be afraid to pull multiple references when working! It’ll always help in the long run
pearl bear
thank you for the advice though, i will look into pureref
i unfortunately only have one monitor so its abit harder to look at reference art and etc
better?
pearl bear
i know its awful, but i need opinions on this hand so i can get it right.
quaint jasper
hand shape should do >
larger part starts at wrists and gradually goes down up to finger tips
look at your own hand, you have the greatest reference you can get in front of you
 hardy marsh
Not sure if this is the place for this
but im using substance painter.
and for some reason its not exporting my normal map properly
example of normal map detail
unity
i cant figure this out for the life of me
i had a default normal map that came with the model.
and it seems to be exporting that instead without combineing it with the normal from my materials in substance and i dont know why
ok what?
fringe rock
Check legacy normal in the fbx importer inspevtor window of your model
hardy marsh
okay just a sec
i dont see that option are you talking about
when i make a new project?
and am selecing my fbx and textures?
hardy marsh
im talking about substance painter right now are you?
theres no rigs in substance
@fringe rock where is this optioni at ?
fringe rock
Forget what i said.
quaint bronze
Do you have a Normal Map channel in your texture set settings?
quaint jasper
@hardy marsh Are you not able to get the normal map on its own ?
hardy marsh
yes i do have a normal map channel set.
it seems its exporting all the detail to a height map.
but i cant use that and i dont know how to make it add the detail to a normal
quaint jasper
change the type ?
hardy marsh
i doubled checked to see if this happens on any old project
quaint jasper
even then that seems wrong
hardy marsh
and it doesnt
quaint bronze
I would check the export settings and make sure you're using the Unity Export setting
quaint jasper
Try PBR metallic roughness then
hardy marsh
on top of that ive tried multiple dif pbr settings
including the one you just listed
nothings exporting the dam normal with the detail and i dont know why
is it a uv problem?
quaint jasper
You'd need to find a way to revert your settings to default then ?
Did you correctly bake all your mesh maps ?
quaint bronze
Is the Normal Mixing channel set to Combine or Replace - iirc that can impact your export
quaint bronze
That's really weird, yeah. And the Normal map is plugged into the normal map setting in mesh maps?
hardy marsh
all though they all are black it didnt give me any errors
quaint bronze
That can just be a weird graphics bug with substance being slow😂
Does your unity export setting look like this?
Specifically the RGB channel on the normal export
hardy marsh
i think it switched it to direct x earlier just to see if it worked
otherwise it was on open gl
mild nimbus
@hardy marsh None of your bakes have information on anything.
Everything is black
and Normal map is flat
Thats why its not exporting anything.
hardy marsh
we just talked about that like 2 seoncds ago everyone said it was a substance visual bug
mild nimbus
Did you manage to export the map?
mild nimbus
Create a custom export setting.
hardy marsh
tried that
hardy marsh
ive been at this for hours ive tried so many things
hardy marsh
i got 2019
hardy marsh
you know the reason why
mild nimbus
Its going to update your project to 2020 but
you just need the normal map
so ill see what i can do with the file
cosmic marsh
How do I fix this?
hardy marsh
i think i wouldnt be out of place saying that i dont think more than half the people on this discord even know what thats supposed to be. @cosmic marsh
cosmic marsh
Okay, to give some context, I used the boolean modifier (set to difference) to make a hole in the walls. When I view it in 3d Viewer, this is what I see
quaint bronze
@cosmic marsh It looks like the parts of the mesh where you used booleans have more than 4 sides per face. You should either triangulate those faces or manually close off the vertices so that every vertex connects to a clean edge somewhere on the mesh
mild nimbus
@shy sonnet
oof wrong person
@cosmic marsh
That is called Fragmentation
Its when to meshes are overlapping each other in the exact same spot.
So Blender is dealing with 2 conflictions of 2 faces in the same location and cant determine which face to render since they are exactly overlapping each in the same location.
So you get that noisy gradient pattern on the walls
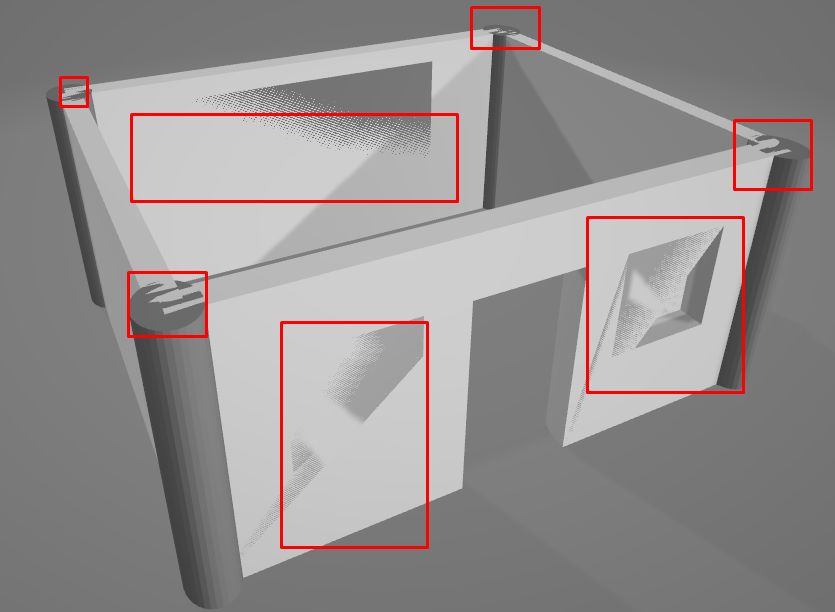
Everything boxed in is fragmentation
You are not connecting your shapes properly you are just putting into other shapes and not properly connecting them.
quaint jasper
zfighting ?
mild nimbus
ya thats another term to
quaint jasper
Feels like the wrong boolean mode was used
or at least the boolean modifier was on the wrong object
cosmic marsh
Correct ^ How do I correct them without having to zoom in and spend so much time with it?
mild nimbus
For starters id remove doubles or to 2.8 standards its called "Merge By Distance"
what you can do for starters is
Select a mesh in Object Mode then go into Edit Mode then go to Vertex Select then press A to select everything on the selected mesh. then in the upper left corner in the 3D Viewport click on Vertex then scroll down toMerge Vertices then a window will pop up on the right of it and click Merge by distance
 mild nimbus
Well ya I know
but he might have doubles regardless
in all these walls
just to be safe
quaint jasper
true
mild nimbus
After you merge by distance you should shift right click all the shapes in the scene
and press CTRL+J to merge all the objects
into 1 mesh
then you can start connecting the vertices from the walls to the pillars.
Alt+M is the hotkey to merge 2 vertices
cosmic marsh
Okay, thank you for the very in-depth explanation, I cannot wait to try it when I get a spare minute! 🙂
mild nimbus
👍
 silent cargo
any tool that help doing worlds in blender ? its very slow to make them by hand lol
brittle crane
Google Sketchup perharps?
silent cargo
is it good? i have used it and its a nightmare doing the uvs with that
 daring karma
I wouldn't suggest SketchUp. You could try blocking out your world in ProBuilder within Unity, and do your final geo in Blender. Most people just do it all straight in Blender though
spiral sigil
https://gyazo.com/4340443532ef84ecda8bfc222abaa162 im making a gamer
 quaint jasper
he does looks like he does gaming
spiral sigil
for a normal looking person with nothing else, how much tris should it be about? to leave room for clothing, etc
quaint jasper
Depends if you plan on fitting within the 70k range
Clothing is rarely what is the most tris
Face/hair is usually a big chunk of a model
quaint bronze
@spiral sigil that's so damn cute! 😃
 buoyant herald
can someone rig a model for me ;-; the rigging it has is fucked to high hell
quaint jasper
Use mixamo @buoyant herald
buoyant herald
what
buoyant herald
how
stable edge
Just try it
halcyon hare
if you good mixamo or look it up on youtube theres some usefull tutorials
 quick thunder
lmao mixamo
 barren quiver
How do I, like, delete the intersection between a bunch of vertices and fill it in?
quaint bronze
Are you trying to delete edge loops or actual faces?
barren quiver
Both
 fallow fable
oi, when I try to paint on a model, it paints the opposite side of the model, I think I need to join all my objects together or something, but i'm not sure how to do that or how to fix this
quaint jasper
@barren quiver grid fill/bridge edge loops
and use the settings of either to make it look better if you need that
fallow fable
it says online that I have inverted normals
my objects are facing inside out
how can i fix this
quaint jasper
@fallow fable Make normals consistent in blender
fallow fable
highlight them all and do what
fallow fable
how do i flip
quaint jasper
Make normals consistent
fallow fable
how do i make normals consistent
quaint jasper
that's literally the name of the tool in blender
open the search bar
and look for "Make normals consistent"
fallow fable
search bar O__O? how i get to that
quaint jasper
in blender ?
quaint jasper
either F3 or space
quaint jasper
sure that also works
fallow fable
oh ok
 dawn anchor
@fallow fable Im not exactly sure but maybe try peinting in the uv editor? (might wanna unwrap your model)
dawn anchor
you clicked where?
dawn anchor
you will have to mark the seams
in edit mode, select the edges that you want and open the edge dropdown menu (above), then click mark seam
but you will need to now where to put them
unfortunately, this is all i know. you will have to search the rest
fallow fable
still can't figure this out : (
quaint bronze
Could you take a screenshot of the UVs? It might be that the areas you're trying to paint are too small in the UV and in that case all you have to do is change the scaling of the UVs for the parts of the mesh that are giving you issues
It may also be worth moving the UV's of the parts that are going to be red away from any parts that are going to be white. Its likely that the color is actually bleeding in from the white areas in your texture
 broken sage
can anyone help me with this weird shading thats happening
idk why but just a bunch of polys just got weirdly shaded differently and it looks really weird and i've been trying to figure out how to fix it but cant seem to find anything
 nimble fern
never seen this issue and im mostly only a maya modeler but have you uv mapped your model? and have you make sure the geometry is fine?
flip normals and even doubles can be an issue make sure mesh is cleaned and everything is uv mapped
broken sage
uh i dont know exactly whats that means but im pretty sure its already uv mapped
its got all the textures and stuff but its shading is just weird
nimble fern
is there any doubles over lapping?
broken sage
nope
nimble fern
thats usually a characteristic of doubles z fighting
spiral sigil
you using blender 2.8 ?
broken sage
blender 2.79
spiral sigil
eww
nimble fern
that clip is strange
it looks like somthing is wrong with your verts
if u grab a vert and pull it is there any overlapping verts under it?
not too sure but i wonder if verts can be flipped in blender
nimble fern
going to try and google it and see if blender does anything weird like vertex flipping since appearently u can have vertices plastered all over without any polys
spiral sigil
open the properties panel
(n by default for the shortcut)
go into the mesh display section
and select the faces for the normals
check the orientation of them
should see those teal lines
broken sage
it does seem the pink ones are weirdly pointed compared to everywhere else on the body
nimble fern
everything is pointed out?
ya its a normal issue than
or whatever it would be considering its a vert
spiral sigil
did you select face ?
broken sage
spiral sigil
so doesn't seem to be a normals issue
nimble fern
did they try the ctrl n cmd?
i think i remember now seeing this once b4 on a friends model
on a small spot
the verts cant be rotated but somehow i was able to recorrect them to face the right way trying to remember if it was in blender or maya
going to get blender again and see if i can remember that thing to help fix your weird dark spots
so far unable to find that option to correct the verts
not sure how you managed to have them like that
broken sage
idk
quaint bronze
Have you tried recalculating the normals on the mesh?
broken sage
yeah
quaint bronze
What about flipping between hard/soft shaded edges and then recalculating?
vivid crater
Try setting normals from face
quaint bronze
iirc it's Ctrl + N > Recalculate Outside in edit mode with all the faces selected
nimble fern
maybe try separating/splitting apart the vertices and re connecting them. i was unable to find a option in blender for this
broken sage
i fixed it just by transferring over to blender 2.8
theres a simple option under the mesh> Normals > set from faces
 worn steppe
hey guys. I'm transitioning from Maya to blender. Over the last week its been a bumpy ride but muscle memory is taking over I think. for blend shapes, my model I sculpted and optimized has a default pose with the mouth open; but the first Basis blend shape requires for it to be closed. I'd like to keep the mouth open for easy of use for other visemes later and deal with the basis later, but when I move the shapes around blender is always defaulting to the first basis "closed" position forcing me to reopen it again. what do? :c
sliders dont help
nimble fern
u can have default as a open mouth
the sil key is for mouth closed
in blend shapes wen porting to unity
worn steppe
so if im not talking I can assign the mouth closed in unity instead of basis in blender?
nimble fern
ya if its all working correctly still in vrchat the sil key is the silent key
that u usually blend shape it to be shut mouth
worn steppe
ok so theoretically can ignore basis
nimble fern
well basis is your og that you work with and having the other blends morph from
so like say you have a model with mouth open u can make a sil key from that basic than shut it for sil
worn steppe
im looking at the viseme list and dont see sil, I see vrc everything else but that
nimble fern
you need the basis and the 4 eye blinks if i recall
you have to make new blends than assign them
worn steppe
ah ok
nimble fern
1sec i see if i can find the docs
these are the names for the blends
the basis is something you already have you just create the others
nimble fern
np
i actually never learned how to use maya like this for vrchat even tho im a maya modeler lol
i just no the blender 1
worn steppe
yeah its been a challenge but its hotkeys really
is there a way to map uv changes to visemes?
my eyes are set up untraditionally heh
im also noticing my model moves up and down un willingly in sculpt mode - is that normal?
nimble fern
not sure about the up and down part ,the uvs i think cant be edited on the same model for other visemes
pearl bear
what do you guys think of this? its my first time doing a humanoid model and i think im finally done the base mesh (its supposed to be headless)
serene onyx
The hands seem a bit large omo
pearl bear
basic anime style is what im going for, abit on the tall side
so shorter arms smaller hands? anything else i should consider
spiral sigil
how do i start modeling lol
quaint jasper
enable sculpting mode in blender 
spiral sigil
does anyone use maya over blender? been thinkin of toying around in it
 flint mirage
I’ve been on and off again with maya but for vrc (and everything else) I really do prefer blender. I made my first avatar over the weekend and being able to seamlessly go from sculpting a base to retopologizing to rigging (the only break was texturing in substance painter, but you can do that in blender too) is most important to me.
I’ve even had actual instruction during college on how to use maya and it still just feels so behind in terms of how fast you can get stuff actually done in Maya. I’m sure if I used it more and more I would get faster but to be honest I’m using it for vr chat and I don’t want to pay the license fee for that.
So short answer yes I have thought about it but decided not to
spiral sigil
Anyone able to help me out with making screw teeth? I've got the faces and everything, the tool just isn't complying and I dunno what to do.
This is the guide I've been following for making threads by the way
https://blender.stackexchange.com/questions/50102/how-to-model-the-bottle-threads

Blender Stack Exchange
The picture show the threads I want to create on the highlighted object. Problem is I don't know how and tutorials really haven't helped much as most of them seem to be about creating a bolt.
So I...
spiral sigil
is 40k tris for this a lot? i mean if i wanna keep it below the 72k limit (i think) then probably but with clothing on i can just cut the mesh parts under off so not sure
tepid wagon
Should be fine if you delete body underneath the clothes. There is no limit but performance rating will change to very bad if you go over 70k poly @spiral sigil
 blazing hill
yo, im trying to merge a keychain(weight painted and w bones) to the spine of the main char but everytime i use cats "Merge Armatures" the keychain bones shrink and the mesh completely disappears
spiral sigil
https://www.youtube.com/watch?v=v_X9v29i-Iw one example of doing fingers
Create a Game Character Now at http://www.darrinlile.com
Modeling the fingers and hands today, and connecting them up to the wrist. If you'd like to follow along, you can download the reference images at http://www.darrinlile.com/tutorial-files
Next Video: https://youtu.be/...
 quick helm
thanks for link
 stable pond
Is unity even capable to do that level of details and gfx?. That's unreal engine right? That's amazing looking 😮
 raven herald
1.i don't think so that's what i'm worried about
2. all modelled and rendered in 3Ds Max.
3. thank you so much.
i need to make more environments and if i do it'll be as a showreel world
 thorny fractal
at its core the way both engines handle rendering stuff is pretty much the same
mild nimbus
But the reflections on the object won't be mathematically correct
thorny fractal
that being said ue4 has a lot of out of the box things that make it EASIER to make things look pretty
mild nimbus
^
thorny fractal
ue4 has RTX too while RTX for unity is only in the HDRP
ue4 also has an ACES filmic tonemapper and screen space reflections and stuff on by default
while with unity you usually have to go and set color space to linear and insteall the post processing stack and turn all that stuff on manually
so it can be a bit more setup and not everyone realises that. but ive madesome little demos in unity before taking these things into account and even porting over that default checkerboard material from ue4 and tricked a few of my classmates into thinking it was unreal
plus unreals material editor makes making new materials a lot easier then making shaders in unity, and shadergraph is kinda crap imo
i also think the default skybox in unity isnt as good compared to unreals but i really dont think you should ever use the defauly skybox as a lightsource
raven herald
@thorny fractal unreal is stunning
thorny fractal
the simplicity for making things look nice is really helpful to artists, but ive ran into technical limitations with it before as a shader artist, so whatever works best for your project i think its hard to say one is better then the other
raven herald
yeah. the only issue with unity for me is the code and the way the lighting is.
with unreal it's amazing even with 1 light with unity you need lots of lights and code to make it look nice
 toxic nexus
for the acceleracers fans in here, made it out of boredom earlier this evening. am actually considering making an acceledrome world using this model, but am not sure yet
 oblique citrus
oh nice another acceleracers fan
that looks really cool, but imo, that's a really weird yellow to have on it
spiral sigil
Is it possible to add additional bones to a completed FBX model? (Like for a tail or something so I can use dynamic bones)
And if so, whats the best way to go with this? Unfortunately I don't have alot of experience using blender
 green shuttle
yo
stable edge
Hello father
Jj you can, the question might be suited more to #avatar-rigging though
You just want to extrude a few bones and do the weights by hand
I don't usually merge armatures but that might work as well
green shuttle
tf is wrong with u
stable edge
So you could alternatively make a second rig, just with the tail bones, auto weight and them merge armatures
I just read your username
green shuttle
my user name is fine itz just i had a idea bout mma name so dats wat i put
stable edge
 incoherent
green shuttle
i mean dats half of it is a lie
spiral sigil
thanks
green shuttle
for wat
spiral sigil
is 2.79 blender obsolete or something?
stable edge
Did you use mesh protection where it changes the vertex positions and has a shape key to fix it
spiral sigil
i dont think so at least cuz i never searched for such an option
stable edge
Also isn't latest 2.8
spiral sigil
it goes glitchy like this as well from time to time
stable edge
It's part of cats to do that
Woww
That isn't cats
I've never had that before, you sure your graphics drivers are ok?
spiral sigil
2.8 also goes glitchy from time to time
spiral sigil
it's okay
no problems at all
the glitch is at least tolerable
it's the mesh being destroyed during other visemes is the main problem
stable edge
Same issue on latest build?
spiral sigil
not sure yet, I have never used 2.8 beyond importing an avatar into it
maybe it's time i learn more than that to see if it has the same problems
spiral sigil
the glitch error and messed up mesh did not happen in 2.8 @stable edge
thanks for the help my dude 👍
spiral sigil
another problem though where materials are solid black even though there's texture in it.......
spiral sigil
god I feel stupid for asking lol
whats they key you press to select certain area's of the mesh so I can hide it? (In blender)
nvm its L
which im taking
 dusky bolt
@spiral sigil check your transparency value in the shader node
 somber sleet
hi I was wondering if someone could do me a quick favor in blender. If anyone could possibly make a 3D Crest Moon FBX that is low poly and can be used on avatars that would be amazing. If you want a reference picture. I have one, and if it had at least some depth to it, that would be great. Thanks!
P.S. I dont need the edges to be rounded or angled, a slice out of a cylinder would be just fine.
 safe lodge
i need with this model, i am trying to set the parent of the tail to the bottom part of the hip bone but it keeps going to to the top and messing things up
 ashen stag
There is no such thing as top and bottom when talking about parent child relationships. Blender visually draws dotted lines to the bones tail but that doesnt technically mean anything besides the relationship
safe lodge
thank you 😄
spiral sigil
@spiral sigil check your transparency value in the shader node
@dusky bolt i will try that 👍
 lapis burrow
I installed the VRC SDK for unity but the tab only shows Utilies -> Clear Cache and Player Prefs
 spiral sigil
check your console, you probably got some other scripts fucking it up
 spiral sigil
set the scripting runtime to net 4.x
in your project settings
in the player section

 lime marlin
I just realized does this discord not have a channel to show off 3D art? there is only UDON showoff lol
lapis burrow
Do I need the newest?
spiral sigil
VRChat
This page lists the current Unity version you should use when creating content for VRChat, as well as links to the correct version for both Unity Hub and direct downloads. Current Unity Version The current Unity version in use is Unity 2018.4.20f1. Unity Hub To install the cu...
lapis burrow
bc I watched a tutorial and he said there that I need a certain version
 gaunt abyss
That tutorial is most likely outdated. 2018.4.20f1 is the one you need now
lapis burrow
i installed the sdk on the other version and it totally fucked my pc over had to restart it but then it worked
spiral sigil
so the one area of modeling i absolutly suck in is the mouth. does anyone have any good resources or tips for matching a mouth the the lips/face? i usually just noodle with it for a long time till it looks ok
 fading pine
so I'm learning a thing. When I sperate parts of a mesh with 'P' in blender the tools seem to be relative to what ever distance the piece was from the original object. This makes it really hard to manipulate the separated piece. Is there any way to fix this?
spiral sigil
if you mean putting the origin to the geometery you can just press space and put that in the search bar
"origin to geometery"
or geometery to origin
fading pine
Thanks!
I figured it out
Another general modeling question, when I'm modeling something like say a hat, should I keep it solid or show it be hallowed/shelled out
 brazen roost
if the inside isnt visible for whatever reason you should remove the inside part to reduce polycount if thats what youre asking about
fading pine
it is, ty
 edgy cedar
Anyone know a good place to start looking to learn how to 3-D model? I don't mind if I have to pay for lessons but not sure what equipment to get besides my PC that I have already.
 dreamy pulsar
https://youtu.be/TPrnSACiTJ4 @edgy cedar
Blender tutorial for beginners! The long awaited reboot of the popular donut tutorial, completely remade for Blender 2.8. New videos will be uploaded every other day to this channel.
Get the shortcut pdf: https://mailchi.mp/ef5b15a32043/subscribe-to-the-newsletter
---------...
a lot of people i know started with this
edgy cedar
@dreamy pulsar I'll check him out. Looks great for learning to create inanimate objects.
blazing hill
i created a new vector group for left arm since it ddnt have one but it wont add the weight and move the broken parts forward in place, if i paint on shoulder or elbow it works but this part is "left arm" respectively
toxic nexus
My best guess is that the group is differently named than the bone it's supposed to connect to, maybe a letter wrong? It's case sensitive
 remote quarry
Quick question, I have an model I'm working on but don't like a portion of the design that has 200 instance of the same small mesh, I have an alternate mesh that I like better ... how does one replace 200 instances of mesh A with mesh B without duplicating mesh B 200 times and moving each one to the correct point
please @ me with any reponses, Idk how long responses take
quaint jasper
@remote quarry Are they all placed like you want /
If they are then you can join them with ctrl + J
remote quarry
They're all part of the same object already
also Ctrl+J only joins them together into the same object, the 200 instances of Mesh A are where I want them, but I want to replace them all with Mesh B which I presently only have 1 of. I basically want to do a replace function within edit mode to change all of mesh A to mesh B
remote quarry
Ok
 modern lichen
im new to blender how the fuck do i move the camera
quaint jasper
@remote quarry Select all object A, then shift select object B, ctrl + L > Object Data
modern lichen
i need help with UV editing
quaint jasper
What do you need help with specifically ?
modern lichen
pretty much one of my textures well all of my textures are fucked from this one model i downloaded and they are all out of place when i apply them to my model
and people are saying oh yea thats UV problems that can be fixed in blender
remote quarry
That relies on them being separate objects. The problem is everything is all part of the same object so that method doesn't apply
remote quarry
and sure I suppose i could sit and split out every single instance to new objects individually and then link, but what happens when I try to merge them all back into a single object? in my experience, joining separated meshes into an existing object throws them way out of place from where they were
modern lichen
also when i try and import a model nothing even happens it doesnt give me an error message or anything
on blender
quaint jasper
Just apply their transforms before you join them if you're not sure
never had that issue though
@modern lichen If the model has textures and broken UVs you won't be able to fix that yourself
@remote quarry video above, key is P
remote quarry
Hmm, I split stuff, I'll see if the linking works or if it breaks everything, saved beforehand though just in case
That ... didn't work, just erased all of object A
quaint jasper
Then you need to apply your transforms
blender rarely breaks what's not already broken
remote quarry
ok, so how do I do that? They were all part of the same object, I use P to split out by individual mesh
remote quarry
still didn't work, applied transforms then linked ...wiped all A again
quaint jasper
Can you share a screenshot of what you're working with ? i have no clue what you did to your stuff beforehand
should work by default as shown in my videos above
remote quarry
Well, I figured out it's replacing all of them ... but stacking them where the replacement mesh is at
remote quarry
done that, all orgin data is set, as soon as I hit link object data they all teleport to the same location as the mesh I'm copying
quaint jasper
Can you move them out of the object they're under ?
remote quarry
yes
it apparently sets all their coordinates to the same as said object rather than saving their original coordinates
quaint jasper
Yeah that makes sense
remote quarry
Is there a way to bypass that so it doesn't reset the coordinates
quaint jasper
Probably but I'm not aware of it
remote quarry
Ok, thanks anyway
 toxic zephyr
dose anyone here know how to make a custom human model from scratch (as a commission) idk if im allowed to ask that i read the rules and didnt see anything that was against it
ping me if anyone is interested
 daring roost
@toxic zephyr if you look at the walls around the spawn point of "the great pug" you can find some advertisements for commissioners there
there are other worlds that have those too but i can't racall any by name. also try #avatars-2-general
toxic zephyr
thank you luna
daring roost
np, i just stumbled across your question as i was about to ask mine
does anybody know of a way i can select multiple objects in blender, then edit them all at once in edit mode without merging them?
shuichi let me know how it goes for you, been curious myself
stable edge
Luna you can in the latest version of blender
@daring roost you select them all then go into edit mode
daring roost
yeah didn't work. only working with a single object
stable edge
Are you using 2.8
 signal helm
idk if this giving a tutorial bcz this is just reviewing https://youtu.be/LBOGj0eCRig

Hi this how im creating / re-creating the hl1 model's for hl op4 and go-mod btc ( go-mod is actualy gmod but its goldsource or has been ported to half-life 1)....The creator of Go-mod is rangerC, but sadly his mod has been hacked so he abandon and does not care about it anymor...
signal helm
im just reviewing of remaking a model
signal helm
How to make a simple cap 3d model https://youtu.be/amEdz1JAOsI

Hope you guys like this cuz im too lazy for remaking the medic mode
fading pine
So I'm making a hat. I have half the hat, using the mirror modifier for the other half. But when I subdivide with the multiresolution modifier the mesh "rips"
without the modifier
how do I fix?
spiral sigil
Double check that clipping is on and make sure the midline vertices are merged together with the clipping
Though why are you using multiresolution and not subdivision surface?
fading pine
Should I not be? I remember picking it up in a tutorial a few days ago 🤔
Do I just crank up the merge limit?
spiral sigil
You can change multiresolution to simple mode and it'll preserve the edge, but that's not what you're looking for.
If you apply the mirror first it won't rip the edge.
If you use subdivision it won't do that at all with mirror
fading pine
Ooooh
thank you
That worked. What is multiresolution suppled to be used for? And are modifiers applied in the order that they're added?
spiral sigil
The order that modifiers are applied are by the order they are in in the modifier menu. You can change the order to have different effects but and apply them all in order but generally it doesn't matter as you still have to manually apply the order yourself.
fading pine
That makes a lot of sense! Thank you!
 grave sequoia
anyone here able to give/show me a particle emission for like a single gunshot
i've got a model to use for the particle itself
signal helm
I never had experience of practicle, sorry
 sweet cobalt
can someone model an asset for me? i will give credit to the creator on my world's info board
im asking cause i'm not good with blender
sweet cobalt
i just need a custom shaped stage
id create in unity but that would be too much worl
signal helm
ohh
 wet bolt
I think this is the best place so dos anyone have a cape or cloak that has physics
every time I come I ask for stuff never get an answer
spiral sigil
this is not an hotline where you get instant answer
we all answer for free and if we feel like it
you are not entitled to anything
and there is no channel to ask to get a model
if you want something done for you you can ask in other discord servers
if you want something vrchat specific there is vrc traders in #community-servers-old
sweet cobalt
what do i export from blender to get a model to unity?
spiral sigil
you need the model as an fbx file
you can import the textures too or include them in the fbx and extract them in unity
sweet cobalt
thats what i thought
wet bolt
@spiral sigil yes I know I was recently annoyed so I sorta took it out on here and I know that's a horrible excuse
sweet cobalt
how do i add colliders to a model in blender?
 ripe escarp
Hi there, I'm pretty new to blender and was wondering if I could bend one specific side to an object, I'm trying to make an old crt monitor and can't seem to find anyway to do it.
Here's a screenshot with a crude annotation to sorta show what I'm trying to accomplish.
@sweet cobalt IIRC there is a colliders modifer, have you tried that out?
ripe escarp
Of course, if you click on a mesh in your scene collection, you should be able to find a wrench icon, click on add modifier and look on the right side.
sweet cobalt
im guessing im using collision?
ripe escarp
Yeah
sweet cobalt
ok
stable edge
Is this for something in blender or vrchat
Blenders settings don't transfer over to vrc
ripe escarp
Click 'Enable physics for Forcefield', I think.
sweet cobalt
i was just told that blender collisions dont work with vrchat
ripe escarp
Ah.
ripe escarp
Alright, I just finished this but I want to optimise and get rid of any unnessacery tris, anyone know any good modifiers or ways to do this without effecting how it looks on the outside? (minor changes are fine) I'm specifically trying to find a way to hollow out some stuff as inside the front, the back bit sticks out and i'd prefer it to be hollow/see through.
 crude basin
@ripe escarp merge by distance
Im trying to add tattoos to my model so in blender I have a plane with a shrinkwrap modifier
trying to make the black part transparent
fringe rock
That done in unity. With the correct shader
crude basin
I figured it out in blender
Why isnt my weight painting doing anything??
how would I merge armatures so the necklace one moves with the body one?
quaint jasper
Cats has a button to do that
crude basin
My dynamic bones are all fucky
they stutter and fly around everywhere even when im not moving at all
barren quiver
Increase dampening
 wheat mural
im trying to edit avatar with blender and i need to move the hoodie slightly forward so i separate materials and move it forward. than i click fix model and export it back to unity and it completely breaks the model.
only happens when i separate materials too.
fading pine
So I edited my model while on the basis (pretty sure) but when I switch to any other shape key the changes disappear
Any help? I'm so close to having this thing changed to how I like it
stable edge
me and the boys aboutta hit ya with a shape propagate
if youve got no shape keys that affect the tail, use it
well that you want to keep
fading pine
like non of the shape keys even use the tail
stable edge
you can also separate the meshes, delete the extra shapekeys and rejoin
fading pine
so it's exactly annoying
stable edge
it wont touch the faces shapekeys
fading pine
So uhhh Basis, P seperate, then ctrl J ?
I don't know what you mean delete the extra shape keys
brazen roost
i'd say try shape propagate first like they said tbh?
so you dont have to split the mesh
stable edge
select the funky verts, Vertex>Propagate to shapes
fading pine
ha that easy
it worked fine
thanks guys
for some reason I thought it would "do it" idk
brazen roost
editing basis is weird sometimes
 strange wind
Does anyone Know how to export the textures on the model from blender 2.82 into unity?
 vapid perch
are those image files or blender materials?
strange wind
I used image files to do the blender materials
quaint jasper
Then bring those images in Unity ?
 untold schooner
Attempted to make a 3D model of Clancy from the midnight gospel
 azure rain
very nice
 marble shuttle
hey does anyone have this issue ive been trying in install cats plugin at i can't get it to work at all its not even showing up in the add-ons
tried to add it manually too just doesn't work
spiral sigil
Are you installing the zip?
spiral sigil
It should pop up then, have you searched CATS?
spiral sigil
Weird, what blender version are you on
spiral sigil
Odd, are you installing the cats master file?
I can't seem to download it to check what it's actually called
marble shuttle
i tried putting it there manually now still now showing unless its another folder
spiral sigil
Why is it in your addons folder?
marble shuttle
is that not the folder or am i just dumb
spiral sigil
I've never seen someone install a blender addon "manually" before. I don't think that's how it works.
marble shuttle
ahh
well when i did it the other way it didnt show up at all in my 2.79 folder its in the same file path so i tried to install it like it was in the file path guess i can't do that
fading pine
how do I get blender to spot doing this? It's making it hard for me to zoom in and select the bits of the eyebrow I want
quaint jasper
@fading pine Select the view menu, the one that shows up when you press N, and you reduce the minimum range on the camera
0.1 to 0.001
spiral sigil
it's this option here, lower it to reduce the clipping rnage
eternal scroll
blender doing that thing where i go into edit mode i cant see the curser
how do i fix it? ive tried pressing " ] "
spiral sigil
Picture of the issue?

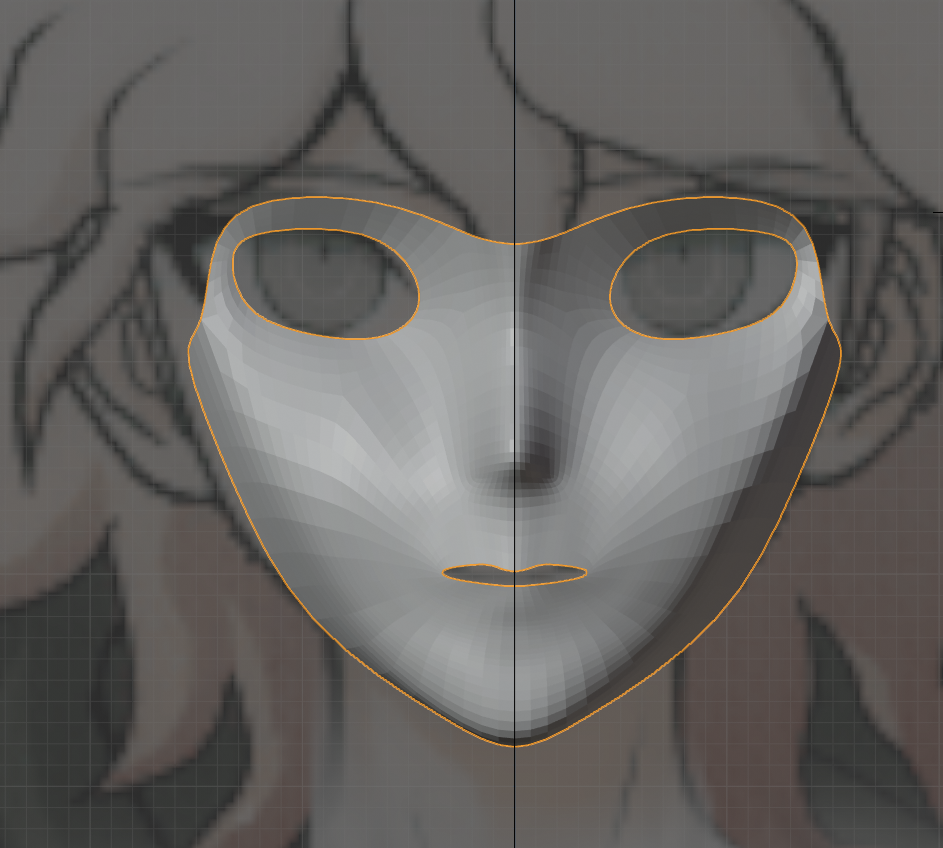


 spiral sigil
I tried looking into it but I can't recreate your issue
Does it happen on fresh instances of blender?
spiral sigil
You can try exporting your work or you can append the object into a new blender file.
Does it happen on new blender saves?
fading pine
Can I texture in blender and export to unity or does texturing have to happen in unity?
quaint jasper
You'd have to bake it in blender, but you can't do it in Unity