#3d-modeling
1 messages · Page 79 of 1
 spare skiff
 devout scroll
Don't watch 2.7 tutorials it you're working with 2.8
They'll just confuse you if you're new
There are plenty of 2.8 tutorials now
Look at grant abbitt's channel
He should have some for everything, and a lot more succint than blender guru
 silent junco
Also remember to watch tutorials that use same rendering engine when doing textures
spare skiff
I have put a mask map on the model when I use matcap but I don't know why one side there is red line coming out while the other sides don't.
silent junco
Uv probably
 terse meadow
my question fits in here the best but i have an idea for a model that i cant make at the moment, i want to mirror this things arms, ie flip its left arm and transform it into a right arm, but i dont have any idea how i do that, so if anyone can help that would be appreciated
 stable edge
X mirror
silent junco
mirror modifier in blender
terse meadow
i mean i have attempted the mirror thing
but i have no clue how to work the damn thing
so any video that would help my specific issue//help would be appreciated
 hallow bough
@terse meadow Are you trying to use the mirror modifier? It should be quite easy to use. Or can you not find it?
terse meadow
i know how it works on a rough level
besides that no clue on what i want to acomplish
lemme open the blender thang real quicc
essentially i just wanna mirror one of his arms and put it where the other cannon arm resides
 ashen stag
You should separate the left arm with its bones, duplicate and mirror it over the origin, rename the bones to right instead of left, then attach it back
ashen stag
Well you dont want to mirror the whole thing
terse meadow
yeah
i have no idea how i mirror specific things
or any real knowladge of mirroring at all
ashen stag
You have to se(p)arate it to mirror it alone
terse meadow
ion know
how i do that
all i know about blender right now is weightpainting and fixing up a model for vrc
ashen stag
Select what you want to separate and press p. Youre going to want to take out the arm bones and the arm verts
terse meadow
welp i did that
got me a seperate arm
but now i gotta delete the original one
without removing the mirror
terse meadow
ok so i made some progress
i got the arm in the right area
how do i make it so that its no longer in mirror mode per say and the arm is there fr
ashen stag
Well if you used the modifier just apply it
terse meadow
cant
terse meadow
ok it works now
there where shape keyes
no longer need help
am big boye, can do it from here
 low nova
 onyx juniper
Neat!
 quaint jasper
paint what ?
spare skiff
I figured out how to do it
 azure lily
I can see why I've heard of people disliking weight painting in blender 2.8. Is there an option for weight painting everything your brush touches, even on the other side of mesh? The front faces option in tools tab doesn't work.
 vivid crater
azure lily
vivid crater
azure lily
Ye that work, thanks!
Gotta start reimporting some models through fbxs probably, I've had some annoying bugs with 2.79 files
 mild nimbus
@young pond those stairs look dangerous
Consider using the array modfiers to duplicate the stairs
Equally
vivid crater
I think they mistook the thing to the right of the leftside stairs as stairs
 young pond
no that's a set of boxed gardens
 spiral sigil
Hi guys is it possible to add cloths separatly in unity want to change them fast the clothes ve the thame rig
theyre not on body connected yet
quaint jasper
How many polygons are on those pieces
quaint jasper
That's way too much for cloth
That's going to have a terrible performance impact
The maximum cloth polygons you can have without being flagged as very poor is 200
spiral sigil
oh wait sry it was together with character
quaint jasper
To know you need to open the arrow next to the asset and click on the mesh object
spiral sigil
hood has 2800, hose has 1624 and shoe has 700
 reef lotus
I don't think they mean a cloth component they just mean swapping clothes, that should be fine assuming you're just swapping materials
spiral sigil
so ive now my clothes but on some positions the body skin shines trough the hood can i fix this?
 cedar oar
hey guys, i'm new here and wanted to ask a question:
I keep getting this problem in Unity where my model is all black and it doesn't give me the option to extract textures. Extracting materials doesn't seem to do anything. What can I do?
cedar oar
i can't find a solution anywhere to this. the main problem is that "extract textures" is grayed out, and it's that way on almost every model I download. Any help?
cedar oar
I keep seeing "Cubed Unity Shaders" pop up on certain models. Does that have to do with my problem?
 slow zealot
there are no textures embedded in the fbx ... so nothing to extract ( when using cats for blender to export make sure embed textures on export is enabled in settings)
this is off on default when importing that add on
slow zealot
else you have to manually put the textures in the unity assets folder
cedar oar
oh is the problem that the textures are in a tex folder instead of the same folder as the model?
slow zealot
does not matter ... but the folder has to be in your assets folder
 next jungle
You don't seem to have any light source in your scene 🤔
spiral sigil
use poiyomi toon shader btw
cedar oar
I see... i think.
I'm sorry i'm very new to all this lol
slow zealot
good eyes @next jungle
cedar oar
I have poiyomitoonshaders in here too
spiral sigil
which version?
cedar oar
2017.4.28f1
cedar oar
oh right
next jungle
spiral sigil
yeahh it might be really outdated
next jungle
You can join poi's server from #community-servers-old to get the latest version
next jungle
Looks like you had a real old version you need to select the materials and change the shader
spiral sigil
click the material and then look in the inspector and change it like this
next jungle
No it's okay you just gotta swap the shader since the materials were using the old naming scheme
cedar oar
I see my mistake. I imported the new shaders and then deleted the old ones. woops
spiral sigil
with poiyomi especially you need to delete it first before updating it
cedar oar
oh my god i'm actually dumb
@next jungle your tip about not having a light was the problem.
i feel really stupid now xD
spiral sigil
it was clearly visible in the project folder
cedar oar
what kind of light would i need to illuminate the whole scene though?
next jungle
It's also good to update your shaders you had really old version of poiyomi
Directional light is usually good for a simple setup
cedar oar
Ah ok. However, a lot of my avatar is still dark, even with the light on. Is that going to be a problem?
next jungle
Can you show a new picture?
cedar oar
yeah
one sec
i'm gonna test the model in-game since i just uploaded it
even if it's not working i can always delete it and fix it
man i really wish there was an "update model" button 😔
next jungle
You can update the avatar by just uploading again
next jungle
It remembers the avatar id it was uploaded to unless you detach it
cedar oar
time to learn how to give the model a male animation set lmao
next jungle
You need to select the model in your assets and change it into humanoid
cedar oar
Import Settings >Rig >Animation Type >Humanoid?
next jungle
Yes
cedar oar
yay i'm l e a r n i n g
next jungle
How do your material settings look like right now?
next jungle
But how do the settings on the materials themselves look if you select them from your assets?
next jungle
Oh that's why they look so off they are on standard right now
Weirdly dark with that as well though your directional light might be facing a different way right now
cedar oar
wdym they are on standard? and how would i change that?
next jungle
When you select a material on the top right you can switch the shader if you wanna swap from standard to poiyomi
next jungle
It depends on the part of the model what you wanna use
Opaque is for stuff that doesn't have transparency and can't be seen trough
Though you can go Advanced Cutout for all for now if that makes it simpler for you
cedar oar
I also wanted to give my model a sword, which i've already downloaded the dae and placed it in scene. part of the sword is red though, is there a way i can change the color in unity or would i have to do that in blender?
next jungle
Color would be best done with photoshop or some alternative photo editing software
cedar oar
rip
oh i think i know the problem, when i imported the dae i neglected to import the textures as well
there we go, i fixed it
i simply dragged the material onto the part of the sword lmao
that was easy
cedar oar
how do i change the camera height though? It seems the placement of my in-game camera is above my avatars head
next jungle
In the avatar descriptor you can change the camera placement
Also these are more of avatar question so #avatars-2-general would be better
cedar oar
Ah ok
slow zealot
been trying out the free display.land app and i think it is pretty useful for 3d scanning props and even buildings etc for worlds
vivid crater
wtf how did you get such a good result, mine came out looking like baby vomit
slow zealot
i believe the person who did that one did 30 rotations
slow zealot
the better the camera ,the more details it can grab and also spending hours and lots of rotations seem to work
 spark horizon
the best way is to just take a bunch of photos and use meshroom
you can also use meshlab to clean them up a bit
vivid crater
yea meshroom is still the best free option, but the hype around display.land is that its all on your phone
spark horizon
ya
vivid crater
no photos, you record around your object, then it gets sent off to process on their hardware, and you can download it for use
spare skiff
is there any way to save the outlines of the uvmap only as an image since there are some places of the model that I cannot paint I would need to do it on a picture editing software
quaint jasper
Isn't RealityCapture free ?
spark horizon
never heard of that before. im curious how it stacks up to meshroom
ill do a test tonight
slow zealot
tried meshroom ... with 1900 screenshots around a 3D model in a game on a black bg for contrast it did not really manage to get anything after processing for 19 hours
quaint jasper
lol
spark horizon
you run into diminishing returns with that amount of screenshots. and if the lighting changes it can completely ruin it
or if the character has an idle animation
slow zealot
black desert online character creation 😄 (no animations)
spark horizon
the background also matters a lot. if there isnt any contrast you wont get anything useful
vivid crater
plus i dont think its the best for trying to recreate something with photogrammetry that was already a 3d model to begin with
spark horizon
you also dont have a focal length so it is harder for it to get accurate depth
but there are some uses I could see
spark horizon
heres a quick scan i did of a t-34 in war thunder. It turned out better than expected but would definitely need a lot of adjustments to make it look good
testing it with reality capture rn
was also faster
wow this looks a lot better. Same images btw
quaint jasper
glad to know it's still superior !
spark horizon
guess im switching
 frosty plinth
Been Making a New Samara Morgan For Halloween Next Year, Always Start Sooner or you'll take a while
 fierce dirge
what website is that?
 stark ore
started making an original character, i think im happy with how this head turned out. gotta do some reproportions on the body and rig up yet. but wet brush's look great in PSD
 steady zealot
@spare skiff can I see the topology?
My guess is it is an n-gon trying to triangulate and creating weird bunched up Normals
spiral sigil
Heerm
mild nimbus
@stark ore Can I asee the topology?
spare skiff
@spiral sigil
spiral sigil
what's up Phil?
 stark bay
Does anyone have any anime head models that i could use for an avatar
 potent sparrow
steady zealot
potent sparrow
steady zealot
@spare skiff yeah that's a massive n-gon. You want to break that shape up into quads or tris
N-gons don't play nicely, especially when theyve got odd shapes
mild nimbus
Only time ngons are fine are on hard surfaces
Like a gun
But don't abuse it
It's limited
Ngons on everything else is a big no no xD
If it deforms quads only
stark ore
@mild nimbus
mild nimbus
Why do you have tris places in major deformation areas?
There shouldn't be a tri on a face except like behind the ear or up in the nostril
You also have it in the back of the head to
 thorny fractal
if you know what your doing you can be a bit crazier on where you put tries, the cheeks look a bit weird but if done right they coudl deform fine and you might even want topology like that if your doing some complicated normal editing for cel shading and want the shadow kinda on the cheak without it looking all shaky
the guilty gear models do a similar thing
but theres a lot of weird edge flow here
 idle niche
@stark ore That looks sick!
Having some tris is fine
@thorny fractal Is right however about edge flow, but it's no biggie. I like using a subdivision surface modifier at lvl 1 and modeling with that because if you do use tris on areas, it will still make them into quads ;)
Not like the cheek is going to deform much anyways >.>
As long as you get better and try every time that's what matters
Here is what I'm in the middle of making
quaint jasper
Did you use the cloth brush for those folds or MD ?
idle niche
It's all modeled
After I apply modifiers I go back and remove edge loops that are unneeded
Starts off High poly, usually about 120k, but I always reduce it below 70k
It lets me get the shapes I want easier since I don't sculpt yet
stark ore
@mild nimbus for the cheek bit, when you have to model in on an existing base you did earlier, due to time restriction being short atm sadly causing me to add a few poly at expense because of the deformation i needed in the eye. this was an edit from my first scratch made model that i just finished not even a week prior to being given the opportunity for this
even modeling it from scratch, i don't think its completely avoidable for the tri
sometimes things can't be perfect, may still be a better way, but i doubt you can make that perfectly all quads
also thanks @idle niche urs is looking good aswell, i never used subdivide yet, i hear mixed back and forth about it
also the obvious thing to avoid having tris on the face is to have more tris i imagine. but i also try my best to have the lowest tri possible, makes it a bit simpler if i want to make a quest version later i imagine
still fairly new to humanoid scratch making though
idle niche
Shows the weight on the bones further down the hierarchy? Don't know. I don't think I've ever seen that before.
quaint jasper
Do you mean a gradient ? @old galleon
 old galleon
Uhh... This picture mean is Weights are painted entirely from the parent bone, and child bones paint only the allocated area.
Sorry
My English is poor. So after lines using Google translate
quaint jasper
If you could try to explain further it could help understand your issue
old galleon
I try explain but I can't writing English well. explain to picture's sentence
quaint jasper
You want the top part or bottom ?
quaint jasper
Oh easy !
Use the gradient tool with substract brush !
Or you can click the weight menu and select "Assign automatic from bone"
It works if you have the armature set to pose mode
old galleon
Thank you! I'll try it!!
mild nimbus
@stark ore subdivision can turn tris into quads
stark ore
I know, but i don't want more poly
Goal is to try to stay around 20000
Sometimes less poly is more. When ur a high poly mesh with a bunch of shapekeys, you present frameloss. Me and my friends tested this after one of them uploaded a model without lowering his hair poly yet.
At 170,000 poly and a full set of shapekeys, we lost 20 fps
this can be seemingly less by simply seperating the head mesh from the body though
vivid crater
blender is especially bad too since its shapekeys save the position for every single vertex, including the non moving ones
vivid crater
🙏
mild nimbus
I mean you can reset the shape keys in blender or further edit it
vivid crater
even still, in blender by having shapekeys on the mesh at all, not including basis, every vertex position is saved
so when using it, it counts as the entire mesh deforming
there have been reports of people having performance issues with shapekeys that are always active, probably the cause of it since most here use blender
mild nimbus
Surprised they haven't fixed it lul
This is why we all must use what is best for the job
Regular subdivision is not the same as subdivision modifier in blender to
Caused the form doesent change
Only just adds geometry
And doesn't turn tris in to quads
silent junco
blender is like an eldritch god
 swift heart
iirc it's a unity bug
devout scroll
I heard it was a unity bug and was fixed in 2018
But you could prevent it if you changed import settings i think
vivid crater
its not really a fault on unity at all tho, its legit just how blender handles shapekeys
in that A shape key merely records a position for each vertex and therefore shapes always contain all the object’s vertices.
just looked at that one canny about it, its untouched
pretty much the fix for blender is what one of the comments say, separate the part of your mesh that actually uses shapekeys from the rest of it
 dull canyon
ya, you'd think that'd be how it's done to begin with
why record the data for each vertex when only one is actually changing

 latent charm
It is a unity bug though, as this problem only recently manifested.
vivid crater
seems like a correlation thing to me, especially since theres hardly any reports of it and the ones that exist have at most 1 reply
since its a fact that blender saves all vertex positions in shapekeys it feels more likely the cause, also considering most games use bone transforms for facial animations one can understand why it hasnt popped up until the vrchat era of unity use
i dunno, to me it sounds the most reasonable enough given the different info
latent charm
vivid crater
probably solved 4weird
my words left unread, since i indeed referred to the canny too 😔
mild nimbus
But bone actions can be shape keys to lol
And it's cheaper and faster for shape keys
I only use shape keys for like revolving doors
Or Chambers for guns
Mostly hard surface stuff
Lol
My organic models are done via bone animations
And can also make shape keys easier if you utilize the facial controls
Facial controls should only be used for simplicity but if you are doing a cinamatic shot bones are a must
But in gameplay it's easiest and most cheapest because it's not the most important thing to see a characters face reaction in gameplay
Especially in 3rd person
So pre determined animations are in play
 brisk iris
dull canyon
brisk iris
dull canyon
so is there any way you can use a blender animation like this in unity?
quaint jasper
Export it ?
dull canyon
wait, can you?
dull canyon
huh, didn't think that was possible
would there be any reason not to do it like that?
quaint jasper
Blender is as much an animation software as a modeling
Well, depends what tools you need, keyframing is complex
But unity has the recording feature which makes it super easy
dull canyon
hm, guess I have to look into that at some point
quaint jasper
Blender has a ton of add-ons to help but overall seems more difficult to me
But you can do a lot of simple animations with randomized keyframes with noise etc
Learned about it recently and it makes me hopeful to get something decent eventually
 storm flower
How do I import a modell from 3D Studio Max to Unity? I tried doing this but the orientation is not right when I upload it to vrchat.
 placid ermine
so i was wondering if some one skilled with blender would be willing to help me for some reason my blender is not merging meshes
placid ermine
a friend helped me find out the problum
devout scroll
Lookup a guide on what settings to export with because it's pretty much all export settings @storm flower
idle niche
You also just may need to apply transformation/rotation fir the origin of the armature
You can do that by selecting it and pressing ctrl+a
 neon mulch
Any good tutorials on how to make an avatar from scratch?
I mean from modeling it to rigging to unity
idle niche
Daniel Kreuter on YouTube is where I learned the basics from
But it’s not exactly the same stuff as you’d want for VRC
I’ve been uploading the livestreams of me making a model but I’m planning on doing a proper walkthrough
There are people who stream as well
ashen stag
You shouldn't limit yourself to vrchat specific videos unless it is on vrchat specific tasks. Any model can be used in VRC.
idle niche
Yeah, but people don’t know that
I dont make my stuff specifically for VRchat but I do put them over sometimes
Anything 3D is befeficial
ashen stag
Only thing to keep in mind is optimization. You can't port in a raw sculpt for example and expect to be treated well lol
idle niche
Hahaha yeah not good
neon mulch
Thx thx
 near crown

Finished this dragon dood for @grassnak. Just gotta fix a few things and adjust an ungodly amount of dynamic bones (tupper pls forgive). Also since this is basically done that means a commission slot is open so feel free to hmu if you're interested :) #VRChat #3dmodeling #ble...

 Twitter
 mild nimbus
@storm flower game engines x axis is the z axis
Especially in ue4
I mean
Z is up in unity
Y is up in blender or any modeling software
So you need to rotate it on the floor in 3ds max
And freeze tranformations
And re export it
Common mistake when new to a game engine
Lol
And Daniel Kruter 50 part tutorial I actually did 3 years ago but when I look back it there are alot of things he has done wrong
But he teaches you pretty good topology flow
And a good workflow for blocking the body head and hair
But his method of applying subdivision and sculpting in details is terrible
Cause now it's extremely high poly.
He never showed baking
And I was stuck with a 300k tri mesh
At the end
Or retopologizing
His rigging techniques are nice though for basics but no tricks and faster workflow techniques
For the rigging process
dull canyon
don't you mean the other way around, Z is up in blender, Y is up in most other modeling software and engines like Unity and UE
 small valve
I started for like the first 10 vids with daniel
After that i knew enough that id basically only need to take a close look at references and anatomy
Currently just need to model hands and ANIME^TM head before i do wryyytopology
spiral sigil
What daniel videos?
small valve
Daniel kreuter's 50 video series on how to make SAO bitch in blender
it's interesting
but
See it looks like in the end the tutorial appears to be guiding the viewer towards a workflow optimized for doing retopiligh, rigging, and then animation
But that doesnt happen
Its a long 50 video sculpting / polymodeling tutorial and then it just ends
Which is okay but you only need to know so much about sculpting and modeling before you can just start doing trial and error over and over WITH REFERENCES until you get it right
spiral sigil
Sculpting 😥
 hollow radish
I would say if you want to learn that workflow, just find professional work
mild nimbus
Sculpting is easier tbh
Cause you are not thinking of form and proper edgeflow at the same time lol
Modeling is just the beginning
In cg art
mild nimbus
Yup yup
hollow radish
though 👀 if want a perfect rig, quickly testing it with a box modelled model is a lot faster
just have to figure out what you want to make
mild nimbus
New generation texture methods
Xd
Most people in VRC are stuck in old texture methods with a albedo map most models in the game are hand drawn
placid ermine
Just finished this little thing i just need to find out how to texture it now LOL
mild nimbus
@placid ermine want feedback?
hollow radish
arms are a bit too short
the wrists should past or on the grain when arms are down
you can check this irl
dull canyon
https://i.imgur.com/mqu0eem.png something like that I think
hollow radish
not spamming
blood l
hmm I guess it doesn't like that
well its on here

Warmest thanks to Pete Wenman for setting up this blog on behalf of the Faversham club. The hope is that, once we get established, there w...
spiral sigil
it's because of the multiple uppercase A
hollow radish
heh
 zenith fable
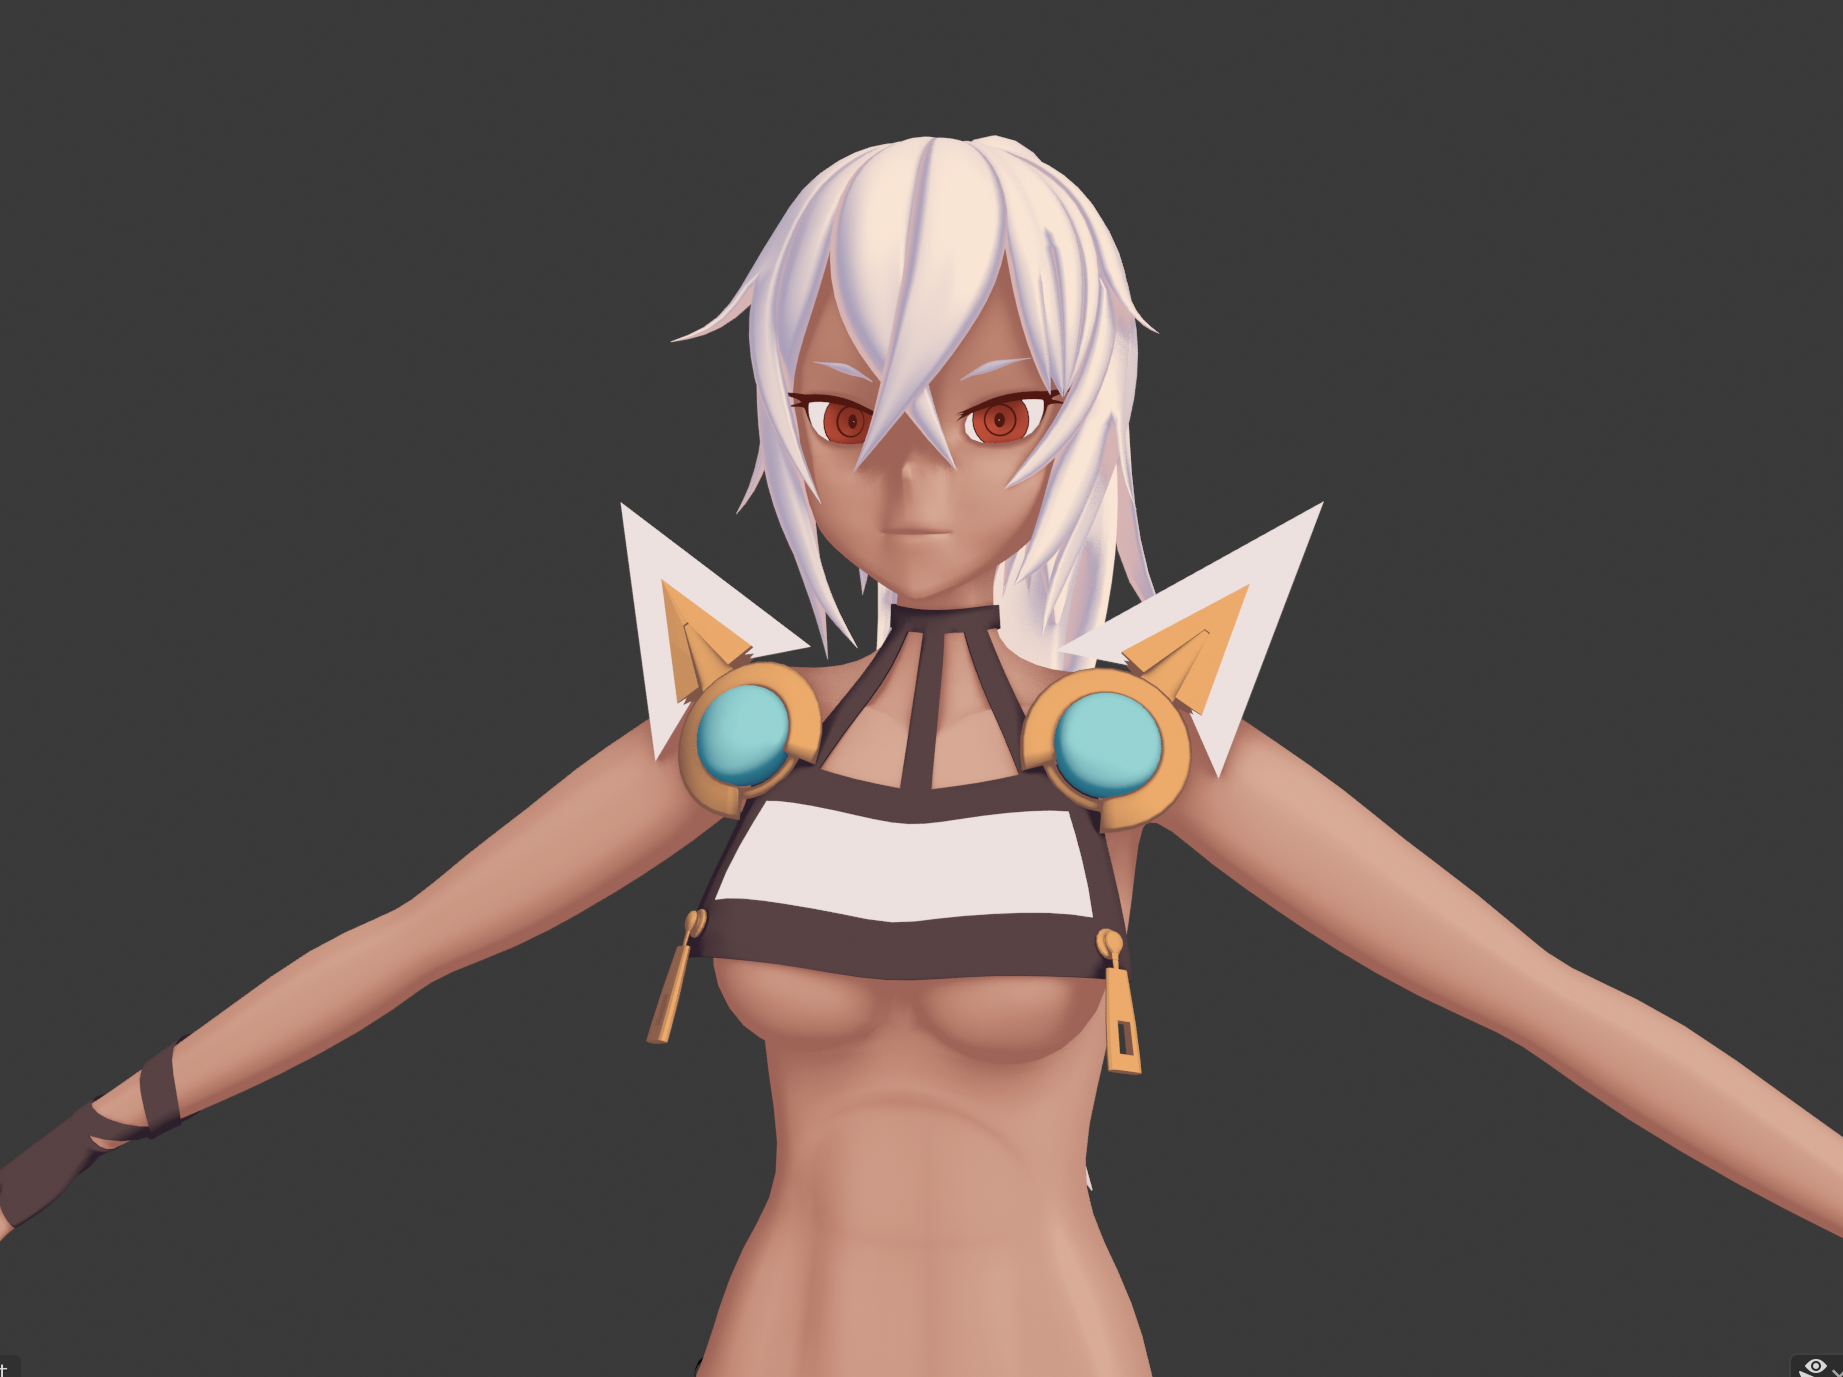 mild nimbus
@Faza_Fox#0273 I reccomand you DONT model in t pose
On be left
He*
@Faza_Fox#0273
F
Modeling in T pose is a mistake
Cause you can't determine proper proportions
T pose only exsist for the game engine to do it for you
Xd
 thorn moth

We’re so excited to bring you #Mixer2020!
This release gives you access to early 3D support with powerful 3D texturing and the return of Smart Materials. Make the Megascans library your own and redefine assets with your own style in Mixer 2020.
Blog: https://t.co/pz14dPlyAJ...
Likes
235
 Twitter
onyx juniper
Twitter
onyx juniper
Offbeat question, does anyone in here know how to get 3DS Max 2007?
 hazy swallow
@still wadi is that Ramathal Valentine?
near crown
An orchid version of my mantis! This was a fun one to work on.
Also a couple quick reminders that the original version of my mantis, along with the rest of my bugs, are still for sale on booth. Also now that this is done I am completely open to commissions. #vrchat #3dmodeli...
 Twitter
 mild nimbus
@onyx juniper You can go to the version directory.
o wait
Autodesk does not log older versions
Unless you go to a actual computer that holds it
F
 spark wagon
Is my face supposed to have this many bones?
devout scroll
No
You can use those to make visemes if your mesh doesn’t have any then merge them all to head
You only need neck, head, left eye, right eye
spark wagon
ok
Other question, i just sepperated my model by Loose parts and removed some parts i didn't need, but now i can't save a new atlas
how can i save my current model's texture?
 fringe rock
in game they have bone to move the face. so they can make and edit animation in engine.
vrchat can use bone for the gesture face animation but have blendshape is easier.
 remote steeple
Straight up power T pose haha @near crown
near crown
lol yea
 still wadi
@hazy swallow close but minneapolis azur lane
quaint jasper
Neat, could do away with a bt of edge loops though
hallow bough
Subdivision modifier 
idle niche
That's the nice thing about subdi though, the ability to get nice detail and just go back and remove edge loops
because it gives you all quads and good edge flow
hallow bough
Indeed. Though the downside is that some modelers don't remove edge loops after and just call it a day. Resulting in many edge loops that don't have a purpose 🤷
hallow bough
Happens with beginners most of the time though so it's just something you learn. I slapped it on my first model when I started out before I learned that edge loops need to have some reason to be there.
idle niche
Exactly
idle niche
Looking good there though Shonzo
hallow bough
Ditto
 polar estuary
So I have this question. So I moved the material layer of this Mat from here to here in Blender manually.
To here.
But when I export the model the mat position does not apply and still uses the default one.
So my question is how do you save the position of the material in blender.
Reason why I'm moving the cheek materials is because of this.
https://gyazo.com/4ff090bac04d9b6f9deef113e3e748d0

I want to apply the position of where the material is last positioned.
spiral sigil
anyone know the poly limit for an avatar
quaint jasper
70.000
spiral sigil
thanks
dull canyon
theoretically there's no limit
hallow bough
Grey area
 median pike
you can upload any amount of polys but its recommended to stay under 70k for your and other players performance sakes
 olive roost
Does markin smth as smooth shading transfer to unity? Also markin smth as sharp?
quaint jasper
ye
olive roost
Ty!
spiral sigil
So this is suppose to be my next avatar in the making
Apologies haha, i feel old too, jus looking for feedback since im not sure regarding vehicle avatars
 compact apex
hey, can anyone give me some good tips on modeling? I can do quite a bit with blender but humanoids are kinda difficult for me
thats the best ive been able to do
add any more detail and im screwed
median pike
sculpt
compact apex
Ah, yes
Gimme a sec
should i subdivide more to make it work better or am i just being dumb with something
also ive just never really used sculpt so im kinda useless at it
quaint jasper
You need to subdivide this by 10
and then smooth
then you can edit vertices with the proportional editing tool
 fossil dirge
ok so im trying to weight paint with 2d falloff (weight paint behind the front mesh ect) There used to be an option for 2d falloff in the weight paint option menu but blender is being mean and has removed it it seems! plzplzplzplz if anyone knows! using 2.82
and this model is just a dummy ahaha, sorry for the mess
quaint jasper
"You need to enable the 2D Falloff option, in the 3D View N panel > Tool tab > Brush > Options or in the Properties panel > Active Tool tab > Brush > Options. Also disable the Front Faces Only option"
fossil dirge
i found it thx, but they have removed the 2d falloff option in 2.82, moved the feature to "stroke", so you have to swich from "sphere" stroke to "projected" stroke, wow, really making it easy UwU
quaint jasper
damn
 fallow fable
Hiiii quick question, I can't seem to zoom in completely towards my 3D models feet in Blender, the distance of zooming get progressively shorter as I get close to the feet, inevitably stopping me from being able to see things upclose
uh, how can I force blender to let me zoom in as far as I want?
fallow fable
I tried every option that pop'd up when I pressed ., but none of them seemed to allow me to zoom in further
can't zoom in any further than this ^
🙏🏼
oh snap, I just pressed shift + B, that really helped.
quaint jasper
Did . not do anything ?
Also what happened to that poor leg mesh, did you decimate it ?
 sturdy mantle
Relatively new to modeling. Say I want to make a simple table, should I take a single cube and mold it into the desired shape, or is it better to construct it from a cube and four cylinders and then join the meshes?
what's the 'correct' approach?
sturdy mantle
right, that's the first approach
 bold zephyr

how can i merge the word guide and the home symbol together as one mesh it doesnt let me do it
quaint jasper
alt+ J ?
bold zephyr
nope nothing
its a text and a cube im trying to merge meshes into one
@quaint jasper
 bitter leaf
Making the swap from maya to blender these past few months I found a tool today for it which is a godsend https://youtu.be/4lxPXkxflV8 if you don’t have this tool I highly suggest it.

Welcome to a walkthrough of RetopoFlow 2.0 for Blender with Jonathan Williamson.
RetopoFlow does for retopology what sculpting did for modeling. This retopology suite turns a difficult and technical process into a smooth, artistic flow so you can create professional models in...
compact apex
I have a bone im trying to move for an animation, its only a child it only controls a hidden object
but whenever i change the values it snaps back
bold zephyr
can anyone help me out
compact apex
Ask the question
dont ask permission to ask the question
Also
When i try to slide the thing nothing happens
olive roost
Make sure all the meshes u wanna join are selected. If ur on .7 its ctrl j. Sometimes u need to smack it a couple times in my experience @bold zephyr
olive roost
Cats also usually has a join meshes button if u have it!
 olive roost
@compact apex id put that in #animation !
bold zephyr
not sure is it because of this
olive roost
Ur ok!
vivid crater
ah, thats why
select your text and type in convert to in the search bar
its not a mesh, its still just text rn
bold zephyr
convert shaders for cycles?
bold zephyr
after that what do i click
vivid crater
mesh
bold zephyr
curve from mesh or mesh from curve
vivid crater
mesh from curve/text
bold zephyr
yay fixed ty ty
 arctic valve
Can somebody give me an idea what might be causing this dark patch on my avatar's whiskers and nose? It's supposed to be a flat black texture, but SOMETHING in Blender has other ideas about those specific vertices, evidently.
spiral sigil
Inverted normals?
arctic valve
Nope, first thing I checked.
stable edge
Checked for doubles?
arctic valve
That too.
stable edge
Shader could be having issues
arctic valve
It's a standard texture on the nose and whiskers, not the fur shader.
This should give a clearer idea of what's going on - I dropped a shiny red texture on the whiskers, nose and mouth area to highlight the differences better.
stable edge
Do you have anything other then an albedo map in use for the material
azure lily
Something wrong with normal smoothing? For a quick check you can let unity calculate the normals in the model's importer settings
arctic valve
I tried that. They're still there when shaded flat.
azure lily
Can you show how they look like in blender edit mode
arctic valve
Sure one moment. This is the nose shaded flat, incidentally -
There's nothing obviously wrong I can see with the mesh. None of it's shaded differently or anything
azure lily
Yeah, nothing seems wrong.
How about not using a texture and just using material's color?
arctic valve
What do you mean?
 small cloud
is it not UV related?
arctic valve
It's DEFINITELY the mesh -
median pike
thats normal maps
or uvs
try recalculating them and set from faces
and show us the uv mapping for those parts of the model please
small cloud
@arctic valve if you don't mind, you could send the model and I can ccheck it for you
don't need textures, just fbx or obj
dull canyon
rare to see you here geek :3
mild nimbus
@arctic valve have you removed doubles?
You need AO to distinguish the lips properly to
Which is why you don't see your lips clearly when the texture is applied
Or draw your own static shadow onto the texture map
But for the nose
It looks like you have a different material assigned
To the portion of the nose
You need to select the appropriate material in the list in Blender. Go edit into mode press L for (linked) will highlight meshes that are seperated but under the same mesh data.
Go back to the material list and click assign under it
It will cover up the whole nose with the respective material
The reason why I assume this is because the portion of your nose is showing a different material in quads
Which can only assume you accidently assigned another material to the nose
It's not a mesh issue it's a material issue
spiral sigil
That is a normals issue search for "Normals from faces" in edit mode and select your nose.
It may mark some edges as sharp(Blue edges) just select them and clear the sharp in ctrl+E menu
and make sure to set the shading for the model to smooth to ensure all verts get the same shading
spiral sigil
yea
The edge would be blue
oh if you don't have it turned on already turn on autosmoothing and set it to 180. Mark sharp only works with it on and i think "set normals from faces" only works with it on aswell sorry
in that tab under normals
arctic valve
I've worked out that it's some kind of material or texture layer doing it. I've tried replacing the nose and the moment I merge the mesh with the main body it gets the same general problem, only with a different shape on the surface.
 coarse kestrel
coarse kestrel
coarse kestrel
Big thankies! oh ye, it's been so long since the last time I posted a render. I forgot to throw my gradient on it x.x
dull canyon
does that fur use normal maps or is it just texturing?
coarse kestrel
it's normals, roughness and texturing.
coarse kestrel
thankies
dull canyon
is it actually sculpted and baked or just generated from a height map?
coarse kestrel
Thinkin when I've done all the clothing and started work on the v5 I'll move it from my patreon to gumroad or somethin
the body is sculpted, fur and tiny details like that were done in substance
dull canyon
okay, nice
coarse kestrel
can even see it on the gloves heh
dull canyon
ya, looks very nice with the folds
I need to stop being a lazy bum and practice sculpting more...
coarse kestrel
i've only done it like 3 times for projects and it's massively bumped up the quality
 halcyon hare
dull canyon
halcyon hare
dull canyon
yes
Painter is to... paint, Designer is to like make your own materials basically
very simplified
 dusty heron
mild nimbus
dusty heron
mild nimbus
😂
 desert crown
well done
fringe rock
Am not sure but the poly count of this boot could probably be an avatr by itself maybe
mild nimbus
It's just 20k
Lol
Ill be doing final clean ups at work tommoz
Can prob bring it down to 18k
But I got a script I use in Maya to decrease resolution for LODs
So I'll be using that
latent charm
Unless anything has changed, avatars can have LODs, but all levels will be visible in mirrors. I also imagine with how LODs are set up in unity it might count the polys of all of them to your performance rank. Incorrectly mind you.
hollow radish
heh, literally half my poly count for my booth model is on hair since
I can't sculpt hair the way I want it and want enough resolution to
do it justice but refuse to use hair cards
the jacket is literally 3k tris I think
hair is 20k
though in hindsight, could reduce and change the way its done
 barren quiver
Foolish Blade, a sword that does not cut is useless
mild nimbus
@steady zealot it may not support it but I can take the desired version of the boots I want and use it
steady zealot
true
 dreamy pulsar
@latent charm as far as i was aware, the sdk prevents you from uploading if you have the lod component on your avatar, unless I'm remembering wrong
latent charm
@dreamy pulsar maybe yeah, I know it was possible at some point.
 main spoke
@mild nimbus This looks impressive. Was this made entirely in Maya or did you use Marvelous Designer? Or did you simply use bump map or perhaps distortion? To reduce poly count i'd recommend to try decimator in combination with remesher, which results in easier computation than remesher alone, but mere remesher is better to preserve geometry of each individual part if you don't want to use freeform for retopology. Do you happen to have a script for exporting physical materials?
steady zealot
@main spoke why did you tag me?
mild nimbus
Remesher is only there to optimize the file for export @main spoke
Or to reset level of detail or to get Nice beveled edges
And my boot was retopologized
Only some portions tho
Cause originally It was boxed modeled
Then I bought into zbrush to sculpt in details
I don't know what you mean for exporting physical materials tho
 onyx crane
anyone have any good resources for texture painting fur?
 light maple
Wow, love that boot. Good job
mild nimbus
Ty ty~
 sand sapphire
Is there any actual way to tell which faces are forward and which is back prior to exporting your objects into Unity? Unity obviously only displays 1 side of an object and hides the other. It's rather annoying to design something all the way through only to throw it in to find out some faces are considered to be backwards and just don't display at all.
Edit : Also, how do I fix objects to players?
ashen stag
In blender you can enable back face culling or another mode that shows the normals via lines. For "fixing objects to players" they should either be direct children or fixed using rigid bodies or VRCIKF if you want particles
 echo sleet
hii ^-^ I want to start making avatars (i know it's hard work but you gotta start somewhere) what do i download??
desert crown
you need to download Blender and Unity
echo sleet
ok thanks c:
desert crown
then you watch some basic tutorials
quaint jasper
@sand sapphire Enable "face orientation" in the viewport settings
sand sapphire
Thanks guys, appreciate the quick feedback.
dull canyon
yeah, the face orientation overlay is the quickest way to see which way normals are facing
sand sapphire
Now that I think about it, I probably should have been a bit more clear on the 2nd thing. I want to make something like a crown as an object, you should be able to pick it up and put it on your head, then trigger it so it locks it's position with the player, you should be able to run around freely with it on your head.
 quaint bronze
@sand sapphire CyanLaser has a tutorial for player tracking that should help you out (https://youtu.be/Yik63cfyuD8)

This tutorial goes over how to create a player tracker and 3 examples of how to use it. The player tracker was first created by HardLight and released in his Toybox prefabs. The link to download Toybox as well as a link to the Prefab Database can be found below.
The examples...
 empty iris
hey everyone im new to unity and i wanna make avatar can someone suggest me some good website to download 3D models
 crisp raven
probably flipped normals?
 gaunt abyss
Thanks for the suggestion though. I should have searched the issue before asking.
Deleting my above posts so the guy above me can have his question answered
olive roost
@empty iris Deviantart! Sketchfab. Models Resource. Booth.
empty iris
thx @olive roost
gaunt abyss
Yup the problem I was having earlier is fixed. Just had to enable viewport clipping.
still wadi
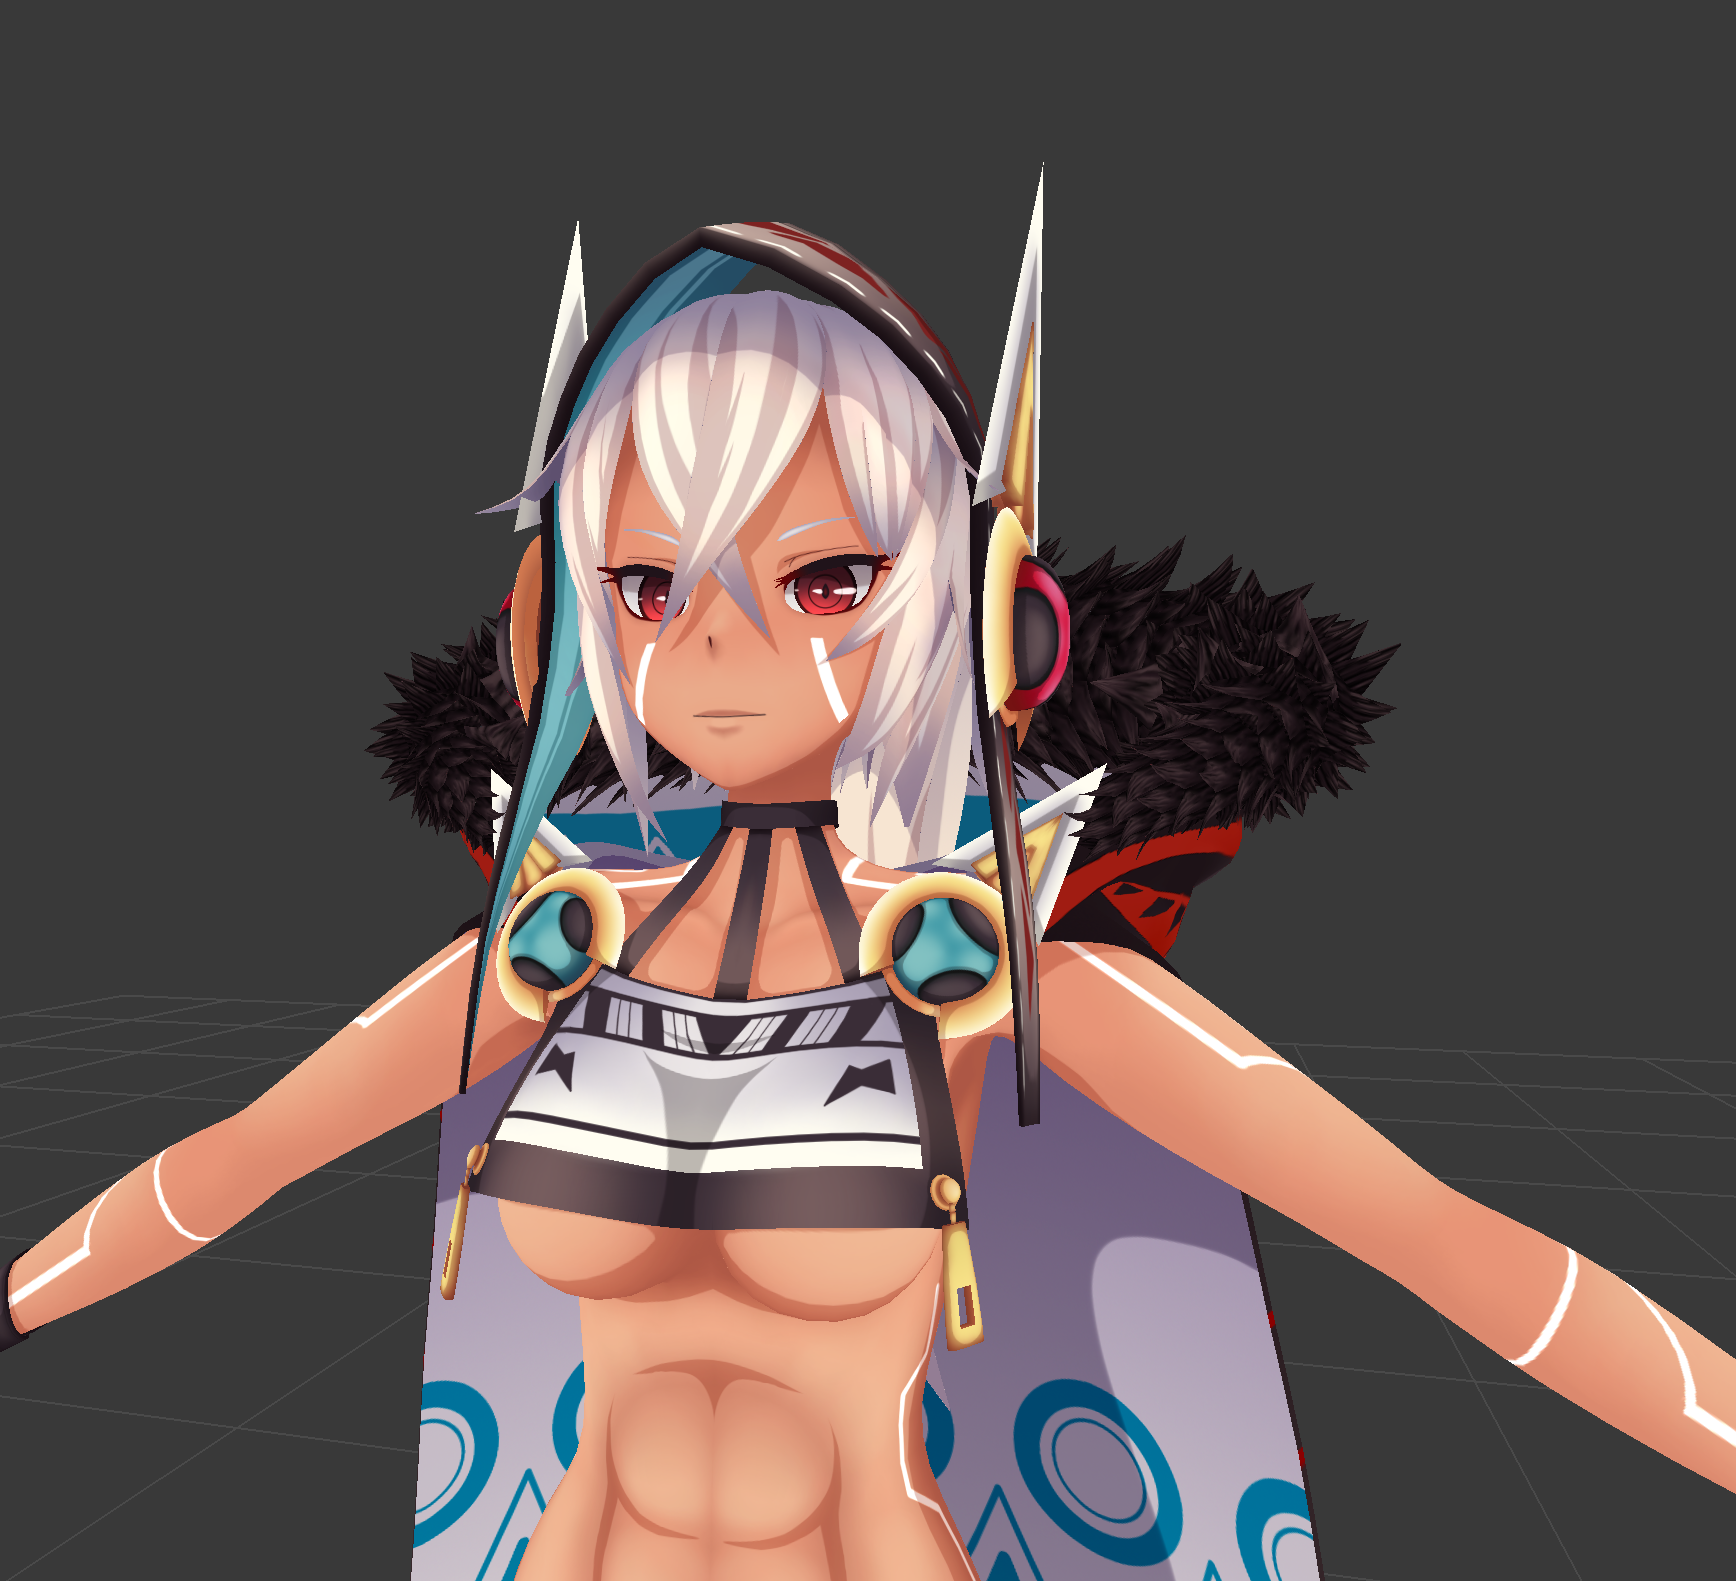
https://i.imgur.com/TEoHztU.png yay or nay ?
 thin bison
The abs shading would do good with some softening as I don't think the transition in that area could ever be that sharp
Even in a highly stylized piece
Or make them slightly smaller
 mighty bramble
How can I move this point of rotation to line up with the bolt?
vivid crater
yea, with how dark it is it makes them seem as deep as her breasts
thin bison
@mighty bramble Set your cursor roughly in the middle of the bolt and set the transform pivot to use the cursor
Alternatively that model might have a jaw bone for it which you can use
quaint jasper
@still wadi Abs are weird to me as well, but overall this looks great
 glad steeple
thats not how muscles work
devout scroll
@mighty bramble select the whole bolt, shift+s > cursor to selected
then , or . (i forget) and switch to cursor as your rotation point and rotate
locking to your x axis
 cobalt bay
I have two door parts who are in the same model on blender, yet I don't know how to select only one of the parts (they are separated by void, no parts linked)
median pike
Go to edit mode. Select all with "A". And press "P" and seperate by loose parts
 hot robin
6,5K tris for a pistol model is low, ok or high?
Still in the making and I might have to go back to blender with this
median pike
thats quite high
mild nimbus
When you make gun props
you dont need to obey the quad modeling
Ngons are actually okay
when it comes to gun props
which saves alot of modeling time and poly count
 azure rain
this isn't a first-person shooter where it's going to be lod into a smaller model for all the other people viewing your gun
reef lotus
doesn't save poly count because when you bring it into unity it all becomes triangles anyways, but yeah for hard surface modeling ngon's are fine as long as the vertices are all on the same plane
obviously you still want to keep topology in mind
 quick thunder
@still wadi The texturing on that model is amazing.
 junior maple
wp
mild nimbus
@visual vigil faces or tris?
If it's 63k faces that's pretty darn high
Double 63k faces you get x amount of tris
mild nimbus
Are you saying tris or faces is what I'm asking
Because faces get triangulated when put into the game engine
And those 63k faces can be doubled from 63k to 126k
 visual vigil
I'm aware how Tris work
mild nimbus
That's what I'm asking I assume it's 63k tris
Lol
If so then good job
Cause you said faces
Was confused
Faces are quads
latent charm
Regardless of your modeling methods, it winds up as tris anyway. And Tris are what vrc's perf system counts.
azure rain
basically the point being you always count triangles never faces
visual vigil
I acknowledge this
i blame fucking loop cuts
i hate having ngons in my workflow
thats good to know that vrchat counts tris
really accurate ingame for it to say poly count and then count tris
vivid crater
Mainly it's just game engines triangulating everything
silent junco
flextape
quaint jasper
Symmetrize what you can first, then do a grid fill, then use the modeling tools to smooth or use "smooth vertex" in edit mode @cobalt bay
quaint jasper
@cobalt bay the same way you do anything, with the spacebar
and a bit of googling
but the mesh will still need a lot of other fixing
would be better to go back to a previous automatic blender save before you destroyed it
cobalt bay
It's mainly because the character have 4 legs, it's a centaur
but I wanted to make him humanoid
 dire seal
How do I change the render view in blender?
tired of seeing 1 sidded textures making it hard to properly edit
quaint jasper
what do you want to see ?
dire seal
Flat materials in blender can only be viewed from one side
the other side wont render unless i rotate the cam
quaint jasper
Enable backface culling ?
spiral sigil
Hello, I am unable to rotate any direction besides left and right in blender. Does anyone know a fix?
mild nimbus
@spiral sigil picture
spiral sigil
1st picture is in blender
2nd picture is in unity
problem is in unity it looks very polygon-y(?)
and the material is not accurate to blender
silent junco
one has shading the other doesn't
and blender and unity uses 2 very different ways of making materials
spiral sigil
the second one is using poiyomi shader
silent junco
likely normals
spiral sigil
i do not understand
silent junco
this is likely because of normals
spiral sigil
alright imma google normals
what about this?
material count 4 but it's showing only 3?
oh w8
nvm
im stoopid
two same materials
one missing material though
frick it, im starting all over again
fringe rock
Take a screen shot in blender
small cloud
@spiral sigil In Blender try selecting skin mesh and do "set normals from faces"
 cold charm
i've been trying to add a hat to this avatar for about an hour and nothing seems to be working. I'm following a tutorial to add a bone for the hat but the tab to name the new bone is just empty in both edit and object mode and I don't know what to do
 mint furnace
(Left Substance/Right Blender) Does anyone know whats up with this? I'm trying to paint my character in substance painter, and I get these weird lines that seem to follow the seams for my UV unwrap. Is there a setting or something that I dont know about that makes it paint properly instead of leaving these gaps on the surface?
quaint jasper
the white lines ? are you sure it's not also sharp ? Were the texture baked and do you have enough UV padding
mint furnace
if you notice along the area where the seam is like along the leg and hip area in substance when I paint on those areas the paint wont take and leaves the area white
and when you say UV padding what do you mean I'm still a bit new to this process
@quaint jasper
quaint jasper
when you unwrap you can leave more space between uv islands
check there is no overlapping
mint furnace
how would I do that with blender?
mint furnace
I hit Smart UV project
that's what I've been using
when I just hit unwrap in general painting in substance doesn't seem to work at all and the islands look different
quaint jasper
i wouldnt use smart uv for avatars
mint furnace
do you have a recommended video that follows the process you would use instead?
quaint jasper
you already have seams so just unwrap normally
spiral sigil
Hello, I am unable to rotate any direction besides left and right in blender. Does anyone know a fix?
 tepid wagon
Does it say "Constrain axis" in Rotate options there? If so unticking constrains may help @spiral sigil
spiral sigil
@spiral sigil In Blender try selecting skin mesh and do "set normals from faces"
@small cloud it's aight im starting all over again, thanks for this though i will try it if i face a similar problem
 bleak tree
https://gyazo.com/d9e1c3d1bd1517859ac86629de46e9b1 Gonna adapt this character for VRchat if I can manage her polycount in the end.
 bleak tree
Blender 2.8 is glorious.
onyx crane
Crossposting from the animation channel for the Blender experts: How can I bring a Unity .anim or other animation into Blender? I'd like to test an animation out within Blender but I can't figure out how to import them.
quaint jasper
i don't think that's possible ?
onyx crane
i did some digging and i found a reply from you in another thread that might help.....the runtime recorder
i think that would allow me to bake an anim to fbx and then export that fbx -> import in blender
is that right?
quaint jasper
Well you can try to record an animation for an object, but i don't think that animation will be included in the FBX ?
If it is, then i guess you can export it to blender, but if not then i don't think that's possible
onyx crane
i think I found a workaround https://forum.unity.com/threads/bake-timeline-animation-back-to-object.540528/

Unity Forum
Is there a way to bake timeline information back to the object for FBX export?
I want to create animation in Unity and then send it back to Maya. I'm...
quaint jasper
oh i didn't know the fbx exported could do that, sweet !
barren quiver
Wow, that's a high poly Elenor!
mild nimbus
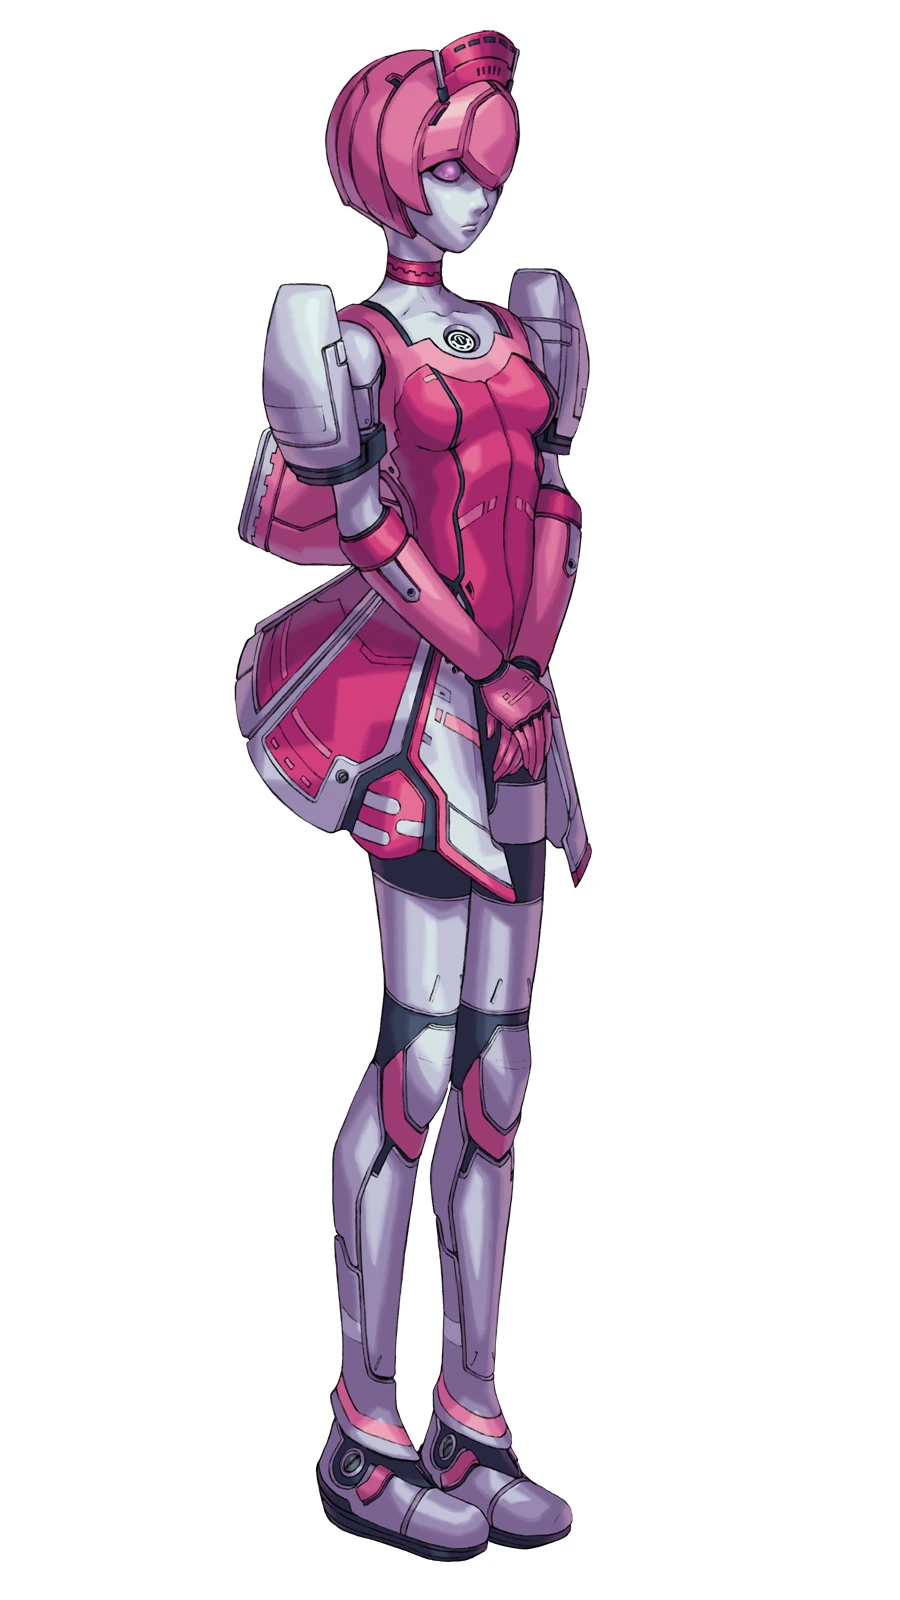
@bleak tree Im pretty sure that is from PSO2
bleak tree
Hey now, someone got her.
It's from the first PSO. Elenor Camuel
She is my favorite character from that game.
Just finished the skirt. I had to be a bit creative with the back of her.
Just under 49k
I'm losing my mind over PSO2 coming to NA so I thought I would take on a big project whilst I'm quarantining myself from the virus.
I've been working five days straight.
First full 3D model project in Blender, actually.
So I'm takin' it all the way and throwing her into VRchat so I can be a robot lady.
spiral sigil
Are you sculpting or poly modeling?
bleak tree
I sculpted the chest and the head first, and then I sorta wrapped around them with a mesh with good topology.
I saw someone do it before. They use a sculpt as a guide so they can focus on the structure of the model, and make sure it animates smoothly.
I wanted to give it a try, and one thing led to another. Now I have a model ready for texturing.
Oh, and the legs and arms and stuff I also made guides for, but all I did was use a subdivided, low poly mesh.
Making guides through sculpting works. It makes your models look so clean, and Blender's sculpting mode is perfect for it.
 bleak tree
I don't think I need these many tris on her face...
desert crown
the face do actually need a lot of tri's actually, Mainly around the mouth and eye parts. The rest of the face doesn't need that much.
quaint jasper
@bleak tree what do you mean by sculpting guide ?
bleak tree
Yeah I'm probably going to bring down a bit but not too much. I still managed to go fown to 47k so that's something.
Hang on I have an example for a sculpting guide

This is my head reference. It's the model I actually sculpted, and my guide.

I started with a single plane on the nose, and pretty much wrapped it around the guide.
I guess instead of a sculpt guide, it could be considered a 3D reference.
This is the first time I used this method. I'm excited that it worked so well.
bleak tree
I thought about jumping onto the UV mapping but now I'm not so sure. I don't have any geometry for the mouth. I guess I'll work on that.
mild nimbus
Thats called
retopologizing
lol
there u go now u know
😂
I do it all the time for my works
I use specialized tools for retopology https://gyazo.com/326983a115defba2837a13b6b2dc80c7

Which is retopo flow.
I use this plugin for 2.79 because its free
2.8 cost money
so i just go back to 2.79
and bring it back to 2.82
Sometimes i use 2.77
for anime renders
so i have tht installed to


prob wont load . 3.
oh it did
bleak tree
Retopologizing. Awesome.
mild nimbus
👌
bleak tree
Well now I have a better term for it.
mild nimbus
ya you can look up the word lots of videos will appear with the exact thing you are doing
bleak tree
Right. Well then I have some videos to watch while I work.

Fixed the lips.
Now they don't look so sad.
desert crown
👍
bleak tree
I also realized the eyes were holding too many tris. Cut 6k from the overall number.
quaint jasper
Also are you using a full sphere for the eyes ?
bleak tree
I subdivided a cube to a spherical shape and cut out a portion of it to be the eye.
quaint jasper

Was making a sphere too simple ?
Maybe there's a technique or reason i'm not aware of
bleak tree
Well, I went for a subdivided cube so that the geometry would be cleaner. And I didn't want to have hundreds of tris sitting inside the head doing nothing.
quaint jasper
yeah usually i'd create the eye tracking and then remove everything that can't be seen
it's hard to get cleaner geometry than a raw sphere though no ?
bleak tree
Oh yeah, it's clean. It's probably a bit better, but Elenor here doesn't have pupils.

She only needs pink eyeballs.
quaint jasper
i'm part of the no pupil gang as well !
 quaint jasper
cute !
bleak tree
I won't run into any hangups if I leave out functional eyes, will I?
Her mouth is still going to move though.
She will smile.
 azure kraken
thats nice but she reminds me an android character from a JRPG mobile game (its pretty good too) except she doesn't have pony tails
quaint jasper
@bleak tree None, eye tracking isn't a requirement
bleak tree
Right on
desert crown
she reminds me of the pink bot in kingsmen, except she doesn't have the sharp legs
bleak tree
The robot ladies get those in Phantasy Star Online 2
desert crown
😮
bleak tree
And they hover around with jets on their legs.
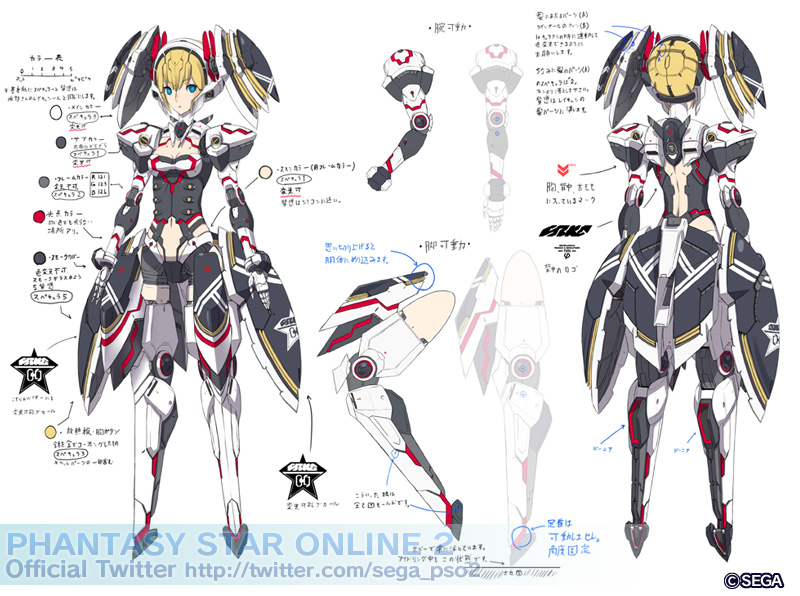
This might be my next project
IF this one goes well.
bleak tree
https://gyazo.com/d7882a1bababaf3363ef6333e58176c0 Made the bow in the back look like it fits better with the skirt.
 bleak tree
I'm gonna need to join all the mesh together if I'm gonna want it to use the same texture, huh?
Don't want to have multiple materials for a model this big.
quaint jasper
Not necessarily no, a couple materials is not a big deal
If you need to have some parts higher quality than others then unwrapping them on their own makes sense
or do all on a single 4K texture ?
bleak tree
Well I mean, I plan on making sure her textures are big.
But I understand there's a limit to how large of a file size the avatar can be
ashen stag
Not technically
You should avoid extreme sizes but the SDK wont prevent you from uploading due to avatar file size
bleak tree
Right
quaint jasper
a single 4k texture or a bunch of 2K is usually good to be aiming for
bleak tree
I'm not going to have any crazy effects attached to this.
She looks much happier.

When I unwrap my meshes, they don't all show up together when I try selecting them all.
quaint jasper
Screenshot ?
bleak tree
Well, I ran into this problem last night.
https://gyazo.com/4c7adaf52fdcd6ecd8ff70f17268a82f I have loads of meshes here. And I'm wondering if they all have to be merged first before I start unwrapping



Never unwrapped in Blender before. First time.
bleak tree
I figured out the seams.
But is there a way to select a separate model within a mesh of many models?
Does that makes sense? I've been trying to figure that out.
Say I wanted to select this girl's shoes but I didn't want to select part of her shinguards also.
bleak tree
In Edit mode, where I unwrap.
Since all my meshes are going to be joined, I still want a way to select just parts of that mesh.
quaint jasper
oh yeah you press L with your cursor on one of the vertices
bleak tree
Hmm. Nothing. Must be because I'm using 2.8, and I have it set to industry controls.
quaint jasper
make sure your cursor is on the mesh part itself
bleak tree
Interesting. If I select a vertex, and hold down the up arrow, I eventually select an entire chunk.
quaint jasper
ctrl + also
bleak tree
If I want certain parts to have a polished shine to them, will they have to be in their own material?
quaint jasper
yep
bleak tree
Right, so I will eventually have to separate certain meshes then.
mild nimbus
I mean shine can be done via UVs
but thats static light
many ways for specular xD
or proper term gloss for PBR standard
. 3.
or roughness lol
quaint jasper
with substance you'll be able to apply metalic/roughness on any part of the texture
mild nimbus
^
quaint jasper
You can easily get a student license/trial on their website
mild nimbus
You got student ID?