#3d-modeling
1 messages · Page 77 of 1
 latent charm
32k is recommended, 70k and above will blast you directly into the very poor rank.
 gaunt abyss
Gotcha, I usually just either use the standard shader anyway with 4k and sometimes 2k textures for for smaller details, with about 3 materials on the avatar.
Thanks for the info!
 sturdy kite
everything under 70k is still green, if you go above it becomes poor
I think before that it was 10k reccomended and 20 max or something. I think they had 2 steps as well in the old limit
 ashen stag
Well before it was "upload or can't" now you can always upload and it'll just effect your performance rank
sturdy kite
yep but most of the time 70k is well enough. Adding the poly count of objects that are disabled makes it a little worse but its still fine for the most part
 nimble lichen
so this is my hunter from MHW:I is it possible to make her an avatar and how do i start it?
sturdy kite
Youll have to find a way to get the model out of the game into VRC but we are not allowed to talk about how to rip games here
nimble lichen
ah ok thnx
 dull canyon
would you guys say the Substance Painter Launch Pad course from CG Boost would be worth 70$?
 tepid wagon
I watched the intro to this course and it seems very similar to SP course released in 2018. Not that many things changed so I think it is not worth $70

Project files available on Substance Academy: https://tutorials.allegorithmic.com/courses/a97b433a5997fd800b5ed300d783cc41/youtube-IGGQl9kVB1M
dull canyon
mkay
so if I have a tail with a dynamic bone component at the root so the whole tail moves, how can I make it so I can touch and move my own tail? don't I just need to add a collider to the wrists or one of the fingers and add these colliders in the dynamic bones component?
 spiral sigil
you add a dynamic bone collider to your wrists
adjust the size
and in the dynbone script on the tail root, you can set to colliders to interact with it
dull canyon
okay, that's what I did. wasn't there some way you can test if it works in unity?
dull canyon
https://i.imgur.com/8rm7aDf.png that's not doing anything
 spiral sigil
is the dyn bone script on the root tail activated
dull canyon
oh wait, I need to increase the radius of the dynamic bones
spiral sigil
yeah
radius
with that tail you can use the radius distrib to make it only around the tail
dull canyon
uhh
I see what you mean but not how to do it
this is my first time messing around with DB
spiral sigil
quick example would be this
each sphere is just one bone that's affected by the script
dull canyon
yea
spiral sigil
i choose a base number for the radius
which in this example is 0.25 and then adjusted the curve until it more or less fit what i needed
dull canyon
ah so you're trying to make it so the spheres only cover the tail
spiral sigil
weird curve since the tail is gradually getting bigger in the middle and then thinning out again
exactly
spiral sigil
also be careful with colliders
they can really easily become unoptimized
cuz they basically multiply how many dyn bones you have
dull canyon
okay, I mostly just wanted to try it out to understand how it works and how it could be used
spiral sigil
feel free to ask if you have any more questions
dull canyon
thanks

 potent pond
love it
dull canyon
@spiral sigil out of curiosity, how did you model the "fur" on your tail there?, could you maybe show the wireframe for it?
spiral sigil
i didn't make the tail
i took it from another mmd model
look like this on the side
from above
@dull canyon
dull canyon
thanks
 woven trail
i have this model that is in a pose
how do i make that specific pose a mesh
instead of the model
and only the mesh
@ me if u can help
 silent junco
What version @woven trail
God I hate that people don’t say what version they are using
 small valve
@woven trail in blender, set pose to rest pose (you can do this with CAT's)
then delete the armature
silent junco
I would recommend you don’t delete armature cause if you regret it then poor you
woven trail
2.8
woven trail
so what do i do
 quaint jasper
Select your mesh in edit mode and do shade smooth
silent junco
Select mesh, right click, smooth shading is the faster way
woven trail
well it didnt work
i need the mesh itself to be the pose
so i can have the pose on a particle
quaint jasper
aren't you just supposed to apply the armature modifier when posed ?
quaint jasper
Just did it and it works
silent junco
Do that I guess then
woven trail
ok can u put in simple terms
silent junco
Ruuuubick to the rescue
woven trail
how do that
quaint jasper
in blender
quaint jasper
in object mode
woven trail
i did not
woven trail
whats the the icon
silent junco
On my phone so I can’t really help that effectively
quaint jasper
it's a wrench
woven trail
so this is after i hit the set pose as rest pose
silent junco
No
quaint jasper
no that's irrelevant
pose the model how you want, go to object mode and apply the modifier, that's all
silent junco
What I said was accidental misinformation and should not be taken as fact
woven trail
spiral sigil
too late, my PC broke :(
woven trail
well i dont think i see this modifier tab
silent junco
Go to object mode
quaint jasper
you need to click on the mesh
silent junco
That too
spiral sigil
wait for it to be down again in 1 min
woven trail
ok time to repeat on the head
dull canyon
so when I'm modeling something with a tail, should the tail be as straight as possible or should it have the shape it'd have in a neutral state?
 hallow bough
I'd assume a neutral state. The shape you want it to be in.
dull canyon
hmm, makes sense I guess
 mild nimbus
@dull canyon depends but I do mine in straight line
For easy rigging weight painting
hallow bough
How do you not make it look akward and stiff though. Gravity?
hallow bough
Makes sense!
dull canyon
but how? ._. I just tried it and couldn't figure out the right settings for DB. are you using colliders?
spiral sigil
not at all
just specific setting that i took some times to get
and i played a lot with the curves too
dull canyon
could you show me those settings?
spiral sigil
sure, gimme a sec to open my project
dull canyon
thanks ❤️
spiral sigil
This should work (in theory), it's a prefab with the dyn bone script, the distrib curves should be there
dull canyon
hm when I copy the values the tail doesn't move at all
spiral sigil
don't forget to set the root
dull canyon
oh
derp
yeah
just noticed
oooooh
thanks a bunch!
need to study this to understand how it actually works
so what does stiffness actually do?
like, I know what stiffness means, but what does it do here?
spiral sigil
in my case or in general ?
dull canyon
in general
ashen stag
Prevents a bone from rotating too far from it's parent iirc
dull canyon
so it limits how much the rotation can deviate from its parent?
ashen stag
Yeah in a sense
spiral sigil
stiffness limits the maximum movement range of the dyn bones
ashen stag
Like a chain rope has very low stiffness but a dry noodle has high stiffness (before it breaks)
dull canyon
ok, so higher value means higher stiffness means less range of movement?
spiral sigil
yes
in my case
the stiffness is super high in the beginning
because the base of my tail had a tendency to collapse on itself and clip through the body
dull canyon
yeah I tried to do that too but couldn't get it to work properly
spiral sigil
so the first 2-3 bones are super stiff so they don't bend as much
ashen stag
It's needed since elasticity is so low
dull canyon
so how do the curves work? are they a multiplier for the value you set?
ashen stag
Remember curves are really important, Svels stuff would be garbage without the curves
spiral sigil
yeah without the curves the tail just fly all over the place
dull canyon
yeah
so for instance if I set the value to 0.5, and the curve for instance at some point has a value of 0.5, will the value for the bone that falls onto that point of the curve be 0.25 then?
ashen stag
Yes
dull canyon
aight, makes sense
so next question, what exactly does elasticity do? again I understand the word, but not exactly how it impacts the bones here
ashen stag
Elasticity is the bones desire to return to its original position
ashen stag
Low elasticity makes the bone move back slowly after being disturbed
Elasticity is always low, above .2 or .3 and the bones just won't move as it's overpowering
ashen stag
Dampening reduces bounciness, low dampening results in a pendulum effect when motion stops
dull canyon
so high dampening = less bouncing?
ashen stag
Yes
dull canyon
okay
spiral sigil
a friend psoted this a long time ago, he just shared again
Damping: increasing this creates more air resistance. This means less jiggle. Start with a value of 0.5.
Elasticity: increasing this will make the bone return to its original position more quickly and with more force. For long flowy hair, decreasing this will help. Start at 0.1.
Stiffness: increasing this will decrease the maximum movement range of the bone(s), making them able to move less far. Start with a value of 0.1. Do not put this too high as it will cause jittering and flickering.
Inert: increasing this will decrease the amount the bones move in general. Lower values will make the bones "lighter" and easier to move. Start with 0.9.
dull canyon
now for the last thing that made no sense to me cause I couldn't see the effects at all, what do gravity and force do?
thanks, I'll note this right down in my TIL document 😄
spiral sigil
gravity will push the bone in the chosen axis
same for force
gravity is less bullshit tho
also if you use a root bone
dull canyon
I never see force do anything with my tail
spiral sigil
you need to use the stiffness curve to make the first and second bone very very stiff
dull canyon
okay
spiral sigil
force rerquire a huge number
ashen stag
Force and gravity do the same thing slightly differently. Both drag the bones in a direction. Gravity only kicks in if the bones are far enough away from their start point
spiral sigil
gravity a small one
spiral sigil
more info from Rokk :
You can find the right stiffness curve really easily
Just set a Y force of like -2
That will stretch the fuck out of the bones
Set the stiffness to 1 and adjust the curve until everything except the first row is pulled down
Which means starting stiffness at 1 and dropping off after a certain point
You can do it in play mode to see it in realtime
Then copy the component, exit play mode, paste values
Set Y force back to normal
I'll probably do it again cuz I just said some random curves and when it was good enough I called it a day
dull canyon
hah
but it looks pretty good
it's a bit too bouncy for my taste but better than anything I was able to do yesterday and today
spiral sigil
it's bouncy cuz it curls up in-game when i run around
also i have a simple left and right movement set on the tail
but with those settings it just looks like the tail is moving randomly
spiral sigil
enjoy
dull canyon
I will create all the jiggles
spiral sigil
the good stuff to do is add jiggles to butt and thighs
dull canyon
that's the plan :3
ashen stag
Not ok :(
spiral sigil
👁️
ashen stag
I used to use dynamic bones for a lot of stuff but now I only really use it for hair, skirts, and earrings
dull canyon
yeah I'll probably try to hold back on the jiggles too since I want a well performing avatar
but I might just make two versions, one which is below the 32 limit and one with all the dynamic bones
spiral sigil
lot of people are doing that
use the less optimized with friends and private instances
and use the more optimized in public
dull canyon
yep
ashen stag
That's usually the best way to do it. Keep in mind the performance limit system has graceful degredation so if dynamic bones are the only reason you're below the limit it'll only disable those instead of your whole avatar
dull canyon
okay
spiral sigil
it only disable the dyn bone if the person activated the limiter
ashen stag
That's what I'm saying sorry
dull canyon
you mean when using colliders?
spiral sigil
some people just don't care and put like 30 colliders to try and prevent clipping
ashen stag
Yeah it's multiplicative
spiral sigil
and they get 3k dyn bone collision checks
dull canyon
oof
spiral sigil
so you can set the limiter to just remove the colliders
dull canyon
yeah I heard they can get real bad real quick
spiral sigil
dyn bone will still work but no more 3k collision checks
ashen stag
You should really only have colliders in your hands (1 per). Colliders to prevent clipping should be a last resort
spiral sigil
i have 3
1 in each hand to touch my ears
and the tail of my fox
- one in the head to prevent the fox tail from clipping in my head
ashen stag
I'd use em more but dynamic bones don't play well with Final IK so it's quite limiting.
ashen stag
Final IK still works but since NetIK you need to use rigid bodies or a VRC IK Follower to grab vrchat ik bone positions
Problem with dynamic bones is that a bone with dynamic bones has its transforms locked
So you can't have a dynamic bone chain on a Final IK effected bone
ashen stag
Of course yeah
spiral sigil
but I can't make a bone follow the rotation of another bone ?
like if i have a puppet, could i make his head follow the same rotation as the main avatar ?
or is that broken now ?
ashen stag
Yeah you can do that with Limb IK I tested it yesterday
ashen stag
To do it you would need a VRC IK Follower for your head and have that as a target of a limb ik where the third bone in the chain is the puppets head
Set position weight to 0, first 2 bones of limb ik need to exist but are not used
spiral sigil
yeah I know all the setup
didn't know about the vrc ik follower tho
I didn't need to use that before
ashen stag
Main problem atm is that the vrc ik follower is kinda bad so it jitters and has a low update rate but is still generally than the baggage of the physics system
spiral sigil
more extra steps for no reason yay
oh it jitters now ?
oof
main reason I used Limb IK instead of fixed joint is to remove that stupid jitter
ashen stag
What I tested were duplicate arms which worked fine but tilted when I turned my head
Like I said I still think it's better as no physics system but still annoying
spiral sigil
true
ashen stag
Also it's more optimized as doing the arms with the physics system took 0.2ms to run where the limb ik ran at 0.06ms. small change but something
spiral sigil
better than nothing at this point
ashen stag
Im hoping it gets fixed at some point but I doubt they will mention anything besides "IK improvements"
spiral sigil
I lost hope for them to fix anything when they break it tbh
been playing for 3 years and it's just disappointments
ashen stag
That's avatar creation for you :)
mild nimbus
Dont go to people who frankenstein
go to people who actually know how to make it REEE
spiral sigil
hey don't attack me
ashen stag
Just because someone kitbashes doesn't mean they don't know more about other things related to avatar creation
dull canyon
I assume the root bones also count towards the 32 DB limit right?
ashen stag
Yes, a root bone helps but still counts for the limit
dull canyon
okay
I assume it's correct that if I select a root bone in weight paint mode everything is purple?
ashen stag
Purple means no influence (or more specifically no vertex group for that bone)
dull canyon
okay
spiral sigil
I am using blender 2.81, and I am having troubles getting my textures exported with my OBJ/FBXs.
Any help?
dull canyon
I'm not expert but I think you have to copy the image files manually or something
at least that's how I had to do it with my first model
 median pike
@spiral sigil i am not sure how to bake textures in to the fbx but I know that the "better fbx import/export" has that feature on by default so you might want to look in to that
spiral sigil
okay I will look into it. Thank you
mild nimbus
@spiral sigil hooking up texture maps in the shader editor
Image Texture and Principle BSDF node to material output node
Hook up all the image textures into each respective materials
Then export fbx
It will export with the appropriate assigned materials
Texture maps are not apart of a material untill you apply it to the material
spiral sigil
Okay thank you
mild nimbus
Yup yup
 visual vigil

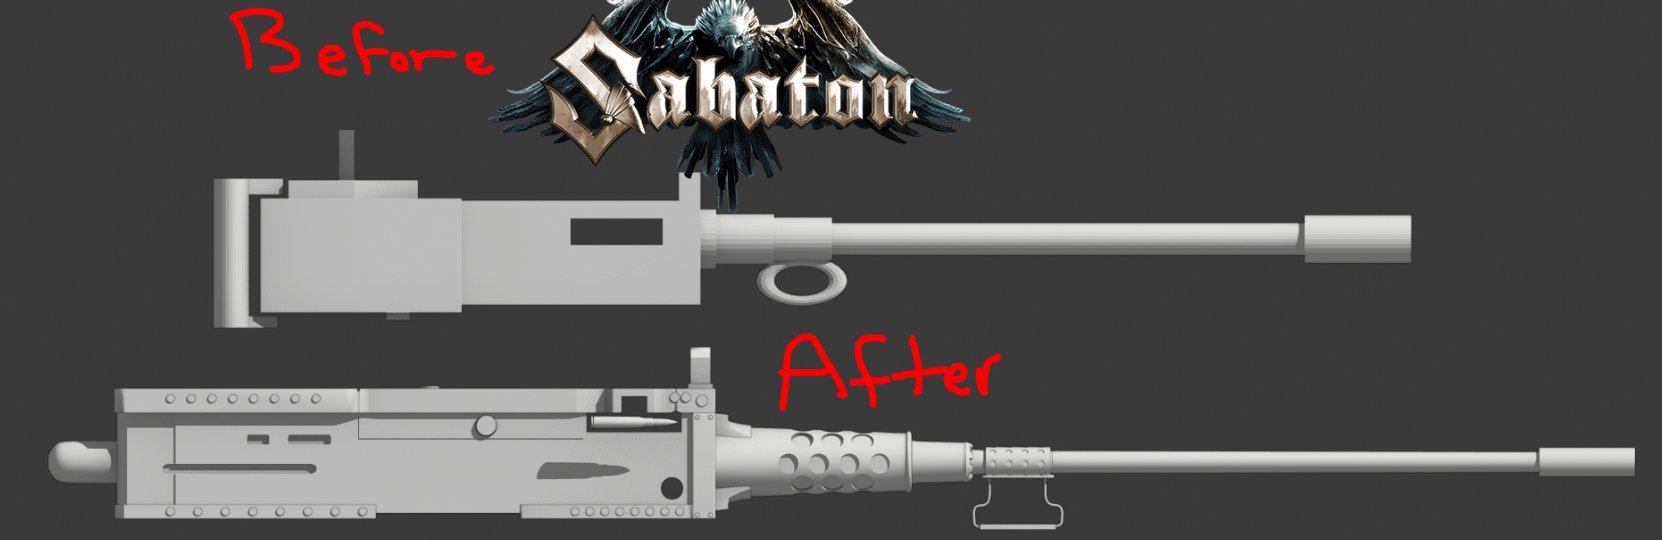
Sabaton is truely a motivating force to listen to. Nothing goes better with Metal, than a big fucking machine gun.
Pictured top: Placeholder M2
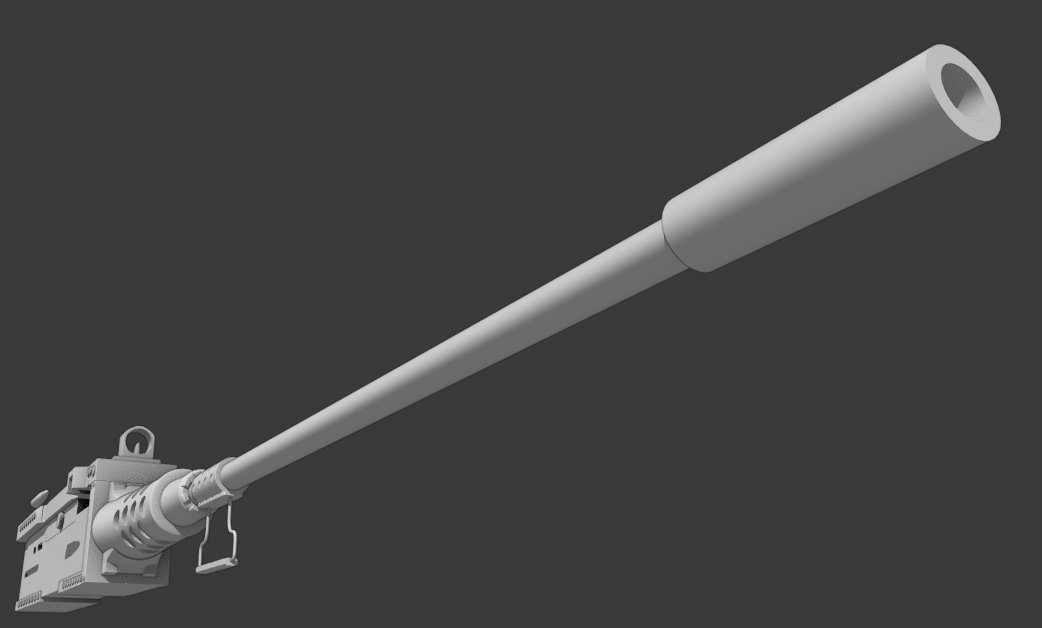
Pictured rest: WIP High poly M2
 Twitter

 dull canyon
https://i.imgur.com/z5B8W3g.png help ._.
 spiral sigil
check bone rolls in blender
dull canyon
I reset them
spiral sigil
set to 0?
spiral sigil
what happen if you reset the pose in unity ?
spiral sigil
🥳
dull canyon
https://i.imgur.com/kIUYwOD.png does this look right?
 spiral sigil
are they slightly tilted "up" ?
dull canyon
 dull canyon
I'm not sure, I was concerned because of how much they spread apart
spiral sigil
that's kinda find tbh
since you can make your own hand gesture
which is what i do all the time cuz i prefer to have more control about all the bends and spreads
spiral sigil
you can choose specifically how each finger bends with animation overrides
I don't know how the Index work so can't help on that part
dull canyon
okay, well with the index you can obviously move each finger individually
you don't need gestures to move the fingers
spiral sigil
the fingers should bend "straight"
they basically should follow that bone line straight down
and not have the bone in the middle being off-center for example
or you'll have some weird bends and spread
dull canyon
okay
dull canyon
do you mean in unity or blender
spiral sigil
fingers should properly face downward
it's easier in blender but you can adjust it unity without issues
dull canyon
ok well it looks like when I enforce the t pose the fingers slant slightly upwards towards the pinky
which I can also see in blender
spiral sigil
😔
dull canyon
I guess the finger bones should each be a straight line right?
spiral sigil
it's preferable
slightly bends toward the direction they should go tho
like every bone btw
latent charm
Not so much the finger bones but the finger mesh itself is what should align as closely as possible with the X axis.
spiral sigil
or unity won't know which way to bend
mines look like this and I didn't have to adjust anything in unity
latent charm
As I understand it unity takes whatever position the bones are in, and uses the world space Z axis to define the rotation space.
dull canyon
https://i.imgur.com/oAIi9KQ.png well this is what mine look like
 latent charm
That'll be easier since the finger mesh and bones are both aligned, so doing the T-Pose in blender is going to be easiest
dull canyon
ok so what are the requirements for eye tracking to work?
I have 2 bones, eye_l and eye_r, do they have to be named LeftEye and RightEye or soemthing stupid like that?
why is there apparently literally no information about how to set eye tracking up without CATS
reee
small valve
LeftEye and RightEye
uhh
the bones of course need to be straight up
position them in a way that your pupils comfortably rotate and shift within their sockets
dull canyon
that's not what I mean
I mean how do I set it up so unity uses those bones for eye tracking
small valve
oh, i think vrc does jt automatixally
dull canyon
well it doesn't for me
small valve
just make sure theyre assigned in the humanoid rig
dull canyon
yeah they are
small valve
and that should be it asusming the rest of the rig is set up properly...
thats weird
dull canyon
 spiral sigil

Google Docs
Name the armature “Armature”. Name the mesh containing both eyeballs “Body”. If possible, make the whole head or avatar a single mesh. Name the bone hierarchy like this. Bones not mentioned can be named whatever. IMPORTANT: You cannot have any bones interrupting the h...
small valve
I believe they fdo need to be named properly
dull canyon
that would be so dumb if it's really that
dull canyon
is it case sensitive?
small valve
Yes
dull canyon
WHYYYY
spiral sigil
why make something simple when you can make it difficult ?
spiral sigil
also you need bone to be hips > spine > chest > neck > head > eye bones
if any bone is missing or there is a bone in-between then eye tracking wont work
dull canyon
so the dynamic bones roots need to be lowest in each hierarchy?
spiral sigil
the root is the parent bone of all the bones that should be affected by the script
dull canyon
yeah, but when I export the fbx it's usually something like
hips
-db root
-leg_l
--knee_l
dull canyon
spine
spiral sigil
and spine to hips
dull canyon
yes
spiral sigil
all good then
dull canyon
well
the builder likes to complain when the db root is above the leg bone
in the list
spiral sigil
yes because unity is actually looking at the order in the hierarchy
so place all the bones used in the avatar rig above other bones
dull canyon
I'm getting a headache
like, I'm a bad programmer, but not even I could think of something this dumb
spiral sigil
I stopped trying to find a logic to that
dull canyon
yeah probably for the best...
 wooden canopy
hey help me please, when i save as on Blender my avatar
then Export it to FBX
get high size 45mb???
dull canyon
does the whole hierarchy of bones have to be named after their naming scheme? is Hips > Spine > Chest > Neck > Head > LeftEye/RightEye not enough?
wooden canopy
my avatar original is 4mb fbx
spiral sigil
the system is looking for all those bones basically
wooden canopy
help :s
dull canyon
sighs
spiral sigil
so if they have the proper name and are properly parented to each other then it will work
if for example
you get chest > upper chest > neck > head > eye bones
dull canyon
 spiral sigil
then the eye tracking wont work
that's good
also btw
actually nvm
you don't use cats to make your models
dull canyon
I want to avoid using it
I want to understand the whole process
and not let some tool do everything for me
ok so just naming and ordering everything up to the eyes doesn't work either, guess it really needs the whole fucking structure to be in the right naming scheme
which is so dumb
it shouldn't need any shape keys right?
for just the eye movement
spiral sigil
the doc doesnt mention anything about it so i guess not
dull canyon
sigh
dull canyon
well I already quit VR
gonna go for a walk now
there's only so much incompetence I can handle at once
spiral sigil
enjoy
dull canyon
okay, lets try this again
dull canyon
so this is funny. if I let CATS name my armature and go into the rigging mapping it won't detect any bones apart from hips to head
spiral sigil
learning to rig isn't worth it when its much easier and less of a headache to have it generated on a pinch.
dull canyon
nope, even with teh whole hierarchy named after what I last heard is the right naming scheme eye tracking still isn't working
spiral sigil
you have the shapekeys ?
dull canyon
no, haven't tried that yet
dull canyon
okay I did a few things and it's working now. now to backtrack what change it was that made it work...
 novel coyote
hey wanted to ask how i mirror the hair on to the other side
spiral sigil
mirror modifier
novel coyote
thx
small valve
learning to rig > auto rigging
every mesh has an ideal or proper way to deform defined by its edge loops, and some are bound by accuracy factors like anatomy
you cant get that same level of realism without knowing how to rig and do proper retopology. they go hand in hand !
dull canyon
okay so what I learned just now is:
bones need to be named exactly Hips > Spine > Chest > Neck > Head > LeftEye/RightEye
eye bones should be straight up and down, as should the head bone be
you need the Base + 4 more shape keys
the mesh needs to be called exactly Body
how the rest of the armature is named apparently doesn't matter, if you name and parent it properly it apparently will get automatically detected just fine for the most parts
silent junco
thats honestly stupid how much has to go into eye tracking
small valve
vrc is full of mysterious wonders locked behind security and old student projects
dull canyon
svel, I did, and I did everything as it was in the doc but for some reason it never worked
maybe I had to completely delete and reimport the model at some point
spiral sigil
mayhaps
dull canyon
https://gfycat.com/UnfortunateSoreBedlingtonterrier okay now what did I do wrong this time...
 quaint jasper
check a vertex and you'll know
dull canyon
what do you mean
quaint jasper
in edit mode, select a vertex and you'll see which vertex groups are affecting it
dull canyon
yeah, it's only LeftEye and RightEye respectively
quaint jasper
are your bone connected ?
dull canyon
to the head bone
quaint jasper
parented or connected
dull canyon
parented
quaint jasper

dull canyon
 spiral sigil
can you show the bone hierarchy ?
dull canyon

it worked before, then I tried to reduce the influence the eye bones have by selecting the head bone, setting the brush to 0.5 and auto normalize and painted over the eyes
spiral sigil
i don't know
I can only think about one more thing
in the "n" panel
you can check the weight of the vertex
 spiral sigil
yes
dull canyon
sheesh
but why would that not show up during weight painting or when I select the vertices in a vertex group?
and why does nothing change when I hit the x
or rather, why can't I remove the weight for all selected vertices at once...
spiral sigil
I don't know, this is unknown territory to me https://docs.blender.org/manual/en/latest/modeling/meshes/properties/vertex_groups/vertex_weights.html
dull canyon
I'm very close to losing my mind right now
okay, so
even though when I selected the vertex group and hit "select" the vertices of the other eye would never get selected
but if I select the vertex group, manually select the other eye I want to remove, and hit "remove" it removed it...
blender pls
spiral sigil
who knows honestly
dull canyon
they need like a Pablo but for rigging
 fallen snow
hmm - in blender 2.81, what would cause the view layer mode outliner to show an object at both the top level and in a scene collection? Notably, disabling (or changing visibility of) the scene collection does not appear to affect the object in question, even though it appears under the scene collection (+ elsewhere)
my outliner looks like this - the problem objects are highlighted
hmm, deleting the collection and relinking everything fixed it. weird...
 mint furnace
Im creating this avatar and Im finalizing Retopo but I've been thinking for a while now is there a significant reason why alot of avatars have eye planes rather than spheres in their head that track ? It's mostly anime avatars I see that do this where theres a concave socket and a flat shape for the iris that gets rigged to track as eyes. Idunno Im just thinking about how I wanna handle eyes in the finished character
quaint jasper
I think it's mostly art reasons
it also gives more control to 2D artists in terms of UVs
but if you have eyeballs, might as well keep them and use Vilar's eye tracking shader for the best result
mint furnace
shaders are used for eye tracking in VRChat? Im not sure exactly how it works just yet, for some clarity I'm basically going through the steps of creation as I go, Character Sculpt, Retopo, Paint, Rig, then probably Visemes (not sure how I want to handle that for VR yet) but all of that so far has been in Blender/ SubPainter for painting I need to start soaking up info towards the Unity side of things though
@quaint jasper
quaint jasper
You can find his GitHub page with all the explanation in it
mint furnace
Im on it now thanks lots I may take this route I was considering changing the eyes and just making something like alot of the anime avatars have with the concave socket and Iris but that may take longer for me to get a variant I like for this particular character
 idle niche
I use full eyeballs and bones for some my avatars I made and they turned out well
So maybe try both
That's what I have and it works good
But Ruuubick probably knows better than I
quaint jasper
I've only done it once on my crocodile model in 2018, and back then it worked great
mint furnace
Ok sounds good did you also use shaders @idle niche or just mapped the eye bones in unity and they just then start doing what theyre supposed to
 dawn jay
Hey i Came from the VRChat avatar, and I was wonder if any one can help me to create an avatar off of one of my sketches
 bold zephyr
anyone here knows how to do the thing where you have this circle that gets on the mesh and placing that circle will create vertexes , I did it before but forgot
quaint jasper
Ctrl + r @bold zephyr
bold zephyr
on edit mode or @quaint jasper
spiral sigil
hey guys I'm having an issue when editing a pre-existing FBX file using blender, it's 7.6MB, I import it, modify it like removing some vertices, and then try to export it with CATS and the resulting file is around 200-300MB in size
Not to mention that it looks very small in the unity asset window
un-edited pre-existing FBX inside the asset view in unity
after blender edit fbx file
quaint jasper
@bold zephyr Yep of course, can't edit in object mode
quaint jasper
@spiral sigil What is in the hierarchy in blender ?
spiral sigil
umm sec
quaint jasper
You have export settings too, you can try only exporting the mesh first to see if that changes the size
spiral sigil
here it is
as a side-note, when I do get the avatar in-game it distorts like crazy when moving
quaint jasper
Oh
spiral sigil
this is with me barely moving my mouse
spiral sigil
so basically, the FBX that I'm trying to edit is broken I guess
quaint jasper
Looks like it, you can remove all shapekeys except Basis
But your mouth won't move, and you won't blink
You can create your own again after that
spiral sigil
ok then, much appreciated! I'm pretty new with everything and I didn't know what exactly the problem was and was unable to search it accordingly
quaint jasper
Look into weight painting first though, could also be that
Difficult to tell just from one screenshot
spiral sigil
yea, regarding the export, only mesh it's 3MB, if I also add in the armature, it raises again, so I guess it has something to do with that and the shapekeys you mentioned
quaint jasper
Wait, is the file that much in unity or outside unity too ?
spiral sigil
it's in unity as well but I think I identified the reason
inside the TDA MATURE BASE there was a Keys item in the hierarchy in blender
I deleted that
and everything is normal now, filesize is as expected, it views normally in unity as well and so far, works great in-game as well
quaint jasper
Congrats !
spiral sigil
was just about to test FBT to see if that works as well
thank you! your assistance is very much appreciated!
mint furnace
Everytime I import the FBX for this character Im working on to Unity for some reason this specific patch of the shoes on both feet become torn up and holes on both idk why it looks fine in Blender but not in Unity
Looks fine in blender not sure what the cause is, also dont mind the color change it's the same model port though -Edit: It was a Flipped Normals issue-
mild nimbus
Idk how models like Halo get to this point

Your best bet is to re create the shape keys if that's the problem
dull canyon
so if I paint my textures in substance and I have made a few materials so I can easily separate the areas I'm working on, is there an easy way to combine these textures back together (ie atlassing) apart from using CATS?
or do I have to go into some drawing program and lay them on top of each other
mild nimbus
The only way is using UDIMS
To seperate texture maps
And material ID maps
@dull canyon another way is utilizing the RGB channels using the TGA format
And seperating the channels
Each channel has a texture map
Under 1 map
dull canyon
but does that work for unity
alos, I'm talking about overlaying the textures for the different parts of the mesh so I only have one albedo, one roughness, etc
mild nimbus
@dull canyon use TGA format then. You can do that stuff in Photoshop
Allows you seperate red channel green and blue channel as seperate maps
Under 1 map
dull canyon
we're talking about different things but I found the solution and it looks like it's ID maps
mild nimbus
ID maps is putting different materials on the same map
Thought you wanted to compress your texture map
XD
Your texture maps into 1 map
But glad u found the solution
dull canyon
yeah no, that's not what I wanted, guess I worded it wrong
though now I'm coming across the next issue
if I want my mesh to use more than one shader, for instance one for the body and a separate one for the eyes I assume I have to create 2 materials in blender and assign the eye parts of the mesh to one material, and the rest to the other material, right?
spiral sigil
yes
dull canyon
so that would mean I have again 2 texture sets in substance
so I'm back to the problem of how I would properly combine the eye and main textures together once I'm done
spiral sigil
atlasing
mild nimbus
To my knowledge you can't combined 2 different UV maps
Unless you use UDIMS
Soo
But you can def use material ID maps on UV 1001 and 1002 and so on
Your best bet is to just compress the entire model into 1 uv
And use a material ID map for it
Which means to re uv unwrap
dull canyon
I'm not talking differnet UV maps
where did that come from
and yes svel, that's what I'm trying to figure out how to best do in substance
apparently it's not that easy to export textures with a transparent background
spiral sigil
I don't know Substance at all but it's quite easy to do it blender
dull canyon
yeah I know it is in blender
spiral sigil
just a bit tedious if you are not used to the process
dull canyon
yeah no I'm not
mild nimbus
It can be transparent
dull canyon
this is my first tiem doing texturing
mild nimbus
You do it upon export options
dull canyon
lemme see if I can get this right
dull canyon
I know, and I just started
mild nimbus
So you gonna have lots of fun

I'm not near my pc so I can't give you a crash course
Of substance painter
dull canyon
ok is there seriously no way in substance to set a default export directory?
mild nimbus
Yes there is lol
dull canyon
where?
mild nimbus
1 moment let me get on my pc
dull canyon
only thing you can change in the settings is the local and temp cache directory
mild nimbus
Thats becaus every project you make you need to set the directory
dull canyon
that's not what a default is >_>
mild nimbus
You cant do a default.
dull canyon
that's dumb then.
mild nimbus
You need to set it all the time.
because if you have multiple projects
u dont want it going to your last projects
doesent make sense to make a defualt
just select your directory
the gif is loading
1min
dull canyon
ok nevermind, that was my mistake
 dull canyon
I forgot I recreated the substance project and didn't export it yet
mild nimbus
lull
When you export your textures you need to select the appropriate directory
where you want it
dull canyon
how do transparency for each texture properly
https://i.imgur.com/AcNcxnF.png like this?

 dull canyon
that alone doesn't do anything tho, I already tried that
dull canyon
the who the what now?
oh
that
uhm, I'm not sure what you mean, how should they be set
dull canyon
yeah, so only the parts that are painted/only the UV islands are not transparent for each individual texture set
so I can easily lay them on top of each other in krita or whatever
or in other words, I don't want a black background
anywhere outside the respective UV islands
hm, I guess the way I have it configured should work
mild nimbus
In Substance, go to your "Texture Set Settings" panel. Click the + to add a new "Opacity" channel. Then go into EACH texture set, create a new blank fill layer. Turn off all Material channels for that Fill Layer except the Opacity (op).
Then, in the "Export Textures" panel, make sure your Config preset contains the "A" channel for each output map. Drag the Opacity input map onto the "A" and choose "A Channel".
Then export as a PNG or PSD or something that uses transparency.
mild nimbus
ya that will suffice
dull canyon
then I can just write a quick imagemagick script to combine all textures for different texture sets together
mild nimbus
TGA does not support transparency if i recall
dull canyon
yeah I'm using only PNG
dull canyon
so someone else suggested that the best workflow for a model that should be able to use multiple shaders is to just merge down all the materials to one and assign the whole mesh to that material and doing a separate export for substance
maybe I should read into scripting in blender and see if there's an easy way to automate this
mild nimbus
Idk if these shaders can just assign to specific ID colors
soo
cause if so
that will be a huge help
dull canyon
not really, poiyomis shader allows you to use separate masks and textures for every effect
mild nimbus
guess thats the easiest way cause you have more creative leg room
dull canyon
but you like can't use the same kind of effect (like a panosphere) with different settings
dull canyon
yeah I can tell
 glad steeple
also for the record TGA supports alpha
dull canyon
at least I have a bit of an artistic background
dull canyon
yeah I couldn't remember if it was PNG and TGA or a different format
but I think there's only like those 2 formats that support alpha
that are widely used at least
dull canyon
how so?
glad steeple
lossless
mild nimbus
I forgot the company that made up the format
but it was used for something
lol
and they made it public
glad steeple
truevision
mild nimbus
ya ill just copy paste this lol
Truevision TGA, often referred to as TARGA, is a raster graphics file format created by Truevision Inc. It was the native format of TARGA and VISTA boards, which were the first graphic cards for IBM-compatible PCs to support Highcolor/truecolor display.
TGA works amazing with anime models in specific to
having 3 maps under 1 map so the game engine just needs to call 1 map with the information of 3 texture maps
thats poggy woggy
tbh
glad steeple
Use PNG purely because its got a smaller filesize, and you dont need to have a lossless texture in vrchat :-P
TGA is nice, but its overkill for alot of applications
mild nimbus
I can see that ya lol
latent charm
That's not how it works.
png or tga, either way they get converted to DXT5 when built, so you don't get lossless textures in vrchat
glad steeple
oh, so use png either way :-P
latent charm
You should be using lossless formats as your source files
glad steeple
Does DXT5 compress as well as PNG, i assume starting with an already lossy png is better in terms of file size
mild nimbus
I dont know anything about its negative trade offs
i just know its functionality
¯_(ツ)_/¯
latent charm
Most pngs are lossless compression, that also happens to be pretty poor on non-vector graphic images.
mild nimbus
Meanwhile I stepped back from PBR doing some NPR love for now https://gyazo.com/715254c83d7b706b46f7efbfd2ec1025
I find hand texturing more fun
tbh
latent charm
Main advantage to using png is it's usually a bit smaller than tga
glad steeple
a bit?
latent charm
It varies on the image.
mild nimbus
Isent being a technical artist fun?
glad steeple
fair enough, most of the time ive used either png is like half
mild nimbus

glad steeple
art is about fun and being wavy brother, no technical in my art 😎
mild nimbus
CG in general is the life
of technicality
hehexd
While we got people who draw we 3D bois over here like
confused
glad steeple
3d bois also have to 2d boi when doing textures 😔
latent charm
@glad steeple Here's two images, one a photo and one a pattern mask, as png and tga. The photo's file size is reduced significantly less than the pattern.
latent charm
https://en.wikipedia.org/wiki/Portable_Network_Graphics#Compression
fun further reading into the png format

Portable Network Graphics (PNG, officially pronounced PING, also commonly pronounced PEE-en-JEE) is a raster-graphics file-format that supports lossless data compression. PNG was developed as an improved, non-patented replacement for Graphics Interchange Format (GIF).
PNG s...
 chilly ravine
How do you move a part of the mesh with the bone at the same time
hallow bough
Weight painting it  ?
?
mild nimbus
@chilly ravine Elaborate
Go into Pose mode and translate the bone
by pressing G
Almost done with the texture work
for the hair
 azure lily
How's blender 2.8 currently? From what I remember, weight painting or uv mapping got tedious in it and possible some other issues I saw vrc modellers complain about
Don't really have problems with 2.79 so would there be any major improvements in upgrading?
median pike
if you make models from scratch than sculpting is much better in 2.8
other than that no
but if you use premade bases a lot of them are being made in 2.8 which get broken when imported in to 2.7
small valve
Weightpa8nting and UV mapping are not any more tedious in 2.8
median pike
I found weight painting pretty tedious in 2.8
small valve
the texture atlas process as a whole is more annoying since you must properly set up your material nodes per-material in order to bake
it was not different at all from 2.79 ???
median pike
especially becauseall the commonly used features are renamed or just gone so its a pain to use at first
small valve
the main draw from 2.8 is that blender is no longer stupid to control
which is why everyone is using it
including me
median pike
but once you get used to stupid controls its hard to just go back
small valve
understandable
byt its quicker and easier to learn and retain 2.8 then 2.79 in my experience, ymmv but id reccommend learning it at some point
even the added work of setting up nodds isnt that bad. I usually make an auto-atlas with Cat's and then work from there
median pike
yeah I have already switched to 2.8 but its still a pain to get used to
small valve
skipping all of the node parts
median pike
I find myself getting so frustrated that I boot up 2.7 and do it there instead
small valve
really?
go through the blender donut tut for 2.8 if you havent already, in that case
thats what i did at leaat
median pike
yeah. I just hate that they remade the UI so much that it barely has any resemblance to the old one and they renamed so many tools for no reason. Like thats just making it harder to transfer over and nothing else
like what purpose does renaming "remove doubles" to "merge/ by distance" besides making it harder for old comers to transfer and make tutorials outdated?
 vivid crater
Merge by distance makes a little more sense because that's closer to what it does tho
median pike
but the old name was fine
small valve
Blender 2.8's ui design is bigger than vrchat avatar stuff. 2.79 and previous was much more terrible in UI / UX as a whole and apparently enough to alienate it from the rest of the 3d industry
median pike
I never heard anyone complaining about it being called remove doubles"
small valve
the massive change is something that many people have been looking forward to and puts blender in a spot where it can, ykno, actually be closer to what the industry wants
believe me wheb i say that as a 3d noob who only picked it ip for vrchat, i dont regret permanently switching from 2.8 to 2.79 and there's plenty of merit in it
median pike
the only thing that I honestly like more on 2.8 is sculpting and the top tool bar being more organized. Other than that I really dislike that they went from a very text based UI to a graphic based UI
I mean I dont regret it but its still a hassle
small valve
Yeh
median pike
but Its not like I can do anything about it
if I want new features I need to use 2.8 anyways so I dont really have a choice
and eventually I will get used to it
but still I feel like it was unnecessary
 devout scroll
it's totally necessary to make blender more user friendly
if you're used to it, it doesn't matter, but for new comers blender was very intimidating because of its rough ux
it'll be better for everyone in the long run like this
silent junco
before 2.8: i wouldn't dare go into node editor
after 2.8: i use node editor very often
azure lily
The ui does look really nice, for now I'll stick to older version. It's gonna take a lot of hours across multiple projects to find where old and new things are. That'll be a job for when I have more free time, probably in summer. Now I just want to get my stuff done.
silent junco
i got used to 2.8 rather quickly
and 2.81 is pretty much the same but theres some light changes
spiral sigil
hey, i've imported an model (a choker) for my character in blender, I've positioned it, using cats and shift-drag I placed it into the armature hierarchy
however it doesn't move with the rest of the body
silent junco
give it weight
spiral sigil
I tried to weight paint it but it still doesn't budge
silent junco
welp idk
 rapid coyote
What is that
spiral sigil
my avatar in pose mode with the head rotated
mild nimbus
2.8 update is amazing
I started in 2.75
If I can learn it you can to
Just takes 2 weeks and done you are using it like normal
And blender changed for the betterment of the industry standard workflow.
That's is blenders main focus.
Always was for the past decade
Tbh old Blender looks so old compared to 2.8 visually it's insane.
Go take a seat and learn the new UI less complaining more learning.
Not even that hard lmao got hang of it in 2 days
spiral sigil
same
did the donut tutorial from blender guru just to familiar myself with the main tools
learned it way faster than blender 2.79
soooo does anyone know how to attach the mesh to the armature of the base model?
managed to do it while having the mashes separated, but once they've all joined, it resets
mild nimbus
@spiral sigil Elaborate more on that
spiral sigil
I've added a separate mesh item into my avatar blender project, moved it and positioned it perfectly but it won't move with the avatar
basically this,
mild nimbus
Vertex groups
It's not weight painted
To that bone
Find the following bone that you are using to attach your new mesh
In the vertex group
Then go into edit mode for the new mesh (make sure the model is joined together with the main model)
And press L on the new mesh object which stands for linked
And go back to vertex group with the appropriate name of the bone set the weight to 1.00 and click assign
And it should start moving with the armature
spiral sigil
alright, let me try
Yo vector, do you know any addon (free preferably) that's useful for hard surface modeling ?
spiral sigil
so the base tool should be more than enough
mild nimbus
I use Maya for my hard surface modeling TBH
Ya I can't give you a fair answer on that
spiral sigil
that's fine
mild nimbus
If anything
If you looking for a dope add-on for retopology
Look up retopo flow
It's amazing

I believe 2.79 one is free
So i go back to 2.79 for retopology lol
spiral sigil
Yeah I know about it but I don't feel I'm anywhere close to sculpt something
mild nimbus
Np xD
dull canyon
2.8 one is free too, but in very early beta
and at least for me it wasn't usable cause it was too laggy
hallow bough
I think it's about time I finally make the move to the new blender version I've been delaying for too long 😅
 sonic jetty
Dose any one do commissions on here for. Vr
 lucid basin
does anyone mind helping me out with unity
spiral sigil
vrc traders in #community-servers-old
this is more a channel for 3d modeling than unity, grub
hallow bough
I hope the texture painting in the new version of blender improved some, I'd love layers. I'll download it tonight and try to follow a basic tutorial to get the hang of things 👍
dull canyon
some of the design choices they made for the texture painting are very... questionable
I'm actually having a blast in substance since yesterday
hallow bough
Oh well I can always hop over to substance
silent junco
You can always spend 50 hours making a node network that makes layers for you
hallow bough
 Nah fam
silent junco
Yes you can
potent pond
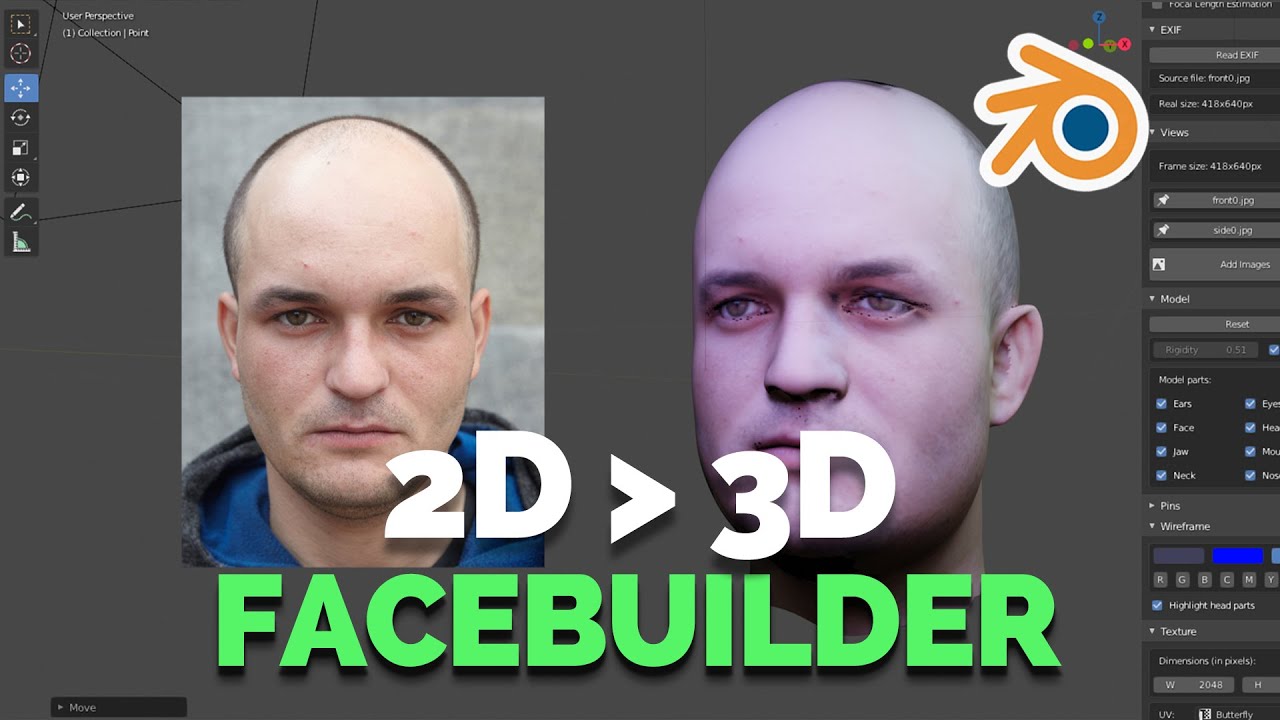
Making 3D head/faces can be quite a challenge and in today's video we would take a look at how you can work with a 2D image to create a 3D model.
Hey there.
Let me know what you think in the comment section and if you love, like or even learnt something from this video then...
oh boi
 red valve
Anyone know where I can find the 3D model for this guy from the game Accel world vs Sword art online? Like his design a lot but can’t find any 3D models on this
 mystic chasm
so in blender i have 29.5k tris, but the vrc sdk says its like over 2 bil
any idea how to fix this?
mild nimbus
Blender 2.8 is not in beta anymore
there was Blender 2.8A
then 2.8B
Then 2.8
Now 2.81
lol
mystic chasm
i still use 2.79
mild nimbus
its stable to transition to 2.8 now
but eh
¯_(ツ)_/¯
sooner or later everyone will give in
mystic chasm
naw
mild nimbus
Only thing I keep older version for is Blender Render for nice toon renders and unsupported addons that are not supported anymore
mystic chasm
i mean 2.79 works
mild nimbus
Not my point xD
mystic chasm
but i wish the sdk worked
mild nimbus
I know it works obviously
Started in 2.75
must say 2.8 is nice ngl
most of the old tools in the older versions still exsist in 2.8
only thing is addons and blender render being removed
mystic chasm
i need addons
small valve
addons?
mild nimbus
Plugins.
small valve
theyre...still there? what do you mean?
small valve
youre talking like custom scripts?
mild nimbus
ya
small valve
like cat's blender tools?
mild nimbus
But im not talking about CATS?
Im talking about other add ons that dont exsist in 2.8 yet
small valve
oh! thats what you meant
mild nimbus
yes.
small valve
i thought you were talking about plugins in general ^ ^`
small valve
sory sory
mild nimbus
is k xD
spiral sigil
@mystic chasm So if you're using the wrong version of Unity, the SDK will say you have 2.something billion tris because of an overflow error
 open palm
Unity 2017.4.28f1
mystic chasm
Don't mean to be a bother but my "head" (if you can even call it that) isn't attached properly
I'll tilt my head and it'll move with but it won't turn or anything. Kinda like it floats above
 scenic perch
how do i sculpt in the chest?
 cobalt prism
Kronk has awoken
silent junco
Oh no
dull canyon
https://gfycat.com/FarflungSeveralEider so I assume the reason why I get these blotchy strokes instead of fine lines is because the texture space for my face UV is too small?
 mild nimbus
Yes
that is correct
Need to cut the lip up more
for it to have more details
But that can easilly be done by sculpting in those details
and baking high to low
via normal map
well no technically it wont work
You need to bring the seam up to the lip
and try and hide that seam
when you texture
dull canyon
yeah that's what I figured. lesson learned for the next model
give the face it's own UV map
dull canyon
https://i.imgur.com/Pi97i7L.png wanted to save on texture space derp
dull canyon
makes sense I guess, then you'd still come out to 2k but with 4 1k textures
dull canyon
ya
mild nimbus
(╯°□°)╯︵ ┻━┻
 tender pelicanBOT
┬──┬ ノ( ゜-゜ノ) There you go
dull canyon
don't judge
mild nimbus
lmao
mild nimbus
: ^)
dull canyon
so I guess that means you also have to use 4 shaders in unity then right
mild nimbus
I dont do alot of unity work im a UE4 guy
but logcially yes
I would
if i want to add shaders
will prob be +2
so like 6 materials
mild nimbus
ya when it comes to texturing
you need to know ahead of time
before you begin your UVing
or u will come across issues


 dull canyon
guess it also comes down to expirience to know what you wanna do with shaders in unity. someone on pois discord suggested dividing the materials up into what will use cutout and transparent shader for instance
looks good
mild nimbus
Ye thats another way of doing it to
Texturing is all about turning on that big brain
so much to it
it never ends
but once u discover a technique its so satisfying
dull canyon
yeah, guess it mostly boils down to knowing what parts of the mesh should use different shaders and also what parts should have more texture detail