#3d-modeling
1 messages · Page 76 of 1
 dull canyon
 solar fossil
Ahhh my baked frames!!!
 mild nimbus
@dull canyon most of the time
u will be hiding the feet
or deleting it
when you work on a new character model.
lol
 fringe rock
dull canyon
fringe rock
dull canyon
@mild nimbus yeah, like I said, I want to make a complete base mesh that I can then modify as needed
https://i.imgur.com/kABBEul.png no idea if this looks better than before...
 dull canyon
I thought you meant the face or something ._.
 silent junco
i have a serious problem when someone says tri count of just wanting to scream not low enough
 vivid crater
now we're talkin
 hollow hemlock
xd
dull canyon
that reminds me a lot of like the old zelda games on the Wii or whatever
hollow hemlock
Cube with extrude
silent junco
I can imagine a way to get it to 8
It’s called a prism
And requires it’s not connected
mild nimbus
@dull canyon what is the tricount?
Cause people are judging off visuals instead of variables


 tepid wagon
@mild nimbus Tricount is number of triangles in a mesh
 azure rain
and every quad is made out of two triangles
mild nimbus
@tepid wagon I know what a tri and quad is I'm asking the count on his model lol?
tepid wagon
It's 1.3k tris @mild nimbus
tepid wagon
The feet are 1.3
tepid wagon
I'm sorry then, I will shut up and rethink my behaviour
 quaint jasper
Not a fan of zremesher ?
mild nimbus
Need some more poly modeling in my life
Well no because zremesher
will ruin the retopo I did
and wont deform properly
Look closely you can see the topology
quaint jasper
super high still no ?
mild nimbus
I just happend to sub divide it again lol
cause i dident like some portions
so I redid some proportions
still need to retopo it again
oof
and its easier to manipulate the models facial features when its already retopo'd
just retopo re import subdivide it a bit
refine and tweak
 median pike
how do you just do that in 30 minutes?!
thats impressive
I cant get a base done in a month
tepid wagon
https://youtu.be/wSKsmyV9ISk Like this I guess although it took the guy an hour to model head @median pike
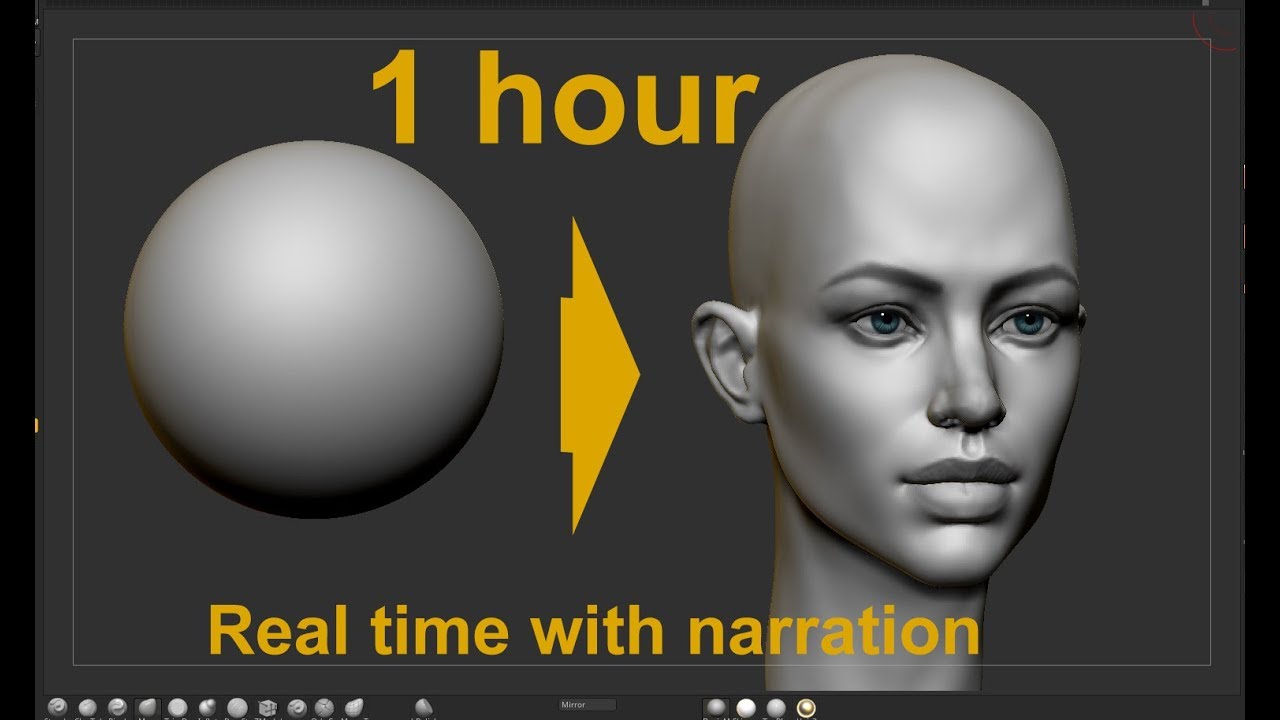
At last i found time to do this tutorial that i have spent 2 months to prepare for. Hopefully you will find it useful :).
link to my Artstation: https://www.artstation.com/nikoto
mild nimbus
Practice and doing it on the job
Repetitive
That guy did it in 1 hour while explaining
So he is prob faster then me
But it don't matter
The speed is good enougg
Enough
dull canyon
@mild nimbus the model isn't retopologized yet cause it's not finished
mild nimbus
ahh i see gotcha
vivid crater
 spiral sigil
😂😂😂😂
 wind garden
Modeling hair...
How does one make it smooth looking without making it too high poly?
quaint jasper
Smooth shade ?
wind garden
Ill try it thanks~
 cold charm
I'm havign a derp moment in blender -- i mashed the wrong button (don't know what it was) and now my selection tool is a circle instead of a crosshair. Any clue how to make it small again?
median pike
escape?
cold charm
god bless u lime
fringe rock
I still have trouble with normal. I have to train that
dull canyon
ok so since I can't get Retopoflow 3 working under Blender 2.81... what are some other tools that specialize in retopologizing and are reasonably priced?
 slow zealot
using retopoflow under an older blender version maybe (just install to a different location)

Home of the Blender project - Free and Open 3D Creation Software
dull canyon
I don't wanna have to regress tho
also makes me wonder if I'm doing something wrong with retopoflow 3... it's supposed to work with blender 2.8+
but when I try to install the addon zip from github it just doesn't do anything
is topogun still a thing?
 digital coral
@mild nimbus I've been using zbrush for a while but only recently got super into it. I love it! I've been trying to do as much of my modelling work in Zbrush as possible since it's a lot cheaper than using autodesk.
I'm still very slow and even tho I paint a lot, 3D anatomy is something else
mild nimbus
I can give it free xd
dull canyon
so take that to DMs
mild nimbus
If i find it tho
digital coral
Oof haha
dull canyon
they also have a book about facial expressions in the same fashion
might get that one
digital coral
I saw that haha
I've been getting around with like
Drawing while sculpting
It let's me plan it out better? Idk
I do concept art but I'm trying to move to 3D
Because 💰
dull canyon
I started learning 3d so I could make my own body for vrchat
digital coral
I challenged myself to make a vr chat avatar so I can get an idea for how the workflow works while still letting myself get away with stuff
dull canyon
https://i.imgur.com/53Kiy4l.jpg current WIP
dull canyon
https://i.imgur.com/ujADgZp.png so after converting a hair particle system, how do I make all those planes separate objects/meshes?
 spiral sigil
is it already converted to a mesh ?
dull canyon
I just applied the particle system modifier
https://i.imgur.com/DddvUqD.png and all the objects that got created from that are using the same mesh that I used as the particle object
 tepid wagon
Try to select everything P -> Separate by loose parts @dull canyon
dull canyon
nope, doesn't do anything
I think I need to somehow convert those instances into actual objects, but "make instances real" doesn't do anything either
tepid wagon
Isn't it already converted to mesh?
tepid wagon
Well if it can't be converted to mesh I don't think it would export to fbx
dull canyon
yeah, I know
that's why I'm trying to figure out how to make those actual individual meshes
spiral sigil
in blender 2.79 there was button on the particle modifier to convert to mesh
 spiral sigil
there was also shift + ctrl +a and choose "make duplicates real"
dull canyon

that shortcut doesn't do anything in 2.81
there is "make instances real" but that doesn't seem to do anything either
vivid crater
@mild nimbus did I hear free? 👀
 olive bone
 opaque cargo
Hello I have a question regarding weight painting, when I click on vertex in weight painting mode even with "weight" set to 0.001 it instantly jumps like the weight is 1.0, there are no inbetween values
tepid wagon
Weights are relative, if vertex is being influenced with strength of 0.001 by a bone and there are no other bones with influences then this one bone will have full control over that vertex. If another bone would also have 0.001 influence strength over that vertex then both bones have 50% influence over vertex each @opaque cargo
opaque cargo
oooooh
silent junco
maths
opaque cargo
very nice explanation thank you
spiral sigil
big brain time
cold charm
having some trouble.. added nails a model and edited a sleeve to be more fitting, along with fix a random vertex in a finger. Tried joining them, along with parenting them to the bones; but now the nails fly everywhere I move, the edited vertices also move every time I speak.. it's a little strange.
spiral sigil
if they move everytime you speak you can select all the moving parts and with the basis shapekeys select, press W > shapekey propagate
in blender 2.79
cold charm
And I parented some horns to the head bone, and now it wants to move like it's hair. Is there an easier way to add static accessories to models?
spiral sigil
you add the accessory to your model in blender
for the horns you place them around the head and then you weight paint the horns to the head bone
cold charm
Would I weight paint the nails then as well?
spiral sigil
hi, I need help
I make models but there are some things in which I need help from other people to be able to continue with my work
My models when exporting are seen with polygons
in fbx and obj
That's why I wanted to know if someone could export the models to me
and also if someone makes me animations for my models since my pc where I work the animations don't work out for me
if you want to help me please talk to me in private
Thanks a lot

 fading citrus
i need help.
I use blender.
My modeled skin is shiny.
However, if you open the data modeled by others,
The skin is not shiny.
Perhaps it's a configuration difference, but I don't know where to change.
The image is in solid mode. Both use image textures.
slow zealot
the bottom one uses the mmd shader most likely (toon) while yours is using the default standard shader.
fading citrus
Thanks for response.
Is the shader visible from the shader editor?
Both data have the same settings.
It looks like the principal shader uses the principal BSDF.
sorry,Image is in Japanese mode.
silent junco
if you want it to look cartoonish you can set it up like this
dull canyon
so I'm kinda unsure how to best proceed with my model from here. I have a sculpted body and head and box modeled hands and feet. should I join the hands and feet with the body and sculpt the details on, then retopo the whole thing and bake the normals; or should I retopo everything now, delete the sculpts and use the multires modifier to sculpt in details and bake normals from that?
does any of these methods have advantages or disadvantages over the other?
dull canyon
also I found the solution to my issue with the hair particle system yesterday. once you apply the particle system modifier you have to select the generated objects, search for "make single user" and check "object data" to make everything a separate mesh
spiral sigil
Good to know !
Also I'm not good enough to give you advice but personally I would join the hands and feet, sculpt the details and make a normal map out of it
Seems like the easiest and faster method for me
dull canyon
hmm, that was my initial thought too
but I actually feel like using the multires would actually be more performant, since it'd be a cleaner mesh than what the remesher produces
opaque cargo
Ok so I'm really confused and don't know where the problem is
this is in blender
moving the uv's doesn't do anything to these "shadows"
same area look good with "solid" shading
tepid wagon
Did you try removing doubles* and recalculating normals?
tepid wagon
Do you have autosmooth on and set to 180? Did you make sure there aren't any faces extruded from that spot inwards? @opaque cargo
opaque cargo
not sure what autosmooth is
 spiral sigil
friends, seriously, I need someone to help me please
I make 3D models, I export them in obj or in fbx and when I put it in unity it looks full of polygons
if someone can help me with that please talk to me in private, or could you help me by exporting the models to you and passing them to me, and if you can help me make animations to the models mouth
a model usually is full of polygons yes, or you wouldnt have a model at all really
I do not mean that
instead of wearing the model well like this
it looks like this
I don't talk about textures
the polygons with glitters look like a precious stone
I export them as fbx or as obj but polygons are seen as precious stones
 Then someone else comes, asks for help, and then they don't read my request and nobody helps me
please someone help me
 latent charm
@spiral sigil Set the objects to smooth shading (Tool shelf, Tools tab, Edit, Shading > Smooth)
spiral sigil
Thanks a lot!!!!
I will prove it
finally someone jsjjsjsj
where is Tool shelf?
xD
latent charm
Press the t key in the 3D view
dull canyon
select the model that has the issue, then press this https://i.imgur.com/dbZT1AJ.png

 dull canyon
yes
spiral sigil
in any tutorial I've seen they taught me this
Thank you very much, I was getting desperate
dull canyon
you're welcome 🙂
 fading pine
In blender, how would I go about inscribing an oval on a mesh and then negatively extruding?
I'm trying to make a hole in the part that's coming out on the right.
 hushed owl
select the edge of the circle and press i to inset it
then press e and extrude it inwards
silent junco
my best guess is Boolean
 small cloud
yeah, boolean modifier to do that
fading pine
the first thing worked out actually
silent junco
also a negative extrusion is called an intrusion
fading pine
I tried a boolean modifier and it just didn't work out for some reason, it was removing the entire face
silent junco
you need to change its type
theres also what you place it on
you need to place boolean on what you want a hole in
then change it to whatever it decides to be the correct one at the moment
mild nimbus
@fading pine Edit Mode > CTRL+TAB > Face Select > E to extrude > S to scale uniformly > E to extrude again > Move it on its Y axis by pressing G then Y
and push it into the mesh
ez pz
If if you want a hole
Delete the inseted face
on both side
Go to edge select ALT+RIGHT CLICK to highlight the entire edge. Select the other side to
then press space and type Bridge Edgeloops
it will bridge both ends of the edges and you will have a hole
Boolean is the incorrect way to do it since it will ruin topology flow
that modifier is really only meant for sculpting because you need to retopologize it in the end anyway
so its okay to have ruined topology
when in the sculpting phase
spiral sigil
what if i don't know how to sculpt ?
spiral sigil
that require effort
mild nimbus
But picture sculpting like virtual clay
not like drawing but
its a craft
practice makes perfect
silent junco
sculpting doesn't require a lot of effort
its not easy peasy now i can create anything i want
silent junco
but for organic things its very good
mild nimbus

When you sculpt characters needs to be anatomically correct
which in itself
is a practice
and a study
thats if its a humanoid
at least
but anatomy plays a role most of the time via animals
and humans
silent junco
when you don't give a fuck (my method) its about not giving a fuck and actually begin doing it instead of some random saying it needs to be done like this
silent junco
nah i just kinda get annoyed by those oh you look this is how you should do it
so kinda
silent junco
well yeah but when you begin while they can help
silent junco
sometimes they just give extra ammount of stress
mild nimbus
In the end its just constructive feedback
remember this an art.
and you will hear from people who do this as a job or a hobby
and they will say the same thing
in the world of art everything is feedback
and must be taken in accordingly for your own self imrpovement.
vivid crater
Yea, because there is such thing as learning bad practices and developing bad habits
spiral sigil
how do you avoid that
dull canyon
by showing things to lots of people that can give you constructive feedback
spiral sigil
😔
mild nimbus
Show it to people
Who are better then you
Don't show it people who don't know anything about the craft or the same as you
spiral sigil
what if i don't know any people that got gud
mild nimbus
Cause you just surround yourself in good and you never improve
Then stay bad idk what to tell you. I'm not gonna butter up my responses.
dull canyon
sent you 2 invites to the servers I'm on to get feedback and help
spiral sigil

mild nimbus
@spiral sigil don't get me wrong I haven't seen your work. So I don't know your skill level just saying in general.
If you find it rude use that to improve then.
There is always room for improvement
 subtle jackal
Make an account on 3D art forums and post stuff there. Find people, basically.
mild nimbus
Artstation / BlenderGuru fourms
ZBrush Discord
Substance Painter Discord
Indie game dev discords
the list goes on and on
xD
subtle jackal
Polycount
subtle jackal
There are some others I'm sure I'm forgetting too
mild nimbus
Reddit is there to
subtle jackal
BlenderArtists too
mild nimbus
yee
The actual Blender discord
also
Autodesk doesent really have a set community
but makes sense tho
its industry software lol
needa pay to get into those kinda places but
FlippedNormals is 1 of them
free
fading pine
There's a blender discord?
mild nimbus
Yes.
 still wadi
 spiral sigil
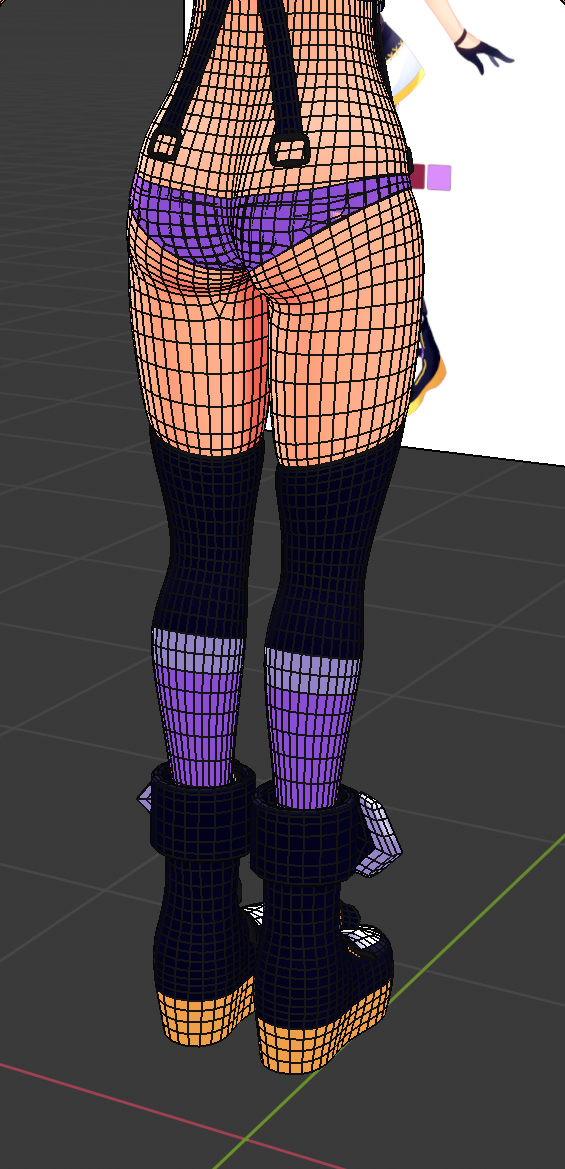
Looks good
I can't see anything particularly wrong with it
how is it from the front ?
 hollow radish
face is abit awkward
 hallow bough
Nostrils!
 shy bolt
hi
mild nimbus

Triggered
jk thats fine
lol
Havin fun with Vector Line art https://gyazo.com/c45ae5199ea04068915d7b8cce4af0e5
 hallow bough
Oh lord that looks like hell to do
mild nimbus
but the end result is a good visualized anime model
10 x faster
the ndrawing it by hand
and no resolution drop
cause its aligned to the x axis
spiral sigil
ping me when you are done, i'm really interested in the result
hallow bough
I did gradient stuff like that but never lineart. I get what you're saying though the tedious work will pay off
mild nimbus
 glad steeple
depending on the scale mipmapping might fuck up the textures
mild nimbus
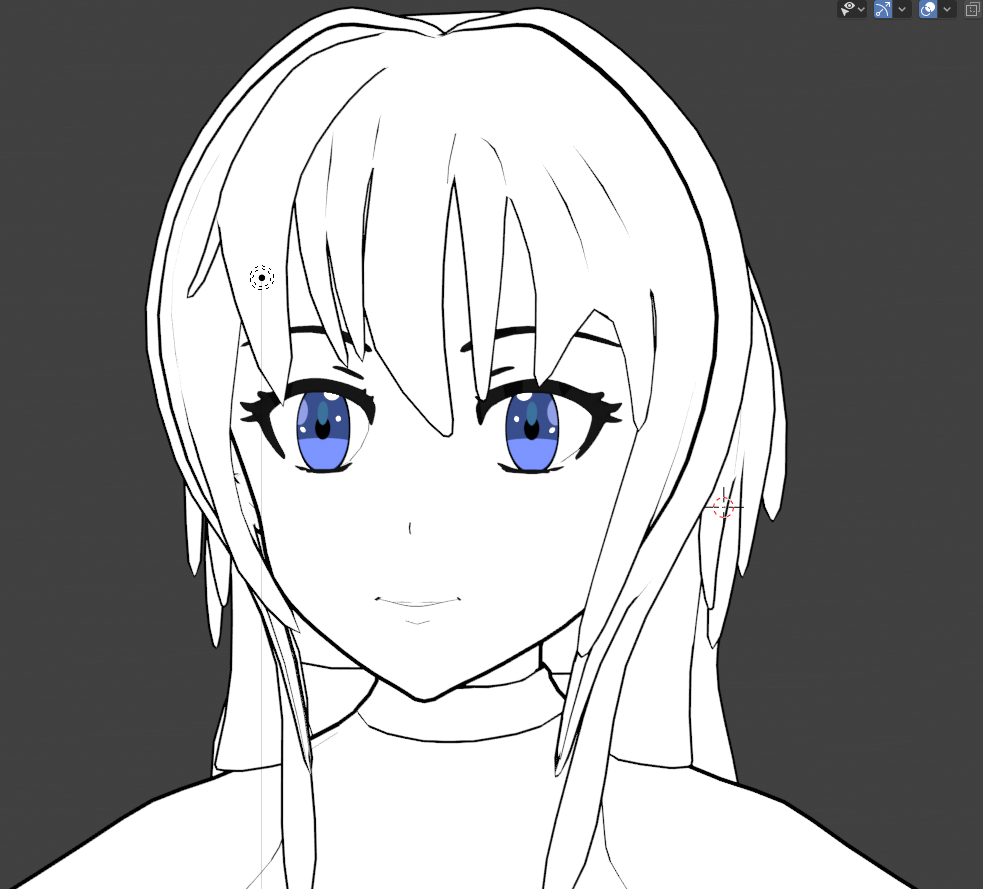

It wont mess it up
its a 8x8 texture map
and is a seperate UV map
strictly for its outline
2nd uv map will be the properly placed UV islands with its textures.
Actually you may be right I may needa test it
But this char will always be close up
 barren quiver
That looks good, but the hair is a bit smooth and goopy
 ashen stag
Slime girls
 fervent estuary
alright how do i select bones in weight paint?
ive looked through up to page 3 in google and nothing has helped
control click, shift click, restarted the project entirely
nothing
spiral sigil
Blender 2.8?
fervent estuary
yep.
tired running it in my older version but the project crashes whenever i try to
since i still have a version of 2.7 downloaded too
spiral sigil
Try this ? https://m.youtube.com/watch?v=rG82fogtuCg
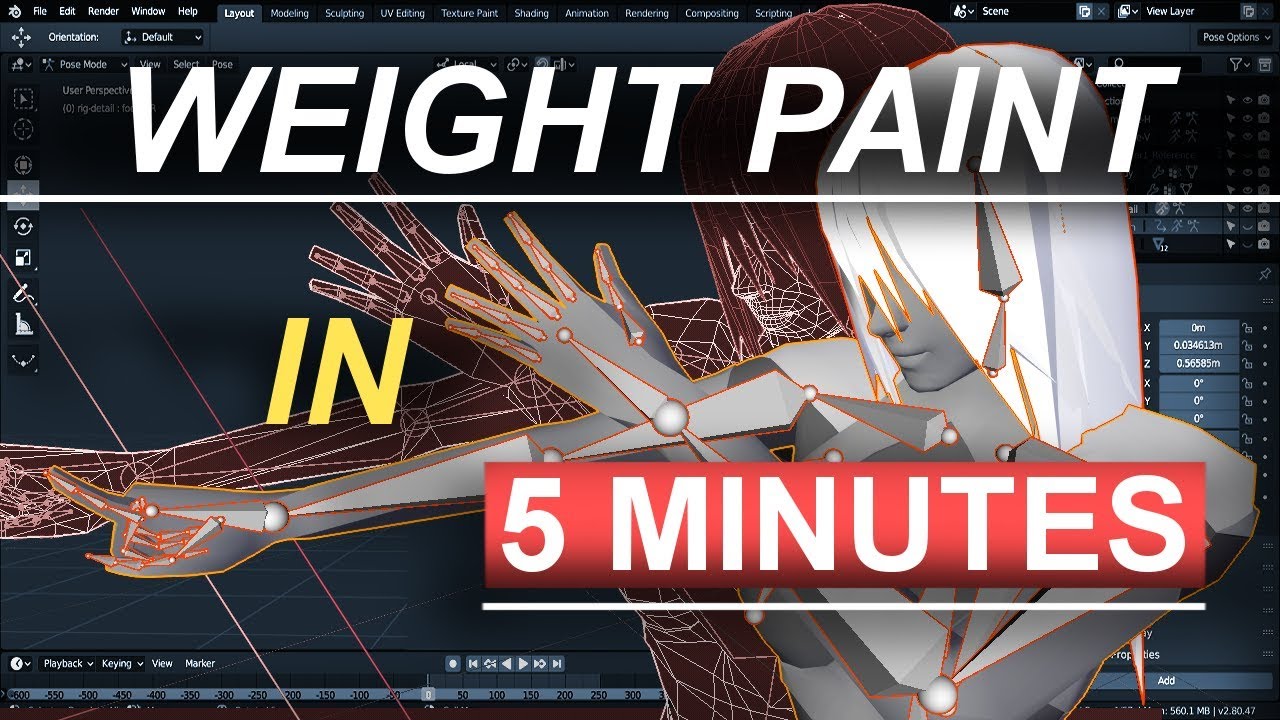
Hey everyone new Blender 2.8 tutorial! In the 5 minutes you'll never have to wonder how to weight paint ever again! Hope it helps you guys and don't be afraid to leave comments and questions below if you have them!
Song: [Chill]aKu - Love Shine
htt...
fervent estuary
i have watched this video 7 times
while i very much appreciate his enthusiasm, as it really makes me feel like I can do it, this is really starting to annoy me
cant click the tail, head, base any of it
"Pointy ass? not on my watch"
also i have no idea what people mean when they say go straight from pose mode to weight paint thats not an option
the moment i click it, it deselects the entire armature
i am dying for a solution to this
silent junco
@fervent estuary
Select rig
Then select mesh
Make sure mesh has priority
Then go to weight paint mode
silent junco
Then you shift left click to select
fervent estuary
yep
what fixed it was i ran "automatic weights" on it and it suddenly let me select the bones properly
fervent estuary
just once, not even on the whole model, on a sub-mesh
and on every tutorial i watched that was never mentioned
oh well
end result looks sick
silent junco
Neat
fervent estuary
so im satisfied, now to get it into unity. i can handle that lol
but i appreciate you trying to help
i spent literally 2 hours trying to figure it out so sorry if i seemed a little passive aggressive in my early responses
silent junco
Btw sometimes try to look through the blender manual
fervent estuary
yea, i did, but i still couldnt figure it out, i looked into bone properties mainly and tried to figure out the armature when it was an issue with vertex groups
looked in the wrong place lol
 sage ice
In blender is there like a "Colour Picker" tool like when you copy a colour to use else where but for Weight painting values %0.0-1.0
Or some way to select a vertice and see what weight value is currently on it
sage ice
ah right forgot to mention Im on 2.79b
silent junco
this is a thing i wish people would say
oh yes does it have this funktion
they don't say the version
ashen stag
@sage ice When weight painting you can hold Ctrl and left click on an area to copy its weight
sage ice
Ooh thank you o: I'll try that when I'm next on in the morning xd
fervent estuary
Just wanted to give a quick update, came out perfectly in the end. and works like a charm, thanks for the suggestions last night
 quaint fog
Can someone make a model of my cat
silent junco
what does it look like
silent junco
huh...
quaint fog
u asked what does he look like ?
silent junco
yeah ik
its just that i think i know a dude with a 3d model of the exact same cat in both color and appearance
silent junco
not on this server
quaint fog
Can i se his model
silent junco
silent junco
it is
quaint fog
my cat does not look like him tho ;c
silent junco
long hair
silent junco
i am not skilled enough and the people i know probably worn't do your cat so no i don't
sorry
quaint jasper
People can help you here, but if you need someone to do it for you then you can join the VRCTraders server in #community-servers-old to commission someone
quaint fog
idk where to look
silent junco
your best hope is commissions probably
glad steeple
you could always photoscan your cat
azure rain
assuming you could get your cat to stand still long enough
glad steeple
tru
quaint jasper
give it food
silent junco
I liked it better when there wasn’t any color
mild nimbus
median pike
Once you bake shading and ao it will look quite nice
silent junco
There’s also the hair being smooth
The blush being weird
And lips on a anime character
spiral sigil
And hair is blue
 stable edge
Please do move the blush higher up the face
silent junco
And give it a smoother transition
mild nimbus
Yuh I will move it further up
You dont ever bake AO with anime models tho
Cause its baking realistic shading instead of intentional shading
When it comes to anime models you need to do everything the wrong way
and adjust normals for it to be good enough for cel shading
I paint my AO manually on seperate RGB channels
http://prntscr.com/qr73wx Which is why it looks like this

all the normals are modified manually
to achieve the proper cel shading
xD
quaint fog
@glad steeple what is photoscan
hallow bough
Plenty of artists bake ao even for anime models though. If you know what you're doing.
Not necessarily something you shouldn't do.
silent junco
ao can make improvements
glad steeple
@quaint fog google
mild nimbus
Computer generated AO will ruin the shading
Need to manually paint AO
Specific to cel shading it's bad
This is.not a pbr workflow
hallow bough
Not bad for non cellshading though :)
 idle niche
That’s not true at all
You can use baked AO for them
You just need to be careful with how you use it
It gave it more vibrancy instead if flat and saves you a bit of work
However, it’s not a full substitute for painting by hand as well
mild nimbus
Bake AO can work but I have places where I want the shadow to be which is why I just want to paint it manually on the green channel via vertex paint.
And its generally easier
if you do it manually imo.
for these kinda models
But I see what you mean
mild nimbus
honestly spending more time on the line art then the actual texture still
defining muscle groups and bones and such
lol
idle niche
Sweet!
Texturing is one of those thing where it’s taking me longer to learn and do well compared to most other things for making models
Using the right tools really helps
mild nimbus
Ye
I hate it when I make a great model
but when i texture it
its like a downgrade
But texturing within itself is a study also so
just lots of practice xD
idle niche
Yes, indeed
quaint jasper
The trick is to not do any texturing 
vivid crater
bare model with wireframe showing off 💦
 hazy flicker
dull canyon
hazy flicker
dull canyon



decided to re-do the hands a bit
mild nimbus
Pretty solid
spiral sigil
Clean
dull canyon
thanks, at least better than my first attempt I think
just need to add the nails
guess I should do some actual work now tho >_>
 silent junco
Looks handy
dull canyon
so I'm a bit unsure how I wanna proceed when it comes to texturing since I don't know the full workflow/"pipeline" yet. I'm working on the naked base model right now, ie no clothes or accessories, just the body, and I was planning on basically completely finishing this base with rigging and texturing so that I can afterwards use that base and give her different outfits. but now I'm unsure how that would work with the rigging and texturing since I'd have to remove parts of the base and add new stuff
anyone got any insight on how to approach something like this?
tepid wagon
If it comes to rigging you could merge armatures and adjust weight paints like you would do in case of kitbash. Similar with textures you could use different material for clothes and make separate texture for them or you could divide your texture into sections like for example hair/face and neck/top/bottom/feet or shoes and replace those sections of texture as you need depending on what clothes you make your avatar wear if you want to have only one material @dull canyon
mild nimbus
Adding anything new to the model will lead to iv unwrapping again and adjusting it to the uv map to retexture
If the body is pre unwrapped deleting faces will just substitute the selected faces
On the unwrapped object
Adding more to the base mesh I reccomand you just make a seperate texture map all the time with a different material and unwrap all the new assets in the model on a different UV map
UVMap 2 rather then UVMap 1
Since 1 has the body
And hands head
Etc
2 is cloths
Material ID maps are also very useful
dull canyon
okay, that was kinda what I was thinking but I wasn't sure if it's a "proper" way of doing things. I'm thinking I either use just one UV space and texture and unwrap and pack the base body as neatly as possible and have it in one area of the UV, leaving enough room for the extra stuff like clothes and accessories
or using 2 materials and UV spaces, one for the base and one for everything else
though I guess that second approach would mean additional textures and thus more bloat
even if I only use 2k textures it would still basically double the size
dull canyon
or I just say screw it and make one outfit since I need to practice anyways and there'll be many more iterations of that model too
ashen stag
Might be best to just make it one for now if you think you'll improve greatly. Obviously save your untextured base for later.
dull canyon
yeah
I mean this is still basically my second model I'll ever finish
so, lots of room for improvement
I just like overthinking things too early I guess
ashen stag
Yeah just gotta keep the ball rolling GL
dull canyon
so when I wanna texture my model in Substance, is it easy to say "I wanna paint on just this mesh" when I have separate meshes for like body, clothes, etc?
or do I need to prepare the model somehow for that?
ashen stag
Only preparation I can think of is UV unwrapping but I haven't worked with substance
idle niche
@dull canyon You mainly paint by material. However there are options for the type of space you paint in. You can make it so there is no bleed in the UV seams when paining on a certain mesh. There is also very easy to use masking options and polygon selection tools
That’s just what I personally know about
mild nimbus
Is it okay to share a youtube video i made? @quaint jasper
quaint jasper
sure yeah
mild nimbus

[Social Media]
Twitter: https://twitter.com/HurallMordem
Discord Server: https://discord.gg/VaCDUXK
Twitch: https://www.twitch.tv/vector_lotus
Just a quick time lapse of me modeling some anime hair for a new character I am working on. Following software used in this was Bl...
 stiff coyote

ive always worked on this model,
only just tried animating it
and im remaking it to be more screen acurate, but getting it perfect seems to be impossible , maybe i dont know how to go about making it right, but no matter what the side and from vide of the character never line up
making it super hard to remake it
quaint jasper
What are you basing it on ?
 daring karma
bro do you even scooby doo?
quaint jasper
i mean which image/video
stiff coyote

The opening scene from the 2002 live action Scooby-Doo film. The gang chase down the Luna Ghost to the Wow-O toy factory to save Daphne and unmask the ghost.
I do not own own this. All rights to Warner Bros. and Hanna Barbera.
and oictures of the same costume
quaint jasper
looks perfect to me
 sand fox
@stiff coyote
daring karma
i appreciate that you're making this
stiff coyote
although its very close its not acurate to the film
and its my kinda dream project ive been continuing for quite a while up till now
quaint jasper
trust me, you can never get to perfection when working off of a movie reference, i've been trying for a year lol
stiff coyote
there has to be a way
quaint jasper
sure, another 1000 hours
sand fox
It's virtual vs reality. Perfection is impossible.
But you can get close.
Just don't ruin your own happiness trying to do it.
You could work on this for the next 10 years and never be happy.
stiff coyote
i just dont know how to model it properly and i dont even know how, its killing me, i tried remaking the head 4 times recently and i dont know how to do proper curves
i even got a voice actor to do the laugh so i can put it on the model, lol
sand fox
Sometimes you need to remove yourself from the equation and get the perspective of someone that hasn't worked on this for hundreds of hours.
sand fox
I'll make a suggestion.
Ask other people what they think of it before you do any more work on it.
You are your own worst judge of anything you have created.
stiff coyote
when making it, i dont know how to manipulate the mech right to get what i want
im not good with depth eithyer, im pretty blind for that
one i made earlier today
 quaint bronze
Have you tried bringing into Unity and giving it any sort of shading?
quaint bronze
if youre more comfortable in blender you can throw a light in your scene and view the model in the renderview
sometimes viewing a model with shading/lighting can help work out where the ‘problem’ areas are
but sometimes you dont really get a complete picture of what you’re making until its fully textured and in engine!
dull canyon
@idle niche aight, thanks, guess I'll just throw together a random model real quick and play around with it in substance to get a feel for it
idle niche
Cool! sounds good
I'll share my most recent project while i'm here! It's Misterious Heroine X Alter from Fate/GrandOrder
https://cdn.discordapp.com/attachments/475816616265908267/669354524942663690/unknown.png
https://cdn.discordapp.com/attachments/475816616265908267/669433366537306122/unknown.png


No textures yet, just started the process now
It's always difficult figuring out how to setup the materials and how many. I want detail and control, but I can't have too many mats
dull canyon
oof, is there any way to change the UI scale in substance?
 heavy bramble
For those who make models, what software do you use?
dull canyon
Blender, and soon Substance Painter for texturing
ok so apparently for applications that don't respect Windows' scaling settings you have to do this https://danantonielli.com/adobe-app-scaling-on-high-dpi-displays-fix/
dull canyon
which apparently doesn't do anything for me >_>
since it's apparently working as it should. but on 4k with 125% scaling it's still very small, and 150% is too big
and here you'd think an expensive piece of software would support something as simple as custom UI scaling...
idle niche
Arg, that sucks to hear. I’ve never had issues, but I only use a 1440p screen
@heavy bramble I use blender to do most things since it can, and decently. However, for texturing I use photoshop and substance painter. I’m learning ZBrush for sculpting at the moment as well though Blender can do it as well.
 novel coyote
This is my first model in progress and i wanted to ask how it looks
idle niche
Awesome! Congrats on getting started!
novel coyote
Thanks
silent junco
did you use randomize for the fur ?
novel coyote
No i made a UV sphere stretch it used Proportional Editing and took some Vertexes and stretched thous
@silent junco
silent junco
oh
 dawn shuttle
not sure if I should have asked this here or over in avatar rigging but... what's a good way to prevent the "candy wrapper effect" on joints once I get them into unity and vrchat?
in blender I can just hit the toggle for maintaining volume, or I can make helper bones and set some constraints, but neither of those translate over to Mecanim
it's most noticeable on the posterior of the avatar, when the legs bend the whole thing just sort of caves in on itself
idle niche
At that point you’d just have to do your best with the skin weighting. Smooth transitions and harder a transitions based on joints and bend areas
Sadly there is not really a way to do twist bones or types of constraints :(
You should post some specific examples and see if you can get help and apply that to the rest
novel coyote
hey i have a question... how do make like anime faces because i want to make a face like this
im new to blender and i already made this but i realy struggel with the face and hands
quaint jasper
You should try to find a template for front and side view
the good thing about anime faces is that they all look the same, so any will do
novel coyote
ok thanks
quaint jasper

I was practicing face modelling with a random anime character sheet from Google and recorded my workflow. Youll see me modelling some areas and copy/past some parts from older projects. Generally speaking it took me about 4 hours to make this, the video is roughly 20x faster
...
novel coyote
thx
quaint jasper
if you set the playback speed to 0.25 you can see that he does
novel coyote
ok
 devout scroll
This guy also has lots of anime character stuff https://www.youtube.com/user/MrLasla

YouTube
This channel is mainly about 3d modeling. I also like to throw in videos about art and drawing. Most of the works are related to anime so hopefully if you sh...
dull canyon
@still wadi is also a master of the anime faces
idle niche
Yeah Daniel has some interesting methods but in general his tutorials are pretty good. They’re what I used initially to learn the basics
There’s never one way to things things of course. I’d recommend finding as many resources as you can to see the different methodologies and practices people use
 spiral sigil
looking good
quaint jasper
You can create a curve and transform it into a mesh instead
fading pine
Oooh
devout scroll
But you can also bend a mesh to a curve with the curve modifier
You can also use a lattice to manually deform stuff
mild nimbus
Shading has been applied to most of it
final tweaks to the hair wil be done at the end
 indigo stirrup
Wow, I'm surprised this hasn't ever been mentionned ANYWHERE in this entire server. But uhhh https://github.com/sakana3/PolyQuilt amazing tool for retopo and just general modeling work.
GitHub
Blender Lowpoly support addon for Blender2.8. Contribute to sakana3/PolyQuilt development by creating an account on GitHub.
mild nimbus
I am finally done with her
just some minor shadow tweaks
and hair tweaks
finished up the specular
on the hair
and it reflects depending on the camera angle
spiral sigil
click on builder and build and publish
@spiral sigil
Did I mess up?
if you made a world it needs a vrc_world prefab in the hierarchy, if you made an avatar you need to add an avatar descriptor to the root of the avatar before you upload
you should be good to go after that
Avatar Damn.
click on the avatar, then select "Add Component" at the bottom of the inspector and type in 'avatar descriptor' to find it, don't forget to set the visemes and adjust the view position
Welp crap
Forgot to add a chest.
This is to hard
mild nimbus
Need a hand?
lol
I assume you want to add a extra bone
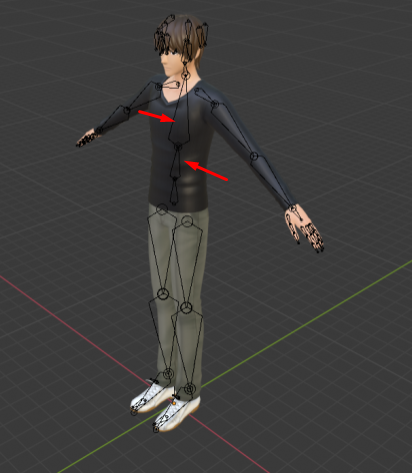
Select those 2 bones in edit mode
press W
and press subdivide
it will insert a bone btween the 2 selected bones
@spiral sigil
spiral sigil
Thank you!
I can't select the bones
When I click on it. It Clicks on the tiny dots Next to it
mild nimbus
@spiral sigil http://prntscr.com/qskt0q

Click edit mode
and click object mode
then select the armature aka the rig in object mode
and then click Object mode in the upper left corner again
and go into edit mode
 fresh isle
Was playing Starbound the other day and I saw my character in it
So I started modeling it
I think it's coming around fine so far
 dense kelp
Lookin' good
 lament pond
quaint jasper
lament pond
quaint jasper
@frail venture Which parts did you model yourself ?
mild nimbus
Looks like a vroid model
quaint jasper
For the body definitely, I'm not too aware of what kind of clothing they have though
novel coyote
Hey dous anybody know where i can finde a template of this character
his name is naofumi from the anime rising of the shield hero
i already look like an hour on the internet for a template but could not finde anything
hallow bough
@novel coyote Do you mean an actual model of the character or a base without clothing?
novel coyote
a base without clothing becaus i want to make the heade
spiral sigil

 cobalt prism
@spiral sigil yeah maybe when i make a Pringles avatar xD 😄
spiral sigil
Soon
vivid crater
put mr peanut on there o7
cobalt prism
haha maybe lol
 frail venture
@quaint jasper The hair and the coloring of the jacket for the model in the 2 pictures of the same pose, and the pupils, eyebrows, hair(of course) and the coloring of the jacket in the square image of the model that is now my pfp
idle niche
@novel coyote Usually you don't need a specific character if you want a sheet to use as reference. Just look for any that are similar to the shape of it, that's what you'll be using it for anyways. you can always adjust it later
especially for just the body
quaint jasper
@frail venture Do you model in blender ?
novel coyote
@idle niche ok than i gone look for a face that look much like that of him thx you
novel coyote
thanks for the advice @idle niche
idle niche
Awesome!
stiff coyote
there is a picture of a costume piece im trying to remake, but i dont know how, any idea of how i should go about it?
quaint jasper
Seeing the picture would help us
 vivid crater
maybe find a skull model and rework it
stiff coyote
that is a good idea
dull canyon
https://i.imgur.com/ShSHjfU.png anyone know if there's an addon that lets me orientate these strips all in the same direction, scales them the same and lays them perfectly on top of each other?
 tepid wagon
https://gumroad.com/l/uvpackmaster2 this one can stack similar islands on top of each other and lock them so they occupy the same space, after that you could just select all those islands with box select and rotate them as you like. At least this is how it shows how it can work I never tried it @dull canyon

Gumroad
Quick links: demo version download (no login needed), the standard edition. UVPackmaster 2 is an efficient UV packing engine available as a command line tool. Its robustness comes from the fact that it was written in C++ and runs as a multi-threaded application. The engine ca...
dull canyon
thanks, I'll check it out
do I need the pro version for that?
for the locking I guess?
tepid wagon
Group islands and lock overlapping I guess, I just checked out some random tutorial
No, it is select similar and then align similar @dull canyon

I review an amazing addon for Blender called UV Packmaster 2.
https://gumroad.com/a/303412339/GJgH - Standard
https://gumroad.com/a/303412339/pCrna - Pro
+++++++++++++++++++
Donate - Paypal - paypal.me/markom3d
www.markom3d.com
https://www.patreon.com/Markom3D
www.face...
tepid wagon
Try using Blenders built in UV menu, select all islands, from UV menu "Average island scale" and then try again with packmaster see if it helps
dull canyon
select similar does still nothing, align similar does this https://i.imgur.com/CLM4C3P.png

which doesn't look quite right
tepid wagon
Can you try my previous suggestion?
Average island scale will make islands the same scale and possibly make them look similar for the addon
dull canyon
I did
tepid wagon
On your screenshot all islands are of different sizes
dull canyon
https://i.imgur.com/YiExPgR.png that's what they look like after squaring and averaging
 tepid wagon
Do they have different sizes in 3d as well?
 spiral sigil
tepid wagon
I would just place all islands on top of another by hand since there aren't many
but I understand why you want more convenient solution
dull canyon
you'd think blender would have some built in function to at least make everything the same size
tepid wagon
Yeah, I am not too happy with the UV tools it comes with
All those mesh pieces are similar, alternatively you could unwrap just one of them and then paste copies of it alongside the tail, rescale each to match the shape of your current one but amount of work would be similar
Isn't there some pop up where you can choose how similar it can be to be stack on top of each other? I mean something like you have on the bottom left whenever you rescale something or slide edge loops etc?
dull canyon
there is a similarity threshold but I don't see how exactly it works and the help isn't really useful either
tepid wagon
I assume the less similarity the more they can be different from each other and therefore vary in sizes. You could also rescale islands real quick so they are more similar in size. Welp sorry it wasn't useful
dull canyon
well it's a start, so thanks for the hint
I guess if I scale and rotate them manually to be close in similarity it would work
tepid wagon
try without rotating first
dull canyon
https://i.imgur.com/YC20EGP.png that works I guess

not sure what these 2 dots in the preview are tho
devout scroll
if you unwrap all the strips one by one then it should stretch them out the same i think
to fill the whole thing
then you can select them all and scale
dull canyon
that'd make sense I guess but the strips aren't all the same size and shape
devout scroll
they should still be fairly close them because they'd all be big
you can then scale manually and stuff
dull canyon
well I did everything manually now so
dull canyon
well it's just tedious
devout scroll
that's uv unwrapping in general
dull canyon
I mean, I could probably also go the other route, just unwrap them and leave as is and paint each strip individually
devout scroll
That's pretty wasteful
devout scroll
They don't have to all be the same size
You can paint out of bounds a bit
And just get them similar
out of bounds of the uv island that is
dull canyon
god why is texture painting in blender such a pain sometimes
why can't I draw even though the texture slot is selected...
silent junco
nodes
dull canyon
 silent junco
you are on your own
dull canyon
thanks
devout scroll
lol
there can be multiple reasons it doesn't paint
best is to just watch some tutorials
dull canyon
it was some stupid hidden setting somewhere, I know I had this issue before
ah no
turns out you just have to restart blender
...
spiral sigil
Yeah that make sense.
mild nimbus
Tbh I had same problem to originally
Way back
Same for texture painting
But it's about selecting the image node and the proper image in the texture settings
For it to work
silent junco
blender works in weird ways
dull canyon
https://i.imgur.com/VXWWbHb.png well, I guess it could look decent if I put more effort into it...

but I'm not sure I wanna do that with this model yet
think I'll just go for some texturing with a normal map for this one
idle niche
I like that a lot! seems pretty good to me, especially if you refine it a little more.
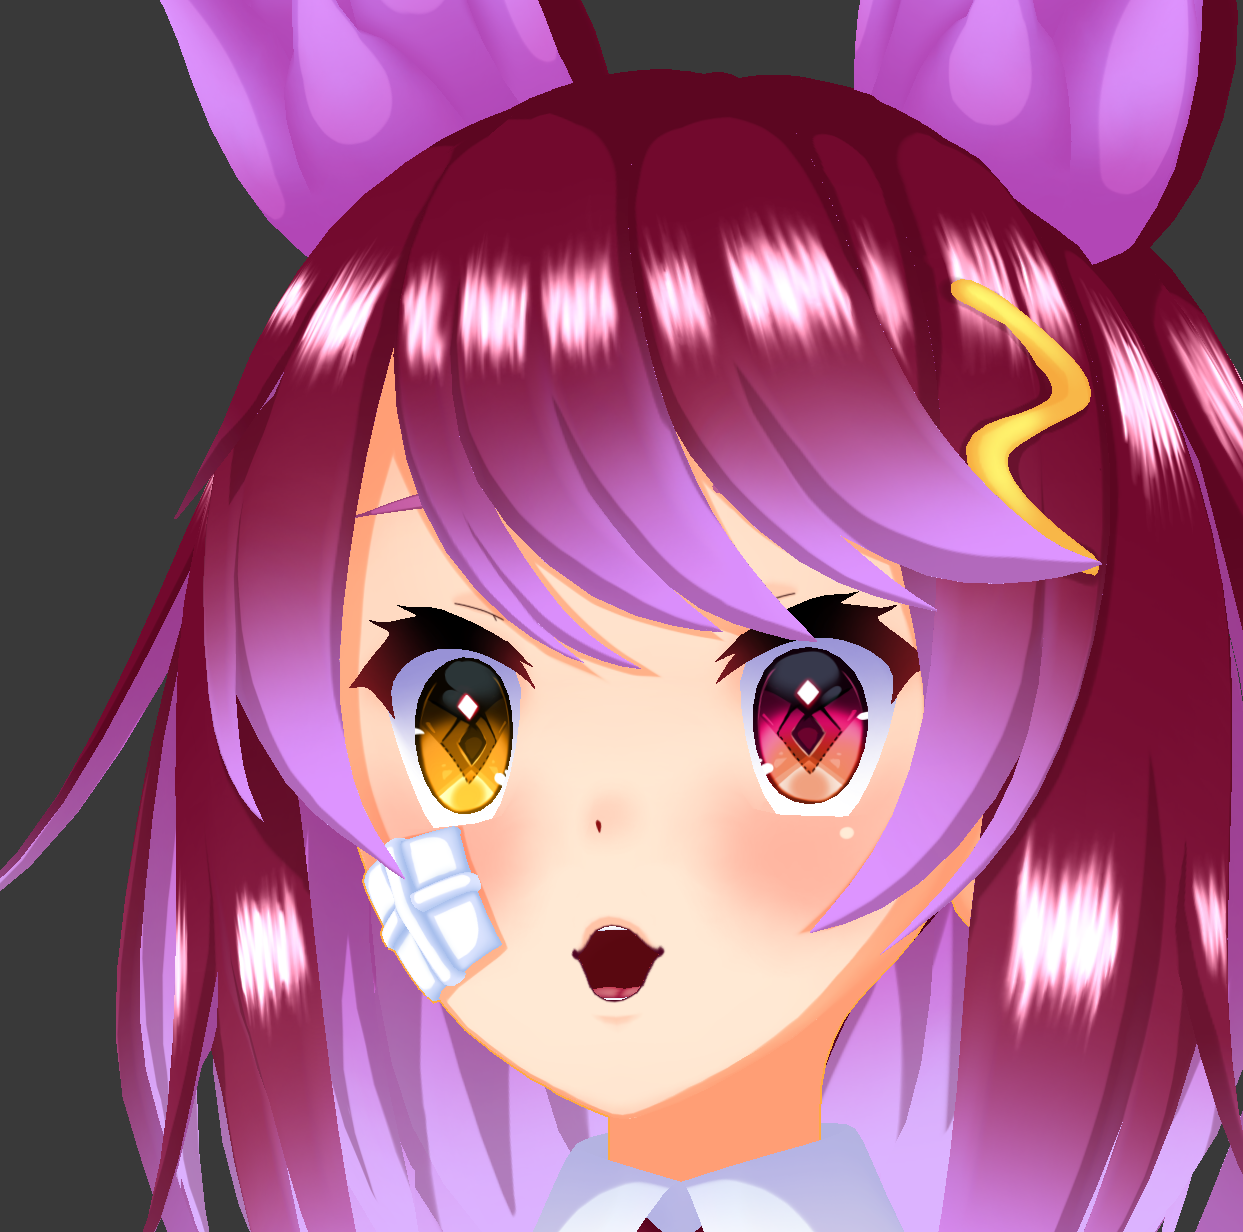 glad steeple
when you
novel coyote
hey question... how do i make hair like this
rather said how do i make hair in general
glad steeple
ok google how do i model hair
mild nimbus
Pretty good
I approve
👌
well anime models are always hand done anyway lol
most of the time at least
What texture maps does it have?
mild nimbus
nvm I checked your stream just a Albedo
silent junco
Now ruin it with shaders
spiral sigil
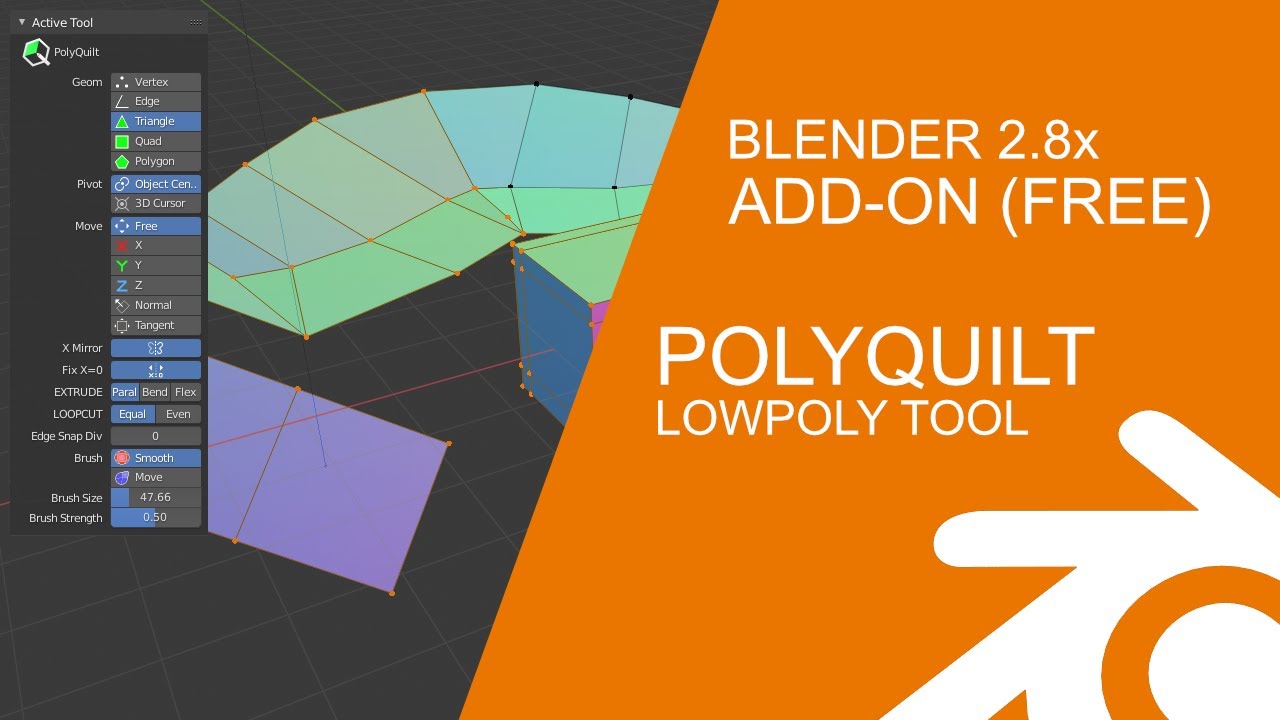
I great tool for modelers and artists, this makes lowpoly modelling a breeze.
Follow me on Twitter: https://twitter.com/IdoineTutorials
PolyQuilt is an add-on for Blender2.8 that supports low poly modeling. In addition to simple, orthodox and old-school surface functions, v...
 potent pond
INteresting!
A little model i'm working on

I little sketch i did and i'm working on it.
It's a little bunny that represents how i feel right now.
Posed it to show him a little, still mega WIP.
So enjoy the updates #3d #character #design #bunny #hope #model

 Twitter
 spiral sigil
"little sketch" ok bruh
potent pond
LOL
spiral sigil
I like it tho
potent pond
Yes
That model came out of how i feel right now
it's the representation of my feels
👀
spiral sigil
👁️
dull canyon
does anyone here have experience with uvpackmaster? how does the packing box work?
ok I guess it does what I think, guess it just doesn't work properly with the demo engine
 next jungle
dull canyon
next jungle
dull canyon
okay, so it's just a demo thing that it's not showing correctly
well, just bought the pro version too
nice, and I get an error when I try to select the engine
spiral sigil
wouldn't want it any other way
dull canyon
UVP initialization failed: Engine version 2.3.0 required
ah wait, do I have an outdated version of the addon...
I indeed do
apparently they updated it in the past 2 days or so
spiral sigil
Easy solution it seems at least
dull canyon
except it's still not working, unless I've done something
spiral sigil
scuffed
spiral sigil

dull canyon
so I'm a bit confused, is a higher or a lower packed islands area better?
sand fox
@potent pond edgy, tsundere, probably thinking "damn i look cool as shit with this fake eyepatch", that doesn't wanna talk to anyone because they are shy or something?
chuni vibes.
 tranquil tree
Does anyone know where i can find a stick figure avatar to put in unity?
spiral sigil
Hey I got a question about avatar making
fading pine
What would be a good way to make a simple scarf? Just a long flat mesh/object with bones?
spiral sigil
How do i make it so that when someone does say a peace sign somthing happens
like somthing apears in their hand
How would i make that happen with my avatars?
fading pine
I think that would be #animation
 small valve
@fading pine long plane, thicken, bevel
you can add more detail to build up defining sillouettes so it doesnt look like a flat pillow and more like a piece of cloth
if you want,a fter that, you can go further and make a high-detail sculpt over top and bake normals'
then just add some bones
you can use blender's auto weight tool and be done with it
pose it as if its being worn and then set that as the rest pose
then test again
fading pine
Thanks I wasn't sure if it could that simple.
dull canyon
so I'm unsure how I wanna proceed now, I basically have a nude avatar that's more or less finished, and I'm not sure if I want to rig it now so I can test it in game to see if all the deformations are looking good and stuff, or if I should wait until I've done all the clothes and everything
would I have any issues or a lot of extra work if I weight painted the body now and then the clothes later on?
quaint jasper
Deformation only matters on the parts you can see
So if it's clothed, seems pointless
dull canyon
hmm, I guess
but I still feel like I wanna do a quick rigging now to see if my topology works
spiral sigil
Wtf
dull canyon
well, lots of high res references
guess at some point I should like separate them out into categories
like clothes, anatomy, others art etc
spiral sigil
Would be better yes
lament pond
vivid crater
The character is from a music video
So I'm guessing that's the actual model then? @lament pond
lament pond
That's a fanart model I made of the character
latent charm
@dull canyon I would definitely rig it at this stage, and don't ever fully delete the basemesh (if you do delete parts do it on a copy), since when you make clothes for it you can use transfer weights to give a really good starting weight base for the clothes with minimal clipping.
dull canyon
yeah I always have backups and do new saves with every big change
but thanks for the info, then I'll apply all the mirrors and subsurfs and start rigging the base body
 thin bison
Been experimenting with Substance Painter
dull canyon
https://i.imgur.com/cvMu8es.jpg how do I get the texture to show on the model again while UV unwrapping?
 median pike
Switch to material view
dull canyon
I guess I can't have materials set up then?
cause I did some simple materials for colors
dull canyon
yeah guess I need a new material with the image texture
thin bison
Yeah, you need the image texture node feeding into either a diffuse node or principled
spiral sigil
Has anyone made mr.doofenshmirtz
small valve
@spiral sigil model or avatar? Al's avatar world probably has a doof
but idk if that model's files are public
doof is really popular however, you can prob find it
spiral sigil
@small valve avatar
small valve
yeah its most likely in there
small valve
good stuff
silent junco
pew pew
 zenith fable
what clip?
spiral sigil
The magazine with "american tactical" written on it
silent junco
Fat
hallow bough
Gotta stan a thicc clip
 wide ocean


 glad steeple
yes thats how discord works
zenith fable
Ahh that
 ornate rock
Does anyone know where I can find a good free tutorial to Blender?
I tried looking myself, but they're usually too vague or behind a paywall.
spiral sigil
Blenderguru made a whole serie to get you started, check it out
dull canyon
does anyone have an example model where you can see the topolgy around the area where the torso transitions into the legs? like around the crotch, hips, butt and thighs? I feel like my topology isn't very good for deformation
do you want topology like this that like wraps around the butt cheecks?
or more something like this where the edges are more straight
 cobalt prism
quaint jasper
cobalt prism
quaint jasper
@dull canyon Depends on the poly count, those look the same to me except the bottom one is working with lower poly count
dull canyon
the topology is different around the transition between leg and torso
I'm just wondering if topology that follows the natural flow of the body like in the first image is better or worse for deformation in the use case of vrchat
quaint jasper
it really depends on the bone placement and weight then
dull canyon
mkay
fading pine
Are there any good competitors to substance painter?
 gaunt abyss
Whats the current tri limit? Last time I actually made a new avatar it was 20k and I heard that it's higher now
 sturdy kite
70k
gaunt abyss
Holy shit ok cool lol, thanks.
sturdy kite
yea 70k is well enough, just make sure not to use too many materials or high res textures and your avatar will still run great
ashen stag
Soft limit not a hard limit