#3d-modeling
1 messages · Page 75 of 1
 stiff coyote

New feature coming to Hair Tool (Blender addon) - tool for making currly hair.
https://gumroad.com/l/hairtool
this video says it has one
 thorny fractal
i just think curves are a super wasy way to block out the shape for hair at least even if you arnt going to use it in the final mesh, the hardest part about hair is just figuring out the shape and flow of everything
 dull canyon
yeah, I guess that's true
dammit why can't I think of the name
vroid
that's it
that lets you basically draw stylized hair

VRoid Studio is an application to create 3D models of humanoid avatars (characters). The app runs on Windows and Mac and can be used for free by anyone. 3D models created with VRoid Studio can be used as avatars on various VR/AR contents, both for commercial and non-commercia...
 dull canyon
👍
stiff coyote
ty
dull canyon
you might wanna try either adding a bit more resolution manually or with one subsurf level so it doesn't look too blocky before you try sculpting on it
stiff coyote
dont worry, i will!
dull canyon
https://i.imgur.com/Hqyc2eq.png so the exact middle would be about one square lower than where the crotch is right now, but I'm not sure if I want/should fix that 😐
stiff coyote

 dull walrus
can anyone help me
 spiral sigil
 wet bolt
Can anyone download some files for me please
It’s free
I just for some reason can’t download sketchfab
stiff coyote
wet bolt
hello
dull canyon
hi
wet bolt
could you perhaps download some files for me from sketchfab for some reason it wont let me download
 mild nimbus
The hair is looking good
I like to see how you are understanding the root of hair.
Alot of beginners just slap on some strands that has no root to the center of the head
or any form of roots at all really
spiral sigil
is anyone able to edit this model of me?
its a shyguy mask, but i want to make the eyes black instead of clear
i have no idea what im doing so i could use some help
 azure rain
send me the texture I should be able to change that in like a minute@spiral sigil
spiral sigil
Its a model
like there is no surface between the eyes (what im doing rn but it wont work)
azure rain
oh that would take a bit longer then
spiral sigil
well ive done it now
azure rain
meaning you started it out or you're broke it
spiral sigil
ive filled in the vertices on my own
azure rain
cool
 stiff coyote
dull canyon
stiff coyote
dull canyon
looks very good
ok so I just looked at one of the more refined base meshes on polycount and there the hand has like 1500 verts compared to the 1200 mine as currently, so, I guess I'm good for now
I feel like you'd want more topology in the hands anways in a game like vrchat cause you look at them a lot usually
 hallow bough
Because big budget company XD
dull canyon
@stiff coyote so did you connect all the meshes together or are they still individual meshes?
hallow bough
It looks like they connected the meshes
wet bolt
Can someone help with skeleton
 marble sail
tips on starting modelling clothes for use on your avatar? (blender)
wet bolt
I need assistance with a skeleton
 silent junco
I recommend to start with clothes then make the body fit
marble sail
Ah ok, I plan to fiddle diddle around a little bit with Lexichi

 spiral sigil
show topology
dull canyon
 spiral sigil
very nice
dull canyon
might need some tweaking later, but I wanna move on for now
spiral sigil
probably yeah
around the thumb maybe
dull canyon
yeah, might try to rotate the thumb so the edges that go horizontally through the fingers don't go vertically through the thumb
or I'll just do a quick test rig and see how it deforms
spiral sigil
i saw this done for the thumbs
dull canyon
yeah I could try something like that
dull canyon
really wish I'd have an easier time to manipulate topology
it's still confusing the shit out of my brain on which edges or vertices I need to remove or move to get the topology I need
 jagged eagle
this isn't specifically a vrchat question (sorry), but once it's made i'm gonna make a lower-poly version, no way am i uploading this many polygons
but, does anyone have a good idea for making the wrapping on this pole less lumpy?
dull canyon
@jagged eagle use separate meshes
jagged eagle
well, the issue is i'm making a replica of a staff from a game, and the original has a complicated texture filigree that i recreated by sculpting
b/c if i had to model that separately i might just drink bleach instead
but i'll figure something out
azure rain
yeah that would be better for having the wires separate on the high-poly and then baked down to the low-poly
dull canyon
^
just take a poly strip, wrap it around the staff, add a solidify and maybe subsurf modifier, merge it together, bake normals and AO
jagged eagle
i was about to politely ask how it being separate would help it be smoother, but now i'm convinced, despite not knowing how to get started
i uh don't wanna bother you with handholding though lmao
i was about to start just going down the filigree and manually selecting and removing it, which would be awful:
(yes the topology is a nightmare, i'm gonna clean it up, i'm just salvaging an ancient project)
i'm just kinda stuck trying to get rid of that 'hammered metal' look on the wires but
iii will play around with it and try those things
like if there were a way to 'apply' smooth shading to the mesh that'd be nice, but lol
but yea don't mind me
again ignore the nightmare artifacts
😔
dull canyon
my suggestion would be, add a plane, enable snapping to faces, add a subsurf and shrinkwrap modifier and extrude the plane along the staff
oh and a solidifer modifier
so shrinkwrap > subsurf > solidify
jagged eagle
mm yeah i think i know how to do that. and google helps. i'll try, thank you
OH subsurf is subdivision, yeah i know what that is, right
i'm
new and dumb, thank you lol
jagged eagle
ye

 silent junco
you can use screw, subsurf and skinwrap to make something similar though it is not perfect
jagged eagle
i hate to be a dumpster person and ask for advice then not follow it, but after failing multiple times the other ways, i managed to get Something Basically Correct with smoothing, remeshing, subdividing, then resculpting the creases
blah
but it'll do for now, thanks for all the help
part of my concern was authenticity to the original, and i kept failing to get the planes to match the real filigree
but oh well
hallow bough
Wonder if using bevel curves would have worked for the wrapping on the staff 🤔
dull canyon
that could work work too probably
 sleek arrow
Imported a model to get ready to sculpt her body, and thought I'd make your eyes scream at this disaster lmao.
 vivid crater
Hand made shapekeys 🕺
dull canyon
sounds like fun times ahead
hallow bough
All the bones!


 spiral sigil

dull canyon
good thing you won't see them naked in 99% of the cases so I just need to get the general shape right I guess
spiral sigil
chubby toes
dull canyon
https://i.imgur.com/qVQ7uFp.png better?
 spiral sigil
yes
feels a bit short tho but since you are going to hide them anyway it doesn't matter
spiral sigil
toes
 spiral sigil
much better
 spiral sigil
it's clean so no need to worry about it
dull canyon
yeah, I won't be making this model to cater to feet fetishists so it should be fine 😄
spiral sigil
😔
vivid crater
But that's like ez money
spiral sigil
make it a furry feet and you can triple the money
vivid crater
Making whole furry easier than making a foot 🥵
vivid crater
i bet your cats look like a foot
spiral sigil
🚶♂️
vivid crater
looks like a foot to me
silent junco
also i don't get why all feet in games are the "normal" one
what about people like me
my toes are like 2-3 cms long
spiral sigil
😐
mild nimbus
@dull canyon Is the model not going to wear shoes?
dull canyon
she is, which is why I'm probably not gonna put more effort into those feet
dull canyon
cause she's meant to be a base, kinda
spiral sigil
I found that something that helped with my feet when I modelled them was pointing the toes slightly inwards towards each other, instead of having them a fixed distance apart from each other
marble sail
why when I extrude from circle mesh, I can't see it outside of edit mode? (in blender)
nvm, tried putting face first on circle then extruding, which fixed the problem
2nd edit: it still happens, after I edit it for a little longer, faces suddenly disappear when I switch to object mode, how do I unhide them?
 strong yacht
any good free retopo stuff for blender? manually doing it with polybuild is great and all but its still a bit of a slog
sleek arrow
First time I've dealt with this, how would you make texture painting less blurry? I'm assuming it has something to do with the UV?
 small valve
@sleek arrow it is a texture thing. i forgot exactly how it was in blender but i know in unity it has everything to do with the uh
fuck i forgot it was called
filter? there's like a filter where you can set how the texture is mapped onto something. there's a handful of options but ive never messed with it in 2.8
i only used it once to change the filter so it doesnt try to blend together pixels for a minecraft avatar
sleek arrow
Filter?
 quaint jasper
Is that on a texture or are you vertex painting ?
quaint jasper
might be better to do that outside of blender then
azure rain
what's the size of your texture and what the UV unwraps look like
as that might just be the Texel density your unwrapped kvue
and remember nobody's going to be that close to your ears in game
sleek arrow
my unwrap is a nightmare lol
marble sail
so I guess I can't model from circles
spiral sigil
Wdym you can't model from Circles?
dull canyon
actual circles or curves?
marble sail
not gonna repeat myself twice for what I wrote like 2 scrolls away
dull canyon
can you not see the faces at all from any angle?
dull canyon
have you tried selecting everything in edit mode and hitting shift + n?
marble sail
just tried it and did nothing
dull canyon
can you send me the blend file?
marble sail
okay, I think I know what was causing the issue: when I copied the vertices from other model, it also copied the material
removed the material and it works normally
dull canyon
ah, well, yeah, that could be a cause
spiral sigil
For some reason the tail has became transparent when viewing outside, however when looking inside the tail you cannot see out of it. ive tried flipping normals, turning the transparency feature on and off and even removed the material however nothing. Anyone got any ideas?
silent junco
faces are one sided
strong yacht
Turn on backface culling to make sure the normals are in fact facing the right way
dull canyon
https://i.imgur.com/uN1OsFX.png you don't want to see red basically

when you turn this on
strong yacht
that works too
@small valve
pretty sure this is what you meant
https://i.imgur.com/og3nIGr.gifv
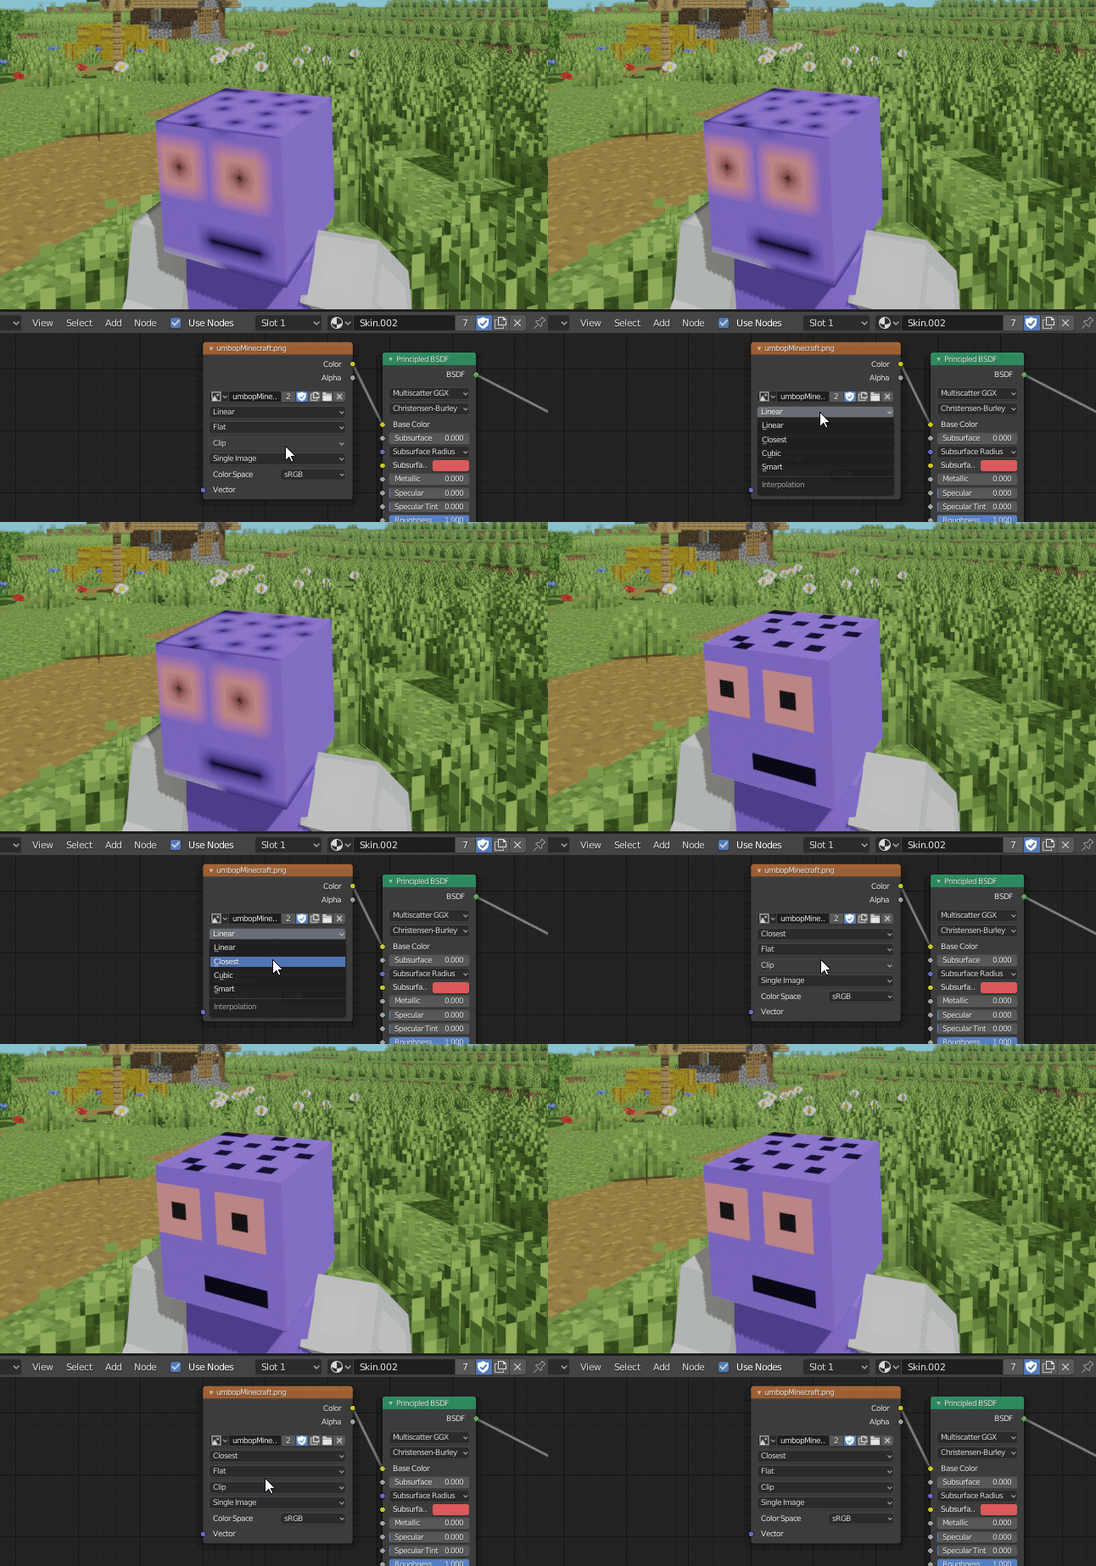 small valve
yeahh that!
 gritty dagger
I got motivated by a VRChat map I cant find anymore to try something in blender after a long time ^^
 vagrant wave
I have a rigged model that I'd like the stretch the arms and legs of in Blender. Is there a way to do this by like, scaling the already weight painted bones themselves, rather than say, trying to somehow stretch the armature with the vertex edit mode (not sure of the best way to do this), and then moving the bones so they align with the mesh again?
spiral sigil
You can use the pose mode on the armature and change the scaling of the bone and it will also change the scaling of the mesh if it's properly weighted
If you use Cats you can then use the "apply as rest pose"or something like that
 snow nymph
😀
 sharp path
I'm having problems about "No active UV layer on High Poly model" when baking a normal map for the low poly model. I checked all the videos that they UV the low poly model only. But mine won't work cuz IDK why.
 still wadi
@sleek arrow it's texture quality sometimes when you have certain mesh uv mapped on low texture quality they look zigzagy and low poly
 zenith fable
 signal hatch
How do you make hair in blender!!!!???
 olive roost
I always thought hair was probably one of the highest poly things on a model second to the face. That’s so cool!! Espec the ones that are just made mostly of planes
azure rain
yep video games are all smoke and mirrors pretty much visually
azure rain
like pretty much all particle effects are just 2d billboards


not Billboards but decent demonstration of why normal maps are useful
olive roost
NIIIIIICE. It brings so much detail to it!
azure rain
yeah this picture is pretty much one of my go-to examples as I pull it up quite often talking about how folks on Second Life are horrible about optimization
which is why they can't have any VR
olive roost
Haha suckeeeers
Ok but for the normal map, does that mean they have a super high poly detailed model somewhere that they made the normal map from?
azure rain
yup
spiral sigil
If you follow the anvil tutorial from Blenderguru, you will model a very basic Low Poly anvil and at some point he will make a duplicate and scult on it
At the end you can make a normal map out of it
Really easy to do actually
olive roost
Thank you!!! I see this has some of those big multi-syllable words y’all say. This will be useful-
And oh sweet!! I love blender guru. His donut tutorial was my first foray into blender!
spiral sigil
The sculpted model got like millions poly
And the basic one only got like a thousand or less
But visually they are exactly the same
One will lag you and the other will be smooth
azure rain
basically if it doesn't contribute to the silhouette put it on the normal map
olive roost
So kinda like with the division example, u could see the big wrinkles still but like the seam of the pants on the sides didnt rlly matter?
azure rain
yup
so they go on the normal map because they're important but not enough to add geometry to it
whereas the wrinkles affect the silhouette
azure rain
no problem want to make sure modelers are pointed in the right direction
spiral sigil
@void shoal by watching a tutorial on YouTube
dull canyon
@void shoal do you mean the general concept of weight painting, or specifically how to do it in Blender or another piece of software?
small valve
weight in a way that you want your mesh to deform
the way you want it to fold
for bodies like humans, follow muscle lines
same thing applies to retopology
dull canyon
okay. I'm not an expert myself, but the general gist is, each mesh is as you probably know made up of vertices. if you want to rig a mesh so it can be animated you'll need bones and link certain vertices to those bones so the vertices follow the movement of that bone. a weight is a value between 0.0 and 1.0, and usually one vertex can share weights between several bones, for instance bone A has a weight of 0.4 on that vertex and bone B 0.6, which determines how much the movement of each bone influences the movement of that vertex
and yeah, the cleaner and more comforming to the actual form your mesh is the better the deformations will be
@latent charm or the people in #avatar-rigging can probably explain it more accurately
 stark ore
i almost finished my first head from scratch. gotta make a tongue and uv and whatnot. i think it turned out decent
3.7k total
dull canyon
anatomically speaking I think you're missing a browline?
stark ore
browline?
dull canyon

Chat available on CGC: https://cgcookie.com/live_streams/exploring-retopoflow-3-0-for-blender-2-8
Retopoflow 3.0 alpha was recently released for Blender 2.8! In this stream I'll be talking to the two main developers, Jonathan Williamson and Jon Denning, about the recent upgra...
silent junco
some people have lots of brow ridge he doesn't
silent junco
looks like an anime character
 hazy flicker
Thank you, my original avatar
 idle niche
Very nice! Good job
hazy flicker
Thanks!
 hazy swallow
it looks very good
quaint jasper
That's really nice ! Never seen anything like that before
 median pike
Oh you poor poor soul
stiff coyote
i hate disney for making there be so much detail...
 brittle crane
i tried to aproach a low poly character to start as my first avatar ever created
stiff coyote
my first model was a character from an anime, ozen the imovable with armor, lemme see if i have a pic of it
stiff coyote

 terse meadow
I would probably make like a tree thing or a robot of some kind
brittle crane
looks great lailai
stiff coyote
thank you
terse meadow
I have the ideas but I lack time and dedication
brittle crane
thats your first avatar?
terse meadow
Also any knowledge of how I could make it
stiff coyote
the armor guy is
i didnt know blender at all, so i made myself make somthing
and i ended up having a friend rig it and help me put it in vrchat
same idea with the elsa
i plan to put it in vrchat
terse meadow
It looks good
 terse meadow
If I made something on that level I would
stiff coyote
this was my second model
brittle crane
spooky but amazing
stiff coyote
a recreation of the luna ghost from scooby doo
median pike
I lack the creative thinking and ideas but know almost all technical things about 3d design
stiff coyote
well if you wanna make stuff, and dont know what to make, you can help others make things maybe!
brittle crane
once i get the ability to upload my little toaster i will make som more 🙂
median pike
I mean yeah.. thats what I have been doing. But generally even though I cant think of anything myself, someone elses idea really must hook me to be passionate about it
brittle crane
only i need to learn how to animate via uv texturing for the eyes and mouth
stiff coyote
all i know how to do is make the shapes , hehe
median pike
I know "how" I just strugle to make it good lol
stiff coyote
this elsa thing is killing me though, its taking such a long time, but i kinda like that
quaint jasper
what's your latest creation Redotix ?
brittle crane
median pike
@quaint jasper well I am working on a furry like character. Still far from done but I am getting there. Already started over like 14 times
quaint jasper
Why so many times 
marble sail
probably working without references
median pike
No I actually have comissioned a suctom refsheet for it
My issue is that I always mess up and rather than try to salvage it I try to avoid it on my next run
silent junco
God I wish I could draw so I can make something other than advanced blobs
median pike
Stop wishing and learn how to do it than
Also you dont need to know how to draw to do 3d art
It helps a lot but its not needed
dull canyon
https://i.imgur.com/MdMkT5U.jpg does this look okay for low poly tails

I'll probably put a rough texture plus a fur shader on it so you won't see much of the underlying geometry with the shader
and the texture is just so that it looks somewhat okay even when people have disabled shaders
silent junco
It is I think but it could use some more
dull canyon
well, with fur shaders you don't want too much geometry
I'll test it out when I get to that point
dull canyon
yeah those are 6 edges
could maybe go for 8
but I just wanna keep it as low poly as possible
since most of it will be hidden by fur anyways
silent junco
That looks like 3
dull canyon
 dull canyon
I'll tweak the shape a bit more, just added a quick cylinder and just moved it around a bit
silent junco
Isn’t that how most things are done lol
dull canyon
I guess 😄
median pike
@dull canyon whats the poly count
dull canyon
on the tails? 176 tris
 hardy lake
hey guys, i've been making some outfits for my avatars from scratch lately, and i've been wondering how there golden rim details are made... pic incoming
it much be a normal map right?
and then specular on top to make it shiny
hardy lake
what's the best way to make normals? i will show a shirt i made, and no matter how i played with the settings while trying to bake it in blender i couldnt get a map with no artefacts...
silent junco
Make a high detailed version
hardy lake
silent junco
Then bake normals
hardy lake
the ruffles were screwing up the normal map
i was attempting to bake the folds into the texture
i had a high res version of this shirt and then tried baking it onto low poly
but i guess blender couldnt calculate the surface with all of the folds from the ruffles
silent junco
Make sure that normals are correct
hardy lake
pretty sure i recalculated them but okay, i'll check it next time 🤔
silent junco
Blender can fuck up when recalculating
silent junco
Overlapping can also fuck it up
hardy lake
yeah that's why i blame it on the ruffles
silent junco
There’s a bunch of settings you can tweak
hardy lake
trying to bake this rim on the shirt, this normal map doesnt look right does it? 🤔
silent junco
oh god
 dusty heron
There is something wrong...
hardy lake
maybe i should just take the texture, open it in photoshop, draw the rim on and make a normal map in photoshop? xD
dull canyon
that's not quite how baking works
I assume you don't have a high poly version of the shirt itself
hardy lake
i have it
dull canyon
then you'd probably have to join the high poly rim and shirt and the bake that onto the low poly shirt
mild nimbus
@hardy lake sculpting is best way for normals
hardy lake
these are the low and high poly shirts okay
and this is the best i can do with baking
no idea where the ruffles are though
dull canyon
have you tried increasing the ray distance?
hardy lake
yes
hardy lake
i guess this isn't too bad?? thats the result of the normal map applied to my low poly shirt
dull canyon
you still don't wanna see those brightly c olored spots
 tepid wagon
@hardy lake Think your normals may benefit from physicaly disconnecting and moving top and the frills away from each other at the time of bake and then connecting them back together so you don't get their normals bleed into each other. Frills normals may need to be recalculated, their normals colors seem off
dull canyon
does he have to move the objects away from each other tho? wouldn't it suffice if just the UV islands are moved?
hardy lake
@tepid wagon thank you, i'll check the normals and move the sleeves away ^^
tepid wagon
Moving islands away could solve problem of having seam* show up at certain distances in game but it will still bake some of the normals of the top to frills and frills normals to the top if ray distance is great enough
too late :>
dull canyon
yeah, I just realized where my thought process went wrong
actually, I'm still confused
if you have only the high poly and low poly version of an object selected, would the rays that the low poly sends out still hit other objects that aren't selected?
tepid wagon
Substance Painter has an option to pair low and high poly objects so they will be only the ones considered in baking process, I don't know does Blender do that
Without specific option enabled every object will be considered in baking. Option is neccesary as with normal maps you only want paired objects to be taken into account in bake process while baking ambient occlusion you would want all objects to be taken into account
but how exacly it is in Blender I don't know
The normal map Jorgen shown has some green and orange spots which shouldn't be there. I don't think I can explain that one though, I think it was either when normals from other objects get baked in or there is too little or too high range the rays can hit high poly object resulting in details that are for example on the other side of an object baked so like details on the back get baked to the front
dull canyon
hm, yeah makes sense
 edgy widget
hi I need help installing Blender Cats plugin
I'm using blender 2.81a from steam
I know where the add-on are, but when I select the folder for cats for install it does not do anything
I'm not sure what files am I suppose to select
 small cloud
github has everything explained, read it
dull canyon
@edgy widget you download the .zip for cats, and then select that when adding the add-on in blender
dull canyon
https://gfycat.com/WebbedFarawayIndianabat it's not pretty but I think I'm slowly getting the hang of how to use sculpting + remesher for quick concepting (hair)
 odd scaffold
Ok so I scaled down my mesh by a factor of 10 in blender to avoid having a weird scale in unity... Now my shape keys move vertices 10 times too far. Is there a way to scale down the shape key influences by a factor of 10
odd scaffold
import bpy
obj = bpy.context.active_object
basisval = obj.data.shape_keys.key_blocks['Basis'].data.values()
for kb in obj.data.shape_keys.key_blocks.values():
    if kb.name == 'Basis':
        continue
    kbval = kb.data.values()
    for vert_index in range(len(kbval)):
        kbval[vert_index].co = basisval[vert_index].co + (kbval[vert_index].co - basisval[vert_index].co) * 0.1
For crying out loud none of the blender resources are any good. you literally are expected to write python scripts yourself with shit documentation. Anyway if anyone did what I did go copy that script or let it be lost in oblivion like all the other blender python scripts I can't seem to find
quaint jasper
Could manually adjust shapekeys to 0.1 and create new from mix, but not ideal
odd scaffold
true, apply from mix is pretty powerful and can probably do that
but doing it manually for each shape key seemed really error prone
tepid wagon
@odd scaffold I tried replicating your issue and it seems it only happens when I scaled down mesh itself without armature. Scaling down both mesh and its armature kept shapekeys the same, is it different for you?
odd scaffold
how did you scale down both together?
I guess I never knew how to do that, so I scaled one, then scaled the other
oh you mean scaling in object mode
vivid crater
i think you couldve scaled the armature in pose mode and set it to rest
odd scaffold
oh, interesting... that will adjust all the shapekeys correctly for the rest pose?
tepid wagon
You can just select everything with "A" both armature and mesh and scale by 0.1
stiff coyote
i accidently closed the modifyer menu in blender, and dont know how to get it back
 onyx crane
@stiff coyote look for the wrench icon on the right side of your screen?
(sorry not sure if this is what you're referring to)
stiff coyote
it was a way different problem, but i eventually figured it out
 slow zealot
my worst nightmare to see when importing an pmx model in blender , any ideas how to fix this?
 fringe rock
shape key set to basis ?
median pike
Flip normals
dull canyon
?
dull canyon
I actually don't see what's wrong with that texture
vivid crater
Maybe they just wanted either at a perfect 90 degree angle or something
Oh, I see the problem, there's a 1 and a 2 over the texture, and the 2 is going into the leg
dull canyon
well is that actually on the texture? I thought yuti made that themselves
and even if it is, that line is easy to fix really
vivid crater
That part was a joke 
silent junco
they also drew the uv map on it
slow zealot
https://gyazo.com/f9ae686b4d0686f402a2771c6551266f flipped the normals ...this is the result :/
 tepid wagon
You were suppose to flip normals on the parts that needed to be flipped, not the entire face. Select head, press ctrl + n (2.79) or shift + n (2.8) to auto recalculate normals, check whether they all point in the right direction and if something is still wrong select only that and flip its normals @slow zealot
silent junco
seems normal
 lament pond
small valve
lament pond
small valve
@slow zealot in case all else fails, you can always hit Normals - recalculate outside
it will get you what you want but may sacrifice something you may or may not notice
 sudden summit
My problem has been solved. In case you have the same problem or something very similar to mine, here are two things you can try :
- Go to object mode, select your object, press
CTRLA, selectApply Scale(orScaleif you are using the circular menu).
If this doesn't work, you can try the following : - Go to edit mode, select everything, then press
ShiftNto recalculate the normals.
 fresh isle
Making someone's Twitter character bc I'm bored
Lme find one with the reference
There lol
Can't post anything from my pc rn bc I'm in a car
slow zealot
cute
silent junco
probably needs a bit more hair polygons
fresh isle
More polygons in the hair? Whatdya mean?
I think that's more than enough imo
Well not more than enough
But r
I think its fine where it is
I don't plan on rigging like 7 bones to the hair, at max maybe 3
dull canyon
https://i.imgur.com/zW5qzMy.png experimenting with blocking out hair

@fresh isle I'd say the resolution is fine, but looking at the references it looks like the ends like spikey balls rather than just a flat "sheet" of paper
fresh isle
Yea I getcha
I'm mostly getting it rough right now anyway
Like I'm doing the tail rn
for example
 subtle jackal
I know it's from like 12 hours ago but please tell me y'all are joking when you say you don't see the problem with that texture.

I mean this is like a damn near complete example of everything not to do when UV mapping and texturing.
subtle jackal
Well anyway for education's sake of anyone scrolling by, let me explain:
- UV islands are a mess. This person marked seams and unwrapped and didn't bother adjusting anything to aid in texturing. No pinning, no sculpting, no attempt to make things nice and even.
- UVs are laid out haphazardly with no regard for UV space usage. There are a TON of wasted pixels in that image, and if that wasn't bad enough
- Despite having all that space between the UV islands, none of it is utilized for mip-mapping, you'll get seams out the wazoo when zoomed out if this texture mips down, there's almost no island bleed-over.
Let's have a look at a decent texture in comparison. Since you gotta do something yourself if you want it done right it's one of mine. Call me a narcissist if you want.
UV islands are adjusted to square edges and positioned cleanly so texturing is dead simple. UV space is used cleverly and efficiently, very little texture space is wasted, and I've used a simple tool called "UVPadder" ( https://polycount.com/discussion/114616/uvpadder-filter-for-gimp-2-6 still works in 2.10.x) to add "infinite" dialation to ensure that mipmapping works as well as possible.

polycount
UVPadder GIMP Filter Automatically generate padding for UV islands! Win32 Binary Download: http://www.mediafire.com/?i7d128nobj898k5
spiral sigil
Should keep in mind that most people creating content for this game aren't professionals in the field with years of experience. Most, if not all of us are amateurs learning as we go on.
Still, your lesson about better practices is still good.
I highly recommend the UV Squares add-on.
subtle jackal
Just because you're not a professional doesn't mean you can't try to do things properly
spiral sigil
True
silent junco
You would become the world’s most disappointed person if you ever saw my uv
 fallow dew
How do you get those clean square unwraps?
spiral sigil
By moving the vertices on the uvs to make then square
fallow dew
ah so u gotta pretty much manually do it
i know theres things like follow active quads and what not
fallow dew
yeah i've been making maps and stuff from scratch for a bit, but im getting rdy to learn humanoids
tepid wagon
You can use Textools rectify for that
fallow dew
Thanks for the answers. Can I get a F for respects cuz im about to delve in to what i think is gonna be months of learning
at least i dont gotta learn blender
again
spiral sigil
Nah it's easy
You'll only break 3 screens
fallow dew
i hope not i just bought this nice 4k panel so i can improve my workflow
idle niche
Yeah, square unwrap is good. It’s default to blender, just need to enable it.
But how you setup your UV’s depends on the method you’re using to texture as well I’d say
It’s not always worth being super meticulous about things if the end result is virtually the same. Time does matter
silent junco
Sometimes you just need to break physics
hardy lake
i found a pretty useful video about UVs today and managed to fix my hair a bit https://www.youtube.com/watch?v=bHbgQs8zkpw

We flatten distorted uv islands without any addons (follow active quads)!
SUPPORT MY TUTORIALS: https://www.patreon.com/cg_matter
business inquiries:
cgmatterofficial@gmail.com
mild nimbus
@subtle jackal I use a Addon specifically for Blender TexTools
It Rectifies your Islands
But Autodesk Maya can just do that for you to
But then again the edges wont be straight if you make them straight in Maya
With this addon saves you the time and straight everything out in a absolute square
https://gyazo.com/7a79f0c5ce58f22f9e3efc5763e17e53 Since its a sphere and I cut Vertically

Go all messed up on the sides
should of cut Horizontally oh well
Very useful add on i recommend it for a faster workflow
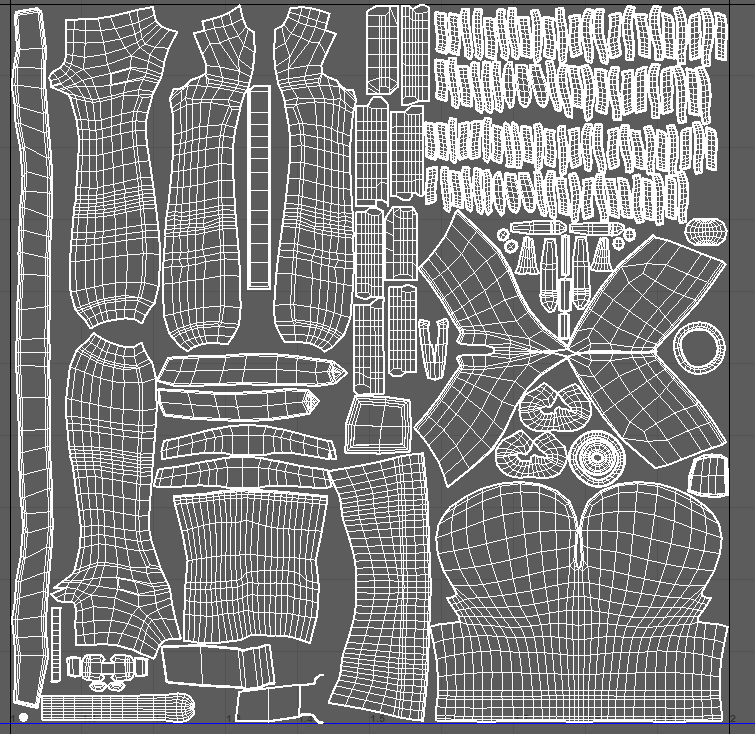
I try my best to align everything to the X and Y axis
just I never vectorized my islands for the sleeves...
so kinda took up extra space
lol
http://prntscr.com/qlktnp this portion
 jagged eagle
okay, #avatars-2-general moves too fast, soo i may ask here. does this seem like a fair solution to both skin clipping through clothes and concealing a hidden body inside the shirt? https://cdn.discordapp.com/attachments/361742235525709825/664985614575468544/unknown.png

planes of black filling the openings of the shirt
i thiiink it looks fine? i really just need an opinion
it's such a loose shirt i can't cut the body right at the openings or she has floating arms and legs
and leaving the body in there makes it clip through her shirt when she moves, in small places
mild nimbus
close it off by exturding
the edges
ur best bet is to do proportional editing
and make them closer
to try and seal it off
lol
spiral sigil
Adding geometry by extruding sounds like a fast track way to corrupt shape keys
jagged eagle
hmm. i think i'll just leave it how it is then. this way i can crouch and stuff and it doesn't look bad inside the shirt lol
loose clothing is a nightmare
spiral sigil
Does anyone here create VRChat models using autodesk Maya?
I have a really annoying issue and I am not sure if there's a solution to it or not
It's regarding the name of blendshapes and exporting them properly into Unity
stiff coyote
how does one uv unwrap
subtle jackal
@fallow dew actually you just straighten the borders and pin them then unwrap again. Addons like UVsquares and such only work on perfect grid UVs
fringe rock
What you can do to avoid corruption is to select all the body but not the face and search propagate/apply
dull canyon
https://i.imgur.com/HN2K2oL.png ok, I think I like where this is going for now

 weak berry
I'm trying to make my first aircraft and i chose the FW-190 A-3 got any tips?
dull canyon
small valve
@weak berry ayy, join an actual 3d modeling discord since that sounds like a really interesting project 0u0
silent junco
@weak berry use a orthografic reference
they shouldn't be too hard to find if you are lucky
though i might have typed wron
weak berry
I'm using one already
 quaint bronze
@weak berry A suggestion I have is to model the plane the way it would have been put together irl! Having the nosecone or flaps be separate objects can help ‘define’ those areas and give a better overall silhouette or look. It can also make texturing easier depending on how you plan to UV the object. Looking at schematics also helps you gain a better understanding of how and why things were made the way they were, which can help tremendously in making the model feel ‘right’! The FW-190 is such a pretty plane and i hope this helps you bring it to life 🙂
Also take into consideration asset usage! Putting the most polys/tris in the places that the player will see/interact with helps keep size down while not losing out on visual fidelity
weak berry
well i'm trying to use it for a avatar that is massive but hide the mesh so i can put the FW in full size with a seat in the hand as a handpuppet avatar
quaint bronze
In that case I would argue going as low poly as you can with as few mats as you can - dont want to take too big of a hit to performance. The general avatar optimizations still hold true even if it's a plane
odd scaffold
Hey, any fix for Alt-b in blender 2.81? It doesn't seem to be working to clip to a bounding box...
Without that I'm not sure how to select stuff just on one part of the model
quaint jasper
How is it not working ?
odd scaffold
in the old blender it would just show a box "frustum"
but now it seems to do nothing
like I want the feature where it clips everything outside of the box you select
odd scaffold
oof, so it's a bug in 2.81? I guess they fixed it so it will get fixed in 2.82?
 fleet anvil
yeesh, im still on 2.79
odd scaffold
I wonder...if it's a rendering issue, maybe it still works to prevent selecting stuff which is what I care about anyway?
quaint jasper
hopefully, seems like it's fixed but awaiting a merge, i don't know if they do mini updates, could be a 2.81b
odd scaffold
aha it is just a rendering issue
stark ore
i started to redo the head now, gotta make the ears, eyes and mouth again, but i think i made it way better this time around
odd scaffold
I'm able to use alt-B to prevent selection
@fleet anvil I can't hide things by selecting them because I'm in the middle of fine-tuning a selection
I guess I would have to learn to save/load selection
fleet anvil
oh right
stiff coyote
so im trying to use a hair particle in blender and follow a tutorial with it, but when i went to add children to the hair, it makes it all crazy
instead of like the tutoriel
and i cant find out why mine is all heywire
does anyone know anything?
mild nimbus
That seems normal to me lol
stiff coyote
mine is the top version
stiff coyote
nvm, im just having trouble
quaint jasper
Cute !
dull canyon
how many tris is that?
quaint jasper
Probably 20k ?
fresh isle
@dull canyon 13.7k
dull canyon
https://i.imgur.com/rWHNXHv.png I'm dreading having to make a single "clean" mesh out of these hair >_>
 dull canyon
floating disks if you mean the iris
dull canyon
so the eye itself is actually just a cavity, and the iris is a disk floating
erm, not really, sorry
 digital coral
wouldn't that cause issues with lighting though?
dull canyon
just looking at a few models in game
digital coral
or do you just apply emissive textures?
dull canyon
no idea how exactly most people are handling that
dull canyon
https://sketchfab.com/3d-models/original-3d-avatarvrchat-etc-6540041d97124e5380549a5782043453 take a look at this model for instance

You can buy that here.(Japanese version only)
https://taisastudio.booth.pm/items/1409955 - Original 3D Avatar(VRChat etc) - 3D model by TAISA (@TAISA) [6540041]
or anything else that shows up when you search for "vrchat"
digital coral
would like to see this in a lit scene though
dull canyon
I mean, you can just download any free model and put it into unity
and test it yourself
most people also tend to use separate meshes for the highlights on the iris
digital coral
yeah I see
most people just apply fake shadows with textures and apply emission to the white of the eye
I suppose that would work. Thanks for the help!
dull canyon
sure thing
dull canyon
hmm, so I have no clue how I would go about cleaning up the block-out for my hair
😐
https://i.imgur.com/VMhi4O4.png like, how would I even approach this?
 hallow bough
By clean-up what is your goal exactly? Making it neater or merging to make in one mesh :0 or making it lower or higher poly? @dull canyon
dull canyon
merging it into one, or fewer meshes basically, right now it's just several hair strands overlapping each other
dull canyon
guess just retopologizing over it would be the "easiest"
dull canyon
would produce shitty topology
silent junco
yes
dull canyon
why are hair so difficult to figure out for me...
slow zealot
be glad you are not working on the same idea as me (for halloween 2020)
dull canyon
mh
dull canyon
looks like a job for hair cards
slow zealot
O_O guess i have to see if i can get my hands on houdini (it has a hair card generator)
dull canyon
or just do them yourself
"just"
I guess I could try and group the strands into bigger clumps and then try to box model them on top...
silent junco
depends on tree
dull canyon
just some planes with a hair texture
silent junco
pretty sure you can do that semi-automatically in unity
give it hair particles
then do some stuff so the hair particles are planes
make them actual objects
just need a base mesh
dull canyon
yeah I have no clue what I should do for my hair... maybe I'll just make the strands a bit cleaner and call it a day
https://i.imgur.com/2ea1dBF.jpg I guess this could work?
 dull canyon
meh, enough for today... if anyone has any suggestions how I could approach this better please @ me
weak berry
i did some texturing but because it was my first time painting but because i will use it on big distance you will see it as just fine
 cold charm
not sure where to ask this -- but i can't seem to find any way to download cats since the website doesn't seem to work. Anyone know what I can do?
spiral sigil

GitHub
:smiley_cat: A tool designed to shorten steps needed to import and optimize models into VRChat. Compatible models are: MMD, XNALara, Mixamo, DAZ/Poser, Blender Rigify, Sims 2, Motion Builder, 3DS M...
quaint bronze
@weak berry its coming out really well!
mild nimbus
@dull canyon Dont use boolean modifier.
Alt + M and merge these vertices manually.
No reason to retopo when the hair itself is already low poly.
Merge everything manually then subdivide if needed
Hair is one of those things that takes alot of manual care.
And having it merged properly allows easier texturing if you want to add that anime vibe via specular on the hair
since strands are individual objects
and its hard to make it look anime like
cause of the space between the strands
Also
using the Boolean modifier will ruin the toplogy
thats the poor way out lol
dull canyon
yeah, I tried merging stuff manually, but I guess I just lack experience to do it properly and come up with a proper "flow"
fresh isle
Finished rigging today and decided to render it
dull canyon
very cute
quaint jasper
Clean AO !
quaint jasper
How long ago was that stated 
dull canyon
https://i.imgur.com/lJztrkR.png something tells me this is not how you're supposed to do it
 quaint jasper
You can select those loops and scale them on x 0 to align them
Wait, are they crossing ?
dull canyon
they're two strands of hair merged on the edges
dull canyon
that's not the goal tho
I want to clean up the hair mesh so I don't have a bunch of individual meshes for each strand
but I have no clue how to do that properly
silent junco
fresh isle
Wait I thought I said the ao was vertex color. Guess I said it in a different server or something
Oh right it was nvm lOl
silent junco
did you use freestyle for those lines?
fresh isle
Yea
I was debating using only silhouette but then I decides against that
I also used dashed outlines
Considering concept at least
This was the image I used as basis for her design, usually she wears longer pants
I think I got pretty close
silent junco
i feel like the hair bottom is too flat on yours but other wise its pretty much the same
except for the obvious that 3d doesn't do the 2d distortions that well
fresh isle
I always got that but I couldn't get it to look right if I did that
3D caaan get that look but it'd have to be some insane jankery with custom normals
Plus other art made it look flatter than that image makes it seem
silent junco
and shape keys and shadows and a thousand more different types of textures
silent junco
shape keys are hell depending on what you want to do
fresh isle
But I always just turn off my brain when I do mouth shapes
It just comes to me
I could rig a jaw maybe? Just to make that process a little quicker
silent junco
you could
fresh isle
But eyes are big pain for me
I usually have good consistency with them but
Man
I just hate the process
spiral sigil
hi
stark ore
i think im content with the head now, im pretty sure i made it better this time
now to merge to the main body
stark ore
i merged the verts on the ear now thou
onyx crane
Does anyone here have Cinema4D and a few minutes? I'd like this file as an .fbx but I only have Blender so I can't export it. If you have a moment to convert it for me and send it over I'd be eternally grateful! https://www.turbosquid.com/3d-models/beach-chairs-c4d-free/967483
Beach chairs 3D Model available on Turbo Squid, the world's leading provider of digital 3D models for visualization, films, television, and games.
onyx crane
Got it! Thanks @daring karma !
dull canyon
https://i.imgur.com/KZZRgay.png hmm, yeah guess I like this approach better, just gonna be a lot of manual clean up of the meshes from those curves probably
 spiral sigil
those ears tho
dull canyon
what's wrong with them
dull canyon
ah, thanks 😄
yeah, I might scale them up a bit
depending on how they match with the rest of the design
 subtle ridge
we
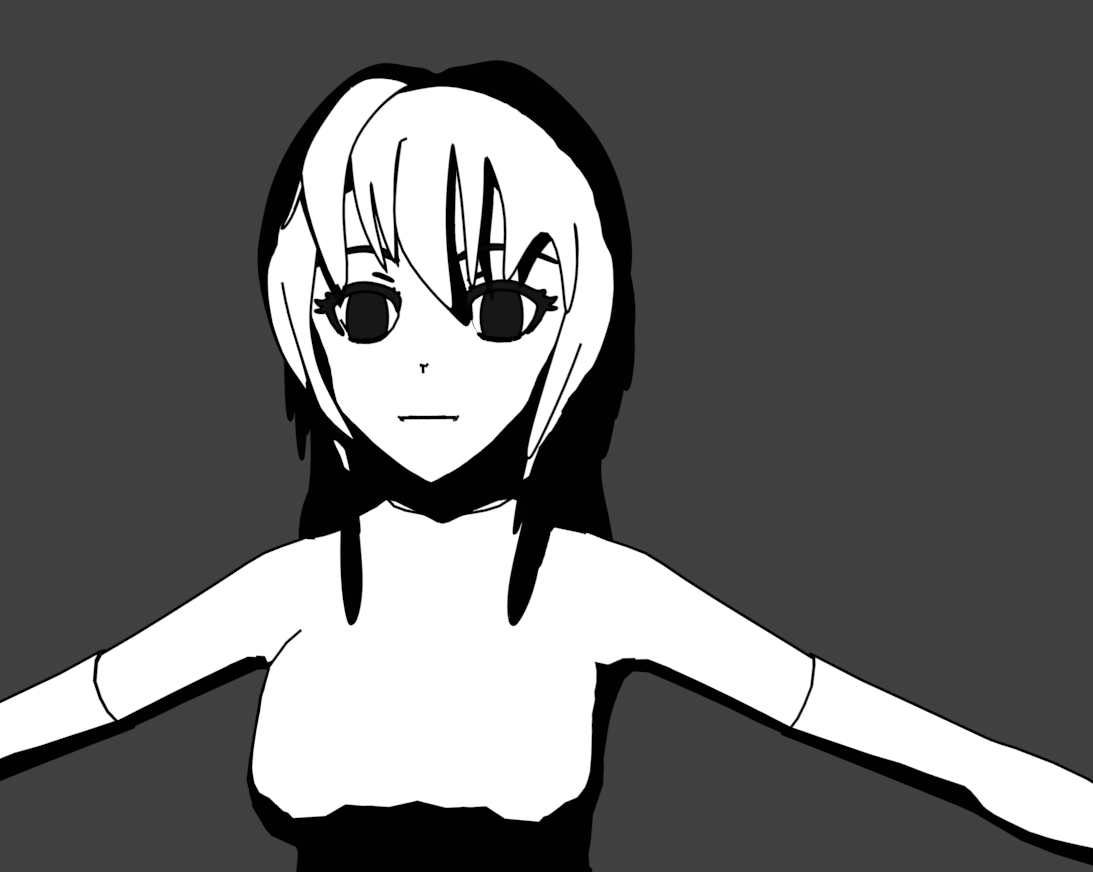 dull canyon
someone remind me, how does the dynamic bone limiter work? if my avatar has <32 dynamic bones then they will be active for everyone?
ie there is no way to hard disable all dynamic bones?
quaint jasper
it's 8 components and 32 collisions if i remember correctly
you can hard disable them by editing the json
@dull canyon https://docs.vrchat.com/docs/avatar-dynamic-bone-limits#section-modifying-the-dynamic-bone-limits
VRChat
Dynamic Bone is a very performance-heavy component, and it is easy for an avatar creator to overuse the component. VRChat has provided a method by which users can limit the number of Dynamic Bones permitted on avatars.You can access the Dynamic Bone Limits toggle by going int...
dull canyon
8 components, what does that mean?
I have no clue about unity yet so I don't know the terminology
quaint jasper
if you check the link i sent you'll see i was completely wrong
quaint jasper
yes
dull canyon
and 8 colliders max
good, so I should be able to make my hair look decent and not have it clip through the body with just a few dynamic bones
quaint jasper
yep
dull canyon
so, if I have a thick/fluffy tail and I wanted to use, say, 3 bones to rig it, would it work that only the first and last bone are dynamic bones? or does the whole chain have to be dynamic
quaint jasper
yeah you can absolutely decide which bones are affected
 stoic ridge
what can I do to join these two faces
I have tried an awful lot
it's like the one last cursed section of this mesh left to clean up lol
stoic ridge
no effect, no effect, no such action(?)
median pike
Lol
Select both meshes with the 3d view and press ctrl + j in object mode
Than go to edit mode
stoic ridge
it's all one mesh
median pike
Oh well than just remove doubles and recalculate normals
stoic ridge
normals, oho, there's a random thing to try
median pike
What blender are you on?
stoic ridge
2.80
median pike
Than just go to edit mode and merge by distance
stoic ridge
no effect
median pike
Are the verts on the same position?
stoic ridge
there is only one vert
both the faces seem to share it
oh god I have angered the blender gods again
killing process
this thing you call a tool .. a demon lives inside it
who wants to play with my cursed blend file
median pike
Your file is cursed. Thats your first mistake
stoic ridge
yes
I only work with cursed files
or rather
I bring the curse to the files
I was only making a nice ice cube tray
then it got out of hand
this thing takes about 15 minutes to do any given operation at this point
especially if the operation is undo or redo
spiral sigil
subdivide it 3 times
stoic ridge
is that the blender equivalent of the "compress it 6 times kunt" meme w
I think this mesh was more manageable when it was inefficient and had lots of individual quads
as soon as I optimised the number of tris making it up, blender was suddenly very reluctant to touch it
anyway the appropriate course of action at this point is probably to ignore the curse and ship it
median pike
Dont subdivide it lol
Thats gonna more than double the polycount
Also you are making an object with a lot of geometry for no reason
If you want a pattern like this just use parallax and tiling lol
Much less resource intensive with simple geometry
stoic ridge
ssh
I could definitely do this using a texture yes
actually I could be doing it as a raymarch
but it was an exercise
I don't know how tiling would pan out
the pattern isn't exactly tiled
it kind of is .. with rotations and stuff mixed in
silent junco
The reason it’s shit is because you are using 5+ vert polygons
 hollow radish
Some zbrush stuff https://gyazo.com/41975ffd164082607ed65da4bfc46a02

 south arch
so you cant just put a photo of me on an avatar to make it look like me put some detail and boom
quaint jasper
@hollow radish Very cool addition of the hair on the texture !
hollow radish
I just wanted to see what it would look like before I decide anything 🤔
quaint jasper
could be cleaner, but i think it looks great
hollow radish
this is what I have right now
Another avatar I have in the pipeline has proportion issues, just wanted to see before I spend a few days again...
💦 Retopoing the hair is going to be nightmare
olive roost
Oooo!! The hair was super cool b4, but im rlly liking the added asymmetry of the bangs!
hallow bough
I am judged
 devout cloud
Anyone know how to use blender 2.8
 halcyon hare
 cobalt prism
what should i add
vivid crater
Teeth
 mint furnace
Anyone know any good tutorials for Illuminated/glowing 2D facial visemes like a 2D face, that glows when I talk Im trying to work on something like that

Like this
spiral sigil
You can probably simulate that kind of effect with blend shapes that go from really tiny to expand into the mouth and have them be different colors. Kind of like how the KDA Akali mask works for most models.
 crystal sundial
Anyone here do custom avatars? Willing to pay
spiral sigil
VRCTraders in #community-servers-old
 blissful sleet
@mint furnace best way is to have several mouths, with varying emit textures, that are laid behind each other very close. then for the shape key you invert their locations, so brightest is in front, then the next brightest, etc, but still very close
to see example https://opengameart.org/content/robot-head-character
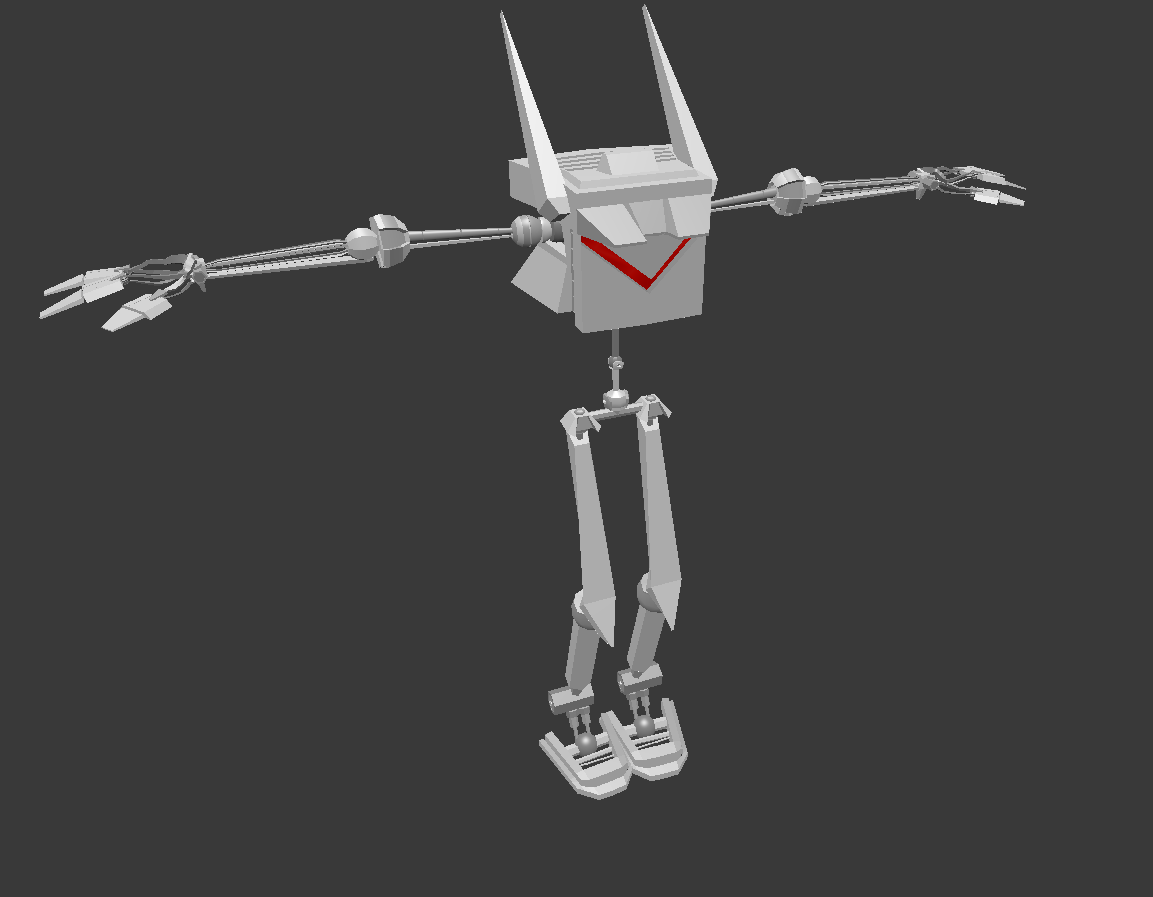
OpenGameArt.org
mechanical pieces into a humanoid character. rigged, works with unity humanoid. 15k tris. basic texture.
mild nimbus
Shader for eye is done
Literally all shaders XD
The UV is just a white circle
Cause parented UV map to the bone
So I can adjust the specular of the texture via bones
This shader is definitely cinmatic shot ready
Since supports world lighting and local lighting
 nimble dagger
助けてください!help me!
Uniry:
(Your avatar is humanoid, but it's feet aren't specified!)
(Your avatar is humanoid,but it's upper arms are not specified!)
(Your avatar is humanoid, but it's feet aren't specified!)
これが出てきます
どうすればいいのでしょうか ?
This will come out.
What should I do?
dull canyon
@nimble dagger https://gfycat.com/HairyNewDinosaur does yours look like this?
 lament pond
 warm jetty
dull canyon
warm jetty
dull canyon
@lament pond dang, how many tris is that hoodie?
lament pond
Not as much as you'd think
dull canyon
yeah that's why I'm asking
my guess would be like around 2-3k?
or even less
hair are coming along
silent junco
i find it funny that the hyper detailed robot arm is there and then the very cartoonish anime character
 dull canyon
ed...ward...
 alpine steeple
Uhm, so i have no idea if this is where i should put this. But i was fixing some rouge vertices in blender, and now my model looks like this.
I dont have a backup before this happened. In blender it looks perfectly fine
quaint jasper
go to the Basis Shape, select the vertices that should never change for any of the blend shapes. The go to options: Mesh -> Vertices -> Shape Propagate.
alpine steeple
is there a way to edit the base shape key without needing to apply that change to all other shape keys?
What ive been doing is when i need to make a change to the base keyshape after i make that change i select all of the vertices i i changed and then use the "blend from shape" with base as the shape. on all of the other shapekeys
quaint jasper
@alpine steeple Not if you modify the mesh that contains the shapekeys
alpine steeple
what do you mean?
im sorry i thought i was editing the mesh when i was making those changes to the base shape key?
quaint jasper
yes, but if you have a single mesh, then all those changes are on the basis
alpine steeple
Sorry i dont think i said this right. When i edit the basis it doesnt apply the change to the rest of the shapekeys
quaint jasper
yeah because that's not how it's meant to be done
shapekeys are made when the mesh is done being modified
if you need to change something that is part of the vertices affected by the shapekeys, then you either need to shape propagate those vertices if they're not meant to change with each shapekey
or if they're meant to change with the shapekey, then you need to edit the other shapekeys or create new ones
dull canyon
https://i.imgur.com/WVobyv7.png how does the shape of the top of the head look? I noticed it was much too flat and also that the skull was a bit too long so I tried to fix that
 dull canyon
thanks for those skull references
silent junco
Skulls are fun to mess around with
dull canyon
so when modeling eyes, should they be fully opened, partially closed or fully closed?
 fading pine
Are textures and materials the same thing
tepid wagon
Nope
You could say texture is an image that you wrap around 3d model and material describes what parts of a model it will affect and what shader and textures it will use
dull canyon
I guess you can also kind of think of a material as a "container" for textures
among other things
fading pine
Ooooh
dull canyon
in terms of vrchat models they really are just that from what I gathered
for instance you say skin has a material, hair have a material, maybe the eyes have a separate material, then in unity you can apply different shaders to each material
spiral sigil
for vrchat, the easiest way to explain it is that a material is a 2d texture applied to a 3d model that allows you to define its properties with the help of shaders
median pike
but materials arent textures even when thinking of vrchat
tepid wagon
Wrong, texture doesn't become a material after it is being applied to anything, it is still a texture
median pike
technically a model always has a material. otherwise the poly structure would just not be visible
so I guess you could say material is a way to set the properties of how to render an object
and a texture is just an image a material can display on a model
fading pine
Ooh
So material a just a way to config how something looks
Materials use shaders and textures
dull canyon
very simply put
tepid wagon
Yes, you assign material to a certain part of a mesh (can be the whole mesh) and that part will use shaders and textures you apply to that material
jagged eagle
this isn't really a modeling question but i can't find the answer online, it's just about unity. is there any way to make like "selection groups" without actually changing parenting? like i have two versions of my avatar and they share a couple of dynamic bones, currently i have to open their armatures and ctrl-click the bones in matching sets to manually select them if i want to change their values
it'd be kinda nice to be able to click a button and have the set selected already, but it's not a huge deal i guess
 knotty plaza
But random but I was editing down my avatar just now and hit 69,420
spiral sigil
Nice
dull canyon
https://i.imgur.com/dhZKmP3.jpg how does this look for "low" poly feet?
 spiral sigil
9/10 would suckle
dull canyon
okay. still feel like 1.3k tris is a bit much without subsurf but I also feel like I don't wanna go any lower res
they'll probably be hidden by socks/shoes anyways but I still want a solid base too
spiral sigil
they are good enough
you going to hide them anyway
maybe even remove them if you have no way to see them
dull canyon
yeah, I know. it's just the "perfectionist" in me that keeps yelling
yeah I just want to make a base mesh of the body which I'll then modify with different outfits and stuff


I'm also somewhat happy with how the topology turned out
the heel is a bit iffy
but oh whale, would need another loop or two there to make it rounder
spiral sigil
seems good enough to me
dull canyon
thanks, yeah I think so too
at least a lot better than what I had before
and the edgeflow should be clean enough so if I add more loops in the legs they won't go throughout the whole foot
 viscid hornet
looks pretty good, reminds me of Splatoon feeties.
which is a good thing since Splatoon's feeties are very low poly and dont look bad!
dull canyon
I take that as a compliment, thanks 😄
subtle jackal
ye those are pretty good
only thing is the lack of nails but that's easy to fix anyway
dull canyon
yeah
https://i.imgur.com/YFT0FKH.jpg meh, guess I have to do the eyes from scratch.. they just don't look right to me



 spiral sigil
they seem too big
dull canyon
well it's meant to be more on the stylized side of things
using Ahri as reference
but I guess I'd have to make the whole head shape more "anime-ish" now that I look at it
spiral sigil
yep
dull canyon
ie wider
dull canyon
yeah, somehow I just now noticed that
that'd probably explain why I can't get it to look right
hallow bough
I think having lower lashes would help with the uncanny feel for this style
digital coral
Hm
dull canyon
yeah that too probably
digital coral
Are you familliar with traditional sculpting stuff?
digital coral
Like primary, secondary, tertiary planes
Ah oki
Working on my vr chat character
There's another dress ontop of this outfit, so I didn't bother with proper folds on the torso
I'm excited to use some cloth physics for frills
 solar fossil
Muh fraaaames