#3d-modeling
1 messages · Page 74 of 1
 feral wolf
i do
 swift heart
good
rigging and shapekeys are also important to know, but they're not necessary until after you're done with the modeling
feral wolf
@swift heart what you mean exaclty by facial animations
swift heart
blinking, smiling, eyebrow movement, etc.
feral wolf
but those arnt necassy right to make an avatar
swift heart
the lip sync is necessary
feral wolf
why?
swift heart
cause there's a bug in vrchat where it plays your voice back to you when you speak if you don't set all the visemes
:v)
feral wolf
oh k
soo btw what did you mean by watch daniel kreuter anime character tutorial tot the deep end
swift heart
it's a good character modeling series
but most people say to not do character modeling stuff for a while
because it's better to work your way up to it or something
i'd disagree, because if your goal is to make a character, then you should learn to make a character
feral wolf
yea
swift heart
that's why i said it was jumping in the deep end
feral wolf
so btw do i have to watch both
swift heart
both?
swift heart
oh
feral wolf
and, anime character modeling tutorial II
 feral wolf
i hope this dont take to much talent or else im rip
swift heart
i started from nothing and ended up with a complete character from scratch after a few weeks
it takes a lot of patience and the first time will take you the longest
feral wolf
soo if i get this right without a template its hard to make an model?
swift heart
you should definitely get a reference image
i think he links the one he's using if you want to follow along with that
otherwise you can try to find one for some other character online
feral wolf
will it make a difference if i choose to use the same or another
swift heart
shouldn't be a big difference as long as it's a good reference
swift heart
i.e. you want to get front and side views of the character that are consistently sized
feral wolf
what you mean?
feral wolf
but it would be hard to create a skeleton right at the first model right
swift heart
you'd make the skeleton after you make the model, if by skeleton you're referring to all the bones
feral wolf
no i mean skeleton as model
swift heart
you should be able to model some basic objects before you start doing characters
if that answers your question
feral wolf
well not rlly
XD
i asked bc skeletons has a bones
like the chest for example
and i was wondering if its to much for a beginner to make
swift heart
the bones aren't really the hard part tbh
or at least they shouldn't be too bad
either the modeling or texturing would be the most difficult
but it's mostly just time consuming and takes a lot of patience
 median pike
id say deppends on what youre more familiar with. I am terrible at sculpting, know a bit of texturing so I know what I am doing at least a bit but I am pretty good at rigging and weight painting
 quaint jasper
eyes look like they could maybe be rotated 10-15% on themselves
 mild nimbus
same
I been trying to adjust it a bit
when i apply the texture that weird placement really shows...
mild nimbus
I adjusted it more
made eye lids bit smaller
to cover the iris
moved the corners of the outer eye socket big foward
 stable edge
shook
quaint jasper
@mild nimbus nose might be too high still
mild nimbus
eh ill see
 silent junco
The face remind me of every woman in dr. Stone
 granite quartz
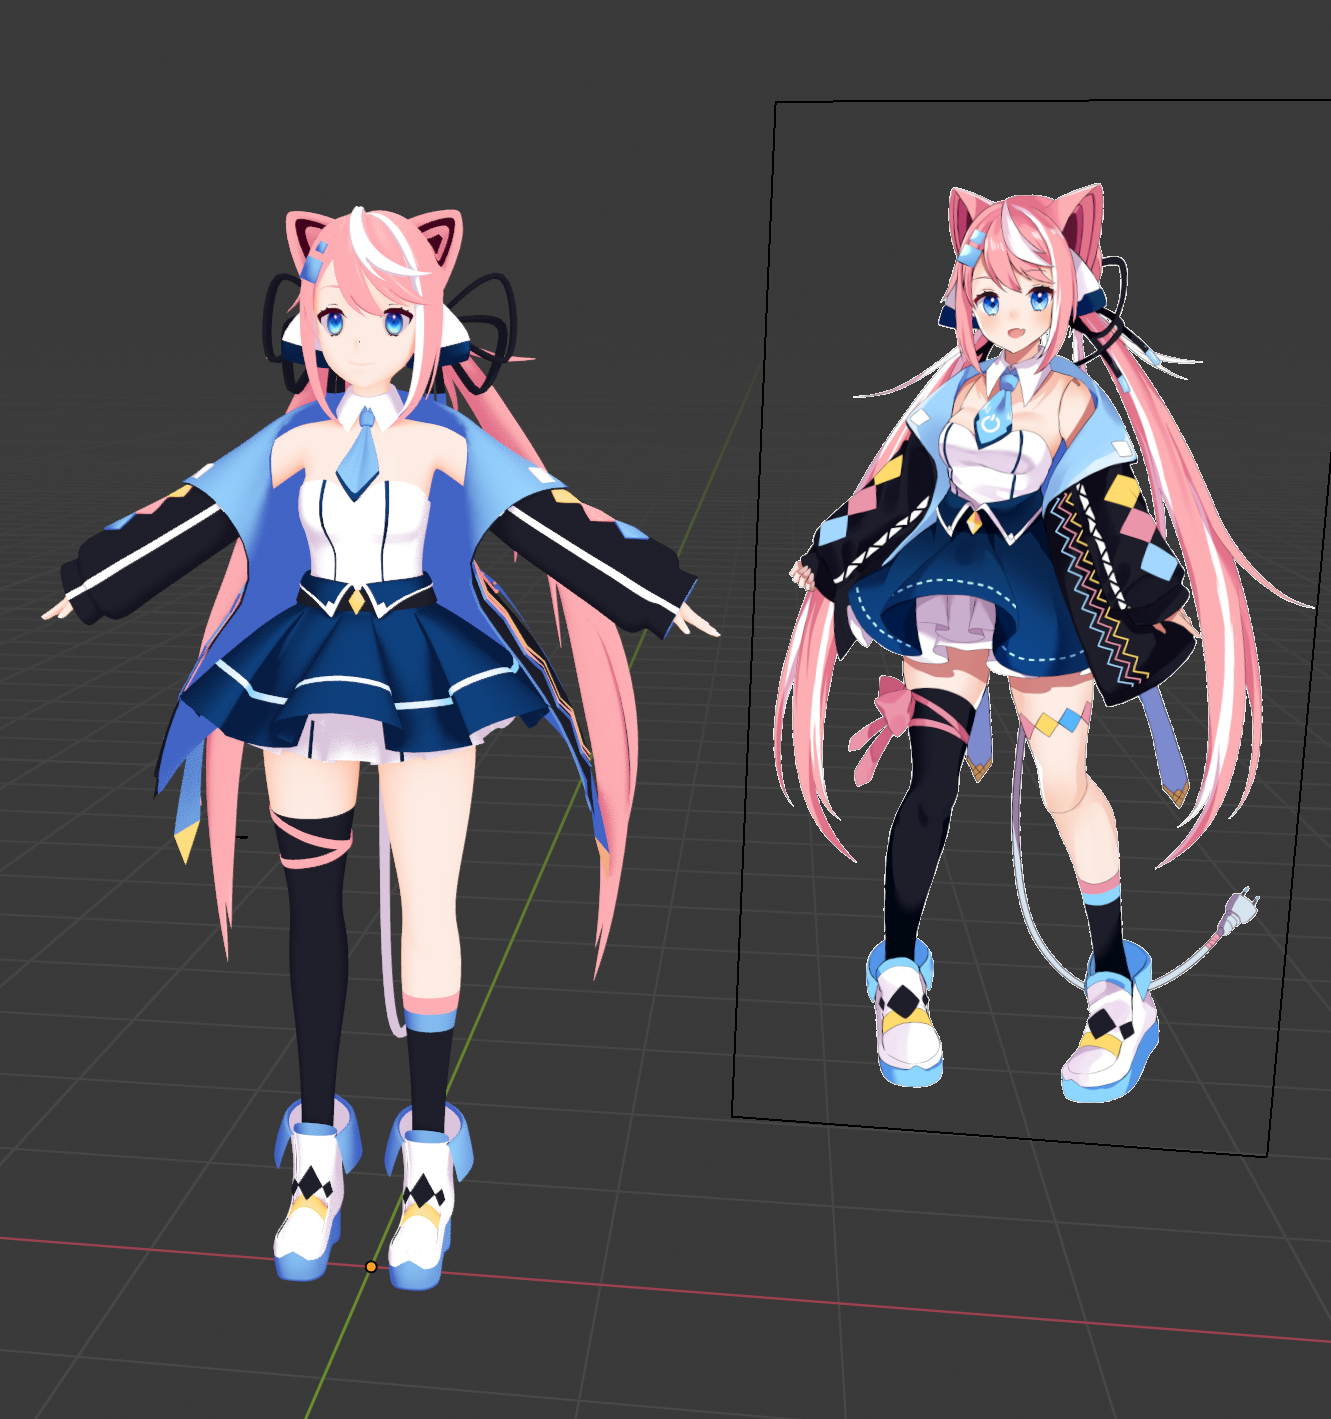
Recently learned how to take nice rendered pictures in blender! Still figuring it out, but I'm really happy with how this one turned out!
Also, model is made entirely from scratch!
silent junco
Needs better materials
 dull canyon
cute
silent junco
The blue part looks like it should be higher on the reference
But that might just be the angle
 hallow bough
Might be the shading color that's throwing you off. The main colors seem close.
median pike
id probably just add some gloss to it
but yeah that looks great
and very accurate
did you use a base or did you make it from scratch
silent junco
There’s some details missing but that’s about it
dull canyon
well he said it's a wip
silent junco
Yeah
 scarlet dust
I'm in work to create my own body in blender. (I do right now my arms and shoulders, to create the Hand with Fingers will be shiiii though. XD)
https://gyazo.com/d319125b763de9302ce30550dec4a721

 hallow bough
Why I like to box model the whole thing roughly first 😅 Especially hands
dull canyon
yeah hands and feet are probably best box modeled, for the rest of the body it just takes practice to sculpt, as with everything >_>
scarlet dust
well I startet like this! XD

I already had the pic of me in, but I think you guys know why I don't show it in the gif! XD
those spheres where placed on my pic fron and side viwe
 median pike
that looks great
I have 0 sculpting experience but I do need to sit down and learn it since I want to finally make an avatar from scratch this holyday
mild nimbus
I forgot to show the rework on the face

lul
Lowered the eyes and made pupils further i nthe center
the one with the mark on her face is the current one
median pike
that slight eye shift really makes a difference
median pike
oh yeah
 glossy briar
feral wolf
glossy briar
feral wolf
welp rip me
 spiral sigil
?
 sleek arrow
how would i fix this? D:
mild nimbus
@sleek arrow I assume the underwear is the problem
Looks like a failed bake
Your best bet is to recolor that whole thing the appropriate off white
I see alot of bleeding from other parts around the model during the baking process
If not some of your normals are inverted
sleek arrow
I haven't baked it
theres not even a texture on it
Thats why I'm super confused lol
The only thing I did was solidify
but it was very very small solidify
sleek arrow
i found the problem I think? It's like it's twisted
quaint jasper
oh, recalculate normals or make normals consistent
dull canyon
so... if I'm done blocking in the general shapes of my character using primitives and the move brush, where should I go from there? join it all together, remesh, dyntopo sculpt? or quadriflow remesh and multires sculpt? or...?
 desert crown
just dropping this here, if anyone knows how to help fix this i'd appreciate it. I thought the ear textures along with the head was supposed to be transparent, but apparently it wasn't even though its transparent in the original png file.
quaint jasper
did you check the alpha setting in the image ?
desert crown
yep it only makes everything else loses texture so that couldn't be right
quaint jasper
might be worth fixing yourself then
desert crown
yeah but no leads
quaint jasper
?
stable edge
they dont know where to start
quaint jasper
gimp, add transparency layer, select the white areas, ctrl + x, done
desert crown
here let me uh
@quaint jasper open this texture png and tell me if its already transparent or not
the ear part
desert crown
really? it looks transparent to me
 desert crown
every tutorial for blender uses node editor huh
guess i'll have to f-ing resort to it
 azure rain
yes that's how shaders work in blender
 winged atlas
What does 3ds max do to the models that causes the textures to do this to it's models?
nvm i got it
or at least I thought I did
okay this time I actually do got it
it was a blender thing
silent junco
nodes are super usefull
you can easily make: gradients, random spots and cracks
all good if you wanna make cheese
azure rain


Wow, this has been quite the month (and a half)!
I'm finally done with all 30 #nodevember prompts!
Each is made from a sphere primitive with a procedural shader in Blender.
Thanks to everyone for the amazing support and overwhelmingly positive feedback! :)
#nodevember20...
Retweets
525
Likes
2712
 Twitter
here's all sorts of stuff made just using nodes
silent junco
you might need to add in the info that this is all made from the default circle
or planes and cubes
 wicked schooner
So is it true the poly count limit was upped to 70k?
Im getting back into modelling and i heard that it is, but i wanna make sure
median pike
@wicked schooner there is not limit
wicked schooner
👀
median pike
but anything uploaded above 70k will be marked as very poor rating
wicked schooner
Thats fair
median pike
its a recommendation
that you should follow
like even 30k polys is well enough imo
wicked schooner
Yea nah i did models at 20k a year or so ago i was just curious
median pike
great
sleek arrow
so I was AO baking and I'm stumped. What could be causing the cheeks and neck and how do I fix it?
I don't really care for the lashes, I forgot to seperate them
 modest shell
Hello everyone, i'm trying to model a banner for my world and its the first time i model a thing from scratch.
i'm trying to add bones so i can weight paint them but they don't let me apply weight paint even after i parent them. can you guys help me find the thing i'm missing?
quaint jasper
@sleek arrow Make sure the normals are correct
@modest shell What's the error message ?
modest shell
Nvm , got it working with the fix model in CATS
silent junco
have you marked all as smooth?
sleek arrow
SOrry just got home from work, I've been trying to smooth it out, but either it's not working or I'm doing it wrong
sleek arrow
I'm gonna leave this here and head to bed. The only thing I could think of was shade smooth but that did nothing lol.
sleek arrow
like recalculate?
sleek arrow
i didn't work sadly, that was one of the first things i tried
 tepid wagon
@sleek arrow Try adding triangulate modifier (do not apply, just select "apply modifiers" in export settings), needs to be placed after subdivision surface modifier and before solidify modifier if you have them or bake AO with antialiasing disabled, export the AO in double the resolution then what you intend to use, scale it down to desired resolution in any image editing software and export it back to Substance
spiral sigil
does anyone know what the geometry for anime eyes usually looks like?
dull canyon
disk
tepid wagon
Think they are usually concave with floating irises, its easier to make eye tracking work correctly
dull canyon
with a pole in the middle
the "eyes" are just the hollow eye sockets in white, and the iris is just a floating disk
spiral sigil
is there a material i should use to keep the concave part from going dark because of shadows?
dull canyon
you can, if oyu want to use separate shader for them
spiral sigil
what usually works best though? I'd imagine most would use an emission but that might be screwy with dark environments
silent junco
separate shadowless shader
dull canyon
https://i.imgur.com/1vyYicM.jpg not sure if I managed to avoid the uncanny valley or if I landed in it dead center

it's supposed to be on the stylized side of things
not sure if the eyes need to be a bit bigger or if they're fine like that
silent junco
alien baby
dull canyon
that's a start I guess
 hardy agate
i think it looks pretty good. its magnitudes better than anything i could do.
 dull canyon
okay
median pike
so I will be starting to sculpt this holyday. All my modeling experience is with blender 3.79. My question is, since I will be learning sculpting for the first time, should I learn blender 2.7 or 2.8 or another program? I personally dont really like 2.8 as it changes and removes a lot of things I am used to from 2.7 but if I will be using it for just sculpting I can just learn it as a new program if its much better at sculpting than 2.7. But at that point I might as well learn a different program than blender if they are better for sculpting. So what do you guys suggest?
spiral sigil
I hear 2.81 has better sculpting tools but worse weight painting tools
median pike
@spiral sigilwell I will be doing rigging and everything around that in 2.7
@quaint jasper so is this a better idea than something like Zbrush or something?
quaint jasper
Zbrush is the best for professionals, might take months/years to become good at it though
and it costs a lot for a license
Blender is free and accessible
median pike
so blender 2.81 it is than. Are there tutorials for that version available already or no?
quaint jasper
yeah, quite a few
the ones for 2.8 are also applicable
but 2.81 has new features
median pike
alright cool, thanks a lot
sleek arrow
So I tried your way to see if it worked, it didn't. 😦 Blender crashes everytime i try. @tepid wagon
quaint jasper
What issue are you having ?
sleek arrow
this one still
quaint jasper
sleek arrow
sleek arrow
I figured it wasn't when i was messing with normals last night xD But I've not worked with normals alot to fully understand them
it seems to just be the cheeks and the neck from what I've seen
theres a few on my chest, but I'm sure if I can figure out the face first, I can get the rest
quaint jasper
Did you check the faces themselves in edit mode ?
sleek arrow
that would be this right?
quaint jasper
no i mean the mesh in edit mode
quaint jasper
And you're only baking half of it ?
quaint jasper
Did you change any setting for your bake ?
sleek arrow
Not that I know of, I think I set normals from faces but thats about it
quaint jasper
Can you send me an fbx of just the face mesh or neck
sleek arrow
Yeah
quaint jasper
i think i may know why
looks like your mesh isn't symmetrical
So if you try to bake only half on overlapping UVs, that might create some of those artifacts
@sleek arrow
sleek arrow
Is there a way to make it symmetrical?
quaint jasper
Not without having to redo a ton of work i'm afraid
so try to bake the entire face instead to see what results you get
sleek arrow
Okie
quaint jasper
Also there's overlapping vertices at the back of your head
If you clean it up a bit you can get a neat result for the face
And giiiiirl these eyebrows are a mess
i don't know what the fuck is going on with that mesh
sleek arrow
I've noticed every TDA face I've used
seems to be set up so poorly lol
I may go on another face hunt and see what I can find lol
 small cloud
@sleek arrow have you tried deleting the faces that are on those spots (to eliminate overlaying faces)? that bake looks like zfighting in some way
sleek arrow
I haven't tried it.

 plush finch
silent junco
plush finch
silent junco
this looks way too much like wolfenstein if it was a 64 game
 safe tapir
dull canyon
safe tapir
dull canyon
 quaint jasper
Should be thinner from temples all the way down
dull canyon
https://i.imgur.com/nqf5mPV.jpg better?

using KDA Ahri as main reference for the face
quaint jasper
I still think the top of the head is very tall, could be smoothed out
If you look at your side view bottom left
It should be almost a sphere, instead the top of the skull goes up
Bottom of the face looks good now I think
sleek arrow
oh my god, these ears are awful
quaint jasper
aren't they all like that ?
sleek arrow
This is the first time i've ever unwrapped it because I'm trying to paint the tips, which is impossible it seems
If I paint the tips, it fucks up inside the ear lol
quaint jasper
can't tell which is which on the UV
sleek arrow
sec
Horrible example but yeah
whatever those pointy pieces are in the ear is what's cauing an issue
I think the squares are my tail?
quaint jasper
are you painting on the UV itself ?
sleek arrow
The ear
not sure what those long pieces are above the ear UV
and it looks like the long piece in the center is the inside of the ear lol
quaint jasper
yeah i expect that result with an unwrap like this tbh
sleek arrow
is there any other ways to unwrap?
quaint jasper
well, seams might help, you have smart uv project, other options for the unwrap itself
sleek arrow
I'll have to look into seams. I've heard of them but haven't really touched them before
quaint jasper
it's super simple, you select edges, mark seam, and that tells the unwrapper " this is a cut"
it helps making pieces in the UV without cutting the mesh itself
sleek arrow
oooooo that sounds pretty nice
quaint jasper
yeah, that's how i managed to get a clean unwrap of the face you sent me, one seam at the neck level and it becomes one smooth piece
sleek arrow
God that face is horrible lol. I'm still debating if I wanna hunt down another face or not.
sleek arrow
I'll take anything to learn honestly lol. Whether it's complicated or not.
Working with models isn't easy after all. :p
quaint jasper
wait until you make a world 
So to start off, hide everything else but the face mesh
click it then ctrl + i then h if you don't know shortcuts
make sure the neck pieces are there
because you have doubles, so they're not joined
sleek arrow
okie
sleek arrow
Isn't the best unwrap but better than it was
me and seams are gonna be best friends, this is the best tool ever lol
quaint jasper
that looks perfect !
sleek arrow
found out what that long ass strip is
and it's kinda irritating lol
wait, so since this is just one ear, if i do the other, won't it overlap each other?
quaint jasper
Well you could delete the other ear and symmetrize this one
quaint jasper
difficult to knw without seeing the UVs
sleek arrow
i assume it's from this one
quaint jasper
and that's with symmetry ?
sleek arrow
thats just from seams and unwrap
quaint jasper
you can try grabbing the uvs manually and moving them away to maybe avoid that overlap
quaint jasper
well, uvs that aren't identical shouldn't overlap like that
@sleek arrow the problem is in the ear itself
sleek arrow
oof
quaint jasper
remove that and you shoudl be good
sleek arrow
the overlapping part?
quaint jasper
the inside part, you don't want closed geometry for unwrapping
but yeah those ears are terrible lmao
sleek arrow
Very terrible lol
I knew they were awful, I was planning on fixing them up, redoing the fur on the inside
sleek arrow
if this doesn't fix it, I'm gonna rage lol
quaint jasper
that should be good
sleek arrow
I'm honestly excited to make the fur lol. Sculpting is my favourite thing
AAAAAA
YESSSSSSSS

uv is still trash but it fucking works
quaint jasper

one thing you can do on top is select all uvs and do ctrl + P
might help tidying up
sleek arrow
Okie, thanks. 😄
sleek arrow
Doesn't look too bad 🤔
quaint jasper
looks great !
sleek arrow
Thanks 😄
hallow bough
Looking great! I love seeing so much effort be put into fixing up these types of models 😄
@sleek arrow If I may ask did you do an ao bake for your characters textures?
dull canyon
https://i.imgur.com/w1zzj81.jpg how does this look?
 silent junco
uncannu
silent junco
yeah
dull canyon
how so
silent junco
its mostly because of its untexturedness
dull canyon
so not because of proportions
silent junco
its better to see what can be improved with an angle


 silent junco
im not sure if the head is too big or its because its missing the neck
dull canyon
trying to get something that looks like KDA Ahri...
silent junco
im guessing its because of its necklessness
dull canyon
maybe, I'll add some more shapes in a bit
silent junco
it looks like something between baby and adult
dull canyon
so, a teen? 😛
silent junco
yes and no
dull canyon
I'll post again when I added some lashes and brows, they usually make a big difference
and ears
silent junco
yeah
dull canyon
was mostly concerned about the general direction and proportions
silent junco
will it just be a flying head or will there come a neck
dull canyon
there'll be a whole body
hallow bough
Of course it's going to be uncanny when it's not finished XD
silent junco
probably still gonna be when finished
median pike
@silent junco surely a great way to motivate someone
hallow bough
🤨
sleek arrow
No, I haven't AO baked it yet, there's issues with the face when I do
quaint jasper
reduce samples by a lot to get a quicker result
median pike
I know it doesnt look like it, but I have been working on this for about 2 hours. First time making a model from scratch and I am not too sure how to go about it so I decided to just make a low poly mesh first.
quaint jasper
That's a pretty good base !
median pike
thanks
so is this kind of workflow okay? Making a lowpoly base retopologyze that and than sculpt from that
quaint jasper
Well, retopology is not necessary if you start with a low poly base imo
median pike
oh yeah I can just use dyntopo
quaint jasper
but you'll need to fix your limbs/torso connection
median pike
but still I like retopologyzing because it connects all he meshes up
oh yeah lol that
silent junco
and head
 thorny fractal
@dull canyon it might be a good idea to vertex paint eyes and some fleshy parts of the skin, i do that in zbrush and helps get a much better feel for how the head should look when sculpting it, its really hard to gauge its uncannyness and what not when theres not texture on it
sleek arrow
I'm so excited for this. ;_; Finally finished the fur and working on the top of the ear. 😄
dull canyon
@thorny fractal yeah I did that for the eyes, but guess I should also do it for the skin and brows and lashes too
mild nimbus
The fur can just be duplicated planes

Testing out the RIG I made for Fuji Chan still a WIP but looking good so far. #VRChat #3dart #3Danimation #3dart #3DCoat #gamedesign #gamedev #substancepainter #Blender3d #blender #blendereevee #animeRP #AnimeStyle #AnimeGirl #Waifus #animecosplay #AnimeMemes #FoodWars #zb...
 Twitter


Early rig testinggg
Mouth still in the works xd
Hands to
silent junco
the mouth has that early cgi feel to it
sleek arrow
Is it possible to add 1 mesh's weights to another that has no weights or bones at all?
silent junco
not that i know of
 ancient escarp
@sleek arrow Sort of? If the mesh has any vertice groups, you can assign those to bones.
Based on my knowledge, anyway.
quaint jasper
@mild nimbus I still think eyes might be too far apart
@sleek arrow What do you mean ? Do you want to join the ear mesh and fluff ?
mild nimbus
1 eye length apart
It's fine
Originally yes it was far
But that seems fine to me and no other said anything about it but I appreciate the feedback though
sleek arrow
The fluff and the top of the ears that I've added, I'm wanting to know if it's possible to add the base ear's weight to them. Or add them to the bone that the ear is attached to
quaint jasper
yeah ofc
mild nimbus
Mirror vertex groups?
quaint jasper
either manually through the ctrl + P option, or you join the meshes, select the vertices in edit mode and assign weight directly
sleek arrow
Am she ;n;
I'm just, the shittiest with weights lmao, trying to find easy ways to do it xD
I'll try it~
quaint jasper
i can record a gif if my explanation isn't enough
sleek arrow
Yes please. 😄
One of these days I just wanna removed weights off a body and just practice weights lol
sleek arrow
OH!
sleek arrow
Whats that mean? first time I've seen it
ancient escarp
Does your mesh have the Armature modifier? @sleek arrow
If so, does it have the correct armature selected?
sleek arrow
that?
ancient escarp
Yes.
quaint jasper
you can try with empty groups @sleek arrow
auto weight paint can fail if there's doubles or holes in the geometry
 foggy maple
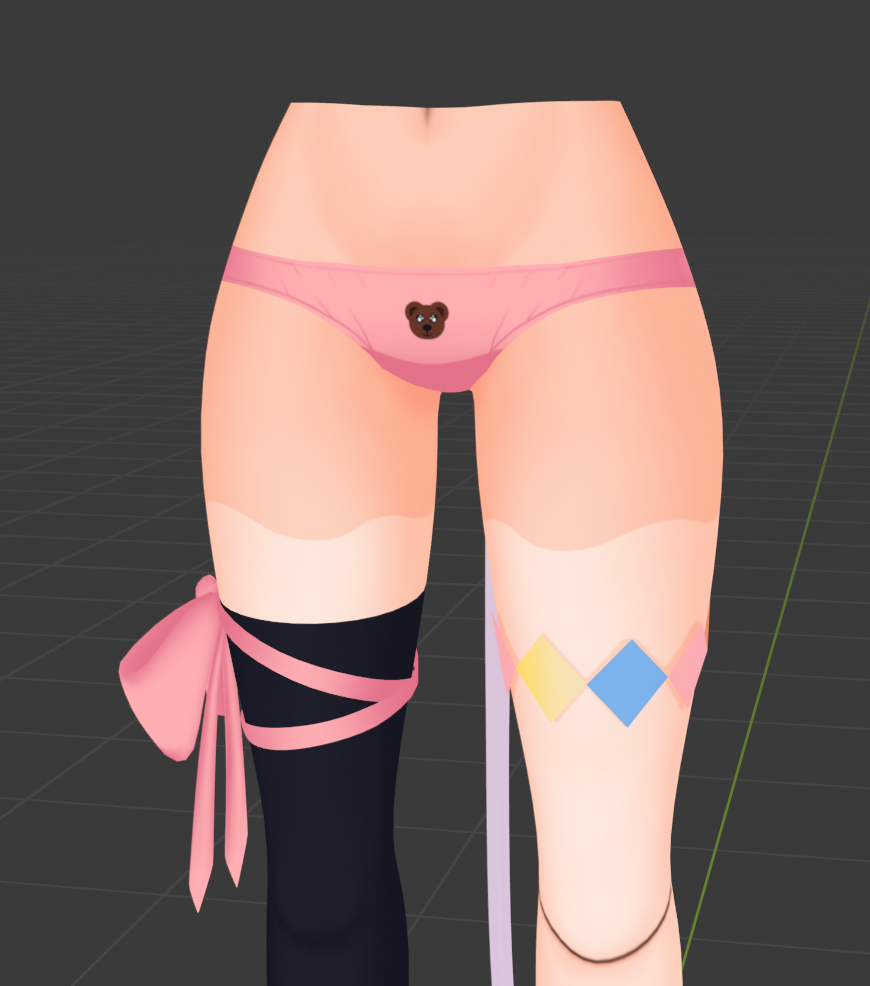
Super cute 
quaint jasper
Great texturing, I'm envious !
 split sparrow
How would I go around getting a vrchat-ready avatar (the download was a unity package so it's pretty much done) back to blender so I could remove/edit some stuff on her? I assume I can't do any of that on unity so. Complete newbie here BTW, started learning about all this stuff literally 2 days ago.
quaint jasper
You'd need to import the fbx from your unity project with blender
split sparrow
I got no .fbx since this whole avatar came on a unitypackage file I opened in unity.
I assume I have to export the prefab as a fbx then or something?
I'm basically trying to reverse engineer an avatar so I can edit her to my liking.
quaint jasper
What did you import in the unity package ?
split sparrow
I don't exactly understand what you mean by that question.
These are the subfolders the package came with
None of them have a file that blender can work with
quaint jasper
that's not a model file, that's a unity package with files in it
split sparrow
It came with pretty much everything already set up
Yeah, that's the only thing I personally did
 vivid crater

quaint jasper
Do you already have something setup in your scene ?
split sparrow
oh
quaint jasper

quaint jasper
you should be able to right click that, and unpack it
actually nvm, you have to export the package now
and then you should get what's in it
split sparrow
Says .prefab in there
Sorry if I seem incredibly obtuse, first time so I don't exactly know what I'm doing. If I extract that it'll give me a .fbx file anyway?
Haven't seen any of this covered in any tutorial which is why I'm really not sure what I'm doing hehe
quaint jasper
are you sure you don't see an fbx in the list ?
vivid crater
who did you get this package from 😱


 split sparrow
I liked it a lot so I wanted to get it and edit stuff to my linking
And yeah I didn't see any fbx
vivid crater
thats usually the folder structure for uh, ripped models, it concerns me even more that the user is named yoinkboy
split sparrow
So when it's a ripped model through illegal means they don't come with a .fbx?
vivid crater
🙅 yea it seems to have been ripped, the pic has the original persons name too
quaint jasper
Try finding the person who made it, and ask if they're willing to give/sell them to you instead
vivid crater
its probably worth letting em know someone on DA is uploading that stuff too
split sparrow
I started playing VRChat like 2 weeks ago and I installed blender/unity only 2 days ago to try and have something for my own. Had no idea about any of this besides the general fact that hackers can rip models from people through protection.
I'm sad now :(
But yeah I'll do what you suggested Ruubick
Think this Hannah person has a world even.
I'll try contacting them.
And also tell them about this other person in DA
Pretty sure this person hates Hannah Quinn because of the filenames inside the packages
 knotty plaza
I have 2 objects and when I select one the other ones gets selected too, but they aren’t touching. How do I stop this?
dull canyon
@knotty plaza I assume you're using blender. select the objects, go into edit mode, deselect everything, hover with the cursor over one of the meshes you want to seperate, hit L, then P and "by selection"
knotty plaza
Wdym by deselect?
dull canyon
just make sure none of the vertecies are selected
knotty plaza
Ah
Slight issue
It’s currently got a ton of subdivided because I didn’t notice until after I started sculpting, and some of the overflow from one object went onto the other object
Is there a way cleanly get the less sculpted object?
knotty plaza
I can’t rn because I’m out of the house now, but I should be able to later
dull canyon
yeah, L in edit mode selects linked meshes, so if none of the vertices of those 2 objects are actually connected it should select only one mesh cleanly
knotty plaza
Ok so I should only need to select some of the vertices of one object then press L and it’ll get the whole object?
dull canyon
yeah
dull canyon
even if they're intersecting, as long as there aren't any connected vertices it will only select one mesh
median pike
so. modeling is hard
https://cdn.discordapp.com/attachments/610952585968615481/660082741609496588/unknown.png
https://cdn.discordapp.com/attachments/610952585968615481/660082773322760193/unknown.png


I am getting somewhere but this will take a lot more work
azure rain
that's why it's like four different jobs to make a video game character in the video game industry
azure rain
sculpting. retopology. UV unwrapping. character rigging. texturing can be commonly separated into separate jobs
 stark ore
tepid wagon
stark ore
tepid wagon
Yeah, imagine you get hired as 3d artist and they say you gonna be doing UV unwrapping and you just* sit there everyday with those puzzles
dull canyon
sounds kinda fun
tepid wagon
I hate it
azure rain
that's why you'd want to hire someone who likes UV unwrapping

 high jetty
Good lord @zenith fable those are adorable.
 zenith fable
Thx, but those aren’t my design, I just model all the drawings into 3D models
And the drawing isn’t a ref with front side view
Which gave me quite a hard time to model lol
vivid crater
Single ref characters 
 median pike
I might give up lol
median pike
my 7th try today and its somehow getting worse than it was before
silent junco
what is
silent junco
show
median pike
this is pretty much the best I got
but its not on par with anything in vrchat so I am starting again
median pike
what do you mean why do I give a fuck?! 😄
silent junco
"not on par with anything in vrchat"
median pike
it really doesnt, and its very different to what I imagined
silent junco
i often just go with the flow when making models
median pike
well take the hobkins or the nanachi for example
I try that but it doesnt look... well... not uncanny
silent junco
this started as an realistic enderman
median pike
this is what I am going for
silent junco
ok
median pike
any tips? since with where I am heading it clearly doesnt look anything like it
silent junco
you might be able to salvage it
try to add more to the torso and arms
to make them less noodle
the most obvious problem i can see is that you make it too thin
 ashen stag
Always better to fix and upgrade than start over from nothing imo
 ashen stag
If you don't start over, progress is progress. Otherwise you're just wasteing time
median pike
should I make the body even bigger?
or are the proportions right now in your opinion?
ashen stag
Stomach is fine but the rigcage part of the body should be bigger. You kinda look like a tube otherwise
This is where anatomy is important
Stomach to leg ratio looks fine tho imo
median pike
yeah 8 years of artschool didnt really teach me much. But I sort of understand it. Thanks for the tips
ashen stag
Well sculpting at all puts you a leg above some other people. I make crazy shit and I still can't sculpt for the life of me lol
median pike
well it probably helps that I got a character refsheet with all sides drawn out
I cant make anything without propper reference
desert crown
does Viseme's still works even for models without mouth bones or jaw bones?
quaint jasper
Yes
desert crown
thanks~
 woven lion
.
desert crown
i accidently hidden my bones is there a way to get them back? or what the heck happened?
I've tried alt + h, but doesn't work.
woven lion
You cant undo?
desert crown
nope
woven lion
Thats a big braine
desert crown
nvm i guess i'll just restart blender with a reimport
desert crown
should i be concern if i am missing sil and pp viseme?
 latent charm
Maybe. sil is used for the short silence between words.
Your main concern is in unity all viseme slots must have something in them, otherwise you'll get weird audio feedback (unless they've fixed that bug)
desert crown
so even if its not sil and pp, i can just throw in any?
latent charm
You can, but things will look best if all visemes are properly made.
latent charm
sil is easy, make a new shape key and move one vertex that's not normally visible a tiny amount. Blender won't export a shape key if it's identical to Basis
For pp add a new shape key and move the lips into the shape made when a p sound is made, like in 'put'.
https://developer.oculus.com/documentation/audiosdk/latest/concepts/audio-ovrlipsync-viseme-reference/?_fb_noscript=1
Useful reference.
A complete table of visemes detected by Oculus Lipsync, with reference images.
desert crown
nice just what i was looking for thanks!
latent charm
Exactly how you get the mouth into the shape is a matter of preference.
I use rigify's face rig and use that to pose the face and apply the armature modifier as a shape key and repeat that for all visemes. Some use proportional editing (edit mode, o key), I'm sure there's other ways too.
desert crown
i see
sleek arrow
I'm having an issue where my UV is shitting itself when I join armatures. Is there a way to fix it?
quaint jasper
are you sure joining armatures is the culprit ?
If not then you could try exporting UVs before joining, making duplicates of your meshes outside of the armature then copy pasting UVs from one to the other or try another method
sleek arrow
Yep, it def is
Atm manually joining meshes
and the second i join the jacket to anything it breaks something
Which is bizarre, I've never seen that happen before
quaint jasper
might be worth googlin'
 quaint jasper
So why don't the UVs go to shit with the first join ?
Oh wait NVM the skin color changes as well wtd
sleek arrow
Yeah, i'm not sure why. Researching it atm
quaint jasper
Never seen that before, maybe try changing the name of the UV maps for each part
They might be merging together
And also try merging meshes with cats to see if there's the same results
sleek arrow
Thats how I noticed something was wrong
I usually merge with cats
but then sometimes merging manually has different results
quaint jasper
Lmk if you find the cause of the problem
sleek arrow
Will do
sleek arrow
Fixed it
It was a renaming issue
For some reason, some meshes have multiple UVs on them which was causing issues as well
dull canyon
wasn't there some way in blender to apply one material to multiple objects at once?
latent charm
Apply it to one, select all the others, then the one with the material, ctrl+l then select the Materials option
 zenith path
spiral sigil
zenith path
spiral sigil
When you reach new user
 molten meteor
play the game
meet people
get new user and then you can upload
median pike
@vast ember I mean,, yeah it says blender on the top of the screenshot
 vast ember
Right my bad
Do you have the full version though? Cause your blender looks like it has more.
tepid wagon
All Blender versions are full. They may look different depending on version and addons installed
latent charm
They're running 2.8x which is the latest version and looks a bit different to 2.7x
All are free so just download the latest one if there's new features you need
desert crown
is it possible to reset pose to t-pose after fiddling around with the pose just to check progress on weight paintings?
would make life easier
latent charm
Is the rest pose the t-pose? If it is just select all bones and press alt+g then alt+r then alt+s
desert crown
yeah default pose is t-pose
latent charm
That'll do it then. Clears locations, rotations and scales.
desert crown
nice! thank you! i was scared that there might not be a way
so i won't have to ctrl + z anymore after every weight paints
 still wadi
https://i.imgur.com/3xHTEgU.jpg she done boys
 spiral sigil
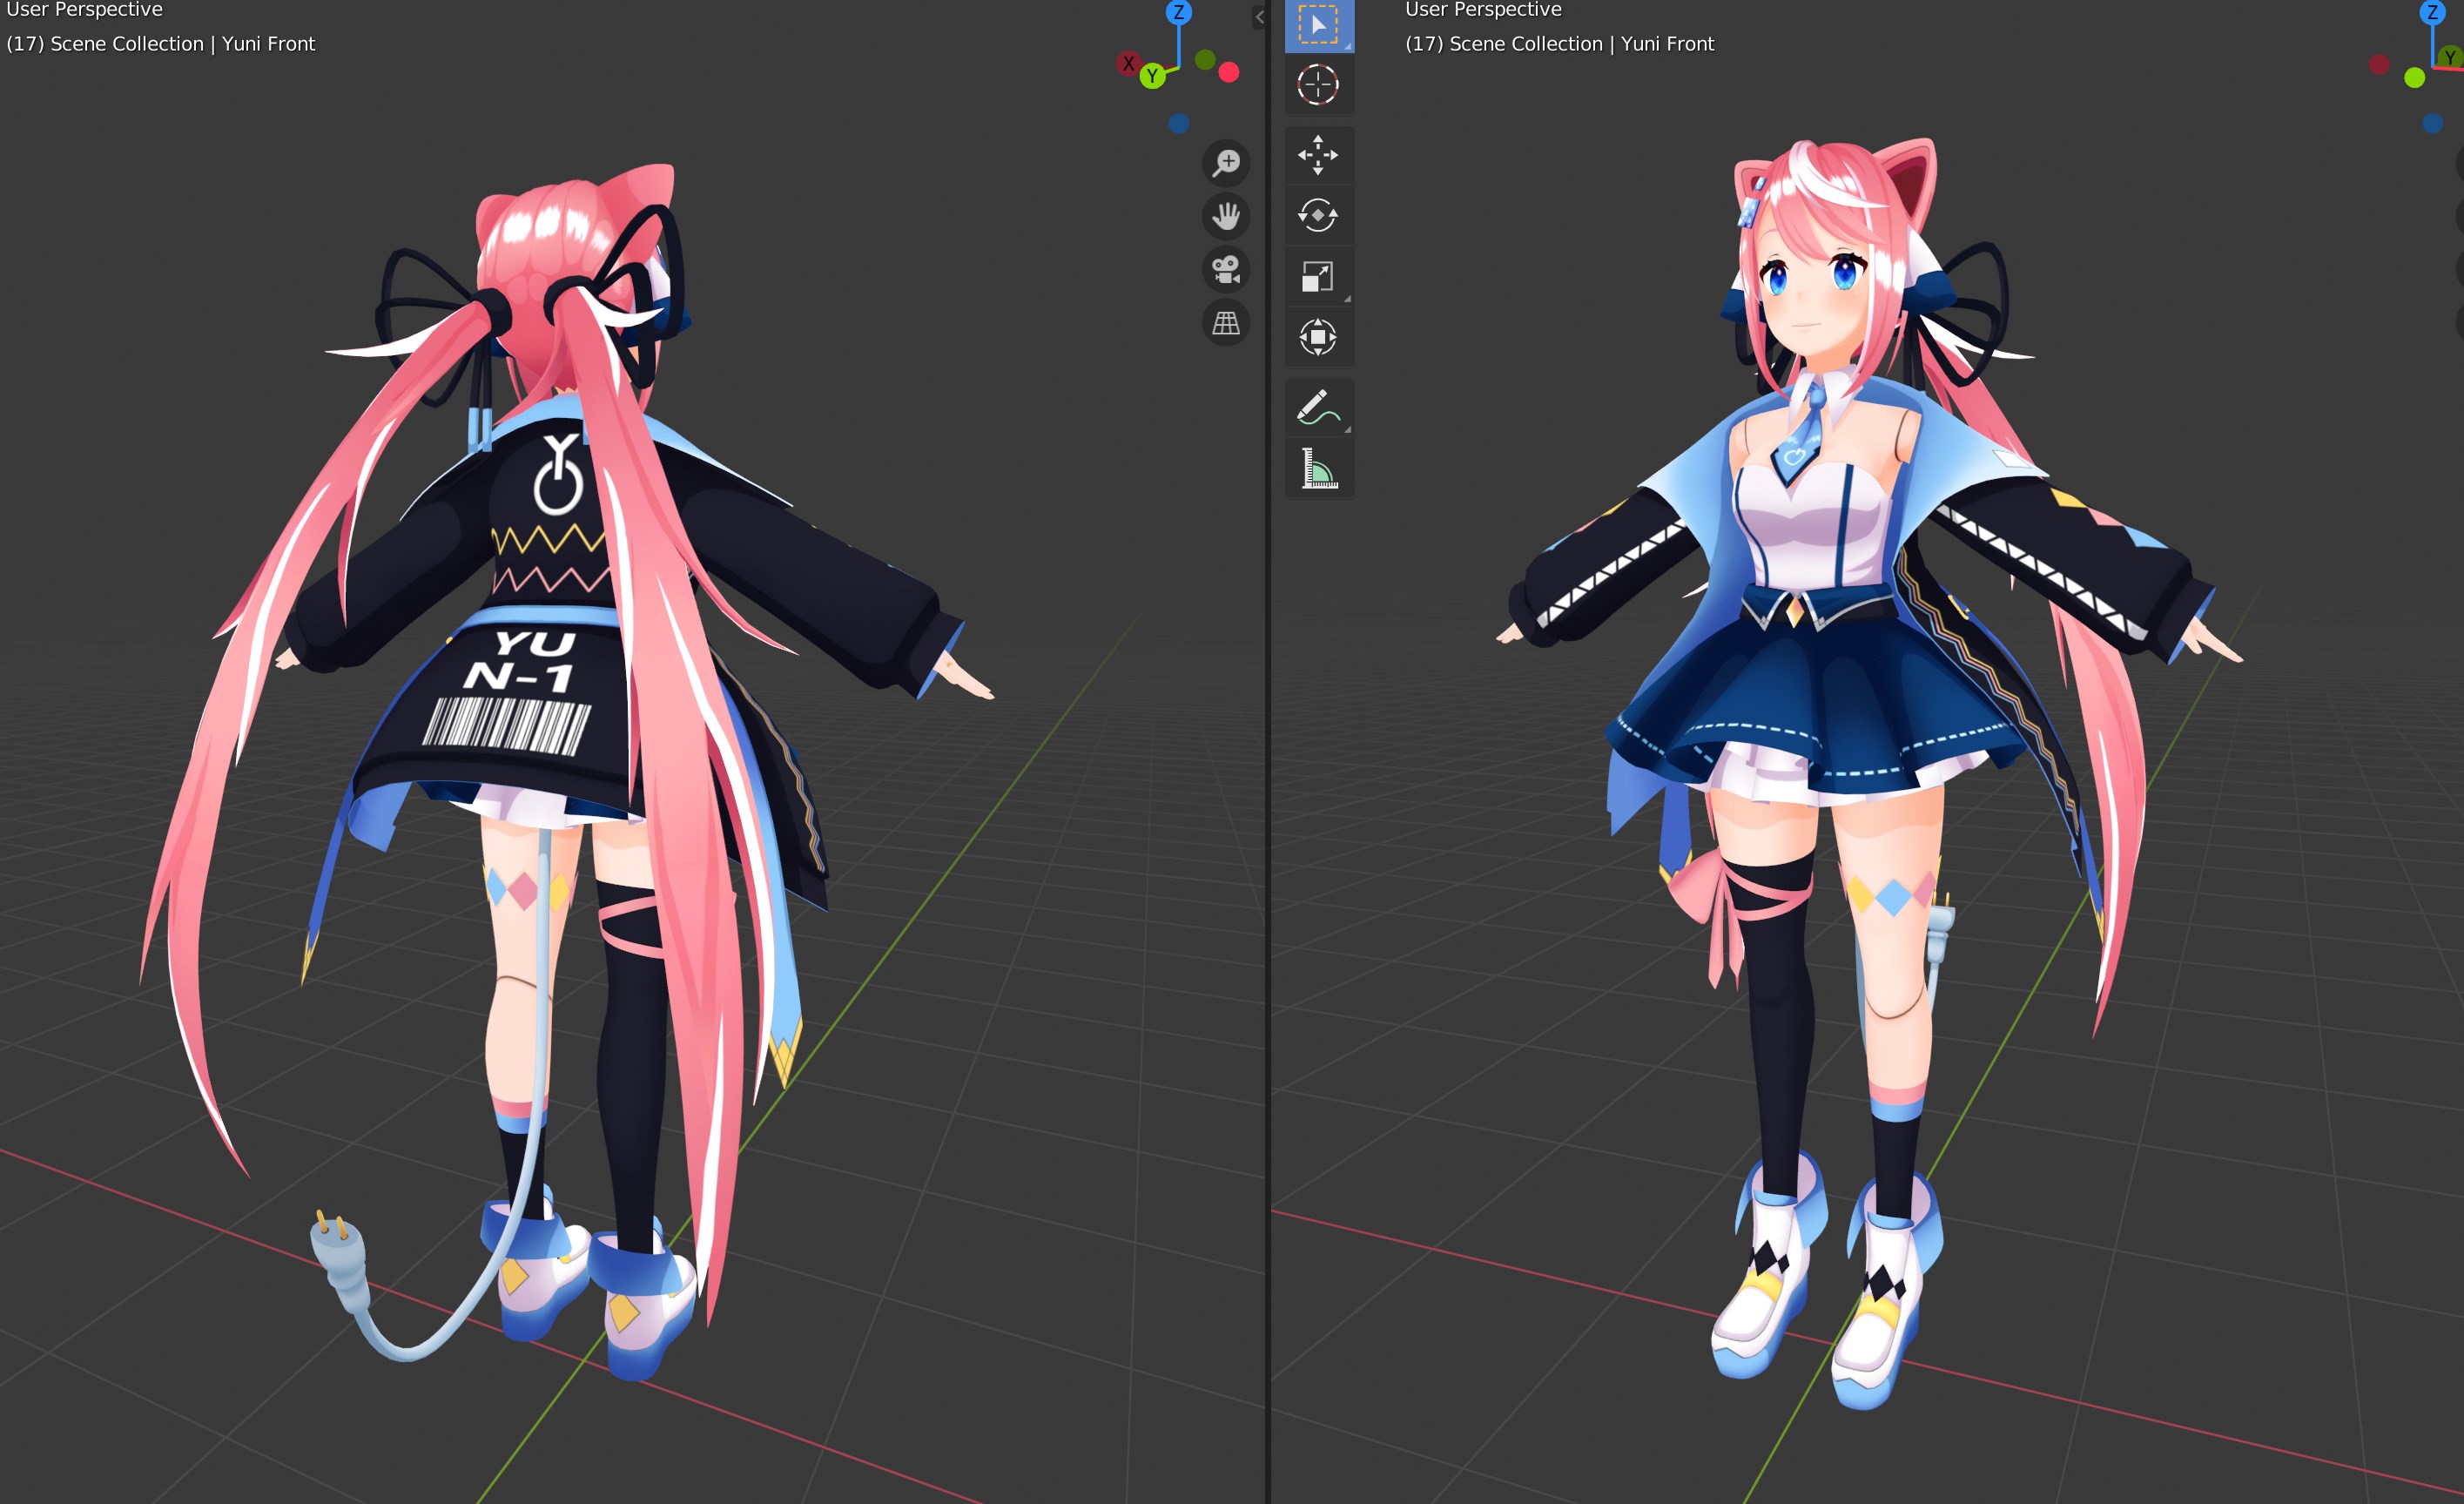
anyone know how to make the selected area black?
Black? UV unwrap it and texture mode paint it black
Or use a material with a black diffuse color to temporarily color it
dull canyon
or vertex paint it
desert crown
@still wadi nice job, how many polys?
spiral sigil
hi Guys
I need help with something
I want to make a sans avatar for VRChat but I personally don't find an avatar as good as you know it in the game.
Does anyone know a sans front and side view that I can model?
desert crown
nope sorry
there is a sans model that i know of from smash ultimate games
it exists on the internet somewhere, but i can't help you find it
spiral sigil
ok thank thou
 olive roost
@desert crown sorry jumping back to a thing from earlier you can also weightpaint while in pose mode! Then you can just hit stop pose mode when you want everything to go back in the right location
desert crown
thank you!
olive roost
Welcome!!
 wet bolt
Anyone got a scythe I could use
desert crown
just look up one on the internet
wet bolt
I wouldn’t be asking if I could download one
olive roost
https://www.deviantart.com/artimiss1238/art/-MMD-Undertaker-s-Scythe-DL-813425052
@wet bolt
May be the weeb in me but i like this one-
wet bolt
I just found demonic scythe but thanks
desert crown
👌
wet bolt
My scythe isspectral
olive roost
Nice!
still wadi
@desert crown 90k
 lament pond
desert crown
lament pond
desert crown
cute concept
stable edge
^^
vivid crater
Vii still alive n kickin 👏
vivid crater
Always waiting for more 👀
desert crown
:]
vivid crater
I like her hair tho, reminds me of soft serve ice cream
vivid crater
Then the hour turns into days because it's never perfect
desert crown
wish i could just mirror these weight paints and get my model done with tonight 😔
lament pond
Is the model mirrored?
desert crown
nope
lament pond
Rip
desert crown
wdym by mirror specifically
lament pond
Left and right same modeling
lament pond
So separate the hair and belt, delete half the model, mirror it over, profit.
desert crown
i could do that, but i am not sure if the riggings will carry over
lament pond
If the rig is properly named it should work
desert crown
i'll experiment it i guess
lament pond
food eaten, back to streaming
 stiff coyote
can i commission someone to make an elsa model for vrchat?
lament pond
You could always convert an existing Elsa since there are a number of her out there
stiff coyote
im currently trying with the kindom hearts model
but its turning to be really hard
im trying to make the new dress from frozen 2
desert crown
i saw your elsa model, you can delete all of her current bones
upload her to Mixamo website and let them rig her with basic bones
and then everything from there is as easy as putting her onto unity and then upload to vrc
stiff coyote
that one i was working on is a whole mess of its own
desert crown
i'm pretty sure its fixable
stiff coyote
its 5000 verticies, which is good in game but terrible if you wanna look good
all the fur textures are 2d
desert crown
yeah that would be on your own time to learn about custom gestures, animation and effects
desert crown
trying to resist clicking fix model in the cats plugins at times 😫
stiff coyote
why is that?
desert crown
cuz if you do that it will fix a number of things, but also ruin alot of things like your riggings that you manually worked so hard
desert crown
not really, unless you have a save backup
desert crown
yeah thats what someone else says too
stiff coyote
ive made a couple models from scratch in blender
but i always had a friend rig them
lament pond
@stiff coyote sure
lament pond
silent junco
you can render without background
lament pond
I know it's a screenshot of the render since I wasn't done yet @silent junco
dull canyon
https://i.imgur.com/9qvJ2Z9.jpg taking things slower this time (if that's even possible at this point)
 desert crown
it is and you'll get there
 near crown
😳👌
desert crown
nice!
knotty plaza
That’s awesome
azure rain
that is a adorable octopus
knotty plaza
Makes me want to make something similar based on Octodad
If only I had artistic skill
azure rain
but now I'm wondering who's there dates for the prom
 rancid notch
small cloud
rancid notch
small cloud
write down your problem
stable edge
Usually the first step
dull canyon
what kind of maps should one bake out in Substance Painter rather than Blender? I've heard that the normal map baking is better in painter compared to blender
 abstract hearth
made my first donut
desert crown
nice~
knotty plaza
GJ
 heavy pulsar
Best way to get the jean texture to cover the skin?
quaint jasper
remove the skin
heavy pulsar
Can't I just map it via vertex?
quaint jasper
why would you need the skin behind the jeans ?
heavy pulsar
The intention was to have the jean over the skin which already exists with a model.
desert crown
delete the skin faces
heavy pulsar
So only delete the skin faces?
desert crown
click on the face square icon
you will then be able to click on the skins polygon by polygon and press delete or x
silent junco
if you press C you can easier mass select
desert crown
yeah that too
silent junco
if you then press Z you can go into wireframe and you can select even more
desert crown
though lime is right, should really learn the blender basics first before advancing further
silent junco
this is what i hate sometimes
desert crown
like to know pose mode and all that stuff
silent junco
people come with questions that are answered if you decided to learn your basic tools
knotty plaza
well tbf blender is prett ycomplex and i couldnt find any tutorials (i might just be blind) so i had to screenshare someone so they could teach me
now i figured out a bunch of shortcuts
desert crown
people are weird, some learn through text tutorials, others via videos and some other people through actual demonstration on screen
desert crown
nope
but in pose mode when you move the bones around, you can go into edit mode after clicking on the mesh
hallow bough
Just delete any skin that's nowhere near visible. Save alot too!
desert crown
@hallow bough offtopic but pretty pfp
silent junco
destroy the uneeded flesh
heavy pulsar
Was able to figure out the skin part. As for hair, best way to avoid being seen through?
desert crown
wdym by seeing through? its transparent?
you can disable culling if you want it solid
heavy pulsar
If I want my hair to remain black, I have to edit the hair texture file right? If so, how do I modify its color?
spiral sigil
By editing its hair texture. Otherwise you can change the tint by changing the diffuse color.
heavy pulsar
Right, but if I export to unity it'll use the original texture color right?
The blender color won't be saved then.
hallow bough
@desert crown Thank you 😄
spiral sigil
Just replace the texture with the new one then.
heavy pulsar
How would I edit the texture?
spiral sigil
Any image editing program.
Or texture mode through blender.
heavy pulsar
Sorry if I'm asking trivial questions but this is probably the first time I mcguivered an avatar from scratch.
spiral sigil
From scratch? That's a little hard to believe sorry.
Maybe kitbash or frankenstein is the term you're looking for
heavy pulsar
I guess Frankenstein would be more awkward sure.
Now what?
How would I go about changing the color?
quaint jasper
use gimp and colorize
heavy pulsar
So I can't edit the color in blender?
quaint jasper
Unless you plan on learning about nodes
 hazy swallow
GIMP its literally one button.
heavy pulsar
Is it me or does gimp not work after installation?
Just installed it and nothing is popping up whenever I attempt to open it.
quaint jasper
Literally just you
spiral sigil
you're all over today huh
it looks like your issue is that the hair has transparency to it, the way blender runs transparency looks like that. When you get your model to unity, it should look better
Really blender and unity print images so differently it's best to keep yourself in unshaded view in blender, as your textures likely won't resemble what you have in unity too similarly
heavy pulsar
Well the good news is that my first frakenstein custom avatar is done.
After about 6 hours.
Hard part was getting cats to play nice in joining armatures.
wet bolt
anyone know how to download files off of scetch fab
spiral sigil
Only certain files are downloadable off sketch fab as decided by the artist.
heavy pulsar
That or you DM them and purchase the model from them.
 scenic perch
I want to make one of my own models, where do i start?
 glad steeple
Blender tutorial for beginners! The long awaited reboot of the popular donut tutorial, completely remade for Blender 2.8. New videos will be uploaded every other day to this channel.
Get the shortcut pdf: https://mailchi.mp/ef5b15a32043/subscribe-to-the-newsletter
--------...
desert crown
you watch a tutorial to get a better understanding of blender basics
once you got the basics down like knowing pose mode, weight paint etc...then you look for a creating guide
heavy pulsar
Wow, took me about 7 hours to get most of the kinks out. Frakensteining a model takes quite a bit of time for a newbie.
olive roost
Same! First model i did prob took me like... ten and it broke. Had to redo it i think three times for it to get to the much better state its in now
U’ll get faster as it becomes more procedural memory and less “wait how do i do this”
dull canyon
so when I'm modeling the hands, should the whole hand including fingers be basically flat? ie without a natural bend?
quaint jasper
Better for posing yeah
dull canyon
okay
dull canyon
https://i.imgur.com/dECQuGB.png how does this look for a start?
 knotty plaza
that looks great
dull canyon
yay, thanks. time to try and add a few details I guess
knotty plaza
i had to use someone else's arm and change it a bit because i couldnt do the hand (or the rest of the arm tbh)
dull canyon
yeah I might try and find someone elses modeled hand that's made for rigging so I can learn how other people do them
 forest mantle
ok im completely new to this 3d modeling thing, and i kinda suck at drawing...
but i think i got what im going for
wish me luck on the side drawing
desert crown
good luck!
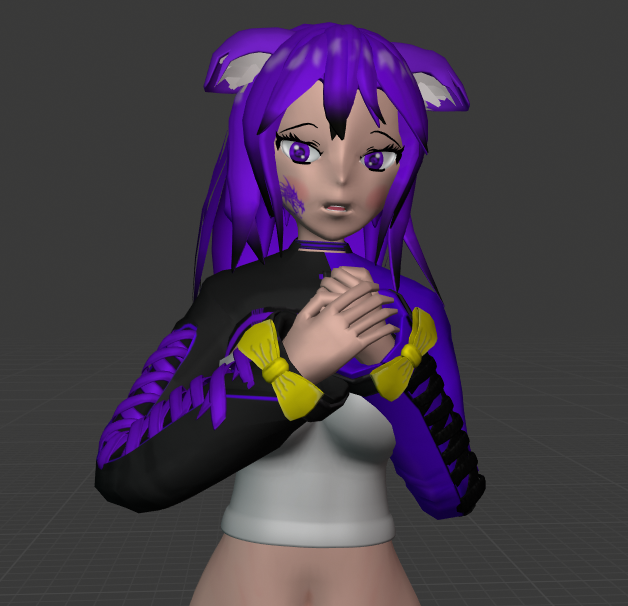

 stark crystal
@mild nimbus looks so nice!

 hoary estuary
Looks sick dude :)
stark crystal
@thorny fractal it's really cute
desert crown
is there a way to fix obj files that are broken like this?
 loud moon
jesus christ wtaf
desert crown
please let me know if anyone have any insights, this is my soon to be vrc world
spiral sigil
usually that happens if blendshapes import weird
I'm not sure if obj has blendshapes but if it does, it's probably that they're broken
hallow bough
Does anyone have a good tutorial on how to get started with texturing in 3d coat? I've been looking around but it's all just so vague. Blender texture paint just doesn't work well for me.
spiral sigil
any 3d moders wanna help me out
dm if u want to help
dull canyon
https://i.imgur.com/FZGp4UM.jpg no idea if this is any good

it's like 1200 tris without subsurf 😐
glad steeple
thats great
the creases in the fingers might be a bit too deep but its god nice topology
knotty plaza
much better than my attempt
dull canyon
thanks, that's what it looks like with one subsurf https://i.imgur.com/nMZlADl.png

but yeah, guess I should make the creases a bit less noticable
glad steeple
looks like bread loaves
dull canyon
😄
dull canyon
https://i.imgur.com/nh93j7o.jpg better?
 dull canyon
xD
spiral sigil
I made stuff the other day
Made these barriers and cones the other day
Dumpster i made a couple days ago on stream.
@dull canyon I like your hands!
If you want to keep detail you can always bake your normal & AO maps
then reduce poly count, the normal & AO maps will help keep that detail
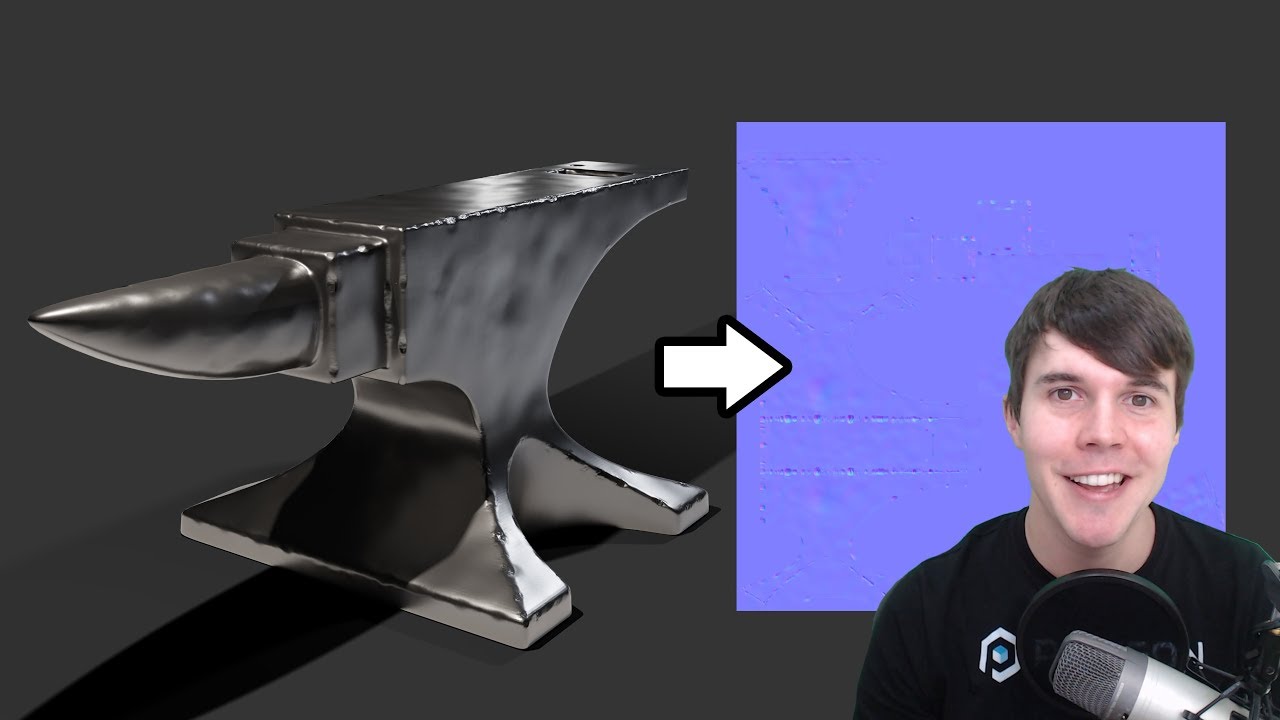
Blender tutorial showing you how to bake a normal map from a high poly model, to a low poly model.
Download starter file: https://drive.google.com/open?id=0B8PFSrI9B3iweUVlaHFFbmRhSnM
CC-BY footage from Sintel, by Blender.org
-----------------------------------------------...
dull canyon
thanks, yeah I know about baking, that's what I'll end up doing with this avatar anyways, but I'm still trying to keep the poly count as low as I can
not sure if 1.2k tris for one hand is considered low poly tho
tepid wagon
I think 1200 tris is alright even if you are going for 32k model and may be bit low if you want it to end up with 70k total. My avatar hands are almost 2k each and I wish they were even higher poly simply because it is the part that I see most often
dull canyon
okay, I just don't have any point of reference so I can't tell when something is "good" or "bad" in terms of topology
 fringe rock
The hand I use are around 250 tris i think
wet bolt
Anybody got reaper from over watch model
Or just a bad ass model wearing all black and a hood
 dull canyon
gl, hair can be a bitch to make, in my limited experience
but that looks like a good start
stiff coyote
is there a good way to make hair cause like i feel dead inside
with the way its going rn
dull canyon
could use the multires on that once the blocking out is done and then bake the normals from that
stiff coyote
perhaps i can sculpt into it once i have a roughed out shape but i dont know that much
dull canyon
yeah, that's what I'm saying
lay out the rough blocks like that, then add a multires modifier and sculpt the details
and bake the normals from that
 dull canyon
yea
stiff coyote
well im just gonna keep trotting along
dull canyon
heh
I still have no idea how I wanna do my hair when I get to it...
but maybe I'll try something like you're doing too
dull canyon
was thinking of using curves but they add a lot of topology
even when you reduce the resolution
stiff coyote
i kindo just took a cube made in rectangular and then duplicated then and moved and bend em around and stuff, and rotated them
stiff coyote
its how i make most my models, is get alot of references and point pull, also use mirror and sub surf mods, to help along, i needed bare feet for this project so i sorced some mmd feet so i didnt have to make those lol
and the elsa model is from kindom hearts 3 , im just giving it a major makeover
dull canyon
yeah I don't like box modeling personally
I rather use a sphere and pull it around in sculpting
dull canyon
it's basically digital clay
stiff coyote
interesting
dull canyon
works best when you have a drawing tablet
stiff coyote
i have one, but i feel if i were to sculpt in 3d i would use my mouse
dull canyon
no, you don't wanna do that
you want the pressure
from the pen
apart from the eyes, lashes, brows and ears this was all sculpted and started out as several spheres


 dull canyon
yeah, both workflows are fine, just personal preference
I just can't get myself to like box modeling for organic things like characters, feels unnatural to me
stiff coyote
it works with a sub surface modifyer and custom reference angles i draw myself
stiff coyote
and i have to make sure all angles match up, it was really hard with the cyber truck cause all the pictures taken didnt match eachother lol
thorny fractal
i always like to use curves with bevel objects and taper objects at least to form the main shape of the hair/ prototyping it, i usually then go back and remake it after i have the base shape down so i have more controlver over the topology and such
stiff coyote
my aproach may be harder, cause i really dont understand a propper way so i go about the way i know, and just kinda do it
thorny fractal

Learn Blender: https://cgcookie.com/flow/introduction-to-blender/
A great Blender workflow for quick hair visualization: learn how to model hair like in anime and manga comic books using Bezier curves. Set up taper and bevel curve objects, easily duplicate a variation of tap...
some times i even bring peices ino zbrush or somthing then dynamesh them together but ive moved onto just making them in zbrush from the start
thorny fractal
you also look at hair cards if you want somthing more realistic but you can technically use ccurves for that too just use a flat curve as the bevel object
dull canyon
actually, I haven't tried what the quadriflow remesher does to curves
thorny fractal
i dont like blenders remesher i think its horrible
dull canyon
🤔
thorny fractal
you can convert curves to meshes but when i meant by dynameshing them i meant using dynamesh as a way to merge pieces together then zremesh them for sculpting