#3d-modeling
1 messages · Page 62 of 1
 dull canyon
https://i.imgur.com/FiVZjQc.jpg I'm kinda struggling with adding the topology for the mouth here, could someone please show me where to start?

 zenith relic
always start from the center
dull canyon
I don't know how
zenith relic
im not really sure how u want to make the mouth..
but my opinion is to start from center if u try to do a hole there
dull canyon
just so it has proper topology to be moved
https://i.imgur.com/36qY0Q3.jpg no idea if this is the right way to do it

something tells me it's not
zenith relic
no idea either..
witch im not making yet an avatar with mouth
if i was to make a mouth...i would use the caracter i want to make.
and il just look at the details on the cat
ex: the cat from konosuba
i would get the details from there.
 zenith relic
that will do.
 zenith relic
yep
im also expecting perfection but in reality of vrchat looks totaly different
ù
specialy when i have some noob skills
so hard to make a head without some tricks to start with.
 stark crystal
@dull canyon time to pamper you to your heart's content
@zenith relic @dull canyon if you two wanna see how i make heads, just ask in DMs and i'll guide you :)
zenith relic
@stark crystal any idea how do i stop the mirroring thing on the sculpting
any sphere i make...and i do a little change on the right side...he does on the left side as well just like i have 1 half of the object using mirror ON
but in this case it is only 1 object 1 piece and that magik happens
its not helpfull when making hair or something that does not require the other half
stark crystal
@dull canyon to stop mirroring go to symmetrize and disable the axis being mirrored
zenith relic
anyways what ever i do...about the head/face specialy... cannot reach the detail i want.
stark crystal
but i gotta tell you i never sculpt hehe xD
stark crystal
when you sculpt, you only do it to get an idea of what you're making, then you have to manually remake it without sculpting
@zenith relic oh, you're using 2.8. i use 2.79
dull canyon
wha? I think you pinged the wrong person there
zenith relic
well duh...most of the times i do manualy to get the closest possible detail i need
2.8
stark crystal
@dull canyon ooofie sorri
@zenith relic with sculpting u can get more detail
it's just that the topology u get from sculpting is baaaad
so u have to remake it
zenith relic
sculpting cant really get what i need no matter how hard i try
i can only do an alternative.
here im trying to do the hair thing
but im not sure where should i look to disable that thing
stark crystal
@zenith relic if you sculpt with dyntopo, u can get any amount of detail you want
u can probably change the settings using that sculpt button up there, but i dont know i never use 2.8
dull canyon
dyntopo settings are on bottom right in that tool tab
zenith relic
symetri this thing right?
it was Y checked.
well maybe i do get detail how u said..
but wonder how many poly should i use..
in my case i use sphere to sculpt..
stark crystal
@zenith relic dont ask how many
just enable dyntopo
so instead of you creating useless polys manually, it makes extra polygons in places u need
zenith relic
a..
stark crystal
oh, and for that hair, i'd just model it manually
stark crystal
@zenith relic you dont need to care, because you shouldnt use your sculpt in the final model, you should remake it manually.
@zenith relic yields worse results most of the time
ooof i mass tag
 void narwhal
learn retopology
zenith relic
whats retopology?
void narwhal
http://wiki.polycount.com/wiki/ReTopologyModeling
https://www.youtube.com/results?search_query=blender+retopology
Enjoy the videos and music you love, upload original content, and share it all with friends, family, and the world on YouTube.
 latent charm
Retopoflow is a blender addon to speed up retopology. You can grab it for free off theut github repo
https://github.com/CGCookie/retopoflow/releases/tag/v2.0.2
Download the zip and install through blender's preferences window.
You should learn the basic concepts of retopology first of course. And topology if you haven't already.

GitHub
A suite of retopology tools for Blender. Contribute to CGCookie/retopoflow development by creating an account on GitHub.
 brazen valley
 cedar gazelle

Does anyone know why this would be happening? These are two different meshes. Upon trying to merge them, one of them loses all it's texture. They both use the same image.
If I change the order I select them, the other part will turn white.
The one that turns white is super shrunk in the UV menu
Actually, it looks like it just un-does the unwrap, but I can't simply re-unwrap it.
I fixed it, it was a UVmap naming issue
 cobalt python
SWEEE
 spiral sigil
I've imported this OBJ into Blender but it seems all messed up for some reason.
Also, when i import it to unity (without putting it in Blender) it looks okay but the mesh only has one material when it should have several.
 strong thistle
@spiral sigil
need more info were did you get the obj file was it made in unity
spiral sigil
No idea, just got it from Sketchfab.
dull canyon
so, do I have to apply the mirror modifier in Blender before I UV unwrap the mesh?
dull canyon
okay, how the fuck are you supposed to do symmetrical shape keys for the mouth
 compact umbra
Your mouth isnt mirrored?
dull canyon
the moving of the vertices isn't
compact umbra
if your mouth is symmetrical and you edit both sides in the shape key together the movement will be completely mirrored
dull canyon
are you talking with a mirror modifier?
compact umbra
No
 compact umbra
you scale on x, you move on y and z
alternatively
do one side
remove half the face
mirror it over
redo the weight paint on your eye.
dull canyon
well luckily I don't have any weight painting yet
compact umbra
i dont see why scaling wouldnt work though.
dull canyon
also, that feels extremely hacky
compact umbra
also if its symmetrical have you tried out x mirror?
dull canyon
how I do dat
dull canyon
I was about to flip some tables if there was not proper way to do this
compact umbra
i mean theres a million ways in blender to get to your solution
dull canyon
yeah but I prefer the ones that don't feel like "hacks"
zenith relic
im so getting annoyed because i cant get the detail right.
dull canyon
https://gfycat.com/CreativeFabulousBat it's something, yay
 zenith relic
cant make a proper hair for an avatar...
 glad steeple
hair is a tricky thing to model
zenith relic
it should be the easiest..
zenith relic
depends what kind of hair u want to make.
mine its easier and yet i cant make it right
 finite glade
decided to stop being an idiot with a material for each different texture in unity, and make all that in blender instead to make a texture atlas, drawing my own textures, heres where I'm at so far
left- before, middle - after, right - reference
the watermelon texture i made brings me great joy
dull canyon
nice
I tried to mess around with some texture painting today, turns out it's not as easy as I thought
as usual
finite glade
I'm painting it in gimp, texture painting in blender is kinda ehhhh
dull canyon
I was about to ask
makes sense I guess
good thing Chomusuke is just flat colors so
but it still is a lot to wrap your head around in the beginning
so I decided to just try and do visemes for now
finite glade
using a brush like this, I just change the size and opacity go over it in places, change the settings and colors, go over it again, over and over until it looks amazing
dull canyon
mhm
if you want something more than GIMP but don't want to pay the Adobe tax I can definitely recommend CSP
finite glade
I'm quite familiar with gimp, so idk about learning a new program for something that works quite nicely for what im doing
dull canyon
yeah, makes sense
so, regarding visemes with CATS in blender, does it only need the 3 "basic" ones?
finite glade
I think you make the 3 manually and then it generates the rest for you
dull canyon
mkay, well clearly I'm doing something wrong, I can't even assign the shapekeys
"no meshes found"

 finite glade
its been a few weeks since I did avatar modeling so I cant help too much
dull canyon
or can I not just straight up use a blender project for CATS
finite glade
does the mesh have a skeleton?
dull canyon
not yet
finite glade
it might be looking for that and cant find it so it stops
dull canyon
ah
finite glade
its kinda important
dull canyon
would make sense
finite glade
even though the skeleton isnt used for the shape keys, thats just vertexs not bones
dull canyon
yeah I'm not sure how to rig quadrupedal avatars tho
finite glade
hmm yeah I've only made human avatars so idk lol, but I think its not all that complicated, just takes a little creativity to fix it up correctly
dull canyon
well, do you use the same structure as for a humanoid?
I remember seeing an option in the Unity SDK to tell if it's humanoid or quadrupedal
finite glade
yeah, it just kind of auto generates walk cycles and the crouching and stuff for vrchat to use, I'm not sure how the quadrupedal works
latent charm
I can't see anything in unity for quadropeds, only humanoid
finite glade
maybe you pick "generic"
dull canyon
okay, maybe I'm misremembering then
latent charm
And I don't think visemes & a bunch of stuff works with generic rigs anyway
dull canyon
so... what would be my options for this one then? give it a humanoid rig but only rig like the head and eyes?
latent charm
You could try rigging the front legs to humanoid legs, no weights to the arms and the head to he head
Kinda like the first person in a two-person theater horse costume
And maybe stick dynamic bone on the back legs so they flap around
dull canyon
mkay
https://youtu.be/Iq4KoFfY3AQ?t=339 looks like that's exactly what you do

This is the tutorial commissioned from me on how to make custom pony avatar with blinking, eye tracking, lipsync, danymic bones and moving head for VRChat us...
dull canyon
nope
latent charm
Something worth looking into since CATS kinda 'hides' a number of steps and stuff from the user, which initially helps but can be a problem later since there's stuff you might need to tweak/do differently and you have no idea what it is
dull canyon
well, is there any good documentation for that?
dull canyon
mkay, thanks
latent charm
Especially considering you're making some visemes from scratch. Plus it's better to do them all manually since they look better that way.
dull canyon
well, for a simple character like this I think the 3 default ones will suffice
the 3 that cats wants I mean
latent charm
Yeah, or just do A, O, EE and F and put the closest one in when you're setting them in unity.

 wanton goblet
Bruh

 ripe lotus
@dull canyon I did a cat a while ago for a commission, I just did my own rig and put bones where they should be, like where it should bend ect. Then I made custom animations for it to walk/run/ crouch. (All in generic model by the way)
dull canyon
and you could still do visemes and eyetracking and such?
ripe lotus
Yeah of course
The hardest part was just making a smooth animation cycle
For the movement I mean
dull canyon
okay, so you didn't use the general humanoid armature?
ripe lotus
No, I didn't even consider it an option haha
dull canyon
okay, guess I'll try that then
ripe lotus
If you could get it to work somehow that would be fine too
dull canyon
I'll get back to you when I ever get to the point of porting it to unity 😄
ripe lotus
Maybe you could like.. make two separate sets of leg bones just parent them to its mirror
I believe
finite glade
So, how do I in Blender 2.8 make a texture atlas for models where the texture is tiled and wrapped around in the empty space like this
would I just have to redesign how the UV mapping is done and make sure it wraps back in on itself correctly, or is there a simple plugin that fixes that
glad steeple
Cut up the uv map
finite glade
Or is there a material node that fixes texture tiling maybe
glad steeple
Cut up the uv map.
 azure rain
that wouldn't stick in unity if you use material nodes
finite glade
yeah i guess id have to bake the texture or something after doing that
glad steeple
just cut up the uv map
finite glade
cut up how
latent charm
If you want to atlas things and be able to use & abuse UV tiling you'd have to look into texture arrays and make a shader that can read them.
Texture arrays provide all the benefits of atlasing (a single chunk of image data) while allowing for UV tiling, as the texture array behaves like a set of layers where in the shader you specify what image should be read.
glad steeple
Or just cut it up and you dont need to do any of that fancy shmancy shtuff
latent charm
There's cases where cutting it up may not be an option, which is why I mention it.
glad steeple
In this case its an option, what cases would it not be an option?
Out of pure curiousity ofcourse
latent charm
A very irregular UV map as opposed to a more regular one like this
Or one that used tiling along both axes
finite glade
it creates weird lines at the edges
when you cut it up and move it
idk how to fix that
latent charm
Oh yeah also this tends to happen by just cutting the map
glad steeple
Only if you do it wrong haha
finite glade
☠
latent charm
You'll have to try and align them value perfect to the UV space
glad steeple
Or get a tool (like cats) to do that for you
latent charm
I wouldn't put much faith in that getting it right in a case like this
glad steeple
also that isnt the issue here, that looks like its stretching one line of faces across a small space
I would, cats would get this done fine - ive used it for exact things like this before
Can we see the UV?
finite glade
yeah I just basically cut one of the layers too long so I moved the edges closer in so it did that, I was able to fix it where it looks better
glad steeple
Dope, good luck with your melon
finite glade
well the issue was it wasnt just the melon, but the apples, and the wood, and the cloth too 🙀
a lot of work cutting it all up manually replacing it
glad steeple
All in the name of our lord and saviour optimization!
finite glade
ok got all the textures squished down into their squares.. only took checks time almost an hour, not bad
now to move them to the atlas
spiral sigil
I have returned.
I've been told by Nonskiller not to speak in the "Social Channels" and only to play in 3D modeling channel the Picture one.
Because they not social
;3
So this 3D model has success.
I think I should give it Armor
Darkness and Light Armor
And he wears a mask
covering up Daffy Duck
finite glade
texture atlas complete!
spiral sigil
and justshowing that he's Bugs Bunny
finite glade

strong thistle
@finite glade
20 Tips to Speed Up UV Mapping in Blender:
⇨ Free Blender hotkey PDF: https://zachariasreinhardt.com/free-resources/ In this video you will learn (at least) 20 tips to speed up the creation of UV maps...
 flat flare
Has anyone poked at the shiba models?
If not, but you are a fluent model-maker, I would love to talk a bit about editing them and such (and the process to go about doing certain things)
spiral sigil
This is part of the "Kermit Series"
Kermit Series has Kermits and other Avatars like Bugs Bunny, Daffy Duck, Big Bird, Gonzo, Piggy, and some random 2006 Meme ones like Duck SOng.
finite glade
Okay so how do I get this texture to tile without just making the UV massive like this, so I can use it on an atlas? https://cdn.discordapp.com/attachments/387443655687798786/595478882040283147/unknown.png

the food stall roof cloth above I just ended up doing some cuts right where the tiles would be, but doing that for this roof seems a bit overkill
 mental topaz
@finite glade or copypaste the image to fill this uv, or crop the face by uv, (do you need a 1click cropper script for blender?) (🤔)
glad steeple
Dear diary
zenith relic
for some reason i cant see textures in blender 2.8 but 2.79 is showing them..
when importing an avatar with textures included

 dull canyon
neat
finite glade
love when I find random stuff out of the model like... ?? when did this happen lol is something broken?
spiral sigil
Okie Cookie Monster + Elmo Fusion
naw
the T-pOse are now the same.. and it feels like a random bunch of people had their own individual project without a work flow
Big Bird + Devil Kayuya?
Bird Bird; Blue, Yellow or Purple Yellow?
Wow.. Big Bird is Such a Broken Texture lol
Just going to throw it like this
I will need to make the "Tail" and the Legs Purple
There lol
Better Purple.
It's a shame I won't make Wizard Big Bird since I don't like how they made his textures.
Unless I make a Remake of Big Bird
This is the worst model.. I am going to make a Better version (Just the head though)
spiral sigil
So terrible.
I think next time, I should 3D Scan a Big-Bird if I see a Big Bird doll
Makes it easier to be honest
spiral sigil
I like how the Kermit Series isn't about Kermit so much; but Muppets and Iconic Cartoons (except Disney)
spiral sigil
Big Bird = Best Bird.
spiral sigil
Imma get back to Making Kermit Soldiers again; make 3 tomorrow. Footsoldier with three weapons; Sword and Shield, Spear, and Bow (arrow animation that repeats; no collision because idk how to make Collission animations on VRChat)
Officer 3 weapons :: Two Handed Sword, Maul, Flail. // And Calvary Kermit || Idle is Riding on a Horse, uses Spear, Lance, Halberd, Longsword. // Then another Footsoldier Kermit which uses 2H Sword, Battle-Axe, and Dual-Swords.
I think these would be a great addition to the Kermit world :3

 whole ibex
 steady zealot
Looks great. Good job
steady zealot
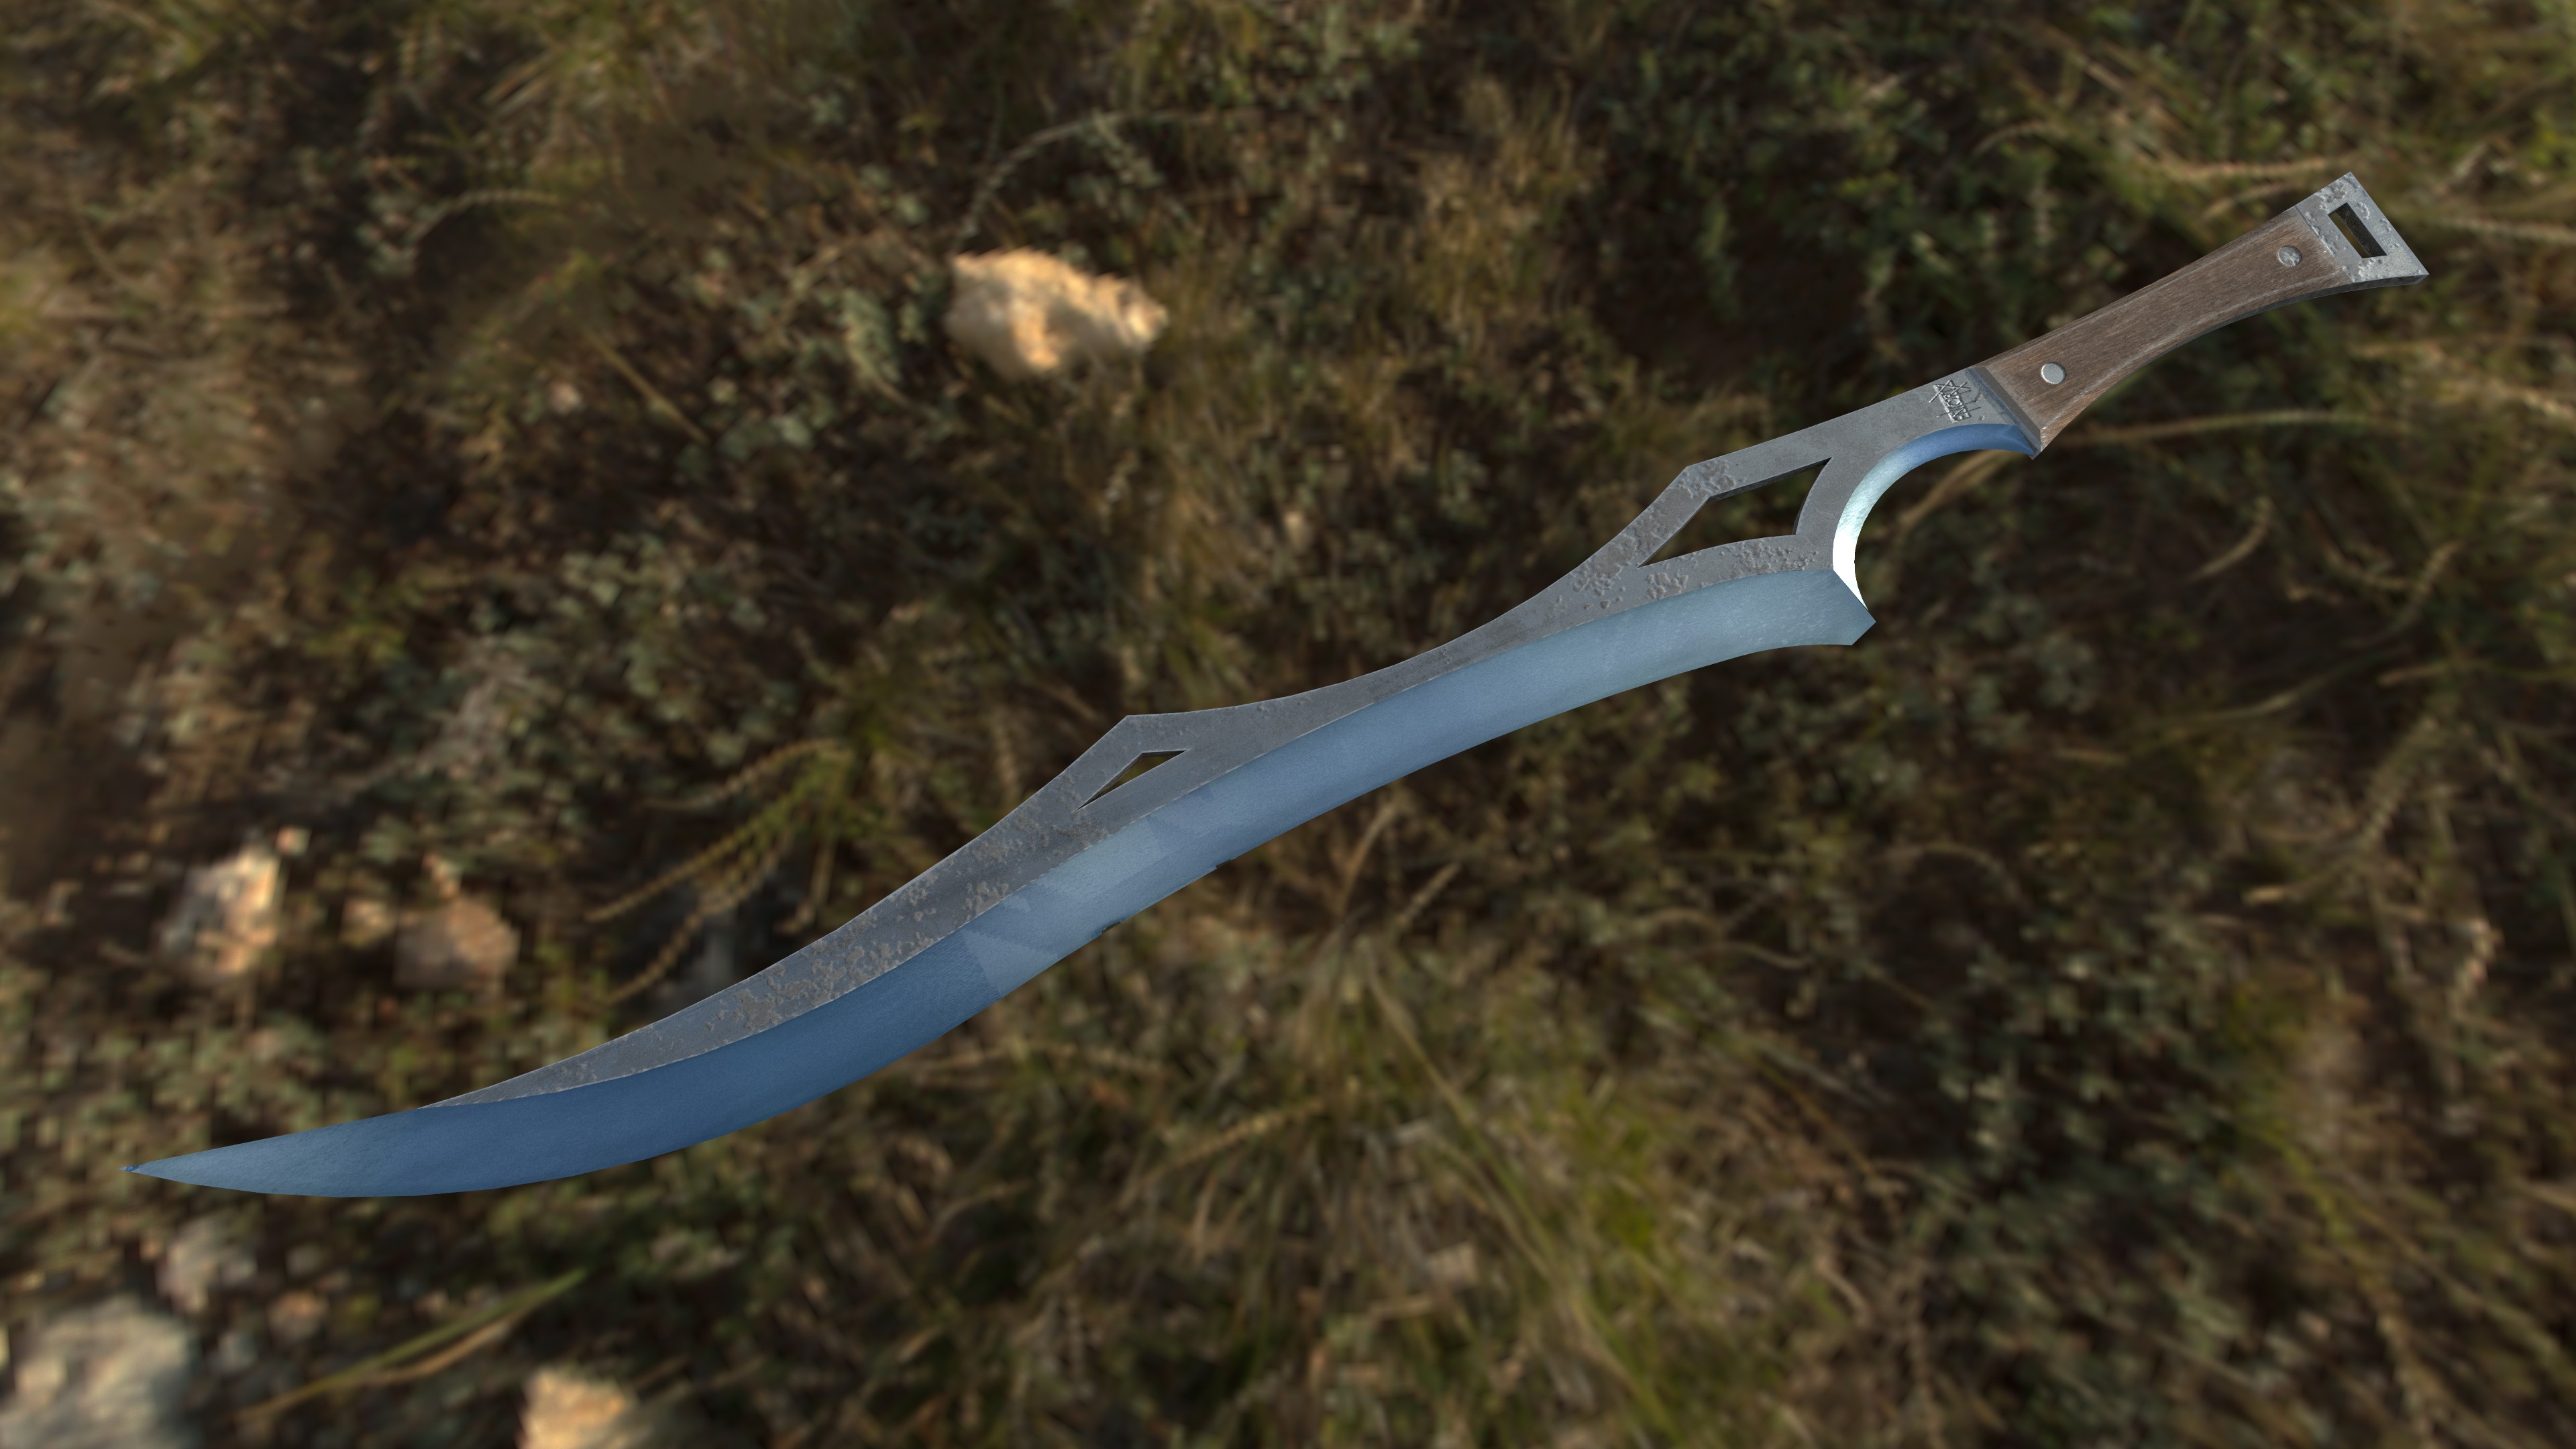
Made this today. Based loosely on the dagger Princess Buttercup was going to kill herself with in the movie The Princess Bride
spiral sigil
This wil make a nice Kermit Model.
 stable edge

zenith relic
it is just me or blender is a little messed up? im trying to put a bone on the foot and it controls the head 😐
not entirely...just a small part
compact umbra
blender isnt messed up, your rigging is.
finite glade
anything automatic needs manual review afterwards
 stuck adder
If I wanted to hire someone to make me a full custom avatar from start to finish, using no gray area assets, How much would it cost? Realisitcly?
And what tools would maybe help me create something if I wanted to just do it myself?
 ashen stag
@stuck adder Around $100 or more if its all from complete scratch. The price would obviously vary depending on how complicated but it's always going to be a pretty penny. If you wanted to make something from scratch the only real thing you need is blender which is free, however, payed programs like Maya, 3Dsmax, Zbrush, and substance painter can also work.
Maya and 3DSMax are similar to blender, Zbrush is top notch for sculpting, and substance painter is top notch for creating high definition textures from scratch. These programs are all very expensive
stuck adder
Do you know anyone who would be willing to do some model work?
It's fore more than just 1 in the long run.
ashen stag
No sorry I don't know any off the top of my head, people usually recommend checking out vrctraders in #community-servers-old
 zinc furnace
$100 is definitely the absolute minimum for a decent avatar, especially if even a small portion of it is from scratch.
For $100 I would expect to be able to get a custom head and not much more
@stuck adder to create stuff yourself you can probably get by with just Blender.
Or any other 3D Modeling tool.
Maya is free if you're a student of any kind
3DS Max too
If you're gonna sculpt something, Blender's retopoflow can be obtained for free from their Github for the retopo step.
stuck adder
Alright to be honest, it's not for me specific.
I'm asking around because who I work for needs avatars, so we're looking for a solution basically.
I don't want to be the one to do it though.
My ways of doing things are not quiet the most professional.
ashen stag
Well like Rokk said if you want a good scratch model get ready to pay a lot
stuck adder
That's what I'm trying to find out is what "a lot" is.
zinc furnace
It also depends on what kind of style you're going for
Toony, less toony, etc.
For stuff that's meant to look realistic, you can look far wider than just the world of VRC, at that point you're looking into commissioning from independent professional modelers.
That's also true for toony models to some extent but I feel like when it comes to toony stuff, the people in and around this community are better at it than "the guy in that office building down the street".
spiral sigil
Now that's a Constantine.
 lunar notch
OII
 spare fern
oh god
spiral sigil
It's going to be a Horse-Riding Constantine (Not Kermit)
Imagine a bunch of Constantines on Horses and they got a sword
Real Calvary Combat
So the Scrabbled Eggs, Hashbrowns didn't make it. Only Pancakes and Spam
spiral sigil
:3
spiral sigil
Constantine ;D
spiral sigil
;D
spiral sigil
I should give my other Kermits the ability to go on a horse. Would be cool ;3
Problem is; I don't want to bone my horses (As I am trying to find alterntive way)
 daring karma
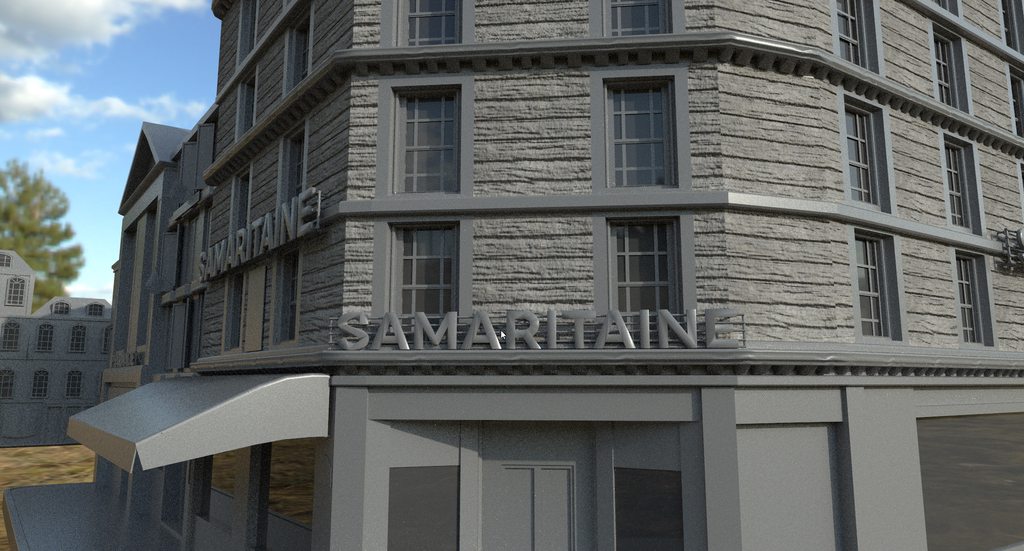
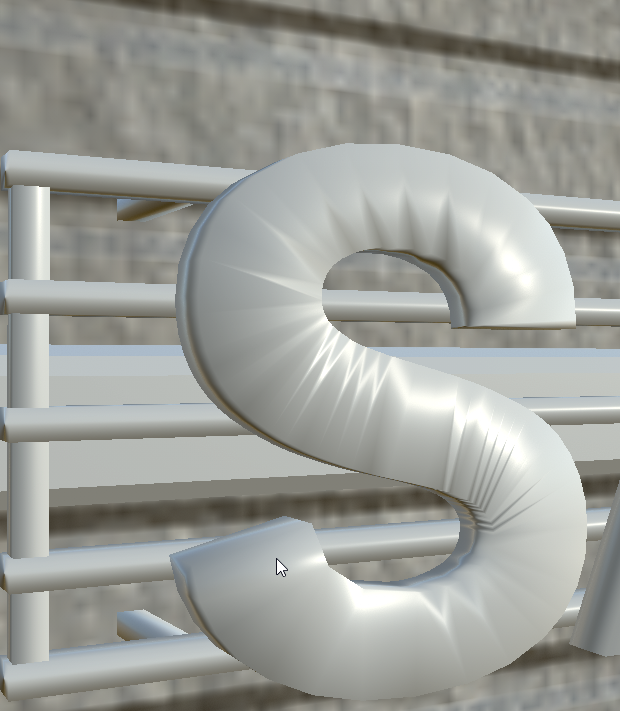
Anyone ever have an issue where parts of a mesh gets weird triangulated normals when you bring it into Substance Painter? https://imgur.com/a/W2xtjLM
 cinder wraith
Hi, I created zippers for a jacket through using the array modifier and curve but now that I finish making it how can i make it so all the zippers use the same UV?
void narwhal
unwrap it before applying the modifier
cinder wraith
ah okay, so i just gotta redo the zippers then
void narwhal
generally people don't actually model a zipper but rather just throw it onto a normal map or sculpt and bake
 void narwhal
some cases in which you want a zipper open and have jagged edges you could resort to cutout unless you want quality
@daring karma looks normal to me unless you're using a normal map for the letters
could also try splitting edges if you haven't already
rendering bouncing light doesn't play nice with low poly in general
daring karma
https://i.imgur.com/q7eFlpb.png this is a better photo of the issue
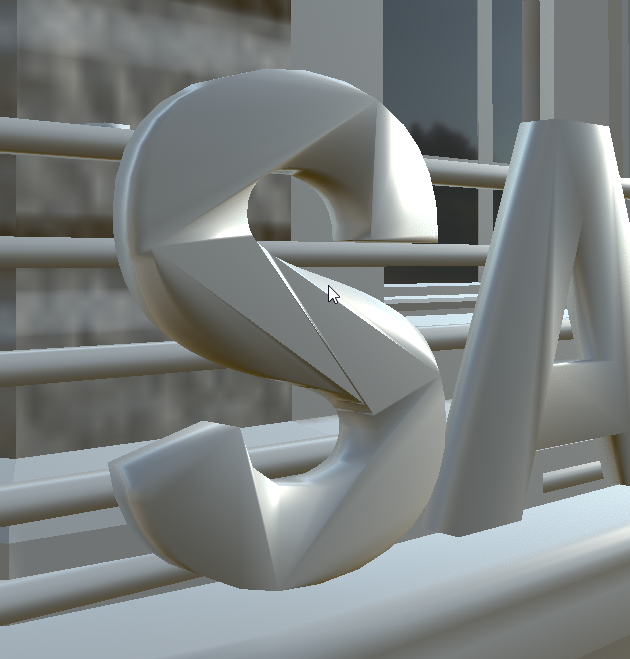
If I triangulate the mesh, it looks a little better but still...https://i.imgur.com/qvqBbVb.png
 void narwhal
looks like you subdivided it in the second picture
if you subdivide a triangulated mesh it's going to give you trash normals
daring karma
But in the OG mesh it's fine almost everywhere! (except substance painter)
Maybe Substance is just doing it's own triangulation for under-the-hood stuff and doing it's own normal stuff to it
I've just never run into this before
void narwhal
so when meshes are rendered technically it's triangulated regardless
but far as i understand it normals can be calculated with 4 points instead of 3
just more expensive
did you apply modifier before exporting it?
daring karma
Yes! I suppose maybe the triangulation should be done in Maya just so I can be QC it before it goes into Substance rather than let Substance take the wheel, etc.
I guess if it's fine in Unity, then it won't matter too much if it's messed in Substance. Although, I think that weirdness is probably messing up my maps for the meshes so any generator work would be messed up too 🤔
void narwhal
depends
really the normals for that text looks horrible regardless
you gotta try splitting the edges
daring karma
I'll look into it! The normals seem fine in the actual 3D software is what bugs me out. And it's weird because there's tons of 3D text on other buildings that were done identically workflow-wise and they don't share this issue
~blackmagic~
daring karma
I'm just gonna go ahead and blame network IK for this one 😤
spiral sigil
This is my Texture I am going to work with.. this will make me.. about.. 10 Avatars; 8 (But for variety; it would be 10)
I should also learn how to make a "Gun" animation for my Bow and Arrow texture.
Me thinking it going to be the Gun Trigger hand; then the Rock and Roll trigger that shoots it.
Else the Mage will use a Fire Ball spell, one Lightning spell, and a meteor spell
Kermit-Mage
So we'll be at.. a total of... 20 Kermits 80 more to go
Probably when I get to 30 kermits; I will make 30 shreks as ShrekFest 2019 is comign
spiral sigil
This will do for now. I like Kermits. So I make General Oukie Kermit.
 faint heron
Hey so, I’m trying to put a clothing mesh around a base of a model, I’ve done it before, but it takes a lot of time making it smooth and accurate so that nothing clips through after you weight paint. I was wondering if anyone knew any easier way then just clicking on the dot/line/platform thing of the mesh and moving it like that. Or it there’s a way to do that and have all the other dots/lines/platform things follow with it in a manner that smooths with it. Or even if there’s like, a button that just makes the mesh surround the base for you. Anyone have any tips, resources or anything else that might help?
latent charm
In blender if you press the o key that enables proportional editing, which when you move a vertex it also moves them around it in a certain radius (controlled by scroll wheel). Blender also has a transfer weights function where it can project the vertex weights of one model outwards onto another, which can speed the process up, so that you just have to do a lot less cleanup to prevent clipping.
 fossil inlet
Did my post get removed or was I so tired I forgot to post anything?
latent charm
I don't think so
fossil inlet
This was like 8 hours ago but maybe I just forgot to hit submit
latent charm
Nope, don't see any mod removals so you're probably tired
zenith relic
finaly ive made a perfect chest thanks to the triangles..
witch i didnt really know about of how much detail u can get with those
the one from above its a failure
fossil inlet
Sculpted a Chronicles moogle and the Crystal Chalice yesterday/last night, planning on turning them into a pet for VRC
zenith relic
gonna have nightmares trying to make a head 😦
faint heron
k thanks, i'll give it a try
okay so first question.
how to i make it only affect one part of the mesh rather then drag the entire thing
@latent charm
latent charm
Um
Reduce the range? And you should be using proportional when moving the clothes around, not the body mesh
you have become a snake
a bendy snake
faint heron
yes i was being silly with that one XD
and how do i reduce the range
@latent charm
latent charm
grab a vertex and scroll up or down, you'll see a circle showing the influence range
latent charm
You have to actually begin moving a vertex then scroll, not just select it
 cerulean shoal
its america day
america man must become created
 limpid lark
Hi
Can anyone tell me why i get this message i blender: No valid selected objects. when i try to bake the materials on the UV map?
spiral sigil
One of the 3D models I am working on — it going to be scanned
I wish I had a transparent table that way I can scan the bottom for a perfect sandwich scan
I don’t like the sandwich design; going to rescan and make a cheesier sandwich
The second sandwich has more details it has more cheese more artistic detail love it
So this be a second version of the sandwich this one is better and superior
faint heron
@latent charm new question! how do you transfer weights 😄
finite glade
uhhh whats going on here?
in my world I walked over this and the mesh collider grabbed my feet and wouldnt let me move
I copied the logs and flipped and rotated them to get them like that, but idk why they are like... inside out?? or idk
zinc furnace
Mesh colliders will do that on occasion. Especially if they're inside out
Avoid mesh colliders I would suggest
If you do use them, mark it as convex
That should help quite a bit, since this is a convex structure anyway
spiral sigil
Normalization issue t seems
finite glade
even when i flip normals/recalc inside/outside, nothing changes, they still look like that
zinc furnace
Check the UV's too
finite glade
alright, maybe recalculating did work, they arent not pink anymore, and dont grab my foot
now i need to fix this grabbing me when i touch it

faint heron
so can someone tell me how to transfer weghts from one mesh to another?
spiral sigil
Now you guys can enjoy sandwiches.
Ye man. Breakfast too
Gonna take a lot of time to clean up the Breakfast Dishes...
Gotta Separate the Scrambled Eggs; Spam, Potato and Shrimp, and Pancakes off the plate.. as..
They will be moved to another silver platter
cinder wraith
i made a zipper but used the array modifier and curve before I applied it I unwrapped it. Is there a way for me to make it so it uses the same UV or do I have to manually put them together? https://gyazo.com/a7bc6a1b8ba2b2761abfa273f9518106
 spiral sigil
Another Grilled Cheese Sandwich
Delivious Grilled Sandwich with Tuna.
and an olive.
spiral sigil
So clean.. so delicious.
One more Grilled Cheese Sandwich then I can work on Kermits Again
 tepid wagon
RIN I assume you didn't save your blend file as new one after applying modifiers and can't go back. It would be quicker to delete all the zipper parts except for one and use modifier again. If you unwrap it without applying modifier they should all be stacked one on top of another after file export and apply all modifiers option enabled. If you don't plan to make normal or ambient occlusion map for them I guess you could also just select all those unwrapped parts, scale them down to one pixel and paint it so that they just gonna have the same base color.
spiral sigil
Okay, I finished al lthe sandwiches.. now... I need to feed the Doogies
Then I can work on the Kermits.
80 more to go
cinder wraith
@tepid wagon I have it one where the modifier isnt applied
 snow willow
Ooh... Fresh meeeaaaaaat~
fossil inlet
Crystal chalice finished modeling/sculpting/texturing - now to do the moogle!
tepid wagon
@cinder wraith in case you didn't already - if your save file after applying modifiers doesn't' have any changes just use go back to it and unwrap without applying modifier. If you made some changes in the blend file after you applied modifier go to old blend -> make zipper it's own object if it isn't already -> in new blend file delete your zipper with applied modifier -> go to file -> append -> search for old blend file -> object -> search for your zipper object -> append from library. You will then have old zipper with modifier in your new file and it should unwrap just it's single part
limpid lark
pls help !!! I can't bake material texture on to uv map :// it just says no vaild selected objects.
zenith relic
there is a way to transfer all the work done with blender 2.8 to 2.79?
latent charm
Export to an exchange format like collada or fbx.
Or try to open a copy in 2.79, depending on what you did (or didn't) do it might open.
zenith relic
opening a copy with 2.79 made in 2.8 doesnt show up at all
it messes up the hud badly
fbx my only way huh?
 fresh isle
@zenith relic Is that Voidoll I see?
Glad to see someone else interested in Compass
At least I presume
I can give you a more basic model of her to use as a reference if you want me to
zenith relic
i actualy have the 3d avatar but at the beggining i wanted to make a male version of her..
well...like a brother or bf
@fresh isle
its yours?
fresh isle
No
I wish I modeled that
I have a mesh from the original game that this character is from
It's a simple model so it's perfect to learn from if you want to try it
I do want to get started on modeling
Well technically I already have
But I mean I wanna get good at it
zenith relic
u have some ss with it?
maybe that gonna help me a bit to improve the acuracy or modeling.
fresh isle
Some SS? Wait what do you mean by that?
 copper gull
So i made this shirt for an avatar i have, but when ever i move my body the shirt clips through his whole body. is there something i didnt account for when i modeled the shirt?
not quite too shirt why this is happening
cerulean shoal
make sure its rigged
copper gull
ok a friend of mine is walking me through it atm
copper gull
i have it rigged but unity is screaming that something is missmatched from the avatar itsself
fossil inlet
Got the Moogle/Chalice all textured and in-engine. Will rig and animate tomorrow
stable edge
The absolute fluff of this boi
 visual python
So, I wanted to try and make a custom uv texture for the roof for the world I'm working on rn, but when I imported it into Blender as a .ply file (because it wouldn't let me import it as an .fbx), there's no mesh attached to it. In my Unity project, there's definitely a mesh attached to it. What am I doing wrong?
visual python
Im not sure, but I thought they'd import together
And no, there doesnt seem to be a specific option for importing with/without the mesh attached..
dull canyon
wait wha
visual python
What?
dull canyon
steam?
dull canyon
interesting
visual python
I didn't know it was, I guess 😅
Btw, never mind, I figured out a clever solution to my problem
dull canyon
nice
 vivid crater
I've noticed a couple people downloaded blender through steam, probably to have their hours of sitting around recorded
latent charm
That is actually quite a bad idea as Steam likes to update shit whenever it pleases, and blender is something you absolutely do not want updating without you knowing it's going to.
vivid crater
Yea, plus personally I use both 2.79 and 2.80 rn
Mainly because I don't wanna think about vrc or have the cats tool when I'm in 2.80 lmao
 onyx juniper
I am just lazy enough to ignore this warning
dull canyon
well cats is running in blender 2.8, if that's what you mean
vivid crater
Nah, I use blender for non vrc things too, so with 2.80 I have nothing vrc related so I don't get distracted and slap together a random model
zenith relic
second attempt..
still some details suk because i dont know how to.. resize an object in directions i want.
 mighty minnow
 gilded lodge
hahahahah
 snow nymph
😀
mighty minnow
is totoro
spiral sigil
oooh thats my neighbor!
mighty minnow
👌
spiral sigil
My next 3D Model --- It's going to be my new Avatar to add in one of my older worlds (The Warner Bros World) and I am going to make this my new Profile Picture.
steady zealot
spiral sigil
I decided to give my Shadow Avatar Real-life teeth
Because I didn't like how his mouth was originalyl formed so I fixed it
There.. much better. The mouth was on the left and right side..
it should be in the middle.. like a Normal HUMAN being.
spiral sigil
Now I need to make a nice Screen-Shot Profile Pic for my New Discord.
fossil inlet
spiral sigil
Making a new Profile Picture for myself and maybe a new RS Avatar
spiral sigil
I also think I found my issue of making Optimized Runescape Avatars from RS3 -- but it is a long process but worth it.
Why use the Software Coloring when you make the pallette yourself
visual python
Um.... Help?
le cries These jeans are so cute, but Idk how to make them fit on the model properly, pls someone help ;-;
latent charm
You'll find the tools proportional editing, and shrink/fatten to be useful here
https://docs.blender.org/manual/en/latest/editors/3dview/object/editing/transform/control/proportional_edit.html
https://docs.blender.org/manual/en/dev/modeling/meshes/editing/transform/shrink-fatten.html
visual python
Thank you ❤
spiral sigil
For some odd reason it took me 8 hours to work on a RS Avatar.
High Quality (Poly) Avatar = 3 hours to 30mins; But a Low Poly = 8 hours.
It comes to show that Low Poly takes longer to edit than a High Poly.
;c
visual python
So I had to restart my Blender for an add-on and I come back and my model I was just working on now looks like this.
What happened..?
Does anyone know how to fix it?
visual python
That can't be it, cause they're all still there
Or it says they are
Oh okay
So
I found out that I can just remove the textures and reinsert them and that works
Bwehehehehe.....
 wind stirrup
how long do i have to wait until i can upload my own characters
visual python
It's different for everybody
I played for months, almost a year in fact, before I was able to start uploading stuff
It all depends on your unique gameplay experience
As far as I know it, the more friends you make and more worlds you visit, the sooner you'll be able to upload stuff
Or at least that's what I've heard people say
le shrug
visual python
Yeah, see, it's different for everybody
It was almost a whole year before I got the email
dull canyon
I started playing in Desktop mode, rarely talked to anyone and only made like 2 or 3 friends until I g ot the mail
visual python
Wait, really? Wow, thats wild, but i guess it really is different for everyone else. le shrug
dull canyon
I think at least, can't really remember
I didn't pay it much heed until I got VR and realized I wanted to start making my own avatars
visual python
I dont even have VR yet, but i really want it
visual python
im broke af, i literally can barely pay for food rn
dull canyon
I got the vanilla Vive in February, and I'm already in the process of slowly upgrading to INdex
well
if you live in VR you won't need any food anymore
visual python
i just want vr so I can be able to ineract with everyone and everything like i wish I could
But im broke and life sucks for me rn
So idfk
zenith relic
i was able to upload avatars since i was a new user
visual python
im still a new user by VRChat's standards
fossil inlet
I don't ever remember not being able to upload new characters, but I got in super early and my VRC name is literally just Rome. I can't imagine they wouldn't let early players upload right away when the game first released, or there wouldn't be much content
visual python
Maybe, idk 🤷
 old field
It was added later you could upload right away before but very few people even knew how
Everyone was to busy trying get lip sync working
visual python
Does anyone know how to remove the hairstyle from my pmd model in Blender so I can switch it out with another style?
visual python
How do I fit a .unitypackage clothing/accessory item in unity? I've been searching for pmx/pmd things to put on my base before I switch it over to Unity, but I cant find any suitable ones for what I want my avatar to look like...
Help? (I feel like such a noobie rn x3)
 dense kelp
I'd highly recommend doing all of that work in blender instead of unity, attaching anything with bones in unity may not work as intended.
You can remove the hair mesh on your MMD model by going into edit mode with the model selected, pressing P and separating by materials, exit edit mode, select the hair in the 3d view, press X to delete it, select everything by pressing A and join them all back together with Ctrl+J
@visual python
visual python
You're a lifesaver, EXSGT, thank you!! ❤
dense kelp
No worries
spiral sigil
how do i add a scene descriptor in unity
visual python
It looks so cute, omg!! ❤
zenith relic
details are bad in compare with the original one
visual python
So, there's a short story that goes along with this screenshot.
For over a year now, playing VRChat, I've used this one avatar I found at an avatar world a looooong time ago, but the world has since been taken down. The avatar's name is Gami and she's an edgy badass who just looked really cool. (Side note: I also keep her favorited because first of all, I'm afraid of losing her forever, and second of all, why would I ever unfavorite her?)
ANYWAY. Scrolling through Deviantart looking for a tee shirt for my custom avatar to wear, I just so happened to scroll across the exact shirt that Gami wears. I legit started at this for minutes, idk why, I swear I'm trippin' xD
Just a cool little occurrence, i guess :3
Anyway, back to the hunt for a shirt
zenith relic
another avatar lost because the world was taken down...i felt the same thing when i lost my white tiger..
visual python
I mean, it's not completely lost because I still have her favorited and she's the avatar I use most often
old field
O i have those shorts i think lol
zenith relic
same thing happened to me i had the avatar as a default and because of a glitch and crash i lost it
spiral sigil
ok so basically when i import clothes and position them to fit my avatar do i have to connect them to something or do i leave them alone?
in blender
tepid wagon
MoistehBoi's Pc ACC you gonna have to weight paint the clothes you added to your avatars armature. Just search "Blender weight painting" and you will see how to do it.
spiral sigil
ok thanks @tepid wagon
visual python
does anyone know how to unwrap a mesh to make a custom texture for it? (In Blender)
strong thistle
20 Tips to Speed Up UV Mapping in Blender:
⇨ Free Blender hotkey PDF: https://zachariasreinhardt.com/free-resources/ In this video you will learn (at least) 20 tips to speed up the creation of UV maps...
visual python
Oh, ty ❤
 slender holly
UV mapping for me is actually so much fun, idk why
I spend majority of my time in the shader section in blender
 small valve
i spend an infinite amount of time just messing around with shaders in unity alone
very fun
visual python
Rn, I'm texture painting the shirt's UV map in Gimp, so ❤
slender holly
Are you new to blender?
visual python
Is it that obvious? 😅
slender holly
Dont worry, Im a newbie too, but i'm surprising myself sometimes.
visual python
Same :3
slender holly
I know you're in a difficult situation, but if you ever come across 20 extra bucks or so, Go to Udemy and look up their blender courses, all you'll need is blender and it'll take you step by step if you want to get down and dirty and do modeling from scratch
their blender courses are super cheap and usually give you enough matierial where if you're serious about learning the skill, it'll really set you up for future model making.
visual python
Ooh, I'll add that to my wishlist, thanks! 😄
slender holly
I'm 2 or 3 ish months in my journey, this is my first major project
visual python
Whoa, that's awesome!!
slender holly
woah big grrr, Im missing the finished product with all the pieces done one moment
visual python
I mean, thats still better than anything I could make atm
slender holly
it just take practice, you can find free blender tutorials, blender guru is an amazing start on his youtube channel.
visual python
Yeah, I watched Blender Guru wayyy back when
slender holly
please excuse the horrible lighting this is in lookdev mode
visual python
Nah, it looks amazing, dude!
Honestly, lately, I've just been focused on trying to finish my first ever custom avatar
slender holly
you'll find different stuff you wont really like. I'm not a fan of rendering and messing with lights.
visual python
It's slow coming 😅
slender holly
Yeah dude focus on singular goals dude
visual python
Yup! :3
slender holly
but modeling a humanoid character from scratch is unbelievably hard so i'd be careful not to frustrate yourself.
Go for some low poly stuff and work your way up! Skyscrapers were not built in a day
visual python
No, im not building it from scratch
i've been using parts from Deviantart and such
But it's still pretty difficult
visual python
Yeah, Im so unartistic, so I had to improvise xD
slender holly
I mean, I failed math and art class when i was in highschool and i had to drop out of the 11th grade because i had to join the workforce and get my own place
It not really about being artistic, its more about consistency.
visual python
Yeah, I guess you're right
Im just really new to all of this, as far as using it for making a custom avatar.
slender holly
Trust me, I havent even entered VRchat, Im just fascinated by the idea of it.
well more like obsessed but.
visual python
I've played VRChat for almost 2 years and just now started actually putting some actual effort into making a custom character of my own.
visual python
Oh, I've already done that 3 days in a row now xD
visual python
I definitely want to :3
spiral sigil
I want to sell my 3D Avatar services for 1 dollar
I need to make 1,000
or 875 precisely
visual python
I think that needs to go in #shameless-self-promotion, mah dude
spiral sigil
Okie
visual python
just sayin'.
spiral sigil
Should I make a banner?
spiral sigil
Actually I can't sell myself Shamelessly
until I make a Banner
showing what you can get.
visual python
Well, Fiverr's an option once you do that 🤷
visual python
Yeah, work your way up :3
visual python
Yeah, sounds fair
visual python
A pamphlet?
spiral sigil
Yes.
An animated Pamphlet
Course 3D modeling is my "Hobby" however I do it more than my main stuff
 clever wolf
Hey folks, it's been a while since I modeled something so here is my Crash Bandicoot model I've done https://sketchfab.com/3d-models/crash-bandicoot-ed8c9f92c99c431dbb949ffce5f9dda3 I still have a lot to learn and a lot to improve on, I am also trying to find a job as 3D modeler but that'll take time, any criticism would be appreciated 😃

Hey so this is my recent model of Crash Bandicoot (Activision) This is my first model in forever and also am looking for a job as a beginner as a #D modeler, this model was made for fun of course there’s a WHOLE lot more to learn! - Crash Bandicoot - 3D model by Daniel Fisc...
spiral sigil
Looks like a Drone.
 silent acorn
@clever wolf Looks really great! out of curiosity, was it made with a sculpting or modelling toolset?
clever wolf
It was made in 3DS max, I used a reference sheet to create the model
I studied game design so I studied 3ds max and Unity, I still have a lot to work on especially when it comes to modeling, I know a bit of zbrush but it'll take me time to create a good looking model in there, I also have to improve on materials
I am also trying to find a job in the gaming industry but I have to work on a really good portfolio to be accepted anywhere
silent acorn
The model's really clean, I think you did a great job! Sorry for replying so late.
 eternal scroll
please answer my question in #avatar-rigging
spiral sigil
The next 3D scanned food is pasta
slender holly
?
fossil inlet
Non skilled why are you scanning all of these objects?
I haven’t seen you retop, bake, or flatten the lighting on any of them. I get that photogrammetry is cool but you always seem like you’re wasting your time.
spiral sigil
That should do it.
The transparent bowl wasn't trans
xD
But the point was to get the rim.
Now people can enjoy
having Pasta.
on vrchat.
 narrow linden
Lmao nice. What do you use to 3d scan the food?
spiral sigil
A phone.
I dont have to use my DSLRS
I dont have time*
When you make food; you gotta use a phone
daring karma
https://www.agisoft.com/index.php?id=71 Just saw this pop up on my Twitter feed + felt it'd be relevant. Agisoft recently released a dope free standalone tool that helps you de-light your photo scans 🌞
 red goblet
Ho have a kirby skin please?
visual python
Well if there isn't already a Kirby skin (which there prolly is somewhere), it prolly wouldn't be overly difficult to make a Kirby avatar. I mean, he's essentially small and round.
But from someone who's been working on the same custom avatar for five days and not even gotten past working on the base, maybe I shouldn't judge xD
le shrug
 distant carbon
Found a papercraft template and decided to make as low of a poly model as I could of the NA version of the SNES.
clever wolf
@silent acorn It's ok, thank you very much up next I will be trying to model digimon armor sets and that'll be fun
spiral sigil
 lament pond
spiral sigil
lament pond
spiral sigil
Me gonna update my Kermit World; but before I do, I am going to make 3-4 more Kermits to add to the world; and then I am going to put two "pages" of the Kermit Manga in the world too -- That way people can read the Manga.
spiral sigil
The Mighty Kermit General, LVL500
silent acorn
I, uh, didn't know kermit had a manga o_O
working on some extreme low-poly stuff for a PS1-style project, here's a smol robot
spiral sigil
It doesn't it my Fan-Fiction ;c
stable edge
Awww man that's a low poly boi
visual python
My wrist freaking HURTS
 dusk turret
🤔
 visual python
I fixed this all earlier, but I miscalculated the size and had to delete all the extra vertices by hand
My wrist is resting xD
 hallow bough
So many unneeded parts  Yeesh
Yeesh
dull canyon
speaking of unneeded things
https://gfycat.com/SpectacularParallelBeardedcollie I feel like 11k tris is too much for just this?

(trying my hand at modeling a certain Imp)
 dawn ember
It really depends on what you want to use it for
For vrchat, yeah maybe 11k tris is a bit too much
Also after a long time of procrastinating I got my first gun model to an acceptable level
I should go back and add a ton of the surface details but eh
silent acorn
Looks fantastic, I love the handle area.
@visual python It might be easier to create a cube and scale it to the size of your current project, you'd save a lot of vertices
 flat solar
onyx juniper
flat solar
onyx juniper
11k tris for that sounds great for VRChat. A lot of people are going to see your model in actual 3D
 sonic nimbus
@dawn ember You could make a low poly version, and a high poly version with a lot of surface details, and then bake normal maps from the high poly model to the low poly model. This is a common workflow for games. https://www.youtube.com/watch?v=0r-cGjVKvGw
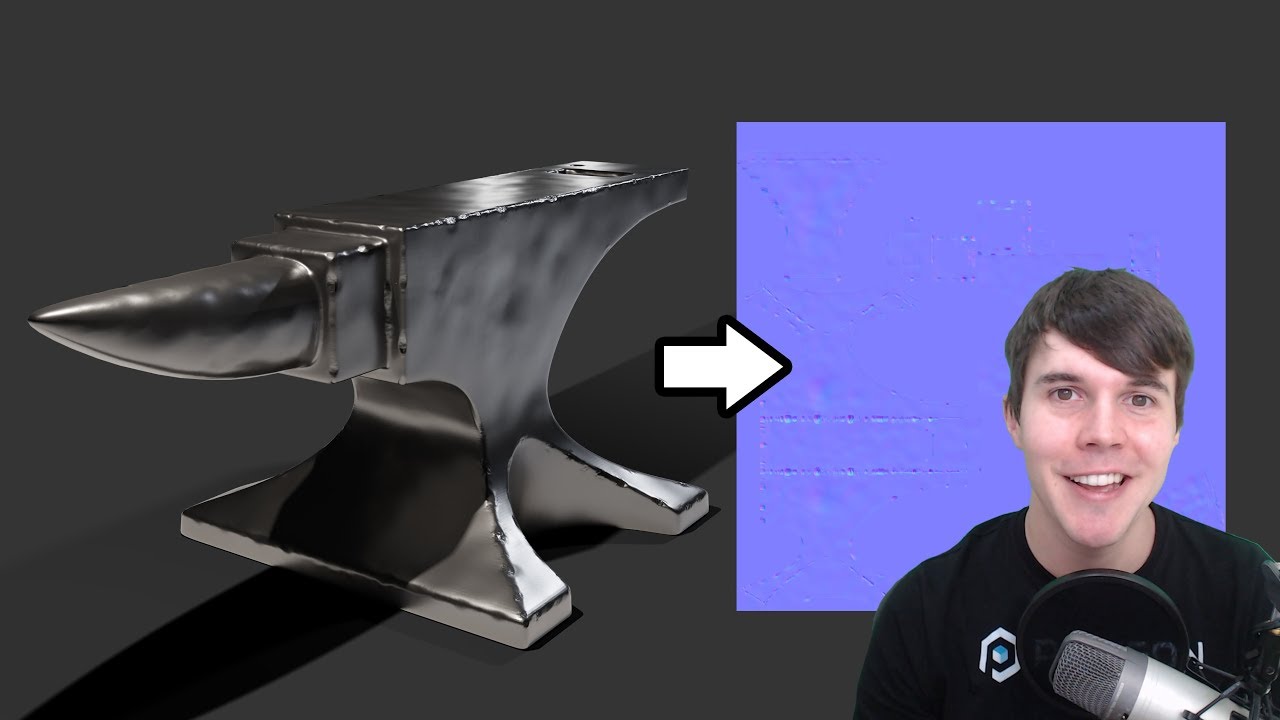
Blender tutorial showing you how to bake a normal map from a high poly model, to a low poly model. Download starter file: https://drive.google.com/open?id=0B...
dawn ember
Yeah I could have
I've seen it in action
but I didn't want to
It wasn't a model for vrchat it was just modeling practice
 mortal pollen
tepid wagon
mortal pollen
tepid wagon
My guess is it doesn't detect upper arm bone because of name, the upper arm bone doesn't exist or clothes aren't weight painted to armature. Check whether it has all bones green in rig import settings.
dense kelp
Looks like improper weights
visual python
Does anyone know how add a color border on the outside of the texture of my mesh? (I'm so bad at explaining it, I apologize.) Here's what I have so far, but I need to make a yellow-colored border along the sides. Does anyone know how to do that?
visual python
Yeah, but I cant seem to figure out how
Texture painting in Blender doesnt seem to wanna work for me, ever ;-;
 subtle jackal
As long as you lay out your UV maps well (which in this case judging by the shape of your object should be very easy), you don't need to do the painting in Blender.
visual python
Well, thats another thing I havent been able to figure out. Whenever I try to unwrap my mesh for the UV map, it tells me that it's a nonuniform shape or something like that and then the UV map itself comes out all wonky. Cause I was gonna try and follow this guide I found that told me to unwrap my mesh and export the UV map to paint it in Gimp, but i dont really know how to do that when my 'nonuniform shape' mesh is coming out as a jagged UV map mess...
vivid crater
I feel like you could unwrap with project from view pretty well
visual python
I've tried several times, but it comes out in these weird lookin parts
I dont know what I could be doing wrong
subtle jackal
Sounds like the structure of your mesh is probably messed up. You might want to try an addon like Mesh Lint, which could help you find problems
https://github.com/garyritchie/meshlint is the latest version I think. The original is at https://github.com/rking/meshlint

GitHub
Blender Addon: MeshLint: Like a Spell-Checker for your Meshes. - garyritchie/meshlint
GitHub
Blender Addon: MeshLint: Like a Spell-Checker for your Meshes. - rking/meshlint
visual python
le sigh thank you. :3
subtle jackal
Sorry, it's late and it would take a while to discover what the UV unwrapper doesn't like about your mesh. In the case of the Mesh Lint addon though I'd be very surprised if there was a major problem once it read cleanly. Perhaps you can use it to find problem geometry and if you're not sure what's wrong you could ask here. I'm sure someone could help you out then.
visual python
I really don't know, but sometimes, I wish this was a tad easier on my poor brain... xD
subtle jackal
It can seem very tricky when you're getting started, but remember there is a ton of information out there to help. Google is your friend and when that fails you, asking communities like this one can usually get you by.
It's a lot to take in but there's a logic to it and that can help it be easier to digest
visual python
I have no bloody clue what gave me this random spurt of inspiration, but on a whim, I raced back to my computer to make this. Not even sure what I'm gonna do with it yet. Just one of those things you have the sudden desperate urge to get out of your head and into physical form, I guess.
Tbf, even though this is the quickest thing I've ever modeled, I'm still quite proud of it
dull canyon
it's the simple things
you can use it as an ad to advertise your custom avatars Kappa
visual python
Haha, thats a good idea. I was actually starting to brainstorm about maybe trying to make it into some kind of giant drive-in theater movie screen.
But your idea's good too
Truthfully, I still have no clue what Im gonna use it for.
 ionic flare
How do i edit the tris of fbx files?
Blender when opening the file i want to edit just displays a cube (oh wait it can't import fbx)
So what program do i even use
tepid wagon
You have new project opened. Click on file -> import -> fbx
tepid wagon
If you don't even know that I suggest you look up some Blender modeling tutorials and try to make something simple and make yourself familiar with the UI in the process, otherwise you are going to keep waiting for someone to tell you what to do next.
spiral sigil
A New D'N'D monster for my Kermit World -- A Harpie
Should recolor her greeen
This is my Second Version it's a lvl30 Harpie
spiral sigil
I need to make a Kermit
that is called "Harpie Slayer" Kermit
A Kermit that slays Harpies
spiral sigil
onyx juniper
I misread "herpes slayer"
spiral sigil
Chef Kermit -- He makes Breakfast, Lunch, and Dinner
spiral sigil
I accidentally destroyed one of my kermits
Imma have to rip it
just to get it back
Hopefully it goes into T-Pose
I had to reskin it, recreate the bones for it
but I will rip it instead because I dont want to retexture it
That Kermit ... was technically done but I need to save back-ups
God my brain and heart hurts
its like I got stabbed
by a Kermit Chef.
because it overrided the save
grr
 sour scaffold
Does anyone know any good "learn 3d" tutorials for blender? I'm trying to get back into it
tempted to pay for cgcookie again, but I want to see if there are any good free ones out there
 vocal frost
Hey guys, when making a model from scratch, is there an automated process to make all the 'standard' shapekeys/blendshapes for the face?
zinc furnace

VRCat: Community-Run VRChat Forums
VisemeFix
A patch for the VRCSDK to fix the automatic detection of visemes.
Compatible with Unity 2017
Overview:
The current automatic viseme...
Oh you mean the 3D modeling part, whoops.
Yeah you can mix Ah, Oh and Ch using Cats blender tool
It's not quite as good as manual work but it works really well and damn near everyone uses it
vocal frost
oh thats visemes (mouth movement)
I meant the shapekeys/blendshapes
like with the eyes winking, whole face expressions
zinc furnace
Well you can rig the face and make them a little more easily that way
Or make the shape key before mirroring, if that's even possible
vocal frost
Hmm
Well if anyone knows if there's a way to automatically generate blendshapes/shapekeys on a fresh-made-from-scratch face. Not the visemes, but facial expressions, that'd be perfect.
I remember something where you designate "this is the eyebrow, this is the eyelid", but I'm not sure.
It seems strange how almost every model has the same shapekeys/blendshapes options, either there's a program that does it, or the majority of people follow a standard.
latent charm
There's the rigify addon, which has a face rig.
The way rigify works is you add a metarig which is used to define things like eyebrows and other parts of the face, which then gets turned into a more complex rig for posing.
It's what I use for making both visemes and any additional expressions as shape keys since you pose the rig as you want it then apply the armature modifier as a shape key.
vocal frost
AH thats perfect! Only thing I had to go on was that you assign parts of the face, thanks Gallium! ❤
 thorny fractal

3d printing one of my models


one on the right was a smaller one that failed cuz the supports where too thin, i ended up making it bigger and making the supports thicker. back of it is pretty rough from where the supports broike off gonna file it down
daring karma
That's super dope
spiral sigil
Here is my next Fusion ---
This is the first Version
I think I will make a 2nd Version.
silent acorn
you're doing god's work, son
spiral sigil
This is version 2 -- I need to somehow turn Kermit's arms into this shape
I think we will call this the "Kermit Brute Form" ---
naw screw it only verson 1
Too lazy
But.. I will use the "Brute Form" as a Template Build
To make different kinds of "Bulk-Sized Kermits"
imma make Version 2 lol
Perfect... this is the Kermit we need.
Crashed.. didnt save
Make like 10 of these Kermit Brutes; barbarian warriors lvl100 Kermits
I should give away the Bulk Version of the Kermit Build as a Template for people to make newly decorated Kermits
"You're Welcome"
spiral sigil
I should make a "Brute Kermit" with War Drums
and some Light-Plate Armor
And it starts using War Drums as it walks
spiral sigil
I now have three types of Kermit Builds I can play with now
Kermit (Standard), Kermit (Ugandan), and Kermit (Brute)
dull canyon
those hair strands look like they'll be a pain in the ass to print
 winter basin
Hi guys tell me what to do
spiral sigil
97 more models till I have 500 avatars
thorny fractal
it uses a lot of supports but its not that bad. its a resin printer so its way more accurate and the layers are a lot thinner so it can nail the smaller details
dull canyon
ah well, resin is a different story

Home of the Blender project - Free and Open 3D Creation Software
soon (tm)
zenith relic
whats that?
 wheat folio
So... how to fix this? XD
hallow bough
Improper weight painting probably, you could also try deleting some skin under that jacket.
zenith relic
@dull canyon non beta?
dull canyon
that's what stable means, yeah
zenith relic
a oke.
probably gonna give up doing avatars with blender...1 of the reasons are that i cant achieve what i want.
cinder wraith
If I have a 1 entire mesh and unwrapped it but I want to have the head UV on another texture how do I do that without separating the mesh?
strong thistle
UV Mapping and Quality of Lighting:
20 Tips to Speed Up UV Mapping in Blender:
⇨ Free Blender hotkey PDF: https://zachariasreinhardt.com/free-resources/ In this video you will learn (at least) 20 tips to speed up the creation of UV maps...
azure rain
perfectly serviceable Uv for low poly solid colors
small valve
c-cursed UVs throws up
idk why but ive always found this style of texturing just so hilarious
like
"oh, my avatar is really only like 3 different colors. time to crumple everything into physically-impossible flat planes"
azure rain
well it's much more efficient than using three different materials for it
 dry zenith
does anybody know how to export textures from 3d paint?
cause in blender the lighting looks messed up
and when i go into the texture mode it dosen't show his "Textures" in which i think he dosen't really have any
(This is what he's supposed to look like)
dense kelp
I have a feeling those are vertex colors
 muted sleet
Hey, I was planning on trying to make my own avatar by editing the 3D model of a prexisting avatar. Would I be able to download it, and how?
 hallow cairn
I'll make a car avatar I said.
It'll be easy I said.
This will be a nightmare
tepid wagon
Most ppl download mmd models of deviantart or other websites. You gonna need Blender with CATS plugin for that.

VERY IMPORTANT - PLEASE READ: This tutorial may still be mostly useful, but there's a few major changes that you need to pay attention to. First off, VRChat ...
 graceful wedge
Hey guys, might sound silly but, when you "set as rest pose" is this a permanent change to the models pose? so even after export, it's in that pose? I basically just wanna move the arms a little bit to fit inside a jacket model I have, since it doesn't fully line up and I'd rather move the arms than mess around with the jacket
tepid wagon
That sounds like something that should be adjusted in edit mode. You can try changing the rest pose just save new version of your file so you can get back to it in case it won't work well and see how your character moves.
latent charm
What you can do is re-pose the arms so they fit inside the clothes, apply the armature modifier, then apply as rest pose, then re-add the armature modifier.
graceful wedge
uhh I think that makes sense 🤔
latent charm
What's happening is you're using the rig to deform the mesh into the new shape, applying that, then the rig pose change as well.
graceful wedge
yeah
where am I applying the armature modifier though? and re-adding it?
I've only messed with this stuff once before
latent charm
One sec, I'll give you some images to help
graceful wedge
awesome thanks
zinc furnace
Cats Blender Tool has an option to do this for you
Applies a pose as rest pose on both the armature and mesh
graceful wedge
oh, so it does it automatically?
latent charm
The addon does, blender itself does not
zinc furnace
Assuming the jacket and the model are in different armatures then yes
graceful wedge
ah right yeah
sorry should have mentioned I was using cats
s'all good then, thanks!
latent charm
Since I've already done it, here's the manual method.
1: Starting mesh and pose
2: Posed rig
3: Armature modifier applied (the apply button)
3a: Applying as rest pose before applying the modifier
4: Armature modifier re-added, now posing from the new mesh shape.
graceful wedge
ah I see 😄
 terse meadow
someones up to no good
spiral sigil
kinda want to see what my oc would look like 3D


 lime steppe
is anyone able to help me out in fully rigging a model i have it is half rigged and it unfortunately not in a tpose i was given the model by the original author and he told me he never finished rigging it
this is the model btw
 ancient mantle
I’m currently trying to learn blender. I’m moving form cad and architecture modeling programs and blender is confusing lol
compact umbra
@ancient mantle Its not made for hard surface modelling like cad and co, ur gonna have a bit of a hard time in the beginning especially with how many features blender has, as its not just a modelling tool but a whole animation, game engine and co.
Take it slow, ur gonna get the hang of it and dont get discouraged
You got it fam
ancient mantle
Thanks
There’s so many things to do lol. But hey. I can make donuts so that’s a start
compact umbra
@ancient mantle Yeah it can be very overwhelming in the beginning, just keeping at it and google will be your biggest friends in the future.
Theres lots of solutions to problems in video form and on the discussion forums that will teach you some nice techniques along the way.
ancient mantle
Right now I'm watching a lot of tutorials
compact umbra
Best to do is just to try stuff yourself honestly
helps a lot more than just binge watching
ancient mantle
yeah, but I have no idea WHERE to begin with human shapes, much less full models
tepid wagon

This video is the 1st part of 40 in this very detailed tutorial series about modeling. I'll take you through all the steps of anime style character creation ...
This guy has fully detailed tutorial about anime human model creation
ancient mantle
thanks
tepid wagon
I must say you are quite ambitious Lucid. I also came from 3D CAD software to Blender but I started from a donut.
dull canyon
same