#3d-modeling
1 messages · Page 61 of 1
 zenith relic
zenith relic
zenith relic
im still new with sculpting thing...like making curves on the mesh
thats why its the last challenge for me i think
giving form to it
anyways..
 coarse kestrel
hehe practice makes perfect :3
zenith relic
great job with the nanachi @coarse kestrel
coarse kestrel
<3 thankies
zenith relic
didnt expect to see u here
coarse kestrel
I'm in most places ;)
zenith relic
a...this is the only place im in..
facebook doesnt exist for me anymore 😄
 grizzled anvil
lewd
zenith relic
2 locked accounts because of some random reports and i gave up on using fb..
coarse kestrel
:x
zenith relic
very soon gonna start too with moddeling avatars like u do rn.
grizzled anvil
sound dedicated
zenith relic
its fun...(better than playing games that gets really annoying...)
coarse kestrel
yeah I can barely take breaks because I just wonna keep modelling hehe
zenith relic
most of the online games is pay to win...so. yep..
coarse kestrel
:c sucks
zenith relic
so that thing is called sculpting.
zenith relic
ive tried for frist time sculpting...but for some reason i cannot see what changes im making unless im switching back to edit mode to see the result
any ideas how to make it live when sculpting?
coarse kestrel
erh if you're using the newest beta version of blender with dynotopo it should show changes in real time
I've had issues in the past but i had no issues doing just that today
zenith relic
i believe i still have the 79 version of blender @coarse kestrel
i cant sculpt if i cant see what am i doing.
2.79 i have.
zenith relic
well if its beta..
does still has all the stuff 2.78 has?
yesterday it crashed a lot for me when i tried to edit an avatar 😄 that had over 50k poly.
alright...
il guess im switching to beta one
im not sure if i should use 8.0 since they tell us to not use it for saving important files.
@coarse kestrel same goes for 2.8
am i missing something?
this is how 2.8 looks like to me
coarse kestrel
nope looks about right
actually
you'll want to disable "load ui" in your perferences then load your blend file again
because your tabs are all messed up
zenith relic
well this is how as default looks like..
i havent done any change to it
disabled load ui..
gonna take a while till il find the buttons i was using on the older version
2.8 doesnt have other differents views? like material-texture-solid?
wow...lots of improvements on the fps side..
 subtle jackal
material view was more or less replaced by Look Dev
zenith relic
i cant see the materials with the new blender..
or probably 2.78 used the textures as materials..(witch i didnt see the textures in texture view)
i still cant use the sculpting thing
works now i think. (the sculpting)
coarse kestrel
woo!
 vale nimbus
is there a website with a library of vr models to download
zenith relic
gonna take a while to get used with the sculpting..
 zinc furnace
I have Blender 2.79 and I can also see my changes straight away in sculpt mode
 bitter leaf
thought this might be useful. I had a few ask me how I make clothes so I made a tweet tutorial thats been broken up so if you click the first one you just hit view for the rest of them. I hope this helps some people out I tried to be as clear as possible https://twitter.com/Alease_VR/status/1140291598061694976


Here is a series of tweets explaining how I go about modeling clothing that I use in #VRChat 1/?? https://t.co/55PGv0MsDZ
 Twitter
 spiral sigil
I remember I use to make actual 3D models from Scratch; it would take me 1 to 5 mins mins to do a basic foundation; however, I haven't done it in so long, so it would take me 5 to 10 mins. And I am sure it would take me 1 hour just to refine the look
XD
bitter leaf
Yeah the base is always quick its adding in details that take time. I usually spend double the time on detail I just went through this quick.
zenith relic
im learning to use the sculpt thing...so for me it kinda takes lot of time to understand it.
bitter leaf
Zbrush?
spiral sigil
This is the next Mario game --- But it's TY + Mario but as a Kangeroo
 daring karma
Peep the #rules, brotha. 13. No discussion of piracy, game ripping, or links to pirated/ripped content
 barren quiver
I think he misread your statement as "I have ripped a model" rather than "I'm going to make an unholy fusion of Mario and a kangaroo from scratch"
 hollow radish
i just use marvlous designer
daring karma
My bad! I don't remember what it said now, but I thought he was suggesting that we should rip models from that game
grizzled anvil
That's a big gap of a misunderstanding 😂
daring karma
Oh, he deleted the OG message I was responding to - he mentioned something like "we should rip from this game" but I suppose he could have meant take inspiration from it 🤔
Just lookin out cus i'm not trying to see Nonskiller get booted, I need my daily knuckles updates
bitter leaf
Marvellous designer is great to use but a lot of the time they are way too high poly
zenith relic
ive just hit my self in to something that starts to get annoying..
like: if i have something near the target i need to select i cant because the other one is already selected..
the dot on the left of the selected one (witch is way behind it)
i cant select it while the other one is selected...thats annoying.
i wish i could fix blender 2.79 to do the stuff there..
im quite dissappointed in 2.8
 latent charm
2.8 is still beta you know
zenith relic
maybe beta...but thats something obvious.
the only thing that i like...is the performance increased/graphics and some of the interface, feels more light...
latent charm
Are you using right or left click to select
zenith relic
i think im going back to 2.79, with the idea that im trying to fix that issue..
for now only the default controls (left click)
latent charm
Try swapping, one of the weird benefits of the right select mode is the gizmo responds to one click, and select to another, and they don't interfere with each other.
latent charm
Or that
zenith relic
and it responds to double click i think...(less worse)
nah nvmind
if i hid that. i cant get an acurate movement..
latent charm
I have right select on and the gizmo location doesn't cause any problems with selecting
zenith relic
like moving the dot to a certain way...like X or Z or Y
2.79 has a lock witch you can move
latent charm
move it and press z x or y to lock it to that global axis, or the same key twice for local space
latent charm
select a vertex, press g then x, that'll move the vertex along the global x axis with no need for the gizmo
zenith relic
latent charm
Yup
zenith relic
works only with those on. (the one that gets in the way
without it doesnt work
anyways...il stop complaining
latent charm
No it does work, move the mouse
zenith relic
gimme some hints of how to fix that in 2.79 if u have
latent charm
What exactly are you trying to do
zenith relic
only with this thing on i can move in one direction
well as an example...trying to move the poly or dot or surface in to 1 direction like Z
without moving it by accident to other directions.
it works with those on
latent charm
So select the vertex, press g then press z and just move the mouse until it's in position
zenith relic
but those things gets in the way if i have less space between the polys..
aaa there u go
thats much better
left click works like grab but only in all directions
latent charm
You can also hold shift to slow it down for more precision
zenith relic
much better
i know material was replaced with dev view
any clue if i can re-use that?
i still dont fully understand how sculpt works
@latent charm thaks buddy...that really saved me a lot of time 😄 and not getting annoyed..
coarse kestrel
nope lmao
zenith relic
trying to apply some pants to make the skin 😄
probably its the avatar fault
same happened on 2.79
 manic iris
This is my first headswap but the neck has holes even though it is stitched
Any help?
 small cloud
merge verts
 hallow bough
Does anyone have some advice on how this characters textures where done? It's a quest avatar. Is it a combination between the mobile shader and a hand painted texture or an ao bake maybe?
 void narwhal
the jacket looks hand painted perhaps an AO bake would be hard to tell
rest of the detail for shadows look like toon ramps or something from a shader
manic iris
@small cloud i did merge vertices
void narwhal
did you select the vertices when you merged em*? and check the distance and actually check if they're merged
manic iris
On neck and head I went and merged every vertice at center
small cloud
can either remove doubles if they're over eachother, or do it manually
manic iris
Wym doubles?
void narwhal
remove doubles basically merges verts based upon a distance that you can define
but it's set to default at an absurdly low value for the sake of "removing doubles" like 0.000001
manic iris
On blender I merged vertices, but in game it break that’s what confuses me
manic iris
This is my first headswap so thanks for helping me out as well lol
void narwhal
otherwise give a better image cause it's kinda hard to see
void narwhal
yes for neck and maybe the head
small cloud
weightpaint issue doesn't cause holes when things are merged
if there's a hole, the vertices are not merged, it's that simple
 whole island
help
void narwhal
definitely not merged
otherwise you'd see orange lines going out from the other side
void narwhal
you can press G to move a vert
and right click to cancel the movement just to test it
also just use "remove doubles" and adjust the distance as need be
make sure you select the verts you intend on merging
manic iris
its not even letting me move the verts
@void narwhal
i can select but i cant move them
void narwhal
are you pressing G with your mouse within the 3d viewport?
manic iris
Yes
void narwhal
how about you take a screenshot of blender then perhaps i can give you a solution rather than guessing blindly
coarse kestrel
no where would be the fun in that
void narwhal
much fun*
manic iris
What do u need in the ss?
void narwhal
everything and nothing at the same time
but just to give you a hint i actually only need "Blender" in general
spiral sigil
Sorry I make Kermits now but I’ve been busy with Fall Out 76
 silent acorn
Pixel art texturing is really fun, but jesus christ the UV arranging part is time-consuming
 dawn ember
So for my first ever gun model I decided to go big
And I just finished the basic blockout
And I'm hoping that I actually see the project through to completion rather than quitting halfway through and add to my already large project graveyard
silent acorn
Woah, that looks amazing! I'm really excited to see the end result.
dawn ember
@brisk cosmos Doon with an N
spiral sigil
Not my Best 3D Scanned Foods; but this is just BBQ Chicken without the Bones
It might be BBQ Ribs without the Ribs
Delicious foods for VRChat. -- I am going to make a Resturant World in July-- And it will be "Diverse" and stuff. The Pub isn't diverse because it doesn't give chairs for small people like Knuckles and are against US Soldiers fighting in Vietnam or something.
dawn ember
3D scan a sandwich
spiral sigil
I need to get my paycheck
And I will use it to make a super expensive sandwich idk
or (buy one from Subway...)
spiral sigil
The new Banjo Kazooie is out
Once it gets Ripped from the Game and imported on a Website.. the next "Banjo Kazooie" Kermit will be created.. correction -- however.. let me rephrase it.. a New Kermit fleshed in the skin of Banjo will be born.
 thin bison
spiral sigil
thin bison
spiral sigil
So.. I have to go with a new Workflow when making Kermit Avatars and because the "Annual" Unity Update has happened again; I will only be working on Kermits now. Every Kermit will take 3 hours to make since I have to optimize their Materials now to put a bunch of gestures with weapons on them
So the first Optimized Kermit I need to make is a Cuchoboo Kermit
Also need to make a Trump-Shadow because the voice actor of Shadow voiced Trump from an animation about Courgis (The Queen's Corgi)
coarse kestrel
coarse kestrel
it's likely an issue with weight painting
make sure things aren't weighted to stuff like the arms
coarse kestrel
?
you'll want to make sure you have the rig selected first before you select weight paint mode on the model
coarse kestrel
new blender or old 2.7 blendeR?
coarse kestrel
it's probably 2.7 as 2.8 is in the beta branch
manic iris
yea
coarse kestrel
ok i think you need to go into pose mode with the bones
then shift select the body then go into weight paint mode to select the bones while editing the weights
manic iris
ok im there
coarse kestrel
can you select the bones in weight paint mode now?
you'll need to shift select the bones
but they should show up as blue and allow you to move them
while still being able to paint
manic iris
i cant see the bone i need to paint though
im attempting to fix the neck
wait
how do i make something ore blue?
more*
oh i got it
coarse kestrel
woo
manic iris
ill lyk if it works when i test
coarse kestrel
just spin the arms and whatever around until you notice anything being out of place
manic iris
the neck is the only problem
everything else is fine
because it did a headswap
do i need to make that more red or more blue?
manic iris
@coarse kestrel I max weighted
But there is still a hole
Do I have to move the head down?
coarse kestrel
well
could also be that the head isn't actually connected properly to the body
as in the vertices aren't merged from the head to the neck
but since it was a headswap doing so can be difficult and more work
coarse kestrel
yup just as i thought the model isn't connected properly
seems there's a lot more wrong with it though than i can really see from here
can you take a picture of the neck close up in blender?
yup it is
the faces on the neck are overlapping but aren't merged
might cause the verts to merge incorrectly but yup
problem is there might be too many verts along the base of the head compared to the neck
manic iris
do i merge with f or alt+m
coarse kestrel
that works ye
mhm
make sure you select "at center"
so it doesn't get all weird
manic iris
so i need to redo it and merge and not have them overlap?
coarse kestrel
redo? just select two verts one from the head and one from the neck at the place where the model overlaps
and go around the neck until it's fully merged all the way around
manic iris
ellumi do u merge with alt+m or f
f creates a new poly
alt+m just merges
can i do taht with what i have currently?
or do i need to redo
"0 vertices remvoed"
 coarse kestrel
might break the vismines if anything just select the basis shape key then do that
manic iris
basis shape key?
coarse kestrel
2.8 is god tier
2.7 sucks big ass
:3
bout to blow your mind
it lets do do some cool shid though :3
 zinc furnace
2.8's material stuff sucks
I don't know if anyone has an atlasing tutorial for 2.8 yet
coarse kestrel
it's easy :x
zinc furnace
As in manually atlasing with baking
coarse kestrel
I'm gonna be making tutorials once i release my v5 public model
and yes
manual atlasing is easy
I'll be covering just about everything I can think of
I super want people to stop using cats
manic iris
coarse kestrel
good christ
i actually hate mmd stuff
also you can do just about everything cats can very easily
nicu
yeah true mind you I kinda stopped even thinking about mmd stuff once i started making my own models
good christ
manic iris
ok how do i change clipping planes ellumi
coarse kestrel
you'll get there :3 mind you i've been doing this for 8 years x.x
heh nice!
:o
I can teach you what i know
but reotop requires you to know how to sculpt
manic iris
ok i merged at cenetr
coarse kestrel
and that requires a decent set up in itself
coarse kestrel
hehe don't let that discourage you ^-^
manic iris
i merged verts but w menu isnt working
coarse kestrel
the model i showed you just now was made in less than a weeks worth of time using sculpting and retopo
nothing compared to the months it takes people usually
and this thing has arm / leg variants
coarse kestrel
don't worry about it if you merged all the verts around the neck
remove doubles is just another way of doing it
coarse kestrel
that should've fixed your issue
you can test it by selected the head bone
and tilting it
see if the neck opens up
 visual vigil
got some images back from my commission
https://cdn.discordapp.com/attachments/584908362437885962/590986615678173202/1.jpg https://cdn.discordapp.com/attachments/584908362437885962/590986759358119936/3.jpg https://cdn.discordapp.com/attachments/584908362437885962/590986800487596082/4.jpg https://cdn.discordapp.com/attachments/584908362437885962/590986908444786720/7.jpg


 spiral sigil
I want to make an anime avatar but like.. there's an animation where a Meat-Dispenser appears and it fills the Anime person as if it's one of those Sausage Containing Skins.
silent acorn
w h a t
manic iris
Excuse me what...
 onyx juniper
Reminds me of this
https://i.redd.it/r28l00gr9l331.gif
 sly basalt
spiral sigil
sly basalt
spiral sigil
first time 3d modeling from scratch-
visual vigil
 rare oriole
so im reaaallly new to unity but ive worked with blender and photoshop, so i have a texure i edited and saved as a png but how do i upload it to the avatar open in unity? do i have to export it as a package somehow?
 strong thistle
just drag and drop in the unity window and apply the texture thru a shader
rare oriole
i figured it out but now the skin texture is missing
 copper gull
Anyone know any decnet 3d modeling apps for vr? i was messing around with artstage and im liking what im seeing but i wanna shop around
 indigo stirrup

Blender XR VR user interface for Blender - a development initiative by MARUI-PlugIn Support this project Download LAST UPDATE: 2019-02-27 What is BlenderXR? MARUI-PlugIn has developed MARUI – a plugin for Autodesk Maya that allows you to create 3D design in VR/AR.Our plugin...
pretty much all of Blender, but in VR
But anyway, how do this? https://bocchi.is-pretty.cool/2Ekhsym.png I just wanna map the hat to a portion of the existing atlas image

nevermind, Blender is easy https://bocchi.is-pretty.cool/8zRx1ZG.png except the part where the UV is absolutely terrible.
 indigo stirrup
drag texture onto texture slot or doubleclick texture slot and select texture from picker-- yeah
 fringe rock
That look fishy
 indigo stirrup
fx 8350
indigo stirrup
unlucky for me, theres a real world reason why Im on an FX in 2019
https://bocchi.is-pretty.cool/wU38Ufk.png everything is good with the world
 indigo stirrup
ye
 dull canyon
👍
indigo stirrup
dont worry about the rest of the diffuse showing through seams
dull canyon
¯_(ツ)_/¯
indigo stirrup
fixed it
At first my goal was to paint flat in Paint.NET
but then I remembered texpainting was a thing
silent acorn
oh, I thought I was the only one that used paint.net for textures!
It's honestly a really good program
indigo stirrup
I use Paint.NET for almost everything
tried to learn GIMP when I was a little kiddo, one day in school friend shows me Paint.NET, have been using since.
 ancient escarp
Same.
silent acorn
As a great man once said, "It just works".
ancient escarp
Can't remember when and why I started using paint.net.
But I'm glad I did.
Best part about it, is that you can install custom plugins.
Which makes the program even better.
silent acorn
Maybe I could work more efficiently with photoshop, but paint.net's just comfy as hell to use.
ancient escarp
Yep.
dull canyon
if you have like 20usd or so to spare I can highly recommend Clip Studio Paint
it's like the inbetweeny of Photoshop and GIMP/paint.net
and it's regularily on sale
ancient escarp
That's a good one too.
dull canyon
since it's actually made for just painting/drawing you get a lot more options than paint.net or gimp
without the big price tag of PS
indigo stirrup
I DONT want the options tho
I also dont want mspaint
pdn is the perfect stopgap between kiddy and hell for me
dull canyon
well you don't need to use all the options, the default brushes work fine too
or even just the standard round brush
anyways, use what you're most comfortable with, just throwing it out there that there's some good value alternatives
 oblique token
sorry if this is the wrong place but I downloaded a model from the internet and had to rig it......rigging went perfect until I imported the FBX into Unity and went in to configure the Rig in unity......the bones are all messed up. What did I do wrong? lol
looks like this in Blender
but this in unity
dull canyon
@oblique token are your bones properly named?
also I think that's a question better asked in #avatar-rigging
oblique token
thanks, & yeah my bones are named properly.
manic iris
Can anybody help me with a weight paint
I’ve spent the past 4 days trying to fix a broken neck on my headswap
 cedar gazelle
I have a really simple problem I don't know how to fix. How can I make it so that when I transform faces of a mesh in Blender, the faces it's connected to will stretch to it? Right now it's just disconnecting entirely.
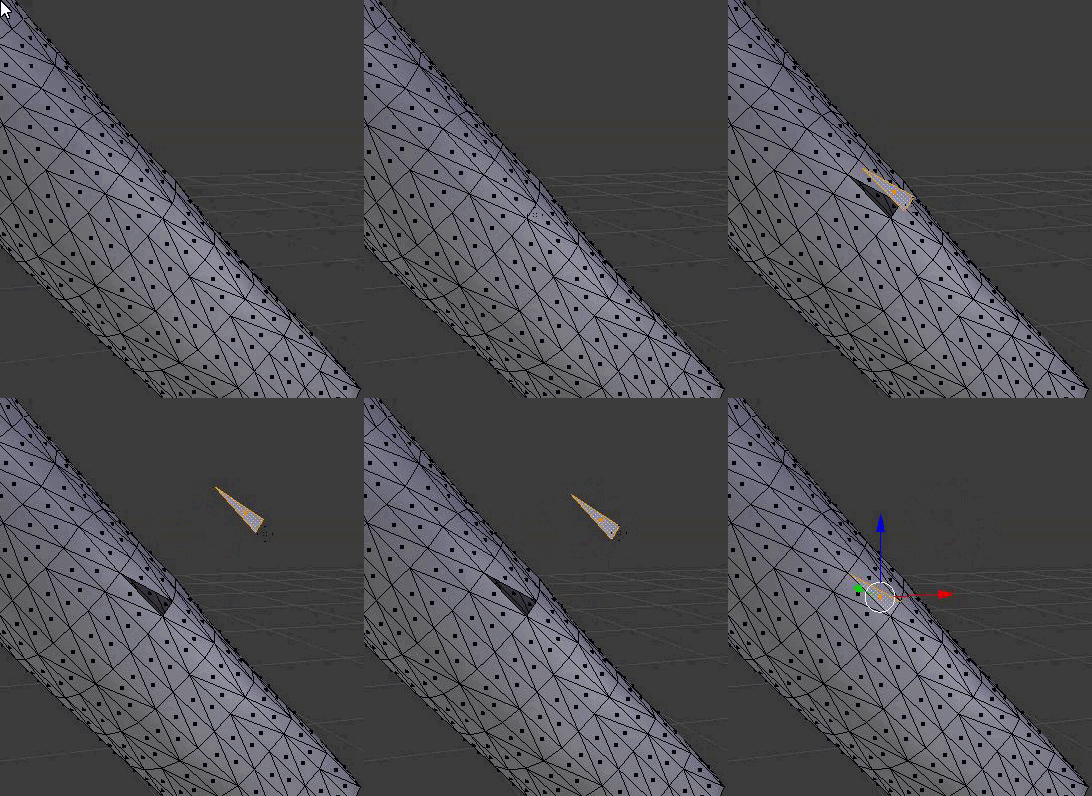
It was doing what I wanted before so I must have changed something by accident.
dull canyon
which version @cedar gazelle ?
cedar gazelle
2.79
dull canyon
down in the bottom check this https://i.imgur.com/CMWHqqX.png

and looks like you pressed w at some point to cut out that piece of the mesh. you can just delete that loose part, click all there of the verticies and hit F
cedar gazelle
None of those settings will work for me. I can seemingly turn them on/off through the mesh settings menu, but they always display wrong. This is also happening to all faces of any mesh.
dull canyon
uhm
 dull canyon
then I have no idea what you did tbh
 plush token
Highlight everything
Remove doubles
Tris to quads
That will fix your issue
Tris to quads might mess your your UV maps
Just an fyi
If it does it will only slightly
cedar gazelle
Ahhhh, it worked
Thank you so much
I was at this for an hour and a half, I wasn't really sure how to google this correctly
plush token
No problem happy I could help
dull canyon
what does one even have to do to get to that point? 😄
cedar gazelle
I have another goofy issue if anyone is willing to help. When I subdivide a face, some vertices still have a sort of ghost edge in between them.
coarse kestrel
that's just how blender is splitting up the faces
if you want to "fix" the issue use the knife tool to cut down the middle of the ghost face to make two triangles instead of a square
cedar gazelle
The knife tool does the same thing
cedar gazelle
That just moves the "ghost edge" somewhere else
void narwhal
it looks like this "ghost edge" you might be confused with is simply more geometry beneath it
coarse kestrel
probably that too but if using the knife tool "moves it" then it isn't that
void narwhal
also don't go around subdividing triangulated meshes
coarse kestrel
yeah lmao
cedar gazelle
What I'm seeing when I subdivide is the creation of what is supposed to be a flat plane, but is actually a 3d shade without a selectable edge.
void narwhal
again you're getting confused due to the geometry beneath also try rotating your camera
the purple colored geometry is a separate object i believe
cedar gazelle
This has nothing to do with the purple geometry, I know thats a different model
@coarse kestrel If thats the case, is there a different way to split these planes that will work?
coarse kestrel
can you show me all the "ghost edges" you're trying to fix?
void narwhal
looks like you have a duplicate face
coarse kestrel
sec

@cedar gazelle
though it might be an idea to just and space some of those verts out a bit more because that can cause shading problems too
void narwhal
yeah no idea really i've experience this issue before in the past i think it's in relation to vertex order or maybe some sort of issue when handling the deformation in relation to multiple quads
but really you shouldn't be subdividing triangulated meshes
coarse kestrel
well when the entire model is tris it doesn't matter anymore
void narwhal
just triangulating it after subdividing would definitely fix it but again you shouldn't really be subdividing tris
there's an actual process if you wanna actually subdivide something even if it was triangulated to begin with
spiral sigil
I’ve been busy playing Fall out 76 to make Kermit’s
Let me beat the game then I will works on then
silent acorn
There's no pressure, you can always make Kermits at your own pace o_O
daring karma
Guess you never know what the future holds, though. What if today is the only day you have left? Would you regret not making those Kermits?
Jokes aside -- dropping this link here because I thought it might be useful to someone! https://cronobo.com/products/nexture/
Cronobo VFX
We research and develop software for VFX Studios, Video Games companies and 3D artists. Our mission is to help artists achieve higher levels of quality and reach the finest level of detail, to promote creative work, and empower innovative visuals and finely-detailed art produ...
silent acorn
smol pistol is complete!
 azure rain
very nice
spiral sigil
4 hours = Why? -- Because I had to make all the Textures 1..
It took me 10mins to put this together
spiral sigil
These Kermits are ready to explore VRChat
I wont be adding gestures to them yet until someone knows the NEW Meta
On how to do Gestures without losing Optimization
3 New kermits (5)
zenith relic
does blender 2.79 have un-subdivide option?
ive just found that on 2.80
witch i can reduce poly in edit mode on selected surfaces
dull canyon
how? out of curiosity
zenith relic
there is an option on 2.80 ive just found
and its really helpfull to reduce poly...i guess
to me the circles objects looked something like this
but now it loks way different and now i can use smooth shader (this is how is called in blender) looks just fine with less polys..
here is after ive used un-subdivide
hang on
il use the old backup to see how it really looked like
this is how it looked like before.
and after is the ss from above
ive reduced some polys..
spiral sigil
does anybody know why the displacement modifier pulls out the vertices in such a weird way like this? I want the area within the red circle to look like the area within the green circles. the amount of vertices are the same on all areas of the model (used remesh modifier beforehand) so I do not know why it is doing that
I am using blender sorry I forgot to mention that
dull canyon
neat
coarse kestrel
zenith relic
@coarse kestrel thats a lot of detail
ive finaly discovered how to reduce poly..now im going for it to try it out
also about that avatar...always has to be a girl insnt it?
😄
zenith relic
all i can say about that work...is SKILL 😄
i really try to learn that skill for my self..
spiral sigil
today I am going to make Cyber Dragons
For my META Avatar Optimization Tutorial xD
Cyber Dragons from Yugioh are Meta.
pepe
I thought he was unbanned
mfw not unbanned
pepe.png
coarse kestrel
@zenith relic who said it's a girl :3c
 daring quartz
Can you reshape the body of the avatar in edit mode?
spiral sigil
Is this avatar from Infinite Blade ?
This will make a nice Kermit Model
It will be a Lvl 78 Kermit
Unless it's the best gear in the game.. lvl 115?
spiral sigil
Level 128 Kermit
fringe rock
Stop. Dont spend time on those model. Again. You only waste time. Dont really learn new @spiral sigil
spiral sigil
You just want me to make Knuckles 3D Models but it's Kermit time.
zenith relic
@spiral sigil xD well said
spiral sigil
I am not allowed to post pictures on VRChat anymore because -- Kermits are illegal on VRChat.. I should have sticked with Knuckles =/
zenith relic
@spiral sigil whats a kermit?
spiral sigil
Nvm; I can post again but.. a Kermit is the new Art-Style
zenith relic
i have no clue what it is.
also i have no idea where the box menu for fliping faces is..
for 2.79 i had i always had it on my left..
but this one.
i have no clue
dull canyon
you mean flipping normals?
zenith relic
@dull canyon yes
 waxen oracle
 dull canyon
@zenith relic in edit mode select the faces and hit shift + n
dull canyon
yeah, that recalculates the normals
zenith relic
i hope i wont have that issue i had on 2.79 (flipping normals and nothing was visible but physicaly it did switch)
i want to flip surfaces
not re-calculate
dammit.
zenith relic
if i have a surface with the face/facing the inside the box...the face becames invisible in game or unity.
yes
dull canyon
ok
that's exactly what shift + n does
if it's still wrong then do this

bottom left
I think there's also a way to set the direction a normal is facing manually, but I forget how that was done
 zenith relic
i only need to manualy flip the surface (changing the normal direction) to avoid bugs in unity
like having transparent object
witch is really annoying if i have many polys..
dull canyon
you sure?
 woven scroll
Yeah
woven scroll
Now you can @ Speedy and claim it
zenith relic
what this recalculate do?
woven scroll
😏
woven scroll
Recalculate makes all the normals consistent in regards to neighbouring faces
dull canyon
flipping does a "hard" flip of the current direction
dull canyon
same 😄
zenith relic
at least with 1920x1080 rez
zenith relic
before i had 2 of them HD and a smaller one till ive upgraded the graphic card.
1920x1080
its just fine
woven scroll
I wish I could get a VR headset and see my sculpts in 3D
zenith relic
who said Blender eats a lot of memory?
i never seen blender eating more than 500 mb
even with an avatar having almost 100k polys..
blender 2.80.. doesnt show anything when fliping a surface.
2.79 at least showed a difference in reflection and color.
another pain.
latent charm
Certain tasks can cause gigantic spikes in memory use. My record was somewhere around 80GB
woven scroll
That's impressive
 open terrace
@zenith relic some addons save in memory different heavy things, you can also edit how many undo steps you can do, which will also increase memory usage, as well as the number of loaded textures, etc, also 100k was a low poly model when compared with some 3A games where the roof of the building was almost 2m polygons
 dusk turret
Yeah I'mma needa source for that too
open terrace
@woven scroll sekiro shadows die twice has a roof with tiles
woven scroll
I always assumed they just tessellated but wow
zenith relic
i need a little tip
how do u aling the objects straight with the map?
looks like my projects opened with blender 2.8 are not visible anymore in 2.79,instead it breaks the blender somehow... (the settings button is gone from the top)
this is how it should look like..
in other words...if i use 2.8 i have to remove 2.79 😦
zenith relic
ffs... so much with my projects..
oh..yeah
u know a way o align the objects straight up with the axies? to be on 0 value
open terrace
@zenith relic try to open project with unchecked 'use UI' or something at the left side in import window;
reasign object Origin to bottom or else where you want to make "object center", then in N panel you can put x,y,z to 0
you can select 1 vert that you want to be a center, then shift+s > cursor to selected then in object mode ctrl+alt+shift+c origin to 3d cursor
zenith relic
im talking about the object in edit mode
ex:
he is like this (before i used 30 degree turn) just an example
and i want to put it back witch right now is on 0
i could just use -30 degree to turn it back to how it was and then move it back to the center
but some times i didnt used the exact values i did now.
il try what u said.
thanks
lol i did it
i used the values i used before xD
and the cursor on the world center as a 0 point
i asked for this because for the next time when i put the bones...i want them perfectly on the mesh.
dull canyon
https://i.imgur.com/oABdAnX.png
https://i.imgur.com/sWT3WMa.png
what's the best way to smoothen out these sharp edges?


 carmine dragon
Try turning off Use Creases on the Subdiv, or use smooth vertices on the 5 faces on the edge and then use the 3d mouse to realign the center vertices so that there is no gap
dull canyon
turning off use creases doesn't seem to change anything
and smooth vertices somehow creates an additional edge
carmine dragon
thats... strange, its like it has a crease on it..
gonna see if i can replicate it
Yeah weird!
Do a merge by distance
you might have an accidental double-vertice on an edge
dull canyon
apparently there were indeed
18 of them
already looking a lot rounder
is there an easier way to create a sausage with good topology? or is by hand the only option
carmine dragon
Probably start with a circle or a cylinder first?
You can start with smaller amout of polygons if using subdiv
dull canyon
those don't play nice with subsurface
carmine dragon
Huh? Imo they work just fine
Start with a 8 vertice circle and you should have a perfectly fine subdividable model
 carmine dragon
use creases then if you want to have "cylindrical" shape
and make sure to fix the ends if you want a literal "sausage"
dull canyon
hmkay
carmine dragon
dull canyon
I am very confused... you do still make new faces by selecting the vertices and hitting F right
 dull canyon
fixed it
forgot to delete the original faces at the ends
though I don't seem to be getting the same rounded shape like you are...
 carmine dragon
minei s around 0.9, but it might also be due to proportions, yours is longer
I suggest adding a edge loop around the middle. (ctrl + r)
carmine dragon
It is a start 😃
dull canyon
mhm
dull canyon
alt + h not doing it?
ugh
I'm very tempted to just sculpt this and retopo later...
https://i.imgur.com/bb85Q9U.png having the hardest time modeling this fella
 zenith relic
@dull canyon it is already visible...but its the other thing hiding it in another way...
dull canyon
huh
dull canyon
https://i.imgur.com/UwH39W5.png welp, slowly, kinda, sorta

 empty cape
Looking good 👍
dull canyon
making a sausage like that is harder than I thought...
feel like there has to be a better way
actually... why didn't I just use a subdivided cube and stretched it
🤦
 cobalt bay

Does anyone know why this happen
( It's not two objects overlapping, it's a single mesh
open terrace
@cobalt bay you have both em in same place, remove one metal beam or use on one of them shader with added 'offset -1. -1' inside subshader part
woven scroll
@cobalt bay https://en.wikipedia.org/wiki/Z-fighting
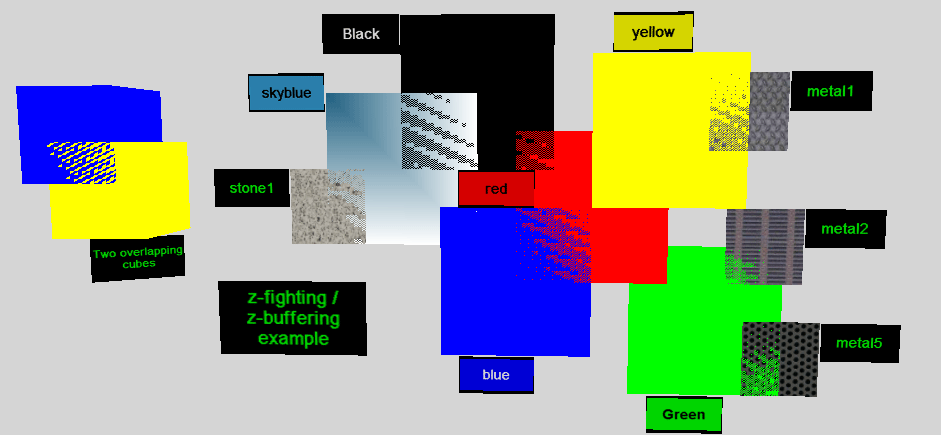
Z-fighting, also called stitching, is a phenomenon in 3D rendering that occurs when two or more primitives have similar or identical values in the z-buffer. It is particularly prevalent with coplanar polygons, where two faces occupy essentially the same space, with neither i...
cedar gazelle
I have a problem where I've added a shovel and pail to be brought out into my avatar's hands as part of a gesture, but when I move the file from Blender to unity, the shovel is nowhere to be found. You can see it here in blue.
Its completely deleted in Unity
This was happening to the bucket too before I did the "fix model" option with CATS
 lunar holly
You should make those separate objects from the humanoid model. Apply them in unity instead of blender
 fervent island
i wanna learn 3d moddeling
but idk should i learn sculpting or any other tehcnique
lunar holly
To start from scratch it’s a lot to learn. To edit a preexisting model doesn’t take much. Just figuring out the UI
 clever condor
For anybody who has messed with Blender 2.80, how do you access CATS? I have the addon enabled, but I can't find the window.
onyx juniper
You go back to 2.79 where the interface makes sense
fringe rock
Its on the right
 frigid meteor
For Blender 2.80 CATS Users
To access CATS in 2.80, press "N" on your keyboard to open up the side panel in your viewport. Next, on the right side of that toolbar should have the following tabs View, MMD, Misc and Cats. Once you have found the tab, select it and you're good to go!
Note: If you don't see the following tabs, then it could mean that CATS is out-of date! To update it, you can download it from its github page here: https://github.com/michaeldegroot/cats-blender-plugin
Once downloaded, go into "Edit -> Preferences", click on Add-ons and then "Install...". Find and add the zip you downloaded from the github page and then enable it.
@clever condor hope it helps you and everyone who are using Blender 2.80. 😃
spiral sigil
I would make an unique 3D model; but there isn't a point for me unless it makes me money.
Im bored.
I spent 30 dollars a large meal
imma make an unique 3D model
"unique"
I will show you my progress in 20-30mins
 opal aspen
maya is the shit my dude. 👌
spiral sigil
I dont like Blender; Blender = Converts objects (however Idk how to make Vismes which seems to be legit)
I made a boot. I am bored now. xD
So it takes me 20 mins per main object
-Downloads from Sketchfab-
xD
 acoustic marsh
dull canyon
acoustic marsh
dull canyon
 dull canyon
https://i.imgur.com/po2miEG.png well it's slowly starting to look like I want it to

no idea if I'll need more topology around the legs
visual vigil
i got back the final WIP for the mesh modeling of ahri
https://cdn.discordapp.com/attachments/584908362437885962/592167135334367242/screenshot043.png https://cdn.discordapp.com/attachments/584908362437885962/592167037506420756/collio.png https://cdn.discordapp.com/attachments/483108927303843860/592177074878545930/unknown.png


 dull canyon
those tails tho
feel like they're missing the actual bones and stuff
looks like it's just hair
spiral sigil
xd
dull canyon
mhm
 slender holly
any general tips about reducing polygon count when modeling from scratch?
indigo stirrup
anyone know where I can find resources on painting shading onto clothes?
@slender holly be aware of your model topology and how it reacts to transforms, also, checking what your model looks like in smooth shading from time to time, you can make a convincing circle with 10 sides for example.
void narwhal
@slender holly retopology or you gotta work in the mindset of low poly topology with good deformation
but really don't be too overly concerned about poly count
@indigo stirrup for toon styles just look up references/tutorials outside of 3d modeling aka anime or cartoons
if you aren't dealing with a toon/anime style just look up AO baking
indigo stirrup
that's a good tip, thanks.
 thorny fractal
You can bake out curvature maps and overlay those on your texture for some baked detail. Could probably get some stuff out of it that youl wouldn't get from baking ao maps. At least for stylized looks I do it some times
thorny fractal
does anyone know if tis possible to use a custom direction/ flow map with a tiling detail normal map and generate a new textures where the flow map drives what direction the detail normal map faces. or maybe not a normal map maybe a hieght map that can then be fed into a normal map generator cuz rotating normal maps can be weird
in a character before i lines all my hair uvs from going top the top to the bottom of the texture so i could feed in a detail normal map for hair strands and then use an anisotropic shader but i had to distort my uvs a bit so i would like to just hand paint a flow map for the anisotropic shader that can also be used to generate a secondary normal map for the strand details
its always possible that i could just do some photoshop magic to distort a hiehgt map to run along the length of the UVs and then convert that to a normal map but this could speed up the process since i still need the custom direction map in the end for the anisotropic shader
void narwhal
@thorny fractal ?
https://docs.substance3d.com/spdoc/flow-map-painting-143327274.html
https://polycount.com/discussion/167263/flow-map-painting

polycount
So, I recently came across this allegorithmic section showing how you can paint flowmaps in substance painter:
 onyx raft
ok
dull canyon
anyone know if Retopoflow is actually working yet in Blender 2.8?
zenith relic
small question
when use sculpting tool and trying to deflate or inflate ( or substract or add) why it only deflate when trying to inflate?
it is normal?
 turbid portal
Guys,can you make bones to this model?I want to import it to VRChat.If you can,I can give you a little prize.
 winged needle
Nobody will just rig it just for a little prize, go on VRTraders and find someone to do it for a price :3 if not learn how to do it
turbid portal
T̷͊̍h̷̊̕a̸͗͗n̵͂̿k̶͆̄s̸͐͝
zenith relic
@turbid portal only way to do something is to do by youreself...this is what i do
making and rigging the avatar from scratch..
most of the stuf i learned from here(about unity) and some tutorials
and about blender ive watched tutorials till ive finished my frist object rigged and animated
dull canyon
https://i.imgur.com/syZgU2d.png it's slowly starting to look like something
 zenith relic
the cheapest pants u ever see... 😄
thought sculpting doesnt go how i want..
but still its hard or confusing at the same time to use sculpting.
zenith relic
im not the one who made it...im just using an existing avatar and fully change the hole structure+details...(also learning)
whats wrong with it?
zenith relic
when u begun to learn?
vrchat for me seem to crash over and over and it gets really iritating again.
hallow bough
With avatars with huge behinds and racks I wouldn't get perplexed by an airplane strip belly button 🙏
zenith relic
ok im still confused about "belly" thing..
hallow bough
The belly button just looks a little off but nothing to worry about :)
zenith relic
im not sure whats wrong with it...
daring karma
I think Meldrix said it because it looks like the belly button is stretched - like if the torso was pulled in a taffy puller
thorny fractal
@void narwhal iknow how to paint a flow map i was just wondering if there was a way to use a flow map to to generate another texture, like i have a hair strand detail normal map than runs vertically and i want to be able to feed that with the flow map to make a new normal map where the strands run along the length of the uvs

Take a look at a fur generator for Substance Painter by Romain Lemaire.
very similarly to this but this works in a way that isnt exactly how i would want it to be because it kinda does some other random scattering and stuff to try to make it look like fur when that's not what I'm using it for
hallow bough
Would a good work flow for sculpting a model be doing a low poly base for the entire thing then sculpting? Or block out the shapes? I've seen tutorials where they grab different shapes and merge them. What's the best way to go?
dull canyon
I think there's no single best way, it's mostly personal preference for the most parts
but as with drawing in 2d it's generally advised to start with big simple shapes and slowly add more and more details
thorny fractal
It's personal preference. I personally don't really like working in zbrush so I usually block out shapes in blender first but a lot of the time I see people blocking it out in zbrush and doing everything there
 mental coral
Nonskiller: Do you use Meshroom or something?
zenith relic
does anyone know where the "remove doubles" in 2.8 is?
fringe rock
F3 search remove double @zenith relic
fringe rock
Right click in edit mode and vertex selection
zenith relic
zenith relic
i need assist
i cannot find "remove doubles" in 2.8
i think remove doubles was replaced with merge by distance
fringe rock
not sure I dont use 2.8 that often
zenith relic
yes it was replaced with merge by distance
 sterile laurel
anyone know of a way to like sorta do the opisite of subdivide something
cuase i made something in autodesk inventor
but when i put it into blender it just all of a sudden added a bunch of verticies
latent charm
Blender has a decimate modifier, which if your mesh is quads can be set to unsubdivide
Although in your case a screenshot might help figure out what's going on
sterile laurel
its conbinded
so i made the head in autodesk
but then i made the body off of the head in blender
like its one solid object
so this will make things hader
harder*
and i aleady added the limbs
😛
latent charm
Might be a case of split the head off, use decimate on it and re-join
latent charm
Nope, it'd preserve the weights and everything and would be fine after being rejoined.
sterile laurel
how do i split it
sterile laurel
sorry i havent decapetated someones head before ||in blender||
modifier can not be applied to a mesh with shape keys
latent charm
Yeahhh, can't decimate something with shape keys. Might have to rethink your workflow or do some manual poly reduction.
sterile laurel
i mean
it still brought the faces down to 784
imna try and do it without applying it
and while still merged
oh nice with an angle of 5 it brought it down to 1800
sterile laurel
i fixed it thx man
i just re imported it
split it
and deleted the old head
and then decemated
and joined
and fixed heat map on head
 cinder wraith
When creating a texture for a model what size is best ?
 hardy agate
i dont really know if there is a "best" it kinda depends on the model, if its supposed to look cartoony, you could possibly get away with a very small texture with a bunch of colored dots on it, if its supposed to look realistic, you will probably want a decently sized texture, such as 1024 by 1024.
 old field
then have him msg on here and not have people pm a random person .-.
void narwhal

This tutorial with introduce you to how to swap heads using at least one method in Blender. It shows texture painting to create a seamless neck without hidin...
 icy edge
how would i fix something like this
 wheat folio
If anyone could help! Would be very lovely, so i want to have the circle x1 y1 z1, as explainded in the image.
Fixed https://blog.mattnewport.com/fixing-scale-problems-exporting-fbx-files-from-blender-to-unity-5/
mattnewport
It's a bit of a pain to correctly export meshes from Blender to Unity 5 using .fbx and retain the correct scale. Making a note of how to do it properly here for future reference. By default, Unity 5 applies a 'File Scale' of 0.01 and a 'Scale Factor'
onyx juniper
Did you all know that you can save Blender's native .blend file directly into your Unity project folders, and Unity will recognize and import it?
dull canyon
neat
zenith relic
connect them they are in pieces that happens..
@icy edge
connect the meshes before u make changes with sculpting..
latent charm
@onyx juniper @dull canyon This is slightly misleading. Unity doesn't read native .blend files, it has a feature that converts the blend file to fbx behind the scenes.
dull canyon
¯_(ツ)_/¯
onyx juniper
@latent charm Yeah, I know. But the functionality under the hood isn't contrary to the simple practicality I was describing. No extra converted files, no scale fixing.
 ashen stag
I don't think it's a good idea to put your blend files in your unity project as it's just another file to package up when we inevitably upgrade to 2018 LTS. Blends are much larger than fbx
latent charm
That and using the .blend 'importer' gives you limited control over the export settings, most importantly the ability to select specific objects to export.
icy edge
Ah ok @zenith relic
zenith relic
select the dots press F (f creates a surface or edge)
 hard spire
i need help when its says this and i been in game for long time how much time u need to wait
spiral sigil
is it normal for unity to show the skin texture as a purple even though textures are there
 distant carbon
If I recall correctly it's because the shader is missing or something along those lines, either way it's easily fixed by changing the shader back to standard or some other shader
 fossil inlet
Just finished putting my most recent VRC commission in my portfolio, was a blast to work on but I don't think I'll be doing any more VRC avatars.
https://www.artstation.com/artwork/e05d9b

ArtStation
Some client work that I was lucky enough to work on, tried a few new things, let me know what you think!
cinder wraith
What is a good size texture should i make for my 3d model?
zenith relic
looks quite different,...
zenith relic
icy edge
I like it
zenith relic
quite confusing because i didnt knew before how poly works while sculpting...but after this one i kinda learned something about it.
latest update.
fringe rock
its like a high poly of one of the the mobile game character COMPASS ?
zenith relic
it does have a compass name on that caracter tho.
but still i dont know where is she coming from
fringe rock
its like an arena game on mobile
onyx juniper
@fossil inlet Aw Rome. I'll miss you classing up the VRChat avatar population
cinder wraith
Is this normal? When I combined all the vertexes to 1 point it looks like this now.

It is like darkened
wheat folio
U need to be "new user"
 sonic nimbus
@cinder wraith The weird shading is a sign of poor mesh topology
You probably joined too many vertices together and now there isn't enough geometry to properly store the vertex normals.
 rustic jacinth
Can anyone tell me how to fix this issue im having. So i have a model and whenever i put dynamic bones on the boobs it clips out of the shirt
hardy agate
The man said no
cinder wraith
@sonic nimbus Ah Okay so how should I go about this? How do I combine it to 1 point without having bad topology?
 stark crystal
someone requested i make senko san. im reaaaally bad at modelling characters, but here's progress
tell me what you think
stark crystal
@cedar zealot awww thank you but you could certainly do better :) have a cake 🍰
:D
 grave spoke
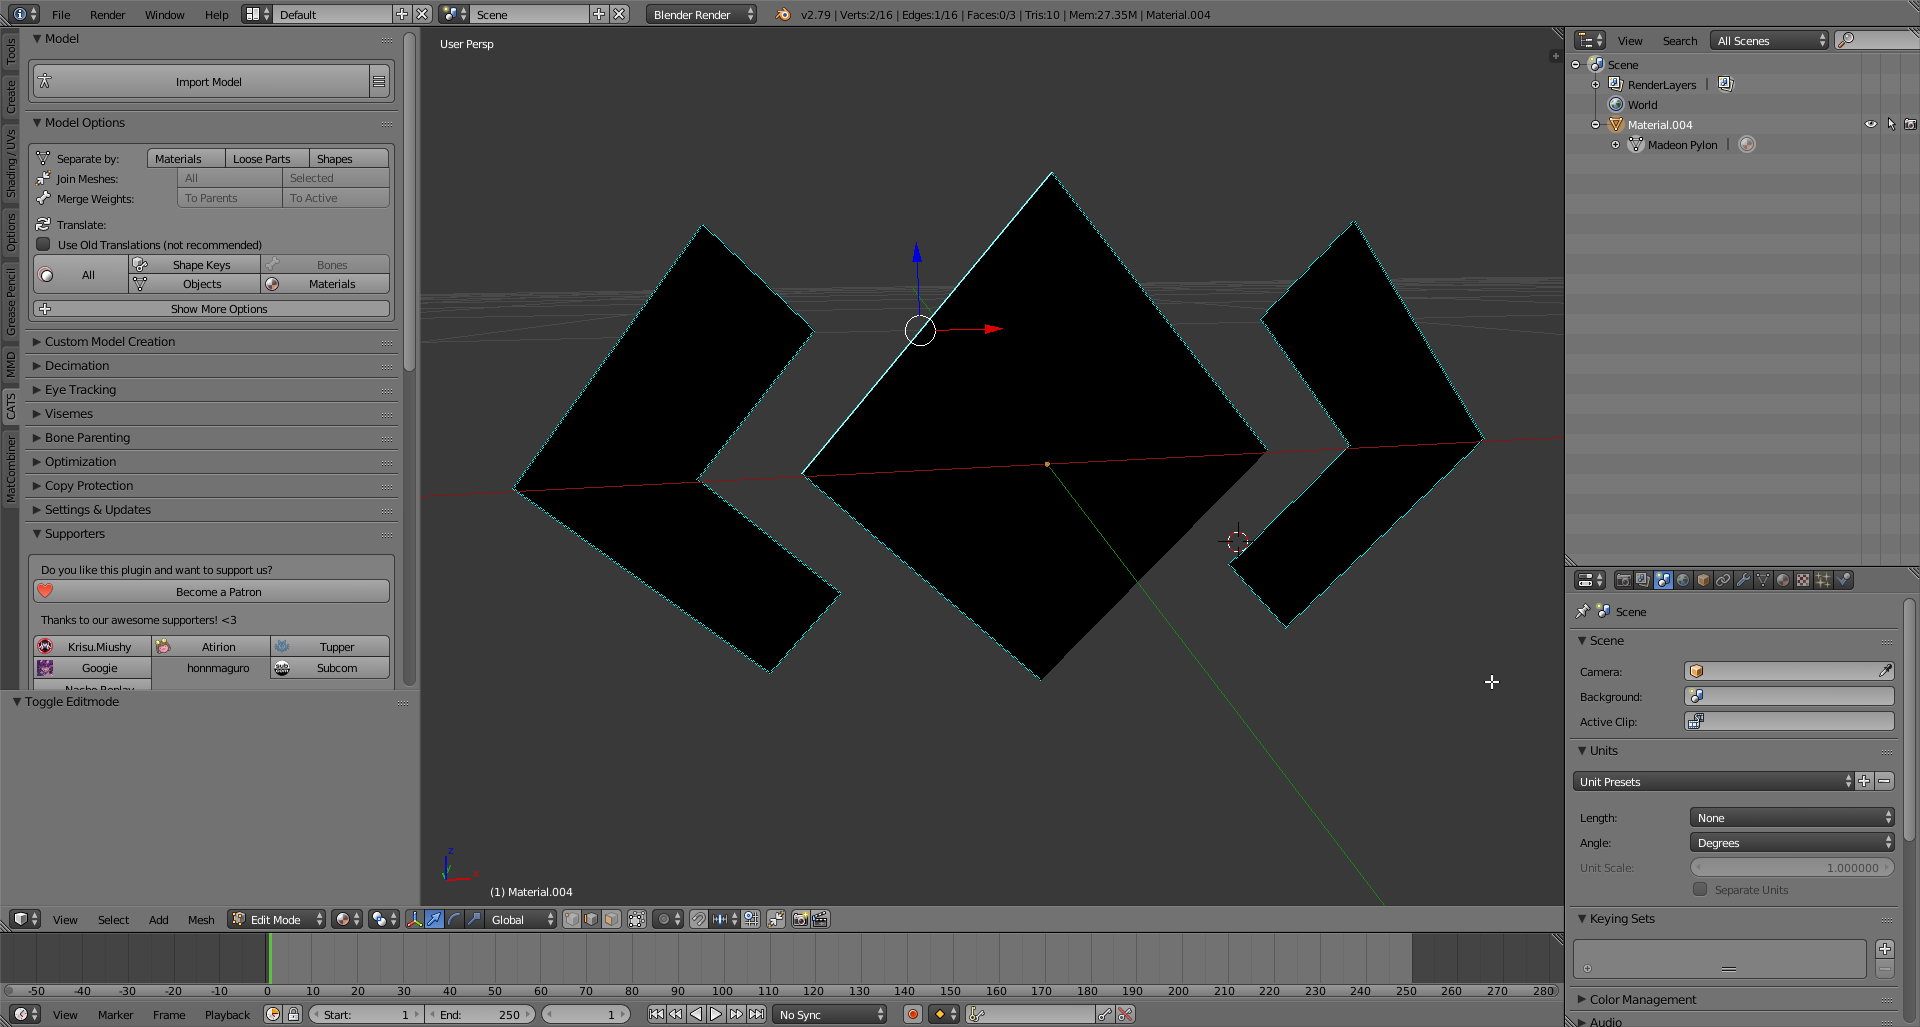
Trying to edit this model for the shape of a particle system, but I cant delete the inside edges or the faces without the whole object being deleted as well... One thing I noticed is the Blue outline which is not shown when selecting regular objects or models... https://i.imgur.com/2NDexCZ.png
Need some help finding a way to normalize the model so i can normally edit the edges and faces
 stark crystal
@grave spoke can you send this to me?
i can try figuring out what the problem is and fix it for you
grave spoke
Ah friend solved it for me, thanks tho
dull canyon
das a cute senko
dull canyon
looks fine
zenith relic
whats wrong with the avatar? it reminds me about from cartoon: Batman from another time line with brain to fight with braniac
zenith relic
so difficult to make a head...probably because of low skill..
 covert fractal
So I got a model (it's an .obj) that has 54,428 polys. And with my model, it puts it over the 70k limit in Unity.
Imported it in Blender (using CATS), and trying to use the Quick Decimation (to bring it down to a more comfortable Poly limit). But when I try, it says "No meshes found!"
How do I add a mesh? Semi-sort of new to Blender.
zenith relic
probably u need to select the meshes(avatar surface) to reduce poly..
im literaly stuck at making the head of the avatar 😦
my skills are not enough to make it how i want.
stark crystal
@zenith relic show me the head you're trying to make :) i may help
 stoic ridge
is there a sane way to paint a map in blender that isn't the main texture
is using blender to do texture painting a sane option in the first place
I know there are some crazies who use it for everything up to and including their audio work
stark crystal
@stoic ridge i use it for texture painting - it's really good for it
trust me its a very much sane option
i see so many people do that
i just finished part of my model, so i can show it to you - everything done in blender
not that great but ehh
i even used blender texture painting to pain alpha channel for that part of the cloth thats transparent in the arms
stoic ridge
yeah right now I'm using it not to paint the albedo, but to paint up the metallic
there is probably a proper way to do this
this job is truly the worst because the UV map doesn't put similar things near each other, nor does it put things near each other if they are in close proximity on the model
stark crystal
@stoic ridge u can paint metallic maps, roughness maps, etc in blender too
but you do you
 novel cairn
@stark crystal oooo
stoic ridge
yeah but every time I try to find a tutorial on something like that, it dives straight into some node view that I've never seen in my life
and I'm like, I thought this was a blender tutorial, what app is this now
a whole new system that I haven't even touched yet
novel cairn
welcome to blender, let me just press a 5 key shortcut and go into the python debug menu where we will be working
stark crystal
@stoic ridge for painting maps i never see people jumping into node view unless it is to preview the map you're making
if you use blender, you really need to learn nodes
@novel cairn lmao
stoic ridge
see this is what I'm talking about
stark crystal
today we will be developing a rendering engine @novel cairn
stoic ridge
the UI you're confronted with has nothing to do with nodes
novel cairn
: D
stark crystal
@novel cairn ooo and do u wanna see the rest of senko san here? :3
novel cairn
oh thats nice. the tail looks refined
stark crystal
@stoic ridge its because you're not expected to work with nodes when starting out
@novel cairn oh thanccc! i tried - i never make characters xDDD
this is like my third one ever
so yeeeties
novel cairn
thats pretty cool
stark crystal
thanccc :DDD @novel cairn have u made any urself? i wanna seeeeee
novel cairn
i made some edits, and a snail
dull canyon
I'd get pampered by that senko
zenith relic
@stark crystal
the head of this avatar...im missing knoweldge to achieve that perfection
even the body it self. the lower part needs to be somehow bigger to avoid legs getting inside to each other.
i want to avoid this
i do have the original avatar but i still prefer to make it on my own and fix some details...and my intetion was to make a male version..
im still not that good with sculpting...and giving the exact form+shape for any part i make is a little difficult
trying to make the face...but i dont know the the exact trick of how to get the details right.
dull canyon
https://i.imgur.com/YgpEEm3.png wondering how I would best go about doing the eyes and mouth for this fella



should I integrate them in the base mesh of the face or just have "floating" meshes above the base mesh
zenith relic
better integrate @dull canyon
dull canyon
I guess for the mouth it'd be easier yeah