#3d-modeling
1 messages · Page 58 of 1
 tulip shoal
if you wanna lower draw calls even more, package your black and white maps, like specular, displacement and AO maps into different channels so you have it all on one texture (green is always roughness, blue is specular, red is AO)
getting off topic already before I even started talking, nice
@fossil inlet sorry to bother you here, but I don't know if you blocked me or i cant message you because you have the "no shared servers disabled". Just wanted to say, sorry for the rant, but i just needed to vent for a bit, but that's not why I'm (trying to) contact you. -
What I came to ask was what do you put into your contracts; someone from VRC traders tried to scam me, so i think it's time I invest into a contract
also, it wasn't my client who said I had an attitute, he praised me in the review as hard as you cna praise someone whos' taking your money, it was the mods, but i'll stop about that topic, i vented it out now so i'm fine
 sharp abyss
i would say the mutiple texture avatars are the biggest things on performance hits since instead of one texture per avatar it some times 15+. i personally texture atlas everything that i dont need to use a diffrent shader on etc
Though im not sure you can texture atlas normals havent tried
tulip shoal
yea you can
If it's only 15 textures per model, that's fine ish, but when you have multiple 10 avatars in one spot with 10 materials with 5 textures each, you'll soon get over the 2500 recommended draw call limit for modern gpus
sharp abyss
Well yeah thats what i meant theres multiple places i go and everyone has avatars that are like 15 textures or materials each
tulip shoal
i could be talking out of my ass, i make weeb stuff, i read this on an article how battlefield makes their games run butter smooth when looking as great as they do
sharp abyss
I mostly make weeb stuff too lol. but yeah if people got into texture atlasing everything i think performance would go up a bit
Ide say bring it down to like 3 mats/textures per avatar or something
tulip shoal
yea.. my avatars are one mesh, one material and one texture
sharp abyss
My anime avatars are like that. my nanachi is currently 2 but thats because i wanted glowing eyes and had to use a diffrent shader
sharp abyss
But my friends are like who cares and just uploads with 17 materials and etc
tulip shoal
ignore the seams
I mean, i do that too, depending on how much i get paid
I won't charge less than minimum hourly wage just to atlas everything
sharp abyss
Thats a pretty nice character. and yeah i say for upload to vrchat though it should be as optimized as it can. and seems lol friend hates that i have to remove seams from models i dont create
sharp abyss
Yeah but texture atlasing also isnt explained or talked about much
tulip shoal
like, maybe for really complex avatars that you have plans to edit in the futures... So eyes, clothes, skin, hair, and accessories, but more than that i dont see why you would
i got more really good avatars tho


was reference
sharp abyss
Thats really nice, i still havent uploaded any of my characters cause i havent finished them lol. i need to do that been playing like 3 months with public avatars cause im pciky about mine being perfect
 tropic bear
this is 5k for example. when you create something optimization always come after.
VERY late to this conversation, but I'm gonna say no to this.
At the very least, as you're working on it, understand how you can scale UP
It's very easy to scale the detail up, especially if you go so low poly that you can simply subsurf the details back in
But scaling down is a lot more difficult
Learn to scale UP your avatars
 ripe lotus
Mine is only two materials
Three sorry
Face, body/clothes, then i had to separate the eyes to make them glowy with a shader for the person i did it for
Also that dragon boy is pree cool
 radiant stirrup
Oh hey isahibby
ripe lotus
OwO
radiant stirrup
OwO
ripe lotus
Fancy meetin you here xD
radiant stirrup
Yyyeeee, My vrc's still broke so...
sharp abyss
when making something from scratch it should always in my opinion always be as low poly and optimized as can be. since you can always use smooth to add more polys a detail later if need be
 thorny fractal
i think that model only really gets away with only being 5k because of its unlit shading. if it had normal shading on it it would probably look pretty weird. and if you can get the same amount of detail with a lower polycount i would aim for that. since i started working on character models i have been gradually reducing the poly count while also making the character look better visually with normal maps and such. my current model is 35k even with the body under the cloths and everything
 onyx juniper
Normals are great and necessary, but they don't create smooth silhouettes.
 marsh hatch
Sounds like more of a topology problem..
 void narwhal
i can understand trying to stay as low as possible for the sake of optimization under the scenario in which you aren't utilizing normal maps otherwise this isn't the case unless you aren't baking
besides that adding polys to a 5k humanoid isn't nearly as simple as you make it out to be for topology with a bunch of triangles at'least not without losing shape&curvature
^-Not as much of an issue if you have very linear geometry but that can come at a cost
-Also weights would need to be smoothed out to make the most out of the additional polys
-edge flow can also be a big concern when subdividing a extremely low poly mesh aswell
also to note there is value in having a high poly and just doing a retop low poly for the sake of a game
that way you can have the best of both worlds
end of the day for PC polys isn't really a big issue for optimization compared to other things
ripe lotus
So 65k isnt a big deal when i optimized the materials and textures?
 dense kelp
Avatars are considered good up to 70k, so one can assume such, it can probably go much higher before it starts actually impacting performance significantly however
The major points of performance impacts are as follows in terms of quantity, in order (based upon my own thoughts on the matter and what i've seen/heard), IK, Meshes, Materials, Dynamic Bones, Bones, Particles, Polygons
(In the terms of Amount of X = Y Lag, i.e 400 Dynamic Bones will lag less than 400 Meshes)
 fossil inlet
Sculpted some HD feet today ಠ_ಠ
dense kelp
Lookin' pretty good
 dull canyon
https://www.youtube.com/watch?v=t2XjdzzWCqI so is it possible to translate hair that are done like that (via materials) into vrchat? do you just have to do the material like that and that's it? or do you have to bake it or something?

In the last few months I've had some time to experiment with different methods of making stylized hair in blender, and one of the easiest and effective ways ...
 fringe rock
you could always bake the normal of the sculpt to a lower poly mesh
dull canyon
yeah but it's not really a sculpt is it
like, he is doing individual hair strands via materials
dull canyon
okay
 latent charm
Way I'd do it is do the hair as shown in the video all the way, then duplicate it and bring it back down to the simplicity it was around the 8 minute mark, and bake details from the full one down to that.
dull canyon
well the complexity never really changes once he's done with the hair in general
what I wanted to know is if it's possible to use the materials like he did for vrchat
to "simulate" all that detail without it actually being there
latent charm
Yeah, you bake out the normals and since it looks like he's using the principled shader in cycles a lot of the inputs in that correlate to the unity standard shader.

 thin bison
Most things done by someone with experience will look easy from the outside
dull canyon
https://i.imgur.com/gFtJ1Br.png well, I tried
dull canyon
okay, somewhere along the way her face got kinda masculine I just noticed...
 hallow bough
Might be her jaw line
void narwhal
jaw line looks a little bad along with the cheek bone on the side from the front view
besides that seems like some details around the nose bridge&upper lip are emphasized a little too much
lips/mouth might be a little flat from the side and nose might be a tad too big but it's whatever
dull canyon
https://i.imgur.com/AW94FIa.png cleaner shot without the hair

but yeah, teh jaw seems the biggest issue
void narwhal
mouth looks fine in terms of depth
hallow bough
I think smoothing stuff out will help yeah
dull canyon
okay
onyx juniper
Big nose
dull canyon
ok
fringe rock
idk why i see a old lady
dull canyon
yeah
there's too many folds I guess, too much details for what's supposed to be a young woman
fringe rock
like say up. smooth it alittle
dull canyon
yeah, I'll try that when I get the chance
dull canyon
https://i.imgur.com/NE2rSZS.png ok, I think this looks a bit better?

yeah, definitely looks younger imo. I made the skin too "saggy" in some areas as you'd usually see in older people
fringe rock
scult the iris. Just so its look more alive
 spiral sigil
i have a mesh that isnt symmetrical but it wont fit on my avatar at the angle i want it, is there a way to flip the mesh over an axis (z axis) ?
spiral sigil
but i dont want to rotate it. it has that flat side on the right but i want it on the left so i was wondering if there was a way to flip the vertex values so that the flat side is on the left and its still pointing the same direction
fringe rock
you could delete half of it an apply a mirror modifier and select z the the axis
another technic would be to place the 3D cursor in the middle and shift S(cursor to selected). change the pivot to 3d cursor on the bottom . Duplicate the part you want with shift D. After ctrl M( chose the axis you want to mirror and press enter
the normal might be inversed so press W in edit mode and select flip normal
 visual vigil
https://cdn.discordapp.com/attachments/531271451098218499/567246728789753866/D4LQ1nbXkAAgUgD.png
https://cdn.discordapp.com/attachments/531271451098218499/567246748100198400/D4LQ5fnWkAElSl8.png
https://cdn.discordapp.com/attachments/531271451098218499/567246759085080576/D4LQ7GrXoAEGN2r.png


 dull canyon
cute
 feral steppe
dull canyon
feral steppe
dull canyon
BAT
dull canyon
(big anime tiddies)
dull canyon
so apparently blender 2.8 should get released around July
 subtle jackal
I'm really looking forward to using it, but not at all looking forward to re-learning a bunch of it lol
worth if it gets more people to give it a shot though. Really tired of people under-estimating it and writing it off just because it's Free Software.
dull canyon
yeah
I tried using it a few days ago
it's... definitely different
lots of hotkeys removed/changed
now they actually want you to use right click for context menus
at least in the version I had basically none of the sculpting brushes have hotkeys
subtle jackal
yeah, un-learning right-click select will be an effort. Once you get used to it it's so intuitive
dull canyon
I always used left click select from the beginning ¯_(ツ)_/¯
since I started with 2.79
thorny fractal
for the hair i dont think getting the look in vrchat is really possible but you could bake the lighting information to a texture and use it that way. as far as like dynamic hair hylights and stuff tho probably not possible in vrchat
if you reduce the resolution of the curves in blender that reduces the poly count of them before you turn it into a mesh. and then you could bake out the textures generated from the material, the normal and alpha. you could probably replicate a similar look with an anisotropic shader then. but i dont think it would work in vrchat or work well because of vrchats lighting

Blender Artists Community
Hi all, I was exporting an object to another program, and I needed to bake all my textures which were heavily procedural. For most of them, no problem; but my Normals continue to bake flat! It looks that baking normals in cycles is just for transfer the surface curvature o...
baking procedural normal maps in blender can be kinda a pain but you can plug the generated alpha into an emmisive channel or somthing and bake the object to itself to get the texture from that
dull canyon
okay, I understood a few of those words
so in short you're saying using the material for generating hair detail won't work/be a big hassle to do
thorny fractal
i saw the video awhile ago. you can easily convert the curves to meshes that are already unwrapped. and reduce the polycount of them to a decent amount and the material uses procedural textures that you can bake to images. i replicated the look to a decent extent in ue4 and marmoset toolbag. I just dont think its really possible in vrchat because of the limitations to what shaders the game allows and the lighting setups of certain rooms. its totally possible in unity tho with a custom shader
most things in vrchat use some form of a cel shader or unlit shader and those that use the default unity shader usually end up really bad because of the way a lot of scenes have lighting set up. you could bake out the lighting in blender to a texture to be used with an unlit shader in vrchat. but thats up to you to decide if you want to use that method and if you think it would look good
visual vigil
https://cdn.discordapp.com/attachments/506248479962693663/567539329359020032/unknown.png https://cdn.discordapp.com/attachments/506248479962693663/567539426813804544/unknown.png https://cdn.discordapp.com/attachments/506248479962693663/567538907064041472/unknown.png https://cdn.discordapp.com/attachments/506248479962693663/567538955956912148/unknown.png


 dull canyon
thicc 👌
 opaque jolt
Bad question but is it very difficult to 3d model? Also should i download the newest version of blender? (mine is 2 years old). And can i update blender in the programm somewhere so i can keep my plugins?
subtle jackal
If your version of Blender is 2 years old there's a good chance some plugins might not work, but yes, blender will automatically give you the option to re-import your add-ons and settings when you install and start the new version. As for if it's difficult, that's hard to answer. Some find it easier than others, but anyone can learn if they put in the time and effort to do so.
opaque jolt
Thank you, i will update my blender today then and watch the pinned avatar creation tutorial 
 silent acorn
It can be difficult to learn the keyboard shortcuts at first, but once you've done that, it's very easy to create things through the program.
opaque jolt
Mhh strg+h to hide stuff and strg+a to select all parts of a body are all I can remember
hallow bough
Getting strange lines on shadow bake trying to post a clear image of it<
thin bison
Do you have parts of mesh intersecting? @hallow bough
hallow bough
Not at all it seems to be doing it even without double meshes or wrong facing normals. I'm trying to grab a clear image.
Seems fine at first look but on my monitor i see the lines clearly. If you look closer you see alot of seam looking lines.
hallow bough
I've tried alot and am pulling my hair out trying to solve this issue. I've had it with about any object and haven't succesfully done an ao bake yet.
Let me check
thin bison
Are you using the Blender render or Cycles?
hallow bough
Blender render
thin bison
Try using cycles
hallow bough
I'll give it a go right now!
thin bison
Infact, always use cycles
hallow bough
Ah alright, i've seen people say otherwise for some reason so i just didn't consider. Let me try it and i'll post the results.
subtle jackal
lol. Blender Render is fine for plenty of stuff. It's really more to do with how Blender calculates lighting in general. High level subdivision helps but if you don't set up your object right it will give you inaccurate bakes. Even so usually the result isn't too noticeable in the final item. You can also clean it up manually with a bit of blurring
more concerning rather is what is up with that UV job? why is the island twisted that way when it would be better coverage to rotate it to fit squarely, it seems
hallow bough
@subtle jackal I didn't pay attention to that as I was just testing it out considering I've had that issue with any object even if correctly uv mapping the object and making optimal use of the uv space. Right now the issue has been resolved with the help of @thin bison by making use of Blender cycles instead. Perfect bakes now.
spiral sigil
@urban acorn is your model rigged correctly?
 urban acorn
yea
spiral sigil
then, wheres the problem with making keyframe animations?
urban acorn
im tryimg to move my sholder down but every time i do it just pops back into place
spiral sigil

In this Cinema 4D Lite and After Effects Animation tutorial, learn about creating basic and complex animations using keyframes and the timeline editor. This ...
urban acorn
@spiral sigil i think im just going to give up
the stuff they use i can't use because im not going to drop 30 on 1 animation
thorny fractal
i dont like blender internal renderer but you can do a lot of cool stylized stuff with it that are not possible or a lot harder to do in cycles. kinda a shame its being removed in 2.8
subtle jackal
They're adding several new renderers to compensate. And grease pencil is super powerful to boot
 stable edge
noice
visual vigil
https://cdn.discordapp.com/attachments/366067686423134218/567984297026519040/unknown.png https://cdn.discordapp.com/attachments/366067686423134218/567985253214584833/unknown.png

 ripe lotus
👌
dull canyon
very cute @warm jetty
did you use some sort of template or something for the general body? or is it all made from scratch
 warm jetty
oh, that body is not from my work.

快活な感じの耳と尻尾の生えた女の子です。 VRchat用を想定して作っていますが、ゲームやアニメーション、配信などでも使えます。 「あ・い・う・え・お」のリップシンクとVRchat用のリップシンクを用意...
you can buy it from here : )
dull canyon
ah, okay
so, are most of the models that are in this style MMD ones? anyone know?
like, they all look very similar
(not judging btw, just curious)
warm jetty
yea most of them have smilar amatures.
dull canyon
mhm
 dull canyon
shiny spikey hair
 hollow radish
yeah not using substance painter for hair and skin texturing
its something I still need to think about, for will use 3d coat and flat colouring

looks pretty good though
dull canyon
yeah, with the right textures/shading it can look good
 velvet fable
@warm jetty thats cool
velvet fable
is it like a private avatar or public?
it would be cool to make an avatar with a prosthetic arm
spiral sigil
anyone knows some tricks with c4d?
if i want to export it
it should convert the "Clone" object automaticly to a big mesh
velvet fable
i want to start doing some 3d modeling for vrchat how do i start?
subtle jackal
Do you have any experience with 3D modeling?
tropic bear
You should start with downloading blender; it's a free, open source 3D software that lets you model. Once you have that, YouTube is your Ally. Learn the interface and navigation, then you're set!
 lean mason
anyone know someone that makes good avatars that can make one for me
fringe rock
Yes
spiral sigil
hey can someone here get in a call with me and tell me something
spiral sigil
yes
velvet fable
yea im installing blender rn
dull canyon
you might wanna download the 2.8 beta though
it should get stable released in July and it's quite a bit different from 2.79
latent charm
You'll be fine with 2.79, just remember that when 2.8 is released and if you upgrade to that there's some interface stuff to re-learn. The important stuff is mostly staying the same.
dull canyon
hotkeys also changed quite a bit
latent charm
https://www.youtube.com/watch?v=kes2qmijy7w&list=PLa1F2ddGya_8V90Kd5eC5PeBjySbXWGK1
Here if you like video guides
https://en.wikibooks.org/wiki/Blender_3D:_Noob_to_Pro
Here if you prefer written.

Blender is Free and Open Source Software Download: https://blender.org/download Donate: https://blender.org/donate -- This tutorial is part of the Blender Fu...
latent charm
Should now, the trailing slash did weird things with the site. ¯_(ツ)_/¯
silent acorn
finished a few more avatars for a lowpoly 90s-themed project!
dull canyon
nice
dull canyon
I can imagine
spiral sigil

I wish this prop item stops shaking though and it actually collides in the ground lol
stable edge
he shonk
 sage grail
Nice
sage grail
I'm just modelling my Impim
sage grail
onyx juniper
That topology looks like it's going to be a pain for you later
hallow bough
Yeah you're making it a tad to complicated for what could be a relatively easy character to model. Think in the basic shapes.
onyx juniper
You should try an approach that works on any humanoid. It looks to me like you think you need a wild approach for such a wild shape, but the character is human enough for conventional wisdom to apply.
Use the mirror modifer for starters
subtle jackal
Beyond that the overall design itself seems a bit difficult to realize in 3D. It doesn't look very anatomically sound, which makes it hard to use more conventional humanoid edge flow as well.
onyx juniper
I disagree. The worst this design can offer is the puffy jester pants thighs, and all you need to do is make thighs, but puffy.
Everything else is cat peach with chicken legs
sage grail
I thought I was doing pretty good.
🤔
Those are just normal Impim thighs, I'm trying to keep it looking like your usual common impim
subtle jackal
looking at other drawings of these "impim" things I suppose it might just be the front-on angle
onyx juniper
I wasn't saying the thigh design was bad, I was talking in terms of modeling difficulty.
The thighs would be the most ornery to deal with
sage grail
Ah
silent acorn
I might personally cut down on edge loops around the head / thighs. You can always re-add them later, but having just enough to get your point across makes the model much easier to work with.
sage grail
Ok I'm sorry this is my first proper model.. thing. What's an edge loop?
subtle jackal
an edge loop is... well, a string of edges that loops around a model, they're sort of the main way of visualizing the topology of the model and how it will deform
I took a different image of one of these impim characters and tried to visualize how the edge flow might go on some areas. It's doable but it's certainly challenging as a character model, especially if you aren't accustomed to 3D modeling.
sage grail
Alright. Should I stop and tackle something easier for now?
subtle jackal
That's a decision only you can make really. Some people learn best by diving in head first and sort of slamming into a challenge until they break through. If you aren't afraid of screwing up a few times before you get it, there's no real reason for you to stop.
subtle jackal
One thing I will suggest though, is make sure you use lots of reference. If you drew the front view you have there, I'd start with doing side views and maybe top or bottom as well, as your edges really don't seem to take those into account. Also I personally (and I suspect many others) like to look at lots of different models to get ideas for edge flow. I'd especially see if you can find others who modeled one of these creatures or a similar one, and see how they did it and try to work out why they did it the way they did. It'll help you learn how to best approach specific forms.
sage grail
Thanks. I will keep this in mind as I progress. :0
silent acorn
Good luck! 👍👍
 foggy maple
The filepath error?
foggy maple
@spiral sigil That's fixed in the dev version of cats
Use the updater
@spiral sigil Oh, can you show the complete error?
foggy maple
@spiral sigil well it was checking if the attribute "image" exists but not if an actual image exists
spiral sigil
oh
foggy maple
well it's because it could not find them. Are they actually there?
 edgy crane
Hey would anybody mind teaching how to hair in blender
dull canyon
so, apart from normal maps, are there any other maps you can use for avatars?
thin bison
Roughness, metallic, height and AO
thorny fractal
Depends on the shader your using
thin bison
And yes, depends on what shader and what kind of workflow you want
 desert crown
rigging in blender is easier than i thought it would be.
 smoky heron
Anybody know why this happen? The lines in the image editor look weird and a lot more saturared. What can I do?
 brazen wigeon
would anyone be willing to help me out a but with a model real quick? Id like to know how to split a tie into two parts so i can have two different shaders on it
 mint prawn
@smoky heron it just looks like that to show you where the texture has changed it wont look that dark if you save it
 cursive wedge
you sure? when i did save those things it saved like that
think its just the color palate being wrong
onyx juniper
How do you want it split? In half? Separate the long and short end?
brazen wigeon
Id like an outline so i can have a rainbow shader out line it 😃
cursive wedge
You can use an shader to create the outline with whatever you want in it, dont need to change the mesh at all, but oh well.
 rose geyser
question for whoever because I used to know way back, but i can't remember for the life of me
How do I blend to the basis shape key
without ruining all the other shape keys
oh wait
I can just do it in unity right?
without ruining the mesh in blender
onyx juniper
@cursive wedge What about an outline on a poly group with no depth?
cursive wedge
You can do it with another mesh with the opposite normal direction to simulate an outline
But it creates another material to be added
onyx juniper
But if the mesh is flat, that would cause z-fighting, right?
dense kelp
@brazen wigeon press L to select all connected vertices, i assume mousing over the tie and pressing L will select the tie alone, after the selection, you can then press P and separate by selection
cursive wedge
@onyx juniper youscale it as much as the outline you want it to be
The only think this does is that it creates extra vertices that you could have been without, but it could be better performance wise if you have a bad shader for creating the effect you are looking for
Just need to assign the new mesh to its own material, no need to split it from the main body, if you do just join it after you have done what you wanted
dense kelp
Oh right i forgot the rest of it, a tad drowzy it seems
After separating the tie, confirm that all of it had been selected by pressing H to hide it, if anything is left, you need to go back to your main mesh and repear the same steps, if you got multiple tie meshes, select them both at the same time and press ctrl+j to merge them, after that's all done, go to the materials tab, make a new material, name it whatever you want, delete the old material and the new material will be applied onto it, don't forget to add a texture to said material, afterwards, just merge the meshes all together with ctrl+j
Oh and, alt+h to unhide everything
Basically a relatively convoluted but foolproof way to set it up
Easiest way to set it up, if you can select everything you want consistently, is by making a new material, selecting what you want on that material in edit mode, selecting the material and hitting assign
dull canyon
does anyone know of some youtubers or streamers who sculpt characters and stuff in blender? apart from YanSculpts
spiral sigil
So... I'm trying avatar uploading for the first time with a zero two avatar however whenever I load the avatar package up on on unity it is completely pink. So I looked up some tutorials to try and find out what to do and they simply dragged the appropriate materials to the appropriate spots. So then I tried that but when I opened the materials folder everything except the body material were all pink blobs and I have no idea what's going on. Is it my computer or the files themselves or something else? If anyone knows something please DM me.
 zinc furnace
You're probably downloading a premade avatar but you don't have shaders imported (such as Cubed's shaders)
@spiral sigil
spiral sigil
Oh. How do I get that and add it to my unity?
zinc furnace
This tutorial will go over installation of all needed plugins and the SDK. After that it will go over how to get a model ready in Blender, fix a few things t...
You just get it off Github
spiral sigil
Oh, well I was going to go to sleep but if it's that simple of a fix I guess I'll stay up longer
And yeah I'm trying to use a premade avatar
One question. Does the shader have to go in blender or can I add it to unity? I just downloaded Noe Noe shader
zinc furnace
In Unity
Shaders in Blender are another matter and Unity shaders won't work in Blender
spiral sigil
Okay
Do I install the shader the same way I installed SDK?
Just drag it into assets
So I got cubed as well but it's appearing as a zip
Ugh.... I don't know what I'm doing at all. I installed NoeNoe shader but the materials for the zero two avatar are still appearing pink.
And it is six in the morning for me
Just, someone please DM me info and help and I'll check the messages later. I cannot continue to deal with this stuff right now. Especially when I'm so tired.
zinc furnace
@spiral sigil you need to manually change the shader on the material
Select the pink materials and select a new shader, such as Standard or Noenoe Toon Opaque
 mental coral
UV mapping
wreck-it ralph voice
"I'm gonna wreck it!"
dull canyon
is mapping the same as unwrapping?
tropic bear
I don't think so, I've never heard it be referred to as mapping
latent charm
Generally yes.
They both kinda refer to the act of mapping 3D geometry into 2D space.
dull canyon
mkay
dull canyon
@mental coral did you make that?
wait
goddammit discord
stupid tabcomplete is so useless
spiral sigil
I'm thinking that maybe I didn't install NoeNoe's shader correctly. All I did was drag and drop it into the assets folder of unity
 modest mesa
Anyone know why importing an FBX to blender that was exported from maya would cause it to become scuffed like this?
the FBX imports A-OK to unity
Heck even opens nicely in paint 3D
 gentle forum
Anyone know how to get rid of these weird corners?
Like why it isn't flat
acting like there's an invisible edge
mental coral
Unwrapping / UV mapping are pretty much the same deal, yes. You are literally unwrapping the 3D mesh as if it were a flat surface and mapping pictures onto it. @dull canyon
Also yeah I'm working on it now.


Too tired to UV map this right now so have a turntable in the meantime. https://t.co/Rjpm4DJddi
 Twitter
 vast spire
@mental coral adorable
sharp abyss
That looks cute and weird at the same time. i need to find someone who can drawn and is willing to do some free work for a updated/ better nanachi model
mental coral
What show is that character from?
sharp abyss
The nanachi model?
mental coral
https://www.youtube.com/watch?v=IdMZgpzxEPw Literally the first result I found.
ALso... I follow some Japanese artist who draws all kinds of this stuff on Twitter I swear.
sharp abyss
Yeah lol made in the abyss is a great anime
mental coral
Oh it's called Made in the Abyss. I see.
I follow like 1500+ accounts because I just like seeing all the art. 🤣
sharp abyss
Still butt hurt i spent 32 bucks to go watch a recap movie because the theater didnt post any of the stuff realted to the movie
but it had really nice audio and i got to rewatch the anime again lol
Yeah its free on amazon if you have prime, not gonna spoil anything but it can be pretty dark and fucked up
 strong thistle
@modest mesa what's it look like in Unity wire frame
modest mesa
Looks fine now, I got some help in a different 3d modeling discord, the problem was this...
"it was bad transforms from the geometry being parented directly to joints and not having the transforms frozen afterwards. Solution was to either unparent and skin geo as normal, or freeze transforms on those objects in hierarchy."
strong thistle
kk
dull canyon
@mental coral nice
https://i.imgur.com/8Y24Bqf.png that's the creepy looking thing I'm currently working on 😄

somehow all my faces look kinda old
hallow bough
I don't think they look odd it just depends on what you're going for. You might have defined some features a bit too much though if going for realism I think it looks good :)
dull canyon
well, at most I wanna go for semi-realistic or even more in the manga style
¯_(ツ)_/¯
dull canyon
but I guess I'd first have to just get any avatar into vrchat to see how it looks and how much more realistic or comic-y I wanna go
guess it's really easy to fall in the uncanny valley with this stuff, especially when you don't know what style exactly you wanna go for
if it's a manga styled base with realistic features it looks just as weird as a realistic base with manga styled features I guess
and all I think I know is that I don't want to make yet another MMD like avatar, but also not one of these photo textured weird looking ones
dull canyon
https://i.imgur.com/fYwCgD3.png ok I think it looks better/more feminine now

 silent junco
thats disturbing
dull canyon
thanks, I guess
dull canyon
what exactly? lack of ears/eyebrows/iris? or altogether? uncanny valley?
silent junco
uncanny valle
dull canyon
yeah, not surprised then
I come from a very heavy manga/anime background so doing this stuff in 3d will bring some weird results in the beginning as I try to find the style I want to go with
 radiant latch
rip criticism
It might definitely come together more when you add more features to it, as most textureless, bald and eyeless figures tend to look odd. Anatomy isn't something I've looked into a heck of a lot, nor do I draw it, but maybe the eyes are a bit big which gives off a more alien look
dull canyon
yeah, every comic/manga character looks basically like an alien if you remove the hair and ears 😄
but yeah, eyes could be smaller I guess
thanks
radiant latch
yw, good work on it so far
I think that crease from the top eyelid might drop a bit too low, or be too defined, as well
dull canyon
yeah
I'm kinda trying to go for a similar style like yansculpts https://www.youtube.com/watch?v=X4KFliqdi1Y

Sculpting and Modeling Bunny Girl using Blender 3D. This is a timelapse video including the sculpting, modeling, re-topology, rigging, posing, assigning mate...
but yeah, lots of things to learn still
radiant latch
you'll get there
 umbral notch
It looks amazing and very close to real life characteristics of the human face. Good job 🙌🏻👏🏻👏🏻
dull canyon
thanks, but it's far from good 😄
subtle jackal
the trick to characters like that is more to remove detail and just exaggerate some major features like eyes
looks similar to Danny Mac's characters.
 gleaming ridge
anyone know how to add a material on blender also anyone have a not so busy blender ui template for a novice 3d modeler thats why i dont use it too many buttons
dull canyon
thanks 😄
dull canyon
am I weird for actually looking forward to doing/learning retopology? 😮
subtle jackal
Only if I'm weird for kinda liking UV mapping
 gentle raptor
Uhhh i accidently got myself into the animation scene in blender and idk how to get myself out
dull canyon
shift + z
gentle raptor
Tysm💖
gentle raptor
Got it. Tysm😅
dull canyon
yw
 alpine merlin
can anyone give tips on texturing?

so.. I just went in blender ..go to texture paint... add a new layer... made it gray.. add spots n smear them over... is this Im suppose to do it.. n then take my time doing every part or is there a better way
https://gyazo.com/3a38cec238331f1c7b6563db5ec69ba2 it looks like this at first.

 azure adder
Sculpting my new avatar https://i.gyazo.com/feb750b49b1be82c879a7e385e6c0705.png
 dull canyon
nice
silent acorn
looks really great!
ripe lotus
I dont hate retopoing but I dont think I like doing it either
i guess its kinda relaxing if you have music on and just kinda go at it
weird meditation xD
dull canyon
well, personally I kinda love optimizing and tweaking things and stuff, and retopo looks basically like that
take a messy complex sculpt and simplify and optimize it
silent acorn
isn't retopo basically creating a new model with the old one as a template?
dull canyon
it's creating a low poly optimized mesh on which to project the high poly sculpt
a mesh that you can actually use for animation/rigging
and games, by extension
silent acorn
oh, that's really interesting! I'll put some research into it.
dull canyon
just search retopology on youtube
silent acorn
I've got this weird habit of making my models too low-poly anyways, though.. :P
dull canyon
blender guru and flipped normals did some nice explanaion and examples
onyx juniper
@azure adder That's not a robot
 storm kelp
does anyone use 3d studio max?
fringe rock
Change program 3ds max user. Its cool that you have scrip to convert rip game file. But in everydat life . You get fuck
desert crown
@storm kelp i actually uses 3dsmax. But probably not for converting to fbx or creating bones or animation.
its good for optimized, mirror edits, fixing model gaps and imports from other game models.
use blender for basic import and editing instead
 small cloud
blender works for those things too.. what
spiral sigil
I want to make this guy
stable edge
thats not how you spell piece
spiral sigil
One thing I don't get abou this Wano Arc -- a bunch of people are super short for some odd reason I wonder if it's a Devil Fruit ability that turns people into small chibis.
spiral sigil
hey guys, I want to make my avatar from my tenno (from the game Warframe), is it still recommended to use blender ? I do have C4D too
dull canyon
pretty sure it's mostly a case of "use whatever you're comfortable with"
but Blender has the Cats plugin which allows you to very easily prepare a model for vrchat
thorny fractal
The tenno have very organic shaped pieces. Their armor look more biological then like hard metal pieces. I would look into sculpting them for getting the base model down.
Whatever you wanna use for sculpting it doesn't matter. I prefer zbeush but a lot of people use blender, 3d coat and mudbox are also options
I don't really see the point in using cats for hand made models. I only ever use it for porting stuff
spiral sigil
thanks @thorny fractal ! I will be looking forward to that, with learning the basics beforehand, and will be using a tenno without armor so it's almost only organic
good thing is that I can use captura IG
onyx juniper
I'm certain that "tenno" is an abstraction of the phrase "ten-year-old"
spiral sigil
nah bruh they could quick yar arse without even being seen
 onyx juniper
You can master MY sword heh heh heh Not bad
Is her head too long or does her scrawny neck make it seem that way?
 candid ocean
https://cdn.discordapp.com/attachments/542823323357413396/570401585461461022/unknown.png anyone know how to fix the armature/model pivot point?
 onyx juniper
@candid ocean In blender?
onyx juniper
Move the 3D cursor to where you want it first. If it's in the center, use Shift + S > Move Cursor to Center
candid ocean
0,0,0 on the grid but
onyx juniper
Oh, you need the model moved back to center?
candid ocean
yea
candid ocean
Doesn't do much but I gtg and brb in 15-20 min if you're still around
onyx juniper
Okay
candid ocean
@onyx juniper back!
onyx juniper
Okay
candid ocean
yea.. its f ed
onyx juniper
Maybe you need to reset the origin, and then move the object
Let me see where the object's origin is
It's the orange dot you seein the viewport when an object is selected. Like this
onyx juniper
Or blue, right
Yeah that'll do it
Select the object and then use Shift + S Cursor to Selected
@candid ocean
Wait, I'm sorry
Go in edit mode and select a vertex from the center of the model
Then Shift + S Cursor to Selected
Then in the Transform panel on the right look for the 3D Cursor location
Change the Z and Y values to zero. For sure
onyx juniper
Then go back into Object mode with your model selected, and go into the Object menu (right next to where it says Object Mode) and Select Object -> Transform -> Origin to 3D Cursor
candid ocean
Still a little weird, do that to the armature now?
That 3d cursor thing always seems a bit weird
onyx juniper
Now Shift + S -> Cursor to Center
and then, finally, still in object mode with the object selected, Shift + S -> Selected to Cursor
candid ocean
With everything selected?
onyx juniper
Yes
candid ocean
I need to sit at a real desk lol on the laptop reclined lol
 vapid portal
Hey guys I new to avatar modeling, what version of blender do I use
onyx juniper
@vapid portal 2.79 is the latest stable build, 2.8 is experimental
vapid portal
Alright thanks for the help, really appreciate it
onyx juniper
I should have told you to change the armature instead of the model, sorry
onyx juniper
Problems still?
stable edge
we will never know
velvet fable
ok guys sooo
um i am takking the hand of it
of blender
and im making stuff
and i made this prostetich arm (sorry for my bad english im italian)
the only thing that is left is the arm
i added bones
holdon how do i connect bones?
alpine merlin
so I coundnt get a proper help or tips on texturing.. cant afford expensive programs to do textures..
am I doing alright right now?
i just smudge them in blender
velvet fable
nice
alpine merlin
thank u.. but I need feedback.. I really dont know about doing textures.. or a proper way of doing it.
stable edge
ah, theres a lot of free image editing software so
alpine merlin
..im not searching for a image software.. more like a 3d object painter.. but I give up looking for one so I just used blender..
stable edge
I mean there are plenty of ways to do it so
velvet fable
btw how do u connect bones 2gheter?
stable edge
pretty sure cats can merge bones
velvet fable
im new lmao
spiral sigil
@alpine merlin try http://pixologic.com/sculptris/ may be what ur after.

http://www.pixologic.com/
thorny fractal
@alpine merlin good uv maps can make texturing a lot easier. So I would make that a focus. I've textured things straight in Photoshop before without the 3d viewer with some good success just with planning out my uvs. You can also do procedural node based textures in blender too and bake them out to the uv texture. That sculptris method that was linked might be referring to another method which is veetex painting a high poly version of the model then baking the vertex paint to the low poly. Which can also be done in blender
Also painting in blender isn't that bad you can't have layers but there's things you can do to get around that. The biggest downside is probably when it comes to pbr painting
spiral sigil
what's the count to look at in blender to not go past ? faces, tris or verts ?
dull canyon
I think it was tris?
zinc furnace
Tris, yes.
Under 32k/70k tris
The others don't matter as much
Although for cloth, verts matter.
spiral sigil
oh cool I thought I was already going a little bit too detailed on certain parts but i'm at 20k with subdivision on so it should be alright
thank you @zinc furnace
zinc furnace
70k is the upper limit and 32k is the suggested limit for "excellent" rank. As always, the lower the better
But within 32k you should be absolutely fine, don't skimp on the details within that range.
spiral sigil
i'm trying to get the body to look as right as possible at first, i'm at 20k without the head, hands and feet. it's my first hand made avatar so i'm pretty sure it won't be as optimized as it could be but i'm still doing my best
spiral sigil
okay the head is a true pain to make
in general, what level of subdivision do you use for your avatars ? just to count the tris to make sure i don't have too many
subtle jackal
I generally don't use subdivision
ripe lotus
 thorny fractal
subdivision can make it really easy to hand model soft edges and organic stuff. with my last character i hand modeled the face with subdivision to give myself mroe control then went back and retopoed it to get better topology and make the poly count a lot lower
i may be mistake but dosnt a mesh over 65k get automatically split in unity into 2 objects
dense kelp
That was due to the old unity limitations, the current upperlimit for polygons is ridiculously higher
onyx juniper
Progress! Look at those shapely legs!
spiral sigil
hey
anybody got tips for modelling human lips, eye sockets and ears by hand ? i'm hand making my avatar and got the body shape already
 lament pond
dull canyon
lament pond
dull canyon
sighs
I should really spend more time working on my thing
it's always the same, I feel like I wanna be productive, but then I can't find the energy or inspiration to, so I feel bad for not doing anything, so I have even less energy to do anything
_>
radiant latch
Get someone to always nag you to work on stuff
Work on your stuff!
I wanna see more!
dull canyon
thanks. hopefully I'll get to do some stuff this weekend
during the week I'm just never in the mood after work
lament pond
Work on it now
radiant latch
You mean definitely
 dusk creek
hello
is there a way to get dynamic measurements that can get modified? ie. click on the number and change the measurements of an objekt within the measurement? (if that makes any sense)
because i know that in blender 2.8 you can measure stuff, it's just that those measurements cannot be affected/written and they don't change when the objekt does. also you can only have one of them at a time (as far as i know)
radiant latch
Are you asking if you can display edge lengths?
dusk creek
kind of yes
radiant latch
What're you trying to measure? Is it like, an entire object, say, a gun from butt to the barrel kind of thing, or just to be able to always see the lengths of each edge?
dusk creek
i think i am basically asking, if you can turn blender into something like a CAD program, where you can put in lengths and diameters and stuff
i.e. i want my charackter measurements to be my real measurements, to get a more perfect fullbody experience, and for that i'd like to type in the measurements into some kind of grid (hop it makes sense)
radiant latch
I get what you're asking. Give me a moment to get home and I'll see if I can help. I don't know how to do it off by heart
dusk creek
ok nice 😃
btw: i know that '3D MeasureIt'-Add-on exists, but there you can't 'type in' measurement ^^ that's kinda the only issue. i gonna wait, no hurry though 😃
radiant latch
hmm, yeah, I thought that they had an option to just enable it like the edges, which it doesn't seem like they do for bones
I've never dealt with addons myself, so I don't know of one that would help you, but you could always do a kind of work around to get the bones the exact length you want. Make a cube, or even just 2 vertices the length that you want, then set your cursor to one point, then select the end of one bone, and move that to the cursor. Then you do the other side too, and position the whole bone to where you need to, after that. That's all I can think of for it though. Someone else might jump on later who knows more
dusk creek
that's kind what i would be doing, but it has to be easier, couldn't it? 😄 ok, hopefully there are gonna be more ^^ thx anyhow
radiant latch
you would hope it was easier, lol. But yeah, good luck
velvet fable
hello, is the bone arrangement ok for this model? (yea im still working on the hands and the head)
(its not nsfw i didnt add textures)
zinc furnace
You need Hips, Spine, Chest, Neck and Head in the spine hierarchy
And each arm needs a shoulder, upper arm, lower arm and hand bone
The legs seem fine
velvet fable
so in the hierarchy i set those bones?
can u show me how i make the hips, chest, neck and head?
i added the shoulders, are they fine?
radiant latch
You essentially just need to break up the big bone you've got running through the body from waist to neck into 3 bones
velvet fable
mhhk
radiant latch
you can do that also by clicking the bone pressing W and then click subdivide
velvet fable
fuck i cannot link the legs bones with the model
cuz the upper part of the leg and the lower part of the leg is all one thing
radiant latch
like, two separate skeletons?
velvet fable
see?
radiant latch
Oh, do you mean the model itself? You'll just need to rig it to the mesh
radiant latch
I can do my best to
velvet fable
if i send u the model?
radiant latch
well, I have stuff I'm working on at the moment, but I can try help you by telling you
velvet fable
ok so as u can see the legs are all one part
radiant latch
mhm
dull canyon
https://i.imgur.com/Y9jlNkC.png I tried
 radiant latch
looking much better Szena
velvet fable
so how do i divide the legs in separate parts?
radiant latch
So each leg is it's own model, is what you want?
velvet fable
yes
radiant latch
ok. Can you just go into edit mode (Tab) and get a closer screenshot where the legs meet the shorts, or whatever they are?
radiant latch
and @dull canyon, I think the eyes look a lot better than before, definitely. I think from there it's personal preference, or character design as to what shape they are
ok, are they connected to each other, maeio?
Like, if you go into edit mode while the mesh is selected
dull canyon
mkay
velvet fable
mh
dull canyon
so, when I sculpted the ears (cause I wanted to try sculpting instead of modeling) I learned that "only front faces" is your best friend when sculpting thin surfaces
radiant latch
Yep that's the mode, but I want to see if you need to split the legs from the rest of it. So while in that mode, hit A to deselect everything (should remove all the orange) then zoom into where the legs connect with the legwear and try and select one edge at the top of the leg part, and then move it with G. If the model stretches from the legwear to the actual leg, they are connected and need to be split
and yeah, Szena. I haven't done a lot of sculpting, but I learned that at one point too
was pain before then
dull canyon
yeah, I just randomly remembered hearing about that option before
though I might try modeling them instead after all
so they have a cleaner shape
velvet fable
like this?
radiant latch
On the right track, but wrong spot. Do it where I did on mine, right at the top of the leg, where it meets the clothing
velvet fable
oh like this
radiant latch
Yep! So from that, it looks like the legs are connected with the pants, which is what I wanted to find out
one sec
velvet fable
ok
radiant latch
Now try select around the leg like that, right at the point where you want to split them
dull canyon
(holding shift)
radiant latch
If you click one edge, you can hold Ctrl and click another one and it will try connect a selection between them
dull canyon
or that
radiant latch
But yes, also that, lol
dull canyon
assuming the topology is clean enough
radiant latch
Yeah. Be careful not to go too far with the separate clicks, as topology (the geometry of the lines), might be a bit weird and it will do some weird paths
after you have it selected, hit ctrl + E, and edge split them
velvet fable
one leg or all of the legs?
radiant latch
One leg at a time, if you want, but you will do both
radiant latch
But after you split then, it will have both edges selected, so deselect with A, and then hold Alt, and click the very top of the edge again
if it loops all the way around, that's good, try drag that too see that it comes apart like mine did
But anyway, now that that's split, if you hover your cursor over the lower leg part, you can press L to select all the connected parts of the model
radiant latch
hang on a sec
one more step, kind of
Press L on that lower part to select it all, and then press P, and separate it by "selection"
That will make them two separate models
doing that, you can hide that leg part with H and then do the same with the foot if that's connected
But you can always check what's connected to what by pressing L
radiant latch
alrighty, good work
So you can do that for each foot, too
If you just have the feet selected, and they're both the same model, you just select one whole foot and then P to separate it
if you did them 1 by 1, that shouldn't be needed, as they'd be separated anyway
velvet fable
so basicaly i do the same thing with the feets?
radiant latch
Yep. If you need to
radiant latch
go for it, good luck
velvet fable
Bam it works
radiant latch
What's your goal at the moment? I assume you're breaking these up to attach them to the skeleton
radiant latch
Ok, you shouldn't need to be splitting the mesh like that to prepare it for rigging
velvet fable
if i want to merge the foots with the shoes
sooooo
i didnt need to do that P and then select ''selected''?
radiant latch
well, that is a really helpful and important thing to know with blender, so I'd say whether for this task or not, it's still something you should know, and separating the legs from the pants might help make things tidier
But no, for rigging, you should have everything that should be connected, connected
velvet fable
@radiant latch
radiant latch
The way rigging works, is it has weights on the different parts of the model. The weights are essentially how much of the mesh a bone is going to manipulate. So if you have 100% weights on the foot applied to the foot bone, it's going to go where the foot bone goes
velvet fable
so for vrchat i dont have to do that P thing?
radiant latch
vrchat isn't really considered at this point. This is making sure your model is working and moves correctly, which in the end, can be related to anything you need to bring the model in to
the P thing is just splitting models up which can help in all sorts of areas
radiant latch
So that one is pretty easy. If you select two objects, you hit Ctrl + J
that one's easier to think of, as you can imagine the J as part of the word "Join"
radiant latch
sure
tropic bear
here's a question for you lot
are there any free/paid video tutorials on texturing a character from start to finish in substance painter?
im looking for something quite extensive because i'm very basic at it
so far i've found one on flippednormals for $70, but if you guys have any other reccomendations before i go and buy one i'd love to hear
already took a peek at skillshare but there's nothing really extensive on there about substance
subtle jackal
Nothing that in-depth naw
To be honest though unless you're doing realistic textures I wouldn't recommend substance for it
thorny fractal
ya i only ever use substance for pbr texturing. the brush engine in it is really bad too so dont expect to do WoW like hand painted textures in it. most people use 3dCoat for that. i usually just use a mixture of photoshop and blender texture painter for stylized stuff. and if i want to make pbr textures for it later on i bring my diffuse maps into substance and make my metallic and roughness in there
 tired bay
lol
alpine merlin
yeh subtance would be best.. but I coundnt find anything I needed so I just painted it myself in blender... u know smudges n dots
n learning to layer
dull canyon
https://i.imgur.com/V8zPlpT.png getting to the point where Blender becomes really laggy again because 1M tris >_>
 thin bison
You should look into doing a retopo and then use the multires modifier if you're to work at high polycounts
dull canyon
that feels like a lot of extra work
thin bison
May feel like it, but dyntopo isn't very good for higher details
It works best for blocking out the form of the model
dull canyon
hm, I see a lot of people use it for this stuff tho
thin bison
If you're talking about Yansculpts and others they tend to have lower res on the dyntopo
thin bison
In Yans daredevil video you can see the dyntopo value clearly
dull canyon
yeah but he's using relative detail
subtle jackal
just make sure you set the dyntopo mode to collapse as well as generate
dull canyon
well, guess time to start over then
thin bison
No need to, you can easily change the settings and fix it
subtle jackal
Yeah the dyntopo mode can be changed at any time, it just sets it so that as you go over parts it will also collapse unnecessary triangles back to bigger ones
subtle jackal
not really
thin bison
It might kill some of the details you've worked in but that can easily be fixed
This is one of the reasons why sculpting is so widely used now. You can easily rework stuff
dull canyon
mkay
dull canyon
so, would it be possible to use blenders hair particles with a custom shape to do something like fur on a tail?
thorny fractal
@alpine merlin idk if you read what i said. but if your going for a kinda hand painted cartoony style i honestly wouldnt use substance because of how bad the brush engine is for actaully painting. although the program is called sutbance PAINTER you dont do that much actual painting in it
alpine merlin
Oh I wanted a mmd, cartoon style.
So lm slowly learning to hand paint one. I mention substance cause u know... Its for making realistic stuff but idk.. U could get some cartoon idk much
thorny fractal
if you really need to be able to paint on the model itself then i would stick with blenders texture painter, and try to work around its kinks. or maybe try somthing like 3d coat since its brush engine is a lot better
i usually just use photoshop and hand paint the texture and theen i bring them into blender texture painter to patch up the seams
alpine merlin
Nah I'm getting used in blender atm
thorny fractal
theres a plugin for texture painting in blender that looks pretty cool and adds layers and stuff but its like $40 and idk if its tgetting a 2.8 version
dull canyon
don't all blender addons have to be open source/under the same license as blender?
 alpine merlin
Bpainter?
thorny fractal
i usually am hesitant to buy addons tho unless i know they are getting a 2.8 release since 2.8 is just around the corner
alpine merlin
Owh in have it already haven't mess around yet
thorny fractal
i think blenders brush engine for texture painting is decent. its a hell of a lot better then subtasnces/ i just think its workflow/ tools and lack of layers and stuff is just awful
alpine merlin
It's everywhere.
thorny fractal
if your gonna do texturing in photoshop or somthing too then you need to think carefully about how your gonna lay out your uvs to make it easier on yourself to texture them too
and maybe tryu backing around like a curvature map or somthing uz you can overlay that onto your texture and color tint it to get some neat effects
same with an AO map
alpine merlin
I havent went deep in texturing yet..
thorny fractal
but its really dependant on how you want it to look
im gussing you dont have a highpoly model to bakje from so backing out a curvarture and AO probably wouldnt look all that great for your case but you could try
alpine merlin
Yeh that's true. Im already happy enough I can layers now in blender.. Than me smudging stuff
Nope not high poly... I just stretch them make them low poly n color em
thorny fractal
for doing other textures in phoptoshop the UV squares addon can help a lot. even tho it can bring in some uv strething some times its a sacrifice to make it easier for you to texture things by hand
this is the texture for my last characters cloths. and i made the whole skirt one big block. it has some stretching but it made it really easy to put the stripes in it and stuff
just some things to think about
alpine merlin

spiral sigil
@dull canyon There is a plugin that streamlines the flow of baking particles to hair cards in Blender, you can find it here: https://gumroad.com/l/hairtool but I think that's doable manually as well. I'm getting some results for this query: https://www.youtube.com/results?search_query=blender+particle+hair+to+hair+cards

Gumroad
I developed Hair Tool, addon for Blender, to simplify creation process of low/medium poly hair models. This addon will help you generate hair mesh ribbons with uv's from bezier/nurbs curves. It is how most current games are doing hairs for characters. For blender 2.8 use Hair...
Enjoy the videos and music you love, upload original content, and share it all with friends, family, and the world on YouTube.
didn't check any of those tutorials so can't say for sure, I just remember this being done somewhere.
dull canyon
ok, so it's advanced stuff then. I got no idea what hair cards are
spiral sigil
Hair cards are planes with hair textures. Most effective way of faking hair in engines.
dull canyon
ok
spiral sigil
there are some cool breakdowns and a link to a paper from Shadow of the Colossus, if you're looking for more recent stuff, https://www.artstation.com/lithvall has released a detailed tutorial for Maya with hair methods they used in Horizon Zero Dawn. From what I've seen a lot of that can be applied to Blender.

Computer Graphics Master Academy is a leading provider of online digital art education.
have a nice 8 weeks of learning stuff 😆
 halcyon citrus
I made a gratesword
inspired by the real one so I had to make it.
If anyone wants one, let me know. It is my gift to everyone.
onyx juniper
Womp womp
 fleet frigate
Anyone know any good 3d model websites that I could use? I'm currently using model-resource.com as my main source.
 random tartan
@fleet frigate https://p3dm.ru/
Огромная коллекция 3d моделей из разных жанров игр.
marsh hatch
@fleet frigate Learn to make your own, unless you happen to just want to be [insert existing game character].
ripe lotus

 ebon willow
Does anyone have a model for "tom" from toonami?
the model I've been working with has bad hands
pic related
thorny fractal

ArtStation
Hair Strand Designer creates hair strands in the form of 4k texture maps ready for placing onto your hair cards. It produces an RGB Masking system for Color Variation, Root Mask and Tip Mask. It also produces a Color Map, Normal Map, Depth Map, ID Map and Mask Map. You have c...
on the topic of hair cards, i found this the other day. looks neat
and the video of hair szena linked before wasnt particle hair, it was curves with an anisotropic shader and an alpha to feather the edges.
 small valve
hello, i have a question about model UVs and what not
so im currently working on making a minecraft character rig from scratch half as a meme, half as a quest avatar, and half as a fun project to wet my feet with 3d modeling
and im using an upscaled image of a normal minecraft skin for my texture in case i want to add certain details here and there after the fact, like normal maps
 harsh torrent
what do i need to make my own model?
small valve
it looks blurry as hell in blender though
whatever tools you need. blender is a must have unless you've got your eyes on other programs you might like, and keep an image editor like photoshop on hand just in case
normal map generators are also nice to have if u want
thats my 2 cents tho since im just starting
harsh torrent
i just need a model creator
small valve
those are model creators. you use the tools to make a thing. you're not gonna have one tool that just does everything for you, unless thats exactly what you want?
in which case i dont really know but i do know that things like that exist somewhere
where you can just stick together parts here and there really easily and then bring it into mixamo for rigging
but like ask someone who actually knows cuz i really am still at the surface here ^ ^`
harsh torrent
well i was thinking about making a big smoke model
but it would take a lot of time
small valve
there's probably a ton of already rigged rips of him somewhere on the internet
maybe on the steam workshop or on shadier websites
harsh torrent
ive already looked. all there are is fake models that crash my interface
small valve
if you strike gold you may not have to rig at all, and you can just import it as you would any other avatar that you take from deviantart
oof. you're likely gonna have to do some frankenstining or make him from scratch then
or you can commission someone!
harsh torrent
well i figured but ive never made a model before
i cant commission someone because i dont have the money
small valve
oof. well, today's a better day then any to start learning
i can give you some tips here and there since i think were the only people using this chat right now'
id reccommend starting by learning how to do some basic mesh creation and edits in blender
and working your way up to sculpting him entirely
harsh torrent
well i know how to make mesh i make maps for games
small valve
then learn how to make a rig (easy) and weight paint the mesh onto the rig (fucking hard as shit)
harsh torrent
isnt there an easier way?
small valve
and then texturing him. im not familiar with this part so you're kinda on your own, but it does involve unwrapping the poor guy onto a flat image and then messing around with that
then stick him back together and you sohuld be good
mhm! many
harsh torrent
i thought there was an easier way
small valve
you can rip assets here and there from existing models and slap them onto a base
and like i said, there is probably many avatar creators out there that just make everything for you
harsh torrent
i dont expect him to have many physics like maybe a little jiggle physics
small valve
but once again, i wouldnt know since ive never looked for them, i prefer to do things from scratch
but it shouldnt be too hard to look for stuff like that, i hope...
harsh torrent
ill see wut i can do. im gonna send you a friend request so i can hit you up if i need any help sound cool?
small valve
mhm
^ ^
anyway, miles above here is a screenshot of my blurry ass cancer minecraft character
and my main things im asking for is
1> how do i make the poor girl not blurry? ive already fucked with the texture image sampling and that hanst helped
harsh torrent
rn im trying to also find 5 players with full body tracking who are willing to get a screenshot for me. i want to get a vr chat snapshot of the ginyu force
small valve
2 > how do i remove some of the artifacts appearing at the edge of the meshes that are "bleeding" from the edges of the model parts?
im assuming this has something to do with the blurriness as well
and 3:
i have another picture for this one because ii gotta explain
if oyu havent played minecraft in a while (or ever), all of the skins have two layers
one under layer that is basically your base where you can paint stuff
harsh torrent
ever think of shortening it?
small valve
and a "jacket" layer above where you can add cute shit like hair and, well, a jacket, and other clothes bits
the issue is that im not sure how to make cutoffs properly work in unity when using things like cibbi's shaders
harsh torrent
u shouldnt need shaders
small valve
it works fine for letting the hair be transparent, but in-game the ends of my amrs and feet are see-thru, as well as the bottom of my head
i mean its hard to avoid shaders when you have to use a material
harsh torrent
add more of the model. copy paste the arms, legs and torso a few times over. it may work
small valve
anyway, im wondering why its only letting parts of my models show through, and i hope that i dont have to start deleting parts of the mesh since i want it to be able to take any skin as an input
and idk about that one. thats not gonna fix an issue with the material i think, and even if it did, it would just make it heavier on the system
harsh torrent
can you add solid parts to the model?
harsh torrent
is that a firm yes?
if you can add solid parts that bend with the model. it should work
i gtg i can talk with you about this more tomorrow. have a good day
 crude frost
I told him what was wrong in DMs and sall good now
small valve
motivational stuff for yall whether ur working on shit or new to 3d modeling and setting up an avatar:
it took me 4 days to make a fucking minecraft avatar as my first from-scratch build but i did it, its polished, and i couldnt be any happier
some of you might take longer or shorter to finish/start whatever infinitely more ambitious projects ur working on rn but the important thing is that you keep at it and you finish it
cuz that feeling of seeing it in game is like no other
i believe in yall
^ ^
dull canyon
yeah, I'm tempted to just finally get the one I'm working on done and in the game just so I can see it moving around 😄
even if it's super bad
silent acorn
my first from-scratch was terrible, but it still took the better part of a month
I'd post updates here for every single bit of progress I made ;>_>
dull canyon
yeah, same
I need to kick myself in the ass more to work on it on a semi daily base, not just on the weekends
 scarlet dust
My Legacy of Kain Sword that I createt a half year ago, where I did not know how to make UV maps.
Createt one
Make the texture with the referanz in the background
And now with Texture and Normalmap with the Unity Standard Shader:
https://gyazo.com/3ecb2d936377f1711c5223a5e5a94853
 small valve
question
my elbows dont appear to bend properly in vrchat
i set up full body IK for my avatar yesterday, and the way that i have my bones mapped means that only the bottom half of my arm should be twisting for my wrists
but instead the entire thing twists if i twist one of my controllers, elbow and all
and i cant tell if its a weight painting thing or if its a rigging thing

the arm in question is this one so it should be an easy fix
i just want my elbow to only rotate on one axis, as any normal elbow should
 clever quail
I've been following a modeling tutorial to get into 3d modeling, but the tutorial suggests cleaning up edges and vertices after using a boolean modifier so that it doesn't screw up a subsurf modifier. Hoping to avoid extra work, I was wondering if it's necessary to have a subsurf modifier or if it's even necessary to fix up edges/vertices after using a boolean modifier to establish proper direction on the mesh faces?
 white crypt
@small valve Do you have a screenshot of the issue?
small valve
oof not atm
 gritty bridge
Made the Master Sword for my Classes and its looking mint👏🏻😩
small valve
good shit
dull canyon
https://i.imgur.com/pkTQDbM.png I have no idea what I'm doing <_>



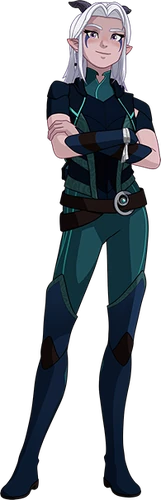


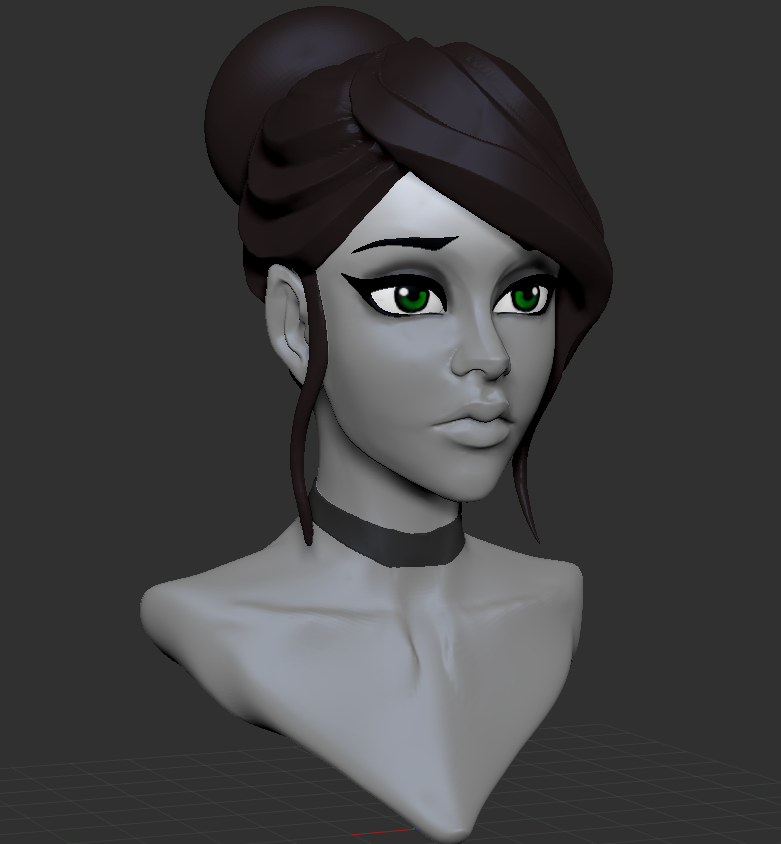


 edgy fjord
@dull canyon looks good
dull canyon
thanks, but there's so many issues >_>
edgy fjord
like ?
edgy fjord
but it looks good so far
dull canyon
feel like the head is too small but I don't know anymore
edgy fjord
no it looks good maybe just be bottom side is a little bit bigger than the top side
subtle jackal
just use lots of reference and don't stress too hard. This is why I suggested going more simple in the beginning you don't have to learn everything all at once lol
edgy fjord
what is all your references
dull canyon
a giant PureRef canvas and the anatomy for sculptors book
edgy fjord
can you put the images up?
subtle jackal
Don't just use anatomical reference. Gather reference for everything. Look at models done in the style you want to aim for, etc. Look at what details they hone in on and which they omit. Ask yourself why and figure out where to focus your attention.
subtle jackal
alright good
dull canyon
the main issue is probably that I don't have a clear direction where I wanna go with this
subtle jackal
long as you stick to that you should be able to find out where to go from here honestly. You just gotta kinda use that all to envision what your finished project will be, and work towards that.
dull canyon
other than a vrchat avatar
yeah that's the issue I think
I'm just sculpting away with a very blurry vision
literally and figuratively... my eyes are giving me some issues again lately >_>
subtle jackal
well, you seem to like the style of Yansculpts stuff. I'd maybe envision something like that and work at it
I'd check out Danny Mac too, his style is similar and should work with your character
subtle jackal
np. I mean obviously if you want to aim for something different then do that, but it's definitely important to have a pretty clear idea of what you're working towards. At least in style if not in exact design
dull canyon
yeah, it's like that with all in my life really...
I have no clear direction or a goal
subtle jackal
The design itself can be tweaked pretty easily, but the style basically dictates how you should approach everything you do
dull canyon
yeah
on the one hand I feel like I should learn how to do "semirealistic" stuff first to learn the proper rules before I break them, on the other hand I'm already so much into the stylized that it all just looks creepy when I try to do that
but I guess I should maybe just
block everything in and get the general anatomy right
and then slowly add details to the point where it looks good to me
or something
I have the tendency to just jump straight into detail cause that's where you see the most stuff happening so it's like immediate reward
but then everything is out of whack
subtle jackal
pretty much. But again it's not super necessary to go super realistic, especially just starting out. Hell in most forms of art people tend to start stylized first, then work at realism, then improve their stylized work
nothing stopping you from doing another avatar later once you've learned more and practiced some
dull canyon
well, again you should at least know the rules first
subtle jackal
eh, screw the rules 😛
dull canyon
cause all that style really is is breaking and bending the general rules in a way that is attractive to you
no matter how cute or cool your "style" is, if the anatomy, the basic framework, is wrong it will always look off
subtle jackal
well that's why reference helps. You can emulate other people and learn that way, then branch off into your own style as you improve
dull canyon
mhm