#3d-modeling
1 messages · Page 57 of 1
 fossil inlet
I love $100 programs
World Machine, Topogun, hell you can even get the entire Quixel suite for $50 on Black Friday some years
I sat at the World Machine booth at GDC and talked to this girl who helped the guy who created it get to the expo. I shook his hand too 😮 dudes a bloody legend. Their next update will focus on updating the UI since it’s kind of dated
I use the development build so it’s dark mode and not as dated but it could still use an overhaul
 small geode
is it possible to add a new bone in blender, re-expoert the fbx overwriting the avatar fbx that in unity, it updating, and working? without having to re-set eeeeeeverything back up?
fossil inlet
Should be, as long as it's not a bone you need to assign in your config. Even if that's the case, you'd just assign it to its designated slot in your humanoid avatar configuration.
Otherwise yeah I do that all the time if I want to add dynamic bones to something
small geode
hmm when i add any bone for some reason it seems like all my verticies get scrambled
oh no nevermind its when i delete a bone
when i add a bone it never shows up on the unity side
 subtle jackal
Doing some more work on my shootybang. Lazy high poly woo.
not looking forward to the Colt horse motif on the opposite side lol
small geode
looks good!
subtle jackal
thanks! I don't do a lot of hard surface stuff so discovering easy ways to get clean looking surfaces was kinda fun
also lots of floater abuse lol
there are actually a lot of places that have issues honestly, but they're all small and shouldn't show up at the texture resolution I'm aiming for lol
 visual garnet
Hey everyone I use Blender but if you have any programs that are much easier and better I would love to try it out.
 hallow bough
To me Blender has always been the "easiest" program. It's just more straightforward for me. But people tend to say the same about Maya 🤷 Might be different for everyone.
 mental blaze
houdini cough*
 solar fossil
Paint 3d cough
 dull canyon
@hallow bough from my short playing around with it Retopoflow for Blender looked pretty easy to use
hallow bough
@dull canyon I'll start playing around with it :D It's a good place to start learning about it atleast.
 thorny fractal
a lot of people use 3d coat for hand painted textures similar to wow style. since substance painter for actually painting is pretty terrible and blenders painting system isnt great
 dusk turret
If you want to sell your work you can't use the amateur version. (3dcoat)
 zinc furnace
I have a ton of unused textures in my blend file, how do I delete them? I wanna pack the blend file but it becomes super large due to all the unused textures.
Only "Eff" is used
 void narwhal
https://blender.stackexchange.com/questions/5300/how-can-i-remove-all-unused-materials-from-a-blend-file/102618#102618
you can use the python script for getting rid of unlinked Mats* /My bad

Blender Stack Exchange
I'm testing different materials in the same object, and finally the file has a lot of unnecessary material, is there any command that performs the cleaning of these materials automatically? in sho...
you can also manually delete it and use a macro
but deleting linked mats/texs can lead to crashing in 2.79 if i recall correctly
zinc furnace
I tried that script but it didn't work
void narwhal
i believe the method i used before was just a macro
zinc furnace
I eventually settled on another solution. In the scene outliner (hierarchy view in the top right) you can set the mode to Orphan Data and hit Purge All once or twice
That removed them for me
void narwhal
alright
 humble fern
if it's not used you should be able to reload blender and it won't be there
oh, textures not materials
 spiral sigil
Yayayyaay
 brisk tapir
Hi ! Can you help me ? I don't really know how to do a hand if you have some tutorials or great mesh it's okay ^^ thank you
 visual vigil
i found the first thing ive ever made in blender 2 years ago
https://cdn.discordapp.com/attachments/440731172805279754/560276003562192915/unknown.png
https://cdn.discordapp.com/attachments/506248523331665940/560275873643888640/unknown.png


 strong thistle
well they will not actually delete without completely closing and reopening blender again
 lament pond
 lethal pumice
 dull canyon
such a cute raph @plush token
 plush token
Thanks!
dull canyon
would protecc
dull canyon
nobody can answer that question if you don't state what you need help with
 turbid portal
Where i can find Paul Newmaker downloadable 3d model?
dull canyon
that's not really what this channel is for, might wanna ask in #avatars-2-general
turbid portal
thx
 twilit dawn
 cinder lynx
Yeah, most people make or edit their models in blender then export it to unity and then once finished, upload it to vrchat
 north spire
hello, somebody know why i cant see the character texturized?
i activated the texture view mode
first time i have this problem
north spire
ty
spiral sigil
tried sculpting as an introduction to 3D, what do you guys think? first time https://i.imgur.com/5IdLs4v.png
had to upload to imgur because for some reason discord deemed THAT explicit
it's supposed to be a hoodie if that isn't obvious enough
lament pond
 spiral sigil
ugh terrible chat restrictions i can't yell in joy
that looks so good!!!!!!!
lament pond
How about whispering in joy?
 fringe rock
Look hight poly asf
spiral sigil
@fringe rock i mean, the thing i did, obviously
here's the progress though
and yes
this is pretty much just a test/concept though

 spiral sigil
oh that's cute as shit
 hollow radish
found a disgaea 4 model pack but no fuka
so just took a the head and body of one female character
took just a day though 🤔
and usually it takes me forever just to get to this stage because I usually research and have exact measurements
spiral sigil
update: reduced to like 12k tris, can prob reduce more.... but i'm proud of myself. it was like 400k before
lament pond
I'm gonna go pass out now, I leave you with this https://skfb.ly/6IQV8

Model I was commissioned to make for use in VRChat.
If you like my work and would like to support it you can check out my Patreon or if you’re interested in having me make a character for you then shoot me an inquiry through my website. - Paruko (Chirpy Chips) (Splatoon 2) ...
strong thistle
suggest you set the arms downwards Y so it would fit on most model pose
 tawdry cobalt
I'm surprised no one's made a Hypnotoad yet haha
 smoky burrow
Maybe someone should try
@here
What would be easy in Blender?
Again @here What would be easy in blender
 tropic bear
I mean we can't make an idea for you
 reef lotus
so many cute models
zinc furnace
@smoky burrow you can't ping everyone or here but there are 20k people online. Were you considering pinging all 20k of them?
smoky burrow
Sure @zinc furnace
zinc furnace
That's pretty rude not gonna lie
 drowsy forge
Aight, so I'm looking for a nametag model. Can anyone hook me up?
 south sparrow
is anyone familiar with blendshapes in maya?
spiral sigil
Okay so I imported a model into blender and used cats to fix everything, but it shows up like this, what am I doing wrong?
spiral sigil
then it does this in unity
thorny fractal
if its an mmd i think thats extra stuff used by mmd for colliders and other things. idk about mmd that much tho but im pretty sure its safe to deleate that stuff
spiral sigil
coolio
thorny fractal
thats just my educated guess tho
 fallen snow
Tab to go into mesh edit mode, select a vertex with right click, L to select connected, P to separate. Then tab to exit edit mode, select the separated mesh, X to delete. Repeat until they're all gone
spiral sigil
after cats Fix Model yea? cause they dont show up until after
fallen snow
When you can see them is fine
spiral sigil
cool, I'll try that out, thanks man
 glacial pasture
@lament pond Inspired by moe shop love taste?
 arctic grove
posting this here too https://gyazo.com/acd2d34fef808b514deae4da2ae30ecc (how do I fix the dark under the chin) >>>> what the avi looks like in mmd >>> https://gyazo.com/f21c286b64dc67ffb1d3cfe620152c39

 lament pond
@glacial pasture what's that
 copper gull
so im hitting a couple walls here
fringe rock
Trump back again
fringe rock
Idk
glacial pasture
do you have shading off and no lights in the scene
copper gull
no i know i dont have any ngons or missing faces or flipped normals
but
i guess its more in line with finding base shapes with my refrence
https://i.imgur.com/COdl3Ln.png
as you can see the lower area of his armor looks more blocky,but...
https://i.imgur.com/TTBn6Q3.png
the back of his hind armor is more sort of spherical.

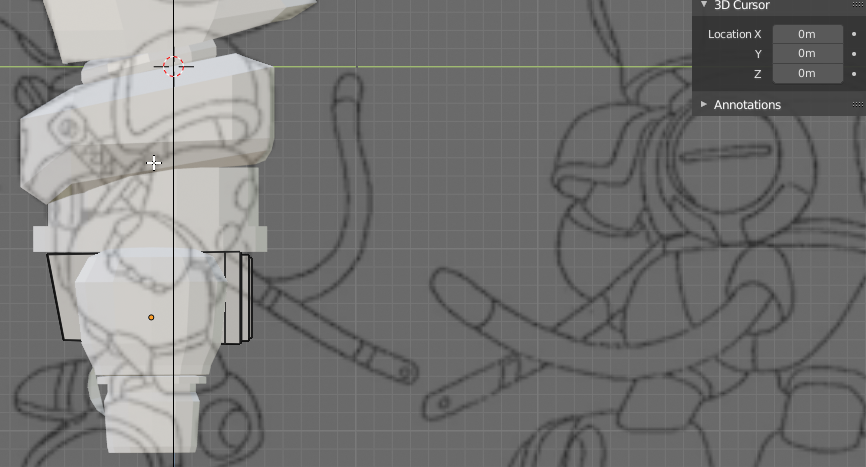
would it be wise to just start with a rounder shape? or would just cutting more loops into the geometry would better?
fringe rock
Your ref more as guid3 line dont try to be exacly the same
Drawing cant never really be exact from all angle
Dont try to optimise firts get the shape right. After play with the topo
copper gull
oh. im still learning this tbh, i thought going semi low poly would at least help as a start.
copper gull
at this point i guess i have no other option but just to give that a shot XD
i appreciate your input _qb!
 hollow radish
 thorny fractal
did you do any vertex normal editing for this model
visual vigil
https://cdn.discordapp.com/attachments/545707771589296138/560701799053656065/D2uRy53W0AAg5Bc.png
https://cdn.discordapp.com/attachments/545707771589296138/560702835713507339/D2uSETCX4AAzOTi.png

 dull canyon
https://youtu.be/S2sTZRn296s?t=268 out of curiosity, would you guys say the way he does the clothes is "optimal" for something like avatars?

I will show you how I sculpted a fan's drawing in 3D! You will see the before and after drawing, from 2D to a full 3D character. ▼Drawing a Fan's Sketch: htt...
 sonic nimbus
@dull canyon Sculpting is a common, but advanced workflow for modeling. Whether it's optimal depends on the artist, and the application (in this case VRChat). It's a lot more flexible than traditional modeling so many artists prefer it. The downside is that the meshes it produces aren't suitable for use in some applications like real-time rendering and animation (VRChat does both) without clean-up through retopology. Sculpting produces very high poly models (that character is a little under 1 million before retopology) with a random topology. Besides the high poly count being an issue for real-time rendered applications like VRChat the random topology also leads to issues when deforming the mesh through animation. This is solved through retopology which is the process of manually modeling around the sculpt to make a new model with the same shape but good topology and often fewer polys. The new model may not be as detailed as the original, especially if you're trying to make a model suitable for real-time rendering like VRChat, but you can recover some of these details by baking normal maps from the original sculpt.
dull canyon
okay, thanks
though I meant the specific process he uses there, of duplicating the body, using Boolean to "cut out" the parts he needs for the clothes, scaling them up and sculpting those parts
I know about retopology and such
like, would you use that approach to do for instance very loose clothes like dresses? I can see it working for tighter clothes like pants or tight shirts
void narwhal
Yeah i don't see an issue it is a quick method that gets results for sculpting in blender
but optimal can be quite subjective considering 3d modeling is a form of art
with many techniques for a variety of reasons beyond that of speed
generally sculpting gets a more organic like look as opposed to other techniques
obviously you can make sculpting look more hard surface but it can take alot of time&skill to achieve that fine detail
sonic nimbus
@dull canyon You might want to try something like this for loose clothing. https://www.youtube.com/watch?v=YPC-T9l1wE8

Follow up from previous tutorial about cloth sewing here: https://www.youtube.com/watch?v=u6CN08r7WVA This tutorial explores an approach to work with cloth s...
visual vigil

ArtStation
My first ever recorded self model was of the British 1939 Boys Anti Tank Rifle of WW2. At the time I was looking for a Boys AT Rifle, but couldn't find one, so I made one!
I rediscovered the file a few days back, fixed some of the smoothing issues i had at the time (Sharp e...
thorny fractal
depending on how i go about sculpting cloths kinda depends what kind of cloths im making and the look i want. cloth simulation is cool and all but if your doing a heavily stylized look then it might not be the best. and some times depending on the kind of cloths its just easier to mesh extract part. sculpting cloths from scratch allows allows you to kinda stylize it yourself while a lot of the base detail and wrinkles in cloth simulation is kinda left to the simulation itself. I dont think theres really a best way to do it.
dull canyon
@sonic nimbus okay, thanks
 cerulean shoal
i will make the duolingo owl muhahahaha
 remote jungle
Hey guys I’m not sure where to ask this - id like to learn how to make a custom avatar myself. I’m trying to port a model from World of Warcraft, is that possible/easier since the animations are there already? (Perhaps this is a better channel to post in?)
zinc furnace
You don't need any animations of your own, as long as the model is "Humanoid" compatible. @remote jungle
dull canyon
https://i.redd.it/7el2xgoqh1p21.jpg if that ain't the truth
 remote jungle
Ah sweet
spiral sigil
thank you, very simple straight forward instructions on blender.
subtle jackal
Joke's on you I customize my start-up file to remove the default cube, camera, and lamp so I can start clean every time 😛
 crimson mist
I just use the default cube most of the time lol
zinc furnace
Yeah, my startup file is utterly empty too
reef lotus
the default cube just wants to be made into something great 
dull canyon
yeah, I also emptied my default workspace 😄
 onyx juniper
I did too, but I always end up creating a new cube
reef lotus
a -> a -> del -> shift + a -> cube
perfection
 vivid crater
Delete is far away, I use x
 ripe lotus
I use planes usually when I start something owo
remote jungle
Hi folks a quick question
Can these be used in VRC as avatars ?
It’s k I found out you can nps
visual vigil
https://cdn.discordapp.com/attachments/366067686423134218/561312996781981696/unknown.png https://cdn.discordapp.com/attachments/366067686423134218/561313146665435166/unknown.png

 onyx juniper
Planegirls?
visual vigil
ye
fossil inlet
Doing daily face sculpts to improve my speed/anatomy. If you have any critique I'd greatly appreciate it
I only gave myself 2 hours so detail isn't a priority here. Just trying to get the main forms and mid frequency detail in as well as the underlying bone structure and fat pockets
 open parrot
guys, im using blender and im trying to port it over to mixamo, textures don't show up due to it not being packed media, what do i do?
fringe rock
already look really great keep doing
spiral sigil
@open parrot Textures arent required for mixamo, so Im not sure what the issue is?
lament pond
fringe rock
how you deal with the collision with the arms ?
 vocal dragon
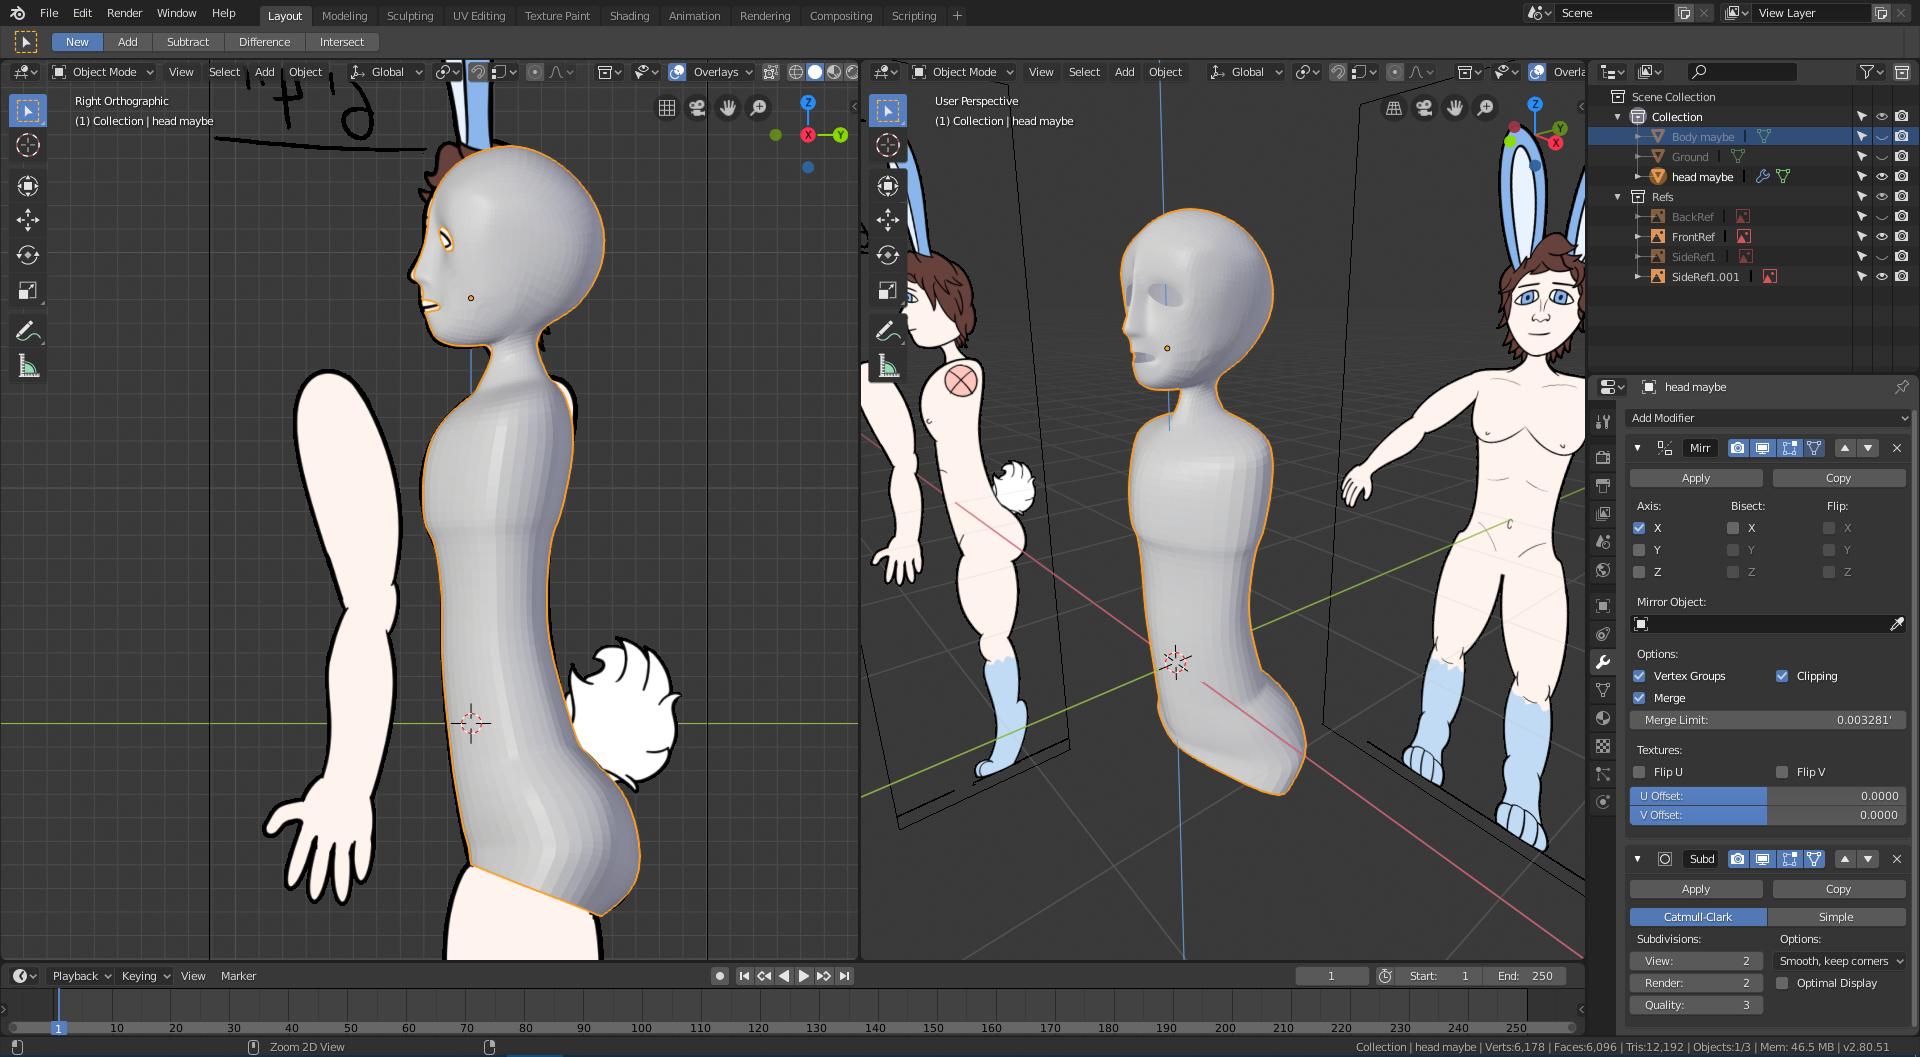
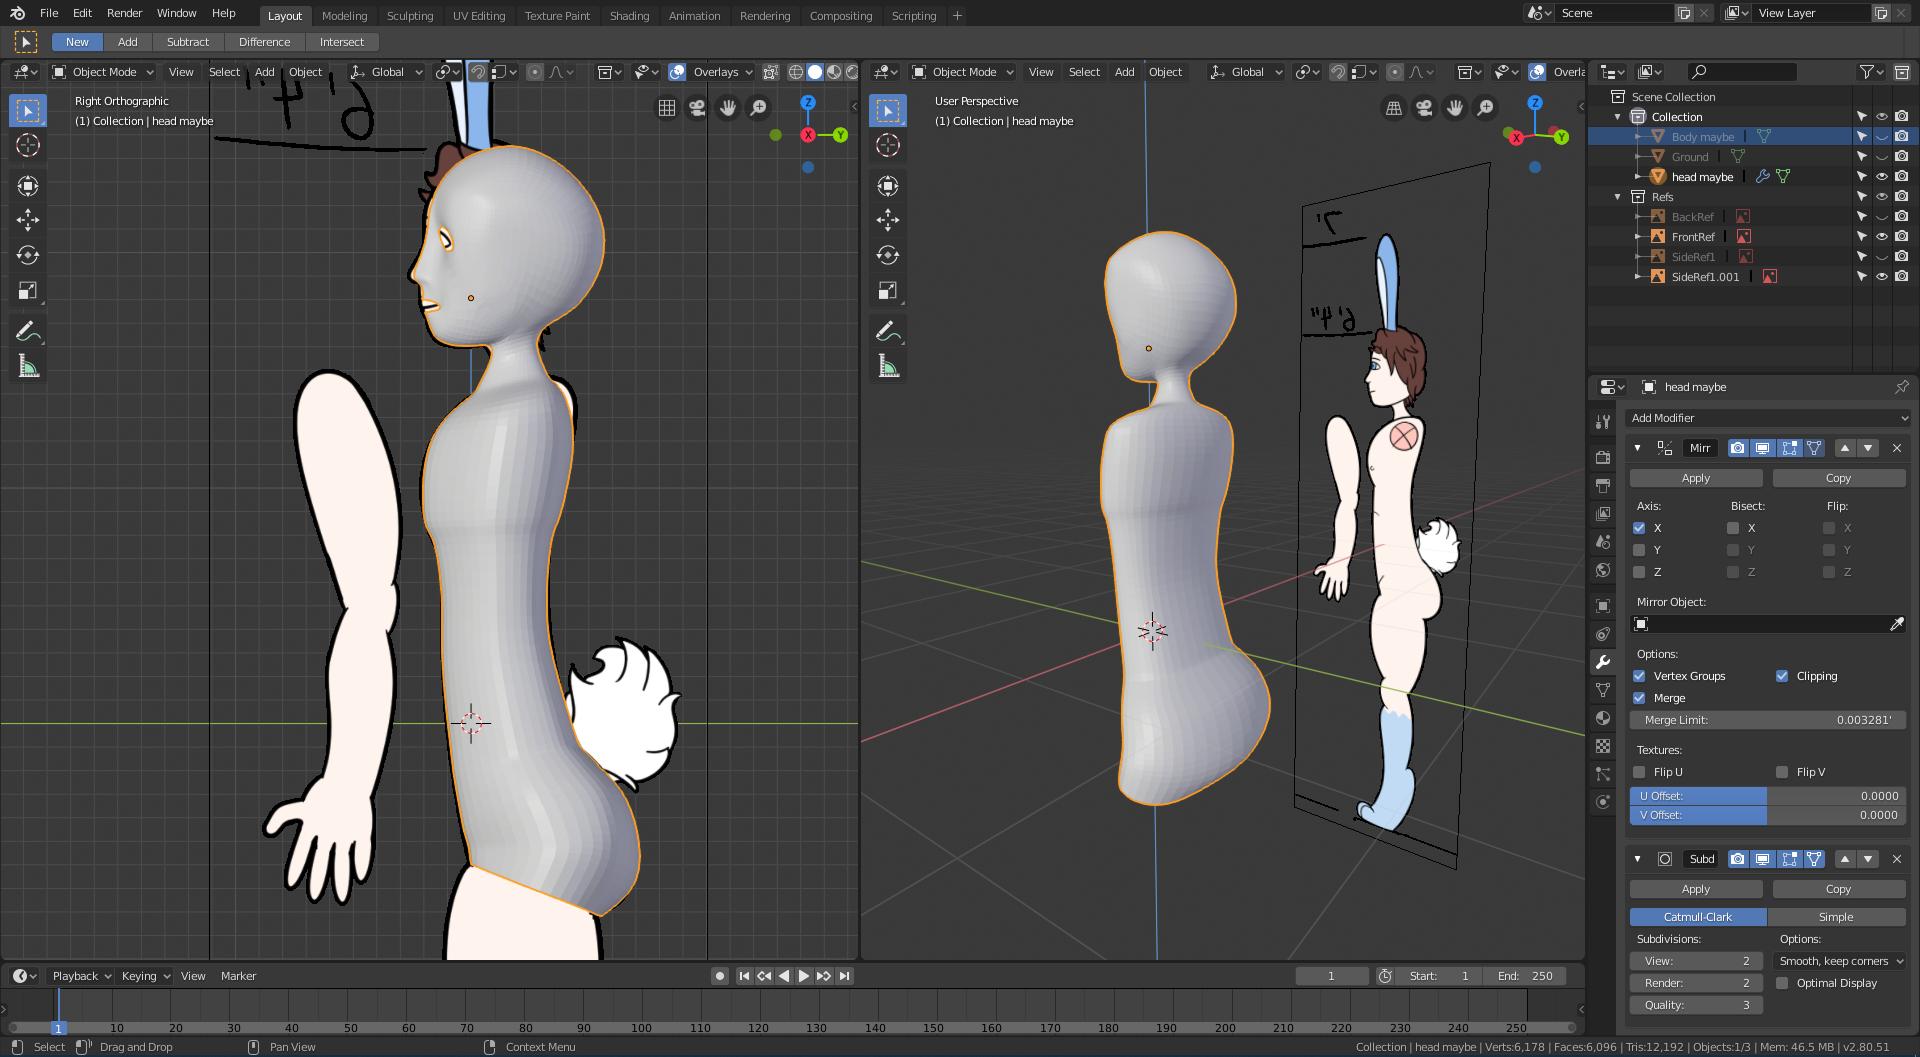
I don't have as much experience with 3D modeling, but this is what I've got of my character so far. I've got a decent amount of experience with 2D artwork and as such, made a front, side, and back view of my character and am modeling based off of that. https://i.imgur.com/ynUBu5A.png https://i.imgur.com/pMGzxdK.png
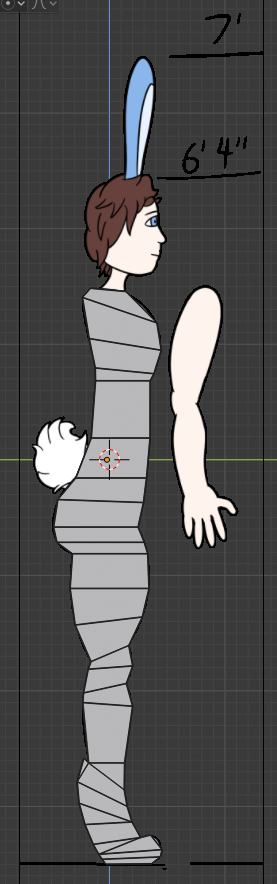

 jovial lichen
Hey does anybody get that problem where you duplicate parts of the model but the duplicated part becomes clear?
 stable edge
uh thats deleting not dublicating
jovial lichen
never mind I figured it out
vocal dragon
Started following that tutorial and uh... oh boy https://i.imgur.com/RN7lZoa.jpg
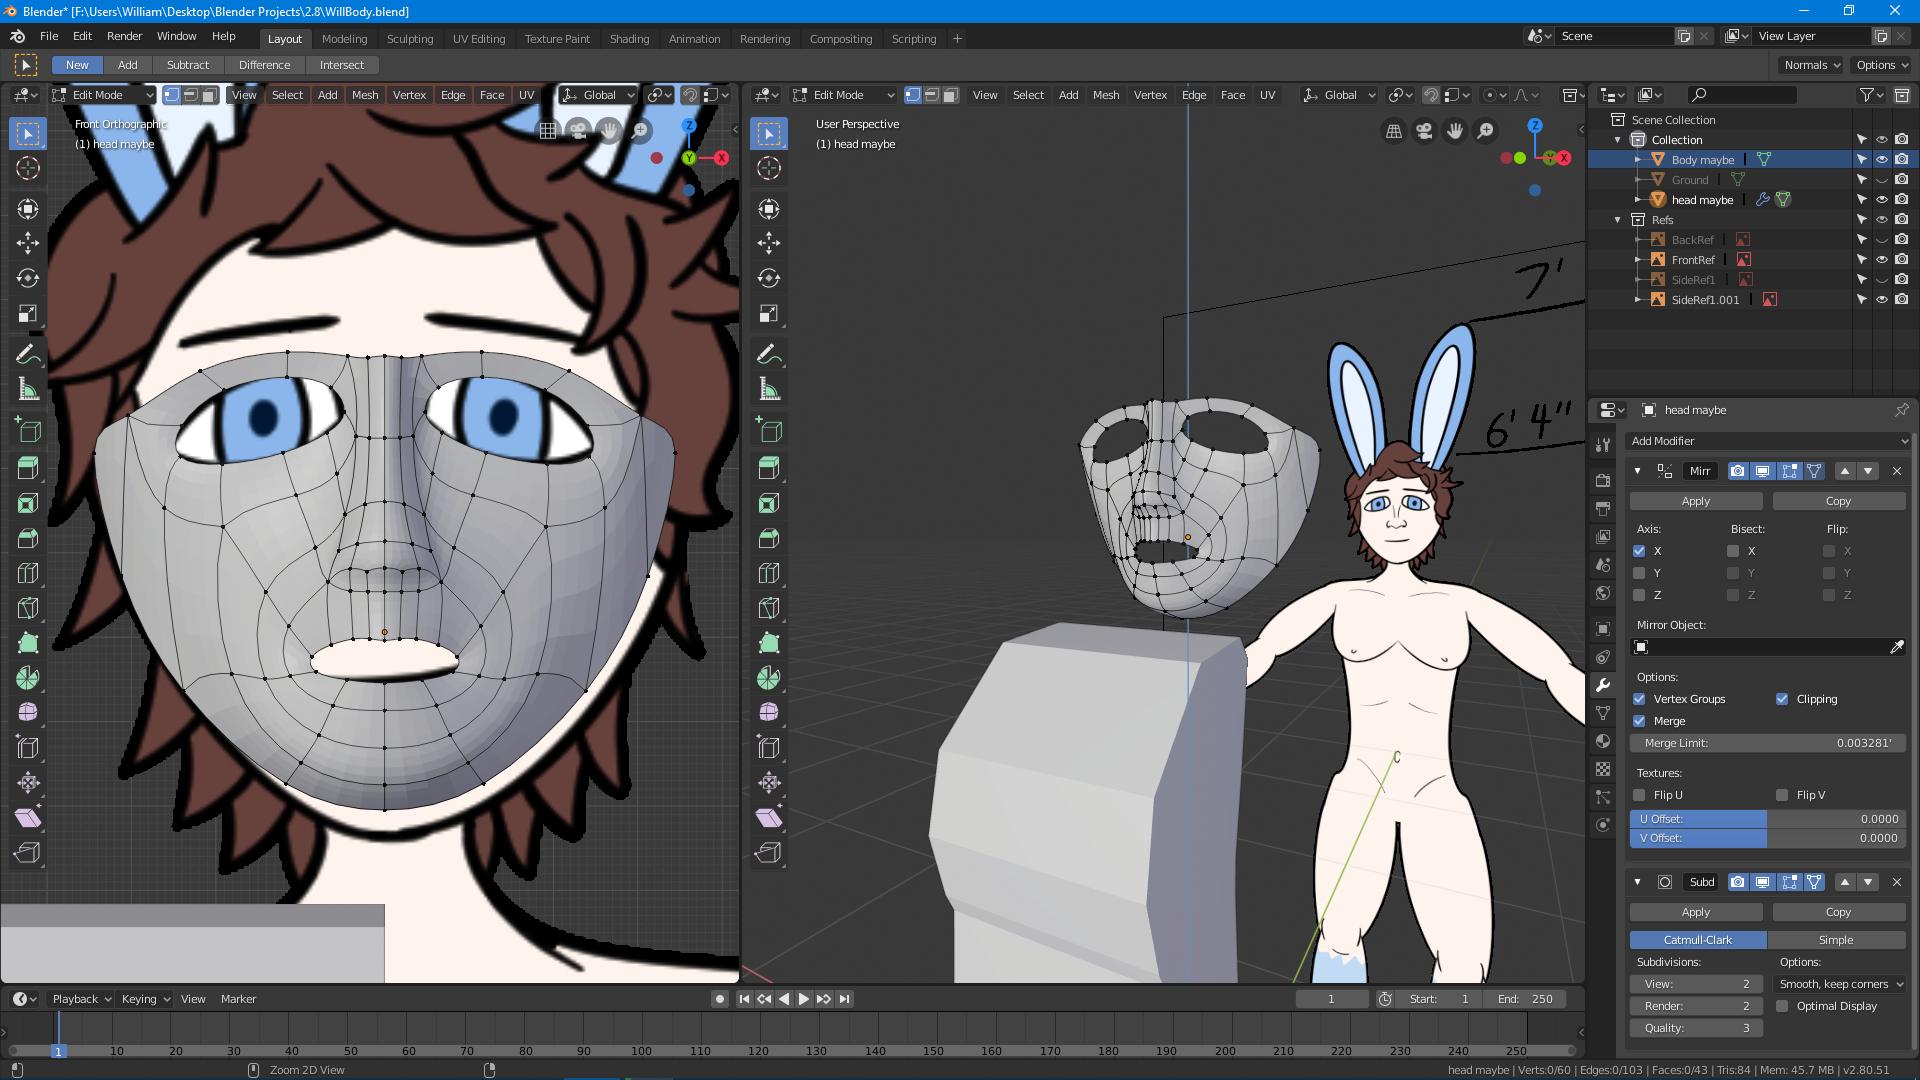
 versed glacier
any thoughs of this? (wip)
 ivory leaf
SCP?
versed glacier
nuh
i just randomly searched for creatures in google and though one of scetches looked cool
and decided to build it
 dawn flower
"looked cool and decided to make it"
how to become a better artist and prevent art blocks xD
dawn flower
Well you searched randomly for creatures :p
Still looks nice
is it fully rigged?
Or are you gonna fully rig it?
versed glacier
im gonna rig it
and texture
i accidentally overlapped 1 vert on the leg and fucked up it completely bc i realized it after sculpting the whole model but luckily i managed to fix it
dawn flower
F
Good luck
I wanna learn to sculpt one day
I wonder if I can follow a class for it at my school
dawn flower
If you want I can optimize it (not now but in the summer), my current assignment is also make a high poly model into low poly for games
Unless you can do that yourself
versed glacier
eh i think ill just make nice scene out of this
4 legged bois in vrchat are pain in the arse anyways
XD
dawn flower
Would still advise optimizing it for static use :p
versed glacier
ill build some alien planet around it and render it
yeh in edit mode its lagging alot XD
since it has to show all dem dots and lines
dawn flower
And move them when you move your camera
versed glacier
oh btw this was first low poly model
then i started sculpting
my intention wasnt to add this to vrc in the first place anyways
dawn flower
You can bake the high poly on the low poly if you still have the low poly
versed glacier
the low poly is long gone after all those brush swipes
versed glacier
hehe
hallow bough
Retopology?
versed glacier
i have no idea what that word means
tropic bear
lol
retopology is the process where you take that messy sculpt and you convert it into something more usable and ready for a game
onyx juniper
You trace quads over it
tropic bear
turns this:
(very messy, uneven detail)
into this:
(a bit more even and ready for animation/games)
onyx juniper
Visual aides help so mich
tropic bear
topogun 🙏
fossil inlet
^
Don't use Blender or Maya or whatever for retop
Topogun is literally built for retop and doesn't lag or have terrible, added on controls for retopology
vocal dragon
Heyyy now i'm getting somewhere :o https://i.imgur.com/rQxVfdD.jpg https://i.imgur.com/69o7Fhn.jpg
 subtle jackal
literally never had a problem using Blender for Retopology
spiral sigil
Does anyone have any tips or tricks for making hair in blender
vocal dragon
^ seconding what Lazy_hound said, I'm gonna be making hair for my character soon
subtle jackal
depends on the style of hair you're making, really
spiral sigil
well something like this
subtle jackal
hairs with headdresses are pretty simple really. You basically would model the headdress first and then just model the bits of hair that stick out
for anime style hair I like to have sort of... planes representing clumps of hair that I then add depth to, personally
https://www.youtube.com/watch?v=QwUmjbhzm1M similar to this workflow but a bit lower poly

Uncommented (time lapse) recording: https://youtu.be/rMPJD_2LiHQ This video teaches you how to model the hair mesh for your 3d anime character. The software ...
 swift heart
i personally recommend vroid studio to anyone trying to do anime hair. makes the workflow sooooo much faster
tropic bear
literally never had a problem using Blender for Retopology
It's not really preferrable imo. I tried for ages but constantly hit snags, it's really not designed for retopo at all
The day i swapped to topogun, it was so so easy
No modifiers, no dealing with mesh display, snapping, etc
dusk turret
Sounds like a sponsored message ngl.
tropic bear
LOL
If i could use blender, I would
I've started really pushing as much of blender out of my workflow as possible and it's gotten a lot easier
Concepting (and detailing post retopo)? Zbrush. Retopo? Topogun. Textures? Substance/3DCoat
I'd buy the blender plugin if I didn't have topogun. Maybe someday. Topogun still doesn't have all the features I want (some symmetry is really wack and not fun to work around)
dusk turret
Which plugin? retopoflow?
fossil inlet
Pretty much every professional 3D character artist agrees that no hair creation solution ever looks quite as good as manually placed hair cards. It's a lot of work but the result is really, really worth it.
dusk turret
It's free!
dusk turret
It both costs money, and is free.
tropic bear
?
dusk turret
Money on the blender store and free on GitHub.
tropic bear
That's odd they'd release it free on GitHub lol
dusk turret
"Purchasing a license entitles you to tool support and helps ensure RetopoFlows continued development."
tropic bear
Any 2.8 support?
I'll keep my eye out because if I can't resolve these topogun issues i might just swap
dusk turret
Seems like they're working on it. b280 branch.
fossil inlet
Just get topogun and stop being cheap and trying to find ways around it :X nothing compares to topogun
There's a reason literally everyone in the industry uses it
tropic bear
I haven't seen any support for topogun though
It's good but there's really some stuff that I really would love to have in my workflow
If it adapted and updated it'd be nice but it feels very dated
dusk turret
@fossil inlet "trying to find ways around it" Around what? 🤔
tropic bear
Unless I'm stupid and there's some box I need to tick, symmetry not connecting the same edges on the opposite side is very frustrating
also finding ways around spending money
blender can only last you so long, eventually if you decide to move up in the 3d space you'll have to fork over some big boy coins
And the implication is still that you should still buy the $90 retopoflow license. It's not free, and you're only really hurting the industry (especially small scale) by trying to push up without spending
fossil inlet
Around avoiding buying topogun lol
it's too good
Topogun is just for retop
idk what else you want from it
tropic bear
It's far from perfect
Ive already spent like 200 hours in it and it's still frustrating me a lot lmao
tropic bear
I haven't bothered with 3Dcoat's support yet
fossil inlet
I don't have experience with retopoflow because I use Maya
And Maya's retop is not good. It's not that the tools are bad, but even caching a high poly mesh as an alembic in your GPU it still lags if you don't clear history every 30 seconds
I imagine Blender also struggles with 30 million polys on screen at once.
The beauty of Topogun is that it doesn't lag no matter how much I throw at it
tropic bear
Blender doesn't have any actual retopo tools built into it, so you have to muck about with modifiers, materials, snapping settings, etc before you can even begin
I don't sculpt to 30 mil anyways, i barely even push my sculpts past 400k
No lag in blender or topogun, but I'll take it from you lol
fossil inlet
Blender can't go that high anyway for sculpting because it's a 3D program
zBrush can go as high as your ram will allow because it's a 2.5D program. They're fundamentally different, which is what allows zBrush to solve what Autodesk couldn't for the longest time
Now Autodesk is straight up removing Mudbox because no one uses it over zBrush anymore
Even Houdini, for as much as it can do in every other aspect, can't sculpt like zBrush because it's true 3D
Not saying my sculpts ever reach 30 mil normally, but 10 mil isn't out of the range of possibility on average
zBrush used to crash around 10 mil before it got a 64-bit client though >.>
 timber yacht
Blender can go pretty high with 2.8. I've seen ~15million.
As long as you don't go into edit mode on the mesh, it's fine. You don't need to do that though if you're just sculpting and retopoing. Retopoflow is a very good tool depending on what you want to retopo, but I'd recommend it.
subtle jackal
Indeed. Unless you're doing professional work as a freelancer or something, telling people to go out and pick up topogun just for fiddling with making stuff in VRChat is kind of silly, and a bit snobbish to boot.
 waxen pulsar
Most I ever imported to Blender was 7.3M polygons. It was really laggy, couldn't work with it. Threw it into a VRChat world with no problems though (desite freezing my Unity for 10 minutes while it split the mesh in 123 parts)
timber yacht
Blender 2.79 doesn't handle high poly counts well. 2.8 is a lot better at it.
waxen pulsar
Ah, cool, maybe I should try it again! And I'd recommend pirating, but that's often frowned upon
dull canyon
for a reason
cause you're showing the company you're even willing to break the law and pirate their software cause that's how badly you want it, so they see there's demand for it which won't make the companies change their views on their pricing model.
instead just don't use overpriced software and look for alternatives instead
that way you're not breaking the law (so they can'T come after you and get money that way) and they won't get any money when you're using something else
¯_(ツ)_/¯
vocal dragon
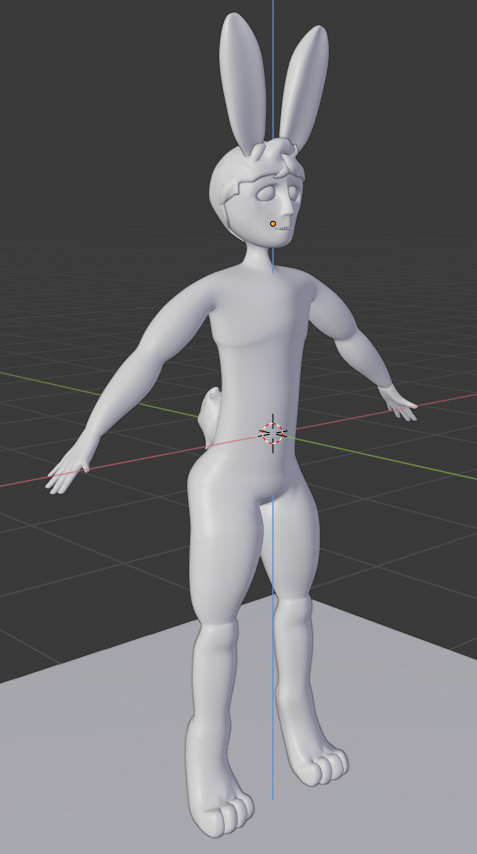
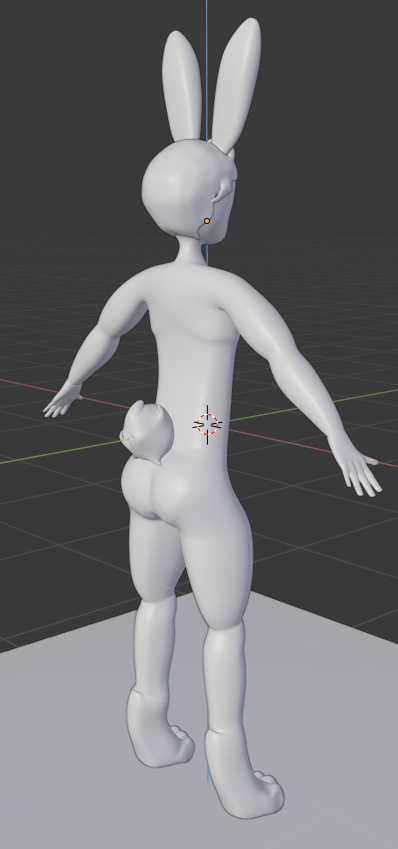
That's the model mostly done, the only thing to do now is finish the hair and maybe make a couple more tweaks, and then it's onto UV unwrapping, texturing, making clothing for him, and so on https://i.imgur.com/XOxMPZu.png https://i.imgur.com/bhn6HAw.png
 north spire

Guardiá de Piedra - 3D model by theoslan (@theoslan)
 mint prawn
oh robots i like robots
dull canyon
so, when you're creating a new character from scratch, what are everyones workflows and processes? do you do detailed 2d concept drawings, or just rough sketches to get a recognizable character and then jump straight into 3d?
I know it's all personal preference, I'd just like to hear how people here are approaching this stuff usually
tropic bear
for me i go to zbrush and start getting the shape down
not a lot of detail, but the basics. then, i pop into topogun and make the retopo
then into zbrush again where i subdivide and do detailing. (I do this sometimes in blender too)
uv, bake normals, then substance painter time
After all that, rig and it's done
dull canyon
so you don't do any 2d sketches first? when doing an original character
tropic bear
ive been doing it long enough i only reference stuff by eye
dull canyon
okay
tropic bear
i generally understand the shape
if you understand the shape of what you're making, you focus way less on the outline/matching refs and more on making it look good on it's own
tropic bear
At least for me 🤷
tropic bear
If I need to follow specific refs I can, that's just my preferred way
I almost have my own style
dull canyon
I might try that with the next iteration of my character then
tropic bear
if you don't have zbrush, I'd reccomend using just a blender subdivided cube
subdivide once, apply
shape it into what you want, apply again
shape it again and you should have a pretty detailed base for sculpting
dull canyon
yeah I know the basics of sculpting in Blender
tropic bear
not a super fan of dyntopo since it always makes the mesh look kinda bad when smoothing
i stay away from it as much as i can
dull canyon
¯_(ツ)_/¯
 jovial rampart
subtle jackal
jovial rampart
subtle jackal
trick to smooth dyntopo is to set collapse edges and try to maintain smooth transitions from sparse to dense geometry
but yeah it'll never beat e.g. multires
 radiant python
@tropic bear buddy you don't use the mesh you sculpt.... you re-topology it to get proper edge loops
tropic bear
I know.
I said that.
I sculpt it, retopo, then use a multires on top to get a hi res
For baking
I've been doing this shit for 5 years now, 2 years commercially
 latent charm
One useful technique I saw was dyntopo sculpt, retopo however, then use a combo of multires & shrinkwrap to create a multires with the sculpted details. In some cases it helps loads with baking since blender has the bake from multires option.
 ornate iron
fossil inlet
ornate iron
fossil inlet
Oof need to turn that background brightness down. Hurts my eyes 👀
@latent charm that sounds like it overcomplicates it a ton. You don't need a fancy program like Substance to do this, but the proper workflow is just sculpt > retop > unwrap/UV the low poly retop > bake the low poly mesh using the high poly mesh > AOL - You have Normals
You don't need to transfer the detail from the high poly to the low poly with subdivision levels unless you're working with subdivision levels in something like zBrush to sculpt further detail
But if your sculpt is done, all you need to do is retop, UV, and bake
 silent acorn
@dull canyon Sorry, I'm kinda late here, but I'll usually create a rough front/side reference, then work to create a very low-poly base for the character. From there, I'll add detail to places that need it. I try to get across with as few verts as I need to get the point across.
dull canyon
okay, thanks
tropic bear
atm im not good enough to make just one sculpt and call it a day
again i get the shape, then retopo, then sculpt over
once im comfy enough with zbrush ill do it in one go.
fossil inlet
Sculpting can be super rewarding once you get the hang of it. When I first got zBrush I would get super frustrated because I didn't feel like I had control over the brushes, but once you get used to it you can do some pretty cool stuff
tropic bear
No yeah for sure. I'll get there, this is just a workaround
fossil inlet
As long as you have a goal that's all that matters
latent charm
@fossil inlet It's been a while since I last used that technique but it definitely does have its uses.
fossil inlet
70% of my character pipeline is in zBrush. The other time is just spent retopping, UVing, texturing, and rigging
If you have a really good sculpt the rest of your character will fall in line, so long as you know materials and how to rig and whatnot
fossil inlet
Most of texturing is just knowing how materials behave with light. You need to start looking at things as roughness and metallic values, how noise impacts diffuse, and how to put all of that together for specific materials so that plastic looks like plastic, metal looks like metal, skin looks like skin, etc.
Most of the time even when people have good sculpts they have a hard time with texturing in PBR so just keep that in mind. There's some really good resources for studying material behavior
tropic bear
Before I even sculpted i used to develop PBR nodes in blender (before principled)
So I've kinda gone through that struggle LMAO
fossil inlet
Have you tried Substance Painter?
fossil inlet
Designer is more for environment artists honestly. You can create most of the materials you need in Painter with folders and material layers controlling each node action as if you were in Designer
Too many people use the preset materials or smart materials in Painter and they're really just a stepping stone for learning, rather than something you should use on anything serious
Gets really easy to see assets on ArtStation where someone just threw on a preset material or smart material from Substance Share or default palette
Only time I use Designer anymore is to get very specific patterns for fabric or leather, or if I want like a tiling embroidered leather pattern Designer is really good for that
Chainmail is another one that's hard to do in Painter with its limited alphas and procedural selection
Substance Alchemist should be fun for environment artists though. They were showcasing it at GDC and you can basically use pictures of whatever kind of environment you're going for and it'll generate a texture and masks based on your image using some deep learning thing. So they demo'd this scene of these craggy rocks and plugged in an image of a snowy mountain, and it filled the valleys with snow and put snow on top of the rocks, and colored the dirt and rocks a very dull grey with darker tones, then plugged a pic of lava and basalt into the same scene and it created this lava flow type scene. It's kind of inaccurate at times but they said they wanted to leave it like that for happy accidents
Aside from the images for your texture color/properties you still have to do the terrain/tile creation through layers like Painter, but it acts like Designer in the way it scales
tropic bear
Yeah substance alchemist
Man it looks insane. I'm very excited for it
I admittedly don't use substance too much, it's nice to have drag and drop materials (since i don't do much realism)
Someday
fringe rock
@vocal dragon I have to say that its look really like your drawing
vocal dragon
Thank you so much @fringe rock !! I think this is almost the final geometry, I just need to actually apply materials, textures, a rig, etc onto it https://i.imgur.com/Hx3qac4.png https://i.imgur.com/NAjHfzp.png

 vocal dragon
And now: in rough colors! https://i.imgur.com/YnnxXtH.png https://i.imgur.com/35rwhev.png

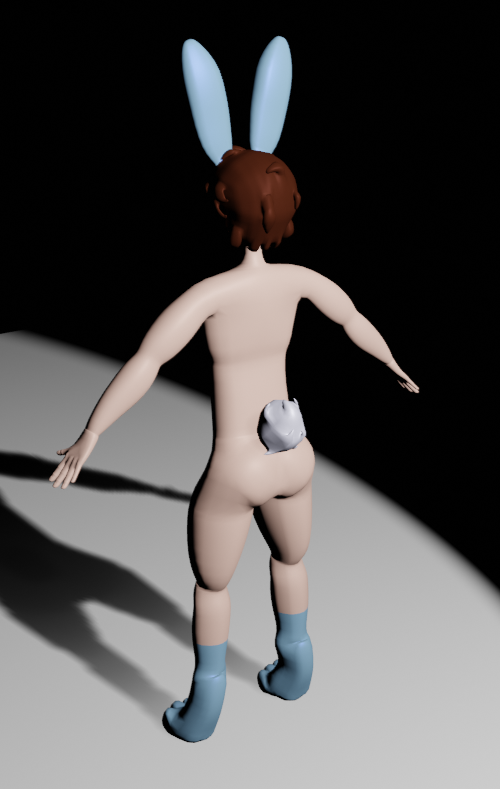 cerulean shoal
wh
cerulean shoal
 sly cairn
is that actually a duo model
spiral sigil
i would pay for that
 void gull
hee hee
void gull
vocal dragon
yES
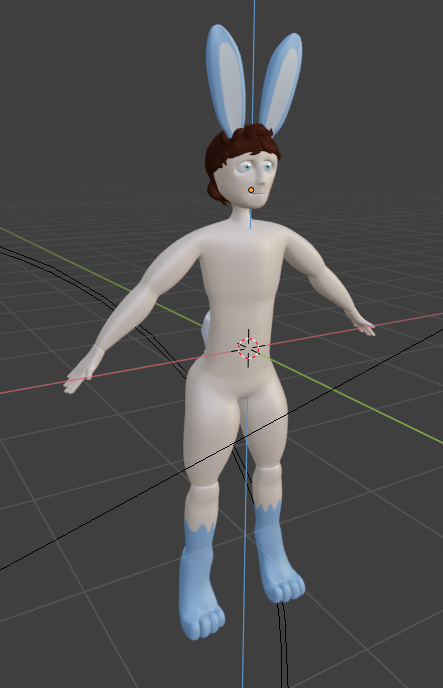
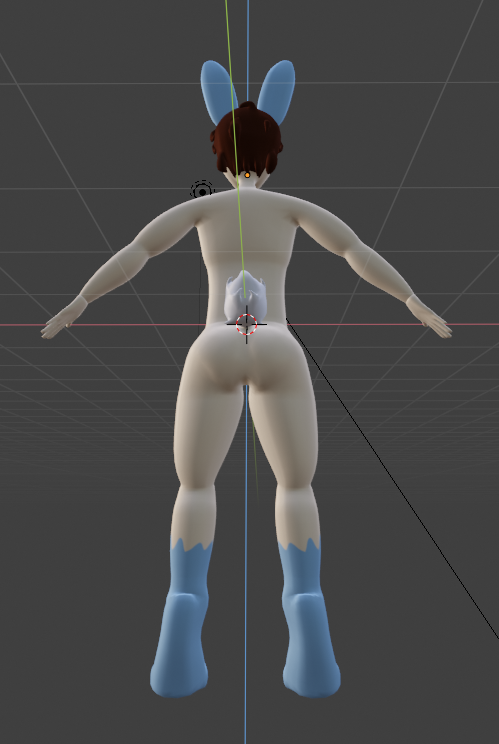
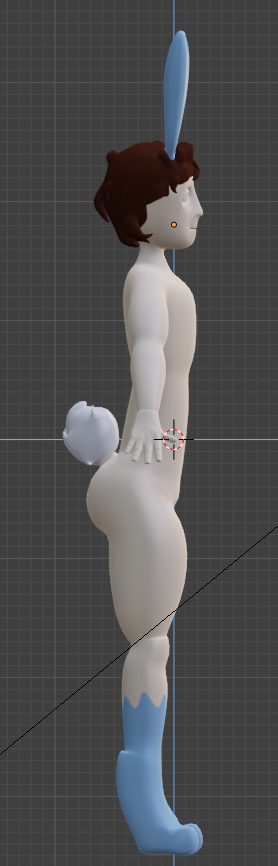
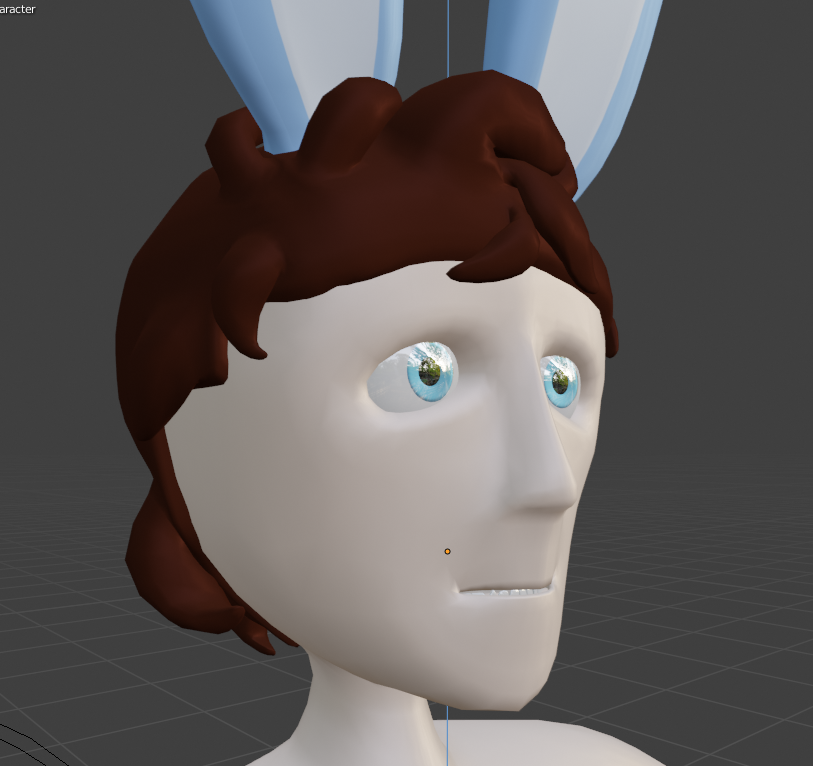
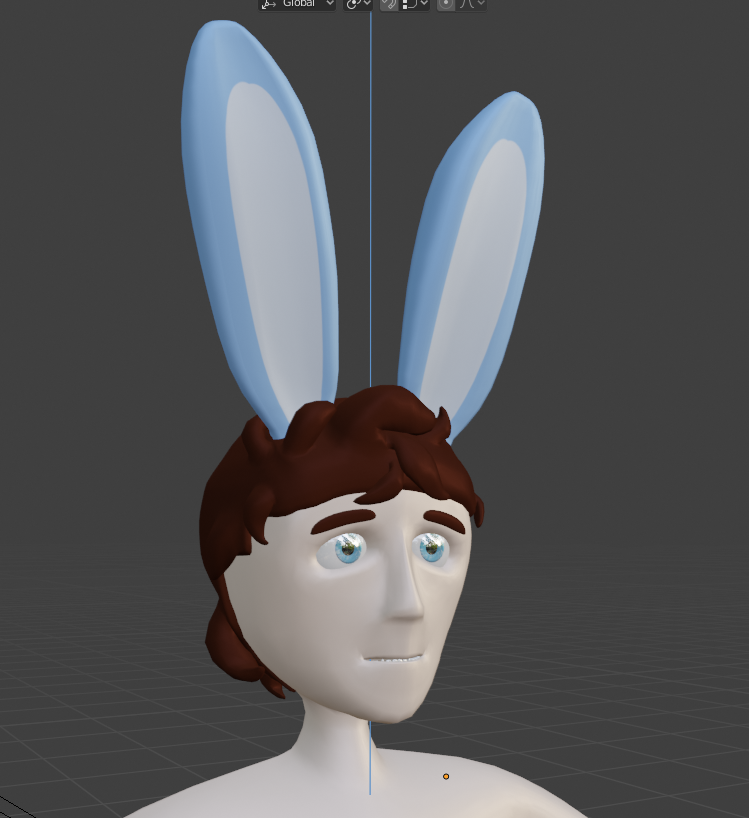
Progress on my current model, now the biggest thing I'm trying to figure out is.. how to make the face look a bit cuter/better, idunno. Any suggestions/thoughts?
 indigo stirrup
eyebrows, they do so much.
vocal dragon
That's something I somehow forgot to do, thank you
fossil inlet
Eyelids too
vocal dragon
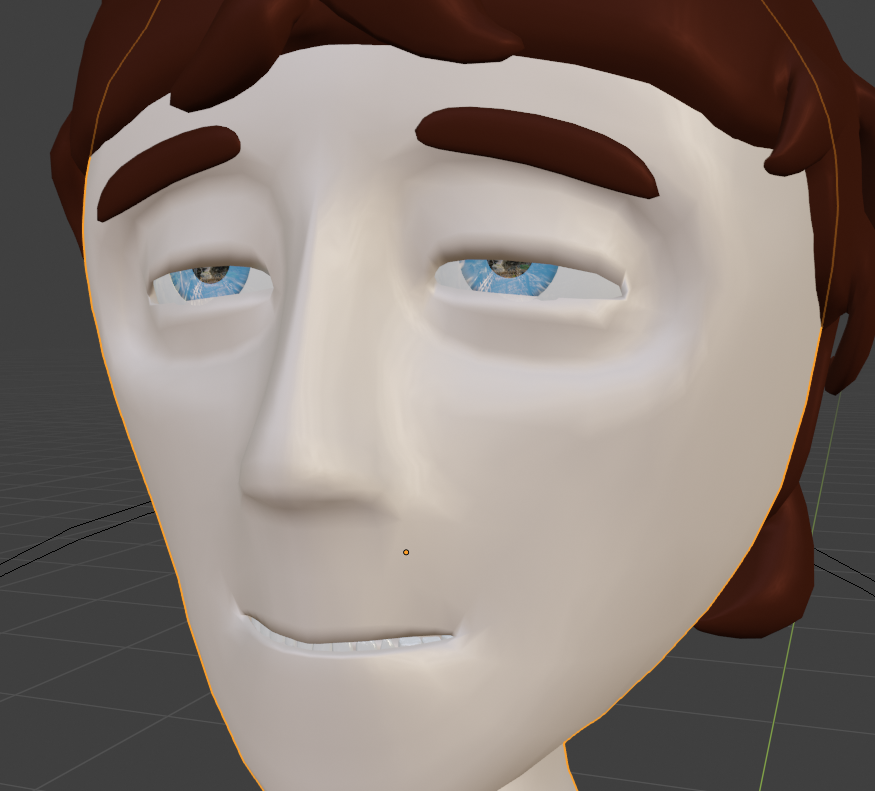
That too yeah.... idk how to model eyelids though, hrm.....
Any suggestions, @fossil inlet ? I'm not super experienced with modeling characters, this is the first one I've tried in all honesty
https://i.imgur.com/a5OXlFY.png There's the eyebrows btw
 vocal dragon
I think I figured it out? https://gfycat.com/InsecureFickleAfricangoldencat
 vocal dragon
Revised https://i.imgur.com/OXPOZNC.png
 vital wadi
so I decided to give modeling a try in sculptis, hands are painful I've learned
vocal dragon
Can agree
vital wadi
Just messing around so wasn't trying to be super accurate or anything
but I don't want my fingers to look like cthulu tantacles or spears either
what I'm calling my final result for now
this is surprisingly fun
vital wadi
so if I want my limbs to "float" for lack of a better word, I need to make them seperate spheres, right?
lament pond
 crystal surge
If avatar is slightly below ground in vrchat, what is the best way to raise it up slightly in blender?
zinc furnace
You don't do it in Blender
You do it in Unity because that's where the core issue is to begin with @crystal surge
In the humanoid rig configuration, raise the hips up slightly until the feet are flat on the floor, then apply.
crystal surge
@zinc furnace I don't play around with rig config much, but... by raise hip, do I just literally move the hip (with the whole body) up on the scene tab then click done? Or do I do so elsewhere? Thanks. got it
 quasi halo
anyone make worlds
thorny fractal
i feel like its a lot harder to sculpt fingers when trying to pull out pieces from the hand itself with somthing like the snakehook brush. its a lot easier to start with a primitive and shape a fringer from that then boolean it into the hand and then touch it up
dull canyon
I saw a video of somebody using metaballs to shape the fingers initially and then sculpt them
looked interesting too
 lavish forge
Hey guys, I just imported this Kobold model into Blender and it's showing the polygrid around the model but not the texture?
lavish forge
Aight @zinc furnace I did that but that's just turned him really dark
That doesn't seem right
and i unticked the transparency and he's just black, hrm..
And in doing so, it removes the poly-grid which I kinda need for this
 viral arch
Try ticking the shadeless box
lavish forge
@viral arch now he's a pink boi
viral arch
Go into the textures tab, if there's a texture in there labeled as toon, uncheck it
lavish forge
Couldn't find 'labeled as toon' I'm afraid, but I did play about with the diffuse influence section and turned off 'Colo' for diffuse. Now he's white. Hrm..
viral arch
It kinda looks like you have the wrong texture or something
 craggy surge
@vocal dragon if you make the face rounder it will look cuter
lavish forge
I'm still figuring out how the texture n' material system of Blender works tbh, I'm used to 3ds max and maya's way
So I got the texture showing
Yet the material stays white..
zinc furnace
You may have to remove the alpha influence from the texture itself
lavish forge
@zinc furnace I'm on the texture diffuse influence right now and it don't have any
zinc furnace
Well so far it seems your texture has zero influence on anything so I suggest starting there
Not surprising that your material is white
Turn on Color influence
zinc furnace
Alright, cool
lavish forge
@zinc furnace you're like a 5 billion IQ master of Blender thank you <3
subtle jackal
Oh boy, a model ripped from Second Life :V
 dapper crane
@lavish forge That is looking awesome! Wow!
lavish forge
as @subtle jackal pointed out it's ripped from SL lol
vital wadi
So I'm learning blender from the ground up since I can't find an avatar I like, and spent 4 hours making a doughnut
y'all amaze me with this wizardry you're postin
subtle jackal
https://skfb.ly/6IVVW finished my shootybang the other day, now I'm back to working on avatar stuff

Game-oriented low-poly model of the Colt M1911A1
Modeled in Blender, textured in Substance Painter. - M1911A1 - 3D model by Artificial_Incarnation (@Artificial_Incarnation)
working on new hair, whee. Also probably do a new outfit when I figure out what I want.
cerulean shoal
Nobody gets duo
fossil inlet
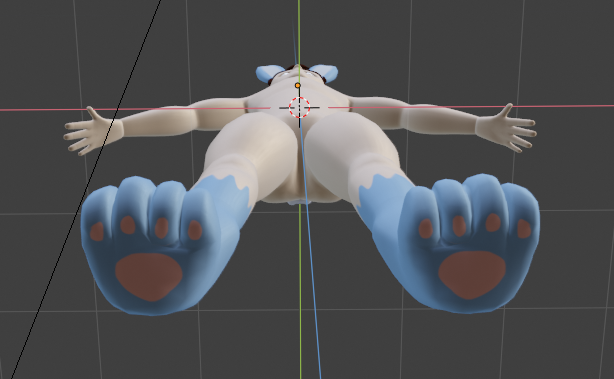
That’s a dude’s torso
fringe rock
👺
vocal dragon
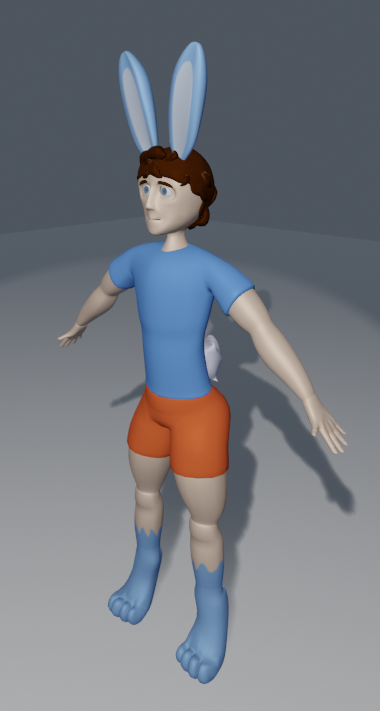
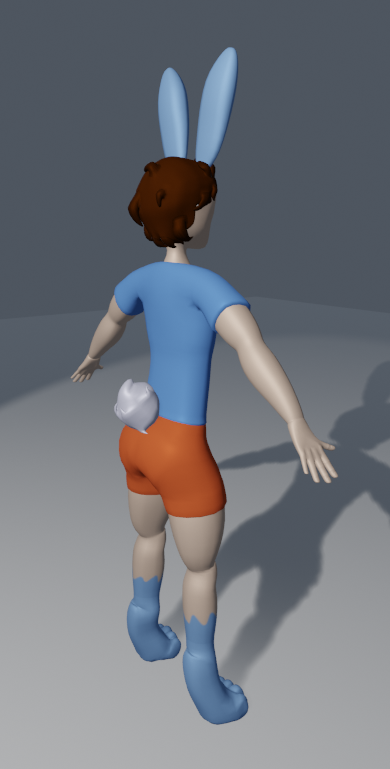
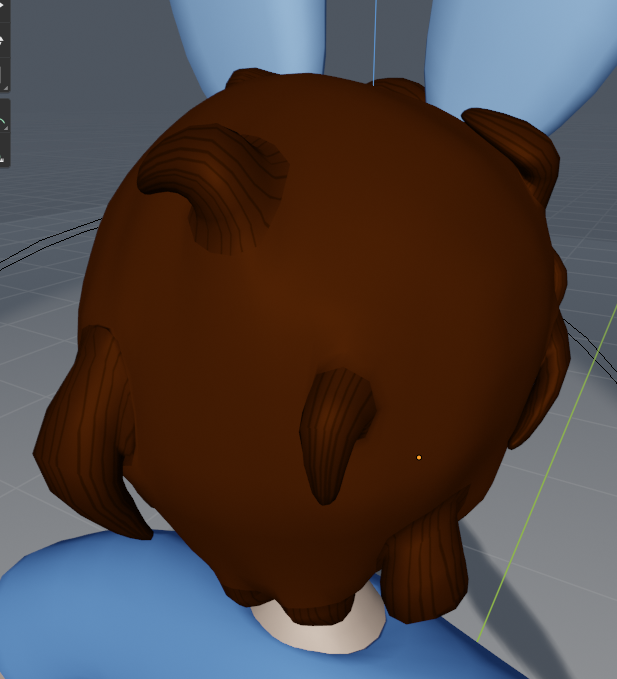

 dull canyon
@subtle jackal are you also using curves for the hair?
subtle jackal
nah I did those by hand
dull canyon
that sounds like a lot of work 😅
subtle jackal
not really
 pliant storm
Start to my learning of 3d modeling. Simple beginner tut,next step lighting. Eventually I'll get to modeling characters and cool gizmos.
 glass cedar
I'd eat that donut
dull canyon
yep, that's how probably 90% of the people start out
subtle jackal
first thing I made was a guitar body in Wings3D. I completely fumbled my way through it but it was in doing that that I realized I could do 3D if I tried hard enough
pliant storm
I did try to model a mask quite a few years ago for a cosplay, but I had no idea what I was doing and I never completed it lol. First serious look, yummy donut.
zinc furnace
I have a model where the face only has a blink shape key. How can I separate this into two separate "wink" shape keys?
subtle jackal
separate half, rename the shape keys, re-join
 light elk
zinc furnace
light elk
zinc furnace
I don't want to separate the face because that results in doubles on rejoin.
I can't remove doubles because that will break the shape keys on the face for sure
subtle jackal
no it won't
I've done it numerous times
you could also, if you're worried, just separate the opposite eye, make sure you have all the faces that move, though. That's why it's easier to simply split the whole face.
zinc furnace
So removing doubles won't fuck up the shape keys?
I'll give it a try, just have to be precise enough to only remove doubles along the middle of the face then
subtle jackal
you can do that by only selecting the edge down the center of the face before selecting "remove doubles"
subtle jackal
well that's strange indeed
zinc furnace
I wish there was a proper way to copypaste vertex positions in Blender
You can do it individually per vertex but that's simply not an option on a fully modeled face
subtle jackal
you say that but I'd consider my face pretty "Fully modeled" and I have not had that happen when doing this
zinc furnace
Anyway I found a way to do exactly this online
reddit
1 vote and 2 comments so far on Reddit
thorny fractal
It's weird when you spend a few months on a project and you finally finish because now I just feel kinda lost and don't know what to make/ do next lol
glass cedar
Just have to relax and recharge for a couple days sometimes
fossil inlet
Just start something new, relaxing is a trap
You’ll get inspired a lot faster by starting something new than waiting for inspiration to come
fringe rock
Sometime shapeskey are on all the body for some reason so if you remove double if fuvk evetyting
Like sometime bones are weight paint on all the model for .00000000~~~
 subtle surge
why does this happen?
 small cloud
missing shader
fossil inlet
Daily face sculpt in zBrush
spiral sigil
@subtle surge Missing texture or shader
fringe rock
https://gyazo.com/0b6903736d729a247cc3b43a75d59dd0 I do lazy stuff. First model from scratch :/
 ripe lotus
@fossil inlet I'm jealous of your experience haha 💕
dull canyon
just get more experience 4head
 clever condor
Spent several hours today on this model. I have yet to do the hands and upper arms, but I need sleep now...
dull canyon
looks nice
spiral sigil
Goggles!
fossil inlet
That 4k jean texture on a flat lit anime avatar
dull canyon
so, did I understand it correctly that a model done and exported in Blender 2.8 can't be imported in 2.79 to use Cats on?
spiral sigil
Uh, no?
If you export the file as an fbx, or whatever you can reimport it into 2.79
dull canyon
okay
spiral sigil
An actual .blend file i wouldn't say so though
dull canyon
ah, so that's what I remembered then
thanks
so I might try to actually start sculpting in 2.8 then since supposedly it should get released soon (tm)
spiral sigil
Cats wouldnt be too far behind if that would be the case
spiral sigil
Not yet, its not a full release
dull canyon
yeah
spiral sigil
You wouldnt want to properly work on developing a tool for a beta branch, its too unstable
dull canyon
mhm
 foggy maple
@dull canyon @spiral sigil Well, cats works in Blender 2.80 currently 😆
dull canyon
nice
foggy maple
They said that the api would be final in december, but it's not
spiral sigil
Oh, it does? that's cool as!
fringe rock
i get error in blender 2.8 when i try to activate cats. only the mmd appear on the right
foggy maple
@fringe rock You need the latest development version of cats
fringe rock
probably
foggy maple
Definitely
 cursive wedge
Oh my, working dev version in 2.8 🙏
visual vigil
https://cdn.discordapp.com/attachments/526815879602634830/562891192929484800/testren4.png
https://cdn.discordapp.com/attachments/526815879602634830/562891198679875595/testren1.png


Almost done
spiral sigil
If questions are allowed here : I need tips with blender modeling
fringe rock
Go
spiral sigil
?
 gleaming ridge
@spiral sigil me too i need to have a model rigged been trying for a while had problems textureing and rigging a model i like this tryed many things i tryed asking googleing i have problems that fall under does not apply you name it been trying for a few years on the same model what do you recomend i have a small problem that i can only do short term projects if its a long term thing a forget easley
This is what ive been trying to work on for the last few years
 plush niche
how does one fix a missing shader or texture
gleaming ridge
@plush niche same here
plush niche
lol
gleaming ridge
My problems are the shaders and textures and rigging and thats it
plush niche
ye i dont know how anything works so dont ask me xD
gleaming ridge
Everything is ready to load into what ever program accepts my model
You and me are both shitfaced in the same boat
plush niche
indeed
gleaming ridge
I dont know either
I hate blender too much buttons i think a space ship is easyer to fly than this
I think an out of control rocket on kerbal space program is easy to fly thats without cheats
fringe rock
..
dull canyon
so, how do you guys model your characters orifices like mouth and eyesockets? I'm currently struggling to wrap my head around how I'm going to do the lips and eyelids after I've sculpted them...
like, how do I separate my lips when I sculpted mouth closed
or is that my mistake? that I should be sculpting the mouth slightly opened instead?
subtle jackal
just leave a ring open for the inner mouth to model in afterwards, as for eyelids/sockets I just sort of extrude them inwards. You don't have to make water-tight meshes these days
dull canyon
https://i.imgur.com/hUmTdKy.png so this would work?

the eyeballs are separate objects
subtle jackal
yes
you just want to make sure you have enough geometry in the eyelids to be able to close them, mostly
for your blend shapes later
assuming you make them
dull canyon
so when I'm done with the sculpt I would then in the retopo define some clean edges for teh lips and eyelids to move them around?
also, gotta love it when the fucking wacom drivers decide to randomly crash and stop working
subtle jackal
basically yeah
dull canyon
okay
now to figure out why I can't draw anything anymore...
it's adding topology but not changing the mesh
there we go... had to close blender
jesus fuck
dull canyon
I have no idea what I'm doing >_<
subtle jackal
that's generally how it goes when you're doing something you've never done before 😛
dull canyon
https://i.imgur.com/tZL3nMZ.png send help 😄
 dull canyon

 edgy gale
for a moment i thought it was zbrush and had some vietnam flashback
dull canyon
lol
yeah no I don't have that kind of money just laying around
so, anything that's totally wrong with it so far?
 zenith relic
any ideas how to fix this zoom?
i cant seem to find the view camera to check the zoom so i can see closer the objects..
sadly i see like this when i zoom in too much
dull canyon
if you hit N you can adjust the lens I think it's called, if that's what you mean
zenith relic
i need to see the object closer to work on the small details
but i cant since i cant zoom enough to get there....the screen hits the object and goes inside
dull canyon
yeah, that's what the lens does I think
increase the value and you should be able to zoom further in
zinc furnace
It's the near clip plane in the N menu
dull canyon
or that
zinc furnace
Lens should also be adjusted to something like 50 IMO, but the near clip plane is what matters most here
Set it to 0.01
The far clip plane is 1000 by default which is usually entirely unnecessary, I set it to like 50
Not that it matters much either, but if the clip planes are too far apart you may get precision issues
dull canyon
if you hit N when your cursor is on the main area
dull canyon
and what rokk said
dull canyon
o7
zenith relic
finaly i can work on the small details
zinc furnace
There's Clip: Start and End there, set the start to 0.01 is what I would sooner recommend
A lens value that high may cause issues
subtle jackal
when I need to get in close I just use orthographic mode
subtle jackal
5 on numpad
zenith relic
whats the command for flipping the faces? i forgot
also i dont find the button for some reason.
dull canyon
flipping faces? you mean normals?
zenith relic
"flip direction" is the thing i asked for...i found it
zinc furnace
In Blender, what could be causing a mesh to decimate itself when scaling or moving vertices in edit mode?
As if a decimation modifier is applied or as if Remove Doubles is constantly re-applied with a huge merge distance
Literally just pressing G, left-click and suddenly the geometry gets decimated to an absurd degree
zinc furnace
Figured it out, vertex snapping was on at the bottom
ripe lotus
People who piece mmd models together and say they’re “3d modelers” makes me wanna vomit
zinc furnace
Depends. Everyone starts somewhere, and piecing together MMD parts and making it look good often still requires modeling skill.
I had to retopo pretty much an entire jacket to get the model from 72k to 30k
ripe lotus
I don’t really consider someone who pulls pieces from talented artists and slaps them together to have the right to the title. Compared to actual 3D artist who go to school and dedicated years and years into making things from nothing.
Ya know?
zinc furnace
That's the definition of gatekeeping right there
ripe lotus
I just dont think its right is all.
¯_(ツ)_/¯
Obviously you have to start somewhere. But I always considered a 3D modeler to be someone who makes their own content from scratch
zinc furnace
You could apply the same logic to avatar creation in general.
"People who use premade shaders for their models are casuals. I make all of my shaders by hand and fine-tune them to make the model look its absolute best. Anyone who slaps a Standard shader on it is invalidating the years I spent learning CG/HLSL."
glass cedar
You're not a baker unless you grew the wheat and sugar yourself
ripe lotus
Everyones entitled to their own views, I was just sharing mine
glass cedar
I just don't want someone who's proud of themselves for stepping outside their comfort zone and learning how to do something new to feel bad because they make someone "wanna vomit"
ripe lotus
I think you missed my point
 barren quiver
I think you don't really have one without more context
It sounds like you're saying "people who base their work on other people's makes me sick!" which is, depending on perspective
- totally valid: you're taking about people who combine preset parts and consider it an original work, but haven't really added anything
- totally unwarranted: you're talking about people who perform extensive customisation and editing of the original models until the result is mostly unrecognisable, or appears identical despite having a vastly more optimised structure
Where the first case is like "people who play with legos are not architects" and the latter is like "people who write blog posts are not writers"
fossil inlet
While both are true, I think there's a fine line between asking for permission to edit someone's assets or use someone's assets in your own work, and stealing, ripping, or downloading from an unsavory site any model you can get your hands on to frankenstein something together. People who simply pipe shove pieces together and never make anything themselves are not 3D artists - just as people who trace other peoples' work or photographs are not artists - they have no understanding of what goes into actually creating the work that they're using, and then claiming as their own. That's what I have a problem with, and it's a rampant problem in this community.
latent charm
And then there's the weird middle ground of kitbashing, which alone is a perfectly valid and important skill. Which includes being able to look at various parts and figure out how to smash them together in a cohesive way.
I just think it's all about honesty really. If you're pulling model parts off deviantart or wherever and whacking them together with no changes whatsoever, fine. Just don't try to claim you're doing more than you are.
dull canyon
is anyone by chance on a discord server that's made for 3d artists to share and critique each others works and such?
also
@ripe lotus that's literally how every programmer starts out
and every 2d artist
you start by looking up things that work/look great/you like, you "steal" them and adapt them to suit your needs
and over time ideally you will develop your own style/technique/whatever
people don't need a degree to call themselves artists/programmers/3d modelers/whatever
if you just plain up trace/copy someone elses work without any modification and claim it's yours then yes, you're a thief
but if you use others works to inspire you and to use as a jumping board into the field that's something different
that's the definition of learning basically
fossil inlet
Idk man I just made my own stuff from the start, felt disingenuous to work with other peoples' work.
Kitbashing is a different story, because most kitbash kits are made specifically to be open source, and most often the pieces for kitbash kits are so small that you can make something entirely new with the variety of pieces.
dull canyon
everyone learns differently
just saying because you used someone elses work to learn isn't valid is just dumb
fossil inlet
Kitbashing is its own art, in some ways, but people who exclusively kitbash are generally very open about their process, or people will use kitbash kits to add small greebles to their hard surface models to add some artificial detail in areas that seem flat or uninteresting. They're generally pieces that mean nothing on their own or are so simple to model that it's a waste of time sitting there modeling a nut or bolt when you have a kit that has small, insignificant details like that.
Not saying it's not a valid way to learn, but most people that do that aren't learning at all.
dull canyon
anyways, I haven't had my cup of cocoa yet so I should just stay quiet I guess
fossil inlet
People that learn eventually stop
You wouldn't put a frankensteined MMD model on ArtStation, so why consider it original art?
dull canyon
don't think that was the point here
fossil inlet
Maybe I'm missing it
latent charm
Oh no, you've said the words. If you're familiar with Marcel Duchamp then you'll know all about the whole 'what is art' thing
Is any art even original and all that
fossil inlet
It just irritates me when people who put MMD parts together and call themselves 3D artists. They aren't, yet, at least.
Yes I'm very familiar with Duchamp.
Doesn't make taking other peoples' assets and claiming them as your own right though. Too many MMD Mergers on VRCTraders sell work they made from other peoples' assets without the permission of the original artists.
dull canyon
and I never said that
fossil inlet
Not saying you did
dull canyon
but also discarding anyone who starts out learning that way and telling them "you're not an artist" is just plain dumb
latent charm
Then would you consider someone who put together a load of MMD parts as a critique of the homogenous look of them an artist or not?
dull canyon
and gatekeeping
anyways, peace out
not in the mood for this kind of discussion
this early inthe morning
fossil inlet
I just don't think there's merit in using other peoples' work. Creating your own is much more fulfilling - people generally use others' work as a way to make themselves feel like better 3D artists than they are, since it's hard to get into 3D and make something that looks good when you're first learning, but using others' work is just delaying that process. Everyone has to go through that.
If you get mad because I'm saying that, it's likely because you're just defending the way that you first started out. There's no shame in learning and growing out of that, but you shouldn't be proud of that period you went through as an artist. 'you' being a general statement, not you specifically.
Unfortunately there's no shortcut to being a good 3D artist, and by using the work other people did and pipe shoving pieces together, you're not learning the process and not really getting better than if you model your own stuff from scratch and learning the asset creation pipeline. There's a process, and planning ahead is integral to a successful 3D artist. You don't have to plan ahead as an asset merger, and aren't learning that vital skill.
I'm not gatekeeping, Szena - there's just a right way of doing things if you want to be successful, and I want everyone who wants to be a 3D artist to be successful. Telling them to avoid using other peoples' work is not gatekeeping.
latent charm
Except it is, on some level. You're saying there's one right way of doing things which is completely untrue.
While learning facial topology I essentially traced over an existing mesh, because I wanted to be able to think 100% about the edge & face flow and not about proportion and some other bits and pieces. Was I wrong to do that? At no point did I claim that was 100% my work because it wasn't.
Besides, the whole initial point was about people claiming to be doing more than they were and then somehow it got off track.
dull canyon
what was the shortcut in blender to box select a part so everything else gets hidden?
nevermind, got it. it was H
well, not quite
alt b
fossil inlet
@latent charm Learning retop is a different story though - if you didn't have a good sculpt and wanted an accurate face sculpt to practice facial topology on, that's using someone's mesh to help learn an entirely different part of modeling - it's still learning. Most times, the people using others' work aren't doing that. You know that.
dull canyon
ok, so having a too detailed 2d sketch actually feels like it's more hindering than helping now...
keep catching myself feeling forced to stick to the reference sketch instead of focusing on the 3d forms
hallow bough
It's always going to be a little off. You just have to find the middle ground and work it out as a 3d form 😃
dull canyon
yeah. I think next I'll really try to just do rough sketches just enough to build up the character, not super detailed references that take me like 3 weeks to do
(and aren't even finished still)
zinc furnace
Even if they're not actively trying to "learn" by putting parts together or retopologizing, that doesn't mean they aren't still learning
There's nothing wrong with putting parts together, as long as you're not claiming to have modeled it all from scratch. There's no need to gatekeep the "3D Artist" title
dull canyon
https://i.imgur.com/k5i5XMe.png
https://i.imgur.com/nY6ONTV.png
yep, feet and hands are just as much a pain in the ass to model as they are to draw...


that'd be too easy and I'll never learn how to do it
I have no idea what I wanna do for the face though... if I should keep it as simplistic anime style as it is or make it a bit more realistic
I'm kinda using the Kizuna Ai MMD model as a bit of reference, guess for a first model I should probably keep it more in teh simple side
 left scroll
Hmm, are the body proportions roughly what you want them as, or do you want to finetune it further?
Personal opinion is that with the body currently leaning more towards realistic human anatomy rather than an anime drawing (I'm seeing a fair amount of muscle and skeletal definition, quite a bit more than the standard anime look), a more realistic face would match the overall look more than a cartoonish anime one.
That's just my idea of what works though -- if you've got your own image in mind, gun it 😛
spiral sigil
An amazing feature of blender to help you with a lot of your workflow is background images @dull canyon
If you have worked out proper positioning of images to base your character off of, you can use background images as a sort of template to sculpt your character around. This can really help you to get the proportions of the character correct to your exact dimensions, and can help with parts like hands and feet. Additionally, The sculpting tool has a handy mirroring open, meaning if you get one hand right, the other will be the exact same assuming the mesh is mirrored correctly.
dull canyon
yeah I know, thanks
that's what I'm using already
what I was saying is that I'm getting too hung up on my reference instead of focusing more on the 3d
spiral sigil
so when making clothes is it better for it to be just one layer of polys around the body or give it a little thickness by using a couple layers close to each other? like just a one layer of polys for a t shirt or give it some thickness with a couple.
zinc furnace
I would recommend using only one layer
There's no need to also have the "inside" or other polys you can't see
spiral sigil
ok
i just like the look of the little thickness to the clothing but makes sense to only use one layer
zinc furnace
Well sometimes people make thicker edges, so the bottom of a loosely hanging shirt isn't just a flat infinitely-thin edge
spiral sigil
ok, might try that if it comes out badly
 tired kraken
yeah, think of it like folding a cuff inwards, no need to go all the way back up, just something like "3 inches" or so
strong thistle
just had a read in history concerning the topic of a real 3D artist hummm is a farm not a farmer as he purchased his seeds from Monsanto
onyx juniper
I love this drawing
strong thistle
Although I am not a painter, I think that the subaqueous qualities of the purity of line seems very disturbing in light of the larger carcass.
dull canyon
https://i.imgur.com/T7ttBe4.jpg
https://i.imgur.com/3KOgwZx.jpg
https://i.imgur.com/mWdUs4q.jpg
and somehow it's 4 hours later


 glass cedar
Why do you keep posting this
dull canyon
looks nice and a bit offputting 😄
tropic bear
yeah, first time actually doing real human anatomy but the goal is to keep trying lips in small batches this whole week
dull canyon
well, I meant more the fact that it's on a square like that 😄
thorny fractal
dull canyon
looks like a wall wants to give oyu a kiss
tropic bear
LOL
dull canyon
exactly my thought chuuko
tropic bear
I'm not a 2d artist at all so the process of having to learn what looks good is difficult
I know a lot of 2d artists transfer their skills easily to 3d, here I am trying to do it the other way lol
dull canyon
yeah didn't say it looks bad
looks good for a start, just making a joke about how it looks like a thwomp cause it's just a mouth on a slab of clay 😄
and you don't need to be a good 2d artist to do 3d
I'm certainly not good at 2d and I find 3d actually more enjoyable
tropic bear
i know but i'm trying to round out my skill
i think i could be a much more practical artist in the industry if I can work with both
certainly tweaking designs on the fly for a customer is much easier in 2d. i think there's a lot of advantages to it
dull canyon
¯_(ツ)_/¯
fossil inlet
@tropic bear Avoid sculpting individual parts of the face. They all have context and influence the shape of one another. Sculpting an anvil will give you a good base to getting use to the tools and challenge yourself without worrying about external issues like anatomy, proportion, etc.
as for 2D, focus on what you want to be good at. If you want to be a 2D artist, do that. If you want to be a 3D artist, focus on that. No one hires generalists - you want to specialize as soon as possible.
The skillset from being a 2D artist certainly can translate to 3D fundamentals, just as it can any art, but you're going to get a lot better focusing on one thing rather than trying to spread yourself across multiple disciplines.
 cyan stump
hey everyone im trying to make a model for vrchat and im putting it into unity but i cant seem to export the textures
whenever i try to export them all of them come out individually
this is the model
fossil inlet
That's because you have to assemble the material in Unity with your textures.
You have a default that imports with it, but it's usually got issues that you want to fix to perfect the look in engine
 tacit chasm
Hey, I'm having trouble with textures.

so first up
my textures arent showing up
and then whatever this "CH" texture is turns the whole thing black
so far there are 3 meshes that use the ch texture
and they all turn it black
the only texture i've gotten to work, along with it's normal, is the chain, which you can see on his hip and the zipper of his jacket.
what am I doing wrong???
tacit chasm
@here
subtle jackal
judging from the texture preview, the texture is very black so it might be showing as it should. You should probably have a look at the different textures/materials and see if there's another one that better suits the mesh. It's possible that material was some sort of overlay or something
 subtle jackal
check to make sure it's set to affect diffuse color
subtle jackal
hmm, not sure off the top of my head, then. I'd have to play with stuff myself, that's usually how I work those things out
subtle jackal
working on my own model at the moment
tacit chasm
ah
subtle jackal
have you tried maybe setting it up in Cycles? its material setup is a little more straightforward
tacit chasm
cycles?
subtle jackal
cycles renderer
You're in Blender Internal at the moment, which is their older renderer
tacit chasm
ohhh
subtle jackal
You'll have to set up the materials again, probably, but it might allow it to properly show in the viewport.
that said, unless you need them to do something, it shouldn't really matter what shows in Blender if you're taking things into Unity anyway, as long as you have all the necessary maps
tacit chasm
yeah, that's true
im gonna have to redo the textures anyway in unity
also, why is it that the model poly limit doesn't apply props not in use?
like, i have a model whos JUST below the poly count limit
and he has a guitar that should throw him over
but i use it in a gesture as a summoned prop
why doesnt that guitar count towards the poly count until its summoned?
subtle jackal
I'm guessing it's not rendered? I've not fiddled with props just yet myself (need to figure that out, actually) but perhaps since they're only temporary they figured it was fine
tacit chasm
i suppose so, yeah
if you set the mesh to "inactive" on unity, and then have the animation use a trigger to make that mesh active again when the animation plays
then whatever mesh was inactive will appear
essentially throwing the model over the poly limit
it's weird, but i suppose that's a good thing
subtle jackal
if you have a high poly model yea
tacit chasm
allowing higher res models to have their own props and stuff without decimating the poly count
also, if I wanted to change the proportions of my character to be more human-like (for example, Wolf O'Donnel is a stocky little wolf guy with short arms, legs, and a big ass head), could I just move the bones around to stretch the skeleton into a more human proportion?
And say if I wanted to shrink his head, would I be able to manipulate a bone to do that, or would it have to edit a mesh?
because that's the daft punk helmet
Wolf could probably swallow that thing whole
I know that you can scale a bone on sfm to change body part sizes
subtle jackal
if you edit the model to have more human proportions you can just edit the skeleton to match, yeah. As for having the skeleton stretch the model: Maybe? How it's weighted will affect how it deforms, basically
tacit chasm
Ah
well, thankfully wolf is seperated into like
7 meshes
Could I scale the host bone, like the neck or something, and would the rest of the bones in the head follow?
ah
latent charm
Just gonna say, there's a good chance you might have to redo most of the material/texture setup once exported into unity. I personally find it something of a waste trying to get all textures 100% working in blender. Just one to make sure the UVs are correct is often enough.
tacit chasm

Yes. Yes I can
Yeah, That's what we came up with too.
Just mess with the textures and stuff in unity
I did that totally with a daft punk PM in blender
and then forgot that I had to do it all over again in unity
onyx juniper
How's this look?
 heady musk
Probably my most ambitious project to date (albeit my first time actually trying to join this channel lol)
Bonus Points- If you know where this guy comes from, without looking it up, congratulate yourself with a pat on the back for being awesome and knowing a true classic robot when you see one.
 ocean pivot
Молчи и про Олю ни чего не говори
foggy maple
No I disagree
 ivory reef
@heady musk i love you. Cubix is best robot.
heady musk
@ivory reef Ahhh a Robot Enthusiast of culture, who knows a true classic when they see it 😄
 zealous mountain
shes doing this dumb thing.. how do i get rid of it
she was fine like 10 mins ago

 quaint jasper
check the pins in #animation
zealous mountain
thank u 😃
 neon tree
hey how big is the modeling on vrchat? for profit custom
clever condor
It's the first time I modeled something completely from scratch, so I'm pretty proud of it. Thoughts?
tropic bear
It looks pretty great!
The uv's on the chest have some significant stretch, it might be worth your time learning better UV's
Unless that's part of the design
clever condor
I've mostly been focusing on the arm, so now I'm going to move onto fixing the rest of the model. I've messed with UV's a bit already, so I think I can figure something out
tropic bear
You can generate a UV texture in blender to easily see where stretch is on the UV's, too
onyx juniper
Weird mix of clothing detail
fossil inlet
Another face, this one for my next VRC avatar
onyx juniper
Low brow
fossil inlet
Yes, very much intentional
tropic bear
Looks really great!!! Wow
spiral sigil
A Brand New Knuckle Build for myself; after 100 Knuckles; then my new World can be created :: a Resturant World for Knuckles
spiral sigil
 oak nova
Guys and gals, Question here from someone that has never ever used unity before...
I bought a 3d model and fixed the limbs etc so it works for vrchat in unity etc but i cant get the textures from the .png file i got with to go on the model. anyone feel to help a noob out???
cursive wedge
you need an shader to attach the texdture to and an material to link it to the model
cursive wedge
usually the materials are generated from the model or you have to click the model to export the materials
stable edge
in project, find your model and select it. in inspector (or one of the related tabs - it's been a while) find the materials and export them
 ancient bear
uhm, does anyone know where i can find a Pathfinder, with custom effects n' such
oak nova
Ok nothing fucking works, cant make it humanoid and i give up. This is really hard...
 violet elbow
oof
oak nova
All i wanted was to get my Papa Emerentius III in the game but noooo. Ugh, so close but still so far away....
 dense kelp
You're not moving bones around in the hierarchy for it to make sense right?
Sometimes people think unity is like blender and you can just reparent bones, but it really doesn't work like that
Other than that i'm unsure of what the problem could possibly be
oak nova
Not moving anything i just left it
 tardy mango
can u send pic
zinc furnace
@oak nova it tells you what to do. Unmap the upper chest. Then take whatever was in Upper Chest, and put it in Chest.
oak nova
Im sorry, but as i said first time doing it and nevee done anything like this
oak nova
With each other? Ok ill try
Ok i think it worked but idk if it uploaded
No, now there is problem when i shall upload, says upload and all fine but cant write name or anything on it
And someone actually made it from my blueprints, came to my world 15min ago and just said shit youre here... FeelsBadMan
So yeah, sorry. Noob here. Stuck again...
 open terrace
@oak nova on the last screen, you need to Unpause (blue button at the top of the window) to be able to upload
oak nova
Omfg. Really. Is that the only problem. OH GOD I SUCK
open terrace
@oak nova at the bottom in Console window uncheck Error Pause, for future : )
oak nova
@open terrace Thank you! Really!
small cloud
you don't, unity is not 3d modeling software
 torn scarab
neat
 lyric salmon
open terrace
lyric salmon
open terrace
you kinda can redo model with scripts and exclude vertices by their indices (lol) but not sure if you are able to transfer weight/shape keys/etc inside unity
 void shale
tropic bear
void shale
tropic bear
Lol I was laughing at that neat reply for a while
 limpid plinth
Any pro facial animators here?
I could really use some more in-depth help on creating a face that's fit for animation in VRchat.
I already made a rigged model that works but it has zero facial expression
subtle jackal
well what do you want it to do, exactly?
limpid plinth
have an animated face, but obviously I gotta model eyelids and a mouth for that.
like I see a lot of anime characters in VR chat that have these wildly expressive facial animations and I'm trying to do the same, but I just figured out I'm not good at all in modeling that.
you can say this is the 1st sorta successful attempt of me making an OC in 3D and rig it myself, and have it work in VRChat.
subtle jackal
well a part of that is the nature of the character you're making. One of the things you could do if you're good with 2D art is think about how you'd express it as a drawing, and then try to figure out how to represent that in 3D
limpid plinth
this is what I got, and I did do a couple of attempts at modeling the mouth, but it did not turn out the way I wanted it to be, even though it looks rather simple
subtle jackal
Well depending on how you want it shaded you could simply model a small strip of faces or an overlay of sorts for a mouth. Alternatively if you want to use an outline renderer you can simply have sort of an indentation in the face, or even extrude it into a full mouth pocket so you can emulate a tongue and inner-mouth in some poses.
as for the eyes it looks like you're using the shine as sort of an inverted pupil like thing? At least in your drawings. You may want to consider making that part of a texture or something you can animate so it works that way
limpid plinth
The character shown here actually has pearly blue eyes with no pupils, but for the sake of ease I drew it hardshaded
subtle jackal
I get that but I'm saying it seems to add to the expressiveness. If you feel it would work either way that's fine, just pointing it out
limpid plinth
can you recommend me any good tutorial video that gets into the nitty gritty of facial animation in unity?
obviously in the context of VRchat
subtle jackal
you don't do it in Unity, you do it in your 3D suite.
limpid plinth
I use C4D for modeling but apparently that facial animation doesn't work that well
subtle jackal
facial animations are done as blend shapes, so all you really have to do is mush your model around into the different expressions and visemes and such
limpid plinth
I mean the animation in C4D doesn't translate well over into Unity
even worse when subd is used
subtle jackal
I don't believe you can make them in unity
void narwhal
can you not create morphs and export it as fbx?
limpid plinth
hence why I was referring to if there are any pros that would like to do it for me? I definitely consider some financial compensation is in order here.
void narwhal
look up vrc traders in #community-servers-old
limpid plinth
traders?
subtle jackal
They're people who take commissions for stuff
limpid plinth
I see
 sharp abyss
Facial animations are just blend shapes in vrc which is really easy to do as long as the model has the mouth and eylids and such
Oh that was a few hours ago
silent acorn
Just finished a test model for a new world project.
he's really more of a testbed for rigging and texturing
 azure rain
that's adorable & run wonderfully on the quest
azure rain
actually that could run on a PS1 pretty well
silent acorn
that's what I was aiming for, yeah! my texture's probably pretty unoptimized, though.
azure rain
are you making a PS1 world
silent acorn
As in, I just wanted to follow the same restrictions as PS1 models
azure rain
compared to everyone else says that's probably plenty optimize
silent acorn
yeah, I was hoping to make a PSX-looking world soon! I'm just making characters for it now.
azure rain
sometime I need to try making a GameCube version of my fursona
and that PlayStation 1 World going to run fabulously on the quest as you texture Atlas everything
silent acorn
Hopefully, yeah! If I went with flat colours, I could atlas the texture into a 12x12 pixel image, but I sort of like the dithering texture. It really gives it that PSX-era look
azure rain
yes but considering the size is your working that might as well go with the PlayStation dithering texture
silent acorn
oh, that's a good point, yeah!
azure rain

In this video I demonstrate how to use a texture atlas using a texture atlas from spyro 1. Thanks for checking it out!
this stuff's interesting and I want to keep hearing about it would it be okay if I pm you NIR
silent acorn
sure, go ahead!
spiral sigil
Hmm... I will make this an Azure Knuckles Knight or texture the armor Red
spiral sigil
Nightmare Knuckles lol
 calm dew
yo i made a model but when i boot into vrchat, i can select the avatar but the model doesnt load, could one of you guys have a look at the files to see if you can figure out why its not working?
 royal steppe
this might be a good question for the avatars section instead.
calm dew
good point
spiral sigil
Hello guys.
 onyx juniper
Cute outfit
dense kelp
Ayy it's kokonoe, lookin' really good
 ripe lotus
65k
fringe rock
Not bad :€
thorny fractal
That seems like a lot for how the character looks.
fringe rock
this is 5k for example. when you create something optimization always come after.
 tulip shoal


