#3d-modeling
1 messages · Page 55 of 1
 zinc furnace
 latent charm
@subtle jackal In Unity for VRC, shaders made with Shader Forge (unmaintained but free) or Amplify Shader Editor (actively developed, but $$$) work with no problems.
 subtle jackal
Good to know, thanks
latent charm
Same, mostly because it's actively developed.
 dull canyon
okay. well that was quite a bit of information to take in again 😄 thanks for the explanation and patience
zinc furnace
Amplify comes with a baffling number of example shaders, if you need toon lighting you can literally just copy one of their examples for example
Gives a good toon ramp
subtle jackal
Yeah I just liked UE4's flexibility, like being able to make color masks and such in the regular material editor was super nifty
reminded me a lot of Substance Designer
latent charm
If you also know your way around blender's node editor you can bake out masks and stuff them in an alpha channel or wherever and easily use them in a shader with amplify.
subtle jackal
Cool, I'll give it a look
 umbral crystal
the node editor is similar to amplify yea
 strong thistle
humm
strong thistle
@subtle jackal if your going to use this in Unity i wouldn't bother to much with the extra maps in Blender as the settings you use in Blender Nodes will not export into Unity so try not to waste time , for blender i would say focus on Diffuse and from that you can generate the other maps after in external programs such as Awesome Bump (Diffuse, Normal, Specular, Height, Occlusion, Roughness, Metallic) are the most commonly used textures in Unity shaders.... other maps such as Displacement a lot of people get it confused with Height maps however its a very different map not used in standard shaders only found in high end Tessellation shaders that use data translated from Normal inverse Y in grey scale to distort the actual verts,this is perhaps the old real type tessellation displacement in Unity as height maps is a sort of fake less expensive way to do this
subtle jackal
I'm well aware lol
Though really if you're working in blender you should really do at least your normal and AO in there too, the results from programs like Awesome Bump/CrazyBump/B2M et. al. aren't the best. They're ok for like simple ground coverage stuff but aside from that you should be either baking down from a high poly or painting your own.
strong thistle
ya just running it with out going thru each layer to fix does not do great
if you take time to adjust settings its ok
your correct Normal and AO are key
sent you link for Displacement Map
subtle jackal
The problem with using generators is that they're essentially fancy image processors, and using just image processing isn't quite enough to get the data out of them you need, at least not with a lot of accuracy, even by adjusting settings.
Don't get me wrong, a lot of them do admirable jobs, it's just important to know what and how you can best use them, and when to do things the old fashioned manual way.
I've been impressed by bitmap2material on multiple occasions, especially its light cancellation feature
 fossil inlet
Best way to get a normal/displacement is to just sculpt out your high poly and bake that to the low.
Other ways will always be less accurate (but take significantly less time - it’s a trade off)
No point in doing a displacement for VRC though
strong thistle
Beast shader works great in VR just set the fixed factor to 1
 gleaming ridge
anyone play tower unite here'
dull canyon
which parts of your model do you want to keep as separate objects? or rather, which should you absolutely keep as separate objects for making an avatar?
 barren quiver
Does anyone know if there's a quick way or addon to move the end of the bone to the start of the next one in Blender?
 fringe rock
You dont want separete object for your vr avatar so part of your avatar dont disappears
dull canyon
yeah, that question was related to my question in #avatar-rigging
 foggy maple
@barren quiver In the bone settings is a check box called Connected
barren quiver
@foggy maple Yeah, that's the kind of thing I want, except in reverse.
zinc furnace
The quickest way is selecting the start of the next bone, put 3D cursor there, select end of previous bone, then perform selection to cursor
I'm actually wondering the same thing myself
barren quiver
That's not very quick when you're dealing with lots of bones
I've ran into this problem several times, basically every model I work on due to format shenanigans
zinc furnace
The only way I found is to check the import settings while importing the model
You can turn on auto-connect there on DAE or FBX for example
dull canyon
so when you sculpt an avatar, do you want the mouth to be open or closed?
barren quiver
Not possible for what I work with
For reference, Connected moves the start of the bone to the end of the parent. What I want is moving the end of the bone to the start of the child.
latent charm
@barren quiver Turn vertex snapping on and just drag the end of the parent bone to the root of the child and it'll snap. A bit tedious but I can't think of a better way short of scripting it in python.
dull canyon
ok so I guess if you have absolutely no experience with sculpting that's not the first thing you should jump into...
lets see if modeling is a bit easier
dull canyon
https://i.imgur.com/zJrfLU8.png so far so good, I think. following along a tutorial this time

 hollow radish
be careful with topology
dull canyon
yeah. this one is just for modeling in general, not specifically for vrc. it'll probably end up with being sculpted and retopologized later on anyways
dull canyon
Blender
umbral crystal
they not sculpting
hollow radish
they said it might end up sculpted
dull canyon
ye
umbral crystal
ye
 crimson mist
it's not bad for the start
dull canyon
thanks. yeah, it certainly looks better than the head I tried to sculpt earlier...
crimson mist
just if you want to make vrc-ready models in the future, then that would be quite a pain to rig and animate
it's good to have at least 3 edge loops for every joint you want to animate :3
dull canyon
yeah, thanks for the tip. but I think it'd be fairly simply to add additional edge loops once the rough model is done here
crimson mist
true
I only hate that place where legs connect with torso. I've never made it properly yet
that's when you just give your character a skirt 😄
dull canyon
😄
well mine is gonna have a skirt too
but also some underwear
yoursl ooks nice too tho
crimson mist
thanks :3 I forced myself to model few characters because I sucked at it
but designing waifus is always the fun part
dull canyon
or designing what you'd wish to look like IRL
crimson mist
Then use it as your motivation :D
fossil inlet
I’m hot af, can’t reach this perfection
So I just model what I wish my girlfriend looked like
.>
<.<
 glossy tangle
XD
 polar violet
I've tried every thing to make my own model I'm at the point where I'm probably am stupid because I've tried EVERY DAMM TUTUORAL and tip and reddit suggestion and i cant seem to get it to work , so what I'm asking is for you genius to help me make my own mmd vrc player model using this , the one id like is called Qoute or in the folder is quart , so if you can please help .
subtle jackal
oh we sharin' body topo? 😛
crimson mist
Are you new to Blender or just character modeling @dull canyon ?
dull canyon
both
started learning 3d modeling like 2 weeks ago
tho I do have some experience with 2d drawing
crimson mist
2d drawing is useful :D
dull canyon
ye
crimson mist
You could turn the subdivision surface modifier on and smooth shading in one of the menus on the left
And see if you like the results more
dull canyon
yeah. I'm just following along a tutorial on general anime character modeling right now
to get a basis
crimson mist
Ah yeah. Then maybe it's better to just keep following it
crimson mist
Yeah, it's good enough
My first ever try of modeling a human head still gives me nightmares sometimes
dull canyon
yeah, that was me yesterday 😄
jumped right into sculpting the head
instead of cute and female it looked very scary and alien
crimson mist
Maybe we're just good at modeling aliens :D
dull canyon
I mean, all anime characters' heads look like aliens if you look at them without hair
 gentle forum
Why does it do this
gentle forum
The shading of the faces
Regardless of using smoothing
first one was standard shader
zinc furnace
Are the vertex normals OK? I forgot how to display those in Blender, they'll be shown as pink lines extending outwards
If they extend inwards you may have to fix them
crimson mist
in Blender press N, scroll waaaay down until you see this little menu:
click on the icon I highlighted. You have to be in Edit mode btw
and then zoom in at those two objects
maybe in wireframe mode
you should see blue lines and yours are probably going to face inwards like this, which is wrong in this case
then you'll need to select those two objects in edit mode, press W and select Flip Normals
if that wasn't the problem then maybe you needed to recalculate normals
 tropic turtle
As person with 6+ years of 3D print experience... the most common issues i see for objects that are 1) no concept of how a 3D model becomes a real thing and how to design for 3D print, 2) blender generated non-manafold... 3) unrealistic expectations of size / quality / cost.
if you want that to be articulated or printed in color via FDM... it needs to be an assembly not just one STL.
 gritty kiln
@hallow bough Make sure you make it decently high poly for 3D printing, but low poly enough for VR chat later. Good luck!
umbral crystal
ez, subsurf / multi res
 zinc shard
alright so i have a question about mesh colliders. every time i add one to the walls of the world im building in order to make it so users cant walk through walls, it wont let me spawn into the world and immediately takes me back to the hub. how can i change it so that users cant walk into walls but im still able to spawn into the world
 open kelp
So hey uh. yeah can somone explain to me how i would fix this.
dull canyon
@tropic turtle yeah, I always have to rage when I see a nice model on myminifactory only to find out it is not optimized for 3d printing...
tropic turtle
I post all my stuff to thingiverse... it's the same there... about 10% of them are junk that need fixing.
open kelp
can i get some help fixing this??? https://cdn.discordapp.com/attachments/390924397726138370/553099655974748178/unknown.png

Like cmon there 14k people online, one of you would have to of seen my message, yet you choose to ignore it
dull canyon
just because someone is online doesn't mean they a) are actually awake and b) know anything about 3d modeling 😃 wait a bit until it's day in other parts of the world
open kelp
All i need is a simple answer. how do i fix the connection problem and why did it happen
 open terrace
connection? problem? just a common model, what you want to fix? how much people in chat? maybe 2-3
select 2 verts and press alt+m to see what google and blender's documentation provide
open kelp
The model isnt 100% 3d, parts of it have gone 2d and idk how to fix it
in the screenshot above it shows that
fringe rock
select the face and press E
open terrace
use Mirror modifier to get copy of other side
crimson mist
Yeah
Ctrl+R and create a new loop through the center, delete the left half and use mirror modifier to get that rounded 2D part on both sides
And then apply the modifier and connect them by making new faces
open kelp
Like i probably wont be able to figure any of this out. Can i just send the blend file to somone and they can see what im tryna explain
Im sorry but i just never use blender so im like such a bot
open terrace
why not ask this questions to google, there's already bunch of examples for everything
open kelp
google cant exactly look at a photo and be able to tell me what i need to do
open terrace
because you need to "create" a question
"how to mirror one part of the model in blender" etc, ask something only if you doesn't find anything, search already answered question is much faster then wait for reply
crimson mist
But I told you what to do :P you can either model the lacking part again or use a mirror modifier to have it on both sides again
And to use it, first you need to split your mesh in half
By using Ctrl + R
And just delete the wrong half
open kelp
Ok, another thing, how do i removed these circled lines
open terrace
select verts/faces with rmb, then X or Delete
crimson mist
Okay now it's messed up
open kelp
Im so confused
crimson mist
Did you apply the mirror modifier in more axis than it was needed?
Or did you just extrude it?
open kelp
all i did was follow a reference image / background image. i honestly dont know what the fuck happened
Omfg im completely hopeless
i shouldnt even bother using blender tbh
crimson mist
Can you at least undo it back to the first screenshot?
open kelp
nope. unfortunately i cannot
like the only thing i know in blender is extruding the cube using background images
so 😦
open terrace
press ctrl+z few times
open kelp
Cant, i already saved it and closed blender
crimson mist
you can send me the blend file
open terrace
why you save thing that looks worse than before, hoh, actually you just need to delete parts to make it looks as before, if you want to
open kelp
because i never use blender and idfk what im doing at this point
fringe rock
see ya
dull canyon
https://i.imgur.com/k3oIxWM.png slowly but surely (getting more nsfw)
subtle jackal
 umbral crystal
hahaha 'google cant look at a photo and tell me what to do'
yea bc google is supposed 2 teach u how 2 do something that works in multiple cases
crimson mist
@dull canyon she's looking good now :D
dull canyon
ty
umbral crystal
u could save time by adding clothes already
that way can skip adding any detail over those areas and in some cases delete them entirely
unless u plan 2 add multiple outfits
umbral crystal
ye ik
it is good practice but then
if ur gona just give it a single outfit
wat use of modelling whole skin layer and sculpting it 2 perfection
just waste of time imo
but yea while it does help u learn about that stuff
just that u might have 2 remove it anyway
crimson mist
I believe it's just a practice of modeling bodies
 pseudo parcel
can please someone explain why i have that weird outline on my black dot?
because in unity i don't see that thing
umbral crystal
u sure its not just ur shader
umbral crystal
what shader is it using
pseudo parcel
cubed paradox/ flat lit toon
dull canyon
@umbral crystal I don't plan on giving her just one outfit, and yeah I'm following a tutorial
umbral crystal
cubed paradox needs 0 outline width
pseudo parcel
i don't have any
pseudo parcel
eh i know
pseudo parcel
alright
i just selected tinted with 0
now i'll reupload it
Oooh
they look good now
thank you alot
fringe rock
Lol
pseudo parcel
No u
dull canyon
so, can some of you show me some examples of how you model your avatars mouth and eyes? trying to learn what approaches there are for it
crimson mist
not mine but I was using it as a reference pic
dull canyon
okay, I should have specified also inside
ie what the mouth looks opened and the eyes without the eyeballs
but thanks, that also helps
crimson mist
are you trying to learn realistic or anime models?
crimson mist
I'd recommend importing MMD model to Blender and examining it
dull canyon
okay
crimson mist
there's just too many different angles to show pics
dull canyon
true enough
crimson mist
most anime avatars have rounded holes as eye sockets
and then the eyeball is just floating in there
dull canyon
okay, and the eyeball is an actual sphere?
crimson mist
it's often a flattened sphere, sometimes even really flat
dull canyon
okay, and then the iris on top of that I assume, if they're even modeling that? or are they just flat textures?
crimson mist
it's usually just a texture, just like you can see in the screenshot. It doesn't have a separate iris
it's all 'usually' because there are many different styles and approaches obviously :P
dull canyon
okay, is that just out of laziness or is there a technical reason for it?
crimson mist
there's no need to model it I guess
dull canyon
okay, I guess you could use like baked normal maps to give it the illusion of some depth?
subtle jackal
It's the flat shading that allows you to do them like that
dull canyon
so with any other shader the flat textures would look off?
crimson mist
you don't even really need normal maps for that. It's just a matter of a good texture
dull canyon
okay, makes sense I guess
crimson mist
anime eyes would look weird with PBR shading
subtle jackal
I mean it still looks reasonably ok even without perfectly flat lit shading but mostly yeah. If you're going for realistic style you'd probably just want to model a normal eyeball
crimson mist
realistic eyes are much more work
dull canyon
I wouldn't mind that
if the result looks nice
I'm not sure how far I wanna go on the scale of anime to realistic
crimson mist
eye sockets like that give a natural shade around the iris btw
subtle jackal
in my case there the iris is literally just a slightly concave plane
dull canyon
ah, okay
and to make them shiny you can just use a glossy texture, right? right? 😛
(probably not htat simple)
subtle jackal
eh, doing them glossy would probably detract from the effect
crimson mist
you could make shiny dots as separate little meshes
dull canyon
okay
crimson mist
just like you would draw those little white shiny shapes when 2D drawing anime eyes
subtle jackal
The reason they're done this way is literally just to mimic a cartoon style so it really only applies to cartoony models
dull canyon
okay
crimson mist
yeah
dull canyon
so maybe not exactly what I want then
like, I don't want mine to look like yet another MMD model
subtle jackal
probably not yea
dull canyon
so, it's not because i'm too lazy but more that I don't really know where to look without risking getting any malware: you guys maybe have an example MMD model that's available for free?
subtle jackal
but contrary to what Nanodeath said more realistic eyes really aren't that much work, unless you're trying for extreme realism. You can achieve a pretty good looking eye even with just the right glossy settings. And also a fairly decent one with merely two layers (so you can properly inset the Iris)
there's the Kizuna Ai model and the TDA miku which are both available for free
crimson mist
I did mean extreme realism tbh :P
dull canyon
https://kizunaai.com/download-page/ from there?
subtle jackal
yes
dull canyon
ok, thanks
crimson mist
 dull canyon
guess I got some stuff to do and look into and learn tomorrow 😄
crimson mist
that's just a lot of fun with setting up a shader
dull canyon
yeah that looks like some work, tho more for the shading/texturing
crimson mist
yeah, that's what I meant
subtle jackal

MikuMikuDance Wiki
Tda Miku Append (Tda式初音ミク・アペンド) version 1.10 is available for download from Bowlroll. Originally, this model was sold on Melonbooks, but was taken down due to violation of Crypton Future Media's...
dull canyon
anyways, something like what asami said I had in mind
subtle jackal
I dunno how easy it is to translate into unity stuff as I've not tried, but Danny Mac who does semi-realistic models actually made a Blender eye tool
crimson mist
I have a good source of kancolle avatars but you often need to understand basic Japanese to download them xD
subtle jackal

Get the Eye Designer here! https://gum.co/oYbu Instagram: https://www.instagram.com/danny_mac3d/ Tumblr: http://danny-mac.tumblr.com/ Twitch: https://www.twi...
dull canyon
I do speak some japanese
crimson mist
dull canyon
alright, thanks
crimson mist
they often need passwords which are mentioned in models' descriptions
 dawn ember
Has anyone ever used the transfer weights functionality of blender? Is it as good as the PMX editor plugin?
latent charm
I've been using it a lot lately for helping reweight outfits and such with nasty rigs to my avatar.
It's rarely going to be 100% perfect, but if the two meshes are similar enough and are properly aligned (and reshaped if need be) you'll only have minimal weight cleaning & fixing to do.
fringe rock
Merge bone with cats work well with model with a lots of bone. But in some case you need to use modifier or paint it yourself
umbral crystal
u cant export fur to unity (u can prob export as polygons but terrible idea)
 foggy compass
Yeah this gravy train wont get rolling. u_u
Probably have to find a way to make the model look fluffier, probably some sort of point pulling
i scribbled on it because it marked the picture as nudity
I'm trying to achieve this short tuft effect for the fur? and was thinking of subdividing the entire model and then pulling random parts LOL
I know there's got to be a better way
umbral crystal
use shaders
and make fluff around joints
there fur shaders in unity that not look like fur but look fluff enough
foggy compass
oh ok!

XFur Studio is the ultimate fur solution for Unity. Paint, grow, shave, groom and customize the fur of your characters easily inside the Unity Editor without...
Something like this?
can you apply a toon shader ontop of it?
or can you only have one shader
umbral crystal
only 1 shader per material
either just write ur own shader or edit one
theres a $10 fur shader made for vrchat called xiexes fur shader
probably has a few toon settings cuz also theres xiexes toon shaders
foggy compass
im extremely new to 3d stuff @.@ don't think i could ever write a shader code
umbral crystal
then idrk
 thick lodge

Can anyone point me to a good resource to learn how to create shape keys? I'd like to make the tongue move as this model only has basic lips and eye movements.
I also wanted to see how I could mimic the same sort of facial expressions and change of eyes like in this example, the face I have is not structured in the same fashion (I didn't expect it to, but yea lol)
umbral crystal
u can "mimic" the expressions by using them
typically an mmd will have several blend shapes that swap eyes and such by moving a panel with that expression over something else
also for making ur "own shapekeys" it is a fairly simple process provided
A) mouth is rigged with detail
or
A) things are properly connected
B) minimal double vertices (unless necessary i.e. y symmetric teeth)
C) u can use connected proportional editing tools and sometimes cursor based rotator
proprtional editing would let u move many verts at a time without such manual and individual work
so u could "tug" on the tongue or the cheeks and so on
thick lodge
Is there an easy way to duplicate a shape key so I can start from one that already has the mouth open?
subtle jackal
Yes, set the shape-keys to mimic the facial pose you want, and then use the small drop-down arrow and select "new from blend" or whatever the specific text is
thick lodge
Ahhh I see, thank you. and as for shifting a panel. could I just make 2d material with the different 'expressions' , join them to the model, and just have the shape key move them over in fron the face?
subtle jackal
depends on how your model is constructed
dull canyon
morning
subtle jackal
I'd recommend looking at some existing models and paying close attention as you activate each shape key and see how they work
thick lodge
Hm, I'm not seeing a drop down in blender in the shapekey drop down saying 'new from blend' just the option to create a blank shape key

ahh wait, neeeevver mind, I'm just blind
thick lodge
yea I got it now, just got to. . . I guess pull the tongue out.
umbral crystal
sure y not
thick lodge
I'm currently just creating a vertex group then move it as a whole, or is there a simpler solution
umbral crystal
uh yea
i already mentioned
connected proportional editing
u literally tug on the tongue vertices by some pull radius
just literally press num 5, click end of tongue vert, press num 3, connected proportional editing, g then resize ur radius with mousewheel and u can move it around problem solved
thick lodge
https://gyazo.com/7bcac2ebe91a69aee5cc46ab6dc03232 I'm learninnng, thanks peopless ; u;
 umbral crystal
woof 🐶👌
dull canyon
now make it so the tongue doesn't go straight through the lip 😛 (at least that's what it looks like from this angle)
umbral crystal
yea easiest way is
where u see a
O
•
O
icon
u change that to cursor
move camera with numpad like i said before all that
click with left click somewhere near cheeks
and rotate the tongue tip with r
good for moving jaws also
u can do the same to angle the tongue back downward by reducing the radius when u do so
 muted ruin
https://media.discordapp.net/attachments/224577435700559873/553588419293478943/unknown.png?width=609&height=676
um i:m ripping the sabo model from jump force and everything is fine but the face????
 subtle jackal
Probably not the best idea to mention that you're breaking the rules of the discord (and also technically committing a crime) when asking for help.
dull canyon
^
 lament pond
umbral crystal
lament pond
umbral crystal
look like dino or snake
subtle jackal
@lament pond Cute!
 dull canyon
so, from what I gathered creating something from scratch falls into 2 categories: model with just basic low poly shapes first and sculpt later which makes the sculpting part a bit easier but you have to worry/think about the topology right off the bat but you might save having to retopologize later; or just add some basic shapes and directly jump into sculpting which means you don't have to worry about proper topology right away but then you'll have to retopologize to get a low-poly model later...
and I'm not sure which approach I like more yet
 ripe lotus
Have you tried making anything yet Szena? OwO
 silent acorn
@dull canyon Sculpting isn't essential, though. I kinda prefer having total control over my vertices, so sculpting's never actually come into play.
dull canyon
yeah, but I feel like you have a lot more you have to think about right off the bat when you're doing it like that
constantly having to think about proper topology
tomorrow I'll give sculpting another go
dull canyon
I think what's mostly holding me back with sculpting is simply my lack of proper understanding of anatomy
so I hope the more I practice it the better I'll get with that
and then just retopologize
that feeds like both my thirst to create something and to optimize/polish something 😄
ripe lotus
Try making something thats not organic!
Faces and bodies can be difficult to do when starting out
umbral crystal
i usually only sculpt existing verts
but i build low poly, apply sub surf, sculpt w/o adding new verts, add multi-res (normals sculpt)
then i just bake normals and paint textures so on
subtle jackal
You can get pretty far without really knowing anatomy as long as you use assloads of reference, honestly.
silent acorn
^
One advantage of 3d modelling is that you can tweak a model endlessly until it looks right
fossil inlet
I've never seen a student or hobbyist get anatomy right just by looking at reference. You can definitely only get so far using it without understanding how the underlying anatomy works.
silent acorn
I guess it depends on your model's level of detail. With something on the lower-end of polycount, you'll be worrying more about silhouette than anatomy
fossil inlet
At that point it's more about proportion. You aren't going to be getting muscle detail out of something in the style of Final Fantasy III's models.
Just don't fall into the trap of having bad anatomy and writing it of as stylized. Even successful stylized models have basic anatomy down - it's one of those, "You need to learn the rules before you can break them" scenarios.
I definitely encourage anyone looking to be a character artist to go take a life drawing/anatomy class where you sit down with a nude model and learn anatomy from an artistic perspective, and then an anatomy class from an art school (not a biology anatomy class, that won't really help you draw people better), where you essentially break down the skeleton into 36 major bones, major muscle groups and how they connect to the bones and how they behave when activated, along with learning landmarks and other defining forms. Even though drawing seems like a separate skillset than modelling, the skills transfer and what you learn in drawing anatomy will help you in modelling it.
silent acorn
These are really good points, yeah.
fossil inlet
After you've got basic anatomy down I recommend taking an écorché class, which is essentially traditional sculpting anatomy from an artistic perspective, where you basically create a skeleton out of clay and wire, then overlay each muscle to the bone, then sculpt out the skin and other features on top of it. If you're ever looking to do zBrush sculpting (Blender doesn't compare in sculpting capability, not even Houdini does, and that program does everything), definitely take an écorché class at least once if you can find one in your area.
 maiden delta
is this science class?
latent charm
Rome is generally right. Without an understanding of actual anatomy you'll jsut be learning wrong and wind up with weird looking results.
Even if your end goal is to make something cartoonish or anime, for fucks sake don't learn on it. You just end up with a really warped perspective of what's right and wrong and eventually have to take the time out to un-learn it so you can learn things properly.
umbral crystal
yea but typically it might help 2 draw anatomy before modelling it
ripe lotus
If you have money and are serious i’d agree with Rome
 vivid rain
Poitrait face modeling in zbrush. SKYPE ID: star.bizlee
ripe lotus
Looks good Leton OwO
vivid rain
Thanks Hibby.
3D Manga face in zbrush. SKYPE ID: star.bizlee
3D modeling with cloth in z brush and MD. SKYPE ID: star.bizlee
dull canyon
@fossil inlet yeah, I have a very basic understanding of anatomy from drawing, watched lots of Prokos and Sycras videos and stuff. I did fall in the "it's just my style" trap in the very beginning but nowadays I think I have a somewhat good grasp on what's good anatomy at its core and what's just not knowing anatomy at all when I see a picture. But it's a whole different beast in 3D, but it might actually turn out to be easier for me after some practice since my biggest issue in drawing has always been that I have to bend and twist my brain to think how the forms would look in 3D without actually being able to see them, which is not the case in 3D modeling 😄
@umbral crystal yeah something like that would've been my idea of approaching it too. Using low poly UV spheres to build the general masses of the body (rib cage, pelvis, head, limbs), applying a subsurf, doing some slightly more detailed sculpting without dyntopo, applying a multires and then doing some finer sculpting for details where needed, like the face or clothes
dull canyon
https://i.imgur.com/9D0KYOJ.png so... how does this look so far? it's just some UV spheres scaled, boolean-ed and sculpted without dyntopo

 onyx juniper
I was about to be impressed with myself that the pic I was about to post was deemed explicit. "It must look like a sexy woman,that's what I was going for!"
But then I scrolled up and saw Dephy's muppet-like monster set off the filter too.
dull canyon
ok
so, what are the common workflows when modeling a character that I want to make different outfits for?
subtle jackal
create a fully textured base body that you can put outfits on, basically
dull canyon
ok, I should've specified more 😄
like, if I have the full body mesh, and then another mesh on top for the clothes, wouldn't that explode the poly count?
even after retopologizing
subtle jackal
You delete the parts of the base mesh that are covered (and don't become uncovered with some animation)
at least that's what I did
you can, if you're a masochist, build all your stuff high-poly, UV and texture that, and then retopo a version of the avatar specific to each outfit and bake your textures down, but that's a lot of unnecessary work
I'll make an example image one sec
subtle jackal
no, masking doesn't actually get rid of the polys. You might save any performance needed shading them but their positions are still calculated behind the scenes, better off to just make a copy of the body and delete anything you don't need for that outfit
dull canyon
but for that afaik you have to join the meshes you want to mask with each other and that would ruin the modularity...
oh okay
subtle jackal
So here's the base body I did
dull canyon
ok
subtle jackal
And here's the version that gets covered by my usual dress
if I'd done like a petticoat thing I could've also deleted more of the legs
also you can ignore the other changes I've made to the mesh since then like adding a tail and changing the hair, still need to backport those lol
dull canyon
yeah, I was about to ask
that approach isn't really "modular" in that the clothes and the body aren't separate from each other, so when you change something on the body after modeling a set of clothes you have to basically do double the work
or, at least duplicate teh new body to all layers with clothes and readjust every set of clothes
subtle jackal
also the textures have stockings for the outfit those are just a layer I can enable/disable in the file for that
subtle jackal
well if you build the clothes on the body you don't have to adjust it, you just use it to see where your body is and how the clothes hang off of it, you can also use it to copy basic weights from to help speed up your skinning
and then once everything's moving nicely you delete the parts of the body that nobody would see anyway
your outfit would have a separate material, textures, etc.
just keep your materials for the body low
I have a material for my hair, a material for the head, and one for the body, so even with another material for the outfit I've still got a "great" performance ranking
I plan to add an additional material for some extra face expressions (I haven't done blush or > < type eyes or anything yet, which I'd need another texture for), and then if I want some accessories too I still have free materials to keep my target "good" ranking too
the only real adjustment I made to the body was adding a squeezy point where the stocking band would squeeze the thighs
that's just because, well, I like the effect, it looks nice
dull canyon
I can agree with that 😃
dull canyon
but the programmer in me can't come to like this approach somehow
subtle jackal
I wish it were more automatable yes, but to the best of my knowledge it's not
dull canyon
okay
subtle jackal
even in commercial AAA games usually meshes are swapped when the character changes outfits, etc.
if you come across a better way please do tell, though
dull canyon
I will if I ever find one 😄
so, what's usually your approach when modeling clothes? do you model or sculpt them?
subtle jackal
I do a low poly and then use that to create a high-res sculpt base
unless I use a tool like Marvelous Designer or such
dull canyon
okay
so, I might be missing something obvious here but... wouldn't there be a way to use the Boolean modifier for removing the topology of the body that gets covered by clothes?
by making the clothes intentionally go inside the body for where you would normally delete that part of the mesh
subtle jackal
Yes but your weights better be perfect, unless you take the time to merge them manually anyway, and also Booleans can cause some weird edges and add vertices in strange places, so you'd still want to clean things up
subtle jackal
they also can't do stuff like modifying your feet for different shoes
dull canyon
in reality you'd probably make sure your character is as perfect as you want to spend time on it to the point that you know you won't be making any changes to that version anymore and then just do different outfits for that specific version
and if something does change with the base you'd just do a new version alltogether
subtle jackal
depending on how much changed yea
dull canyon
yeah, so within one version you'd have the base, and for different outfits you'd copy that base and adapt it for the outfit
subtle jackal
yep
dull canyon
and if you'd change the base you just do a new file, copy/import the old base, make the changes and adapt the outfits if you wanna do the same ones
or I guess you can do it in the same file, it'd be the same amount of work
subtle jackal
in the case with many outfits you can probably use another similar base too, like if the outfit is still pants and a T-shirt you probably don't need different bases
dull canyon
yeah
but the nude base would always be the base for new outfits, unless the new one is similar to an existing one to the point that it'd be easier to just modify that existing one
subtle jackal
yeah basically
dull canyon
mkay, I guess that's how you have to do it then
well, lets see how far I can get it until tomorrow
I wanted to have a somewhat presentable model by the end of the week but I doubt I'll get that far
subtle jackal
That's alright. You're doing pretty well so far from what I can see
dull canyon
thanks. yeah, I'm just trying to set myself some "soft" deadlines so I can get myself to make some actual progress
subtle jackal
and it's good you're applying critical thinking to stuff, I see so few people that do that and want tutorials to tell them every single step of the process
dull canyon
and not just procrastinate
subtle jackal
those thinking skills are maybe the most important part of getting good at this
dull canyon
yeah, I learned from my mistakes when I wanted to learn how to draw
when I was basically stuck at just looking for and watching tutorials without ever actually drawing and using what I learn
subtle jackal
nods
dull canyon
my TIL document keeps growing almost every day
dull canyon
ye, all thanks to you guys here ❤
for me personally I learn best when I have people I can directly ask and interact with to explain stuff to me, instead of having to look for tutorials and watch/read through all the stuff I don't need to know right now just to find that bit of information I was looking for
I usually try to google stuff before I ask here, but most of the time the thing I wanna know is either so specific or so broad that it's hard to find any info
subtle jackal
It's important to have that at the start yeah, and eventually once you get comfortable you can learn a lot on your own
dull canyon
yeah
subtle jackal
once I got the hang of the modeling part I started looking at all the videos I could of people making stuff, looking at how they approached edge flow and whatnot
especially professionals
they're my favorite to watch
dull canyon
yeah
I've subbed to YanSculpts and Blender Guru cause they seem to know their stuff for the most parts
anyways, time for a shower and then some more modeling and sculpting
subtle jackal
alrighty! Happy creating :p
 thorny fractal
still very much wip
thorny fractal
ye
dull canyon
nice
 small cloud
thighs 🍆
dull canyon
thicc thighs save lives
thorny fractal
^
 dull canyon
very nice
also, are there any specific reasons to use A or T pose or is it just preference?
ripe lotus
Just preference i think, I’m sure there is a more logical reason to it but i usually A pose from habit now
dull canyon
mkay
ripe lotus
I believe if the outfit is complicated I’ll Tpose it, looking at the other ones I’ve done
dull canyon
makes sense
dull canyon
I'd pat you
ripe lotus
hecc
silent acorn
IIRC, a half tpose like that means that any shoulder deformation when the arms move is less noticeable than if they were modelled 100% up or down
dull canyon
ah, that also makes sense
so, when you're sculpting the body, do you apply the mirror modifiers first?
ripe lotus
I save a backup of the thing im going to sculpt with the mirror still on to a different layer then apply with the one im gonna be working on
dull canyon
ok
ripe lotus
Always good to have backups ^^
dull canyon
wish I had a feminine body to look at and touch for reference >_>
latent charm
@dull canyon So you have VR? You could download a base mesh and load it into Unity along with the SteamVR SDK so you could have a good look without it getting weird for someone else.
dull canyon
I guess that'd be the next best thing, after just looking at a lot of reference images
thick lodge
While in Vrchat, my avatar somtimes squints? The eyes just close a little before reseting to default. I checked back to blender and used the CATs eye tracking test and the blend shapes are in the right positions. I'll double check to make sure but does any one have an idea what else might be causing this?
fringe rock
Thats normal
thick lodge
None of my other avatars do it, thats odd.
And im not talking about blinking, it blinks fine
umbral crystal
are u sure thats not the lowerlid shapekey
 celest dust
what is the best way to smooth out my low poly model? to be more high quality
umbral crystal
subsurf
celest dust
but some of the mesh goes missing because it cuts the corners of the body mesh leaving holes
ripe lotus
Before applying the subsurface select all the verts and remove doubles
That might do the trick
celest dust
that acuallty did the trick
so what doees the view and render mean for stupid people?
umbral crystal
wat
celest dust
in the subdivions tab when u add it as a modifier it has a view and a render section u increase
subtle jackal
View is the level shown in the viewport. Render is the level shown when performing a render. It's so that you can make a model look good subdivided without shoving hundreds of millions of polys around in the viewport.
celest dust
ty
dull canyon
well, lets see what will be released first, Blender 2.8 with support for RTX cards or the Ryzen 3000 series of CPUs >_>
dull canyon
https://imgur.com/nwNbdNv (I was bored and curious so I looked a bit into animations)
dull canyon
also, I just realized that if I do get the Corsair K70 wireless it'd be a problem cause it's a TKL >_>
dull canyon
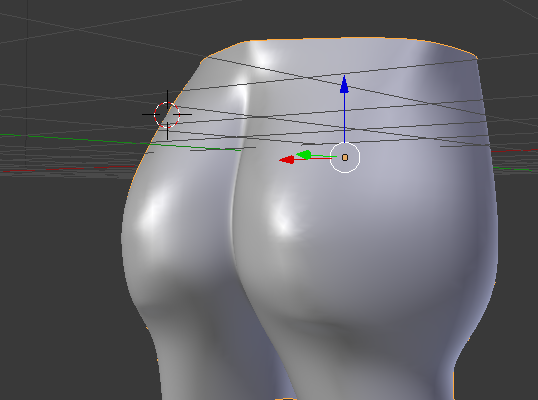
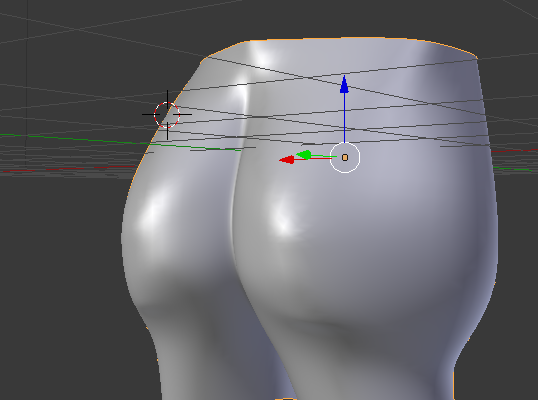
hm, now I'm kinda unsure how I want to do this. should the butt be part of the upper body mesh or the legs?
I guess it'd be easier if the glutes are part of the upper body
pseudo parcel
so i'm having a prob in blender; why in the uv editing i can only see half of the mesh?
 royal steppe
the mesh was unwrapped with a mirror modifier. the other half uses the same UV area
just reversed
open terrace
apply mirror modifier if it has it, select half of the model, move away uv, another half, move too, you'll see both sides after
pseudo parcel
well yeah i used the mirror
zinc furnace
Unwrap it again if you need the two sides to occupy different spots on the UV map @pseudo parcel
umbral crystal
^
that or just split the uv by selecting half of it
but if it has any actual textures they will all break unless u do this on a new UV map and bake them to it
dull canyon
hm, very tempted to set up a linux vm on my server and use that just to render stuff since it has 7 unused CPU cores atm... at least until Ryzen 3000 gets released and I upgrade my main machine
ripe lotus
Wulfe your picture is adorable
dull canyon
https://imgur.com/CdUGcHF well, that's the result of my first week of learning 3d modeling 😄
 umbral crystal
o
ripe lotus
Looks good for your first week, something seem off about it though
dull canyon
yeah
there's probably lots of issues with the anatomy
I'll start from scratch next week
ripe lotus
I think the arms are a little too short
dull canyon
yeah, now that you mention it
ripe lotus
Otherwise its pretty good, for how fast your learning
dull canyon
yeah, the palms of the hands usually go about to the widest part of the thighs, which I didn't keep in mind there
ripe lotus
Im impressed owo
dull canyon
thanks. it's all thanks to the help of everyone here ❤
ripe lotus
In my experience working with hands, working with as little as geometry as possible to get the basic shape first helps alot
dull canyon
yeah
ripe lotus
I feel like its easy to get lost in loop cuts and sub surfs
dull canyon
I was thinking of starting either with just boxes or metaballs
lament pond
ripe lotus
OwO
 feral hedge
Noice
ripe lotus
Did you see my dragon too?
dull canyon
ye
ripe lotus
uwu
dull canyon
looks good
umbral crystal
look like spyro did a gargoyle
 solid tapir
hey, can anyone help me with my butt? im getting something like a weggie formation here
onyx juniper
How do you people keep getting around the filter?
strong thistle
@solid tapir did you try the sculping brush
add some more verts in that area and sculp brush
you should try to make a higher poly and then bake the textures , after you could decimate a bit
onyx juniper
I think butt Spear wants advice on good butt topology
strong thistle
lewd
 sage zephyr
hey, i've been having trouble with some mesh vertexes with weight painting that for some reason doesn't change with how it moves with bones no matter what weight it's at.
Always acting like it's at maximum weight even when it's not, unless it's 0, then it suddenly acts normal, but only when it's 0.
what could be causing this?
umbral crystal
something else has weights on it
sage zephyr
i checked, but no, i couldn't find anything else with weight on it
i even checked the vertex weights, but i didn't see anything else connected to the vertexes
umbral crystal
o ik y
bc its a weight average
it will compute
(offseta*weighta + offsetb*weightb) / (weighta*weightb)
and if there is only 1
it just uses full weight
cuz nothing 2 average
sage zephyr
??? i don't fully understand but in that case, shouldn't it still be changing the average if i'm at the very least changing one of these numbers
umbral crystal
yea but if its the only weight for that vertex
its not averaging any others
so anything > 0 is 100%
sage zephyr
how would i fix this then, also i'll be posting some pictures just in case
umbral crystal
well Always acting like it's at maximum weight even when it's not, unless it's 0, then it suddenly acts normal, but only when it's 0.
make the weight blend with another
wat
sage zephyr
i said i would post screenshots of the problem
there you go
oops wait
there we go, this'll show the vertex painting settings
note: the bone this piece is connected to has been scaled up in pose mode, that's why the vertex is able to be moved at all.
unless i missed what else exactly i was supposed to blend it with the vertex, it didn't work.
fossil inlet
Working on texturing in Substance. Skin & Makeup are done, need to start on the clothing and accessories now ^^
Close-up of the face to show the specularity a bit better
Hair cards are done but will be textured through a Fibermesh workflow so they're currently hidden along with eyebrows and eyelashes
onyx juniper
I like your efforts toward fleshiness. I think it's ended up looking a little flat in the armpit though?
Sorry, you were asking about texturing and not modeling, right? The skin tones looks nice I think, but still makes me think of plastic, especially around the lips.
fossil inlet
I wasn't soliciting critique at all, but thank you c:
onyx juniper
Is this going to be an avater, and if so how many tris are you going for?
fossil inlet
Yes this is a commission. It’s currently 56k, with her weapon adding an additional 4k to the count.
crimson mist
@fossil inlet do you use a tablet for texturing or just your mouse?
 hallow bough
@solid tapir Add just 2 or two more loop cuts on the butt area.
fossil inlet
@crimson mist Both, depending on what I'm doing
Leaving it here for tonight, will finish tomorrow, then rigging ^^
fringe rock
👀
hallow bough
I'd say yes. Just how to go about making the triangle details on her skirt and sleeves. Weither I should model those individually or just use a transparent texture on a strip.
They look like ruffles but the shapes are odd :/ ruffles i can do but these I'm confused about.
dull canyon
oh, I don't know anything about transparent textures. I'd say they're just flat flaps of cloth
https://i.imgur.com/D9pwoYq.png I'd probaly do something like that

but maybe you can save on topology with a transparent texture, no idea how that works
hallow bough
I think that should work yeah.
Thanks for the help I'm pretty much a beginner still so I'm learning as I go.
dull canyon
same
I started like not even 2 weeks ago 😄
https://imgur.com/CdUGcHF this was last weeks result
hallow bough
Looks good! I haven't tried sculpting yet I purely work with just box modeling and such. I wanna try it out though.
Most experience I have is robotic things so human models are very new to me haha
dull canyon
yeah, I tried the modeling approach and didn't like it, at least for organic forms like this, but it's all just preference probably
personally right now I feel more comfortable to just use a UV sphere and deform it into the general shapes and then start sculpting, and later on just do a retopology
hallow bough
Yeah I guess it's preference. I haven't gotten into retopology yet.
dull canyon
same, I only took a brief look at retopoflow
but it looks easy enough to use with a bit of practice
so I can sculpt and see the actual shapes first and don't have to worry about topology until I'm actually finished with the model 😄
dull canyon
ah, those are yours?
hallow bough
These are two robots I finished recently
dull canyon
very nice
hallow bough
Yeah xD
dull canyon
thicc 👌
hallow bough
Indeed 👌 There's issues with it but definitely a good way to learn is to just do it.
dull canyon
yep
I'm trying to do an iterative approach
2 weeks ago I set myself to do the first concept art for my character, last week I set myself to get as far into modeling/sculpting as I can, this week I'll re-do the concept and next week modeling again
hallow bough
Great way to approach it.
I just do whatever whenever xD I should consider planning more too.
dull canyon
yeah, that's how I used to approach drawing... and it didn't work out for me 😄
cause I'm a lazy ass
so if I just set myself some deadlines I'll have at least some motivation to get something done
hallow bough
I honestly have more experience with art so I have to weave in the modeling portion. I'm the worst at deadlines. I need to start sometime.
dull canyon
sometime (tm) 😄
dull canyon
neat
 iron schooner
umbral crystal
iron schooner
umbral crystal
creepi
dull canyon
anyone have any other youtubers they can recommend who do 3d modeling and stuff? similar to Blender Guru or YanSculpts
fossil inlet
@dull canyon FlippedNormals (more generic but sometimes specific videos, good if you want to get into the industry), Gregory Stark (sculpting), CG Allies (in Russian but gives you an idea of the workflow)
dull canyon
okay, thanks
fossil inlet
I kind of hate some of the things FlippedNormals say so take them with a grain of salt but they're not wrong 90% of the time.
dull canyon
so kinda like YanSculpts (for me at least)
he says some smart things, but some times he sounds like he has no clue what he's actually talking about
fossil inlet
Yeah except when they have no clue what they're talking about they still pretend like they do
dull canyon
yea
fossil inlet
They started out in the industry just a few years ago and already dropped it to start doing YouTube full time, and things in this industry change in the matter of a couple of years, drastically.
So some of the things they say might be outdated but I'd still listen to them and take 90% of what they say to heart
dull canyon
yeah, I just don't follow everything they say by the book
fossil inlet
I mean it's good to take 100% of it when you're still learning and then learn why some things aren't 100% correct after you start to master it.
I don't think you have the judgement quite yet to determine who knows what they're talking about. If it's things like, "you should go to school for 3D modelling" and you disagree with that, that's an opinion and you'll learn whether you're wrong or not later down the road.
dull canyon
well, I'd like to think I have some life experience with my 30 years by now so I some decent judgement for when someone says things that are actually helpful or when they're just spouting nonsense or completely subjective things they're trying to sell as facts and rules
anyways
fossil inlet
Age really doesn't denote wisdom; if you're just starting out in this industry, there are some things you might believe now that you'll use to disagree with advice people give you, that you might be wrong about.
crimson mist
@dull canyon I see you trying to learn modeling really hard.
What are your goals? Job in the industry, making your own VRChat avatars or just to relax with Blender?
dull canyon
the latter two for now
mostly I just wanna make my own avatars
for myself and maybe friends
crimson mist
I was trying to do solo gamedev for some time but now I prefer to focus on 3D and team up with someone
I'm waiting for that Trusted rank so I can unleash my power 
dull canyon
heh
yeah my main goal is just to have fun for now
maybe one day I can use it in a job or something
¯_(ツ)_/¯
 fossil inlet
It's a shame I have to bake the lighting for it to look halfway decent in VRChat. I might be able to do well enough with a PBR shader with a fallback cubemap but we'll see.
zinc furnace
Use Rero's tweaked Standard shader
 hearty aspen
 sage zephyr
I'm going to post this again, since my question got buried pretty quickly and Google, Youtube, and Blender questioning sites haven't been able to find my problem.
basically, certain vertexs are only moving at a very specific weight no matter what i set them to and i don't know why.
the only thing that makes any change at all is to completely un-weight them, but it doesnt really fix anything.
 void narwhal
try looking through the vertex groups for weights on other bones
probably another bone influencing it
besides that i can't really help you without more information
small cloud
get this addon, seperate the mesh part
then go to Vertex groups and click on black arrow under +-, and select Remove usused vertex groups
then you'll see which groups have extra weight there
sage zephyr
@void narwhal look at the vertex weights menu on the right, you can see all vertex groups connected to that one vertex.
also, what more info do you need?
void narwhal
there can be vertex groups without bones with weights assigned as Yuumi has directed you towards
have you checked vertex groups yet?
sage zephyr
i did anyways and no, but i didn't need to since it was showing the groups it was connected to, not the bones it was connected to
also, going to mention this since you need more info
void narwhal
alright giving insight as for how it might be deforming could be useful
is it sitting in place when rotating/moving bones?
void narwhal
so is perhaps the issue is not weighting but rather the base geometry?
do you have any active morphs?
could the script you used to import be at fault?
sage zephyr
rappy, what you are seeing isnt the normal pose of the model
the bone its connected to is 1.4X the size in the picture
i can show the original size if you need
small cloud
I still don't understand what's the issue
void narwhal
well the scale could be an issue if the weight for the bone isn't smooth
it isn't uncommon when scaling geometry to have jagged verts due to sharp weights
sage zephyr
that's why im trying the change the weight of the vertex
void narwhal
especially with large values for scaling with low geometry
sage zephyr
but even though im changing the weight painting, the way the bones moves it and how far it moves it doesn't change
void narwhal
provide a picture of weights for the other bone connected
small cloud
try enabling auto normalize
umbral crystal
already told u if theres no other weights on that vertex
sage zephyr
taking pictures of this model is complicated due to the rules
umbral crystal
it always uses 100% weight
unless its set to 0
so u have 2 blend weights with something else
otherwise this will happen every time
if u look at chest or neck weight u will see they have no influence on that vertex
sage zephyr
I guess I don't understand what you mean by this
umbral crystal
it really really simple if u know anything about weight painting
the way the vertex moves is determined by an average of the weights affecting it
if there is only a single weight affecting it then it just uses 100% from that bone
if there are 2, it will average the weight, moving one more for the higher weighted bone
and less for the lower weighted bone
same goes for more complex weighting
sage zephyr
I thought the point of the weight painting system was to make it so that you can attach a vertex to one bone and then change how much that bone moves that vertex?
umbral crystal
no
its an average
thats y ur supposed 2 blend weights together
and why u dont leave ur hip bone without any weight
i mean it makes sense anyways also
why wouldnt it be a blending of multiple weights
its either more attached 2 ur chest or more attached 2 ur shoulder
but the main point is its attached to both
so u need 2 blend weights
sage zephyr
o_o the whole model's vertexs is connected to individual bones, barely any of them are connected to a secondary bone
are you telling me my entire model is basicly screwed when it comes to customizing it's weight painting?
umbral crystal
uh no
im being really straightforward
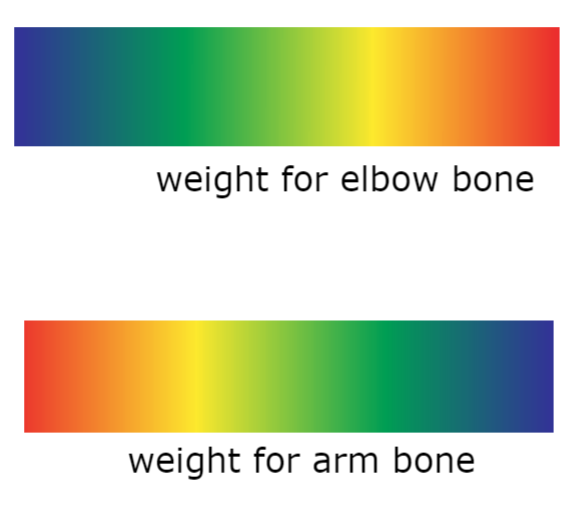
if u have an arm
do u paint the arm entirely to the arm bone only
no
u blend the weight of the arm to other bones

if i just remove the 'weight for arm bone' part
then that area becomes unweighted
with weight only from the elbow
so now the elbow owns 100% of its movement
if its weight in the area is over 0
if u want to 'use less influence'
void narwhal
Weight painting should end up as a value of 1 with everything influencing it added up
umbral crystal
then blend ur weights as such
void narwhal
imagine the colors as Blue to Red as 0 to 1
umbral crystal
like i said, its literally an average of the weights for that vertex
void narwhal
Blender basically automatically averages internally when it goes above 1 as for how it does it exactly idk
*But you need to normalize/blend weights together regardless for other programs/engines
umbral crystal
and if u only have 1 thing on it
then the average is always 100% for weight > 0
bc theres nothing else to average with
it will do something similar to this
offset = <0,0,0>
total = 0
for every vertex group this vertex is in
    offset += boneoffset * weight
    total += weight
offset /= weight == 0 ? 1 : weight
its also why if u weight something twice to 100% they each get 50% and 50%
(a + b)/2
again u literally just
blend it more to another bone
if u want 'less influence'
cuz the idea is not to 'lower the influence'
the idea is ur 'adding bias'
ur giving it more precedense to one bone
sage zephyr
just going to make sure i understand this correctly
if I connect everything to the "hip bone", including the vertex im trying my hardest to fix, would it fix/help with my problem?
umbral crystal
no
sage zephyr
fucg
umbral crystal
obviously not
again think about it
then if u rotate ur spine
ur vertex is gonna stay planted there
so obviously
u just weight it to the nearest and most sensible bone
so if its a shirt sleeve
u weight some of it to the arm
some of it to shoulder
maybe a bit to chest or neck
u dont weight to any other bones
umbral crystal
u create bone for breast
weight to chest, breast bone, and maybe spine
or dont add bones and just weight to chest and spine
again its all about blending weights together
sage zephyr
I think i get it
however, i do want to ask one last question
you said earlier and why u dont leave ur hip bone without any weight, and the model i'm using has a hip bone without any weight
basically what do I do?
void narwhal
it doesn't need weight
umbral crystal
u need that weight
yea it doesnt if u dont want root rotation
and it might have blending problems
cuz again that 100% thing
void narwhal
it will rotate whatever is connected
umbral crystal
but some people may also weight spine all way down to hip
yes but if nothing has weight in the hip area
it will sit there and have sharp blending
void narwhal
but realistically it should have weight for the pelvis in this circumstance
umbral crystal
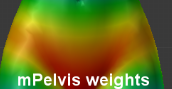
ye usually hip has minimal weight but its there
its typically shaped like a thong https://i.gyazo.com/7ba6f5f5f4385a197d9e121259010609.png

just cuz thats sensible weight painting
sage zephyr
ok yea it just had a different name...
weird, theres a vertex group not connected to anything that does literally nothing
but it's named as the "hip"
weird
umbral crystal
make sure to remove it maybe by using CATS merge weights tool or remove 0 weighted bone tool
just so A: no humanoid mapping issues B: less bones C: prevent confusion
void narwhal
hip or usually pelvis can be a separate bone in some rigs all together
i believe i've seen it in such a format for some games
usually done for manually adjusting/animating* it separately from the rest of the armature
sage zephyr
actually, thats the weird thing, theres no bone connected to it at all, or bone that's named like it
void narwhal
yeah absolutely
umbral crystal
a lot of things are done to make animation easier
void narwhal
hence it should be merged if it has weights
umbral crystal
such as control panels, IK constraints, and joint chains/controls
a lot of blendswap models are like this
void narwhal
well if it doesn't have weights it is probably just a placeholder for a rig/root
umbral crystal
and also animation ready models
fossil inlet
Still have a whole bunch more to sculpt out but the hair is coming along; also need to do eyebrows/lashes for the hair map, might add a few more hair cards just for strays at the part and back of the neck
void narwhal
Nice
 spiral sigil
Anyone here take 3D commissions?
 bronze bridge
I like the fact that im trying to look for uv mapping for unity and instantly the video i went to thats a guide towards unity shows something completely different acting like it doesnt know what im looking for. For instance it told me to "press tab" and another window shows up. I press tab and it shows nothing
fossil inlet
@spiral sigil go to #community-servers-old and join VRC Traders
spiral sigil
@fossil inlet Thanks, I didn't know that place existed 😅
bronze bridge
right clicking in blender the vertex point is the only thing selected and when i select all vertex to move the face or even a single vertex point it just resets itself preventing itself from being moved :T
trying to edit a image in uv mapping of uv editor in blender is so complex .... I love maya.... your so friendly to work with but i hate you blender
void narwhal
go use maya if you're gonna keep complaining about how inferior it is
if you're honestly good with maya nothing is truly stopping you from using it
bronze bridge
-_- im not rich i cant afford maya
in order for me to use maya i need permission in college to use lab
but i cant seeing it was too late since im doing my assignments in a art class i had lots of work in there to do
I have a model for vrchat but its not letting me us a maya file in unity guess its cause i havent exported my maya file yet :T
bronze bridge
after this one class im near to graduate my student license isnt going to be sufficient
void narwhal
when you wanna select and move something click the mouse again to confirm the action
blender can have two different mouse setups right click or left click to select* basically
what i'm used to using is right click to cancel while moving something and* left to confirm or select
bronze bridge
thank you my good sir
=_= everytime i click away from the uv editor to see what vertex im moving the sphere projection just wants to disappear
bronze bridge
yay thanks 😄
I feel like i shouldve gone for project cylinder instead of sphere like wow adjusting vertexes to match a line aint workin for me atm
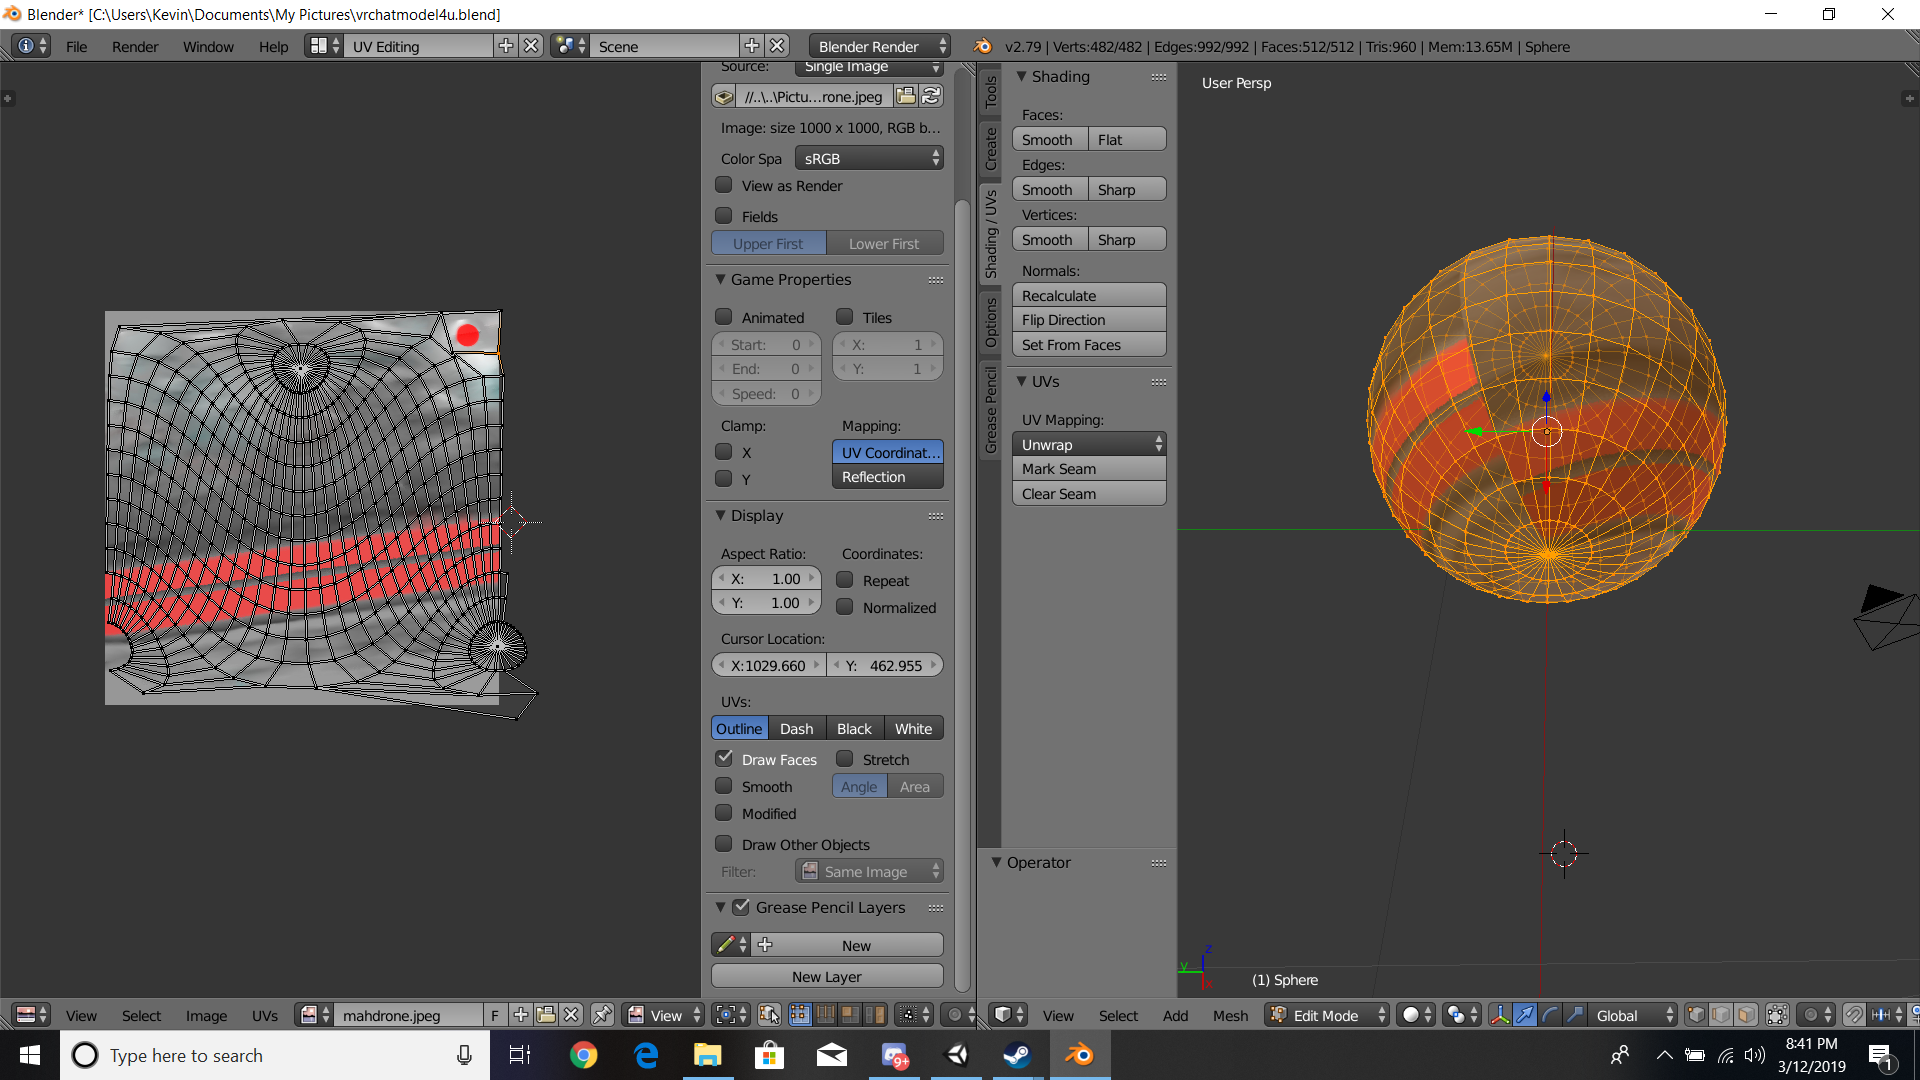 void narwhal
Marking Seams for edges can affect how the model is unwrapped
So you can press W in Viewport to click Mark Seam with whatever edges you have selected
you can bind marking seams to a shortcut if you feel the need for it
File>User Preferences>Input
you can also search for certain actions/keys within it
Blender 2.8 has a favorite option allowing you to easily bind stuff on the fly
which is pretty cool
anyways Basically imagine Marking Seam as defining where to cut the geometry when it unwraps
same thing as Maya
Oops just press Ctrl E not W to bring up the menu dunno why i got that confused
bronze bridge
yeah and when you hold w you make the vertex get messed up and look like a straight jacket XD
void narwhal
you might find this useful if you're familiar with maya
http://renderhjs.net/textools/blender/
bronze bridge
anyways i marked a seam but it seems that i cant control the seam
guess the problem for me is that i can only move 1 vertex and holding shift doesnt do anything for me even if i select both vertex points
void narwhal
holding shift while selecting just enables you to select multiple
try holding alt*+shift and clicking on an edge for an edge loop
C for Circle Select and B for Border Select
bronze bridge
i did alt shift and it just selects and then selects other things not move them or anything :T
void narwhal
G is to Move R is Rotate S to Scale
after picking either GRS you can select which axis with XYZ
bronze bridge
thanks
regrets everything he says about blender and finds that "g" is actually being more helpful in the sphere model somehow and keeps tinkering with it.
void narwhal
blender is nice but is lacking in certain aspects
bronze bridge
and i guess unity is supposed to fill those aspects blender doesnt have?
 rare plinth
current map that im working on for vr chat >w<
void narwhal
No Unity is a game engine
rare plinth
Still a ways to go though >w<
void narwhal
keep working
bronze bridge
you know what world vrchat might be missing .///_///.?
a portal 2 tube thing ... you know the ones that suck you up :T
void narwhal
i like the style you're striving for in that world
bronze bridge
._. wonder if there is any folks that actually make their house turn into a horror show
void narwhal
i feel like the colors look a little washed out but that could be due to the skybox and the terrain textures
bronze bridge
:T your just slightly irritated by me arent you rappy
void narwhal
can also see black lines on the horizon
rare plinth
could be for sure, I do have color correction added but I can always change that
bronze bridge
rappy im sorry for being a complicated individual ;_;
void narwhal
color correction should be done minimally though keep that in mind
rare plinth
absolutely ^^
hmm quick question, have you guys ever liked / disliked auto exposure in maps with vr on?
void narwhal
idk if i've ever noticed it tbh
generally you should avoid high contrast scenes with bright lights otherwise you will cause fresnel effect on the lenses
rare plinth
Thanks for letting me know.. Honestly building for vr chat is fun but I have only built for architecture projects for a led retrofit company. While building this I want to be sure its a good experience in not eye garbage.
void narwhal
yeah it's definitely a learning experience which can be fun
time consuming though e.e
 fair vine
Just put my avatar back in Blender from Unity as a FBX and now it looks like this. I tried CAT's eyetracking fix but it didn't work
What can I do to fix the eyes?
also this is what's happening
void narwhal
you mean from blender into unity?
if you're looking into a mirror it can cause eyes to wander/derp (or at'least it use to)
try getting a friend to look at it or try viewing it with a camera if that is the case
bronze bridge
yeah its really time consuming that im kinda of nervous that it will take away the hours i get to rainbow six seige or overwatch
void narwhal
if you aren't willing or can't put in the time&effort then don't
rainbow six siege and overwatch is hardly valuable time unless you lack time to relax to begin with
bronze bridge
XD yeah well I do want to be around vrchat to relax and look unique
Speaking of vrchat I really wonder how people add those juke boxes to worlds
void narwhal
Not too many
bronze bridge
You know the changing of the musics? When you click on them in vrchat?
They put a jukebox and buttons on it is that a coding or is it a link that the jukebox is picking up. Or is it something else.
void narwhal
i would imagine you could approach it a couple different ways
there is a jukebox component or something if i recall correctly
anyways keep in mind which chat you are in to keep it in context
bronze bridge
K
 plush token
Little bean is all done
plush token
why of course
dull canyon
Raph attacc, Raph protecc, Raph pat
plush token
Just doing the finishing touches on the rig now but she is coming to a VRchat near you
plush token
my friend might be modeling Filo
dull canyon
nice
crimson mist
Amazing
plush token
if he does i'll make older Raph
dull canyon
they totally have to do her transformation form tho 😄
plush token
he will
dull canyon
👌
plush token
he is going to do the works if he does do her
if so, i'll make either teen or adult Raph
umbral crystal