#3d-modeling
1 messages · Page 54 of 1
 dull canyon
https://i.imgur.com/HmVLInd.png so before I do it the probably wrong way again. what would be the "proper" way to fix this mesh now that I've deleted some of the edge loops?

 silent acorn
as in, filling in those gaps?
dull canyon
yeah, joining the vertices and creating the faces
silent acorn
there's prooobably a better way to do it, but just selecting four points and hitting 'F' should work.
dull canyon
the way I did it before was select two vertices that aren't connected, hit F and keep hitting F so it forms all the faces. but that feels kinda tedious
if I have to do this for all the gaps, oof
silent acorn
You should be able to select up to four vertices to make a complete face, so it's not tooo bad, but yeah. Sorry, it is kinda annoying
dull canyon
well I only have to select 2 vertices in this case
and then just point the cursor on where I want the edge/face to be created and keep hitting F
but okay, guess that's how it has to be done 😄

I guess over time you'll become more efficient with it
silent acorn
yeah! as it stands, what you've got here is miles ahead of my first model
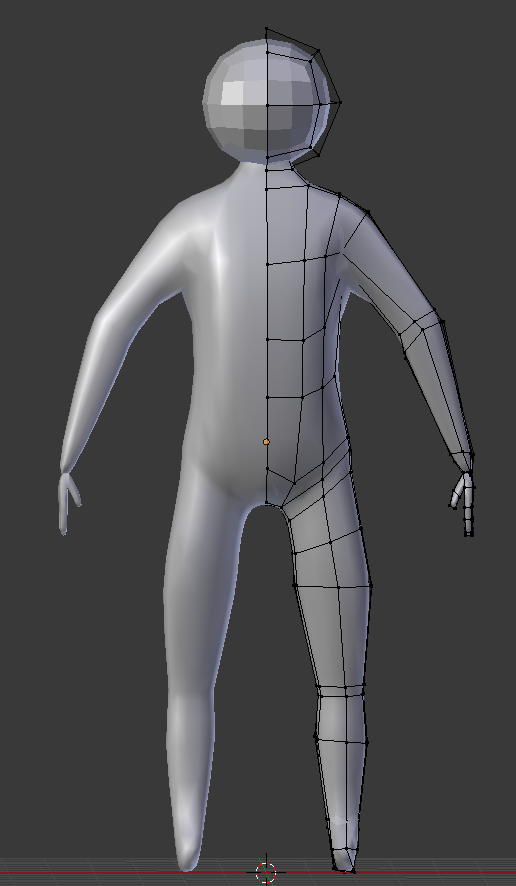
shudders
dull canyon
I mean, that looks like it'd work
silent acorn
The hands, man, they still haunt my dreams
silent acorn
It looks like a balloon animal twisted into human shape and given the cruel gift of life
mmmaybe ;>_>
dull canyon
xD
so
do you absolutely have to avoid triangles with this?
like, just polygons and ngons?
silent acorn
Ngons are usually a big nono, they sometimes freak out when stretching or twisting.
silent acorn
I know that some people prefer to work in tris, though. I'm not entirely sure of the details there.
Oh, I think I know what you mean. Lemme throw together an example here
dull canyon
thanks
dull canyon
yeah
like if I go from a detailed area like the eyes to a less detailed area like the rest of the face
I'd obviously need less faces
 fringe rock
Cut sqare in one or more quad with k and make an aditionnal cut in the corner outside that new quad
To keep everything quad
So youcan add detail in knee, chest,etc
silent acorn
Yeah, you could probably do something like this. I find it's best to keep even edgeloops around a model, though.
dull canyon
ok so you make tris
silent acorn
Like, this is waaaaay above anything I could make, but it demonstrates really nice quad layout.
 latent charm
Here's one way to do it
dull canyon
oh, okay
latent charm
If you're doing a model that's going to deform, such as an avatar you should be avoiding tris as much as possible.
They are allowed, just strongly discouraged for a few reasons, mainly that when subdivision modeling they create weird geometry and can cause shading oddities, among other things.
latent charm
It's not a hard rule like I said, just a strong suggestion.
dull canyon
okay, this really is its own science 😄
latent charm
Mesh Topology if you want to look up more about it
dull canyon
yeah, thanks
silent acorn
aw shoot, I should go sleep
good luck with the modelling, you're doing real good so far!
silent acorn
👍 👍
dull canyon
ah, so in that head, you'd basically lay down an actual grid on top of the model, and then just move the vertices to match the details
simply put
latent charm
http://wiki.polycount.com/wiki/Topology
Has a lot of links to further reading
dull canyon
oof
latent charm
 latent charm
The polycount wiki has so much good information
dull canyon
but it's so much
and I'm a dumdum so I need things like this in an ELI5 format 😄
I learn better when I have images to look at and some text to read instead of pages upon pages of just text
latent charm
I found one of the hard parts initially with modeling was being able to put a name to the concepts and actions, once I had that I could search for it and learn more at my level of understanding at the time.
dull canyon
yeah, that's the issue with everything new you learn. at least for me
the terminology and concepts you don't know yet
so you go in a discord channel and ask lots of questions 😄
at least that's how it works best for me. when I have people I can actually talk to and ask questions directly, rather than having to read long texts just to learn the terminology so I can google for it... might sound lazy but ¯_(ツ)_/¯
latent charm
Sounds like you just need a little human assistance to make that first link and can make good progress yourself from there, which I wouldn't describe as lazy.
dull canyon
yeah, that's basically it
I learn best by doing, but I'd always need someone I can directly ask questions if I'm stuck figuring something out
one of the reasons I hated purely abstract/theoretical classes in university so much. like math. it's purely abstract, you never apply anything you learn in the real world so you just have books to read, and you simply can't ask the prof during the lecture every time you don't understand something
like, once I'm over the initial hurdle and know some of the basics I can find stuff on my own more and more
latent charm
Oh god right? I actually really love using math stuff to actual end results, but unless I can constantly see the (even if incorrect) output of it all it makes no sense to me. I also failed maths at school a few times, partly because they never took it beyond theoretical conceputal whoowhoo.
dull canyon
yeah, I eventually dropped out of IT studies
there was too much crap that's just theoretical/abstract which we never applied to anything
we just learned it for the sake of learning it
like, wtf am I supposed to do with all this
dull canyon
ok, I think I'm kinda getting the hang of it, or at least a better understanding of topolgy
 umbral crystal
also u should mostly use quads if ur rendering or u want good shading also
quads just tend 2 have smoother shading than if u mix in triangles
even if its triangles that are quads
dull canyon
mhm
so, is there a way to automate the process of having to select each individual vertex and hitting G + click so it snaps to the surface of the underlying mesh when you for instance add an edge loop or extrude multiple vertices at once?
 subtle jackal
shrink-wrap modifier, or retopoflow is good for that.
dull canyon
thanks
subtle jackal
shrink-wrap can be a little fussy when trying to move vertices more precisely
dull canyon
I still don't understand what F2 actually does
subtle jackal
or at least I haven't found any magic combination of settings that makes it less fussy
and it lets you do things like create a face by selecting the vertex in a corner between two faces and pressing F, or continually create faces by selecting an edge between two edge loops and pressing F. It also intelligently tries to select materials when creating faces on objects with materials assigned
lemme find a video it'll probably explain things better than I could
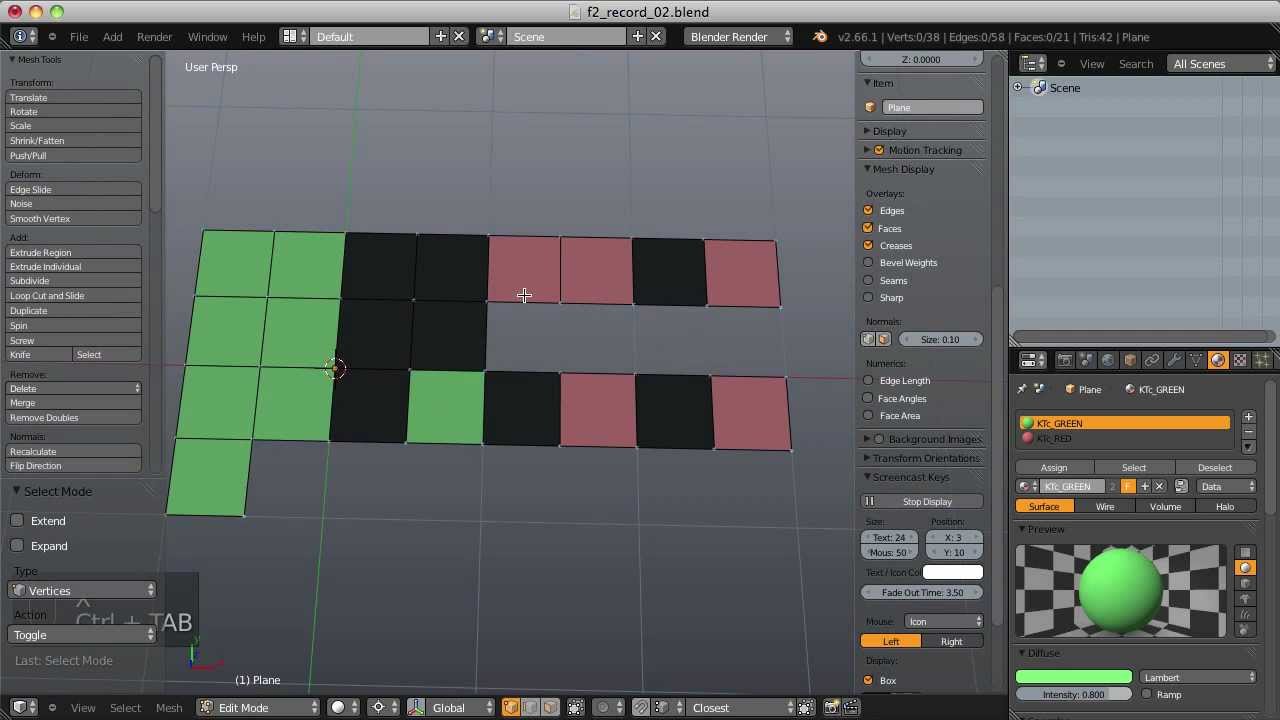
Quick tip about an addon for speeding up your poly-modeling workflow - http://cgcookie.com/blender/2013/03/19/tip-using-the-f2-add-on
dull canyon
ok I might actually consider spending money on retopoflow... gonna watch some more tutorials/reviews
but it looks like a huge timesaver
 zinc furnace
@dull canyon retopoflow is free FYI
dull canyon
is it?
zinc furnace
You can buy it on the marketplace if you need official support
dull canyon
like, officially?
zinc furnace
Yes
subtle jackal
It's open source, so if you're poor like me you can just grab it from github
zinc furnace
But you can also just download it from Github
subtle jackal

GitHub
A suite of retopology tools for Blender. Contribute to CGCookie/retopoflow development by creating an account on GitHub.
zinc furnace
Just make sure that you rename the folder if you do that
dull canyon
oh
zinc furnace
You can only get support directly from the dev if you buy it, which is mostly done by professional companies and stuff
For personal use it's not worth the money
zinc furnace
I think you have to rename the folder inside the zip to just retopoflow
And then either extract it to blender addons directly, or put it in a zip again and install from zip
subtle jackal
all the stuff on Blender Market is required to be GPL (or some sort of open source) licensed IIRC, so a lot of them have github pages where you can snag 'em for free.
You don't, I've installed them normally plenty of times now
dull canyon
oh, I didn't know that
zinc furnace
I had to rename the folder to get it to work
Otherwise it just would not show up at all
Maybe blender addons can't have periods in the folder name
subtle jackal
weird, maybe it changed recently
dull canyon
so, I just do "install addon from file" and point it to the zip with the source?
subtle jackal
yeah, and if that doesn't work rename the zip apparently
zinc furnace
I think you rename the folder in the zip, not the zip itself
dull canyon
should I see it in the addons list?
subtle jackal
yes, if it worked it should go to the addons list with that searched and check the checkbox
dull canyon
ok yes you have to rename the folder in the zip file
subtle jackal
ok
zinc furnace
dull canyon
yeah, got it now
zinc furnace
I had to rename the retopoflow folder in %AppData%\Roaming\Blender Foundation\Blender\2.79\scripts\addons
dull canyon
so now I just have to fight my conscience
zinc furnace
Retopoflow has plenty of tutorials so it should be easier to get started
dull canyon
cause even after all these years I'm still partially in the mindset of using tools like that kinda counts as "cheating"
subtle jackal
lol
dull canyon
even though I know it isn't, but my brain is stupidl ike that >_<
subtle jackal
if addons are cheating I've never modeled a thing in my life
dull canyon
it was the same with digital drawing in the beginning
subtle jackal
one of the best parts about Blender is there are so many great addons to speed up workflows
dull canyon
yeah
to me it just feels like... stuff like this you should first learn the "hard" way before you take shortcuts
but on the other hand I want to produce nice avatars and not have to spend hours just on one step (eg retopology)
¯_(ツ)_/¯
dull canyon
lol ok
zinc furnace
Kind of a running joke because shrinkwrap is easier but also gives worse results
subtle jackal
well what you do is use shrinkwrap to keep geometry in place and move it around after, that's pretty legitimate
cheating would be using like... uh what's that addon called
Tessellator
dull canyon
what would that one do
subtle jackal
it can generate quad meshes on its own, but doesn't take into account things like deforms and whatnot
it's similar to ZBrush's ZRemesher
dull canyon
okay
subtle jackal
made to take high poly static objects and generate low poly geometry automatically

Blender Market
Tesselator is an remeshing addon for blender that helps create good quality meshes out of sculptures
Dynremesh does a similar thing as well

They are very impressive tools
dull canyon
I know that it doesn't actually matter, but I wonder what people like blender guru would have to say to addons like retopoflow 😄
subtle jackal
I'd be surprised if he didn't appreciate it
dull canyon
probably
but yeah, it looks like an amazing tool
if I end up actually using it a lot I think I'll still buy it, just to support the guys
subtle jackal
Anyway I won't badmouth the guy but I really wouldn't take him to be any sort of authority on Blender or 3D art in general. The guys at CGCookie are equally as good at least.
dull canyon
yeah
subtle jackal
Andrew Price, that is
dull canyon
well, thanks again everyone for the help and info ❤ gotta go grocery shopping now (yay...)
 brisk tapir
Hi, I have a question. It's my first character modeling and I make the body first without any clothes or just clothes ? ( I use 3dsMAx)
subtle jackal
I made a full body without clothes so that I can make versions with different outfits in the future. It depends on what you want
brisk tapir
U think it's better for a CGI student to do the full body without clothes before ? Iwant to improve myself you know
dull canyon
I come from a 2d art background and basically everyone says to draw the body in the nude first before putting any clothes or similar on
mostly so you get the anatomy and everything right, and as @subtle jackal mentioned that allows you to do different outfits later on
you're more flexible if you don't have a set-in-stone concept for the characters design or if you plan on reusing the same character in the future
also, I wish yansculpts would get a proper audio setup, his mic is waaaay to bass heavy >_<
brisk tapir
Okay thx you a lot^^ I will do that
dull canyon
o7
 dim field
I have no idea how to 3d model I'm only in ninth grade but I really want to :(
dull canyon
https://www.youtube.com/watch?v=JYj6e-72RDs this is what I started out with a few days ago when I had 0 clue about 3d modeling. watching blender guru and yansculpts and asking around here has helped me a lot to get a lot of knowledge in a short amount of time

Blender tutorial for complete beginners! How to use the most common functionality of Blender: Modelling, Materials, Lighting Watch Part 2: https://youtu.be/s...
dim field
oh thanks
umbral crystal
how do u retopo with stuff like fur
 fading lion
would someone mind taking a look at a model, something is going on with the armature not following the mesh when I move it in object mode and I think the right leg is parented to the stomach?
fringe rock
yeah
fading lion
thx b
 spiral sigil
So I got bored in class and decided to model an X-Wing with a BB-8 droid and a whole interior cockpit
 fossil inlet
More like X-Doubt
Viewing it in Microsoft 3D viewer, no 3D program open in your toolbar, and you just decided to model an entire functional scale model with an interior in the span of a class?
Yeah no lol
spiral sigil
Can i be in vr chat
dull canyon
I guess?
spiral sigil
I demand a 3d or bodies will be droppin
spiral sigil
anyone thats an expert on blender?
i wish to make this point stick out without having to create a new surface on the tip
any suggestions?
brisk tapir
For my first face modeling I make that, what do u think about it ? ( sorry for my english I’m half flemish and half French)
dull canyon
looks good at first glance
brisk tapir
Thank you
 ripe lotus
Oo i like it @brisk tapir!
Do a cycles render of it
Kinda reminds me of elves from divinity
subtle jackal
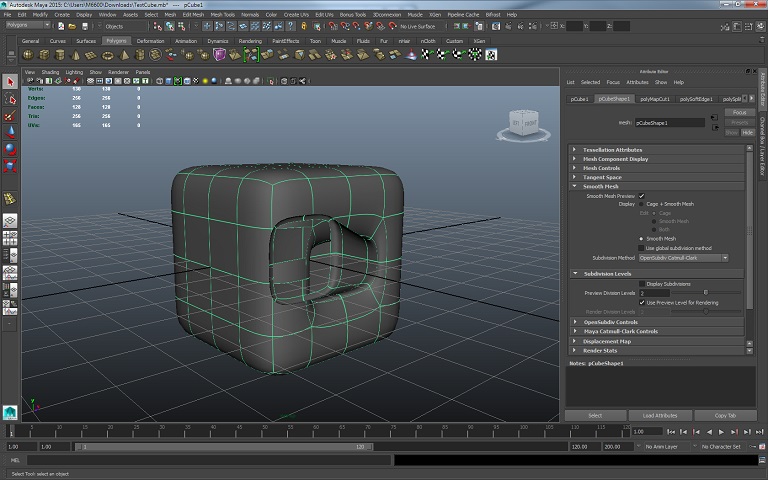
Looks like a Maya viewport to me so he doesn't have cycles.
fossil inlet
That’s the Max viewport
Maya doesn’t have the cube with the ring around it
Still doesn’t change that he doesn’t have cycles
subtle jackal
 fossil inlet
I’ve been using Maya since 2010 and have literally never seen that, must be an option.
subtle jackal
still could be either
fossil inlet
You can also switch Max to Maya controls so it’s likely in a similar vein so that Max users aren’t ripping hairs trying to navigate with Maya
That said his poly count and UI still look like Max
subtle jackal
yeah you're right
Ever since we had to use Maya for Mac in school I've tried to purge the experience from my memory so I couldn't quite remember the particulars 😛
fossil inlet
😂
I’ve been using Maya so long it broke me
Blender seems atrocious every time I’m forced near it
subtle jackal
honestly would pick Blender over Maya every time. It's just a nicer experience for me
crashes less, too
fossil inlet
But all the cool plugins are written for it and Max, and I don’t want to write a Python script for something I can bear 10 minutes of Blender to accomplish
I haven’t had Maya crash in a couple of years
Last couple of updates have been more about stability than anything
subtle jackal
yea this was back in like 2011
fossil inlet
Also removing Mental Ray and making Arnold and Renderman native
fossil inlet
Yeah Maya crashed way too often back then for little things
 umbral crystal
how 2 make circle shapes without using triangles 00f
 strong thistle
i think pro builder would do this
 swift heart
delete every other edge
triangles are now quads
zinc furnace
Everything is triangles, even circles
You can technically use ngons but you really don't want to
If you want it to look less jagged, fix up the vertex normals and set the shading to smooth
umbral crystal
yea but wat if i had an odd number of verts
also actually unity can import quads
theres a keep quads button in the import settings
also quads / quad triangles have much better shading than triangles
they are also subsurfed better
swift heart
quads will also tessellate in a way that's different from how triangles tessellate if you use tessellation shaders
umbral crystal
yea they will get cut into fours
or halves
triangles do too but they will keep the triangle shape as quads keep quad shape
 hollow sand
how do I upload my 3d model?
 stable edge
In unity, import the sdk, and choose the menu window, vrcsdk, build control panel. Login and you can upload from there Josuke :)
hollow sand
why is my VRChat tab not functioning?
@stable edge sorry for bothering again, but could you help me please?
stable edge
its fine!
a new window should have popped out so i probably said something wrong
oh this is the new sdk
stable edge
you need to have the model within the scene, firstly
stable edge
oh have you never done the process before?
stable edge
thats fine, we all have a first!!
you dont need blender open for this, so feel free to close it
stable edge
after adding the avatar to the scene click on the avatar in the hierarchy (left), change to inspector (right)
does it already have a rig?
stable edge
mm, this might take a while then
if you have no rig theres no point to having unity open
#avatar-rigging is more suited to what youre doing right now
stable edge
id recommend making one yourself!
hollow sand
ok
stable edge
there are two pinned posts id recommend you look at in rigging
 solid glen
I have a few questions about beginning modelling, once someone has some time.
stable edge
what are the questions?
solid glen
I guess I'm mostly looking for the most efficient workflow for beginning a base model. Start from a sphere? Cube? Have a design ready to go, or wing it? Have a detailed drawing ready, or just a sketch? Clothes before or after? That sort of thing. What's basically considered the easiest to start with
Bunch of things. I'm not new to Blender, but it has been a long time.
stable edge
workflow is specific to people, and there isnt really a "best" workflow
solid glen
I get that
stable edge
usually people start with a cube, plane or vertex
solid glen
However, I do want to hear what people have to say about what they found good for them from straight beginner
Thank you for your time. 😃
stable edge
you'll want to have a design already, otherwise your mesh will be... off...
you can stray from the design a bit, and you dont have to be that detailed, so you can do a sketch if you want to, but having fuzzy (?) lines might be confusing
with the illust id recommend doing they base body first (if you dont, clothing is more guesswork) and then clothing
you might want to have the lineart of the body visible over the clothing so you have an idea of the elbow location, etc.
model wise it more depends on what youre going for
if you want more of a character base that you can swap clothes of then do a full body
but im usually lazy
if youre just starting, do something with a simple head and work on making complex faces later
solid glen
I think I will want to switch clothes sometimes, so a body with clothes I can change sounds nice
 solid glen
yeah, complex by high poly and heavy mesh
 sly basalt
@hollow sand You're also using an outdated Unity. You need Unity version 2017.4.15f1
solid glen
I am a 2d artist casually, so I am aware of how to create body shapes that look realistic/stylized to an extent
stable edge
youre going off memory so youll miss aspects, and youll mismake shapes (?)
compare yourself drawing a circle to a perfect circle
youll draw the circle too square or to diamond like
too*
stable edge
neither but...
left is "traced"
its not perfect but the right is deformed
as a comparason
oh wait hang on
since when could we upload images
stable edge
timewise, its better
and it makes complex things easier to do too
really a reference is a must
solid glen
so what you're saying is to start with a clean sketch at minimum, or a reference photo similar to what I want?
dull canyon
I think most people (at least in the beginning) do a front and side (and sometimes back) view of the character they want to model
at least that's what I'm working on atm
stable edge
front and side are minumum
dull canyon
https://i.imgur.com/7Ei7Quz.png (slightly nsfw)
stable edge
reference or clean sketch, as long as its (mostly) front or side
pretty good!
face is a bit strange and the busts seem a bit too linear but
arms might be a bit too short as well
dull canyon
thanks, yeah I know there's lots of issues
I haven't drawn in a long time
gonna redo the whole thing
stable edge
tails also a bit linear as well
dull canyon
I got way too caught up in details and shit
stable edge
there arent that many issues actually
you probably dont have to redraw it (just fix some aspects), but if you want to improve artistic skill, feel free to!!
dull canyon
eh I went at it with the wrong mindset so
and she is suppsoed to look more foxlike
so I was trying for a longer face
stable edge
well, best of luck!
dull canyon
thanks :3
dull canyon
I'm just really happy that I got into VR and that something like vrchat exists
it's given me the opportunity to experience having a body I can't yet have IRL, and the motivation to learn something new that will hopefully make me happy and might even come handy in the future for new jobs
umbral crystal
also a lot of ppl who model
r gonna be like
"start with face then make rest"
actually just make whole entire character
but don't add any details
just basic round shape and round head
dull canyon
work from big to small shapes
umbral crystal
then u can start subdividing and adding details
dull canyon
just like with drawing basically
umbral crystal
like a muzzle or eyes
and floof
cuz dam i used 2 like
try and model the mouth along with the character
was terrible idea
and super hard 2 keep quads correctly
dull canyon
yeah, same mistake I made with my current project
dull canyon
"do as I say and not as I do"
umbral crystal
ye
dull canyon
so, how far do you guys take your concept art when you're creating a character? like, how detailed/finished do you make your drawing before moving onto 3d?
subtle jackal
I'm crap at 2D art so not very
really it's less about having a super detailed concept drawing and more about having a plan in general
dull canyon
https://i.imgur.com/nEkcGTj.png this is what I got so far (slightly nsfw), and I'm not sure how I should proceed now. if I were to just draw a normal picture I'd either do some lineless gray scale shading or do some cleaner lineart and then start shading/coloring
yeah, a plan is what I'm lacking right now 😄
like, I figure I should probably do some cleaner lineart now, define the base face and hair
then probably do some clothes, and some flat coloring?
subtle jackal
more detailed than what I worked from really
dull canyon
and probably some mugshots of the head with different expressions?
subtle jackal
that would probably help yeah, when crafting expressions
dull canyon
mh
I guess the easiest way to describe it is to go so far until she has an actual character so to speak
right now the face just feels very generic I guess
(I'm just typing out my thoughts right now, hence the rambling)
so I guess I should make the final face/head
subtle jackal
I mean when I say a plan what I mean is you don't have to draw out exactly what you want, but have maybe some reference images and so forth
dull canyon
add some flat coloring and the clothes
subtle jackal
so like for me I'll have a general idea and then maybe find images with elements I want to combine
dull canyon
well, the 2d artist in me would scream if I left it "unfinished" like that 😄
subtle jackal
the rest I do in my head
dull canyon
mkay
subtle jackal
so like my character has demon horns for example, and for those I didn't actually draw exactly what they'd look like but rather just looked for anime style images of characters with horns to get an idea how much detail to go for etc.
dull canyon
ok so, my plan I think will be: clean up the lines on the body > make a detailed face that has actual character > do some expression shots of the head > add some colors > move over to 3d for a first prototype
subtle jackal
which isn't to say that's all you SHOULD do, mind. Everyone has different ways that work best for them, but you don't have to is all I'm saying
dull canyon
yeah, I'm just trying to gather different peoples workflows so I have some reference to go on...
subtle jackal
I try to speed up my workflow wherever possible because I want to work professionally (or at least semi-professionally), so I skip things if I think I can get away with it 😛
dull canyon
yeah, makes sense
but as with drawing you first have to learn the rules before you can break them and take shortcuts 😄
which is where I'm at atm
subtle jackal
yeah I mean if you want to go strictly as "proper" as possible then you'd want a detailed character turn-around with all the features, then a full high-poly character sculpt, and then build a low poly from that, but realistically you can trim a lot of the fat from that sort of workflow 😛
dull canyon
yeah
I just want to learn how to do it "properly" first, so do every step
from that I can figure out what I can skip and where I can cut corners
subtle jackal
Yeah in that case I mean go nuts with your character turn-around really. I mean either way it's not gonna hurt
dull canyon
ye. maybe I'll do just a quick rough backview just to get a feeling for how it looks from that angle. anatomy has never been my strong point
subtle jackal
hell it can even help you with your 2D art since when you get to modeling it, it'll exaggerate any short-cuts you take in terms of realizing your drawing in 3D form
dull canyon
like, I also don't want to "waste" time by making a fully rendered image of it for instance
but I'd want the image to also be somewhat presentable if that makes sense 😄
like, I want to polish both my 2d and 3d skills I guess
subtle jackal
It's hard to waste any time on that since there's always use for it later probably. You can use it to sample colors from, decide on shaders for the final model, practice texturing, etc.
dull canyon
true
subtle jackal
and if there's an element you won't like about the character it's better to find it in the 2D stages than later on
dull canyon
on a different note... I still feel like I don't have my "own" style even after all these years
like, everything I draw just always felt very generic :/
subtle jackal
I feel the same way honestly I think part of it is just the high-level of self-criticism most artists have
dull canyon
I guess
https://imgur.com/0W3Zmjk this was the last fully rendered image I did (I know this isn't strictly 3d modeling related...)
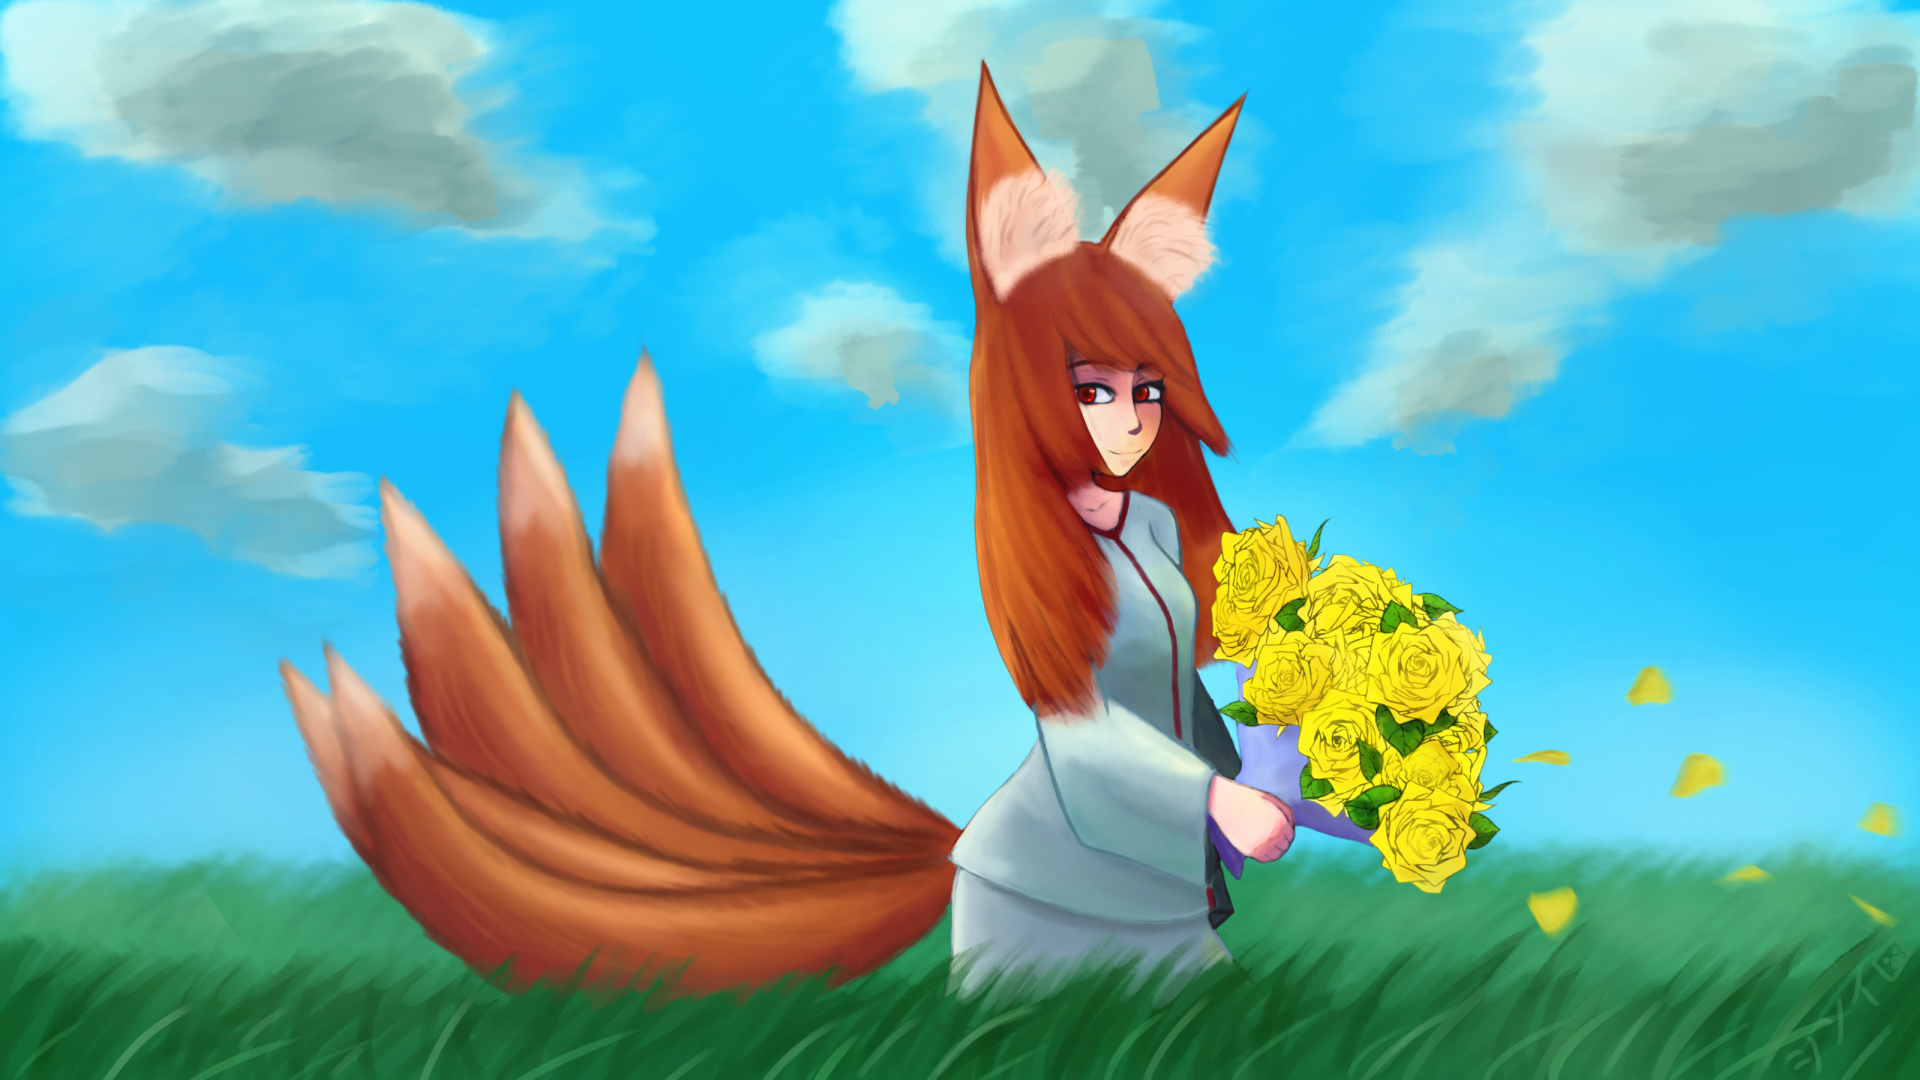 subtle jackal
well for what it's worth, what they taught us in school (talking like university, not like... K-12), was to find a bunch of artists we like and follow everything they do. Honestly I always kinda did that on my own, but it does help
especially if they're professionals
dull canyon
yeah, I know that good artists know how to properly steal successful artists' works
subtle jackal
for example one of my favorite artists learned to decide colors by looking at photographs and color-picking random spots and seeing where on the color picker they show up
well when I say "follow" I don't mean copy
dull canyon
but I get like a strong case of impostor syndrome when I do that 😄
subtle jackal
I just mean keep tabs on them and study their body of work
dull canyon
well, most art, especially in the manga/anime field is derivative, and even outside that area artists always copied each other to some degree
it's nothing bad, if done correctly
subtle jackal
well yes, but I mean don't try to be them, just learn how they work, maybe try the techniques they use, see what you can learn from them etc.
dull canyon
like, you're obviously not suppsoed to just blatantly rip someone elses art off
yeah
learn how they do things, learn what mistakes they made
subtle jackal
yep
dull canyon
if you really want to learn from someone don't look at their success, but look at all their failures that lead to that success
don't look at a masterpiece, look at all the failed sketches that lead up to it
aaaaaanyways, time for couch and stream
subtle jackal
\o/
dull canyon
hopefully tomorrow I actually get my paycheck so I can order the 2070 and modmic
I wish I would've started doing art a bit earlier in my life, maybe things would be a bit easier now 😄
 ancient kettle
Hello
spiral sigil
@stable edge What do you mean by "too linear" for Szena's side & front view sketch
 plush token

 spiral sigil
Thats looking cute
I like how the shader looks on the upper image
Would personally prefer increasing the outline width
stable edge
Is that a puyo?
Side view of the busts is almost a line and curve (mica), same with tail, that starts with a line as well (the top of the tail connecting to the back/hip
Busts are usually a bit rounder at the top
The way it was illustrated implied too much weight, and also not wearing a bra to some degree
 sleek crater
spiral sigil
sleek crater
spiral sigil
@stable edge Thanks for the explanation
Am not too familiar with tails but can see what you mean about the breasts
stable edge
all good!
dull canyon
Rimuru!
I love it
can he also transform into his Shizu form? 😄
@stable edge I mean, she's not wearing anything in those pictures so... 😄 I will refine everything with the final lineart so hopefully there'll be more curves where they should be
but yeah, I can see what you mean
I didn't really have much flow when I did that sketch
stable edge
thats fine!!
as long as your ref is good for when you actually make the model
you wont run into that many problems
dull canyon
yeah. I also gotta remind myself that this is just the first time I'm actually doing anything like that
so of course it's gonna be messed up in various ways
and that's fine...
but it's hard to break out of old habits 😄
like, I still have the tendency to treat everything like a masterpiece, which is bad
stable edge
yeah
dull canyon
https://i.imgur.com/0QLjxMe.png so yeah, that's the rough plan for now, for the concept art at least

so, here's a question... if I were to 3d model and rig my character in the nude, how difficult would it be to add for instance a bra that actually does... bra stuff?
without altering the actual nude model
ok now that I think about it I guess that wouldn't actually be doable in just blender, I'd assume
so I should probably model the character at least in underwear
stable edge
i mean collisions is easer in unity
dull canyon
ye, figures
dull canyon
yeah, I guess it'll be easier to just model her with a bra and panties
I don't plan on having her be without clothes anyways 😄
I just figured I'd be more flexible the more "modular" I model everything, so have the clothes be completely separate so I can change her outfit easily
stable edge
as long as theyre separate from the face
dull canyon
https://www.youtube.com/watch?v=7_1i4djTBR8 this is very relatable 😄

Most beginners skip the most important of learning step: planning. In this video you'll discover why setting learning goals, a routine and release schedule a...
dull canyon
feel like we need a development-general-chat or something 😄
https://docs.google.com/document/d/1eJirtacoSyc4cgHsalu6zye6Y06Xy75WUWCv-1UC5tw/edit?usp=sharing trying to outline what I wanna do

Google Docs
I want to learn how to create 3D models of characters so I can do renders of them and so they can be used in VRChat. For that I need to learn how to do 2D concept art, 3D modeling/sculpting/rendering/rigging and how to prepare a model for VRChat. For 2D concept art I need t...
 crimson cove
@plush token ohhh wow great Rimuru!!
dull canyon
indeed
dull canyon
so, what methods/workflows are there to do texture for your model?
latent charm
Quite a few. Texturing isn't my strongest point but I'd definitely suggest getting AwesomeBump (free, https://github.com/kmkolasinski/AwesomeBump/releases) which can generate PBR texture sets from a single colour image.
Also worth getting familiar with texture baking in blender, especially normals from a high poly model to a game-ready one.
dull canyon
yeah, I'm a bit familiar with baking at this point
subtle jackal
AwesomeBump is a cool clone of crazybump, yeah. I use Bitmap2Material since I got it with Substance's indie pack. Substance painter is also very powerful especially for more realistically styled models
I actually painted my avatar entirely in Blender, however. Its 3D painting is just more intuitive for me somehow.
latent charm
Plus reading up on PBR so you understand how that workflow works.
subtle jackal
I only wish performance was a bit better
well, I say entirely but I did a few things in GIMP also, so that's not completely true lol
latent charm
Yep, gimme a bit and I can get you some links
dull canyon
thanks, I'd appreciate it. currently just reading about it on wikipedia
zinc furnace
Pretty sure it's a fancy way of saying that your diffuse texture is completely unlit and that you offload a lot of information to other textures. Stuff like specular or metallic maps, and AO
subtle jackal
It's more than just that, honestly
latent charm
As always, polycount wiki is a great place
http://wiki.polycount.com/wiki/PBR
There's two PDFs I'm trying to find that were nice and long and went balls-deep into the detail of the system.
In a horribly simplified form that's kinda true.
latent charm
I suggest you do eventually if you intend to be creating materials.
subtle jackal
It's also about energy conservation and microsurface simulation etc.
but you just don't really need to know about that stuff if you're authoring materials
dull canyon
ok, I guess I have to read up/look up some videos explaining texturing in general
like, I have a very rough understand about what's involved but again I lack the terminology to look further into stuff...
latent charm

We cover the basics of art content creation, some of the reasoning behind various PBR standards (without getting too technical), and squash some common misconceptions.
subtle jackal
Was just about to link that lol
dull canyon
what I actually meant with my initial question is: say you have a character with for instance very detailed eyes (think anime styled), would you try to draw that design in say Blender, or would you UV unwrap the eyes and paint it in an external program? I don't really know how good the drawing tools in Blender are but I'm using for instance Clip Studio Paint to do all my 2D drawing
zinc furnace
That's actually something I'm curious about too. Texture paint in Blender seems very tedious and hard to work with, while doing it in an external program without seeing your changes immediately seems even worse.
dull canyon
yeah, that's basically my point
subtle jackal
I painted mine in Blender, you can do awesome things in it if you learn the tools. The main reason I ended up with blender (I tried substance painter, first) is the ease of swapping between multiple meshes/maps, which for whatever stupid reason is still difficult in painter
https://www.youtube.com/user/XRG81/videos never let your tools hold you back
 dull canyon
thanks, I'll watch through those
latent charm
Also @dull canyon If you're trying to look something up but don't know the name for it feel free to @ me
dull canyon
thanks, I will then ❤
but I hope you realize you've opened the flood gates by saying that 😄
latent charm
I'm cool with it, because helping people trying to learn and improve is something I was brought up around, in a way. Both parents being teachers and all.
dull canyon
ah, well yeah that'd explain it
dull canyon
https://www.youtube.com/watch?v=svzKoq3vew0 ok so I think this is basically what I was thinking of
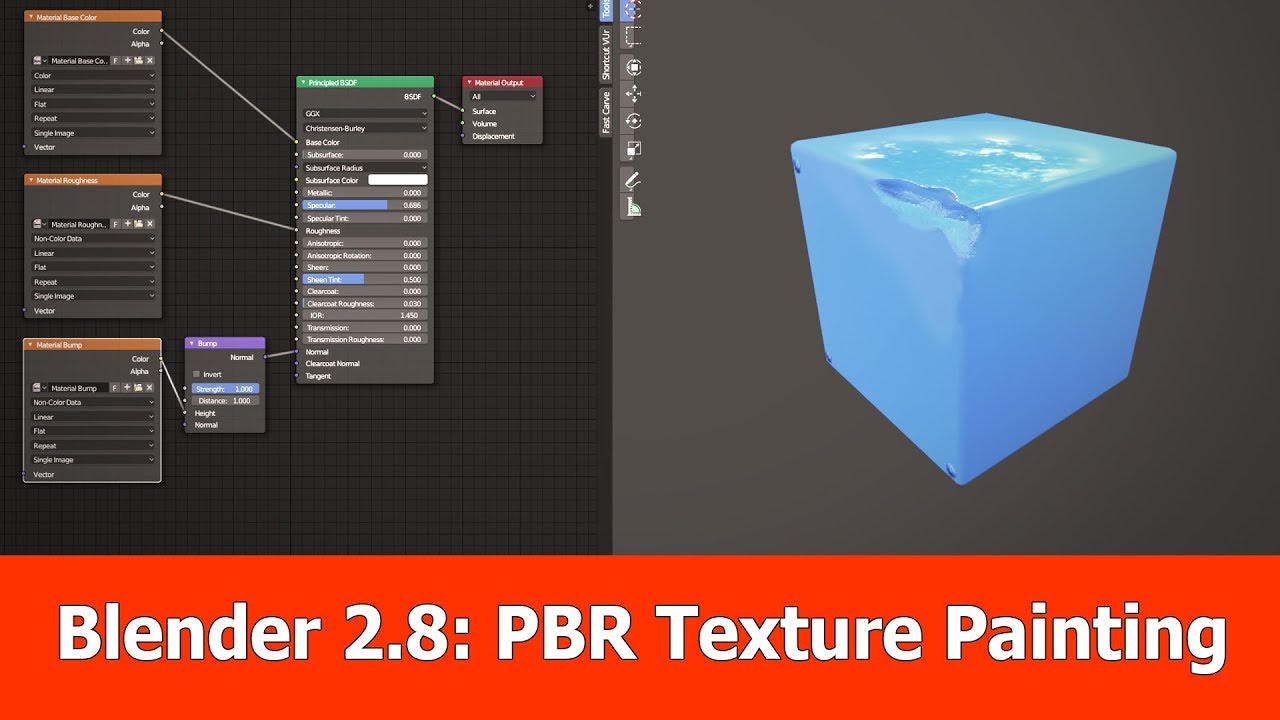
In this video tutorial I show how to texture a model with Blender 2.8 using PBR texture painting. I add paint slots for base color (albedo), bump (heightmap)...
or wondering about how you'd do it
so if I understand this correctly I could basically draw my texture, like a roughly woven scarf as the texture, and take the same image in grayscale to define the shadows/highlights and use as a normal map?
ok, now things make more sense I think
@latent charm on terminology again: are normal, bump and height map synonymous?
latent charm
Not all of them no.
Height map and bump map are generally the same thing, where in most cases 50% grey is no change, white is high and black is low. Based on this texture the geometry gets displaced along its normal.
Normal maps are significantly different, but it's fairly easy to convert a displacement map into a normal map.
I can give you a quick rundown on normal maps if you'd like
dull canyon
yes please
latent charm
Normal maps use the RGB channels in an image to alter how the surface normal is when lighting calculated against it.
The light hits the surface at a certain point and the normal map says "Wait no, you're facing like this actually" which changes the shading, giving the appearance of fine detail. No geometry gets moved around compared to with bump/height maps.
dull canyon
ah, so a normal map basically... tells the light in what direction the normal it hits faces
latent charm
Yup.
dull canyon
so, the RGB values are basically used as teh new XYZ values for the normal?
latent charm
As far as I know, in unity B is ignored because it can be recomputed from R and G in the shader and frees up a channel to assist in compression.
But yeah, pretty much.
dull canyon
yeah, I was about to ask, you'd only need X and Y I guess since the Z probably won't change
alright, thanks for the explanation 😄
latent charm
It kinda does but like I said, recomputed in the shader. Nothing for you to worry about usually.
dull canyon
yeah
I think I'll start doing like a "Today I learned" diary or something to write stuff like this down 😄
because I know I have a tendency to suck up a lot of information when I'm learning something new but at some point my brain has like a memory overflow and old stuff gets overwritten by new stuff
latent charm
It's gone now but I used to have an old blog that was kinda the same, just a record of what I'd learned and how I'd applied it to a model/render/whatever.
It's a pretty good learning technique to write down what you have learned and how you used it since it helps anchor it in your memory. Same with talking about it to other people.
dull canyon
yeah. I wish I realized that when I was still studying at university
I've always been the worst at taking notes
so I'd remember something I learned that day for one day, and the next day more than half of it would be forgotten again
subtle jackal
you can reconstruct the Z value because if you've properly calibrated your normal map each vector should = 1, so 1 - (x-y) = Z, for what it's worth. Also bump and height maps don't necessarily always displace geometry either. Often they're used to simply alter shading like a normal map or even (for example in Godot) for parallax occlusion mapping
dull canyon
ok
umbral crystal
u can change that with a shader
 native niche
guys, little question
the 70k tris patch is released or are we still in 20K tris?
(im completely new with this)
 dense kelp
70k is already in place
native niche
thank you
spiral sigil
Can someone make a Batman player model put it in a world then DM me the world name so I can equip it please?
umbral crystal
wat
fringe rock
I DM you when its done @spiral sigil
spiral sigil
❤
 minor reef
does anyone know where i can find the base for this fox girl?
fringe rock
Be different. We get to much déjà vue
zinc furnace
It's on deviantart somewhere
dull canyon
that's why I'm learning how to model, cause I don't want to use some run off the mill avatar base that a thousand other people are using 😄
umbral crystal
btw
model like a very generic character first
then extrude and cut out details
easier 2 keep good topology
 versed ember
This is as far as i can go for modeling tonight but think it was worth it just need to learn some more on rigid body's and are arms will be set
dull canyon
👍
umbral crystal
wait where is the "modelling"
did u model any of the characters or something
cuz cant rlly tell
 zenith relic
blender anyone-?
i could use some assist..
i need to cut that wing in order to make it flexible for dynamic bones..
and im having a little difficulty to cut it since its not a box anymore..
latent charm
You'll have to clean up the topology a bit, but k for knife tool may well be what you need
spiral sigil
weird thing, for some reason the hair has rim lighting and the meshes aren't the same shape, any idea how to fix this?
zinc furnace
I'm retopologizing an absolute mess of a fur coat. Is there an easy way to get a solid view in edit mode for the new mesh, but keep viewing the other mesh in material view?
latent charm
@spiral sigil My guess is how smooth shading works. Either mark the edges as sharp or throw another edge loop.
And Rokk you should be able to set any 3D viewport to any shading mode independent of any other.
dense kelp
Not sure about that but have you tried using one of the matcaps?
It should be easier to spot things that way
Since blender has built in matcaps
zinc furnace
Ohh, I didn't think of opening multiple viewports. That's good, thanks
umbral crystal
make sure all ur models are made using quads and/or triangles
n-gons are typically bad practice due to shading and exporting limitations
bc most programs convert them to quads and/or triangles anyways
zenith relic
knife doesnt really help
i need to cut it just like a normal box
but since the shape is different i have to do it manualy..
it would take me forever to cut them all
zenith relic
not working..
umbral crystal
it works if u can make a loop cut
zenith relic
i tried
umbral crystal
only works if its near face or edge center also
and then after u click u can slide it
makes cutting faster and u can cut where its gonna bend more so that its more fluid
zenith relic
it appears only 1 line in 1 surface..
umbral crystal
r there no double vertices
zenith relic
y
umbral crystal
won't work
zenith relic
indeed
zenith relic
connected how?
zenith relic
a
umbral crystal
remove doubles fixes that
umbral crystal
?
umbral crystal
are there no doubles
zenith relic
i made those objects from boxes...
but when i got the shape..
ive removed the edges...to make it in 1 piece.
and probably i need to remake it again in order to get that thing to work
also ive noticed that there is no aling option in blender
umbral crystal
did u try like
doing the ctrl r thig
on the center of an edge
it shows a pink line if u can cut
u press it not hold it
zenith relic
it does seem to show up a working cut
but not how i want it..
to fix that i need to make a center of the box?
instead of having just a surface?
 white moth
just a general blender question, i have some textures with transperency, how can I render them as cutout alpha in the 3d view instead of gradient transparency?
cutout would avoid alot of rendering bugs in the 3d view
umbral crystal
idk but in rendered view it fixes
spiral sigil
I imported it but i cant import the textures
fringe rock
Another jojo
spiral sigil
Yea
fringe rock
If you only want a basis model of jojo. There already a world with them
umbral crystal
ur not using a mode that actually renders materials/textures lol
also make sure that ur lights are set to hemi
spiral sigil
so.. im completely new to modeling and Im trying to add shoulder bones to a model, anyone think they could me out?
Im able to share screens and what not
umbral crystal
um u dont have any shoulder bones
spiral sigil
right
umbral crystal
if u want 2 add them u do it in blender or whatever
spiral sigil
I have no idea how to add them
umbral crystal
u might wanna add weight painting tho
so that theyre actually rigged
and not just empty bones
spiral sigil
Ive got blender open but I have no idea what the fuck im doing
Can I call you and share screens? @umbral crystal
umbral crystal
na gona play vrcat
spiral sigil
;/
 onyx juniper
 stable edge
that is some straight hair my dude
dull canyon
not sure if this is the right place to ask, but is anyone here using a RTX card and blender 2.79?
zenith relic
so...to make the whing bone flexible i have to split 1 cube in multiple ones right?
zinc furnace
In Blender
 dawn ember
zinc furnace
dawn ember
zinc furnace
CATS has an "attach mesh" button that you can use
zinc furnace
Just put that model back into Blender and also import the glasses
 sweet mirage
oh ok
zinc furnace
Then attach it to the head bone with attach mesh
umbral crystal
"Blender"
or parent it to the head in unity (u will have an extra mesh added to the count tho)
umbral crystal
oof
zenith relic
any clue how to mirror the bones in blender?
the old way doesnt work anymore in 2.79 version...
zinc furnace
Mirror a pose or mirror bones in edit mode?
Set origin point to 3D cursor with . for the latter. Recenter the cursor with Shift+C
Duplicate one side of the armature (minus the middle bones of course)
Press CTRL+M to mirror the duplicates, then press X to mirror along the X axis
Then press W and flip names, although you will still have to fix up the bone names manually since they'll be named .001
For pose mode, just CTRL+C one side, CTRL+V to the other and tick "flip on X-axis"
umbral crystal
symmetricize works also
zenith relic
i tried this: shit+d then ctrl+M then set the axies witch for me was Y then enter.
and...pretty much worked..
thanks dude
umbral crystal
ok blender bois
how 2 move UV and edge at the same time
without using a loop cut or knife tool
 tropic bear
What exactly to you mean?
If you mean moving the edge in the x axis, and watching it also move in the x axis, not really possible
If the UV's are simple enough, just translate them in the UV editor
latent charm
@umbral crystal press g twice to enter vertex/edge slide mode, slide it. Press f6 and there's an option to slide the UV as well.
umbral crystal
kk thx
zinc furnace
Is there a way to scale a model outward by its face normals? I need to add a second layer of fur to this fur coat.
subtle jackal
Alt+S
zinc furnace
I set the pivot point to "individual origins", duplicated the faces then just scaled up, but that ends up doing this
Yeah I actually tried that next, but that just does this:
Obviously the scaling here is exaggerated to showcase what it's actually doing, but you get the point
Actually nvm, you were right! I had to set the pivot point back to "median point"
Thanks.
subtle jackal
np
sweet mirage
can anyone add rigging to hair
umbral crystal
u can try asking in a server thats meant for that
like some dev server or #community-servers-old
spiral sigil
@hybrid forum just scammed my friend, he paid him $400+ to do a model and he created a cheap looking half assed model. when my friend left a slightly negative review on @hybrid forum in his discord server he deleted his message, and banned him to get him silenced. BE CAREFUL
 gray canopy
my normals are doing weird stuff, how do I fix this https://i.imgur.com/MjisO9K.png
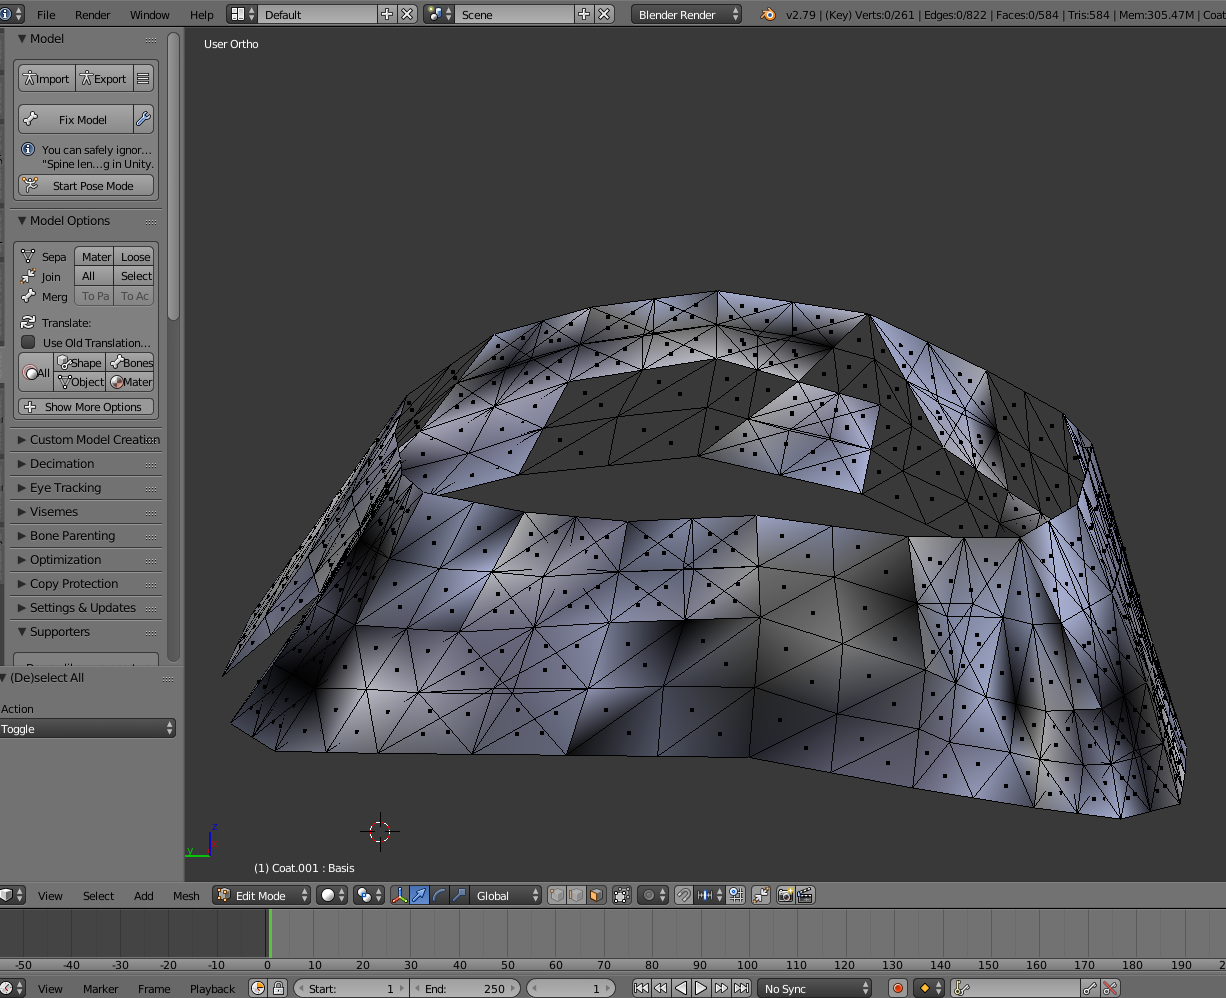 dull canyon
have you tried normalizing the normals yet? I think it was something like ctrl shift n or similar
gray canopy
yes, the problem is more extensive then that
if I do that, then it just puts the normals inside and while they are reflecting light the right way that direction, I need them on the outside
reflecting light outwards
ripe lotus
@spiral sigil Noted! I'll spread the word :3
subtle jackal
@gray canopy ctrl-n to normalize, then go into mesh>normals>Flip normals
though it looks like you also have doubled-up faces and stuff
gray canopy
btw that didn't work
gray canopy
I think i figured it out but the solution is horrifying, it seems that there is an inside and an outside piece and that the normals are all over the place for either and that it's missing pieces
subtle jackal
sounds about right.
gray canopy
solved.
dull canyon
enlighten us
zinc furnace
Oof, that happens a lot when a model has duplicated and flipped polys for the "inside"
And you then remove doubles
spiral sigil
Hey, how do i shape my mesh to this shape?
i added the red
for the shape
im using blender
im trying to shape it into the helmet. also i have top, front, back, left and right images
help?
subtle jackal
Well, you could get like 80% of the way there with half a UV Sphere
spiral sigil
how do i do that
subtle jackal
https://cgcookie.com/course/learn-the-blender-basics It sounds like you may want to start from the top, this is a good course to get you going

CG Cookie
Welcome to the Blender Basics course here on CGCookie.com! We're happy to have you here and are ready to teach you everything you need to know in order to start using Blender like a boss.
We'll cover everything: what Blender is, navigating the interface, working in 3D, movin...
spiral sigil
ik how to use blender to an extent
i have background images for every side
i just dont know how to sculpt it to the helmet
subtle jackal
well you'd create a UV sphere with add>mesh>UVSphere, then choose the resolution of sphere you want, delete the lower half, and use the scale and move tools, probably along with proportional edit, to shape it like the helmet. You can use wireframe view to see the background images you added.
a helmet like that is honestly kinda the most basic of basic shapes
subtle jackal
ctrl+right click I think? it's like a muscle memory thing for me at this point lol
wait, ctrl+left click actually
subtle jackal
now you'd use the basic tools like scale and extrude to adjust the shape and add geometry as needed
spiral sigil
Can anyone please help me make animations?
dull canyon
I think there's a separate channel for that
ah, you already asked there
nevermind ¯_(ツ)_/¯
onyx juniper

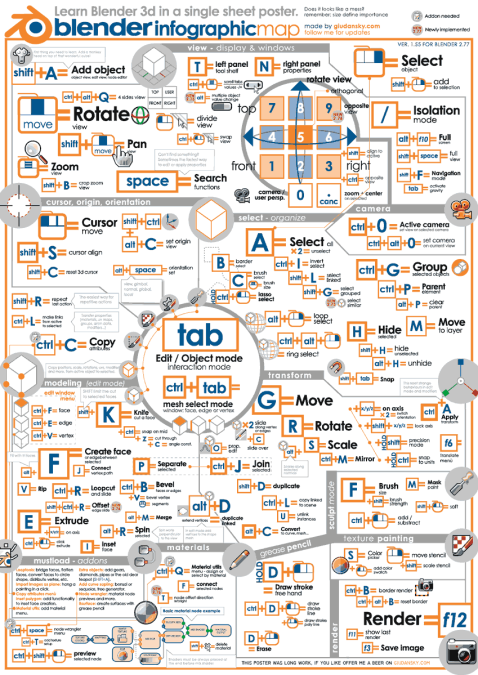
 tough hazel
That looks painful... For someone who uses blender, including myself, this looks soul shattering
zinc furnace
Is that for 2.79 or 2.8?
Seems to be 2.79
I need to learn 2.8 soon
I just got used to the backwards workflow of 2.79 and now it's time to switch already lol
tough hazel
I'm already used to 2.80
So hah
But judging by the icons in the poster... Maybe it's 2.79
fringe rock
they change a lots in 2.8 ?
 magic narwhal
Does anyone know how I could get a sketchup model into the vrchat?
Like a room model
umbral crystal
u would have to create a lot of colliders
that or separate the room into different parts if u wanted object colliders
other than that pretty straightforward
will need to bake lighting also #world-lighting
dull canyon
whee, today I'll start modeling/sculpting my first character 😄
god it's gonna be awful xD
umbral crystal
not if u make a super generic one then make urs from that
dull canyon
?
latent charm
Oh it'll be awful. I guarantee it.
Then you look at it and see that it's terrible, but also where you can make it better, and that's the basis of learning.
And over time you get better. :D
latent charm
Not what you want to do, but that it's okay to do.
Like failure is a step towards further understanding, which will make you better at it.
dull canyon
yeah
and hopefully 3d modeling will help me with 2d drawing too
to get a better feel for the forms
cause that's always been an issue of mine with drawing, translating the forms and shapes onto 2d
dull canyon
anyways, I plan on finishing this first version by the end of the week, so I can move on to either another character or the next version of this one 😄
silent acorn
Hey, good luck! Hopefully yours turns out better than my first character, ugh
I could describe how I wasted five hours manually filling in the edges of unwrapped faces because I had no idea what I was doing
but the memory's a little too painful ;>_>
silent acorn
I'm reasonably certain that you've got more skill at this than I had at the time
I had, like, negative talent
heck, I still do
fossil inlet
No such thing as talent, just hard work and dedication. You had negative hard work and dedication, probably. 🤔
Talent is just an excuse people make because they don’t want to admit someone put time into learning and developing their craft.
 jovial lichen
Hey so I wanted to make my own custom avatar from scratch and have it more or less finished and made it in sketchup. However, I’m not sure what to do from this point. Do I need to export it to blender to give it bones or something? How do I add joints to my model??? Any good tutorials y’all could recommend for a beginner to the avatar creation scene?
dull canyon
yeah, "talent" is an excuse for the lazy people basically
"oh I don't have any talent so I might as well not even bother putting in some actual effort into this"
silent acorn
You're right, yeah.
@jovial lichen You'll probably want to export it to blender, yeah.
https://www.youtube.com/watch?v=jp_SqjB0468 I found this tutorial very useful, but there might be better ones out there.
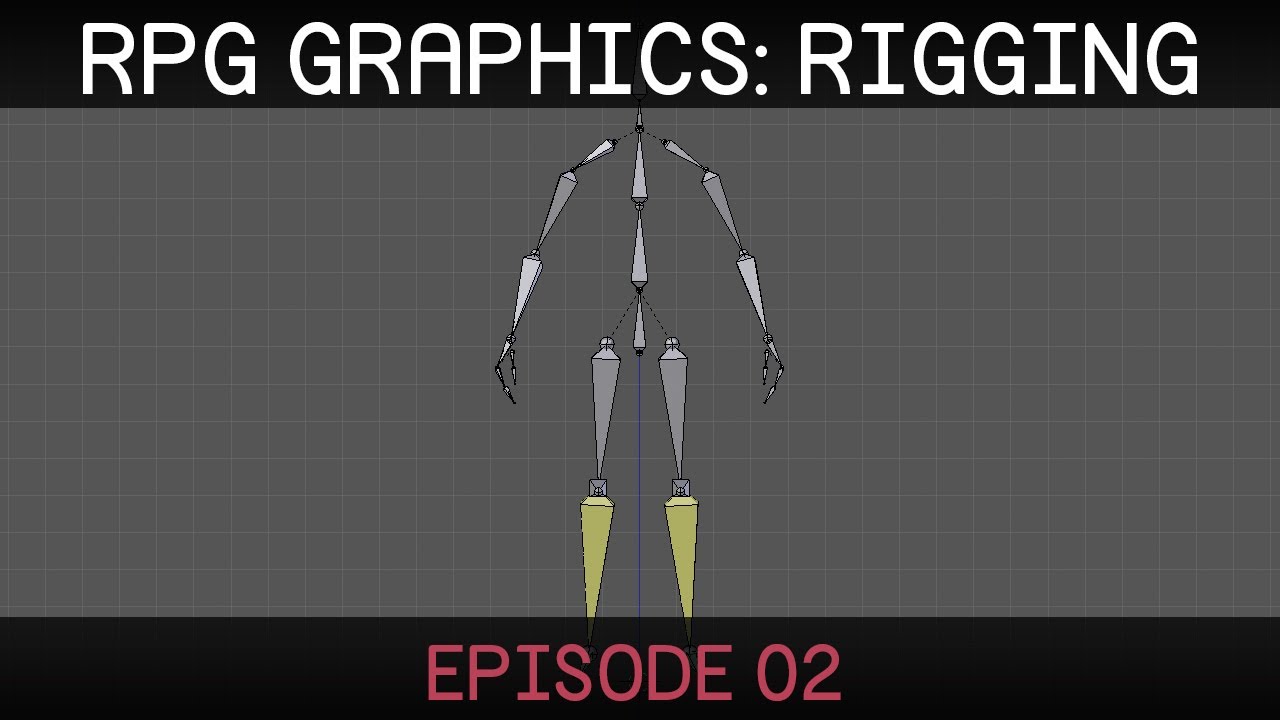
In this episode we create a rig for the character. In the following episode the mesh deformations will be improved using weight painting. See Brackeys' chann...
silent acorn
np, good luck with it!
jovial lichen
😃
silent acorn
oh, almost forgot!
once the rig's done, you'll need to export the whole thing to unity to upload it

VRChat Avatar tutorial from Unity to VRChat Links: Unity: https://unity3d.com/unity/qa/patch-releases/5.6.3p1 Model I used: VRC SDK: www.vrchat.com (Ensure y...
this is a really great tutorial for that step of the process
white moth
I seriously don’t understand quads. They don’t need to be coplanar, so they are clearly two tris anyway, what are quads even?
subtle jackal
The easiest type of face to work with
they subdivide cleanly and are the natural result of operations like a face extrusion
And while they don't have to be coplanar if your edge flow is good they are usually damn close
umbral crystal
yea and a smooth quad topology results in really good shading
normals will interpolate over areas and harsh shading angles or shading issues will be easier to fix
subtle jackal
Shading doesn't really matter between quads and tris, in fact, sometimes you'll get smoother shading splitting a quad the opposite way because of how it's triangulated internally. It's really just all about ease of construction, in the end. You don't get edge or face-loops with triangles,
 manic ermine
can anyone help me with a model im working on i have all the parts i need but i would like to have someone who knows what their doing connect them together im using 3ds max and would like it to be done for free mainly because it will not require much effort as i did the most difficult part
umbral crystal

Enjoy! Downloads: Template Mesh: https://mega.nz/#F!AywFzaqR!EiIArwWURQlBUxd3sBMiNQ
manic ermine
i don't need a tutorial and i know how to make the mesh but as im not that experienced id rather have someone who knows what their doing do it and then learn after for the future
umbral crystal
well then idk if u can find someone to do it for free then
manic ermine
well it's not much mesh just a neck and waist same with the skeleton
umbral crystal
if its not much and everything is separate then i dont really see what the difference would be as rigging segmented models is fairly simple compared to a fully skinned mesh
manic ermine
yeah i just want to make sure it's connected correctly so that is works
umbral crystal
u pretty much just create the bones urself and then give every segment full weighting so
manic ermine
as i have been trying this for around 18 hours or less
umbral crystal
idrk what ur model is but if its segmented then yea
manic ermine
oh the skeleton is their i took three models and removed each part i wanted and plan to then connect them together
the parts are a head a upper torso and a lower torso
umbral crystal
i mean if they were all already rigged individually
should really be as easy as merging the armatures together
idk how u would do that in 3dsMax but blender has some tools for that built-in and in CATS tools
manic ermine
yeah just need to connect the bones and then the mesh thats all i need
umbral crystal
no im saying if they already had rigs attached
u would just merge them
no actual rigging required other than fixing any gaps
manic ermine
i tried blender it has so far been useless to me
umbral crystal
again are they all already rigged? also #avatar-rigging is more the topic
manic ermine
well im going to put in miaximo after to auto rigg it and make it an fbx file
manic ermine
im not sure if it is rigged
manic ermine
yeah i can but all im asking is for nothing more than someone to connect some parts
but it will have to wait as i have to fix the model as i accidentaly deleted a fingers mesh
umbral crystal
no but heres what im saying
if the original meshes had rigs
the process would be much simpler
as opposed to if nothing was rigged
which would mean u would have 2 rig them urself
but bc ur not answering its hard 2 even give u a solution or suggestion
manic ermine
that is because im not sure my self but i can say their smd files i converted in crowbar
umbral crystal
well its literally the easiest thing to find out
if the mesh has bones, and u can pose those bones (and/or if the character when used in the game can actually move and has joints) then its obviously rigged
and again at that point u would just merge all the rigs together and bam ur practically done
manic ermine
well they can move around yes
umbral crystal
yes but do they have any joints
like in the game do their arms move, do their legs move, etc
cuz again if so then its rigged obv
manic ermine
if i could paste a screenshot i would but this chat wont let me
umbral crystal
and u can check that in whatever software that supports rigs
and sure u can lol

also the bot doesnt delete screenshot links
manic ermine
i ment like printscreen and ctrl v
subtle jackal
you can ctrl+v into imgur
manic ermine
yeah but do i need an acount
umbral crystal
just load the original models
also it seems they do have rigs, they clearly have bones
manic ermine
yeah i did i removed the mesh as i plan to connect parts from different models
the part named niddhog is connected to mesh0 to 3 while ultima is seperate
umbral crystal
well as long as ur exports have the bones also
u can just merge the rigs together
manic ermine
yeah thats what i was aking someone to do to make sure its done right as this is my first custome model
umbral crystal
well again if u want someone 2 do something 4 u this isnt rlly the place for it
this is more of the place 4 people helping others do things
if u dont know how 2 do something, ask people how 2 do it or go 2 some server like VRCTraders and maybe some1 will do it 4 free or charge
manic ermine
k were can i find vrctraders
umbral crystal
manic ermine
found it
dull canyon
@latent charm so can you ELI5 when I would chose between a bump and a normal map, why would I chose one over the other? can you combine them?
umbral crystal
arent they basically the same thing
bump and normal and detail maps are usually the same thing
but a heightmap is usually in black n white
and what the different types of bump maps would do is just change how the models shading looks
the map itself is a diagram of what the shading would look like if u shined 5 lights on the object
one for each color u see
and in turn that would change lighting directions on the surface of ur mesh
and a heightmap will usually do that shading part but also displace the mesh so it looks even more 3D
dull canyon
https://www.pluralsight.com/blog/film-games/bump-normal-and-displacement-maps well I read this and it says there is a difference between bump and normal map


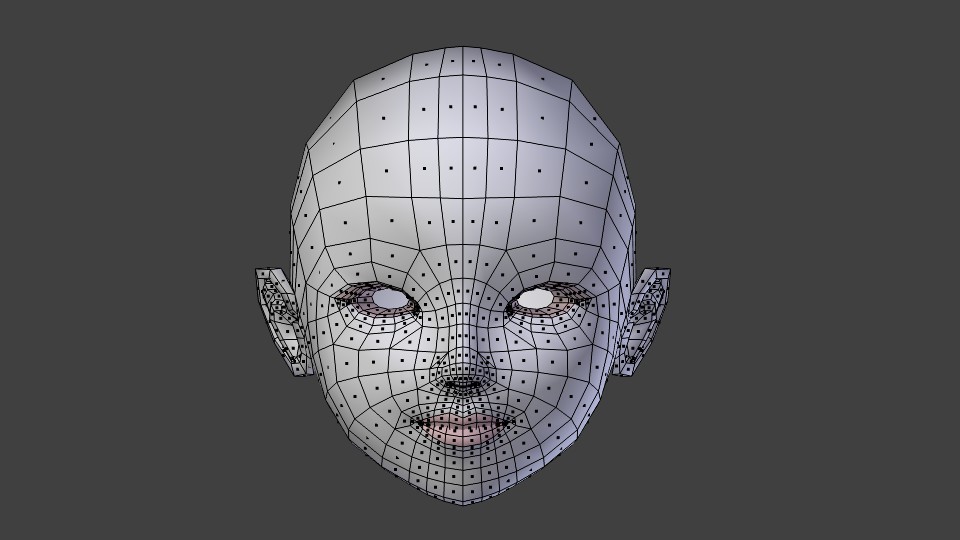


 umbral crystal
its saying a bump map is basically a heightmap
dull canyon
yea
umbral crystal
but the terminology honestly is just messed up everywhere
dull canyon
mkay
umbral crystal
people call them different things in different places
a lot of people would interchange bump and normal maps
rather than bump and height maps
and etc
subtle jackal
A bump map only defines a single axis, normal maps give all 3 (x, y, and z). Generally speaking you'll probably want a normal over a height/bump map, especially since most of the VRChat shaders I've seen use them.
zinc furnace
Bump map and normal map is the same in Unity
_BumpMap is just normal map
A heightmap is what actually displaces geometry
Heightmaps are still cool and should be used in conjunction
Not always though, IMO it should only be used on bumpy surfaces. I have a very rough wall in one of my more recent maps that greatly benefits from heightmaps
As well as the carpet
But the wood doesn't have it nor does it need it
Normal mapping is pretty much solely for lighting and won't do you much good on very basic toon shaders
dull canyon
okay. normal maps is what's used to bake a high poly mesh onto a low poly one right
latent charm
A high poly mesh can have any of its properties baked down to a low poly, the most useful being normals.
dull canyon
okay
zinc furnace
How does that work again? Wouldn't you need to unwrap both meshes the same way?
latent charm
And height maps are best used if you ever intend to combine two, or edit one by hand. Eventually they should be baked down to normal maps, unless you plan to use them for displacement in a shader.
zinc furnace
Unless it's vertex normals
latent charm
Nope, each can be unwrapped completely differently. It's only the low-poly's unwrap state that matters.
dull canyon
what other properties would there be on a high poly mesh?
zinc furnace
Oh I see, that's interesting
latent charm
Ambient occlusion, procedural textures that use the more detailed geometry, displacement, etc
subtle jackal
Your high poly doesn't need to be unwrapped at all
umbral crystal
u can use stuff like the multires tool in blender to sculpt details onto a lower poly model as well, automatically able to generate a normal map 4 u
latent charm
That's still doing a high-to-low poly bake, just streamlines parts of the process.
umbral crystal
ye
subtle jackal
bake from multires is ok but I've had generally better results with separate meshes
dull canyon
so, as far as Blender is concerned a normal map == bump map == height map?
latent charm
Nope
Normal maps change shading via altering the normal direction on a per-pixel basis.
Height maps are used to displace geometry.
Some of the confusion comes from the fact it's very easy to calculate a normal map from a height map.
latent charm
The opposite way is much harder.
dull canyon
so a height/bump map just simulates high/low points in the texture?
subtle jackal
bump maps that don't displace geometry are a thing too, and they work similarly to normal maps, but they are not used as often these days.
but yes
dull canyon
yeah, that's the ones I meant
not the displacement maps
the ones that don't alter the actual mesh
so, if I wanted to simulate for instance more details in a characters hair without actually adding additional topology, would that be done via a normal map?
subtle jackal
yes
dull canyon
okay
subtle jackal
in fact you can, in some instances (or I guess in this case depending on what character shaders you use) layer them.
dull canyon
I assume via the same process of sculpting a high poly model and baking it onto the low poly one
layer them? as in applying multiple "cycles" of normal maps?
subtle jackal
So you could have a very low poly in-game mesh, simulate large differences in geometry with one normal map baked from a high-poly, and then have a repeating super-fine normal map that describes, say, even individual hair strands
dull canyon
huh, neat
subtle jackal
these are usually known as "detail normal maps"
zinc furnace
I use those for skin
dull canyon
so what kind of shader would your recommend for such things that are also "vrc friendly"?
zinc furnace
Standard
dull canyon
okay
zinc furnace
If you need a toonier model with those details, Cibbi's Toony Standard works.
Xiexe's XSToon probably works decently well too, but I don't like how inconsistent the lighting can get on that one. Every time I see friends walking around in it, they're super dark in an otherwise very bright map.
Or other way around
subtle jackal
I've been using Xiexe's shaders, since I heard they perform well and they have a good amount of options, but I haven't really verified it myself.
latent charm
I would suggest getting familiar with proper PBR shading before playing around with toon stuff.
Walk before you can run, learn the foundations and work from there and all that.
dull canyon
yeah I was in a very dark map with a friend today and his avatar was completely light and everyone else was properly dark 😄
subtle jackal
Haven't noticed any weird lighting stuff myself but I don't go to many places lol. I did notice compared to Poiyomi's Shaders that the tinting of the scene light seems to contribute more, and brightness doesn't seem to be clamped
zinc furnace
Yeah, which would be correct for a PBR Shader
But it trusts ambient too much compared to other toon shaders (or even Standard) that I've tried
Granted, I've only ever tried using XSToon in such a way that it looks like poiyomi or Noenoe
dull canyon
@latent charm I did watch at least Blender Gurus video on PBR
latent charm
Time to scream at world builders who don't set up ambient lighting properly :B
subtle jackal
I haven't tried NoeNoe yet but it seemed to be focused around doing weird effects
from the preview stuff
latent charm
@dull canyon So to answer your question, aim to be using Unity Standard Shader for now
dull canyon
okay
which would probably be best anyways considering I don't wanna go for a very toon/anime look with my avatar
subtle jackal
I would be interested in someone much more knowledgable demoing the performance of popular shaders to see how they stack up. I don't know enough about rendering to make any real evaluation
dull canyon
like, I love watching anime, but my taste in pure drawing/art has moved more to a anime-realism-middle ground these days
latent charm
Standard is really performant. And good. Anyone saying standard is terrible either has such specific needs it can't meet them, or is bullshitting.
dull canyon
okay
subtle jackal
I do wish we could do UE4-style node-based editing so I could do some advanced masking. If we can I haven't found where yet lol
zinc furnace
Standard is one of the best shaders for more "realistic" looking models but it has a few caveats that Rero showed me today
There are ways to improve upon Standard that are more suitable for VRC
dull canyon
mkay, well I'll ask around here anyways when I ever get to that point
but I don't have to worry about the shader while sculpting/modeling right?
subtle jackal
no
dull canyon
good
zinc furnace
Not while modeling but I think it's something that will come into play when you texture it
subtle jackal
Not really anyway, it's a good idea to have some clue what amount of detail you'll have as final, like I didn't worry too much about my hair since I knew it would be toon shaded, but aside from that it doesn't matter