#3d-modeling
1 messages · Page 48 of 1
 glacial pasture
if it's 6 seconds you could try to Gyazo it
 floral violet
its like 39mb
glacial pasture
gyazo just screen records for 6 seconds and uploads it online
floral violet
i forget im recording a 4k screen
glacial pasture
useful for discord posting like this where we can't attach anything
floral violet
lol
glacial pasture
and I was annoyed with one day of working on a revolver
floral violet
thats just one of 3 trees
glacial pasture
You animating the whole mech from start to finish?
floral violet
i will be rebuilding all of them too
glacial pasture
00f
floral violet
ps that is a vehicle
floral violet
mhmm
also not to self dont dump anything from OW
7 textures for mech
13,000+ that dump
glacial pasture
👀
floral violet
needle meet haystack
i had fun for 10 hours playing what texture goes to this uv map
glacial pasture
worst part of ripping
absolute pain, like the old Runescape cache everythings jut titled 1-whatever
So you gotta open each of them and just hope you find it
floral violet
they were 000000 in hex
and explorer doesnt know how to sort by name in hex
also they were dds
yea im happy thats over with
glacial pasture
painful things
I think I've seen that dance machine in a world before, can't remember
glacial pasture
I'll have to take some Fullbody boys there
me rift no fullbody
I wanna do the vive fullbody with the rift headset setup
floral violet
it also allowed me to make pushbutton triggers without interact
glacial pasture
I'm pretty low on the world making stuff, so that'll lose me real quick
floral violet
i also made the Aqua Capital Mac Anu with the mini map, menu, weapons, combat and pockets
glacial pasture
Haven't seen it
floral violet
should
you can pick up items and place them behind you, drop them and they dissappear and go into your pockets that follow you around
floral violet
okie
 spiral sigil
@floral violet holy crap I just started looking into modeling and stuff today. I’m amazed by your work
floral violet
😮
thank you
im working on some stuff rn :3
@spiral sigil I didnt even know i had fans XD
spiral sigil
you do now 😄
 visual vigil
https://cdn.discordapp.com/attachments/397120744234156034/489162388961230848/unknown.png how do i merge uvmaps like this?

 past mountain
My way of solving it is you split up the 2 uv maps with the selected meshes they are assigned to, then on both meshes you delete the one it is not assigned to. Then you name them both the same ( you may have to respecify the uv map in the materials/Texture tab) then you merge both meshes together again
hope you understand what I mean, kinda bad at explaining
 zinc furnace
Basically, you need to make sure they have the same name before you merge the meshes
Otherwise you'll have to separate and rejoin them again
Probably by material @visual vigil
visual vigil
 spiral sigil
Ooooo
 rose cedar
Anyone know why the Object Mode doesn't show the bones armature of my model anymore ? The edit mode show the bones tho. It started just after merging a head and body mesh (with bones) 🤔
I'm out of idea tbh
spiral sigil
did you hide them ?
rose cedar
No I didn't hide them
I already tried ALT + H it doesn't do anything
Ok so it seems , hiding the mesh and moving some of armature managed to make the bones show up in object mode 🤔 I have no idea what just happened , what button I pressed but whatever.
 viral mesa
is it normal that there are black spots appearing on my model after applying the material on it in unity?
 brave dune
black spots? pics?
viral mesa
this discord group disabled the picture posting feature
I can't show anything which makes it a pain
I guess I could link it to you in pm
spiral sigil
upload to imgur
viral mesa

here
around the model
there's black spots and changes whenever I look at the model from different angles
brave dune
looks like specular stuff
viral mesa
I have no idea how the light system works in this software
brave dune
standard shader or custom one?
viral mesa
standard
viral mesa
still does it
brave dune
does it only do it with the normal map applied?
viral mesa
it still does it without
I can see black surounding the model
like a lineart
under shadows
it's weird
there's also no lights in the scene
and no skybox
I'm on default viewport
brave dune
that could be part of it
https://i.imgur.com/brOFZJv.png
with those two option enabled, you will see the lighting you setup in the scene
 brave dune
maybe lower the normal scale slightly?
viral mesa
how do I lower textures resolution from the engine?&
nvm found it
still does it ffs
brave dune
did you readd the directional light and skybox to test the scene?
https://i.imgur.com/nz3jkT7.jpg
https://i.imgur.com/ZQOuwsF.jpg
those two view options do let you see a huge difference in lighting on a model

 viral mesa
how do I do that
brave dune
viral mesa
oh I did
I guess I have to start from scratch
cuz I'm working with substance painter
I don,t understand it looks fine in painter
brave dune
did you give it a matallic map?
 lament pond
 viral mesa
@brave dune everything works fine now
idk what I did right, but I know what to do now
 small cloud
umm, is there a way to symmetrize mesh, but NOT the uvs?
 latent charm
@small cloud When you say symmetrize, are you referring to blender's mesh function with that name, or the generic act of making a symmetrical mesh by whatever means?
latent charm
Well, regarding the symmetrize function, it copies all mesh data from one side to the other. This includes UV data.
https://docs.blender.org/manual/en/dev/modeling/meshes/editing/basics/symmetry.html#symmetrize
small cloud
yeah, the UVs is something I want for it to ignore, but probably is not feasable, will have to find some workarounds, or just reuv
latent charm
What exactly is it you're trying to do? It could be that you'd be better off using the mirror modifier, or if you already have the geometry on both sides then using the snap to symmetry function.
small cloud
yeah that's where I screwed up, I forgot snap it to symmetry.. oof
shaped one side of jacket to fit female breasts, but I forgot to snap to symmetry
I would gladly use symmetrize, but I like how one side of jacket has different texture

it's not an issue to shape other side, tho I hate when can't use xmirror
visual vigil
https://cdn.discordapp.com/attachments/407090704213475328/489725627855798272/unknown.png https://cdn.discordapp.com/attachments/407090704213475328/489726132485226496/unknown.png

 spiral sigil
how are the ears getting out ? 🤔
 twilit ferry
I was trying to replace the fbx in my assets file yesterday and it would refresh in unity but when I loaded it into the game, it was the old version still...
I only got it to work by removing the model from the Unity project completely before re-adding.
Any ideas as to why that might have happened?
past mountain
make sure to click the expand button before selecting the model again. When it has to load you know you've done it correctly
twilit ferry
Does it not load in properly if you don't expand that?
The model in the Scene window matched what I had in Blender but didn't pass through to VRChat.
past mountain
yep I know it's weird, you basically refresh your list
twilit ferry
Weird
I'll try that next time thanks.
Been working on a Manny Calavera (Grim Fandango) avatar since I got tired of all the female anime characters.
Admittedly not the best choice for FBT as instead of having extra long legs, he has stumpy legs which is even worse! 😛
 topaz frigate
@twilit ferry Ye the stubby legs on manny are a bit weird in full body
 tender tendon
https://i.imgur.com/SN3cbNQ.png Pretty satisfied with this dude so far, fun to try and make a character into a kind of 2.5d version with joints
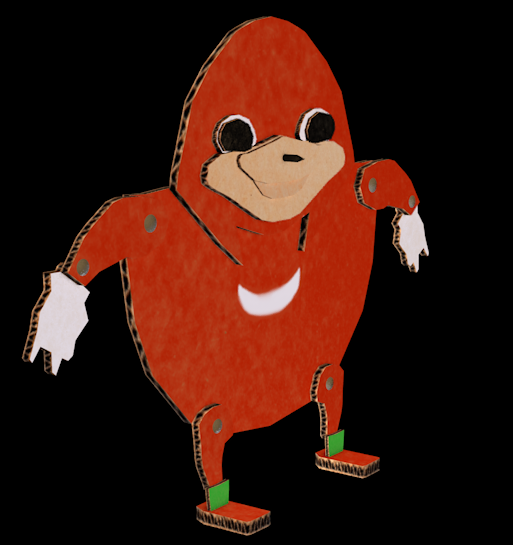 tender tendon
Sad part is knuckles gives me creativity, their shape and the history is just so fun
 dry chasm
you could say your creativity sometimes falls a bit flat?
topaz frigate

tender tendon

 grizzled grove
visual vigil
grizzled grove
visual vigil

 topaz frigate
😰
spiral sigil
yes 👀
lament pond
 topaz frigate
wow thanks
twilit ferry
@tender tendon if you can get the joints to rotate in just one dimension too then it'd be awesome!
tender tendon
i made custom animations for it
only problem is the standard avatar controller makes stuff like VR just break it
twilit ferry
no way to lock it down? :/
pc only avatars heh
though surely most knuckles are pc users anyway?
 cyan lantern
good evening-morning-noon,
I'm wondering, is there an easy way to change an open hand from a T pose into a relaxed A pose hand?
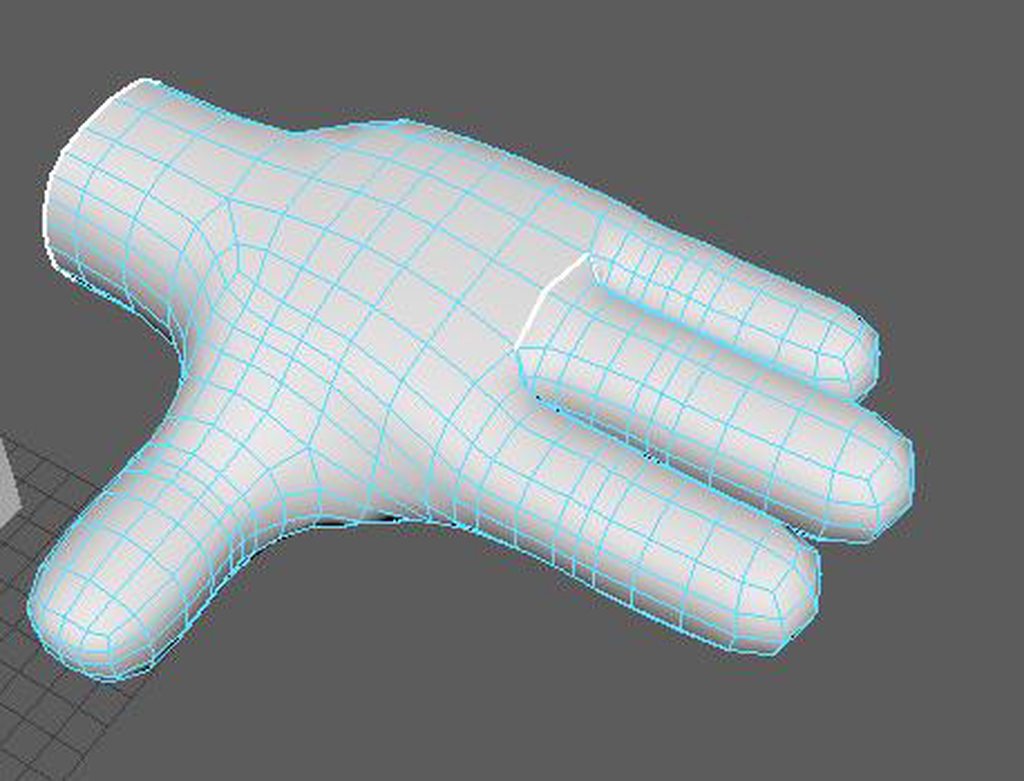
 hollow tide
Is there a way to mirror in blender without it fkn up?
 slow zealot
anybody can tell me how i can create a 3d model easily from game screenshots (things like meshroom etc do not work as there are no meta data in screenshots)?
i hqve 0 experience in modeling
thamk you
cyan lantern
what program do you use?
slow zealot
i hqve blender and unity to upload models to vrchat
cyan lantern
oh boy, well zero means you need to learn the basics of both the program, for which luckily for you there are a lot of tutorials, and then the basics of modeling in general
slow zealot
and 471 screenshots around the character i want the model to be
cyan lantern
you should try modeling some simple things first, jumping into a complex character might be really hard for the first time if you didnt model anything at all, and would actually take you much longer than if you'd have modeled a few things before to get the gist of how modeling works
you model a character by getting at least 2 shots of it , 1 from the front, another from the side, and setting up as reference planes , you build meshes in the general shapes and use the various techniques of modeling to keep adding more detail
also take note of a thing called topography, which means the edges connecting the polygons should have a certain flow so you can later on animate it correctly
i suggest you start by modeling very simple models of objects to get an idea of how the program and modeling works, and then maybe try to have a go at that character
slow zealot
ok...thanks
cyan lantern
you need specific techniques to model a face, to model the hands, to model the pelvis, all those require certain topographies so they work well later on when you animate them
it's not easy to model a character from zero, don't expect instant results, you need to first teach yourself a lot of things to be able to do that. so i say start slowly with something simple before you move up to characters
slow zealot
hehe yea... if it was a pc game i could just rip the obj file and go from that, but this is a mobile game only ~_~'
cyan lantern
you're taking the longest route possible to create a character
maybe find something you dont need to spend a few months on
because that's how long it'll take you at hte very least if you have no experience in modeling, an experienced modeler will take about 2 weeks to model a character, and that's after a few years of modeling stuff
maybe ask around for a comission
slow zealot
yea.. think my best bet would be a commission, in maybe 5 years or so when i have the money
slow zealot
@spiral sigil not for ios games sadly
spiral sigil
there is???
cyan lantern
tanshi, then you're out of luck dude, in your case you need to spend either time (lots of it) or money (which actually cheaper than spending time learning how to model and modeling your character).
spiral sigil

On-device iOS Emulator on Windows PC. Android, iPad and iPhone emulator. With Smartface, you can emulate apps instantly with a single click. No Mac needed.
slow zealot
@cyan lantern thanks for the help and suggestions either way
spiral sigil
hmmm
cyan lantern
depending on how a game is built it may or may not be possible to rip assets from it, if it's for mobile i wouldn't keep my hopes up
gl
 honest agate
If anyone can help, I'm trying to convert an FBX file to a PMX file. So far the model converts into PMX alright, but the model is completely invisible.
slow zealot
Try importing it into blender and then export as pmx
honest agate
that's exactly what i've been doing
slow zealot

This is not game dev related, but you can also import your MMD’ed FBX model to Unity, and it gives you better physics simulation using stereoarts’ MMD4Mecanim, read tutorial here. Anywa…
honest agate
seems that when I export the model to PMX it doesn't save the file like it should
even so, I've already tried following that tutorial and I got the same result
 onyx phoenix
is anybody here able to work with a perfectionist whos driving himself crazy, to try and get a perfect show-accurate Neo hair model from RWBY?
 cerulean shoal
your dad
onyx phoenix
i wish. he doesnt 3d model.
onyx phoenix
well, DM me if you can help...

 lament pond
Merci
 stoic ridge
should contribute that to the manual if it's still lacking the page for it...
onyx phoenix
i guess nobody can help me with Neo..?
 iron pecan
^
zinc furnace
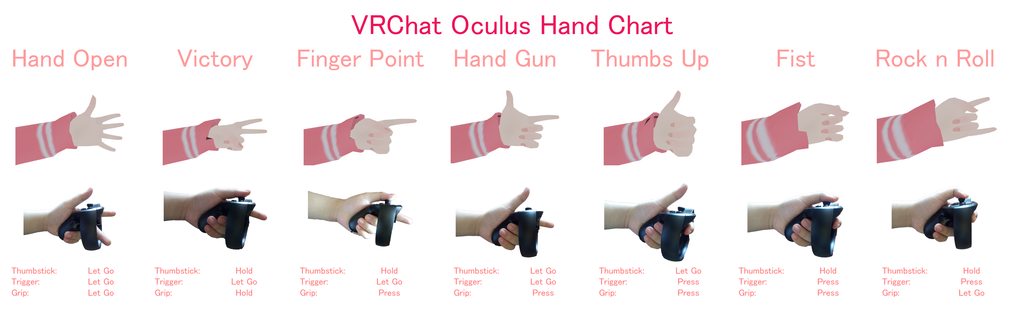
Having an Ok Hand in that slot makes so much more sense IMO
 near patrol
That's way too cool for the devs, tho.
zinc furnace
I think a bigger issue is finger proportions making it very hard to have a "one size fits all"
Since you need to have two fingertips touch each other, rather than being able to define it in simpler terms like "stretch out index finger and pinky"
 glacial pasture
he gonn be pinchin
 scenic ember
How do you guys approach making anime hair with good topology?
 hollow radish
I use tris to build up hair
and make edge crease on the edges of the hair
then I use subdivide 1 max
best to figure out how to texture paint or else texturing hair is a lot more tricky
In general, I just build up each strand
I mark seam for front strand and back strand

 junior idol
does topology for hair matter?
 mossy quail
@visual vigil wait so youre doing emperor musk
visual vigil
Tech Skittari Musk
https://cdn.discordapp.com/attachments/491504077268582402/491504243761741826/unknown.png https://cdn.discordapp.com/attachments/491504077268582402/491504326918012935/unknown.png https://cdn.discordapp.com/attachments/491504077268582402/491504181430059009/unknown.png


 solid tapir
visual vigil
solid tapir
visual vigil
watch a lot of blender tutotirals
slow zealot
Any good suggestions : need one that does not use terminology much
spiral sigil
@solid tapir https://www.youtube.com/watch?v=DiIoWrOlIRw
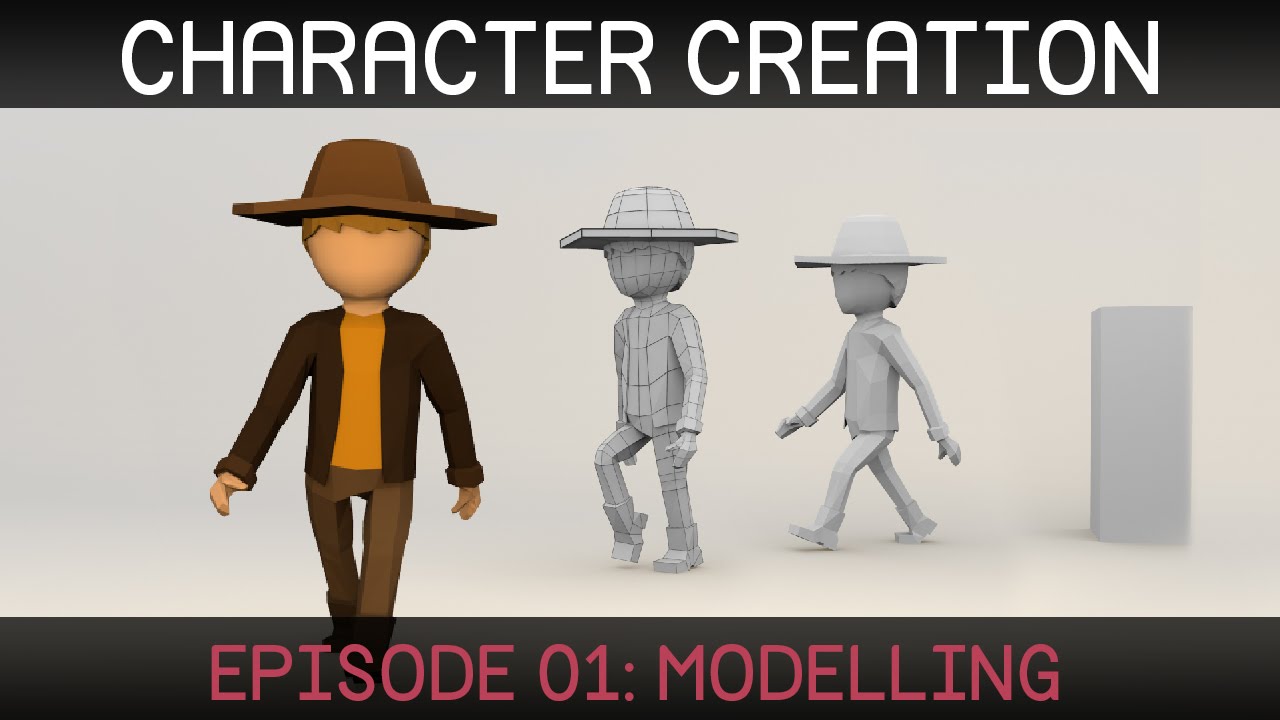
Welcome to the first episode in a series on creating a simple character in Blender. (http://blender.org) Download reference images: http://i.imgur.com/7LPDej...
a really good guide
 cerulean ivy
So very new to blender, trying to make some custom buildings and such. I feel like i heard somewhere that its better to have multiple meshes over just one mesh. is this true?
slow zealot
Small question.. Do you have to animate the 3d model for vr chat or is rigging enough for base use (for just having a personal avatar)
glacial pasture
rigging is what the predone animations need
 neat sentinel
Anyone know where a first time beginner can learn how to make models?
glacial pasture
youtube youtube and youtube
 serene moth
Hey, looking for some help with an avatar I'm making in Blender
 pulsar mantle
does zbrush core have features to make the mesh for a proper avatar? i heard scluptris doesn't so
 valid sequoia
Zbrush core has more sculpting tools then sculptris but the main problem you will run into is poly count. Is been a while but i don’t think it had retopology tools.
@pulsar mantle ^ above and im not sure what you have been told but you can upload a mesh made from sculptris. You would have some visual problems with how the mesh deforms with the rig. Since the polygons are not uniform.
pulsar mantle
@valid sequoia I believe ZBC had a tool to sort the polygons into square ones, as well as a way to reduce poly count IIRC. I'm unsure if it actually can reduce poly count to a fair point, though. Might need blender for that
 topaz frigate
Prove it
 cerulean ivy
Does anyone have any ideas on this? downloaded this building, though when i added my own texture (the bricks) this happens https://postimg.cc/s19qKfrj

though that piece is all one mesh, so I cant seem to select just the one part to scale down the texture
glacial pasture
That’s your Uv mapping
cerulean ivy
hmm ok ill play around with that, only did that once a while back with my avatar
visual vigil

 stable edge
Nice going!! Cape weights around the legs look a bit weird and it might help the model look more realistic by adding clothing folds around the elbows and other joints (the arms look a bit cylinder-like). The textures look very nice too! The model looks very nice overall, you did a very good job making it :)
 leaden socket

 grim tinsel
 mossy quail
aw
grim tinsel
I'm trying to get the model to work in VRChat
grim tinsel
nah. I'm using Mixamo for that
I just need to get the hours and playtime on my new account to do it... sucks I couldn't use my steam XD
 halcyon citrus
That is strangely adorable
Weight painting shouldn't be too difficult for that actually.
grim tinsel
<-- literally just started 3D modeling a few days ago and doesn't understand fancy terms
Also... I don't know how to rig it... Mixamo seems to work, but idk how to line it up with the trackers...
halcyon citrus
Mixamo should be fine I would think, but I was just saying if you wish to learn how that the avatar would be a pretty good beginning step to learning.
grim tinsel
yeah
halcyon citrus
My first avatar I used Mixamo on and once I got confident I decided to take it into Blender, add an armature, and weight paint myself. Difficulty varies from model to model and experience
grim tinsel
The one thing I don't like about Mixamo is that it stretches the sides a bit when the arms move
I REALLY don't want to edit the model, either
halcyon citrus
That's just a weight paint issue
grim tinsel
I still don't know what that means...
halcyon citrus
Weight paint is what allows the model to visibly move with the bones pretty much.
grim tinsel
oh
halcyon citrus
And there are levels of "influence" that the weight paint can have
Depending on the level it will move with the specific bone it's applied to.
grim tinsel
tbh I might just take the hard route and place all the bones and joints myself
halcyon citrus
It's easier than you think, it's just Blender involves a lot of short cuts and remembering what keys and buttons do what.
grim tinsel
ah
halcyon citrus
So it can be pretty confusing and overwhelming
grim tinsel
also, I use Google 3D Paint to make my models. Is there an easy way to check my model size?
zinc furnace
Size doesn't really matter as long as it's fine in Unity
A default cube is 1x1x1 meter
You can change the scale within Unity in several ways
halcyon citrus
When you get it into Unity and you have the SDK downloaded what I do is find the sample avatar and bring into scene as well as your model to adjust.
Since the sample avatar is the average size of models in game.
You can scale the model in Unity
grim tinsel
Yeah, but when I put the model in Unity, It was extremely small.
I'm fine with editing the model's saved size, but still
zinc furnace
You can scale it up/down in Unity or change the import scale
grim tinsel
alright. Thank you both for the help
I might also order a 3D print of a model I made before, so that's another reason I asked about size
halcyon citrus
No problem, if you ever want to learn about Blender when it comes to adding bones and weight painting, there is a lot of people that can help you there. It's surprisingly simple once you get the hang of it.
Just varies from model to model and experience.
 vague idol
Bonus note on scaling, the standard 3d cube in Unity is about half the size of a normal model. Scaling it to 2.0 on the Y axis gives you an average height to work with easily.
VRChat's proportions are off, but the 3d Cube in Unity is a 1 meter cube.
sizing proportion for normal:Vrchat is approximately 1:0.8 (so 1 meter is 80cm, 2m is 160)
If anyone has a more accurate ratio please let me know
hollow radish
You can use the vrchat descriptor to size it correctly
Just put the ball where you want your height to be
Then scale
Then put it back down
In blender you can change the measurements to meters
 sonic nimbus
@vague idol VRChat's scale is 1:1, however you are scaled based on your avatar.
vague idol
@sonic nimbus I'm talking about the scale of Real World vs VRChat.
Everything in VRC seems to be larger than it should be (based on Unity 1m basic cube at a 1x scale). "Normal" height avatars are around 2m height in Unity, but due to the scaling of everything in VRC you appear smaller IE the 2m average avatar seems to be around 160cm instead of 200cm. (Avatar Testing map is a good example)
sonic nimbus
@vague idol My avatar's height in Blender matches Unity and Avatar Testing
vague idol
(assuming 200cm avatar due to lack of numbers) So if you take a basic cube, give it a 2x y scale, your avatar would be that height, and fit the 200cm height in avatar testing?
Because mine is just a bit more than a 2x Y scale cube and comes out at about 168 I think it was.
cyan lantern
I just finished modeling my hand, pre rigging, can anyone tell me if i have all i need to be able to rig it right for all VR gestures?
https://imgur.com/a/YqSsRPZ
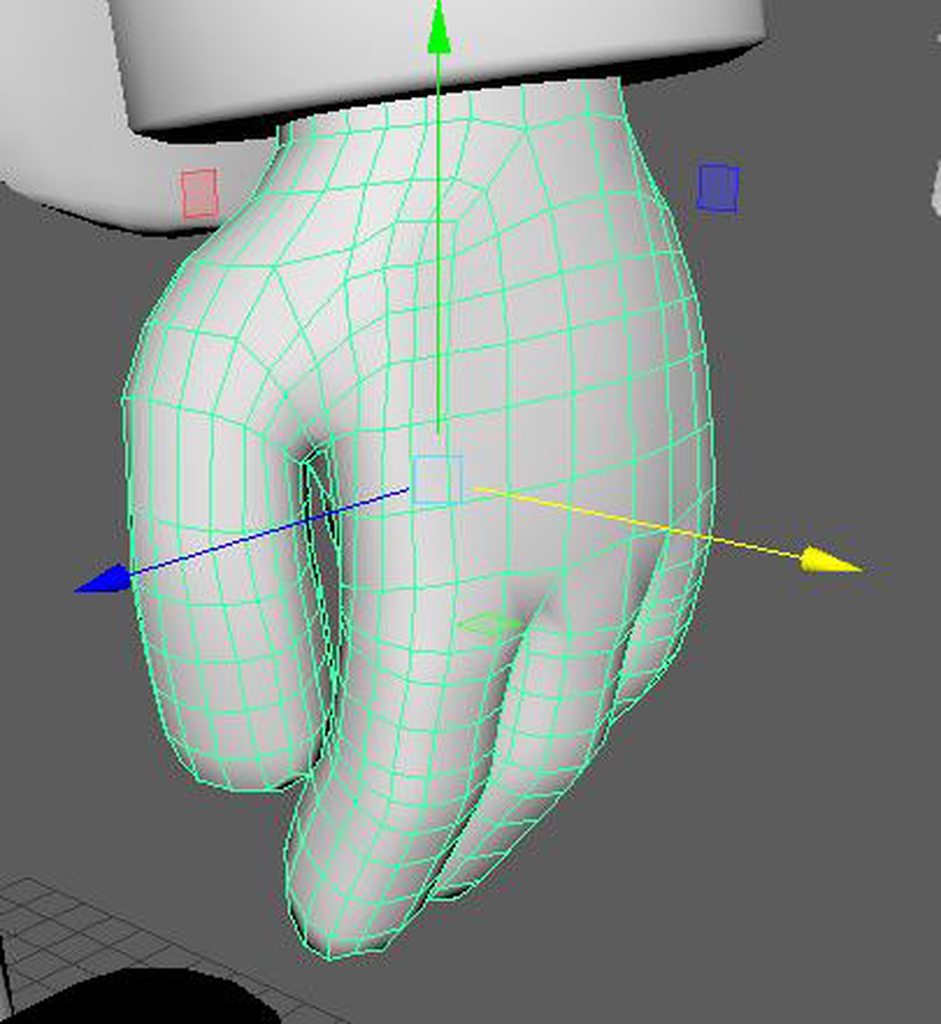 vague idol
the bones, empty or not, are what is important
but yes, a bone on the thumb, index, and middle fingers will cover that
cyan lantern
and in terms for flow and topography?
vague idol
can't really help there, it doesn't take much for VRChat
cyan lantern
so from looking at hte model you don't see anything outright wrong with it? would that be correct?
vague idol
If you're looking for opinions on it, the thumb near the base looks...off? probably the rotation on it. But that's really up to what design type you're going with too
for "will it work or not" that's really just dependent on the bones/weight painting to make it work well
cyan lantern
gtocha, thank you
stable edge
Just make sure there's enough loop cuts for the thumb
Otherwise it might get a bit iffy when bent
 hot flint
Texture error
spiral sigil
how do i fix it?
hot flint
make sure the path to the right image file is selected
hot flint
Did you make the model yourself? Or do you not know where the texture files are?
hot flint
just gotta import the image if it isn't already, an just drag and drop it ontop of the model
(that is, if it's one texture file)
spiral sigil
the image is in the unity package file
hot flint
if it's multiple, you need to drag them onto the model where they belong
ah.
I don't honestly use anything that isn't my own so dislodging that isn't something I'm familiar with
spiral sigil
why does making a vrchat character have to be so hard XD
spiral sigil
and google isint giving me any answers on how to apply the textures either
YAAAAAY
pink = missing textures or missing shader
i think i found that out already
also i found the textures in file explorer but i cant drag and drop
UGHHHHHHHHHHHHHHHHHHHHHHHHHHHHHHHHHHHHHHHHHHHHHHHHHHHHHHHHHHHHHHHHHHHHHHHHHHHHHHHHHH
IVE BEEN TRYING TO DO THIS FOR 2 DAYS NOWWWWWW
spiral sigil
I JUST WANT TO PUT THE TEXTURES ON THE GOD DAMN MODEL HOW HARD IS THAT IM GONNA BREAK SOMETHING
hot flint
sigh
 foggy maple
@spiral sigil If the model is pink in Unity you might have selected a shader that you don't have installed
foggy maple
Good, now calm down
spiral sigil
now i just need to put the character onto vrchat....how do i do thaT?
foggy maple
You really should watch a tutorial about that
foggy maple
True xD
spiral sigil
umm the guy has a vrchat sdk thing on his unity but i dont
how does i gets
from the vrchat wesbite
were on it?
foggy maple
Literally Google Vrchat sdk
glacial pasture
more
spiral sigil
http://help.vrchat.com/knowledge_base/topics/why-cant-i-upload-avatars-or-worlds-yet
https://medium.com/@vrchat/trust-systems-content-gating-9e501de487fa
Medium
Hello, VRChat! We’ve been working on some new “Trust” systems to help make VRChat a friendlier place. These systems will be used to help…
im using a steam account will that work?
glacial pasture
yes it can run through steam
past mountain
yes ofc, you can play through steam and log in to your vrchat acc
glacial pasture
but your steam account can't upload
 lucid badge
How do you make those rotating watermarks that are on some avatars like Togas?
spiral sigil
particle system with rotation over life time
glacial pasture
Or get a prefab like in RLS and change it up
 spiral sigil
@hot flint yo, blow this dude's mind
 mental blaze
What's the character from?
spiral sigil
seki from touhou
mental blaze
A video game.
 glacial pasture
👀
mental blaze
Wireframe

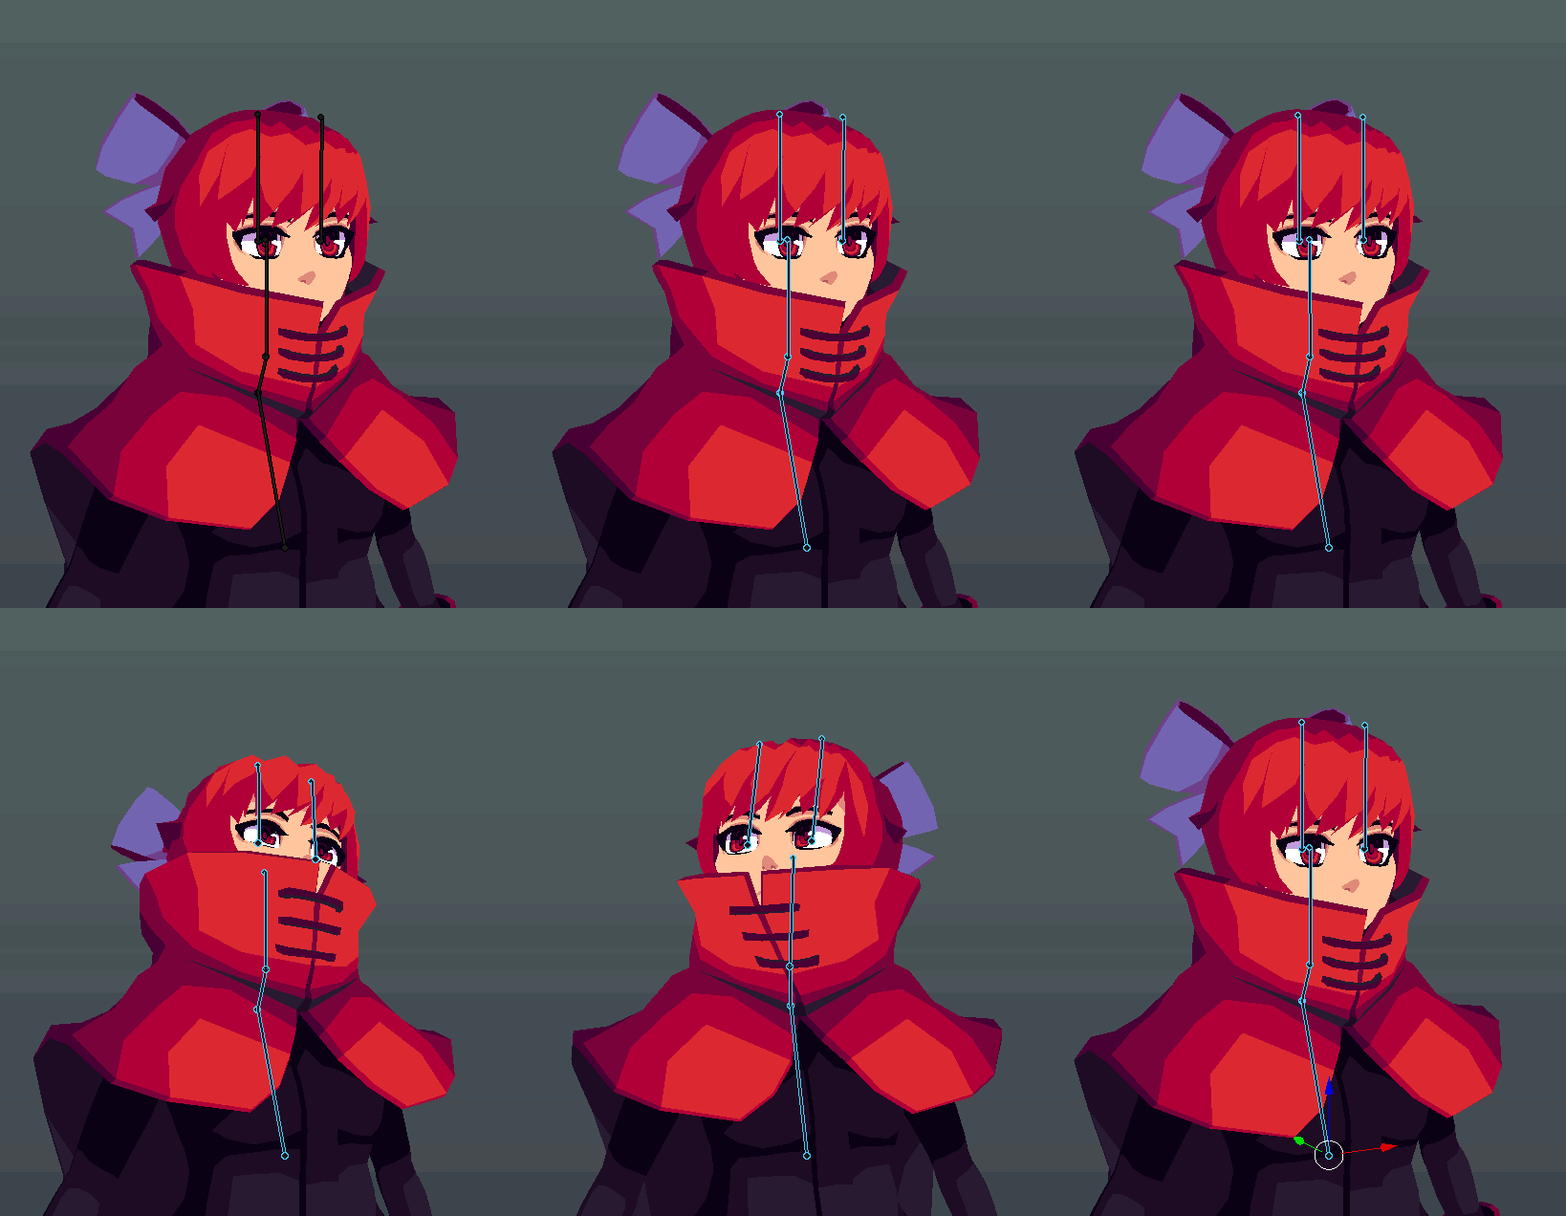 mental blaze
Yeah, good topology
spiral sigil
the topolgy is really good
mental blaze
I made this one a while back
https://cdn.discordapp.com/attachments/353351685982388234/492775374925856768/zuru_progress_3_6_1.png
 hot flint
oh awesome!
spiral sigil
looking nice
hot flint
yeah, I've yet to have a model react well to lighting
spiral sigil
maybe it's just me but the hands looks really small
hot flint
I've been debating working on doing custom vertex normals like they do with guilty gear Xrd etc
mental blaze
Vertex normals is the way to go to correct shadows
hot flint
 mental blaze
But I'll probably never bother to dive into that area.
hot flint
A closer look at the head topo
yeah, vert normals is effectively like doubling your weight painting workflow
as far as effort goes
some of the triangles are there specifically for the sake of shading
but it's completely quad based otherwise
spiral sigil
dont post your question in multiple channels, thanks
?
#avatars-2-general for all general question / unsure where else to post
maybe it's also better to read the rules before posting anything
 fringe rock
I've done something and now when am in edit mode and try to move a vertex i move all the object
ah
ok
proportion was activated
lament pond
 stoic ridge
cute
mental blaze
let me adjust something real quick.

Not vrchat related, but I was working on a turntable scene for my classwork.
spiral sigil
Ayo anyone know any good modelling tutorials
visual vigil
lament pond
 glacial pasture
No
mental blaze
you made progress on that unity project vr?
 plain bridge
@hot flint YOOOO YOURE STILL ALIVE!
hot flint
somewhat!
lament pond
Yes @mental blaze
mental blaze
made any progress on that face rig you wanted to learn?
 humble hemlock
@hot flint I just saw your model work, it's super inspiring! Do you have a twitter or something I can follow you on? I'd love to see more of your work!
mental blaze
i think she has a deviantart
glacial pasture
I must see more of their work
hot flint
I've got a tumblr!
it's just https://polarstarvrc.tumblr.com/

I build and rig 3D models! Feel free to reach me through my Discord: PolarStar#1898
@humble hemlock
I'm most active on discord though, so pester me if you want updates
humble hemlock
Ty, that's super cool 😊
hot flint
🎵
mental blaze
you used to stream?
hot flint
at one point
mental blaze
https://cdn.discordapp.com/attachments/353351685982388234/493232735113183252/Fish_Bowl__Blocking_Thumbnail.png
Ready for the uv/texture phase.
 hot flint
I fell off on streaming when my internet started to get really spotty
mental blaze
It happens
I let my yt channel die despite having over 6k subs
I could potentially see myself streaming on twitch, but it will most likely be focused on modeling or playing another game besides vrc
hot flint
I feel like I want to just have a twitch channel as a working log of my own projects rather than working on commissions
Getting pretty jaded with doing commissions
glacial pasture
well when you make sexy shit like that ofc
hot flint
Hehehe 💙
spiral sigil
hello
can somoene tell me how to get blender to convert all color materials into actual files
?
 cursive wedge
Uuu, time to lurk PolarStar once again in the 3d-modeling channel ^^
hot flint
💦
 chrome arrow
imma be real with u, i always checked this channel to see your model progressions, they are GOD TIER
mental blaze
Streaming projects doesn't sound too bad.
 unborn venture
when i join meshes in blender of a custom model, it creates a second layer of all the faces
hot flint

redid the rig to work in t-pose because unity likes to cry about a-pose
and a few shading updates
nothing should be clipping anymore, hopefully anyway
i'll be testing it out soon
also blinking/eyetracking ❤
 iron crypt
nice job!
hot flint
The more weight painting BS that i have to put up with, the more efficient I start to get with it
brave dune
ive been wondering for a while. Are your shadows baked into the texture or is that just your render settings?
 vivid crater
And if they are baked into the texture, how does she look from behind, for science of course
hot flint
That's a good question
so the way that it works is that each color has its own spot on a 16x16 pixel grid of the colors used
all the UVs are shrunk down to a dot, so there's no clipping or sheering or anything nasty

Like so
(artificial rim lighting)
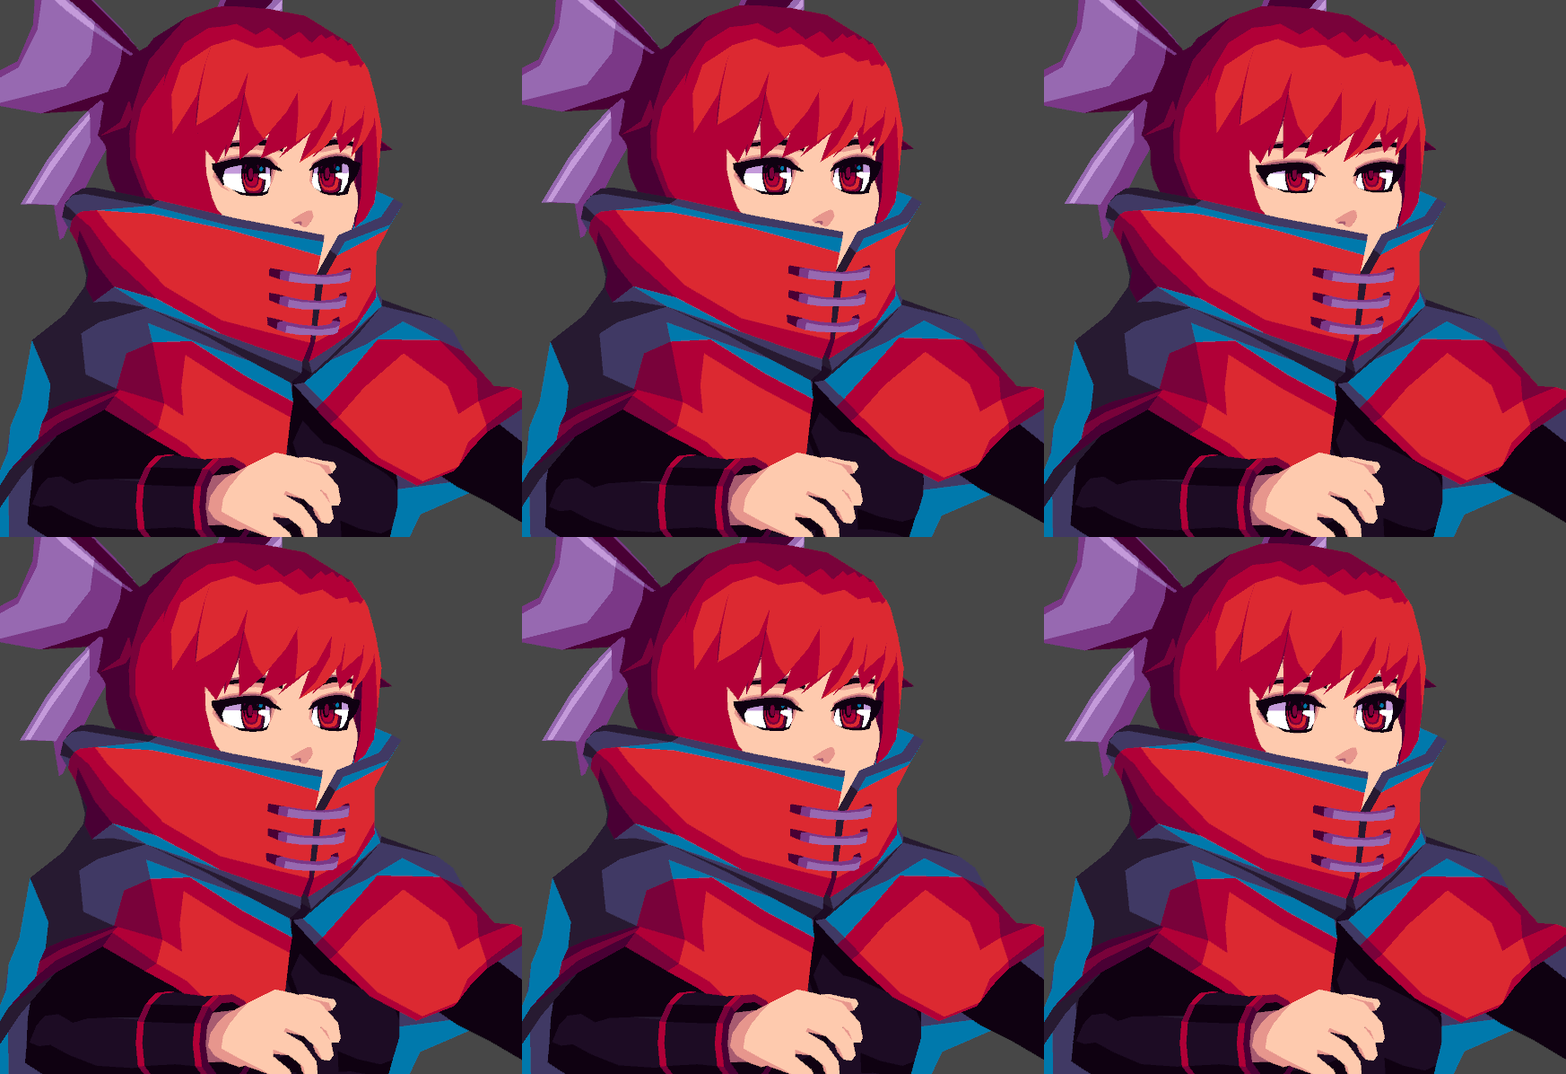
working on the idling animation
vivid crater
Ah, that's right, you actually make geometry where the colors separate so it's super crisp and exactly how you want

 thin bison
Nice Sekibanki
hot flint
forgot that i needed to model the inside of her mouth, like a dummy
so back to blender
Seki's one of my favorites :> @thin bison
plus, she'll be a good model for halloween
thin bison
I'm guessing you have her quirks in mind when modeling her?
 thin bison
http://prntscr.com/kxv70z Looking for some feedback on this
 hot flint
BUFF BIRB
thin bison

It feels like I may have hamstrung myself by not having more geometry in the legs
Causing me to increase the subdiv earlier
To get the necessary work on the legs.
hot flint
Hmmmmmmm
yeah subsurf isn't always the best way to solve low detail, it's mostly making sure that detail is even before using subsurf
or in my case, never
thin bison
I'm sculpting with the multires modifier
So it's gonna go through retopo either way
Main thing is I want to get as much detail as possible from each subdiv level.
hot flint
Hmmmmm
yeah that's a good way to go about it
I don't have much experience with that method
lament pond

 hot flint
i always just set my metrics to meters and model at literal size
scaling down in unity can lead to.... some inconsistencies
that is if you plan on doing any additional components to the model
through parenting
thin bison
Same here, using meters in blender
mental blaze
Fuq, and I'm here working with cm in Maya
Not my choice as the instructor required so.
vague idol
at least that's a fairly easy conversion
visual vigil
 slow zealot
finally almost done with converting a mobile game model into vrchat... just some re weight painting and figuring out hownto apply the textures from the game files on the meshes
 copper gull
Lol a fine addition to my collection
 vague idol
Take a cube in unity, set the Y scale to 1.45 (x and z I usually set to about 0.1 to make it a stick)
A normal cube in unity is 1m, setting to 1.45 will give you a scale to check the avatar size
slow zealot
Size is correct, using the measuring from avatar testing world but when standing next to some defaults i am like 1.5 times their size
Or even bigger (grey robot default)
lament pond
 hot flint
It's just about to be my one-year anniversary
Well, i say that but...

I'm still about two months out
mental blaze
https://cdn.discordapp.com/attachments/353351685982388234/494039512507482113/maya_outline_comparison.png
Maybe 3 more days until I can start 3D modeling this character

needs clothes and stuff

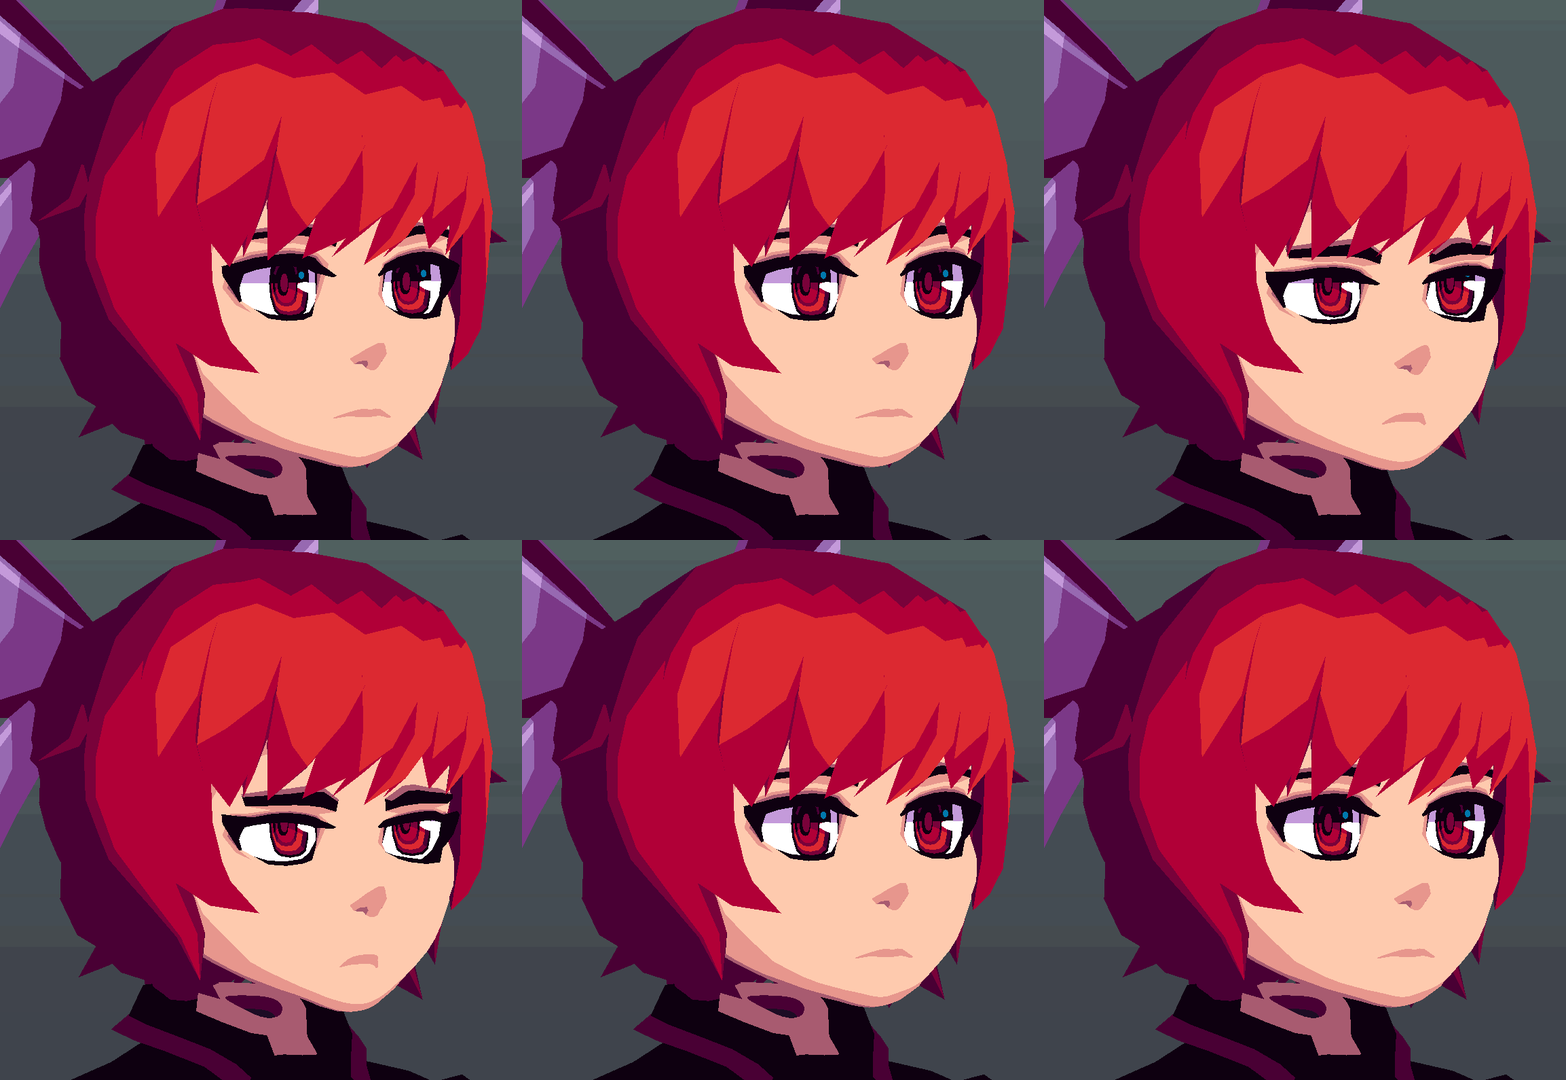 spiral sigil
ಠ_ಠ
hot flint
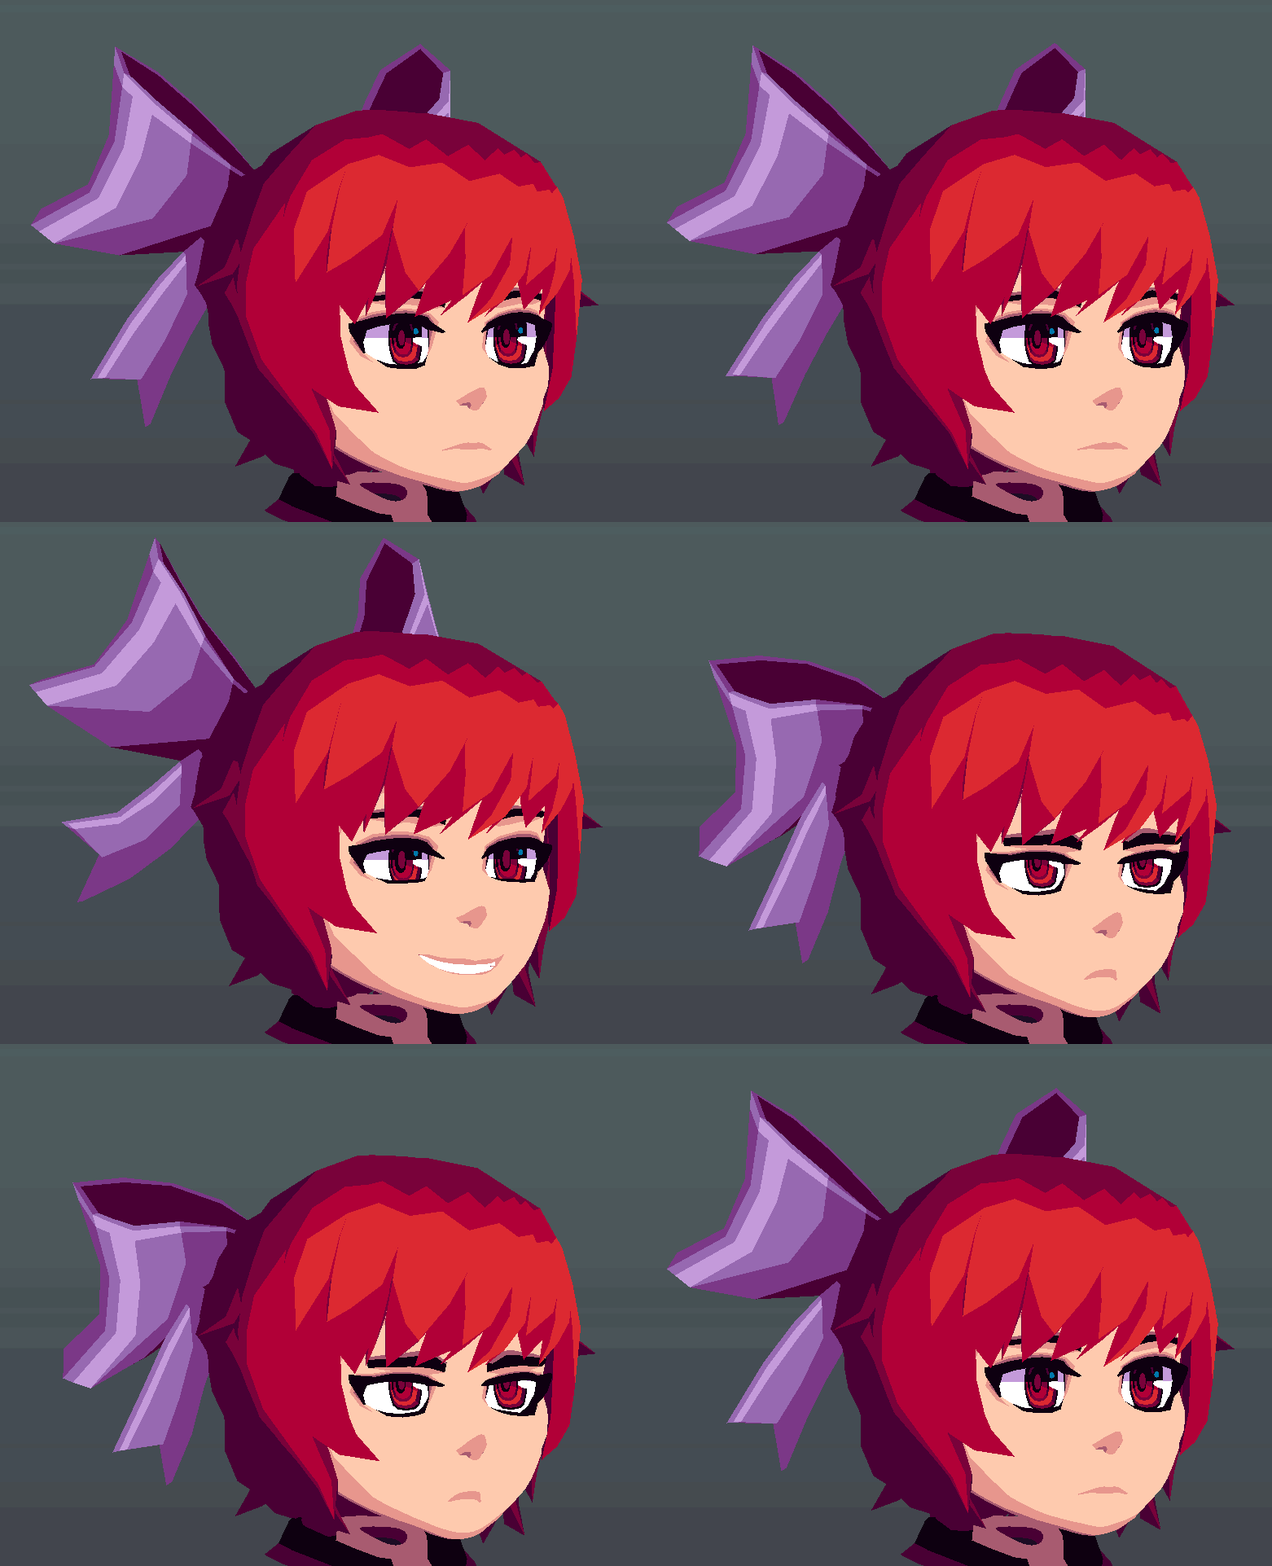
 regal swan
Hello, i'm working on my first vr model, and I want to have it kinda feathery/fluffy, is this effect achieved with the mesh or is it something else? I saw this screenshot on google of these animegirls collars and in their ears https://i.ytimg.com/vi/6zSStIk4Hqk/maxresdefault.jpg
 vague idol
@regal swan yes, the fluff is done with a mesh
regal swan
@vague idol thanks
cerulean shoal
Omega sure does look weird
 robust badge
wow he thicc
slow zealot
https://imgur.com/gallery/jhAb0I8 this is ginna take while for a firat timer that i am
 livid maple

Since everyone is going crazy over Bowsette and all these other new Mario characters i decided to make this and release it to the public because there aren't any 3D models of it yet.
Enjoy!
RTs are appreciated c:
https://t.co/cTa2KUpSw9
#NewSuperMarioBrosUDeluxe #VRChat #...

 Twitter
glacial pasture
Twitter
glacial pasture
all traps should wear that crown indeed
fringe rock
look like heavy poly
I made that yesterday. why not (1.8 k) https://gyazo.com/ad1ec3d23ab28c87637565942bb1b0b4

 tender isle
^ I remember seeing you in this.
fringe rock
n64
 fringe rock
the normal one
fringe rock
mario n 64
 fresh isle
So Super Mario 64 then?
fringe rock
did not have leg so I pick one of the 3ds I think since its low poly as well
fringe rock
why I pick 64 when I could I take gamecube or wii I dont know
fresh isle
Since she had a dress but no legs
Also it's a good design choice, glad you went with it
Pretty sure no one else would've gone for it
fringe rock
I made a world that is public now.
I still imporve the model and maybe add other monster later
 glossy orbit
right, i did a stupid and have zero clue how to fix it.
i realized recently that my models legs at some point or another fused together
fringe rock
press V on the vertex
that is snap
and you probably need to repaint the weight correctly
 plucky jewel
Hey what is the unity equivalent of changing Texture > Influence > Color in blender?
 lyric lodge
Is there anyone that knows how to make a model because i dont know how to
If you do please DM me
fringe rock
look youtube
lyric lodge
If i just looked at youtube i still wouldn't know how to even model the thing
mental blaze
Oof
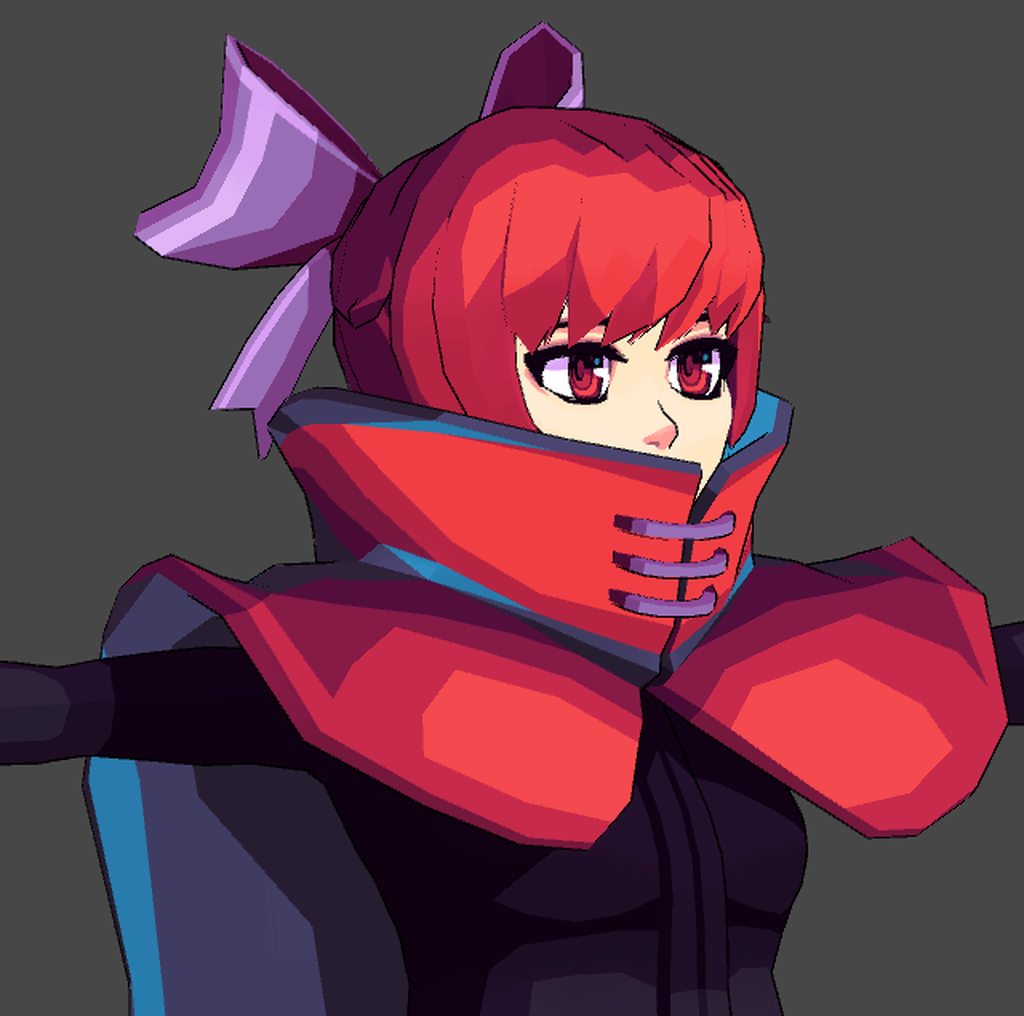 mental blaze
:P
brave dune
what is the difference between a screenspace outline and normal outlines?
fringe rock
the way its render
hot flint
it's based on camera position, so it will only render if you're looking at it from a certain angle
kind of like a holographic trading card
 toxic quail
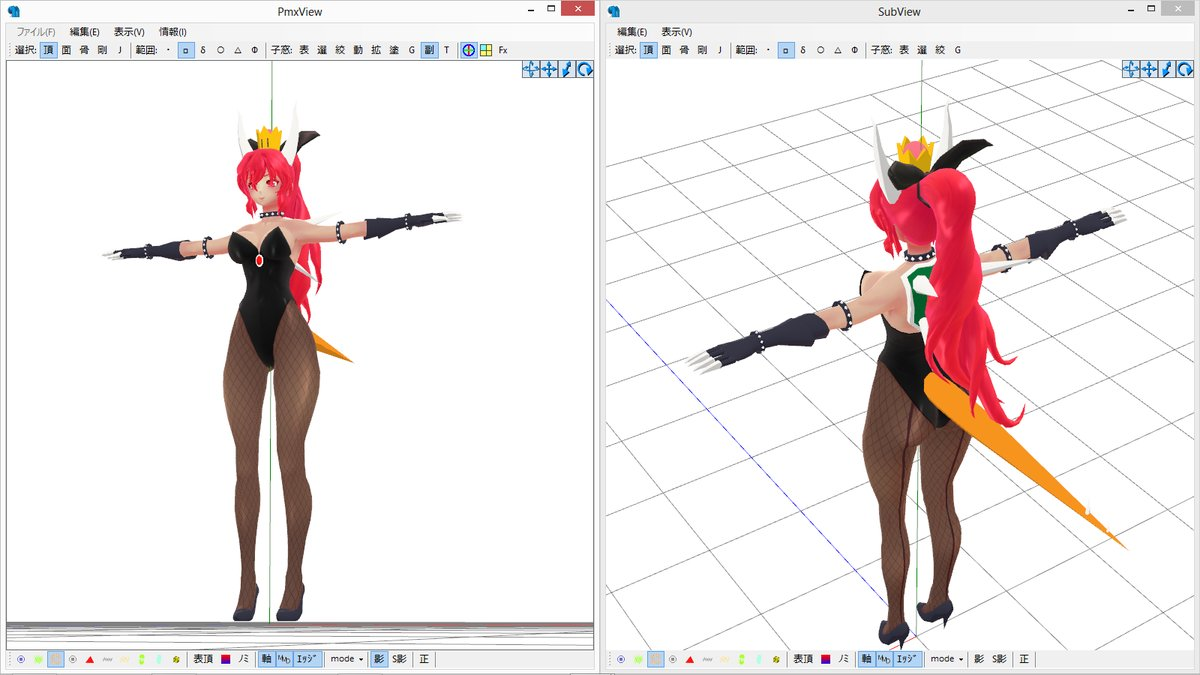
https://i.imgur.com/qgsEhCn.png Currently around 17k poly.... No skirt tho....
 hot flint
Haahhhh bandwagon
but lookin really sharp so far!
My skirt object is 2352 tris
of course, it's not textured so it wouldn't go well at all with it
toxic quail
most of the bowser parts are not textured on mine .- . just flat colors
lyric lodge
Can someone help me with rigging, decimating, and eye blinking for a model please DM md
Me
 brisk shard
Request 3D Broswer https://i.kym-cdn.com/entries/icons/original/000/027/222/Bowsette.png
 hot flint
You definitely aren't the first
toxic quail
already testing her in vr :T wasnt able to use the skirt tho .- . messes with tail
lament pond
https://sketchfab.com/models/9d918d77569d451aafaa78a3071cfd54
https://sketchfab.com/models/614ecf7c4ffe47838455004861142b45

3D model commissioned by Yuikai for use on her YouTube/Twitch channels. - Yuikai - 3D model by V--R (@v--r)

3D model commissioned by Rhythm Otonashi for use on her YouTube/Twitch channels. - Rhythm Otonashi - 3D model by V--R (@v--r)
 earnest helm
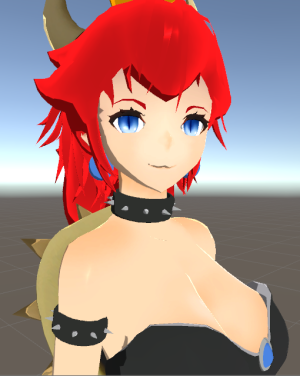
Obligatory https://i.imgur.com/b4L9rIO.png
 fringe rock
I think I start to be too serious on that model for it is https://gyazo.com/80c26472e3dd07282b179b7eb6ff11f3?token=88892c1bbd51b1bea45ba5537a006206
 fringe rock
yes
fringe rock
I already have a map public with her in both skin tone. But they are my first version. people where complaining about the texture or whatever. So I try to improve it
mossy quail
@fringe rock lol, its an n64 version, the textures are fine
fringe rock
but people only want mmd quality
mossy quail
dats stoopid
you could up the resolution of the textures
but i wouldnt go further than that
lament pond
 hot flint
@lament pond Those wireframes make my bones ache
slow zealot
https://imgur.com/gallery/jlRqDti ugh cannot for the life of me get various mesh parts to work like they should
when i move the head bone the eyebrow meshes (joined in the headmesh) stay frozen in place, etc
ugh
hot flint
that would be a weight painting issue
 rose flame
Hello I am new to channel and would like to ask if anyone has a good video on avatars. I am a beginner but I seem to be having trouble in general. All I am trying to do is very basic stuff nothing advance yet. Any tips and advice would help.
fringe rock
I work hard on the lower half of the body hope its look good https://gyazo.com/56903512c328fff43549c142f1f74169
lament pond
@hot flint xD
lament pond

The man (or porcine) behind the models. Here’s a 3D model I threw together of my fursona, I still prefer drawing him so I don’t use this model too much but you’ll more than likely find me running around in it on vrchat! - Vii Rii - 3D model by V--R (@v--r)
fringe rock
https://gyazo.com/41e7d58bbe20eba978b476a1cd76cdf1 that's a drastique change
 brave dune
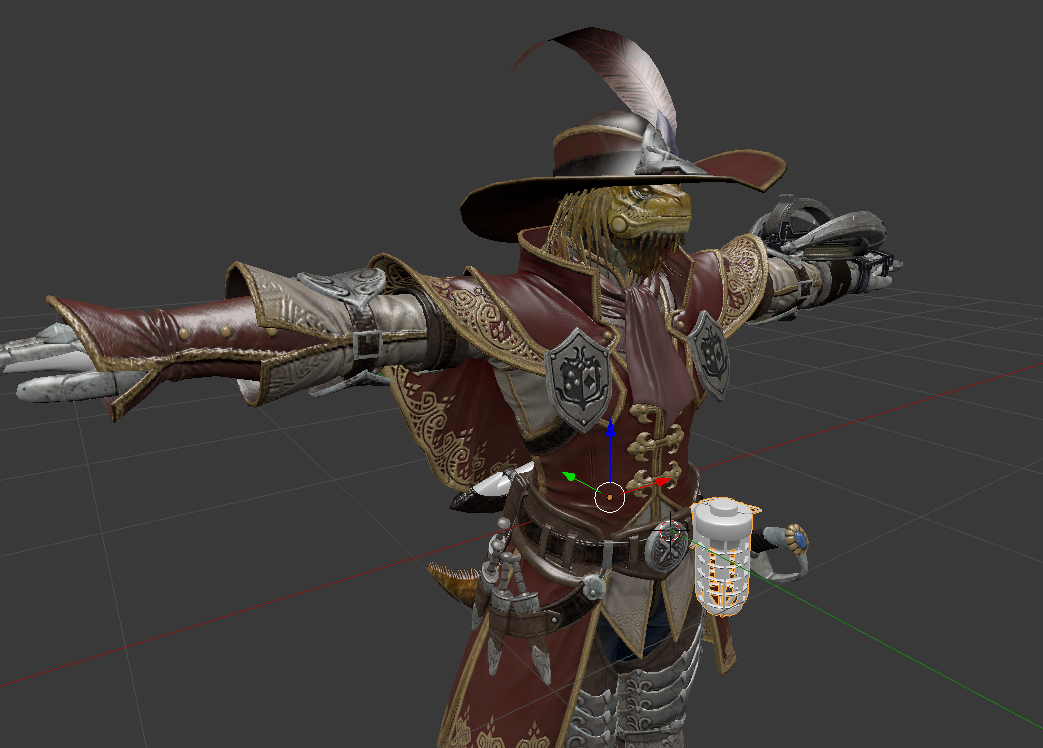
https://i.imgur.com/3Tl5tHF.png
the fun tediousness of weight paint fixing so many small things
 fervent umbra
I'm about to pay 5 bucks for a honey dipper if I cant find a free one somewhere :^)
im gonna just get a wood spoon and call it a day
🐝
 vast hare
https://cdn.discordapp.com/attachments/434777529677774869/494705594431963137/IMG_20180927_095809.jpg

hhmmmmmmmmmmmmmmmmmmmmmmmmmmm
lament pond
@vast hare either delete that or give him real pecs
vast hare
LMAO
vivid crater
It's gonna take time to get some proper pecs, assuming he has the dedication to have a gym lifestyle
 main goblet
any tips on double sided plane on unity?
lament pond
 halcyon citrus
Looking good, some sort of Skeleton Necroninja?
halcyon citrus
I haven't seen too much of the anime to know his different forms if any past the knight.
 spare radish
After I do retopo, anyone want a Jack Nicholson head to put on their anime-style avatar?
 spare radish
Ah cool. Trying to add in a rim light?
cerulean shoal

mental blaze
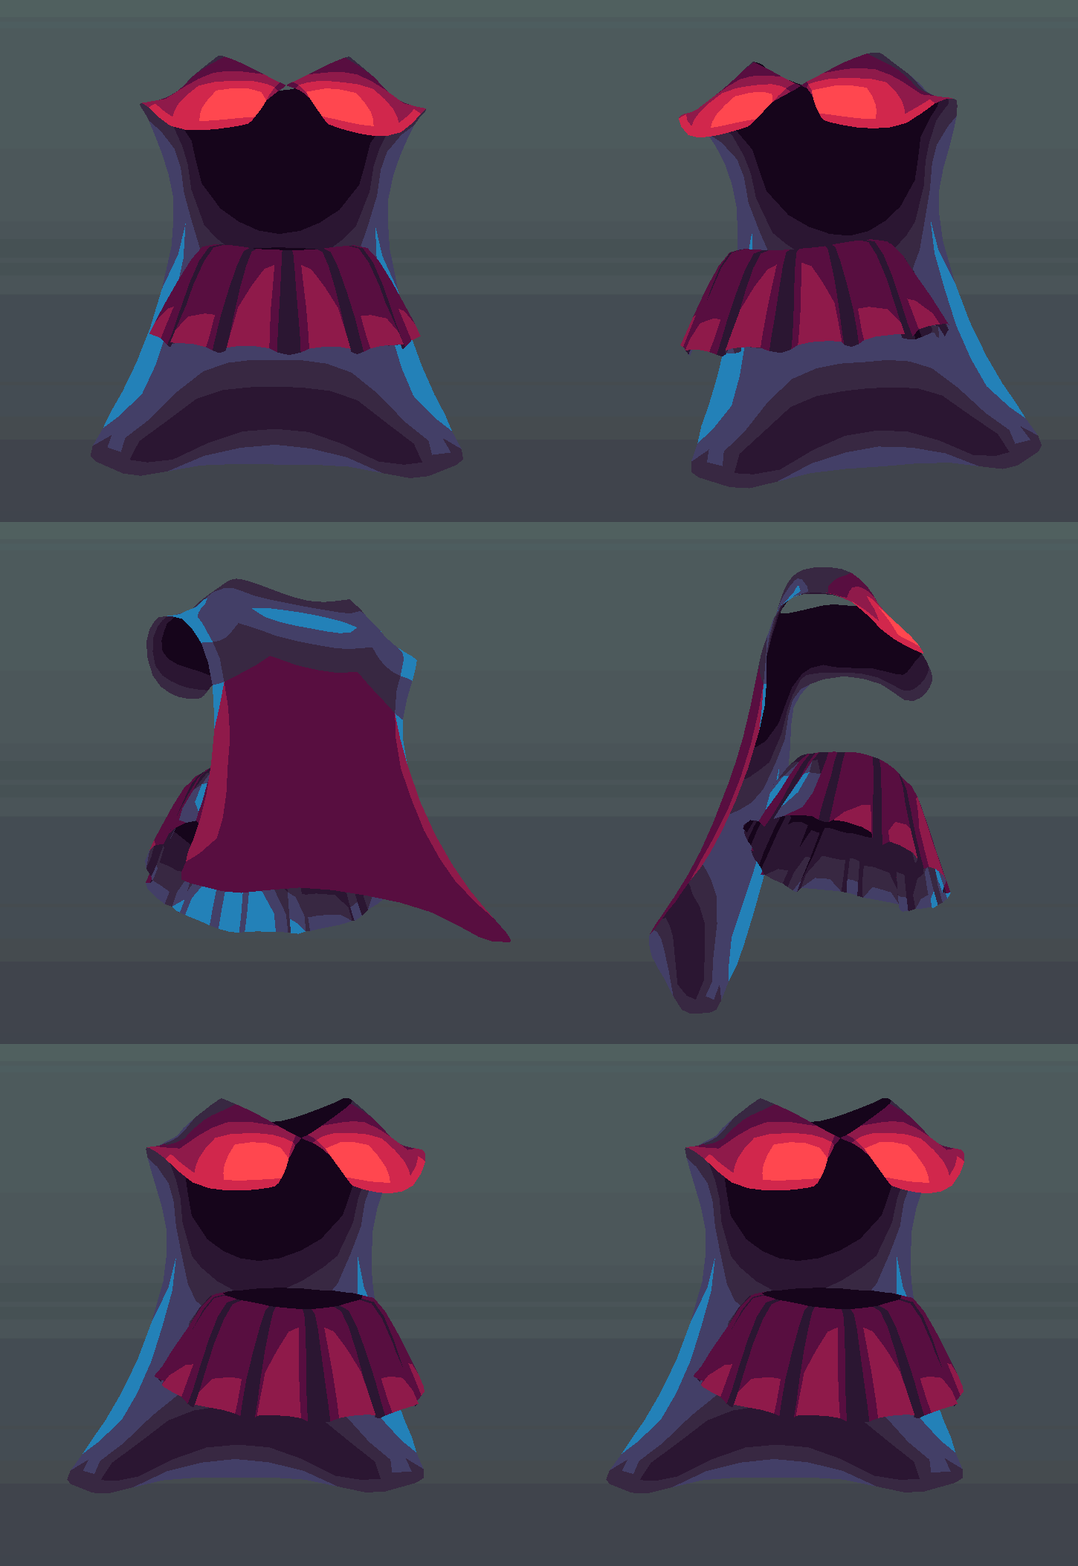
https://cdn.discordapp.com/attachments/353351685982388234/495092445114138635/maya_clothes_upper.png
hmm, not bad.

Damn, the design is going to look sick once I get into the modeling part.
mossy quail
@lament pond Momonga is best skeleton emperor
lament pond
I don't know who that is either xD
mossy quail
@lament pond Thats the Character youre working on 👀
Momonga-sama aka. Ainz Ooal Gown
lament pond
Oh xD
fringe rock
am not sure if I should shrink the head https://gyazo.com/0ea57d5c6e6bc5ca4309d373a8cd1e80
 lament pond
 slow zealot
Anyone can tell me how i can "cut-off" a limb from a mesh in blender and make it a seperate mesh
Currently i need to weight paint arms but a part is attached to the body of the mesh messing it up to weight paint well
lament pond
Does anyone know a shader that can have a normal based overlay like a matcap or spa textures from mmd models?
@slow zealot select the limb and click p
 sullen cobalt
Hi everyone ! Trying to replace an arm of a character by another. I've succeeded in doing one, but I can't move the second one into place cause it keeps telling me that I have to modify the body. Also even If I respect that, it sends the arm at the feet or above the character with distorted bones. What can I do ?
cerulean shoal
whats the best way to make a human model
cerulean shoal
very useful information, thank you
iron crypt
Basically
you get a reference
and try your best to recreate it in your modelling program of choice
lament pond
 spiral sigil
For humanoid modelling, I was told in class to start with one foot and work up the leg to the rest of the body.
fringe rock
@slow zealot P in edit mode. Select the vertex you want et and click P (selection)
lament pond

A model I made for VRChat of Ainz Ooal Gown aka Momonga in an outfit he wore in a more recent episode. - Ainz Ooal Gown - 3D model by V--R (@v--r)
mental blaze

A turntable of a fish bowl. Model will be updated with textures soon. - Fish Bowl Vignette - 3D model by Pr2Hack (@Pr2Hack)
ains model is lit VR
lament pond
Merci~
vast hare
 lament pond
Stop
vast hare
NO
mental blaze
lol
slow zealot
https://photos.app.goo.gl/usE5D1pZ2vrpqjGz5 really hope i get this character model working for vrchat

Google Photos
 dapper kiln
lol an overlord fan
how depressed are you that madhouse screwed up season 3 episode 12?
I'm annoyed as hell
along with like literally 2 million people xD
Just stick to the light novels
they're the single greatest fantasy novels out there
with LOTR as a close second
fringe rock
@gaunt bane bowsette n64 avatars
sullen cobalt
Hmm I asked a question here earlier, but it got deleted
 floral moat
How do i take multiple faces a different angles and make them all extrude to the same point instead of them going all the same direction
floral moat
not really what i was asking but if i may ask, how would i do what you are talking about?
fringe rock
@floral moat If you want them to join in the median. Extrude them and right click. Then press S and 0. If you want them to join in a exact place you can place your 3D cursor somewhere and change the median to 3D cursor on the same place where you change edit mode and to the same bottom press
or select the face and press G
after you extrude and press right click
floral moat
Thank you very much
 gaunt bane
@fringe rock Ty

 gaunt field
what is that effect where the model's texture changes color
 deft fog
It's a shader effect, usually called rainbow
So I have a model that crashes when I try to join meshes. Anyone know what could be causing this?
I didnt exactly figure it out, but I fixed it anyway.
gaunt field
good jobs
okay i see the rainbow, but the effect where it changes in stages? like red then all of it into green, no inbetween
 lament pond

The beautiful Toru Hakagure made for VRChat! I gotta say her face was probably the hardest for me to make but I think I nailed it so well worth the days of effort put into it.
If you’re interested in having me make a character for you then shoot me an inquiry through my web...
floral moat
in blender is it possible to make a material render over another
gaunt field
My avatar pedestal previews are super long but are like 1cm thick, they're just a line on the pedestal, what did i screw up on?
nvm i think it was cause i tried to manually make one instead of using prefab
lament pond
Might be it
lament pond
 slow zealot
anyone know how to easier put a texture map on meshes (have 7 texture maps for 352 meshes with 3 uv maps)
stupid model rip has every single button and lace as a seperate mesh (ugh)
vague idol
definitely merge the meshes ... that would be hell on performance
lament pond
Jesus christ
slow zealot
Not around right now, try later!
 lament pond
Reminds me of Stardew Valley
hot flint
Don't worry Tupper, i'll be modeling Cirno too
eventually
She's #36 on the list

More cowbell
brave dune
gotta love that art style of yours
hot flint
:>
 rain flax
I always love seeing the stuff you're working on Polar, amazing to watch you grow
hot flint
:'>>>> Senpai
slow zealot
Hopefully when i get this model i am working on for 4 weeks now (even though i ripped the model assets from a game) i get this endresult : https://imgur.com/a/Fpc9vyA
 hot flint
I remember being so excited to follow all your youtube guides
slow zealot
What shader could be used for this?
hot flint
Hmmm, it seems like most of the shading is texture based
Shouldn't need anything special
could look good though with noe-noe's screenspace outline tho
slow zealot
first need to figure out how to apply the textures as the re-joined meshes don'thave uv-maps
hot flint
Oh boy, that could be rough
latent charm
If they had UVs pre-joining and you're using blender, make sure the UV layers have the same name before joining.
If you have two objects, one with the UV layer called UV_001, and another object with a UV layer called UV00002, they will get discarded.
foggy maple
If you use cats to join the meshes, it does fix uv names now as well
slow zealot
https://imgur.com/gallery/KaZ4QTL so back to this mess :/
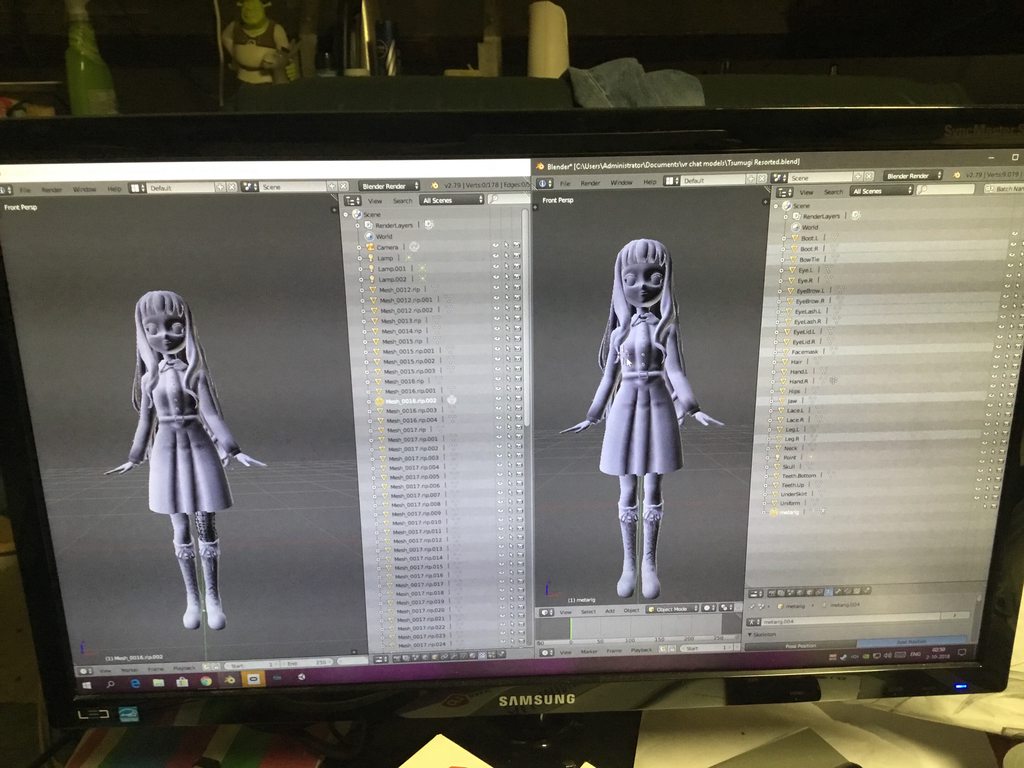 hot flint
ho boy
slow zealot
ikr
hot flint
Thank you though Tupper, I'm honestly doing my best to push the boundaries on what I'm comfortable with doing as far as modeling goes.
I really do appreciate hearing that
lament pond
@slow zealot are your normals backwards
lament pond
Just click flip and see if it stops being dark
lament pond
 spiral sigil

halcyon citrus
Please no why do this dear Lord what have we done?
That crown needs to become an SCP.
And no do not place on SCPs
Class A and higher only, securely upside down, in a maximum security vault, kill on sight whoever removes the crown for any reason.
spiral sigil
if you place it into a containment cell then the containment will also transform into a girl
there is no escape.
lament pond
That's why you store it upside down
Or use an anti gravity chamber for containment
If it can't make contact, we are safe
halcyon citrus
Or the containers that store the power-ups
 hallow bough
I check this channel everyday for the models everyone is creating. Very inspiring to me!
 west rapids
My blender keeps crashing whenever I do any form of mesh joining, does anyone know a solution to this
 civic dawn
Have anyone tried importing meshes from Autodesk Maya to Blender? When using the CATS addon which supposedly is going to help making rigging a whole lot easier, the plugin refuses to translate my mesh and says its an error without source. this is an fbx export which i think is the only export you can do from maya. it should take the file and i dont know what might cause it.
latent charm
Make sure you're exporting a binary fbx and not ASCII
Unless this error happens after getting the fbx into blender
civic dawn
you can either export as FBX or DAE_FBX, ive tried the FBX one. is it the other one?
or is there any other fbx type im missing
 lament pond
That's one way to do it
spiral sigil
lmao nice
west rapids
My blender keeps crashing whenever I do any form of mesh joining, does anyone know a solution to this
foggy maple
@civic dawn You are probably not using the latest cats version. This error is fixed there
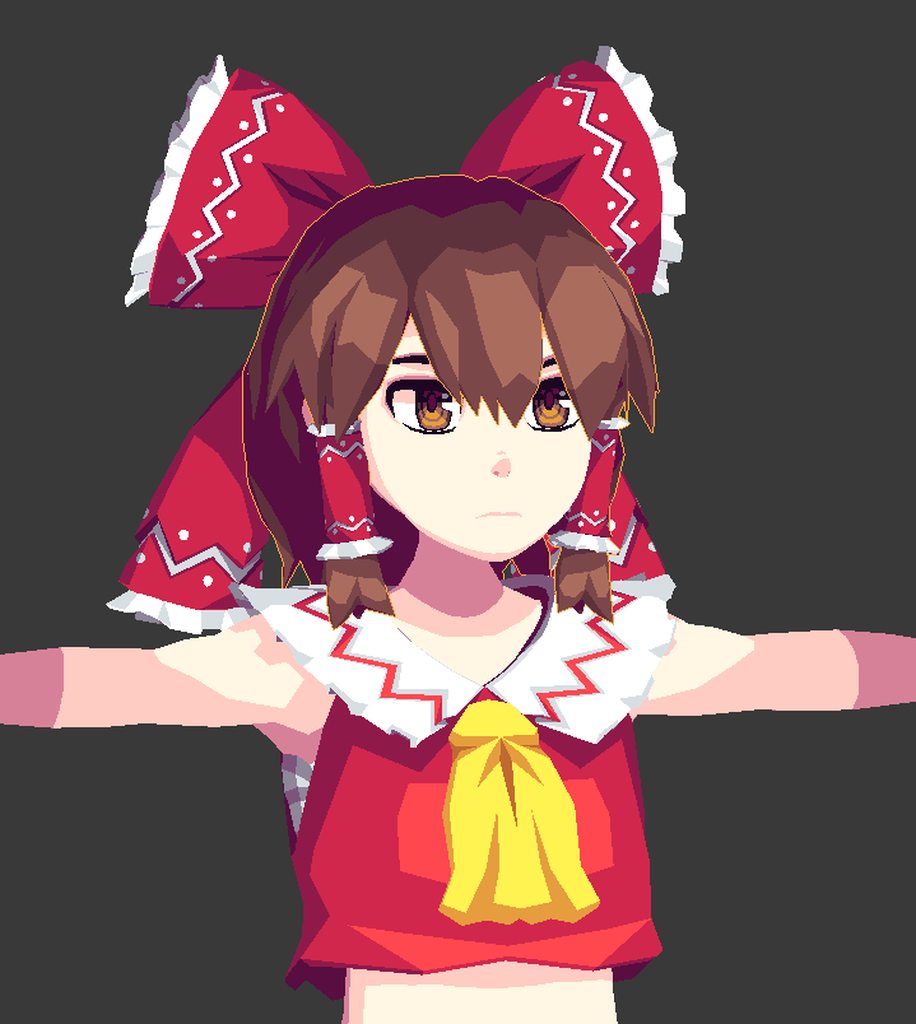
 fresh coral
Fiouf Nice
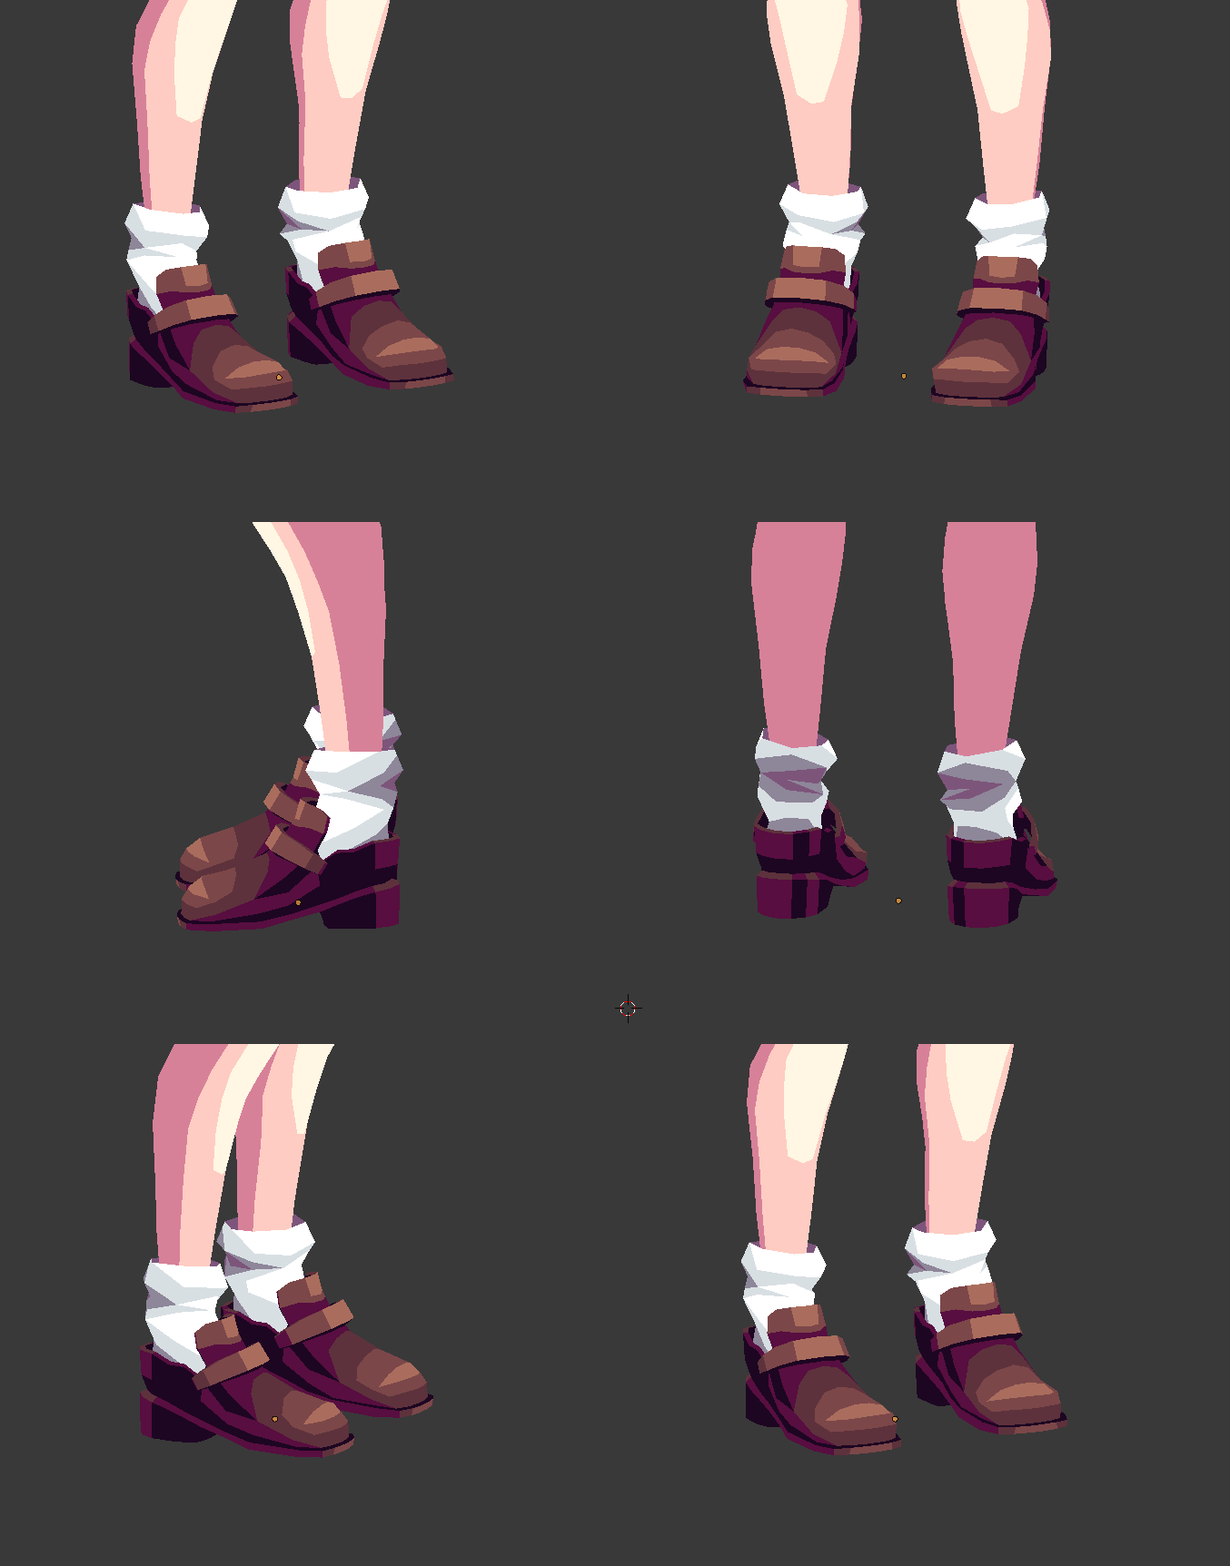 civic dawn
@foggy maple No hotox i just installed this
i got an idea however im gonna try, maybe it helps
foggy maple
@civic dawn Can you post a screenshot of the error?
civic dawn
il tag you later with screenshot if my idea doesnt work.
brave dune
safe to say nothing exists yet between those two pictures 😛
 inland matrix
[UNKNOWN TERRITORY]
hot flint

In other words, i'm working on it
far from done though, still needs all the frills
needs sleeves too oof
fringe rock
how many polygon in general they have ? @hot flint
hot flint
Generally between 10000 and 15000
Reimu is sitting around 16000 right now
With some careful decimation, I should be able to keep her under 20K with no problems
fringe rock
I made this, but now sure what to do with the skirts. https://gyazo.com/381ac7f41252df5c1620e7cc8b4276c9
 halcyon citrus
Wouldn't it be better if the pipe was the dress though?
 wide haven
@hot flint Is the hard lighting/highlighting on your models part of the texture or due to the shader? I'm really digging the no-gradient style, especially in the hair.
spiral sigil
it's his own shading
wide haven
I mean, I'm guessing it's in the shader that way it'll follow a light source.
spiral sigil
nope, it's all textures
zinc furnace
Yeah, it's baked into the texture basically
It's all solid colors IIRC so super small texture size too
wide haven
Ah. Nice. Thanks for the info.
 dense kelp
Yep, quite efficient, some textures can be reused for many sections so it could possibly be even smoller in some cases
 harsh sleet
@hot flint That is some very impressive shading wizardry. Keep up the good work!
hot flint
It does come with the sacrifice of it being less reactive to light, but it does keep it's general color scheme in any kind of lighting across all maps
No matter how scuffed their light sources are
zinc furnace
I think it's fine as long as the shader has no light ramp of its own. Noenoe seems ideal for this
Or Cubed's with the contrast/shadows set to 0
Most worlds exclusively use baked lights anyway, and at that point 99% of shaders can't get any "real" light reactions and have to fake them
hot flint
yep yep!
Noenoe's does a far better job of anticipating light differences than just adding a shade of grey to your model in low light
but noenoe's screenspace outline suffers on one-sided objects sooooo...
It's a bit of give and take
zinc furnace
Suffer how? You mean it appears black?
I think with some stencil magic you could fix that, I made a version a while ago that only has the outlines on the outer edges of the model as well
hot flint
nah nah
It just doesnt render with the same scale in my experience
I had trouble on the bits of one of my outfits that had culled backfaces
just wouldnt render outlines on the edges unculled faces that led up to culled ones
hot flint


Took a good while today to really do a good job of defining her hair shapes etc by adding another shadow color
way less muddy now, can actually tell the hair apart from the ribbon
by immediate comparison...
lament pond
Now I'm imagining a complex shadow map used to keep this kind of style in shadows while also allowing it to move
spiral sigil
that would be so beautiful
hot flint
Oof
Wouldn't that be divine
Noenoe's does a pretty cool job of simulating that actually
Let me see here...

In static lighting

and dim-lit
of course, it's not dynamic lighting like I'd like
but still doesnt look terrible
sonic nimbus
@hot flint Have you made custom vertex normals?
hot flint
Never played with them before, but I'm not really into the idea of doing that with 5-tier ramps
I've seen vertex normal editing, it's just not something that seems like it'd behave accurately with a 5-step ramp
if that makes sense

It'd still take a separate ramp for each color group
and not all of them end in the same colors
sonic nimbus
I'm not entirely sure about the technique but I believe the simplest custom normals are to make the face shade more like a sphere and then use a step ramp in the shader.
hot flint
yep yep, but... hmmm how do I explain this exactly...
certain parts of the mesh have specific ramps
oddly specific
it'd wind up being several materials
sonic nimbus
Hmm, you could use masks and a texture array of ramps.
hot flint
Possibly! It's just that... hmm
how do I describe this... let me actually make a quick visual example
sonic nimbus
You need different ramps on different parts right?
hot flint
yes, but not just "hair, body, ribbons"
but also different PARTS of those pieces
so you'd wind up with like
15 different materials defining these things
not to mention, let's say for an example a character with rainbow colored clothing
sonic nimbus
With a custom shader you can use a mask texture to specify a different ramp per pixel.
hot flint
then we're talking 20-40
Ahh i see what you're getting at
What i'm thinking of though is specific lengths though within ramps
ugh, i need to make a visual example
give me a second
sonic nimbus
Ok
hot flint

what happens when you have two oddly specific ramps like so
is there a way to have them reference these exact positions without having them as separate regions? (And consequently, separate materials)
((not that I would ever use these disgusting ramps oof))
I feel like it'd probably just be an offset thing
but that seems like it'd get pretty tedious
also any shaders that I come up with aren't going to be whitelisted so there's that too.
rip
 fervent folio
Guis I've encountered a problem
spiral sigil
a solution would be to make a matcap with that ramp, so you can have one material
hot flint
Wouldn't I need a ramp for each color group though?
spiral sigil
it would look like the one on the left https://d27nqrvkk22y65.cloudfront.net/product_image/image/20150/big_18e4367d3d.jpg

 hot flint
Reds, Yellows, Skintones, Whites, and Browns?
spiral sigil
hmm good point
hot flint
That's the trouble
Reimu is also a terrible example since she only has 5 main color groups
spiral sigil
yeah, matcap toonshading isn't as detailed and controllable as what you're doing either 😐
hot flint
then you've got someone like...

The shading on that belt is actually inaccurate as well....
it's supposed to be per-segment shading
spiral sigil
I would do a greyscale matcap (for the ramp) then tint the color in maybe ... 🤔
fervent folio

 spiral sigil
but still not really what you are looking for
fervent folio
Having a problem
hot flint

more like this
Yeah, you've probably got a point on that. The grey scale ramp deal could poooossibly work
fervent folio
Anyone know what can fix that?
hot flint
It's just still going to be a lot of color groups for the mats
@fervent folio looks like you have some of your backfaces reversed
in blender, hit tab to enter edit mode, hit "a" to select everything and hit spacebar, then type out "make normals consistent"
(in edit mode)
spiral sigil
or select everything and hit ctrl-N to just recalc them all 😉
hot flint
that works too