#3d-modeling
1 messages · Page 37 of 1
 hot flint
as much as i hate doing this, it'll be nice to actually be able to have viseme mouth shapes

yeah, me too nif
me too
 rare crystal
its tooo bad shaders cant just transfer from prgram to program with no problem. I like the way the toon shaders look in maya
hot flint
yeah... i feel that...
thats usually why i just do shadeless
idea
couldn't you bake textures?
rare crystal
idk how that works
hot flint
Ahhh
most engines have the ability to "bake" whatever the current rendering style is onto a texture map
that you can then use to apply back onto the model later
look into it
texture baking
rare crystal
I dont like boolean.
rare crystal
manually connecting would be better. boolean usually causes some unwanted effects
 spiral sigil
oh
rare crystal
vertexes dont match up and polygons go berserk
spiral sigil
is it fixable
if you just attach a head to the neck or something
with boolean
then fix it
rare crystal
it is, but its almost as much work as doing it manually. but itsa huge mess
spiral sigil
oh
rare crystal
if you can, make the two meshes treat as one, then sew them edges together. but make sure they vertexes line up.
spiral sigil
ah
rare crystal
otherwise youll end up with holes.
rare crystal
no.
spiral sigil
or just directly stitch them
rare crystal
directly. but again make sure the lines and edges line up well. or youll end up with extra polygons that wont have a matching partner to stitch with
rare crystal
no.
spiral sigil
any modifiers?
rare crystal
youll have to manually deletes some edges and vertecies in certain spots
spiral sigil
o
rare crystal
im sure there's some viedeos that can help show you
spiral sigil
are there any modifiers that would make joining meshes easier
rare crystal
idk in blender. if it was Maya i could tell you the tool to use directly.
but idk its name in blender
spiral sigil
cant you just union boolean then merge?
rare crystal
maybe. ill have to see what your doing
spiral sigil
merge the vertexes after or join/delete
rare crystal
merge them after. delete or add whats neccessary then merge them
spiral sigil

thats just a bunch of random shapes
i booleaned together
the overlap is the redish area
rare crystal
omy my goodness
spiral sigil
i could cut it across?
and then slide it
merge the vertexes and remove doubles
?
im not really sure how to do this
rare crystal
ok... so for instances like that, you can just connect the Vertices that intersect the other object to another vertice within the same polygon. any polygon that has more than 4 vertices will not show up in unity. it will be an empty hole
spiral sigil
i know theres a way to slide the vertexes together
but i dont know how the guy did it
but apparently it makes it easier to merge meshes
he uses the knife
after making loops
and then slides it all together
rare crystal
idk what the tool name is in blender, but there should be a tool to allow you to connect 2 vertices by creating another edge in between.,
rare crystal
yeah. the knife would be your first tool
spiral sigil
im not sure how the knife thing works
rare crystal
after that its up to you.
spiral sigil
hm
i have to review
if i knew how to workt he knife i could probably do it
it's a combination of knife cuts and loops
rare crystal
relatively simple. just select the knife then the 2 vertices you want to connect
rare crystal
cool!
spiral sigil
then connected the outides together
 polar estuary
Anybody knows how to fix the Tranparancy of a 3D Model
Ive been trying different shaders/Material but its still Transparent
https://ibb.co/nvmQ27

 rare crystal
YEAH!
hot flint
wooorttthhh
okay.... is there ANYTHING ELSE im forgetting WHILE im in blender...
Hmmm...
rare crystal
eye tracking?
rare crystal
idk
hot flint
I thought that was in unity
rare crystal
neever tried
hot flint
i've only ever seen it being a CATS thing
i have eye bones set up for it
so maybe that'll work
rare crystal
but supposedly its important how you set it up in the building process
hot flint
eh, i've got eye bones that rotate properly
rare crystal
they have to be in a certain starting position though, otherwise your eyes in game will look into your skull
rare crystal
yeah
hot flint
Maybe they have to be pointing forward?
mine are pointing straight up, and use rotation to move
so we'll see
this is how i see MMD models set it up
so if it works on MMD, it should in theory work for me
time to throw it to the unity wolves
crooooosssing my fingers
rare crystal
probably
hot flint
im actually really stoked to see how well dynamic bone gravity plays with the hair and cloak bones i set up
Ahhhhhhhhhh....
Eyes need to be children of the head
rare crystal
yes
rare crystal
aahh yeah.
hot flint
Hmmm... interesting...
It seems unity incorporated the pose i put her in.
i see some potential
Ahhah....
I also see some points that i never applied weight to
so now they're all kinds of left behind
rare crystal
whoops
rare crystal
sweet!
hot flint
which is a first
rare crystal
i still have yet to make a model that has everything. mine are all just blank expressions with some dynamic bones
hot flint
few more things i need to test....
dynamic bone set up, and normal movement
OH....
OH GOODNESS
YES
YES YES YES
THE HAIR
ITS SO CUTE
HECK
rare crystal
lol
hot flint
IM SO GIDDY
okay okay
now to check the robe
okay, that one is way more subtle than it needs to be... let's fix that
spiral sigil
hm
rare crystal
?
hot flint
somehow, there was 10% weight paint influence on a ring of verts around the waist that both SHINS were influencing
fiiiiiixxxxed get the FUCK out
spiral sigil
you don't like shin rings? 😄
rare crystal
oh pffft
hot flint
not around my waist
spiral sigil
some mmds are so beyond fucked up
spiral sigil
oh geez
hot flint
must have been when i was editting part of the robe
no clue how it wound up on BOTH shins
ooorrrr it could have been the autorig from rigify
for the initial weights
regardless, case closed, take em away
rare crystal
i feel like later irl. im gonna end up saying "A Bolt of BRILLIANCE!" because of Detective Pikachu
hot flint
added one layer of tail bones to the robe thingersso that should make for a more bouncy skirt feel
that's a great line hahah
yes, perfect, seems that was exactly what the problem was
also the eye tracking should be picking up properly now
Yessssssssss
turns out i just needed to make the robe bones fall like one of those mobiles used for toddlers
works like a dream
rare crystal
toddler robes!
hot flint
heheh
Alright, that looks to be the magic formula
remains to be seen if it'll play nicely with all of VRC's very jerky movements
hot flint
fingers crossed... uploading now..
IT... IT WORKS
IM IN TEARS
the only thing i cant verify yet is eye tracking
since mirrors dont show it???
i dont think??
hot flint
hmm
 tired plume
i think it doesn't show mouth visemes though.....?? not sure
you could ask somebody though if not sure
tired plume
cause my first model had eyetracking and i walked up to the hub mirror
hot flint
not sure how to do eye tracking from scratch
tired plume
and she started responding like that
hot flint
everyone uses cats
 cobalt willow
Mirrors show visemes, although roughly 1 second delayed
spiral sigil
hey guys
how do i mirror and flip onto the same place
i sealed 1 foot
but i have 2 feet
i dont want to manually seal the 2nd foot
and the mirror modifier doesnt do what i want
is there a way to get it to work
it's the offset of the mirror modifier
NVM I DID IT
:d
😄
😄
decimated 1 foot - sealed it then mirrored 😄
omg
my hair without decimatio is 13000 polys wtf
i have a mess of vertices in the hair and i need to seal the holes how do i do this

should i just decimate it more and then seal because it s a mess

 marsh lava
Anyone had the sculpt tool refuse to work on a specific mesh?
spiral sigil
is there a way to delete all unlinked vertices?
i have garbage vertices just floating
spiral sigil
what if i place a cube inside the head and boolean all the hair that goes all over the place
to delete it all
or could i just create a mesh
throw it inside
what if i duplicate the hair
sclale it down
throw it inside
hit boolean
how do i change the origin of the duplicate to make it the center middle of the original object
cursor to select doesnt do anything
it keeps snapping to origin
instead of middle of the head
spiral sigil
hm
i guess that doesnt work
is there no modifier that deletes everything and remeshes eveyrthing>
hm
spiral sigil
ok
 blissful sleet
@spiral sigil space -> select similar -> amount of adjacent faces (to select all floating vertices)
blissful sleet
i grab them and snap to vertice then remove doubles but merge is probably faster
 small cloud
@spiral sigil what do you mean by seal skirts
spiral sigil
when i decimate them
they get holes
hm
16000 tris
and i havent touched the face hands or legs
lol
should i even bother decimating them
40000 down to 16000 manually

❤
i need better colours
its so flat
lol
how do i make the colours better
 lament pond
Shading
spiral sigil
how
blissful sleet
don't touch the face or hands legs should be fine
click glsl in nmenu to see shading
 eternal crow
does anyone know how this filetype works? i got these files outta the files for sonic forces and i wanna use the parts for the avatar to make my character
spiral sigil
@blissful sleet can you screenshot the location of that i cant find
blissful sleet
@spiral sigil at the bottom of the n menu http://puu.sh/zSVWu/908ad9289d.jpg

 hot flint
Hey @spiral sigil! Awesome work, glad to see you making some progress!
spiral sigil
ty
hot flint
What would you say you've learned most in doing this so far?
spiral sigil
stitching and repair meshes
lol
decimating properly
manual decimation and filling holes
time for my favourite part
unity particles 😄
my model looks weird with cubed's shaders
i dont have to use cubed's shader do i
 steady notch
Nope!
A good alternative is just to use full-bright. It won't look right in darker maps like the PUG, but it it is an alternative. If your character isn't anime/cartoon, the standard shader will be just fine for you.
blissful sleet
i always use standard
shadeless loses so much detail
i turn down smoothness and set emission to .1 or .2
steady notch
Ah, that's some good advice.
 zinc furnace
Even less cartoonish characters might look better with Flat Lit Toon or Unlit
I ported a Quan Chi from Mortal Kombat 9 which looked plastic-y with standard shaders
steady notch
Without normal maps and some sort of map controlling gloss/specular/smoothness, most models look kinda rough.
Though bringing smoothness waaaayyy down helps. Snake/Big Boss/whatever from MGS5 looks amazing with just a normal map and low smoothness.
 rigid root

Substance in Unity contains the plugin for Substance Source and the Substance Painter live link . Whether you are working in games, VFX or VR/AR, Substance delivers a unique experience with optimized features for enhanced productivity.
Subst...
if you have Substance Painter + Substance Designer, this is really useful
@steady notch have you tried to set up a PBR avatar with a roughness map yet?
also FWIW most materials that'd be on a person are quite rough, the default value in the slider is supposed to be changed
steady notch
@rigid root I haven't. But I'm a huge fan of Substance Painter! I just don't do many realistic characters.
And when it comes to world design, I really dislike the way Unity renders cube reflections.
Is VRChat set up as a forward renderer?
steady notch
They do, but the way they distort them is poorly executed, IMO
UE4 uses some sort of black magic that makes probe based reflections nearly as convincing as real-time.
For example, I can easily leave glass reflections to the probes in a UE4 project, but in Unity, it's disturbing to look out a window using them.
rigid root
looking into that now, I want to see if Unreal does it the same way as CryEngine
spiral sigil
Should I remove doubles before or after decimating (planar)?
rigid root
before, but just try it and you'll see the difference
spiral sigil
Yeah I just saw some parts of the model are better to decimate before doing it or you get this odd stretchy texture.
rigid root
ah yeah I think that's from when the merged vertices have different uvs
@steady notch this is Unreal's code for sampling environment probes https://github.com/EpicGames/UnrealEngine/blob/release/Engine/Shaders/Private/ReflectionEnvironmentComposite.ush, but this is offtopic for this channel now
is it user configuration whether to use box captures or sphere captures?
in both cases the code seems pretty simple, I wonder if maybe the quality difference in unity is from how they each deal with blending multiple probes

 mental blaze
oof
eternal crow

im getting my forces avatar made, (i finally named her after like awhile cause why not, her name is Asakura)
rare crystal
thats a cool name
eternal crow
Thanks 😄 i honestly was gonna use my name irl but i thought that's not very original
plus it fits her better than my actual name does
hot flint
Rigging is definitely a pain, yes@lament pond
 lapis needle
@cobalt willow That pin hurts my feelings. (Not really)
I nearly forgot why I got on here again. If anyone is dieing for a model they cant find to be made into an avatar Im the dude who does those. RIP my hardrive. I actually killed my last computer for overusing it with making models and using it for VR.
eternal crow
^ i accidentally beat mine when i got mad and it had a tiny yet essential piece break off
but it was a cheap $200 hp stream laptop
which ran like a potato
but hp was nice enought to let us exchange it and i ended up getting a WAY nicer one for like only $100 when its normally like $750
rare crystal
The hard part about making a model of Ozzy from Osmosis jones is that literally HALF of the google search results are fan fantasies. HALF the entire search. So finding good reference angles are hard.
rare crystal
lol i don't have it, and i don't feel like paying $2 to watch it on YouTube
 sour quest
how can i fix that
 timid crane
@spiral sigil there's a blender add-on for that
eternal crow
i have that add on but it only lets me export them for some reason
tired plume
@lament pond i suppose you could have two extra shoulder bones just there by themselves, for the purpose of trying to keep that part of the shoulder mesh in shape
spiral sigil
O
hot flint
It's more just a matter of divying up bone weights really
I had a bit of that issue with a good number of my models too
Just takes precision and patience
small cloud
@lament pond that is generally fixed by having enough loops and blurred weight, should be easy enough, but yeah, shoulders are single most hated bones of mine...
 bronze quartz
How can I select 2 materials at the same time in blender and on edit mode select all the vertices of the 2 materials? Cause I try with CTRL and when I enter edit mode and select all vertices it only selects the last material I clicked...
bronze quartz
Oh, thank you!
 minor oracle
hey folk, anyone know if there's a good chat to talk about oculus quill / medium / other vr art programs?
 sinful sable
Hi guys.
I have have huge problem regarding a model that I've been trying to fix for GMOD and also put into VRchat

It stretches in specific locations near the head
that I don't know why
tired plume
Cause mixamo isnt perfect and i suppose you could try to yank this out as a .fbx and then go manually fix it in blender
eternal crow
@sinful sable Welcome to the club of mixamo f*cking models up 😄 i've had it where mixamo completely wrecks a foot
for simpily no damn reason
tired plume
Basically even if mixamo accepts and spits out a model youre gonna have to understand how to use blender anyway if you want no mistakes like this
 proud oar
https://cdn.discordapp.com/attachments/322408796926377986/429935383992729601/unknown.png how to remove those line on foot?
 cobalt willow
Select all your meshes and set the origin point at the same place
 junior idol
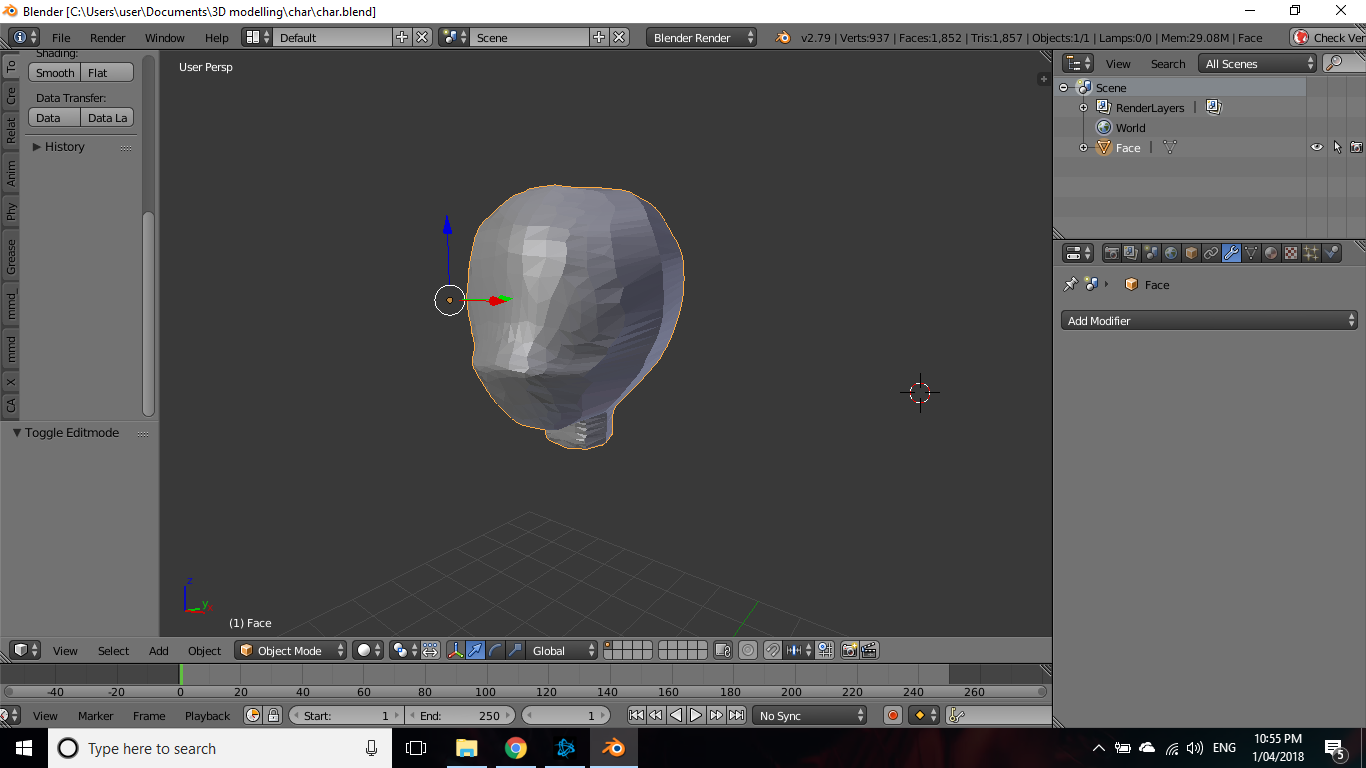
for my first time creating mesh, i think i did pretty well on this https://i.imgur.com/VwUTbw1.png
 wooden marsh
Anyone know why in blender when I append a new head onto a new body, and join the armatures, the bones on the appended mesh lose their weight paint so they're useless?
 topaz frigate
whats poppin?
spiral sigil
how do i apply that shader that makes my body parts look like space
how do i apply it to a select part
what do i do in blender
so that i can use it on parts of my body and not the entire body
 past mountain
@spiral sigil what you need to do is have a separate material for that and yes you can do that in blender.
In the blender you create a new material for the mesh. When you do this you will of course have a material that isn't tied with any surface, so what you do is you go into edit mode, select the areas you want to have that material assigned to, then on the right you select the material and in edit mode there should be a button called assign, you press that button. Then (if the selected area is already uv mapped) you export it as an fbx put it into unity and now you can apply the space material/shader to the new material part. For the actual space material you'd have to look around the web for it or ask other people. Hope this helped ^^
spiral sigil
that's complicated 😵
past mountain
yeah, that's blender for you. Took me ages to get into blender but at some point you get used to using blender and can actually do cool stuff, would recommend to watch tutorials and try around if you have time and determiantion
 stray topaz
anyone know about Unity Dynamic Bones? I got the plugin
I created the bone root but the white line goes up it and not the rest of the bones

I unintentionally fixed it before but now it's doing it again. Was it something about bone end or something?
 upbeat star
hey guys im legit completely braindead to how .smd files work in unity, since im making a pokemon model the zip came with a .smd file and i exported it as an fbx, what do i do?
 coarse walrus
Is there a way to navigate blender (change the camera/view position) with a trackpad?
lament pond
 lament pond
no you don't
spiral sigil
😄
its gotta stick out and twist
i wonder if prefab blender tongues exist
oh boy
just attach the bone and good to go
XD
resize it a bit
LOL
stray topaz
hey how do I reimport a model in Unity? right clicking and reimporting the model isn't working
upbeat star
iv been stuck on making this model all day i really need some help ;--;
 north onyx
https://gyazo.com/472dfeccc2e4fd7b4906cdff7931f4f1 My first attempt at modeling seems to be going better than I expected it to.
 spiral sigil
hey guys
help pls
how do i assign a heirarchy group to a different parent
in blender
i made some face parts and imported them into my working file
but i cant figure out how to attach it
it's a bone/armature
and object
ctrl doesnt work
ctrl j doesnt work
i cant drag the armature into the other armature
lament pond
 timid crane
Awesome stuff as always!
lament pond
Thanks
spiral sigil
OMG
I MANAGED TO TRANSPLANT MY CUSTOM TONGUE INTO MY MODEL
i know how to swap body parts now 😄
the secret that is not available online
😄
not on youtube or google or any site
nice
spiral sigil
trying to get a plane with a mesh on it to stand up right in vrchat but rotating it doesnt help
cobalt willow
@upbeat star .smd files are not supported in unity. You will need to download and install the blender plugin source blender tools to be able to import .smd files to blender, when you got the model in you can export it in a unity friendly format
You can either save the blendfile or export as dae or fbx
Into unity that is
spiral sigil
@spiral sigil it's a secret found in #tutorials
 main goblet
hello
 iron stone
world's biggest secret
spiral sigil
What
Well #tutorials doesnt say how to bake eyes and hair seperately
@spiral sigil
Its not working when i try to do it
I hide the eye and hair mesh and then atlas and bake
try to fry instead
Lol
past mountain
@spiral sigil Are you doing it manually or through the CATS tool?
spiral sigil
Manually
I only do manual atlasing
But i dont know how to have the eyes and hair seperate
past mountain
have you tried doing seperate meshes and then doing it seperately there?
that should probably work
 native palm
I don't know if this would count, but I extracted a few models from a game that uses Unity and I'm having troubles opening them in Blender because the FBX files are ASCII format.
I need to open them in Blender because I have to add some new bones to fit the VRChat skeleton, like with knees and stuff, and some I have to add a full hand structure to (the mechas)
Is someone able to help me with this?
stray topaz
I feel like I'm going crazy, I'm fixing up my main avatar and my last iteration isn't uploading to VRChat for some reason. The last couple times it uploaded fine, it was almost perfect and after I added a dynamic bone collider; it just doesn't want to upload
the client path is the same, I didn't make any changes to the model, I only added the bone collider to my head so that my hair doesn't clip into it.
@native palm I wish I knew how to help with that 😢
native palm
Also found that using Noesis to export it to the new format shrinks the model size, so I can't use that.
stray topaz
does the character have an exact height?
native palm
Not really.
Like I'd rather have it at the right size according to the game right away.
And then scale it in unity from there.
stray topaz
I scale it in blender so I wouldn't have to do guess work in unity
my avie is supposed to be 7' tall, so I scaled it accordingly and did a test run in avatar testing and it came out to 213 cm
native palm
It's sort of driving me nuts because I have to essentially, afaik, rerig the model in order to be able to have the VRChat SDK interpret everything properly, as there's unnecessary ground bones and it's missing a few bones for like knees and stuff.
I know of Blender's Easy Rigging tool already, but I need to be able to import into Blender first before I can do anything with it. 😛
stray topaz
aaahhh ok
stray topaz
@spiral sigil FINALLY! That worked. Thanks! ❤
spiral sigil
Np
spiral sigil
im trying to put a gif on a plane and put it into vrchat. i have the gif part down but when i import it into vrchat it keeps laying down.
Rotate it
Or change the billboard setting
And put it as a child of the plane
rotating it doesnt help ingame, but what is this billboard setting?
The billboard setting will probably fix it then
Under the render tab
Im going to transplant the blender monkey head onto a random mmd body
XD
 vital gate
Can I import an obj file into unity or do i need to export it first?
also how tf do i export it?
zinc furnace
I think obj works, but I don't think obj supports rigging
Obj is always the most reliable format for me
 molten cedar
While Unity does support various formats ( https://docs.unity3d.com/Manual/3D-formats.html ), you should always be using FBX, it's the industry standard for a reason.
 spiral sigil
Anyone really good at making these 3d models, i have a custom request adn i cnat model worth crap. i want to like bring my Vindictus character into Vr i tried some tutuourials but none seemed to show how to get my specific custom character in. i was wondering if someone could help in any way possible. i am but a broke man so i cant offer any compensation im sorry
tired plume
@spiral sigil i have experience ripping from games like that and honestly
the decimation IS NOT WORTH
it is just... not gonna be meant for this world
to really bring that shit in you're gonna have to find somebody crazy enough to spend a whole month manually decimating such poly
cause it's one thing to rip it and that's the easy part
and i'm guessing that if you want somebody to copy the look of your vindictus character that's gonna cost you like 200 dollars, fam
cause that's hard
it's only easy to do it with games like WoW cause the models are way shittier
spiral sigil
damn ok
spiral sigil
i need help
i baked the items seperately and it didnt work
i dont know how to bake items seperately
it isnt working
i cant find any tutorials or solutions
lament pond
 spiral sigil
how many avatar did you make in the last month, jesus
lament pond
I'm a busy boar
lament pond
It'd probably be faster to just make a new pokeball
 stoic ridge
sphere -> slap on a texture, done?
 mossy quail
it has a really cool inside modeled though
when i decimate it all shape keys are lost
which is the problem
can have it exported without splitting into 2 parts?
@stoic ridge i want it to be able to spring open though
lament pond

 smoky vector
lament pond
smoky vector
lament pond
They didn't ask for those
spiral sigil
Eh, most games have low poly character models
Because optimization, shaders n whatnot
Great textures with normal maps, specular maps et al 🤔
Autocorrect pls don’t fix specular to something weird again
spiral sigil
that moment when you find a free pistol model online and it's 1 million tris
anyone know a good place to get low poly gun models?
I just want a pistol
cobalt willow
@spiral sigil You might find some here? https://poly.google.com/
 spiral sigil
I had no idea this existed
cobalt willow
+1 KNOWLEDGE 🙌
spiral sigil
exactly 🙏
 whole plinth
does everyone combine their materials before exporting from blender? I know that megatutorial said to do that, but I have issues most of the time that i try it out.
cobalt willow
Depending on how many materials you got, combing them might or might not be necessary.
It's ALWAYS best to have just one material, but a few more isn't too bad
zinc furnace
I have a model with one shape key for blinking. To avoid issues with missing shape keys, I need to separate the blinking shape key into two winking keys in Blender. What's the easiest way to do that?
cobalt willow
For simulated eye tracking?
zinc furnace
Yes
cobalt willow
If you got one shape that blinks both eyes I just create dummy shapes that moves a single vertex
cobalt willow
Technically they are new shapes so it works
zinc furnace
And it would be nice if Blender just exported empty shape keys too
But I've resorted to moving a few tiny vertices in the hair instead
cobalt willow
Blender does export empty shapes, unity doesn't recognize them
zinc furnace
Oh, makes sense
 silver tide
Could someone help my friend figure out the problems with this model, we pulled them straight from FFXIV but the colors from the textures are faded and the hair/etc is..... polygonal... and there's no "texture" on the horns (like, actual texture as if it looked like it had bumps and etc on it).

should look more like this
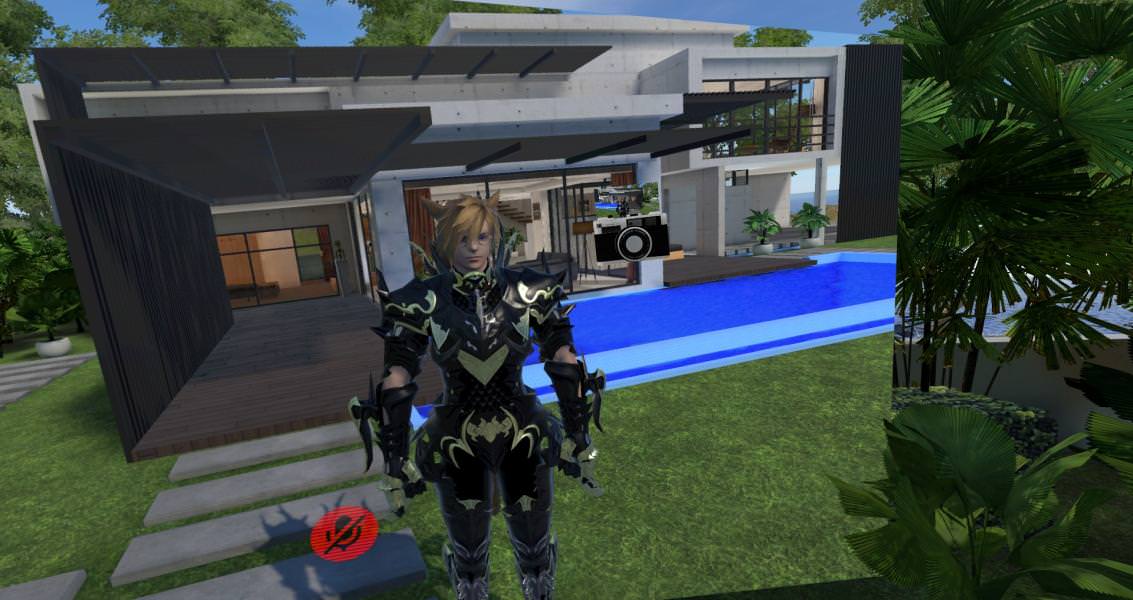
color/texture wise not the same armor/guy of course, but you know what I mean)
spiral sigil
It uses a color id map
you'll need a special shader
for it to apply the color to the textures
silver tide
@dense hornet gonna just go ahead and tag you, this stuff might help lol
 onyx juniper
 static sun
Not in VRchat yet but i got my showcase renders done for my character project.
need to clean up the Weight paints to make them more animation friendly
https://www.artstation.com/artwork/voVmE enjoy

ArtStation
This was a 6 weeks personal project to get my head in to the new year.
This is a Fan art of Max Caulfield from the Life is strange Franchise.
This is my first project working with haircards and using Maya, I genuinely had to relearn a fair amoun...
mental blaze
Neat
spiral sigil
hello
whats the easiest way to mirror eyes
i need to get my pupil into a symmetrical position
hot flint
I don't know that eyes ever look quite right if they're completely symmetrical

This is a better option
spiral sigil
i have OCD
hot flint
then dont add shines
hot flint
 spiral sigil
i need to figure out how to align my pupils on an x mirror
spiral sigil
i pressed mirror
hot flint
Please listen.
spiral sigil
ok
hot flint
Do the following:
-Take the eye you DO like, and go into edit mode and duplicate it
-Left click to confirm duplication, then immediately press spacebar and type "separate"
-Separate by selection
-Open the property panel (N key) and set your 3D cursor to 0, 0, 0 coords

Set the pivot to 3D cursor
-Select the duplicated eye mesh in OBJECT MODE
-Tab into edit mode
press A to select all
Hit S to scale
type in: X -1
left click to confirm
press spacebar, type in "Flip Normals"
and do that command
then, just tab out of edit mode, select both meshes with right click, and do CTRL + J to join them
done
hot flint
I sent the printscreen
spiral sigil
i see
hot flint
I'm not sure i understand, i need to see what's going on, clearly
DM me if you're having trouble so im not cluttering things
hot flint
np!
mastering blender has taught me a ton
also
a very, very useful check to do:

Turn on Backface Culling
make sure nothing disappears
if it does, its normals are inside out
spiral sigil
so i have my pupils on the bones of each eye area do i need to CTRL J the pupils to the white part?
and add weights
?
o
if i want the pupils to bounce around when i move how do i do that
?
i guess the white part has to move with it
if i want my eyes to roll around when i move around
i saw some guy have that
how do you that
when he turned his head his eyes rolled to the side he turned to
and then bounced back
it looked hilarious
and when he would dance
his eyes went all ove rthe place in his head
lol
hot flint
Sorry, i'm bouncing back and forth between channels
let me read
That would be done with a root bone for both eyes and a dynamic bone plug in
hot flint
Something like that
head >
Bone>
Eye_L
Eye_R
but that might mess with eye tracking if that's something you wanted
but it sounds like you dont care about tracking, you just want them to flop around
spiral sigil
hahaha
ye
but i do need to do mouth visemes
i want my character to do random weird mouth animations
lol
spiral sigil
yeah
hot flint
but if you want them to do it while you're not talking, there's a different method for that
 hot flint
should be interesting
spiral sigil
lol
i just need her eyes to flop around
do i still need to join them to the whites and add weights
i need to parrent them too right
i dont think i need to add weights
the white part has weights already on the bone
so i just parent them
hot flint
nah, the whites can stay separate
spiral sigil
o
do i have to set anything in blender to make the eye bones become dynamic or do i just do it all in unity
as long as there is a dynamic bone holding the 2 eyes
it should bounce all over right
hot flint
nope, only unity
but you do need the dynamic bones plugin for unity
if you dont have it, you'd need to buy it
spiral sigil
so i dont need to split the head from the eye bone
hot flint
nope
hot flint
likely yeah
spiral sigil
😄
i should fix the mouth
i need to put a curved rectangle behind the opening
it looks weird when she opens her mouth because its empty
i put my custom tongue into her
spiral sigil
well
the mouth was weird
the tongue and teeth were combined into each other
and the mouth animations were broken before i decimated it
but i didnt decimat ethe face

maybe i just do 1 of those
lol

right now the inside of the mouth is empty
except for my tongue
lol
maybe i throw a 2d object in there and apply a rainbow shader or something
lol
rainbow cube inside lmao
hot flint
lmao whatever works, right?
spiral sigil
yeah
i gotta put something in there to block it out a bit
if i dont attach bones to floating objects what happens
 modern compass
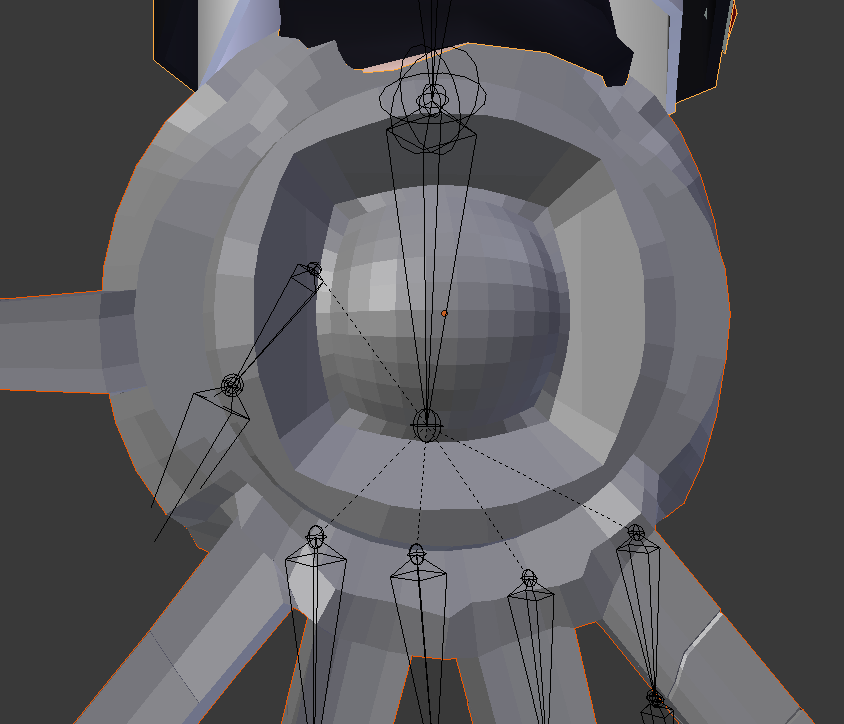
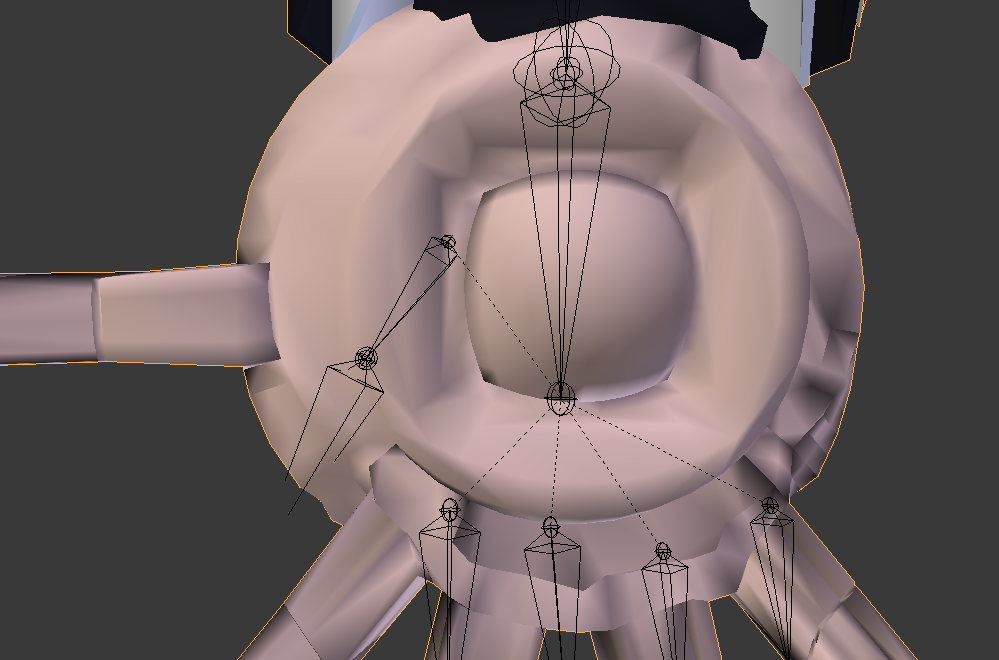
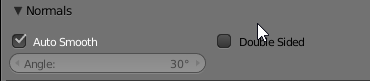
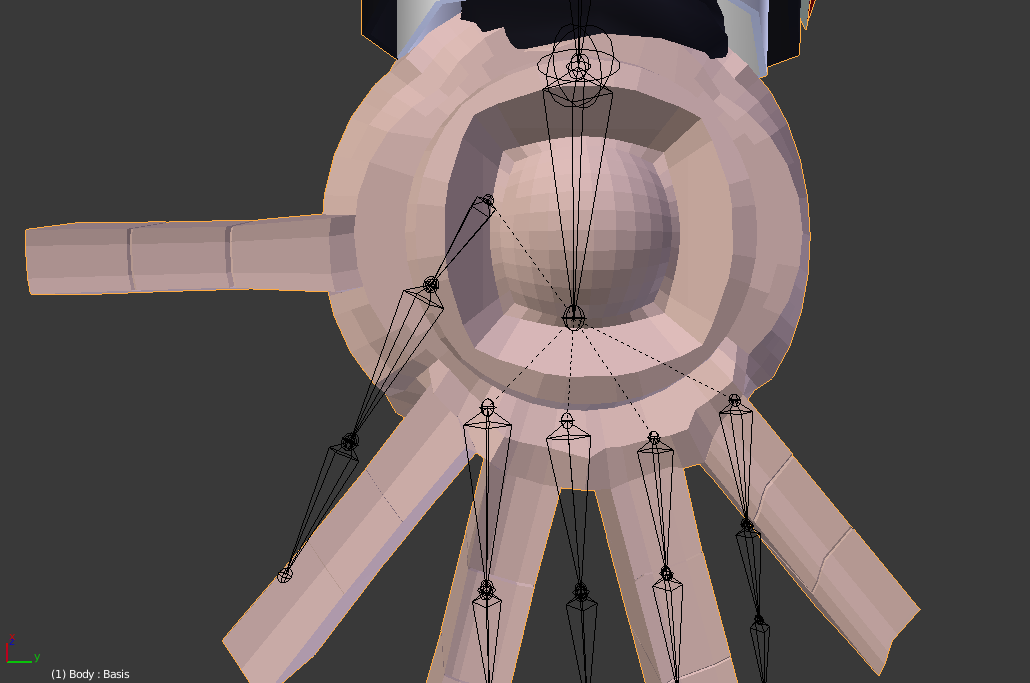
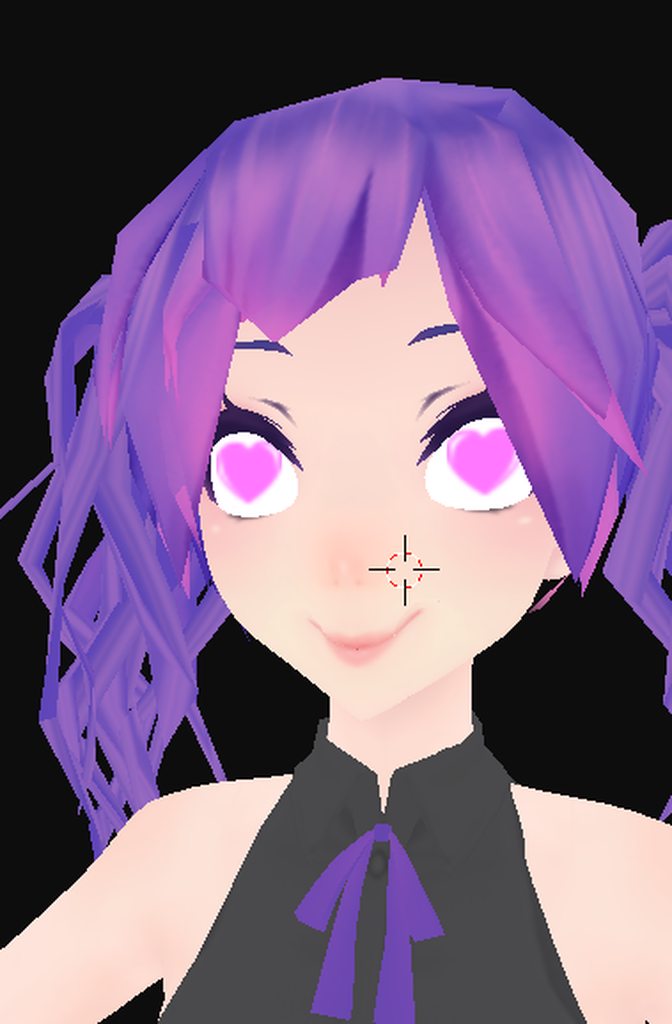
Can anybody know whats up here? My model is fine but when I ctrl+J to join the hand to the arm it applies this weird smoothing effect? https://i.imgur.com/D7HDXt6.png https://i.imgur.com/v3s4ZxM.png
Edit: NVM ticking https://i.imgur.com/pMSO63m.png stopped it https://i.imgur.com/8azFSCE.png
 hot flint
Are you talking about eye tracking?
spiral sigil
no
hot flint
I'm not very versed in it, sorry
spiral sigil
when i did the eyes
hot flint
Hmm
spiral sigil
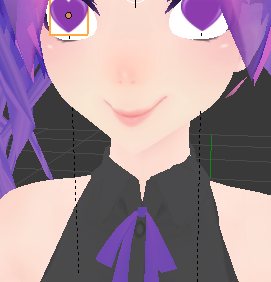
the pivot point is the dotted lines that go into the ground
how do you get rid of that
the origin
the origin for the eyes are the floor
i fixed it
nvm
model is broken
junior idol
my first shot at 3d modelling  https://imgur.com/a/UE5NT
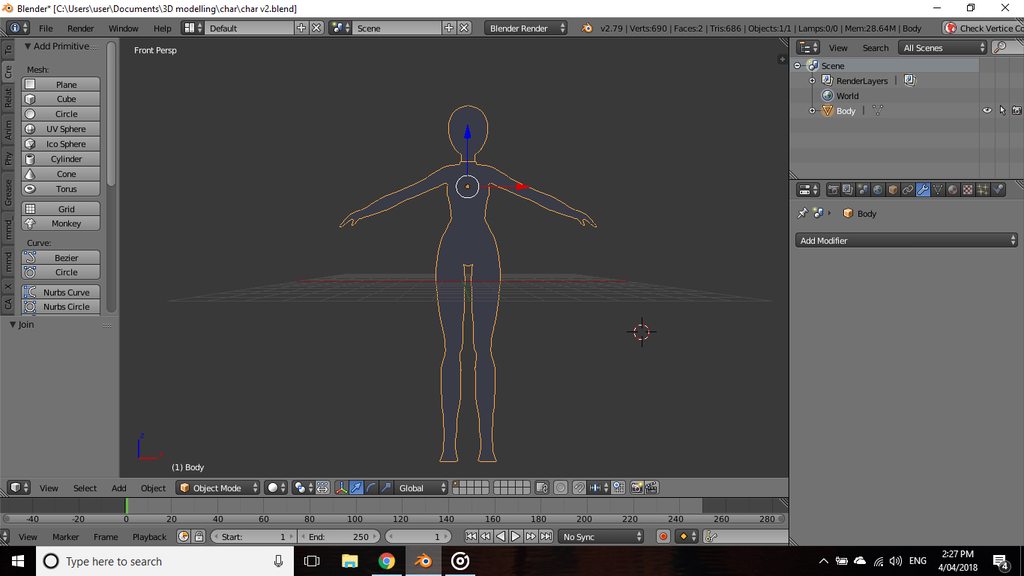
its 2d and i cheated by tracing a basic drawing but its something
timid crane
Curvy 👌
lament pond
That is the usual method
polar estuary
Hey guys anyone knows how to change the Origin position of an MMD model in Blender?
https://ibb.co/j47QBc

 patent arrow
@polar estuary tools>origin
lament pond
 topaz frigate
Thank you
patent arrow
@lament pond short rock MonkaS
lament pond
What
patent arrow
looks like the evil gas girl from boku no hero academia
lament pond
If that's Toga then yes
lament pond
The hair will be a fun challenge to see how many strands I'll be able to put in
patent arrow
u gonna make the mask aswell ?
lament pond
Her scarf?
patent arrow
yeah
lament pond
Yes
patent arrow
she has like both kinda
spiral sigil
@lament pond are you creating them from scratch or did you make body parts yourself and then you just put them together and modify them ?
lament pond
Those both count as scratch
spiral sigil
so for that Toga model you started from nothing ? didnt use premade legs or anything like that ?
 cursive wedge
VRArt1 makes everything from scratch from what i see, as good and nice avatars those are, simple low poly and colourfull, love them. Keep up your good work @lament pond ^^
hot flint
The trouble with "Same face" is that people tend to get suspicious easily even when they don't see the effort put in
Oof
I can relate, but I forcibly make my models all unique to avoid that issue because I don't deal well with the accusations
@lament pond does honest work, but this is a common problem when it comes to anything
Just think back to the controversy with Disney over so many characters looking like Elsa
Legos aren't known for their wild variety in design, but more for their versatility

 mental blaze
neat
lament pond

 sullen sail
gey
spiral sigil
no
mossy quail

spiral sigil
thats skill
mossy quail
u mom gay
sullen sail
👏🏿 NO 👏🏿 U
mossy quail
ya granpap a trap
 cold plank
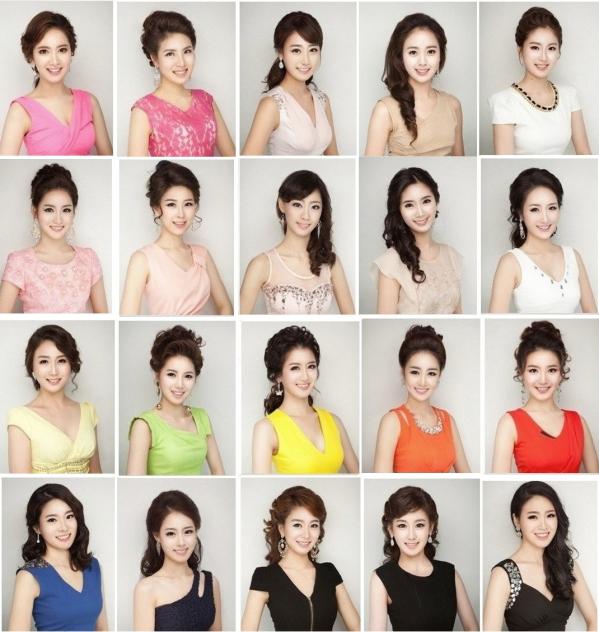
lol don't worry guys. First off: using a base model, tda/lat/whoever isn't cheating. If you do literally EVERYTHING except the body form and you make changes to the face textures it's fine. There's a huge amount of effort chopping and weighting things even from other models and redoing armatures no matter what software you use. Even in anime, AND western animation "sameface" is a thing... mainly because in the real world people actually look pretty similar.
I mean, honestly:

don't worry about it.
it's honestly pretty funny too. the same thing is happening in korea IRL with plastic surgery mayhem.

different eyebrows go a super long way to change the same face.
so if that's all you do along with some retexture it's great.
lament pond
@sullen sail I can make them geyer
lament pond
ew no
spiral sigil
i wish i could make avatars but i have no skill what so ever.. i tried and failed miserably
lament pond
So keep trying until you're not failing
hot flint
What VRArt said 🎵
takes time and effort
my early models were pretty garbage
heck, i'm still fixing mine

one of her bones decided it wanted to take her teeth for a joy ride
So not only am i fixing that issue, but i'm going back through every single weight painting itteration to be sure nothing else is scuffed
it's not about it being easy
it's about being diligent
If it matters enough to you, you will find the determination to see it through
lament pond
I was about to ask what that white thing was until I read the text xD
hot flint
yepppp
they're fixed now though
along with a heap of other things that needed polishing
lament pond
Polish until you see blood
lament pond

 mossy quail

 crimson cove
 junior idol
hey at least you're better at it than me 
 cobalt willow
Just keep at it! 3D modeling is tough as shit, but you're bound to keep making more and more improvements
Might take a few months to get good enough you're satisfied with yourself, but as long you keep practicing you'll get there
 fresh briar
hmm, maybe i should start with having a sketch in paper instead of blindly starting to model with no reference
fresh briar
also, i did make 1 "working" avatar, but how can i make some parts "solid" so that they dont twist when i move the joints?
as in a robot
mossy quail
@fresh briar this might help

Google Docs
Blender Cheat Sheet ----------------------------------------- Basic Hotkeys: E: Extrude S: Scale R: Rotate G: Grab Pressing x,y,z in any of these limits the movement to that axis Pressing shift x,y,z excludes that axis Ctrl+r: Loop cuts Ctrl+b: ...
its a cheat sheet i made with a few peeps across servers
to get into modelling
i didnt get to use it yet
but it might help ^^
also whoever sees this and wants to add sth
feel free to do so
just put your name at the bottom as well
cobalt willow
https://www.youtube.com/playlist?list=PLFt_AvWsXl0fEx02iXR8uhDsVGhmM9Pse
This video series really helped me out when i first started out
 fresh briar
nice sheet
i have been using blender quite a lot but i just cant make a face that looks like a face
and the hands i have made look like they went thru lawnmower
cobalt willow
I used to draw stuff, but for the life of me I never could draw hands
But modelling hands came surprisingly natural to me
Thought it should've been the other way around for me
mossy quail
@cobalt willow haha, i hope its that way for me XD
my 2d hands succ
also face
it hurts when i look at it
cobalt willow
Could draw faces decently well
fresh briar
how the hell do you do mouths?
mossy quail
and mouth and nose are a nono
as well as some hair
i dunno
most of my drawings have a w mouth
cuz thats easy to do xD
hot flint
@fresh briar mouths are complex if you intend to have them animate
otherwise just use a texture

Because this is the shape you'd be modeling
having a cavity for the inside of the mouth and tongue
and teeth
mossy quail
@hot flint for face expressions
do you just select the vertices and move them?
then put it into a blend shape
hot flint
Dont move anything before you make a blend shape
first and foremost, create a new shapekey
it should automatically be named basis
dont change basis
make a new shape key, then highlight it
once you're not "on basis" anymore, you can make any vert edits you want, and basis will not be effected
those changes will only effect the shape key you created AS LONG AS you still have that new shape key highlighted
once you go back to basis, any changes you make there will impact basis
mossy quail
so these are permanent
hot flint
well, not really no
mossy quail
hot flint
they're instances that can be deleted without damaging the mesh
hot flint
however, adding certain things onto the basis layer can sometimes break your existing shapekeys
mossy quail
now i just need to learn modelling and im ready to go and do commissions
hot flint
so it's advised that shapekeys are done dead last
to avoid as much of this as possible
mossy quail
alrite
 hot flint
👌🏼
mossy quail
nice
 scenic ember
Cool chair
 vivid crater
We all should make chairs now
small cloud
my chair would be made of 3 planes  still not optimized enough
zinc furnace
Every once in a while, I come across a model that I just cannot texture atlas in Blender. I hit the StartManualUnwrap button, and nothing happens.
Even with the mesh selected
How do I fix that?
stray topaz
@zinc furnace from what I can think of without seeing the model, is everything related to the model selected? 'cause I think it can't unwrap anything if nothing is selected
and does everything when selected have a green outline?
zinc furnace
It does not, that always happens for me after a successful unwrap
Anyway, it fixed itself when I clicked the "New atlas" button again.
¯_(ツ)_/¯
It seems to do that sometimes
stray topaz
oh ok 😛
now an issue that I've been having, my main avatar's eye tracking wants to look at the quaft over one of his eyes. Is there anyway to fix it?
fresh briar
hmm did some random modeling and ended up with this https://gyazo.com/95268a09b3584e4ae8cd1602f3b74a56
 hot flint
Cloth physics, or manually modeled?
fresh briar
physics
hot flint
Nice! I was gonna say, if you'd modeled those corners I would have been very impressed
past mountain
@zinc furnace I think you have to be in object mode to be able to click the StartManualUnwrap button
zinc furnace
Yeah, I was in object mode, made no difference
past mountain
hmm weird 🤔 Probably was just lucky, well atleast it works now
 latent heath
looking for a good fur shader
eternal crow
i got these models for a ps2 game but most of them import as giant ass un recognizable blobs of mesh https://cdn.discordapp.com/attachments/431136401149657119/431996808210677770/unknown.png is there a way to slowly but effecietnly correct the mesh whithout me having to move every part by hand?

 arctic lava
did you check the shape keys by chance?
eternal crow
doesn't have any
 zenith isle
Still wanting help with eye modelling
hot flint
@zenith isle Eye modeling is relatively simple depending on the style you're going with
lament pond
They want ultra detail
Gotta bring out those retinas
You gotta be able to see into the back of the eyeballs
vivid crater
The eye needs veins in it too
hot flint
In other news
Redoing some of the shading for nif
a bit more defined with more variety
 junior idol
would sculpt tools be good for someone wanting to start out at 3d modelling but cant create overly detailed stuff?
hot flint
Sculpting is somewhat of a messy way to get things in the general area that you want them, but if you want any decent level of detail, you're probably looking at higher poly count
it's better to learn some mesh best practices such as facial topology and joint topology before trying to make something without anything to reference
sculpting can be useful in getting you closer to a rough shape though
if you prefer sculpting to drawing/digitally painting your reference images, i guess that could be a method
but generally, sculpting alone lacks the accuracy needed for things such as eyes, mouths, and fingers
among other things..
junior idol
oof
on a more positive note, this is what ive done so far https://i.gyazo.com/985ef72ea1dc24d9b2d19001d8cd730a.png
 hot flint
I suppose i should be clear, sculpting is not something I personally am strong with
That looks like a great start!
junior idol
i followed a tutorial for the torso and hip area but ive done everything else without any help
seems like all my mesh manipulation time is paying off
hot flint
It really does look great!
if you're finding yourself at a roadblock, it's always a good idea to give your eyes a break from it
I've fixed countless things with my model today that i thought were great yesterday
hot flint
truth be told, i'm bad, i dont texture at all
(dont follow my example)
i use a material for each separate color, but keep my colors limited
 quasi flame
Sculpting is great if you're going to do normals and all that, but for vrchat just doing it manually is fine.
hot flint
Aye, normal mapping is a great way around lack of detail for low poly models
junior idol
i watched a texturing tutorial the other day and just using simple colours and an ambient occlusion looks like it will do the job
but the guy used photoshop
which i dont have, so it wont be easy to say the least
 quasi flame
general use is the same between photoshop and the rest
 cunning cedar
hello, need some help with proportional editing
i select my skirt, press o, select 1 vert and then G
but it moves my whole skirt
 polar glen
anyone know much about 3ds max probool? I'm trying to take a sphere, overlap a cylinder, and then paint the cylinder's color on the sphere but remove the cylinder afterward. How do I do that with bool, or is there a better way?
 fresh briar
finally got the ceiling lamp modeled and lit https://gyazo.com/625538c443e39d0282ddc05490e11a82
 hot flint
But truthfully, some of the mesh could be cleaned up quite a fair amount
That wouldn't be half a bad idea for me to fix up at some point
I appreciate you reminding me
@lucid gorge
hot flint
Oh of course, I'll post caps when I get back to my computer
If you're just talking about seeing the topology of where the vertices are, I can just post screenshots in edit mode
The reason I choose shadeless is because often times the way that I setup my topology doesn't look terribly good with common shaders
A lot of the parts wouldn't look half as defined as they do now
It would be very muddy looking
hot flint
Let's see here...

Eyelashes had some serious shearing at one point
I'll have to retopo those

The shape is ultimately fine, but somehow partial tris got flipped when going from Tris to Quads
yeah, this is why i go shadeless
it's bad

Like why would i not


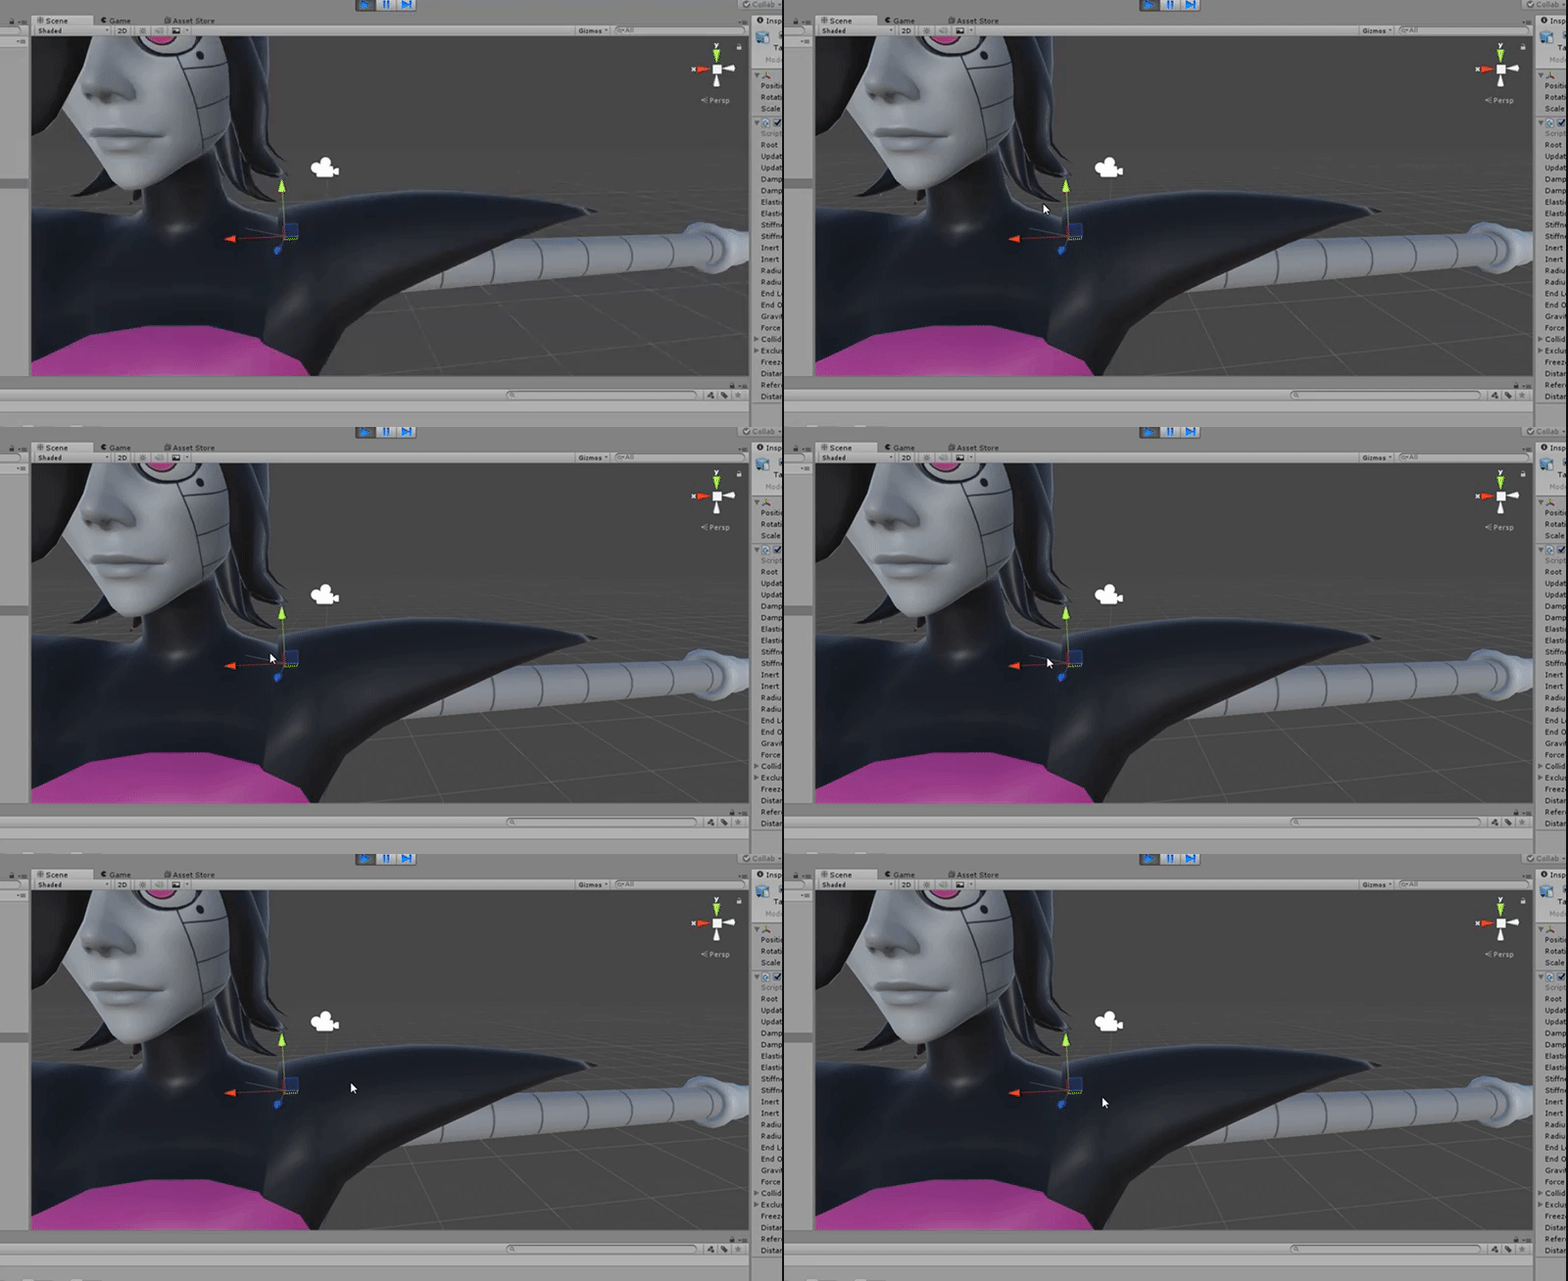




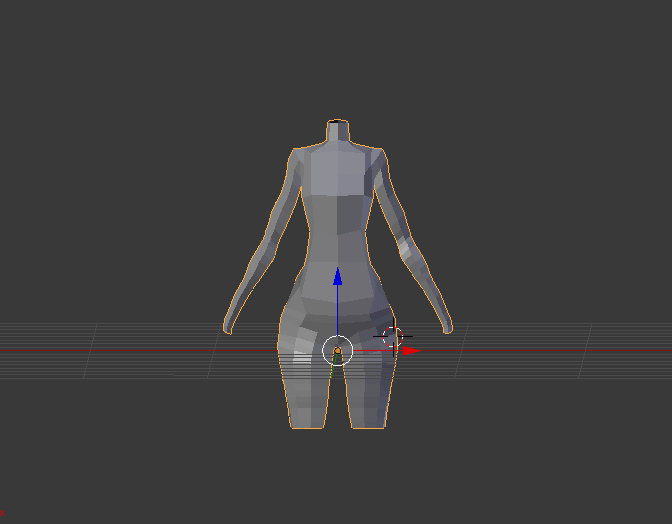
 honest scroll
@hot flint Looks like oil paint, i like it
Like i wouldnt even have guessed it was modeled
mental blaze
Neat
honest scroll
C4d has a cell shader built in muahahahaha
mental blaze
Go for gradiants
hot flint
Oooh... gradients could be neat
but that would require UVMaping
and would wind up being lower res ultimately
mental blaze
Or... god eater cell shade style
hot flint
I'm not familiar with it
honest scroll
Comic book style ooooo
mental blaze
Watch 1 episode of god eater and then come back here
Your challenge in terms of 4 cell shades
hot flint
Oooohh.... halftones would be really cool
mental blaze
Oooh