#3d-modeling
1 messages · Page 33 of 1
 spiral sigil
 lament pond
Thanks
spiral sigil
👍
 eternal crow
Ok so im trying to attatch new clothing to a model but i can't get the pants to fit right http://prntscr.com/iitlo3 ive tried everything but they look sorta right on one end

http://prntscr.com/iitm35 but they look far off on the other
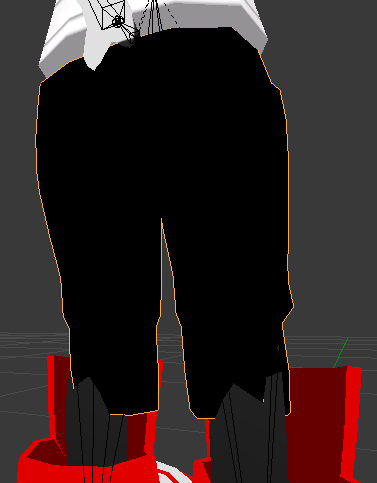
and don't position properly
also if i pose his arms to match the shirts t-pose http://prntscr.com/iitmkn parts of the inner skin stick through

 graceful kindle
 spiral sigil
Nice
 timid vine
he looks great so far

 static sun
 spiral sigil
does anypne have a rigged robotbody
i want to make a joke avatar
doesn't matter what it looks like
lament pond
@azure adder looking good and accurate
spiral sigil
👌
 proper niche
 desert ferry
do you know how I can tint a model with the Standart shader?
I like the metallic/albedo shader but I can't tint the texture
nvm I found something called Sprites and it's good
 keen robin
@proper niche if you're actually gonna finish this I love you
 coarse walrus
How do I merge selected faces into a new mesh?=
 lethal nest
I think ctrl+J @coarse walrus
coarse walrus
ty
 mossy tide
https://cdn.discordapp.com/attachments/307348216767053825/416962126536769539/unknown.png umm ok , so I havea bit of a problem after I take my avatar to unity after blender one side of my hair is transparent, how can I fix this?

 lucid raft
ctrl+J where?
 nocturne marlin
some models holy what are these skirt bones lol
lucid raft
ctrl+J does not do anything for me...so it appears
 toxic belfry
@lucid raft CTRL+J is join meshes. This would be utilized when needing to combine two or more meshes into one. You would select the appropriate meshes, then use this shortcut to join them together in Blender. (make sure your UV maps are all named the exact same thing first)
 serene crown

How can an unwrapping be so pretty yet so shitty at the same time?
@mossy tide The hair only has one face, you'll either have to use a shader that renders both sides of a face, or make the hair have 2 faces facing away from eachother.
mossy tide
ya ty , got told about cubs shaders about a hr ago
now im on to learning how to decimate from 70k polys yo 20k with out making it look like total crap
 timid crane
hey guys, so question
one of my models in blender had 3 materials, and I exported it as a FBX
but now I can't put more than 1 material
in unity, I mean
....and just as I typed this I literally dragged the materials onto the model again and again and now it's working
i hate this program sometimes
spiral sigil
My avatar has a successful upload but doesnt appear ingame
PM me if you know the solution
lament pond
Try reuploading
 azure adder
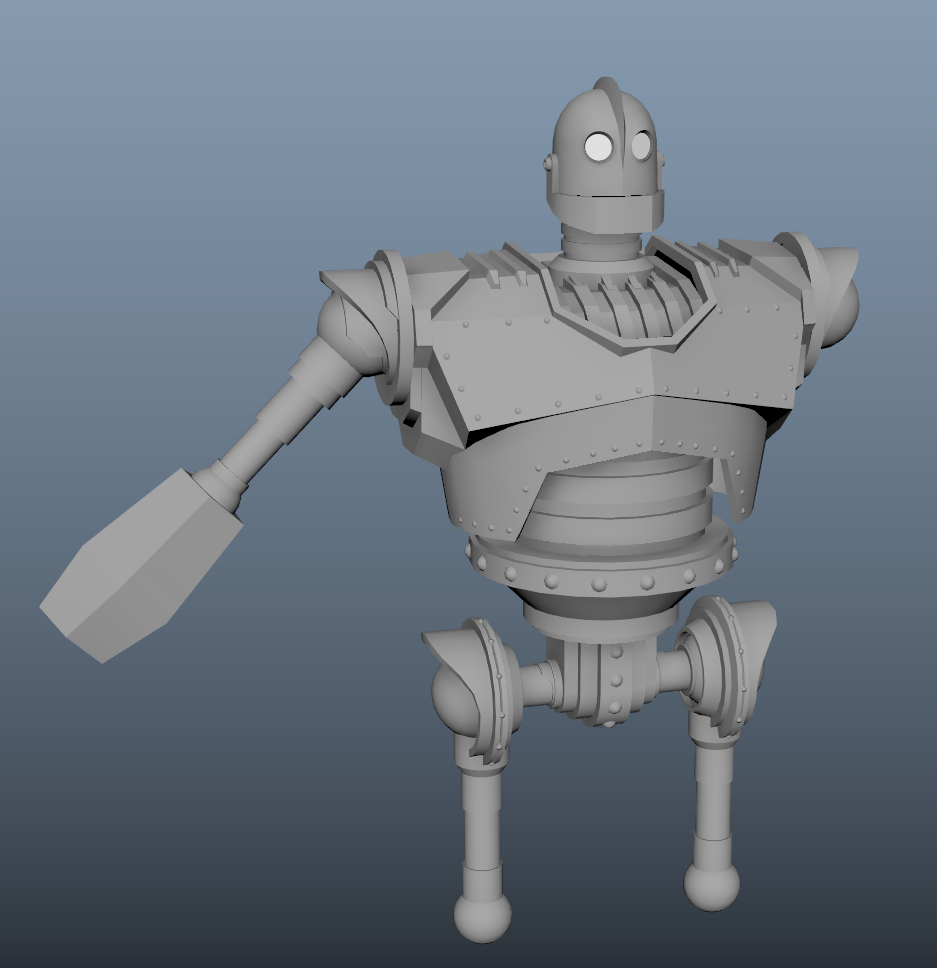
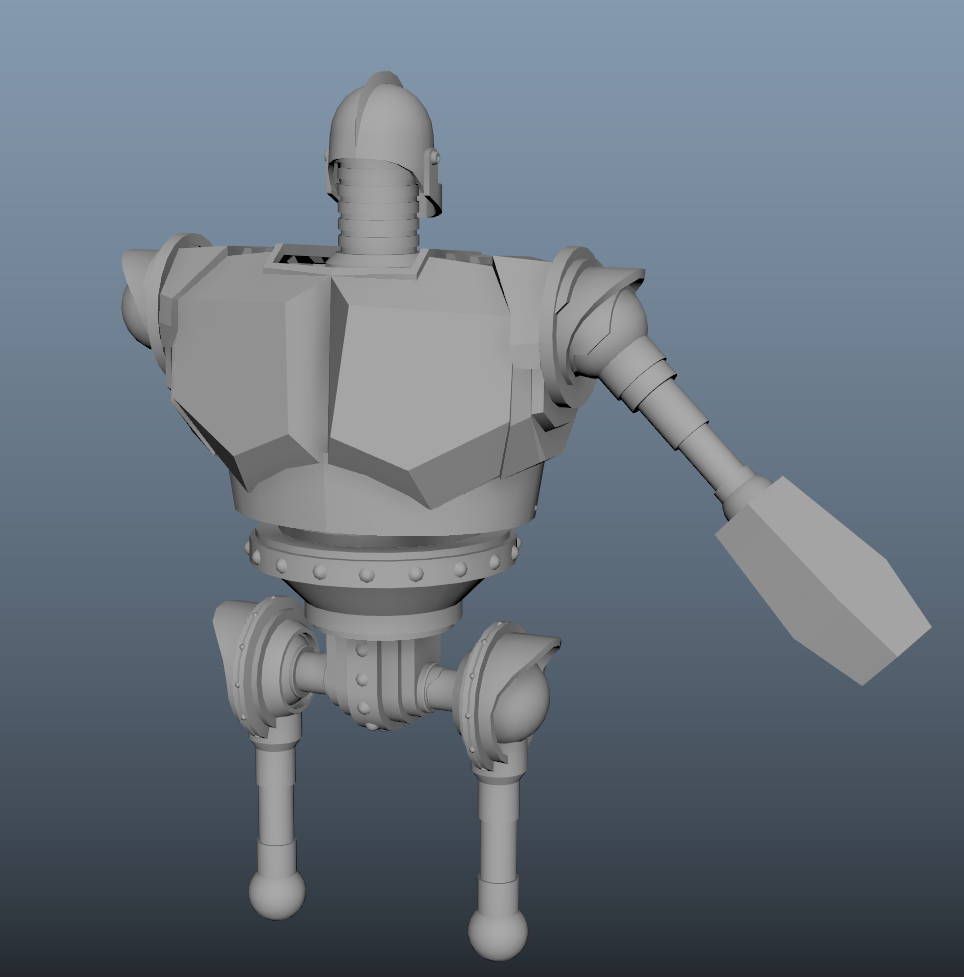
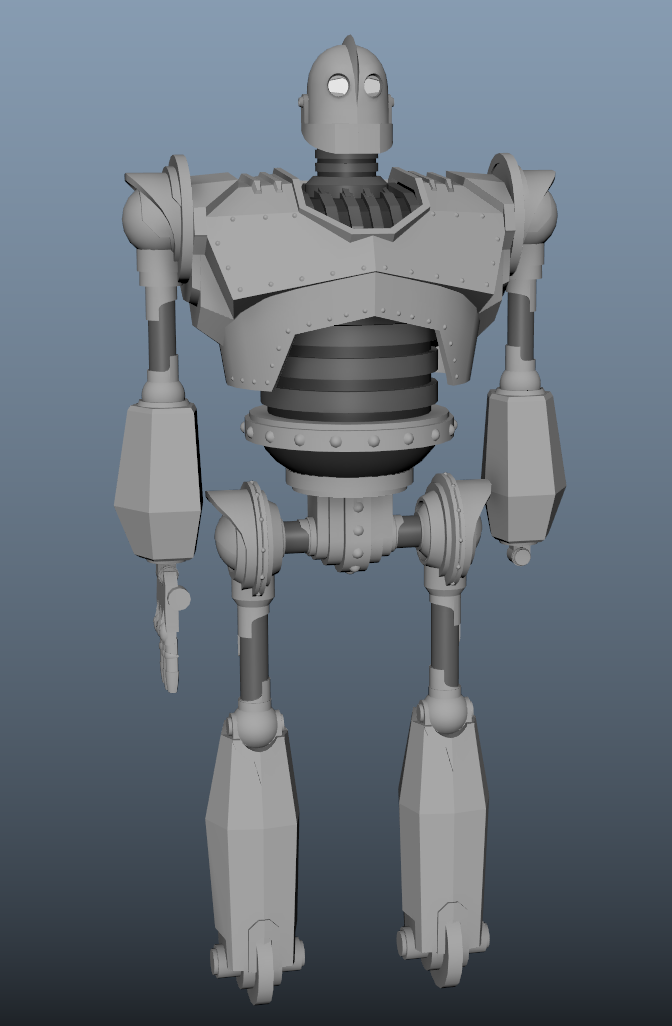
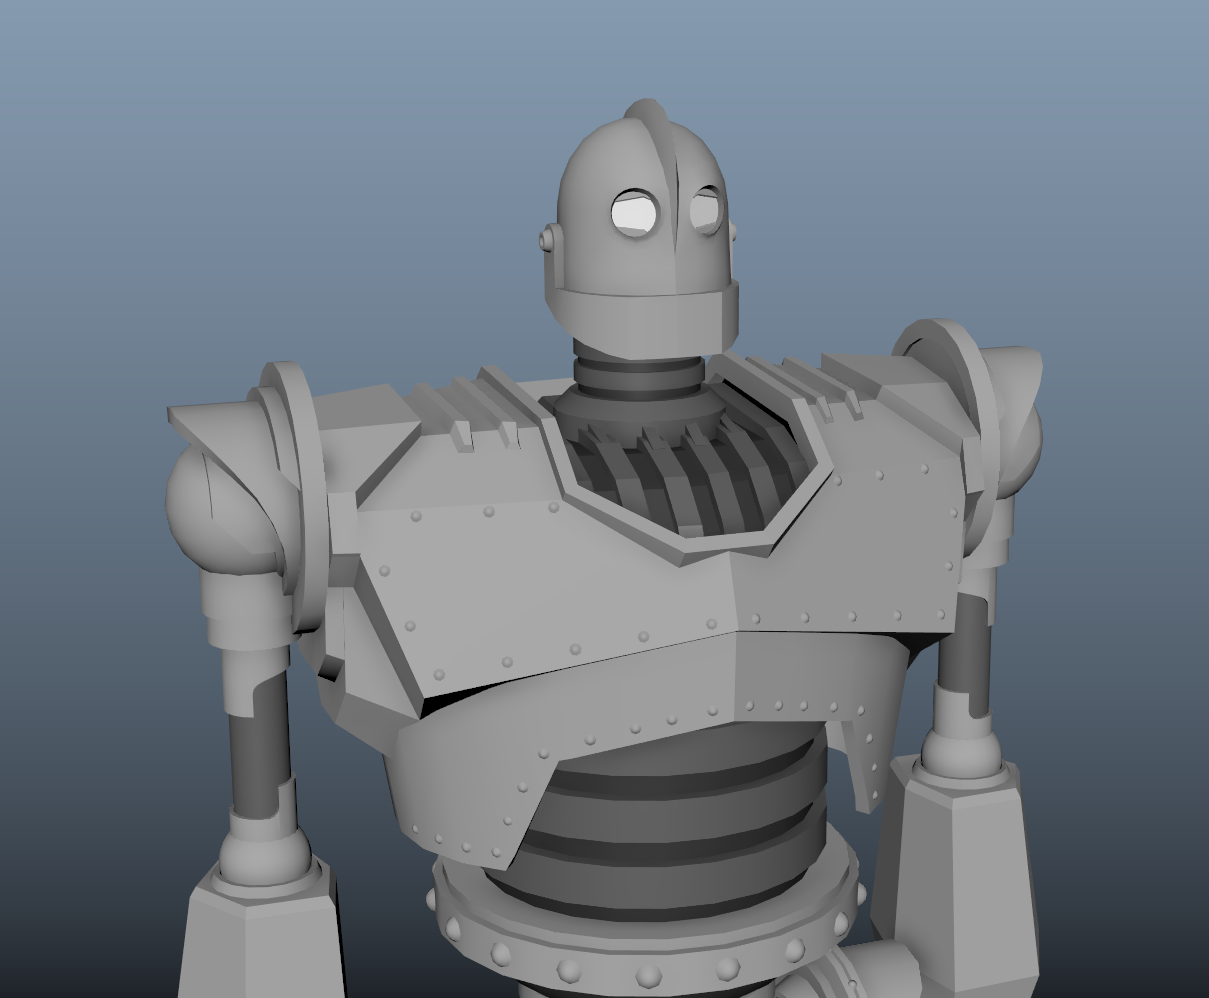
Progress on the iron giant 😃 https://i.imgur.com/57NkkZU.png
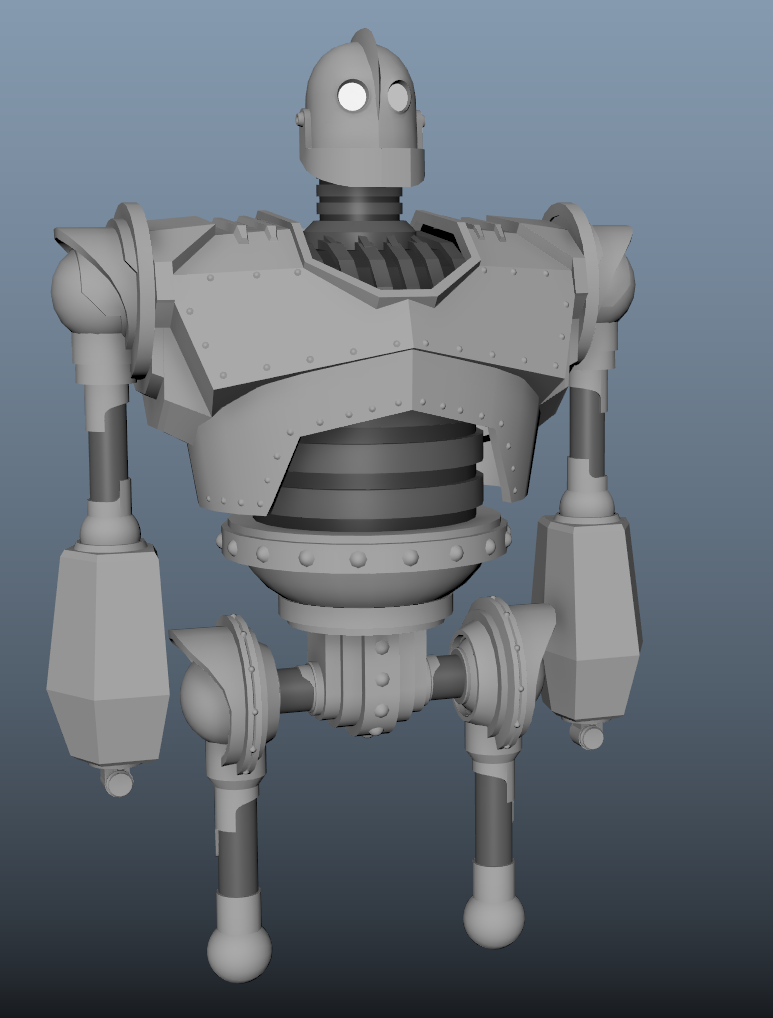
the torso is a little short but thats an easy fix 😃
i hope to have him done tomorrow 😃
the model anyway
spiral sigil
@azure adder Coming out very well
lucid raft
once i joined/combined meshes, how do i select the individual joined parts in unity and apply materials on it?
since it is all one mesh?
 cerulean shoal
trying to make myself in a chibi/anime style hybrid thing
this person a loser ^^^
 vivid crater
It cute
 mental blaze
The iron giant model is coming along nicely.
 sinful sable
Am I even doing this right?
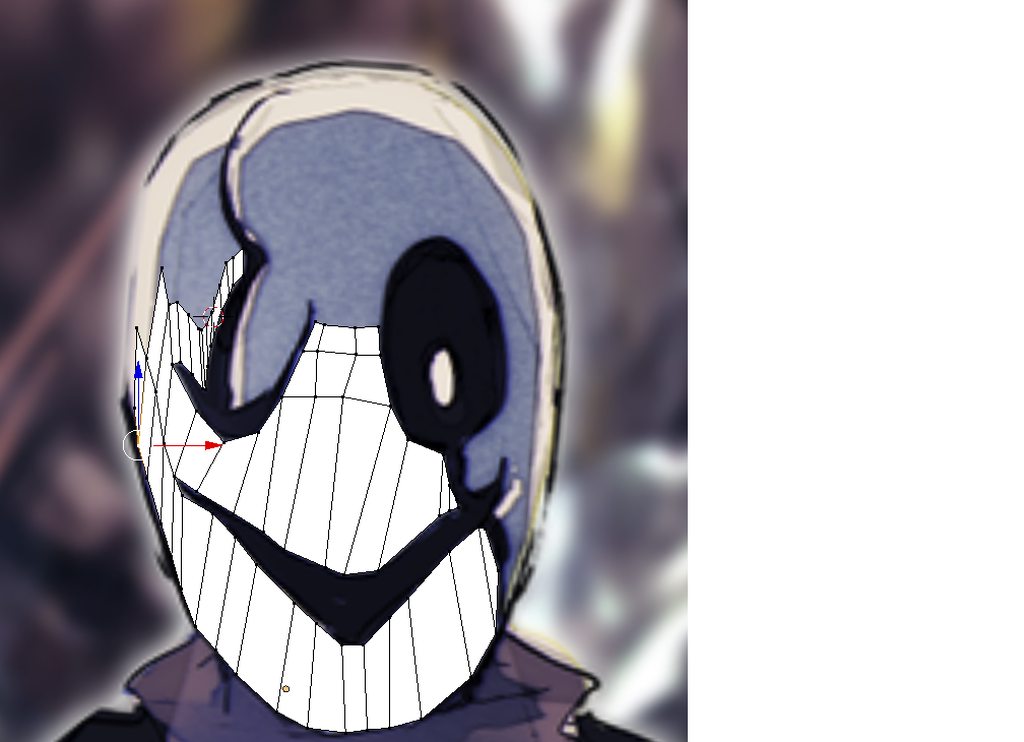
First time trying to make a mesh
I hope I'm not doing it wrong
 tired plume
so how do you use the 'o' button in blender properly? cause i've selected part of a mesh, i set it to Root, and then even though i selected just part of a mesh the whole mesh goes up/down??
sinful sable
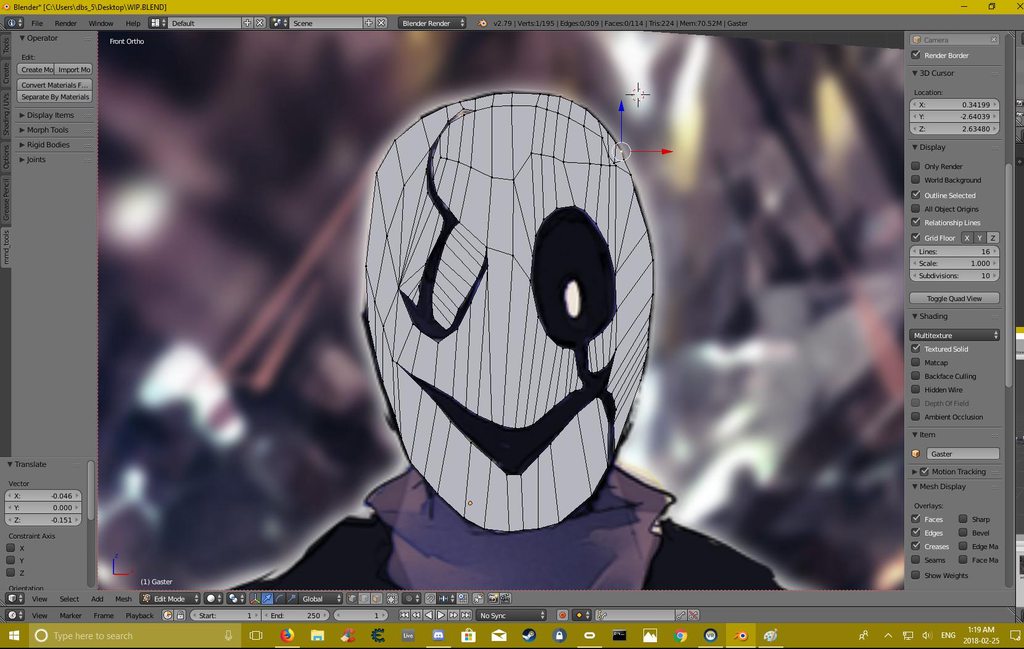 mental blaze
The topology of the face will have to be refined after you complete it
but it's a start.
sinful sable
I might just buy a 20k poly comission
mental blaze
no... continue learning.
do it 😄
try this: learn how to use sculpt mode and make a rough version of the character.
dont be afraid to get over 1mil in poly count
after that, edge model it.
 cobalt willow
Do you have any blender sculpting tutorials you would recommend?
mental blaze
Mostly by blender guru
cobalt willow
Never could get the hang of it
sinful sable
I myself am not generally artistic.
cobalt willow
Organic modeling has always been my weakest side :(
sinful sable
I'm mainly artistic in music
mental blaze
https://www.youtube.com/watch?v=ywSq0bSYLWI
not related to character modeling, but more on the usage of the sculpt tools.

Blender tutorial showing you how to add fine details to your model, like bumps and scratches. Perfect for armour, vehicles or anything that needs wear and te...
sinful sable
I'm willing to pay for a good commission of the character I want.
cobalt willow
Cheers, thanks
sinful sable
I don't really know where to look for commissions though
mental blaze
I don't even know if people accept them here.
sinful sable
:/
mental blaze
But prices usually go as high as the triple digits.
mental blaze
modeling + rigging + texturing + animations + shape keys, etc...
sinful sable
I can easily pay fifty to 100 USD
I have no problems paying that much as long as the model is done Well
mental blaze
find someone on art station, tbh.
I'm not good at organic, but my specialty is leaning more towards hard surface.
 subtle bough
Why pay though. There are plenty MMD models in the web. You just need to export them and read if author allows using it in VRChat. Apparently, it's common for Japanese to have grudge to people using their models there
mental blaze
but as of now, im practicing modeling environments.
sinful sable
I've gotten two Gaster Models. There's one there I dislike.
That's all there is. Other models are ones I do not desire
The one I want is based off of an image.
mental blaze
But when I create models out of boredom, I end up making this.
mental blaze
this was a 30 minute model.
sinful sable
And a bunch of other players
mental blaze
dont know, it might've been my brother playing on the account.
subtle bough
I saw someone using it already. 'Slurp my noodle' he said
sinful sable
It was a girl
mental blaze
but he usually plays alone in vr
 mental blaze
yeah or give turbosquid a stab when it comes to grabbing models.
oh.... if you really really want a good software to make clothes, download Marvelous Designer 7.
 mental blaze
ah
sinful sable
Mainly the scientist model on the right
The coat would have to be buttoned together, and the head and hands would need redesining
Other than that though
mental blaze
if you want to, get a base model online and place it in MD7
to save money
see how the software works, so you know how different it is from blender.
a slim base model (ignore the head)
sinful sable
The thing is I wouldn't even know how to start
I understand you're telling me to get a base model
and remove the head
But even then
mental blaze
what you should do is watch the video demonstrations of the MD7 software.
give it a try 😛
sinful sable
You're telling me to download a new software to make a model when all I want is a SINGLE model
:l
mental blaze
no really, take a look on how the clothes are modeled.
no edge modeling at all.
you get a plane and it wraps around the model base.
sinful sable
But whatabout the head? >_>
mental blaze
worry about the head last.
sinful sable
marvelous designer price = 50.00 a month
mental blaze
30 trial 😄
mental blaze
I use speedtree (a tree modeling software), but the license is 2K
guess what i used...
well, eventually, I'll have to switch over to the unity version for 20 a month.
sinful sable
:l
How long would it take to even do a complte edit with this software then redo a head
Because I'm terrible at vert edits in blender
mental blaze
just watch the video tutorials on md7 first.
dont even try for blender, its a hassle.
sinful sable
Modelling in this software is easier, I assume?
sinful sable
_>
mental blaze
which is why they placed a price tag on the software.
mental blaze
I haven't made anything, but catie uses it a lot.
mental blaze
Its because i switched to my world project.
but I have the software on my pc whenever i switch back to character modeling
sinful sable
This better be worth it. I downloaded it..
mental blaze
im a 3d art student and thats what my instructors tell everyone.
sinful sable
I see
mental blaze
as a game designer, instead of playing 40 hours on one game, play 20 games in 40 hours.
that's something I have to practice doing.
mental blaze
"Your design prowess will level up much faster."
sinful sable
Basically what you're saying
is to work on everything in a period of time
instead of just one thing
mental blaze
something like that.
sinful sable
:l
mental blaze
im a 3d artist, so im not much informed on actual game design.
sinful sable
Well currently
Im trying to convert my PMX model of gaster MMD
to a filetype acceptable by MD
mental blaze
ah, thats easy
sinful sable
Except blender froze when trying to import
mental blaze
oh
sinful sable
🤷🏻
mental blaze
I was about to say that you import to blender and then export as a obj.
oh and make sure to watch the tutorials though.
That's what I'm going to do when I get back on character modeling.
Like for instance, making Ozen the immobile with her combat suit.
I don't like the one that's publically available.
mental blaze

yep, learn the UI first.
I was even confused at first.
lemmie open it up so I can remember.
top section is the menu bar, the 3d navigation is the one on the left, the one on the right is where you place your 2d planes for making clothes.
as for toolbars, start using em.
bruh, I literally misread some of the import types as MMD lol
sinful sable
:/
mental blaze
the navigation isnt really bad compared to Maya.
many of my classmates had trouble (im a 1st year).
mental blaze
a fully rigged model of your character interest.
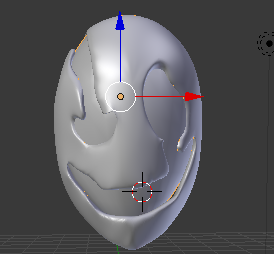 mental blaze
nice
sinful sable
I could directly remove the head on the MMD model
resize the body
and use this head
mental blaze
yee
but seriously, watch the first couple of videos so you know how to make the clothes planes wrap around the model.
the reason is because of the ripples.
sinful sable
:l
mental blaze
Almost ALL of the anime clothes in vrchat have nothing.
rippleless clothes...
well, some bothered to texture them on.
actually, I think you have to bake them on the model :\
Well, I'll come across that issue sometime

 deft fog
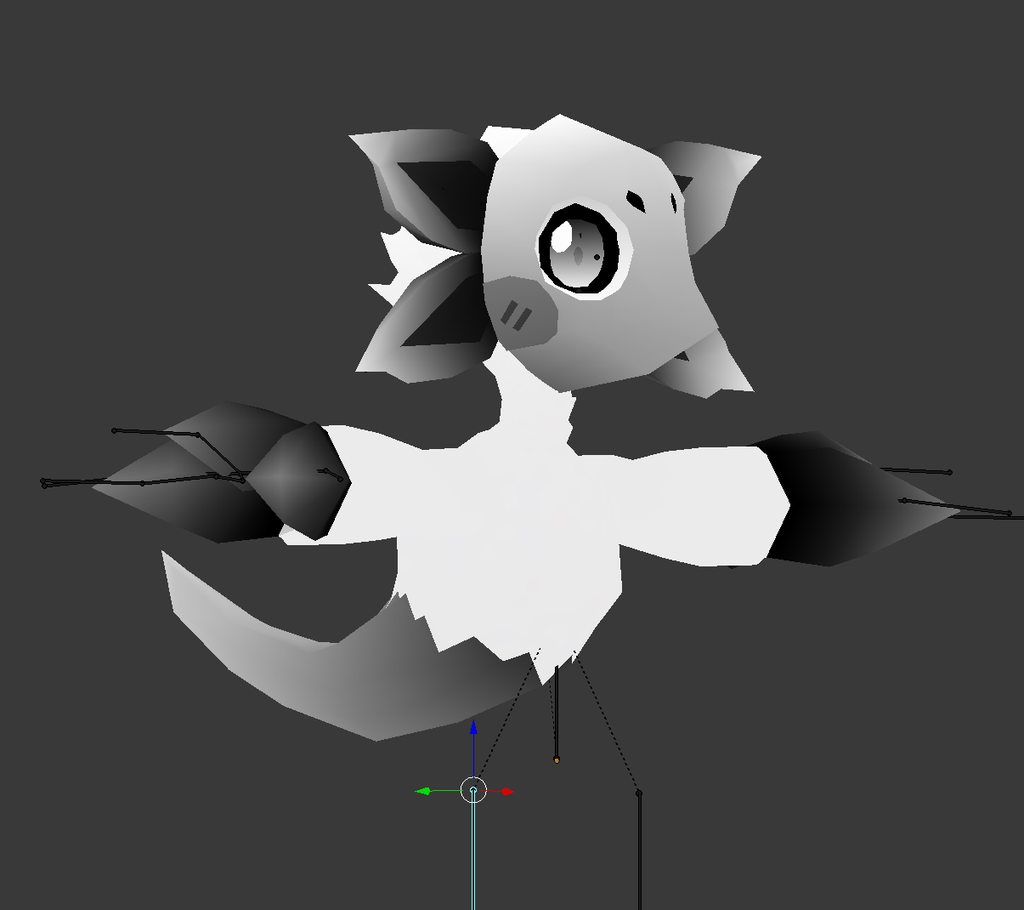
Wew. I have a hair model section thats not in the armament, where I need it to be.
Any time I try to move it over into the heigharchy, it... deletes itself?
 lament pond
@spiral sigil looks cool
spiral sigil
ty
 inner mesa
How do I select multiple vertices in blender..?
vivid crater
@spiral sigil Gotta say, lovin your characters
 vivid crater
Covering the whole spectrum of breast size I see
 tidal gull
didn't even notice that but yeah I guess so
 wicked kettle
Can you make a mesh that changes breast size with the emotes
 trail laurel
Yes. I'd imagine you'd do it in the same way as when you change facial features
Where you would make a shape key that would expand/contract the breasts. You'd just need to make sure the topology and texture would support the stretching.
Feel free to correct me if that's wrong though. Not the most experienced.
 tough niche
Can someone help me get a MAX file into blender???
I would like to have a cactus avatar but the only free version came in MAX file, please help...
trail laurel
@tough niche I did a bit of research but the only results I can find say that you can't. You'll need to open the MAX files in 3Ds MAX and export them as an OBJ file or an FBX file. From there you can import these files into Blender.
tough niche
Kind of impossible...
I tried an online converter and the after importing the files, nothing appeared...
Im either too much of a n00b in Blender or Idk...
I have no idea what I might have done wrong... @trail laurel
 hardy turret
How do i give my avatar a mouth when it doesnt have one
spiral sigil
guys how can I make a simple 3d object based on a picture with alpha and width. Imagine Nyan Cat with some upscaled width. How can I do this with pictures?
spiral sigil
So uh, I know nothing about 3D modeling but I want to try and get my OC onto VRChat. How do I start?
 harsh cedar
I would recommend blender. since almost all tutorials is for that
spiral sigil
@spiral sigil
First, start by learning tutorials on yt. Basics first then if you want- any more tips during your spare time. Create something simple to start off. After so, if you have enough experience- you can try making complex models.
 viscid siren
check out some tutorials by Blender Guru those are pretty good.
spiral sigil
^^^
viscid siren
the anvil and donut tutorials exactly are for beginners, and there is one tutorial series pinned in this channel which you should take a peek at too
 high jetty
I would recommend Darrin Lile’s Blender character modeling series as well
 drifting sphinx
 spiral sigil
If I had more time I'd definitely get into it. Agh, and this looks cool too ;-;
 verbal lintel
Nanachi Isnt allowed to be used
 steady kelp
 spiral sigil
Nice
eternal crow
guys is there anyone here good at editing clothing to fit a model?

i can't get all te verticies from this sleeve to come out without them being all wierdly stuck out
 pure sand
@eternal crow try removing the part of the arm that wont be visible
eternal crow
omg i completely forgot i could do that xD
 charred adder
Does anyone know how to fix this?

I imported a model in and the parts are all over the place in blender
If I import it into unity it looks fine
 worthy cypress

can anyone tell me why the feet are going through the floor and how to fix it?
i think its that white line
it only appears when i make the avatar descriptor btw
deft fog
It took roughly... 6 hours. But I learned how to actually do this modeling stuff.
Though the most of what I'm doing is just building my own custom model out of an existing
 idle orbit
Does anyone of you knows how to make my humanoid floats all the time? Instead of walking by feet, I want it to hover the ground.
 sweet steppe
 left scroll
do idle animation overrides work when you're just using bone/transform rotations? or do they need to be made from the muscle animator specifically?
 quiet rune
thought i actually would see someone working in zbrush here making models from scratch lulz
azure adder
i work in zbrush when the project requires it
i just dont like doing hard surface stuff in zbrush so i'm using maya
tired plume
I did use zbrush this last week to make a uh... Snakegirl. But not a lamia type. Her upper is the snake lmao
spiral sigil
snek
tired plume
And then people in the other channel were like WHAT, THIS WAS YOUR FIRST SCULPT????
✌
I should make a chimera next
 limpid walrus
can someone help me
so i made a custom hand gesture but when i do it in game it does nothing
just makes my hand move a little
spiral sigil
this channel aint the place for that question
limpid walrus
@spiral sigil tf where would i go there aint one fore gestres
spiral sigil
#animation ??
spiral sigil
then im not too sure
azure adder
animation
toxic belfry
Gestures are animations
I don't know why you wouldn't be able to hit up animation chat.
 regal lily
how to add spectral maps to a material
spiral sigil
@regal lily do you mean normal maps?
tired plume
I think theyre called specular and no those are different than normal maps
tired plume
Lol
spiral sigil
@regal lily so what is it??
regal lily
listen
spiral sigil
a spec or norm
regal lily
It's
toxic belfry
black and white texture or blue and yellow?
 spiral sigil
that could be a specular map
toxic belfry
looks like a soft sphere specular
regal lily
ok
spiral sigil
on some shaders you have to make them into an alhpa
tired plume
I think i added my gloss stuff as the Metallic field and my albedo was the usual texture tho
Cause the metallic sliders were next to smoothness sliders too
Then normal map goes in normal map
toxic belfry
Yeah, the metallic slot is almost the same as the spec, just a bit more focused on gloss than shadow
toxic belfry
I love putting reflective sphere maps onto characters in armor. Something about being a walking mirror just stirs the heart.
 silent vine
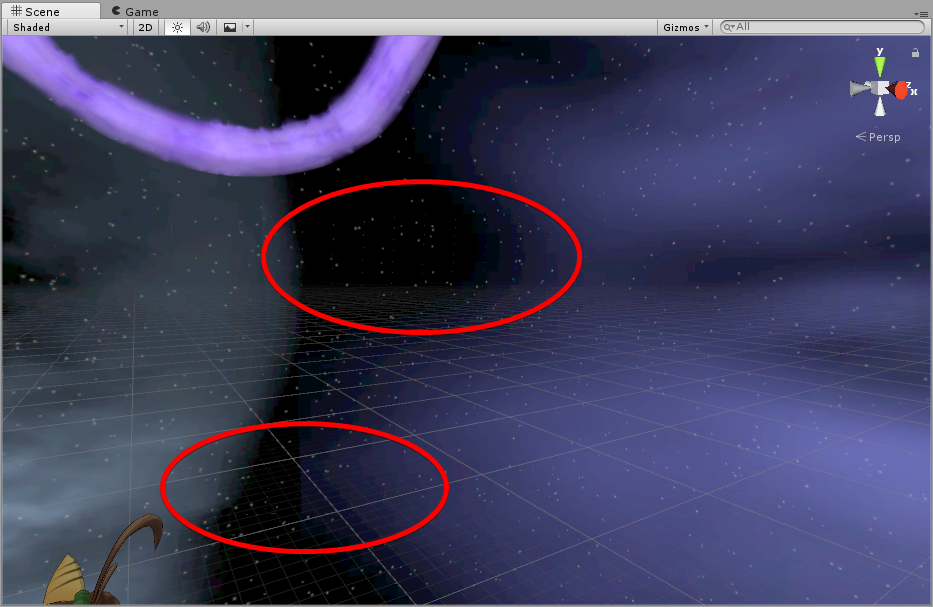
This is a bit of a specific scenario but I have a mesh I made in blender which I'm using as a skybox. In unity though the vertices of the mesh are slightly visable which kinda ruins the effect. You can barely see them in the screenshot but they're very obvious when the distort effect I'm using is playing. Other meshes are fine but this one that I want to use is like this. Anyone know what's wrong? https://puu.sh/zwf1S.png (They're the dotted lines in the circles)
 latent charm
@silent vine enabled smooth shading in blender and made sure there's no split vertexes? (edit mode→remove doubles)
silent vine
The smooth shading did it I think, cheers
 novel blaze
question about creation of a simple mesh:
how difficult does this mask look to make? (only the mask)


I have no experience with creating from scratch, but I'd be interested in attempting it to make that
timid crane
Hey lads just a quick question
Visemes/CATS eye tracking works even with non-MMD models right?
I saw an option that said "FBX" in the tab but I'm not sure
 jovial echo
yo can anyone give me some tips on how to delete meshes? and not a youtube video please.
 lofty dust
hey guys
this sounds silly but
only one of my models wont upload
it gets stuck at beginning
and at bottom it says the client is older than the sdk..
o_O
ive been exporting it out of the project all day no issue
timid crane
@jovial echo in blender? go into object mode, select the mesh you ant and delete
with X
in unity, just select the mesh you want to delete on right and press del on your keybaord
jovial echo
um i cant really explain it
@timid crane its a pair of shoes and they share the same texture or whatever ya call it
and it has 8,000 polys and idk how to delete meshes faster
timid crane
unity or blender?
jovial echo
blender
timid crane
ohh youre talking about decimating
timid crane
just to make sure, you know what a mesh means right
mesh can be an entire body part or the entire model itself can be one mesh
jovial echo
not fully but all i know is that i'm trying to delete one shoe and they share the same mesh so im trying to delete faces/verts
i just need to know how to do it faster
timid crane
sorry man, idk how to do that
I've never had to delete any faces from my models since I dont use MMD
jovial echo
i know it has to do with edit mode tho
timid crane
yeah, edit mode is where all the deletion goes
I know you said you dont want youtube but that might legit be the best way to find a solution haha
spiral sigil
So uh, I don't really have a budget for commissions. Are my chances low on VRCTrade?
Not that I'm being cheap, just don't have much to save because of school.
tired plume
@novel blaze that doesn't seem so bad, the mask
just need better control in whatever program you're gonna use tho
like i'd probably make the base in zbrush and then go to blender to really make it crisper + add the detail with little lines here and there
and teeth is choose either
there's probably even somebody else's teeth mesh i could edit to make it faster.
novel blaze
the teeth on that mask would basically just be bumped up
no need to move or even separate or have gaps
but yeah alright, zbrush, I'll make note of that program
tired plume
then i guess i suppose i would subdivide just that region on the front of the mask and then manually sculpt in blender
by dragging here and there and constantlly looking at it
if there's any symmetry tools in blender to help with this then i would definitely make use of that.
and p sure there is
novel blaze
there are, but I always forget how to use them
tired plume
yeah
novel blaze
well then
mental blaze
oh no
 halcyon bay
Anybody created a realistic avatar model head based off of a real person before?
 flat panther
I tried by taking a lot of pictures of my head then importing the photos to 123D Catch but it was bad x)
cobalt willow
I have seen atleast 5 people using actual 3D scans of themselves or others as avatars
coarse walrus
Does anyone @here have Daz Studio/Poser? I need a .pz2 converted to .obj.
 spiral sigil
@lament pond nice one mind showing off some topology?
 spiral sigil
@lament pond do you not use control curves?
if not that makes work with curves faster
lament pond
I don't have much experience with beziers xD
spiral sigil

I show my technique for creating hair in Blender using curves. I also provide the Blender file. (Gumroad Store For Cool Character Stuff Down ▼) "Sculpting In...
quick search but that is basically it
@lament pond hope this might be helpful
lament pond
Rainbow shit?
 tender veldt
No
lament pond
make it rainbow
tender veldt
Um, another shit post https://imgur.com/gallery/1gymNFD
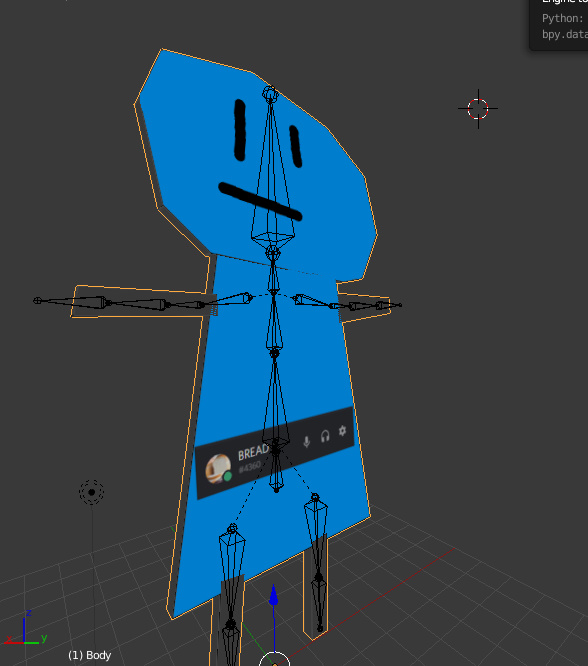 lament pond
#donttalktomeuntilyouhavearainbowpoopemojiavatar
lament pond
Bad bread
tender veldt
And now I don't want to be a cancer anymore
spiral sigil
@tender veldt is there a problem with your most recent creation ?
tender veldt
No
The Lenny creation is the history
Nukes, rainbow shit, raining shit, and the evil skybox
Are my freaking creation
 lament pond
stop clicking enter
tender veldt
OK fine
spiral sigil
@lament pond those shoulders look mighty spikey :0
lament pond
xD
 amber snow
Idk if this is the right channel but can someone help me joining a couple of files into one in blender and preferrably keeping the bones? I converted the model from a game
 prisma summit
hey my dae file is not importing correctly into blender
it looks fine in unity
any ideas on how to solve this?
idle orbit
guys do you know where to get pictures that works well with panosphere? without showing the edges!
halcyon bay
Do you guys know if I can view my desktop while in VRChat?
Is there a way to allow this? I think I saw somebody do this once.
prisma summit
i believe you need some sort of third party software for that
halcyon bay
Oh, hacks?
Anybody know how to make the gui bigger so I can see all the names of the menu and heading bars inside of Blender?
spiral sigil
I
Wait
I think blender did an update where the UI resizes according to your desktop resolution
That might help @halcyon bay
latent charm
@halcyon bay You can increase the size of some areas by pressing the + and - keys, or you can scale the whole interface up or down by going into file→User Preferences→Interface, at the top left is a display scale slider.
 latent charm
Oh, you're on a slightly older version than me I think. Try looking in system for a DPI slider. @halcyon bay
halcyon bay
Oh, I'd like thew new blender version, may I ask yours?
latent charm
Latest. 2.79
If you're also on 2.79 it could be because I'm on a high dpi display (macbook pro)
latent charm
https://www.blender.org/download/releases/2-79/
What's new in 2.79

Home of the Blender project - Free and Open 3D Creation Software
halcyon bay
ha, thanks @latent charm !

 covert fractal
boobs
 slim summit
ayo
tired plume
Not turned on until i see tri-titty
I should sculpt one with six titty
And like four heads
Shit i wonder if i can find a hydra monstergirl
vivid crater
I think there was a multi-titty girl on Osmosis Jones
Not sure why that was my first thought
tired plume
👍
deft fog
I need some really quick assistance (hopefully).
I have two separate materials/meshes, what have you.
I need to combine them into one object, or at least parent them in a way where it doesnt break the pre-existing bone structure for the main item

That flat hood in the back, I just want to attach it so it matches the movements the body makes. Will I need to make a bone for this?
spiral sigil
@deft fog and it did not belong to the model?
deft fog
It initially did. I detached it and removed the parents so I could flatten it and merge the three materials into one.
Because it was outer, lining, and eyes
I'm now going to try and make bones for it by duplicating an arm and restructuring it
I'm still super new at this and this is the first time I've ever done anything beyond rigging an MMD.
spiral sigil
try selecting the mesh then the armature and parent them
select mesh then armature then press ctrl p
or shift p
does the hood still have an armature modifier on it?
deft fog
I have no clue
 deft fog
I finished making the bone structure for it. Could I just apply these new bones for it
That way I can also have dynamic physics for it
Okay this is weird
When I go to select the mesh and then the bones, as you said before, to set its parents

The moment I select the mesh, it highlights the entire bone structure.
spiral sigil
ok all you need to do
is select the hood
go to the right
there is a wrench symbol
click that
add modifier
armature
and in the modifier assign the skeleton
no need for a new skelleton
deft fog
Is that Object?
spiral sigil
 deft fog
Error, cannot be applied to a mesh with shape keys.
deft fog
I have no knowledge of rebuilding shape keys, though
spiral sigil
the hoodie won't have any important shape keys
deft fog
OH
I thought it wanted it removed from the armature.
Im a doofus
Okay this is weird

So close.
But posing shows that bending/moving tears apart the combined meshes
spiral sigil
well
deft fog
Is there a way to fully combine these materials in the hood to be one solid object that cant be warped like this?
spiral sigil
if you transform meshes after weighting that can happen
you will need to weight paint it
if you got the stamina
deft fog
There's just no way of joining/combining these, then?
Sort of like having two spheres, and then combining them to be one large mesh
spiral sigil
every vert has a weight influence towards a bone
if you change its position relative to the bone
deft fog
How would I weight paint this with that sort of issue?
spiral sigil
the influence still stays the same but the leverage becomes different
deft fog
Its applied to three bones.
deft fog
Man, this would all be alleviated if I could combine these three into one single object/mesh
They were originally separated for MMD reasons. No need for it to be like that now
spiral sigil
dunno
cats does starnge things
i didn't program it
but if your weights are fucked up
either go back to a point were they still worked
or repaint the weights
spiral sigil
well then you will have to weight paint
deft fog
Shit
spiral sigil
its not that bad only for that hoody

Quick intro and guide to skinning/weight painting. this video is meant for those with a basic understanding of Blender
spiral sigil
^^
this is the way
trust me
but i don't have the time right now to teach you
:/
 balmy mantle
https://imgur.com/a/kxn7k blender is flickering for me :c

 mint ginkgo
im trying to add textures to an object i just made but after importing the image with the UVs the the object still has no textures

 whole pike
@deft fog select both meshes in object mode and press ctrl j
deft fog
Thats not my issue anymore
Well, sort of
I want them as one solid object, completely. Not just joined
Even when joined they can tear from each other
I want it as a solid single mass.
whole pike
Oh
deft fog
My new issue is weight painting.
whole pike
So like moving together as one?
mint ginkgo
@deft fog select the vertices you want to join and press alt+m

 mint ginkgo
oh
deft fog
What does alt+M do
mint ginkgo
i mostly use it to merge vertices together
but nvm wont work for you
you can always try selecting both meshes and merging them
deft fog
This is way to complex for how new I am
I think Im just going to remove that brown lining.
whole pike
Weight painting is actually simple: https://m.youtube.com/watch?v=G3gIN4dJYw4

Learn Blender at https://Blender101.com In this video we begin the process of binding the character mesh to the rig. We touch on weight painting and point we...
I learned it from that guy
mint ginkgo
its simple when you have simple avatars ^^!
whole pike
I think its already merged
But it isnt weight painted so it doesnt move when a bone moves
mint ginkgo
theres a difference between joining them with ctrl+j and merging them with alt+m
deft fog
Dammit.
whole pike
👀
mint ginkgo
lol
deft fog
Alt+M does nothing, after joining
mint ginkgo
it didnt work?
deft fog
Literally did nothing
whole pike
I never used alt M so i don't know what it does
 whole pike
Rip
mint ginkgo
lol ctrl+z
 whole pike
Lets vore it
deft fog
Cant believe I was able to make my own hair and shoulders into this model, but I cant attach a simple hoody
mint ginkgo
you made your hair and shoulders from zero?
deft fog
Not from zero, no
That was taking too much time
So I started with another models' hair and edited it to what I wanted
Easier to start with a base
This is the first model I ever customized like this in any way
whole pike
oh
So is it the inside of the hoodie thats not moving along with the model?
deft fog
Ì checked, They shared the same painting
Even after making them all 100% painted, it still did it
Is there a way to custom set painting so I can set a specific number
deft fog
Because this painting system seems pretty counterintuitive for some aspects of modeling
Rigging
Wait, there is an automatic assign from bones
Im gonna test that
whole pike
I do a combination of weight painting and selecting vertices
I only do the weight painting when there isn't any creases or interior mesh
deft fog
The arms have control over its weighting too, even when it shouldnt
Why does this have weighting from every damn bone on this model
This is so frustrating.
whole pike
https://m.youtube.com/watch?v=G3gIN4dJYw4 starts at 6:43
Learn Blender at https://Blender101.com In this video we begin the process of binding the character mesh to the rig. We touch on weight painting and point we...
Its likely some areas are weight painted even when they're not suppose to be
tired plume
if this is a hoodie that you are trying to paint i recommend moving everything else to another layer
whole pike
So the left arm bone should only have it weight painted on the left arm area, etc.
deft fog
I have no idea what layering actually is or how to change layers.
deft fog
So I did the assigning using vertex groups, still does it
I think Im just going to remove the lining.
whole pike
Hide the part that is weight painted accordingly to the bone
And then select the entire mesh (ctrl a) and click remove
Alt h to make the hidden part visible again
deft fog
Is there a way to remove all weighting from all vertexes on a mesh
Because I think its caused by the lining having influence from EVERYTHING ELSE
whole pike
Weight painting is simple yes....but tedious af and i hate it
The only good thing about it is seeing the model being "colored"
deft fog
There should be options for removing all weighting from an item
Especially when you need to remove and edit it often
whole pike
Alternate but pretty much the same way:
Ctrl A and click through the vertex group and click remove
So you at least dont need to click select every single time
 fair sedge
Hey can anyone help with getting my model under 20000 polys
whole pike
👍
deft fog
Infinite, you need to separate by material and go piece by piece decimating
Its a learning process
Im going to save this and then see if I can auto weight it to get a wider range of movement from the hood
fair sedge
It's just that I'm kinda new to uploading avatars, and I just went through the whole process just to find out that my model went over the poly limit
deft fog
One more quick question. What's the best way to smooth out weighting?
Im setting up some physics and they're far too... jagged for what Im doing
 forest comet
The best way to smooth it out is to paint it manually after the automatic weighting
deft fog
Well, It's more that I need to smooth it out, have some lighter weighting around
forest comet
basically you do automatic weights and then go through everything in weight paint + pose mode to make sure ot deforms the way you want
deft fog

See how it's pretty red for most of it? I need it smoothed out, sort of fading to blue instead of just abruptly stopping
forest comet
eh I don't see a problem with it being bright red?
if it's not bound yo any other bone it's not gunna really matter anyways
deft fog
When animated, it looks bad
forest comet
paint over them in a less hard colour using the chest bone
 forest comet
eh probably but I didn't learn it
deft fog
As you can see, its pretty weird as is from automatic painting
forest comet
oh your problem is more about the fact that it doesn't deforn properly with the rest
deft fog
Its why I need lighter weighting around it
Else it just has that section where you can tell it stops
deft fog
Minutes?
forest comet
20 *
deft fog
Yeah sure, Ill still be here
forest comet
I need to get up and eat some breakfeast, then i can show you
Alright breakfeast aquired
now I have a question for you, Do you want me to just tell you how to change the "colour" of the weight paint
or do you want me to tech you how to do it properly?
deft fog
Proper
forest comet
mmk
whole pike
Okay so ive been screwing around with apps
So sorry for no responses lately
If you want it to be smoothed out, weight it by using the vertexes instead of actually painting
So the majority of the boob at the center would be red, but as you extend from there
Create the different rings of weight around it almost like a gradient, so try:
Center (red/100%), outer ring (green/50%), outmost ring (blue/25%)
If parts are a little wonky, experiment with the wonky areas by changing them to different weights
deft fog
Gatreh helped me out a ton
I SHOULD have a 100% working and ready custom avatar for VRChat now
And if I wanna mess around and use it in MMD
I may send it to the original creator and be all "look what I did!"
whole pike
I never used MMD but i would want to hgngj
Do you need to configure the model in any way for it?
deft fog
Sort of
You need to get decent enough with visemes/shape keys, and a specific structure for the body that MMD reads
Which should be the same for Unity.
whole pike
doesn't seem like a problem 👍
I may or may not put myself through torture making each individual shapekeys for lip syncing from scratch--
I could've saved my troubles by using CATS rip
deft fog
Its actually really easy
You pose, use CATS plugin for "save to shape key" or whatever the option is
And name it
Wash, rinse, repeat.
 whole pike
Spent 3 days making individual mouth movements
latent charm
Good lord dude, were you doing each viseme vertex by vertex?
whole pike
YUP.
latent charm
WHYYYYYY
whole pike
lasso tool
deft fog
I have absolutely no emote I can use to show you my reaction
Dammit. Nitro cannot save me, here.
latent charm
There is no emote to show the kind of emotion I know you're feeling
deft fog
Oh trust me, I have thousands of em thanks to Nitro
Also, instead of doing my studies, I worked on this model all night.
Now I have 267 reviews piled up
whole pike
I dragged myself through needless pain 👀
deft fog
Now that I know all this
I may never even reapply the knowledge
I have the custom avatar I want right now, and no other urges to do this again
Maybe I'll... study again.
latent charm
Anyway, @whole pike There's a great way to do visemes that's surprisingly easy.
Once you've got the model, split the head off, so if you bugger it up, no big deal.
Add the human metarig and go into edit mode to line the face control guides with your model. In the rig tab under Rigify Buttons, hit generate.
That'll create a big fancy complex control rig.
Add an armature modifier to the mesh by selecting the mesh, then the armature, then ctrl+p and picking automatic weights. Go through the list of visemes one by one, posing the face using the rig, then hit apply as shape key each time.
Boom. Done.
deft fog
I'm starting to lose a lot of... whats that word
Will?
happiness

This is just killing my spirits. EVERYTHING I do causes another problem.
whole pike
Seems like you forgot to weight the sleeves, thankfully nothing too drastic
like having to rearrange the entire edge flow of the head so there isn't any weird geometry
latent charm
Haha weird geometry
not guilty of that one
nope
not me
deft fog
Its my first edit, so its pretty sloppy underneath the clothing
whole pike
👀 you can't hide from me
deft fog
seriously
After all that, that really did just kill my spirits a bit

Because now stuff like this is happening
latent charm
Not entirely sure what I'm looking at there
deft fog
The bottom part of the arm isnt connecting with the rest of the shirt
latent charm
So it's meant to be a closed sleeve then?
deft fog
Yes
latent charm
merge the vertexes and reweight if needed then
deft fog
The vertexes are merged
Its the weighting
Big problem is that it also decided to throw out a lot of weighting I had already made
And I dont know why
latent charm
If they were merged it wouldn't be able to split like that.
deft fog
Its all one big solid piece

My weights even moved around
I dont know how this is even possible
Im probably going to give up and just stop, this is crushing me.
I cant afford this time to keep doing this
latent charm
Nope, it's split. Look how the pale blue suddenly steps to the 0-weight dark blue as it goes down the arm
deft fog
Well, it was working before I weight painted the chest
And for some reason, after doing all that, joining the meshes back together destroyed the weight painting
I also have no clue how to merge vertexes.
Oh.
And the save file is corrupted.
I cant even load it anymore.
I guess I'm done.
Maybe if I get some money, I'll just commission someone to fix it.
whole pike
I could probably do it for free if i ever finish modeling Greed
tired plume
Idk i think some of us forget that 'one big solid piece' doesnt actually mean one big solid piece cause
When we 'merge' meshes the gaps are still there just fyi
So we have to go in that shiz and get down and dirty with the vertex editing like manually close some gaps
With fill or the bridge gap thing or other tools
Cause the only way a mesh is one big actual solid piece is if they were sculpted like that from the beginning or edited heavily.
Any mmd models are definitely not the definition of that. People mix and match hair and face n clothes for mmd models -because- they are actually not merged in the way we think it is
Even if it says a single Body mesh in your blender.
So basically i can see theres an armpit in that picture up there where the sleeve is tearing up.that is cause a clothing mesh was fitted over a body mesh for that chick and there was always a gap there from the beginning.
deft fog
Well, good news is the backup was fine. It was before everything got corrupted. Dont have some of the other bone and weighting stuff I did.
I have a working model and thats good enough now. I dont need anything else because Im not risking that or taking the 5+ hours. Man, what a ride.
nocturne marlin
is there a way to extrude weights?

 solar mauve
How do you bake a mesh onto another mesh'texture? There's a dress with some markings and the markings are on a mesh that is separate from the dress mesh. I would like to bake the markings texture onto the dress mesh so I don't need the extra mesh just for the markings
eternal crow
Is there anyone here who is good at fixing deformed models or something? because i found model rips from a game i like but most of the models are super deformed
 graceful summit
this might be something easy, but I cant figure out how to close this gap. I was just pressing F to create the face after selecting the vertices, but now when i select them they select a lot of extras
spiral sigil


Any opinions? Is the topology ok?
 spiral sigil
so just drag the cheeks out a little to make them more prominent?
spiral sigil


better?
lament pond
3/4 view
spiral sigil
 lament pond
Little more
spiral sigil
I'm scared that pulling them much more will make the edges between faces too noticeable
 spiral sigil
OK, thanks for the ss, now it should be fine.
is 1k tris appropriate amount for the area that I've done?
 leaden ice
the face?
spiral sigil
the mesh that I've sent, so basically only the face
leaden ice
depends really
my fox face has like 750, but that is with tongue, teath and it has a muzzle
spiral sigil
I compeletely ignored the mouth. I can't use emotes as I don't have VR and I don't think I want to make visemes, at least with my experience right now
leaden ice
if your going for more detail, use normal/specular maps, dont just rely on higher poly count
spiral sigil
If need be I will decimate it a little and bake the normals from the higher poly mesh. I know that trick
leaden ice
mhmm
and tbh this 20K limit is rather low, most "modern" games go much higher
ive shreaded a few models to make them fit that limit tho
spiral sigil
afaik 20k tris is ~2007 games era
leaden ice
mhmm
leaden ice
cause its a free to play game with people playing potatoes? 😛
potatoes are for baking, boiling or putting in a stew
spiral sigil
and the optimisation is... well it just is I guess. 😁
lament pond
I need to shave I'm becoming unsmooth
 lapis river
i have a bit of an issue (not sure where i would really ask about this) where I've exported an object from unreal engine (umodel) but i cannot get the uv map to follow. In most cases i would do it myself but I'm not that skilled yet and it would require significant work with how much i know, but i had have the blueprints and maps for them. would it be possible to either A: export the uv "set" with umodel (I've not seen the option in it) or B: use the normal maps (or the other maps whichever) to get the texture coordinates from them. (or C if I'm dumb and there's a simple answer other then "geet gud" what would that be)
https://imgur.com/a/djZFc
that is what I've managed on top (i just want the head) and what the real uv map is below
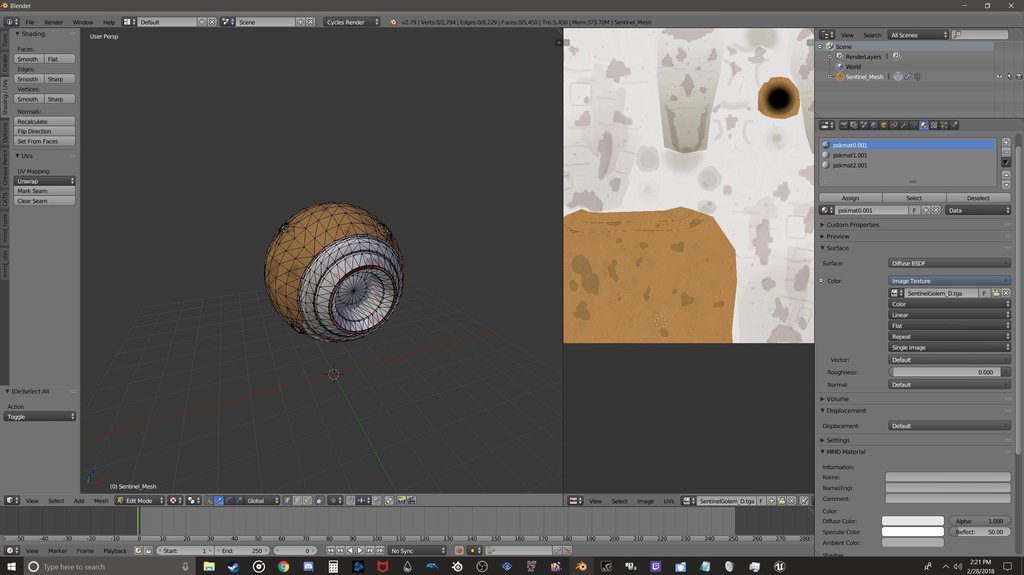
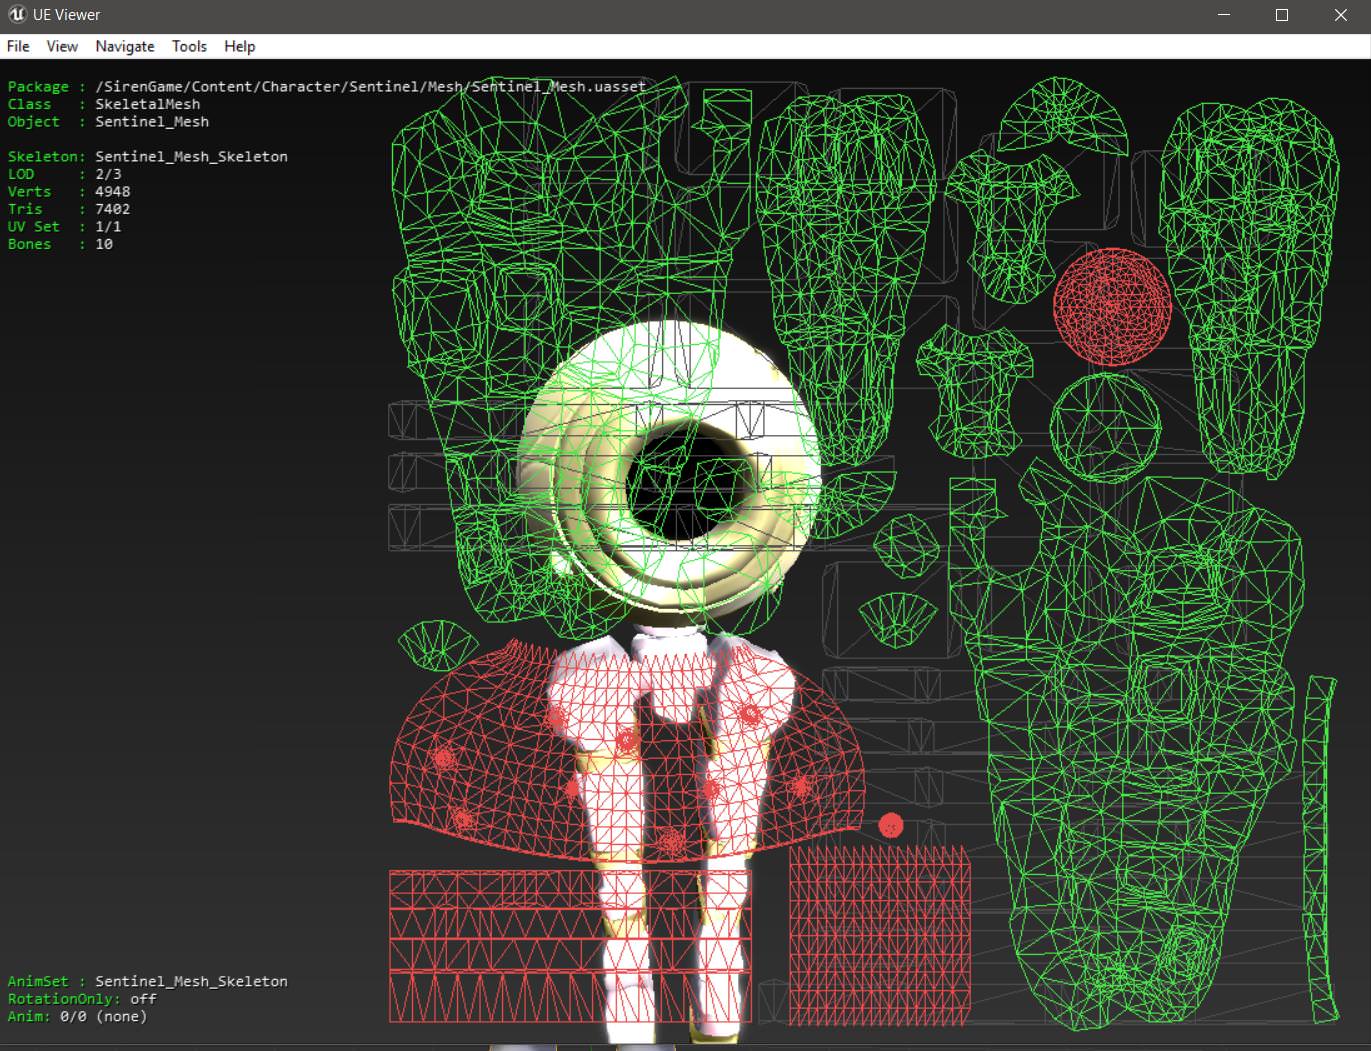
...
 lucid elbow
https://imgur.com/a/9BckS I need to relocate this mesh and the corresponding bones to the waist of the model, is there a way to move both at the same time also will moving them separately cause it to not work correctly in the end?
 tired plume
i dont think it has to be totally perfect, just as long as you weight it good enough
like the rope following hips or something and the rest to their own bones for DB or whatever
mental blaze
@azure adder you in the mars map?
mental blaze
someone has the iron giant model
mental blaze
 lament pond
He looks great
 whole pike
I try to make it as accurate to the ref as possible 👀
mental blaze
oh no
but the hair is coming along nicely

I just have to ignore minor details and focus on the main elements.
lament pond
 whole pike
i made some slight anatomical changes
lament pond
His shirt normals are backwards
whole pike
is this better? https://gyazo.com/80e766d8d7e20052a64035fed4408ad5
 lament pond
His arms look really long
Add more shoulder bump
Thin the neck and raise the groin/pelvic area
lament pond
It's pretty short
 deft kite
how do i accomplish the "void texture" galaxy effect in unity?
halcyon bay
I think I'm dumb. In Unity, is there a way to save a template file to build characters from so I won't have to continuously re-import the VRChat sdk and asset packs?
Looks like this is the answer: https://forum.unity.com/threads/template-for-new-project.71595/

Unity Community
Hi,
Is there a way to make our "New Project..." template for Unity? For example, when we make a new project with our template it should make some...
halcyon bay
Anybody know if there is a way to move a unity 3d character from unity into blender back and forth easy?
 visual vigil
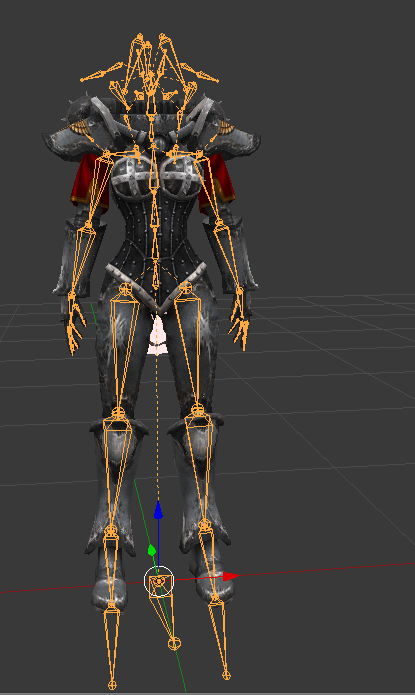
I need some help here. After Parenting the armature the head teleports to the starting location of it when imported https://i.imgur.com/JOAI7Kg.png https://i.imgur.com/1kfMaeK.png
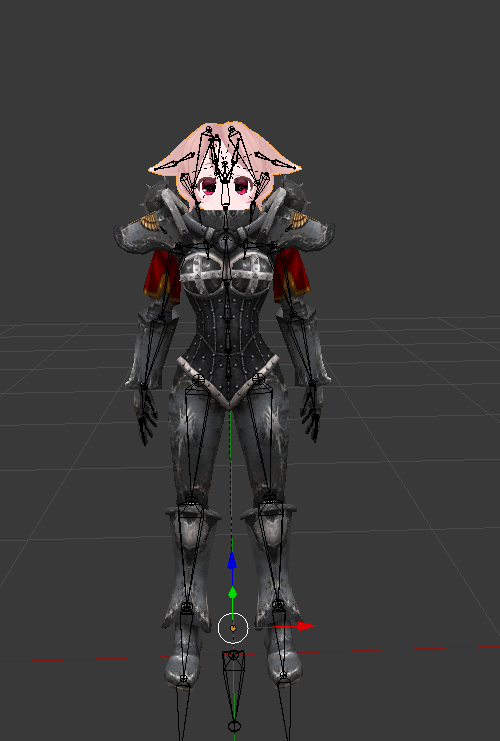
 obtuse summit
#avatar-rigging @visual vigil
visual vigil
o
solar mauve
Does anyone know how to bake a mesh texture onto another mesh?
tired plume

reddit
I had to change my UVs but now my textures are broken :( Help
this? @solar mauve
solar mauve
I don't think so
I have a dress with some 'markings'
But the markings are on a separate mesh
I would like to bake the markings texture onto the texture of the mesh so I don't need the second mesh
tired plume
yea i getcha
 normal cypress
Hey~ Quick question. I've tried getting a Mesh from Blender into Unity as .obj to use it as Emission in a Particle System but it just ends up being invisible for some reason (Putting it into the scene normally shows up completely fine) ~ Any idea? QwQ
tired plume
Huh.. so do you know if it is inverted in blender?
In solid view a normal thing is white and an inverted one is weird and blacker looking
Inverted meshes are invis
normal cypress
it works completely fine when I just pull it into unity
like
only as particle emission its invis
 safe flume
Not sure if this is the best place to ask, but anyone have any suggestions or guides for how to create a Texture atlass if you're using more than just the diffuse/color texture? I have a model with diffuse, normals, emission, specularity and alpha textures that I'd like all baked to minimize draw calls.
I may just suck at google but not finding much info.
Looks like I can change the Bake mode actually. I assume I"d just need to make an atlass for combined diffuse/alpha, for specularity, and for normals.
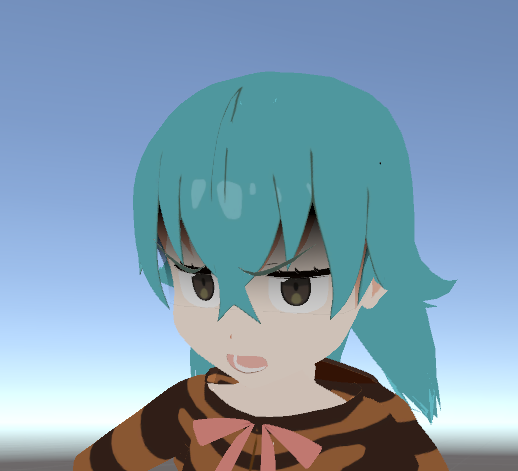
 normal flame
Has anyone here ever made a model for vrchat in 3dsmax? It seems 3dsmax expects blendshapes to be 0 to 1. But 3dsmax by default makes them from 0 to 100, and i can't seem to find how to change that if it is even possible
azure adder
yeah works the same with maya
blendshapes are 0 to 1 but in unity i put them up to 100
works fine
normal flame
Ok, as long as that is what vrchat is expecting and what unity does, it should be fine to do my blendshapes as is. Time to experiment. Thanks for the answer you two!
normal flame
Ok, so my character now blinks and has eye movement. The eye movement i get due to the bones. But what in the hell gives it the ability to blink? Not my blendshapes, and no bones that have eyelids rigged. I am scared.
normal flame
It was my blendshape but i forgot to update it to stand out so i was confused 😄
 light nest
There should be bones that called blink
normal flame
Nah, no blinky bones, just eyeball bones and blednshapes
light nest
p.p Weird
normal flame
Is it?
It's what the default example rig uses
Unity doesn't even have room for eyebrows in their default avatar rigs
humanoid default that is
light nest
I mean in models that I kinda tried to use. There is always bone with this name lol
normal flame
There were in a model i used as well, but that is not something VRchat seems to give a shit about. And they were not even properly weight painted in the first place
¯_(ツ)_/¯
I now have the knowledge that i can do what i want from 3dsmax. Now i just need to start a model from bloody scratch
It'll be easy i am sure
light nest
Yeah, you can always try x)
 jovial escarp
so somehow, i managed to make a very very broken model that unity hates
i just wanted to combine two meshes
specifically, just putting the head of nanachi on a space engineer, similar to the spacedeer model thats in my icon
well...

Maya seems to approve of the model, and its at about 19k polys
Unity on the other hand, thought that figure was closer to 200k polys
so i did some investigating, and then i looked at the fbx file itself, and was greeted with this lovelyness
 vivid crater
oh lord
jovial escarp
somehow, during the export process, Maya thought it would be a great idea to add in dozens of half broken Nanachi models to each individual part of the model
azure adder
That happens when there is a problem with your blendshapes usually
Your base model and the blendshapes dont match. So it then generates all the blendshapes as seperate models during export
 cunning cedar
how to fix this? https://gyazo.com/e356a32cf7856ffa6075f38aa31faf8c

in blender it looks like this:


 spiral sigil
@cunning cedar go to your ear texture image, click on it and tick 'alpha is transparency' and apply to import again
(in Unity)
cunning cedar
 azure adder
Set the material to cutout
cunning cedar
im using atlas, then my whole model will disappear xd
azure adder
Transperancy then
nocturne marlin
@jovial escarp whenever I ask myself why I have bad fps I'll look back on that moment

 small cloud
@cunning cedar it should be fixed in unity if u use cutout
had the same thing with that model
mental blaze
Whoa
whole pike
Grease pencil is a wonderful thing
viscid siren
can't wait for the 2.8 version of Blender
then you use Grease pencil for animations and a new system for rendering
latent charm
One great thing about 2.8's eevee renderer is it'll be very easy to have material setups in blender that will look almost identical when moved across to unity. At least when using a standard PBR setup.
 empty moss
welp time to figure out how to 3d model by force, i am determined.
empty moss
tiny bit clueless on where to start when it comes to making a person, obviously i want it to be modular. is there any uh tutorials?
whole pike
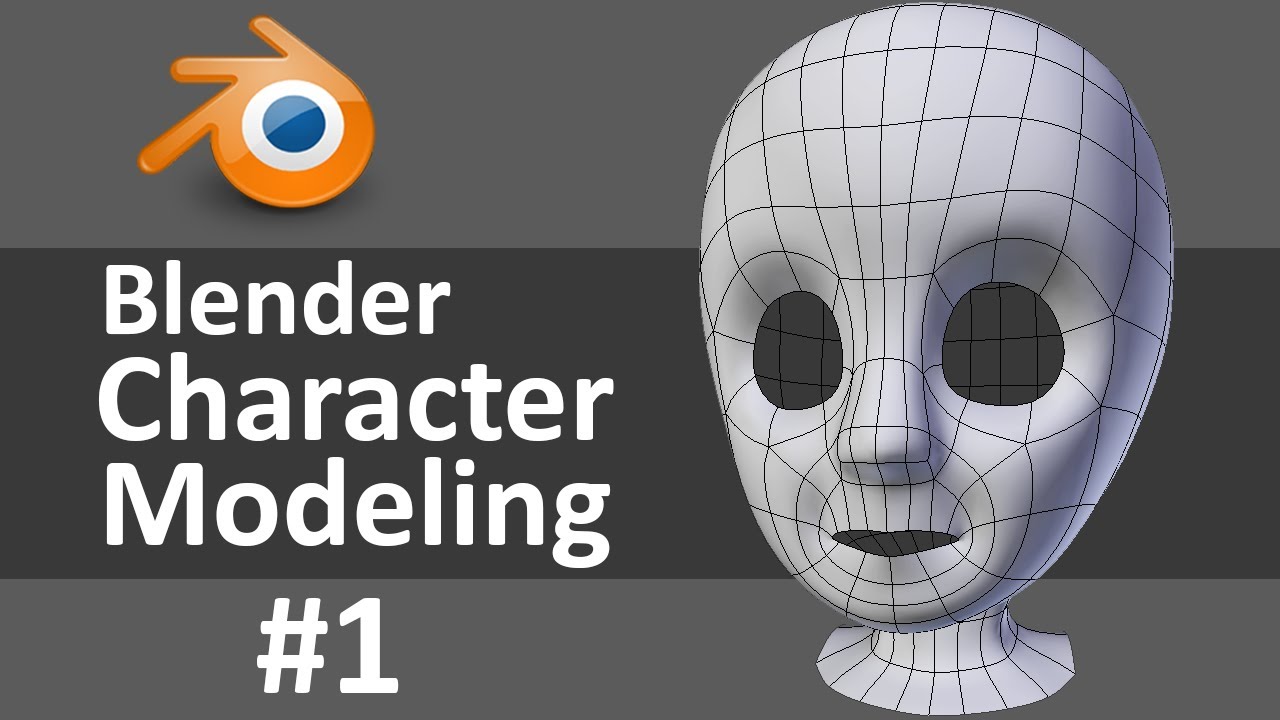
Learn Blender at https://Blender101.com If you're new to Blender, watch this Blender Quick Start Guide first: https://youtu.be/lZe3tGWSy6s Starting a new cha...
So a really big nutshell:
Make the face, extend from the face to make a head, extend from the head to make the body, and then extend the body to make arms and legs
Etc
So just alot of extending
But there's another method where you subdivide a cube and shape the model with that
I prefer the extension method
empty moss
oh boy and i thought warp travel was possible
whole pike
It's simple, but tedious like 99% of making models
 cerulean ivy
has anyone had unity not allowing them to upload avatars since installing the new sdk?
 frank owl


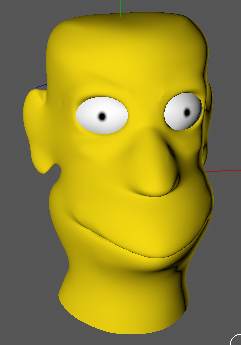




 tired plume
uh, i'm dumb, how do you use that o button for the proportional movement when editing vertices? i looked it up and didn't understand lol, cause i selected a surface and it won't become parabolic or concave or whatever. The whole mesh drags entirely.
mint ginkgo
when i import an object to my avatar in unity, the center of rotation of the bones on my avatar all become the center of rotation of my object