#avatar-rigging
1 messages · Page 163 of 1
 spare jay
 short prism
don't worry about it my friends are bullying me I am disowning them as my friends
 ember flint
'bout to give up on trying to rig this for vrchat
ember flint
Why is it saying my avatar is 90k polys when blender is saying 30k
 mild stratus
Because the SDK counts tris, which means the quads are split, and so are other geometry.
 fading verge
So idk how much bout riggin, and I'm stumped on trying to get mixamo to run this thing. All the file types are png except for 1, but it's not anything compatible with the website or blender ehh I just want my goat boi or tips on how to get em formated to import to unity
ember flint
Then why is it labeled everywhere that it's tris
Hmmmm, they changed it, cuase it did say polygons on the documentation
I swear
mild stratus
@fading verge Yeah, that file's not compatible with mixamo, it is compatible with blender however, which means you can import it to blender, then export as an fbx.
fading verge
hm I'll try it out, I took out the whole file and put it into blender so lemme see if that appraoch will work
am still noob
mild stratus
After you export it as an fbx, you can then use mixamo.
fading verge
ight I'll try it out
 deft snow
@ember flint I'm not at my PC at the moment, but there should be an option in unity to use 'quad' rendering. VRchat should see the quads as polys and a lower amount as a result.😏
ember flint
I'll give it a look see when I wake up tomorrow
Been working on the model for far too long today
deft snow
Been there before. Good luck 👍
ember flint
It's my second full body model ever, and I'm just not having a good time getting it to work for vrchat
fading verge
Thanks @mild stratus man, you saved me alot of stress and have brought me to peace
 rapid mauve
@ashen blade - i fixed your model in blender - if you still want it can i post it here or dm it to you ?
fading verge
I'm already in the process of importing the model it into vrchat @rapid mauve appreciate it tho
I mean if ya resized it or anything I'll be happy to take it off your hands since you went through the trouble
rapid mauve
it's not any trouble rly - took only few minutes - was just adding bones for ears then make shapekeys for ear wiggle in quest also floppy ears / if dynamic bones used for pc (ill send you model) doesn't matter if not use it
 fringe citrus
@faint pilot I was helping someone else with a similar issue and it turned out the model had imported mirrored on the x axis. So the bones labeled "right" were on the avatar's left side etc (from first person perspective). Make sure that the bones assigned to the right/left are actually on that side.
In the end we fixed it by scaling the armature by -1 on x axis in object mode, applying the transformation, then going on the body mesh and applying it's transformation because apply to the armature gives it one. But this x flip turns the model inside out, so in edit mode select all and do "flip normals"
note: I have no idea what this might do to shapekeys if you have them. So if your shapekeys get screwed up, you'd probably be better off just renaming all the bones with "right" to "left" and vice versa
 magic sonnet
theres also a way to just flip all the bone names in blender
fringe citrus
oh is there a single step for that?
magic sonnet
yeah, dont know if theres a keybind but just use the search thing and type "flip names" friggin life saver when i found that out
fringe citrus
oh nice! yeah TIL thanks
in the case of the other person's model the mesh itself was asymmetric and a game character with an official look of a shoulder pad on one side
so we had to flip everything to get it right
but for a symmetric mesh, flipping names is probably best
magic sonnet
yeah definitely
 mighty urchin
where do I find VRC_AvatarDescriptor in my SDK?
 dawn oak
It's a component you add onto the avatar. Search for "avatar" when adding a component it should pop up
mighty urchin
thanks
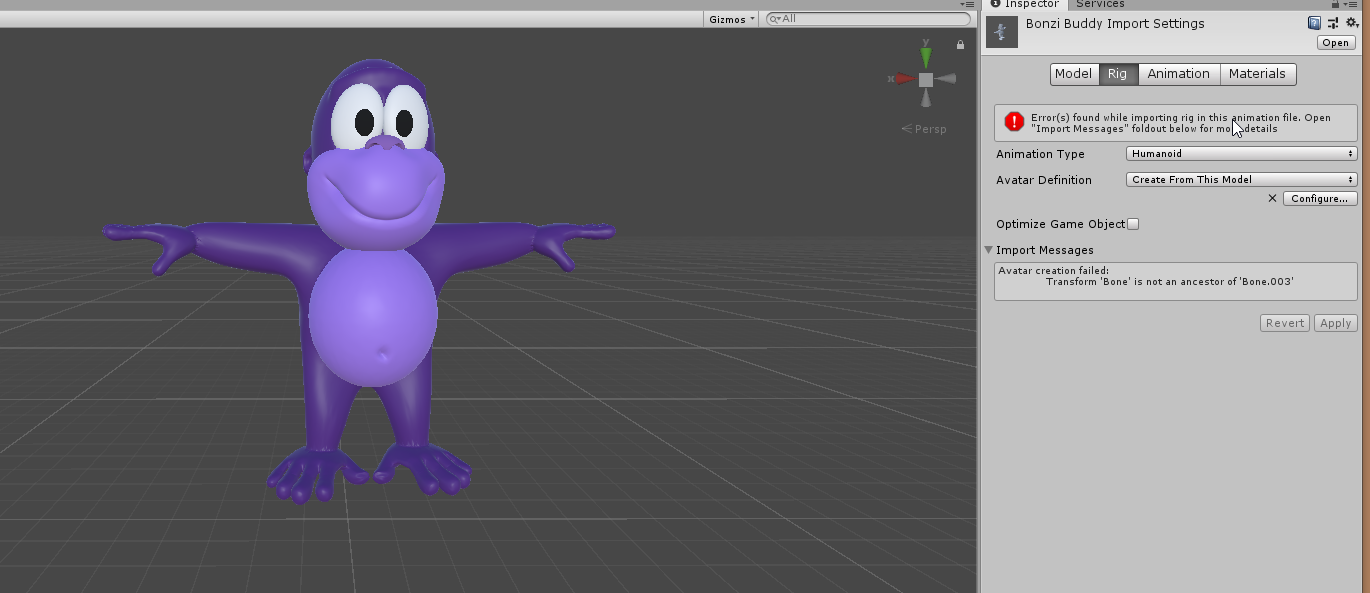
anohter quick troubleshooting question--the avatar is rigged as Humanoid and has its bones all squared away and working, but i'm still getting this
dawn oak
Make sure the avatar descriptor is placed on the top most game object (and not the body)
some people make that mistake
fading verge
I'm editing an avatar that will have eyes that dont move. Can I just delete the bones for the eyes and it'll be ok?
dawn oak
Considering eyes aren't actually a requirement for a humanoid model to work in Unity it should be fine assuming that it doesn't inexplicably break the model when you do that.
Also it shouldn't be necessary to outright delete the bones, as long as the eye bones aren't named "LeftEye" or "RightEye" VRChat won't use them.
dawn oak
As stated earlier make sure the avatar descriptor is placed on the top most game object for your avatar
mighty urchin
I made sure of that
This would disable crouching, right? I don't have any custom gesture-generated emotes or anything like that
dawn oak
That warning shouldn't disable crouching
mighty urchin
dawn oak
ah I did skim over it and didn't look at Full-Body IK will be disabled
mighty urchin
and VRC_Avatar is on the top object
dawn oak
Actually considering I didn't ask this yet. You are using Unity 2018.4.20f1 correct?
mighty urchin
yes, I've been following the guide up till now
dawn oak
I don't really know anything else that could fix it other then making a new project and exporting the model again from blender (I say this as I exported a avatar in blender but it broke during export for some reason, exporting it again worked just fine)
mighty urchin
okay, thanks
I have to wait anyway to get past Visitor (used Steam account for a while, only now switched to a VRC account)
 fading verge
no
click on the model you imported in the project panel
then click on the rig tab in the inspector
and click on configure
ember flint
yeah i just saw that
ember flint
is there an easy way to mirror the changes i made
fading verge
You can write a script which can do anything
 tight summit
I have a dynamic bone collider but I'm not sure how to configure it. I want it so a tail doesn't clip the floor. Can someone help me and tell me where to put the component and how to set the settings?
 dense stump
Usually best way to do a dynamic bone floor collider is to put it on either the root of the avatar, or an empty under the root of the avatar. You make the collider super big. Then you just set the offset of the collider to - 1/2 the size u set ur collider. Boom the edge is at floor level! Then u put it in ur dynamic bone collider list like normal!
 amber kestrel
Speaking of dynamic colliders, I have several on my model, but none of them seem to be interacting with any of my dynamic bones even though they're assigned as collision checks. Does the avatar just move too fast or something?
I mean strictly in VRChat, they work fine in Unity
 stark ridge
Anyone work in blender and can help a gal out?
 olive river
What's the issue?
 open bison
how do i enforce t pose in unity
fading verge
via the configuration menu in the rig tab
rapid mauve
@ember flint thats non humanoid - can you make it humanoid ?
ember flint
dango
 rapid mauve
ooh that quite easy
ember flint
I mean, I have a rig, just
not one for unity
and no clue on how to get the rig i made, to work with unity.
fading verge
if it has all the bones a human has then it's fine
even if they're a bit rotated like in the pic
 tropic elm
som1 know how to fix mine avatar thed i uploadt spawns in the floor
but i olso get this error wen i rig it
open bison
Mixamo is good
rapid mauve
^^ only if you dont know how to rig ^^
@tropic elm set back to generic / apply then back to humanoid - make sure rig have not mapping errors - also in blender where is origin ?
tropic elm
the origin i think in between the feet
and i set it to generic and then back to humanoid
idk y this is like thed
rapid mauve
after you set back humanoid still have above error
tropic elm
yap
rapid mauve
click configure - show screen shot
rapid mauve
ok - i think unity is confused - click on hips bone - raise up avatar - save and test
tropic elm
what move the hip or the holl avater ?
rapid mauve
moving the hip bone up in rig configuration will raise the avatar up yes
out of the floor
rapid mauve
is possible several edit you make for correction
rapid mauve
is addition of large neko head make unity confused i think
rapid mauve
very welcome
 rich mauve
hi
tropic elm
hoi
rapid mauve
hey
rich mauve
how are you?
tropic elm
y u want to know
rich mauve
oh umm nvm then
tropic elm
lol
rich mauve

tropic elm
21 happy
rich mauve
what
open bison
Mixamo > rigging manually
rapid mauve
Mixamo is rigging like taxi for ppl who cant drive 🙂
 fervent hornet
Mixamo is a crutch and a barrier to learning actual rigging. It's better to just learn how to do it then deal with bad weights
Blender auto weighting does fine with water tight stuff and doesn't rename every bone when you use it
fading verge
Whenever I try blender auto weighting from the W menu I always get "Bone Heat Weighting: failed to find solution for one or more bones"
fading verge
Tried a remove doubles, same issue.
Tried with a different bone (the arm) on a different part of the mesh with no holes or tears, same issue.
I just can't get automatic weights to work for me at all
 crisp tendon
What does the mesh look like ?
fading verge
None of these are separated, they're on the same loose part
 celest rock
Why is the wrist outside the mesh
fading verge
Weird transform maybe, still has the proper rotations/movement since the origin is still in the right place
Same thing happens on any model that I try, I just can't use automatic weights
 burnt goblet
Well rotate the bone so you can clearly see what is clipping through , add or delete weight painting as needed to make it look as it should and hit alt+R to reset the rotation of the bone
fading verge
Not the problem.
fervent hornet
When testing for where it's complaining I usually cut the mesh apart and try to auto weight the segments. Makes the area to look smaller
 sweet rain
Oh hey I should ask here but uhhh
I really need help
I put this guy into a test pose ans must've forgotten to reset it before setting automatic weights a second time
Is there any way I can reset this for only the leg ? I'm kinda panicking
WAIT okay I set the armature as "rest pose" I'm saved
 boreal steeple
So I finally got my avatar in the game. But the shoulders are messed. Anyone know how to fix this? I fitted the clothes to the avatar but I assume I messed it up because the rested post is all weird and stretched and then when I put my arms up, it looks like this. I assume it's a weight paint or rig problem
sweet rain
Ooh yeah def looks like weight painting!
The shoukders need to affect up to the neck about
boreal steeple
So add more to the left of where the yellow part is? Not on the neck though I assume, just to the collar.
Should I remove some of the paint on the upper chest? When I was in a resting position in vrchat, the shirt would kinda sag down and the logo would be distorted constantly.
crisp tendon

Timestamped Links (Right-click: Copy Link to share a stamp)
0:00 - Intro
1:00 - Visual Guide
2:53 - User Real Height
5:54 - Proportions
7:04 - OpenVR Advanced Settings
8:17 - Proportions cont'd (Blender Start)
10:20 - Shoulder Sag Fix
11:46 - Proportions cont'd (Scaling Limbs)...
fading verge
Is this a good setup for eye tracking/blinking to work?
I've heard that it's a bit finniky when it comes to the rig
crisp tendon
If you have upper chest it'll break afaik
fading verge
darn
any idea how to fix that without reworking the rig?
Maybe cats can fix that?
If i click on fix model it automatically adjusts all of the bones which I don't want
could I just make it merge the upper chest and the chest bone and don't let it touch anything else?
crisp tendon
yep
fading verge
how?
crisp tendon
fading verge
Like this?
And then just remove the spine4 bone and put everything under it under spine 2?
 umbral idol
My muscle group preview looks fine (all legs, arms, etc move as they should) in the SDK but when I export to the game, the whole body below the head is fixed to the head, and the limbs are the only thing I can really move. What do you guys thing I did wrong?
 tame skiff
What was the trick for eye bones for eye tracking?
I remember I need two sets, but I forgot the rest
umbral idol
Update on issue: It's only with full body tracking. The model animates just fine with animations. Pressing calibrate won't do anything unfortunately
sweet rain
Has anyone ever had this like
Floating parent line in blender?
I can NOT find the source of it lol
crisp tendon
apply all transforms on your armature ?
 wind osprey
Check for hidden objects, or an object with its origin in a strange place.
 mint star
hello can someone fix model for me i would need a weightpaint fix and rig cape and skirt
crisp tendon
If you want to commission someone you can join the VRCTraders discord in #community-servers-old @mint star
mint star
thx
 brazen marsh
Any particular reason his arms stay up and stiff like this? Playing it in game, his arms will always go up and inside the head not being able to move it. only time it looks remotely normal is if you do a standard emote that moves the arms
 velvet copper
first, your default pose isn’t a t pose, second, check on the import settings that it’s all mapped correctly
issues that stand out to me would be the hips, hands, and that it isn’t a t-pose, but an a-pose instead
brazen marsh
Oh the T-Pose thing is because I took a picture of it in the Muscles tab rather than the Mapping tab. In the Mapping tab it's set to T-Pose.
velvet copper
it doesn’t look like you have shoulder bones eithe
brazen marsh
Can it not be controlled through the pivot points between the chest and upper arm points?
 obtuse hazel
I'm here building an avatar from a premade rig, the catch is its from blender and I'm working on it in Unity using the FBX. Its my first one and I'm hoping someone could help me while I stream it?
 raven lintel
someone explain to me how im actually supposed to place this i cant figure it out blender says its 180 but unity says 166
raven lintel
what format are you using
boreal steeple
Could someone send me some screenshots of the weight painting of the bones of a successful avatar? Mines messed up and I don't know how to paint it. Also I'm in Blender 2.79
umbral idol
My rigging issue was fixed. I forgot to assign the extra fingers like a total dummy
fading verge
Transforms set to 0,0,0 so it's at the origin and easy to find?
Do you see the outline of it?
what do i have to weight paint
obtuse hazel
So I have the file on blender loaded up and it looks fine.
And then theres the issue on Unity with the fbx model where I am creating materials to put onto him and none of the textures are working for the missing part
Even the one that is said to be used on Blender
fading verge
Pink normally means missing shader or missing texture, check those.
If it's neither of those the nuclear option is available, in edit mode select the material then select the vertices assigned to that material and delete the offending geometery
obtuse hazel
Where do I go for selecting vertices on the material that I created?
the material being used corresponds with what is shown on blender.
fading verge
You can try to turn the material to a cutout material to cutout the excess if you got the material working
The nuclear option is in blender.
 steel marlin
disclaimer: im new to avatars and rigging
im noticing this issue, where bones in unity are 1 part shorter than in blender. this leads to the ear (dynamic)bones rotating around the center of the head instead of the point where they attach to the head. is this a known issue, or something that i messed up in exporting my model from blender (im exporting using CATS)?
bones in unity: https://i.vgy.me/2U4Lae.png
bones in blender: https://i.vgy.me/rbeEVy.png
ear horizontal in blender: https://i.vgy.me/mIFqxY.png
ear horizontal in unity: https://i.vgy.me/4N7TIG.png


 steel marlin
in fact, all bones seem and act one shorter
fading verge
Can my avatar function without having shoulder bones mapped?
Also what are the naming requirements for the bones if there are any?

 fierce grail
@steel marlin Try exporting your model out of Blender with leaf bones checked. You can find this option while exporting in armature section.
fading verge
I have these bones that control specific parts, is this useful at all for vrc? https://cdn.discordapp.com/attachments/521112661841149952/714686346899226635/unknown.png

You could potentially use them for twist bones maybe
is that something that i would set up in the config window in unity?
rn im just joining the extras into the main ones, but was just curious if they can be used for better tracking

VRCat: Community-Run VRChat Forums
Greetings all, been awhile since I've posted a guide, but now I have good reason to, as lots of people have been asking me about this in the past day...
steel marlin
@fierce grail ive messed around with that a bunch now, and it doesnt seem like that setting does anything...
scratch that, it does something, just doesnt help the dynamic bones
 wheat kiln
 fading verge
Set the proper bones to be spine and such
 reef saffron
how do I map the thumb, index, and middle fingers?
fading verge
click on the imported model in the project panel, then click on the rig tab in the inspector panel and on configure
then click on thr hand buttons and drag and drop the bones into the correct slots
ember flint

feet are twisted
weights looked fine
ignore the material
nvm fixed it
bone was rotated
in blender
 obtuse trench
im having some trouble with my dynamic bones in my ears everytime i move them the go out of the head
 winter matrix
@obtuse trench I'm betting you have the bone on the head rather than the base of the ears themselves, push it out a bone on the heirarchy so they're starting from the right spot.
fading verge
You're missing the lower arm bone on their left arm, the pelvis bone is rotated, spider-man
boreal steeple
Is there some reason why my weight painting for my chest bone is pink as if it has no weight but in pose mode, it moves?
Can I just leave it pink or do I have to manually paint it?
(and also does the chest move a lot in vrchat without full body tracking that I'd need to weight paint it well?)
fading verge
Does anybody know how to fix the two yellow errors I am getting on this avatar?
send a picture of the rig in blender with bone names enabled, tactical
and then send another picture of the configuration menu in unity
I didn't do it in belnder, I did it in 3DS Max... xD is there a way i can transfer it to blender?
celest rock
If you exported it as fbx from 3DS Max you should be able to import it in blender. I'm pretty sure you can fix it in 3DS Max too though.
fading verge
I think i found the issue xD
i'm sure you can also show bone names in 3dsmax 😛
nice
I think i see the issue
Blender then 3DS Max and then Unity
can someone just tell me how to delete the entire bone structure xD, ill rebuilt from scratch
Where do you want to delete it?
Just all of it. Like make it just an object again without any bones hoenstly, I just redo all of the bone syustem
Well that'd be in 3ds max or blender
whatever program you want to use
and after that just delete the fbx in unity and import a new one
fervent hornet
Deleting all of the bones is overkill
fervent hornet
All you need to do is flip your hip bone in edit mode though
fervent hornet
Flip it on the up and down axis
should invert the 7.2 so youll have 173/180 instead of 7.2/180
fervent hornet
Yes, you can reorder the bones in unity but as of 2018 you have to unpack the prefab
They usually dont cause any issues though if you dont fix it
fading verge
Okay, thank you
 heavy spear
hello, im having issues with my hands in vrchat. i'm not experienced at all and i don't rellay know what to look for. the issue is, is that when i do a hand gesture it does it incorrectly. for example, doing the peace sign does it with the index and ring finger.
this is what the bones look like
fading verge
make sure the bones are assigned properly
so that the thumb in the configuration menu is actually the thumb
and not the index finger
 fallow pond
https://i.imgur.com/wGEo2Qb.png hey guys I try to move an accessory to a bone but it keeps saying this
any ideas on how to fix it?

 turbid spear
or open the prefab by pressing the > arrow on the right of it
fallow pond
thanks it worked!
fading verge
I've also noted that you can technically avoid the unpacking step (I don't like breaking my prefabs okay) by instead of dragging the object under the parent (putting it in with the children), if you instead drag it directly on top of the parent it will make the object a child of the parent with no complaints
fallow pond
@fading verge alright thanks!
boreal steeple
So I finally got my new avatar in and the legs are super messed. This is in desktop mode in the rested position
(eyes just crossed for screenshot theyre normal)
it kinda makes sense because in blender, it's legs were really tight together
But is there a way to fix it without having to redo everything?
 sleek isle
ll
fading verge
Use pose mode to rotate the legs out a bit and try to make the leg bones straight but with a slight nudge forward in the knees so the ik knows how to orient them. Then apply as rest pose in CATS
boreal steeple
okay thanks so much I'll try in a bit
 astral warren
I'm getting weird shoulder clipping issues in VRChat but it's not in blender or unity when i play the same idle animation in the editor?
Nevermind, I am, it's just not mirrored because not a mirror
boreal steeple
@fading verge Just want to make sure I get this right. You mean rotate the top leg bone so the legs are farther apart, then bend the knee a bit?
fading verge
Pretty much yeah, if there is already a bend then you don't need to add extra bend
boreal steeple
Awesome thank you
olive river
Okay, so, I'm really confused but. I have an avatar, everything is weighted properly that I can see, yet the jaw seems to flap around, and half of the teeth move up, and have of the nose gets into the wrong position.
none of my visemes are set to anything like that
Does anyone know what might be causing this?
 old kite
it sounds like a weight paint issue. maybe the jaw and nose is slightly painted on a chest bone or something just enough to cause problems
did you manually do the weight painting yourself or did you use automatic weights?
old kite
unfortunately i can't think of it being anything else. I'd had models mess up like that when painted at 0.1 or something barely noticeable before, so i figured that might be it.
maybe someone else will be of more help. sorry!
olive river
It's okay! I can always select all the vertices just in case again.
old kite
weight painting is my least favorite part of making models lol
olive river
lmao yea
I found it easier with earlier versions of Blender
but this new system is a little odd for me
it took me awhile to realize how to subtract in 2.8 @_@ Since I delayed actually using it
Hm, looks like the back of the tongue wasn't fully weighted. Nose seems okay in every one but heeyyy maybe that was causing the issues
like 1 vertex
olive river
I used to hate weight painting many years ago. Eventually I learned to understand it more, but it can be a pain sometimes. XD
 gentle plinth
why would the bone in my leg just fucking dissapear without deleting it
i just parented the vertex group of the ribbon to the leg
saved
worked on other things
then realise the fucking bone is missing
no reason at all
ffs
uh
so
i filled in the parts in between
renamed the bone
but
uh
how do i bring it back into its place
in the hierarchy
 sharp hound
Question, how do I set a shape key to be the default shape key?
 robust crescent
move it to the top in blender, it will become Basis (might need to rename it though)
sharp hound
Ah. Thank you.
astral warren
In current blender you can just drag those bones around in the hagiarchy, same as unity. It will parent them as expected @gentle plinth
If in edit mode, on the armature in question
gentle plinth
It didn't, but I moved it through parents tab
 shy cloud
Been trying to figure out how to stop the left foot from pointing upwards when IK starts. Does anyone here know what could be causing it? https://i.gyazo.com/7e37c1c04a41b148d89ff66704c71484.mp4
crisp tendon
can't tell without seeing what your armature looks like
rapid mauve
Looks like the leg bones aren’t straight - I straighten all my models legs for fbt as I suffered the same problem on so many of my creations
shy cloud
Yeah I've messed with the legs to line the knee up better, but why would this cause only one foot to screw up?
(don't mind the asymmetrical arm, that's new since the problem)
fading verge
I got an issue, I have rigged my avatar pretty well (Blender and unity both look good) but i can't seem to get the muscles working, Can anyone please tell why on earth my muscles aren't automatically locking to my bones in unity?
Did you weight them in blender?
And does the model move when you move the bones in blender if you go into pose mode?
Ah, shit xD
Makes sense
before i look it up, do you know how to weight bones in blender? xD
A little tiny bit
best to watch a tutorial
Okay, Will do
thanks for the help
 novel aurora
is it possible to fuse multiple bones and their weights into one? for instance, taking a “front right leg” and “back right leg” bone and fusing them into a right leg bone that VRC can read
novel aurora
what modifier is that? the name is cut off
how do you even get that window, anyway—
fading verge
VertexWeightMix
novel aurora
ah
fading verge
click on the mesh, click on the modifiers panel and add it
then select the two vertex groups you want to merge together
and adjust them accordingly
novel aurora
ah, i see now
thank u, very helpful! i might try and make a mounted avatar, or maybe just something with multiple legs
fierce grail
CATS addon for Blender allows to merge weights even easier.
fading verge
yeah but afaik only all of them at once which cats thinks is wrong
and not two specific bones
fervent hornet
Nope, you can merge bones into another via active (to merge to the last selected) or to their individual parents
Honestly the only thing from CATs that I use anymore
fading verge
oh wow overlooked that
thanks a lot
does that also merge the two bones into one or just their weights?
fervent hornet
Merges the bones and their weights
If you had the bicep as two bones (one used for twist or some function like that) and merged them, you would have 1 bone with the combined weights of those two
fierce grail
Yeah, I used that functionality of CATS to for example merge bones on dress and their weights to hip bone or weights from hair ribbons and braids to head bone.
Easy 91 -> 50 bones on model, which allowed it to reach excellent rating on Quest and PC.
 dense hinge
I can't get my hands to move correct on my custom avatar. Is the way the hip bone is oriented is the same direction the finger bones should be?
 bronze fern
I dont think that would change it, its probably the weighting
fading verge
https://cdn.discordapp.com/attachments/402349592244649996/715850988933873724/unknown.png https://cdn.discordapp.com/attachments/402349592244649996/715851126024568832/unknown.png so when setting up the eye tracking i got this error for the bone heirarchy, but the spine bone is parented to one of the twist bones around the waist area, not the hips. Does that matter? should i change the bone heirarchy so that its all correct (Hips>spine>chest>neck>head) or should i just leave it parented to the twist bone?

 rapid mauve
yes it matters - you have a choice to and with cats model options use "to parent" the bone or re parent it to the bone it's movement is most associated with if you want to try and use it - personally i just "to parent" or "to active" them
also if you choose to keep it - rename that bone with prefix Z and you wont have to unpack your prefab if you have bone hierarchy problems in unity
 little spindle
What's the fastest way to mirror hand weight paints?
Duplicate each bone, mirror each, and rename each? or is there a 1 button that i cant find yet
 rough portal
Hey I will be rigging my character today so I need a little help on that. Making bones myself is a must do I suppose but do I have to do weight painting as well or does CATS plugin do that? Can I attach the rig using CATS as well or is there other way I should do it?
Long story short - how do I rig for vrc? xd
fading verge
Nope you can't skip weight painting 😛
If you have a really generic human you could upload it to mixamo and let that weight paint and bind a rig to your model
however that works only limited and requires some manual editing afterwards to make it decent
rough portal
aight
rough portal
Does the hips bone have to be disconnected from other bones? as in is only parented and not directly extruded?
same question for the shoulders and legs
rapid mauve
@rough portal the hips dont need to be connected but do need to be parented- same for shoulders and upper legs also fingers
ooh and hair and accessories
rough portal
can I just weight paint the accessory with head bone selected?
rapid mauve
if the accessory is on the head yes
rough portal
Thank you you are very helpful ^^
rapid mauve
it's easier to add the vertices to the head vertex group if it's static
 final beacon
Pretty new to this, so please assume I'm an absolute dumbfuck. Why does this happen? Is it because the shoulderbone is connected to the upper arm via offset or am I missing something?
magic sonnet
merge the vertices in blender
final beacon
Still does that
magic sonnet
then im not sure, if they were merged then it shouldnt be able to pull away the mesh at all
magic sonnet
that would explain it, remove doubles wouldnt have done anything, you really should merge meshes before uploading anyway, its really unoptimized to have them not
final beacon
Ayy thx :D Joining both meshes then merging by distance did the trick
 maiden iris
Hi, I've got three meshes and using automatic weighting from bones to weight the vertices to the left shoulder. However, only 2 out of the 3 meshes are receiving weights, the body and the jackettop, the jacketinner mesh that covers the breast doesn't get any data. I applied automatic weights the same way to all three meshes.
Not sure if there's something I'm missing here, with weight data it should pull up along with the other meshes when the shoulder rises and I shouldn't see the skin come through. Is this a limitation of automatic weights and I need to get out my brush?
sleek isle
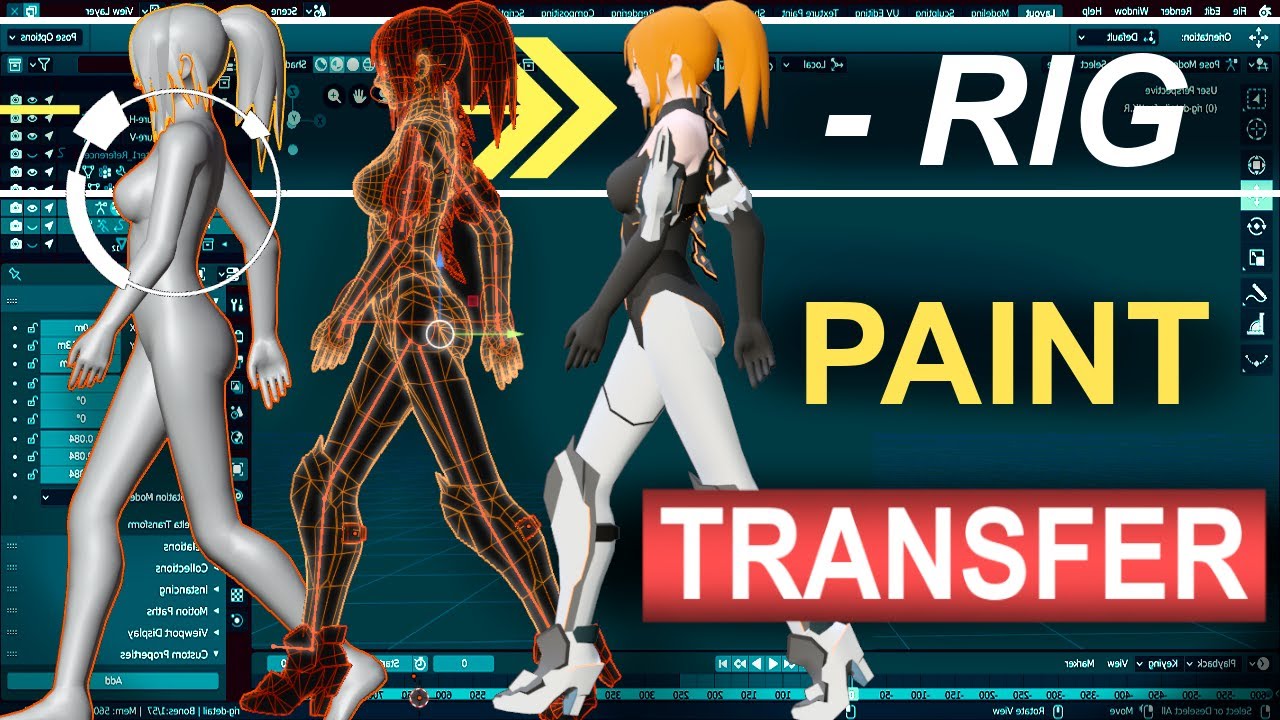
Never waste your time re-painting a new character ever again. In the next 60 seconds, you'll learn everything you need to transfer your Rig's weight painting from one character to another under a minute!!! Hope it helps :)
Free Female Base Rig Download:
https://www.theroyalsk...
maiden iris
my man 🏆
 cosmic anchor
does anyone know how to fix this or why its happening?
fading verge
Fix what exactly?
cosmic anchor
when i move the bone instead of the hair being on top of the bone its not completely following the bone
so when i use dynamic bones the hair moves less than the actual bones
making my hair stiffer than it should be
fading verge
Most likely you have redundant weights on those parts.
Remove the redundant weights or try autonormalize, I think that handles that for you I'm not sure though
 lavish karma
I am trying to adjust the armature on a model to fix the legs snapping to a rotation when they touch the ground in full body, hopefully someone has seen an issue like this before and can point me in the right direction.
What I have tried so far is various bone adjustments, making sure hips and upper leg are straight with lower leg just slightly angled forwards, making sure hips and upper/lower leg bone roll is set to 0.
rapid mauve
have you compared the armature with a working model
 upbeat yarrow
quick question, how do I make a hip bone in blender? my model is missing one
little spindle
edit mode on armature, shift A, move to position, click whole left leg bone, ctrl P to new bone, right leg bone ctrl p to new bone, ctrl p spine to hip, go to bones and name it hip.
upbeat yarrow
danka
or well, how do I select whos parent
I click left leg, but how to designate hip
little spindle
shift click hip
little spindle
parent keep offset
upbeat yarrow
gotcha
its been a while, last time I rigged the tri limit was 20k
then I assime its the same for breast bones
little spindle
i del breast bones and make that chest
 fossil reef
I need help rigging a blender model
upbeat yarrow
but I want the bounce
ah theres a video for it
oh lord you gotta pay for that
laaaaaame
fossil reef
can someone help me figure out what i need to do in unity to rig a blend file please
the model is done

 upbeat yarrow
in blender
fossil reef
Okay, in Blender.
little spindle
i sent u a cheat sheet in dm just right click and veiw in browser
fossil reef
do i need to do weight painting?
okay thanks man
I'm so glad this server has helpful people
I knew I wouldn't be the first noob
little spindle
yea dude 2 weeks ago i was a noob
fossil reef
what's CATS?
so you're saying in a few weeks I can go from 0 to hero?
maybe getting banned from AGDG is a good thing... if it means I can learn new skills here I can use in future games in Unity
upbeat yarrow
thats cats
its a model import and conversion tool
typically for mmd modles but works for others
its for fixing more then it is for creating
little spindle
the pose mode button is helpful bc then u can click it, check something, and hit ctrlz ctrl z to get right back to weight painting
 fluid slate
i have a bone question i think. if i want to take a flat circle and cause it to lose rigidity gradually so it can flop around would i have to add bones to it and then give it dynamic ones or is that over complicating it somehow?
amber kestrel
How do I edit the mesh of something that is used in a shape key? Every time I edit a part of my mesh in blender it snaps back to its original place when I exit edit mode. I can only assume it's because a shape key uses it
Just figured it out
Gotta edit the basis
 ocean coyote
hey can anyone help me? im trying to follow the fullbody 2020 fixes by Kung, im up to the part where he says to check the shape keys, but while he says to make sure they arent broken, he doesnt explain how to fix them if they are broken.
Basically, no matter what value my shape key is, the face wont change (it still has the shape, it just wont start at the regular facial expression like it's supposed to
here, the value is set to 0 but the shape is still fully winking
and here the value is set to 1 but nothing has changed
WAIT nevermind i forgot to switch out of edit mode, to object mode
my bad lol
ocean coyote
ok im definitely doing something wrong following this fullbody proportions tutorial
my model looks like a dwarf
amber kestrel
I think your skirt needs more bones
rapid mauve
@ocean coyote this because you see the difference - i think it looks normal - anime /mmd legs are stupidly long - admittedly the torso could do with some alterations but overall it think the model looks great / normal.
 coral canopy
So im trying to get eye tracking going on this model but the mat having a hole in it causes problems. Im not exactly an expert outside of bones and such and have no idea about..... how to fix a problem like this
turbid spear
is the mesh missing or is it a transparent hole in the texture
how does it look like in edit mode
turbid spear
select the circle of verts in the eye then merge at center with alt m, maybe
turbid spear
Then move the eye a little forward so it doesn't clip
I'm assuming you got no eye bones
coral canopy
Yah i need to move it forward a bit thanks for your help
got the eyes rigged for the movement
just need it to actually look nice
clipping is the big problem
turbid spear
Reduce the eye move range in cats if that's what you're using
coral canopy
How much you say from default
turbid spear
Or move the eyewhites back a bit
No idea
Try it until it clips
But I'm also not sure how this will affect the shape keys that affect the eyes
 atomic harness
When i try to paint weights on some bone i get no active vertex group for painting aborting error
how can i fix this
 foggy birch
I'm having an issue where my avatars hooves are in the ground
the bones are to the floor
foggy birch
nope it's 1:1
I added an extra bone to the hooves along that plane hoping it would help but it did not
the 'bottom'
fading verge
its not going below those lines are they?
foggy birch
Excuse me? The Green and red line? in blender? nope
fading verge
ok than that's fine
hmmmmmmmmm
did you restart Vrchat?
maybe it was just a bug
it happens to me time to time and restarting usually fixes it
foggy birch
I've been turned VR chat off and loading it each time
fading verge
did it work?
foggy birch
let me try it again, and no it did'nt work haha
nothing works that i can think of :C
 maiden fable
What's the best way to align finger bones? These are kinda fucked up
atomic harness
i am in some mode where the bone is cyan and i can't rotate and move them
any idea whaat mode i am in and how to turn it off
all my joints seem to be lockedd
rapid mauve
@foggy birch in the rig options for the avatar select the hip bone and in the model view - grab the hip bone and move the avatar down about the same amount it's above the ground
is possible you need make small adjustments and test to get correct level
foggy birch
I think it's because of how hooves work.
upbeat yarrow
this look about for dynamic bones? or is it better as a single bone
fading verge
that's good, if you have multiple bones that means it'll wobble better
since each bone wobbles "on it's own"
crisp tendon
Why are there two bones
upbeat yarrow
theres not
thats a halo of the smaller one that I cant get to go away
now that I joined meshes that went away
somehow I had 3 more duplicated armitures
 weary mist
😮
 low field
anybody using the rigify to unity add on in blender?
low field
It seems that it doesnt work anymore with all that new facial bones in Rigifys Human (Meta Rig)
What do you use to export you riggified Charakter to unity? I went throug https://docs.unity3d.com/560/Documentation/Manual/BlenderAndRigify.html but there must be a more easy way, or?
The Unity Manual helps you learn and use the Unity engine. With the Unity engine you can create 2D and 3D games, apps and experiences.
steel marlin
is there any way to transform the dnyamic bone collider to be anything other than a sphere?
fading verge
You can kindof make it cylinder like by using the height function to get two spheres that can intersect each other.
You can try DB plane colliders but I've never used them before.
Otherwise no not really
turbid spear
plane colliders aren't whitelisted, pretty sure
probably because devs like people using huge spheres under their feet
fading verge
Yeah you're right. I was gonna check originally but I completely forgot to
steel marlin
i figured out you can stretch the colliders by adjusting the "height", i guess that allows for something similar to a plane collider.
fading verge
Yeah, exactly what I said
amber kestrel
When I join an outfit's mesh with a body base in blender, the mesh of the outfit shifts forward off its armature, while the outfit armature doesn't move at all. Any idea why this would happen?
fading verge
Could your transforms not be applied?
amber kestrel
What do you mean?
Also I just moved the outfit far away to test this behavior, seems like it just sets the mesh position to the origin every time
amber kestrel
I've joined clothing mesh to an avatar before, just not sure how this case is different
amber kestrel
Any tips for rigging short hair? Do I need anything more than a single bone? Even though my hair is short, I want it to be able to sway a little
This is what it looks like
crisp tendon
like a skirt
amber kestrel
I haven't rigged a skirt before 😂 but I imagine I find a central point and throw a couple bones from that central point in a few directions along the hair? Maybe centered somewhere near the back?
I can experiment with it for sure, just wanted some protips to point me in the right direction before I go balls deep
 main vine
Anyone know what causes this? I have an avatar descriptor on
amber kestrel
Ah you see, sometimes people model things into an area known as a "world", and they can apply textures to things within that world, along with other cool VRChat things like world portals, mirrors, etc. Players can also move around with things call avatars, like the one seen near the bottom of that image
fading verge
There are a lot of bones in my model that are rotated 90 degrees away from what they should be, anyone have a clue how to fix that in blender? It used to be worse but at least CATS got like 75% of them
fervent hornet
If you export from blender normally, your armature will have a -90° x rotation due to blender using the Z axis as up and down while Unity uses the Y axis. This can be fixed by rotating the armature in object mode -90° on the X axis, applying it's rotation (Ctrl+A), and the rotating it 90° on the X axis. This will result in the axis lining up after export. (All rotations are 0). Keep in mind to remove any blender animations as the export process for fbx takes them into account and it may edit rotation/scaling depending on the animation.
fading verge
That's not the issue, thanks though.
A) I'm still in blender
B) It's only some of the bones not the entire armature
fading verge
It is mostly the hands and feet. So I guess ye the bone tails
fervent hornet
So what I usually do:
- Select the head of the child bone
- Snap (Shift+S) cursor to selected
- Select the tail that is off
- Snap selected to cursor
You can always just drag the tails to where they should be, which youll have to do for things like toes that have no where to snap to. Remember you can always edit bone transforms by the number for more exact manipulation
fading verge
ok thanks! one more question because I'm dumb, which tab lets you edit bones in detail? I've been on the Layout tab the entire time
fervent hornet
I cant help much with blender 2.8 as Im assuming thats what the tabs are from. You want to be in edit mode while having the armature selected
fading verge
There's no rotation options, just transformation for the head and tail
fervent hornet
Correct, bone tails and heads are points, not objects. You cannot rotate a point
fading verge
roll option does nothing
fervent hornet
You shouldnt be rolling, only putting the tails of the bones pointing out to the heads of their children
fading verge
yeah but like you said some of them don't have children. I'm trying the method you mentioned above:
Remember you can always edit bone transforms by the number for more exact manipulation
but changing any of those values resizes the bone
fervent hornet
Bones dont actually have a "size" in a sense
The tails of the bones cease to exist in unity as unity just uses them to understand the rotation of the bone
For something like a finger or toe, it can be very small or very large as long as the tail of the bone lines up with how the joint should be pointing at rest
fading verge
ok thank you. and especially for the Shift + S thing as well as that fixed everything else
fervent hornet
Glad its working out
 slim torrent
Hi All, is there a doc anywhere that explains what these poses should mean vrc.blink_left
vrc.blink_right
vrc.lowerlid_left
vrc.lowerlid_right
vrc.v_aa
vrc.v_ch
vrc.v_dd
vrc.v_ee
vrc.v_ff
vrc.v_ih
vrc.v_kk
vrc.v_nn
vrc.v_oh
vrc.v_ou
vrc.v_pp
vrc.v_rr
vrc.v_sil
vrc.v_ss
vrc.v_th
slim torrent
i understand the eyes part just not sure what the poses for the mouth mean do i just add random month poses? or do they mean some thing i know AA is for fully open month but thats it
fervent hornet
Its what the mouth should look like when making the sound
fading verge
yeah they should represent the expression you do when you do that specific sound
slim torrent
oh thats perfect thank you
 clever barn
Im trying to do Bone drivers for corrective shapekeys... i know how to get it working in Maya and Unreal... but cant figure out how to do it for Unity...
if i make the Corrective shapekeys with the drivers in something like Maya / blender and then import it to Unity for VRC would it just import the drivers or do i need to do a setup for it... or does VRChat not even support Corrective shapekeys
fervent hornet
Im unsure what you mean by corrective shapekeys, but in VRC you can use constraints which have some similarities to bone drivers
clever barn
Bone driver is basically "L_Forarm Rotation_X = Value, Driver = Y, Shapekey = Z)
a bone driver takes the bone rotation and tells a Shapekey to turn up or down based off the value
 fervent hornet
Yeah you cant use shapekeys like that in Unity, at least with VRC in mind
fading verge
don't think there's anything for shapekeys
clever barn
Maya Bakes it in to the bones on export
and Unreal just goes yeup i can do thaat
 I can use Maya to do the constraints and import them... Life made 100x easier... Thanks
fervent hornet
You should test that first before going all in. Blender bone constraints do not export over, you need to redo them all.
clever barn
Maya's export to Unity is one click... it has a one click edit and connect tool for Unreal and they have a send to for Unity thats basically one click
I love doing the synced edit with Unreal
fading verge
oh that's cool
clever barn
Mix that with Zbrush GOZ, Substance Sync and the GOZ for Marvelous designer and Zbrush... workflow for games is pretty quick
 sharp viper
i understand the eyes part just not sure what the poses for the mouth mean do i just add random month poses? or do they mean some thing i know AA is for fully open month but thats it
@slim torrent Deadly, vrchat quite uniquely matches REAL sounds to mouth movements
it's pretty cool
fading verge
ok so the blender manual says in order to put the 3d cursor at your mouse use RMB but that just brings up the right click menu???
astral warren
You might be using a guide for an old version of blender
To place the 3D cursor just pick 3D cursor from the left side (button that looks like the cursor) and then left click anywhere. Select the box tool afterward to avoid accidentally moving it again
Though really I usually move the 3D cursor around by using the shift S shortcut, and picking “cursor to selected” or “selected to cursor” that is how I quickly copy and paste positions across various things like bones to verts etc
fading verge
is there anyone open for commissions for rigging?
im learning it but im really bad with technology haha
amber kestrel
Looks natural to me
fading verge
Why are they bones that point to the sky ?
because when i try to rig in unity the fingertips look to the ground
robust crescent
Some models have that , just move em back down
little spindle
Whats the best way to rig hair on the chest like this? I tried painting the hair to head and another upload painted on the chest and both look janky
crisp tendon
Rig it and paint it to itself ?
little spindle
When its head parented it is going through the chest when i look around
fading verge
Yeah, when they're painted to themselves and parented to the head, they'll obviously follow the head bone and click into the chest. The way people try to alleviate this problem is using a lot of dynamic bone colliders to try to force the hair from not clipping but even this doesn't work.
The only other option would be to weight the hair on the chest to the chest, and that way it won't clip, but the only issue is the border between the chest hair to the head hair movement will look a little weird and stretches because the chest hair barely moves at all while the rest could move.
The way to alleviate this is to have it instead parented to the chest so you can add some dynamics for a little bit of movement in the chest hair.
Most people just ignore the problem and deal with it, the hair will clip, so what.
While the rest just use meshes that just won't clip to start with
sleek isle
You can put a gradient like this https://gyazo.com/3427b1a72ea74d38adc2633d6cd98875
amber kestrel
Is there a resource to help create shape keys for mouth movements? The shape keys on the model I downloaded are pretty bad, I'm gonna have to do them myself but I don't know if there's a better way than just running through them one by one
fading verge
https://docs.google.com/document/d/1W5KFa_aszCMrJaFD8mb9a-GHYO4X4S9M63GjM4UwuEw/pub
This has resources for how the shape keys should look like
fading verge
i don't have the vrc Visemes
@fading verge I get the same bug again 😦
Yeah, Koikatsu models are like that with their visemes being an absolute mess.
What bug?
I just click enforce T pose in the riging ?
"Character not in tpose "
Yeah, enforce tpose in pose
And aply after ?
It should fix the red issues first yeah?
Yeah it did
i also improved the shading
So For the lip sync
how do i do that ?
is this normal ?
Yeah that's fine, that's the animation tab, we don't use that.
ok 🙂
For lip sync you can try to use the shape keys you already have but they most likely won't match up properly. Koikatsu has a lot of wtf shape keys.
The other option would be to make the shape keys yourself which is a lot of work, but you only need to make three since CATS will generate the rest for you from those three
Koikatsu shape keys seem to only move eyebrows
i don't really cares for now, it's more polish than anything
I can put my model ingame now right ?
You can try it yeah
There is an option in CATS where you can fix the Koikatsu shape keys, I don't know if it'll work for this model but it's an option. It'll generate a bunch of fixed shape keys for you including the mouth ones so you can have visemes
wheres would that be ?
Hidden under the show more options in model options
it didnt do anything
and the names of the shapekeys are weird, i dont understand what they mean
It did something for me, it looked like it put all the mouth shape keys for me first.
?
Yeah, you have a bunch of mouth blendshapes in the right now.
OH VRC
OH
Those vrc ones you probably generated yourself, check them to make sure they are mouth visemes and not like mixed with eye or anything like that
How do i do that ?
HOLY SHIT
ILY PQNDQ
PANDA*
Did you assign the blendshapes in the avatar descriptor so you can get the visemes working?
i was uploading before the whole vicemes thing
Ohh okay
But that means i have to redo everything if i swap the model for the one with the vicemes
😦
Did you do the legacy blendshape fix to help with the load times?
And also not exactly, you can just replace the model with a new version and it should just update everything
yeah its on
how do i do that ?
She looks a bit down when i look streight at someone
Make a copy of the avatar in the unity assets just in case we need to go back to it. Then just overwrite the version in the unity assets with the new one (or delete it then replace it with the new one with the same filename) and then go in unity and it should update.
Looks a bit down how? What are the first four shape keys?
i'm stuck
how do i replace it
Like you would replace any file in windows explorer
oh ok
i dont have the new vicemes 😦
Are you sure?
yeah
ihave the blink ones
Is it hidden under the menu? Does auto detect work?
no it doesnt 😦
and its not in the menus
Can you check the skinned mesh renderer and see if they're there
they are not 😦
Did you replace it with the new one? Does the one you replaced it with have the blendshapes?
wait
i think i got it
PogU
You want them all to be assigned if possible. If you don't assign sil it'll feedback your voice to your head and get annoying really fast
done 🙂
And for the eyes ?
Did you add eye tracking and blinking?
yeah
but it doesnt working in blender
And you tested them in blender? Okay
yeah
the pupils move
but eyes dont blink
If they don't work in blender, they probably won't work in unity.
oh ok
it's fine tho
Did you do it before or after the koikatsu shape key fix?
after
Huh
Did you use the blink shape keys to generate the blink or did you not have any assigned
i used the shape keysq
Did they work beforehand?
they are old and normal versions now
i tested eyeEx
Those are the bones, not the shape keys
i know but the bones are all over the place
i dont know what to pick
the only one who moved thing was Eyeex
You can check in pose mode which one is connected to the eyes.
fading verge
It's cause they're set to stick. Change it to octahedral or whatever you want
 hushed agate
Ah alright, thank you very much!
amber kestrel
Is there a way to rig eye movement a little better? From what I can tell, eye movement range is just based on how close the eye bones are, but what about just limiting the rotation of the bone?
fading verge
I mean you can freeze the axis of rotation in blender but I don't know how that applies in unity.
turbid spear
For now it's just bones, but when avatars 3.0 will come out soon™️ you'll have more control over it
amber kestrel
So the eye movement will always rotate those bones the same angle?
fading verge
When I want an eye to move more than what CATS allows me to move, I just manually move the bones myself to make the transforms be more... More, just more.
amber kestrel
Right, I've been moving the bones myself too. Ultimately though, we give VRChat the RightEye and LeftEye bones, the ones that point up by default, as the bones to control the eyes. I have bones pointing out under them. Any way I can rig them to rotate less in blender? Or do I have to do weird shit in Unity?
turbid spear
Well cats does some spooky things with extra bones
And shared weights I think
So the bones probably still more the same amount by the rig, it's just that their physical position limits how much they move
Just play around with them
fading verge
Check the rig configuration and make sure everything is green in the t-pose
Pose in the bottom right and enforce t-pose
fading verge
https://cdn.discordapp.com/attachments/521112661841149952/717239833650790451/unknown.png so the neck needs to be parented to the chest right? but then the other neck bone does not rotate everything above it
does that mean i should make the other neck bone the main neck bone and the top one to be an extra twist bone?
even though the top neck bone is a better main neck bone for controlling the neck? the bottom controls a bit to much of the lower neck/upper chest area
 fervent hornet
Yeah you should make the one that seems to control the wrong bit a twist bone, as then you can adjust its weight
tame skiff
Speaking of twist bones, what are the essential ones aside from wrists?
 crystal vector
@tame skiff Arm bones as well
fervent hornet
Essential is subjective, you can use them all over
novel aurora
can you merge armatures within unity, or do i have to awkwardly rename all of these bones so that CATS doesn't fuse them to each other?
basically i have a model with animations that break if i dont keep the bone names intact (understandably), but i can't get generic to work as well as i want, so im having unity bind the humanoid rig to the SDK's example avatar with the mesh deleted
darn it, trying to do it in blender with cats just deletes ALL of the bones for whatever reason,,,
aha
i have magically fixed it by fixing the bone arrangement/naming
novel aurora
or not, because the animations still break after i try merging. very cool
amber kestrel
Bend your upper leg inward in pose mode into more of a T pose and you'll see why
Kinda
Someone else also mentioned this earlier, but VRC has a rough time figuring out leg bend if the joints are completely straight. Give it a tiny bit of bend at the knee and put the avatar more into a T pose, see if that helps
fierce grail
Bone legs should be pointing perfectly straight down when viewed from front (2nd picture).
amber kestrel
Speaking of which, how do you ensure it's pointing straight down?
I can't seem to figure out how to lock it to an axis
 sweet tundra
@fierce grail should i change it in pose mode? or edit mode
fierce grail
Definitely in pose mode in this case, after that you would need to align feet of your model/origin point with ground level (0, 0, 0 coordinates). There is an explanation on how to do that 2nd part in this video: https://www.youtube.com/watch?v=2sfTEBAl8sA&t=1053s
Timestamped Links (Right-click: Copy Link to share a stamp)
0:00 - Intro
1:00 - Visual Guide
2:53 - User Real Height
5:54 - Proportions
7:04 - OpenVR Advanced Settings
8:17 - Proportions cont'd (Blender Start)
10:20 - Shoulder Sag Fix
11:46 - Proportions cont'd (Scaling Limbs)...
sweet tundra
is the time stamp you sent where i need to be
fierce grail
Yeah
@amber kestrel Head and tail of bone should have same X coordinates in theory, but in pose mode I personally just eyeball it by displaying bones as sticks and rotating it until I notice no aliasing along it.
amber kestrel
Yeah that's how I did it with my last avatar, but I want to be more precise
fierce grail
If you align it like me, then I think leaving out that microscopic angle shouldn't really matter.
novel aurora
not sure if this is rigging or animation, but how would i merge these armatures to keep the animation playing from the origin?
regardless of what i set "attach" in cats to, this happens:
notice how it goes flying off into the sunset
im trying to do a "faux humanoid" set-up for this non-humanoid model
even if i change the "attach" to something else, the only change is that the humanoid armature stays at 0,0,0, the mesh + skeleton i need retained flies away
fading verge
why doesn't ctrl + j combine meshes like it is supposed to? it just does nothing
novel aurora
are you in object mode
you have to be in object mode to combine, otherwise it doesnt work
rapid mauve
rename the main armature bones - merge the ones you dont want / need then use cats to fix it
hushed agate
That worked, thank you!
fading verge
@novel aurora thank you, I am the big dumb.
novel aurora
np 💗
 hoary mulch
Hi! does anyone know why this happens? the knees are bending to the sides not to the front
fading verge
What do the leg bones look like in blender from the forward facing position and a side facing position
fading verge
Yeah so you want legs to be straight when looking at them from the front usually and from the side the knee should be slightly bumped forwards.
hoary mulch
changing to something like this will this work?
robust crescent
you can snap the bones to other with shift+s in edit mode
or do it manually, if bone stand like that its gonna be funky usually see the broken finger avatars in vrchat when they are straight up/down
 rose meteor
hello i have a question, I'm tryin to get clothes on my avatar and the jacket is not connecting to the bone any suggestions
amber kestrel
Not a blocker, just kinda annoying; why do I get this warning when the armature is mapped correctly in the model's rig settings?
fading verge
Because it's not the first child in the hierarchy. Unity organizes things alphabetically in the hierarchy so you'll have to rename those bones (Ex1_1) OR break your prefab instance and reorder the bones yourself.
It generally isn't an issue but it does sometimes make for weird rotations and thin joint syndrome
robust crescent
When you twist wrist what has this it tend to fold on itself, legs dont really show it that easy
steel marlin
can someone please explain to me why, when using dynamic bones in unity, the last bone just doesnt work/disappears? i have ear bones, one for each ear, both are connected to a root ear bone. when i apply the dynamic bones compnent to the root bone, the ears move, albeit in a wierd way because whats actually moving is the root bone, so they move around the center of the head. when i apply a dynamic bone component only to the root ear, nothing moves.
the wierd thing is that in blender, the bones look completely fine, stretching from where the head ends to the tip of the ears. but when selecting the bone with the dnyamic bone component, it only shows the bones up to the second to last in the hierarchy.
robust crescent
1 for each ear thats your problem if you want dynamic bone to move it need minimum 2 , you can set dynamic bone, end lenght to anything and it should move,
steel marlin
the thing is, this is a model which works in vrchat, but that i edited in blender (the UVs were awfull lol)
it came with one bone each
robust crescent
you can make a fake bone in blender or use dynamic bone offset
root always looks like jello for me
steel marlin
ok so after googling, there is a option when exporting using CATS to add leaf bones
which adds a bone to the end
but when i then try to use dynamic bones its somehow locked to a axis
robust crescent
just dont remove empty bones in cats any fake bone shouldnt be removed then
steel marlin
(only moves along Y)
robust crescent
you can set end offset but making a fake bone in blender is usually what id do , then you can force dynamic bone to move that way
steel marlin
wdym fake bone?
thing is, rotating the bones manually in blender works perfectly fine
robust crescent
Dynamic bones need 2 , 1 wont work for wiggling it
steel marlin
but using "Add Leaf Bones" adds a second bone after each end bone, but dynamic bones still doesnt work as expected
when i do that its only moves along Y axis
(up and down)
robust crescent
Uhu, its just a fake bone not weight painted to anything
steel marlin
fake just means it has a length of 0 and no vertex group?
robust crescent
can be any lenght/direction you want ear/tail to move in, no vertex group
robust crescent
Try it , see
steel marlin
do you know what the isue is, or only how to solve it?
i would love to understand why this is happening
is it dynamic bones being dumb, or blender export to fbx?
or just unity
robust crescent
'cause dynamic bones need 2+ to make it move , 1 will not work'
steel marlin
so belive it or not, the leaf bones thing would work. same with your method of manually adding a extra bones. what was actually fucking up is that the left ear bone was assigned to the right vertex group and vice versa
🤦♂️
thank you for your patience though
i still dont see the reason why dynamic boens should need 2 bones, but eh
fading verge
So that it has a reference point from where the bone can swing I guess
steel marlin
wouldnt the reference point along which it swings be the parent bone (or parent-facing end of the bone)? why does it need a extra child bone that does nothing?
thats how it works in blender anyways
the bone has 3 pieces, i cant recall their proper names, but theres the parent facing point, then the acutal length of the bone, and then the child facing point
 twin quail
I am looking to commission someone for rigging? I know nothing about how to rig and weight paint and etc. I tried doing bones, but after that I am beyond stuck.. I have a custom avatar and need help.
fading verge
If you don't find anyone here there's a commissions section in the vrchat forum thingy and there's also a vrc traders community server for commissions in #community-servers-old
fading verge
https://cdn.discordapp.com/attachments/402349592244649996/717705172650033162/unknown.png https://cdn.discordapp.com/attachments/402349592244649996/717705231475015710/unknown.png https://cdn.discordapp.com/attachments/402349592244649996/717705322940203048/20200603044246_1.jpg https://cdn.discordapp.com/attachments/402349592244649996/717705326102839306/20200603044251_1.jpg anyone know whats wrong with the legs and mouth here? literally the perfect T pose. the only thing i can think of tinkering with is the extra twist bones or the curvature of the spine


It's too perfect!
The leg bones should be straight when you look at them from the front, which is good in your rig
However they should be slightly bent when you look at them from the side:
/
\
So vrchat knows in which way they should point
Since they're completely straight from the side vrchat just guesses in which direction they should look and it guesses wrongly
rapid mauve
I don’t think guessing is involved
fading verge
Yeah it's probably just floating point precision errors taking over when it's straight 😛
 gritty latch
https://gyazo.com/aa560ff3a34bc8b8c35cb4f4c737dadb
how do i rig a hip chain?
celest rock
If it's located on two bones: Two bone roots, with a middle intersection in the middle.
If it's located on one bone: One bone root that split into two bones for each chain with a middle intersection. or one bone root and one bone hierarchy that equally split each side of the chain.
gritty latch
but wouldnt that make the middle of the chain wobble weirdly? that's what happened when i tried the two chains of bones method, where twochains of bones each starting from the hip goes down and they meet one another on the bottom point.
celest rock
That might mean that you need to do a bigger intersection. If they're on the same bone and you're not intending to use colliders I suggest doing the one bone root and one bone hierarchy version though. Normally, in the case that a thing has to completely affect the other thing (such as in a chain) you'll want the intersection to be the whole other part of the chain with a low weight to it.
For example: with two bone chains. The last bone will affect all the other bones in the other chain. On a gradient from 1> to 0.
gritty latch
could you please give some visual example? like a scheme? i dont really follow
fervent hornet
Cloth seems more complicated than something like Final IK and dynamic bones
rapid mauve
it's rly simple tbh - it has drawback that needed to be separate and under 200 poly for poor rating - but visual is near perfect
fervent hornet
Yeah guess the only real drawback is going to be the almost guaranteed very poor rating
rapid mauve
yes - if it's over 200
fervent hornet
Anything I've done with cloth under 200 has suffered due to not having enough polygons for colliders to function well
rapid mauve
rly - i make amazing skirts with 199 - they do look great
rapid mauve
pleated yes - i'll show a short video - one moment
gritty latch
@rapid mauve when i applied cloth to my chain all the polygons got stretched to hell
rapid mauve
there is a setting to turn that off - "Use Tethers" needs to be checked
here - 199 poly skirt - 3 colliders - poor rating yes but it's very good
here are the settings i use
fervent hornet
Yeah I've already retopologized the skirt as much as I could before the look starts falling apart. Definitely wont be able to get mine below 200 without sacrificing the shape. Nice job on yours though
novel aurora
whoa that’s impressive
taking notes there
fervent hornet
Cloth is your go to for skirts or other things like it, long dress are cool too but suffer a lot more from clipping
novel aurora
i’ve just been using dynamic bones instead— had no idea about cloth
no idea how to retopologize tho,,
rapid mauve
with remesh you can set max quads you want - click button and it's done
rapid mauve
yes it's a plugin for blender - it's not free but worth every penny
novel aurora
interesting 🤔
i will look into it
but first i think i will try to understand more about modeling first


 astral warren
If that’s cloth you need some anchor points, I’d also optimize it to only be one particle per fidget spinner.
gritty latch
the first one is cloth the last one is two chains of dynamic bones meeting each other at the bottom point
how do i make it one particle per chain link? and set anchor points for cloth?
astral warren
Hm, I’d probably make it symmetrically weighted along X axis, so there a left bone chain and a right bone chain, so that they can jiggle up and down but front and back loops move in unison.
Since that’s where the anchor points are and you don’t have a disjointed loop
I have a similar pocket chain I weighted give me a sec
rapid mauve
if you want make chain with cloth then you need add constraints to the ends so it does not fall - it's easy to do when the avatar has scale of X3 xyz
astral warren
Ah I was referring to bones. I have sworn off cloth
rapid mauve
yes - saw that i was only referencing cloth - i hate Dbones when both ends are anchored
so difficult
astral warren
Cloth has uses and can in some cases be better than bones... but people go overboard and simulate every vert and make lag bombs
For double anchored “ropes” I put the head of the bone at the midpoint between the two anchors, and the tail at the most outward part of the curve.
rapid mauve
ooh thats interesting - i shall try that method
celest rock
It only falls apart doing so when you need colliders. But, otherwise. It works great.
astral warren
You’l typically need to constrain them to a specific axis, so bone roll setting is important in blender
I don’t use collider but if you need them, remember you can offset collider away from the actual bone to where the geometry is
Bone need only be the pivot point. Collider does not need to be there
 clever eagle
how do i fix fit
gritty latch
can someone please show a visual example of how to rig a hip chain correctly?
gritty latch
okay, thank you
 knotty fiber
hi so i got a issue where my moel rigging looks diffrent to other people in vrchat. lets say 1 model on my side got broken shoulders but for any1 eles who looks at me there just fine...im on the lastest sdk and currect ver....i dont get this issue and its game breaking for me...id give my guess its rigging based so thats why i type on it here. would love any help
astral warren
Issue with bone roll. Bone roll issues are local only, they don’t translate over network IK
Reset your bone roll on humanoid bones in blender
Don’t reset any non humanoid bones or you will mess up any unity animations you made
celest rock
Go blender. Edit mode on armature. Go on bone. Go into the bone properties. Bone roll. 0. Is a way. Unsure if there's an automatic way.
astral warren
Select the armstrue in blender, tab to enter edit mode, shift-left select all the bones that you marked as humanoid in unity, space to open search, type “clear roll”, hit enter. Edited to add: then hit tab again to exit edit mode because I’m superstitious
knotty fiber
and there is somthing even simpler
thank you vary much mates ill chack it now and report if it helped!
celest rock
That does sound a lot easier than my idea
knotty fiber
either way it wouldent have been too bad cus its not thatttt many bones
astral warren
Does anybody know the official statement of which way toe bones should point? I would love to have them bound, but they always point directly down in walk cycles and look silly.
it also seems to make the view position center over the toes instead of the feet. is there a way to avoid this?
 ashen radish
What causes an avatar to look normal until you try to use full body tracking? As soon as full body is used the hips go nuts -- but is otherwise fine up until that point
fading verge
wrongly weight painted?
can you move bones around in unity in all sorts of forms without it breaking?
ashen radish
Didn't use any weight painting, let me see if i can break it in unity
hmm seems to move normally in unity
astral warren
So it’s fine in desktop and regular vr , only does that after full body t pose calibration?
ashen radish
Correct, as soon as you click the triggers to calibrate the full body it messes up like that
astral warren
Can you fully expand the armature tree in unity and printscreen it
astral warren
The knee should absolutely be the first child of leg, yes, so fix that, but I don’t think it’s the problem. Fix it for IK purposes though
Guess check if it’s still around I guess but I’d expect it to still be around
ashen radish
yeah i'll give that a shot, hopefully that was the issue since that's a simple fix haha
astral warren
Right wrist should also be the first child of elbow.
Basically, humanoid bones should always come before non humanoid
Across the whole tree
Arm_Left_Finger_4_5 also concerns me. If it’s hon-humanoid, put it after the 5 fingers
Unless you are using it in bone config
ashen radish
i believe i'm using that one in bone config but i'll double check, thanks for the tips!
hmm yeah something is super wrong with the full body IK, moving my head is what causes the hips to freak out and distort wildly
celest rock
Show bone config in rig on the model, also, show blender configuration of bones.
celest rock
ok. So. What I want you to do is:
- Go into the bone settings on the spine bone. click "connected"
- Re-size the hip bone's to be half the size by draggin the ball on top down.
- Check weight painting on the different fingers to see which ones are actually supposed to be used.
ashen radish
alrighty sorry just a moment
Alright resized spine and deleted that unneeded finger bone. it wasn't mapped anywhere but also had no weight or purpose
astral warren
I recommend not deleting bones directly. Dissolve them to the parent, otherwise you can end up with some verts that are partially weighted to nothing
Which will have them pinned to t-pose
ashen radish
will do, thanks! no luck on the hip issue, there's probably something simple i've done wrong but am not experienced enough to spot it